
SANSA E200 - Mp3 player SANDISK - Free user manual and instructions
Find the device manual for free SANSA E200 SANDISK in PDF.
User questions about SANSA E200 SANDISK
0 question about this device. Answer the ones you know or ask your own.
Ask a new question about this device
Download the instructions for your Mp3 player in PDF format for free! Find your manual SANSA E200 - SANDISK and take your electronic device back in hand. On this page are published all the documents necessary for the use of your device. SANSA E200 by SANDISK.
USER MANUAL SANSA E200 SANDISK
Safety Instructions 4
Introduction 5
Package Contents 6
Getting Started. 7
Overview Of Features 7
Music Screen Features 8
Playback Screen Features 8
Li-ion Battery Charge 9
Battery Level Indicator 10
Battery Replacement. 10
Battery Warning. 10
Hold Switch (Factory set to the locked position) 10
Minimum System Requirements 11
Firmware Upgradeable 11
Connecting to Your Computer 12
MSC and MTP Modes 12
Connect to your computer 12
Transferring Files 13
Photo/Video Transfer-Sansa Media Converter 13
Supported IMPORT media types 13
Transfer Photos and Video 14
Delete Photos and Video 14
Transfer Music 15
Transfer Playlists 15
Delete Music Files 16
Synchronize Files 16
Safely Removing Sansa e200 from the Computer 16
Basic Usage 17
Power On 17
Using Thumbwheel 17
Main Menu 18
Using Navigation Buttons 18
Using Submenu Button 18
Power Off 18
Music Mode 19
- Music/Voice 19
- Setting Repeat Mode 19
- Setting Shuffle Mode 20
- Setting Music EQ 20
- Add songs to Playlist 20
- Remove Songs from Playlist 21
- Scan Through Song 21
- Rate This Song 22
Photo Mode 22
Viewing Photos 22
Slideshow 23
- Slideshow Options 23
Video Mode 24
- Playing Video 24
Recording Mode 25
- Recording 25
Settings Mode 26
-Backlight 26
- Language 27
- Date and Time 27
- Brightness 27
- Reset to Original Setting 28
Device Information 28
- Set Auto Shut-Off 28
- Set USB Mode 28
- Reset All 29
Tips, FAQ, and Troubleshooting 30
Service and Warranty Information 32
Getting Technical Support 32
Learn More 32
1-YEAR SanDisk Limited Warranty 33
USER NOTICE 35
End User License Agreement 36
FCC Regulation 40
Important - Safe Hearing Level Info 41
Safety Instructions
- Read the safety instructions carefully before using your Sansa.
- Read this entire manual to ensure proper usage.
- Keep this User Guide for future reference.
- Do not use HeadPhones/Earphones while driving, cycling, or operating any motorized vehicle. This may create a traffic hazard and may be illegal in some areas. It can also be dangerous to play your music with Headphones/Earphones at high volume while walking, or engaged in other activities. You should exercise extreme caution and discontinue use in potentially hazardous situations.
- Avoid using Headphones/Earphones at high volume. Hearing experts advise against continuous loud and extended music play. Keep the volume at a moderate level, so that you are better able to hear outside sound, and to be considerate of the people around you.
- Keep your player away from sinks, drinks, bathtubs, showers, rain, and other sources of moisture. Moisture can cause electric shocks with any electronic device.
- Follow these tips to keep your player working well for a long time:
Clean your player with a soft lint-free cloth used on glass lenses.
- Do not allow young children to use your player unsupervised.
- Never force any connector into the ports of your player or your computer. Make sure your connectors are the identical shape and size before you connect.
- Do not disassemble, crush, short-circuit or incinerate battery as it may cause fire, injury, burns or other hazards
Introduction
Congratulations on your purchase of a SanDisk Sansa™ e200.
The Sansa e200 is a high performance portable digital audio/video player with a large 1.8" TFT color screen, voice recorder, microSD™ card expansion slot, and a replaceable and rechargeable Lithium Ion battery.
The Sansa e200 enables users to play MP3, WMA, and secure WMA audio files. It also plays video, and displays photos that are transferred to the player through the Sansa Media Converter and has a voice recorder function.
The Sansa e200 provides superior sound playback and supports Microsoft PlaysForSure subscription music. The SanDisk Media Converter supports most image formats allowing you to enjoy photos and personal videos.
The Sansa e200 is available in the following capacity points:
2GB (e250), 4GB (e260), 6GB (e270), 8GB (e280)
| 2GB | 4GB | 6GB | 8GB | ||
| MP3 | Hours of Music Content | 32 | 64 | 96 | 128 |
| Number of Songs | 500 | 1000 | 1500 | 2000 | |
Note: Approximation based on 4 minute songs at 128 kbps MP3 (3,932,160 bytes/song)
1 megabyte (MB) = 1 million bytes; 1 gigabyte (GB) = 1 billion bytes. Some of the listed capacity is used for formatting and other functions, and thus is not available for data storage.
Features:
- Digital Audio Player - supports MP3, WMA, and secure WMA, audio files. Other file types need to be converted to these formats.
Video Player - supports video files converted and transferred to the device through the included Sansa Media Converter software.
Photo Browser - supports photo files converted and transferred to the device through the included Sansa Media Converter software.
■ Voice Recorder - supports voice recording function with built-in microphone.
■ EQ effect - you are able to select an EQ mode to personalize your music experience. - microSD™ Slot - supports read or write of Music Files from external microSD cards.
Internal Memory - allows users to store data on the internal memory
Package Contents
Please unpack your Sansa e200 and check that the following were included.
- Earphones
USB 2.0 Travel Cable
Installation CD (User's Manual and Sansa Media Converter included) - CD End User License Agreement Insert in CD Sleeve
- Loud Music Warning Insert
Quick Start Guide
Travel Pouch
Lanyard
Getting Started
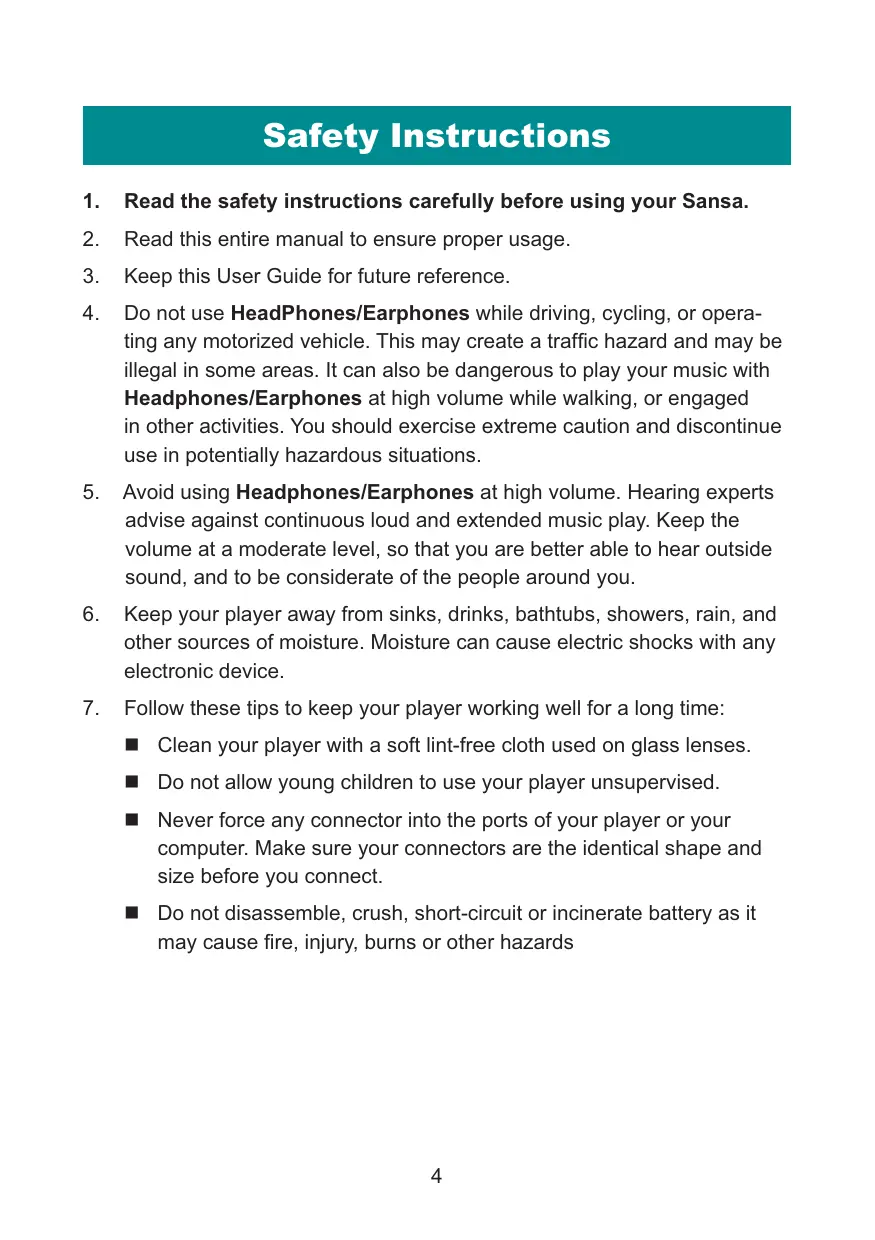
Overview Of Features


- Record
- Strap Eyelet
- MIC
- Hold
Voice Record Button.
Lanyard connection.
Internal Microphone.
Factory set to locked position (shows Orange Color). Slide to unlock controls. When locked all controls are disabled. Lock to prevent accidental activation of controls.
- Earphone Port
- Display Window
- Thumbwheel
- Select Button
- Up/Pause/Resume
- Left/Previous/Rewind
- Down/Submenu
- Right/Forward
- Power/Menu/Reset
Connect earphones here to listen to player.
Read status and information here.
Rotate to select menu items or adjust volume.
Press to select the item.
Press to move up one item, pause, or resume.
Press for previous track, rewind, or move left.
Press to move down or to options menu.
Press for next track, fast forward, or move right.
Press to power on/off, enter menu, or hold 15 seconds to reset your Sansa. When the player is locked using the HOLD switch, described above, the player will not power on or off. All controls will be disabled.
Plug the Dock Connector Cable here.
Insert microSD, or gruvi™ content cards.
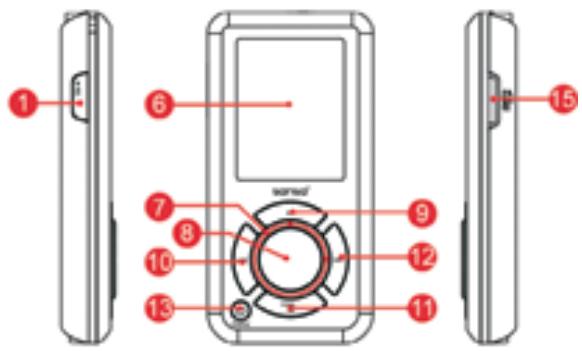
Music Screen Features
- Menu Title Displays the title of the current menu.
- Items Displays items for selection.
- Time Indicates the current time.
- Battery Indicates the Battery Charge Status.
Playback Screen Features

- Track Number Display the current track number and the total number of sound tracks.
- Artist Name Displays the current playback track artist name.
- Song Name Displays the current playback track song name.
- Track Timer Displays the timer of the current playback track.
- Clock Displays current time.
- Repeat Indicates when Repeat function is enabled.
- Album Name Displays the album name of the current playback file.
- Play/Pause/Stop Displays the music or voice files playback status.
- Track Length Displays the remaining timer of current playback file.
- Battery Indicates the Battery Status.
Li-ion Battery Charge
The Sansa e200 comes with a replaceable Li-ion rechargeable battery. To use the device for the very first time, remember to fully charge the Li-ion battery. You can charge your Sansa through the USB port of your computer, a car adapter (not included) USB port, or AC adapter (not included) USB port.
Computer USB charging instructions below:
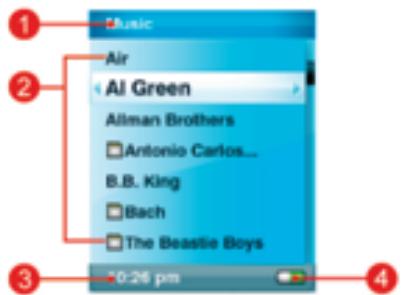
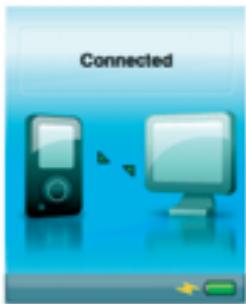
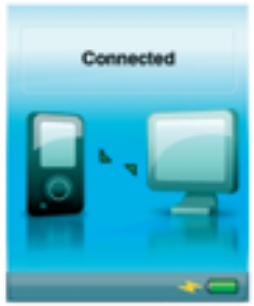
- Connect the small connector of the USB Cable to the USB port on the computer, and then plug the larger end in to the Sansa e200 Dock Connector. The computer must be on for most USB ports to charge your battery. Your Sansa will show connected and the yellow charging indicator will appear. The battery level indicator will blink while charging. You will not be able to play while connected to the computer USB.
- To stop recharging, disconnect the cable.
If you are using an AC adapter(not included) or Car Adapter(not included), you will be able to play your device while charging.
The Li-ion rechargeable battery will reach approximately 70% charge in 2.5 hours and full charge in about 3.5 hours. It is recommended that you fully charge your Sansa e200 before first use.
Note: Some low-power USB ports may not be able to provide enough charge power. Also note that rechargeable batteries may eventually need to be replaced as they have limited charge cycles (which vary with use and settings).
Battery Level Indicator
Battery is Half Full
10:26 pm

Battery is Low
10:26 pm

Battery Replacement
The Li-ion rechargeable battery is replaceable. To purchase a replacement battery, visit your local retailer or www.sandisk.com.
Follow the instructions provided with the replacement battery.
Battery Warning

CAUTION: Do not disassemble, crush, short-circuit or incinerate your battery as it may cause fire, injury, burns or other hazards.
Hold Switch (Factory set to the locked position)
The Sansa e200 Hold Switch is located on the top of the device, and is used to prevent any accidental operation. Once the Hold Switch is moved to the lock position (Orange Color visible), all function keys will be disabled. Buttons on the Sansa e200 will not operate when the Hold Switch is active (Orange Color visible).

Minimum System Requirements
Windows XP SP1
Windows Media Player 10
Intel Pentium class PC or higher
CD-ROM drive
- USB 2.0 port required for hi-speed transfer
Firmware Upgradeable
SanDisk occasionally releases firmware updates, which includes bug fixes and performance enhancements. To make sure your Sansa e200 series player has the latest firmware, please visit http://www.sandisk.com/e200series/fwupgrade and follow the instructions
Connecting to Your Computer
MSC and MTP Modes
Your Sansa e200 can operate in two different USB modes, MTP (Media Transfer Protocol) and MSC (Mass Storage Class). From your Sansa's main menu, go to Settings/USB Modes/MTP or MSC to change the mode.
Note: The MTP mode supports Windows Media Player 10. You must use the MTP mode to synchronize music files using Windows Media Player 10.
In MTP mode the device will show up as "Sansa e200" and no microSD card will be displayed. MTP is needed when using your device with monthly music subscription services such as Rhapsody, Napster and Yahoo !Music.
In MSC mode your device will show under your computer's „My Computer“ as Removable Drives. One drive for your Sansa Player and one drive for the microSD card if inserted into the expansion card slot.
Connect to your computer
- Connect the small USB Cable end to the computer USB port and plug the larger Cable Dock Connector to your Sansa e200 port.
- The Sansa e200 will show connected and your computer will show the device.
Transferring Files
Photo/Video Transfer-Sansa Media Converter
You will need to use Sansa Media Converter to transfer photos and video to your Sansa e200. Insert your SanDisk CD and select Sansa Media Converter to install it to your PC. Then you can load your personal photos and video onto your Sansa e200 by using Sansa Media Converter.

Supported IMPORT media types
- Still Image Files: JPEG, TIFF, PNG, BMP, GIF.
Video Files: AVI, MPEG-1 & MPEG-2 in MPEG, MPG, MPE or VOB(unprotected) formats. MPEG-4 in AVI format, DAT, ASF, QuickTime MOV, and WMV. Please Note: QuickTime 6.5 or higher and Windows Media Player 9 or 10.0 are required for QuickTime MOV file. Error message will appear if not installed.
Transfer Photos and Video
To transfer photos and video to your Sansa e200:
- Open Sansa Media Converter on your PC
- Connect Sansa e200 to the computer.

The detected Sansa e200 will list the available space and total space on the device. If more than one device is inserted, only the first device will be supported.
- Add the media files to be converted

- The Sansa Media Converter will place all files in MyAlbum unless you type in a new Album Name at the bottom of the screen. Use this option to organize your files and slide shows.
- Press Connect to start the conversion process. A status box will appear showing which file(s) are being converted.
- Photos and Video can not be transferred to the microSD card.
- Do not move your photo or video files from the location the Sansa Media Converter places them.
- See Safely removing your Sansa from the Computer instructions below.
Delete Photos and Video
Your photos are stored in two locations on your Sansa...My Album and Thumbs nails.
-
To delete a photo in MSC mode, connect your Sansa to your computer and go to My Computer and delete the photo in Removable Disk/Photo/My Album and in Removable Disk/Photo/Thumbnails/My Album.
-
To delete a video in MSC mode, go to My Computer and delete the video stored in Removable Disk/Video.
- To delete a photo in MTP mode, connect your Sansa to your computer and go to My Computer and delete the photo stored in Sansa e200/ Data/Photo/My Album and Sansa e200/Data/Photo/Thumbnail/My Album
- To delete a video in MTP mode go to My Computer and delete the video stored in Sansae200/Data/Video.
The player database will refresh after deleting files when you disconnect from your computer..
Transfer Music
To transfer music files or files organized in directories to your Sansa e200.
- In MSC mode, connect to your computer and drag and drop files from your computer to Removable Disk/Music directory or a second Removable Disk(microSD). You can also use a variety of music software programs to transfer/synchronize your files.
- In MTP mode, drag and drop files from your computer to the Sans-ae200/Media/Music folder after selecting "NO ACTION" on initial connection to the computer. You can also select from a variety of music software programs to transfer/synchronize your files.
- For correct Album Work functionality, the art and associated music file may need to be located in the same folder.
Transfer Playlists
To can transfer playlists to your Sansa e200 using software programs like Windows Media Player (WMP) 10 follow these steps:
- Create a playlist in Windows Media Player(WMP) 10
- Connect your Sansa to the computer in MTP mode.
- Go to the Synch Tab and click Set Up Synch.
- Select Automatic Synch
- Select the playlist you wish to transfer to the player.
- Unplug when the synch is completed and check for the playlist by selecting main menu screen Music and then Playlists
- If you need further Help with creating and synchronizing Playlists in Windows Media Player 10 select Help in the toolbar and "To create a playlist" and "synchronize" from the drop down list.
Delete Music Files
- In MSC mode, connect to your computer, go to My Computer, and delete the music file(s) in Removable Disk/Music directory or the second Removable Disk(microSD). You can also use a variety of music software programs to synchronize your files.
- In MTP mode, connect to your computer, select NO ACTION, go to My Computer and delete the music file(s) in Sansae200/Media/Music folder after selecting "NO ACTION" on initial connection to the computer. You can also select from a variety of music software programs to transfer/ synchronize your files.
Synchronize Files
Various software packages are available to synchronize songs on your device. Please refer to the specific software package instructions.
Safely Removing Sansa e200 from the Computer
Disconnect the USB cable from the Sansa e200 after you have completed charging, transferring, firmware upgrade, or synchronizing files. MSC mode provides some additional steps to safety remove the Sansa e200:
- On your computer's task bar (usually bottom right corner of your
computer screen), click on the Safely Remove Hardware icon or
Player Icon
- Wait until „Safe to Remove Hardware or Mass Storage Device“ message is displayed.
- You can now disconnect the player from the computer.
Basic Usage
Power On
For initial power-up you must unlocked the controls by moving the HOLD switch to the un-locked position (No Orange Color visible). Press the Power button once. The Thumbwheel will light up and the main menu will appear.
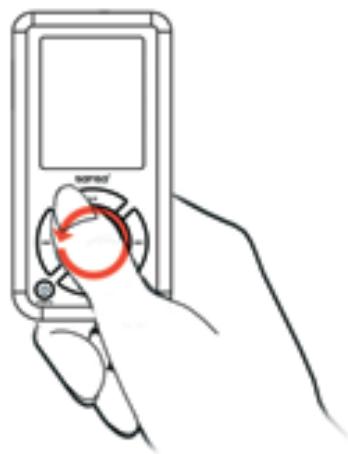
Using Thumbwheel
Turn the wheel clockwise to scroll down though menu items rapidly or increase the volume during playback.
Note: when you use the wheel the blue LED under the wheel should lighten automatically.

Turn the wheel counterclockwise to scroll up though menu items rapidly or decrease the volume during playback.
Main Menu
Music
Photo
- Settings
Voice
Video
Using Navigation Buttons
Use Navigation Buttons, described in "Getting Started", to navigate though menus, play music, play video, browse photos and arrange files.
Using Submenu Button
When submenu is available, the submenu icon will display on the left
bottom of the Sansa e200 screen. Press the Submenu to enter submenu.
Power Off
Press the Power button and hold for two seconds or until "Goodbye" is displayed. To prevent accidental power on, move the HOLD switch to the locked position.
Music/Voice
- To play music stored in the internal memory or microSD card, recorded FM or Voice recording, select Music in Main Menu.

- Select Artists, Albums, Songs, Genres, Playlists, Recordings (FM/Voice), My Top Rated, and Music Options.

- Highlight and Select the desired track or file to play. You can browse other areas of your player (music lists, settings, and photos), while your music is playing.

- Setting Repeat Mode
- In playback mode, press submenu
- Highlight and Select Repeat.
-
Select one of the following:
-
Off: No repeat of tracks
Song: Repeat the current track
All: Repeat all selected tracks - Press submenu again to exit Music Options.

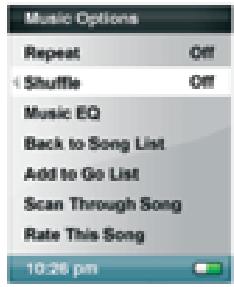
- Setting Shuffle Mode
- In playback mode, press submenu
- Select the Shuffle item. To play songs in random order, set Shuffle to On.
- Press |<< button for previous screen.
- Setting Music EQ
Sansa e200 provides various EQ modes, such as Classical, Pop, and Rock.
- In playback mode, press submenu
- Scroll and Select the Music EQ item.
- Scroll and Select a Music EQ mode.
- Press the |<< button to return to Music Menu.

- Add songs to Playlist
- Play a song.

- In playback mode, press submenu
- Select the Add to Go List.


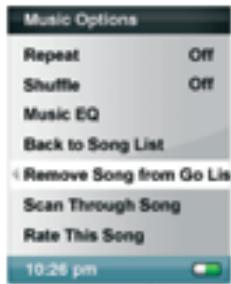
- Remove Songs from Playlist
- Select Playlist and play a song.
- In playback mode, press submenu
- Select the Remove Song from Go List.
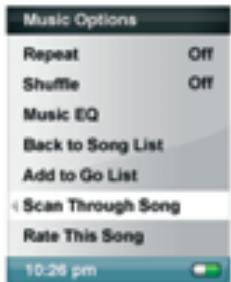
- Scan Through Song
- In playback mode, enter submenu.
- Select the Scan Through Song item.
- Use the Thumbwheel to scan the song.
- 3 seconds of inactivity exits Scan mode.
- Press the |<< button for previous menu.
- In playback mode, press submenu
- Select the Rate This Song item.

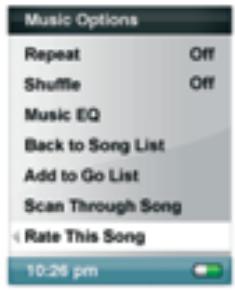
- Use Thumbwheel to rate the song (1 to 5 stars) and press |<< button to exit back to Music Options menu. My Top Rated Songs can be viewed in MUSIC menu.

Photo Mode
Viewing Photos
Your Sansa will only display photos in portrait orientation. You can crop your pictures with a photo editing software package prior to converting if you wish to display in full screen. The Sansa Media Converter converts the files and will transfer your photos to the player's internal memory.
- To view photos stored on your Sansa, select Photo in the main menu

- Select PhotoList or Thumbsnails.
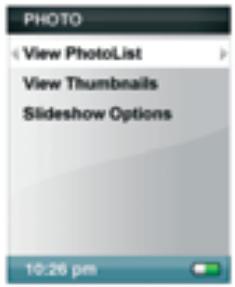
- If you selected Thumbs nails you will see the browser screen. Scroll through the photos and select the one of interest.
- Use the |<< and >>| buttons to backup or advance to another photo.

Slideshow
To play slideshow, Press Select button while viewing one of your slideshow photos. Press the Select button again to Pause the slide show, set your slideshow options below, like using the current song or your GoList for background music.
- Slideshow Options
- Select Slideshow Options in PHOTO menu.
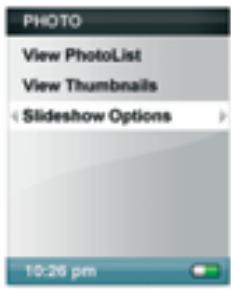
2. Personalize your Slideshow Options.
- Select the Shuffle: Select On for random order.
- Select Loop: Select On to set nonstop slide-show.
- Select the Slide time each photo view time.
-
Select the Music for background music and select CurrentSong or GoList in the Music submenu.
-
Press |<< to move to Photo menu.
- Select PhotoList
- Select the folder you desire for the Slideshow
- Press select button when the list of photos is displayed
- Press Select to start and pause the show.
- Use Thumbwheel to control volume.
- Press submenu to go back to ViewPhotoList.

Video Mode
Your Sansa will only play videos that are loaded through the Sansa Media Converter. The Converter transfers the files to the player's internal memory.
- Playing Video
- To play video select Video in Main Menu.
- Select a Video to play.
- Press Select to pause or resume the video.
- Press and hold | << and >>| buttons to advance and rewind the video.
- Press submenu to move to Video list
Recording Mode
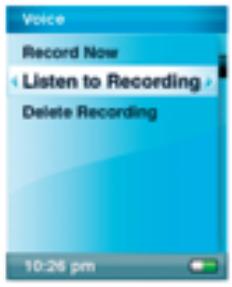
Voice Recording
Use your Sansa e200 for Microphone Recording. You can record your own voice, an interview, or a speech via internal microphone.
- Press the Record button to start recording.
- To pause recording, select Pause in Record mode.
- On the Display, a recording file should be generated and placed under the folder of [ /RECORD/VOICE/ ].

- To stop recording, select Stop in record mode, and then a pop-up window will appear on the screen. Select Yes to save recording. The recording will be saved in the RECORD folder. The file list will appear.

- Press |<< button to return to the Record, Listen, or Delete Recording Menu.
Settings Mode
You can personalize your Sansa e200 settings by selecting Settings in the main menu.
- Scroll the Settings Menu and make a selection.
- Set Backlight
Backlight timer program can adjust the backlight setting from the default, turn off backlight after 2 seconds idle time. Press any button to turn on the backlight.
- Select Settings in Main Menu.
- Select the Backlight item.
- Select the Backlight Off setting that you want.

- Set Language
- Select Settings in Main Menu.
- Select the Language item.
- Select a language you want to use.

- Set Date and Time
- Select Settings in Main Menu.
- Select the Time item.
- Set the time or date.
- Press the |<< button for the previous screen.

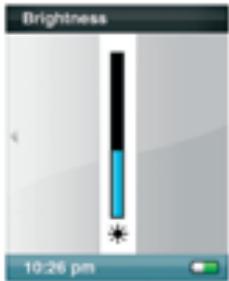
- Set Brightness
- Select Settings in Main Menu.
- Select the Brightness item.
- Use the wheel to adjust the brightness setting, and then press Select to confirm and exit.
- Reset to Original Setting
- Select Settings in Main Menu.
- Select the Reset item.
- Select the Yes item.

Device Information
- Select Settings in Main Menu.
- Select the Info item.
- You can read device information on the screen.

- Set Auto Shut-Off
- Select Settings in Main Menu.
- Select the Auto Shut-Off item.
- Select the setting you want.
- Set USB Mode
- Select the Setting item in Main Menu.
- Select the USB Mode item.
You can select MTP or MSC mode.
Note: MTP Media Player (MTP) mode
The MTP mode supports Windows Media Player 10 only. You must use the MTP mode to synchronize music files using Windows Media Player 10.
- Reset All
NOTE: THIS IS AN ADVANCED OPERATION AND RESTORES ALL SETTINGS TO THE FACTORY DEFAULTS. NORMAL USERS ARE NOT RECOMMENDED TO PERFORM THIS OPERATION!
If your device freezes up press the Menu button and hold for 15 seconds.
This is like a power down of the device. Once you perform the reset, the adjustments you made during last operation will be gone.
Tips, FAQ, and Troubleshooting
This chapter provides answers to common questions you may have.
Question: How do I reset my Sansa?
Answer: Hold the menu button down for 15 seconds..
Question: How do I copy files to the Sansa MP3 Player?
Answer: To transfer music to your Sansa e200.
- Connect Sansa e200 to the computer.
- In MSC mode, drag and drop files from your computer to Removable Disk/Music directory or Removable Disk(microSD). You can also use a variety of music software programs to transfer/synchronize your files.
- In MTP mode, drag and drop files from your computer to the Sans-ae200/Media/Music folder after selecting "NO ACTION" on initial connection to the computer. You can also select from a variety of music software programs to transfer/synchronize your files.
Question: Why won't my album art display?
Answer: For correct Album Work functionality, the album art and associated music file may need to be located in the same folder. See preloaded content as an example.
Question: What music file formats does the Sansa e200 support?
Answer: The Sansa MP3 Player will support MP3, WMA, secure WMA. Any other formats need to be converted to these formats using the Sansa Media Converter.
Question: What is MTP?
Answer: Media Transfer Protocol (MTP) is a new protocol and accompanying set of drivers developed by Microsoft to connect portable devices to a Windows XP PC and synchronize digital media content between those devices and the PC. MTP USB mode is required for WMP10.
Question: Some of my music files are on my player, but cannot be played. When I select them, another song begins to play. What is wrong?
Answer: You may not have purchased the rights to play the song on an additional device. To test this, try to play a song that you have copied from an
older CD and converted to MP3 format. If you can play that song, but not the song that will not play, then you need to purchase the rights to play the song.
Question: Why doesn't my photos display in full screen?
Answer: Try cropping your pictures to 128x64 with a photo editing software package prior to converting if you wish to display in full screen.
Question: Why should I update the firmware?
Answer: You should always update the player to the latest firmware to ensure that it functions correctly and has all the latest features.
Question: How do I access the player microSD card from computer?
Answer: There is no need to change any settings. To access the card from the computer ensure the Sansa is set to MSC USB mode(in settings), open up My Computer, and your card should show up as a Removable Disk.
Question: How can I use non-supported file types with my mp3 player?
Answer: First you must convert the songs to a supported format. Then you can transfer the songs to the player,
Question: In MTP mode, how do I drag files to the player?
Answer: As long as the files are wma or mp3, they can be dragged into the Sansae200/Media/Music folder. An alternative is to switch the player to MSC mode, then the files can be dragged/copied to the Removable Disk/Music directory
Question: Is the player compatible with podcasts?
Answer: As long as the podcasts are in mp3 format and an appropriate bit rate (32-320 kbps), then the player should be capable of playing the files.
Question: Why does my player say unknown artist/album?
Answer: Normally this is because the ID3 tags are missing information. On the computer, right-click the song and choose Properties, then the Summary tab and click Advanced. Then you can input the data such as Artist, Album, Song Title, Track Number, Genre, and Year.
Service and Warranty Information
This chapter provides information about how to get support for your player and the terms of your warranty.
Getting Technical Support
Before you contact Technical Support, we encourage you to read the Tips, FAQ, and Troubleshooting section.
If you have questions about the use or features of your player, please call the SanDisk Technical Support Center at 1-866-SanDisk (1-866-726-3475), or fill out an on-line support request at http://www.sandisk.com/retail/support.asp.
If you have questions about our partner services, please call their Technical Support Center.
When you call or contact us for support, please include as much information as you can from your packaging material. This will allow us to help you more quickly.
Learn More
You also can visit us on the web at http://www.sandisk.com to learn more about your player as well as other SanDisk products.
2-YEAR SanDisk Limited Warranty
SanDisk warrants that this product will be free from material defects in design and manufacture and will substantially conform to the published specifications under normal use for one year from your date of purchase, subject to the conditions below. This warranty is provided to the original end user purchasing from SanDisk or an authorized reseller, and is not transferable. Proof of purchase may be required. SanDisk is not responsible for any failure or defect caused by any third party product or component, whether authorized or not. This warranty does not apply to any third party software provided with the product and you are responsible for all service and repair needed for such software. This warranty is void if the product is not used in accordance with the product instructions, or if it is damaged as a result of improper installation, misuse, unauthorized repair, modification or accident. To obtain warranty service contact SanDisk at 1-866-SanDisk or send an email to: support@SanDisk.com. You must return the product in tamper resistant packaging, freight prepaid, as instructed by SanDisk. You must obtain a tracking confirmation number, which you may be required to provide to SanDisk. SanDisk will, at its option, repair or replace the product with new or refurbished product of equal or greater capacity and functionality, or refund the purchase price. The warranty duration on replaced product will be that time period remaining on the original product. THIS CONSTITUTES SANDISK'S ENTIRE LIABILITY AND YOUR EXCLUSIVE REMEDY FOR BREACH OF THIS WARRANTY.
SanDisk does not warrant, and shall not be responsible for, any lost data or information contained in any product (including in any returned product), regardless of the cause of the loss. SanDisk's products are not warranted to operate without failure. SanDisk products should not be used in life support systems or other applications where failure could threaten injury or life. This warranty gives you specific legal rights, and you may also have other rights which vary by jurisdiction.
THE FOREGOING IS SANDISK'S SOLE WARRANTY. SANDISK DISCLAIMS ALL OTHER EXPRESS AND IMPLIED WARRANTYES TO THE FULLEST EXTENT PERMITTED BY APPLICABLE LAW. THE IMPLIED WARRANTYES OF MERCHANTABILITY AND FITNESS FOR A PARTICULAR PURPOSE ARE LIMITED TO THE DURATION OF THE EXPRESS WARRANTY. SOME JURISDICTIONS DO NOT ALLOW LIMITATION ON HOW LONG AN IMPLIED WARRANTY LASTS, SO THE ABOVE LIMITA
TION MAY NOT APPLY TO YOU. IN NO EVENT SHALL SANDISK OR ANY AFFILIATED OR SUBSIDIARY COMPANY BE LIABLE UNDER ANY CIRCUMSTANCES FOR ANY DIRECT, INDIRECT, OR CONSEQUENTIAL DAMAGES, ANY FINANCIAL LOSS OR ANY LOST DATA OR IMAGE, EVEN IF SANDISK HAS BEEN ADVISED OF THE POSSIBILITY OF SUCH DAMAGE. SOME JURISDICTIONS DO NOT ALLOW THE EXCLUSION OR LIMITATION OF INCIDENTAL OR CONSEQUENTIAL DAMAGES, SO THE ABOVE LIMITATION OR EXCLUSION MAY NOT APPLY TO YOU. IN NO EVENT WILL SANDISK'S LIABILITY EXCEED THE AMOUNT PAID BY YOU FOR THE PRODUCT.
SanDisk, the SanDisk logo, and Store Your World In Ours are trademarks of SanDisk Corporation, registered in the U.S. and other countries. Sansa, TrustedFlash, and gruvi are trademarks of SanDisk Corporation. SanDisk is an authorized licensee of the microSD trademark. The PlaysForSure logo is a trademark or registered trademark of Microsoft Corporation in the United States and/or other countries.
© 2006 SanDisk Corporation. All rights reserved.
Made in China
USER NOTICE
This product is protected by certain intellectual property rights of Microsoft Corporation. Use or distribution of such technology outside of this product is prohibited without a license from Microsoft or an authorized Microsoft subsidiary.
Content providers are using the digital rights management technology for Windows Media contained in this device ("WM-DRM") to protect the integrity of their content ("Secure Content") so that their intellectual property, including copyright, in such content is not misappropriated. This device uses WM-DRM software to play Secure Content ("WM-DRM Software"). If the security of the WM-DRM Software in this device has been compromised, owners of Secure Content ("Secure Content Owners") may request that Microsoft revoke the WM-DRM Software's rights to acquire new licenses to copy, display and/or play Secure Content. Revocation does not alter the WM-DRM Software's ability to play unprotected content. A list of revoked WM-DRM Software is sent to your device whenever you download a license for Secure Content from the Internet or from a PC. Microsoft, may, in conjunction with such license, also download revocation lists onto your device on behalf of Secure Content Owners
End User License Agreement
SANDISK CORPORATION
END USER LICENSE AGREEMENT
DO NOT USE OR LOAD THIS SOFTWARE until you have carefully read the following terms and conditions. The firmware, computer programs, device drivers, data or information ("Software") distributed or bundled with the product is provided to you under the terms and conditions of this End User License Agreement, and may be subject to additional terms and conditions in an agreement between you and SanDisk's third party licensors. By downloading, installing or using the accompanying Software, you agree to all of the terms of this End User License Agreement between SanDisk Corporation ("SanDisk," "we," or "us") and each person who downloads, installs or uses the Software ("you" or "your"). The Software is owned by SanDisk or by others including Portal Player Inc. ("Licensors") who permit SanDisk to distribute their Software. If you do not agree to the following terms and conditions, do not install or use the Software. The Software is protected by copyright laws and international copyright treaties, as well as other intellectual property laws and treaties.
-
Software License. Subject to the terms and conditions contained herein, SanDisk grants to you a limited, non-exclusive, non-sub licensable, transferable in accordance with these terms, royalty-free right and license under SanDisk's intellectual property rights to use the Software in executable form for SanDisk products and services solely for your personal use on a single computer (the „License“). For each Software licensee, the Software can be "in use" on only one computer or hardware device at any given time. The Software is "in use" when it is either downloaded, copied, loaded into RAM or installed into the hard disk or other permanent memory of a computer or other hardware device. SanDisk and its Licensors retain all right, title and interest in and to the Software.
-
Restrictions. SanDisk or its Licensors retain all rights in the Software not expressly licensed to you. You may not modify, create derivative works (new versions) of, adapt or translate the Software. No source code is provided under this Agreement. You may not reverse engineer, disassem-
ble, decompile, rent, or lease the Software, or re-create or discover the source code version of the Software. The Software contains proprietary and confidential information of SanDisk or its Licensors, which you agree not to discover or reveal to others. Any and all permitted copies of the Software that you make or distribute must be unmodified, must contain all of the original Software's proprietary notices, and must include or be accompanied by this Agreement. You may not separate the Software into component parts for sublicense, distribution or transfer to a third party. You may not embed the Software within any other software product or modify the Software in whole or in part in any manner.
-
DISCLAIMER OF WARRANTYES. TO THE MAXIMUM EXTENT PERMITTED BY APPLICABLE LAW, THE SOFTWARE IS PROVIDED "AS IS" AND "AS AVAILABLE" WITH NO WARRANTYES. NEITHER SANDISK NOR ITS LICENSORS MAKE ANY REPRESENTATION OR WARRANTY, STATUTORY OR OTHERWISE, IN LAW OR FROM THE COURSE OF DEALING OR USAGE OF TRADE, EXPRESS OR IMPLIED, INCLUDING WITHOUT LIMITATION ANY WARRANTYES OF MERCHANTABILITY, FITNESS FOR A PARTICULAR PURPOSE, NON-INTERFERENCE, OR NON-INFRINGEMENT OF ANY THIRD PARTY INTELLECTUAL PROPERTY RIGHTS, OR EQUIVALENTS UNDER THE LAWS OF ANY JURISDICTION. YOU ASSUME THE ENTIRE RISK AS TO THE QUALITY AND PERFORMANCE OF THE SOFTWARE. SHOULD THE SOFTWARE PROVE DEFECTIVE, YOU, AND NOT SANDISK, ITS LICENSORS OR RESELLERS, ASSUME THE ENTIRE COST OF NECESSARY SERVICING, REPAIR, OR CORRECTION.
-
LIMITATION OF LIABILITY. IN NO EVENT WILL SANDISK OR ITS LICENSORS, OR THEIR RESPECTIVE DIRECTORS, OFFICERS, EMPLOYEES, CONSULTANTS, LICENSORS, LICENSEES OR AFFILIATES, BE LIABLE FOR ANY INDIRECT, INCIDENTAL, SPECIAL, CONSEQUENTIAL, OR EXEMPLARY DAMAGES, ARISING OUT OF OR IN CONNECTION WITH THE DOWNLOAD, USE OR PERFORMANCE OR NON-PERFORMANCE OF THE SOFTWARE. THE FOREGOING LIMITATIONS OF LIABILITY SHALL APPLY NOTWITHSTANDING ANY FAILURE OF ANY REMEDY PROVIDED FOR HEREUNDER IN ITS ESSENTIAL PURPOSE. IN NO EVENT WILL SANDISK'S OR ITS LICENSORS' TOTAL LIABILITY TO YOU EXCEED THE AMOUNT YOU PAID TO US FOR THE USE OF THE SOFTWARE.
-
The Software is provided with "RESTRICTED RIGHTS." Use, duplication or disclosure by the Government is subject to restrictions as set forth in FAR 52.227-14 and DFARS 252.227-7013 et seq. Use of the Software by the Government constitutes acknowledgement of SanDisk's proprietary rights therein. Contractor or Manufacturer is SanDisk Corporation, 140 Caspian Court, Sunnyvale, CA 94089.
-
Termination. We may terminate this Agreement and the license if you violate this Agreement at any time. Upon termination of this Agreement, you must delete or destroy all copies of the Software.
-
High Risk Activities. The Software is not fault-tolerant and is not designed or intended for use in hazardous environments requiring fail-safe performance, or any other application in which the failure of the Software could lead directly to death, personal injury, or severe physical or property damage (collectively, "High Risk Activities"). SANDISK DISCLAIMS ANY EXPRESS OR IMPLIED WARRANTY OF FITNESS FOR HIGH RISK ACTIVITIES AND SHALL NOT BE LIABLE FOR ANY LIABILITIES OR DAMAGES ARISING FROM SUCH USE.
-
General. This Agreement contains the entire understanding between the parties with respect to your use of the Software. If any part of this Agreement is found void and unenforceable, it will not affect the validity of the balance of this Agreement, which shall remain valid and enforceable according to its terms. This Agreement is governed by and construed under the laws of the State of California and the Federal laws of the United States of America without regard to conflicts of laws provisions thereof. The U.N. Convention on Contracts for the International Sale of Goods shall not apply to this Agreement. Any action or proceeding arising from or relating to this Agreement shall be adjudicated in the state or federal courts of Santa Clara County, California, and the parties hereby agree to the exclusive jurisdiction and venue of such courts. You will not remove or export from the United States or reexport from anywhere any part of the Software or any direct product thereof to any country in violation of U.S. Export Administration Regulations, or a successor thereto, or otherwise except in compliance with and with all licenses and approvals required under applicable export laws and regulations including, without limitation, those of the U.S. Department of Commerce. Any waivers or amendments of this Agreement shall be effective only if made in writing and signed by
an authorized representative of each party. The provisions of Sections 3, 4, 5, 6, 7 and 8 shall survive the termination or expiration of this Agreement.
FCC Regulation
This device complies with part 15 of the FCC Rules. Operation is subject to the following two conditions:
- This device may not cause harmful interference, and
- This device must accept any interference received, including interference that may cause undesired operation.
This equipment has been tested and found to comply with the limits for a Class B digital device, pursuant to Part 15 of the FCC Rules. These limits are designed to provide reasonable protection against harmful interference in a residential installation. This equipment generates, uses, and can radiate radio frequency energy and, if not installed and used in accordance with the instructions, may cause harmful interference to radio communications. However, there is no guarantee that interference will not occur in a particular installation. If this equipment does cause interference to radio or television reception, which can be determined by turning the equipment off and then on, the user is encouraged to try to correct the interference by one or more of the following measures:
- Increase the separation between the equipment and receiver.
- Correct the equipment to a different outlet so that the equipment and receiver are on different branch circuits.
- Consult the dealer or an experienced radio / TV technician for help.
Important - Safe Hearing Level Info
IMPORTANT INFORMATION
YOU MUST READ THIS BEFORE USING YOUR SANSA MP3 PLAYER
Congratulations on the purchase of your SansaTM media player!
Your media player is equipped with a variety of features. To help you maximize your listening pleasure, SanDisk would like to advise you that it is important to use your headphones with your media player at a safe hearing level.
- Exposure or repeated exposure for an extended period of time to music and other sounds that are too loud can cause damage to your hearing resulting in temporary or even permanent "noise induced hearing loss".
- Symptoms of hearing loss increase gradually with prolonged exposure at high levels of loudness.
Initially, you may not even be aware of the loss unless detected with a hearing test.
HEARING LEVELS
To help you understand what may be considered a safe hearing level, the following examples are included for your reference.
Examples of Typical Approximate Sound level
Sound Levels in Decibels (dB)*
Refrigerator humming 40
Normal conversation 60
City traffic 80
Motorcycles and lawnmowers 90#
Rock concerts 110-120#
Firearms 120-140#
-
dB -A decibel (dB) is a unit of relative measurement of the strength of sound wave. In decibels (dB), a measured signal level doubles with every additional 3 dB.
-
These sound decibel levels are considered harmful under extended exposure.
Information courtesy of the National Institute of Deafness & Other Communication Disorders (NIDCD)
http://www.nidcd.nih.gov/health/hearing/noise.asp
FOR YOUR SAFETY!
- Your hearing may adapt to higher volumes of sound. In order to prevent any harmful impact to your hearing, you must control the sound emanating from your headphones and set the media player volume to a low setting where you can hear it clearly and comfortably.
Studies, including one from NIDCD indicate that sounds of less than 80 decibels, even after long exposure, are unlikely to cause a hearing loss. - Listen to your media player at such a level that you can still hear conversation and other people in your environment without shouting when you attempt to converse.
- It can also be dangerous to play your music with headphones/earphones at high volume while walking, or engaged in other activities. You should exercise extreme caution and discontinue use in potentially hazardous situations.
- Do not use headphones/earphones while driving, cycling, or operating any motorized vehicle. This may create a traffic hazard and may be illegal in some areas.