
DVD-R580 - Video recorder MUSTEK - Free user manual and instructions
Find the device manual for free DVD-R580 MUSTEK in PDF.
| Product Type | HDD+DVD Video Recorder |
| Brand | MUSTEK |
| Model | DVD-R580 |
| Hard Disk Capacity | 40, 80, 120 or 160 GB depending on version |
| Disc Playback Formats | HDD, DVD, DVD±R, DVD±RW, Audio CD, Kodak Picture CD, JPEG Picture CD |
| Recordable Disc Formats | DVD+R, DVD+RW |
| Recording Modes | HQ (High Quality), SP (Standard), LP (Long Play), EP (Extra Long), SLP (Super Long) |
| Recording Resolution (PAL) | HQ/SP: 720×576, LP/EP: 360×576, SLP: 352×288 |
| Recording Resolution (NTSC) | HQ/SP: 720×480, LP/EP: 360×480, SLP: 352×240 |
| Input Connectors | Composite (CVBS), S-Video, DV (i.LINK), TV antenna |
| Output Connectors | Composite, S-Video, Component (Y Pb Pr), Digital audio coaxial, Analog stereo audio |
| Main Functions | Direct recording, programming (8 events), Timeshift, playback, title editing, HDD→DVD dubbing |
| Advanced Playback Functions | Slow motion, fast forward, chapter/time search, zoom, multiple angles, subtitles, audio languages |
| Parental Control | Restriction level with password |
| Power Supply | 220-240 V ~ 50/60 Hz |
| Power Consumption | Approx. 25 W (estimate) |
| Dimensions (approx.) | 430 × 280 × 55 mm |
| Weight (approx.) | 3.5 kg |
| Maintenance and Cleaning | Unplug before cleaning; use a soft, dry cloth. Do not use solvents. |
| Safety | Class 1 laser; do not open the casing. Protect from moisture and heat sources. |
| Spare Parts and Repairability | Repair exclusively by a qualified technician. No user-serviceable parts. |
Frequently Asked Questions - DVD-R580 MUSTEK
User questions about DVD-R580 MUSTEK
0 question about this device. Answer the ones you know or ask your own.
Ask a new question about this device
Download the instructions for your Video recorder in PDF format for free! Find your manual DVD-R580 - MUSTEK and take your electronic device back in hand. On this page are published all the documents necessary for the use of your device. DVD-R580 by MUSTEK.
USER MANUAL DVD-R580 MUSTEK
- Before attempting to connect, operate or adjust this product, please save and read the User Guide completely.
- The style of the HDD+DVD Recorder shown in the User Guide may be different from the actual unit due to various models.


User Guide
Playable Format:
HDD/DVD/DVD±R/DVD±RW/Audio CD/Kodak Picture CD/JPEG Picture CD
- The HDD+DVD Recorder is intended to record DVD+R or DVD+RW disc only.
- The capacity of Hard Disk Drive varies due to different models.
Getting Started

FCC and Safety Information 1
Important Safety Instructions 2
Precautions 3
Definition of Terms 4
About This User Guide 5
Feature Reference 6
Before Operation 7
Quick DiscPlayback 8
Quick Recording 10
1-5 DISC Setup 27
Initialize DVD Setting 27
Finalize DVD Setting 28
Format HDD Setting 29
Scandisc HDD Setting 30
1-6 SYSTEM Setup 31
Auto Play Setting 31
Rating Setting 31
Set Password Setting 32
System Information Setting 33
Factory Reset Setting 33
Initial OSD Settings

1 Initial Settings 12
1-1 LANGUAGE Setup 14
Guide Language Setting 14
Audio Language Setting 14
Subtitle Language Setting 15
Menu Language Setting 15
1-2 TV CHANNEL Setup 16
TV Signal Setting 16
Channel Setup Setting 17
Channel Setup Setting 18
1-3VIDEO & AUDIO Setup 19
Speaker Setup Setting 19
SPDIF Setting 19
DRC Setting 20
Equalizer Setting 20
TV Aspect Setting 21
Video Output Setting 22
1-4 RECORD Setup 23
Record Quality Setting 23
DVD Auto Chapter Setting 23
Set Time Setting 24
Schedule Record Setting 25
Playing Back

2-1 Operation with HDD and DVD 34
Basic HDD Playback 34
Basic DVD Playback 34
Returning to Menu Screen During HDD Playback ... 34
Stopping DVD Playback and Returning to the Menu Screen
(If a Menu Screen is Available on the Disc) 35
Stopping HDD Playback 35
Stopping DVD Playback 35
Fast Forward (Fast Backward) 35
Skipping Ahead or Back to Chapters 35
PausingPlayback 36
Frame Advance (Step) 36
Slow-MotionPlayback 36
Selecting Scenes by Title Number 36
Selecting Scenes by Chapter Number 37
Selecting Scenes by Time 37
Selecting Audio System During Playback 37
Selecting Subtitle System During Playback 38
Selecting Angle System DuringPlayback 38
Displaying the Information of the Scene 38
Repeating a Sequence Between Two Specific Points
(A-B Repeat) 39
Playing Back
Repeating Viewing in HDD Mode 39
Repeating Viewing in DVD Mode 39
Zooming a Scene DuringPlayback 40
Changing Audio Soundtrack Language 40
Clearing/Changing Subtitles 40
Viewing from Different Angles 41
VCD Menu 41
Muting the Recorder 41
Using Volume Function 41
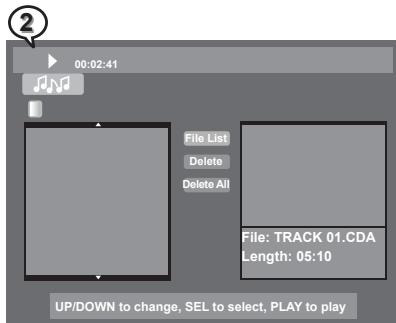
2-2 Audio CD Operation 42
BasicPlayback 42
Adding Parts of Audio CD Tracks into Play List ... 43
Adding All Audio CD Tracks into Play List .... 44
Deleting Parts of Music Tracks from Play List ... 44
Deleting All Music Tracks from Play List 45
Stopping Playback 45
Fast Forward (Fast Backward) 45
Skipping Tracks Ahead or Back 45
PausingPlayback 46
Repeating a Music Sequence Between Two Specific
Times (A-B Repeat) 46
RepeatingPlayback 46
Display the Disc Information 46
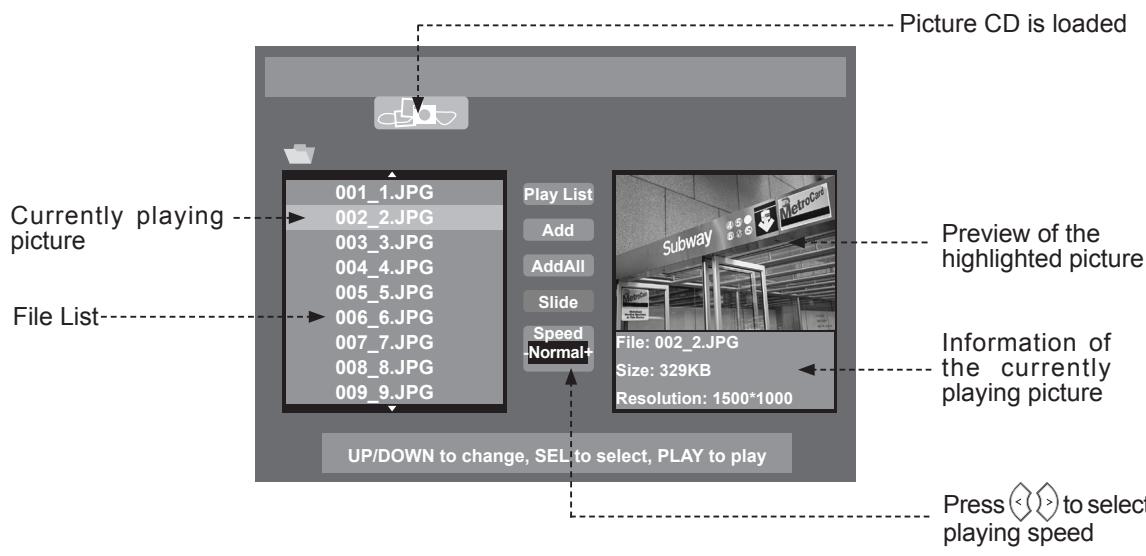
2-3 Kodak and JPEG Picture CDs Operation 47
Playing Picture CDs Back 47
StoppingPlayback to DisplayFileList 47
Adding Parts of Picture Files into Play List .... 48
Adding All Picture Files into Play List 48
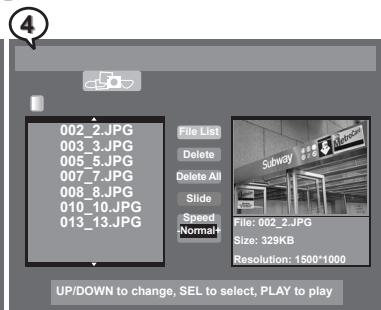
Deleteing Parts of Picture Files from Play List .... 49
Deleting All Picture Files from Play List 49
Viewing Pictures through Other Functions 50
2-4 DV Operation 51
DV Control Function 51
Recording
3-1 Before Recording 52
Recording Option 52
Basic Recording Troubleshooting 52
Schedule Recording Troubleshooting 52
3-2 Recording Overview 53
Record Quality Setting 53
Recording External Sources to HDD 53
Recording External Sources to DVD 54
Recording TV Programs to HDD 55
Recording TV Programs to DVD 56
3-3 Timeshift Operation 57
Timeshift Setup and Operation 57
3-4 Schedule Recording 58
Using Schedule Recording 58
Editing

4-1 Editing HDD 59
Deleting HDD Recording Titles 59
Dubbing HDD Recording Titles 60
Editing Title Names in HDD 61
4-2 Editing DVD 62
Editing Titles in the Title Menu 62
Editing Titles during Playback 65
F or Your Reference

5-1 Troubleshooting 67
5-2 Disc Handling and Maintenance .... 69
CAUTION:
This unit employs a laser. Due to possible eye injury, only qualified service personnel should remove the cover or attempt to service this device. Use of controls, adjustments, or the performance of procedures other than those specified herein may result in hazardous radiation exposure.
NOTE:
This equipment has been tested and found to comply with the limits for a Class B digital device pursuant to part 15 of the FCC Rules. These limits are designed to provide reasonable protection against harmful interference in a residential installation. This equipment generates, uses and can radiate radio frequency energy and, if not installed and used in accordance with the instructions, may cause harmful interference to radio communications. However, there is no guarantee that interference will not occur in a particular installation. If this equipment does cause harmful interference to radio or television reception, which can be determined by turning the equipment off and on, the user is encouraged to try to correct the interference by one or more of the following measures:
- Reorient or relocate the receiving antenna.
- Increase the separation between the equipment and receiver.
- Connect the equipment into an outlet on a circuit different from that to which the receiver is connected.
- Consult the dealer or an experienced radio/TV technician for help.
This product incorporates copyright protection technology that is protected by method claims of certain U.S. patents and other intellectual property rights owned by Macrovision Corporation and other rights owners. Use of this copyright protection technology must be authorized by Macrovision Corporation, and is intended for home and other limited viewing uses only unless otherwise authorized by Macrovision Corporation. Reverse engineering or disassembly is prohibited.
For the HDD+DVD Recorder with Progressive scan output:
'Consumers should note that not all high definition television sets are fully compatible with this product and may cause artifacts to be displayed in the picture. In case of Progressive scan picture problems, it is recommended that the user switch the connection to the "Standard Definition" output. If there are questions regarding our TV set compatibility with this model HDD+DVD Recorder, Please contact our customer service center.'
Since it is usual for DVD movies to be released at different times in different regions of the world, all players have region codes and disc can have an optional region code. If you load a disc of a different region code to your player, you will see the region code notice on the screen. The disc will not play, and should be unloaded.
(Possible region codes:)


There are 6 regions (also called "locals"). Each DVD player and disc will be played in one region ONLY.
1: Canada, U.S., U.S. Territories
2: Japan, Europe, South Africa, Middle East (including Egypt)
3: Southeast Asia, East Asia (including Hong Kong)
4: Australia, New Zealand, Pacific Islands, Central America, Mexico, South America, Caribbean
5: Former Soviet Union, Indian Subcontinent, Africa (also North Korea, Mongolia)
6: China
Never make or change connections with the power switched on.
CAUTION VISIBLE AND INVISIBLE LASER RADIATION WHEN OPEN AVOID EXPOSURE TO BEAM (WARNING LOCATION: INSIDE ON LASER COVER SHIELD)
- Read these instructions.
- Keep these instructions.


Important Safety Instructions
- Read these instructions.
- Keep these instructions.
- Pay attention to all warnings.
- Follow all instructions.
- Do not use this apparatus near water.
- Clean only with a damp cloth.
- Do not block any of the ventilation openings. Install in accordance with the manufacturer's instructions.
- Do not install near any heat sources such as radiators, heat registers, stoves, or other apparatus (including amplifiers) that produce heat.
- Do not defeat the safety purpose of the polarized-type plug. A polarized plug has two blades with one wider than the other. The wide blade is provided for your safety. When the provided plug does not fit into your outlet, consult an electrician for replacement of the obsolete outlet.
- Protect the power cord from being walked on or pinched particularly at plug, convenience receptacles, and the point where they exit from the apparatus.
- Only use attachments/accessories specified by the manufacturer.
- Use only with a cart, stand, tripod, bracket, or table specified by the manufacturer or sold with the apparatus. When a cart is used, use caution when moving the cart/apparatus combination to avoid injury from tip-over.
- Unplug this apparatus during lighting storms or when unused for long periods of time.
- Refer all servicing to qualified service personnel. Servicing is required when the apparatus has been damaged in any way; such as when the power-supply cord or plug is damaged, liquid has been spilled or objects have fallen into the apparatus, the apparatus has been exposed to rain or moisture, does not operate normally, or has been dropped.

WARNING: To reduce the risk of fire or electric shock, do not expose to rain, moisture, dripping or splashing.
No objects filled with liquids, such as vases, shall be placed on top of the recorder.
Please read these precautions before operating the unit.
Power cord protection
To avoid any malfunctions of the unit, and to protect against electric shock, fire or personal injury, please observe the following.
- Hold the plug firmly when connecting or disconnecting the AC power cord.
- Keep the AC power cord away from heating appliances.
- Never put any heavy object on the AC power cord.
- Do not attempt to repair or reconstruct the AC power cord in any way.
PlACEMENT
Avoid placing the unit in areas of:
- direct sunlight or heating radiators, or closed automobiles
- high temperature (over 350^ ) or high humidity (over 90% )
- much dust as the internal parts may be seriously damaged.
Non-use periods
When the unit is not being used, turn it off. When left unused for a long period of time, the unit should be unplugged from the household AC outlet.
No fingers or other objects inside
- Touching internal parts of the unit is dangerous, and may cause serious damage to the unit. Do not attempt to disassemble the unit.
- Do not put any foreign object on the disc tray.
- Keep away from water/magnet
- Keep the unit away from flower vases, tubs, sinks, etc. If liquids are spilled into the unit, serious damage could occur.
- Never bring a magnet or magnetized object near the unit.
■ Stacking
- Place the unit in a horizontal position, and do not place anything heavy on it.
Condensation
Moisture may form on the lens in the following conditions:
- immediately after a heater has been turned on
- in a steamy or very humid room
- when the unit is suddenly moved from a cold environment to a warm one If moisture forms inside the unit, it may not operate properly. In this case, turn on the power and wait about one hour for the moisture to evaporate.
If there is noise interference on the TV while a broadcast is being received
Depending on the reception condition of the TV, interference may appear on the TV monitor while you watch a TV broadcast and the unit is left on. This is not a malfunction of the unit or the TV. To watch a TV broadcast, turn off the unit.
Angle
Recorded onto some DVD discs are scenes which have been simultaneously shot from a number of different angles (the same scene is shot from the front, from the left side, from the right side, etc.). With such discs, the ANGLE button can be used to view the scene from different angles.
Chapter Number
These numbers are recorded on HDD and DVD discs. A title is subdivided into many sections, each of which is numbered, and specific parts of video presentations can be searched quickly using these numbers.
DVD
A high-density optical disc on which high-quality pictures and sound have been recorded by means of digital signals. Incorporating a new video compression technology (MPEG II) and high-density recording technology, DVD enables aesthetically pleasing full-motion video to be recorded over long periods of time (for instance, a whole movie can be recorded). A DVD disc normally has 4.7GB capacity and is able to record 2hrs of high quality DVD movie.
DVD+R
This means DVD+Recordable. These Discs can be recorded and finalized only once.
DVD+RW
This means DVD+ReWritable. These Discs can be recorded on repeatedly.
Finalize
After being recorded and finalized, the recorded disc can be played back on a regular DVD player if the DVD player can take DVD+R discs.
HDD
HDD refers to the internal hard disc drive of the recorder. It is a fragile piece of equipment. Backing up important recordings onto DVD+R/RW is recommended in order to protect against accidental loss.
Subtitles
These are the printed lines appearing at the bottom of the screen which translate or transcribe the dialogue. They are recorded on DVD discs.
Play Time
This indicates the play time which has elapsed from the start of a disc or a title. It can be used to find a specific scene quickly. (It may not work with some discs.)
Title Number
These numbers are recorded on DVD discs. When a disc contains two or more movies, these movies are numbered as title 1, title 2, etc.
Track Number
These numbers are assigned to the tracks which are recorded on audio CDs. They enable specific tracks to be located quickly.
Note: Before attempting to connect, operate or adjust this product, please save and read this User Guide completely.
Thank you for buying the HDD+DVD Recorder. We sincerely hope you can enjoy the pleasure of recording and playing back pictures through this quality unit with only certain simple operations to follow. By using the HDD+DVD Recorder, you can enjoy the programs recorded in the HDD, DVDs, audio CDs, or watch TV shows through external devices. What's more, you can record these shows to HDD, DVD+R or DVD+RW discs according to your favor.
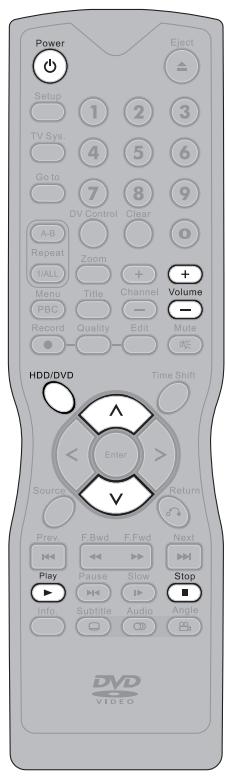
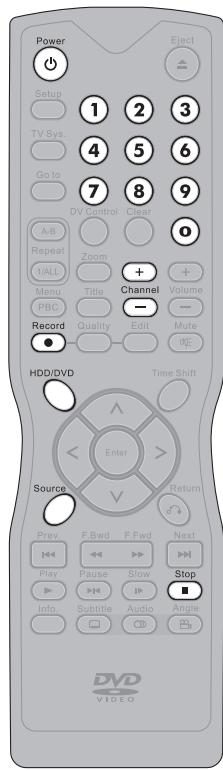
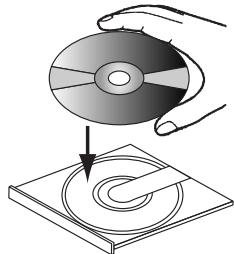
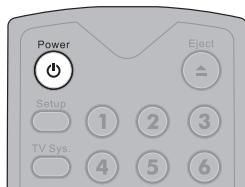
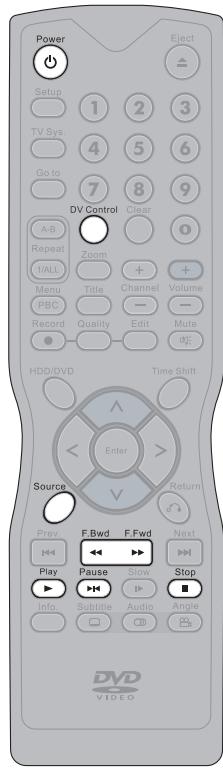
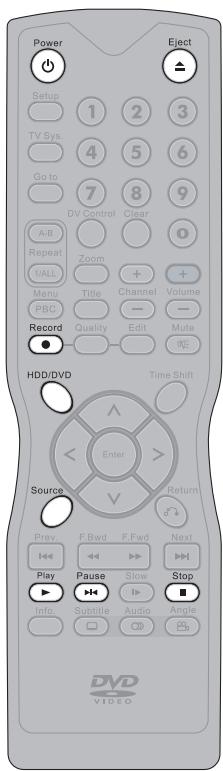
Instructions in this User Guide describe mainly the use of the remote control. Buttons with the same or similar marking on your HDD+DVD Recorder have the same functions as those of the remote control. For introduction to the panels (HDD+DVD Recorder), buttons (Remote Control), and various connections, please refer to the Quick Guide.
About the Internal HDD:
Please use the recorder following the guidelines below to protect against possible HDD failure. It is recommended to always back up important recordings onto DVD+R/RW discs in order to protect against accidental loss.
Install and operate the recorder on a stable and level surface
Do not move the recorder while it is on
Do not block the rear vent/cooling fan
Do not move the recorder immediately after switching it off
- Do not use the recorder in places that may be subject to sudden changes in temperature, or in excessively hot or humid environmental conditions
It could cause loss of recording data if there is a power failure during recording programs.
As the recorder is switched on, do not unplug from the wall socket or switch the electricity off from the breaker switch.
Scheduled Recording:
Number of events: 8 (Freq, Start time, Duration, Mon-Fri/Weekly Mon/Weekly Tue, etc) Up to 1 month in advance
Programming mode: OTR, Remote
Timer programming: VCR Plus+ & manual
4.7GB DVD+R / DVD+RW disk
| Rec Mode | Rec Time | Resolution (pixels) | Vertical Freq. |
| HQ | About 1 Hr | 720 x 576 (PAL) | 50 Hz |
| 720 x 480 (NTSC) | 60 Hz | ||
| SP | About 2 Hr | ||
| LP | About 3 Hr | 360 x 576 (PAL) | 50 Hz |
| 360 x 480 (NTSC) | 60 Hz | ||
| EP | About 4 Hr | ||
| SLP | About 6 Hr | 352 x288 (PAL) | 50 Hz |
| 352 x 240 (NTSC) | 60 Hz |
40 / 80 / 120 / 160 GB Harddisk
| Rec. Mode | Recording Time | Resolution (pixels) | Vert. Freq. |
| HQ | About 8 / 16.5 / 25 / 33.5 Hr | 720 x 576 (PAL) | 50 Hz |
| SP | About 16 / 33 / 50 / 67 Hr | 720 x 480 (NTSC) | 60 Hz |
| LP | About 24/ 50 / 75 / 100 Hr | 360 x 576 (PAL) | 50 Hz |
| EP | About 32 / 66 / 100 / 134 Hr | 360 x 480 (NTSC) | 60 Hz |
| SLP | About 48 / 100 / 150 / 201 Hr | 352 x288 (PAL) | 50 Hz |
| 352 x 240 (NTSC) | 60 Hz |
Before Operation
This section covers significant information about the unit's general behavior. Please read the below information carefully.
As turning on the HDD+DVD Recorder, the unit directly enters to DVD mode.
If a disc is already placed on the disc tray, the reocrder will start to load the disc right after power is turned on. It will be invalid by pressing HDD/DVD to switch to HDD mode or Source to change connected source during loading.
□ If Auto Play is set on, the recorder will start to play the disc or display its menu after loading.
To switch to HDD mode, please do the following:
- If there is no disc placed in the recorder, press HDD/DVD on the remote control to switch to HDD mode.
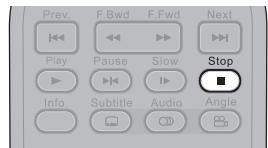
- If there is a disc placed in the recorder, press Stop twice to completely stop DVD playback. Press HDD/DVD on the remote control to switch to HDD mode.
When pressing Stop for a first time during DVD playback, the recorder turns to a pre-stop status and memorizes the position where the playback is stopped. To start play from where the playback has been stopped, press Play.
If intending to completely stop DVD playback in order to operate the other functions in pass-through mode, press Stop for a second time following the previous stop operation. - When recording programs to a DVD+RW or DVD+R disc, after the disc is loaded and its disc menu is displayed on the screen, press Record once to switch the recorder to record mode. Then press Source to select a preferred source for recording. To start the recording, press Record again.
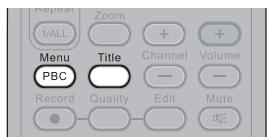
To display the title menu during HDD playback, press Menu or Title. To leave the menu, press Play.
To return to the title menu during DVD playback, press Menu or Title.
As appears on the right top corner of the screen, it indicates that the action is prohibited or not available.


HDD Quick Playback
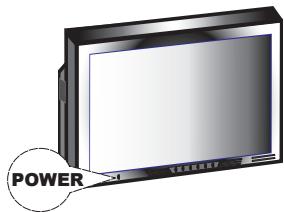
1 Press STANDBY/ON button on the HDD+DVD Recorder or Power on the remote control to turn on the HDD+DVD Recorder.

2 Turn on the TV set, and switch it to the correct Video Input source (Video 1, etc.).
3 If intending to play the programs recorded in HDD, press HDD/DVD on the remote control to select HDD mode.
4 Press Play, a title menu appears on the screen, and the lastest recorded program starts playback behind the title menu.
Note: HDD Playback can be proceeded only when there is one or more programs recorded in the hard disc.
5 Press on the remote control to highlight a preferred title. The selected title will be played behind the title menu immediately after being highlighted.
6 To leave the title menu and watch the program, press Play again.
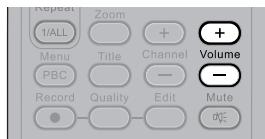
7 Press + Volume to adjust volume.
8 To stop playback and operate the inputs of external sources (TV, CVBS1, Video1 and DV etc.) in pass-through mode, press Stop.
QuickPlaybackofOtherDiscs
1 Press STANDBY/ON button on the HDD+DVD recorder or Power on the remote control to turn on the HDD+DVD Recorder.

2 Turn on the TV set, and switch it to the correct Video Input source (Video 1, etc.).

3 If intending to play the programs in DVD or other playable discs, press HDD/DVD on the remote control to select DVD mode.
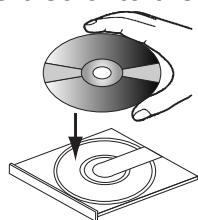
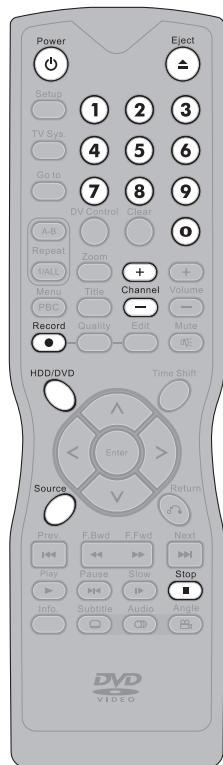
4 Press Eject to open the disc tray. Place the disc onto the tray.
Note: Hold the disc without touching its surfaces, position it with the printed title side facing up, align it with the guides, and place it in its proper position.
Press Eject. Disc tray will close and start playback.
6 If it does not start playback, do the following: If playing DVD/DVD±R/DVD±RW, a disc menu appears. Press on the remote control to select a preferred title. Press Play to start playback.
7 Press + Volume to adjust volume.
8 To stop playback, press Stop.
Note: When pressing Slop for the first time during playback, the recorder turns to a pre-stop status and memorizes the position where the playback is stopped. To start play from where the playback has been stopped, press Play.
9 To operate the inputs of external sources (TV, CVBS1, Video1 and DV etc.) in pass-through mode, press Stop again.


HDD Quick Recording
1 Press STANDBY/ON button on the HDD+DVD Recorder or Power on the remote control to turn on the HDD+DVD Recorder.
2 If intending to record programs in HDD, press HDD/DVD on the remote control to select HDD mode. Turn on the TV.
To Record from External Sources
3 Press Source on the remote control repeatedly to toggle to the external A/V input sources you wish to record.
Note: To record from your videotape player, you can connect it to S-VIDEO1 input connector of you HDD+DVD Recorder, and press Source to select S-Video1 on TV.
To Record TV Program
3 Press Source on the remote control repeatedly to see TV channels through the HDD+DVD Recorder.
Note: To view local TV programs through this recorder, you have to proceed Channel Scan first. Please refer to Chapter 1-2: Channel Scan Setting on page 17 for details.
4 Press + - Channel or Number Botton(s) to select a preferred channel for recording.
5 Press Record to start recording the selected channel.
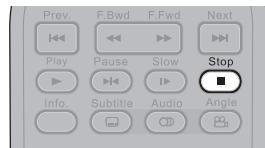
6 To stop recording, press Stop.
DVD+R and DVD+RW Quick Recording
1 Press STANDBY/ON button on the HDD+DVD Recorder or Power on the remote control to turn on the HDD+DVD Recorder.
2 Press Eject to open the disc tray. Place a DVD+R/DVD+RW disc onto the tray, and press Eject to close it. After the disc is loaded, and its menu is displayed on the screen, press Record once to switch the recorder to record mode.

Note: Hold the disc without touching its surfaces, position it with the printed title side facing up, align it with the guides, and place it in its proper position.
To Record from External Sources
3 Press Source on the remote control repeatedly to toggle to the external A/V input sources you wish to record.

Note: To record from your videotape player, you can connect it to S-VIDEO1 input connector of you HDD+DVD Recorder, and press Source to select S-Video1 on TV.
To Record TV Program

3 Press Source on the remote control repeatedly to see TV channels through the HDD+DVD Recorder.
Note: To view local TV programs through this recorder, you have to proceed Channel Scan first. Please refer to Chapter 1-2: Channel Scan Setting on page 17 for details.
4 Press + Channel or Number Botton(s) to select the preferred channel for recording.
5 Press Record to start recording the selected channel.
6 To stop recording, press Stop.

This chapter covers all the OSD settings for your HDD+DVD Recorder. There are six major functions in the Setup menu, including LANGUAGE, TV CHANNEL, AUDIO &VIDEO, RECORD, DISC and SYSTEM. By proceeding these OSD settings, you can select options that suit best to your equipment.
The six major OSD settings:
1. Under LANGUAGE Setup
3. Under AUDIO &VIDEO Setup
5. Under DISC Setup
When No Disc is placed
6. Under SYSTEM Setup
2. Under TV CHANNEL Setup
4. Under RECORD Setup
5. Under DISC Setup
When a DVD+R/RW is placed
1 Initial Settings - continued
In Advance:
1 Press STANDBY/ON button on the HDD+DVD Recorder or Power on the remote control to turn on the HDD+DVD Recorder.

Or
2 Turn on the TV set, and switch it to the correct Video Input Source (Video 1,etc.).
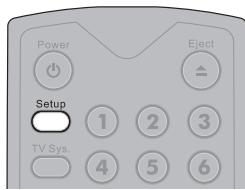
3 Press Setup to display the main Setup Menu.

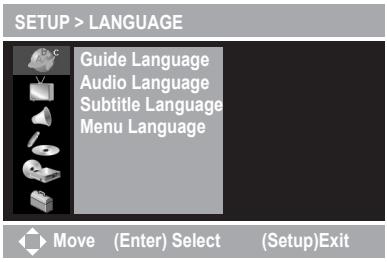
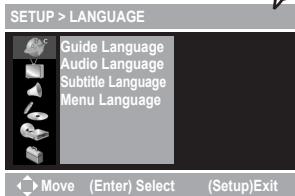
Guide Language Setting

SETUP > LANGUAGE
Guide Language Audio Language Subtitle Language Menu Language

Move (Enter) Select
(Setup)Exit

SETUP > LANGUAGE
Guide Language Audio Language Subtitle Language Menu Language
'English Espanol Francals Deutsch Italiano

Move (Enter) Select
(Setup)Exit

SETUP > LANGUAGE
Guide Language) Audio Language Subtitle Language Menu Language
English
Espanol
Francais
Deutsch
Italiano

Move (Enter) Select
(Setup)Exit
Guide Language is a function for selecting Setup menu and on-screen language displays.
1 Press Setup to display the main Setup Menu.
2 As LANGUAGE SETUP icon is highlighted, a primary option window appears on the right.
3 Press > to highlight Guide Language, and a secondary option window appears on the right.
4 Press > again and then to highlight a preferred language among the options. Press and a tick appears in front of the selected language.
5 To return to the main Setup Menu, press twice. To leave the main Setup Menu, press Setup.
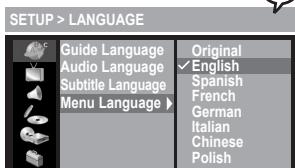
Audio Language Setting

SETUP >LANGUAGE
Guide Language Audio Language Subtitle Language Menu Language

Move (Enter) Select
(Setup)Exit

SETUP > LANGUAGE
Guide Language Audio Language) Subtitle Language Menu Language
Original English Spanish French German Italian Chinese Polish

Move (Enter) Select
(Setup)Exit

SETUP > LANGUAGE
Guide Language Audio Language) Subtitle Language Menu Language
Original English Spanish French

Move (Enter) Select
(Setup)Exit
Audio Language is a function for selecting DVD audio language outputs of discs.
1 Press Setup to display the main Setup Menu.
2 As LANGUAGE SETUP icon is highlighted, a primary option window appears on the right.
3 Press > and then to highlight Audio Language, and a secondary option window appears on the right.
4 Press > again and then to highlight a preferred language among the options. Press and a tick appears in front of the selected language.
5 To return to the main Setup Menu, press twice. To leave the main Setup Menu, press Setup.
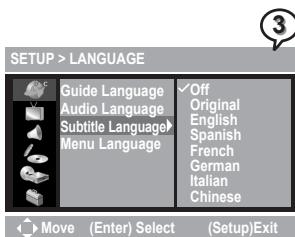
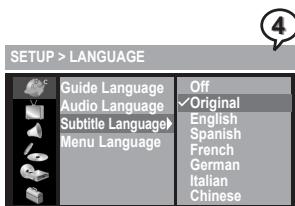
Subtitle Language Setting
Subtitle Language is a function for selecting DVD subtitle language outputs of discs.
1 Press Setup to display the main Setup Menu.
2 As LANGUAGE SETUP icon is highlighted, a primary option window appears on the right.
3 Press > and then to highlight Subtitle Language, and a secondary option window appears on the right.
4 Press > again and then to highlight a preferred language among the options. Press and a tick appears in front of the selected language.
5 To return to the main Setup Menu, press twice. To leave the main Setup Menu, press Setup.


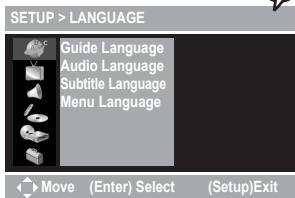
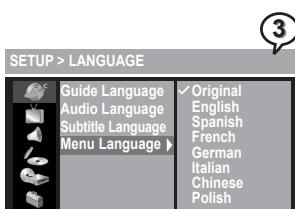
Menu Language Setting
Menu Language is a function for selecting DVD menu language displays of discs.
1 Press Setup to display the main Setup Menu.
2 As LANGUAGE SETUP icon is highlighted, a primary option window appears on the right.
3 Press > and then to highlight Menu Language, and a secondary option window appears on the right.
4 Press > again and then to highlight a preferred language among the options. Press and a tick appears in front of the selected language.
5 To return to the main Setup Menu, press twice. To leave the main Setup Menu, press Setup.


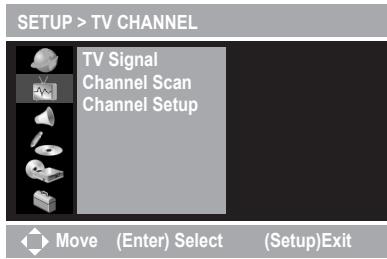
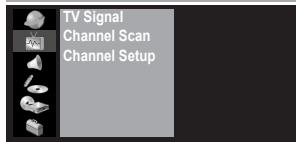
TV Signal Setting

SETUP>TV CHANNEL

Oye (Enter) Select
(Setup)Exit

SETUP>TV CHANNEL
TV Signal
Channel Scan
Channel Setup
TV
CATV

Move (Enter) Select
(Setup)Exit

SETUP>TV CHANNEL
TV Signal
Channel Scan
Channel Setup
TV
CATV
TV Signal is a function for setting the source of TV signal receiver.
1 Press Setup to display the main Setup Menu.
2 Press to highlight TV CHANNEL SETUP icon, and a primary option window appears on the right.
3 Press to highlight TV Signal, and and a secondary option window appears on the right.
4 Press × again and then to highlight a preferred option. Press and a check appears in front of the selected option.
5 To return to the main Setup Menu, press twice. To leave the main Setup Menu, press Setup.
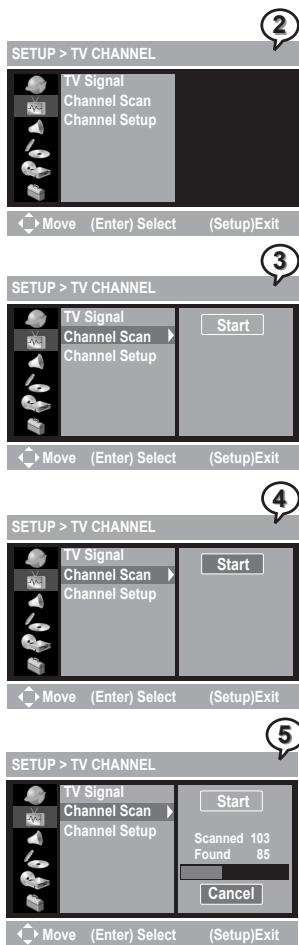
Channel Scan Setting
Channel Scan is a function of searching available TV channels which can be viewed through the HDD+DVD Recorder.
1 Press Setup display the main Setup Menu.
2 Press to highlight TV CHANNEL SETUP icon, and a primary option window appears on the right.
3 Press > and then < to highlight Channel Scan, and a Start icon appears on the right window.
4 Press > again to highlight Start and then Enter to start Channel Search. The recorder will store all the receivable stations into channels. This process may take several minutes to complete. The available Channel numbers will be displayed on the screen.
5 To cancel scanning, press Enter as Cancel is hightlighted.
6 To return to the main Setup Menu, press twice. To leave the main Setup Menu, press Setup.

Note:
- While proceeding Channel Search, it will erase and replace all previously stored channels.
- To watch TV programs through the recorder after Channel Search is proceeded, press Source repeatedly until TV Channels appear on the screen.


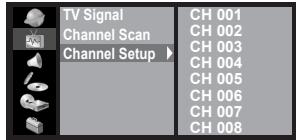
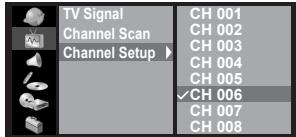
Channel Setup Setting

SETUP>TV CHANNEL
Move (Enter) Select (Setup)Exit

SETUP>TV CHANNEL
Move (Enter) Select (Setup)Exit

SETUP > CHANNEL SETUP
Move (Enter) Select (Setup)Exit
Channel Setup is a function for selecting channels that can be watched through the recorder.
1 Press Setup to display the main Setup Menu.
2 Press to highlight TV CHANNEL SETUP icon, and a primary option window appears on the right.
3 Press > and then to highlight Channel Setup, and a secondary option window appears on the right.
4 Press > again and then to highlight a preferred channel. Press and a tick appears in front of the selected channel.
5 Repeat the above step to set the other preferred channels.

Note:
- These selected channels can be viewed as operating + - Channel on the remote control.
- Those unselected channels can only be operated by pressing Number botton(s).
6 To return to the main Setup Menu, press twice. To leave the main Setup Menu, press Setup.
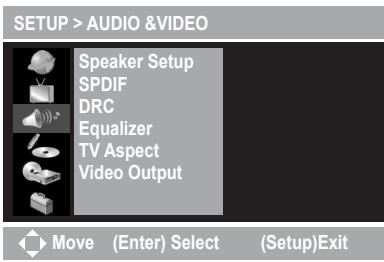
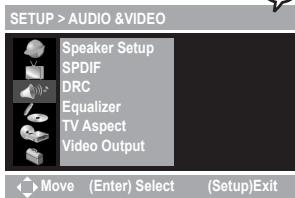
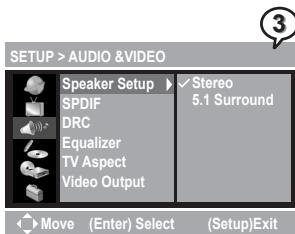
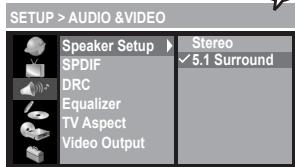
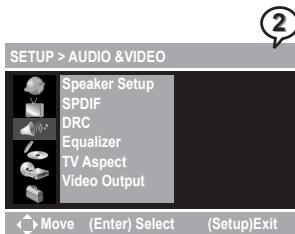
Speaker Setup Setting (Optional)
Speaker Setup is a function of setting the applied amplifiers.
1 Press Setup to display the main Setup Menu.
2 Press to highlight AUDIO &VIDEO SETUP icon, and a primary option window appears on the right.
3 Press to highlight Speaker Setup, and a secondary option window appears on the right.
4 Press again and then to select a preferred option. Press Enter and a check appears in front of the selected option.
5 To return to the main Setup Menu, press twice. To leave the main Setup Menu, press Setup.

Note:
- This function is available on HDD+DVD Recorder with 5.1 channel audio output.
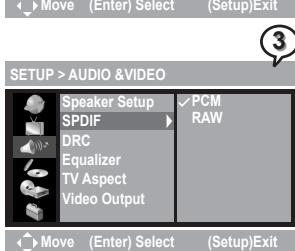
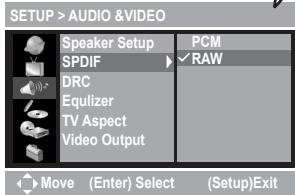
SPDIF Setting
SPDIF is a function of selecting a proper audio output system to for the applied amplifiers.
1 Press Setup to display the main Setup Menu.
2 Press to highlight AUDIO &VIDEO SETUP icon, and a primary option window appears on the right.
3 Press > and then to highlight SPDIF, and a secondary option window appears on the right.
4 Press again and then to select a preferred option. Press Enter and a check appears in front of the selected option.
5 To return to the main Setup Menu, press twice. To leave the main Setup Menu, press Setup.

Note:
- Select PCM when connecting to a 2-channel digital stereo amplifier.
- Select RAW when connecting the recorder's Digital Out jack to a Dolby Digital or DTS decoder (or other equipment with a Dolby Digital decoder).


DRC Setting
DRC (Dynamic Range Compression) provides a function for compressing dynamic range of the audio output.
1 Press Setup to display the main Setup Menu.
2 Press to highlight AUDIO &VIDEO SETUP icon, and a primary option window appears on the right.
3 Press > and then to highlight DRC, and a secondary option window appears on the right.
4 Press again and then to highlight a preferred option. Press and a check appears in front of the selected option.
5 To return to the main Setup Menu, press twice. To leave the main Setup Menu, press Setup.

Note: With the DVD format, a program's soundtrack in the most accurate and realistic presentation can be performed by digital audio technology. However, in some cases, a compressed dynamic range of the audio output (the difference between the loudest sounds and the quietest ones) might be required. For example, to view programs at night without disturbing other people, DRC function can help to achieve the effect.
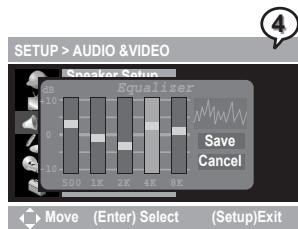
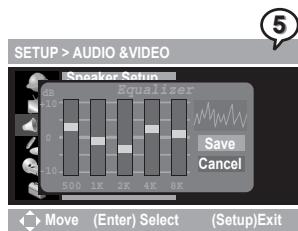
Equalizer Setting
Equalizer provides a function for adjusting the performance of audio output.
1 Press Setup to display the main Setup Menu.
2 Press to highlight AUDIO &VIDEO SETUP icon, and a primary option window appears on the right.
3 Press > and then to highlight Equalizer. Press > again and an Equalizer window appears on the screen.
1-3 Audio & Video Setup - continued
Equalizer Setting - continued
4 Press > to highlight each event, and then press to adjust the dB values.
5 Press to highlight Save to save the setting, or press and then to highlight Cancel to cancel.
6 To return to the main Setup Menu, press . To leave the main Setup Menu, press Setup.
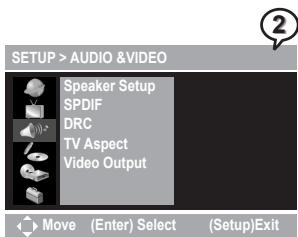
TV Aspect Setting
TV Aspect provides a function of selecting (4:3) or (16:9) TV type to for view programs through the HDD+DVD Recorder.
1 Press Setup to display the main Setup Menu.
2 Press to highlight AUDIO &VIDEO SETUP icon, and a primary option window appears on the right.
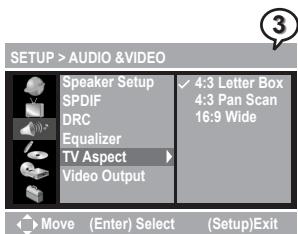
3 Press > and then to highlight TV Aspect, and a secondary option window appears on the right.
4 Press > again and then to highlight a preferred option.
4:3 Letter Box
Select "4:3 LetterBox" for a conventional size TV set. Black bands appear at top and bottom of screen (letter-box style).
- Video material not formatted in the pan & scan style is played in the letter-box style.


TV Aspect Setting - continued

b

C
4:3 Pan Scan

Select "4:3 PanScan" for a conventional size TV set.
- Video material formatted in the pan & scan style is played in that style (the left and right edges are cut off).
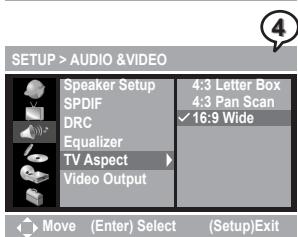
16:9 Wide
Select "16:9 Wide" for a wide-screen TV set to played in "FULL" size.
- Setting the wide-screen TV to "FULL" mode is also necessary.
- Each screen shows an example when the video material for a wide-screen is played.
5 Press Enter and a check appears in front of the selected option.
6 To return to the main Setup Menu, press twice. To leave the main Setup Menu, press Setup.
Video Output Setting
Video Output is the function of selecting a type of video output according to the output format.
1 Press Setup to display the main Setup Menu.
2 Press to highlight AUDIO &VIDEO SETUP icon, and a primary option window appears on the right.
3 Press > and then to highlight Video Output, and a secondary option window appears on the right.
4 Press > again and press to highlight a preferred option. Press and a check will be shown in front of the selected option.
5 To return to the main Setup Menu, press twice. To leave the main Setup Menu, press Setup.
Note:
- Select YCrCb when TV provides Component feature and the unit's P-Scan Pr Y Pb Out jacks are connected to the TV's Component In jacks.
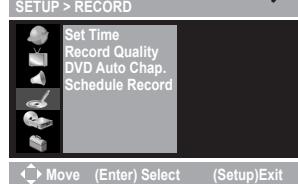
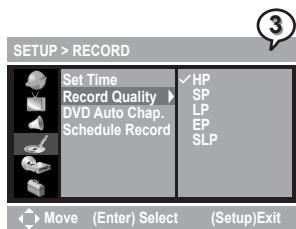
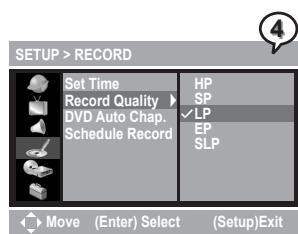
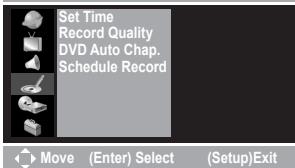
Record Quality Setting
Record Quality is a function of setting various recording qualities according to the user's needs.
1 Press Setup to display the main Setup Menu.
2 Press to highlight RECORD SETUP icon, and a primary option window appears on the right.
3 Press > and then to highlight Record Quality, and a secondary option window appears on the right.
4 Press again and then to highlight a preferred option. Press Enter and a tick appears in front of the selected option.
| Record Mode | Recording Time for 40/80/120/160 GB Hard Disc | DVD+R/RW Recording Time |
| HQ: High Quality | Approx. 8/16.5/25/33.5 Hours | Approximate 1 Hour |
| SP: Standard Play | Approx. 16/33/50/67 Hours | Approximate 2 Hours |
| LP: Long Play | Approx. 24/50/75/100 Hours | Approximate 3 Hours |
| EP: Extended Play | Approx. 32/66/100/134 Hours | Approximate 4 Hours |
| SLP: Standard Long Play | Approx. 48/100/150/201 Hours | Approximate 6 Hours |
5 To return to the main Setup Menu, press twice. To leave the main Setup Menu, press Setup.
2
DVD Auto Chapter Setting
DVD Auto Chapter is a function for automatically setting chapters in recording programs.
1 Press Setup to display the main Setup menu.
2 Press to highlight RECORD SETUP icon, and a primary option window appears on the right.
3 Press > and then to highlight DVD Auto Chap., and a secondary option window appears on the right.
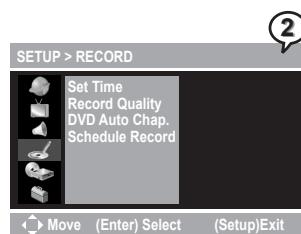


DVD Auto Chapter Setting - continued

SETUP>RECORD
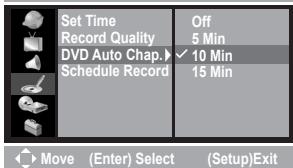

Press again and then to highlight a preferred option. Press Enter and a tick appears in front of the selected option.

To return to the main Setup Menu, press twice. To leave the main Setup Menu, press Setup.

Note: The recording program is automatically inserted a new chapter according to the selected interval time. If Off is selected, there will be only one chapter existed.
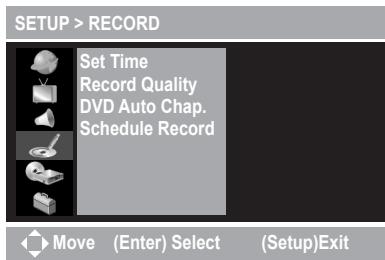
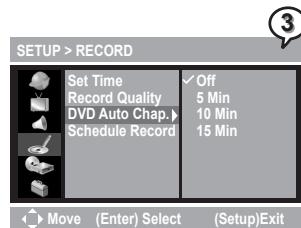
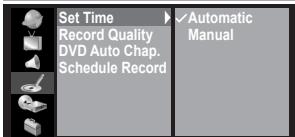
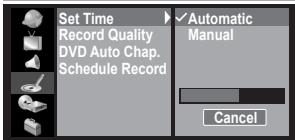
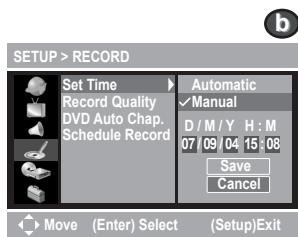
Set Time Setting

SETUP>RECORD
Set Time is a function of setting time clock in the HDD+DVD Recorder.

Press Setup to display the main Setup Menu.

Press to highlight RECORD SETUP icon, and a primary option window appears on the right.

Press > to highlight Set Time, and a secondary option window appears on the right.

Press again and then to highlight a preferred option.

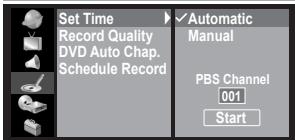
SETUP>RECORD

Automatic Setup

SETUP>RECORD

- Press or Number Button(s) to adjust PBS channel. Press < to highlight Start and then Enter.
- Wait for the setup finishing or press Enter to cancel the setup.

Move
(Enter) Select
(Setup)Exit

SETUP>RECORD
Note: The automatic time setting is set through scanning your local PBS channel. If the time was not set correctly, use manual setup to adjust.

Move
(Enter) Select
(Setup)Exit
SETUP>RECORD

Manual Setup
- Press Enter and a time setup menu appears.
- Press to highlight M/D/Y (Month/Day/Year) and H(Hour): M(Minute).
- Press Number Button(s) or to change the setting of the highlighted event.
Set Time Setting - continued
- Press > to highlight Save to save the setup, or highlight Cancel to cancel the setup. Press Enter.
5 To return to the main Setup Menu, press twice. To leave the main Setup Menu, press Setup.
Note: Everytime before proceeding schedule recording, Set Time setting needs to be checked again to make sure the time information is correct.
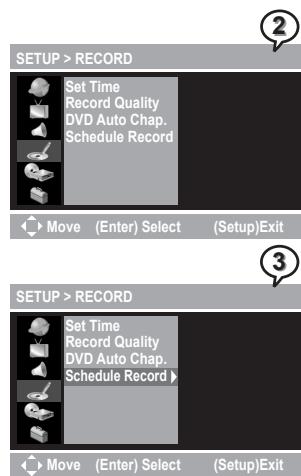
Schedule Record Setting
Schedule Record is a function of setting recording schedules.
1 Press Setup to display the main Setup menu.
2 Press to highlight RECORD SETUP icon, and a primary option window appears on the right.
3 Press > and then to highlight Schedule Reocrd, and a secondary option window appears on the right.
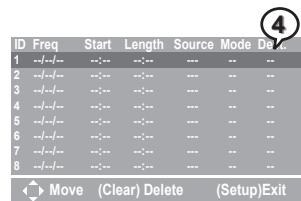
4 Press > again to enter the setup table. Press to select a row and press > to enter a setup window.
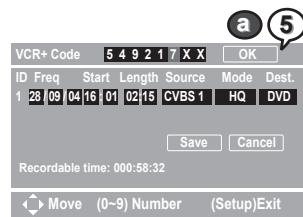
5 VCR+ Code Setup VCR+ Code is an easy numeric system. All settings can be made by entering the desired program's code (3-8 digits number), which is available in the program guide or specified newspapers.
- Press > and Number Button(s) to enter VCR+ Code. Highlight OK and press Enter after entering the code.
- A Mapped to channel window appears, press & or Number Button(s) to adjust Channel number if necessary.
- Press to highlight Save and press Enter. Freq, Start, Length and Source are set automatically.
- Press > to highlight Mode and Dest.. Press to alter the setting if necessary.
- When finishing all settings, press > to highlight Save or Cancel to save or cancel the settings and then press Enter to return to Schedule Record menu.


Schedule Record Setting - continued
(5)
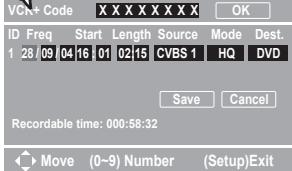
Manual Setup
- Ignore the part of VCR+ Code setting and press to highlight the other events. Press Number Button(s) or to change the settings of each event.
Press to browse various settings for each event:
| Freq. (Date) | Start | Length | Source | Mode | Dest. (Destination) |
| 01/01/05 | 00:00 | 00:00 | PR 001 | HQ | DVD |
| Wkly Sun | DV | SLP | HDD | ||
| Wkly Sat | SCART | EP | |||
| Wkly Fri | SVIDEO2 | LP | |||
| Wkly Thu | SVIDEO1 | SP | |||
| Wkly Wed | CVBS2 | ||||
| Wkly Tue | CVBS1 | ||||
| Wkly Mon | |||||
| Daily | |||||
| Mon-Fri |
- As finishing all settings, press > to highlight Save or Cancel to save or cancel the settings and then press Enter to return to Schedule Record menu.
6 To delete a schedule, press to highlight an ID, and then press Clear. An option window appears, press to highlight Yes or No and press Enter.
7 To return to the main Setup Menu, press twice. To leave the main Setup Menu, press Setup.

Note:
-
When the recording time of a new scheduale is overlapped with the time of a previously set schedule, a window will appear to remind you that the entry of new schedule is invalid, and the time needs to be reset.
-
Schedule recording can only be activated when the recorder is power off, but in Stand-by mode. If the recorder is still on when the schedule time is approaching, a time box will appear on the screen to remind you to turn off the recorder.
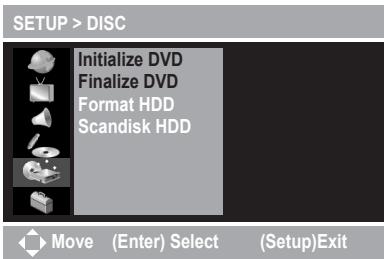
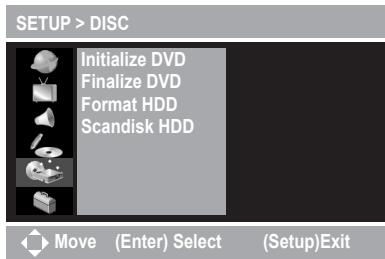
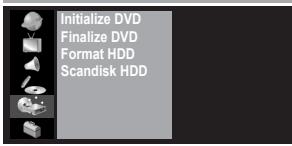
Initialize DVD Setting
Initialize DVD provides the function of formatting DVD+RW discs.
1 Press Setup to display the main Setup Menu.
2 Press v to highlight DISC SETUP icon, and a primary option window appears on the right.
3 Press to highlight Initialize DVD.
4 Press > again to highlight Start and press Enter.
5 An option window appears.
Press Enter as No is highlighted to cancel initializing the DVD disc.
To return to the main Setup Menu, press twice. To leave the main Setup Menu, press Setup.
Press to highlight Yes and then press Enter to begin initializing the DVD disc.
To leave Setup Menu, press Setup.

Note:
- When Initialize DVD setting is in progress, the attempt of pressing any button on the remote control to cancel or pause the command will be invalid.
- This function will erase all programs recorderd in the DVD disc, please reconsider the necessity of such acts before proceeding the function.


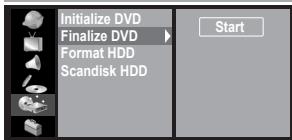
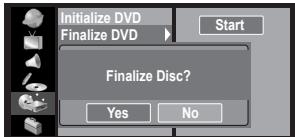
Finalize DVD Setting
Finalize DVD is a function for finalizing DVD+R discs.

SETUP > DISC
Move (Enter) Select (Setup)Exit

SETUP > DISC
Move (Enter) Select (Setup)Exit

SETUP > DISC

Move (Enter) Select (Setup)Exit

SETUP > DISC
Move (Enter) Select (Setup)Exit
1 Press Setup to display the main Setup Menu.
2 Press to highlight DISC SETUP icon, and a primary option window appears on the right.
3 Press and then to highlight Finalize DVD.
4 Press again to highlight Start and press Enter.
5 An option window appears.

Press ( ) as No is highlighted to cancel finalizing the DVD disc.
Press twice to return to the Setup Menu or press Setup to leave.

Press to highlight Yes and then press Enter to begin finalizing the DVD idsc.
To leave Setup Menu, press Setup.

Note:
- The function of Finalize DVD can be applied only once to a DVD+R disc.
- When Finalize DVD setting is in progress, the attempt of pressing any button on the remote control to cancel or pause the command will be invalid.
Format HDD Setting
Format HDD is a function for formatting HDD.
1 Press Setup to display the main Setup Menu.
2 Press to highlight DISC SETUP icon, and a primary option window appears on the right.
3 Press > and then to highlight Formatting HDD.
4 Press > again to highlight Start and press Enter.
5 An option window appears.
Press Enter as No is highlighted to cancel Formatting HDD. Press twice to return to the Setup Menu or press Se to leave.
Press to highlight Yes and then press Enter to begin formatting HDD.
To leave Setup Menu, press Setup.

Note:
- When Format HDD setting is in progress, the attempt of pressing any button on the remote control to cancel or pause the command will be invalid.
- This function will erase all programs recorderd in HDD, please reconsider the necessity of such acts before proceeding the function.
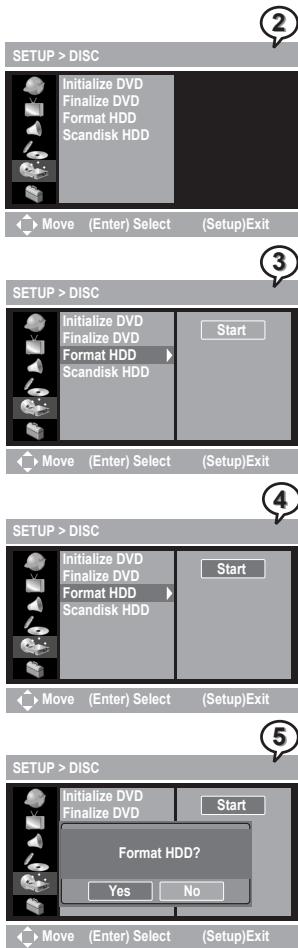


Scandisk HDD Setting
Scandinck HDD is a function of scanning HDD to check if any defect occurs in the hard disc.
1 Press Setup to display the main Setup Menu.
2 Press to highlight DISC SETUP icon, and a primary option window appears on the right.
Press and then to highlight Scandisk HDD.
4 Press again to highlight Start and press Enter.
5 An option window appears.

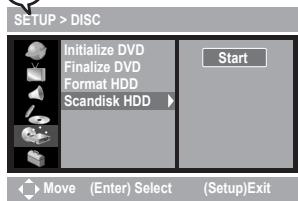

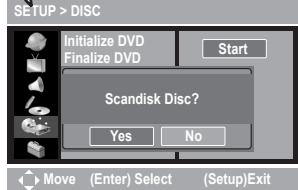

Press Enter as No is highlighted to cancel scanning HDD.
Press twice to return to the Setup Menu or press Setup to leave.
Press to highlight Yes and then press Enter to begin scanning HDD.
To leave Setup Menu, press Setup.

Note: When Scandisk HDD setting is in progress, the attempt of pressing any button on the remote control to cancel or pause the command will be invalid.
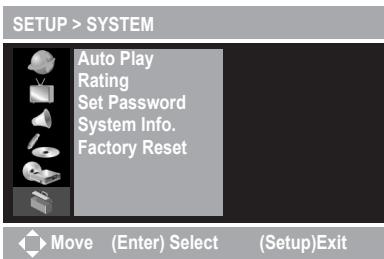
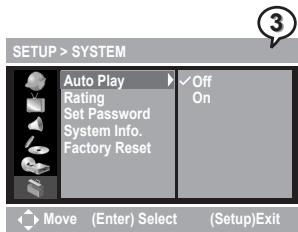
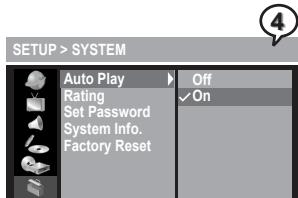
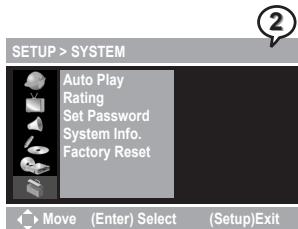
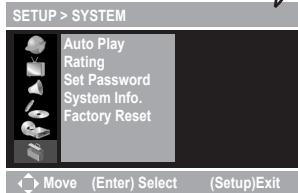
Auto Play Setting
Auto Play is a function of setting automatic playback for DVD discs as the discs are loaded.
1 Press Setup to display the main Setup Menu.
2 Press to highlight SYSTEM SETUP icon. A primary option window appears on the right.
3 Press > to highlight Auto Play, and a secondary option window appears on the right window.
4 Press > and then to select a preferred option. Press Enter and a check will be shown in front of the selected option.
5 To return to the main Setup Menu, press twice. To leave the main Setup Menu, press Setup.


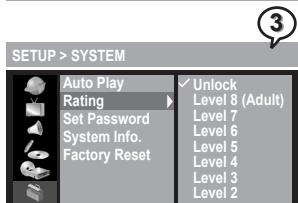
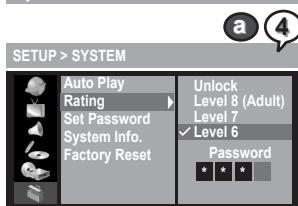
Rating Setting
Rating Setting is a function of setting rating level for Parental Control. Movies on DVDs may contain scenes not suitable for children and therefore may contain Parental Control information that applies to the complete disc or to certain scenes on the disc.
1 Press Setup to display the main Setup Menu.
2 Press to highlight SYSTEM SETUP icon, and a primary option window appears on the right.
3 Press > and then to highlight Rating, and a secondary option window appears on the right window.
4 Press > and then to highlight a level. Press Enter.

Enter the password to set the new rating level.
Note: Please refer Set Password Setting on the next page to review the function of setting password.


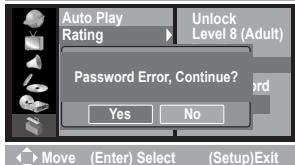
Rating Setting - continued

SETUP > SYSTEM
4

If the entered password is wrong, an option window will appear. Press > to highlight Yes or No, and then press Enter to re-enter the password or leave the setting.
5
To return to the main Setup Menu, press twice. To leave the main Setup Menu, press Setup.

Note: Ratings are country-dependent. If Unlock is selected, Parental Control will be not active and the disc will be played in full.
Set Password Setting

SETUP > SYSTEM

Move
(Enter) S
(Setup)Exit

SETUP > SYSTEM
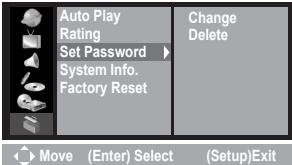
Set Password is a function of setting a password for operating the function of Rating.
1
Press Setup to display the main Setup Menu.
2
Press to highlight SYSTEM SETUP icon, and a primary option window appears on the right.
3
Press > and then to highlight Set Password, and a secondary option window appears on the right window.
4
Press > and then to highlight an preferred option. Press Enter
Change
Enter the default password "9999" or the previously set password.
Enter new password and verify.
5
bDelete
Enter the previously setted password and the Delete option will become invalid until the new password is set.
5
To return to the main Setup Menu, press twice. To leave the main Setup Menu, press Setup.
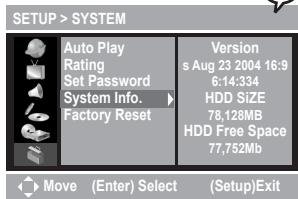
System Information Setting
System Information is the function of providing system information of the recorder.
1 Press Setup to display the main Setup Menu.
2 Press to highlight SYSTEM SETUP icon, and a primary option window appears on the right.
3 Press > and then to highlight System Info., and a information window appears on the right.
4 To return to the main Setup Menu, press twice. To leave the main Setup Menu, press Setup.


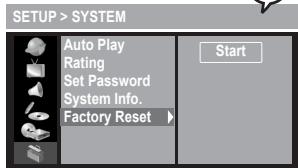
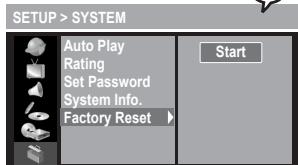
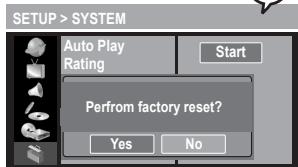
Factory Reset Setting
Facotry Reset is a function for setting the recorder to the default setting.
1 Press Setup to display the main Setup Menu.
2 Press to highlight SYSTEM SETUP icon, and a primary option window appears on the right.
3 Press × and then to highlight Facotry Reset.
4 Press > again to highlight Start and press Enter.
5 An option window appears.

Press Enter as No is highlighted to cancel factory reset.
To return to the main Setup Menu, press twice. To leave the main Setup Menu, press Setup.

Press to highlight Yes and then press Enter to begin factory reset.


Move (Enter) Select (Setup)Exit


Move (Enter) Select (Setup)Exit


Move (Enter) Select (Setup)Exit


Move (Enter) Select (Setup)Exit

Preparations:
- Press on the Power button of the TV set, and select "Video" as the TV input.
- Press on the Power button of the stereo system if the recorder has been connected to a stereo system.
Basic HDD Playback

1 Press Power on.
2 Press HDD/DVD to select HDD mode.
3 Press Play, a title menu appears on the screen, and the lastest recorded program starts playback behind the title menu.
4 Press on the remote control to highlight a preferred title. The selected title will be played behind the title menu immediately as being highlighted.
5 To leave the title menu and watch the program, press Play again.
Basic DVD Playback
1 Press Power on.
2 Press HDD/DVD to select DVD mode.
3 Press Eject to open the disc tray.
4 Place a disc onto the tray. Press ject to close the disc tray. After the disc tray closing, the DVD starts playback if Auto Play is set on.
5 If the disc has one or more titles recorded on it, a menu will appear on the TV screen. Press to highlight a program title in the menu.
6 Press Play to start playback the selected title.
Returning to Menu Screen During HDD Playback
1 Press Menu or Title during HDD playback to display the title menu.
To leave the menu, press Play.
Stopping DVD Playback and Returning to the Menu Screen (If a Menu Screen Is Available on the Disc)
1 Press Menu during DVD playback to display the title menu.
Stopping HDD Playback
1 To stop HDD playback and to operate the inputs of external sources (TV, CVBS1, Video1 and DV etc.) in pass-through mode, press Stop.
Stopping DVD Playback
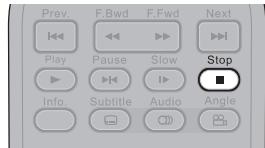
1 To stop DVD playback, press Stop.
2 To operate the inputs of external sources (TV, CVBS1, Video1 and DV etc.) in pass-through mode, press Stop again.
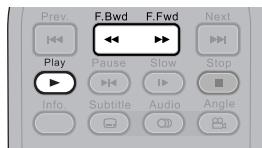
Fast Forward (Fast Backward)
1 Press F.BWD or F.FWD during playback.
The speed of DVD advance ( x2, x4, x8, x16, x30, x60 and x100) or DVD reverse ( x2, x4, x8, x16, x30, x60 and x100) changes for each press of F.FWD or F.BWD. The speed of VCD advance ( x2, x4, x8 and x16) or VCD reverse ( x2, x4, x8 and x16) changes for each press of F.FWD or F.BWD.
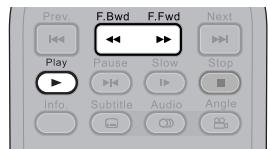
2 Press Play to return to normal playback.
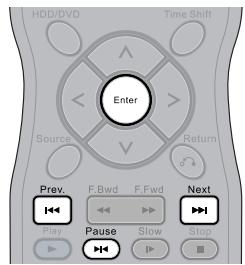
Skipping Ahead or Back to Chapters
Skipping Ahead
Press Next during playback.
Skips a chapter each time you press the button.
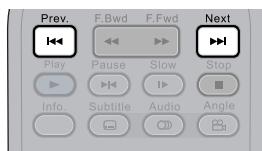
Skipping Back
Press Prev. during playback.
When you press Prev. once midway through a chapter, the recorder returns to the previous chapter to start playback. The recorder skips the previous chapter each time you press the button.


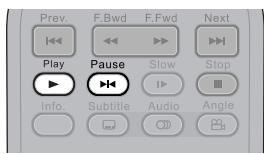
Pausing Playback
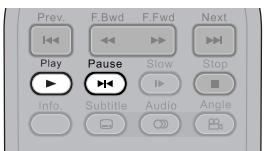
1 Press Pause to pause the playback.
2 Press Play to return to normal playback.
Frame Advance (Step)
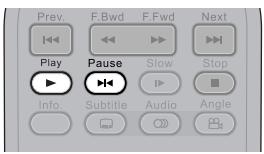
1 Press Pause to pause the playback. The disc is advanced by one frame each time you press the button.
2 Press Play to return to normal playback.
Slow-Motion During Playback
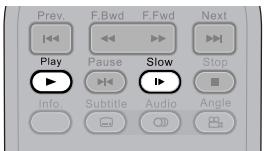
1 Press Slow during playback.
The playback speed changes forwardly and backwardly (▶ 1/2,▶ 1/4,▶ 1/8 and▶ 1/16) each time you press Slow.
2 Press Play to return to normal playback.
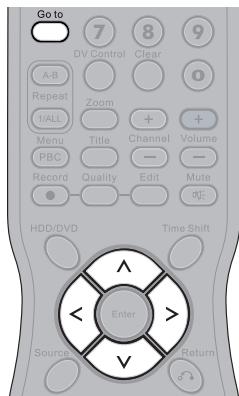
Selecting Scenes by Title Number

1 Press Goto during the playback. A menu box appears on the screen.
2 Press to select Title.
3 Press the Number Button(s) or > to edit title number. New title will be played right after the reset.
4 Press Goto again to leave the menu box.
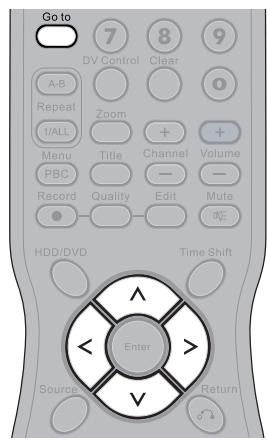
Selecting Scenes by Chapter Number
1 Press Goto during playback. A menu box appears on the screen.
2 Press to select Chapter.
3 Press the Number Button(s) or > to edit chpater number. New title will be played right after the reset.
4 Press Goto again to leave the menu box.

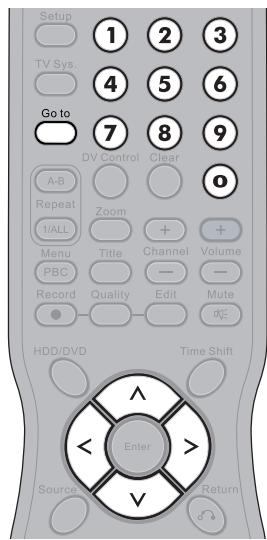
Selecting Scenes by Time
1 Press Goto during playback. A menu box appears on the screen.
2 Press to select Time.
3 Press the Number Button(s) to edit playing time. New scene will be played right after the reset of time.
4 Press Goto again to leave the menu box.

Selecting Audio System During Playback
1 Press Goto during the playback. A menu box appears on the screen.
2 Press to select Audio.
3 Press to edit audio setting.
4 Press Goto again to leave the menu box.


Selecting Subtitle During Playback
1 Press Goto during playback. A menu box appears on the screen.
2 Press to select Subtitle.
3 Press to edit subtitle setting.
4 Press Goto again to leave the menu box.
Note: This function is not available in HDD mode.
Selecting Angle During Playback
1 Press Goto during playback. A menu box appears on the screen.
2 Press to select Angle.
3 Press the Number Button(s) or > to edit angle number. New viewing angle will be played right after the reset.
4 Press Goto again to leave the menu box.
Note: This function is not available in HDD mode.
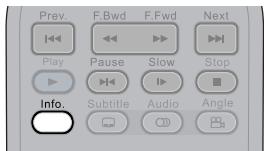
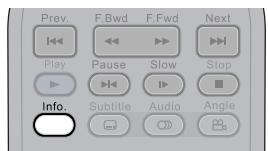
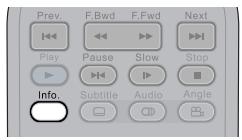
Displaying the Information of the Scene
Displaying the Information of the Scene
Press Info. during playback, a list appears to provide information, including Title, Chapter, Time, Audio, Subtitle, Angle, Remained time of Current Title Chapter and Free Space of Recordable Media, will be shown on the screen.
Stop Displaying the Information of the Scene
Press Info. again to close the Info. list.
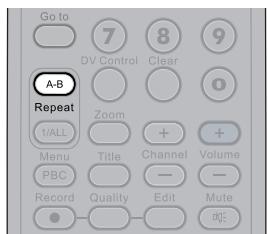
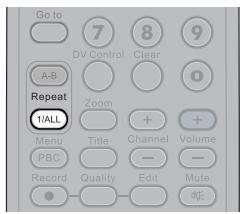
Repeating a Sequence Between Two Specific Points (A-B Repeat)
1 Press A-B Repeat A-B during playback.
OFF appears on the right corner of the screen.
2 Press A-B Repeat A-B again during the playback at the point where repeat play is to start (A).
A appears on the right corner of the screen.
3 Press A-B Repeat A-B again during the playback at the point where repeat play is to end (B).
B appears on the right corner of the screen.
4 The recorder starts to play the section between A and B repeatedly.
5 To return to normal playback, press A-B Repeat A-B until OFF appears.

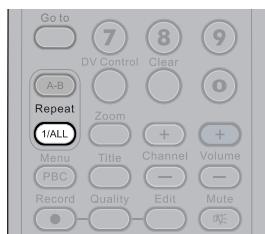
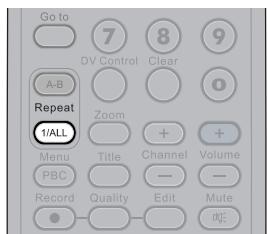
Repeating HDD Playback
1 Press 1/ALL Repeat 1/ALL repeatedly to operate the following functions during the playback.
TITLE : The current Title will be played repeatedly.
ALL:All Titles will be played repeatedly.
OFF: Repeated playback will be off and return to normal playback.
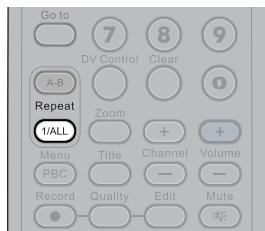
Repeating DVD Playback
1 Press 1/ALL Repeat 1/ALL repeatedly to operate the following functions during the playback.
CHAPTER : The current Chapter will be played repeatedly.
TITLE : The current Title will be played repeatedly.
OFF: Repeated playback will be off and return to normal playback.


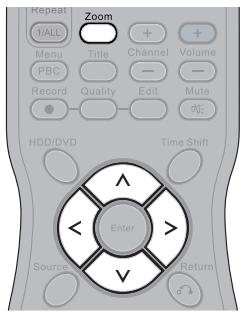
Zooming a Scene During Playback
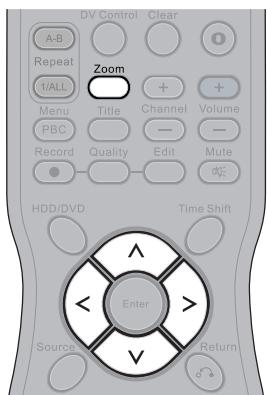
1 Press Zoom during playback, a zoom window will appear on the right button side of the screen.
2 Press Zoom a number of times to watch the scene with different enlargements.
Press to choose a preferred position of the scene to view it in Zoom %200, Zoom %400 and Zoom %800.
4 To return to normal playback, press Zoom a number of times until the zoom window disappears.
Changing Audio Soundtrack Language
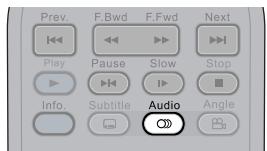
1 Press Audio repeatedly during playback to select a preferred language.

Note:
- This operation functions only with discs on which multiple audio soundtrack languages are recorded.
- When the preferred language is not among the options, it may indicate that the language is not available on the disc.
- If you do not select any language as the audio soundtrack language, the DVD Recorder will play back a prior language programmed on the disc.
Changing Subtitles
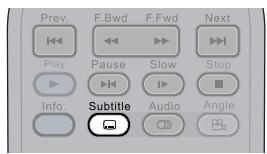
1 Press Subtitle repeatedly during playback to select a preferred subtitle.
2 To hide subtitle, press Subtitle repeatedly to select "Subtitle Off".

Note:
- This operation functions only with discs that provide subtitles.
- When the preferred language is not among the options, it may indicate that the language is not available on the disc.
- If you do not select any language as the audio soundtrack language, the recorder will play back a prior language programmed on the disc.
- In some cases, the subtitle language may not change immediately to the selected one.
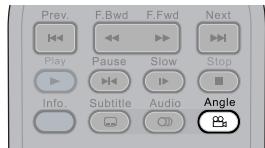
Viewing from Different Angles
1 Press Angle repeatedly during playback to select a preferred viewing angle.

Note:
- This operation works only with discs that have been recorded with various angles. The viewing angle are shown on the player's display and you can select one from them for viewing
- The recorded angles vary depending on the disc programmed.
VCD Menu (only for VCD 2.0)
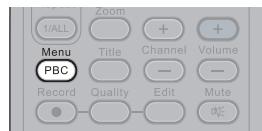
1 Press PBC PBC twice during playback.
2 Press Number Botton(s) to select a preferred item and then press Enter to enter.
3 To return to the menu screen while playback, press Return. (This function only works when PBC function is set to ON.)

Note:
- PBC function provides a menu for choosing and starting from a selected chapter only on VCD 2.0 discs with menus recorded on.
- The default of PBC function is set to ON. By pressing PBC once, you'll turn off this function.
Muting the Recorder
1 Press Mute during playback, a MUTE icon appears on the left corner of the screen.
2 To resume the sound, press Mute again.

Using Volume Function
1 Press + Volume during playback to adjust volume.


Preparations:
- Press on the Power button of the TV set, and select "Video" as the TV input.
- Power on the stereo system if the recorder has been connected to a stereo system.
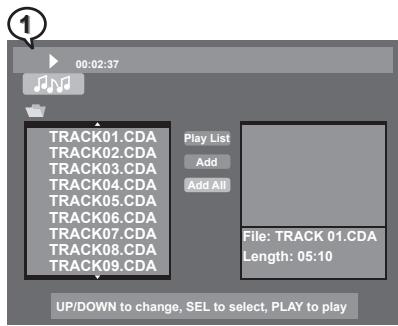
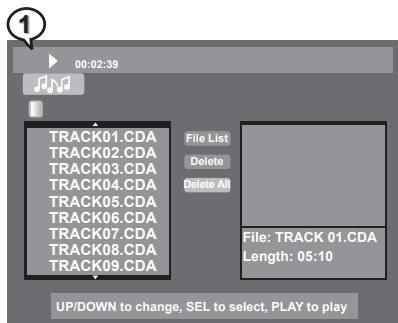
BasicPlayback
1 Press Power on.
Press HDD/DVD to set the recorder to DVD mode.
3 Press Eject to open the disc tray. Place an audio disc onto the tray.
4 Press ject to close the disc tray. After the dis tray closing, the recorder starts playback from the first track.
5 To play other tracks, press to highlight a preferred music title in the menu. Press to start playback of the selected title.
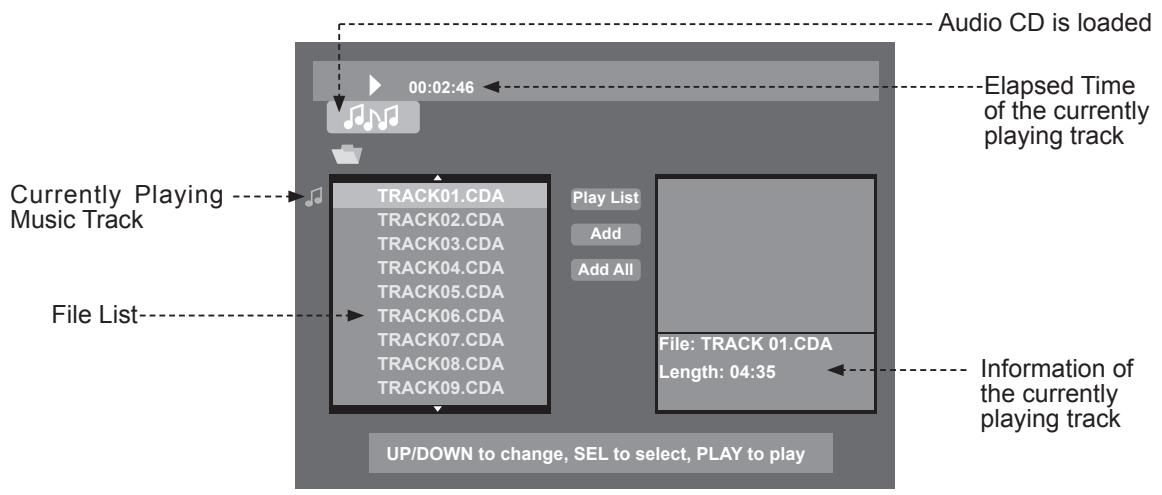

Note:
- Some discs might contain both audio and picture files, to select Audio CD mode, press > < to highlight the symbol of Audio CD and press Enter.
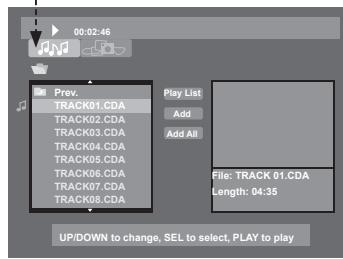
- When a disc contains files saved in more than one folders, the folders will be displayed on the File List.
- To enter one of the folders, press to highlight the preferred folder and press Enter. The files among the folder will be displayed on the File List.
Highlight the symbol of Audio CD to enter Audio CD mode
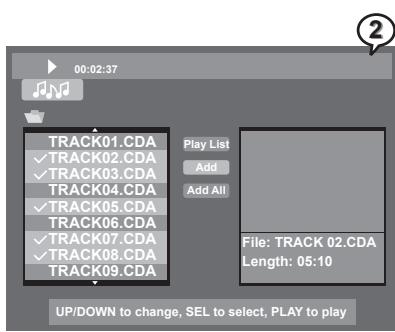
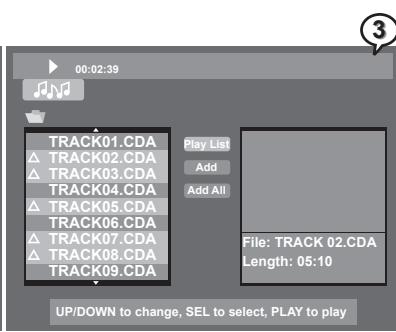
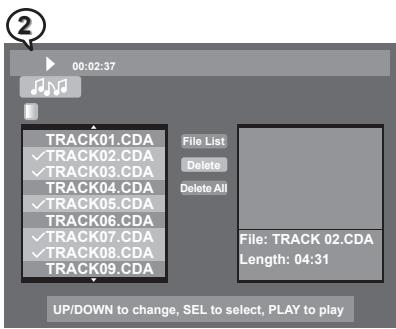
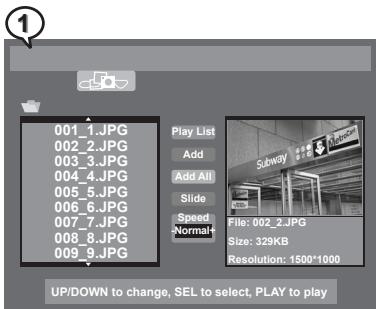
Adding Parts of Audio CD Tracks into Play List
1 Press to highlight a preferred music track which is going to be programmed into the Play List and then press Enter. A tick appears in front of the selected track.
2 Repeat the above step to select other music tracks for Play List programming. Press < > to highlight Add and then press Enter.
3 Triangle symbols appear in front of all the selected music tracks. Press to highlight Play List and then press Enter.
4 The music tracks just selected appear in the Play List in the order according to the File List. If intending to alter the order of the music tracks, proceed Add each time after selecting a music track.
5 To play the music in the Play List, press to highlight a music track in the menu. Press to start playback the Play List from the highlighted track.
6 To return to the File List, highlight File List and press Enter.

Note: The Programming of Play List can be proceeded both in the stop mode and during playback.
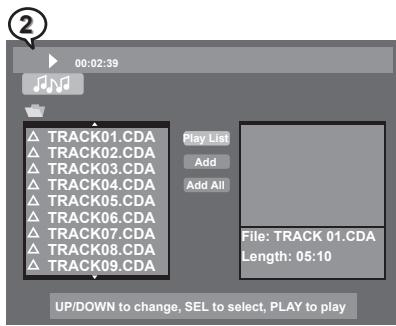
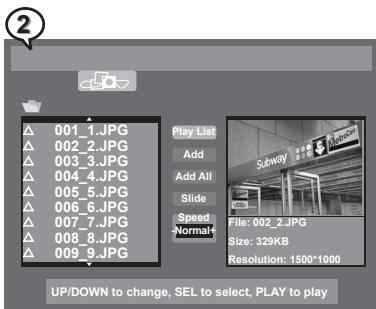
Adding All Audio CD Tracks into Play List
1 Press to highlight Add All and then press Enter.
2 Triangle symbols appear in front of all the music tracks on the file list. Press to highlight Play List and then press Enter. Play List displays all music tracks of the disc.


Adding All Audio CD Tracks into Play List - continued
3 To play the music in the Play List, press to highlight a music track in the menu. Press to start playback the Play List from the highlighted track.
4 To return to the File List, highlight File List and press Enter.

Note: The Programming of Play List can be proceeded both in the stop mode and during playback..
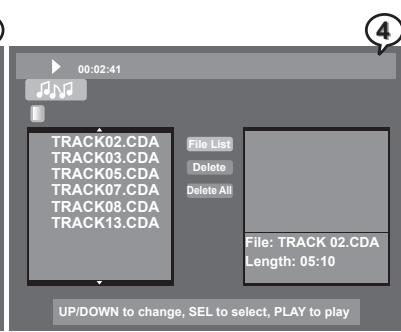
Deleting Parts of Music Tracks from Play List
1 Press to highlight a music track which is going to be removed from the Play List and then press Enter. A tick appears in front of the selected track.
2 Repeat the above step to select other music tracks which are intended to be removed for the Play List. Press to highlight Delete and then press Enter.
3 The selected tracks are deleted from Play List. If intending to delete music tracks one by one, highlight a music track and press Clear. The highlighted track will be removed from the Play List.
4 To return to the File List, highlight File List and press Enter.

Note: The Programming of Play List can be proceeded both in the stop mode and during playback.
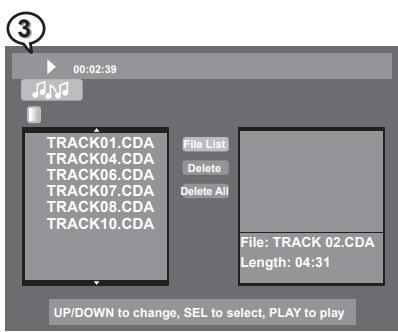
Deleting All Music Tracks from Play List
1 Press < > to highlight Delete All and then press Enter.
2 All music tracks on the Play List are removed. To return to the File List, highlight File List and press Enter.

Note: The Programming of Play List can be proceeded both in the stop mode and during playback..
Stopping Playback
1 Press Stop to stop the playback.
Fast Forward (Fast Backward)
1 Press F.BWD or F.FWD during playback.
The speed of advance ( × 2, × 4, × 8 and × 16) or reverse ( × 2, × 4, × 8 and × 16) changes for each press of F.FWD or F.BWD.
2 Press Play to return to normal playback.
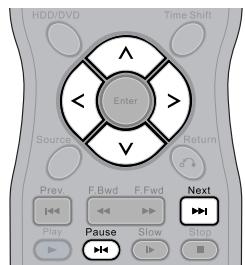
Skipping Tracks Ahead or Back
Skipping Ahead
Press Next during playback.
A track each time you press the button.
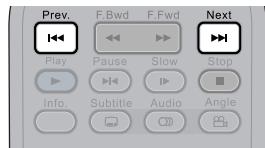
Skipping Back
Press Prev. during playback.
When pressing l Prev. midway through a track, the playback returns to the previous tmusic rack. The recorder skips a track each time pressing the button.

Pausing Playback
1 Press Pause to pause the playback.
2 Press Play to return to normal playback.
Repeating a Music Sequence Between Two Specific Times (A-B Repeat)
1 Press A-B Repeat A-B during the playback at the time where repeat play is to start (A). appears on the middle top of the screen.
2 Press A-B Repeat A-B again during the playback at the timewhere repeat play is to end (B).
A-B appears on the middle top of the screen.
3 The music track starts to play the section between time A and time B repeatedly.
4 To return to normal playback, press A-B Repeat A-B until the icon disappears.
Repeating Playback
1 Press 1/ALL Repeat 1/ALL repeatedly to operate the following functions during the playback.
: The currentTrack will be played repeatedly. : The Disc will be played repeatedly.
2 To return to normal playback, press 1/ALL Repeat 1/ALL until the icon disappears.
Displaying the Disc Information
Displaying the Information of the Track
Press Info. during playback, a list appears to show information of Current Play, Elapse Time and Remain Time.
Stop Displaying the Information of the Track
Press Info. again to close the Information list.
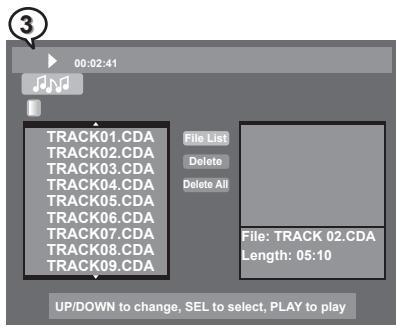
Playing Picture CDs Back
1 Press Power on.
2 Press HDD/DVD to set the recorder to DVD mode.
3 Press Eject to open the disc tray. Place a picture disc onto the tray.
4 Press Eject to close the disc tray. The recorder starts to play the picture CD back. Photos will be presented in a slide show automatically.
Stopping Playback to Display the File List
1 Press Stop to stop the playback, a File List appears on the screen.

Note:
- Some discs might contain both audio and picture files, to select Picture CD mode, press > < to highlight the symbol of Picture CD and press Enter.
- When a disc contains files saved in more than one folders, the folders will be displayed on the File List.
- To enter one of the folders, press to highlight the preferred folder and press Enter. The files among the folder will be displayed on the File List.
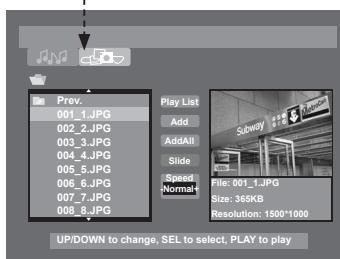
Highlight the symbol of Picture CD to enter Picture CD mode


Adding Parts of Picture Files into Play List
1 Press to highlight a preferred picture which is going to be programmed into the Play List and then press Enter. A tick appears in front of the selected picture.
2 Repeat the above step to select other pictures for Play List programming. Press to highlight Add and then press Enter.
3 Triangle symbols appear in front of all the selected pictures. Press to highlight Play List and then press Enter.
4 The pictures just selected appear in the Play List in the order according to the File List. If intending to alter the order of the pictures, proceed Add each time after selecting a picture file.
5 To play the pictures on the Play List, press to start playback, or press < > to highlight Slide and press Enter.
6 To return to the File List, highlight File List and press Enter.
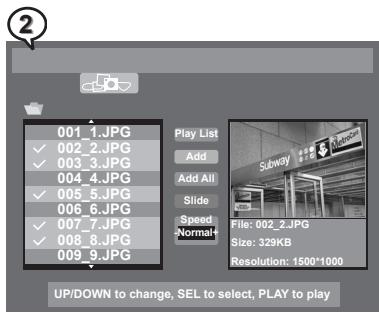

Adding All Picture Files into Play List
1 Press to highlight Add All and then press Enter.
2 Triangle symbols appear in front of all the picture files on the File List. Press to highlight Play List and then press Enter.
3 Play List displays all music tracks of the disc.
Adding All Picture Files into Play List - continued
4 To play the pictures on the Play List, press to start playback, or press to highlight Slide and press Enter.
5 To return to the File List, highlight File List and press Enter.
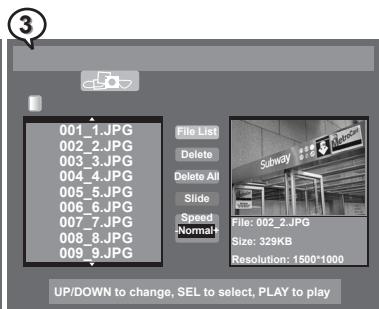
Deleting Parts of Picture Files from Play List
1 Press to highlight a music track which is going to be removed from the Play List and then press Enter. A tick appears in front of the selected track.
2 Repeat the above step to select other music tracks which are intended to be removed for the Play List. Press to highlight Delete and then press Enter.
3 The selected tracks are deleted from Play List. If intending to delete music tracks one by one, highlight a music track and press Clear. The highlighted track will be removed from the Play List.
4 To return to the File List, highlight File List and press Enter.

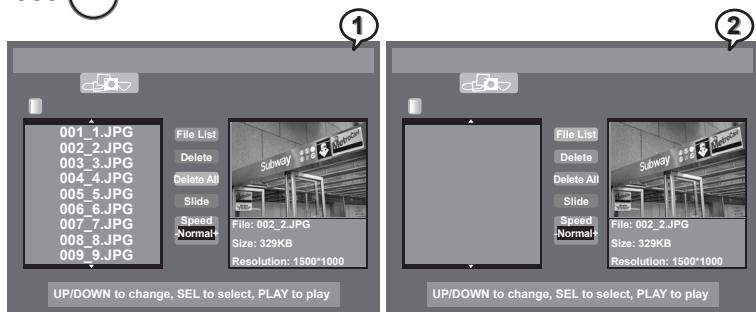
Deleting All Picture Files from File List
1 Press < > to highlight Delete All and then press Enter.
2 All picture files on the Play List are removed. To return to the File List, highlight File List and press Enter.

Viewing Picutres through Other Functions
Zoom
1 Press Zoom repeatedly to view photos with different sizes. Zoom x2, Zoom x4, Zoom x1/2, Zoom x1/4 and normal.
2 Press < to view different parts of the photo in close-up mode.
Pause, Next and Prev.
1 Press Pause to pause the playback. Press Pause to return to normal playback.
2 Press Next and Prev. to view the next or previous photo.
Rotating
1 To rotate a picture on the screen, press Pause and to rotate the photo by 90 degree.
2 The Slide Show will stop after using the above functions. To resume the Slide Show, press Next.
Repeating
1 Press 1/ALL Repeat 1/ALL during playback, a REPEAT box appears on the top right corner. The slideshow will be played repeatedly.
2 To return normal playback, press 1/ALL Repeat 1/ALL again, and a REPEAT OFF box appears on the screen.
Information
1 Press Info. during playback, an information list appears. Some pciture discs can provide the information of File, Size, Resolution, Make, Model, Time, Exposure time, F-number and ISO.
2 To leave the information box, press Info. again.
DV Control Function
1 Connect the recorder to DV.
2 Turn on Power of the recorder and DV.
3 Press Source on the remote control repeatedly until DV source is set.
4 Press OV Control on the remote control. A DV controller menu appears on the top of the screen.
5 The DV now can be operated through the remote control of the recorder.
- To play the DV program, press Play.
- To pause the program, press Pause.
- To fast forward or fast backward the playback, press F.Bwd/F.Fwd.
- To stop playback, press Stop.
6 To leave DV controller menu, press OV Control.


This chapter shows you how to record HDD or DVD discs from external sources by using the remote control. Some of the functions may require readdressing your OSD Settings. Please refer to Chapter 1-4: RECORD Setup for details.
Recording Option
(1) One touch recording from any video source
(2) AV/DV/Tuner/Hard drive to DVD+R/DVD+RW.
(3)AV/DV/Tuner/DVD to hard drive.
Basic Recording Troubleshooting
Please check the following if recording doesn't happen.
(1) Correct placement of disc.
(2) Use only hard drive or DVD+R/RW discs for recording.
(3) Compatible disc formats.
(4) Free recording space on disc.
(5) Correct connections to the external equipment (please refer to the Quick Connection Guide).
(6) Please place disc in recorder again if all fails.
Schedule Recording Troubleshooting
Please check the following if recording doesn't happen.
(1) Disc is loaded onto the disc tray.
(2) Free space on the HDD or DVD+R/RW discs
(3) Power is turned off.
(4) Unported Disc is set to On (please refer to Chapter 4-2 Editing DVD: Editing Titles in the Title Menu on page 62).
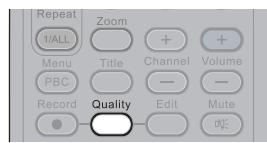
Recording Quality Setting
1 Press Quality in the stop mode, a quality box appears on the middle button of the screen. The box indicates the current quality setting and the remain recording time of the disc.
2 To change the quality setting, press Quality repeatedly to select a preferred recording quality and check the remain time for recording.
Recording External Sources to HDD
1 Connect the recorder to TV.
2 Turn on Power of the recorder and external equipment.
3 Press HDD/DVD to set the recorder to HDD mode.
4 Press Source on the remote control to toggle among different external A/V input sources.
5 Press Record on the remote control to begin to record.
This recorder contains the function of One Touch Recording, and it can specify a time to stop recording. During recording, the following time period can be set by pressing Record button repeatedly. The options of recording time could be vary according to the setup of recording quality and the remained disk space.

6 To pause the recording, press Pause. To resume the recording, press Record again.
7 Press Stop on the remote control to stop HDD recording.
8 Press Play to review the title just recorded.


Recording External Sources to DVD
1 Connect the recorder to TV.
2 Turn on Power of the recorder and external equipment.
3 Press HDD/DVD to set the recorder to DVD mode.
4 Press Eject to open the disc tray.
5 Place a recordable DVD+RW or DVD+R disc onto the tray.
6 Press Eject to close the disc tray.
Note: If you use an unused DVD+RW or DVD+R disc, the first reading will take about one minute. If the recorder reads a new DVD disc, a format dialogue box will appear. Highlight OK and press Enter to format the disc, or highlight Abort and press Enter to cancel. If the recorder reads a used DVD disc, a Title menu will show the available titles for playback and available space left for recording.
7 Press Source on the remote control to toggle among different external A/V input sources.
8 Press Record on the remote control to begin to record. This recorder contains the function of One Touch Recording, and it can specify a time to stop recording. During recording, the following time period can be set by pressing Record button repeatedly. The options of recording time could be vary according to the setup of recording quality and the remained disc space.

9 To pause the recording, press Pause. To resume the recording, press Record again.
10 Press Stop on the remote control to stop HDD recording.
11 Press Play to review the title just recorded.
Recording TV Programs to HDD
1 Connect the recorder to the TV set.
2 Turn on Power of the recorder and the TV set.
Press HDD/DVD to set the recorder to HDD mode.
4 Press Source on the remote control to view TV channels through the HDD+DVD Recorder.
5 Press (+) Channel or Number Botton(s) to select a preferred channel to record.
6 Press Record on the remote control to begin to record. This recorder contains the function of One Touch Recording, and it can specify a time to stop recording. During recording, the following time period can be set by pressing Record button repeatedly. The options of recording time could be vary according to the setup of recording quality and the remained disk space.

7 To pause the recording, press Pause. As the recording is paused, you can select the other channel to record. To resume the recording, press Record again.
8 Press Stop on the remote control to stop HDD recording.
9 Press Play to review the title just recorded.


Recording TV Programs to DVD
1 Connect the recorder to the TV set.
2 Turn on Power of the recorder and the TV set.
3 Press HDD/DVD to set the recorder to DVD mode.
4 Press Eject to open the disc tray.
5 Place a recordable DVD+RW or DVD+R disc onto the tray.
6 Press Eject to close the disc tray.
Note: If you use an unused DVD+RW or DVD+R disc, the first reading will take about one minute. If the recorder reads a new DVD disc, a format dialogue box will appear. Highlight OK and press Enter to format the disc, or highlight Abort and press Enter to cancel. If the recorder reads a used DVD disc, a Title menu will show the available titles for playback and available space left for recording.
7 Press Source on the remote control to view TV channels through the HDD+DVD Recorder.
8 Press + Channel or Number Botton(s) to select a preferred channel to record.
9 Press Record on the remote control to begin to record. This recorder contains the function of One Touch Recording, and it can specify a time to stop recording. During recording, the following time period can be set by pressing Record button repeatedly. The options of recording time could be vary according to the setup of recording quality and the remained disc space.

10 To pause the recording, press Pause. As the recording is paused, you can select the other channel to record. To resume the recording, press Record again.
11 To stop recording, press Stop on the remote control.
12 Press Play to review the title just recorded.
Timeshift Operation in HDD
Timeshift is a convenient function for temporally storing TV programs in the HDD for later viewing.
1 Connect the recorder to the TV set.
2 Turn on Power of the recorder and the TV set.
3 Press Source on the remote control to view TV channels through the HDD+DVD Recorder.
4 Press + - Channel or Number Botton(s) to select a preferred channel to view.
Press Timeshift while watching a TV program.
6 During Timeshift is proceeding, press Play, and playback starts from the very beginning of the Timeshift.
7 To watch the timeshift program backward or forward, press F.Bwd or F.Fwd
8 To pause the timeshift playback, press Pause. To resume the playback, press Play.
9 To go to the end point of Timeshift, press Next.
10To stop Timeshift, press Stop.

Note:
- Press Info. as playing the timeshift, the information box indicates the time between the current viewing point and the actual Timeshift recording point.
- The function of Timeshift can store a program in the HDD temporally. Once stop Timeshift, the temporally stored program will be deleted.
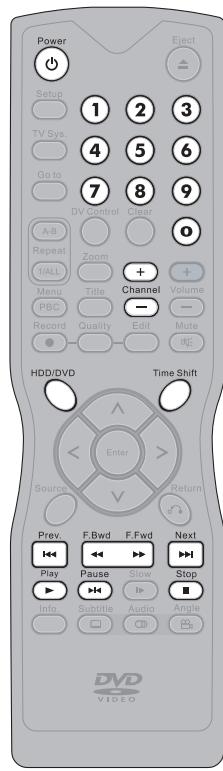

Using Schedule Recording
Schedule recording of this HDD+ DVD recorder provides 8 events of recording settings which allow users to record preferred programs in the most convenient ways. Please refer to Chapter1-4 Record Setup: Schedule Recording Setting on page 25 for details.

Deleting HDD Recording Titles
Press HDD/DVD to set the recorder to HDD mode.
2 Press Play, a title menu appears on the screen, and the latest recorded program starts playback behind the title menu.
3 Press to highlight a title that is intended to be edited.
4 Press > , the playback will be paused, and an editing option window appears on the right.
5 Press to highlight Delete and press Enter.
6 An option window appears.

a
Press Enter as No is highlighted to cancel deleting title. Press to return to the HDD title menu.
Press to highlight Yes and then press Enter to begin deleting the title. The screen directly returns to the title menu.


Dubbing HDD Recording Titles
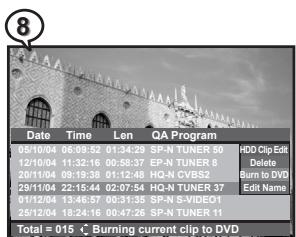
1 Press Eject to open the disc tray.
2 Place a recordable DVD+RW or DVD+R disc onto the tray.
3 Press Eject to close the disc tray.
Press HDD/DVD to set the recorder to HDD mode.
5 Press Play to display the title menu. The recording is directly playing the lasted recorded title.
6 Press to highlight a title that is intended to be edited.
7 Press > , the playback will be paused, and an editing option window appears on the right.
Press to highlight Burn to DVD and press Enter.
9 An option window appears.
Press Enter as No is highlighted to cancel dubbing the title. Press to return to the HDD title menu.
Press to highlight Yes and then press Enter to begin dubbing the title. After the dubbing process is finished, review the DVD title menu to check if the dubbing is successfully operated.
Editing Title Names in HDD
Press HDD/DVD to set the recorder to HDD mode.
2 Press Play to display the title menu. The recording is directly playing the lasted recorded title.
3 Press to highlight a title that is intended to be edited.
4 Press > , the playback will be paused, and an editing option window appears on the right.
5 Press to highlight Edit Name and press Enter.
6 A keyboard menu appears. Press > to select characters and press Enter to enter.
7 To leave the keyboard menu, press > < select Done and press Enter. The new named title will be shown on the title menu.
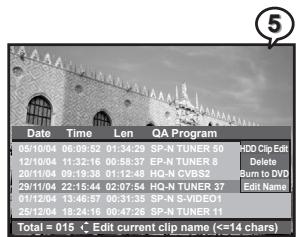
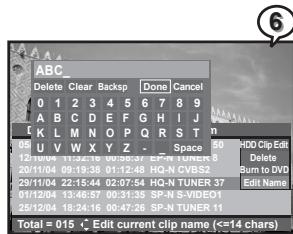

Editing Titles in the Title Menu
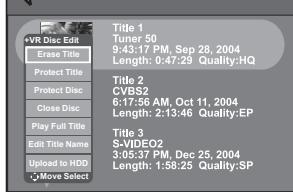
3
Erase Title
1 Press to highlight a title that is intended to be edited in the Title Menu.
2 Press Edit, an edit menu appears.
3 Press to highlight Erase Title and press Enter to process the erasure.
4 The updated Title Menu will appear on the screen.

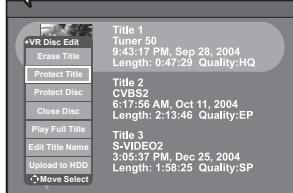
(3)
Protect/Unprotect Title
1 Press to highlight a title that is intended to be edited in the Title Menu.
2 Press Edit, an edit menu appears.
3 Press to highlight Protect Title/Unprotect Title and press Enter.
Note: If the title is protected, the functions of Erase Title, Close Disc, Make Compatible and Edit Title Name will become invalid. To resume these functions, unprotect the title.
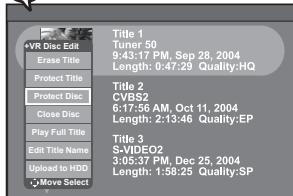
(2)
Protect/Unprotect Disc
1 Press Edit, an edit menu appears.
2 Press to highlight Protect Disc/Unprotect Disc and press Enter.
Note: If the Disc is protected, the functions of Erase Title, Close Disc, Make Compatible and Edit Title Name will become invalid. To resume these functions, unprotect the Disc.
Editing Titles in the Title Menu - continued
Close Disc (only for DVD+R discs)

1 Press Edit, an edit menu appears.
2 Press to highlight Close Disc and press Enter to start the process.
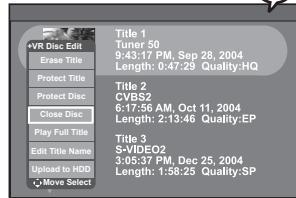

Note:
- If a DVD + R disc is closed, the disc will not be able to be recorded or erased programs.
- As this command may not be paused or cancelled, please reconsider the necessity of such acts.
Make Compatible (only for DVD+RW discs)

1 Press Edit, an edit menu appears.
2 Press to highlight Make Compatible and press Enter to start the process.

Note: If a DVD+RW disc is made compatible, the disc will be able to be played in other DVD recorders or players.
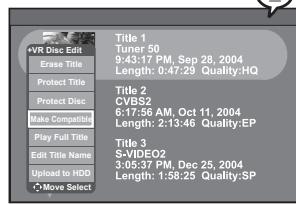
Play Full Title

1 Press to highlight a title that is intended to be edited in the Title Menu.
2 Press Edit, an edit menu appears.
3 Press to highlight Play Full Title and press Enter. The title starts playback.

Note: The function of Play Full Title can play the whole title back, including all the hidden chapters.
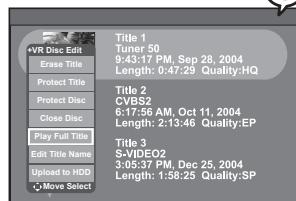

Editing Titles in the Title Menu - continued
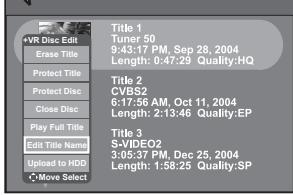
(3)
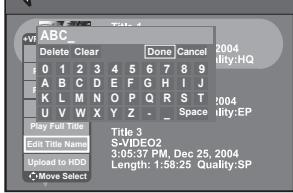
(4)
Edit Title Name
1 Press to highlight a title that is intended to be edited in the Title Menu.
2 Press Edit, an edit menu appears.
3 Press to highlight Edit Title Name and press Enter.
4 A keyboard menu appears. To enter a new title name into the display row on the top, press to select letters and press Enter to enter.
5 Select Done and press Enter to leave the keyboard menu after keyboarding the new title. The updated title will be shown on the title menu.
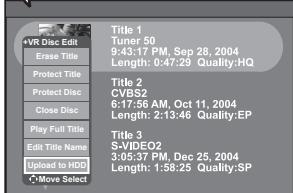
(3)
Upload to HDD
1 Press to highlight a title that is intended to be edited in the Title Menu.
2 Press Edit, an edit menu appears.
3 Press to highlight Upload to HDD and press Enter.
4 A Dubbing box appears on the right bottom corner and shows the status of the dubbing process.
5 To review the dubbing title after uploading to HDD, press HDD/DVD to set the recorder to HDD mode.
6 Press Play to display the title menu. Press to highlight the title. Press Play again to leave the menu.
Editing Titles During Playback
Insert Chapter
1 Press to highlight a title and press Play.
2 Press Edit during playback, an edit menu appears.
3 Press to highlight Insert Chapter. As the title is played to the preferred point for inserting a new chapter, press Enter. A new chpater is created.

Note:
- Chapters are markers inside a title. The playback can be skipped from chapter to chapter.
- To check the information about the chapters of a title during playback, press Info. during playback (please refer to Chapter 2-1 Operations with HDD, DVD and VCD: Displaying the Information of the Scene on page 38).
Delete Chapter
1 Press to highlight a title and press Play.
2 Press Edit during playback, an edit menu appears.
3 Press to highlight Delete Chapter. As the title is played to the chapter intended to be removed, press Enter.

Note:
- The program section of the deleted chapter will be automatically merged into the previous chapter.
- To check the information about the chapters of a title during playback, press Info. during playback (please refer to Chapter 2-1 Operations with HDD, DVD and VCD: Displaying the Information of the Scene on page 38).
Hide Chapter
1 Press to highlight a title and press Play.
2 Press Edit during playback, an edit menu appears.
3 Press to highlight Hide Chapter. As the title is played to the chapter intended to be hidden, press Enter.
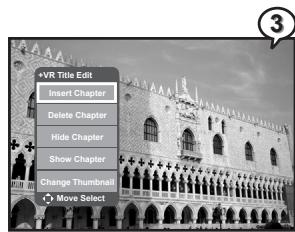

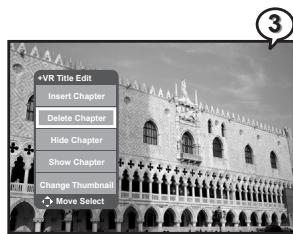
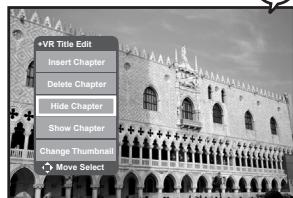
3

Editing Titles During Playback - continued

Note:
- After proceeding Hide Chapter, those hidden chapters will not be shown up during the normal playback.
- To play those hidden chapters, press Goto and refer to Chapter 2-1 Operations with HDD, DVD and VCD: Selecting Scenes by Chapter Number on page 37 for operation.
- To play the whole title included the hidden chapters, please refer to Chapter 4-2 Editing DVD: Editing Titles in the Title Menu - Play Full Title on page63.
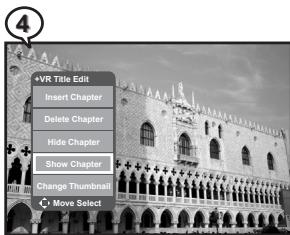
Show Chapter
1 Press to highlight a title that is intended to be edited in the Title Menu.
2 Press Edit, an edit menu appears. Press to highlight Play Full Title and press Enter. The title starts playback.
3 Press Edit during playback, an edit menu appears.
4 Press to highlight Show Chapter. As the title is played to the hidden chapter that is intended to be shown again, press Enter.

Change Thumbnail
1 Press to highlight a title and press Play.
2 Press Edit during playback, an edit menu appears. Press to highlight Change Tumbnail and then Enter when the preferred image for the new thumbnail appears on the screen.
3 Press Menu or Title to return to the title menu. The new thumbnail will be shown on the screen.

Note:
- After pressing Menu or Title to go back to the title menu, a Change Thumbnail box appears. It might take 15~30 seconds before the new index picture appears on the title menu.
-Thumbnail is changed
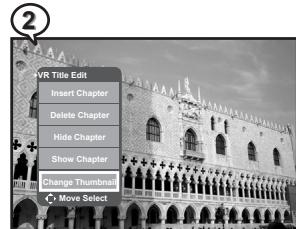
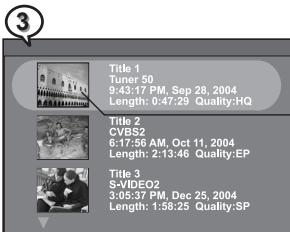
5-1 Troubleshooting
Before requesting service for the HDD+DVD Recorder, check the chart below for a possible cause of the problem you are experiencing. Some simple checkups or a minor adjustment on your part may eliminate the problem and restore proper operation.
| SYMPTOM (COMMON) | REMEDY |
| No power. | • Insert the power plug securely into the power outlet. • Check if the ON/OFF button on the front of the recorder is set to on. • Check if no power at the AC outlet by plugging in another appliance for a test. |
| The recorder does not start playback when PLAY is pressed. | • Condensation has formed: wait about 1 to 2 hours to allow the recorder to dry out. • The recorder cannot play discs other than DVDs and audio CDs. • Check if the disc is defective by trying another disc. • Check the region (local) code. |
| The recorder starts playback but stops immediately. | • The disc may be dirty and may require cleaning. • Ensure that the disc is installed with the label side up. |
| No picture. | • Ensure that the equipment is connected properly. • Ensure that the input setting for the TV is “Video”. • Check if the TV is on. • Select the same channel and source on the TV as on the recorder. |
| No sound. | • Ensure that the equipment is connected properly. • If using a HiFi amplifier, try another sound source. • Check the Audio Output Setting menu to make sure that Analog Output is selected. |
| Distorted sound. | • Ensure that the input settings for the TV and stereo system are proper. • No sound is heard during still picture (pause) or slow-motion playback. |
| No audio at Digital Output. | • Check the digital connections. • Check the settings menu to make sure that the digital output is set to on. • Check if the audio format of the selected audio language matches your receiver capabilities. |
| Distorted picture. | • Check the disc for fingerprints and clean with a soft cloth, wiping from center to edge. • Sometimes a small amount of picture distortion may appear. This is not a mal-function. |
| Completely distorted picture or no color in picture. | • The disc format is not according to the TV-set used (PAL/NTSC). |
| Picture is distorted during rapid advance or rapid reverse. | • The picture will be somewhat distorted at times: this is normal. |
| No rapid advance (or rapid reverse) playback. | • Some discs may have sections which prohibit rapid advance (or rapid reverse). |
| No 4:3 (16:9) picture. | • Choose the correct setup “Aspect Ratio” item which matches the TV set used. |
| No operations perform with the remote control. | • Check the batteries are installed with the correct polarities (+ and -). • The batteries are depleted: replace them with new ones. • Point the remote control unit at the remote control signal sensor and operate. • Operate the remote control unit at a distance of not more than 7 meters from the remote control signal sensor. • Remove the obstacles between the remote control unit and remote control signal sensor. |
SYMPTOM (COMMON)
REMEDY
| PLAY does not start playback even when title is selected. | ·This may be a result of the parental lock function that has been set. Confirm the “PARENTAL” setup. |
| Audio soundtrack and/or subtitle language is not the one selected at the initial settings. | ·If the audio soundtrack and/or subtitle language does not exist on the disc, the language selected at the initial settings will not be seen/heard. |
| No subtitles. | ·Subtitles appear only with discs that contain them. ·Subtitles are hidden from the TV screen. Press SUBTITLE to display the subtitles. |
| Alternative audio soundtrack (or subtitle) language available. | ·An alternative language can not be selected may result of no more than one languages cannot be selected. |
| Angle cannot change. | ·This function depends on software availability. Even if a disc has a number from angles recorded, these angles may be recorded for specific scenes only. |
| No sound when connecting to 5.1 Channel speaker | ·Check if the disc supports 5.1 Channel. ·Check if the speaker is properly connected. ·Check if the audio output setting is right. |
| No key operation (by the DVD Recorder and/or the remote control) is effective. | ·Turn the unit off and then back to on. Alternatively, turn off the unit, disconnect the AC power cord and then re-connect it. (The recorder may not be operating properly due to lightning, static electricity or some other external factor.) |
| No picture and sound (for recorded disc) | ·Check if the DVD Recorder and external equipment are properly connected. ·Check if the schedule recording setting is correct. ·Check if using the correct recordable disc. (DVD+RW/DVD+R) ·Check if power set to stand-by mode while using schedule recording. ·Check if the disc has been closed. (only for DVD+R disc) |
| Distorted picture or no image | ·Check if the TV system setting is correct. ·Check If you set output format in “Progressive Scan”, then you have to set “Component” in the video output setting. The actual output format must match to the output format setting. |
| OSD setting doesn’t be executed | ·Some setting must be stored by pressing left button. Re-check it. |
| Wrong time | ·Reset time. |
Handling Precautions
- Hold the disc by the edges so the surface will not be soiled with fingerprints. (A)
Fingerprints, dirt and scratches can cause skipping and distortion. - Do not write on the label side with a ball-point pen or other writing utensils.
- Do not use record cleaning sprays, benzine, thinner, static electricity prevention liquids or any other solvent.
- Be careful not to drop or bend the disc.
- Do not install more than 1 disc on the disc tray.
- Do not try to close the disc tray when the disc is not installed properly. (B)
- Be sure to store the disc in its exclusive case when not in use.
If the surface is soiled (C)
Wipe gently with a soft, damp (water only) cloth.
When wiping discs, always move the cloth from the center hole toward the outer edge.
(If you wipe the discs using a circular motion, circular scratches are likely to occur, which will cause noise.)
If the disc is brought from a cold to a warm environment, moisture may form on the disc
Wipe the moisture off with a soft, dry, lint-free cloth before using the disc.
Improper disc storage
You can damage discs if you store them in the following places:
Areas exposed to direct sunlight
- Humid or dusty areas
- Areas directly exposed to a heat outlet or heating appliance
Playable disc format
- HDD, DVD, DVD+RW, DVD+R, DVD-RW, DVD-R, CD-DA, Mixed CD-DA, JPEG file disc and Kodak Picture Disc.
Recordable disc format
HDD
DVD+RW (Application Program)
DVD+R
Maintenance
- Be sure to turn the unit off and disconnect the AC power cord before maintaining the unit.
- Wipe this unit with a dry soft cloth.
If the surfaces are extremely dirty, wipe clean with a cloth which has been dipped in a weak soap-and-water solution and wrung out thoroughly, and then wipe again with a dry cloth.
- Never use alcohol, benzine, thinner, cleaning fluid or other chemicals. And do not use compressed air to remove dust.
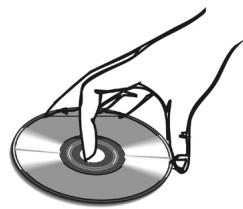
(A)
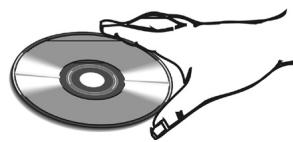
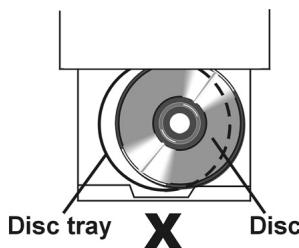
(B)
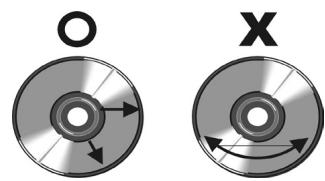
(C)