
MANAGER V4.1 - Audio software FOCAL - Free user manual and instructions
Find the device manual for free MANAGER V4.1 FOCAL in PDF.
| Product type | Audio control software for FOCAL speakers |
| Version | 4.1 |
| Compatibility | Mac and PC (Windows); Palm OS version also available |
| Minimum configuration | Computer with serial or MIDI port, FOCAL speakers compatible with DSP V4 |
| Preset management | Import/export via FMPresets folder; preset creation and loading |
| Startup window | 3 options: load last settings, load a preset, reset to factory parameters |
| New Preset menu | Dedicated menu for managing presets (Load, Save, etc.) |
| Reorganized Preferences menu | Tabs: Set up (system initialization) and Keyboard shortcut (keyboard shortcuts) |
| Customizable keyboard shortcuts | Mute, increase/decrease Master Volume with user-defined keys; increment from 0.5 to 5 dB |
| New Diagnostic submenu | Check MIDI communication and speaker operation via internal generator |
| New Audio Input submenu | Modes Automatic (digital priority) or Analog only; +6 dB sensitivity possible |
| Reset to factory settings | Resets speaker parameters to factory values, except volume and initialization |
| Mute/DeMute command | By spacebar (active window, except Preset window) |
| Volume variation | By Alt+drag mouse (1 dB) or F1/F2 keys (0.5 dB) |
| Display serial number | Read via Utilities menu; only for the Master speaker directly connected |
| Special function in Equalizer | Direct comparison between stereo and 2.1 setup (with subwoofer); sub level adjustment |
| DSP update required | Speakers must have DSP V4 firmware to use all FM V4.1 functions |
| Incompatibility with version 3 | FM V3 presets and configurations are not compatible with V4.1 |
| Available languages | French, English; translation available upon request |
Frequently Asked Questions - MANAGER V4.1 FOCAL
User questions about MANAGER V4.1 FOCAL
0 question about this device. Answer the ones you know or ask your own.
Ask a new question about this device
Download the instructions for your Audio software in PDF format for free! Find your manual MANAGER V4.1 - FOCAL and take your electronic device back in hand. On this page are published all the documents necessary for the use of your device. MANAGER V4.1 by FOCAL.
USER MANUAL MANAGER V4.1 FOCAL
Releases 3 and 4.1 of Focal Manager are not compatible. Before starting FM V4.1 please discard release 3, or save it -together with its associated file "FMPref.txt"- in a folder different from the one you are intending to place the new release FM V 4.1.
This also means that all presets created under FM V3 are incompatible with release 4.1 and will therefore have to be rewritten.
In order to take advantage of all the new facilities of your new release FM V4.1, you must also upgrade the DSP firmware of all the speakers of your system to release 4. To do so please refer to the DSP upgrade procedure as described (page 11 and 12) of the Focal Manager User Manual. These new firmware are available for download for each of our existing models on our website: www.focal-fr.com.
What is new in release 4.1?
I/Importing/exportingpresets
FM V4.1 includes a new menu called "Preset".
- FM V4.1 automatically creates -at the same level as the application- a folder called "FMPresets" (fig. 1). This folder contains all presets created by the application. To import a particular preset simply place the corresponding file inside this folder; it will be then possible to load it using the "Load Preset" sub-menu from the new "Preset" menu (fig. 2). To export or save your presets simply copy the corresponding files.
II/ New start-up window
Each time the program starts up a window will appear (fig. 3) giving you 3 different options (except at "basic level" use where settings at startup will be as recorded when the program was last closed -see User Manual about the use of passwords):
1 - Load settings as in force when last exiting Focal Manager.
2 - Load a particular preset from the "FMPreset" folder.
3 - Restart from scratch, i.e. reset all speakers of your system to their default "factory" settings. Please note that this will not affect the parameters of the "preference" menu, for instance the initialization of your system.
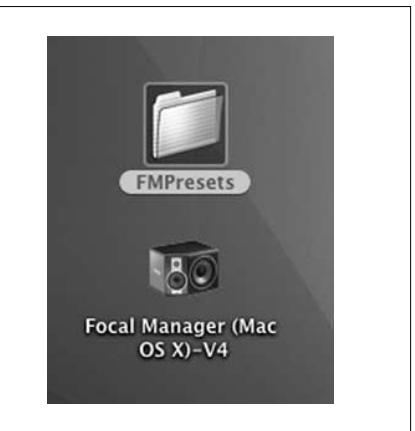
Figure 1
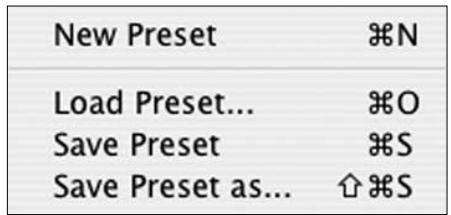
Figure 2
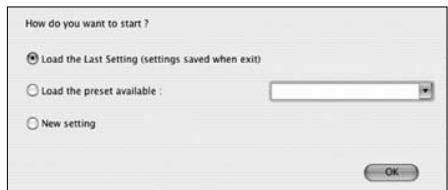
Figure 3
III/ New "Preference" menu
The "Preference" menu has been reorganized, some tabs have been removed or modified, others are new.
- New "Setup" tab (fig. 4).
Previously called "Misc", this tab now encompasses -on top of its previous functionalities- all parameters allowing the system initialization, and describing the exact state of the audio configuration. As such it does replace the "Initialization" sub-menu as used to exist in Focal Manager release 3. - New "Keyboard shortcut" tab (fig. 5).
To be able to avoid any possible conflict with other applications running concurrently with Focal Manager, FM V4 now allows to define the keys associated with shortcuts for functions such as "Mute" or "Master Volume". To do so simply check box "Change" displayed in front of the command to be executed and press the desired key.
It is now also possible to choose the increment value (0.5 to 5 dB) of the increase / decrease "Master Volume" function.
Warning: It is now also possible to increase or decrease the "Master Volume" by sliding the mouse upwards or downwards upon the corresponding window while keeping "Alt" key depressed.
IV/ New "Focal Manager" Menu
The "Focal Manager" menu has been reorganized. As seen previously the "Initialisation" sub-menu has been removed, and replaced by the "Setup" tab from the "Preference" menu.
- New "Diagnostic" sub-menu (fig. 6).
This sub-menu provides a facility to check out that your system has been properly wired up and plugged in, and that the initialization has been successfully completed. Even in the absence of an audio source the "Diagnostic" command will allow you to make sure that all speakers respond to the controls you are sending and therefore that the MIDI links are ok. Checking the "On" box instructs all speakers of your system to generate a tone (using an internal tone generator). You can check that each channel is working and respond to commands by using the "Solo" functions.
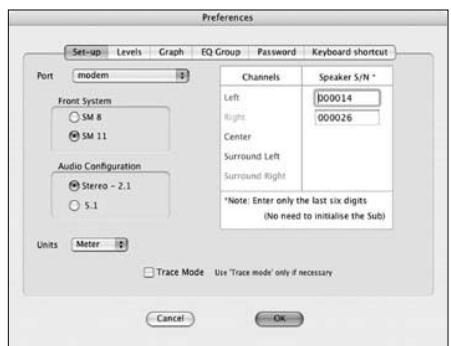
Figure 4
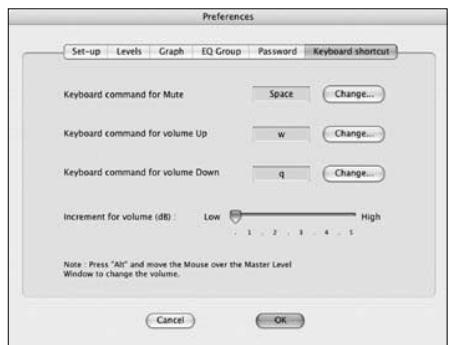
Figure 5
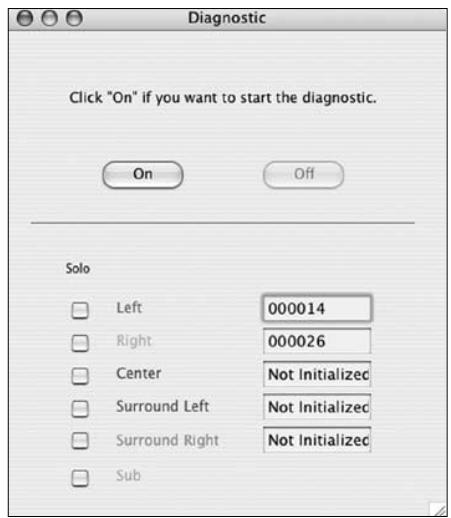
Figure 6
NEW IN MAC/PC VERSION
1/ New "Manager" Menu (fig. 1)
In FM version 3, two new sub-menus have been added and the order of the sub-menus has been modified :
A/ "Audio Input" sub-menu (fig. 2)
This new sub-menu allows to select among 2 possible audio input modes : "Automatic" and "Analog only"
- In the former, "Automatic" (default mode), either the analog or the digital input can be used. If both are connected the digital signal is always given priority over the analog signal.
- The latter mode called "Analog only" always uses the incoming analog signal. If the digital input is also fed it will only be used as an external clock to the internal converters.
In this new window, the option to increase the speaker sensitivity by 6 dB is offered - only when using the analog signal - by checking the dedicated box. WARNING: this option should be used carefully bearing in mind that it increases the risk of overdrive / overflow that could result in serious distortion.
B/ "Reset to factory settings" sub-menu (fig. 3)
As its name suggests this sub-menu offers the user the possibility to reset all speaker parameters to their initial, factory set, default values. Please note this does not include the master volume, which will remain unchanged, nor the channel allocation (so no need to run the initialisation procedure again).
Using this facility may be recommended at start-up, after installing your system (initialisation of the various loudspeakers), or whenever there can be a doubt about the current settings.
2/ New "Mute" and "Unmute" key operated commands
With "Focal Manager" V.3 it is now possible to "Mute" or "Unmute" from the keyboard using the space bar. This requires at least one window of the software to be open, with the exception of the "Presents" window.
The space bar of your keyboard will act as a "Mute" / "Unmute" toggle switch, and in turn make the "Master level" window appear on the screen.
This new facility is very convenient in normal use, but also in the event of a warning tone being emitted after a loudspeaker has detected failed data transmission. However when large data streams are being sent - e.g. a "reset" - the effect of pressing the space bar will be delayed up until completion of data transmission over the serial port: please be aware that it may take some time.
| Manager | |
| Master level | M |
| Individual Levels | L |
| Equalizer | E |
| SweetSpot | S |
| Delays | D |
| Presents | R |
| Audio Inputs | A |
| Initialisation... | I |
| Reset to factory settings | |
Figure 1
| Audio Input | |
| Automatic (External clock source only) (If both Analog and Digital signals are present, DIGITAL HAS PRIORITY) | |
| Analog Sensitivity +6 dB | |
| Send | |
| For EXTERNAL clocking, feed clock source to AES input) |
Figure 2
| Do you really want to reset all parameters (for all speakers) to their default factory values? | |
| No | Yes |
Figure 3
| Utilities | |
| Current version of the DSP firmware: 3,00 Product ID: SM8 Master serial #: 1 | |
| S/N reset | DSP Upgrade |
Figure 4
| HP | LP | 2.1 Bypass | Q2 | PEQ3 | ||||||||||
| dB/ocf | Hz | dB/ocf | Hz | dB/ocf | Hz | Hz | Q | dB | Hz | Q | ||||
| Left Right | 12 24 | 100 | Left Cy | |||||||||||
| Center Surround Left Surround Right Sub | 12 24 | |||||||||||||
| 12 24 | ||||||||||||||
| 12 24 | 10d | |||||||||||||
Figure 5
3/ Possibility to increase or decrease the "Master level" from the keyboard
Focal Manager V3 adds two alternative ways of changing the "Master level".
- One way is by pressing "Alt" key on the keyboard and sliding the mouse, up to increase / down to decrease the level, with 1 dB increments.
- The other way is to use F1 (increase) and F2 (decrease) function keys, operating with 0.5 dB increments.
4/ Changes to the "Utilities" and "Preferences" menus, and "Equalizer" sub-menu
-
In the "Utilities" window, the information displayed regarding the content of loudspeaker internal ROM has been extended to include the serial number (fig. 4). To get the information from the loudspeaker, click "Read info" button, this action will mute the system for a few seconds. Beware sometimes all the information cannot be read in one go; in this event please try again. REMEMBER: the information is only valid as far as the loudspeaker directly connected to the computer is concerned (i.e. the Master speaker). To find or check out the serial numbers of each of the loudspeakers, one will have to connect the computer to each one of them consecutively (with the speaker Control switch in PC position). This new function is particularly useful after a "DSP Upgrade" operation, which requires re-setting the speaker serial number: you can now double check that the number is what is expected.
-
When clicking the "Units" tab in the "Preferences" menu (fig. 6), then selecting "Feet", some additional information appears on the signification of the displayed values, which are in decimal feet (such as 3.23 means 3 feet and 23/100 of a feet).
- In the "Equalizer" sub-menu a new facility, called "Special" has been added. It can be accessed as a check box in the "Edit" window, near the lower right corner. This facility allows to make direct comparisons between a simple Stereo (without Sub) and a 2.1 (with Sub) setups, with just a mouse click, and in particular help setting the Subwoofer level properly (from the "Individual Levels" sub-menu). Ticking the "Special" option box will turn the traditional "Bypass" button into a "2.1 Bypass" (fig. 5), which only operates on the Passband section as well as muting the Sub channel. Unticking "Special" will change the button back to a niormal "Bypass" function and unmute the Sub channel.
NEW in Palm OS "Focal Manager"
The new Palm OS version incorporates the whole set of changes implemented in the PC/Mac version regarding the new "Manager" menu (fig. 7), the new "Audio Input" (fig. 8, 9), and "Reset to factory settings" sub-menus. Two other sub-menus - "Sub-EQ" and "Master level" - have been slightly modified (fig. 10, 11).
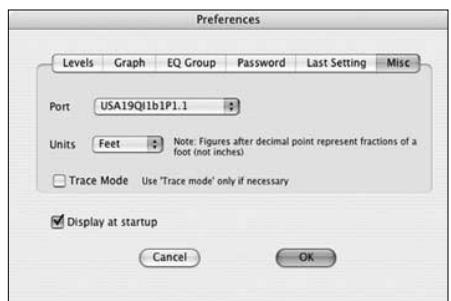
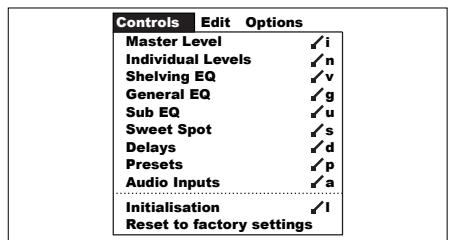
Figure 6
Figure 7
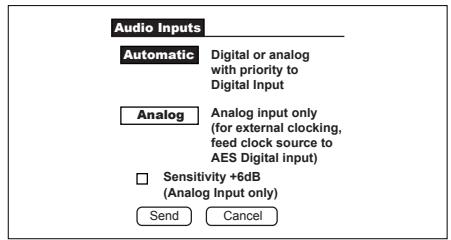
Figure 8
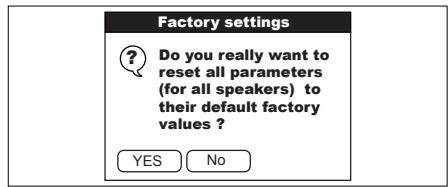
Figure 9
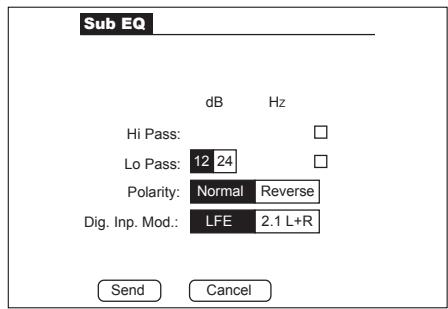
Figure 10

Figure 11
Très Important
B/ Sous-menu "Reset to factory settings" (fig. 3)
| Manager | |
| Master level | M |
| Individual Levels | L |
| Equalizer | E |
| SweetSpot | S |
| Delays | D |
| Presents | R |
| Audio Inputs | A |
| Initialisation... | I |
| Reset to factory settings | |
Figure 1
| Audio Input | |
| Automatic (External clock source only) (if both Analog and Digital signals are present, DIGITAL HAS PRIORITY) | |
| Analog Sensitivity +6 dB | |
| For EXTERNAL clocking, feed clock source to AES input) |
Figure 2
| Do you really want to reset all parameters (for all speakers) to their default factory values? | |
| No | Yes |
Figure 3
| Utilities | |
| Current version of the DSP firmware: 3,00 Product ID: SM8 Master serial #: 1 | |
| S/N reset | DSP Upgrade |
Figure 4
| HP | LP | 2.1 Bypass | PEQ3 | ||||||||
| dB/°C | Hz | dB/°C | Hz | dB/°C | Hz | Hz | Q | dB | Hz | Q | |
| Left | 12 24 | 100 | Left | ||||||||
| Right | |||||||||||
| Center | Cy | ||||||||||
| Surround Left | |||||||||||
| Surround Right | |||||||||||
| Sub | 12 24 | 100 | nde: 5.1 (LFD) | 2.1 (d+R) | Special | ||||||
Figure 5
- What is new in release 4.1?
- I/Importing/exportingpresets
- II/ New start-up window
- III/ New "Preference" menu
- IV/ New "Focal Manager" Menu
- NEW IN MAC/PC VERSION
- 1/ New "Manager" Menu (fig. 1)
- A/ "Audio Input" sub-menu (fig. 2)
- B/ "Reset to factory settings" sub-menu (fig. 3)
- 2/ New "Mute" and "Unmute" key operated commands
- 3/ Possibility to increase or decrease the "Master level" from the keyboard
- 4/ Changes to the "Utilities" and "Preferences" menus, and "Equalizer" sub-menu
- NEW in Palm OS "Focal Manager"
- Très Important
- B/ Sous-menu "Reset to factory settings" (fig. 3)
Brand : FOCAL
Model : MANAGER V4.1
Category : Audio software