1073SPX-D - Audio Interface AMS Neve - Free user manual and instructions
Find the device manual for free 1073SPX-D AMS Neve in PDF.


| Product type | Professional audio interface |
| Brand | AMS Neve |
| Model | 1073SPX-D |
| Frequency response (micro/line/DI inputs) | 20 Hz to 20 kHz ±0.25 dB |
| Distortion (THD+N) | <0.02% at 1 kHz |
| Gain range (micro input) | 20 to 80 dB |
| EIN noise | <−124.5 dBu |
| Micro input | Female XLR 3-pin |
| Line inputs | Female XLR 3-pin and 6.35 mm TRS jack |
| Direct DI input | 6.35 mm TRS jack |
| Headphone output | 6.35 mm TRS jack |
| Monitor outputs | Male XLR 3-pin |
| Insert sends/returns | 6.35 mm TRS jack |
| A/D conversion | 48 kHz to 192 kHz, dynamic range >119 dB |
| D/A conversion | 48 kHz to 192 kHz, dynamic range >117 dB |
| Maximum output level | +26 dBu |
| Power supply | USB 2.0 Type-B (bus-powered) |
| Cleaning | With a dry cloth only |
| Safety | Do not expose to rain or moisture |
| Maintenance | Refer to a qualified technician |
| Manual | 36 pages, in French |
Frequently Asked Questions - 1073SPX-D AMS Neve
User questions about 1073SPX-D AMS Neve
0 question about this device. Answer the ones you know or ask your own.
Ask a new question about this device
Download the instructions for your Audio Interface in PDF format for free! Find your manual 1073SPX-D - AMS Neve and take your electronic device back in hand. On this page are published all the documents necessary for the use of your device. 1073SPX-D by AMS Neve.
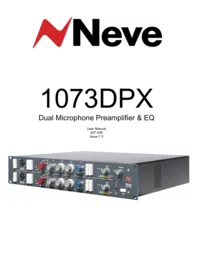
USER MANUAL 1073SPX-D AMS Neve
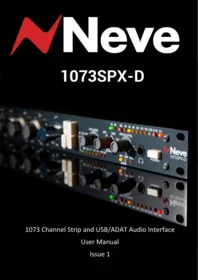
Neve
1073SPX-D

1073 Channel Strip and USB/ADAT Audio Interface
User Manual
Issue 1
FOR YOUR OWN SAFETY AND FOR THE PROTECTION OF OTHERS PLEASE OBSERVE THE FOLLOWING HEALTH AND SAFETY INSTRUCTIONS


• READ THESE INSTRUCTIONS AND KEEP THEM HANDY
• HEED ALL SAFETY WARNINGS
• DO NOT USE NEAR WATER
• CLEAN ONLY WITH A DRY CLOTH
• DO NOT INSTALL NEAR HEAT SOURCES
• DO NOT BLOCK VENTILATION OPENINGS
• PROTECT THE POWER CORD
• USE ONLY ACCESSORIES SPECIFIED BY THE MANUFACTURER
• UNPLUG POWER CORD WHEN UNUSED FOR LONG PERIODS OF TIME
• REFER ALL SERVICING TO QUALIFIED PERSONNEL ONLY
• NO USER SERVICEABLE PARTS INSIDE
FAILURE TO OBSERVE THESE PROCEDURES AND RECOMMENDATIONS WILL INVALIDATE THE MANUFACTURER'S WARRANTY
POUR VOTRE SECURITE ET CELLE DES AUTRES MERCI DE RESPECTER LES INSTRUCTIONS DE SANTE ET SECURITE SUIVANTES


• LISEZ CES INSTRUCTIONS ET GARDEZ-LES À PORTÉE DE MAIN
• TENEZ COMPTE DE TOUS LES AVERTISSEMENTS DE SÉCURITÉ
• NE PAS UTILISER PRÈS D'UNE SOURCE D'EAU
• NETTOYER UNIQUEMENT AVEC UN CHIFFON SEC
• NE PAS INSTALLER PRÈS D'UNE SOURCE DE CHALEUR
• NE PAS BLOQUER LES BOUCHES D'AÉRATION
• PROTÉGER LE CORDON D'ALIMENTATION
• N'UTILISER QUE LES ACCESSOIRES SPÉCIFIÉS PAR LE FABRICANT
• DÉBRANCHER LE CORDON D'ALIMENTATION DE LONGUES PÉRIODES D'INACTIVITÉ
- CONFIER TOUTES LES OPÉRATIONS DE MAINTENANCE À DU PERSONNEL QUALIFIÉ UNIQUEMENT
• AUCUNE PIÈCE INTERNE N'EST RÉPARABLE PAR L'UTILISATEUR
LE NON-RESPECT DE CES PROCÉDURES ET RECOMMANDATIONS INVALIDERA LA GARANTIE DU FABRICANT
Important Safety Instructions
For your own Safety and for the protection of others, please observe the following safety precautions:
1) Read these instructions.
2) Keep these instructions.
3) Heed all warnings.
4) Follow all instructions.
5) WARNING: To reduce the risk of fire or electric shock, do not expose this apparatus to rain or moisture
6) Clean only with dry cloth.
7) Do not block any ventilation openings.
8) Do not install near any heat sources such as radiators, heat registers, stoves, or other apparatus (including amplifiers) that produce heat.
9) Protect the power cord from being walked on or pinched particularly at plugs, convenience receptacles, and the point where they exit from the apparatus.
10) Unplug this apparatus during lightning storms or when unused for long periods of time.
11) Refer all servicing to qualified service personnel. Servicing is required when the apparatus has been damaged in any way, such as when liquid has been spilled or objects have fallen into the apparatus, the apparatus has been exposed to rain or moisture, does not operate normally, or has been dropped
WARNING:
TO REDUCE THE RISK OF FIRE OR ELECTRIC SHOCK, DO NOT EXPOSE THIS APPARATUS TO RAIN OR MOISTURE.
WARNING:
WHERE THE MAINS PLUG OR AN APPLIANCE COUPLER IS USED AS THE DISCONNECT DEVICE, THE DISCONNECT DEVICE SHOULD REMAIN READILY OPERABLE.
Head Office:
AMS Neve
AMS Technology Park
Billington Road
Burnley
Lancashire
England
BB11 5UB
Phone: +44 (0) 1282 457 011
Fax: +44 (0) 1282 417 282
Email: info@ams-neve.com
Web: www.ams-neve.com
Health & Safety notice (English) 2
Health & Safety notice (French)....3
Important Safety Instructions (English) 4
Important Safety Instructions (French)....5
1073SPX-D Introduction 7
Rack Mount Instructions (English) 8
Rack Mount Instructions (French)......8
Quick Start Guide 9
Input Connections....11
Preamp Controls 12
EQ Section 14
Output Connections & Controls 15
Monitor Connections & Controls 16
Digital Connections & Controls 18
USB/ADAT Hub Mode 19
ADAT Audio Expander Mode 25
Dimensions & Power Requirements 26
Audio Specification 27
AD/DA Specification....29
Round Trip Latency 29
Unit connection Tables 30
Dimensions & Power Requirements (French)....31
Audio Specification (French) 32
AD/DA Specification (French) 34
Round Trip Latency (French) 34
Unit connection Tables (French)....35
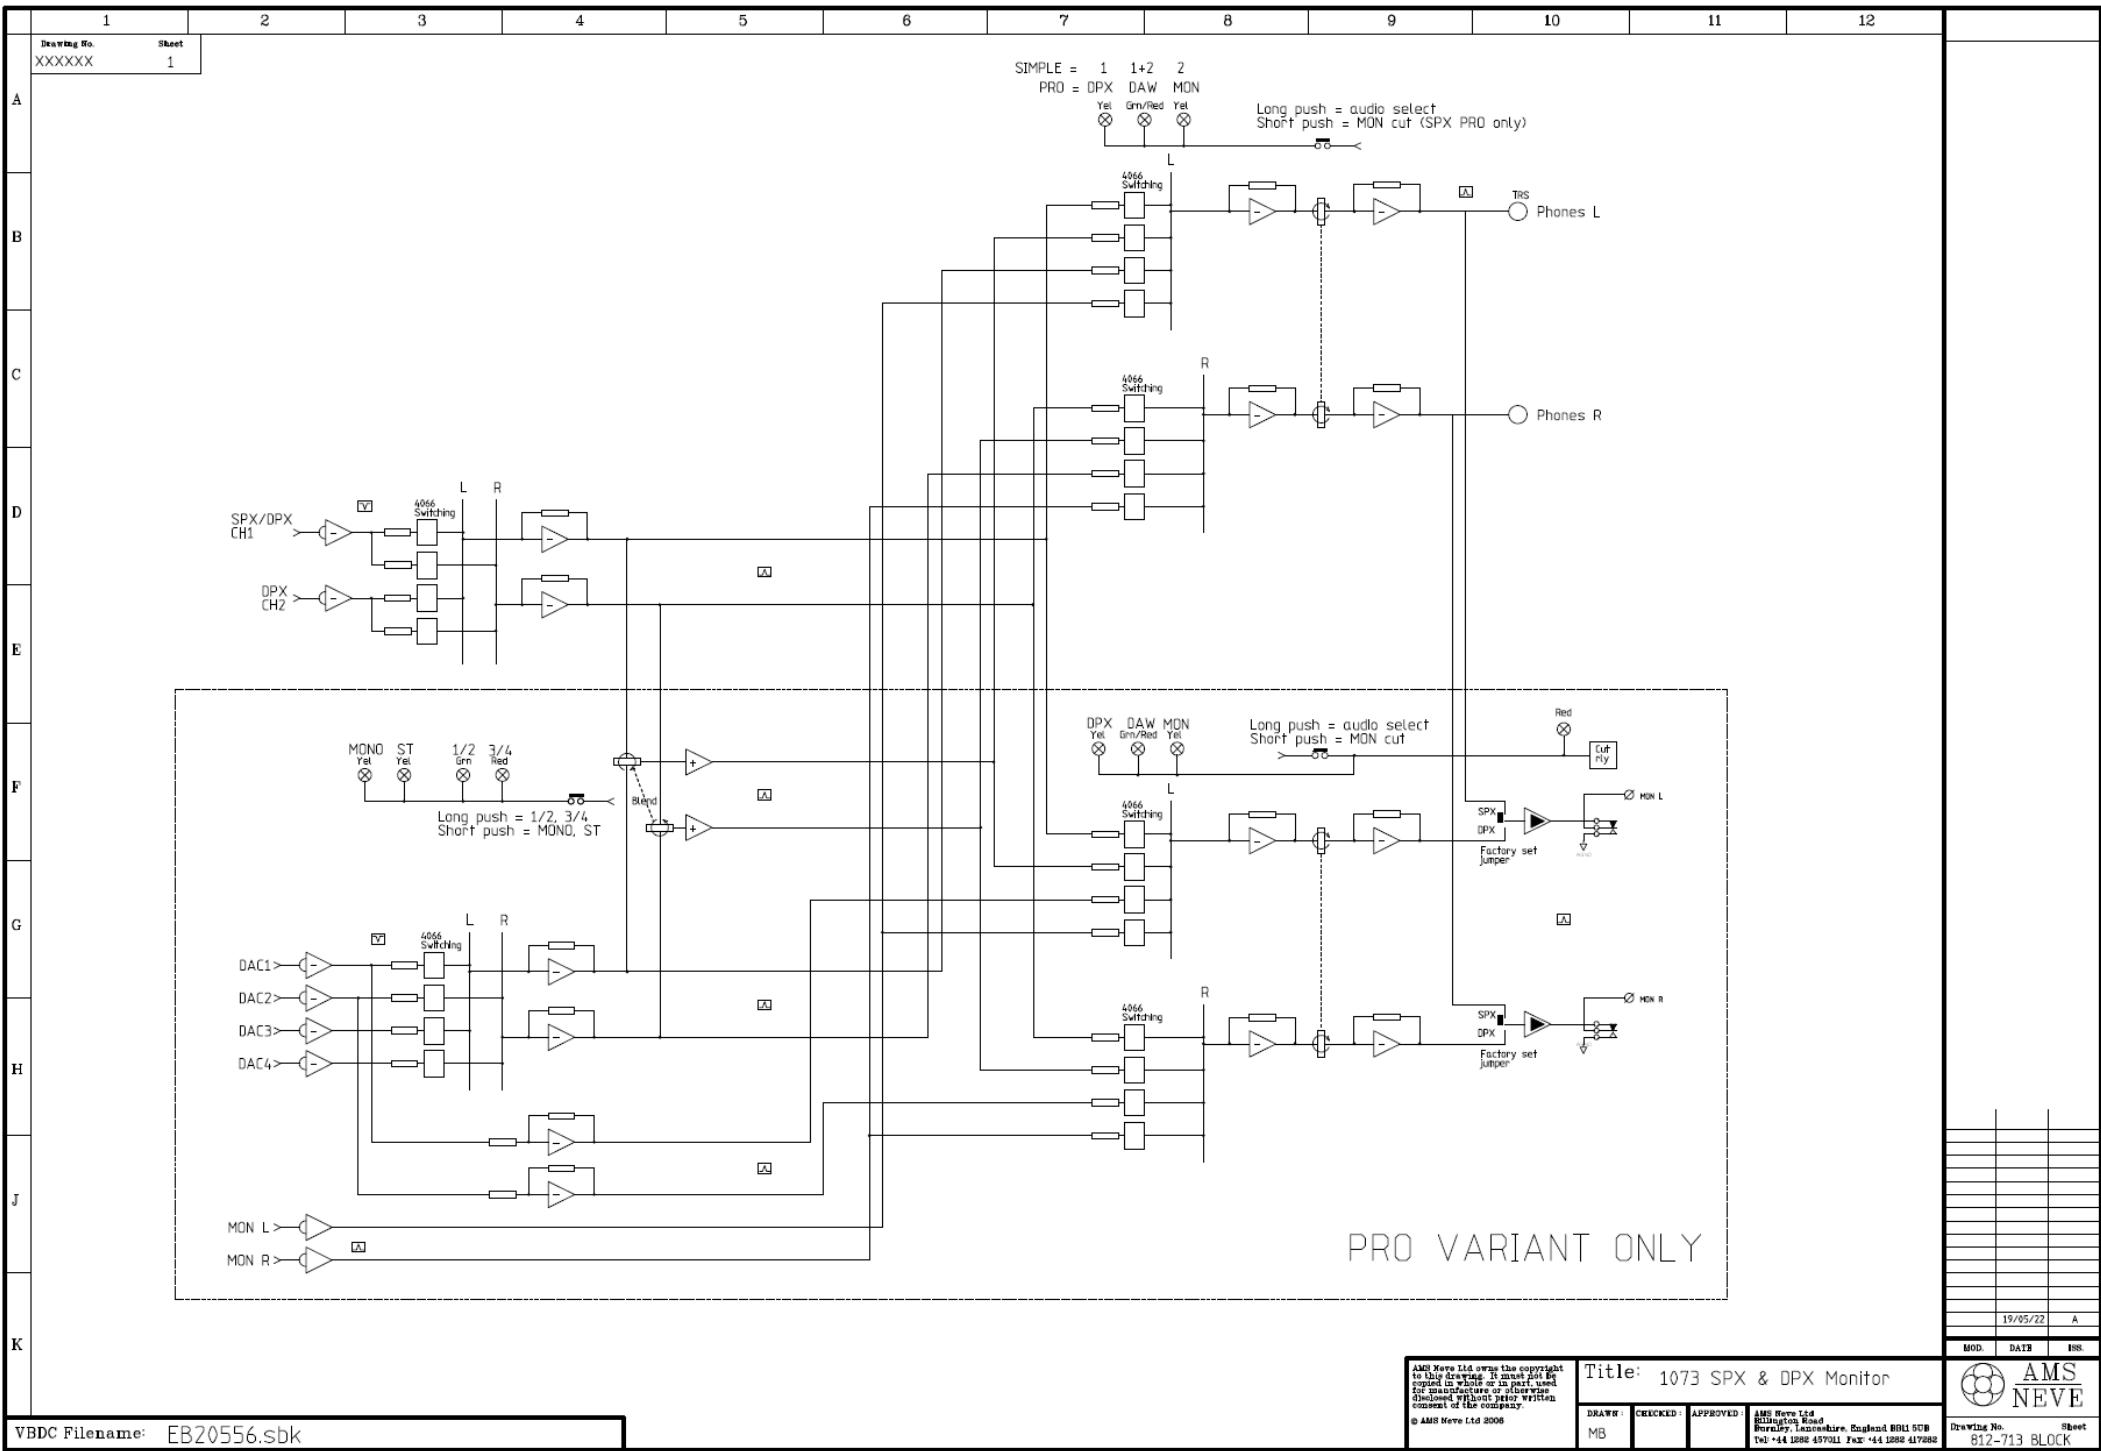
Block Diagram 36


Legendary Preamps
Neve preamps have been at the forefront of studio technology for 60 years, providing a premium front end system that allows engineers, artists, and producers to have confidence in their recording system, allowing their creativity to shine through.
Analogue Legacy
The Neve 1073 ® is considered by many to be the best preamp ever made, capturing the very essence of the Neve sound. Manufactured from the early 1970s to the present day, the discrete class-A design offers a transformer-balanced preamp, inductor-based EQ, choke-coupled high-pass filter and transformer-balanced output stage. Each of these components combine, along with out technical expertise to produce audio magic at the module output.
Modern Extras
The 1073SPX-D accommodates a complete 1073 ® circuit in a stand-alone 1U rack-mount unit. At its core, the 1073SPX retains the same class-A design as the original 1073, but includes many additional features to ensure the unit sits comfortably in the modern studio environment.
Digital Innovation
The 1073SPX-D is the latest innovation in the Neve 1073 line, combining a complete 1073 channel strip with a powerful digital audio interface. Featuring USB and ADAT connectivity, the 1073SPX-D becomes a one-stop-shop for recording, mixing & monitoring in any studio environment or for any audio application.
Custom Workflows
The SPX-D's new digital interface can be used in multiple ways, allowing for many varied workflows. Musicians can connect the 1073SPX-D directly to a PC/Mac computer, providing a simple plug & play workflow. The 1073SPX-D can also be utilised as an ADAT audio expander for an existing audio interface, allowing home studio users to add a complete 1073 channel strip to their system.
Rack Mount Instructions
▶ Elevated Operating Ambient- If installed in a closed or multi-unit rack assembly, the operating ambient temperature of the rack environment may be greater than room ambient. Therefore, consideration should be given to installing the equipment in an environment compatible with the maximum ambient temperature (30°C) specified by the manufacturer.
▶ Reduced Air Flow - Installation of the equipment in a rack should be such that the amount of air flow required for safe operation of the equipment is not compromised.
▶ Mechanical Loading - Mounting of the equipment in the rack should be such that a hazardous condition is not created by improper or uneven mechanical loading.
▶ Reliable Earthing - Reliable earthing of rack-mounted equipment should be maintained. Particular attention should be given to supply connections other than direct connections to the branch circuit (e.g. use of power strips).
Installation en Baie (rack)
The SPX-D, delivered in premium packaging, contains the following-
- SPX-D 19" rack unit
• USB A > USB B 2.0 cable (Black)
• USB C > USB B 2.0 cable (Black) - User Manual QR link
• Neve Outboard Product Brochure - Neve Sticker
Physical Computer Connections
Connect your 1073SPX-D unit to your computer using the USB cable provided, do not use USB cables longer than 3m as they can cause a drop in performance of your unit. The 1073SPX-D is USB 2.0 compliant; USB 2 and USB 3 ports can be used for digital audio transfer. Once a Stable connection is made, (and the AMS Neve Audio Driver is installed for PC users) the USB LED will illuminate Blue.
Connecting via a USB hub
It is best practice to connect the 1073SPX-D Directly to your computer's USB port, ensuring a stable connection with a continuous power supply. If a USB Hub is required, it is highly recommended to use a high-quality, powered USB Hub.
Software Quick Start
The following information contains connection & software installation instructions for Mac and PC systems. The 1073SPX-D complies with the USB Device Class Definition for Audio Devices 2.0 specification.
MAC
The 1073SPX-D will appear as a core audio device once connected to your Apple Mac computer.
To select the 1073SPX-D as your Mac Audio Interface, navigate to-
>System Settings>Sound
Select Neve SPX/DPX Mic Preamp as both Input and Output Device

Windows
To operate on a Windows 10 PC, download and install the 1073SPX-D Driver from - https://www.ams-neve.com/1073SPX-D/#MoreInfo > Downloads
Follow the setup wizard instructions to install the driver.

To select the 1073SPX-D as your PC Audio Interface, navigate to – Control panel>Hardware & Sound>Sound>Manage Audio Devices.
Select 1073SPX-D Dual Mic Pre as the Playback and Recording device.

Input Connections


Rear connections
The 1073SPX-D features independent rear mounted female XLR connections for microphone or line level inputs.
The rear connections are ideally suited for studio integration into patch bays or direct connections to studio microphone snakes and line-level equipment such as audio interface outputs.
The two Rear connections are the default inputs for the 1073SPX-D.

FRONT Switch
The FRONT switch activates the front mounted Combi Mic/line/DI connector and disables the rear XLR input connections.
Toggling the FRONT switch allows for easy access to the unit via the front combi input, without disconnecting the integrated rear inputs.

Front input Connections
Microphone Input (XLR Connection)
Connect microphone sources via an XLR cable to the front combi input.
Line/DI Input (TRS Connection)
Connect line or instrument sources via a TRS/TS jack cable to the front combi input.

DIGI
The DIGI switch activates the digital line input, fed from DAW output 3 named Neve Out 3 (Digi/Mon 3).
This input is designed so that the 1073SPX-D can act as a USB or ADAT hardware insert by sending DAW signals directly into the SPX-D line preamp.
When DIGI is depressed, front & rear analogue line inputs (XLR & TRS/TS) are bypassed and only the digital input is fed to the 1073 Line preamplifier.


The 1073 SPX-D features the legendary 1073 preamp, complete with transformer-balanced topology and multiple gain stages for all input types.
Gain Switch
The 1073SPX-D gain switch is used to select the input type (Mic or Line) and set the preamp gain level for the selected input.
Preamp gain is incremented in 5dB steps, ranging from -20 to +10 of line level, and -20 to -80dB of microphone level.
The line preamp has seven gain settings, selectable from the gain switch. In each of these positions, the rear XLR or front TRS line input is selected via the FRONT switch setting.
The microphone preamp has 13 switch settings, selectable from the gain switch. In each of these positions, the rear XLR or front XLR microphone input is selected via the FRONT switch setting.
There are two 'off' positions. The first off position deactivates the line preamp before switching to the microphone preamp.
The second 'off' position denotes the point in which the first single-transistor gain stage is deactivated, and the second, dual-transistor gain stage is activated.
At higher gain settings, a greater degree of harmonic saturation can be achieved by adjusting the output gain via the O/P Level into the DAW.
Phantom Power (+48v)
The +48V switch activates phantom power for the front & rear XLR microhpone inputs. When activated, the red LED will illuminate.
Dynamic microphones such as SM58's and Ribbon microphones do not require phantom power (+48v).
The +48V switch should be switched off for dynamic and ribbon microphones.
Condenser Microphones require Phantom power.
The +48V switch should be switched on for condenser microphones.
Note: Before activating Phantom Power, ensure that the monitor level is turned down to protect your monitoring system from pops.

Lo-Z
Lo-Z Switches the front or rear microphone input impedance from the default 1.2kΩ setting to 300Ω impedance.
This switch should be used to impedance match the microphone preamp to the connected microphone.
Most modern microphones use higher impedance settings, so the default 1.2kΩ setting should be used.
Vintage microphones may use lower impedances, so the Lo-Z setting of 300Ω should be used.
Note: Always check your microphone output impedance settings before activating lo-Z

DI
The DI Switch activates the front TRS DI instrument preamplifier input.
When depressed, instruments can connect to the front TRS combi connector via a 6.35mm TS or TRS jack cable.
The DI input has a high impedance of 2MΩ. DI signals pass through the microphone transformer and mic preamp stage of the 1073SPX-D.
To apply gain to an instrument DI, set the 1073SPX-D gain switch to the microphone input side of the switch, and adjust gain accordingly.

NOTE: When DI is depressed, all other microphone inputs are automatically disconnected

-20
The -20 switch Provides 20dB of attenuation to the DI input, accommodating 'hot' instrument signals.
In the default position (-20 off) the input impedance of the DI input is approximately 2MΩ .
When set to -20dB attenuation (-20 depressed) the input impedance of the DI input is approximately 200kΩ .
EQ Section


The 1073SPX-D uses a three-band inductor-based EQ circuit, identical to the classic 1073 80-series modules. The EQ circuit also includes a choke-based high pass filter.
EQ Switch
The three-band EQ and HPF are activated via the EQ switch. Unless EQ is switched, the EQ and HPF are completely bypassed.
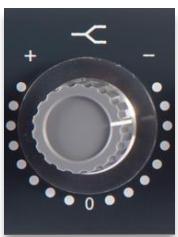
High Frequency
The high EQ band control provides smooth +/-16dB of fixed frequency shelving EQ at 12kHz.

Mid Frequency
The mid EQ band control provides smooth +/-18dB of peaking EQ with a fixed Q.
The second ring of the dual concentric control is a switched frequency selector, ranging from 0.36, 0.7, 1.6, 3.2, 4.8, & 7.2kHz.
In the ‘off’ position, the mid EQ band is bypassed.

Low Frequency
The Low EQ band control provides smooth +/-16dB of shelving EQ.
The second ring of the dual concentric control is a switched frequency selector, ranging from 35, 60, 110, & 220Hz.
In the ‘off’ position, the low EQ band is bypassed.

High Pass Filter
The HPF is a switched rotary control used to activate an 18dB per octave high pass filter into the 1073SPX-D signal path.
Corner frequencies are selectable at 50, 80, 160 & 300Hz.
In the 'off' position, the HPF is bypassed.
Output Connections & Controls


Phase
The Phase switch reverses the phase of the 1073SPX-D output signal. In the default position, absolute phase is preserved through the unit. When Phase is depressed, the output signal of the unit is inverted by 180 degrees.
Insert Send & Return Connections
The insert send and return TRS connections are balanced at +4dBu, allowing for connection to professional audio equipment such as compressors etc.
INS
The INS Switch activates the rear TRS insert send/return loop into the SPX-D signal path.
PRE
When depressed, the PRE switch positions the insert send/return loop before the 1073SPX-D EQ circuit (pre-EQ).
In the default position, the insert loop is positioned immediately after the EQ circuit (post-EQ).
Line O/P
The Line O/P male XLR connection is the main analogue output of the 1073SPX-D.
Connect the Line output to an available line input on your audio interface to record SPX signals into your DAW.
O/P Level
Adjusts the output audio level fed to the XLR output.
This control is post-EQ but pre-output transformer.
The pot ranges from -inf to +5dB, the thick line on the graticule indicates the point of nominal unity gain.
Metering
The 1073SPX-D features a 7-stage LED PPM meter ranging from -30dB to +24dBu.
Metering can be fed from three sources, selected by pressing O/P LEVEL.

I/P – Displays metering just after the preamp gain switch.
EQ – Displays metering after the EQ & Insert send/return loop circuit.
O/P – Displays metering after the output level control.
In addition to the 7-stage LED meters, each of the meter source LEDS (I/P, EQ, O/P) include clip indication and will illuminate red if their respective signal source is close to clipping.
Monitor Connections & Controls


Monitor Input
The two monitor in L and monitor in R connections are used to input a stereo monitor source into the 1073SPX-D analogue monitor path.
These connections are ideally used as monitor connections from an external audio interface, providing an additional monitor attenuator control via the HP/LS level pot.
HP/LS level must me set to MON to activate the stereo analogue monitor path.
Monitor Output
The two monitor out L and R connections are used as the main stereo monitor output for the 1073SPX-D.
These connections are designed to connect to active studio loudspeakers or amplifiers.
HP/LS Level
The HP/LS Level control is a full range attenuator ranging from 0dB at the fully clockwise position to -inf at the fully counter-clockwise position.
The HP/LS Level control features a centre détente at the 12-o-clock position. This position is set at -10dB from the maximum output level and is ideally set as an 85dB SPL calibration point for your studio loudspeakers.
This control attenuates the Stereo XLR monitor outputs and the TRS headphone outputs in parallel.
Monitor CUT
Monitor CUT can be activated by short-pressing the HP/LS Level pot. When depressed CUT will disable the stereo monitor L&R XLR outputs. The TRS HP output will remain un-cut.
Monitor Source Selection
Long pressing the HP/LS Level pot selects between the four available monitor sources detailed below.

SPX- The output of the SPX-D channel strip is fed equally to the left & right stereo monitor outputs as a mono signal.

DAW- The output of the DAW/computer is fed into the left & right stereo monitor output as a stereo signal.

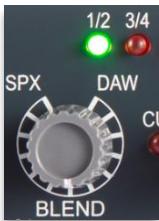
BLEND (SPX/DAW) - A blend of mono SPX-D output and stereo DAW input is fed into left & right stereo monitor outputs. When both SPX and DAW LEDs are illuminated, the BLEND pot is engaged.

MON - The stereo analogue monitor input is fed into the stereo left & right monitor outputs.
Blend
The blend control is used to crossfade stereo DAW and mono SPX signals into the 1073SPX-D stereo monitor path. This pot is designed to allow for latency-free monitoring when tracking through the 1073SPX-D.

- At the centre position, DAW and SPX signals are each attenuated by 6dB.
- At the maximum, counter-clockwise position (DAW) the SPX signal is fully attenuated, and only the stereo DAW signal is present at the stereo monitor output.
- At the maximum, clockwise position (SPX) the DAW signal is fully attenuated, and only the mono SPX signal is present at the stereo monitor output.


A long press of the BLEND pot changes the stereo DAW signal from output 1/2 to output 3/4.
This switch allows two independent stereo mixes to be selected and sent to the headphones or stereo monitors.
Digital Connections & Controls


The USB 2.0 B-type port is used along with the cable(s) provided to connect the SPX-D to your computer as an audio interface.
When connected, the 1073SPX-D can be used as both a playback and recording device for the connected computer and DAW software applications.
When a valid USB connection is made, the USB LED will illuminate blue, indicating that the device can now be configured as the computer audio interface.
Sample rate selection is handled either from the DAW application, or from the ASIO/Core audio driver.

The LEDs on the front of the unit indicate the selected sample rate.

ADAT Connections
The 1073SPX-D features one optical output port and one optical input port. These two optical connections are used to connect the 1073SPX-D via TOSLINK cables to another ADAT-enabled audio interface such as the Neve 1073OPX or another 1073SPX-D.

Wordclock Synchronisation
The 1073OPX USB/ADAT Digital card has a Wordclock 75Ohm BNC output connector.
This output can be used to synchronise external equipment to the 1073SPX-D internal clock.
The Wordclock output transmits sync data when either ADAT internal/external mode or USB mode is selected.
The 1073SPX-D has two possible modes of digital operation.
USB/ADAT Hub mode enables the 1073SPX-D to function as a 9x12 I/O USB audio interface for your Mac or PC, expandible via ADAT in and out connections.
Connect the 1073SPX-D to your computer via USB. The USB LED will illuminate once the computer selects the SPX-D as its audio device.
In USB/ADAT Hub mode, the USB audio interface will report two analogue inputs, 8 digital inputs, four analogue outputs, and 8 digital outputs from the audio driver (Core Audio for Mac, AMS Neve USB Audio Device Control Panel for PC).
USB Driver I/O
The 1073SPX-D has two digital inputs to the USB connection and four digital outputs from the USB connection.
- Neve Input 1 is reserved to send the 1073SPX-D signal into the DAW.
- Neve Input 2 (Neve Input 2) is unused.
- Neve Outputs 1&2 (Mon L/R) are reserved for stereo DAW monitoring.
- Neve Outputs 3&4 (Digi/Mon) can be configured as an additional stereo monitoring pair.
- Neve Output 3 is also used as the SPX-D digital DIGI line input.

ADAT Output
In USB/ADAT Hub mode, a single ADAT output is used to transmit up to eight additional outputs digitally from your DAW via the ADAT output port.
At lower sample rates (44.1kHz, 48kHz) the optical output can transmit eight channels of digital audio. ADAT OUT transmits channels 1-8.
At higher sample rates (88.2kHz, 96kHz) only the first four channels of digital audio are available. ADAT OUT transmits channels 1-4.
At the highest sample rates (176.4kHz, 192kHz) only the first two channels of digital audio are available. ADAT OUT transmits channels 1-2.

ADAT Input
In USB/ADAT Hub mode, the ADAT IN port is used to feed signals from external devices through the 1073OPX USB and into the DAW.
At lower sample rates (44.1kHz, 48kHz) the optical output can transmit eight channels of digital audio. ADAT IN transmits channels 1-8.
At higher sample rates (88.2kHz, 96kHz) only the first four channels of digital audio are available. ADAT IN transmits channels 1-4.
At the highest sample rates (176.4kHz, 192kHz) only the first two channels of digital audio are available. ADAT IN transmits channels 1-2.
| Sample Rate | ADAT OUT | ADAT IN |
| 44.1/48 kHz | DAW Outputs 5-12 | DAW Inputs 3-10 |
| 88.2/96 kHz | DAW Outputs 5-8 | DAW Inputs 3-6 |
| 176.4/192 kHz | DAW Outputs 5-6 | DAW Inputs 3-4 |
Internal/ADAT clock source selection
In USB Hub mode, the 1073SPX-D can either clock to its internal clock source or can clock to an external source via the ADAT input.
Note: sample rates must be matched on both devices when using ADAT clock mode.
Clock Source Selection PC
Open the AMS Neve USB Audio Device Control Panel, navigate to 'clock source tab and select either AMS Neve Internal clock, or AMS Neve ADAT Clock.

Clock Source Selection Mac
Open Audio MIDI Setup, navigate to 'show audio devices' and select either AMS Neve Internal clock, or AMS Neve ADAT Clock from the dropdown option at the top of the window.


Sample Rate/ ADAT Channel Count Configuration
When using the 1073SPX-D in USB/ADAT Hub mode, adjustments must be made from within the audio driver in order to correctly map the unit's digital ADAT I/O to the available channel count at the requested sample rate. If this step is not performed, the DAW may present an error message when changing sample rates.

PC
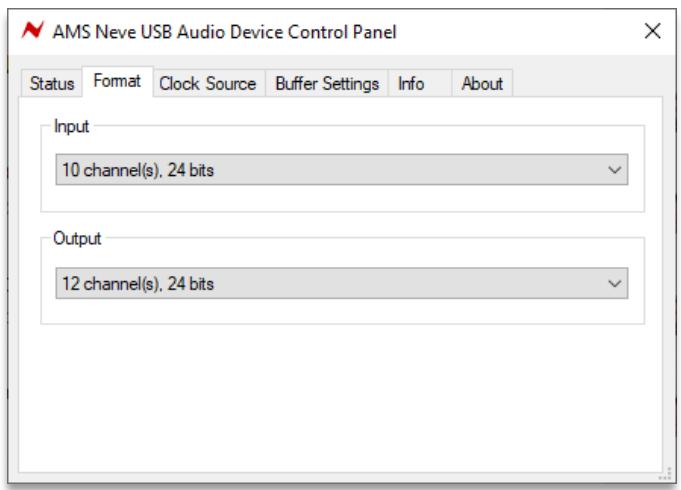
To configure the ADAT channel count for your selected sample rate -
▶ Navigate to the Windows Start Menu>AMS Neve>AMS Neve USB Audio Device Control Panel
▶ Open the AMS Neve USB Audio Device Control Panel application
▶ Open the Format tab

To configure for 44.1 or 48kHz sample rates, select –
▶ Input – 10 channel(s)
▶ Output – 12 channel(s)

To configure for 88.2 or 96kHz sample rates, select –
▶ Input – 6 channel(s)
▶ Output – 8 channel(s)

To configure for 176.4 or 192kHz sample rates, select –
▶ Input – 4 channel(s)
▶ Output – 6 channel(s)


Mac
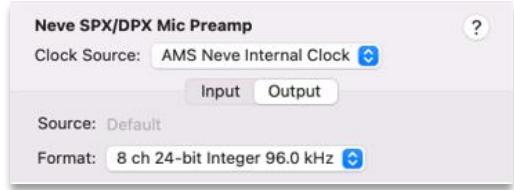
To configure the ADAT channel count for your selected sample rate -
▶ Navigate to the Applications>Utilities>Audio MIDI Setup
▶ Select Neve SPX/DPX Mic Preamp from the Audio Devices Window
▶ Select Input & Output tabs to configure the ADAT I/O channel count

To configure for 44.1 or 48 kHz sample rates, select –
▶ Input – 10 ch 24-bit Integer 44.1 kHz/10 ch 24-bit Integer 48 kHz
▶ Output – 12 ch 24-bit Integer 44.1 kHz/12 ch 24-bit Integer 48 kHz


To configure for 88.2 or 96 kHz sample rates, select –
▶ Input – 6 ch 24-bit Integer 88.2 kHz/6 ch 24-bit Integer 96 kHz
▶ Output – 8 ch 24-bit Integer 88.2 kHz/ 8 ch 24-bit Integer 96 kHz


To configure for 176.4 or 192 kHz sample rate, select –
▶ Input – 4 ch 24-bit Integer 176.4 kHz/4 ch 24-bit Integer 192 kHz
▶ Output – 6 ch 24-bit Integer 176.4 kHz/6 ch 24-bit Integer 192 kHz


ADAT Audio Expander Mode


ADAT Audio Expander mode allows the 1073SPX-D to function as an I/O expansion device for your current audio interface (provided that it includes ether an ADAT input or an ADAT input & output).
The 1073SPX-D features an optical output port and an optical input port. These two optical connections are used to connect the 1073SPX-D via TOSLINK cables to your audio interface, expanding its recording capabilities by adding a complete 1073 channel strip and two additional stereo monitor outputs.
ADAT Outputs
In ADAT Audio Expander mode, the ADAT output is used to transmit the digital output signal of the 1073SPX-D channel strip at sample rates ranging from 44.1kHz to 96kHz.
ADAT Input
In ADAT Audio Expander mode, the ADAT IN port is used to feed signals from the DAW, through your audio interface, and into the 1073SPX-D DAW 1&2 or 3&4 stereo monitor input at sample rates ranging from 44.1kHz to 96kHz.
Sample Rate Selection
To select the 1073SPX-D sample rate, press the SR button located to the left of the sample rate LEDs. The sample rate will toggle through 44, 48, 88, and 96.
The sample rate set on the 1073SPX-D must match the sample rate set on your audio interface.
Digital Synchronization
The 1073SPX-D can operate as Master clock or can slave to an external clock via the ADAT input via the SYNC switch located to the right of the sample rate LEDs.

Internal clock (INT LED On)
In internal clock mode, the 1073SPX-D is the master clock for your audio interface. In this mode, your audio interface must select ADAT as its clock source.

ADAT Clock (INT LED Off)
In ADAT clock mode, the 1073SPX-D receives its clock source from the ADAT Input. In this mode, your audio interface must be set to internal clock source.

Dimensions & Power Requirements
| Height | 44mm/1.75 inches |
| Width | 480mm/19 inches |
| Depth | 360mm/14.17 inches |
| Weight | 5.475Kg/12.07Lbs |
| Voltage | 100 – 240Vac |
| Current | 0.2A @ 240Vac |
| PSU | Neve PS12221 |
| +16V internal fuse | T2A 230V 20mm |
| -16V internal fuse | T2A 230V 20mm |
| 48V internal fuse | T250mA 230V 20mm |
Audio Specification
| Microphone Inputs | |
| Frequency Response 20Hz to 20kHz | +/- 0.25dB |
| Frequency Response 10Hz to 35kHz | +/-0.5dB |
| Distortion (THD) | <0.2% 20-20kHz, <0.02% 1kHz |
| Noise EIN | <-124.5dBu 20-20kHz unweighted, gain @ 60dB |
| Gain Range | 20 to 80dB |
| Maximum Input Level (Max Gain @ 80dB) | -56dBu |
| Maximum Input Level (Min Gain @ 20dB) | +6dBu |
| Input Impedance | 1200Ω / 300Ω |
| Line Inputs | |
| Frequency Response 20Hz to 20kHz | +/- 0.25dB |
| Frequency Response 10Hz to 35kHz | +/- 0.5dB |
| Distortion (THD) | <0.2% 20-20kHz, <0.02% 1kHz |
| Noise (EIN) | <-100dBu 20-20kHz unweighted, gain @ 20dB |
| Gain Range | -10 to +20dB |
| Maximum Input Level (Max Gain @ 20dB) | +6dBu |
| Maximum Input Level (Min Gain @ -10dB) | +36dBu |
| Input Impedance | 10kΩ |
| DI Inputs | |
| Frequency Response 20Hz to 20kHz | +/- 0.25dB |
| Frequency Response 10Hz to 35kHz | +/- 0.5dB |
| Distortion (THD) | <0.2% 20-20kHz, <0.02% 1kHz |
| Gain Range | 20 – 80dB without pad |
| Maximum Input Level (Max Gain @ 80dB) | -56dBu |
| Maximum Input Level (Min Gain @ 20dB) | +6dBu |
| Input Impedance | 2MΩ / 200kΩ |
| Insert Send / Return | |
| Maximum Output Level | +26dBu |
| Maximum Input Level | +26dBu |
| Mon Outputs | |
| Maximum Output Level | +26dBu |
| Headphone output (600Ω load) | ||
| Maximum Output Level | +20dBu | |
| Frequency Response | 10 - 30kHz +/-0.1dB | |
| Distortion (THD) | 0.005% | |
| Noise floor | -90dBu | |
| Metering | ||
| Signal | ~-30dBu | |
| Clip | +23dBu | |

AD/DA Specification
| Type | Device | Sample Rate | THD+Noise | Dynamic Range | Distortion | Max Input Level | Max Output Level |
| USB | A/D Conversion | 48,000 | <100dBFS 1 | >119dB | <0.002% 2 | >+26dBu | - |
| USB | D/A Conversion | 48,000 | <-91.5dBu 1 | >117dB | <0.001% 2 | - | 26dBu |
| USB | A/D Conversion | 192,000 | <100dBFS 1 | >119dB | <0.002% 2 | >+26dBu | - |
| USB | D/A Conversion | 192,000 | <-91.5dBu 1 | >117dB | <0.001% 2 | - | 26dBu |
1 THD+Noise (A weighted), 20Hz, 20kHz filter ON, measured through line in transformer
2 Distortion, with a +26dBu input signal, minimum gain
Round Trip Latency (RTL)
| Type | Device | S.R. | Bits | Buffer | Measured RTL (ms) | Noise Floor |
| ASIO | AMS Neve USB Audio Device | 44100 | 32 | 16 | 8.707 | -110.7 |
| ASIO | AMS Neve USB Audio Device | 44100 | 32 | 32 | 10.454 | -110.4 |
| ASIO | AMS Neve USB Audio Device | 44100 | 32 | 64 | 10.794 | -111.4 |
| ASIO | AMS Neve USB Audio Device | 44100 | 32 | 128 | 12.132 | -111.1 |
| ASIO | AMS Neve USB Audio Device | 44100 | 32 | 256 | 16.145 | -111.8 |
| ASIO | AMS Neve USB Audio Device | 44100 | 32 | 512 | 26.327 | -111.6 |
| ASIO | AMS Neve USB Audio Device | 44100 | 32 | 1024 | 45.669 | -111.3 |
| ASIO | AMS Neve USB Audio Device | 44100 | 32 | 2048 | 87.029 | -111.6 |
| ASIO | AMS Neve USB Audio Device | 48000 | 32 | 16 | 8.854 | -109.1 |
| ASIO | AMS Neve USB Audio Device | 48000 | 32 | 32 | 9.958 | -110.5 |
| ASIO | AMS Neve USB Audio Device | 48000 | 32 | 64 | 10.604 | -111.7 |
| ASIO | AMS Neve USB Audio Device | 48000 | 32 | 128 | 11.062 | -111.1 |
| ASIO | AMS Neve USB Audio Device | 48000 | 32 | 256 | 17.875 | -111.6 |
| ASIO | AMS Neve USB Audio Device | 48000 | 32 | 512 | 25.333 | -111.2 |
| ASIO | AMS Neve USB Audio Device | 48000 | 32 | 1024 | 45.104 | -111.6 |
| ASIO | AMS Neve USB Audio Device | 48000 | 32 | 2048 | 82.188 | -110.6 |
| ASIO | AMS Neve USB Audio Device | 96000 | 32 | 16 | 5.062 | -109.7 |
| ASIO | AMS Neve USB Audio Device | 96000 | 32 | 32 | 5.49 | -109.5 |
| ASIO | AMS Neve USB Audio Device | 96000 | 32 | 64 | 6.312 | -109.8 |
| ASIO | AMS Neve USB Audio Device | 96000 | 32 | 128 | 6.104 | -109.3 |
| ASIO | AMS Neve USB Audio Device | 96000 | 32 | 256 | 9.062 | -109.6 |
| ASIO | AMS Neve USB Audio Device | 96000 | 32 | 512 | 13.99 | -109.6 |
| ASIO | AMS Neve USB Audio Device | 96000 | 32 | 1024 | 23.323 | -109.7 |
| ASIO | AMS Neve USB Audio Device | 96000 | 32 | 2048 | 40.99 | -109.7 |
| ASIO | AMS Neve USB Audio Device | 192000 | 32 | 32 | 3.365 | -107 |
| ASIO | AMS Neve USB Audio Device | 192000 | 32 | 64 | 3.516 | -107.1 |
| ASIO | AMS Neve USB Audio Device | 192000 | 32 | 128 | 4.474 | -107.2 |
| ASIO | AMS Neve USB Audio Device | 192000 | 32 | 256 | 4.771 | -107.2 |
| ASIO | AMS Neve USB Audio Device | 192000 | 32 | 512 | 7.099 | -107.5 |
| ASIO | AMS Neve USB Audio Device | 192000 | 32 | 1024 | 11.516 | -107.1 |
| ASIO | AMS Neve USB Audio Device | 192000 | 32 | 2048 | 21.484 | -107.4 |
Unit Connection Tables
| Power and Comms | USB2 Type-B |
| Preamplifier Microphone Inputs | XLR 3-pin plug female |
| Preamplifier Line Inputs | XLR 3-pin plug female & 1/4 " TRS Jack socket |
| Preamplifier DI inputs | 1/4 " TRS Jack sockets |
| Headphone Output | 1/4 " TRS Jack socket |
| Insert Sends | 1/4 " TRS Jack sockets |
| Insert Returns | 1/4 " TRS Jack sockets |
| Monitor Outputs | XLR 3-pin plug male |
1/4 "Inputs and Outputs
All 1/4 " Line Inputs & Outputs on the unit have the same wiring, excluding headphones
| Tip | Hot |
| Ring | Cold |
| Sleeve | Ground |
XLR Inputs & Outputs
All XLR Inputs & Outputs on the unit have the same wiring
| Pin 2 | Hot |
| Pin 3 | Cold |
| Pin 1 | Ground |
Dimensions & Exigences Alimentation
| Hauteur | 44mm/1.75 inches |
| Largeur | 480mm/19 inches |
| Profondeur | 360mm/14.17 inches |
| Poids | 5.475Kg/12.07Lbs |
| Voltage | 100 – 240Vac |
| Courant | 0.2A @ 240Vac |
| PSU | Neve PS12221 |
| +16V fusible interne | T2A 230V 20mm |
| -16V fusible interne | T2A 230V 20mm |
| 48V fusible interne | T250mA 230V 20mm |
| Pointe | Chaud |
| Bague | Froid |
| Corps | Masse |
| Point 2 | Chaud |
| Point 3 | Froid |
| Point 1 | Masse |
| 19/05/22 | A | |

| Drawing No. | Sheet |
| 812-713 | BLOCK |



- NEVE
- SPX-D
- FOR YOUR OWN SAFETY AND FOR THE PROTECTION OF OTHERS PLEASE OBSERVE THE FOLLOWING HEALTH AND SAFETY INSTRUCTIONS
- FAILURE TO OBSERVE THESE PROCEDURES AND RECOMMENDATIONS WILL INVALIDATE THE MANUFACTURER'S WARRANTY
- POUR VOTRE SECURITE ET CELLE DES AUTRES MERCI DE RESPECTER LES INSTRUCTIONS DE SANTE ET SECURITE SUIVANTES
- IMPORTANT SAFETY INSTRUCTIONS
- WARNING
- LEGENDARY PREAMPS
- ANALOGUE LEGACY
- MODERN EXTRAS
- DIGITAL INNOVATION
- CUSTOM WORKFLOWS
- RACK MOUNT INSTRUCTIONS
- INSTALLATION EN BAIE (RACK)
- PHYSICAL COMPUTER CONNECTIONS
- CONNECTING VIA A USB HUB
- SOFTWARE QUICK START
- MAC
- SYSTEM SETTINGS>SOUND
- SELECT NEVE SPX/DPX MIC PREAMP AS BOTH INPUT AND OUTPUT DEVICE
- WINDOWS
- INPUT CONNECTIONS
- REAR CONNECTIONS
- FRONT SWITCH
- FRONT INPUT CONNECTIONS
- MICROPHONE INPUT (XLR CONNECTION)
- LINE/DI INPUT (TRS CONNECTION)
- DIGI
- GAIN SWITCH
- PHANTOM POWER (+48V)
- LO-Z
- DI
- EQ SECTION
- EQ SWITCH
- HIGH FREQUENCY
- MID FREQUENCY
- LOW FREQUENCY
- HIGH PASS FILTER
- OUTPUT CONNECTIONS & CONTROLS
- PHASE
- INSERT SEND & RETURN CONNECTIONS
- INS
- PRE
- LINE O/P
- O/P LEVEL
- METERING
- MONITOR CONNECTIONS & CONTROLS
- MONITOR INPUT
- MONITOR OUTPUT
- HP/LS LEVEL
- MONITOR CUT
- MONITOR SOURCE SELECTION
- BLEND
- DIGITAL CONNECTIONS & CONTROLS
- ADAT CONNECTIONS
- WORDCLOCK SYNCHRONISATION
- USB DRIVER I/O
- ADAT OUTPUT
- ADAT INPUT
- INTERNAL/ADAT CLOCK SOURCE SELECTION
- CLOCK SOURCE SELECTION PC
- CLOCK SOURCE SELECTION MAC
- SAMPLE RATE/ ADAT CHANNEL COUNT CONFIGURATION
- PC
- TO CONFIGURE FOR 44.1 OR 48KHZ SAMPLE RATES, SELECT
- TO CONFIGURE FOR 88.2 OR 96KHZ SAMPLE RATES, SELECT
- TO CONFIGURE FOR 176.4 OR 192KHZ SAMPLE RATES, SELECT
- TO CONFIGURE FOR 44.1 OR 48 KHZ SAMPLE RATES, SELECT
- TO CONFIGURE FOR 88.2 OR 96 KHZ SAMPLE RATES, SELECT
- TO CONFIGURE FOR 176.4 OR 192 KHZ SAMPLE RATE, SELECT
- ADAT AUDIO EXPANDER MODE
- ADAT OUTPUTS
- SAMPLE RATE SELECTION
- DIGITAL SYNCHRONIZATION
- INTERNAL CLOCK (INT LED ON)
- ADAT CLOCK (INT LED OFF)
- INPUTS AND OUTPUTS
- XLR INPUTS & OUTPUTS
Brand : AMS Neve
Model : 1073SPX-D
Category : Audio Interface