Encore Two - Headphones AMS Neve - Free user manual and instructions
Find the device manual for free Encore Two AMS Neve in PDF.


| Product Type | Audio Automation and Configuration Software |
| Brand | AMS Neve |
| Model | Encore Two |
| Compatible Consoles | DFC II, Gemini, PS1, DMC, MMC, 88D, 88R/88RS, Libra Live, Libra Post |
| Software Versions | V5.3, V5.4, V6 |
| Operating System | Windows 7 for V6; earlier versions for V5.x |
| Main Functions | Mix automation, desk configuration, offline editing, EDL conforming, backup management, snapshot recall |
| Automation Modes | Record, Play, Isolate, Manual Keep, Auto Keep, Glide |
| Timecode Support | Multiple sync sources, presets, offset, display options |
| Mix Tree Filing | Client/Project/Title/Mix hierarchy |
| Backup Manager | Archive to local drives, removable media, CDR; compression and linked file support |
| Offline Editing | Copy, erase, merge path data; EDL mix conforming; extract path data |
| Configuration Files | Desk Setup, I/O Config, GPI Config, Meter Designer, Snapshots, User Defaults, AES Config |
| Safety Features | Safety Nets, Initial Snapshot, restore modes/gangs/links, safety stop |
| Headphone Monitoring | MIOS racks with headphone sockets; monitor DIM, mono pad, calibration |
| Health & Safety | Read instructions, avoid water, use dry cloth, protect power cord |
| Maintenance | Calibrate faders (analogue), regular backups, periodic cleaning |
| Documentation | User manual: 243 pages, free PDF download, AI question support |
| Interoperability | Pro Tools, Pyramix, Flying Faders, MIDI over LAN, Star Command |
| Sync & Clock | Word clock, external LTC, 9-pin sync, internal sync source |
Frequently Asked Questions - Encore Two AMS Neve
User questions about Encore Two AMS Neve
0 question about this device. Answer the ones you know or ask your own.
Ask a new question about this device
Download the instructions for your Headphones in PDF format for free! Find your manual Encore Two - AMS Neve and take your electronic device back in hand. On this page are published all the documents necessary for the use of your device. Encore Two by AMS Neve.
USER MANUAL Encore Two AMS Neve
Encore Two
User Manual Build 35 or later
Issue 1 527 - 366
DFC / II / Gemini / PS1
DMC
MMC
88D
88R / 88RS
Libra Live
Libra Post
Introduction
As Encore Two software is installed on several AMS Neve products, some of it's functions only apply to analogue consoles, some only to digital consoles, some only to broadcast consoles etc.
Where relevant, this is displayed in the Alphabetical Index, as well as on the chapter's title bar (in brackets).
AMS Neve welcomes feedback on all aspects of it's documentation. Should you wish to comment on this manual, please email Info@AMS-Neve.com, with the subject 'Encore Two Iss1'.

Table of Contents
Health & Safety Notice....9
V5.3 / V5.4 Software....10
V6 Software....10
Conventions Used in this Manual....10
Glossary
AutEngX....11
Automation Mode....11
C/P/T/M....11
Desk Setup....11
Encore Two....11
Events....12
Function Key....12
Glide....12
Initial Snapshot (ISS)....12
MIOS....12
Mix/Pass Tree....13
Pan Designators....13
Play Pass....13
Port Routing....13
Processing Element....14
Quad-Madi II card....14
Quantisation....14
Radio Button....14
Record Pass....15
Routing....15
Safety Snapshot....15
Star Command....15
Sync Source....15
Timecode....15
Virgin Territory....16
WavTrak....16
Word Clock....16
Using Encore Two
Timecode Editing....20
Notes on Timecode Display....20
Timecode Display With Offset....20
Keyboard Shortcuts....21
File Menu
New Mix....22
Clear the Current Tree....22
Insert Into Current Tree....22
Open Mix....22
Save Mix As....23
Automation Mode....23
Reload Last Mix....23
Restore Safety Snapshot....23
Restore Modes....23
Restore Gangs....23
Restore Links....23
Label Options....24
Renumber List On Merge....24
Display Options For Each Load....24
Select A Mix From The Filing Page....24
Create a New Mix....24
Recover Automation on Desk....24
To Stop the Automation System......25
Backup Manager....26
Encore Window....26
Destination Window....26
To Create a new Archive....27
To change the drive used for Archives......27
To Backup Files....27
To copy only new or modified files....27
To select individual Mix/Passes from the Mix Tree......28
To copy live data to an archive....28
To make sure linked files will be copied....29
To restore data from an archive....29
To delete an Archive....29
Options....29
Show Data for all Users....29
Compressed....29
Small Icons....30
Use Recycle Bin....30
Copy Linked Files....30
Automatically Copy New Archives to CDR....30
Only New/Modified Files....30
Filing....31
Automation Mix Tree Filing....31
Filing Hierarchy....31
Creating New Clients, Projects & Titles......31
Loading A Mix / Pass Tree....32
To select the Mix Tree....32
Desk Setups....33
System Filing....35
Desk Setup....35
I/O Config....35
GPI Config....35
Meter Designer....35
Snapshots....35
User Defaults....35
AES Config....36
Currently Loaded File....36
To select an IO Configuration, Snapshot or User Defaults
file....36
Linking Mixes to Mix Setups and System Files......36
To Link a System file to a Mix Setup....37
To link a Mix/Pass tree to a specific Mix Setup....37
Standard Filing Operations....38
Edit....38
Rename....38
Delete....38
Copy....38
Read Only....38
Force Desk Keep....39
Calibrate Faders (Analogue)....39
Flying Faders Preferences (Analogue)....39
Reset System......40
Exit Encore....40
Automation Menu
New ISS....41
Load Options......41
Restore Safety Snapshot....41
Modes....41
Links....41
Gangs....41
Label options....41
Trim (Analogue)......42
Safety Nets....43
Offline Editing....44
Copy Path Data....45
Erase Path Data....47
Merge Path Data....48
EDL Mix Conforming....49
Cutlist View....49
Ripple Mode....49
EDL View....50
Considerations for EDL files....50
Track....51
Event....51
To apply an EDL or Cutlist to the currently loaded automation....53
To apply an EDL or Cutlist to other automation....53
Mix Conforming....54
Move....54
Delete....54
Insert Stock....54
Automation Editing....56
Move....56
Delete....56
Copy....56
Conform Labels....56
Extract Path Data....57
Set Offset....58
Advance Automation....58
Retard Automation....58
Show Mix Statistics....59
Show Mix Pass Tree....59
Clear WavTrak Data....59
Reassign Active (Analogue)....59
UNDO Button (console surface)......60
Manual Keep....60
Timecode Running....60
Timecode Stopped....60
Auto Keep....60
Timecode Running....60
Timecode Stopped....60
Options Menu
Show Labels in Main Window Space......61
Disk Space Status Warning....62
Mix/Pass Tree Options....62
Background Colour....62
New Mix Name....62
Auto Recovery Options....62
Preferences....63
Automation....63
Keep Mode....63
Instant Start Automation....63
Show Mix Pass Tree (+/- key)....63
Initial Snapshot....63
Safety Stop....63
Layer / Bank changes....64
Collect Touch....64
Use Collect Touch Buffers....64
Go To Lock Master Touch Isolate On Entering....64
Master Touch Isolate Respects Safety Nets......64
Collect Touch Hard Write....64
Clear Scope/Buffers on Exit....65
Add Writing Controls To Scope When Entering......65
Glide Clears Scope....65
Popup Hold Options....65
Extended Collect Touch Options....65
On Master Touch Record....65
At a Specified Time....65
At The Last Stop Time....66
Always In Write....66
Brightness Controls (digital systems only)......66
Pan & Operating Levels....66
Fader Indication....66
Page Two Toggle Mode....66
Pan Logicator Arc....66
System Operating Level....67
Limit Filters to 12dB/Octave....67
Headroom (Use Lower Dynamics Ctrl Values)......67
Quad Madi Overload Settings....67
Solo Settings & Relay Control....68
Solo Mode....68
Fader Start Relays....68
GPI....68
Process Grouping....68
Status Panel....68
Relay Ganging....68
PEC Direct....68
Process Present Leds....69
Recorder Control....69
Partition Designer (DFC only)....69
Partitions....69
Global Path Change In Play....69
PreDub Zone....69
Default Partition....70
Meters Partitions....70
Tone & Talkback....70
Inhibit Talkback While Automation Playing....70
Sync Select....70
Vari-Speed Settings....71
Monitoring....71
Monitor DIM Value....71
PEC/Direct Bus/Tape....71
Monitor Calibration....71
Mono Pad....71
Follow Control Room Options....71
SEL Monitoring Control....72
MCS....72
References....72
Reference Source....72
External LTC....72
9 Pin & Internal....72
9 Pin & Video....72
LTC From Master Machine....72
LTC Reader Validation Period....72
LTC Dropout Limit....73
Reverse Play / Rollback....73
PEC-Direct Serial Track Arming....73
Master Machine Follows Automation....73
Generator Mutes Until Locked....73
Generate LTC When Stationery....73
Allow Recording to Timecode & Video Tracks......73
Restore Machine Settings On Detection....73
Wait for Slaves Before Issuing Play command.....73
Instant Chase On Add Machine To Group....74
Auto Stop Updates Automation....74
Automatically Restore Last Groups When Encore
Starts....74
Presets....74
Pre Roll Time....74
Post Roll Time....74
Rewind Limit....74
Fast Forward Limit....74
Roll Back Time....74
Shuttle Speeds....75
Ports....75
Panel....75
Single Button Record....75
FF & Rew only....75
Use Preroll When Locating....75
Enter Play After Locating....75
Swap Transport Keys....75
Use Encore Labels for Locate/Cycle Setup....75
Ports (88R only)....76
Metering....76
Centre Meter Panel....76
Meter Scale Type....77
Colour Options....77
Meter Scale Type....77
Enable WavTrak Locate Window Start Time....77
Display WavTrak in Bar Graph Area....77
Clear WavTrak Data....77
Control Sensitivity....77
Velocity Sensitivity....77
Layer Key Routing Delay....77
Fader Reset....78
Channel Range....78
Meter Legends....78
Link/Process Page (DFC only)....78
Aux Layout (for 36 Auxes)....78
Extended Prefs (Libra Live only)....79
Led On When Cut....79
Fader Input Metering....79
Upper Knob Lock....79
Aux LED On when CUT....79
Snapshot Touch Scope....79
Channel Strip New Layout....79
Aux Cut Ident....79
Alternative Aux Layout....79
Alternative SLS Button Layout....80
Use Banks....80
Launch AFU on Fader Touch....80
AFU follows PFL....80
Muting Studio Loudspeakers Enable....80
Mic Inputs to Work Mic/Live Relay....80
Strong Hidden Channel Indication....80
VCA Gang Mode....80
Logicator Manual Match Mode....80
Cut / Fader Mode Keys....80
Console Split at Fader Number....81
Fader Start Options....81
Momentary Signalling....81
Integrity Check....81
Manual Start/Stop....81
Fader Start Enable....81
GPI Options....81
Assignable Buttons (Libra Live only)......82
Assignable Buttons (DMC only)....83
Global Buttons....83
Link Suspend....83
Fader Reset....83
Aux 1-16....83
Local Buttons....83
PFL Small Fader....83
Solo Inhibit....83
Path Control Copy....83
Saving System Preferences....84
Timecode Options......85
Timecode Type....85
Local Zero....85
Display options....85
Timecode....85
Foot/Frame....86
FT/FR = Timecode....86
Film Format....86
Screen Options....86
Self Closing Dialogs....86
Reduce Information/Warning Screens....86
Logo Enabled....86
CPT Bar Enabled....86
Display Clock....86
Autohide Icon Menu....87
Large Dialogs....87
Enable Screensaver....87
Extended Wait Icons....87
Dual Monitor Options....87
Screen Colours....87
Transport Menu
Group Setup....89
To Add a machine to a Group....89
To Take a machine out of a Group....89
To Remove all machines from a Group....89
To Change the currently selected active Group......89
To configure an individual machine....90
Machine Properties....90
Machine Offset....90
Transport Options....90
Auto Offset....90
Track Arming....90
To Arm a Track....90
MCS Parameters....91
To Change the Machine Name....91
To Change a Parameter....91
Servo Parameter Definitions:....91
Servo Wait....91
Lock Acceleration....91
Hold Off Time....92
Start-up Time....92
Park Time....92
Servo Type....92
Slew Limit....92
Lock Correction....93
No Lock Wait....93
Servo Hold....93
Release Hold Off....93
Shuttle Stop....93
Unlace Time....93
Relace Time....94
Play Into Park Time....94
No Chase Stop....94
Stop Command....94
Stop Before Wind....94
Park Window....95
95
Edit Delay....95
EE Delay....95
Min Cue Speed....95
Max Cue Speed....95
Stop Count....95
Poll Timing....95
Show MCS Machine Status....96
Show MCS Group Status....96
Locate/Cycle Window....97
MCS Preferences....97
MCS Presets....97
Reload Last Used Groups....98
Lists Menu
Label List....99
To grab Timecode and create labels....99
Locate Labels....99
To Modify a Label....100
To Delete a Label....100
To Delete all Labels....100
Capture Timecode....100
To Capture Timecode....100
Path Names....101
Auto Increment....101
Auto Number....101
Default....101
Default All....101
Import / Export......101
Range....101
Fader Moves List....102
Mute List....102
To Browse the Event List....102
To change the Selection of Events displayed....103
To change the Paths listed....103
To Add to the Event List....103
To Delete from the Event List....104
To Modify Multiple Events....104
To Modify an Event Time....104
Nudge....104
Absolute....104
To modify an Event Value....105
To Modify a Single Event....105
To Create Labels from Events....105
Custom Event List....106
Gangs Menu
107
Display Gangs....107
Clear All Gangs....107
Coalesce All Gangs....107
Coalesce Selected....107
Clear Selected....107
Keep Master Moves....107
Clear After Coalescing....107
88R Options....108
Clear Links....108
Clear All Gangs & Links....108
Suspend Gangs....108
Suspend Links....108
Tools Menu
Diagnostics (Analogue)......109
Fader Direct... (Analogue)......109
Fader Direct....109
Channel Meter....109
Overdub....109
Mic / Line Rack Control....109
LS Monitor Settings (Analogue)......110
Reassign (Analogue)......110
Routing....112
Offline Routing Assistant (Digital consoles only)....112
Stem Mixer (88R only)....112
Stem Monitor (88R only)....113
Stem Naming Options....113
Routing Options....113
Star Command....115
Pro Tools ™ 115
MIDI over LAN (Local Area Network)......115
Ethernet MIDI....116
IP-MIDI Network conflicts....117
Pyramix....118
Recall (88R only)....119
To select a Channel....120
To select the Monitor section....120
Resetting to a Recall Store....120
To turn off sections that do not require resetting......121
Auto Recall....121
File Menu....123
Create New Recall Store....123
Open Recall Store....123
Open Recent Store....124
Search Recall Stores....124
Copy Store to Current Location....124
Save Recall Store As....124
Exit....124
View Menu....124
Channel Select Menu....125
Next and Previous....125
Set Path....125
Select Monitor....125
Select Score Panel....125
Activation Menu....125
Activate Auto Recall....125
Verify Recall Store....126
Activate Hold Recall....127
Deactivate Recall....127
Options Menu....128
Recall Setup....128
Setup User Desk....128
Studio Information....128
Desk Size....128
Accuracy....128
Scanning Range....128
Auto Recall....128
88R Standard Colour....128
Operations Menu....129
Store Whole Desk In Memory....129
Store Only This Channel....129
Map Channel....130
To copy the settings of a section from one Channel to
another....130
Help Menu....131
Stem / 2T Fader Mapping (Analogue)......132
AES Config (Digital)....132
Inputs....133
Outputs....133
Sync....134
Frequency....134
Priority Sync....134
Misc Options....134
Copy To All....134
Automotion (Digital)......136
Transferring Studio Configurations....136
Export a Studio Configuration....136
Select Drive page....136
Studio Configuration Page....137
Import a Studio Configuration to Offline Encore......137
A: Select Drive Page....137
B: Studio Configuration Page....137
Logic to Encore Conversions....137
Conversion of data from Logic to Encore format......138
Importing the new archive onto the Encore drive.....139
Using the imported Mix as a starting point for further automation....139
Automotion (Analogue)......141
Importing Flying Faders Mixes....141
Importing Flying Faders Recall....141
Exporting Mixes To Flying Faders....142
Exporting Recall To Flying Faders....142
Backup Manager....142
Copy Buffer (DFC only)......143
Defaults Manager (Digital)......143
Reset Wizard....144
Desk Edit (Digital)......145
Allocating Path Processing....146
Cut and Paste....148
Drag n Drop Processing....148
Changing Path Names....148
Changing Paths Mono / Stereo state....150
Desk Designer (Digital)......151
Banks....152
Pan Designators on Monitors (Tracks) and Groups.....152
To select the Speaker position individually....153
To automatically assign speaker positions......153
Custom Surround Macros....153
To edit an existing surround macro....154
Stem Setup with Desk Edit....154
To configure Stems individually....155
Solo Inhibit....156
Inhibit Allocation....156
Inhibit Automation....157
Monitor Folddowns (DFC only)....157
Predub Masters (Digital)....159
Desk Layout (DFC only)......162
EDL Editor....163
EQ & Dynamics (Digital)......164
I/O Config (Digital)....165
Making two mono ports act as a stereo pair....166
Clearing Settings....166
Delay....167
Dither....168
Relays....168
MCS Track Arming using 'virtual relays'......168
Port Grouping....169
GPI Configuration (General Purpose Interface)......170
Configuring GPI Relays....171
Configuring GPI Opto-Isolators....172
Console Status and Relays....172
Console Status and Opto-Isolators....173
Audio Follow Tally (AFT), (Libra Live only)......174
Quick Prefs....176
I/O Patching (Digital)......177
Inserts....178
Online / Offline Routing....179
Quick Patch....179
Machine Manager (Digital)......180
Meter Designer (DFC only)......183
To change individual meter options....185
To change the metering pick-off point....186
Stem Meters....186
Meter Maid (DFC)....188
To set Meter Designer Defaults....189
To set metering defaults for a path type....189
To set metering defaults for Stems....189
Mix Importer (Digital)....190
To Import a Pro Tools Mix Into Encore....190
Offset....190
Adding notes....191
To Import an Encore mix into Encore....191
Path Edit (Digital)....192
On-Line and Off-Line operation....192
Path Selection....192
Changing Signal Processing....192
Copy & Paste....193
Port Routing in Path Edit....194
Quick Patch (Digital)....194
Surround Manager (Digital)....195
Predefined Macros....195
Custom Macros....195
User Manager....196
Utilities....196
Floating Timecode....196
Format Disk....197
Timecode Presets....198
Text Pages....199
Snapshots....200
Snapshot Filing....200
Administrator....202
Utilities....202
MADI Diagnostics....202
SSP Diagnostics....202
User Manager....202
Start Control Panel....202
Start Explorer....202
Start Event Viewer....202
Start RAS Admin....202
Start Registry Editor....202
Shutdown....203
Shutdown The Machine....203
Shutdown & Restart Machine....203
Encore Emergency Disk......203
To Create an Emergency Disk....203
Create Backup....203
To Restore Encore Settings....204
To Restore Console Settings....204
Help Menu
Contents....205
Help Settings....205
PDF (Default)......205
User Defined....205
Information....205
Licence....205
Version....206
Contacts....206
Technical Support....206
System Info....206
Offline Encore
Registration and License Number....207
Inter-Console Compatibility....207
Familiarisation....207
Configuration....208
Pro Tools Conversion....208
Offline Automation....208
Flying Faders Conversion....208
Inter-Product Transparency....208
Installing Offline Encore: Minimum Installation
Requirements....208
Installation Instructions....209
Getting Started....213
Standard: 213
Broadcast:....213
Studio Configuration....214
What to do with Offline Encore....216
Automation Files....216
Configuration Files....217
File Structure....217
Automation and Configuration Files......217
File Management....218
Filing....218
Backup Manager....218
Offline Routing Assistant....219
Configure Menu....220
Configure Blocks....220
Arrange Blocks....220
Remove Current Block....220
Clear Current Block....220
Autoroute Current Block....220
Pre/Post....220
Zoom In / Zoom Out....220
Options Menu....221
Colours....221
Show Separators....221
Using Offline Encore Two....222
Uninstalling Encore Two....223
The Encore Shell....224
Appendix A: Default Security Settings
Administrators....225
Power Users....225
Users....226
Backup Operators....227
Special Groups....227
Appendix B: Terms & Conditions
End User Licence Agreement....229
Term....229
Ownership....229
Appendix C: Reboot Options
Flash Boot Operation....230
Assignments and Automation....230
Control Surface....231
Allocation and I/O....231
Force Boot....231
Upgrade Flash....231
Boot From Disk....232
Appendix D: Rebuilding The Mix Tree
Reforestation....233
Reforest....234
Partial Rebuild....234
Full Rebuild....234

Health & Safety Notice
For your own safety and for the protection of others please observe the following safety instructions:

- Read these instructions
• Heed all safety warnings - Do not use equipment near water
• Clean only with a dry cloth
• Do not install near heat sources
• Do not block ventilation openings - Protect the power cord
• Only use accessories specified by the manufacturer
• Unplug when unused for long periods of time
• Refer all servicing to qualified personnel only
Head Office:
AMS Neve
Billington Road
Burnley
Lancs
UK
BB11 5UB
+44 (0)1282 417 311
London Office
+44 (0) 207 432 3858
info@ams-neve.com
www.ams-neve.com
V5.3 / V5.4 Software
V5.4 Software requires multi-engine hardware support (USP processing cards) but in most operational respects is the same as V5.3.
Where there are differences between V5.3 and V5.4, the V5.4 features only are shown with a yellow background.
The rest of the Encore software works as has been previously documented.
As there are still only a few multi-engined systems in operation, most users of this manual can ignore all reference to V5.4 software.
NB:
For the purposes of this document and in all of the screen-shots shown where applicable, Encore has detected a 2-Engine system (a Master with a Slave), and shows two-engine options accordingly.
V6 Software
V6 software is identical in all aspects of operation to V5.3 and V5.4, it only involves changes to the system hardware and computer operating system.
This means a new improved PCI Link Adaptor card, which is compatible with modern PC motherboards.
This link adaptor is faster, and has capability for 12 links (rather than the previous 2).
The computer operating system needs to be Windows 7.
Conventions Used in this Manual
Background facts and information are shown in italics within a framed text box.
▶ An arrowhead bullet before text indicates you should perform this action.
All console button names are shown in BOLD CAPITALS.
All text referring to V5.4 software is shown with a mustard background.

AutEngX
This is part of the Automation system (contraction of Automation Engine X).
Previously, when Automation data was written and the timeline stopped, this data was stored on the SUN820-200 card (or Trancon cards) and then written to the console hard drive.
This could take up time as the full bandwidth of the communications was being used when transferring and writing this automation.
Using AutEngX, the data is held in the RAM of the PC and only written to disc at either user-defined intervals (every X passes) or when the user decides. This speeds up the response time of the console, and improves Save and Load times.
Automation Mode
This refers to the states of controls that are used to record and re-play control moves against timecode.
The two basic Automation Modes are RECORD and PLAY, and variations on these are used to perform different functions.
Controls can also be in ISOLATE mode which is used to exclude them from the automation system.
C/P/T/M
Abbreviation for Client / Project / Title / Mix, the standard filing hierarchy for Automation files.
Desk Setup
A Desk Setup is a file that contains the current configuration of a digital console.
The information stored as part of a Desk Setup is:
• The number of signal paths of each type (i.e. number of Channels, Tracks, Auxes, etc.)
- The signal processing allocated to each signal path and the current settings for processing parameters.
• The user names for signal paths.
• The internal routing between signal paths (e.g. which Channels are routed to which Tracks).
• The routing between signal paths and physical inputs and outputs (i.e. I/O patching).
• The assignment of signal paths to the console surface.
• The configuration of the PreDubs.
• The configuration of the Film Stems (i.e. which Tracks in which Stems).
• Which paths are inhibited from Solo, the automation system, and/or being allocated.
• Pan designation of Tracks and mono Groups.
• The current configuration of Gangs and Links.
Encore Two
Encore Two is used in conjunction with the console surface to provide functions for configuring and setting up the console and automating the console.
Configuration functions include setting the tone (slate) frequency and volume, selecting the internal sample rate, deciding how the solo system operates and so on.
Console setup functions include rapid port routing (similar to using a patch bay only much faster), setting how many paths of each type are to be used, applying the same signal processing functions to multiple paths, etc.
Encore provides management of automation data and automation functions such as labelling user selected timecode points, mix conforming, and event list editing.
Events
Events are changes to control settings that are recorded against timecode by the automation system.
They are recorded in timecode order to make the Event List. When a Mix/Pass is played back, it is the data in these Event Lists that is used to automate controls.
Function Key
The Function Keys are the row of keys at the top of the Encore keyboard that are marked F1 to F12, and they act as shortcuts to various functions and menus within EncorePlus.
A table of these shortcuts is shown in the Using Encore Two chapter.
Glide
Glide is an automation function.
This is when a continuously variable control (fader, Logicator controlling frequency, etc.) moves or is moved smoothly to match back to the Play Pass.
There are three types of Glide:
- Manual Glide: This is when the GLIDE key for a control is pressed while the control is recording automation. The control matches back to the play pass using the Manual Glide time.
- Auto Glide: This is when a control matches back to the play pass automatically when it is released. The Auto Glide time is used.
- Manual Match: This is when the GLIDE key is pressed while a control that is recording automation is being touched. The alpha associated with the control will display an arrow indicating the direction to move the control to match to the play pass. The control will drop out of record when the play pass position is matched. If the control is released before it is matched, it will remain in position waiting to be matched. If the play pass goes through the control position then the control will return to play back. If the transport is stopped before the control is matched then the control will drop out of record and snap back, the same as any control in record when transport is stopped.
Initial Snapshot (ISS)
The Initial Snapshot (ISS) list contains the initial state of all controls which are not in Isolate when the system is put into Play or which are taken out of Isolate while the system is in Play.
There is also an option in Automation Preferences (First Mode Change Updates ISS) that will force the Initial Snapshot to be updated with the current setting for a control when it is taken out of Isolate for the first time.
The Initial Snapshot settings are stored as automation events at the beginning of a Mix/Pass.
MIOS
Acronym for Modular Input / Output System.
Each MIOS rack can consist of up to 6 (in total) of the following modules in any configuration:
• Mic/Line (4 Mic A, 4 Mic B and 4 Line Input)
• Input (16 Line Inputs)
• Output (16 Line Outputs)
• AES (8 Inputs & 8 Outputs)
The audio from the rack is converted into Madi for the Quad-Madi II card.
Each rack has a headphone socket for monitoring Inputs & Outputs and 2 stereo monitor outputs (as L & R XLRs).
Mix/Pass Tree
A graphical representation of the current sequence of Mixes and Passes. Any Mix/Pass can be selected from the Mix/Pass Tree to be the Play Pass.
Pan Designators
A pan designator is used to determine which portion of a panned signal will be received by a Track (bus) or Group.
For example:
Channel 1 is routed to Track 1, Track 2 and some other destinations. Track 1 is pan designated as Mono (i.e. true mono) and Track 2 is pan designated as Front Left.
Panning of Channel 1 will not affect Track 1 because it is a true mono destination. However, Track 2 will only receive the portion of Channel 1 for Front Left, according to the panning on Channel 1.
| Mono | This is a normal mono path. The signal received Track or Group will not be affected by surround panning. A Track designated as Mono would not normally be used in a Film Stem. |
| Centre Mono | This causes a Track to act as a normal mono routing destination (i.e. Unaffected by surround panning), but is routed to the Centre film monitor when used in a stem.If the Centre Mono designator is used in Surround Sound Manager then the Tracks it is applied to are auto-routed to the Centre film monitor.This can be applied to Groups, but only has the same effect as normal Mono. |
| Left & Right | These are normal stereo left leg and right leg routing destinations. The signal received by a Track or Group is only affected by left/right panning (i.e. front/back, surround left/right and divergence controls have no effect). These should be used when Stereo is selected for Film paths in the Desk Edit Config page. |
| Front Centre, Front Left & Front Right | These are the surround destinations corresponding to the front speakers.Front Centre is often fed directly by dialogue to 'lock' dialogue to the screen. |
| Surround Mono | This panning destination that has two different uses. In LCRS format, it is the panning destination for rear surround.In wider formats (5.1 and 7.1) it is the destination corresponding to the sub-woofer. |
| Surround Left & Surround Right | These are the panning destinations for the rear left and right speakers.These are normally only used with the wide formats (5.1 and 7.1). |
| Surround Centre | This is the rear centre destination (i.e. opposite front centre) used by the 6.1 format (also known as Surround EX). |
| Inner Left & Inner Right | These are panning destinations that sit between Front Left/Front Centre and Front Right/Front Centre to provide a smoother image across the front. These are normally only used with 7.1 format. |
Play Pass

The Play Pass is the Mix/Pass that is being used to play back a previous recording of automation moves (events).
The current Play Pass number is displayed in green on the Encore screen.
Port Routing
This refers to switching on an electronic connection between a physical input or output of the console and a console signal path (e.g. from a microphone to a Channel).
This is the electronic equivalent of using a patchbay on an analogue console.
Also known as digital patching, digital port routing, or virtual patching.
Processing Element
Digital console have a certain amount of processing power available.
This depends on the number of signal processing cards in the main system rack. Each signal path uses processing power and adding audio processing to a path, such as EQ or dynamics, uses more processing power. Anything that applies changes to a signal in a path uses processing - this even includes the fader.
A processing element is one of the individual items of audio processing that can be assigned to or removed from a signal path (e.g. fader, compressor, three band equaliser, etc.).
The processing elements are allocated to the signal paths in advance of being used. This reserves the processing power and prevents resources from being overloaded.
The information about which processing elements are assigned to each path is stored as part of the Desk Setup.
Quad-Madi II card
Each Quad-Madi II card has 4 pairs of madi ports, each pair consisting of one Transmit port (Tx) and one Receive port (Rx).
These pairs of ports are usually accessed from the back of the SPS rack (or they can be accessed from the front of the card itself (the upper port in each pair is Tx).
QuadMadi cards bring madi signals into the system and place the data on the backplane where the XSP cards can access, process, and then return this information.
QMII cards are available in three versions, depending on the amount of assignable delay required (none, 5secs total or 10secs total).
The card is also responsible for:
- Assigning Delay to a signal, either on Input or Output.
- Generating most (if not all) of the meter data seen on the meter bridge and fader beds.
• Dither on Outputs.
• The system timing, ensuring all of the XSP processing cards run in sync.
Quantisation
Quantisation is an effect of converting analogue signals to digital signals.
For instance, a pure sine wave is sampled at the system sample rate (usually 44.1kHz or 48kHz), creating a series of stepped values (the level at each sample point along the wave form) which produce a close approximation of the sine wave.
However, if a wave is at a very low level, the smallest step size (or quanta) can become significant so that the approximation of the wave is inaccurate. This is when quantisation can distort a signal.
A solution to this is to dither the signal on output and this has the apparent effect of smoothing the stepped values.
Radio Button

Used to select only one option from a limited list of options.
Only one radio button in a set can be selected at a time.
Selecting a radio button automatically de-selects the previously selected radio button.
Record Pass

A Record Pass is made when the transport is in play and changes to control values are recorded against timecode.
At least one new automation event must be created by a control in a record mode.
A new Mix/Pass number is created and displayed in red on the Encore screen.
Routing
This refers to making electronic connections between the different signal paths within the console. Digital consoles provide routing control that is tailored for mixing down to surround sound formats in film post-production.
In addition, 'standard' routing control is provided to give the console maximum flexibility and allow for non-post production applications.
Safety Snapshot
A record of the settings of all controls that can be automated, regardless of the automation mode the control is in.
A Safety Snapshot is taken when New Mix is executed and when the system is put into Play. For a New Mix, the Safety Snapshot is stored with Mix/Pass 1.0. When the system is put into Play, the Safety Snapshot is taken but it is not stored unless the Mix/Pass is saved after the transport has been stopped.
The Safety Snapshot is stored with a Mix/Pass but separately from the automation event data.
Star Command
This is the AMS Neve name for controlling Digital Audio Workstations from the console (for eg, Pro Tools, Pyramid etc).
Sync Source
This is the source for the word clock synchronisation signal that is used to ensure that samples of digital audio are sent and received simultaneously by digital audio devices that are connected together.
The Sync Source is selected in the Sync Select page of Preferences.
Timecode
The source for timecode can be a tape machine (digital or analogue) or a pulse generator (video source).
The Timecode source is selected in the Automation page of Preferences, and the Timecode format is set in Timecode Options.
When Encore is receiving good valid timecode, the on-screen display will run in green.

If the display were to be running unevenly in red, it indicates that either:
• The received timecode is not valid;
- The Encore MCS settings are not configured correctly (for example, Sync, Frame-rate, Master Machine, Reference Source etc), or
- You have not logged onto Automation by creating a Client/Project/Title/Mix.

Virgin Territory
This is an expression used to describe parts of a Mix/Pass (or a series of Mix/Passes) for which there is no return value for a control (i.e. the value it snaps back to when timecode stops).
The automation engine takes an Initial Snapshot of all controls that can be automated. The ISS value for each control is marked to indicate whether TO END has been used on each control.
If To End has not been used, then the control has Virgin Territory after the last recorded control move. If To End has been used while the control was recording automation (i.e. the control was in 'hard record'), then the control has no Virgin Territory.
The last recorded move is used as the return value, so that when further automation is recorded the control will snap back to the return value when timecode stops.
WavTrak
This is the wave-form information of audio that can be seen on systems with a TFT meter bridge.
Word Clock
This synchronisation signal is used by digital audio equipment.
Word clock ensures that the digital audio itself is synchronised so that artifacts such as distortion, crackle, and dropouts do not occur.
For instance, when a console records to a digital multi-track tape machine then both must be synchronised to send and receive each digital sample of audio simultaneously.
If they were not synchronised (out of phase) then the tape machine would record the samples incorrectly, so that the recording would not match the output from the console.
The rate at which word clock is running sets the sample rate (e.g. 44.1kHz) for the devices reading the word clock.
This should not be confused with timecode (or timeline) which is used to keep devices lined up at the same time position.
The Word Clock rate and Sync Source are selected in the Sync Select page of Preferences.

Encore Two is the automation and configuration program that runs on AMS-Neve consoles:
- Libra Live
- DMC
- MMC
- Libra Post
• 88D - 88R & 88RS
- DFC II / Gemini / PS1
The majority of Encore is common to all products, but there are certain differences between some products.
These are explained where relevant.
The Encore program can be accessed by either:
- Opening C:/Encore/EncorePlus.exe;
- Go to Start Menu / All Programs / AMS Neve / Encore Two / Encore
- Click the Encore logo on the desktop
In all instances (Except Libra Live consoles), the main Encore screen will open.

Menu bar
Contains the drop down menu options (these are described in detail in the following chapters).
Logo
The logo can be removed to create more working space (display more labels).
Icon bar
The Icons are used to access to commonly used functions from the drop down menus.
There are two pages of icons, toggled with the arrow button.
Label List
This shows the current set of labelled timecodes.
Safety Nets Status
This shows whether or not the Safety Nets are active. It shows the Safety Net start and end points when active, and a 'countdown wipe' when timecode approaches the Safety Net start or end point.
When the Safety Net is active (i.e. the automation system is safe), this is indicated by the word 'Safety' appearing in red, and the two safety net boundaries displayed on the status bar at the bottom of the screen.
Free RAM and Disk Usage
Displays the current level of free RAM in the system.
The bargraph gives a rough indication of how much hard disk space has been used.
Glide Times
Allows users to adjust Glide rates for Match and Auto Match modes.
Current Desk Setup and I/O Config
This shows the names of the currently loaded Desk Setup and I/O Configuration files.
Current Play Pass and Record Pass
The green numbers show the current Play Pass that will be used for play back when timecode is running.
The Record Pass is only shown when a Record Pass is being made or when Manual Keep is active and the Record Pass has not been kept.
Timecode
Shows the current timecode (running or stopped).
Transport Control and Status Indication
Used to control and show the current status of the primary transport controller.
The icons are functionally identical to the matching keys on the console surface.
The icons change to a lighter colour (so that they seem to illuminate) to show the transport status.
Timecode Format
The current type of Timecode that is being received by the console.
Sample Rate
The current sample rate being used by the system (digital systems only).
Safety Stop indicator
This is an indicator of what happens to automation on STOP with regard to previously written moves (see Safety Stop).
Sync Source
This indicates whether the current source of the synchronisation timing signal is internal or external.
Keep Mode
This shows whether the Keep Mode for new Record Passes is Auto or Manual.
If it is Auto then a new Record Pass will automatically be saved to the Mix/Pass Tree when timecode stops.
If it is Manual then a new Record Pass will only be saved when timecode is stopped and the KEEP MIX key is pressed.
Offset
This shows the current timecode offset used by the automation system.
This is the difference between the timecode in use by a transport device and the timecodes at which dynamic events will be played back and/or recorded.
Icons
The icons are used for quick access to commonly used items on the drop down menus.
There are two 'pages' of icons which are toggled by clicking the Page icon.
One page of icons is oriented to automation functions and the other page is oriented to configuration options.

Timecode Editing
Many of the Encore functions have timecode fields.
These can be set using the Label List (see the Lists Menu chapter) and/or adjusted manually, as follows.
To change a Timecode manually, click on the Timecode.
The cursor will change to a plus or minus sign according to whether the cursor is over the top or bottom half of a digit.
Either:
▶ Click on a digit to increment or decrement it,
▶ Type in an absolute timecode value, or
▶ Press Z on the keyboard to reset to 00:00:00:00
Alternatively, press the A, B, C, D, E or F key on the Encore keyboard to use a Timecode Preset (the timecode will be set to the value from the selected preset).
Notes on Timecode Display
Encore can derive it's timecode and sync source from a number of places – via an XLR, down a 9 pin, with Sync being provided by AES / Video / Internal etc.
As each method requires different settings to be adjusted in Encore, the colour of the timecode display itself is used to indicate whether the system is receiving the valid timecode that it requires to write the automation events against.
Regardless of how the timecode signal is input to the system, you are required to log onto the Automation and create a Client/Title/Project/Mix for the timecode to be recognised. If you fail to do this, the system will never receive valid timecode.
Running correctly: If Encore is configured correctly, whenever you press PLAY and Encore receives timecode, it will run on screen in green. This is how the system will display in normal operation. Unless the display is running in green, it is not possible to write automation.
Running incorrectly: If Encore is not configured correctly, when you press PLAY, the on-screen display will start running, but continue to be displayed in red and run in an uneven manner as though it cannot read every frame.
To fix this, check the MCS settings, sync rate, sync source, etc.


Regardless of where the timecode is sourced from, whenever you press STOP, the static time will be displayed in red.
Timecode Display With Offset
If you have applied an Offset value to the timecode (in Timecode Options), then the user can define the Running and Stopped colours of the timecode display.
In this way, it is possible to see at a glance whether an offset is applied.
All of these colour conventions apply to the large timecode display as well.

Keyboard Shortcuts
The following list shows which keys can be used in place of pointing and clicking with the mouse:
| Key | Action |
| f2 | Mute List |
| f3 | Fader Moves List |
| f4 | Custom Event List |
| f5 | Group Setup (MCS |
| Ctrl / f5 | MCS Preferences |
| f6 | Show Mix/Pass Tree |
| f7 | Filing |
| f8 | Preferences |
| f9 | Locate using MCS Labels |
| f10 | Timecode Options |
| Esc | Closes the active dialogue box. Equal to clicking the Cancel button. |
| Alt / Backspace | Undo changes to data in a dialogue box |
| Tab | Jump between fields in a dialogue box |
| A, B, C, D, E or F | Set currently selected Timecode field to value held in the Timecode Preset for the key pressed |
| Z | Set currently selected Timecode field to zero |
| Ctrl / K | Capture current Timecode and store it in Preset A |
| Ctrl / N | New Mix Tree |
| Ctrl / S | Toggle the Safety Nets on and off |
| Ctrl / I | Set Safety Net in point (i.e. start time) to the current timecode and switch on the Safety Net.This also sets the Safety Net end time to the start time plus two hours. |
| Ctrl / O | Set Safety Net out point (i.e. end time) to the current timecode and switch on the Safety Net. |
| Spacebar | Swaps the Encore screen between displaying the Label List or the Mix Tree display.You must be logged onto Automation to do this. |

New Mix

If Automation is switched off, it opens the New Mix dialogue, asking if you want to start automating.
▶ Click No (which will abort the login), or Yes to be asked to confirm creating a new mix tree.

▶ Click Yes to continue to create a new Mix tree with default names. (Click No to be taken to the filing page below where you can set different names other than Default).
You will then be taken to the Name page, where you can name the Client / Project / Title / Mix:
'Client / Title / Project / Mix' is a filing convention of folders and subfolders where a Client can have many Projects, a Project can have many Titles, and so on. Throughout this manual, the abbreviation 'C/P/T/M' will be used.

By default, the C/P/T/M will all be called Default.
▶ Click OK to create the new mix using the default names, or type in new names and click OK.
If you are already logged onto Automation, you will be presented with the following options:

Clear the Current Tree
Discards the currently loaded automation title and creates a new tree from scratch.
Insert Into Current Tree
This allows a second tree to exist at the same time, making it possible to Cut, Copy & Paste automation between two different titles.
Open Mix

This has the same effect as clicking on the Filing icon, and opens a dialogue for you to select a Mix to load.
Save Mix As

If you have created a new CPTM with all the Default filenames (as shown above), this allows you to rename the Client / Project / Title / Mix with your own names.
▶ Click either the Client / Title / Project or Mix buttons to show those already existing, or type in new names and click OK.
Automation Mode
This is used to turn the automation system on and off.
When automation is off, all the automation functions in Encore are unavailable, plus the timecode display will not run in green.
To start the Automation System, click New Mix in the drop down File Menu, or click the Automate icon.

▶ If you click the Automate icon, a dialogue box will be displayed to select how to start up the Automation System.
▶ Click the radio button for the required option, and click OK.
Reload Last Mix
This reloads the most recently loaded Mix/Pass.
The Restore Modes dialogue box will be displayed.
Restore Safety Snapshot
This is a static snapshot of the state of all automatable controls as they were at the end of the selected pass.
Restore Modes
If ticked, then the state of the automation modes for all controls will be reloaded.
If unticked, then all controls will be brought back in Isolate.
Restore Gangs
Reloads any gang structures in the selected pass.
If unticked, the current state of any gang structures remain unchanged.
Restore Links
Reloads any Link structures in the selected pass.
If unticked, the state of any current link structures remain unchanged.

Label Options
Encore may already have a list of labels in place when loading a pass that also has a label list associated with it.
These four options inform Encore how to treat both lists:
- Load: Loads labels from the selected pass and discards the current list.
- Keep: Keeps the current labels and ignores those associated with the selected pass.
- Clear: Clears current labels and ignores those associated with the selected pass.
- Merge: Adds both labels to form one list.
Renumber List On Merge
Only has a function when two label lists are merged together, and ensures that both lists are merged, renumbered and time-ordered to form one list.
Display Options For Each Load
If this is ticked, the above Options screen will be displayed each time you load a pass enabling you to change the options. If unticked, the pass will be loaded taking into account the previous state of these settings.
▶ Click the required check boxes, and click OK, and the mix and Mix/Pass Tree will be loaded.
When this is complete, a confirmation dialogue box will be displayed.
▶ Click OK.

Select A Mix From The Filing Page
Opens the Filing page, so you can select any mix.
Create a New Mix
Opens the Filing page, so you can create a new mix.
Recover Automation on Desk
When a Mix/Pass is recorded, the automation data is initially stored in the computer automation buffer.
When timecode stops then this is saved to the current Mix/Pass Tree automatically if the Keep Mode is set to Auto.
If the Keep Mode is set to Manual then it is possible that an un-saved automation pass is stored in the automation buffer.
This option is used to save that pass as a new Mix/Pass that is added to the most recently loaded Mix/Pass Tree.
The Mix/Pass is added to the tree at the last loaded Mix/Pass available.
The mix and Mix/Pass Tree will be loaded. When this is complete, a dialogue box will be displayed.
▶ Click OK.
The other two options on this screen are self explanatory.
To Stop the Automation System
▶ Click the ticked Automation Mode option in the drop down File Menu or click the Automate icon.
The automation system will be switched off, and the Client Information area (where the current C/P/T/M is displayed) will change colour from light blue to grey.
The Label List will be cleared and no Play Pass number will be displayed.

Backup Manager

Backup Manager is used to copy setup information, system files and automation data to and from removable media for safe keeping.
It is also used to restore information from previously created archives, and uses archive folders to store information.
These can be on the local hard disk or removable media (floppy disk, CD, DVD, USB drive or zip disk), or on any other network location.
Floppy disks have a relatively low capacity so are only used for mix setups, system files and the Encore Emergency Disc.
The screen is split into two: the upper half is the Encore drive; the lower half is the destination where you wish to backup the information to.
Encore Window

Perform backup to Destination drive.

Send to Recycle Bin (only available for Automation files).

Mix Tree (only available when backing up Automation files)

Change Source drive.

Include this file / all files in this fold to be backed up.

Exclude this file / all files in this fold to be backed up.

Verifies Automation for missing files.
Destination Window

Perform Restore operation to Source drive.

Create a New Archive on the destination drive.

Send to Recycle Bin.

Include this file / all files in this fold to be restored.

Exclude this file / all files in this fold to be restored.

Verifies Automation for missing files.

Backs up archives to CDR
Encore data is shown in the top half of the screen; the current archives are shown in the bottom.
The data structure within an archive is the same as the data structure for Encore.
▶ Select another destination drive using the pulldown menu above the lower screen.


To Create a new Archive
▶ Click the Create Archive icon.
The New Archive Name dialogue box will be displayed with a default name as the current date and time.
▶ Either type a new name (then click OK), or click OK to use the default name.
To change the drive used for Archives
▶ Click the drop down arrow for the Archive directory box. Any existing archives will be shown in the archive window.
To Backup Files
▶ Click on the required item/s in the Encore data window.
▶ Click the + signs to expand sub-sets of data (click the Tick icon to include these files; a green tick will be displayed next to the filename, left).
▶ Click on the target archive in the lower window and click the Backup button:
If the amount selected is greater than the free space available on the destination media, then the Amount Selected display on the right hand side of the screen will show in red as a warning, and warning text will be displayed at the bottom of the Backup Manager screen.
Insufficient space to backup selected files! You may need several disks.
▶ To ensure all linked files will be copied, make sure the Copy Linked Files option is checked (click on Options on the title bar to set this).
This means that when a Mix Setup is selected, then all the linked system files will also be copied.
To copy only new or modified files
▶ Make sure the Only backup new/modified files option is checked (click on Options on the title bar to set this).
When the backup is executed, files will be compared with the existing files in the archive. Only new files or files that have changed since the last backup will be backed up.


To compress a backup, make sure the Compressed Backup option is checked (click on Options on the title bar to set this).
Compressing the backup allows up to (for example) 800Mb of data to fit on a single ZIP disk, although this will vary according to the complexity of the data.
To select individual Mix/Passes from the Mix Tree
All Mix/Passes are selected by default.
▶ Click the name of the required Mix Tree in the Encore files window so a green tick is placed against the desired file.
▶ Click the Tree icon on the upper icon bar.
A flyout menu will be displayed.
The Select All option selects the entire Mix Tree for backup.
The Exclude From Backup option prevents the entire Mix Tree from being backed up.
▶ Click Select From Tree.
The Select Passes screen will be displayed.
▶ Click the required Mix Pass in the Tree so it is highlighted green, or use Shift/Click to select several Mix Passes.
(The Mix Tree can be edited at this point by clicking the <<Show Edit button.
This will display the editing buttons which work in the same way as in the Prune Tree dialogue box.
See Editing the Mix/Pass Tree for details.)
▶ When the selection of Mix/Passes has been made, click the OK button.
The Mix Tree icon will change to show that only part of the Mix Tree is selected.
To copy live data to an archive
▶ Click on the required item in the Encore data window.
▶ Click the + signs to expand sub-sets of data, then press the Tick button to include these files, so a green tick is placed against each file.
▶ Click on the target archive in the bottom window.
▶ Click the Backup button.
A confirmation dialogue box will be displayed.
▶ Click Yes.
The data will be copied.
If a sub-set of data was selected then the correct hierarchy will be automatically used in the archive.
To make sure linked files will be copied
▶ Make sure the Copy Linked Files check box is checked in Options.
This means that when automation files are selected, then the associated Mix Setup will also be selected and copied, plus any System files linked to that Mix Setup.
To restore data from an archive
▶ Click on the required item in the Archive data window.
▶ Click the + signs to expand Archives and sub-sets of data.

▶ Click the Restore button.
A confirmation dialogue box will be displayed.
▶ Click Yes, and the data will be restored to Encore.
To delete an Archive
▶ Click the required Archive name and then tick it to remove a whole archive).

▶ Click the Remove Archive button.
A confirmation dialogue box will be displayed.
▶ Click Yes.
The selected item will be sent to the Recycle Bin, where it can be restored if needed.
Options

▶ Click on the Options button on the window's title bar to see a small fly-out menu.
The state of the ticks against each option is remembered on each entry/exit.
Show Data for all Users
If you are logged on as the Administrator, this toggles the option between showing only files created by the Administrator, or all available files.
If you are logged on as a User, this toggles between showing those files created by that User, and any other files that the user may have been given access to by other users.
Compressed
Allows greater amounts of data to be stored on the destination media.
Small Icons
Changes the size of the icons on screen.
Use Recycle Bin
Sends any deleted files to the Windows Recycle bin so they may be recovered later if needed.
NB: This option does not apply to files on Zip, CD or USB drives.
Copy Linked Files
With this option ticked, all of the file links that the user may have set up can be used to add those files into the scope of data to be copied.
For example, backing up an Automation file will also backup the Mix Setup associated with it, which in turn will also backup any System files that may be linked to it.
Automatically Copy New Archives to CDR
With this option ticked, any newly created archives that have not yet been backed up will be burned to the CDR.
Only New/Modified Files
With this ticked, the backup will only contain Mix Setups / Mix Passes / System Files that have been modified since the last Backup operation (also called a Rolling Backup).
NB: Use this option with caution!
Even if you select to archive ALL mix setups/automation on the Encore drive, with this option ticked, only those files that have changed since the last backup operation will be archived.

Filing

The Filing screen is used to organise automation and configuration data that has been saved to the Encore hard disk.
Automation Mix Tree Filing
The files that contain actual automation data are Mix/Passes within Mix/Pass Trees.
These are saved according to the current User ID within an organised hierarchy.
The User is determined by who is logged onto the Encore computer.
If the Administrator is logged on, the User button can be used to select the data for any user names in the system.
This allows the Administrator to maintain the Encore filing system.
Filing Hierarchy
The top level of Mix filing is the User.
Each User can have any number of Clients, and each Client can have any number of Projects.
The Project level can be used as the overall level for music albums or films and other post-production projects.
A Project can have any number of Titles (e.g. individual music tracks, or episodes from a television series) and the Mix/Pass Trees are stored within the Titles.
Note that the Clients are under a top level called 'Automation Data' that is transparent (ie not shown) in the Filing page.
This is done so that it is convenient to make a backup of all automation data for a particular user.
Creating New Clients, Projects & Titles
When a new Client is created then a new Project and Title must also be created, otherwise the Default Project and Default Title will be used.
These can, however, be renamed later if required.
This can be done at any time, but usually when starting a new Mix Tree.
▶ Click the Client button.
The Client name will be cleared and the text cursor will flash in the Client name box.
▶ Type in the new name as required.
The Auto-Fill feature will attempt to match anything typed with existing names.
Carry on typing to ignore the autofill matches, or press Delete to remove the text.
▶ Click the New button or press the Tab button.
The text cursor will move to the Project box.
There will be no Projects listed for the new Client.
Follow the above process for new Projects and Titles.

Loading A Mix / Pass Tree
To select a Mix Tree to Load, either:
▶ Select Filing from the File Menu,
▶ Press F7 on the Encore keyboard, or
▶ Click on the Filing icon.
The Filing dialogue box will be displayed.
To select the Mix Tree

Using Auto-Fill
If a Client, Project, Title or Mix Tree name is typed the auto-fill system will attempt to match the letters typed in to existing names.
If one is found then the box will automatically display the remainder of the name.
This can either be accepted by pressing tab to jump to the next filing level (e.g. From Project to Title), or continue typing until the correct name is selected.
If a name that does not exist is typed in, then it will be created and added to the auto-fill text library.
▶ Click the Client button.
The list box for automation data and a List Of Clients will be shown.
▶ Double click the required Client name or type the required Client name in the box next to the Client button.
The list box for automation data will display a List Of Projects for that Client.
▶ Double click the required Project name or type the required Project name in the box next to the Project button.
The list box for automation data will display a List Of Titles for that Project.
▶ Double click the required Title name or type the required Title name in the box next to the Title button.
The list box for automation data will display a List Of Mixes for that Title.
▶ Click the required Mix or type in the Mix name in the box next to the Mix button.
▶ Click Load.
The linked Desk Setup will be highlighted in the Desk Setups list.
If the Desk Setup has linked System files, then these will be shown in the relevant boxes.
▶ To change the Configuration files loaded with a Mix configuration files loaded with a Mix, click the Mix Only radio button.
▶ Select and Load the required Desk Setup, IO Configuration, Snapshot and User Default files (if required).
▶ Click the Mix name in the List Of Mixes again (this is to ensure that the red rectangle is shown around the Mixes).
▶ When all the information is correct, click the Load button.

If a Mix Tree is already loaded then the Loading Mix Tree dialogue box will be displayed.
This has two options:
- Clear The Current Tree will remove the current Mix Tree from the active automation system before the selected Tree is loaded.
- Insert Into Current Tree will combine the selected Mix Tree with the currently loaded Mix Tree.
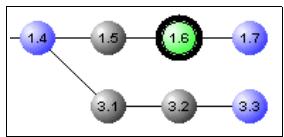
▶ Click the required option, click Load and the Mix Tree will be displayed.
▶ Click the required Mix/Pass number so a black ring is shown around the selected Mix/Pass and click the Load Revision button.

The Restoring Modes dialogue box will be displayed.
▶ Click the check boxes as required, and click OK.
The Mix will load and progress information will be shown on the screen.
Desk Setups
The Desk Setup contains all the information relating to the configuration of each path, including:
• The processing allocated
• The order of processing
- The settings for each processing element at the time the Desk Setup was saved
- Path names
- Routing to and from other paths
• Input and/or output routing (patching)
- The assignment of paths to the console surface.

The Filing page allows three locations for Mix Setups to be saved to:
- User: Contains all the setups for the currently logged-on user.
- Studio: If you wish the desk boot with a particular default Mix Setup, then they must be in this folder. Setups in this folder are accessible by all users.
• Tech: Maintenance and non-engineer Mix Setups.

V5.4 Software
V5.3 Mix Setups can be loaded onto a V5.4 system, but will be converted into the newer format as it is loaded.
Once it has been converted, it is not possible to load this V5.4 format Mix Setup on a v5.3 system.
V5.4 Mix Setups created in V5.4 are only compatible with other V5.4 systems.
V5.3 Automation can be loaded onto a V5.4 system for Playback purposes only.
However, if you then write automated moves and add to the Mix Tree, the automation will be written in V5.4 format and it will not be possible to take this automation back to a V5.3 system.
It is advisable that before converting any V5.3 Mix Setups / Automation to V5.4, that Backup Manager is used to make copies of all critical data as a safety precaution.
Other System files created in V5.4 software are not backwards-compatible to V5.3 software for the following types:
- I/O Config
- AES Config
- Machine Manager
- I/O Designer
There are NO compatibility issues transferring system files between V5.3 and V5.4 for:
• Copy Buffer (DFC only)
• Meter Designs (DFC only)
- User Defaults

System Filing
There are six types of configuration file used by Encore:
Desk Setup
This contains the number of type of path and thereby dictates the type of task that the console will be used for.
The Desk Setup contains all the information relating to the configuration of each path, including the processing allocated, the order of processing, the settings for each processing element at the time the Desk Setup was saved, path names, routing to and from other paths, input and/or output routing (patching) and the assignment of paths to the console surface.
The main utility for changing the base Desk Setup is Desk Edit.
I/O Config
This contains the configuration of the input and output ports that are available to the system, including port names, mono/stereo port types, SRC configuration, delay available on a port, dither on a port and if a relay is associated with a port.
The main utility for changing the IO Configuration is I/O Config.
GPI Config
This is the GPI (General Purpose Interface) file which contains the configuration of the relays and opto-isolators.
The utility for changing the GPI configuration is I/O Config.
Meter Designer
Allows you to custom-design the meterbridge into a variety of configurations.
The utility for changing this is Meter Designer.
DFC consoles only.
Snapshots
Snapshots are used to save control settings that can be recalled at a later time.
A Snapshots file can contain any number of Snapshots. If Snapshots are recalled when a Mix/Pass is being made then the values will be written to controls that are in Record.
The contents of a Snapshots file can be managed using the Snapshot utility.
User Defaults
The User Defaults are used to change the values that controls have by default (i.e. Line-up settings).
A file of User Defaults is changed using the Defaults Manager.
AES Config
If there are any AMS-Neve AES 960 boxes connected via madi, this file allows you to set parameters from Encore without having to set them from the unit itself.
These settings can then be saved and recalled, and linked to specific mix setups using the AES Config programme.
Currently Loaded File

Above the selection box for each file type is a black rectangle. This shows the currently loaded file.
This can be blank for I/O Configurations, Snapshots and User Defaults, indicating that no file of the relevant type is currently loaded.
▶ To select a Desk Setup to work with (if required, click the Show All Desk Setups check box.
This will display a list of all Mix Setups, not just those of the current User).
▶ Click the required file name in the Desk Setup list.
The red rectangle will highlight the Desk Setup list and the Filing buttons will now operate on the selected Desk Setup.
If the Desk Setup is not loaded, but the Edit button is used to launch Desk Edit, the file will be loaded when it is saved in the Desk Edit.
To select an IO Configuration, Snapshot or User Defaults file
▶ Click the selection box for the required IO Configuration, Snapshot or User Defaults file.
The red rectangle will jump to the selected box.
▶ Click the drop-down arrow next to the box, and a list of available files will be shown.
▶ Click the required file.
The filing buttons will now operate on the selected Desk Setup.
If the file is not Loaded, but the Edit button is used to edit the file, the file will be loaded when it is saved in the relevant utility.
Linking Mixes to Mix Setups and System Files
When a Mix Tree is created, the Desk Setup that is loaded is linked to the new Mix Tree.
Each Desk Setup can have an I/O Configuration, a GPI, a Snapshot and a User Defaults file associated with it.
This means that when a Mix Tree is loaded, the linked Desk Setup is also Loaded, plus any files that are linked to the Desk Setup.
Alternatively, a Custom load allows a Mix Tree to be loaded without loading the linked Desk Setup.

The diagram on the left shows how the User is linked into the filing structure.
To Link a System file to a Mix Setup
▶ Go to the System tab, and make sure the Update Links to Desk Setup is set to On Load/Edit.
▶ Select the file you wish to link from the relevant list and click Load.
When the file loads, it will have a link created between it and the currently loaded mix setup.
To link a Mix/Pass tree to a specific Mix Setup
▶ Go to the Desk Setups page and make sure the Load Options is set to Full.
▶ Load the Mix Setup you wish to be associated with the currently loaded mix.
Once the mix setup is loaded, you will be warned that the desk setup has changed whilst automation data was loaded and you have two options: either Turn Automation Off or Reload Tree.
▶ Click Reload Tree. (You may be asked to set the Reload Mix options, then click OK).
You will be asked if you want the selected desk to be associated with the current mix.
▶ Click Yes.

It is not possible to link individual mix/passes with different Mix Setups.
Standard Filing Operations
Edit
(Does not apply to automation data (Clients, Projects, Titles and Mixes) or Snapshots)
▶ Select the file, click the Edit button and the relevant Encore utility will be launched.
(A Desk Setup must be loaded before it can be edited).
Rename
Select the file, Client, Project, Title or Mix and click the Rename button.
A rename dialogue box will be displayed.
▶ Type in a new name and click OK or press Enter. The file will be renamed and moved in the relevant list.
If the file name already exists, a dialogue box will be displayed showing all existing files of the selected type.
▶ Re-type the name so that there is no conflict and click OK.
NB: It is not possible to rename a file that is currently loaded.
Warning!
Exercise caution when deleting Clients, Projects or Titles as all the data below it will also be deleted (e.g. all the Mixes for a Title will be deleted when a Title is deleted).
Delete
▶ Select the file, Client, Project, Title or Mix and click the Delete button.
The item will be removed.
It is not possible to delete:
• A file that is currently loaded.
- Read Only files.
Copy
▶ Select the file to be copied and click the Copy button.
A dialogue box will be displayed for the new name.
▶ Click OK or press Enter.
The file will be copied and placed in the relevant list.
If the file name already exists, a dialogue box will be displayed showing all existing files of the selected type.
▶ Re-type the name so that there is no conflict and click OK.
Read Only
This protects a file from being edited or deleted (this does not apply to automation data).
It will still be possible to load the file, but not possible to amend or overwrite it.

▶ Select the required file, and click the Read Only button.
A dialogue box will be displayed to confirm changing the Read Only status.
▶ Click OK.
The same process is used to un-mark the file.
▶ Select a Read-Only file and click the Read Only button.
The Linked tickbox ensures that all System files linked to the Mix Setup will also be made Read Only.
Force Desk Keep
This has the same effect as pressing Keep Desk on the console surface.
Calibrate Faders (Analogue)
The faders are calibrated when the console is first booted.
It is advisable to calibrate the faders periodically, and they should always be calibrated if any of the faders are changed.
It is also possible for the faders to become misaligned.
For instance, if an obstacle is left in the way of a few faders when the console is starting up then those faders may not move to the full extent of the travel on the fader bed.
This may cause the affected faders to become misaligned and may also cause the faders to freeze in position.
Other problems or misuse can also cause the faders to freeze in position.
A fader calibration is performed to attempt to cure any fader problems.
▶ To calibrate the faders, select Calibrate Faders from the menu, and the faders will be recalibrated immediately.
There is no confirmation dialogue box.
There may be situations when this does not cure the problem
If repeated attempts to re-calibrate the faders are unsuccessful then it will be necessary to re-boot the console.
Flying Faders Preferences (Analogue)

This will select default Flying Faders preferences to enable familiarity of operation.
▶ To set, select from the menu then confirm using the dialogue box.
When timecode is stopped, the following options will be applied to the following parts of the automation system:
• Fader Lock Record - Auto Join
• Fader Touch Record - Trim To End
- Mutes - Auto Join
• Channel Events - Auto Join
This is for familiarity for Flying Faders users, and is a shortcut instead of going into System Preferences and setting these options individually.
Reset System
This exits Encore and closes all of it's components (Routing Screen, CORServer etc) and flushes any automation data that may be held in the computers RAM.
▶ Use with caution!!
Exit Encore
Closes Encore and all of it's components in a controlled way, making sure all files are closed and updated in the correct manner.

New ISS

Allows you to create a new static Initial Snapshot from the state of the controls currently on the console surface.
The new ISS will stem directly from the root of the tree, and will be given the next available pass number.
All dynamic automation will be removed from this pass.
There is no limit to the number of new ISSs that can be created on a tree.
Load Options

These settings affect what happens when a Mix/Pass revision is loaded.
Restore Safety Snapshot
Determines whether or not the Safety Snapshot is loaded (this is the static snapshot of the state of all controls at the point where Play was pressed).
Modes
Determines whether or not the Automation Modes of controls are loaded.
Links
Determines if control Links will be restored
Gangs
Determines if fader Gangs will be restored.
These can be either on or off, and will remember their last state when launched again.
Label options
Load Labels: Loads the labels from the selected mix/pass.
Keep Current Labels: Will keep any labels currently displayed and ignore those in the selected mix/pass.
Clear Labels: Clears all labels and starts with a blank label list.
Merge Labels: Combines any existing Labels with the labels being loaded in the Mix Tree to form one list (if Renumber List On Merge is ticked, then when both sets of labels are merged, they will be renumbered and time-ordered).
If Display Options For Each Load is ticked, then you will see the Load Options screen every time you attempt to load a pass.
Otherwise the pass will be loaded taking into consideration the state of these tickboxes the last time they were set.
Trim (Analogue)

Channels can be selected from the list on the screen, or from the fader SEL keys.
These channels can be reset by toggling the ALL ON button on the screen, or by pressing the SEL key on the global automation panel.
▶ Selected faders can now be trimmed either by moving them manually or by nudging on the screen.
Channels can be nudged in 0.1 dB steps by pressing the Mix+ and Mix-buttons, 1 dB steps or by a user definable amount.
If Whole Mix is selected then the whole mix will be trimmed by this amount as an offset.
Alternatively, Trim To and Trim From times can be entered, plus a crossfade value, set in frames.
The From and To times default to the whole of the mix unless set otherwise.
The Take New Preset button only has an effect if Timecode is stopped, and will take a new Initial Snapshot for all those faders selected, overwriting the initial values (plus any dynamic automation) held in Pass 1.1.
- If the Suspend Gangs option is ticked, trim will only be applied to those faders selected, not to any that may be part of a Gang structure.
- If the Suspend Links option is ticked, trim will only be applied to those faders that are selected, not to any that may be part of a Link structure.
- If Kill Suspends On Exit is ticked, both of these options will be unticked on Exit.
▶ Click OK.

Safety Nets

Allows you set up an In and an Out point on the timeline so that automation on either side of these two points is protected against further changes.
For example, if a scene is inserted into a finished film, it only allows automation data to be written between these two points, but protect already-written automation.
The values for either field can either be entered manually, or selected by double clicking the relevant label.
The Use Closest Labels On Activate tickbox ensures that when Activate Safety Nets is ticked, it will grab the two closest label times and presume that these are the Before and After values.
▶ To place the current timecode value into either the Before or After fields, click the relevant GT (Grab Time) button.
▶ The >> and << buttons will transfer the timecode value from one field into the other.
▶ Click OK.
Once the In and Out times have been set and the feature turned on this information will be displayed on-screen.

▶ You can also turn Safety Nets On/Off by placing a tick in the box below Safety on the main Encore screen.
Once Safety Nets have been turned on, the In and Out times will be displayed across the bottom of the main Encore screen.


The circle above the timecode display will show a countdown-swipe for 5 seconds before the In time and 5 seconds before the Out time:
- If the circle underneath is red, you are currently inside the In and Out times.
- If the circle underneath is green, you are currently outside the In and Out times.
If you try and record any automation on the console when Safety Nets are active, even though you are in Record, the mode buttons on the console will flash green to indicate that Encore is not recording automation data.

Offline Editing
All of Encore's Offline Editing functions are non-destructive.
As each operation creates a new pass, it is always possible to go back to the previous pass and revert to the pre-edited automation.
For all Offline Editing functions, an automation pass must be loaded. Once the offline edit has been performed, this then becomes the current play/pass.
Once an Offline Edit has been performed, a text-note can be added to the pass.
This can be viewed by right-clicking any of the Mix/Pass numbers on the Encore screen.
A list of all passes with text added will be displayed.
Offline Editing can be performed on an Offline PC and does not need to have a console attached.

Copy Path Data
Copy Path Data is used to copy automation data in the current Play Pass from one path to any other path(s) (including itself). It could be used, for example, for copying chorus automation data from one section of a song to another.
A timecode range can be specified and the destination timecode can be offset.
Once copied, a new Mix/Pass is created and becomes the current Play Pass.
▶ First, select the correct Mix/Pass from the Mix/Pass Tree or use Load Mix if the current Play Pass does not contain the required automation data.
There are three tabbed pages for Times, Path Selection and Copy Mode. The Times page will be on top.
▶ To set the source and destination timecodes, click on the Source Start, Source End and Destination Start timecode, and click on the Label with the appropriate timecode (this can then be adjusted manually).
If all the timecodes are left at zero then all of the automation data from the source path will be used.
▶ To set the Source and Destination paths, click the Set Paths tab.
▶ Click on the required source path in the Source list, and the path will be highlighted (you can only set one source path).
▶ Click on the required paths in the Destination list, each selected path will be highlighted.
▶ The Select All and Deselect All buttons can be used to reset the selection if it is necessary to start again.
▶ To set the Copy modes, click on the Modes tab.
▶ Click the Faders, Mutes, etc. check boxes to select which parts of the automation data to copy (at least one item must be checked in the Include box).
▶ Enter the required crossfade time in the xFade Time box. (Pass Selection is not currently implemented).
▶ To create the new Mix/Pass, click on OK.
The data will be copied as selected and the window will close.
The new Mix/Pass number will be shown as the current Play Pass on the main screen.


If no source or destination paths or have been selected then a dialogue box will appear to request the selection to be made and the copy will not be executed.
The same will also happen if no controls have been included.

Erase Path Data
This used to delete automation data (fader moves, mute events, channel button events etc) from selected paths.
Automation can be erased over any period in timecode, although the timeline itself is not affected in any way.
It does not alter the designated Mix/Pass, but it will create a new mix (displayed in the Mix/Pass area of the main screen).
Under Include, select which parts of the automation are to be erased (at least one item must be checked).

▶ Enter the crossfade time in the Splice Mode box.
Only onexFade time can be used at present.
This will be used at both the beginning and the end of the timecode range.
▶ Enter the Erase From and Erase To times in the Set Times box either manually or clicking on Select From List and selecting the times in the Start and End Times dialogue box.
▶ Click the Whole Mix button to set the start to zero and the end to 23:59:59:24.
▶ Click the required paths in the Paths list (click the Select All or Deselect All buttons to select all / deselect all paths.). The selected paths will be highlighted.
▶ To create the new mix pass, click the Erase button.
The Erase Path Data dialogue box will close and a dialogue box will appear confirming that a new Mix/Pass was created.
The new Mix/Pass is automatically selected as the Play Pass.

Merge Path Data
Used to replace automation data from one Mix/Pass in another Mix/Pass. Each Mix/Pass must be in the current Mix/Pass Tree. A new Mix/Pass will be created (displayed in the Mix/Pass area).
The source and destination Mix/Passes are not affected.

▶ Click the Select Pass button in the Take From Here box to set the Source mix/pass (or click the Current Pass button to use the current Play Pass).
▶ Click the Select Pass button in the Insert Here box to set the Destination mix/pass (or click the Current Pass button to use the current Play Pass).
The same Mix/Pass cannot be used for both the source and destination.
▶ Under Include, select which parts of the automation data are to be merged (at least one item must be checked in the Include box).
▶ Enter the crossfade time in the Splice Mode box for the crossfade period at the beginning and the end of the merged data.
▶ Click on the required paths in the paths list (the selected paths will be highlighted in the list), or click the Select All button to highlight all paths.
▶ To set the timecode range, enter the Merge From and Merge To times manually, or click the Select From List button to choose times from the Label List in the Start and End Times dialogue box, or click the Whole Mix button to set the start to zero and the end to 23:59:59:24.
A timecode range must be specified.
▶ To merge the data, click the Merge button.
The Merge Path Data dialogue box will close and a dialogue box will be displayed to confirm that the new Mix/Pass was created.
The new Mix/Pass will be shown on the main screen as the current Play Pass.

Before using EDL Conforming, ensure that in Timecode Options, the display format for timecode is set to:
- HH:MM:SS:FF if working with an EDL
- Feet/Frames if working with a Cutlist
EDL Mix Conforming
An EDL (Edit Decision List) or Cutlist rearranges the automation to match video or film cuts.
• An EDL relates to video and works with timecode values.
• A Cutlist relates to film and uses feet/frames.
▶ Ensure the sample rate and framerate are set to be the same as when the automation was recorded.
A warning screen will appear if this is not the case.
▶ When the EDL Mix Conforming screen is first opened, select which type of list you need to work with:
- If the button to the right of the screen says Cutlist View, you are currently working in EDL mode.
- If the button to the right of the screen says EDL View, you are currently working in Cutlist mode.
▶ Toggle this button to set the list to be in the correct mode.
The view of the subsequent edit screen is dependent on this selection.
Cutlist View

▶ To create a new Cutlist, make sure you are set to Cutlist View, click the NEW button, and the Cutlist screen will open.
▶ To create a new event:
- Click the Foot/Frame field just beneath the main window and set the Foot/Frame value you wish the event to start at.
- Select the type of event from the radio button selections, Delete Shot, Insert Shot etc (depending on the selection made here, the options to the right may also change).
- Using the Length field, set the length you wish this event to last for (the total length of the event will be displayed underneath the At This Footage Foot/Frame display.
▶ Once all the event parameters have been set, click ADD and the event will be added into the list showing the events:
- Type
- In time
- Out time
- Length
▶ To modify and event, click on the relevant event in the list (all the display parameters will change accordingly). Make the necessary changes and then click Modify.
The event will be changed and reinserted back into the list.
Ripple Mode
If you modify an event so that it is (for example) one second longer than it previously was, by clicking the Ripple button before you change this initial event, one second will also be added to all subsequent events in the list further down the timeline.
Until Ripple is turned off again, all events in the list will automatically be modified in this way every time an event is changed that requires all subsequent events to be changed.

In this way, it is not necessary to have to individually modify all the events due to a single change.
▶ To remove an event completely, click the event in the list and click Delete.
▶ If you select the Import radio button option, a file dialog will allow you to set the Client/Project/Title/Mix of another mix where you can import automation from, including a Foot/Frame time to start the import from.
Once this has been set, it will appear on the right side of the screen (as shown left), with a Foot/Frame field underneath to set the time to import automation from.
▶ Click ADD once this has been set and the event will be added to the list.
▶ Once all the events have been added to the list, save the file using the File menu, and the file will be saved in .CUT format.
Too apply this (or any other previously created Cutlist) to the currently loaded automation, see below.

EDL View
▶ To create a new EDL file, make sure you are set to the EDL View, click the NEW button, and the EDL screen will open.
▶ Set the Source Start time and End time. The Length will be calculated automatically.
▶ Set the Target Start time. The End time will be calculated automatically.
▶ Click Add, and the event will be added to the list.

▶ Alternatively, click the Add New button, and another window will open allowing you set the values above.
This screen also allows you to set the V, the reel number and A1 to A4 fields which equate to Audio and Video 1 - 4).
▶ To change events already added to the list, select the entry in the list so it is highlighted then click the Undo, Delete or Modify button as required.
▶ Once all the events have been added, save the file using the File menu. It will be saved in .ENC format.
Considerations for EDL files
Encore needs to verify that the information contained in an EDL does not contain any conflicts, for example, times that overlap, gaps left in the timeline etc.
In the main file management screen, use the 4 tick-boxes at the top of the screen to filter the display of files by their extension.

There are two ways to verify an EDL:
▶ The first is to check each event manually and ensure that the events are consistent with the timeline.
The second is to allow Encore to automatically verify the [name].EDL file, which then generates a new file called [name].ENV. It contains all of the same information and events as the EDL, but a ENV file has been verified by Encore to ensure a consistent timeline in the resulting mix pass.
▶ To verify an EDL file, select the file and then click Edit. The file will open and the list and events will be displayed.
Track
Will show either V and/or A1 to A4.
This denotes Video, and Audio 1 to Audio 4.
Event
C indicates Cut.
If the Gaps or Overlaps box is available, then Encore has detected a conflict in the list of events.
▶ Click the Gap or Overlap box and any events (shown left) shown in green indicate a gap; any events in red indicate and overlap, either of which will produce an inconsistency in the resulting timeline.
These must be corrected before you apply the EDL.
These inconsistencies can either be manually verified or automatically verified by Encore:

Manual Verify
▶ To manually change an event, click on the event and click Edit. A small display will show the parameters of the selected event.
The small pulldown list on the top left indicates the reel number. The two timecode fields next to Source indicate the Start & End times. The two timecode fields next to Target indicate the Start & End. The length is automatically calculated.
The V and A1 to A4 tick-boxes refer to the Video and any Audio tracks available that you may wish to include in the Conform operation.
▶ Once you have set all the parameters, click OK and the event will be placed back in the event list displayed with black text (red or green text indicates there is still a conflict).
Automatic Verify
▶ If either of the Gap or Overlap boxes are available, tick them.
▶ From the View menu, select Properties, and then the Preferences tab.

Dissolve
It is possible that the EDL list contains Dissolve instructions, but as it is not possible to dissolve automation, you need to inform Encore how to treat this instruction:
Treat as Cut: the event is treated as a CUT at the Source Start time.
Delete: Will ignore the event completely.
If Shorter Than
If an event is shorter than the time value entered here, then Encore can either:
- Remove the event from the list altogether,
- Merge it into the Previous event, or
- Merge it into the Next event.
By default, this time is set to 00:00:00:00
Gaps
If Encore detects a gap in the event list timeline, it can be set to:
- Ignore (not recommended as this will leave errors in place).
- Stretch Previous (which will extend the End Time of the previous event to include this event), or
- Stretch Next (which will bring forward the Start Time of the next event to include this event).
Overlaps
If Encore detects an overlap in the timeline, it can be told to either:
- Ignore it (not recommended as this will leave errors in place).
• Cut from Start of the overlap, or - Cut from End
▶ Once these preferences have been set, click OK and the events in the list will be changed accordingly.
Both of the Gaps and Overlaps boxes should now be greyed out indicating that Encore has resolved all the timeline inconsistencies.
▶ From the File menu, select Save, and the Save dialog will open.
▶ Select the location to save the file to from the pulldown list at the top of the screen.
There are two boxes beneath the list of existing verified files:
▶ Enter the filename into the top box (the bottom box shows the full filename and location).
▶ Give the file a name and click Save.
The file will be saved in ENV format (an EDL file that has been verified by Encore).

If the list still contains gaps or overlaps, then it will be saved as a .ENC file.
This is an Encore compatible list which you can return to at a later date to finish verifying the settings.
▶ Close the Event List by clicking the X in the top right of the screen.
To apply an EDL or Cutlist to the currently loaded automation
▶ In the Conform Mix File page, select the .ENV file you have just created.
▶ Select which components of the Automation you wish to conform (faders, mutes, auxes etc).
▶ If you add text into the Mark Edit Points With Labels Called field, this will create numerically sequential labels at each edit point, called [text] 1, [text] 2, [text] 3 etc. These will be merged with the current label list.
▶ If the Conform Labels option is ticked, then the existing label list will have it's timecode times adjusted accordingly to match the conformed automation (this ensures you have the same locate points for the start of each scene, but with the new times).
▶ Click Apply.
Encore will now apply the verified EDL list to the currently loaded pass, create a new conformed pass and add text to the new pass saying Conformed using [filename.env], [time, date]'.
To apply an EDL or Cutlist to other automation
▶ From the View menu, select Properties, then click on the Automation tab.
▶ To change the Client/Project/Title/Mix, click the Select button.
▶ Select the Client by double clicking on the relevant Client in the list.
▶ Repeat this for Project, Title and Mix.
At the lowest level, the relevant automation tree will be displayed allowing you to select the source pass.
▶ Once the pass has been selected and OK clicked, the tree page will close and the new C/P/T/ M will be displayed in the Properties page.
Also in this page is a Global Offset, where either the source or destination timelines can be offset by a positive or negative value.
NB: Global Offset affects ALL parameters and ALL automation!
If working in Cutlist view, the Apply button will only be available for Cutlist files.
If working in EDL view, the Apply button will only be available for Encore Verified files.

Mix Conforming
Provides functions for making mixes conform to film edits.
Warning: Mix Conforming is destructive not only to the automation, but to the timeline as well.
Move

Used to move part of the current mix, creating a new conformed mix/pass.
All automation events for the selected paths are moved.
Move first cuts the section out of the mix and then inserts it at the destination time (e.g. Scene 2 has been relocated to appear after Scene 3 and as the picture and sound for this edit are conformed the automation is conformed to match).
Delete
Deletes automation events from the current mix, creating a new conformed mix/pass.
All information including fader moves, events and mutes is deleted. The Delete operation changes the timecodes on events following the removed section so that the new mix has no gaps.
Insert Stock
Inserts a blank space into the current mix, creating a new, conformed mix/pass.
Used, for example, when a new scene is added to a film (during this space/time all faders, events and mutes have the same initial settings as the start of the inserted time).
The source Mix/Pass is not changed by conforming the mix.
▶ Click on Move, Delete or Insert Stock in the operation box. The options available will change according to the operation selected.
▶ To set the From and To times, click on each timecode and alter it manually, or click the Select From List button to set the times from the Start and End Times dialogue box.
The Length timecode will automatically show the amount of time that will be conformed (change the timecode length manually if required).
▶ To set the To Here timecode for a Move operation, click on the timecode and alter it manually, or click the Select From List button to set the time from the label list box.
▶ To select the paths to conform, click on the required paths in the list, and the selected paths will be highlighted, or click the Select All button to highlight all paths.
▶ To change the crossfade time, click in the xFade Time box and enter the required number of frames of crossfade.
This will be used at both the beginning and the end of the conform, or at the "join" for a delete operation.
▶ To force the Label List to follow the conform operation, click the Conform Labels.
Note that when this is done, the previous Mix/Passes will no longer match the new Label List.
▶ To create the new conformed mix, click the Conform button.
The Mix Conforming dialogue box will be removed and a confirmation box will appear to indicate a new Mix/Pass has been created.
The new Mix/Pass will be shown as the Play Pass on the main Encore screen.

Automation Editing
Automation Editing works in exactly the same way as Mix Conforming, except that Automation Editing is Non Destructive to the timeline.
Automation Editing affects all automation for all controls on all paths.
Move
Takes a piece of automation and places it somewhere else on the timeline, replacing the original automation with static values.
Delete
Erases all automation between two points.
Copy
Takes a piece of automation and places a rubber-stamp copy of it at another point in the timeline.
Conform Labels
Conforms the labels as well so that scene markers still apply to the new automation.
For all of the above, you will be warned if the Start, End or Destination times overlap.


Extract Path Data
This is used to select part of the current Play Mix/Pass and create a new Mix/Pass.
This is useful, for instance, for extracting a scene (or a short sequence of scenes) to concentrate on that particular part of a Mix.
The extracted section can then be merged to combine it with other completed work.
▶ Click the Faders, Mutes, etc. check boxes to select which parts of the automation data to erase.
At least one item must be checked in the Include box.
▶ Enter the Isolate From and Isolate To times in the Set Times box either manually or by clicking the Select From List button and selecting the times in the Start and End Times dialogue box.
▶ Click the Whole Mix button to set to isolate from to zero to 23:59:59:24.
▶ Click the required paths in the Paths list (click the Select All button to choose all paths). The selected paths will be highlighted, or click on Deselect All to deselect all paths.
▶ To create the new mix pass, click the Extract button.
The Extract Path Data dialogue box will close and a dialogue box will appear confirming that a new Mix/Pass was created.
The new Mix/Pass is automatically selected as the Play Pass.

Set Offset

This is used to offset the automation system from the incoming timecode.
▶ Change the timecode manually or use a preset (A to F).
▶ Click the Advance Automation or Retard Automation dialogue box as required.
The Offset Labels tickbox ensures that all of the current labels held in Encore are renumbered when the Offset is applied so all of the previous scene markers etc still match.
When an offset is applied to the Encore timeline, the timecode display no longer uses the colour conventions:
- Green=running
- Red=stopped
The new Running and Stopped colours can be set in Timecode Options.
Advance Automation
Deducts the timecode value from the timecode displayed on the Encore screen (i.e. Automation events will happen in advance of the actual incoming timecode value they were recorded at).
Retard Automation
Adds the timecode value to the timecode displayed on the Encore screen.
▶ Click OK to apply the offset.

Show Mix Statistics

Allows users to view details of the current Mix/Pass.
Also displayed is the amount of memory used by the current Mix/Pass chain.
▶ Click on OK to close the dialogue box.
Show Mix Pass Tree
Opens the Mix Pass Tree display.
Clear WavTrak Data
▶ Clears any WavTrak data that may be displayed on the TFT meterbridge and empties the meter display data buffer.
Reassign Active (Analogue)
This menu entry indicates whether the Reassign feature is active. A tick placed next to the entry confirms that it is.
For more information on Reassign, see chapter under the Tools menu.

UNDO Button (console surface)
The UNDO button has two functions, depending on whether timecode is running or stopped, and whether you are working in Manual Keep or Auto Keep (as set in System Preferences).
Manual Keep
Timecode Running
▶ If timecode is running and Undo is pressed, this has the effect of removing any automation data that has been added to the buffer since the last time Play was pressed, but still preserving any previous data added.
On this occasion, any controls on the desk that are in record will flash Green instead of Red to indicate that the current 'stripe' of automation has been discarded, and no further automation can be recorded until Stop is pressed and then Play.


Timecode Stopped
▶ If timecode is stopped, pressing Undo will open the Undo dialog if there is automation data held in the computers memory that hasn't been added to the automation tree.
Each entry in the list equates to a Start / [write data] / Stop command.
The entries that are greyed-out are the discreet mix/passes as displayed in the Automation Tree.
The other entries in the list are time-ordered, with the most recent first.
▶ To remove a single entry, highlight and then click Undo. That particular piece of automation will be removed from the computers memory.
- To Redo this operation, press the Undo button and the above screen will open, this time with a Redo button available.
- Click Redo and the operation will be reversed.
▶ To write all this automation to disc and create a new pass, press KEEP DESK.
This also has the effect of:
- Clearing the Undo buffer.
- Compounding all the automation into a single pass. It is not possible to use the Undo feature described above on any pass that has been added to the Automation Tree in this way.
If there is nothing available to undo, Encore will display this.
Auto Keep
Timecode Running
Works as if running in Manual Keep.
Timecode Stopped
If timecode is stopped, the Undo button acts as a Load Previous Pass button and will open the Load Options dialog, if this option has been set.
▶ Tick options as required and click Load to load the previous pass.
With the new automation engine (AutEngX) turned off, the Undo button has no function when timecode is stopped.
When timecode is running, it behaves as described above.
Show Labels in Main Window Space

This option is only available when logged onto automation, and swaps the main Encore page between displaying the Label List or the Mix Tree.
The menu entry will change depending on what is currently displayed.
▶ This can also be done by pressing the spacebar on the keyboard.

The Mix Passes on screen are displayed in a number of colours:
Grey: No attributes
Green: Current Pass
Green with black border: Currently selected
Blue: A Junction or end of branch
Red: Milestone
The icons at the top of this screen only appear here and not on the Mix Tree screen accessed by clicking the Tree icon in the icon bar.

Increases/decreases the screen magnification.
At it's lowest level, the pass numbers are not displayed on each pass.

Reduces the display so that only Milestones, junctions and ends of branches are displayed.

The presence of other passes in between those displayed on screen is shown with broken red lines.

Reverts the display to showing the current Tree in the top left of the screen.

Places the current Play pass in the centre of the screen.

Marks / Unmarks a Pass as a Milestone mix.
After you mark a pass as a Milestone, it will be shown in red on screen. It is not possible to delete a Milestone pass, you must first remove the Milestone flag.

Opens a small screen so that text can be added to label significant passes.

The passes that have had text added can be viewed by right-clicking anywhere on the Mix Pass display.
A list of passes that have had text added will be displayed.
To load any of these passes, click on the relevant entry in the list.
L Opens the Load Options screen, so the various parameters for loading a pass can be set.
With this icon turned on, the selected pass will be loaded without:
• the Safety Snapshot
- Gangs
- Links
- Automation Modes
AB Loads the last loaded Mix Pass so an A/B comparison can be made.
Allows you to Delete and Prune the mix tree by opening the Edit Tree screen, but will require that Automation is turned off.

Finds any subtree that may have been created in the current tree. The adjacent display box will show the name of the subtree mix once it has been selected.
Disk Space Status Warning

The look of this screen will change depending on whether your hardware has FilerX with a Multilink adaptor or an SPS drive.
Regardless of the hardware considerations, it is advisable to set this warning to be no more than 85%, as Encore needs at least 15% slack to run the automation efficiently.
Once the drive reaches this limit, warnings will be displayed every time you attempt to create a New Mix or Save & Load a Mix Setup.
Should you continually ignore the warnings as they are presented, the drive will eventually become too full to write to.
Mix/Pass Tree Options

Background Colour
Allows you to select the background colour for the Mix/Pass tree display screen.
New Mix Name
In the Filing page when a new mix is created, this is the text that will be used (with the addition of the next available pass number) when the Next button is pressed.
Auto Recovery Options
What happens in the event of the system being shutdown with automation data still held in RAM.
These three options are self-explanatory.
Preferences
Allows users to establish and set various system options.
To set Preferences:
▶ Click on Preferences in the drop down Options Menu;
▶ Click the Preferences icon; or
▶ Press f8 on the keyboard.
The tabbed System Defaults dialogue box will appear, showing the Automation options.
Automation

Keep Mode
▶ To automatically write automation data to the hard-disc every time a Stop is detected, check the Auto Keep checkbox.
Whenever a Stop is detected on the timeline, the automation will be written to disc and become the current Play/Pass.
Alternatively, the system can be set to Auto-Save which can be every 5, 10, 20 or 50 passes.
In this instance, automation data is held on the RAM of the PC until it is written to the drive.
The system Administrator can also force all other non-administrator users into Manual Keep by ticking the Lock Manual Keep for non-Administrators box.
If set to Auto Keep, then Encore will display how many passes have elapsed until data is written to the disc.

Instant Start Automation
With this option checked, it is possible to automate from a standing start (and therefore from a particular frame) without taking into account whether any attached tape machines are up to play-speed.
Show Mix Pass Tree (+/- key)
If checked, shows the Mix/Pass Tree when pressing +/- on the main Encore screen.
Initial Snapshot
With the First Mode Change Updates ISS option ticked, any control that is in Isolate will have it's Initial Snapshot updated with a new value (if applicable) when that control is first put into Play, Record (or Trim).

Safety Stop
This determines how automation behaves with regard to Stop and overwriting previous automation.
It is toggled on and off by clicking the Safety Stop icon at the bottom of the main Encore screen underneath the Mix/Pass numbers.
▶ Point at the icon to see a flyout display of the current state of Safety Stop.
Any control that is still in write when timecode is stopped will automatically match the previous play pass at that point ie controls will 'snap back' at the point where timecode is stopped.
The control value is left as it is until future events (if any) ie the value of the control on Stop will be held until the next automated event.
This feature is usually:
- On for DFC, DMC, Libra Post & MMC systems.
• Off for 88D and 88R.
NB:
If First Mode Change Updates ISS is ticked, then Safety Stop is not applied on the first mode change.
Layer / Bank changes
With this option disabled, it is not possible to swap layers on the console surface while timecode is running.

Collect Touch
Use Collect Touch Buffers
With this option checked, using Collect Touch allows extra control setting data to be stored in the Buffers.
This is so that the Collect Touch Buffers can be used to rehearse and store settings for overdubs, special audio effects and scene changes. This option is checked by default.
Go To Lock Master Touch Isolate On Entering
This forces Master Touch Isolate to be Locked when Collect Touch is initiated.
This prevents Master Touch Isolate from dropping out when the transport is stopped. This option is checked by default.
Master Touch Isolate Respects Safety Nets
This causes the new settings in the buffer(s) to be ignored outside the Safety Nets.
This means that a scene change can be previewed and rehearsed entirely in context, as it will be recorded when Master Touch Record is engaged. This option is checked by default.
Collect Touch Hard Write
This causes controls that are put into Collect Touch Scope to automatically drop into full record when a record mode is selected (i.e. as if the control was put into Lock Record and then touched – see Automation Modes in the Automation chapter).
This option is checked by default.
Clear Scope/Buffers on Exit
This causes Collect Touch Scope and the Collect Touch Buffers to be cleared when the Collect Touch key is turned off.
If this option is un-checked then the Collect Touch Scope and Buffers will retain the settings from the last time Collect Touch was used and Scope and the Buffers will have to be cleared manually.
Add Writing Controls To Scope When Entering
With this option ticked, any control that is recording will be added to the scope of paths in Collect Touch when entering Collect Touch.
Glide Clears Scope
Once a Glide (either Manual or Auto, Global or Local) is initiated on a control and completes, that control will be dropped from the scope of Collect Touch.
Popup Hold Options
With this ticked, every time the extended Collect Touch functions are invoked, a screen of Collect Touch options will open allowing the user to set punch-in / punch-out times etc.
Extended Collect Touch Options

They are actioned by pressing and holding ALL/SCOPE and the pressing COLLECT TOUCH.
The associated Collect Touch led will flash to indicate you have more options.
▶ To come out of this mode, repeat the same button presses. (For this feature to work correctly, the Go To Lock Master Touch Isolate On Entering Preference must be ticked).
If the Preference has been set to show the options on screen when these buttons are pressed, the screen shown left will replace the Label List (this Preference is also duplicated on the screen below, named Popup On Activation).
This screenshot shows options for MMC, hence the single box. A DFC console will have one screen for each partition. For other console types, there will be just the one box of options.
The pulldown menu contains the following options:
On Master Touch Record
This means that all controls with the scope of Collect Touch will go into Record as if Master Touch Record has been pressed.
At a Specified Time
The Master Touch state will go from Isolate into Record at the specified time. This time can be set by either:
▶ Clicking on the timecode field and typing a time in.
In Extended Mode Collect Touch:
- The ALL/SCOPE & TO END function (where a static value can be written to the beginning and the end of the timeline) is blocked out.
- The TO END function still works as usual.
- Safety Nets are respected, so if the TO END button is pressed outside and before the Safety Net In time, that static value will be written to the end of the Safety Nets.
- Buffer A & B still work as they do in Standard Collect Touch mode.
▶ Clicking the Label button. The Label List will open allowing you to select a labelled time, or
▶ Click Grab Time. This can either be clicked when the timecode is running or stopped. The current time will be placed into here.
You can still edit the time after selecting it by any of the above methods.
At The Last Stop Time
The Master Touch state will go from Isolate into Record when the timeline passes the last STOP point.
This ensures continuity of automation while preserving all previous data.
Always In Write
Means that all controls within the scope of Collect Touch will be in Write at all times.

Brightness Controls (digital systems only)
The Brightness Controls page is used to set the illumination levels for LEDs, buttons and alpha displays on the console surface.
All of these control sliders should be set at about 75% as shown left.

Pan & Operating Levels
The Pan & Operating Levels page is used to set the indication response of faders and Logicators and the overall operating level for the console.
Fader Indication
The alpha display just above the fader can be set to:
• Always display the path name,
• Always display the fader level, or
- To display the fader level only when the fader is touched, otherwise the pathname is displayed.
Page Two Toggle Mode
Not currently implemented.
Pan Logicator Arc
The sweep of the Logicators can be set to 180° or 270° for when they are used for panning.
The lower value allows the pan to be changed more rapidly with a greater panning effect for less Logicator movement.
System Operating Level
This sets the digital headroom to a value between 8dBu and 30dBu.
The default is 18dBu.
Changing the operating level alters the PPM and VU meter sensitivity, offsets the level of the tone generator and changes the dynamic processing threshold levels accordingly.
NB: changing the Operating Headroom in Encore will also require a jumper change on any MIOS units attached to the system.
Notes on Operating Level
0dBu = 18dBFs. Levels are expressed in dBFS because the only useful reference point for digital signals is full modulation of the digital signal path (similar to defining 0.775v rms as 0dBu).
The choice of operating level is primarily a question of the headroom preferred for a particular application. However the need to interface with external equipment with operating levels that cannot be adjusted can also determine operating levels.
Both operating levels and ADC/DAC scaling can be matched so that the console is consistent with external devices in those circumstances. Having set the operating level the PPM and VU meters read zero (as marked on the meter scale) when a signal at the operating level is present. The console tone generator will produce a signal at the operating level when set to 0dB and dynamics thresholds will be at the operating level when set to 0dB. This will be sufficient for all digital interfacing but the utility only sets the operating level within the digital domain, therefore further adjustments may be required to ADCs and DACs to set the desired operating level in the analogue domain.
When setting ADCs and DACs the important parameters are firstly, the scaling of the conversion and secondly, the maximum analogue signal level (or clip level) which the converters are capable of producing or accepting before clipping. Setting the analogue clip level on AMS/Neve converters as described, will simultaneously scale the converter so that the clip level corresponds to full digital modulation (therefore optimizing performance).
For 16-bit converters, the clip level may be set between +16 and +24dBu, and for 20-bit between +16 and +26dBu in 2dB steps.
Limit Filters to 12dB/Octave
This limits the cutoff slope of any Filters that may be in use to 12dB/octave.
This is particularly useful where there is little processing headroom, and the user needs to free up as much processing resources as possible.
Headroom (Use Lower Dynamics Ctrl Values)
This option is only to be used on the advice of AMS-Neve, otherwise this option should be unticked.
Quad Madi Overload Settings
If you have a LED-based meter bridge, this sets the overload level to trigger overload indication and when overload detection is active.

This option has no function on systems with TFT meters.
Solo Settings & Relay Control
The Solo Settings & Relay Control page is used to select the Solo mode and how the (optional) relays are operated.
Solo Mode
The Solo Mode determines the signal behaviour when a SOLO key is pressed.
▶ To set the Solo Mode click the AFL, Solo In Place or Track Present radio button as required (see panel on left for explanation of solo modes)
Fader Start Relays
This determines whether or not the optional Relay Control Unit recognises faders being cut.
GPI
If you are controlling external devices by GPI, then this option should be enabled.
Process Grouping
This allows EQ Grouping, Filter Grouping and Aux Grouping to be enabled and disabled. When grouping is disabled then all of the process items (e.g. all EQ bands) are switched on and off together.
In the case of the Aux controls, this option is used to prevent the Auxes from being grouped.
This option is only available on DFC.
Status Panel
Enables or disables the relays which control the indicators in the optional Status Panel.
Relay Ganging
This option is used to simultaneously drive relays for an AudioFile and dubbing machine.
Do not enable this option unless it is necessary.
PEC Direct
The Pec Direct panel (where fitted) normally operates in Record Direct mode where switching a paddle from OFF to REC will also switch the associated bus/tape paddle from TAPE to BUS (This is necessary for older tape machine designs that do not have a tape return when the machine is in record).
AFL: When AFL is selected, the Solo signal will be routed to the AFL bus (LISTEN1). The signal to the control room monitors will be replaced with the AFL signal. All signals will still be routed through the console but will not be audible.
Solo In Place: When Solo In Place is selected, operating a Solo key will cause all the other paths to be cut, leaving only the Soloed path to be monitored. This makes Solo In Place a destructive operation to the Films and/or Main Outputs.
Track Presend: Track Presend is the same as Solo In Place, except that any Track pre-send auxiliaries are not cut.

Record Direct Defeat can be enabled to prevent the bus/tape paddles from switching automatically. This is for use with modern tape machine designs that have a tape return when the machine is in record.
Solo Direct Defeat is used to prevent Tracks from automatically switching back to Bus when solo is engaged and Solo In Place is the current solo mechanism.
Process Present Leds
This allows the green leds in the Signal Processing Selection Keys to be turned off when processing is present but not switched on.
This option is only available on DFC.
Recorder Control
If ticked, Force Track Arm will:
- Resend the Record command (if the relay is already set to 'Record On', it will be set to 'Record Off' for 100mS before re-instigating the 'Record On' state).
• Not fire the Master Record/Play relays.

Partition Designer (DFC only)
The Partition Designer is used to determine how many faders belong to each console partition in Split Console mode and where the predub zone is positioned within each partition.
The top part of the page is a schematic representation of the console showing how many Master Sections (Master and Surround Quadstrips) are installed in the console.
Partitions
Used to set the number of faders in each partition.
The starting position of the first partition is always the first fader on the console (left hand side).
The other partition starting positions are restricted by the placement of the Master Sections so that the partition boundaries can only include one Master Section.
The Master Sections are shown by the white zones. The split point(s) can be set by either dragging the black divider bar(s) on the coloured bar, or using the scroll arrows next to the number of faders.
The arrows show the bars that can be dragged.
▶ They can only be dragged to the right of their current positions.
Global Path Change In Play
This allows global path changes to each partition while the automation is running.
PreDub Zone
Each partition can have a predub zone set on any adjacent pair of quadstrips within a partition.
The Enabled check box turns the predub zone on and off for each partition. If there is no predub zone in a partition then predubs cannot be expanded and the AFU functionality cannot be invoked on that partition.
Default Partition
The Paths Not On Surface Default To option sets the partition that will control the automation and management of any paths that are not assigned to a fader strip or predub.
Meters Partitions
This is used to set the split points on the Meter Bridge for consoles that have more than one partition.
This option does not appear when there is only one partition (such as one a PS 1).
▶ The split point(s) can be set by either dragging the black divider bar(s) on the coloured bar, or using the scroll arrows next to the number of meters.

Tone & Talkback
Allow users to select the mode of the talkback keys and frequency, type and level for the tone generator.
- Sine : constant tone.
• EBU: dips on the Left.
• BBC: dips once on the Left and twice on the Right.
Inhibit Talkback While Automation Playing
Will prevent Talkback when timecode is running.

Sync Select
The Sync Select page is used to determine the console sample rate and the synchronisation source.
The system will attempt to use the requested settings.
If a source is not available, the actual sync source will automatically set to Internal and the sample rate will jump to the nearest of 44.1kHz or 48kHz if a pull down rate was selected.
If an invalid Sync selection is made, the system will default to Internal.
If the system should lose sync for whatever reason, there will be a 30 second flywheel period during which time the system will 'pretend' that sync is still available (for example, in case a lead is unplugged by accident).

After 30 secs, a warning screen will alert you that sync has been lost, and present you with 3 options shown left.
▶ Click the required option.
Vari-Speed Settings
This is for old analogue tape machines capable of vari-speeding a timecode track.
▶ To save and apply the changes to the Sync Select page, you will need to click the 'Apply' button in the title bar.

Monitoring
The look of this page and the options available are dependent on the console type.
The top screen example is for DFC, the lower screen is for all other digital consoles.
Monitor DIM Value
This sets the dB level the monitor outputs drops by when the DIM key is pressed.
PEC/Direct Bus/Tape
This determines whether the Safe keys on the PEC/Direct panel are active or not.
- Bus/Tape Unlocked When Safe will disable the Safe keys.
- Bus/Tape Locked When Safe means that if a Safe key is on, it will prevent the corresponding Bus/Tape switch from operating.

Monitor Calibration
Allows the user to set the output from the desk to preset levels. The options are 82dB, 85dB and 88dB.
Disabled this if you wish the Output to be variable and controlled from the console.
If Disable Changes From Surface is ticked, then it is not possible to alter the output level from the console surface.
Mono Pad
This is the amount that the level of each Film path is reduced by when Mono is engaged on the Surround Monitor Panel.
This offsets the accumulated level to prevent loud noises from the centre speaker.
The Mono pad is not applied when Lt-Rt Mono is selected.
Follow Control Room Options
▶ If you wish the Studio Loudspeakers (SEL 2) and the Headphone Jack (SEL 4) to follow the monitoring selected for the Control Room, then both of these boxes should be checked.
SEL Monitoring Control
This sets which SEL outputs are affected by the Control Room Monitoring options (eg Cut Left, Phase, Mono, etc).
The options are:
- Just Control Room (Sel 1)
• Control Room and Studio Loudspeakers (SELs 1 & 2)
• SELs in Follow (All SELs except SEL 2) - Global (all SELs)
These selections have no effect when working in Surround.
MCS
The MCS page is used to set the preferences for the Machine Control System.
It is split into four sub pages that are selected by clicking on the sub-page tabs.

References
Reference Source
This option informs the MCS how the timeline is sourced.
External LTC
Timecode is read from the Timecode Track on a tape machine. The MCS has no control over this machine.
The transport controls show the machine status according to incoming timecode.
9 Pin & Internal
The timeline position is taken from the master machine. The timeline is generated internally and the master machine is servoed until it locks to the timeline. The MCS controls the master machine.
9 Pin & Video
The timeline position is taken from the master machine. The timeline is generated and read from a video pulse generator and the master machine is servoed until it locks to the timeline. The MCS controls the master machine.
LTC From Master Machine
The MCS controls the tape machine through the 9 Pin serial port but timecode is read from the Timecode Track on the tape machine.
LTC Reader Validation Period
This is the number of consecutively incremented timecode frames that are received before MCS acknowledges that the timecode source is in play.
LTC Dropout Limit
This is the maximum amount of time (in frames) that bad timecode will be received before MCS drops synchronisation and timecode display is stopped on the screen.
This is also known as the Flywheel period.
Reverse Play / Rollback
Determines whether a tape machine will go into Rollback or Reverse Play (some machines may not be capable of this).
PEC-Direct Serial Track Arming
This option only applies to systems with the optional Surround Sound Panel installed. The panel has PEC/Direct track arming.
- Arm Only causes tracks to be armed ready for record.
- Arm & Punch-In causes tracks to arm and receive a punch-in command to start recording immediately.
Master Machine Follows Automation
When checked, the attached tape machine is servoed until it locks to the timeline. This is the usual setting.
When un-checked, the timeline does not start (take the initial position and start running) until the machine has servoed into lock.
Generator Mutes Until Locked
When checked, the internal timecode generator does not generate a signal until lock has been established.
Generate LTC When Stationery
This should be ticked if using Tascam tape machines, and relates to how Encore and tape machines communicate with regard to Stop/Play commands.
Allow Recording to Timecode & Video Tracks
When checked, this allows the Timecode and Video tracks on any attached machine to be recorded over. Used with caution!
Restore Machine Settings On Detection
This is used to make sure that the machine settings (offsets, servo parameters, etc.) are restored to the same condition when Encore starts.
This will ensure that the machines are in a known state (i.e. as configured from Encore).
Wait for Slaves Before Issuing Play command
This is used to make sure all machines in a group are at the same position before the Group Master starts to play.

Instant Chase On Add Machine To Group
This causes machines to immediately position themselves to the Group Master position when added to a group.
Auto Stop Updates Automation
This is used when Stop is pressed twice to issue an All Stop command.
The automation system will then locate to the time at which All Stop was issued and the desk will be updated with the control settings at that point.
This is typically used when rewinding or fast forwarding and it is necessary to see the state of the Play Pass at the point where All Stop is pressed.
Automatically Restore Last Groups When Encore Starts
Loads the last used group setup when Encore opens.

Presets
With the exception of the Rollback time, all of the following options need to be ticked to enable them.
Pre Roll Time
This is a timecode value that sets the amount of extra timecode that a tape is re-wound by when executing a Locate or Cycle.
▶ Tick to enable.
Post Roll Time
This is a timecode value that sets the amount of extra time that a tape will continue for at the end of a Cycle before rewinding to go back to the Cycle Start time.
▶ Tick to enable.
Rewind Limit
This is the lowest timecode (or foot-frame) position that machines will go to when rewinding before they stop automatically.
▶ Tick to enable.
Fast Forward Limit
This is the highest timecode (or foot-frame) position that machines will go to when fast-forwarding before they stop automatically.
This is useful when using older reel-to-reel tape machines to prevent unspooling.
▶ Tick to enable.
Roll Back Time
This is a timecode value that sets the amount of re-wind when a Roll Back command is sent to the transport device(s).
Shuttle Speeds
Allows the user to set the speed of Slow, Medium and Fast Wind/Rewind. This feature is not supported by all tape machines.

Ports
If there any Sony tape machines connected, the corresponding port should be ticked due to Sony machines having their own control protocol.
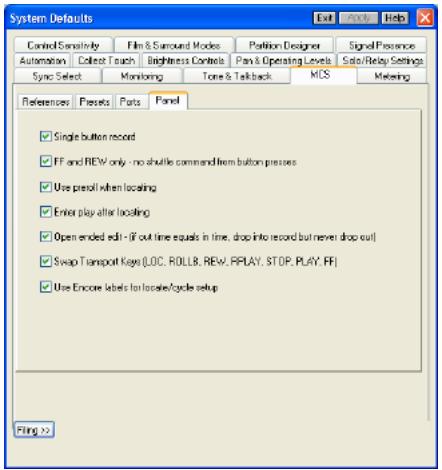
Panel
Single Button Record
Allows machines to be put into Record by pressing the MCS Record button. With this unchecked, the user must press Play at the same time.
FF & Rew only
With this checked, pressing the << or >> keys will put the machines into fast forward or rewind. Without this option checked, then the first press of the key will put the machines into shuttle; the second, wind or rewind.
Use Preroll When Locating
With this option checked, the MCS will take into account the amount of Preroll time set in Preferences.
Enter Play After Locating
With this option checked, the machines will drop into Play after they have located; otherwise they will go into Stop.
Swap Transport Keys
Allows for a different layout of the MCS buttons.
Use Encore Labels for Locate/Cycle Setup
Allows the Encore labels to be used for setting up Locates, Cycles etc. With this option unticked, the labels only serve as a display.


Ports (88R only)
For 88R consoles only, the Ports tab has extra options for each of the MCS ports.
▶ Tick each port if you are using an Adams-Smith synchroniser and/or Flying Faders.
It is also possible to globally disable transport commands.

Metering
Allows you to set the metering options on systems with TFT meterbridges.
The options shown above will change depending on the type of console.
The screenshot shows options for MMC (for DFC, other metering options are available in the Meter Designer).
On fader strip displays, the metering information itself is always shown on the top half of the TFT screens.
The area below this has two display areas which can show user-defined displays.
For the centre meter panel, there are a range of Stem / Group / Aux / Film etc displays.
The metering options relate to all the TFT panels across the console with the exception of the centre meter panel that shows Groups / Auxes / Films etc.
The Upper Window and Lower Window options let you decide which information is shown in these two windows:
• EQ Curve: standard EQ curve display.
• Dynamics Curve: standard compressor / limiter / gate display.
- Small Meter: Shows input metering for paths that may be on the small faders.
- WavTrak: shows waveform information for the incoming audio.
- Pan Position: Shows the surround placement of the signal, including speaker destinations.
• Path Information: shows Stem and Aux routing
Centre Meter Panel
The Master Meter panel is divided into 4 areas, with identical display options for each section.
▶ Select each option for each section as required.
If you select an option where those paths do not exist (selecting Groups 7-12 where there are only 4 groups for example), then that section of the screen will be blanked out.
Select Follow Surrmon and the display will chase to whichever selection is made on the Surround Monitor panel.
Meter Scale Type
Lets you select the scale for all of the meters, either PPM, VU or Peak.
This scale will be used across the meterbridge globally. It is not possible to display different types on different panels.
Colour Options
Lets you set an alternative background and path colours, so it is clearer to distinguish the metering information.
Meter Scale Type
Lets you set the type of metering displayed. The options are PPM, VU and Peak.
Enable WavTrak Locate Window Start Time
▶ Tick this option to bring a timecode display box on screen.
This allows you to set the start time for the WavTrak display on TFT screens.
As there is only a limited number of hours of WavTrak display data that can be stored in memory, set this option to be the start of your data display.
By default, this is set to 00:00:00:00.
If the incoming timecode starts at (for example) 10:00:00:00, then to display the relevant WavTrak display, this should also be set to 10:00:00:00.
Display WavTrak in Bar Graph Area
Displays WavTrak data as a waveform.
Clear WavTrak Data
▶ When changing reels, tick this option to clear the current WavTrak data.
Control Sensitivity
The Control Sensitivity page is used to select velocity sensitivity for different functions that can be assigned to the Logicators.
Velocity Sensitivity
This causes a control value to change slightly faster when a Logicator is rotated more rapidly.
Layer Key Routing Delay
This is the number of seconds a path Access key must be held down before the Path Access key to Path Access key routing function is activated.


If it is set to zero, the Path Access key to Path Access key routing function is disabled.
This option only applies to DFC.
Fader Reset
With this option checked, holding the Clear button and tapping the fader will reset the fader to 0dB, regardless of the default fader value held by the User Defaults file.
Channel Range
This allows a range of channel strips to be specified by the operator, so that setup controls (e.g. porting, nulling values etc) operate across a range of paths.
▶ This option must be ticked to be enabled, and is only implemented for DFC.
Meter Legends
This option determines what is shown underneath the meters, either port names (Normal), Path Names or the current Process and Page (ie EQ, Comp etc).
This option only applies to DFC.
Link/Process Page (DFC only)
If the Link/Process Page option is ticked, then for paths that form part of a link, calling a process to the surface for one path will call the same process to the surface for all paths by the link.
Aux Layout (for 36 Auxes)
On a single partition PS1, this allows for a different layout of how the Auxes are displayed on the logicators.


Extended Prefs (Libra Live only)
Led On When Cut
When checked, the status LED above the channel Mute key will be illuminated when the signal is cut by the key.
Normally used when switches engraved CUT are fitted to the fader strips.
If the option is un-checked then the status LED above the mute key will be illuminated when the signal is on (i.e. not cut).
Normally used when switches engraved ON are fitted to the fader strips.
Fader Input Metering
The fader strips are fitted with a mini bargraph meter.
These are normally used to show gain reduction caused by Dynamics elements in the signal path.
If this option is checked then the meter will show the level of the input to the path.
If it is not checked, it will show any Compressor & Gate processing.
Upper Knob Lock
When this option is checked then the surface Lock Knob key is enabled for freezing the operation of the Assignable Logicator.
When unchecked, the Lock key will lock both the fader path and the assignable logicator function against changes.
Aux LED On when CUT
When selected, the aux switch illuminates when the Aux is cut. (This option is for people who feel the Aux send switch should be consistent with the channel On/Cut switch).
Snapshot Touch Scope
No longer implemented.
Channel Strip New Layout
If ticked, will show the display of controls on Channel Strip Panels (MMC / 88D) in an alternative layout.
Aux Cut Ident
This option is no longer implemented.
Alternative Aux Layout
Uses an alternative layout for placing Auxiliary controls on Channel Strip Panels.
This option only applies to Live, MMC and 88D consoles.
Alternative SLS Button Layout
Only to be ticked if the system has the alternative button layout for Studio Loudspeakers.
Use Banks
When this option is turned on, an additional selector box appears in Desk Designer in the Desk Editor application.
This allows paths to be located on any of the four layers in any of 6 banks.
Launch AFU on Fader Touch
With this ticked, every time a fader is touched, then the relevant channel is called to the AFU.
AFU follows PFL
With this ticked, every time a PFL button is pressed, then that path is called to the AFU.
Muting Studio Loudspeakers Enable
Mutes the SLS whenever the On-Air button is pressed.
Mic Inputs to Work Mic/Live Relay
This has been superseded by GPI Configuration.
Strong Hidden Channel Indication
This option is only implemented on Libra Live.
VCA Gang Mode
This affects the behaviour of slave faders in a gang.
When ticked, the response of slave faders is changed so that when a master is moved down to the cut position then all slaves will also move down to the cut position, regardless of the original offset from the master.
The slaves will move at variable rates according to their offset from the master so that all gang members reach the cut position together.
Fader offsets are retained and will be restored when the master is moved back to the original position.
Logicator Manual Match Mode
This option has been superceded and should be unticked.
Cut / Fader Mode Keys
Only to be ticked if the automation keys above the fader read Cut Mode and Fader Mode.
Console Split at Fader Number
Allows the user to set the position at which Left Enable and Right Enable layer control keys split the console.
It also specifies which faders are accessed by the left hand AFU and which by the right when two AFU panels are fitted.
Fader Start Options
These options apply to the relays associated with ports in I/O Config (i.e. these options do not affect the GPI).
These checkboxes are largely redundant – it is recommended that fader start operation is set up using GPI configuration within the I/O configuration utility.
Momentary Signalling
Not implemented yet.
Integrity Check
This check box is synonymous with the Fader Start Integrity System check box on the GPI Configuration page of I/O Config.
When this is checked, then a relay associated with a path by GPI Configuration will only fire if the path has a clear route to an output.
This is in addition to any other conditions that affect the relay (e.g. when the Link Logic is set to And).
Manual Start/Stop
Allows the relay to be fired manually using one of the Assignable buttons.
Fader Start Enable
When this option is checked then the Fader Start system is enabled (i.e. moving a fader up will close or toggle the associated relay).
(Relays are associated with ports in I/O Manager).
GPI Options
These options are duplicated in the GPI Configuration page.
- Enable AFT: This switches on the Audio Follow Tally System.
- Invert AFT: This toggles the input sense of the GPI opto inputs so that a low-level signal activates the AFT inputs rather than a high level signal.
- Invert On/Cut: This toggles the input sense of the GPI opto inputs so that a low-level signal activates the ON/CUT switch function rather than a high level signal.

Assignable Buttons (Libra Live only)
For the 3 buttons just above the fader (labelled A/L, R/B and the Neve logo), different functions can be assigned to these.
These are console-wide assignments and apply to all faders.
It is possible, however to assign different functions to mono and stereo paths.
If the Seperate Mono/Stereo box is unchecked, then there will only be a single set of assignments available on the left of the screen.
Once a function has been assigned, the led will light in the button to show the function is available.
The options are:
- Right i/p only: With this option selected, the Left button option is forced to be Right i/p only.
• GPI Fader Relay: Shows the state of the associated fader relay.
• GPI Switch Relay: Allows a GPI Switch relay to be opened/closed. - Mix Minus Talkback: Press to talk to the associated Mix Minus bus.
- Insert 1 Divert & Insert 2 Divert: switches any Inserts that may be assigned on/off.
- Pre / Post Route: switches the pre/post state (does not affect Mix Minus)
- AFT Control: shows the state of the AFT fader.
- PFL 2nd Layer: Allows PFL on the path on the sublayer to be switched on/off.
- Not defined: No function assigned, and led will not light.

Assignable Buttons (DMC only)
The MACRO 1 - MACRO 4 buttons allow you to set up 4 'soft' functions set in Encore System Preferences / Assignable Buttons which are then applied to the 4 buttons on the lower AFU and those by each fader.
In this way, it is possible to have any 4 user-selected functions on the faders at any one time.
Different functions can be assigned to the Global and Local buttons.
Global Buttons
Link Suspend
Press and hold this button to change an offset between linked controls.
Fader Reset
Press and hold this button then touch the fader to reset it to 0dB.
Aux 1-16
It is possible to assign the On/Off for any of the (up to) 16 auxes.
Local Buttons
These have the same options as the Global buttons with the following additions:
PFL Small Fader
Operates as a PFL button for the path held on the small fader.
Solo Inhibit
Keeps the path open when a Solo is detected somewhere on the console. Suitable for example, for hearing vocals in context with it's reverb returns.
Path Control Copy
Puts the desk into Copy mode and allows you to set up a copy template, and then copy this collection of control values between paths.

Saving System Preferences
It is possible to save the System Preferences as a separate file.
The Filing function is available on all Preferences tabs.
Click the <<Filing button to open.


▶ To save a Preference file, type a unique name into the name field and click the Save icon:
The file will be saved.
During typing, if the text in the name field turns blue, this indicates that a file already exists with that name.

▶ To load a previously saved Preference file, select the file from the pulldown list, then click the Load icon.
A screen will warn the user that Encore needs to be closed and reopened for the new Preferences file to be loaded successfully.

▶ To delete a Preference file, select the file from the dropdown list, then click the Delete icon: A prompt will ask for confirmation that the file is to be deleted. Click Yes.
With regard to Backup Manager, these Preference files (called System Default files) can also be backed up and restored as you would any other file type.

Timecode Options

Used to set timecode type, timecode display options, local zero times and to create timecode presets (for later recall).
To launch Timecode Options:
▶ Click on Timecode Options in the Options drop down menu.
▶ Click on the Timecode Icon.
▶ Press f10 on the keyboard, or
▶ Click on the timecode field in the Encore screen.
The Timecode Options dialogue box will be displayed.
Timecode Type
Used to set the frame rate for incoming Timecode.
▶ To set the Timecode type, click on the radio button for the required timecode.
The choices are 24, 25, 29.97 (Drop or Non-Drop) and 30 frames per second.
Encore does not automatically determine the incoming code type, so it is advisable to verify the timecode type before mixing.
If incoming Timecode differs from the selected type then a message will appear to inform the user.
Local Zero
Used to display the running time of a Mix instead of the Timecode in use.
When Local Zero is activated running code will be offset so that the chosen point is displayed as 00:00:00:00 in all Timecode fields.
▶ To set Local Zero, enter the desired timecode in the Local Zero box either manually or by clicking on Select From List and making a selection from the Select A Label dialogue box.
When the cursor is placed and clicked in the timecode area of the Local Zero box it will change to a + or - sign allowing the user to increment or decrement the displayed times using the mouse button.
▶ Click on Local Zero On.
Local Zero is saved and automatically reloaded with the Mix.
Display options
Used to set the display format for Timecode within Encore.
To set the timecode display options, click on the required display settings in the Display Options box.
Timecode
Timecode will be displayed in HH:MM:SS:FF format.
- Hide Frames suppresses the display of frames on the screen.
- Hide Hours suppresses the display of hours on the screen.
In other parts of the system where you are required to enter a timecode value (Offline Editing for example), complete entry of Timecode is required even if the display of Hours and/or Frames are suppressed.
Foot/Frame
Timecode will be displayed in Foot/Frames format.
FT/FR = Timecode
Allows users to synchronise the Foot/Frames display and actual SMPTE time (for example, to make the Foot-Frame counter read zero feet at a timecode of one hour, enter 0.00 under Ft-Fr and 01:00:00:00 under Timecode).
Film Format
Buttons are provided to set the type of film being used.
▶ If a custom format is desired, enter the number of frames per foot and frames per second using the Other button.
To access the MCS Preferences page, click the MCS Settings button. To reboot the MCS Controller card, click the Reboot MCS button.
Screen Options
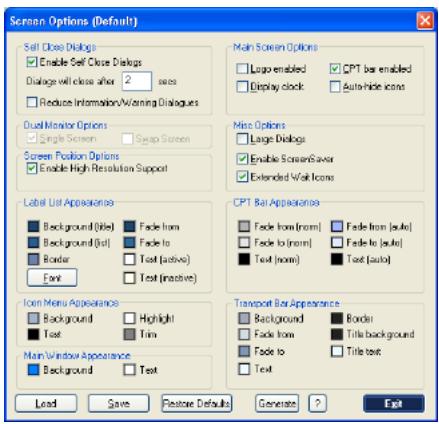
Sets display colours and other visual options.
Self Closing Dialogs
This allows you to set how long confirmation dialogs will be displayed for.
▶ Tick to enable and enter a value into the Secs box.
Any confirmation screens will only be displayed for this length of time.
Reduce Information/Warning Screens
This should only be ticked by experienced users, as it removes Confirmation Delete dialogs.
Use with caution!
Logo Enabled
This displays the EncorePlus logo on the main Encore page.
CPT Bar Enabled
▶ Tick this to display the Client/Project/Title/Mix information when an automation title is loaded.
Display Clock
▶ Tick this to display a small time/date bar that appears on top of all other open screens.
Autohide Icon Menu
Hides the icons on the right-hand side of the screen until the mouse is moved over to the right hand border.
Large Dialogs
▶ With this ticked, any subsequent screens that are opened will take up the full size of the screen regardless of the screen resolution.
Useful for system where screens have limited sight access.
Enable Screensaver
Allow the Windows screensaver to be enabled/disabled.
Extended Wait Icons
When Encore is busy (for example loading & saving a Mix Setup) a range of animated icons will be displayed.
Dual Monitor Options
Allows Encore to be run on a single screen.
Screen Colours
It is possible to set a different colour for each component of the main Encore screen.
▶ Once you have chosen the screen colours, they can be saved and loaded like any standard file (saved in *.sch format).
All the screen colours can be reset using the Restore Defaults button.
Rather than select each colour manually, you can tell Encore to generate a range of colours based on one base colour.
▶ To do this, click the ? Button.
▶ Tick the Use Base Colour box.
▶ Click the Selected Base Colour box to open the Windows colour selector to set your base colour.
▶ Move the sliders so the Colour Depth and Colour Variation ranges are set (the further they are to the right, the greater the degree of variation).
▶ Click Exit, and then click Generate on the Screen Options screen.
A range of colours will be generated to replace the current colours, and when you Exit this page, the new screen colours will be applied.


Group Setup

Group Setup is used to setup groups of machines and configure individual machines.
When Group Setup is selected, the MCS Group Setup dialogue box is displayed with the page for the Current Group on top (the f5 key can be used as a shortcut to MCS Group Setup).
There are eight tabbed pages for the eight MCS groups.
Each page is identical except for the group it relates to. A red asterix is displayed on the tab for the currently selected group.
The page shows a list of the currently available machines, and a Group list, which shows the machines in the Group.
The group's master machine is indicated by an asterix (*) next to the master's port number.
To Add a machine to a Group
▶ Click on the numbered tab for the required Group, and then click on the required machine in the machine list.
▶ Double-click on the machine.
If it is the first machine assigned to the Group then it will be the Group Master and a * will be displayed next to the machine's Port number.
This means that it is the timecode received from this machine that all the other machines will slave to.
To Take a machine out of a Group
▶ Click on the numbered tab for the required Group, click on the required machine in the Group list and select Remove Machine button.
The machine will be removed from the Group list.
If the machine is the Group Master then the next machine in the group list will be master.
To Remove all machines from a Group
▶ Click on the numbered tab for the required Group (this also selects the Group as the Current Group that is controlled by the MCS card) and click the Clear Group button.
All machines for that Group will be removed.
To Change the currently selected active Group
▶ Click on the numbered tab for the required Group, and click the Select Group button. The red asterix will move to the newly selected Group.

To configure an individual machine
▶ Click on the required machine in the machine list on any MCS Group Setup page and click the Machine Properties button.
The Machine Properties dialogue box will be displayed.
The dialogue box has two pages:
- Properties
• MCS Parameters
Machine Properties
The Machine Properties page shows the status of the selected machine, including the machine name and type and has controls for changing the offset and track arming.
Machine Offset
The offset for a machine is applied as a difference between the position of the machine and the position of the group master (a group master does not therefore have an offset).
▶ To set the offset, click the +/- button in front of the timecode value to set it to plus or minus, then change the timecode manually to the required value.
Transport Options
This should always be set to Normal.
Auto Offset
▶ Click to enable the Auto Offset.
This sets the offset to the current difference between the position of the machine and the position of the group master.
Track Arming
The Track List shows the tracks for the selected machine.
Armed tracks are highlighted and each track has a check box, which will be ticked when the track is armed.
To Arm a Track
▶ Click the check box for the required track.
Each click will toggle the track between armed and safe.
▶ To Arm all tracks for the current machine, click the All Ready button. All the tracks will be highlighted and the check boxes will be ticked.
▶ To Disarm all tracks for the current machine, click the All Safe button. No tracks will be highlighted or ticked.
By default, and as a safety precaution, the Record Mode will be set to Disable when Encore is started.


MCS Parameters
The MCS Parameters page is used to change settings for individual machines to optimise performance.
The machine name can also be altered (e.g. to identify different machines of the same type).
To Change the Machine Name
▶ Click in the Machine Name box, type the required name then click the Reset Name button to change the name back to the default for the machine type.
To Change a Parameter
▶ Click the required parameter in either list box.
The parameter will be highlighted and a description will be displayed in the box beneath the parameter lists.
▶ Click the Edit Value button.
▶ Type in the required value and press Enter.
NB: Each parameter has a specific range of values it can use. A value within range for the parameter must be provided. Values outside the range will be rejected.
Servo Parameter Definitions:
These settings are used to "fine tune" the machine when servoing into lock.
Servo Wait
(frames)
Wait this number of frames after a play command before beginning servo action.
This parameter is used to delay the onset of servo action for a given number of frames. This can be set to allow time for the machine's transport to stabilize before beginning servo action.
Some machines may give inaccurate information to the MCS when servo is begun too quickly. Increasing this value may help to compensate for this.
Lock Acceleration
(frames)
Number of frames away from lock that minimum servoing is applied.
Servo action is applied in 3 stages by the MCS, each stage being more aggressive. If the machine persistently overshoots the lock position during locking, increasing this value will apply gentler servoing as the machine approaches lock and may help reduce this.
Hold Off Time
(frames)
Wait for this number of frames after fine slewing into lock has achieved a zero error before releasing.
Normally, when zero error has been achieved the machine is released from servo in order to lock to the video frame edge.
However, depending upon the transport ballistics, some machines may have moved through zero error and be moving away from zero error at this point.
If released in this situation the machine may repeatedly report lock & locking.
Increasing the hold off time causes the MCS to wait after zero error has been achieved before releasing the machine.
Start-up Time
(frames)
Play command is issued when the timeline is this many frames behind the machine position.
When machine synchronisation is begun after the PLAY key has been pressed, the system will pre-roll by 16 frames and then run the timeline through the machine position.
If the machine error is observed to count down slowly from 16 frames to zero, adjusting this parameter by 2 frames may correct this.
If the machine can be seen to have several frames to servo after receiving its play command, adjusting this parameter may correct this.
Park Time
(frames)
Machine parks ahead when chasing to a moving timeline by this many frames.
Servo Type
• 0 means servo up from 1 frame behind.
• 1 means servo directly into lock.
• 2 means come back from 1 frame in front.
This parameter determines the way the machine servos into lock.
The most common method is to servo up from 1 frame behind.
However, this is not suitable for some machines, which will be unable to lock by this method. If the machine hovers between zero error and 1 frame error, try an alternate servo type.
NB: The servo software can make automatic changes to this value.
Slew Limit
(frames)
Maximum number of frames of error which will be made up by servoing rather than shuttling.
Error above this value will cause the machine to go into shuttle mode rather than servo mode.
Lock Correction
(frames)
Number of frames a machine will 'jump' when releasing.
The parameter allows correction for machines who's reported position "jumps" when it is released from servoing. Adjustment of this parameter is normally not necessary.
No Lock Wait
Non zero means assume lock when zero error is achieved before machine reports servo lock.
Setting this to a non-zero value will decrease machine lock up time in some cases (for example 7030).
This is because certain machines may achieve and hold zero error for some time before actually reporting lock.
Servo Hold
(frames)
Hold servoing for this number of frames before issuing play.
Once zero error has been achieved, the MCS will continue to servo at play speed for the time specified.
This can help avoid situations where the machine is servoed up from behind and is possibly speeding up when released and therefore could be into the next frame when released.
Release Hold Off
(frames)
Number of frames to wait after releasing before Lock is confirmed.
This parameter controls the last stage of the servo process for a machine. After zero error is achieved and the machine is released, the MCS will wait for the specified time before lock is confirmed.
This gives more leeway for final errors to be corrected if required. Adjusting this value may help if lock errors are observed after lock has been reported.
Shuttle Stop
Non-zero means that machine will be slowed down to stop. The larger the number the gentler the action of the stop command.
Unlace Time
(seconds)
Distance to target in locate/chase above which unlaced or high-speed wind will be engaged.
When the "locate to" or chase difference is greater than this time the machine will unlace and fast wind until the difference is within the relace time.
Setting this value to 255 will cause “infinite” unlace time to be adopted. This will permit devices capable of instant locates to avoid entering shuttle or wind modes.
Relace Time
(seconds)
Distance to target in locate/chase below which laced or shuttle wind will be engaged.
This parameter is essentially the opposite of the above and operates if "unlaced wind" has been engaged.
When spooling to a locate time shuttle mode is engaged when the difference between the current position and the locate target is below this value.
Play Into Park Time
Allowed overshoot in a locate operation before new locate command is issued.
When locating, the machine may overshoot the specified location. If the overshoot becomes greater than the value specified in this default the MCS will issue a new locate command rather than allowing the machine to park at the "overshot" position.
This is primarily used to cater for devices which have a built in "play into park" mode (for example Tascam DA60).
No Chase Stop
(0 disabled, 1 enabled)
1 = Don't issue Stop command when parked next to master.
If this option is enabled then this machine will be set to shuttle at zero speed when it is parked next to the master position.
Stop Command
(0 or 1)
0 = Shuttle at zero speed
1 = Stop command.
This option determines how the machine will behave when the Stop key is pressed.
If it is set to 0, then the machine will shuttle at zero speed. If it is set to 1, then the machine will be sent a Stop command.
Stop Before Wind
(0 or 1)
1 = issue Stop command before going into wind from play.
Setting this option to 1 will cause a stop commend to be sent to this machine between a wind and a play operation.
Park Window
(frames)
Allowed error after a locate or chase operation.
This is the maximum allowed difference between the position required by the locate or chase operation and the actual final machine position.
If the difference exceeds this value, than another locate will be performed.
Edit Delay
(frames)
Number of frames the machine takes to respond to an Edit On command.
This setting should be used to compensate for the time required by the machine to perform an edit on (i.e. enter record) after receiving the command.
The compensation is applied during programmed external recording.
EE Delay
(frames)
Number of frames the machine takes to respond to an E to E (input monitor) command.
This parameter is similar to the previous value but applies to the response time to an E to E command.
Min Cue Speed
Smallest permitted value of shuttle speed command.
Units - 1/64th of play speed, i.e. 4 = 1/16th, 128 = 2*play speed. This value should be used to set the minimum shuttle speed for the machine. Higher values will result in the machine moving in response to shuttle wheel movements below the normal minimum shuttle speed.
Max Cue Speed
Largest permitted value of shuttle speed command.
Units = multiples of play speed.
This value should be used to set the maximum shuttle speed.
Larger values will result in higher shuttling.
This parameter can be used to slow down machine shuttling if desired.
Stop Count
(frames)
Machine must be motionless for this number of frames before a Stop is reported.
Increasing this value will force the MCS to wait for the specified number of motionless frames before considering the machine to be stopped.
Poll Timing
Time after frame edge that machine position reports are requested from the machine.
Each "unit" in the value is 128 uS (i.e. 10 = 1.3mS, 80 = 10mS).
Some machines do not update their internal position values until some distance into the frame.
Use this parameter to remove any ambiguity about machine position values.
A typical result of this parameter needing adjustment is persistent and random 1 frame lock errors.
Show MCS Machine Status
Displays or hides the Machine Status bar.
This shows either the status of the current group (the group master is indicated by a red * in the Machine name) or the status of the current machine in solo.
Machine Status is displayed above the Label List on the main Encore screen.
▶ To show or hide the MCS Machine Status, click the Show MCS Machine Status option in the Transport Menu.
When the Status is shown, the option is ticked.
• ID: shows the port number the machine is using.
- Machine: shows the name of the machine, usually indicating the model name.
- Offset: shows the offset from the Group Master.
- Position: shows the current position of the machine.
- Status: shows the current activity of the machine, i.e. Stop, Play, etc.
- Deviation: shows the difference between the machine's position and the timeline position. This takes any offset into account (i.e. if the difference is equal to the offset then the deviation is zero).
- Error: shows any errors reported by the serial connection to the machine, for example, mismatch in frame rate.
- RM: shows the current Record Mode. This will be DIS for disabled; INS for insert edit mode or ASS for assemble edit mode.
There is no dialogue box for this function.
Show MCS Group Status
This shows the overall status of the Group and the status of each individual machine in the Group.
The status of the Group Master is shown above the number 1.
The Group Status is displayed above the Label List on the main Encore screen.
The box at the right hand end shows the current system reference, either LTC (linear timecode) or VIDEO.
The background colour indicates the status of the reference source, with green for present & red for absent.
▶ To show or hide the MCS Group Status, click the Show MCS Group Status option in the Transport Menu.
When the Status is shown, the option is ticked.

There is no dialogue box for this function.
Locate/Cycle Window

This causes the MCS Labels dialogue box to be displayed.
A Locate or Cycle can then be executed.
▶ Select a label and the Locate button will become available, or
▶ Select two labels and the Cycle button will become available.
▶ Select the label(s), then click the function.
MCS Preferences
This causes the Preferences tab in the MCS page of the System Defaults to be displayed.
The MCS Presets are described under Preferences in the Options menu chapter.
MCS Presets
This causes the Presets tab in the MCS page of the System Defaults to be displayed.
The MCS Presets are described under Preferences in the Options menu chapter.

Reload Last Used Groups
This is used when Encore is started to restore the groups of machines, as they were setup the last time that Encore was running.
This option only needs to be selected when Encore is re-started.
Subsequent changes to the machine groups will be saved.
▶ To restore the group setup, click on Reload Last Used Groups in the Transport menu.
A confirmation dialogue box will be displayed. This warns that any groups that have been setup using the MCS Panel directly will be overwritten.
▶ Click Yes or No as required.
If the Preference Restore Last Groups When Encore Starts is enabled in System Preferences/MCS/References, this obviates the need for selecting this option.

Label List

If the Mix Tree is displayed in place of the label list, then a new label can be created by pressing the Tab button on the keyboard.
This will open the NEW LABEL screen (below) where you can type in a name for the label.
Allows users to create or Capture a point in timecode, modify it if required and assign a name to it.
The Label List is organised in timecode order.
These labels cam then be used to set Locate & Cycle points, for Safety Net times and Offline Editing functions and for globally locating attached machines to specific points on the timeline.
▶ To access the Label List, click on Label List in the drop down Lists menu, or click on the Label List icon.
The Label List dialogue box will appear.
To grab Timecode and create labels
▶ Check the Create Labels On The Fly checkbox in the Label List dialogue box.
▶ Click OK to return to the main screen.
▶ To grab timecode and create a label on the fly, press any letter key on the keyboard when the main Encore screen Label list is displayed.
The Add Label dialogue box will appear displaying the time when the key was pressed.
▶ To Create a label, type in the rest of the Label (edit the timecode if desired), then click OK or press Enter.
▶ If Use Current Timecode After Pressing OK is checked then the time will be grabbed again when OK is clicked (or Enter is pressed) and that time will be used for the Label.
Locate Labels
The label selected for locating to can be chosen using the keyboard or by using the MCS Labels dialogue box on the screen.
The timecode can also be adjusted or entered manually in the MCS Labels dialogue box.
▶ To select a Label on the screen click on a label. The Label will be highlighted in blue and the Locate button will become available.
▶ Click the Locate button, press the LOC key, the Enter key or the Play key.
The transport will wind or rewind to the required time. (If the Play key was used, it will drop into Play).
▶ To change or enter the timecode manually, click on the timecode field at the bottom of the screen to highlight it.

The focus of the MCS Labels dialogue will change to the Locate To time which will show the timecode of the selected Label (or zero if no Label has been selected).
▶ Use the mouse or the keyboard to adjust the timecode manually (use the Cancel key to undo changes to the timecode), then either:
- Click the Locate button
- Press the LOC key
- Press the Enter key, or
- Press the Play key.
The transport will wind or rewind to the required time.
If the Play key was used, it will drop into play.
The Label List can also be used to create or edit a label if there is no label with the required timecode.
To Modify a Label
▶ Click on the required Label in the Label List dialogue box.
The label will appear in the Selected Label box.
▶ Modify the entry in the Selected Label box, change the Timecode manually as required and then click the Update button.
The label will be changed in the list.
To Delete a Label
▶ Click on the required Label in the Label List dialogue box so it appears in the Selected Label box.
▶ Click the Delete button and the label will be removed from the list.
To Delete all Labels
▶ Click the Delete All button in the Label List dialogue box.
All labels will be deleted.
Capture Timecode
Allows the current Timecode value to be captured and stored in Timecode Preset A.
To Capture Timecode
▶ Click on Capture Timecode in the drop down Tools Menu or press Ctrl/K on the keyboard.
The current Timecode (as displayed on the main Encore screen) will be stored in Timecode Preset A.
Path Names

A Path Name cannot contain more than four characters.
Allows a 4 character name to be assigned to any of the paths in the current mix setup.
NB: It is not possible to rename paths if the Mix Setup is read-only.
▶ To name a path, click on Path Names in the drop down Lists menu or click the Path Names icon. The Path Names dialogue box will appear.
▶ Select the desired paths by clicking on the associated path number.
The related System and User Names will appear in the System Name and User Name boxes.
▶ Edit the User Name, click Name, and the new name will be inserted into the list.
Auto Increment
If this box is checked, and if the name should contain a number as it's last character, then when you click on Name, the highlight bar will drop to the next entry in the list, the name will be copied down and the trailing number will be incremented by 1.
Auto Number
▶ Allows you to number paths sequentially by pressing Name.
Default
Select a path and click Default to rename that path to its default name.
Default All
Resets all names to default.
Import / Export
It is possible to import and export all path names as a *.CSV file (Comma Separated Value file).

Range
Allows you to define a range of paths to be renamed. As shown here, this will rename paths 1-24 as P-T 1, P-T 2 etc up to P-T 24.
When you exit the Name page, these path names are then written to the mix setup without having to press KEEP.
This is to prevent accidental loss of names.
Fader Moves List

Displays the Event List with Fader Move events selected automatically.
The Fader List shows:
- The Timecode at which the event occurred (a special case of this is the Initial S.S. which is the initial snapshot of the state of the control).
- The Event Type
• The state the control was changed to. - Name is the user name for the path the event took place on.
Events can be added or deleted.
See below on Mute List for more information about managing this list.
Mute List

Displays the Event List with Mute events automatically selected.
The Mute List shows:
- Timecode at which the event occurred - a special case of this is the Initial S.S. which is the initial snapshot of the state of the control.
• The Event Type which is the type of control.
• State which is the setting the control was changed to.
Events can be modified, added or deleted.
To Browse the Event List
▶ Click in the scroll bar at the side of the Event List.
▶ To jump to a Timecode point in the Event List, click on the Timecode in the Timecode box and enter the Timecode manually.
Click the Locate button.
The list of events will jump to the Timecode entered.
▶ To jump to a Timecode point from the Label List, click the Select From List button in the Timecode box.
The Select a Label dialogue box will appear.
▶ Click the label with the required Timecode, and click OK.
The Timecode in the Timecode box will be set to the value from the selected label.
▶ Click the Locate button.
The list of events will jump to the Timecode selected.
▶ To jump to the current Timecode, click the Current Timecode button in the Timecode box.
The Timecode will be set to the Timecode displayed on the main Encore screen.
▶ Click the Locate button, and the list of events will jump to the Timecode selected.

If the Timecode selected to locate to is beyond the last item in the Event List then a dialogue box will appear to indicate that no item can be located.
To change the Selection of Events displayed
▶ Click on the drop down arrow next to the Event Type in the Filter box.
▶ Click on the required Event Type in the list, or
▶ Click on All to see all Event Types.

▶ To view more than one event Type in the List, click Set Custom Filter in the Events box.
The Event Filter Selection dialogue box will appear.
▶ Click on the check boxes to set the required selection of Event Types, then click OK to return to the Event List dialogue box.
To change the Paths listed
▶ Click the Selection radio button in the Paths box.
▶ Click the required paths in the Path list (click the Clear button to reset the selection and start again).
To Add to the Event List

▶ Click the Add button, and the Add New Event dialogue box will appear.
▶ Click the required path(s) in the Paths list (up to 20 paths can be selected).
▶ Click the drop down arrow for Process and select the required process.
▶ Click the drop down arrow for Control and select the required Control.
▶ Click the up/down buttons next to the Value box to change the Value.
▶ Either:
• Change the Timecode manually,
- Click in the Label List to set an existing time, or
- Press A to F to use a Preset.
Timecode zero may not be used as this is reserved for Initial Snapshot values.
▶ Click on Add to insert the event and return to the Event List box.
▶ When Events have been added / deleted, a new Mix/Pass will be created and added to the Mix/Pass Tree on clicking Exit on the Event List dialogue box.
(You can abort these changes by pressing Cancel).
To Delete from the Event List
▶ Click on the Event to be deleted, and the Timecode for the selected Event will be highlighted.
▶ Click on Delete and a confirmation dialogue box will appear.
▶ Click on OK to delete the Event.
▶ When Events have been added or deleted, a new Mix/Pass will be created and added to the Mix/Pass Tree on exiting the Event List dialogue box.
To Modify Multiple Events
The Timecode and the control State (value) can be modified for all Events except Initial Snapshot (ISS) Events.
▶ Click on an Event in the list, or select a range of Events (e.g. click and drag down part of the List).
▶ Click the Modify button, and the Modify Event dialogue box will be displayed.
The small Events list on the right of the dialogue box will show the selected Event(s).
There are two separate areas for modifying event times and values. Each has an individual Apply button.
▶ Click on an Event, and the Absolute timecode will change to match the Event timecode.
To Modify an Event Time
▶ Click the Nudge or Absolute radio button as required.
Nudge
▶ If Nudge is selected, click on the scroll arrows to adjust the timecode by frame amounts or change the timecode manually.
▶ Click the Forwards or Backwards radio button as required.
- Forwards will subtract the Nudge value from the event time.
- Backwards will add the nudge value to the event time.
▶ Click the Apply button in the Time area, and the timecode for the selected Event will be adjusted in the list.
Absolute
Either:
- Click on the scroll arrows to adjust the timecode by frame amounts,
- Change the timecode manually, or
- Click the Labels button to choose a time from the Select a Label dialogue box.

▶ Once the timecode is selected, click the Apply button in the Time area.
The timecode for the selected Event will be set to the Absolute timecode value.
To modify an Event Value
▶ Either:
Click on the scroll arrows next to the Event Value.
The amount by which the value changes depends on the control type. Switches can be set to On or Off.
▶ Click the Default button.
The Event Value will be set to the default according to the currently loaded User Defaults file.
▶ Click the Apply button in the Value area.
The value for the selected Event will be adjusted in the list. When all modifications are complete, click the OK button.
The Modify dialogue box will close and the Event List will be updated with any changes that were made.
When Events have been modified, a new Mix/Pass will be created and added to the Mix/Pass Tree on exiting the Event List dialogue box.
NB: If the Save Mix After Apply box is checked, then a new Mix/Pass will be created when you click Apply.

To Modify a Single Event
▶ Click the event and click Modify.
This screen allows you to change the timecode and/or the state of the event.
▶ Click OK when finished, a new Mix/Pass will be created and you will be taken back to the Mute list.
To Create Labels from Events
▶ Click the Label Event button.
The Add Label dialogue box will be displayed.
The timecode on the label will be taken from the selected Event.
The name of the label will show details of the Event (path name or number, control type and the control value).
If required, edit the label name and/or the timecode.
▶ Click OK, and the label will be added to the Label List.

Custom Event List
Displays the Event List dialogue box with the current Custom Selection of Event types selected automatically.
The Event List shows:
- Timecode at which the event occurred - a special case of this is the Initial S.S. which is the initial snapshot of the state of the control.
• Event Type which is the type of control.
• State which is the setting the control was changed to.
• Name is the name for the path the event took place on.
• Path is the System Name for the path the event took place on.
Events can be added or deleted.
See the preceding section on Mute List for more information about the Event List.


Gangs & Automation
With a Master and Slave link, automation is only written for the Master fader; the slave fader is given an offset value which it replays with regard to the Master fader position.
Because of this, it is possible to add or subtract faders to a Gang 'on the fly' and they will follow the Master faders automation, keeping any offset in place.
The Slave faders automation is said to be 'soft-written' ie it only has offset value written with reference to the master, not an absolute position.
If you wish to turn this soft data into hard data, then the Gang must be Coalesced.
Display Gangs
Shows the current Gang structures in graphical form.
As shown here, there are 4 Gang structures in place; Masters are shown with a red F; slaves are shown in pale blue F.
The top Gang has Fader 1 controlling faders 2 and 3, while fader 3 is also a Master to faders 13, 14 & 15.
'Nesting' the gangs like this is only available up to 2 levels. When nesting faders in this way, please use with extreme caution.
If there are large offsets between Masters and Slaves, sudden increases in levels are possible.
Clear All Gangs
Removes all of the gangs.
Coalesce All Gangs
Destroys all gang structures and hard writes any automation data for all slaves in all Gangs into a new mix/pass.
Coalesce Selected
Destroys the selected Gang and hard writes any automation data for that gang only into a new mix/pass.
Clear Selected
Allows you to select a single gang Master and delete just that Gang.
▶ Selecting a Slave fader and pressing Clear Selected will remove just that slave from it's gang.
When clearing Gangs using either of these two methods, the state of the two tickboxes underneath is taken into account.
Keep Master Moves
Will remove the Gang, keep the automation for the Master fader and discard the automation for the slaves.
This will create a new mix/pass if logged onto Automation.
Clear After Coalescing
Will remove the Gang structure after the automation has been coalesced.
This will create a new mix/pass if logged onto Automation.
88R Options
Clear Links
Removes any fader Links that are in place on the console.
Clear All Gangs & Links
Removes all Gangs & Links that are in place on the console.
Suspend Gangs
Keeps the current Gang structure, but temporarily suspends it until this option is selected again.
Automation will not be written for Slave faders when the Master is moved.
Suspend Links
Keeps the current Link structure, but temporarily suspends it until this option is selected again.
Automation will not be written for other faders in the Link when the Master is moved.
These four 88R options do not invoke any of the Coalesce functionality.
Use with caution, as when clearing either Gangs using this method, it is possible to lose automation data unless it is Coalesced.
There is no dialogue box for the four 88R options.

Diagnostics (Analogue)

This program tests the integrity of the hardware for all the faders, leds, touch-sense, motors etc on the surface of an 88R console.
These tests should only be run by AMS-Neve personnel only, or upon their instructions.
Fader Direct... (Analogue)

▶ Click on the tab at the top of the screen to select the function.
All 3 screens are identical.
Fader Direct
Selection of each channel (from 1-96) on this screen will switch the input source to directly before the fader, cutting out all the remaining channel electronics.
This will be displayed on the meter bridge.
Channel Meter
Allows individual line inputs to be metered on the meter bridge.
Overdub
This allows individual tracks on multitracks recorders to be armed, so that when the console is put into Overdub mode, these tracks will also drop into Record.
Mic / Line Rack Control

This is for any AMS-Neve Mic/Line modules that may be in your system, for example 1081R modules.
For operation, please see separate Mic/Line rack documentation.
LS Monitor Settings (Analogue)

▶ Each time the Monitor Settings screen is opened, you will be asked if you wish to revert to the default settings.
- Click YES and everything will be reset to default values (shown left).
- Click NO and the last used settings will be loaded.
The Monitor Settings form part of any Recall Store that is taken, so can be optionally applied whenever a Recall file is loaded.
Some of the options on screen are tied.
For example, un/ticking the Left Fader Mute or Bus Cuts will also un/tick the Right.
Reassign (Analogue)
The Reassign feature allows the reassigning and remapping of automation from one fader to another.
This could be used for ease of operation, or because automation is being transferred to another console of a different size.
In this way, only essential information from the original console's automation will be played back on the new desk.
NB: Source automation is not affected in any way by the remapping procedure.
To accommodate this feature, the console type & layout is now saved transparently with the mix.

If the user loads automation created on another desk, the Reassign program will automatically launch a prompt if it detects a change in the desk size or configuration (whether this be larger or smaller than original console. The Reassign information is saved with the automation files when loaded onto the target desk).
▶ Clicking No will leave the original automation intact, and any automation relating to faders that may no longer physically exist will be ignored.
▶ Click Yes to open the Reassign screen.

This screen shows the desk size for the original console the automation was created on in the upper window, and the current console size in the lower window.
▶ Clicking on any of the tabs (1-12, 13-24 etc) will display those faders.
▶ To remap faders, click the Source Fader tab in the top window (they will have a green outline bar placed round them).
▶ Drag this selection onto the first of the destination faders in the bottom window.
(If you drag the mouse through any of the numbered tabs, the lower display will change to show those faders).

The lower window will show faders in red that have had automation remapped plus the source channel (in effect, the automation between the source and destination is swapped).
A red dot will appear on the numbered tabs in the lower window to show that faders within that range have been affected.
▶ To reset the mapping for a fader, click on the relevant fader in the lower window, and both the source and destination automation will be returned to their original faders.
▶ Once the remapping is complete, click the Save & Use button.
The Reassign Status will turn white and show Active.


▶ Tick the Show Names box, and whenever the mouse is hovered over a channel, the user given (or default) name will be briefly shown as a small fly-out display.

▶ Alternatively, you can click on Templates, and be taken to the filing dialogue where you can Save, Load and Delete these Reassign templates as you would any other file.
Once the Reassign is active, a tick will be placed against ReAssign Active on the Automation Menu.

▶ Alternatively, you can click on Inactive, and a prompt will remind you that current changes have not been saved.
▶ Click Yes, to apply changes and turn Reassign on.
▶ Click No to abandon changes but still turn Reassign on.
▶ To clear the remapping selection entirely, click New.
▶ Click Yes or No as desired.

Routing
Routing Screen (not DFC): On single-screen digital systems, this opens the Routing Screen on top of the Encore screen.
The 3 styles of display can be cycled by clicking on the screen itself, then using the Page Up and Page Down buttons on the keyboard.
Offline Routing Assistant (Digital consoles only)
Designed for Offline versions of Encore only where initial mix setup preparation & routing can be prepared away from the console (please refer to the Offline Encore documentation for further details).
This feature is not designed to work on On-line consoles.
Stem Mixer (88R only)
The console SCRN button opens and closes the Stem Mixer page within Encore.
The Stem Routing page can display 24 channels worth of stem assignment data at a time.
When this page is displayed, pressing any of the console Bay Selector buttons changes the display to show the selected channels.
Console buckets are linked together for display and this is shown underneath the buttons in the Bay Selector.
▶ Pressing either button of each linked pair in the Bay Selector will display the selected 24 channels' stem assignment data.

Alternately, the page can display a single stems' worth of channel assignments and information at once (click the button at the bottom of the screen or press the stem button on the Stem Mixer panel to see a single stem).
The TM and BM buttons swap the display between showing the Top Matrix and Bottom Matrix.

The Colour Groups/Colour Stems button swaps between showing all stem members in the same colour but a different colour for each stem (screen above), and colour coding each part of the stem, so LCR is red, LS/RS is yellow and 7/8 is green uniformly for each stem (screen left).
Stem Monitor (88R only)
With the screen enabled, then further control over the 2T mix is possible.
▶ Use the 2T 1 to 2T 4 buttons to select a mixer on screen. The display is divided into blocks of 8 over 2 pages. The stems contributing to the mix are grouped on the left.
Inputs turned On are shown in their stems, with Trim level, Bus or Tape, Pan and Solo status also shown.
The last group on the right displays Main Bus, Patch or Stem Mon.
The screen can swap displays by clicking on the large 2T1 text as shown next to the Neve logo.
It will cycle through all 4 of the 2T mixers then onto the Stem Monitor.


Stem Naming Options
For all of these displays, the grey column just beneath the Stem name can be named with up to 10 characters.
The name will be displayed vertically.
NB:
Names can only be applied after the routing has been put in place.
▶ To name an input, click anywhere on the grey column itself to open the dialogue naming screen.

Clear Channel will clear that channels name and routing.
Clear All will clear all the 8 names within that stem only.
With Auto Next ticked, the same name will be carried over to the next stem member.
In this way, it is possible to either give each member the same name, or clear a sequential block of names.
Routing Options
The Stem Monitor page not only displays information sent from the console, but also allows the stem information to be set on screen.

▶ To set stem information using this screen, click on the first available blue box just underneath the input name corresponding to the stem you wish to route to. This will open an Options screen.
The currently selected stem will be displayed under Stem.
▶ In the Channel list, select the channel you wish to send to that stem member.
▶ In the Routing section, click on the destinations you wish to send the input to.
▶ Click OK.
If the Auto Next box ticked, then as you click OK, then next available channel will be selected and placed in the next available position using the same surround selections.

▶ When adjusting a LEVEL or PAN, hover the mouse over the relevant part of the screen to see a fly-out window showing the value being applied.

Star Command
Pro Tools ™
It is possible to set up Pro Tools via a network or USB (using Midi) so that automation information can be bi-directionally passed between the console and Pro Tools.
Depending on your hardware setup, you may need to enable the USB port in your computers BIOS settings.
The setup procedure is the same for analogue and digital consoles.
Control can either be established over a network, or via Ethernet MIDI.
From the Tools menu, select Star Command / ProTools Midi Hub and the Encore Midi Hub will open as an icon in the System Tray if it has previously been set up.
If it has not been set up, it will appear on screen. Each quarter of the screen will show the status of the comms.
The Encore Midi Hub application has to remain open for the application to work, although once it has been set up it can be minimized.

It will appear as an icon on the Windows System Tray (circled, left).
▶ To reopen the application, click the icon.

The Midi activity over the network is also seen on the top right of the main Encore screen title bar as a series of flashing red dots.
There is 1 dot for each block of 8 paths.
MIDI over LAN (Local Area Network)
If the Encore Midi Hub is closed, Pro Tools will display the error message:
Pro Tools is unable to communicate with HUI. Power cycle HUI and check its connections. Note, if HUI is not in use, update the Peripherals dialog to prevent further warnings.
Should this happen, reopen the hub and then check the settings.
This presumes that both the console PC and Pro Tools is on a network.
▶ You will need to install the ipMIDI programme on the ProTools workstation to enable this.
More information from www.nerds.de.
There are 3 steps in setting up comms over a network:
• Install ipMIDI on pro Tools
- Configure Pro Tools
- Configure Encore
Before setting up the midi configuration, ensure that Encore and all it's components are closed, only opening it when all other software has been configured.

Step 1
▶ Install the ipMIDI programme from www.nerds.de.
This programme allows the Mac to receive midi commands over a network.
Step 2
▶ Configure Pro Tools.
For more information, please see your Pro Tools documentation.
Step 3
▶ In Encore, from the Tools menu, select Star Command / Pro Tools MIDI HUB.
(The screen will be slightly different for analogue or digital consoles).
▶ Ensure the Connect By Network box is ticked.
If it isn't, you will have untick it, then close and reopen the MIDI Hub.
A warning screen will inform you of this.
▶ Click the Network Channel box in Controller 1.
A screen will open showing the available midi channels in green, and those already in use in red.

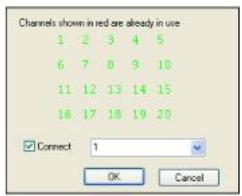
In a studio there may be more than one Encore unit transmitting midi data across the network so it is important to map the right Midi data to the right channel.
▶ Click the Connect button and the pulldown list of midi channels will become available.
▶ Select the MIDI channel you wish to use and then click OK.
▶ Repeat for Controllers 2, 3 and 4.
▶ To disconnect a MIDI channel, untick the Connect button for each Controller.
▶ Click OK and minimise the Midi Hub to carry on working.
Ethernet MIDI
This setup is used when a network is not available, and typically uses MOTU Fastlane to Midi converter boxes.
On the Midi Hub, ensure the Connect By Network box isn't ticked. If it is, you will have untick it, then close and reopen the MIDI Hub. A warning screen will inform you of this.
For each of the Controller boxes on screen, there are 2 pulldown menus.

▶ Set the Input Channel and Output Channel for Controller 1 to 1.Ethernet MIDI.
▶ Click the local Apply button, and you will start to see activity in the Handshake bar.
▶ Set the Input Channel and Output Channel for Controller 2 to 2.Ethernet MIDI and repeat the rest of the setup as above.
▶ Repeat for the Controller 3 and Controller 4.
IP-MIDI Network conflicts
An issue has arisen concerning IP-MIDI HUI communication with Encore Two V5.3 and Pro Tools HD 7.4.
Other versions and systems may also be affected.
If your Encore system crashes with an AutEngX error whilst running HUI in Pro Tools via an IP-MIDI port, please check your network setup.
This is known only to occur where the Encore PC and Pro Tools CPU are connected to a corporate Local Area Network (LAN).
For greatest stability and reliability, please keep the Encore PC and Pro Tools CPU on an isolated network free from any other IT devices.
We cannot guarantee the stability of HUI where more complex network requirements are needed, however we are currently investigating this issue.
Disabling HUI in Pro Tools will alleviate this error if immediate intervention is required.
After following the network suggestions above, logging out and back into your Encore PC, then following the on screen recommendations will bring your system back online.

Pyramix
Both Encore and Pyramid need to be either on the same network or connected via discreet cabling, and they must both have the same IP address.
This is set from within Pyramid in Settings / General Settings / Controller / Add an IP address.
Give it a name, and when prompted for the driver, select Driver-OASIS.
The IP address in Windows is set within Control Panel / Network / Internet Protocol / General / TCP/IP, although you may not need to access this.
▶ Run the program called PyriPyri.exe located in C:/Encore (this also gives the Windows IP address.
▶ The Console box must be ticked, and the port should be set to 2000.
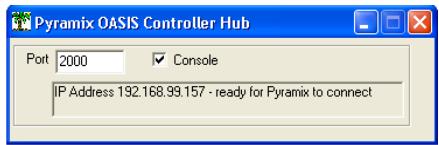
The text will show whether there are valid communication between Pyramix and the console.
▶ To set up Pyramid, go to Open Project.
▶ After a Save+Load, Pyramid must be re-synched again, using the General Settings page in Pyramid, then hitting Apply Changes.
NB:
In Pyramid / General Settings, if there are other controllers available and configured, they must all be disabled apart from the Encore IP as this will cause conflict.
Pyramix will map Input 1 to Input 1; Input 2 to Input 2 etc. It is a straight 1:1 ratio and is not supported for all other path types.
The currently supported controls are Faders, Pans and Cuts.

Recall (88R only)
When Recall starts, the console is taken over by the Recall application. The Channel Solo keys are used to select the Paths for display on screen.
The console will mute the audio when Recall scans the console for:
• Making a new Store,
- Updating a Store
- Resetting with Auto Recall, or
- Resetting with Hold Recall
There is no store loaded by default when Recall starts.
A Store must be loaded or created before Recall's other functions can be used.

▶ To start the Recall application, select Recall from the Tools menu, or select the Recall icon.
The main Recall Store Management screen will open.

▶ To create a new Recall Store, click Create Store on screen.
(If you already have a Recall Store loaded and it has changed then a dialogue box will be displayed to ask if you want to save these changes. Click Yes or No as required).
The Create Recall File dialogue box will be displayed.
It has a list which shows the names of all existing Recall files within the current filing hierarchy shown at the top of the screen.

▶ If you do not wish to save the file to this location, either:
- Select Browse from the screen. This will take you to the standard Windows explorer screen where you can select the location to keep the Store.
- Select Filing. This will take you to the Encore Automation directory and you can select to save the file into another Client/Project/Title/Mix, then press Back once selected.
As you are logged onto Automation, it defaults to naming the store as the current Mix (left).
▶ Either keep the name as it is, or type a name for a new Recall file.
▶ Press Enter or click OK.
If the name is already used then a dialogue box will be displayed to ask if you want to overwrite the existing file.
▶ If you click No, you will need to edit the name of the new Recall file so that it is unique, otherwise click Yes.
Recall will scan the console and store the current control settings in the new Recall file.


The console will be muted while Recall scans the controls.
All the Channel Solo keys will flash in order as the scan completes, and once verified, a confirmation box will be displayed.
▶ Click OK to close.
Channels and the Monitor section can be selected at any time, including when Recall is actively scanning the console for a Reset.
To select a Channel
▶ Either:
- Press the Solo key on the required Channel module.
- Press the + and - keys on the numeric keypad to step through the Channels.
- Click Increment or Decrement on the drop down Channel Select Menu to step through the Channels, or
- Click Set Path in the drop down Channel Select Menu (the Set Path dialogue box will be displayed) and enter the required Channel number. Click OK or press Enter. If the Channel number is out of range (eg. you enter 42 and there are only 36 Channels) it will be ignored.

In all cases, the appropriate Channel will be displayed. The Monitor section will be displayed when stepping through the console.
To select the Monitor section
▶ Either:
- Press the + and - keys on the numeric keypad to step through the console to the Monitor section.
- Click Increment or Decrement on the drop down Channel Select Menu to step through the Channels, or Click Select Monitor on the drop down Channel Select Menu.
In all cases, the Monitor section will be displayed.
Resetting to a Recall Store
The normal procedure for resetting the console to a Recall store is:
- Load the required Store.
- Use the View Menu to turn off sections that do not require resetting (optional).
• Use Auto Recall to Reset the console.
▶ To load the required Recall store, click Open Recall Store on the File Menu.
▶ If the currently loaded Recall file has changed then a dialogue box will be displayed to ask if you want to save the changes (click Yes or No as required).

The Load Recall dialogue box will be displayed.
It has a list which shows the names of all existing Recall files.
▶ Type the name of the Recall file or click the required file in the list.
▶ On the right side of the screen, set the options for those elements of the Recall Snapshot that you wish to send to the console.
These are global options and affect that particular control/switch across all paths.
▶ Press Enter or click OK.

If any boxes have been ticked to load settings from the Recall Snapshot, a second window will ask for confirmation that you want these settings restored to the console.
▶ Click Yes or No.
- Clicking Yes sends all of these ticked control values immediately to the desk, plus the Recall file will be loaded.
- Clicking No will load only the Recall store and ignore the information held in the desk snapshot.

To turn off sections that do not require resetting
▶ Click View in the menu bar, and the drop down View Menu will display the section names corresponding to the five sections of a Channel module.
The section names that are ticked (checked) will be scanned during the reset operation.
▶ Click a section name to include/exclude that section from the reset operation.
Auto Recall
▶ Select Activate Auto Recall in the drop down Activation Menu.
The shortcut keys A, H, D and X at the top right of the screen can be used as well as the dropdown menus to activate different functions:
• A - Auto Recall
• H - Hold Recall
• D - Disable Recall
- X - Exit Recall
Push buttons and keys are displayed on-screen with LEDs lit.
This is a display convention to make them easy to see, and does not mean that the LEDs for the real push buttons and keys will be illuminated when they are matched to the Recall Store.
The console will be muted and Recall will start scanning the console surface, starting at Channel 1:
- If a scanning range has been set using the Options dialogue box, then only those channels in the range and the Monitor Section will be scanned.
- If the View Menu has been used to disable the display of any Channel module sections, then these sections will be ignored by the scan (but the controls will still be displayed).
The screen will display the Channels and the Monitor Section as the scan proceeds.

When Recall finds a control that does not match the currently loaded Store, the scan will stop and Recall will display the section(s) and the controls which do not match. The Channel Solo key will also illuminate. For example, on the left is shown the Monitor Section.
▶ Adjust each control so that it matches the setting in the Recall Store.
▶ As you alter each control, the large expanded graphic on the top right side of the screen will change so you can match up the control to the red line indicating the controls position.
This large graphic will chase to whichever control is being altered.
For Faders and Mutes, their adjacent automation mode led will display if the control needs resetting manually:
- For Mutes, the led will flash if the state needs to be changed (once the state has been toggled the led will extinguish).
- For Faders, the null leds will indicate which direction the fader needs to be moved to match the Recall store.
When the fader is within 3dB of where it should be, the led will start the flash.
Once it has reached the correct position, the led will extinguish, and as each control is matched it will be removed from the display.
When all controls in a section are reset, the section will be replaced by text indicating the section is reset.
When all controls on a Channel module or the Monitor section have been reset, Recall will continue scanning.
Auto Recall scans the surface three times in succession (this value can be changed in Recall / Options / Recall Setup. This is in case any controls have been accidentally nudged when adjusting other controls).

When the three scans are complete, no problems have been found and all Channels and the Monitor Section have been reset, a confirmation dialogue box will be displayed.
The console is now completely reset according to the Recall Store that was loaded.
▶ Click OK.

File Menu
The File Menu has options relating to the management of Recall Stores, plus an option to Exit Recall.
Create New Recall Store
This is used to create a new snapshot of the console and save the snapshot as a Recall Store.
▶ Click Create New Recall Store on the drop down File Menu, or press the S5 key on the console surface.
(If the currently loaded Recall file has changed then a dialogue box will be displayed to ask if you want to save the changes. Click Yes or No as required).

The Create Store filing dialogue will be displayed.
It has a list which shows the names of all existing Recall files.
▶ Type a name for a new Recall file.
As you are logged onto Automation, it defaults to naming the store as the current Mix (left).
▶ Either keep the name as it is, or type a name for a new Recall file.
If the file name is already in use, then a dialogue box will be displayed to ask if you want to overwrite the existing file. If you click No, you will need to edit the name of the new Recall file so that it is unique.
▶ Press Enter or click OK.
Recall will scan the console and store the current control settings in the new Recall file. The console will be muted while Recall scans the controls.
Open Recall Store
This is used to load a previously saved Recall Store.
▶ Click Open Recall Store on the drop down File Menu, or press the S2 key on the console surface.
(If the currently loaded Recall file has changed then a dialogue box will be displayed to ask if you want to save the changes. Click Yes or No as required).
The Open Recall File dialogue box will be displayed.
It has a list which shows the names of all existing Recall files stored with the currently loaded C/P/T/M automation.
▶ Type a name for a Recall file or click the required file in the list, then press Enter or click OK.
The selected file will be loaded, and the control settings in the Store are shown on the screen.

Open Recent Store
The flyout menu will show the (up to) 9 last-loaded Recall stores, the most recent store being at the top of the list.

▶ Click the desired store to load.
Search Recall Stores
Allows the user to search the hard drive for recall stores either by username, client, project, title, mix or filename.
▶ Select the search criteria and then click Search.
A list of all the files that match the search criteria will be displayed.
▶ Double click on a store to load it, or select a store and then click:
Copy Store to Current Location
This will copy the select store into the current Client/Project/Title/Mix location.
▶ You will be asked to confirm this action.
This will ensure the a copy of the current store is saved in the same location as the currently loaded automation.
Save Recall Store As
Used to save a Recall Store that has changed with a unique name
The Save Recall File dialogue box will be displayed.
▶ Type a new unique filename and click OK.
The file will be saved with its existing name.
You can also select one of the other file names to save to and overwrite.
Exit
The Recall Screen will close and the console will return to normal operation.
View Menu
The View Menu is used to select which Channel module sections are included when executing a Reset.

▶ To include or exclude each part of the console, select each one individually.
A tick in the menu indicates that this section of the console will be included in the Reset.
Channel Select Menu
The Channel Select Menu is used to select which Channel is displayed by Recall, or to select the Monitor section for display.
Next and Previous
Used to select the next Channel for display when Hold Recall is active or Recall is deactivated.
▶ Either:
Press + on the numeric keypad, or Press - on the numeric keypad.
In both cases, the next or previous channel will be displayed.
- If the last Channel is being displayed, the display will go on to show the Monitor section.
- If the Monitor section is being displayed, the display will go to the first Channel.
Set Path
Used to jump the display to a particular Channel. Enter the required Channel number.
Click OK or press Enter, and the Channel will be displayed.
If the Channel number is out of range (eg. you enter 42 and there are only 36 Channels) it will be ignored.
Select Monitor
Used to select the Monitor section for display.
Select Score Panel
This is only effective if you have the optional Scoring Panel fitted.
Please see separate documentation.
Activation Menu
The Activation Menu is used to cause Recall to start a Reset operation, or to turn off the current Reset operation.
Activate Auto Recall
Auto Recall is used to scan the surface to check for differences between the current Recall Store and the console surface.
When differences are found, the scan stops and prompts for the surface controls to be matched to the Store.
The scan continues automatically when the controls match the Store.
Auto Recall will scan the surface three times in succession, confirm the console has been Reset and then deactivate automatically.
If any control sets have been de-selected in the View Menu then those controls will not be scanned for reset.
NB:
Push buttons and keys are displayed with LEDS "illuminated".
This is a display convention to make them easy to see, and does not mean that the LEDS for the real buttons and keys will be illuminated when they are matched to the Recall Store.
▶ Select Activate Auto Recall on the Activation Menu, the console will be muted and Recall will start scanning the console surface, starting at Channel 1.
If a scanning range has been set using the Scanning Options dialogue box, then only those Channels in the range and the Monitor Section will be scanned.
The screen will display the Channels and the Monitor Section as the scan proceeds.
When Recall finds a control that does not match the currently loaded Store, the scan will stop and Recall will display the section(s) and the controls which do not match.
▶ Adjust each control so that it matches the setting in the Recall Store.
As each control is reset it will be removed from the display.
When all controls in a section are reset, the section will be replaced by text indicated the section is reset.
When all controls on a Channel module or the Monitor section have been reset, Recall will continue scanning.


When all Channels and the Monitor Section have been reset, a confirmation dialogue box will be displayed.
Verify Recall Store
Recall files can be manually or automatically verified.

▶ To automatically select this option, select the Verify After Create on the Create Recall filing screen.
The message Verify Successful will be displayed if all OK. If not (for example a module has been removed), a screen will show the results, and which channels or controls have failed.
▶ If this happens, then click Try Creating The Store Again can be selected which will overwrite the store with the same name as previously entered.
▶ Cancel can also be selected which will keep the existing Recall store.

Activate Hold Recall
Hold Recall scans the current Channel module and displays the controls which need adjusting.
After making adjustments, you must then manually select the required Channels that you wish to Reset.
Recall is then Deactivated when all the required Channels have been reset.
▶ Select Activate Hold Recall from the drop down Activation Menu. The console will be muted and Recall will scan the currently displayed Channel Module/Monitor section.
If the View Menu has been used to disable the display of any Channel module sections, then these sections will be ignored by the scan.
If any controls do not match the currently loaded Store, Recall will display the section(s) / controls which do not match.
As each control is reset it will be removed from the display.
When all controls in a section are reset, the section will be replaced by text indicated the section is reset. When all controls on a Channel module or the Monitor section have been reset, Recall will display All Controls Reset next to the Channel number.
▶ When all the required Channels have been reset, select Deactivate Recall from the drop down Activation Menu.
Deactivate Recall
Deactivate is used to turn off Auto Recall and Hold Recall.
It would normally be used to turn off Hold Recall, because Hold Recall does not turn itself off automatically.
▶ Select Deactivate Recall from the Activation Menu, and Recall will stop scanning the console.
The screen will revert to displaying the control settings in the current Store.


Options Menu
The Options Menu is for miscellaneous settings.
Recall Setup
Setup User Desk
This displays the Recall 88 Setup dialogue box which allows you to configure Recall to match the console.
These settings will only need to be changed if Channel modules are added or removed, or if the computer is upgraded.
Studio Information
Miscellaneous information about the studio.
▶ Click in the required box and edit the information as required.
Desk Size
This option describes the size of the console in multiples of 12.
Accuracy
The Rotary Tolerance is the degree of accuracy required to match a rotary control to the current value in a Recall Store.
It's default is 30 which is Standard matching, although it can be set from 0 to 255.
A higher value means that the position of a rotary control does not need to be as close to the Store position for Recall to detect a match.
The default value is 30 (recommended).
Scanning Range
This is used to set which Channels are scanned when Auto Recall is activated.
▶ To set the range of Channels to be scanned, click the up/down buttons on the right hand side of each box to set the scanning range. Once set, they will remain set until it is changed again.
Auto Recall
With Number of Scans, you can specify how many scans the desk performs during a verify operation.
By default this is set to 3, although it can be set between 1 and 6.
88R Standard Colour
With this option ticked, the colours of Windows screens are matched to the standard 88R colours.
Operations Menu
The Operations Menu is used for updating the current Recall Store, either by taking new values from the Channels or by copying values between Channels with the Map Channel utility.
Store Whole Desk In Memory
This option takes a snapshot of the whole console and updates the current Recall Store.
This may be useful, for instance, when you make minor adjustments across several channels and you wish to have the new settings saved to the current Store.
▶ Click Store Whole Desk In Memory in the drop down Operations Menu.
The Store will be updated with all settings across the console. The console will be muted while Recall scans the controls.
The Store must be saved if the changes are to be kept.
There is no dialogue box or confirmation for this operation.
Store Only This Channel
This option takes a snapshot of the current Channel and updates the current Recall Store.
▶ Select the required Channel (the Channel will be displayed on the screen).
▶ Click Store Only This Channel in the Operations Menu.
The Store will be updated with a new snapshot of the selected Channel. The console will be muted while Recall scans the Channel module. The Store must be saved if the changes are to be kept.
There is no dialogue box or confirmation for this operation.


Map Channel
The Channel Mapping Tool is a screen that is used to copy snapshot settings between Channels.
▶ Click the left/right arrows at the top of the screen to scroll the Channels.
▶ Click on the required source Channel.
It will be outlined in red and this is where the settings will be copied from (this is the same as pressing SOLO on the Channel module).
▶ Click Map Channel in the Operations Menu, and the Channel Mapping Tool will be displayed.
▶ Click and hold on the blank grey area at the bottom of the outlined Channel (the pointer will change to a box containing the word All).
▶ Drag the pointer to the required target Channel.
If the target Channel is not shown, drag the pointer to the border of the display in the required direction.
When the pointer is held over the border, the Channels will scroll sideways.
▶ Move the pointer away from the border when the required Channel appears.
▶ Release the button, and a confirmation dialogue box will be displayed.
▶ Click OK.
To copy the settings of a section from one Channel to another
▶ Click the left/right arrows at the top of the screen to scroll the Channels.
▶ Click on the required source Channel. It will be outlined in red and this is where the settings will be copied from (this is the same as pressing Solo on the Channel module).
▶ Click and hold on the required section within the outlined Channel. The pointer will change to a floating copy of the selected section.
▶ Drag the pointer to the required target Channel.
▶ If the target Channel is not shown, drag the pointer to the border of the display in the required direction. When the pointer is held over the border, the Channels will scroll sideways. Move the pointer away from the border when the required Channel appears.
▶ Release the button.
A confirmation dialogue box will be displayed.
▶ Click OK.
▶ When all the required copy operations are complete, click OK, and the Channel Mapping Tool will close.
Help Menu
The Help Menu is used to access Help information, and provide information about the version of Recall.
V5.4 Software
| SP Info | |||
| XSP's | Mezzanines | QM2's | |
| Engine 1 | 6 XSPs | 0 | 3 |
| Engine 2 | 6 XSPs | 0 | 3 |
In version V5.4 software, the Help / System Info screen will also display the multi-engine hardware that has been detected, including:
• The number of XSPs per engine;
• The number of XSP Mezzanine processing chips per engine; and
• The number of Quad Madi II cards per engine.
Stem / 2T Fader Mapping (Analogue)

The Fader Allocation screen allows you to map any of the large or small faders to control stem inputs and outputs, 2T mixers and the Music, Effects and Dialogue faders (plus the Utility fader, where fitted).
On consoles larger than 96 channel strips, it is only possible for the first 96 faders to be mapped.
▶ In the Fader Resource section of the screen, either:
- Click on the 1-12, 13-24 etc buttons (to display the appropriate bucket of faders underneath). Click LF to select Large Faders, SF for Small Faders, then click on any of the 12 fader numbers underneath you wish to map, or,
- Click the numbered Group Output you wish to map, or,
- Click M, D or E (or U where fitted).
In all cases, the button will turn green.
▶ Next, click on the box to the right of the path you wish to control in the lower half of the screen.
The fader selected will be displayed next to the relevant path. (Click in the same box again to clear the mapping for that control).
▶ Repeat for as many controls as you wish to map.
▶ Alternatively, after selecting the fader to map, click the ALL button in the relevant section and all of the available paths will be controlled by that fader.
In this way for example, a single fader can control all of the Stem Inputs.
The fader mapping is stored as part of any Recall files that are taken, but is not stored as part of the Desk Setup that is available for reloading after rebooting the console.
▶ Click on CLEAR to reset all of the fader mapping.
The Fader Allocation screen does not need to be open or minimised for the mapping to remain in place.
It will remain until either CLEAR is clicked or a Recall file is loaded to overwrite it.
AES Config (Digital)

On bootup, the desk will reload the last used Setup file, and display it's name in the title bar.
When the AES960 racks are placed under console control AES I/O pairs 28 are used to pass control data to and from the console and as such are not available audio channels (so you lose X madi 55 & 56, where X = the madi port number).
- The individual W/Len, Mute & State windows are active with the mouse cursor over that window. Its parameter can be changed by use of the left or right mouse buttons.
- In the case of W/Len the options are 24, 20dt or 16dt, with the last 2 options having triangular dither applied.
• The Mute can either be On or Off. - For State Input the options are BYPass, SRC or AUTO; for State Output the options are BYPass, INT44, INT48, INT88, INT96 or Blok (A...G).
In addition for the INTxx options pressing and holding down the mouse button toggles the Pull-Down flag on/off.

There is a Global Parameter selection area, which selects Master Sync and Misc Options.
A selector box to select each rack in turn and a Copy To All tick box are placed immediately underneath.
The Copy To All option, if enabled, will change all the parameters in similar boxes.
This is useful for initial setup, but can equally lose a carefully arranged configuration, if this option is ticked a big warning message appears before any change is made.
The Refresh button is a useful diagnostic tool as it collects and displays the status of the currently selected rack, this is carried out on opening the page, selecting a different rack and on pressing the Refresh key.
This task will take a few seconds to load.
The Save and Load keys on the front panel allow the saving and loading of up to 4 presets and in addition the current settings are associated with the console's Mix Setup.
Inputs
• Pair: the inputs as a stereo pair
- Name: XXXX
• State: either BYP, AUT or SRC
- Mute: either M or (blank)
- Status: NI
The State of the input will either say:
- SRC (where the input signal is converted to a desired sample rate)
- AUT (where the incoming signal is automatically converted to the required sample rate), or
• BYP (where the incoming signal bypasses the conversion route).
Channels can be muted by clicking next to the required input in the Mute column. When a signal is muted, it will show M in the column.
The Status column indicates the condition of that input. If NI is seen in the column, then there is No Input.
Outputs
Pair: the inputs as stereo pair
Name: XXXX
State: either 96, 88, 48, 44, BYP, or Blk(X) [where X = block number, A - F]
Mute: either M or (blank)
W/Len: either 16dt, 20dt or 24
Where there is more than output that needs to be universally converted, cycle through the options in the State column.
It divides the SRC into blocks, where it is possible to set the SRC for a block of outputs rather than having to apply the same SRC to each output individually.
The blocks are configured as:
A (1-4)
B (5-8)
C (9-12)
• D (13-16)
• E (17-20)
• F (21-24)
G (25-28)
The output can be muted by clicking next to the required output in the Mute column (a red letter M will indicate when the mute is on).
W/Len represents the word length of the signal from that output.
The options are 16, 20 and 24.
Sync
- Auto
- Auto Low
- Internal
- Auto High
This sets the system sync.
With either of the Auto options selected, then the system will automatically select and display the highest priority valid clock source found.
Frequency
• 44.1 kHz
• 48 kHz
• 88.2 kHz
- 96 kHz
- Pulldown
Sets the sample rate for the whole system.
Priority Sync
- AES
- Wordclock
• MADI
Misc Options
• Channel 55 Control
• Wordclock Termination
- Sync Out
Copy To All
With this option ticked, setting one value in any column will change all of the other inputs/outputs to that value as well.
NB: This function only copies parameters on the current rack and not to other racks that may be connected.
An asterisk at the end of the file name in the title bar, indicates that changes have been made to the current setup and these changes have yet to be saved.
▶ Click Save, the changes will be written to the current file and the asterisk will be cleared.
For more information, please refer to the separate AES documentation.
V5.4 Software

If you have AES 960 boxes attached to the system, then these must be configured for each engine.
▶ Go to the Tools menu, open AES Config, and select the relevant Engine from the pulldown menu, as shown left.
The rest of the AES Config software works in the same way as V5.3.

Automotion (Digital)

Automotion is an offline utility for:
- Converting Mix Setups and automation mixes between different software versions,
- Export & Import of the Offline Desk Configuration file, for use with Offline copies of Encore, and
- Converting Desk Setups and automation mixes between different console types
- For the 88R console, this utility also converts Flying Faders automation and Recall Stores into Encore format and vice versa.
At present, Automotion can convert Mix Setups and mixes from Version 2 to Version 2.5 Encore software, and from Logic series consoles to Version 2.5 Encore.
Desk Setups can be converted from Version 2 to Version 2.5 'on the fly' when loading a Desk Setup.
However, the old Desk Setup is automatically over-written with the converted version.
Automotion can be run from within Encore or as a standalone application, except when converting Logic format data to Encore.
Transferring Studio Configurations
Encore can be used offline on a computer that is not attached to a digital console.
In order for Encore to correctly manipulate Mix Setups, a configuration file must be loaded that holds information about the hardware available on the target console.
This configuration file is called a Studio Configuration.
The Studio Configuration is exported from Encore and then imported to offline Encore on a separate computer.
Note that a Studio Configuration is fixed by the hardware for a particular console - it is not necessary to restore the Studio Configuration to the console.
When a Studio Configuration has been imported by offline Encore, then Desk Edit and I/O Patching can modify and create Desk Setups, which can be transferred back to the console.
The Studio Configuration page of Automation has two options:
• Export a Studio Configuration
- Import a Studio Configuration to Offline Encore
Only one of these options will be available, according to whether Encore is operating online or offline. Select the only option available, and click Continue.
Export a Studio Configuration
When this option is selected, a two page dialogue box is displayed.
Select Drive page
A target drive must always be selected.
▶ Click the drop down arrow next to the Select A Drive box and a list of available drives will be displayed.
▶ Click on the required drive letter.
The available free space will be displayed. The Studio Configuration only uses a few kilobytes of storage space (typically less than 10kb) so it will fit on any new floppy disc.
Studio Configuration Page
This will show the current Studio Name in the Backup Configuration As box, and a list of configurations that have already been copied to the selected drive or disk.
▶ If required, click in the Backup Configuration As box and change the name and click the Transfer File button.
The Studio Configuration will be exported and added to the list.
Import a Studio Configuration to Offline Encore
When this option is selected, a two page dialogue box is displayed:
A: Select Drive Page
A source drive must always be selected.
▶ Click the drop down arrow next to the drive Select box and a list of available drives will be displayed.
Click on the required drive letter and the available free space will be displayed.
B: Studio Configuration Page
This will also show a list of configurations that are available on the selected drive or disk.
▶ Click on the required configuration name in the list.
It will be highlighted and the name will be shown in the View box. Click the Transfer File button.
The Studio Configuration will be imported and will now be used to define the hardware available to Desk Setups.
Logic to Encore Conversions
Converting Logic format automation to Encore format automation is performed with an application called Automotion, which also converts Desk Setups.
It is a 3-step operation:
• Automation converts the data into Encore format.
- The file is imported into Encore using Backup Manager.
- The imported revision becomes the starting point for further automation to be written.
It is best to have the Logic automation on a zip or CD drive ready for conversion (as this method is quicker than playing the information from an exabyte tape).
The file will be called [name].LGC
Conversion of data from Logic to Encore format
The Automotion application has to be run outside of Encore, so close down Encore and at the prompt, Do You Want To Close All Other Encore Components As Well?, click Yes.

▶ Open a standard Windows Explorer window, go to C:/Encore and double click the icon called Automotion.exe.
▶ Click the Logic/Encore tab.
▶ Click the Import from Starnet radio button, and click I want to convert it to an Encore Backup file to restore to Encore later as shown left.
▶ Click Continue>>.
You will be taken to the standard Windows load dialog.

▶ Select the Logic file you wish to convert, and click Open.

▶ Select the drive you wish to save the Backup Archive file to.
▶ Click OK.

▶ You will be asked to give the Archive a name.
It will default to the current date and time as shown left.
▶ Either give it a unique name and click OK, or click OK to keep this default name.
The Mix Data Interchange page will show you the file you have selected to convert, and from the Action menu, select Backup Contents.

▶ You will be asked which parts of the data you wish to convert. Use the + signs next to Root and it's sub-folders to expand the data hierarchy.
▶ If you are unsure which parts of the mix needs converting, place a tick in the box next to Root and this will convert all the mix information (as shown left).
This will not affect the source information in any way.
▶ Click on Import Selected.


▶ You will be asked to name the Client / Project / Title / Mix as per the standard Encore format.
▶ Either leave the names as they are, or rename them.
▶ Only tick the Ignore Automation data box if you just wish to convert the Mix Setup, yet not the Automation.
▶ Click OK.
The data will start to convert, and a progress bar will indicate this taking place.
Depending on the density of the automation, this may take several minutes.
You will be alerted once the Import has finished.
▶ Click OK.
▶ Close the other Automotion windows that are still on-screen by clicking the X on the top right of the screens.
This completes the conversion to Encore format.
Importing the new archive onto the Encore drive

▶ Open Encore, go to Backup Manager and restore the newly created archive.
▶ Once you click the Restore icon, you will see the Rename dialogue, which allows you to rename the Client / Project / Title / Mix of the filing hierarchy as it is imported onto the C: drive.
Either leave the names as they are, or type in new names and click OK. You will see this dialogue for every Pass, and as there could be many, you can prevent this by clicking the Don't Ask Again box.

Should a Mix Setup already exist on the Encore drive with the same name, you will see the options dialogue for Mix Setups.
▶ Make a selection and click OK.
Once all the data is restored, it can be loaded as you would with other Automation and/or Mix Setup file.
Using the imported Mix as a starting point for further automation
At this stage, there is no link between the imported Mix Setup, and the imported Automation, so two Load operations will be required.
To do this, you will need to open the main Encore Automation program
Either
- Click the Automate icon, or
- Select the Filing icon.
▶ Load the files as you would any other, loading the Mix Setup first.
When you load the automation, you will be asked whether you want to create a tree from the imported mix.
▶ Click Yes.

This will create a new tree from the imported revision. You are now ready to continue working.

Automotion (Analogue)

This screen has four options as shown:

Importing Flying Faders Mixes
▶ Select the drive that contains the Flying Faders mix you wish to convert and then click on the Automation tab.
▶ In the upper window, either double-click on each level to navigate to the mix level, or click on the top-most level and click Select All. This will convert all data in the selected Client.
This files for conversion will be displayed in the lower window.
▶ Click Transfer Selected Files.
The conversion will use the same CPTM hierarchy in Encore.
Source automation is not affected in any way. Imported mixes only have:
• An Initial Snapshot, and
- Pass 1.2
This is due to the way Flying Faders stored automation.
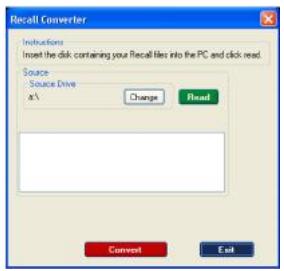
Importing Flying Faders Recall
▶ Place the floppy disc containing the Flying Faders Recall files into the Encore PC and then click the Read button.
▶ A DOS window will open informing you to insert the disc and press any key to continue.
The drive will be scanned, after which the information contained will be displayed.

▶ Click down each level in the left-hand screen til you reach the mix level (as shown left).
This ensures that when the conversion takes place, Encore uses the same C/P/T/M as Flying Faders.
(Should the Recall file have been made on a desk of different size, this will be indicated as seen above).
▶ In the left hand window, select the files to convert by including them by clicking on the icon to the left of the text.
A green tick will be placed at that level and at all levels underneath it (as shown left).
▶ Click the Convert button.


The new files can be loaded within the Recall application as you would any other Recall file.
The converted Recall files will have their original name but a .RCL suffix.
Exporting Mixes To Flying Faders
This will open a page for selecting which mix to export.
▶ Click on User to change the currently logged on user.
▶ In the top window, select the Client, Project, Title etc down to mix level.
Once the mix has been selected, this will be shown in the lower window.
▶ Click on Transfer Selected Files, and the file will be converted.
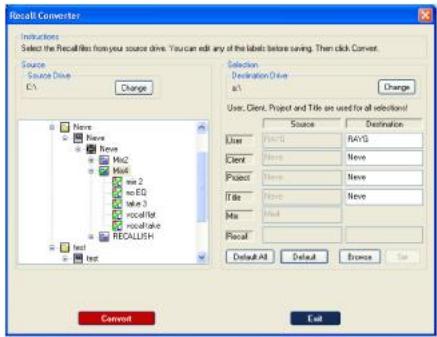
Exporting Recall To Flying Faders
▶ In the left hand window, select the source drive where the automation is stored (using the Change button), and navigate down to the mix level (as shown left) and select the Recall files to be included in the conversion so that a green tick is placed next to each file (or at the folder level above).
▶ In the right hand window, select the CPTM where you would like the converted Recall files to be placed:
The Default All button will place the text Default in the Client/Project etc.
The Default button will use the existing filing structure ie the destination for converted files will be the source directory.
Browse allows you to select another location altogether.
▶ Once selected, click Convert and the file conversion will take place. The converted files MUST go onto the A: drive and a blank floppy disc must be used.
As the conversion starts, a DOS window will warn you that all files on the A: drive will be erased.
▶ Press any key to continue.
▶ Click OK and then Exit on the Automotion main page.


Backup Manager
This is covered in the section on the File Menu.
Copy Buffer (DFC only)

Copy Buffers 1-20 can be renamed and saved to a separate file, and these files can then be exchanged between projects.
A list is displayed for (up to) all three partitions with the EQ/Dynamics curve view of each selection.
▶ The buffers can be named by double clicking the buffer number.
▶ The copy buffer filing utilities (New, Save and Save As) allow users to store all the Copy Buffers under one file name.
Defaults Manager (Digital)

Defaults Manager is used to set the default values for all controls that can be automated (eg. the default frequency for the first band of EQ).
Different sets of defaults can be created, saved and loaded as required.
The current set of defaults is associated with the current mix setup.
▶ Click the up/down buttons at the end of a box containing a required parameter, or click in the box showing the value and type in an absolute value.
▶ To copy the current page of default settings to other path types click the Copy button and the Copy dialogue box will appear.
▶ Click the check boxes for the path types to copy the settings to and click OK.
(The screenshot shown left is for a DFC. Other systems will only have a single list of destination path types).

▶ To set values from existing control settings from the console surface, click the Capture button.
▶ A dialogue box will appear requesting an Access key to be pressed.
▶ Press the Access key for the path containing the required control settings and the dialogue box will be replaced by the Capture Scope dialogue box with the All (Current Page Only!) radio button selected.
▶ Touch the required controls on the path that the Access key was pressed for above (any controls for which there are settings in Default Manager can be selected).
The list box in the Capture Scope dialogue box will show the selected controls and the current control position.
▶ Click an item in the list and click the Remove button if a control is incorrectly selected and click on OK to execute the capture.

Reset Wizard
▶ To reset controls on the console surface to the settings in Defaults Manager click the Reset Wizard button.
This is useful for flattening EQs, resetting a range of faders to 0dB etc.
The Paths page of the Reset Wizard will appear.

▶ Using the Path Type radio buttons and the list of available paths, select the paths you wish to reset controls on (a selection of paths can be highlighted using click and drag).
▶ When the selection has been made, click Yes.

The Controls page of the Reset Wizard will appear.
▶ Tick the controls to be reset and click Next.
The selected paths will have the selected controls reset to the current default values.
▶ Once the user has set or captured the correct controls, this file can then be saved like any other file type, and linked to the current desk setup.
NB: Loading a Defaults file when the Mix Setup is loaded does not automatically reset any controls in the current mix setup to the values in the Defaults file.

Desk Edit (Digital)

Desk Edit is used to create, manage and modify the basic structure of Desk Setups.
The Desk Setup defines how many of each type of path is available, the processing allocated to each path, the placement of paths on the console and the routing configuration.
Desk Edit is used to setup the number of paths and the signal processing.
▶ To start a new Desk Setup, click the New button.
The Name box will display a default name using the date and time (eg. Desk - 22/08 16:25).
The Current User Defaults box will show the same as the selection in the User Defaults for New Desk Setup box (this determines the values that controls will be set to when they are added or cleared).
▶ To change the Desk Setup name, type in the required name using the keyboard (this is also the name of the file that will be used when the Desk Setup is saved).
To Change the current User Defaults
▶ Click on the drop down arrow at the end of the Current User Defaults box.
A list of available files will be shown, plus an option for
▶ Click the required name, and the selected item will be displayed in the Current User Defaults box.
The new Desk Setup is now ready to be defined. The minimal remaining steps in Desk Edit that are required to start a working Desk Setup are:
- Change numbers of paths so there are signal paths to work with.
- Assign paths to the fader strip with Desk Designer.
- Save the Desk Setup to permanent storage on the Encore hard disk.
Further refinements can be made in Desk Edit by:
• Changing Path Processing
- Changing Path Names
To change the Path numbers
▶ To enter the number of paths of each type, click in the Channels box and type in the required number.
▶ Click in the Tracks, Groups, Main, Cue, Auxiliaries etc boxes in turn and type in the required numbers of each path type.
If a number is entered which is out of range (eg. a negative number, more than 4 Mains, etc,) a dialogue box will appear which will indicate the maximum number allowed.
▶ Click on the drop down arrow for Films and select the required Film monitoring type.

You should always select the largest format you need to work with (for example, selecting 5.1 will allow you to work in all surround formats up to this size).
The options are Stereo, LCRS, 5.1, 6.1 and 7.1 which use 2, 4, 6, 7 or 8 Film paths respectively.
The number of Film Listens (used for AFL Solo) will also be changed to match the Surround selection.
To change the Number of System Paths
▶ Click System Paths.
A warning prompt will appear advising users not to continue unless they are familiar with the purpose of the system paths and parameters.
▶ Click on OK to continue (or Cancel to quit). The system paths boxes will appear.
▶ Enter the required number of Listen, Talkbacks and SELs. The most common use for this function is to increase the number of SELs, to enable the use of VU Meters. (See the monitoring schematic in the Monitoring chapter).
The number of Film Listens is set automatically according to the Films selection. This should not be changed.

| Path type | Number |
| SELs | 5 (or 6 for older systems with a VU on the meterbridge) |
| Listens | 2 |
| Talkbacks | 1 (or 2 for systems with MIOS) |
| Films | Automatically set depending on Surround Law. |
Allocating Path Processing
There are pages in Desk Edit for each of the path types, which allow rapid configuration of the processing.
▶ To select the path, click the required tab (Channels, Tracks, Groups, etc).
The first path on the page will be outlined in red.
▶ Click on the required path.
The path will be outlined in red and the path name, number and type will be shown and the processing in the path will be shown in the path processing box.
If there are more than 24 paths of one type then they are displayed and scrolled 24 at a time (i.e. paths 1-24, then 25-48, etc.).

▶ To view paths > 24
- Click on the path scrolling arrows to jump 24 paths at a time,
- Press the PgUp and PgDn keys on the Encore keyboard to jump 24 paths at a time,
- Press the arrow keys on the Encore keyboard to scroll the red outline across the paths (if the red outline crosses a page boundary then the next (or previous) set of 24 paths will be displayed),
- Press the Home and End keys on the Encore keyboard to jump to the first and last paths, or
- Type the required path number on the Encore keyboard. There is a small timeout when this is done, so to jump to path 15 press the 1 and 5 keys in quick succession. The display will go to path 1 then path 5 if a long gap is left between pressing the keys.
Allocating processes is identical for all path types.
▶ Click on the required processing element in the processing pool, then either:
- Click on Add, or
- Double click on the required processing element in the processing pool.
In both cases, the processing will be placed in the selected path at the last available point before the fader (if present).
- Filters will not be available if a path has more than 4 bands of EQ (although you can set a band of EQ to operate as either a Hi-Pass or Lo-Pass Filter);
- Removing the fader from a path means the path will pass audio at 0dB, although CUT will not be available.
- All Dynamics processing (Compressors, Expanders, Gates and DRCs) must be in consecutive positions (for eg you cannot place EQ between a Gate and an Compressor).
• Where available, you cannot have a combination of Neve EQ and Standard EQ.
• You cannot have more than 4 bands of EQ on the same path with a Sidechain. - The number of bands of EQ can be changed by selecting an EQ with the required number of bands in the processing pool (eg. if EQ 2 is already in the path for 2 bands of EQ, EQ 4 can be allocated simply by adding it to the path and EQ 2 will automatically return to the pool). The number of filters can be changed in the same way.
• If a DRC is in the path then this will prevent other dynamics modules being added and vice versa. - If more than 4 bands of EQ are assigned to a path then any sidechain elements and Filters will be removed, and vice versa. EQ bands 5 to 8 have the same system defaults as EQ bands 1 to 4 respectively (i.e. band 5 is an HF band and so on).
▶ To de-allocate processing in the currently selected path, click on the required processing element in the current path processing box, then:
- Click on Remove, or
- Double click on the required processing element in the current path processing box.
In both cases, the processing will be removed from the path and returned to the processing pool.
This process is identical for all path types.
To change the order of processing
▶ Click and hold on an item in the Current Path Processing box.
▶ Drag the item to a different location in the signal path, release the mouse button and the signal processing chain will change accordingly.
If an element is moved to an illegal position then a dialogue will be displayed that explains why the move may not be made.

Cut and Paste
▶ To Copy and Paste processing from one path to another, place the cursor in the source path (i.e. the path selected to Copy from). The path will be highlighted with a red border.
▶ Click on the Copy button (the path contents will be copied into a temporary buffer) and click on the Paste button.
The Paste Options dialogue box has three options.
- Paste To All: Pastes contents of the processing buffer to all paths within the path type.
- Paste To Selected: Select the destination path before clicking Paste and the processing will be copied to a single destination path.
- Select Paste Range: Opens another screen which allows you click-n-drag any selection of paths to copy the processing to.
▶ Click on OK.
The processing will be copied depending on the options selected.
To Remove processing from a path
▶ Place the cursor in the desired path, and click the Cut button. The processing in the path will be replaced with the default processing.
(▶ The Undo button can be used to reverse this action).
Drag n Drop Processing
▶ Click on the source path and hold down the mouse button (the pointer will change to show a floating fader next to the arrow).
▶ Move the pointer to the target path, and release the mouse button. The processing will be copied to the target path.
This method can only be used on one screenful of 24 paths which are displayed together.
If there are more than 24 paths then another method must be used to copy because they are not displayed together.
NB: This will also copy the mono/stereo state of the path as well.
Alternatively, it is possible to copy processing without using the Paste button.
▶ Click on the source path, and click the Copy button.
▶ Move the pointer to the target path and hold down the Alt key on the keyboard.
▶ Click the mouse button.
The processing will be pasted into the target path.
Changing Path Names
▶ To rename a path, select it, then click in the Name box and highlight the existing name.
▶ Enter the new name using the keyboard.
▶ To set the path name to system default, select a path and click Reset Name.
▶ To change the names of several paths, click the Quick Names button. The Path Names dialogue box will be displayed.
See Path Names in the Lists Menu chapter.

Changing Paths Mono / Stereo state
▶ Select the path, then click on the drop down arrow next to the Type box.
▶ Click on Mono or Stereo as desired.
The selection will then be displayed.
NB: It is not possible to change the mono/stereo state of system paths and Tracks.

• Mono paths are displayed with a blue header with a MON icon
- Stereo paths are displayed with a red header with an AB icon
Desk Designer (Digital)

Desk Designer is used to select which paths are assigned to which fader strip position on which layer within each Bank.
(The path positions set in Desk Designer are stored as part of the Desk Setup).
Assigning paths to the console manually
▶ To display the required fader, either:
- Scroll the faders to the desired strip using the fader scrolling arrow buttons,
- Press the PgUp and PgDn keys on the Encore keyboard to jump eight faders at a time.
- Press the arrow keys on the Encore keyboard to scroll the faders.
- Press the Home and End keys on the Encore keyboard to jump to the first and last faders, or
- Type the required fader number on the Encore keyboard
Faders are numbered sequentially from left to right across the whole console.
The blue boxes beneath the fader numbers as shown above indicates that these positions are part of the Predub Zone.
▶ In the Paths area, either:
- click on the radio button for the required path type, or
- Click on the All radio button.
The path-list will display all of the paths for the selected path type. (If the path list does not show the required path, use the scroll bar to move the list to the required path).
▶ Click and hold on the required path.
A floating fader will be shown next to the mouse pointer to indicate drag-and-drop mode.
▶ Move the pointer to the box representing the layer for the required fader strip and release the mouse button.
The path name will be dropped into that layer for the fader strip on the console surface, and the path name in the path list will turn green (if a path already occupied the target location then it will be de-assigned automatically).
A position on a fader strip can be cleared by dragging and dropping the path name from the layer box back up to the path list.
To automatically assign paths to the console surface
▶ To select the starting fader strip on the console, either
- Scroll the faders using the fader scrolling arrow buttons,
- Click on the required fader on-screen (a red line will appear around the selected fader), or
- Click in the Start box and enter the strip number.
▶ Click the required Layer check box (make sure there are no previous layers checked as the paths are assigned in layer order).
To select the paths to assign
▶ Click on the first path to assign in the path-list.
▶ Hold down Shift on the keyboard and click on the last path to assign (this highlights all paths in between).
▶ If the last path is not shown in the list, scroll down the list and then Shift and click (the first path clicked will not be lost even though it may not be visible on the list).
▶ Click the Assign button.
(Non-continuous selections can be made using Ctrl/Click).
The path names will be displayed in the corresponding layer boxes.
Wrapping To Multiple Layers
Wrapping allows the selected paths to be assigned to multiple layers on a specified section of the console from the Start fader to the Wrap fader.
▶ To wrap onto multiple layers, click the layer(s) to wrap across.
The paths will always be assigned starting from the first layer checked (the Wrap check box will be available when multiple layers are checked).
▶ Click the Wrap check box, and click in the Wrap fader strip number box.
▶ Enter a fader strip number to wrap at (the fader strip number must be greater than the Start number).
Banks
There are 6 Banks available (of 4 layers each) which can be accessed using the Banks pulldown menu in the centre of the screen (the tickbox Use Banks in Preferences/Extended Prefs must be checked to enable this feature).
With banks enabled, paths in the list are displayed in one of three colours:
• Black: Currently unassigned
• Green: Assigned on the currently selected Bank
• Red: Assigned on a Bank other than the one currently selected.

Pan Designators on Monitors (Tracks) and Groups
▶ Click on the Tracks or Groups tab as required.
The Tracks and Groups pages have two extra buttons labelled Pan Designators and Pan Macros.
Each Track and each mono Group also has a icon at the bottom of each strip which shows the speaker that the path will route to when used in a film stem.
The default speaker output is mono.

To select the Speaker position individually
▶ Click on the required path, and click on Pan Designators.
The Pan Designators dialogue box will appear.
▶ Click the required speaker position then click OK.
The box at the bottom of the path will indicate the selected speaker.

To automatically assign speaker positions
▶ Click Pan Macros, click on the format required, and click OK.
The paths will automatically be assigned to the speaker positions in sequence starting from the first path (i.e. if 5.1 is selected, the first path will be assigned to Front Left, the second to Front Centre, etc.).
If there are excess paths, the speaker assignment will cycle round (i.e. if 5.1 is selected, the speaker assignments will start again with Front Left for the 7th path, Centre for the 8th etc).
Custom Surround Macros
The Surround Macro Editor/Viewer is used to define custom surround monitoring formats.
▶ To access the Surround Macro Editor/Viewer, click the Pan Macros button and the Pan Designators Macros dialogue box will be displayed.
▶ Ensure the User Defined Macros option is selected.
▶ Click View/Edit Macro.
The Custom Macros screen will open.
▶ To create a new macro, click the New Macro button. The name in the Selected box will be cleared and the Surround Stem Setup boxes will be reset.
▶ Click and hold on a speaker position icon in the Surround Type Select area.
The pointer will "pick up" a copy of the speaker icon.
▶ Drag the symbol to the first empty Stem Setup box and release the mouse button.
The icon will be dropped in the box.
▶ Continue to place the required speaker types in the Stem Setup boxes, working from left to right.
The icons will be shown in the sequence they are placed.

If an icon is dropped in an empty box when there are still empty spaces to the left, then a warning dialogue will appear to indicate that all macro items must be consecutive.
▶ Click the <-Delete button in the Stem Setup area to remove the most recently placed icon if an error is made.
▶ Click the Save Macro button when the custom macro is complete. The Save Macro dialogue box will appear.
▶ Type a name for the macro and press Enter or click OK.
The macro will be saved and the name will be displayed in the Selected box.
▶ Click OK, and the Macro will be selected automatically in the Pan Designators Macros dialogue box.
To edit an existing surround macro
▶ Click the drop down arrow next to the Selected macro box.
A list of available macros will be shown.
▶ Click the required macro name, the name will be shown in the Selected box and the speaker icons that form the macro will be shown in the Surround Stem Setup.
▶ Click the <-Delete button to remove icons from the Stem Setup.
▶ Drag and drop the speaker position icons as required, and click the Save Macro button.
The Save Macro dialogue box will appear with the name of the macro in the Macro Name box.
▶ Click OK to save changes to that macro, or change the name and press Enter or click OK to save the changed macro with a new name.
To delete a macro
▶ Click the drop down arrow next to the Selected macro box, and a list of available macros will be shown.
Click the required macro name.
The name will be shown in the Selected box and the speaker icons that form the macro will be shown in the Surround Stem Setup.
▶ Click the Delete Macro button (a confirmation dialogue box will be displayed).
▶ Click OK.
The Macro Name and the Stem Setup will be cleared.
Stem Setup with Desk Edit
This function is only available when the optional Surround Sound Panel is installed.
The Stems page is used to rapidly configure all Film Stems for the surround monitoring system.
▶ To configure the Stems to match with the current Films selection, click the Automatic button.
The available Tracks will be assigned consecutively to the Stems and will have Pan Designators applied according to the current Film paths selection in the Config page.
The Tracks will also be automatically routed to the Film paths which correspond to the Pan Designators.
For instance, if LCRS is selected on the Config page (4 Film paths), then Tracks 1 to 4 will be assigned to Stem A, Tracks 5 to 8 will be assigned to Stem B and so on.
Also, Track 1 will be designated as Front Left and routed to FLM1 (which should be patched to the Front Left speaker).
The other Tracks will be pan designated and routed accordingly.
To configure Stems individually
▶ Click the required Stem (A to F) in the top left box.
▶ Use drag and drop between the Paths and Selected Paths In Stem boxes to remove and add the required tracks to the Stem.
▶ Click the Pan Macros button.
The Pan Designators Macros dialogue box will be displayed.
▶ Click the radio button for the required Stem format or select a user defined Macro.
▶ Click OK.
The selected Macro will be applied to the Stem.
Saving Desk Setups
▶ Click on the Save & Load button.
If it is a new Desk Setup, a Confirm Create Desk Setup dialogue box will be displayed.
▶ Click Yes.
The copy porting dialogue box will now be displayed (before the Desk Setup is saved or allocated).
This is displayed because it is the first time that the new Desk Setup has been saved.
It allows the port routing (I/O patching) to be re-used from the Desk Setup that is currently allocated on the console before it is replaced by the new one.
This saves having to re-port all of your Inputs / Outputs / Systems Paths in I/O Patch.
▶ Click the check boxes to de-select porting that is unwanted.
It is recommended that AT LEAST the following are ALWAYS ticked:
- Listens
- Talkbacks
- SELs
- Externals
- Films

A timer will be displayed while the Desk Setup is being saved and then allocated on the console.
When this is complete, a dialogue box will be displayed confirming that the allocation process has finished.
If the Desk Setup is not allocated successfully, the Allocation Results dialogue box will be displayed.
This shows which paths have not been allocated because too much processing has been used.
▶ If this happens, remove some processing from those paths and try again.
▶ To save the Desk Setup with a different name, click the Save As button. The Save As dialogue box will be displayed for entering a different Desk Setup name.
▶ Enter the new name in the box, or click on a name in the list and modify it in the box.
▶ When the name is correct, click the OK button.

Solo Inhibit
If Solo Inhibit is active on a path then the path will NOT be cut when the Solo key is pressed for another path.
This is so reverb returns etc can be left open so a path is heard in context.
The current status of Solo Inhibits is saved as part of the Desk Setup.
▶ Click on the radio button for the required path type.
Click the check boxes for the required paths, or click and hold on the first path required and drag the pointer down the list.
A path is Solo Inhibited when its check box is checked.

Inhibit Allocation
This is used to prevent paths from being allocated on the console.
This can be useful for isolating routing problems or temporarily suspending the allocation of nonessential paths (for example, when a processing card has been removed).
▶ Click on the radio button for the required path type.
▶ Click the check boxes in the list for the individual paths to be inhibited (clicking a path a second time will un-inhibit the path).
When the Desk Setup is loaded, the selected paths will not use any processing resources and will not appear on the console surface.
The Desk Setup will not be affected in any other way.

Inhibit Automation
This is used to force the automation system to ignore the paths that are inhibited.
No automation data is generated by the selected paths.
This can be used, for instance, to cut down the amount of automation data that is generated when practicing moves for part of a mix.
▶ Click on the radio button for the required path type.
▶ Click the check boxes in the list for the individual paths to be inhibited (clicking a path a second time will un-inhibit the path).
The automation modes of the selected paths can not be changed.
This will not affect the contents of an existing Mix/Pass, but inhibited paths will not re-play moves as they can not be put into Play.

Monitor Folddowns (DFC only)
Allows the user to set up 4 different sets of speaker levels when monitoring surround mixes (accessed on the console surface with the FD1 to FD4 buttons).
The speaker matrix display shown on Monitor Folddown tab depends on the which Surround law you are working in (shown left are speaker matrixes for 5.1 (upper) and 7.1 laws).
Both screens above show default values where there is a 0dB change (ie no change) when selecting 'Fold 1' as the monitor.

Fold-downs are not available if Sel Based Monitoring is selected in Preferences / Monitoring / Sel Monitoring Control.
When a monitor set is selected, the last folddown configuration selected will automatically be recalled.
▶ To set a 0dB change, right-click in the junction of the appropriate box, and a zero will be placed.

▶ To set any other value, left-click in the junction of the two speakers, and a box will appear with a pulldown list of all the values it can be set to.
These run from -6dB to +6dB in steps of 1.5dB.
▶ Select the required value and click OK.
▶ On the left of the screen, there are 4 Configuration buttons. These can each be renamed with up to 8 characters.
▶ To reset all of the fold-downs to default values (including the 4 Folddown names), click the Default All button.
▶ Click Yes or No.

All the settings in this page can be saved independently of Desk Editor.

▶ Click the Filing>> button to open the Filing options:

▶ Open Folddown file.
▶ Click the pulldown arrow by the filename to select a filename and then click this icon to Open.

If the fold-down file was created on a mix setup using a different Surround Law, you will be reminded of this when the file loads.
▶ Click Yes.

Saves the Folddown file.
▶ Type a filename field and then click this icon to Save.

Deletes the Folddown file.
▶ You can only delete the currently selected folddown file. For each of the three operations associated with Filing, you will be shown a confirmation dialogue before each of the above actions take place.
▶ Click Yes or No.
To remove the Filing options from on screen, click the <<Filing button again.


Predub Masters (Digital)
PreDub Masters are a control only path type used to control the predub members (consisting of any combination of mono Channels or Tracks. It is not possible to use stereo Channels in a predub).
PreDub Masters use no processing resources.
All controls in the predub members are linked to the PreDub Master.
PreDub Masters are assigned to the surface using the Desk Designer page of Desk Edit.
If a PreDub Master is not assigned to the surface then it is not possible to expand it and access the member paths.
PreDub Masters can control a group of up to 8 Channels and/or Tracks in any combination.
The predub members are 'stacked' under the PreDub Master and are accessed individually by expanding the predub across the PreDub Zone.
A predub can not be expanded if the console does not have a PreDub Zone.
▶ Click a Predub in the Predubs list.
▶ Click the Channels or Tracks radio button.
▶ Highlight a continuous selection from the Path list or drag and drop each required path from this list to the Selected Paths in PreDub list (the names of paths used in predubs will turn green in the upper window).
If a path which is already assigned to a predub is dragged and dropped, a dialogue box will appear to confirm whether or not the path should be moved from one predub to the other.
▶ Click Yes or No.
The PreDub Zone Width column in the predubs list will show the number of paths in that predub.
If the paths were already assigned to the console in Desk Designer, they will be de-assigned automatically and the first path in the predub will be replaced by the PreDub Master on the console surface.
▶ To Remove Paths from a Predub, drag and drop the path from the Selected Paths in PreDub list to the Paths list above it.
▶ To remove all paths from a predub, click the Remove All button, and click Yes to confirm.
▶ To Rename a Predub, click on the required predub and click the Name PreDub button, or double click on the User Name for the required predub. A box will appear over the top of the existing User Name to allow the name to be edited. Enter a name of up to four characters with the keyboard and press Return.
NB: Check Desk Designer to make sure that all PreDub Masters are assigned to the console surface!
▶ To save the Predub setup with the Desk Setup, click Save & Load.

V5.4 Software only

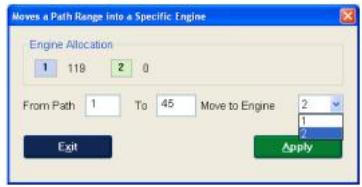


NB:
In multi-engine systems, only the Channels can be assigned to Engines 2, 3 or 4.
All other paths (including system paths) will be assigned to Engine 1.
The two fuel gauges in the Desk Editor title bar are not engine-specific, and will always show the cumulative 'worst case scenario' of the engine with the most processing.
The Engine button for selecting different engines (as shown left) will only be present on the Channels tab.
The Channel path colour displayed in Desk Editor, will change depending on the engine that the path resides on.
Engine 1 - Blue
Engine 2 - Green
To move a single path to another engine, click on the path (so the path is highlighted in red), then using the Engine pulldown option, select another engine.
If desired, a whole block of paths can be moved by clicking Engines.
A screen will display the number of engines, plus the total number of Channels in the current Mix Setup.
▶ Select the range of Channels to be moved, then select the engine you wish to move then to.
▶ Click Apply, and the channels will be moved to the selected engine. The changes will be sent to Desk Editor once you click Exit.
▶ Click Save & Load in Desk Editor to save and apply those changes to the engines.
The success of the allocation can be viewed in the Desk Editor main page by clicking Allocation Status as in previous software.
For a more detailed view of the allocation, click Allocation Detail. This will open a screen detailing the allocation across all the engines.
As can be seen left, where a green bar and a percentage below 100% exists, this means the allocation across a particular processor (or mezzanine processor) on an XSP has been successful.


If any entry is shown in red, there has been an attempt to assign too much processing to a particular engine and the allocation of paths / processing cannot physically fit.
▶ Please re-distribute the processing so it is more in line with the processing amount available.
Also, remember that it is possible for all the engines to be non-identical in terms of physical XSP cards present, so the amount of paths and processing that each engine can handle can vary drastically.
The pulldown menu on the right-side of the screen enables the display of more detailed allocation, down to timeslot and tempi information of each path.
These screens are for AMS Neve R&D Dept and are presented here only for information & clarity.
Dynamic Links
Dynamic Links between Channels can still be created, but all the paths in the link must reside on the same engine.

Desk Layout (DFC only)

Desk Layout is used to graphically reproduce the placement of modules on the console surface.
The Desk Layout is used by Meter Designer so that it can show where the meters are above Master Quadstrips, and so on.
All DFC consoles are provided with a Desk Layout at installation time.
This only needs to be altered if the arrangement of modules is changed on the console surface (eg. by adding new modules or moving existing modules).
▶ To view information about the console partitions, from the File menu, click Partition & Meters Data.

The Partition and Meter Data dialogue box will be displayed.
This shows the size of each partition, the size and position of each Master section, the size of the desk and the number of meters.
▶ Click OK to close the dialogue box.
To determine the type of a module, rest the pointer on the required module icon in the module bar.

The type of the selected module will be briefly displayed.
▶ To place a module, click and hold on the required module icon.
▶ The pointer will pick up a copy of the selected module. Either:
- Drag the module to the required position, and release the mouse button, or
- Click on the required module and move the pointer to the required position. Click in the required position.
In both cases, the module will be dropped into place.
Existing modules will be removed as necessary.
If the module is dropped in an incorrect location, it will be placed in the strip in the nearest position that it can take (e.g. if a meter module is dropped at the bottom of a quadstrip then it will be placed in the meter bridge).
Placing any fader strip module will place a complete fader quadstrip.
Placing either of the matrix modules will place both.
Modules can also be drag and dropped from one location to another on the desk graphic.
▶ To place the same module again, click in the other places where the module is required.
▶ To remove a module, click and hold on the required module on the desk graphic, drag the module into blank space or down to the module bar and release the mouse button.
▶ To make the view larger or smaller, click the Zoom icon (just underneath the File menu), then either:
- Click the desk graphic to make it larger, or
• Right click the desk graphic to make it smaller.

▶ Click the Zoom icon again to end zoom mode.
▶ To save changes, select Save from the File menu (as there is only one Desk Layout file, it is not necessary to give this file a name).
A confirmation dialogue box will be displayed when the save is complete.
▶ Click OK.
▶ To close Desk Layout, select Exit from the File menu bar.
If there are no changes to save Desk Layout will close.
If there are changes to be saved, a dialogue box will be displayed asking if you want to save changes.
▶ Click Yes or No as required.
If you click Yes, a confirmation dialogue box will be displayed when the save is complete.
▶ Click OK and Desk Layout will close.
EDL Editor
This topic is covered in the chapter for the Automation Menu.

EQ & Dynamics (Digital)

The EQ curve is displayed as a solid red area that shows the effect on the signal across the full frequency range.
Boost is shown above the centre line and Cut is shown below the centre line.
The EQ & filter curves are displayed as a thick red block when in circuit, and as a broken blue box when turned off.
This allows you to preview the shape of the EQ or filters before switching it in circuit.
The dynamics meter is shown as a single red line when in circuit (or a blue line when out of circuit) which chases as changes are made on the surface.
Both the curves and values are updated dynamically when changes are made to control settings on the console surface and as individual elements are turned on and off.
▶ To change the set of EQ parameters displayed, click the Band 1/4 or Band 5/8 radio button.
▶ To change the path displayed press the Access key for the required path on the surface.
The EQ and Dynamics displays can also be shown in smaller form on systems with a TFT meter bridge.

I/O Config (Digital)

I/O Config is used to configure the properties of Input and Output ports such as dither and delay.
Unlike I/O Patch, I/O configuration is a completely separate configuration to the Desk Setup as it applies to the I/O hardware rather than to the processing paths currently loaded on the console.
However, to make it easier to load whole console setups, the I/O Configuration is linked to all of the Desk Setups that it is used with.
When a Desk Setup is recalled it recalls the associated I/O Configuration automatically, but it is also possible to manually load an alternative I/O Configuration.
The name of the I/O Configuration being edited is shown in the title bar, and the name of the currently loaded I/O Configuration is shown on the main Encore page.
V5.4 Software

It is still possible to name each madi port on the console (and in Encore), so that a more user-friendly name is displayed.
This employs the same method as I/O Config in V5.3, but before you name the ports, you have to select the Engine first, using the Engine 1, Engine 2 etc buttons.
This ensures the correct list of ports is displayed for each engine.
The rest of this page works as in V5.3.
▶ To start a new I/O Configuration file, Click New.
A confirmation dialogue box will be displayed, indicating that the new file will start with factory default settings.
▶ Click Yes.
The current settings will be cleared back to factory defaults and no name will be shown in the title bar.
I/O Config will start with all settings at factory default.
▶ To assign a User Name to a port, double click on the Name for the required port, and a text entry box will appear with an X next to it.
▶ Enter up to 4 letters and press Enter.
The new name will be shown in the Name column.
- If Auto Increment is enabled, the text entry box will move to the next port.
- If Auto Copy is enabled, the text entry box will contain the last User Name entered.
▶ To cancel selection or exit from Auto Increment mode, click on the X at the side of the list.
If Auto Increment Value is ticked, then if a name finishes with a number, the highlight bar will drop down to the next port, keep it's original text but increment it's value by one.
▶ To assign a number to a port, double click on the Number for the required port, and a text entry box will appear with an X next to it.
▶ Enter a number using the Encore keyboard, and press Enter.
The new number will be shown in the Number column.
- If Auto Increment is enabled, the text entry box will move to the next port.
- If Auto Copy is enabled, the text entry box will contain the last number entered.
▶ To cancel selection or exit from Auto Increment mode, click on the X at the side of the box.
Making two mono ports act as a stereo pair
The ports may optionally be assigned in pairs to make a stereo Input or Output.
The ports will still follow the paths if they are not specifically set (i.e. a pair of mono ports assigned to a stereo path will be treated as a stereo pair).
Adjacent odd and even ports make a stereo pair (e.g. A and B on LIN ports, an odd numbered port and the following even numbered port on MADI ports, etc.).
▶ Either:
- Click on a mono port (the Mono/Stereo radio buttons will indicate Mono), or
- Click the Stereo radio button.
The second port of the pair will be removed from the list.
The first port will be renumbered with a trailing S replacing the A or B to indicate stereo (e.g. 1LIN 3A will become 1LIN 3S).
Clearing Settings
▶ Resetting a value will change the entry back to either ---- or 0.
▶ To clear a single setting, click directly on the required entry, and click Clear.
▶ To clear all settings for a single port, click on the System Name of the required port in the Ports column, and click Clear.
▶ To clear all settings for multiple ports, click and hold the mouse button on the first System Name of the ports and drag down the list until the a selection is highlighted.
▶ Release the mouse button and click Clear.
▶ To clear multiple entries in a single column, click in the column containing the entries to be cleared.
▶ Click and hold the mouse button on the first entry to be cleared, and drag down the list until the last port to be cleared is selected.
▶ Release the mouse button, and click Clear.
Delay
▶ Click on the Delay Units button.
A dialogue box will appear containing the options for Delay Units.
▶ Click the radio button for the required Units and click OK, or click Cancel to leave the units unchanged.
The legend on the Delay Units button will change to indicate the selected Units.
The Remaining Amount will display the amount of Delay left to assign in the new Units.
Any Delay configured will change to show the setting in the new Units.

| One second of delay = | Units |
| 48,000... | Samples (typically, although depends on Sample Rate, could also be 44,100) |
| 1,000 | Time (milliseconds) |
| 330 | Distance (speed of sound = 330m/sec) |
| 24... | SMPTE (typically, although depends on Framerate, could also be 25, 29 or 30) |
To see the total amount of Input or Output delay available, click on either the Inputs or Outputs radio button.
The amount of delay available will be shown underneath in the units selected.
For systems with more than one QuadMadi II card, the total amount of delay available shown in I/O Config is a total of all the available delay across all Quad Madi cards.
Once all the available delay has been used up from one Quad Madi card, it is not possible to use the delay from another card.
Nor is it possible to 'steal' from the pool of Input delay if all the Output delay has been used up (and vice versa).
To configure Delay on single ports
▶ Double click in the Delay column for the required port (a box will appear with an X next to it).
▶ Enter the amount of Delay from the Encore keyboard and press Enter. NB: Auto Increment and Auto Copy can be used when entering delay times.
To automatically configure Delay on multiple ports
▶ Click in the Delay column, click and hold the mouse button on the first Delay entry to be configured and drag down the range of ports to configure.
▶ Release the mouse button.
▶ Click on the Auto Configure Delay button.
The remaining delay will be divided equally amongst the highlighted ports leaving a remainder which will be the new Remaining amount.
Any Delay already assigned to the selected ports will be added to the Remaining amount before it is divided up.

Dither
Dither is used to replace distortion caused by quantisation with a low level wide-band noise that is subjectively easier on the ear.
Dither is set automatically on ADCs for the word length of the converter.
Dithering is 16, 18, 20 or 24-bit with an LSB Rounding, Rectangular or Triangular pattern.
▶ To set Dither on Output ports, click on the Outputs radio button to show the list for Output ports.
▶ Click on the Type radio button as required.
▶ Double click on the Dither entry for the required port, and a drop down list of Dither settings will appear.
▶ Double click on the required setting.
NB: Auto Increment and Auto Copy can be used when setting dither.
Relays
The relay control in I/O Configuration is a simpler alternative to the full GPI Configuration control.
The choice of using GPI Configuration or I/O Configuration settings is made in Encore Preferences.
When a relay is associated with an input port, the relay is actioned when the fader crosses the -60dB threshold.
▶ To associate a Relay with a port, double click on the Relay column for the required port (an entry box will appear with an X next to it), and enter a relay number using the Encore keyboard. The number will be shown in the Relay column.
NB: Auto Increment and Auto Copy can be used when associating Relays with ports.
MCS Track Arming using 'virtual relays'
You can remotely arm up to 48 tracks using the Pec/Direct panel if you have assigned 'virtual relays' in I/O Config.
These relays use the MCS 9pin to arm machine tracks.
The 3-digit relay number has the format XYY, where:
- X = MCS port number (1-6) that the machine is attached to on the SPS rack;
- YY = the 2 digit track number (01 - 96) you wish to arm. For example, if you wish to arm track 7 on a machine attached to port 3, the relay number would be 307.
This relay number is attached to the Output port from the console that feeds the audio input to the machine.
▶ Click the Output radio button so the ports list shows Outputs.
▶ Double click in the junction of the Relay column and the Output port you wish to assign a port too.
▶ Type in the 3 digit relay number and press Return.

You can use Auto Increment and Auto Increment Value when setting up continuous relays on continuous ports.
In the example shown left, two 8-Track machines are being fed audio from the console on 2MAD, these machines are attached to MCS ports 2 and 3.
▶ Click Save&Load and the tracks will be ready to be armed remotely.
▶ This can be done by either:
- Opening the Machine Properties dialog, and clicking each track on screen to arm/disarm each track.
- Using the REC buttons on the Pec/Direct panel (making sure the relevant Track is not set to SAFE)
Names Configuration
The Names Configuration page has been superceded by I/O Configuration, and is non-functional.
WARNING!
ANY Changes made in I/O Designer will apply to ALL Mix Setups that are subsequently loaded onto the console.
Port Grouping
Port Grouping allows a number of Output ports to be ganged together like a distribution amplifier, so that when a path is attached to one of the outputs, it is routed to all of them.
This is particularly useful when sending a single signal to multiple destinations.
The utility used to interrogate and set the Port Grouping is called I/O Designer.
I/O Designer is a password-protected system utility set up when the console is installed, and is not normally part of the operational Encore suite.
▶ To change the Port Grouping, launch I/O Designer using the Edit (I/O Designer) button.
This is a password-protected application as changes will affect all subsequent console users.
▶ Select the Grouped Ports tab.
V5.4 Software / Engine selection

In V5.4 software, it is still possible to group Output ports together, but not possible to include ports from different engines into the same group. All ports must therefore reside on the same engine.
▶ Click the Engine 1 or Engine 2 button first to display all of the ports handled by that engine.
The rest of the procedure is the same as V5.3 software.
On the right-hand side of the screen, select the type of ports to be displayed on the left half of the screen, then select the individual ports to be ganged by selecting them and then using the >> button to move them to the right hand side list.
▶ Highlight a group of up to 6 ports using the left hand mouse button when holding down the Shift key on the keyboard (for a contiguous block of ports in the list) or when holding down the Control key (for non-contiguous ports).
▶ Click the Re-Group button to form the ports into a group.
▶ On the right hand side of the screen, highlight a port to be the master (i.e. the port to which a path is routed to when routing to the group) and click on Make Master.
The ports must all be on the same Quad MADI board, e.g. using MADI ports 1-4, or MADI ports 5-8 etc.

When grouping ports for creating parallel Stereo feeds, it will be necessary to group all the Left signals together and then group all the Right signals together in two separate operations as shown left.
▶ Click Save and Exit to finish.
A reminder will be displayed that the Grouping will not take effect until the Desk configuration is re-loaded.

GPI Configuration (General Purpose Interface)
The GPI page is used to map relays and opto-isolated inputs (optos) to console controls and events.
GPI is an alternative to the simpler relay setup (associating relays with ports) in the I/O Configuration page.
There are several places in a digital System where relays and optos may be physically located:
- A relay card may be fitted in the control surface, providing 8 relays and 8 optos.
- 8 relays and 8 optos are provided in each MIOS rack in the system.
- A relay card with 8 optos and 8 relays may be fitted in a remote IOS rack.
There are two types of dedicated relay/opto racks:
- Fader Start Box: Normally fitted with 16 optos and 64 relays, but is expandable.
- Track Arming Box: Normally fitted with 48 optos and 48 relays.

▶ To launch GPI configuration, select the GPI Configuration tab from within I/O Configuration.
▶ To check how many optos and relays are available and what their numbering system is click on the Relays and Optos Map button.
A list of the available optos and relays will be displayed, together with their identification.
When GPI is located in a MIOS or IOS rack, the rack is identified by its MADI connection to the console. EG: MADI 1/2 indicates that the rack attached to MADI port 2 on Quad MADI board 1 has GPI facilities.
There are two sets of radio buttons on the right hand side of the GPI page.
• The first is used to select Relays or Opto-Isolators.
- The second set is used to select Input Paths, Output Paths or Console Status.
The combination of radio buttons determines the console controls or events that are displayed in the list.
Configuring GPI Relays
▶ To configure relays associated with controls in signal paths, click the Relays radio button and either the Input Paths or Output Paths radio button.
The list will show all the input or output paths.
- Path: This shows all valid Input paths (Channels and Track Monitors) or Output paths (Groups, Auxes and Main Outputs).
- Fader Mic/Line: This can be set to Mic, Line or Any and is set to Any by default. This determines whether the relay associated with the fader will be activated when the path's input is selected to Mic or Line or any input. For instance, if this is set to Mic for Channel 1 then the fader relay will only fire (when the fader is over-pressed) if Channel 1 is switched to Mic and there is a source connected to the Mic input.
▶ To select Fader Mic/Line, double click the entry for the required path. A small drop down list will be displayed.
▶ Click Mic, Line or Any as required. (If Auto Increment is enabled, the drop down list will move to the next path after selecting Mic, Line or Any.)
Fader Relay: This is the relay number that is switched by the detector at the bottom of the fader travel.
▶ To select the relay number, double click the entry for the required path.
An entry box will appear in the list.
▶ Type the required relay number and press Enter. If Auto Increment is enabled the entry box will move to the next path. If Auto Increment Value is also selected the next unused relay number will be automatically entered in the box.
(▶ To cancel Auto Increment, click the red X at the side of the entry box).
Link Logic
The only option currently available is ANY.
The OR and AND options are currently not supported.
Action
This is used to set the relay action to Latching (switch closed or switch open and stay until changed) or Momentary (temporarily close and open).
If relays are assigned to both the fader and switch then they will both have the same action.
▶ Double click the entry for the required path, and a small drop down list will be displayed. Click Latch or Mom as required.
If Auto Increment is enabled the drop down list will move to the next path for selecting Latch or Mom.
Mic Live Bus
This is used to select whether or not the path will affect either of the Mic Live busses when the relays are closed.
Mic Live Busses A and B are 'virtual' busses that can be used to switch relays when they are active.
They are activated by an open path from a Mic input to an output. This provides a signal integrity system which can be customised as needed.
For instance, Channel 1 is set to activate Mic Live Bus A. For Mic Live Bus A to go active then Channel 1 must be set to Mic, the Mic input must be switched on, and the signal must have a clear path to an Output path.
To select the Mic Live Bus
▶ Double click the entry for the required path, and a small drop down list will be displayed. Click None, A, AB or B as required.
If Auto Increment is enabled the drop down list will move to the next path for selecting None, A, AB or B.
Configuring GPI Opto-Isolators
▶ To configure opto-isolator inputs, click the Opto-Isolator radio button and either of the Input Paths or Output Paths radio buttons.
The list will show opto-isolator setup for input or output paths (as shown for inputs above).
The columns are the same for input and output paths.
Opto-isolators must be assigned uniquely (i.e. to only one function or path) except when the same opto-isolator is used for On/Cut and PFL for a Channel.
- Path: This shows all valid input paths (Channels and Track Monitors) or output paths (Groups, Auxes and Main Outputs).
- On/Cut: This is used to select the opto-isolated input that will toggle the Cut switch (the operation of the Cut switch is set by the Led On When Cut option in Preferences. If the path is on the surface then the switching will be visible as the Cut key led illuminates or extinguishes.
- PFL: This is used to select the opto-isolated input that will switch the PFL solo function. If the path is on the surface then the switching will be visible as the led in the PFL key illuminates or extinguishes (the led in the Solo Clear key will flash as for normal solo operations.
This can be set to the same opto-isolated input as On/Cut.
This is useful for 'lazy talkback' where a presenter has a microphone with an associated switch that can be used to cut the Channel and switch on the PFL.
Console Status and Relays
▶ To configure GPI optos and relays for Console Status, click the Relays radio button and the Console Status radio button.
The list will show relay or Opto Isolator setup for console status events (as shown for above).
The columns show the console status items and the relay/opto for each item.

Console Status relays are latching only.
Mic Live A & Mic Live B
These are the 'virtual' busses that are activated by a clear signal path from a mic input to an Output. When this condition is met then either or both of the Mic / Live busses will close the specified relay.
Talkback 1
The specified relay will close when the Talkback bus is activated. (Talkback 2 is not currently implemented as a Talkback path, but is used as the headphone monitoring path for MIOS).
AFL
The specified relay will close when the AFL solo bus is active.
PFL
The specified relay will close when the PFL solo bus is active. This will also happen if an opto isolated input activates PFL on a path.
Console Status and Opto-Isolators

On-Air
Only implemented on Libra Live consoles.
Control Room Dim
The specified opto-isolator will switch the Dim key for the Control Room monitors.
Control Room Cut
The specified opto-isolator will switch the Cut key for the Control Room monitors.
SLS Cut
The specified opto-isolator will switch the Cut key for the Studio Loudspeakers.
Headphone Cut
The specified opto-isolator will cut the output to the Headphones.
SLS Select MSB and SLS Select LSB
These are used to specify a range of seven opto-isolators that represent a source for the Studio Loudspeakers in binary form.
The opto-isolators should not be used for anything else.
The LSB opto-isolator number must be after the MSB opto-isolator number.
The seven digits are split into two binary numbers: a three digit number that indicates the path type and a four digit number that indicates the path number.
- The MSB (most significant bit) is the highest digit in the binary number that indicates the path type.
- The LSB (least significant bit) is the unary digit (i.e. the 'ones' column of the number) of the number that indicates the path number.
Path numbers are obtained by adding 1 to the binary number.
Each opto-isolator represents 1 when it is closed or 0 when it is open.
All zeros indicates an invalid selection (i.e. nothing will change).
| MSB | Optos inbetween: | Path Type | Optos inbetween: | LSB | ||||
| Opto 4 (Binary 1) | Opto 5 (Binary 2) | Opto 6 (Unary bit) | Opto 7 (binary 8) | Opto 8 (binary 4) | Opto 9 (binary 2) | Opto 10 (unary bit) | Path | |
| 0 | 0 | 1 | 1 = Main | 0 | 0 | 1 | 0 | MA13 |
| 0 | 1 | 0 | 2 = Aux | 1 | 1 | 1 | 1 | AU16 |
| 0 | 1 | 1 | 3 = Ext | 0 | 1 | 1 | 0 | EXT7 |
| 1 | 0 | 0 | 4 = Group | 0 | 0 | 1 | 1 | GRP4 |
| 1 | 0 | 1 | 5 = Cue | 0 | 0 | 0 | 0 | CUE1 |
SLS Select Valid
This is used to execute routing of the path to the Studio Loudspeakers, as selected with SLS Select MSB and SLS Select LSB.
Headphone Select MSB & Headphone Select LSB
These are used to specify a range of seven opto-isolators that represent a source for the Headphones in binary form.
The opto-isolators should not be used for anything else.
The LSB opto-isolator number must be after the MSB opto-isolator number.
The usage of the seven opto-isolators is identical to the format used for the Studio Loudspeakers.
Headphone Select Valid
This is used to execute routing of the path to the Headphones, as selected with Headphone Select MSB and Headphone Select LSB.
TALKBACK 1
When the specified opto-isolator closes then the Talkback will be switched on.
Talkback 2 is not currently implemented as a Talkback path, but is used as a monitoring path for MIOS.
Audio Follow Tally (AFT), (Libra Live only)
This feature allows fader positions to be controlled by external switch closures.
A typical application is Audio Follow Video when audio channels open in response to camera or video switcher tallies.
When in AFT mode, the faders do not physically move in response to the external control, but the audio is faded up and down at pre-programmed rates as though the fader was moving.
This feature allows the operator to adjust the level to which the fader will open even while the channel is off, or is in the process of fading.
Thus there is the physical fader position representing the "Open" position and a DSP fader position which is the real audio level as controlled by the AFT system.
The console scribble strip always displays the DSP fader level.
▶ The whole facility can be turned on and off using the Enable AFT checkbox.
Configuration
Any opto input may be mapped to any signal path with each opto capable of controlling up to 8 different paths and each path being controllable by up to 4 optos.
Each input path is given a fade-up time and a fade-down time via the Encore screen.
- The Fader Open (maximum) value is set using the fader and can be adjusted at any time.
- The Fader Closed (minimum) value is set via the screen so that the value may be saved and recalled with the console configuration.
The minimum value is usually set to Cut (= -103dB), but may be set higher to allow an background buzz-track when the fader is 'closed'.
The facility is set up using GPI Configuration in I/O Config.

To configure AFT
▶ Select the Audio Follow Tally radio-button on the right hand side of the screen.
Opto isolators are mapped to paths in the same way as other GPI functions, except that up to four different optos may be mapped to a path using commas to separate the numbers, e.g. 1, 8, 27, 64.
This allows up to 4 cameras to open one microphone in an 'Audio Follows Video' application.
Opto isolators may also be assigned to multiple signal paths (maximum 8), to allow a camera to select multiple microphones.
When AFT is turned on, the optos will control whether the fader is opened or closed.
At the bottom right of the screen an AFT Invert check-box determines whether an active opto input drives the fader up or down.
Three other columns are used to set the fade-up and fade-down rates and the minimum level to which a fader will go to when closed. To set the minimum value to Cut, enter a value of -103, or type Cut on the keyboard.
If no values are entered the minimum value defaults to Cut and the fade rate is set to 1ms.
The AFT facility can be turned on using the AFT Enable check-box, and the Quick Prefs checkboxes are also found in User Preferences.
Using AFT
Faders that are in AFT mode cannot be part of a Gang structure or be included in the scope of a snapshot recall.

This is to avoid conflicts arising if two systems attempt to control the same fader.
Faders in AFT are indicated by one of the two triangular trim indicators next to the fader being illuminated.
The bottom of the two triangular trim indicators next to the fader will illuminate to indicate the DSP fade is at the bottom. The physical fader however will remain in the open position.
This allows the operator to move the fader to the level it should be at when the external tally opens the fader.
Touching the fader will confirm the DSP fade value, i.e. the pre-programmed minimum value.
When a tally is applied to any of the opto isolators that have been mapped to a channel's AFT function, the channel's fader will open.
The upper trim indicator next to the fader will flash during the transition to indicate the direction of travel. The fader knob will remain stationary, but the audio will be faded up at the pre-programmed rate till it reaches the level that the fader knob indicates, when the Control AFT switch will go red and the upper trim indicator will illuminate.
The fader can be moved at any time to adjust the open fader level, but the audio level will not follow the fader if it is moved below the minimum value.
When the tally is removed, the audio will fade to the minimum value at the pre-programmed rate, though the physical fader remains stationary.
Switching AFT Control off will restore the fader to normal manual control and the audio fade will ramp up/down to match the physical fader position.
Quick Prefs
These 4 Prefs are the same as found in Preferences / Extended Prefs
- Fader Start Integrity System: When checked, a relay associated with a path will only fire if the path has a clear route to an Output. This is in addition to any other conditions that affect the relay:
- AFT Enable: turns the AFT system on and off.
- AFT Invert and On/Cut Invert: Some switcher systems use inverted logic so these options allow incoming data to also be inverted, so the switch logic operates as it should.
▶ To exit from I/O Config, click the Exit button.
If all changes have been saved I/O Config will close (if there are un-saved changes a warning dialogue box will be displayed).
▶ Click
- Stay In IO Config,
- Exit, or
- Do Not Save
as required.
▶ If Exit, Do Not Save is selected then I/O Config will close.
Any changes made since the last save will be lost.
This is useful if erroneous changes have been made that would be time consuming to undo (for eg accidentally clearing delay on all inputs).
I/O Patching (Digital)
I/O Patching is used to rapidly configure input/output routing.
The number and availability of different path types will depend on the Desk Setup (which can be modified with Desk Edit). The number and availability of input and output ports will depend on the hardware setup.
▶ To Attach Ports to Paths, click on the tab for the path type you wish to route.
▶ To attach an Input Port to a Path
- Click on the In column for the required Path, or
- Select Input from the drop down list.
The In column will be highlighted in green.
▶ Click on the required port in the Ports List.
▶ If the required Port is not in the list, click on the Rack and Type radio buttons to select the correct location of the port (if the Port is already in use then the Paths box will show the path name(s) and the words Port Used By x Other Paths will flash).
▶ Click the Assign button, and the Port name will be displayed against the Path in the In column (if Auto Increment is enabled, the next path and port in each list will be selected).
▶ Click Assign repeatedly to assign sequential Ports and Paths.
V5.4 Software
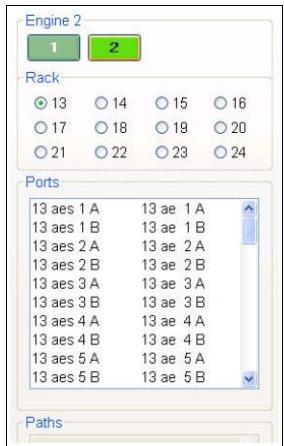
I/O Patch now contains buttons for selecting the display of madi ports relating to a particular engine. Clicking Engine 1 will show Madi ports on racks 1 – 12 Clicking Engine 2 will show Madi ports on racks 13 – 24 (left) etc.
Once the display shows the madi ports you wish to attach, the porting method is the same as previous software.
For dual-engine systems (but not on quad-engine systems) it is possible for a Channel to live on one engine, yet for the Input (or Output) to be handled by another Quad Madi II card on another engine.
In this instance, a delay of a few samples will be incurred as the information is sent between engines using the optical RSI links on the front of each USP card.
Care must be taken to avoid phase differences in this situation.
NB: For multi-engine systems, the Quick Patch function has been removed from I/O Patch.
▶ To attach a port to an Output path, click on the Out column for the required Path, or Select Output 1 from the drop down list. (Output 2 may only be selected for Main paths).
The Out column will be highlighted in red.
Input and Output ports can only be assigned to Paths if the Path type is appropriate.
For example, input ports cannot be assigned to Main Paths and Output ports cannot be attached to Channel Paths (unless an Output has been added to the channel path in Path Edit or Desk Edit).
▶ Click on the required Port in the Ports list (if the required Port is not in the list, click on the Rack and Type radio buttons to select the correct location of the port. If the Port is already in use then the Paths box will show the path name and the words Port Used By 1 Other Path will flash).
▶ Click the Assign button.
The port name will be displayed against the Path in the Out column (if the Port was in use by another path then it will be de-assigned and then assigned to the new path. This is because only one path can be routed to an Output Port).
If Auto Increment is enabled, the next Path and Port in each list will be selected.
▶ Click Assign repeatedly to assign sequential Ports and Paths.
Inserts
▶ To assign Ports to Inserts in a path, select Insert In 1 from the drop down list.
The In and Out columns will show Insert In 1 and Insert Out 1. The Insert In 1 column will be highlighted in green.
▶ Click in the Insert In 1 column for the path with the Insert.
▶ Click on the required Port in the Ports list. (If the required port is not in the list, click on the Rack and Type radio buttons to select the correct location of the port. Use the scroll bar on the Ports list to view more ports in the list).
If the Port is already in use then the Paths box will show the path names and the words Port Used By x Other Paths will flash.
▶ Click the Assign button.
The Port name will be displayed against the Path in the appropriate column.
▶ Click in the Insert Out 1 column for the path and repeat the Port selection and assignment as above.
If the selected Output Port is in use by another path then it will be de-assigned and then assigned to the insert.
This is because only one path or insert can be routed to an Output Port.
▶ If the Path has a second Insert, repeat the procedure by selecting Insert In 2 from the drop down list.
Input and Output ports for Inserts can only be assigned to a path which has been configured with an Insert in Desk Edit or Path Edit.

Online / Offline Routing
On Line routing is enabled when the On-Line check box is ticked.
- If On Line is enabled, the changes will appear on the console immediately.
- If On Line is disabled, the changes will not appear on the console (and the Apply button will be available).
▶ If working in Offline mode, you can force the console to match routing changes by clicking the Apply button.
▶ To clear all settings for a single port, click on the System Name of the required port in the Ports column, and click the Clear button.
▶ To clear all settings for multiple ports, click and hold the mouse button on the first System Name of the ports to be cleared.
Drag down the list until the last port to be cleared is selected, and release the mouse button.
▶ Click the Clear button.
▶ To clear multiple entries in a single column, click in the column containing the entries to be cleared.
▶ Click and hold the mouse button on the first entry to be cleared.
▶ Drag down the list until the last port to be cleared is selected. Release the mouse button, and click the Clear button.
Quick Patch
Quick Patch is used to assign all of the inputs or outputs for one path type to a sequence of ports.
▶ Click on the drop down arrow next to the path type box.
The list of valid path types for use with Quick Patch will appear.
▶ Click on the required path type.
▶ Click on the drop down arrow next to the port type box, and the port type list will appear.
▶ Click on Input or Output as required.
▶ Click on the drop down arrow next to the port names box, and the list of available sets of ports will appear.
▶ Click on the required port name, and click the Apply button.
The selection will be applied to the current Desk Setup and allocated on the console:
- If there are more ports than paths then the remaining ports will be unused.
- If there are more paths than ports then the remaining paths will be cleared.
If I/O Patching is not On Line then any modifications made on the pages not affected by the Quick Patch selection will be applied at the same time as the Quick Patch is applied.
▶ To exit I/O Patch, click on the Exit button in the bottom right hand corner of the I/O Patching window.
Changes made to the porting are automatically saved on Exit, unless the Mix Setup is read-only.
If working at 96kHz, then only the 1st and 3rd pair of madi ports on each QuadMadi II card will be shown in I/O Patch.
Machine Manager (Digital)

Machine Manager allows the user to quickly port or unport tape machines, effects units (plus any associated relays) and the like from a reference library of commonly used machines.
V5.4 Software

This differs from v5.3 software in that there is a new top-level menu entry in the Ports display screen.
This allows you to select the engine you wish to display the madi ports for.
Once this has been set, the rest of the software works the same as in previous versions.

First you must create a library of all the machines.
▶ Click the Machines box at the bottom of the screen, then from the Machines menu, choose New.
There is a list of the most commonly used machines.
▶ Select the option you require.
Selecting the option for Tascam DA88 could be applied to any 8 track digital tape machines, not specifically those manufactured by Tascam. This applies to all the machines in the preset list.

The parameters for that machine will display on the right hand side of the screen (if the machine does not appear in the preset list, there is also the option for the user to create a Custom machine):

The Machine Name field allows the user to type in a unique name by which that machine will be identified.
▶ Type in the number of mono Inputs and Outputs that the machine has.
The Model box contains a pulldown list of all the previously used manufacturers names.
▶ If the one you require is not in the list, click New and type in the name.
This will be used for the current machine and added to the list for future use.
▶ In the Category field, select the type of machine. The options are:
- Tape Machine
- FX Workstation
• Audio Workstation
• Networked Workstation - Playback Only Machine.
If the machine needs to be armed remotely from the desk, then provision must be made for relays to control this.
▶ Select the type of relay required. The options are:
- None
• Physical Dubber
• Physical Multitrack
• Virtual (9 pin serial) - Raw Relay Number
▶ Once all the parameters have been set for the machine, click OK and the machine will be added to the library, with the appropriate icon for it's function.
Once the machine has been added to the library it is still possible to change the parameters by clicking the machine on the left (it's parameters will be shown on the right of the screen from where they can be changed).
If you change any of the values, the lower half of the screen will display a flashing Update box.
▶ Click on this to amend the machines properties.
▶ To Delete a machine from the list, highlight the required machine and select Delete from the Machine menu. You will be asked to confirm the removal of the machine.
▶ To change the order of the machines in the list, select the machine to be moved, then use the + and - buttons at the bottom of the screen to move that machine up or down the list.
▶ To port the inputs and outputs of a machine, highlight the machine from the list so it's inputs and outputs are displayed on the right side of the screen.
▶ At the bottom of the screen click on Ports. The display will change to show the currently available system ports.
▶ On the Ports list, double click each level of the tree to show the available ports on that rack.
Before you port the machines, first ensure that if there are Inputs displayed on the left of the screen, and the window on the right must be set to display Outputs (outputs from the desk are inputs to the machine, and vice versa) otherwise ports will not be applied.
▶ Highlight the selection to be applied by clicking on the first port, then holding Shift and clicking the last port to highlight a selection.
▶ Drag and drop this on the first port where you wish to start your porting from.
When ports are applied, unlike I/O Manager, Encore does not warn you that an Output port may already be in use.
▶ To set the relays for a machine, all the desired machine to the right hand window and click Relays underneath (this option will be unavailable if the Relay field is set to None).
▶ From the Relay Type pulldown menu, select the type of relay.
▶ Double click on the words Not Connected, and a dialogue box will open.
▶ Enter the number of the relay.
▶ If you hit Return on the keyboard, the highlight bar will drop to the next path and increment the value by one.
▶ The + and - buttons at the end of the field can be used to increase or decrease the relay number.
If you try to assign a relay that is already in use, you will be warned of this before any reassignment takes place.
▶ To clear ports or relays, highlight the selection to be cleared by clicking and dragging, then press Clear.
Clearing Output ports will not clear Input porting and vice versa.

Meter Designer (DFC only)

Meter Designer allows up to eight metering designs to be available at any time.
Each set of designs is saved in a configuration file.
The current meter design file is associated with the current Desk Setup when the Desk Setup is saved.
The Meter Designer defaults for each path type are stored according to the current Encore user so that each user can have individual metering preferences.
▶ To start a new design file, click on the Meter Designer selection box in the System tab in the Filing page, and click the New button.
A dialogue box will appear for the new design file name.
▶ Type in an appropriate name and press Enter on the Encore keyboard. Meter Designer will run with a blank set of designs.
▶ To make a new design file from an existing design, click the Edit button. The Meter Designer will run and load the selected design.
▶ Click the Save As button.
A dialogue box will be displayed for entering the new design file name.
▶ Type a new name and click OK.
▶ Modify the meter designs as required.
(Alternatively, Copy the file in the Filing page and then click Edit).
To setup a meter design
▶ Click on the drop down arrow at the end of the Design number box. A list will drop down, showing the eight meter designs.
▶ Click the required Meter Design number, and the design page will display the selected design number.
▶ To display the required meter number, either
- Click on the meter scrolling arrows
- Press the PgUp or PgDn keys on the Encore keyboard to jump eight meters at a time
- Press the arrow keys on the Encore keyboard to scroll the meters
- Press the Home and End keys on the Encore keyboard to jump to the first and last meters
- Type the required meter number on the Encore keyboard (there is a small timeout when this is done, so to jump to meter 15 press the 1 and 5 keys in quick succession. The display will go to meter 1 then meter 5 if a long gap is left between pressing the keys).
Meters are numbered sequentially from left to right across the whole console.
Gaps in the meters (i.e. quadstrips with no meters) are ignored by Meter Designer.


▶ To select the path type or meter group to place, click on the radio button for the required path type or meter group.
The list box will show the selected paths or meter groups.
If split console mode is in operation then there will be one set of Wild Meters and PreDubs available for each console partition.
The names reflect the console partition the meters are applicable to (i.e. Wild 1 represents the Wild Meters in partition 1, etc.).
If Stems is selected then Stems A to F will be listed, plus an option for Film which represents the Film monitor outputs.
▶ Use the scroll bar to view additional paths in the list.
▶ To place a path or meter group, click and hold on the required item in the list (the pointer will change to indicate drag and drop mode. Drag 'n' drop onto the required meter).
The path or meter group name will appear in the box underneath the meter.
The default meter type for the item will appear at the top of the meter. Other options will appear below the meter.
If a Group item was selected then the requisite number of meters will be allocated (4 for Wild Meters, 8 for Stems or PreDubs).
Wild Meters will automatically snap to use the whole of the quadstrip they are dropped onto.
Stem and PreDub meter groups will automatically snap to the set of eight meters they are dropped onto. (i.e. they will snap to meters 9 to 16 when dropped onto meter 15).
If a meter was already allocated then a dialogue box will appear to confirm re-assignment of the meter.
To assign paths on a layer
▶ Click the Meter Follow Path button.
A flyout menu with follow options will appear.
▶ Click the Assign Paths Currently Under A Meter option.
The Auto Assign By Layer dialogue box will be displayed.
▶ Click A, B, C or D for the required layer, and click OK.
The paths assigned to the selected layer will be assigned to the corresponding meters.


▶ To automatically set meters to follow layer selection, click the Meter Follow Path button.
A flyout menu with follow options will appear (as above).
▶ Click the Make Meters Always Follow Selected Path option.


A dialogue box will be displayed for selecting which partition of meters should be set to follow layer selection.
▶ Tick the required Partitions, click OK, and the selected meters will be set to Strip.
▶ To copy a design, click the Designs button, and a flyout menu with design options will appear.
▶ Click the Copy Current Design To Another option.
A dialogue box will be displayed for selecting which designs to copy to.
▶ Click the check boxes for the required designs, and click OK.
▶ When the design is complete, click the Save+Load button.
A dialogue box will appear to confirm saving the design with the current file name.
▶ Click OK, or enter a new file name and then click OK.
The meter designs will be loaded into the console and the current design page will be assigned to the meters. (This is a way of doing a 'Save As' for a meter design based on an existing design).
When the meter design has been saved, selecting a design page will also assign the design on that page to the meters on the bridge.
If further changes are made to the design then the changes will not be made live until another Save+Load is executed.
To change individual meter options
▶ To display the required meter number, either
- Click on the meter scrolling arrows.
- Press the PgUp and PgDn keys on the Encore keyboard to jump eight meters at a time.
- Press the arrow keys on the Encore keyboard to scroll the meters.
- Press the Home and End keys on the Encore keyboard to jump to the first and last meters, or
- Type the required meter number on the Encore keyboard.
To change the meter type, click on the drop down arrow next to the meter type box above the required meter.
The list of meter types will appear.
▶ Click on the required meter type.
If the meter type for a meter in a group (Wild Meters, Stem, PreDub) is changed then all the meters in that group will change simultaneously.
There are no other options for Wild or PreDub meters.


To change the metering pick-off point
▶ Click on the drop down arrow next to the box below the meter.
The list of meter points will appear.
▶ Click on the required meter point.
Stem Meters
Stem meters have additional options to select which controls to follow, which partition the controls are on that are followed and which Stem is metered by default.
All eight meters will change together.
▶ To select which controls are followed by Stem meters, click on the drop down arrow next to the Follow box, and the Follow list will appear. The options are:
- PEC and PEC2 to follow the Stem selection keys A to F on the first or second PEC/Direct Panel in the partition
- Surround to follow the selections on the Meter section of the Surround Monitoring Panel, and
- Fixed to always monitor a selected Stem or the Film outputs. Click on the required Follow option.
▶ To select which partition the meters follow, click on the drop down arrow next to the partition number box. The partition list will appear.
▶ Click on the required partition (this is not selectable if the Follow option is set to Fixed).
The meters will now follow the metering on the selected partition. (eg If Follow PEC and Part.2 are selected then the meters will follow the Stem selection keys A to F on the PEC/Direct Panel on the second partition.)
▶ To select which Stem to meter, click on the drop down arrow next to the Stem box. The Stem list will appear.
▶ Click on the required Stem (A to F) or Film (for Film monitor outputs). This is only selectable if the Follow option is set to Fixed.
To clear one meter
▶ Right click on the required meter.
A flyout menu will appear with Clear Meter and Clear Path options.
▶ Click on Clear Meter.
The item assigned to the meter will be removed. If a group item is clicked (Wild Meters, Stems or PreDubs) then all meters used for the group will be cleared.
To clear a path from the meters it appears on
▶ Right click on the meter containing the required path.
A flyout menu will appear with Clear Meter and Clear Path options.
▶ Click on Clear Path.
The path will be removed from any meters it is assigned to in the current design.
To clear the current design page
▶ Click the Designs button.
A flyout menu with design options will appear.
▶ Click the Clear Current Design option.
▶ Click Yes.
To clear the designs from all pages
▶ Click the Designs button.
A flyout menu with design options will appear.
▶ Click the Clear All Designs option. A confirmation dialogue box will appear.
▶ Click Yes, and all eight meter designs in the current file will be cleared.

Meter Maid (DFC)
Meter Maid is used for rapid modification of existing meter designs.
It allows the meter type and metering pick-off point to be changed for selected meters or paths, and also provides an alternative method of clearing a selection meters or paths from the meters they appear on.

▶ Click on the Meter Maid button on any meter design page, and the first page of Meter Maid will appear.
▶ Click the Path or Meter radio button.
- Path means the modifications will be made according to selected paths.
- Meter means the modifications will be made according to selected meter numbers.
▶ Click the Next> button.


The second page of Meter Maid will appear with a list of Paths (shown left) or Meters (right) displayed according to the selection on the first page.
▶ Click on the items which require changing, or click and hold on the first required item and drag down the list.
Each time an item is selected its check box will be toggled between checked and unchecked.
▶ Click the Next> button.

The third page of Meter Maid will appear for selection of the change to take place.
The Meter Type and Meter pick-off point can be changed or meters can be cleared.
▶ Click Modify or Clear Meter(s):
If Modify is selected:
▶ Change the Meter Type and/or Meter point by clicking on the respective drop-down arrow and selecting the required option from the drop down lists (at least one of the options must be changed).
▶ Click the Next> button.
The last page of Meter Maid will appear for selection of the designs to modify.
The design that Meter Maid was launched from will be ticked by default.
▶ Click on the designs which require modification, and click Finish. Meter Maid will close and the modifications will be made.
If the Next> or Finish buttons are clicked with nothing selected then a dialogue box will appear to inform the user that something must be selected.
Meter Maid will stay on the same page when the dialogue box is closed.
To abandon the operation at any time, click Cancel on any Meter Maid page.


To set Meter Designer Defaults
▶ Click on the Defaults tab.
The Defaults page allows the default metering type to be set for all path types and meter groups.
It also allows the default metering pick off point to be selected for each path type and the default following mode for stem metering groups.
The Meter Designer Defaults are stored according to the current Encore user so that each user can have their own metering preferences.
To set metering defaults for a path type
▶ Click on the radio button for the required path type.
▶ Click on the drop down arrow next to the Meter Type box. The Meter Type list will appear.
▶ Click on the required meter type.
▶ Click on the drop down arrow next to the Meter box.
The Meter pick off point list will appear.
▶ Click on the required pick off point.
To set metering defaults for Stems
▶ Click on the drop down arrow next to the Meter Type box. The Meter Type list will appear.
▶ Click on the required meter type.
▶ Click on the drop down arrow next to the Follow box.
The options are:
- PEC and PEC2 to follow the Stem selection keys A to F on the first or second PEC/Direct Panel in the partition;
- Surround to follow the selections on the Meter section of the Surround Monitoring Panel, and
- Fixed to always monitor a selected stem or the film outputs.
▶ Click on the required Follow option.
▶ Click the drop down arrow for Stem Width.
The options are 2, 4, 6, 7 or 8, corresponding to the number of Film paths that can be selected in Desk Edit.
▶ Click the required number of meters.
To set the default meter type for Wild Meters and PreDubs.
▶ Click on the drop down arrow next to the respective Meter Type box. The Meter Type list will appear.
▶ Click on the required meter type.
Mix Importer (Digital)
This imports ProTools V5 automation files and Encore automation (from different mixes) into Encore.
Only V5 versions of Pro Tools automation can currently be imported.
To Import a Pro Tools Mix Into Encore
Firstly, ensure you are logged onto Automation with a Mix/Pass loaded, as once Encore has imported Pro Tools data, it needs this destination to export to.
▶ From the File menu select Import Protocols Automation and the standard Windows Load dialogue will be shown.
▶ Open the desired Pro Tools file (it will have a .pt5 suffix) As the file opens, it will be converted into Encore format.
▶ Globally tick/untick controls to be included or excluded (using the Fader, Pan, Mutes etc buttons), or individual controls can be included or excluded by clicking the junction of the control and pathname.
You will need to map the automation from Pro Tools to Encore, even if it is a straight 1:1 mapping.
This is done on the Mapping Screen.
▶ To open this screen, click on any of the pathnames in the first column.


▶ In the left hand half of the screen, click in the Source column and Destination columns to select where you want the automation to be mapped from and to, and the click Add. (You can also select a block of sequential Source paths by clicking on a path, then holding Shift down and clicking on the last path in the block).
The path(s) in the destination column will display in blue to show it has been remapped.
The right hand side of the screen will show the results of remapping
▶ To remove paths from the mapping, click on the paths in the right hand window and then click Delete.
The mapping for both the source and destination path will be cleared.
Offset
▶ To apply either a positive or negative offset to a path(s), before you click Add, set a timecode value in the Offset box and click either the +/- button to either add or subtract this value to the remapping.
After you click Add, it will apply this offset to all paths in the selection and this will show in the right-hand column as a +ve or -ve offset.
It is possible for different paths (or blocks of paths) to have a different offset values.
Adding notes

▶ Click on the line you wish to add text to, and a small text box will appear.
▶ Add the text and click OK.
▶ Click Apply to merge this automation into the current pass, and a new pass will be created.
This import map (plus notes) can then be saved using the File menu. In this way, a library of remapping templates can be built up.
Plus, when reloading a map, any associated automation can also be loaded.
To Import an Encore mix into Encore
First make sure that the mix you wish to import the automation into is loaded.
▶ From the File menu, select Import Encore Automation.

▶ From the screen that opens, select the User, then Client, Project, Title and Mix.
By default, this screen will open showing the automation held on the Encore (C:) drive.
▶ If you wish to change this drive, click the Drive button and select a different dive letter.

As you select the Mix, the Mix Tree for that mix will be displayed so that the individual pass can be selected.
▶ Double click the desired pass, and the automation will be displayed in the Importer screen, the next step being identical to the Pro Tools stage as outlined above, where the mapping procedure takes place next.

Importing Encore automation in this manner can be useful if you wish to apply an offset only to certain paths within the mix.
Path Edit (Digital)

Path Edit is used to alter the signal processing configuration of individual paths.
It can also be used for port routing on individual paths.
The top part of the screen shows the currently selected path with any signal processing it has assigned to it, plus any source or destination routing.
Below the path is a tabbed bar containing the available un-used processing on two tabs and available I/O processing on the third tab.
▶ To access Path Edit
- Select Path Edit in the drop down Tools Menu, or
- Click the Path Edit icon
The two fuel gauges at the top of the screen are a rough indication of the amount of I/O (depending on mix configuration and routing) and processing power (dependent on number of processing cards) available.
Both of these can be pushed up to 99% without any adverse effects, although once either reaches 100% then you will experience allocation failures.
On-Line and Off-Line operation
When Path Edit is On-Line, all changes are updated in the signal processing system as they are made on the screen.
There is a small time-lag between the change on the screen and the change showing on the console surface.
Further changes can be made while the console is allocating. A timer on the screen shows when all changes have been completed.
When Path Edit is Off-Line, any number of changes can be made in Path Edit.
When the required changes have been completed the console is updated by putting Path Edit back On-Line.

▶ To switch between On-Line and Off-Line click the On-Line/Off-Line check box.
- When Path Edit is Online the indicator shows in red.
- When Path Edit is Offline the indicator shows in green.
Path Selection
There are two methods of selecting paths, using either the path access keys on the surface or a drop-down list on screen.
This is controlled with the Follow Access Key check box.
The current processing in the path will be shown in the top part of the screen.
Changing Signal Processing
The signal processing elements are shown as icons.
These are dragged from the processing pool onto the path and placed in the required order.
The icons can also be dragged left or right on the path to change the processing order of existing processing.
▶ To add a processing element click on the required tab of the process pool selector.
▶ Click and hold on the required element in the processing pool then drag the icon to the required location and release the mouse button. The processing element will be placed on the path.
If an item was dragged to the incorrect location, it will jump to the nearest correct position.
▶ To move an output Pre or Post fader drag the output icon to the required location or click the Pre/Post button of the extra function panel (only available when working in Online mode).
The current output ports assigned to the path will be shown, as is the Pre/Post status.
To show the Insert status click the Inserts tab.
Inserts in the path will have their port routing status shown.
If a port is shown as Off then this means that the Insert is allocated but the port routing is off.
▶ To remove a processing element click and hold on the required element in the path then drag the icon to the process pool and release the mouse button.
The item will be removed from the path.
Dependent items may also be removed (e.g. if there is a sidechain, it will be removed if all the dynamics elements are removed).
▶ To remove all processing in the current path click the Clear button.
A dynamics element must be present to add Key Input and/or Sidechain EQ.
When the Key Input or Sidechain EQ is added it will attach to the first dynamics element.
If the dynamics order is changed then the sidechain will stay attached to the first dynamics element.
If all dynamics are removed then the Key Input and Sidechain EQ will be removed with the last dynamics element.
If a DRC (Dynamic Range Controller) is added then all existing dynamics will be removed automatically, and vice-versa.
Copy & Paste
The Copy and Paste functions allow the configuration of a path to be copied to other paths of the same type (e.g. Channel to Channel).
▶ Select the required path of the same type, click Copy and then Paste. The signal processing shown will change to the be the same as the source path.
▶ To paste the configuration to multiple paths of the same type click the Paste button before another path is selected.
A list of paths will be displayed in the Multi-Paste Operation dialogue box with a check box next to each path name.

▶ Click the check boxes for the paths to paste the processing to, then click OK.
Port Routing in Path Edit
The Port Routing on the current path can be changed from within Path Edit.
This saves having to close Path Edit to run I/O Patching or use the console surface for patching.

▶ To change the Port Routing click the Edit I/O Porting button.
▶ Click the Inputs, Outputs, Insert 1 or Insert 2 radio button as required.
The current porting (if any) will be shown and the Input Port and Output Port selection boxes will become available as applicable.
The Port Used By boxes show which paths are already using the selected port.
▶ To change an I/O Port, uncheck the Port State check box, which turns off the selected port (you must be Online to use this function).
▶ Click the AES, AFT, LIN, MADI or SDF radio button as required then click the drop down arrow next to the port name.
▶ Scroll through the port list and click on the required port name then uncheck the Port State check box.
If an output is selected that is already in use by another path then a confirmation dialogue box will be displayed to re-assign the port.
If the Disable Output Route Overwrite warning check box is checked then the confirmation dialogue box will not be displayed and the path that was originally ported to the output will be de-routed transparently.
Quick Patch (Digital)
This has previously been covered under the section on I/O Patching.

Surround Manager (Digital)

The Surround Manager option displays the Surround Sound Manager screen.
It is used to apply surround stem setups live on the console surface. Also, user defined surround macros can also be applied.
▶ To select the stem to work with, click on the drop down arrow next to the Selected stem in the Stem Select Box. A list of stems A to F will be shown.
▶ Click on the required stem. The Tracks that the stem is composed of will be shown in the Surround Stem Setup box.
The current speaker assignment for each path is shown above it.
Predefined Macros
▶ Click on the All Mono, Stereo, Rvrs Stereo, LCRS, 5.1 or 7.1 radio button in the Macro Select box.
The speaker indicators above the path names will change to show the new designations.
Custom Macros
▶ Click on the drop down arrow next to the Selected box in the Macro Select box.
A list of currently defined custom macros will be shown.
▶ Click on the required item in the list. The name of the macro will be shown in the Selected box.
The speaker indicators above the path names will change to show the new designations. The change to speaker routing on the console is immediate.
To define a custom Macro, see Custom Surround Macros in the chapter on Desk Edit.
▶ To change speaker designations on-the-fly, click and hold on a speaker position icon in the Surround Type Select box (the pointer will "pick up" a copy of the speaker icon).
▶ Drag the icon to the existing speaker designation icon above the required path in the Surround Stem Setup box, and release the mouse button.
The new speaker designation icon will be shown above the path name. The change to speaker routing on the console is immediate.
▶ To reverse changes to a stem, click the Undo button in the Stem Select Box. The stem will revert to the speaker designations it had when Surround Sound Manager was started.
▶ To close Surround Sound Manager, click the Exit button.
Certain speaker designations can only be used once in an individual stem (e.g. Inner Front Right).
If the speaker designation is already used, then assigning it to a different path will automatically cause the path that was previously using it to be designated as Mono.
User Manager
See the Appendix at the end of this document.
Utilities

Floating Timecode
This allows a scalable timecode display to be placed on the screen.
The timecode is displayed with larger digits than the Timecode in the corner of the main Encore screen to make reading timecode easier when operators are some distance from the screen.
The display also shows framerate, any applied offset and (on digital systems) sample rate.
On dual screen systems, it is possible to drag this display between both screens.
▶ To display the Floating Timecode box
- Click the Floating Timecode option on the Tools menu, or
- Right-click on the Timecode display on the main Encore screen.
The Floating Timecode box will be displayed.

▶ To keep the Floating Timecode box on top of all other screens, right click on the Floating Timecode box (a small fly-out menu will appear) and click on Always On Top.
The Floating Timecode box will always be visible, regardless of other items selected on the screen.
This may mean that the box will require moving to access items which it hides.
▶ To hide floating timecode when timecode is stopped, right-click on the floating timecode and select the Hide When Stopped option.
To unset this option, it can only be accessed when timecode is running and the box is visible on screen.
The height of the box will be adjusted according to how large the timecode is displayed.
The size of the box is saved for the next time that the box is displayed.
▶ To change the size of the Floating Timecode box, move the pointer over the bottom right corner of the Floating Timecode box. The pointer will change to a double-headed arrow.
▶ Click and hold the left-hand mouse button, and move the pointer (an outline will be displayed to show the new size of the box).
▶ Release the mouse button, and the Floating Timecode box will be displayed at the new size.
▶ To move the Floating Timecode box, click and hold the left-hand mouse button while the pointer is inside the box.
Move the pointer, and the box will follow the pointer.
Release the mouse button.
▶ To remove the Floating Timecode box, right click on the Floating Timecode box, and a small fly-out menu will appear. Select Exit.

Format Disk
The Format Disk utility is provided so that users with older hardware can format floppy and Iomega Zip disks.
This utility will not allow fixed disks (i.e. hard disks) to be formatted!
▶ To format a disk, insert a floppy or Zip disk into the correct drive as required and select the Format Disk option from the Tools menu.
The Format dialogue box will be displayed.
Drive [A:] (the floppy disk drive) is selected by default.
▶ To select the Zip disk drive, click the drop-down arrow adjacent to the box containing the drive letter, and a list of available disk drives will be shown. Click the drive letter for the Zip disk.
▶ When the required drive is selected, click the Format button.
A progress bar will be displayed to indicate how far the format process has proceeded.
This will be removed when the format is complete.
▶ Click the Abort button to close the Format dialogue box.


The Presets button in the Timecode Options dialogue box also provides access to the Timecode Presets dialogue box.
Timecode Presets
Allows users to create timecode presets for later recall.
The Timecode Presets dialogue box shows six preset timecode boxes labelled A to F.
Users can enter up to a maximum of six presets at any one time.
▶ To enter a preset manually, place the cursor in the selected preset box (A, B, C etc.) and enter a time using the numeric keyboard.
▶ To enter a preset using select from list, click on the Select From List button for the required preset, and the Select a Label dialogue box will appear.
Select the label desired and click on the OK button.
▶ To enter/alter a preset using the cursor, place the cursor in the selected preset box (A, B, C etc.).
It will change to a + sign (when in the upper half) or a - sign (when in the bottom half).
▶ Click the left-hand mouse button to either (according to the cursors location) increment or decrement the displayed timecode.
▶ To zero an individual timecode display, place the cursor within the displayed timecode area and press the Z key on the keyboard. The displayed timecode will be zeroed.
▶ To zero all the displayed timecodes click on the Zero All button.

Text Pages
Provides users with a basic word processor for making notes etc.
▶ To create a text file, click on Tools menu / Utilities and the Text Pages dialogue box will appear.
▶ Enter the desired text in the text area using the keyboard, and click Save As.
The Save As dialogue box will appear.
▶ Enter the file name, and select the directory you wish to save to.
▶ Click on Save. (If you wish to overwrite an existing file, select it from the list of available files first).
▶ To open a text page file, select Open from the File menu.
▶ The Open dialogue box will appear.
Select the directory and the file to be opened or enter the name of the file using the keyboard.
▶ Click OK to open the file.
Snapshots

Please refer to the separate console documentation on putting controls in and out of scope and the surface operation of Snapshots.
A Snapshot allows the settings of controls on the console to be saved with a name.
Groups of snapshots are saved to the hard disk in a snapshot file.
▶ To access Snapshots
- Click on Snapshot in the Tools menu, or
- Click the Snapshot icon.
The Snapshot System dialogue box will be displayed.
This can be used to manage the Snapshots without creating or recalling Snapshots.
Before Snapshots are can be created or recalled, the Snapshot Scope must be set first.
Snapshot Scope is the selection of controls which will be included in a new Snapshot or affected by recalling a snapshot.
Recalling Snapshots
Recalling a snapshot has two stages:
- Setting the Snapshot Scope, and
• Recalling the Snapshot.
Please see the separate Console documentation on putting controls in and out of scope and the operation of Snapshots.
▶ Double click on the snapshot on screen and it will be fired to the desk.
To end Snapshot recall
▶ Click the Exit button on screen.
The screen will close and the console will return to normal operation.
To Rename a Snapshot
▶ Click the required Snapshot in the list, and click the Rename button. A dialogue box will be displayed for entering the new name.
▶ Type the required name and press Enter.
To Delete a Snapshot
▶ Click on the Snapshot(s) in the list.
▶ Click the Delete button.
Snapshot Filing
The Snapshot System dialogue box provides facilities for saving the current set of snapshots, loading a new set from a file on the Encore hard disk and deleting unwanted files of Snapshots from the hard disk.
▶ To start a new set of Snapshots, click the New button.
A confirmation dialogue box will be displayed to indicate that the current list of snapshot will be cleared.
▶ Click Yes.
The list of snapshots will be cleared.
▶ To save changes to the current Snapshot file Click the Save button. The progress bargraph at the bottom of the dialogue box will indicate when the save is complete.
To save the current Snapshots in a new file
▶ Click the Save As button.
The Snapshot Filing dialogue box will be displayed.
▶ Click in the Snapshots box, and type in the required file name.
▶ Click the Save button.
The current Snapshots will be saved to the hard disk as the named file. (If the Save On Exit box is checked, then changes will be saved automatically each time you exit Snapshot mode, providing the file has been given a file name).
To overwrite a Snapshot file with the current list
▶ Click the Save As button, and the Snapshot Filing dialogue box will be displayed. Click the required file name in the list of available Snapshots.
▶ Click the Save button.
A confirmation dialogue box will be displayed to indicate that the file will be replaced.
▶ Click Yes.
The current Snapshots will be saved to the selected file name.
To delete a file of Snapshots
▶ Click the Save As button.
The Snapshot Filing dialogue box will be displayed.
▶ Click on the file name to be deleted in the Available Snapshots list, and click the Delete button. A confirmation dialogue box will be displayed.
▶ Click Yes.
The selected file will be removed from the list of Available Snapshots. (Click the Cancel button to return to the Snapshot System dialogue box).
To rename a file of Snapshots
▶ Click the Save As button.
The Snapshot Filing dialogue box will be displayed.
▶ Click on the file name to be renamed in the available Snapshots list.
▶ Click the Rename button.
A dialogue box will be displayed for entering the name.
▶ Type the new name and press Enter.
The new file name will be shown in the Available Snapshots list.
Click the Cancel button to return to the Snapshot System dialogue box.
Administrator

Utilities
MADI Diagnostics
R&D dept only.
SSP Diagnostics
R&D dept only.
User Manager
This is covered in the appendix at the end of this document.
Start Control Panel
Opens the standard Windows Control Panel.
Start Explorer
Opens a standard Windows Explorer window.
Start Event Viewer
This opens the Windows Event Viewer, useful for diagnostic purposes. This option is only for AMS-Neve R&D staff.
Start RAS Admin
This opens the Windows Remote Access Server, which enables AMS-Neve to connect to the Encore unit and remotely interrogate the drive, if a suitable modem has been installed.
This option is only for AMS-Neve R&D staff.
Start Registry Editor
This starts the Windows Registry Editor.
R&D dept only.

Shutdown
Shutdown The Machine
Shuts down the PC.
Shutdown & Restart Machine
Shuts down and restarts the PC.
Encore Emergency Disk
If it is necessary to reinstall Encore, rather than having to reset all the Encore, hardware and I/O settings, it is possible to back all of these onto a single dedicated floppy disc which can then be restored.
Creating an Encore Emergency Disc consists of two parts:
• Create the Emergency disc
- Backup the necessary files
To Create an Emergency Disk
This will format the disc in drive A: and write some necessary system files needed for the backup.
If you have not already done so, make sure you are logged onto the PC as the Administrator.
▶ Place a floppy disc into the A: drive.
▶ From the Tools menu, select Administrator/Encore Emergency Disk. The EDAMS Welcome screen will open.
▶ Click on Create a Blank Emergency Disk.
The screen on the left shows options for digital consoles.
This will begin the standard Windows floppy-disk format and write some temporary files onto the disk.
Even if the disk has already been formatted and contains no files, you must go through the Format procedure (do not select Quick Format when prompted).
Create Backup
▶ Once the format has finished, click on Backup Emergency Data.
The relevant data will be copied to the A: drive, and once finished, a dialog box will display it's completion.
▶ Click OK to close this box, and then click Exit.
You have now created the Encore Emergency Disk containing all your unique system settings.
You can check that the disk has been created successfully. The disc in drive A: should now contain the following:


For 88R users, the only backup they will be able to make is of the Encore settings.
During the Backup, you may see error messages saying 'The I/O Definitions file cannot be found' (or similar).
• EDAMS.exe
- Readme.txt
- Zlib.dll
- A 'data' folder containing registrydata.zpp & Machine Library (all systems)
• A Configuration.wnc file (digital systems only).
To Restore Encore Settings
▶ Insert the Encore Emergency disk as previously prepared.
▶ Using Windows Explorer, open the A: drive and double click on the program called EDAMS.exe.
After about 15secs, the following screen will open.
Each of the components can be restored individually.
NB: Depending on the hardware setup of your system, some of the options shown above may be unavailable.
▶ Of the three options available at the top of the screen, tick all those available, then click Restore Encore Settings.
You will be asked to confirm your actions.
You will be informed when the data has been restored successfully:
▶ Click on the message and you will be taken back to the main EDAMS screen.
To Restore Console Settings
This unique files contains details of all the peripheral I/O connected, and informs the SPS rack what to expect on bootup.
▶ Click on as many settings as you wish to restore and click on Restore Console Data.
NB: Not restoring as many settings as available could cause the desk to fail to boot.
Once the operation has completed, you will be informed:
Click the message and you will be taken back to the main EDAMS screen.
▶ When finished, click Exit.


Contents
Opens any user-set PDF Manual as determined by the Help Settings options below. This could be an Encore manual, the console manual, or any other PDF file.
This ensures that as the user downloads updated manuals, a new pointer can be created each time so that the latest version of the manual always opens when Contents... is selected.
Help Settings

Set the Help file options as desired.
PDF (Default)
Automatically opens the first PDF file in the C:/Encore directory.
User Defined
Selecting this option places a Set button on screen.
▶ Press this to open a standard Windows File Location dialogue to select the specific file to open when f1 on the keyboard is pressed.
Information

Contains details on the studio, date, time and main front page for the other information pages.

Licence
This opens up the Licensing Page for licensing copies of Offline Encore on standalone PCs.

Version
Displays the Encore Build version number, plus a rolling list of changes and fixes.
▶ Click OK to close.
Contacts
AMS-Neve offices and distributors contact details.
Technical Support
If installed, this will open the product Technical Help Manual (obsolete on new systems).
System Info

Contains information on system software version numbers for:
- Encore Two
- CORServer
- MCS
Also shows the state of the links:
- Automation Link
- Fileserver Link (digital systems only)
Also shows console type and current Mix Setup / Processing card-count (both digital systems only)

This document provides instructions for installing Offline Encore Two and using it for the first time.
There is a brief overview of the files used by Encore Two and the two main utilities for manipulating them.
Offline Encore Two is configured to emulate:
- Logic DFC / Gemini / DFC2
- MMC
• 88D
• Libra Live / Libra Post
• 88R / 88RS or V Series analogue consoles.
You can find further information in the relevant console User Manual.
Registration and License Number
You will need to obtain a license number after installing Offline Encore Two for each computer it is installed onto. Each computer will need a unique password. [Certain applications within Encore also require a password to activate them, the EDL Editor for example].
To be able to use Offline Encore Two you will need to register your personal copy of the program with AMS Neve.
You may install Offline Encore Two on different machines under the terms of a site license agreement, or because of your working requirement.
See the Registration section of this document.
Inter-Console Compatibility
If you intend to use Offline Encore Two to configure processing and I/O for a specific console, then you will need the Studio Configuration from the target console.
This is so that Offline Encore Two will work to the resources of the target console.
The Automotion utility is used to export a Studio Configuration from the target console.
Offline Encore Two is identical to a standard Encore Two installation, but some components are non-functional without the console and its associated hardware.
Offline Encore Two is useful in five main areas:
- Familiarisation
- Configuration
• Pro Tools Conversion - Offline automation
- Conversion of Flying Faders mixes & Recall stores to be Encore Two compatible.
Familiarisation
Encore Two provides a high level of flexibility and control over console configuration, automation and operation.
Offline Encore Two allows you to explore and master all of the functions which do not require the physical presence of a console.
You should check that the console is running the same version of Encore Two than you are using offline.
This is to prevent mismatches in file-formats as they may change over time.

Configuration
Offline Encore Two allows you to design console and I/O configurations away from the console.
This is particularly useful when setup time on the console is limited.
Configurations that you create offline can be fine tuned after they have been loaded onto the console.
Pro Tools Conversion
Pro Tools Session 5 files can be imported into Encore, even when the console is a different size to the original Pro Tools mix, as automation can be remapped.
Offline Automation
Offline Encore Two allows automation data to be viewed and edited away from the console.
You can adjust the automation timeline (insert, delete or move scenes or verses) and fine tune individual control moves.
Flying Faders Conversion
As Encore Two is available as an upgrade on our series of V desks, the Automotion utility can be used to convert these mixes to the new format that Encore Two uses.
It also converts Recall files.
Inter-Product Transparency
Automation recorded on one analogue console can be remapped for playback (and the addition of further automation) on another analogue console of a different frame size thanks to the Reassign feature.
Automation is also freely transferable between all analogue products, and across all digital products.
Installing Offline Encore: Minimum Installation Requirements
- Windows XP (with SP3), Windows NT 4 with (SP6), Windows 98, Windows 2000 or Windows ME (to check that you have at least Windows 98, 2000 or ME, right click "My Computer", and select Properties).
• 100MHz Pentium - 32MB memory
- 50MB Hard disk space
• 256 colour (8-bit) graphics card
Encore Two runs better with a minimum of 65536 colours (16-bit colour).
Encore Two is not available for Mac.
Installation Instructions
The software is installed in two parts:
- System Files
- Encore Plus files.
The System Files are installed first, and provide support files and drivers used by Encore.
The computer will then restart and the Encore Two applications will be installed.
You will be required to select a console type during the installation of the Encore Two applications.
The computer will then restart again, after which the software is ready for use.
Do not use the Offline Encore Two software to install or upgrade a full Encore Two installation that is attached to a console!!
▶ Close any applications that are open.
▶ In Windows Explorer open the Encore folder and run EncorePlus100J.exe (the software build number may be greater than this).
The installation wizard will initialise and display a Welcome dialogue box.


If you do not wish to proceed with the installation then this is the point at which to stop.
▶ Click the Cancel button on the above screen, and a warning will be displayed.
▶ Click the Exit Setup button. If you choose to resume the installation process, do not interrupt or cancel the installation process once you have proceeded beyond this point.
▶ Click the Next> button to proceed with the installation.
The Select Components dialogue box will be displayed.
System Files and Encore Two are both selected.
A first time installation requires both.
▶ Click the Next> button.

The Start Installation dialogue box will be displayed to inform you that the Encore Two System Files are ready to be installed.
▶ Click Next>.

The necessary files will be copied and other installation processes will complete automatically.
The progress will be displayed.
When this is complete, an Installation Complete dialogue box will be displayed.

▶ Click the Finish> button and the computer will reboot.
Allow the computer to reboot and (if necessary) login as normal.

When Windows has re-started, the installation process will continue with a new Welcome dialogue box.
This stage will install Encore Two and the associated applications.
▶ Click the Next> button.

The Select Components dialogue box will be displayed.
▶ By default, Encore, Automotion and Offline Encore Two should all be ticked as shown above (there will be a Recall option available for analogue consoles, which should also be ticked).
▶ Make sure that the Setup The AMS Control Panel After Copying The Files option is checked as shown.

This is particularly important so that it can be verified that the Offline check boxes are checked.
▶ Click the Next> button, and the Start Installation dialogue box will be displayed.
▶ Click the Next> button.
The necessary files will be copied and other installation processes will complete automatically.

The progress will be displayed.
When the installation of files is complete, the control panel for AMS Neve Hardware Settings is displayed.
This is used to select the Console Type and verify the Link settings.

▶ Click the radio button for the required console type.
If set to 88 Series or V Series, ensure that the numbers of channel strips and fader placements matches that of the target console.
▶ Click the PC Setup Page tab and click the Links button.

On the left hand side of the screen, the pulldown menu has two options:
- Fileserver
- Automation
For both of these options, a tick should appear underneath in the Offline box (this prevents the PC from expecting to see the console and it's associated hardware when you open Encore Two).
These Offline boxes must be checked or your computer may not boot up correctly.
(If you re-install or upgrade Offline Encore Two then these settings will be retained.)

▶ Click the Licensing tab, then click the Register New Product button.
The 32 digit number in the middle of the screen is unique to every PC, and it is this number that is used to generate your 4 'keys', one each for Offline Encore, EDL Editor, Encore Two and PC Assign.
You will need to license at least Offline Encore, otherwise the software will not work.
You will also need different keys for every PC that Offline Encore Two is installed onto.
Send this password to AMS-Neve and you will be supplied you with the appropriate keys.
▶ Select the product you wish to register at the top of the screen, enter the keys, and click OK.
A small dialogue box will tell you if the registration has been successful.
▶ Click OK to close the Control Panel.
The emulated console can be changed at any time by opening AMS Neve Hardware Settings in the Control Panel.
The installation will be verified and when verification is complete the Validate Files dialogue box will be displayed.

▶ Click the Exit button.

The Installation Complete dialogue box will be displayed as a final confirmation of a successful installation.
▶ Click the Finish> button.

A timer will be displayed again, allowing 5 seconds before the computer reboots.
Your computer will reboot automatically.
Allow the computer to reboot and login as normal.
When Windows re-starts, a very brief setup routine will run. (This only happens when Encore Shell is started for the first time. Encore Shell is a background program and will load when you start Windows).
Offline Encore Two is now installed on your computer and shortcut icons will be placed on your desktop.

Getting Started
Encore Two provides an interface that is used to start various functions and applications.
Some applications can be started independently, but it is more usual to start them from within the main Encore Two front end.
There are two versions of the Encore Two main screen:

Standard:
This is the full Encore Two front end that provides access to all the functionality that Encore Two provides.

Broadcast:
The Broadcast Start page is only available when the console type is set to Libra Live and Encore Broadcast is selected.
This is a simplified front end which ignores the automation aspects of Encore - this is because automation is never used in broadcast.
(If required, the standard Encore screen is accessible from within the Broadcast Start/More page).
These are the major components of Encore Two that can be used offline:
- Automotion - transfer Studio Configurations and convert data from previous versions of software, also Automation mixes and Recall files from Flying Faders, and convert them into being compatible with Encore.
- Filing - manage configuration and automation files
- Desk Edit - create and manage Desk Setups which store console configurations
• Path Edit - display and edit the signal flow in individual paths - I/O Patch - input and output patching between signal paths and ports
- I/O Config - setup input and output ports with delay, dither, relays, etc.
- Defaults Manager - setup alternative default control settings
- Backup Manager - create archives of configuration and automation data which can be restored to online or offline systems
• Copy Path Data - copy automation data between signal paths - Erase Path Data - remove automation data from mixes
- Merge Path Data - combine automation data from one path to other paths
- Mix Conforming - adjust a mix to match changes to a scene
- Extract Path Data - copy part of a mix to a new mix Show Mix/Pass Tree - select mixes and edit the Mix/Pass Tree
- Label List - manage the list of labelled timecodes
- Mute List, Fader Moves List and Custom Event List - manipulate individual automation events


▶ To start Encore Two for the first time, double click on the Encore icon on your desktop.
When you start Encore Two for the first time, the About Encore Two dialogue box will be displayed.
This shows the software revision history, up to and including the current version of Encore.
▶ Click OK to close the About Encore Two dialogue box.
The licence agreement terms and conditions will be displayed.

▶ Read through the licence agreement and then click the I Agree Register Now button.
You will be asked to confirm that you have read the agreement.
▶ Click Yes (Encore will not open if you decline either of these two options).
If Encore Two has not already been licensed, the licence agreement will be redisplayed with a space for the licence number.
▶ Enter the Licence number as supplied.
As you type the 8th character into each box, the cursor will automatically jump to the next box.
▶ When the whole licence number has been entered, click OK.
If the licence number is correct then a confirmation dialogue box will be displayed.
▶ Click OK.
If your licence number is rejected then please contact AMS Neve.
Once your computer has a valid licence number, you will not need to enter it again.
The licence number will remain valid when upgrading your copy of Offline Encore.
Encore Two will continue to start.
Messages will be displayed as Encore Two loads software components and data.
When Encore Two is ready, either the Standard Encore screen or the Broadcast page for Libra Live will be displayed, depending on the selection made in the control panel during installation.
Studio Configuration
When Encore Two starts for the first time, there will be no information regarding the processing and I/O available on the target console. This is stored in the Studio Configuration.
The Studio Configuration is a hardware description of the target console and it is used in place of a real console by Offline Encore.
This provides resource limits for the utilities used to create and manipulate Automation and Configuration Files.

A Studio Configuration does not need to be imported for analogue consoles.

▶ Select Automation from the Tools menu.
The Studio Configuration page will be displayed. Note that only the Offline option is available.
▶ Click the I Want To Restore a Studio Configuration radio button, and click the Continue button.
A two page dialogue box is displayed with the Source Drive page on top.

▶ Click the drop down arrow next to the Select A Drive box.
A list of available drives will be displayed.
▶ Click on the required drive letter.
The available free space will be displayed.

▶ Click the Studio Configuration tab.
The page will show a list of configurations that are available on the selected drive or disk.
▶ Click on the required configuration name in the list.
It will be highlighted and the name will be shown in the Configuration To Restore box.
▶ Too see the specification of the Offline Desk Config, click the View button.
A dialogue box will display details of the Configuration.

▶ Click OK to close the View screen, and click Transfer File.

A warning dialogue box will indicate that the existing Studio Configuration will be overwritten (this will happen even if the current configuration is blank).
▶ Click Yes.
Automotion will import the Studio Configuration.
A timer will be displayed while the configuration is copied.
When the process is complete a confirmation dialogue box will be displayed plus a prompt to restart Encore.
▶ Click OK.
Encore Two and all of its components will now close. Once Encore Two is restarted, the imported Studio Config will be available.
What to do with Offline Encore
What you do now will depend on whether you are using Offline Encore Two with real console data or as a standalone application for familiarisation.
In either case, a useful starting point is to be aware of Encore Two file organisation, as described on the following pages.
If you are working with real console data, you will need to use Backup Manager to transfer files to the Offline Encore Two computer.
If you are learning Encore, use the Filing utility to create and organise some new Configuration Files, starting with a new Desk Setup.
There are two categories of file types:
- Automation
- Configuration
Automation Files
Automation data is stored in a hierarchy with the following levels:
- User
- Client
- Project
- Title
- Mix Tree
This means that Clients are stored within Users, Projects are stored within Clients, Titles are stored within Projects and Mix Trees are stored within Titles.

A Mix Tree stores the automation data as Mix/Passes.
A User can have any number of Clients, a Client can have any number of Projects and so on.
The only limitation is the space available on the Encore hard disk.

Configuration Files
There are six different types of configuration file:
- GPI Config: Contains settings for General Purpose Interface ie firing optos and relay to and from the console.
- Desk Setup: The primary configuration for the console surface, including number of signal paths, control settings and routing.
- I/O Config: Configuration of the input and output ports, including dither, delay and stereo pairing GPI Configuration of the General Purpose Interface for relays and opto-isolators (not used by Logic DFC)
- Meter Design: Only used by DFC to configure meter assignments in the meter bridge.
- Snapshots: Snapshots of control settings on the console surface (not used by DFC)
- User Defaults: User defined default control values, typically used as control reset values.
The Desk Setup is the 'master' to which the other configuration files can be linked.
File Structure

The link means that when a Desk Setup is loaded, the correct set of configuration files is also loaded automatically.
A Desk Setup does not have to be linked to any other configuration files.
Automation and Configuration Files
A Mix Tree is linked to a Desk Setup.
This means that when a Mix is loaded from a Mix Tree, the Desk Setup is also loaded automatically.
If there are any other configuration files linked to the Desk Setup then these are also loaded automatically.
A Mix Tree is initially linked to the Desk Setup that was current at the time the Mix Tree was created.
A Mix Tree is always linked to a Desk Setup, although the particular Desk Setup can be changed.
Also, links can be overridden when a Mix Tree or Desk Setup is loaded.

File Management
There are two main applications within Encore Two for managing files:
- Filing
- Backup Manager
In addition to this, Automotion is used to convert files from earlier versions of software, and to transfer Studio Configurations to Offline Encore, as detailed in the previous pages.

Filing
You can run this from the System menu or by clicking the Filing icon.
It is the main housekeeping utility for managing automation and configuration files.
Filing has three pages, one for Automation, Desk Setup and System Files (the System files are configuration files other than Desk Setups).
Filing is where you can change the links between Mix Trees and Desk Setups, and between Desk Setups and other configuration files.
You can also use Filing to copy, delete and create files, and you can mark Configuration files as Read Only to protect them from accidental alterations or deletion.

Backup Manager
You can use Backup Manager to copy some or all of the Encore Two data files to another disk or to another location on the same disk.
It is more usual to copy files to another location, such as a flash drive via USB, CD, a floppy disk (for small files) or a network drive.
Initially, the entire Encore Two folder is selected for backup, but you can expand the underlying structure to choose items for a selective backup or restore.
The screen is divided in two, showing the contents of the Encore Two drive in the upper half and the contents of the backup medium in the lower.
▶ Operation is by the straightforward selection of files for backup or restore (by ticking for files to be included) and then clicking on the appropriate button.
▶ You can view links and properties for any file, by clicking the file to select it, then clicking the Details button.
You can use Nero to copy the files from the local C: drive onto CD. If you select Finalize before copying, this allows Backup Manager to restore from the CD directly.


Offline Routing Assistant
The Offline Routing Assistant allows the user to set up internal path routes within a desk setup (including setting a route to be either pre- or post-fade), and then import this setup.
This means that all of the configurational work can be done on a remote PC and simply transferred into the system reducing the amount of setup time needed on site.
There are no limits to the blocks of routes that can be displayed.
The Offline Routing Assistant is not meant for use on online consoles. It is only meant to be used on offline laptops and computers where you need to set up the routing away from a console before a session begins.
On Online consoles, it is for display only and contains no settable options apart from displaying routes in place.

▶ In the Configure menu, select Configure Blocks.
This opens a screen asking the user which blocks of routes they wish to display.
▶ Tick the blocks you wish to view, and click OK.
▶ To view all blocks, tick the first option, and then drag the mouse to select all.

▶ Once the chosen blocks have been displayed, you can create a route by clicking in the junction of the two paths.
All routes are created post-fader (and shown as orange squares), but by right-clicking on a route already in place, the route can be sent pre-fade and will be shown in green.
The source of the route is always displayed down the left side of the screen, while the destinations are displayed along the top.
Due to limitations of space, any paths that the user has renamed will only appear on Source routing.

Even though the user names are not displayed across the top, if you point at the junction of two paths, a small flyout menu will tell you which paths you are currently pointing to, including any user names for those paths.
Configure Menu
Configure Blocks
This brings up the block selection screen as shown above
Arrange Blocks
Once the blocks are displayed, it is possible to move them by hand by clicking on them and dragging them around the screen.
This option snaps the blocks back to the grid.
Remove Current Block
This simply removes the current block from the screen.
The routing for that block remains unaltered.
Clear Current Block
This removes the routing from the current block.
Autoroute Current Block
This presumes a direct 1:1 relationship between source paths and destinations and will create all of those routes where possible (as shown left).
This is primarily intended for multitrack recording, where Input 1 feeds Multitrack 1, Input 2 feeds Multitrack 2 and so on.

Pre/Post
Allows the user to change whether routes are pre-fade or post-fade after they have been created.
The Toggle option allows the user to flip all the routes in a particular block to it's other state, whether this is initially Pre- or Post- fade.
Zoom In / Zoom Out
The keyboard Page Up and Page Down keys will alter the zoom of the Routing Assistant, so all the blocks can be viewed on screen at once.
▶ All routing changes are automatically saved to the Desk Setup when the user selects the File menu, and clicks on Exit.
Options Menu
Colours
There are three colours which the user can set.
The screen Background, the Active Block, and any Inactive Blocks.
▶ Selecting any of these options will open the standard Windows Custom Colour screen.
Show Separators
The Separators form a crosshair display (one vertical, one horizontal) that are purely used for marking out sections of the screen.

Using Offline Encore Two
The main Encore Two utilities you can use offline fall into three broad categories:
File Management:
- Filing
- Backup Manager
Configuration
- Desk Edit
- Path Edit
- I/O Patch
- I/O Config
- Defaults Manager
Offline Automation
- Copy Path Data
- Erase Path Data
- Merge Path Data
- Mix Conforming
- Extract Path Data
• Show Mix/Pass Tree - Label List
- Mute List
- Fader Moves List
- Custom Event List
Make sure you have loaded a suitable Studio Configuration (as described earlier in this manual) before proceeding further.
If you are working with real console data, you will need to use Backup Manager to transfer files to the Offline Encore computer.
If you are learning Encore, use the Filing utility to create and organise some new Configuration Files, starting with a new Desk Setup and a new I/O Configuration.

Uninstalling Encore Two
▶ Go to the Windows Control Panel and double-click the Add/Remove Programs application.
Windows will display a list of all the installed programs.

▶ Select Encore System Files (as shown left, as being between 120-140meg), then click the Change/Remove button.

You will be asked if you want to perform a Custom or Automatic uninstall.
▶ Select Automatic and click Next.
Windows will uninstall the Encore components, delete most of the Encore registry entries and remove all the temporary files Encore Two uses (your passwords and keys will remain on the computer so that should you need to reinstall Encore Two, you will not need to re-licence all the components again).
During the uninstall procedure, you may see a warning about Deleting Shared Files.
▶ If in doubt, click NO.

▶ Click Finish to complete the uninstall, or Cancel to abort the operation completely.

The Uninstall program will start to delete files from the hard-drive.
Once Encore has been uninstalled, you will see it is no longer in the Windows Control Panel Add/Remove program list.
The Encore Shell
If Encore Shell has not been disabled, then it will not be terminated or uninstalled on Windows 95 / 98 / 2000 or ME as part of the uninstall process described above.
If this is the case, when the uninstall process is complete, reboot your computer.
Encore Shell will not start when Windows restarts (this is because the relevant registry entry has been removed).
▶ Start Windows Explorer and delete the C:\Encore directory (the only item that should remain in this directory is EncoreShell.exe).
Encore is now fully uninstalled.

Appendix A: Default Security Settings
Before modifying any security settings, it is important to take into consideration the default settings.
There are three fundamental levels of security granted to users. These are granted to end users through membership in the Users, Power Users, or Administrators groups.
Administrators
Adding users to the Users group is the most secure option, because the default permissions allotted to this group do not allow members to modify operating system settings or other user's data.
However, level permissions often do not allow the user to successfully run legacy applications. The members of the Users group are only guaranteed to be able to run programs that have been certified for Windows.
For more information on the Certified for Windows Program, see the Microsoft Web site. (http://msdn.microsoft.com).
As a result, only trusted personnel should be members of this group.
Ideally, administrative access should only be used to:
- Install the operating system and components (such as hardware drivers, system services, and so on).
• Install Service Packs and Windows Packs. - Upgrade the operating system.
• Repair the operating system. - Configure critical operating system parameters (such as password policy, access control, audit policy, kernel mode driver configuration, and so on).
• Take ownership of files that have become inaccessible. - Manage the security and auditing logs.
- Back up and restore the system.
In practice, Administrator accounts often must be used to install and run programs written for versions of Windows prior to Windows 2000.
Power Users
The Power Users group primarily provides backward compatibility for running non-certified applications.
The default permissions that are allotted to this group allow this group's members to modify computer wide settings.
If non-certified applications must be supported, then end users will need to be part of the Power Users group.
Members of the Power Users group have more permissions than members of the Users group and fewer than members of the Administrators group.
Power Users can perform any operating system task except tasks reserved for the Administrators group.
The default Windows 2000 and Windows XP Professional security settings for Power Users are very similar to the default security settings for Users in Windows NT 4.0. Any program that a user can run in Windows NT 4.0, a Power user can run in Windows 2000 or Windows XP Professional.

Power Users can:
- Run legacy applications, in addition to Windows 2000 or Windows XP Professional certified applications.
- Install programs that do not modify operating system files or install system services.
- Customize system wide resources including printers, date, time, power options, and other Control Panel resources.
- Create and manage local user accounts and groups.
- Stop and start system services which are not started by default.
Power Users do not have permission to add themselves to the Administrators group.
Power Users do not have access to the data of other users on an NTFS volume, unless those users grant them permission.
Caution!
Running legacy programs on Windows 2000 or Windows XP Professional often requires you to modify access to certain system settings.
The same default permissions that allow Power Users to run legacy programs also make it possible for a Power user to gain additional privileges on the system, even complete administrative control.
Therefore, it is important to deploy certified Windows 2000 or Windows XP Professional programs in order to achieve maximum security without sacrificing program functionality. Programs that are certified can run successfully under the Secure configuration provided by the Users group.
For more information, see the Security page on the Microsoft Web site (http://www.microsoft.com).
Since Power Users can install or modify programs, running as a Power User when connected to the Internet could make the system vulnerable to Trojan horse programs and other security risks.
Users
The Users group is the most secure, because the default permissions allotted to this group do not allow members to modify operating system settings or other users' data.
The Users group provides the most secure environment in which to run programs.
On a volume formatted with NTFS, the default security settings on a newly installed system (but not on an upgraded system) are designed to prevent members of this group from compromising the integrity of the operating system and installed programs.
Users cannot modify system wide registry settings, operating system files, or program files.
Users can shut down workstations, but not servers. Users can create local groups, but can manage only the local groups that they created.
They can run certified Windows 2000 or Windows XP Professional programs that have been installed or deployed by administrators.
Users have Full Control over all of their own data files (%userprofile%) and their own portion of the registry (HKEY_CURRENT_USER).
However, user -level permissions often do not allow the user to successfully run legacy applications. Only the members of the Users group are guaranteed to be able to run Certified for Windows applications.
(For more information, see the Certified for Windows Program on the Microsoft Web site. (http://msdn.microsoft.com)

To secure a Windows 2000 or Windows XP Professional system, an administrator should:
• Make sure that end users are members of the Users group only.
- Deploy programs that members of the Users group can run successfully, such as certified Windows 2000 or Windows XP Professional programs.
Users will not be able to run most programs written for versions of Windows prior to Windows 2000, because they did not support file system and registry security (Windows 95 and Windows 98) or shipped with lax default security settings (Windows NT).
If you have problems running legacy applications on newly-installed NTFS systems, then do one of the following:
• Install new versions of the applications that are certified for Windows 2000 or Windows XP Professional.
- Move end users from the Users group into the Power Users group.
- Decrease the default security permissions for the Users group. This can be accomplished by using the Compatible security template.
Backup Operators
Members of the Backup Operators group can back up and restore files on the computer, regardless of any permissions that protect those files.
They can also log on to the computer and shut it down, but they cannot change security settings.
Caution!
Backing up and restoring data files and system files requires permissions to read and write those files. The same default permissions granted to Backup Operators that allow them to back up and restore files also make it possible for them to use the group's permissions for other purposes, such as reading another user's files or installing Trojan horse programs.
Group Policy settings can be used to create an environment in which Backup Operators only can run a backup program.
For more information, see the Microsoft Security page on the Microsoft Web site(http://www.microsoft.com).
Special Groups
Several additional groups are automatically created by Windows 2000 and Windows XP Professional.
When a Windows 2000 system is upgraded to Windows XP Professional, resources with permission entries for the Everyone group (and not explicitly to the Anonymous Logon group) will no longer be available to Anonymous users after the upgrade.
In most cases, this is an appropriate restriction on anonymous access. you may need to permit anonymous access in order to support pre-existing applications that require it.
If you need to grant access to the Anonymous logon group, you should explicitly add the Anonymous Logon security group and its permissions.
However, in some situations where it might be difficult to determine and modify the permission entries on resources hosted on Windows XP Professional computers, you can change the Network access: Let Everyone permissions apply to anonymous users security setting.
- Interactive: This group contains the user who is currently logged on to the computer. During an upgrade to Windows 2000 or Windows XP Professional, members of the Interactive group will also be added to the Power Users group, so that legacy applications will continue to function as they did before the upgrade.
- Network: This group contains all users who are currently accessing the system over the network.
- Terminal Server User. When Terminal Servers are installed in application serving mode, this group contains any users who are currently logged on to the system using Terminal Server. Any program that a user can run in Windows NT 4.0 will run for a Terminal Server in Windows 2000 or Windows XP Professional. The default permissions assigned to the group were chosen to enable a Terminal Server to run most legacy programs.
Caution!
Running legacy programs in Windows 2000 or Windows XP Professional requires permission to modify certain system settings.
The same default permissions that allow a Terminal Server user to run legacy programs also make it possible for a Terminal Server user to gain additional privileges on the system, even complete administrative control.
Applications that are certified for Windows 2000 or Windows XP Professional can run successfully under the secure configuration provided by the Users group.
For more information, see the Microsoft Security page on the Microsoft Web site(http://www.microsoft.com).
Local accounts created on the local computer are created without passwords and are added to the Administrators group by default. If this is a concern, Security Configuration allows you control membership of the Administrators (or any other group) with Restricted Groups policy.
For more information, see Restricted Groups.
When Terminal Server is installed in remote administration mode, users logged on using Terminal Server will not be members of this group.
For more information on setting up users, please refer to the Windows documentation supplied with your console.
Further information can also be found at:
http://windowsxp.devx.com/articles/fus/default.asp
http://windowsxp.devx.com/articles/usingfustest/default.asp

Appendix B: Terms & Conditions
The Small Print
IMPORTANT NOTICE: The copyright in this software ("the Software") and its associated documentation is owned by AMS Neve Plc ("the Owner") and the use of the Software is governed by the terms of the End User Licence Agreement set out below. By installing the software you (an individual or legal entity) agree with the Owner to be bound by the terms of the End User Licence Agreement which will govern your use of the Software.
End User Licence Agreement
After registering the software, you are permitted to: load the Software into and use it on any computer which is under your control make as many copies of the program in support of the permitted use as you need for your personal use. The copies must reproduce and include the Owner's copyright notice.
You are not permitted to:
load the Software on to a network server for the purposes of distribution to one or more other computer(s) on that network or to effect such distribution; divulge the Password to any other person or use the Password to enable any other person to use the Software;
except as expressly permitted by this Agreement and save to the extent and in the circumstances expressly required to be permitted by law, to rent, lease, sub license, loan, copy, modify, adapt, merge, translate, reverse engineer, decompile, disassemble or create derivative works based on the whole or any part of the Software or its associated documentation or use, reproduce or deal in the Software or any part thereof in any way.
Term
This Agreement is effective until you terminate it by destroying the Software and its documentation together with all copies. It will also terminate if you fail to abide by its terms. Upon termination you agree to destroy all copies of the Software and its documentation including any Software stored on the hard disk of any computer under your control.
By using this software, you agree to AMS Neve's terms and conditions which are:
-
Replication: You may make as many copies of this program for your own use as you need, but you may not divulge your password, nor supply copies of the program to anybody else.
-
Governing Law: This agreement shall be governed by the laws of the United Kingdom.
-
Disclaimer of Warranty: THIS SOFTWARE IS AS IS AND WITHOUT WARRANTIES AS TO PERFORMANCE OR MERCHANTABILITY OR ANY OTHER WARRANTIES WHETHER EXPRESSED OR IMPLIED. In particular, there is no warranty for compatibility between the Offline version of Encore and the target console's version of Encore. Because of the various hardware and software environments into which Offline Encore may be put, NO WARRANTY OF FITNESS FOR A PARTICULAR PURPOSE IS OFFERED.
It is strongly recommended that the configuration transfer be thoroughly tested with non-critical data before relying on it. The user must assume the entire risk of using the program. ANY LIABILITY OF THE SELLER WILL BE LIMITED EXCLUSIVELY TO PRODUCT REPLACEMENT OR REFUND OF PURCHASE PRICE.
Ownership
The Owner shall at all times retain ownership of the Software as originally supplied and all subsequent copies thereof regardless of form.
The express terms of this Agreement are in lieu of all warranties, conditions, undertakings, terms and obligations implied by statute, common law, trade usage, course of dealing or otherwise all of which are hereby excluded to the fullest extent permitted by law.
The Owner does not warrant that the Software will meet your requirements or that the operation of the Software will be uninterrupted or error free or that defects in the Software will be corrected.
You shall load and use the Software at your own risk and in no event will the Owner be liable to you for any loss or damage of any kind (except personal injury or death resulting from the Owner's negligence) including lost profits, loss of or damage to data, or any indirect or consequential loss arising from your use of or inability to use the Software or from errors or deficiencies in it whether caused by negligence or otherwise except as expressly provided herein. In no event shall the Owner's liability exceed the amount paid by you for the Software.
This Agreement shall be governed by English law.

Appendix C: Reboot Options

Also called Service Control, this may exist as an icon on the desktop (called T1LOC) or as a menu entry in the Start menu.
The program itself can be found in C:/Encore/ServiceControl.exe.

The Service Control application gives you control over the console and the computer.
• Reboot Console: Boots the console.
- Shutdown PC: Closes down the PC. On some systems, this will cause the console to reboot automatically.
- Restart Encore: reopens Encore and all it's components.
- Program Modules: Allows the Channel Strip programmable pics on an 88R to be reprogrammed in-situ. This function is password protected.

For Libra Live consoles, there are more options and a different screen:
Flash Boot is used to boot only the parts of the Libra Live system that need resetting, as opposed to forcing a complete reboot.
Flash Boot boots from Flash RAM and is the normal method for re-booting the console when a SUN820A200 card is fitted.
The console will also normally boot from Flash RAM on power up, unless boot from ROM has been selected in the Rack Configuration page of AMS Neve Hardware Settings (this can be found in Windows control panel).
Flash Boot Operation
A reboot can also be sent from the 200 card using the switches at the bottom of the card.
- HRST (Hard Reset) Will reset the TranSCSI and Fileserver and Reboot ALL the processors from the Flash Memory.
- SRST (Soft Reset) Will reset the TranSCSI and Fileserver and reboot ONLY the required processors from the Flash Memory.
• ANYL (Analyse) used for diagnostics by authorised service personnel only.
For the purposes of flash boot, the operation of the console is divided into three sub-systems:
- Assignments and Automation
- Control Surface
- Allocation and I/O
The level and speed of a flash boot depends on how much of the console needs to be booted.
During a flash boot, the system checks which of these sub-systems is down and only restarts the sub-systems that are down with the exception of the Assignments and Automation which are always restarted.
This is to minimise the impact on audio throughput.
Flash Boot always restores preferences, I/O Config (including SRC and GPI settings).
It does not write a diagnostics report as is seen with the Forced Boot and Boot from Disk options.
Assignments and Automation
Assignments is the interface between the Control Surface and Allocation, and keeps track of which processes are currently assigned to which controls.
For instance, when the function of the Assignable Logicators is changed by the operator, Assignments executes this.
Automation is the console automation engine, and is closely dependent on Assignments. For instance, when a fader move is played back by Automation, then Assignments will execute the instructions to the Console Surface to move the control, and indicate to Allocation that a control value has changed.
Assignments and Automation are always restarted when the console reboots, and can be restarted without also restarting the Control Surface or Allocation and I/O. Audio is not lost by restarting Assignments and Automation.
The Control Surface will be frozen until Assignments has rebooted and restored the connection between the Control Surface and Allocation. The control positions will be restored from the last point at which Assignments was working.
Control Surface
The Control Surface can be restarted without losing audio. Assignments will also be restarted if the Control Surface is restarted.
The control positions will be restored from the last point at which the Control Surface was working.
Allocation and I/O
Allocation keeps track of which processes are assigned to which paths (e.g. the number of EQs on Channel 3), and has overall control of signal processing.
I/O controls the Input and Output resources of the console.
If the Allocation and I/O are restarted then the whole system is rebooted. Audio will be lost for between 30 and 90 seconds.
Force Boot
When this icon is clicked, there will be a full restart of all sub-systems as described in the previous section.
Preferences, I/O Config, SRC and GPI are NOT loaded giving the operator the option to select alternative configurations.
Extra diagnostics are written to the engineering folders.
Upgrade Flash
The console will boot from hard disk, and as part of the boot process, the console software will be copied to FLASH RAM and the configurations will be copied to SRAM.
This should only be used when upgrading the software or when additional hardware not previously "seen" by the system is added to the console.
The system will boot slowly because of the extra time to copy the software and configurations.

Because it is not necessary to Upgrade the Flash in day-to-day operation, clicking the Upgrade icon will open a second confirmation screen.
▶ Click Yes - Upgrade Flash Now.
As part of the Upgrade process, a Flash boot is required at the end to confirm this.
A message will appear on the fader alphas, saying Upgrade Successful, Flash Boot Now Required.
▶ Click FLASH BOOT to complete the Upgrade process.
Boot From Disk
The console will boot from hard disk.
This is the equivalent to the original, pre Flash RAM system boot and is used if the Flash RAM is suspected of being faulty.

Reforestation
The Reforestation program has been replaced with the Reforest program (see Appendix D.ii), but is documented here for users whose versions of Encore are not compatible with Reforest. If you have Reforest.exe in C:/Encore, please use that, otherwise please use Reforestation.exe.
Within each automated title in Encore, there is a file called Mixpass.tree which holds all the information of how all the different passes inter-relate to each other.
Occasionally, as with any computer file, this file can become corrupt.
If this happens, it becomes apparent when attempting to load a mix. The warning will say Unable to find the mix X, or Unable to find last mix X.
Reforestation is an application that rebuilds this file by looking at each individual pass, interrogating it's title path, and compiling a new Mixpass.tree file from this data.
Reforestation is yet to be fully integrated into EncorePlus, however, the following method will perform the function.
▶ Close Encore and all it's components.
▶ Open Windows Explorer and go into C/Users/... and navigate down to the file level where the corrupt file lives. (The right hand window will show all the *.aut and *.lbl files for the passes).
▶ Delete the file Mixpass.tree (this has to be deleted, as it is the corrupt file you wish to replace).
▶ Go into C:/Encore and find Zlib.dll and Reforestation.exe. (if Zlib.dll is not in this directory, it may be in C:/Windows/System32, depending on the Encore version).
▶ Copy these two files (not move) into the Encore directory where the corrupt file used to live (same folder as in point 1).
▶ Double click Reforestation in this directory.
A DOS window will open very briefly, and Encore will create a folder called 'Backup', and a new file called Mixpass.tree.
▶ Close Explorer and relaunch Encore.
It should now be possible to load any of those passes from this mix.
The dependencies of the mix passes will change with relation to the Initial Snapshot, so the look & structure of the tree will be drastically different.
The mix information contained in each pass however remains unchanged.
Reforestation will not work on multiple passes imported from Flying Faders, as these are initially saved independently of a tree structure.

Reforest
Reforest replaces the Reforestation programme in later versions of software.

▶ Close Encore and all it's components and run the Reforest.exe program in C:/Encore.
The Reforest screen will open.
▶ From the list if users displayed on the right side of the screen, select the relevant User.
From the list of Clients now displayed, select the relevant Client, and continue to select the Project, Title and Mix in this manner.

Once the Mix has been selected, the Display Tree button will become available allowing you to view the current state of the tree. This is a display-only screen, and does not require you to select a pass.
As shown left, Encore thinks there are two passes that are corrupt and therefore cannot be loaded.
▶ Click OK to close.
There are two options on the Reforest screen:
Partial Rebuild
A Partial Rebuild will not find any missing revisions, but will remove non-existent passes, which may enable you to load the mix.
You should select this option if the desired pass is being shown in the Mix Tree, but you are having problems loading it.
Full Rebuild
A Full Rebuild will regenerate the Mix Tree from the automation files found in the selected directory.
All mix notes will be lost using this method, but any missing revisions not displayed by the mix tree will be re-added.
Use this method if a Partial Rebuild does still not allow you to load the mix, or if you have lost any revisions from the mix tree.
When you select either option, a confirmation screen will appear asking if you want to continue.
▶ Click Yes.
The Mix Tree will be rebuilt.
Close Reforest and then reopen Encore.

You will now be able to continue working.

Alphabetical Index
2
200 card....11
8
88R Standard Colour....128
9
9 Pin & Internal....72
9 Pin & Video....72
A
AB icon....150
About Encore Two....214
Absolute....104
Access key....164
Accuracy....128
Action....138, 171
Activate Auto Recall....121, 125p.
Activate Hold Recall....127
Activate Safety Nets....43
Activation Menu....125p.
Active....111
Add Label....99, 105
Add New....50
Add New Event....103
Add Writing Controls To Scope When Entering......65
Add/Remove Programs....223
Adding notes....191
Administrator....202
Administrators....225
Advance Automation....58
AES Config....34, 36, 132
AES960....132
AFL....68, 173
AFT....174
AFT Control....82
AFT Enable....175p.
AFT Invert....175p.
After....43
AFU follows PFL....80
All (Current Page Only!)......143
All Controls Reset....127
ALL ON....42
All Ready....90
All Safe....90
ALL/SCOPE....65
Allocation......230
Allocation and I/O....231
Allocation Detail....160
Allocation Results....156
Allocation Status....160
Allow Recording to Timecode & Video Tracks....73
Alternative Aux Layout....79
Alternative SLS Button Layout....80
Always In Write....66
Always On Top....196
AMS Neve Hardware Settings....211, 230
AND....171
Any....171
ANYL....230
Apply....104
Arm & Punch-In....73
Arm Only....73
Arrange Blocks....220
ASS....96
Assign....152
Assign Paths Currently Under A Meter....184
Assignable Buttons....82p.
Assignments....230
At a Specified Time....65
At The Last Stop Time....66
At This Footage....49
Audio Follow Tally....174
AudioFile....68
AUT....133
AutEngX....11, 60, 117
AUTO....132
Auto Assign By Layer....184
Auto Configure Delay....167
Auto Copy....165pp.
Auto Glide....12
Auto Increment....101, 165pp., 169, 171, 178
Auto Increment Value....165, 169, 171
Auto Join....39
Auto Keep....60, 63
Auto Next....114
Auto Number....101
Auto Offset....90
Auto Recall....119pp., 127p.
Auto Recovery Options....62
Auto Stop Updates Automation....74
Auto-Fill....32
Autohide Icon Menu....87
Automatic....155, 223
Automatic Verify....51
Automatically Copy New Archives to CDR....30
Automatically Restore Last Groups When Encore Starts 74
Automation....41, 230
Automation Editing....56
Automation Link....206
Automation Mode....11, 23, 25
Automotion....136, 207, 213, 215
Autoroute Current Block....220
Aux 1-16....83
Aux Cut Ident....79
Aux Layout (for 36 Auxes)....78
Aux LED On when CUT....79
B
Backup....28
Backup Configuration As....137
Backup Contents....138
Backup Manager.....26, 34, 84, 137, 213, 216, 218, 222
Backup Operators....227
Backwards....104
Band 1/4....164
Band 5/8....164
Banks....152
BBC....70
Before....43
BM....112
Boot From Disk....232
Bottom Matrix....112
Brightness Controls....66
Bus/Tape Locked When Safe....71
Bus/Tape Unlocked When Safe....71
BYP....133
BYPass....132
C
C/P/T/M....11
Calibrate Faders....39
Capture....143
Capture Scope....143
Capture Timecode....100
Category....181
Centre Meter Panel....76
Change/Remove....223
Channel 55 Control....134
Channel Events....39
Channel Mapping Tool....130
Channel Meter....109
Channel Range....78
Channel Select Menu....120, 125
Channel Strip New Layout....79
Clear After Coalescing....107
Clear All....113
Clear All Designs....187
Clear All Gangs....107
Clear All Gangs & Links....108
Clear Channel....113
Clear Current Block....220
Clear Current Design....187
Clear Group....89
Clear Labels....41
Clear Links....108
Clear Meter....186
Clear Path....186
Clear Scope/Buffers on Exit......65
Clear Selected....107
Clear The Current Tree....32
Clear WavTrak Data....77
Client....31
Coalesce All Gangs....107
Coalesce Selected....107
Collect Touch....64
COLLECT TOUCH....65
Collect Touch Hard Write....64
Colour Depth....87
Colour Groups....112
Colour Options....77
Colour Stems....112
Colour Variation....87
Colours....221
Compressed....29
Compressed Backup....28
Compressor....147
Configuration To Restore....215
Configure Blocks....219p.
Configure Menu....220
Configuring GPI Relays....171
Confirm Create Desk Setup....155
Conform Labels....53, 55p.
Connect....116
Connect By Network....116
Console....118
Console Split at Fader Number....81
Console Status....171pp.
Console Status and Opto-Isolators......173
Console Status and Relays....172
Console Type....211
Contacts....206
Contents....205
Control....103
Control Room Cut....173
Control Room Dim....173
Control Sensitivity....77
Control Surface....231
Copy....38, 56
Copy & Paste....193
Copy Buffer....34, 143
Copy Current Design To Another....185
Copy Linked Files....27, 29p.
Copy Mode....45
Copy Path Data....45, 213
Copy Store to Current Location....124
Copy To All....133
CPT Bar Enabled....86
Create a Blank Emergency Disk....203
Create Labels On The Fly....99
Create New Recall Store....123
Create Recall....126
Create Recall File....119
Create Store....119, 123
Current Pass....48
Current Timecode....102
Current User Defaults....145
Custom....223
Custom Event List....106, 213
Custom Load....37
Custom Macros....195
Custom Surround Macros....153, 195
Cut....148
Cut / Fader Mode Keys....80
Cut from End....52
Cut from Start....52
Cutlist....49
Cutlist View....49
Cycle....97
D
Deactivate Recall....127
Decrement....120
Default....101
Default All....101
Default Partition....70
Defaults Manager....36, 143, 213
Delay....14, 167
Delay Units....167
Delete....38, 54, 56, 62
Delete Macro....154
Deleting Shared Files....223
Desk Designer....151
Desk Edit....35p., 136, 145, 213
Desk Editor....160
Desk Layout....162p.
Desk Setup....11, 35, 183, 217
Desk Setups....33
Desk Size....128
Destination Start....45
Deviation....96
DIS....96
Disable Changes From Surface....71
Disable Output Route Overwrite....194
Disable Recall....121
Disk Space Status Warning....62
Display Clock....86
Display Gangs....107
Display options....85
Display Options For Each Load....24, 41
Display Tree....234
Display WavTrak in Bar Graph Area....77
Dissolve....52
Distance....167
Dither....14, 168
DRC....147
Drive....191
Dual Monitor Options....87
Dynamic Links....161
Dynamics Curve....76
E
EBU....70
EDAMS....203
Edit....36, 38
Edit Delay....95
Edit Tree....62
Edit Value....91
EDL....49
EDL Mix Conforming....49
EDL View....50
EE Delay....95
Enable AFT....81, 175
Enable Screensaver....87
Enable WavTrak Locate Window Start Time....77
Encore Emergency Disc....26
Encore Emergency Disk....203
Encore Midi Hub....115
Encore Two....11, 209
Engine....160, 165
Enter Play After Locating....75
EQ & Dynamics....164
EQ Curve....76
Erase From....47
Erase Path Data....47, 213
Erase To....47
Error....96
Ethernet MIDI....115p.
Event....51
Event Filter Selection....103
Events....12
Exclude From Backup....28
Exit Encore....40
Expander....147
Export a Studio Configuration....136
Exporting Mixes To Flying Faders....142
Exporting Recall To Flying Faders....142
Extended Collect Touch Options....65
Extended Prefs....79
Extended Wait Icons....87
External LTC....72
Extract Path Data....57, 213
F
Fader Direct....109
Fader Indication....66
Fader Input Metering....79
Fader Lock Record....39
Fader Mic/Line....171
Fader Moves List....102, 213
Fader Relay....171
Fader Reset....78, 83
Fader Start Box....170
Fader Start Enable....81
Fader Start Integrity System....81, 176
Fader Start Options....81
Fader Start Relays....68
Fader Touch Record....39
Fast Forward Limit....74
FF & Rew only....75
Fileserver Link....206
Filing....213, 218
Film Format....86
Films....145
First Mode Change Updates ISS....12, 63p.
Fixed....186
Flash Boot....230
Floating Timecode....196
Flying Faders....39, 136, 208, 233
Follow....186
Follow Access Key....192
Follow Control Room Options....71
Follow Surrmon....76
Foot/Frame....49, 86
Force Boot....231
Force Desk Keep....39
Force Track Arm....69
Format Disk....197
Forwards....104
Frequency....134
From....42, 54
FT/FR = Timecode....86
Full....37
Full Rebuild....234
Function Key....12
G
Gangs....41, 107
Gaps....51p.
Gate....147
Generate....87
Generate LTC When Stationery....73
Generator Mutes Until Locked....73
Glide....12
Glide Clears Scope....65
Glide Times....18
Global Buttons....83
Global Offset....53
Global Parameter....133
Global Path Change In Play....69
Go To Lock Master Touch Isolate On Entering......64p.
GPI....68
GPI Config....35, 217
GPI Configuration....168, 170
GPI Fader Relay....82
GPI Options....81
GPI Switch Relay....82
Grab Time....43, 66
Group Master....89
Group Setup....89
H
Handshake....117
Headphone Cut....173
Headphone Select Valid....174
Headroom (Use Lower Dynamics Ctrl Values)......67
Help Menu....131, 205
Help Settings....205
Hide Frames....85
Hide Hours....85
Hide When Stopped....196
Hold Off Time....92
Hold Recall....119, 121, 127
HRST....230
I Agree Register Now....214
I want to convert it to an Encore Backup file to restore to
Encore later....138
I Want To Restore a Studio Configuration....215
I/O Config....34p., 165, 213, 217
I/O Configuration....168
I/O Designer....34, 169
I/O Patch....155, 213
I/O Patching....136, 177
ID....96
If Shorter Than....52
Ignore....52
Ignore Automation....139
Import....50
Import / Export....101
Import a Studio Configuration....136
Import Encore Automation....191
Import from Starnet....138
Import Protocols Automation....190
Import Selected....138
Importing Flying Faders Mixes....141
Importing Flying Faders Recall....141
Inactive....111
Include....47
Increment....120
Inhibit Allocation....156
Inhibit Automation....157
Inhibit Talkback While Automation Playing....70
Initial Snapshot....12, 63
Input Paths....171
INS....96
Insert 1 Divert....82
Insert 2 Divert....82
Insert Here....48
Insert In 1....178
Insert Into Current Tree....32
Insert Out 1....178
Insert Stock....54
Inserts....178
Installation Complete....210
Instant Chase On Add Machine To Group....74
Instant Start Automation....63
INT44....132
INT48....132
INT88....132
INT96....132
Integrity Check....81
Invert AFT....81
Invert On/Cut......81
IP-MIDI Network conflicts....117
IpMIDI....116
ISOLATE....11
Isolate From....57
Isolate To....57
ISS....12, 41, 104
K
Keep Current Labels....41
Keep Desk....39
Keep Master Moves....107
Keep Mode....18, 24, 63
Kill Suspends On Exit....42
L
Label List....18, 20, 25, 96, 99, 213
Labels....24
Large Dialogs....87
Latch....171
Latching....171
Launch AFU on Fader Touch....80
Layer....152
Layer / Bank changes....64
Layer Key Routing Delay....77
Led On When Cut....79
Length....49, 54
Licence....205
License Number....207
Licensing....211
Limit Filters to 12dB/Octave....67
Line....171
Link....211
Link Logic....81, 171
Link Suspend....83
Link/Process Page....78
Linked....39
Links....41, 211
Load Labels....41
Load Mix....45
Load Options....37, 41, 62
Load Recall....121
Load Revision....33
Loading Mix....32
LOC....99
Local Area Network....117
Local Buttons....83
Local Zero....85
Local Zero On....85
Locate....97, 99
Locate Labels....99
Locate To....100
Locate/Cycle....97
Lock Acceleration....91
Lock Correction....93
Lock Manual Keep for non-Administrators....63
Logicator Manual Match Mode....80
Logo Enabled....86
LS Monitor Settings....110
LTC....96
LTC Dropout Limit....73
LTC From Master Machine....72
LTC Reader Validation Period....72
M
Machine....96
Machine Manager....34, 180
Machine Name....91, 181
Machine Offset....90
Machine Properties....90, 169
Machine Status....96
Machines....180
Macro Name....154
MADI Diagnostics....202
Make Master....170
Make Meters Always Follow Selected Path....184
Manual....24
Manual Glide....12
Manual Keep....18, 60, 63
Manual Match....12
Manual Start/Stop....81
Manual Verify....51
Map Channel....130
Mapping Screen....190
Mark Edit Points With Labels Called....53
Master Machine Follows Automation....73
Master Sync....133
Master Touch Isolate....64
Master Touch Isolate Respects Safety Nets....64
Max Cue Speed....95
MCS....72
MCS Parameters....91
MCS Preferences....97
MCS Presets....97
MCS Settings....86
MCS Track Arming using 'virtual relays'......168
Merge....48
Merge From....48
Merge Labels....41
Merge Path Data....48, 213
Merge To....48
Meter Design....217
Meter Designer....35, 162, 183
Meter Designer Defaults....189
Meter Designs....34
Meter Follow Path....184
Meter Legends....78
Meter Maid....188
Meter Scale Type....77
Meter Type....188p.
Metering....76
Meters Partitions....70
Mic....171
Mic / Line Rack Control....109
Mic Inputs to Work Mic/Live Relay....80
Mic Live A....173
Mic Live B....173
Mic Live Bus....172
MIDI over LAN....115
Min Cue Speed....95
MIOS....12
Misc Options....133p.
Mix Conforming....54, 213
Mix Data Interchange....138
Mix Importer....190
Mix Minus Talkback....82
Mix Only....32
Mix Pass Tree....59
Mix Tree....217
Mix Tree Filing....31
Mix/Pass Tree....13
Mixpass.tree....233
Modes....41
Modify....49, 104, 188
Modify Events....104
Mom....171
Momentary....171
Momentary Signalling......81
MON icon....150
Monitor Calibration....71
Monitor DIM Value....71
Monitor Folddowns....157
Monitor Section....122, 126
Monitoring....71
Mono....150
Mono Pad....71
Move....54, 56
Mute....132
Mute List....102, 213
Mutes....39
Muting Studio Loudspeakers Enable....80
N
Name PreDub....159
Names Configuration....169
Network Channel....116
Neve EQ....147
New Archive....26
New ISS....41
New Mix....22
Next....125
No Chase Stop....94
No Lock Wait....93
Not defined....82
Nudge....104
O
Offline....179, 211
Offline Automation....208
Offline Desk Configuration....136
Offline Editing....44
Offline Encore....207
Offline Routing Assistant....112, 219
Offset....19p., 96, 190
Offset Labels....58
On Load/Edit....37
On Master Touch Record....65
On-Air....173
On-Line....179
On/Cut....172
On/Cut Invert....176
Only New/Modified Files....30
Open Mix....22
Open Recall Store....120, 123
Open Recent Store....124
Operating Level....67
Operations Menu....129
Options Menu....61, 128, 221
Opto Isolator....172
Opto-Isolators....171
OR....171
Output Paths....171
Overdub....109
Overlaps....51p.
P
Page Two Toggle Mode....66
Pan & Operating Levels....66
Pan Designators....13, 152, 155
Pan Logicator Arc....66
Pan Macros....152
Pan Position....76
Panel....75
Park Time....92
Park Window....95
Partial Rebuild....234
Partition & Meters Data....162
Partition Designer....69
Paste To All....148
Paste To Selected....148
Path....172
Path Control Copy....83
Path Edit....192, 213
Path Information....76
Path Names....101
Path Processing....146
Path Selection....45, 192
Paths Not On Surface Default To....70
PC Setup Page....211
Peak....77
PEC....186
PEC Direct....68
PEC-Direct Serial Track Arming....73
PEC/Direct Bus/Tape....71
PEC2....186
PFL....172
PFL 2nd Layer....82
PFL Small Fader....83
PgDn....147
PgUp....147
PLAY....11
Play Into Park Time....94
Play Pass....13, 18
Poll Timing....95
Popup Hold Options....65
Popup On Activation....65
Port Grouping....169
Port Routing....13
Port State....194
Port Used By x Other Paths....177
Ports....75p.
Position....96
Post Roll Time....74
Power Users....225
PPM....77
Pre / Post Route....82
Pre Roll Time....74
Pre/Post....193, 220
PreDub....184
Predub Masters....159
Predub Zone....151
PreDub Zone....69, 159
PreDubs....184
Presets....74
Previous....125
Priority Sync....134
Pro Tools....115, 117, 190, 208
Process....103
Process Grouping....68
Process Present Leds....69
Program Modules....230
Project....31
ProTools Midi Hub....115
Prune....62
Prune Tree....28
Pull-Down....132
Pulldown....134
Pyramix....118
Q
Quad Madi Overload Settings......67
Quad-Madi II card....12, 14
Quick Format....203
Quick Names....149
Quick Patch....179
R
RAM....18
Range....101
Re-Group....170
Read Only....38
Reassign....59, 110
Reboot Console....230
Reboot MCS....86
Reboot Options....230
Recall....119
Recall Setup....128
Recall Snapshot....121
Recall Stores....136
RECORD....11
Record Direct Defeat....69
Record Pass....15, 18
Recorder Control....69
Recover Automation on Desk....24
Recycle Bin....26, 29
Redo....60
Reduce Information/Warning Screens....86
Reference Source....72
Reforest....234
Reforestation....233
Register New Product....211
Registration....207
Relace Time....94
Relay....168
Relay Ganging....68
Relay Type....182
Relays....168, 171, 182
Relays and Optos Map....170
Release Hold Off....93
Reload Last Mix....23
Reload Last Used Groups....98
Reload Tree....37
Remaining Amount....167
Remove....143
Remove Archive....29
Remove Current Block....220
Remove Machine....89
Rename....38
Renumber List On Merge....24
Reset Name....91
Reset System....40
Reset Wizard....144
Restart Encore....230
Restore....29
Restore Console Data....204
Restore Encore Settings....204
Restore Gangs....23
Restore Last Groups When Encore Starts....98
Restore Links....23
Restore Machine Settings On Detection....73
Restore Modes....23
Restore Safety Snapshot....23, 41
Restoring Modes....33
Retard Automation....58
Reverse Play / Rollback....73
Rewind Limit....74
Right i/p only....82
Ripple Mode....49
RM....96
Roll Back Time....74
Rotary Tolerance....128
Routing....15, 112
Routing Screen....112
Running....20
s
Safety Nets....18, 43
Safety Snapshot....15
Safety Stop....18, 63
Sample Rate....18
Samples....167
Save Macro....154
Save Mix After Apply....105
Save Mix As....23
Save On Exit....201
Save Recall File....124
Save Recall Store As....124
Scanning Options....126
Scanning Range....128
Screen Colours....87
Screen Options....86
Search Recall Stores....124
Security Settings....225
Sel Based Monitoring....157
SEL Monitoring Control....72
Select A Drive....215
Select a Label....102, 198
Select A Label......85
Select All....28
Select Components....209
Select Drive....136
Select From List......47p., 54, 102, 198
Select From Tree....28
Select Group....89
Select Monitor....120, 125
Select Pass....48
Select Paste Range....148
Select Score Panel....125
Selected Base Colour....87
Selected Label....100
Selected Paths in PreDub....159
Selected Paths In Stem....155
Self Closing Dialogs....86
Seperate Mono/Stereo....82
Servo Hold....93
Servo Parameter Definitions....91
Servo Type....92
Servo Wait....91
Set Custom Filter....103
Set Offset....58
Set Path....120, 125
Set Paths....45
Setup The AMS Control Panel After Copying The Files. 210
Setup User Desk....128
Show All Desk Setups....36
Show Data for all Users....29
Show Labels in Main Window Space....61
Show MCS Group Status....96
Show MCS Machine Status....96
Show Mix Pass Tree....63
Show Names....111
Show Separators....221
Shutdown PC....230
Shuttle Speeds....75
Shuttle Stop....93
Sine....70
Single Button Record....75
Slew Limit....92
SLS Cut....173
SLS Select LSB....173
SLS Select MSB....173
SLS Select Valid....174
Small Icons....30
Small Meter....76
SMPTE....167
Snapshot Filing....200
Snapshot Scope....200
Snapshot Touch Scope....79
Snapshots....35, 200, 217
Solo Clear....172
Solo Direct Defeat....69
Solo In Place....68p.
Solo Inhibit....83, 156
Solo Mode....68
Solo Settings & Relay Control....68
Source End....45
Source Fader....110
Source Start....45
Special Groups....227
Splice Mode....47p.
SPS rack....14
SRC....132p.
SRST....230
SSP Diagnostics....202
Standard EQ....147
Star Command....15, 115
Start....152
Start Control Panel....202
Start Event Viewer....202
Start Explorer....202
Start Installation....210p.
Start RAS Admin....202
Start Registry Editor....202
Start-up Time....92
State....132p.
Status....96
Status Panel....68
Stem....184
Stem / 2T Fader Mapping....132
Stem Meters....186
Stem Mixer....112
Stem Monitor....113
Stem Naming....113
Stem Setup....154
Stems....184
Stereo....150, 166
Stop Before Wind....94
Stop Command....94
Stop Count....95
Stopped....20
Store Only This Channel....129
Store Whole Desk In Memory....129
Stretch Next....52
Stretch Previous....52
Strip....185
Strong Hidden Channel Indication....80
Studio Configuration....136, 207, 214p., 222
Studio Information....128
Surround....186
Surround Macro Editor/Viewer....153
Surround Manager....195
Surround Sound Panel....154
Surround Stem Setup....153, 195
Surround Type Select....195
Suspend Gangs....42, 108
Suspend Links....42, 108
Swap Transport Keys....75
Sync....18, 134
Sync Out....134
Sync Select....70
Sync Source....16
System Default files....84
System Files....209
System Info....206
System Name....101, 166, 179
System Operating Level....67
System Paths....146
System Tray....115
T
Take From Here....48
Take New Preset....42
Talkback....173
Technical Support....206
Templates....111
Terms & Conditions....229
Text Note....44
Text Pages....199
The Encore Shell....224
Time....167
Timecode....15, 18, 85
Timecode Options....20, 58, 85
Timecode Preset....20
Timecode Presets....198
Timecode Type....85
Times....45
Title....31
TM....112
To....42, 54
TO END....16
Tone & Talkback....70
Tools Menu....109
Top Matrix....112
Track....51
Track Arming....90
Track Arming Box....170
Track List....90
Track Presend....68
Transfer File....137, 215
Transfer Selected Files....141
Transport Menu....89
Transport Options....90
Treat as Cut....52
Trim....42
Trim From....42
Trim To....42
Trim To End....39
Try Creating The Store Again....126
U
Undo....148
UNDO....60
Uninstall....223
Unlace Time....93
Update....100, 181
Update Links to Desk Setup....37
Upgrade Flash....231
Upgrade Successful, Flash Boot Now Required......232
Upper Knob Lock....79
Use Banks....80, 152
Use Base Colour....87
Use Closest Labels On Activate....43
Use Collect Touch Buffers....64
Use Current Timecode After Pressing OK....99
Use Encore Labels for Locate/Cycle Setup....75
Use Preroll When Locating....75
Use Recycle Bin....30
User....31
User Defaults....34p., 217
User Defaults for New Desk Setup....145
User Defined Macros....153
User Manager....196, 202
User Name.....101
Users....226
USP....10
V
V5.3....10
V5.4 Software.10, 34, 131, 135, 160, 165, 169, 177, 180
Validate Files....212
Value....103
Vari-Speed Settings....71
VCA Gang Mode....80
Velocity Sensitivity....77
Verify After Create....126
Verify Recall Store....126
Verify Successful....126
Version....206
VIDEO....96
View Menu....120
VU....77
W
W/Len....132
Wait for Slaves Before Issuing Play command....73
WavTrak....16, 59, 76
Whole Mix....42, 47p., 57
Wild Meters....184
Word Clock....16
Wordclock Termination....134
Wrap....152
X
XFade Time....54
z
Zero All....198
Zoom....162, 220
.....41, 52, 69, 72, 74p., 80, 83, 87, 95, 107, 112, 115, 127, 134, 156p., 173, 196, 202
<
<<Show Edit....28

- ENCORE TWO
- USER MANUAL BUILD 35 OR LATER
- INTRODUCTION
- TABLE OF CONTENTS
- GLOSSARY
- USING ENCORE TWO
- FILE MENU
- AUTOMATION MENU
- TRIM (ANALOGUE)
- SAFETY NETS
- OFFLINE EDITING
- SET OFFSET
- SHOW MIX STATISTICS
- SHOW MIX PASS TREE
- CLEAR WAVTRAK DATA
- REASSIGN ACTIVE (ANALOGUE)
- UNDO BUTTON (CONSOLE SURFACE)
- OPTIONS MENU
- SHOW LABELS IN MAIN WINDOW SPACE
- DISK SPACE STATUS WARNING
- MIX/PASS TREE OPTIONS
- PREFERENCES
- BRIGHTNESS CONTROLS (DIGITAL SYSTEMS ONLY)
- PAN & OPERATING LEVELS
- SOLO SETTINGS & RELAY CONTROL
- PARTITION DESIGNER (DFC ONLY)
- TONE & TALKBACK
- SYNC SELECT
- MONITORING
- MCS
- PRESETS
- TRANSPORT MENU
- LISTS MENU
- GANGS MENU
- TOOLS MENU
- AUTOMOTION (DIGITAL)
- AUTOMOTION (ANALOGUE)
- BACKUP MANAGER
- COPY BUFFER (DFC ONLY)
- DEFAULTS MANAGER (DIGITAL)
- DESK EDIT (DIGITAL)
- DESK DESIGNER (DIGITAL)
- DESK LAYOUT (DFC ONLY)
- EDL EDITOR
- EQ & DYNAMICS (DIGITAL)
- I/O CONFIG (DIGITAL)
- I/O PATCHING (DIGITAL)
- MACHINE MANAGER (DIGITAL)
- METER DESIGNER (DFC ONLY)
- MIX IMPORTER (DIGITAL)
- PATH EDIT (DIGITAL)
- QUICK PATCH (DIGITAL)
- SURROUND MANAGER (DIGITAL)
- USER MANAGER
- UTILITIES
- SNAPSHOTS
- ADMINISTRATOR
- ENCORE EMERGENCY DISK
- HELP MENU
- CONTENTS
- HELP SETTINGS
- INFORMATION
- SYSTEM INFO
- OFFLINE ENCORE
- APPENDIX A: DEFAULT SECURITY SETTINGS
- APPENDIX B: TERMS & CONDITIONS
- APPENDIX C: REBOOT OPTIONS
- APPENDIX D: REBUILDING THE MIX TREE
- REFORESTATION
- HEALTH & SAFETY NOTICE
- V5.3 / V5.4 SOFTWARE
- NB
- V6 SOFTWARE
- CONVENTIONS USED IN THIS MANUAL
- AUTENGX
- AUTOMATION MODE
- C/P/T/M
- DESK SETUP
- EVENTS
- FUNCTION KEY
- GLIDE
- INITIAL SNAPSHOT (ISS)
- MIOS
- MIX/PASS TREE
- PAN DESIGNATORS
- PLAY PASS
- PORT ROUTING
- PROCESSING ELEMENT
- QUAD-MADI II CARD
- QUANTISATION
- RADIO BUTTON
- RECORD PASS
- ROUTING
- SAFETY SNAPSHOT
- STAR COMMAND
- SYNC SOURCE
- TIMECODE
- VIRGIN TERRITORY
- WAVTRAK
- WORD CLOCK
- MENU BAR
- LOGO
- ICON BAR
- LABEL LIST
- SAFETY NETS STATUS
- FREE RAM AND DISK USAGE
- GLIDE TIMES
- CURRENT DESK SETUP AND I/O CONFIG
- CURRENT PLAY PASS AND RECORD PASS
- TRANSPORT CONTROL AND STATUS INDICATION
- TIMECODE FORMAT
- SAMPLE RATE
- SAFETY STOP INDICATOR
- KEEP MODE
- OFFSET
- ICONS
- TIMECODE EDITING
- EITHER
- NOTES ON TIMECODE DISPLAY
- TIMECODE DISPLAY WITH OFFSET
- KEYBOARD SHORTCUTS
- NEW MIX
- CLEAR THE CURRENT TREE
- INSERT INTO CURRENT TREE
- OPEN MIX
- SAVE MIX AS
- RELOAD LAST MIX
- RESTORE SAFETY SNAPSHOT
- RESTORE MODES
- RESTORE GANGS
- RESTORE LINKS
- LABEL OPTIONS
- RENUMBER LIST ON MERGE
- DISPLAY OPTIONS FOR EACH LOAD
- SELECT A MIX FROM THE FILING PAGE
- CREATE A NEW MIX
- RECOVER AUTOMATION ON DESK
- TO STOP THE AUTOMATION SYSTEM
- ENCORE WINDOW
- DESTINATION WINDOW
- TO CREATE A NEW ARCHIVE
- TO CHANGE THE DRIVE USED FOR ARCHIVES
- TO BACKUP FILES
- TO COPY ONLY NEW OR MODIFIED FILES
- TO SELECT INDIVIDUAL MIX/PASSES FROM THE MIX TREE
- TO COPY LIVE DATA TO AN ARCHIVE
- TO MAKE SURE LINKED FILES WILL BE COPIED
- TO RESTORE DATA FROM AN ARCHIVE
- TO DELETE AN ARCHIVE
- OPTIONS
- SHOW DATA FOR ALL USERS
- COMPRESSED
- SMALL ICONS
- USE RECYCLE BIN
- COPY LINKED FILES
- AUTOMATICALLY COPY NEW ARCHIVES TO CDR
- ONLY NEW/MODIFIED FILES
- NB: USE THIS OPTION WITH CAUTION
- FILING
- AUTOMATION MIX TREE FILING
- FILING HIERARCHY
- CREATING NEW CLIENTS, PROJECTS & TITLES
- LOADING A MIX / PASS TREE
- TO SELECT THE MIX TREE
- USING AUTO-FILL
- THIS HAS TWO OPTIONS
- DESK SETUPS
- V5.4 SOFTWARE
- SYSTEM FILING
- I/O CONFIG
- GPI CONFIG
- METER DESIGNER
- USER DEFAULTS
- AES CONFIG
- CURRENTLY LOADED FILE
- TO SELECT AN IO CONFIGURATION, SNAPSHOT OR USER DEFAULTS FILE
- LINKING MIXES TO MIX SETUPS AND SYSTEM FILES
- TO LINK A SYSTEM FILE TO A MIX SETUP
- TO LINK A MIX/PASS TREE TO A SPECIFIC MIX SETUP
- STANDARD FILING OPERATIONS
- EDIT
- RENAME
- WARNING
- DELETE
- COPY
- READ ONLY
- FORCE DESK KEEP
- CALIBRATE FADERS (ANALOGUE)
- FLYING FADERS PREFERENCES (ANALOGUE)
- RESET SYSTEM
- EXIT ENCORE
- NEW ISS
- LOAD OPTIONS
- MODES
- LINKS
- GANGS
- COPY PATH DATA
- ERASE PATH DATA
- MERGE PATH DATA
- EDL MIX CONFORMING
- CUTLIST VIEW
- RIPPLE MODE
- EDL VIEW
- CONSIDERATIONS FOR EDL FILES
- TRACK
- EVENT
- C INDICATES CUT
- MANUAL VERIFY
- AUTOMATIC VERIFY
- DISSOLVE
- IF SHORTER THAN
- GAPS
- OVERLAPS
- TO APPLY AN EDL OR CUTLIST TO THE CURRENTLY LOADED AUTOMATION
- TO APPLY AN EDL OR CUTLIST TO OTHER AUTOMATION
- NB: GLOBAL OFFSET AFFECTS ALL PARAMETERS AND ALL AUTOMATION
- MIX CONFORMING
- WARNING: MIX CONFORMING IS DESTRUCTIVE NOT ONLY TO THE AUTOMATION, BUT TO THE TIMELINE AS WELL
- MOVE
- INSERT STOCK
- AUTOMATION EDITING
- CONFORM LABELS
- EXTRACT PATH DATA
- ADVANCE AUTOMATION
- RETARD AUTOMATION
- MANUAL KEEP
- TIMECODE RUNNING
- TIMECODE STOPPED
- AUTO KEEP
- BACKGROUND COLOUR
- NEW MIX NAME
- AUTO RECOVERY OPTIONS
- AUTOMATION
- INSTANT START AUTOMATION
- SHOW MIX PASS TREE (+/- KEY)
- INITIAL SNAPSHOT
- SAFETY STOP
- POINT AT THE ICON TO SEE A FLYOUT DISPLAY OF THE CURRENT STATE OF SAFETY STOP
- LAYER / BANK CHANGES
- COLLECT TOUCH
- USE COLLECT TOUCH BUFFERS
- GO TO LOCK MASTER TOUCH ISOLATE ON ENTERING
- MASTER TOUCH ISOLATE RESPECTS SAFETY NETS
- COLLECT TOUCH HARD WRITE
- CLEAR SCOPE/BUFFERS ON EXIT
- ADD WRITING CONTROLS TO SCOPE WHEN ENTERING
- GLIDE CLEARS SCOPE
- POPUP HOLD OPTIONS
- EXTENDED COLLECT TOUCH OPTIONS
- IN EXTENDED MODE COLLECT TOUCH
- AT THE LAST STOP TIME
- ALWAYS IN WRITE
- FADER INDICATION
- PAGE TWO TOGGLE MODE
- PAN LOGICATOR ARC
- SYSTEM OPERATING LEVEL
- NOTES ON OPERATING LEVEL
- LIMIT FILTERS TO 12DB/OCTAVE
- HEADROOM (USE LOWER DYNAMICS CTRL VALUES)
- QUAD MADI OVERLOAD SETTINGS
- SOLO MODE
- FADER START RELAYS
- GPI
- PROCESS GROUPING
- STATUS PANEL
- RELAY GANGING
- PEC DIRECT
- PROCESS PRESENT LEDS
- RECORDER CONTROL
- PARTITIONS
- GLOBAL PATH CHANGE IN PLAY
- PREDUB ZONE
- DEFAULT PARTITION
- METERS PARTITIONS
- INHIBIT TALKBACK WHILE AUTOMATION PLAYING
- VARI-SPEED SETTINGS
- MONITOR DIM VALUE
- PEC/DIRECT BUS/TAPE
- MONITOR CALIBRATION
- MONO PAD
- FOLLOW CONTROL ROOM OPTIONS
- SEL MONITORING CONTROL
- REFERENCES
- REFERENCE SOURCE
- EXTERNAL LTC
- PIN & INTERNAL
- PIN & VIDEO
- LTC FROM MASTER MACHINE
- LTC READER VALIDATION PERIOD
- LTC DROPOUT LIMIT
- REVERSE PLAY / ROLLBACK
- PEC-DIRECT SERIAL TRACK ARMING
- MASTER MACHINE FOLLOWS AUTOMATION
- GENERATOR MUTES UNTIL LOCKED
- GENERATE LTC WHEN STATIONERY
- ALLOW RECORDING TO TIMECODE & VIDEO TRACKS
- RESTORE MACHINE SETTINGS ON DETECTION
- WAIT FOR SLAVES BEFORE ISSUING PLAY COMMAND
- PRE ROLL TIME
- POST ROLL TIME
- REWIND LIMIT
- FAST FORWARD LIMIT
- ROLL BACK TIME
- SHUTTLE SPEEDS
- PORTS
- PANEL
- SINGLE BUTTON RECORD
- FF & REW ONLY
- USE PREROLL WHEN LOCATING
- ENTER PLAY AFTER LOCATING
- SWAP TRANSPORT KEYS
- USE ENCORE LABELS FOR LOCATE/CYCLE SETUP
- PORTS (88R ONLY)
- METERING
- CENTRE METER PANEL
- METER SCALE TYPE
- COLOUR OPTIONS
- ENABLE WAVTRAK LOCATE WINDOW START TIME
- DISPLAY WAVTRAK IN BAR GRAPH AREA
- CONTROL SENSITIVITY
- VELOCITY SENSITIVITY
- LAYER KEY ROUTING DELAY
- FADER RESET
- CHANNEL RANGE
- METER LEGENDS
- LINK/PROCESS PAGE (DFC ONLY)
- AUX LAYOUT (FOR 36 AUXES)
- EXTENDED PREFS (LIBRA LIVE ONLY)
- LED ON WHEN CUT
- FADER INPUT METERING
- UPPER KNOB LOCK
- AUX LED ON WHEN CUT
- SNAPSHOT TOUCH SCOPE
- CHANNEL STRIP NEW LAYOUT
- AUX CUT IDENT
- ALTERNATIVE AUX LAYOUT
- ALTERNATIVE SLS BUTTON LAYOUT
- USE BANKS
- LAUNCH AFU ON FADER TOUCH
- AFU FOLLOWS PFL
- MUTING STUDIO LOUDSPEAKERS ENABLE
- MIC INPUTS TO WORK MIC/LIVE RELAY
- STRONG HIDDEN CHANNEL INDICATION
- VCA GANG MODE
- LOGICATOR MANUAL MATCH MODE
- CUT / FADER MODE KEYS
- CONSOLE SPLIT AT FADER NUMBER
- FADER START OPTIONS
- MOMENTARY SIGNALLING
- INTEGRITY CHECK
- MANUAL START/STOP
- FADER START ENABLE
- GPI OPTIONS
- ASSIGNABLE BUTTONS (LIBRA LIVE ONLY)
- THE OPTIONS ARE
- ASSIGNABLE BUTTONS (DMC ONLY)
- GLOBAL BUTTONS
- LOCAL BUTTONS
- SAVING SYSTEM PREFERENCES
- TIMECODE OPTIONS
- TIMECODE TYPE
- LOCAL ZERO
- DISPLAY OPTIONS
- FOOT/FRAME
- FT/FR = TIMECODE
- FILM FORMAT
- SCREEN OPTIONS
- SELF CLOSING DIALOGS
- REDUCE INFORMATION/WARNING SCREENS
- LOGO ENABLED
- CPT BAR ENABLED
- DISPLAY CLOCK
- AUTOHIDE ICON MENU
- LARGE DIALOGS
- ENABLE SCREENSAVER
- EXTENDED WAIT ICONS
- DUAL MONITOR OPTIONS
- SCREEN COLOURS
- GROUP SETUP
- TO ADD A MACHINE TO A GROUP
- TO TAKE A MACHINE OUT OF A GROUP
- TO REMOVE ALL MACHINES FROM A GROUP
- TO CHANGE THE CURRENTLY SELECTED ACTIVE GROUP
- TO CONFIGURE AN INDIVIDUAL MACHINE
- MACHINE PROPERTIES
- MACHINE OFFSET
- TRANSPORT OPTIONS
- AUTO OFFSET
- TRACK ARMING
- TO ARM A TRACK
- MCS PARAMETERS
- TO CHANGE THE MACHINE NAME
- TO CHANGE A PARAMETER
- SERVO PARAMETER DEFINITIONS
- SERVO WAIT
- LOCK ACCELERATION
- HOLD OFF TIME
- START-UP TIME
- PARK TIME
- SERVO TYPE
- SLEW LIMIT
- LOCK CORRECTION
- NO LOCK WAIT
- SERVO HOLD
- RELEASE HOLD OFF
- SHUTTLE STOP
- UNLACE TIME
- RELACE TIME
- PLAY INTO PARK TIME
- NO CHASE STOP
- STOP COMMAND
- STOP BEFORE WIND
- PARK WINDOW
- EDIT DELAY
- EE DELAY
- MIN CUE SPEED
- MAX CUE SPEED
- STOP COUNT
- POLL TIMING
- SHOW MCS MACHINE STATUS
- SHOW MCS GROUP STATUS
- LOCATE/CYCLE WINDOW
- MCS PREFERENCES
- MCS PRESETS
- RELOAD LAST USED GROUPS
- TO GRAB TIMECODE AND CREATE LABELS
- LOCATE LABELS
- TO MODIFY A LABEL
- TO DELETE A LABEL
- TO DELETE ALL LABELS
- CAPTURE TIMECODE
- TO CAPTURE TIMECODE
- PATH NAMES
- AUTO INCREMENT
- AUTO NUMBER
- DEFAULT
- DEFAULT ALL
- IMPORT / EXPORT
- RANGE
- FADER MOVES LIST
- THE FADER LIST SHOWS
- MUTE LIST
- THE MUTE LIST SHOWS
- TO BROWSE THE EVENT LIST
- TO CHANGE THE SELECTION OF EVENTS DISPLAYED
- TO CHANGE THE PATHS LISTED
- TO ADD TO THE EVENT LIST
- TO DELETE FROM THE EVENT LIST
- TO MODIFY MULTIPLE EVENTS
- TO MODIFY AN EVENT TIME
- NUDGE
- ABSOLUTE
- TO MODIFY AN EVENT VALUE
- TO MODIFY A SINGLE EVENT
- TO CREATE LABELS FROM EVENTS
- CUSTOM EVENT LIST
- THE EVENT LIST SHOWS
- GANGS & AUTOMATION
- DISPLAY GANGS
- CLEAR ALL GANGS
- COALESCE ALL GANGS
- COALESCE SELECTED
- CLEAR SELECTED
- KEEP MASTER MOVES
- CLEAR AFTER COALESCING
- R OPTIONS
- CLEAR LINKS
- CLEAR ALL GANGS & LINKS
- SUSPEND GANGS
- SUSPEND LINKS
- DIAGNOSTICS (ANALOGUE)
- FADER DIRECT... (ANALOGUE)
- FADER DIRECT
- CHANNEL METER
- OVERDUB
- MIC / LINE RACK CONTROL
- LS MONITOR SETTINGS (ANALOGUE)
- REASSIGN (ANALOGUE)
- NB: SOURCE AUTOMATION IS NOT AFFECTED IN ANY WAY BY THE REMAPPING PROCEDURE
- OFFLINE ROUTING ASSISTANT (DIGITAL CONSOLES ONLY)
- STEM MIXER (88R ONLY)
- STEM MONITOR (88R ONLY)
- STEM NAMING OPTIONS
- ROUTING OPTIONS
- PRO TOOLS ™
- MIDI OVER LAN (LOCAL AREA NETWORK)
- STEP
- ETHERNET MIDI
- IP-MIDI NETWORK CONFLICTS
- PYRAMIX
- RECALL (88R ONLY)
- TO SELECT A CHANNEL
- TO SELECT THE MONITOR SECTION
- RESETTING TO A RECALL STORE
- TO TURN OFF SECTIONS THAT DO NOT REQUIRE RESETTING
- AUTO RECALL
- CREATE NEW RECALL STORE
- OPEN RECALL STORE
- OPEN RECENT STORE
- SEARCH RECALL STORES
- COPY STORE TO CURRENT LOCATION
- SAVE RECALL STORE AS
- EXIT
- VIEW MENU
- CHANNEL SELECT MENU
- NEXT AND PREVIOUS
- SET PATH
- SELECT MONITOR
- SELECT SCORE PANEL
- ACTIVATION MENU
- ACTIVATE AUTO RECALL
- VERIFY RECALL STORE
- ACTIVATE HOLD RECALL
- DEACTIVATE RECALL
- RECALL SETUP
- SETUP USER DESK
- STUDIO INFORMATION
- DESK SIZE
- ACCURACY
- SCANNING RANGE
- R STANDARD COLOUR
- OPERATIONS MENU
- STORE WHOLE DESK IN MEMORY
- STORE ONLY THIS CHANNEL
- MAP CHANNEL
- STEM / 2T FADER MAPPING (ANALOGUE)
- AES CONFIG (DIGITAL)
- INPUTS
- OUTPUTS
- SYNC
- FREQUENCY
- PRIORITY SYNC
- MISC OPTIONS
- COPY TO ALL
- AUTOMOTION IS AN OFFLINE UTILITY FOR
- TRANSFERRING STUDIO CONFIGURATIONS
- EXPORT A STUDIO CONFIGURATION
- SELECT DRIVE PAGE
- STUDIO CONFIGURATION PAGE
- IMPORT A STUDIO CONFIGURATION TO OFFLINE ENCORE
- LOGIC TO ENCORE CONVERSIONS
- CONVERSION OF DATA FROM LOGIC TO ENCORE FORMAT
- IMPORTING THE NEW ARCHIVE ONTO THE ENCORE DRIVE
- USING THE IMPORTED MIX AS A STARTING POINT FOR FURTHER AUTOMATION
- IMPORTING FLYING FADERS MIXES
- IMPORTING FLYING FADERS RECALL
- EXPORTING MIXES TO FLYING FADERS
- EXPORTING RECALL TO FLYING FADERS
- RESET WIZARD
- TO CHANGE THE CURRENT USER DEFAULTS
- TO CHANGE THE PATH NUMBERS
- TO CHANGE THE NUMBER OF SYSTEM PATHS
- CLICK SYSTEM PATHS
- ALLOCATING PATH PROCESSING
- TO VIEW PATHS
- TO CHANGE THE ORDER OF PROCESSING
- CUT AND PASTE
- TO REMOVE PROCESSING FROM A PATH
- DRAG N DROP PROCESSING
- CHANGING PATH NAMES
- CHANGING PATHS MONO / STEREO STATE
- ASSIGNING PATHS TO THE CONSOLE MANUALLY
- TO AUTOMATICALLY ASSIGN PATHS TO THE CONSOLE SURFACE
- TO SELECT THE PATHS TO ASSIGN
- WRAPPING TO MULTIPLE LAYERS
- BANKS
- PAN DESIGNATORS ON MONITORS (TRACKS) AND GROUPS
- TO SELECT THE SPEAKER POSITION INDIVIDUALLY
- TO AUTOMATICALLY ASSIGN SPEAKER POSITIONS
- CUSTOM SURROUND MACROS
- TO DELETE A MACRO
- STEM SETUP WITH DESK EDIT
- SAVING DESK SETUPS
- SOLO INHIBIT
- INHIBIT ALLOCATION
- INHIBIT AUTOMATION
- MONITOR FOLDDOWNS (DFC ONLY)
- PREDUB MASTERS (DIGITAL)
- V5.4 SOFTWARE ONLY
- DYNAMIC LINKS
- MAKING TWO MONO PORTS ACT AS A STEREO PAIR
- CLEARING SETTINGS
- DELAY
- TO CONFIGURE DELAY ON SINGLE PORTS
- TO AUTOMATICALLY CONFIGURE DELAY ON MULTIPLE PORTS
- DITHER
- RELAYS
- MCS TRACK ARMING USING 'VIRTUAL RELAYS
- NAMES CONFIGURATION
- PORT GROUPING
- V5.4 SOFTWARE / ENGINE SELECTION
- GPI CONFIGURATION (GENERAL PURPOSE INTERFACE)
- CONFIGURING GPI RELAYS
- LINK LOGIC
- ACTION
- MIC LIVE BUS
- TO SELECT THE MIC LIVE BUS
- CONFIGURING GPI OPTO-ISOLATORS
- CONSOLE STATUS AND RELAYS
- MIC LIVE A & MIC LIVE B
- TALKBACK
- AFL
- PFL
- ON-AIR
- CONTROL ROOM DIM
- CONTROL ROOM CUT
- SLS CUT
- HEADPHONE CUT
- SLS SELECT MSB AND SLS SELECT LSB
- SLS SELECT VALID
- HEADPHONE SELECT MSB & HEADPHONE SELECT LSB
- HEADPHONE SELECT VALID
- CONFIGURATION
- TO CONFIGURE AFT
- USING AFT
- QUICK PREFS
- CARE MUST BE TAKEN TO AVOID PHASE DIFFERENCES IN THIS SITUATION
- INSERTS
- ONLINE / OFFLINE ROUTING
- QUICK PATCH
- TO SETUP A METER DESIGN
- TO ASSIGN PATHS ON A LAYER
- TO CHANGE INDIVIDUAL METER OPTIONS
- TO CHANGE THE METERING PICK-OFF POINT
- STEM METERS
- TO CLEAR ONE METER
- TO CLEAR A PATH FROM THE METERS IT APPEARS ON
- TO CLEAR THE CURRENT DESIGN PAGE
- TO CLEAR THE DESIGNS FROM ALL PAGES
- METER MAID (DFC)
- IF MODIFY IS SELECTED
- TO SET METER DESIGNER DEFAULTS
- TO SET METERING DEFAULTS FOR A PATH TYPE
- TO SET METERING DEFAULTS FOR STEMS
- ONLY V5 VERSIONS OF PRO TOOLS AUTOMATION CAN CURRENTLY BE IMPORTED
- TO IMPORT A PRO TOOLS MIX INTO ENCORE
- ADDING NOTES
- TO IMPORT AN ENCORE MIX INTO ENCORE
- TO ACCESS PATH EDIT
- ON-LINE AND OFF-LINE OPERATION
- PATH SELECTION
- CHANGING SIGNAL PROCESSING
- COPY & PASTE
- PORT ROUTING IN PATH EDIT
- PREDEFINED MACROS
- CUSTOM MACROS
- FLOATING TIMECODE
- FORMAT DISK
- TIMECODE PRESETS
- TEXT PAGES
- TO ACCESS SNAPSHOTS
- RECALLING SNAPSHOTS
- SNAPSHOT FILING
- MADI DIAGNOSTICS
- SSP DIAGNOSTICS
- START CONTROL PANEL
- START EXPLORER
- START EVENT VIEWER
- START RAS ADMIN
- START REGISTRY EDITOR
- SHUTDOWN
- SHUTDOWN THE MACHINE
- SHUTDOWN & RESTART MACHINE
- TO CREATE AN EMERGENCY DISK
- CREATE BACKUP
- TO RESTORE ENCORE SETTINGS
- TO RESTORE CONSOLE SETTINGS
- PDF (DEFAULT)
- USER DEFINED
- LICENCE
- VERSION
- CONTACTS
- TECHNICAL SUPPORT
- REGISTRATION AND LICENSE NUMBER
- INTER-CONSOLE COMPATIBILITY
- FAMILIARISATION
- PRO TOOLS CONVERSION
- OFFLINE AUTOMATION
- FLYING FADERS CONVERSION
- INTER-PRODUCT TRANSPARENCY
- INSTALLING OFFLINE ENCORE: MINIMUM INSTALLATION REQUIREMENTS
- INSTALLATION INSTRUCTIONS
- DO NOT USE THE OFFLINE ENCORE TWO SOFTWARE TO INSTALL OR UPGRADE A FULL ENCORE TWO INSTALLATION THAT IS ATTACHED TO A CONSOLE
- GETTING STARTED
- STANDARD
- BROADCAST
- STUDIO CONFIGURATION
- CLICK OK
- WHAT TO DO WITH OFFLINE ENCORE
- AUTOMATION FILES
- CONFIGURATION FILES
- FILE STRUCTURE
- AUTOMATION AND CONFIGURATION FILES
- FILE MANAGEMENT
- OFFLINE ROUTING ASSISTANT
- CONFIGURE MENU
- CONFIGURE BLOCKS
- ARRANGE BLOCKS
- REMOVE CURRENT BLOCK
- CLEAR CURRENT BLOCK
- AUTOROUTE CURRENT BLOCK
- PRE/POST
- ZOOM IN / ZOOM OUT
- COLOURS
- SHOW SEPARATORS
- USING OFFLINE ENCORE TWO
- UNINSTALLING ENCORE TWO
- THE ENCORE SHELL
- ADMINISTRATORS
- POWER USERS
- POWER USERS CAN
- CAUTION
- USERS
- BACKUP OPERATORS
- SPECIAL GROUPS
- THE SMALL PRINT
- END USER LICENCE AGREEMENT
- TERM
- OWNERSHIP
- FLASH BOOT OPERATION
- ASSIGNMENTS AND AUTOMATION
- CONTROL SURFACE
- ALLOCATION AND I/O
- FORCE BOOT
- UPGRADE FLASH
- CLICK YES - UPGRADE FLASH NOW
- BOOT FROM DISK
- REFOREST
- REFOREST REPLACES THE REFORESTATION PROGRAMME IN LATER VERSIONS OF SOFTWARE
- PARTIAL REBUILD
- FULL REBUILD
- ALPHABETICAL INDEX
- A
- B
- C
- D
- E
- F
- G
- H
- K
- L
- M
- N
- O
- P
- Q
- R
- S
- T
- U
- V
- W
- X
- Z
Brand : AMS Neve
Model : Encore Two
Category : Headphones