
NMP-530 - Digital media player VIEWSONIC - Free user manual and instructions
Find the device manual for free NMP-530 VIEWSONIC in PDF.

| Product Type | Digital Media Player |
| Brand | VIEWSONIC |
| Model | NMP-530 |
| Model Number | VS11681 |
| Power Supply | External Power Adapter |
| Network Connectivity | Ethernet RJ-45 (100Base-T) |
| Video Outputs | HDMI, S-Video, Composite, Component (via adapter) |
| Audio Output | Via HDMI, S-Video, Composite (not explicitly specified but included) |
| Additional Connectors | RS-232 (serial), S-Video/YPbPr adapter included |
| Box Contents | Remote control with batteries, quick start guide, ViewSonic CD, Ethernet cable, S-Video/YPbPr adapter, RS-232 cable, power adapter |
| Supported Formats | Graphics, videos, Flash files (third-party software required for creation) |
| System Requirements (Server) | PC with Windows or Linux, 1 GHz processor, 512 MB RAM, 100Base-T network interface |
| Video Resolutions | Multiple resolutions available (selectable according to display) |
| Remote Management | Web interface via Internet browser |
| Security | Login/password identification, automatic logout after 5 minutes of inactivity |
| Operating Temperature | Not specified, estimate: 0 to 40 °C |
| Operating Humidity | Not specified, estimate: 20 to 80 % (non-condensing) |
| Maintenance and Cleaning | Clean with a soft, dry cloth. Do not use liquids or aerosols. |
| Spare Parts and Repairability | Contact ViewSonic support for any repairs. No spare parts provided. |
| General Information | Compliant with applicable standards. Manufactured under license. Copyright ViewSonic Corporation, 2006. |
Frequently Asked Questions - NMP-530 VIEWSONIC
User questions about NMP-530 VIEWSONIC
0 question about this device. Answer the ones you know or ask your own.
Ask a new question about this device
Download the instructions for your Digital media player in PDF format for free! Find your manual NMP-530 - VIEWSONIC and take your electronic device back in hand. On this page are published all the documents necessary for the use of your device. NMP-530 by VIEWSONIC.
USER MANUAL NMP-530 VIEWSONIC
Check that you have all the following items in the package.

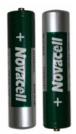
Remote Control and Two Batteries
NMP-530
Quick Start Guide
ViewSonic CD
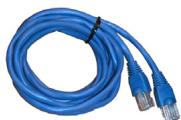
RJ-45 Ethernet Cable

S-Video/YPbPr Adapter
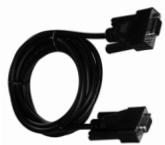
RS-232 Cable
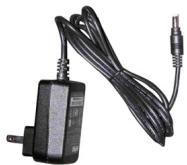
AC Power Adapter
System Requirements
System requirements include a display, a network environment, and a PC with network capability
Software Requirements
Software applications need to be purchased separately in order to create material for playback, such as graphics, video, and Flash files, etc.
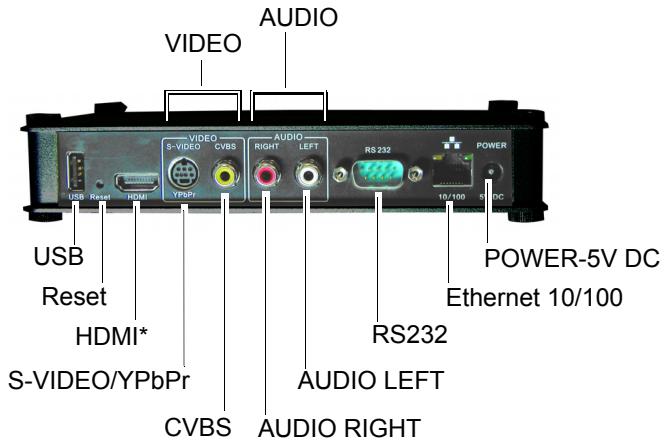
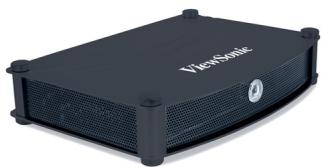
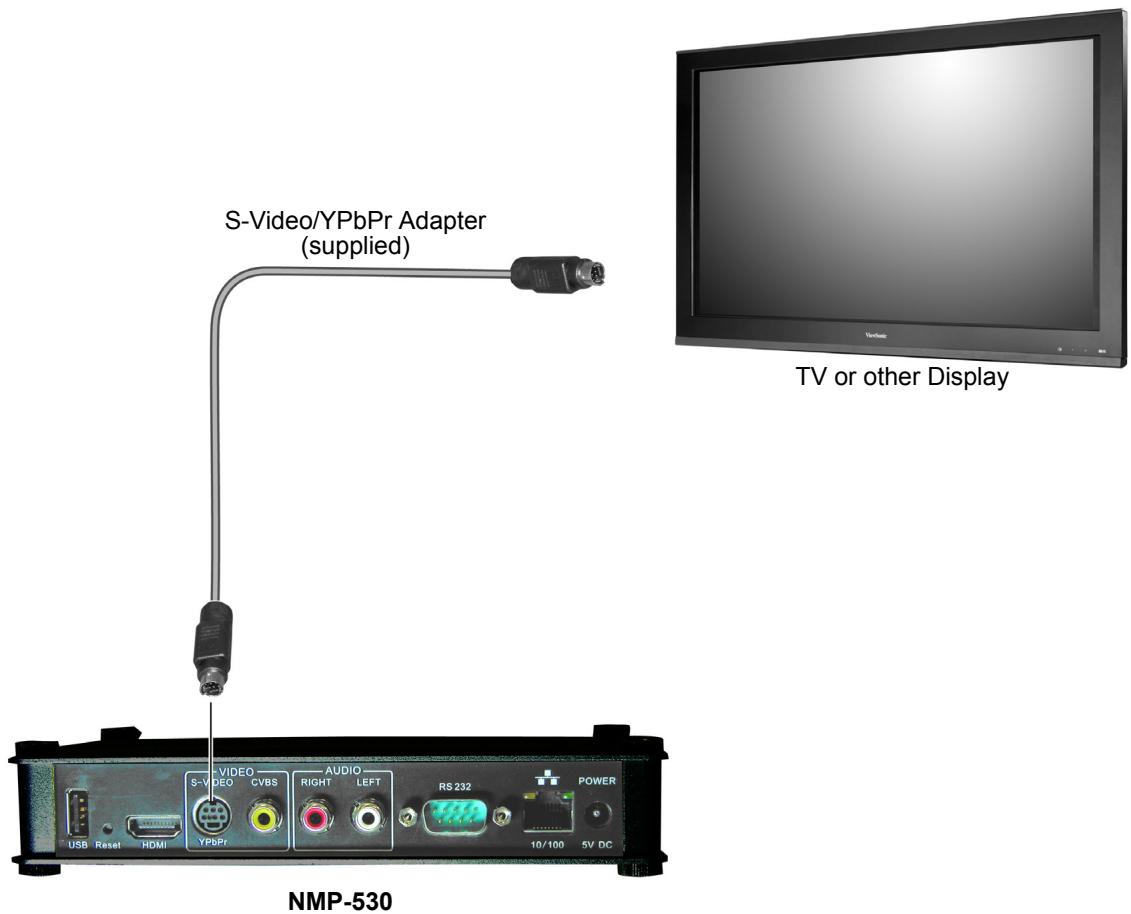
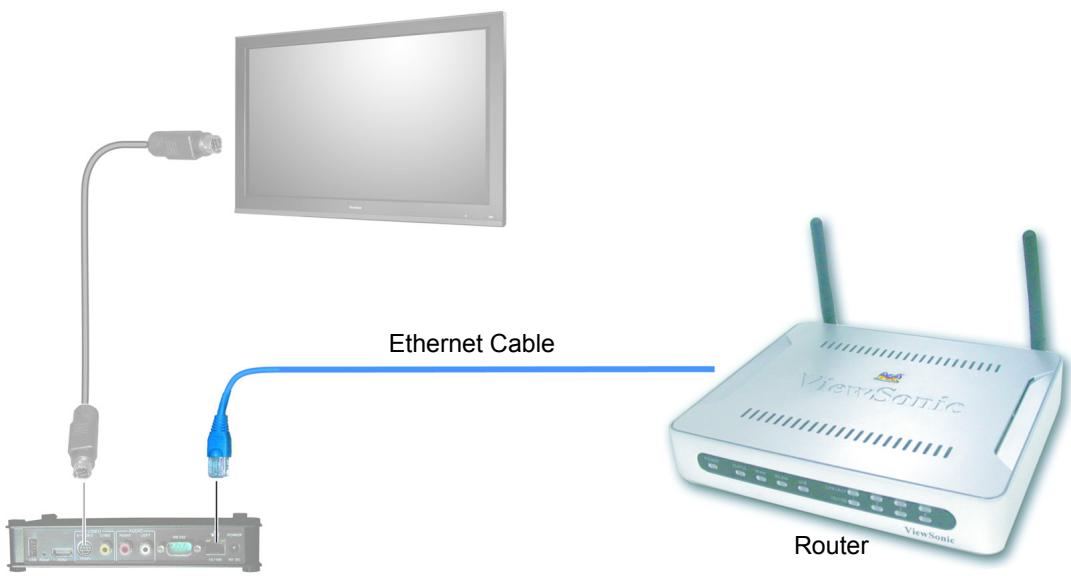
Back view
PC Requirements (for basic server)
- Operating System: Any Windows® or Linux OS capable of running a web server
- Processor: Intel® Pentium® 4, 1 GHz or higher (or compatible microprocessor)
Memory: 512 MB RAM or more
Network Interface: 100Base-T
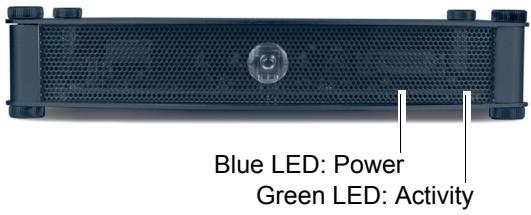
Front view
Setup
For the initial setup, you need the following:
A Router with DHCP services
- A TV or Display with Composite or S-Video input for initial setup. During the setup, you can change the NMP-530 output to the final display being used.
A PC with Internet Browser

CONNECT TO A DISPLAY
Connect the S-Video or Composite output of the NMP-530 to the corresponding input on your TV or other display.
Connect the supplied RJ-45 ethernet cable from the NMP-530 to a router with DHCP services. Refer to your router's user guide or contact your network administrator for assistance.
3 TURN POWER ON
Connect the supplied AC Adapter DC Plug into the NMP-530. Turn the TV or the Display power on making sure that the Input is on the proper setting. Plug the AC Adapter to a wall outlet.

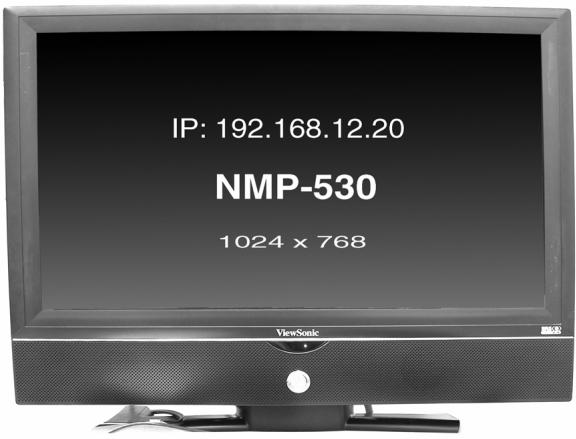
Wait a few seconds and the IP Address of the NMP-530 appears on the screen. Make a note of the IP information as this will be used to login to the NMP-530.

LOGIN
Open an Internet Browser, i.e., Internet Explorer on a PC in the same network. In the URL address field, type the IP address of the NMP-530 noted in the previous step > press Enter. The Login screen appears. Type the defaults Login: admin and Password: admin. For security purposes, we recommend that you change the Login and Password. For more information, see the Security section in this NMP-530 User Guide. After logging in successfully, the Network Configuration screen appears as shown in the next step. Note: The NMP-530 automatically logs you out after five (5) minutes of inactivity.

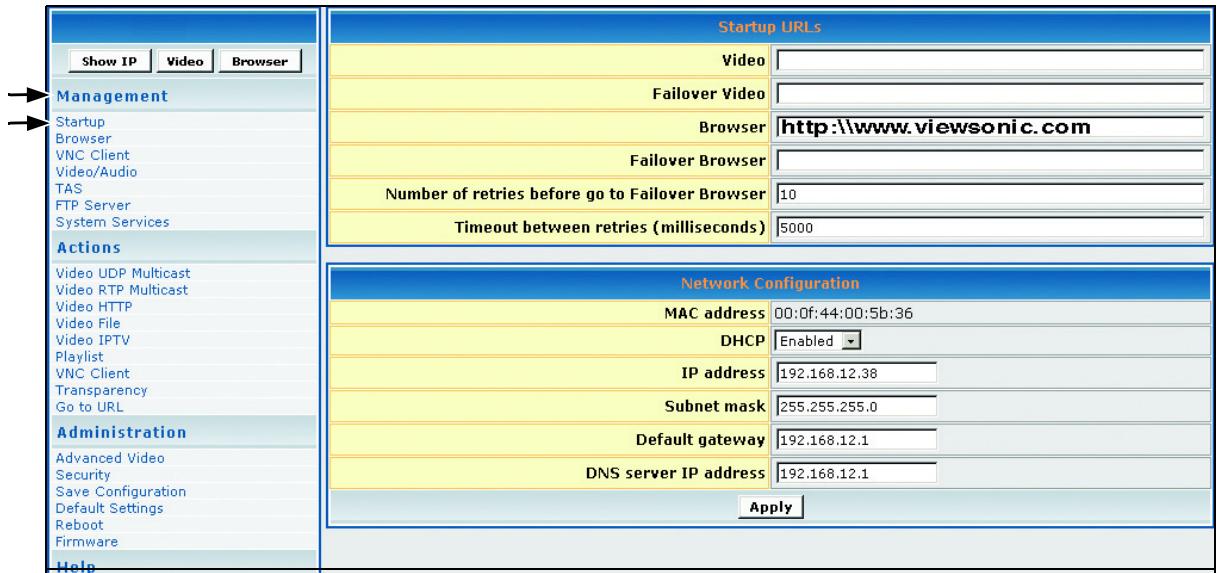
STARTURL
Under Management click Startup. The screen shown below appears. In the Video field, enter a valid URL. Or, in the Browser field, enter a valid web page. For more information, see the NMP-530 User Guide.
7
SETVIDEO OUTPUT OFNMP-530
By default, the video output is set to S-Video. But, you can choose any one of the following connections if you prefer, depending on the type of display input you want to use.
HDMI Connect an HDMI cable from the back of the NMP-530 to the HDMI interface on the back of the display.
S-Video: Default. Connect an S-Video cable from the S-Video interface on the back of the NMP-530 to the S-Video interface on the back of the display.
Component: Using the S-Video/YPbPr adapter.
Composite: Using an RCA cable.
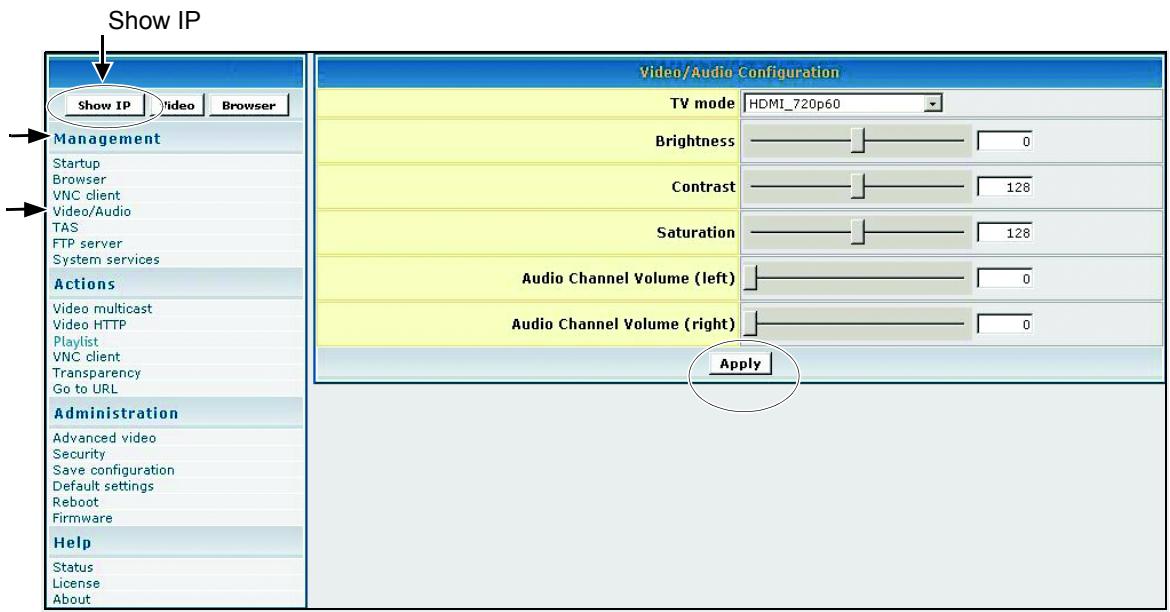
To change the output setting, login to the NMP-530, under Management click Video/Audio. The screen shown below appears. For more information, see the Video/Audio Configuration section in the NMP-530 User Guide.
-
In the TV Mode field, click the down arrow for the pull-down menu and select one of the resolutions required by your display (PDP or LCD).
-
If any changes were made to this screen, do the following:
-
To enable the changes, click Apply
- To save the changes, under Administration click Save Configuration > click Save.
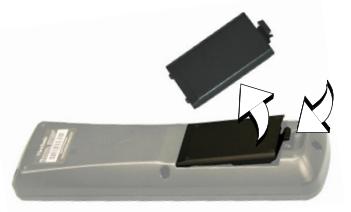
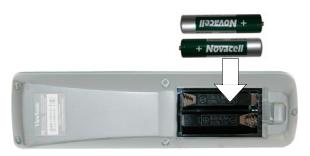
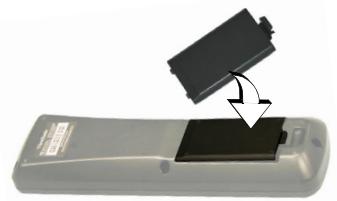
PUT BATTERIES IN REMOTE CONTROL
Remove the back cover from the remote control as shown below. Put two AA batteries in the battery compartment. Be sure to match the positive end of the battery with the positive end in the compartment. Put the cover back on the remote control.
For more information, see the NMP-530 User Guide. If you still need help, contact ViewSonic Customer Support as listed in the user guide or on our website.
Website: www.viewsonic.com
Model Name: NMP-530
Model Number: VS11681
Serial Number:
Document Number: NMP-530_QSG_ENG_REV1A 7-DEC-06
Copyright © ViewSonic Corporation, 2006. All rights reserved. ViewSonic Corporate names and trademarks are the property of their respective companies.
Brand : VIEWSONIC
Model : NMP-530
Category : Digital media player