
E5AK - Temperature Controller OMRON - Free user manual and instructions
Find the device manual for free E5AK OMRON in PDF.


| Product type | Digital temperature controller |
| Dimensions (mm) | 96 x 96 x 92 (depth) |
| Weight | Approx. 580 g (without options) |
| Power supply | AC 100-240 V~ (50/60 Hz) 16 VA max. or AC/DC 24 V~ 12 VA / 8 W |
| Sensor input | Thermocouple (K, J, T, E, L, U, N, R, S, B, W, PLII), Pt100/JPt100, current (4-20 mA, 0-20 mA), voltage (1-5 V, 0-5 V, 0-10 V) |
| Control outputs | Relay, SSR, NPN/PNP voltage, 4-20 mA current, 0-10 V voltage (modular) |
| Display | 2 7-segment displays, 10-segment bar graph, status LED |
| Main functions | Self-tuning PID (AT), fuzzy auto-tuning, ON/OFF control, heating/cooling, position-proportional, alarms, HBA, LBA, SP ramp, remote SP input, multi-SP (4), RS-232/422/485 communication |
| Maintenance and cleaning | Wipe with a dry cloth; do not use solvents. Periodically check terminal tightening. |
| Safety | IP66 (NEMA4) front panel protection; mandatory grounding; observe isolation distances; do not use in corrosive or explosive atmospheres. |
| Spare parts and repairability | Output units (E53-*), option units (communication, event input), extension unit, terminal covers (E53-COV08/09) |
| General information | Brand: OMRON / Model: E5AK / Category: Temperature controller / Year: 1996-2010 |
Frequently Asked Questions - E5AK OMRON
User questions about E5AK OMRON
0 question about this device. Answer the ones you know or ask your own.
Ask a new question about this device
Download the instructions for your Temperature Controller in PDF format for free! Find your manual E5AK - OMRON and take your electronic device back in hand. On this page are published all the documents necessary for the use of your device. E5AK by OMRON.
USER MANUAL E5AK OMRON
Thank you for your purchase of your E5AK, intelligent digital controller.
The E5AK allows the user to carry out the following:
- Select from many types of temperature and analog input (multiple input)
- Support position-proportional control (position-proportional type controllers only).
- Select output functions such as control output or alarm (output assignment)
- Use the HBA (heater burnout alarm) function (standard type controllers only).
- Use four setpoints (multi-SP function)
- Use remote SP input.
- Monitor the control loop by LBA (Loop Break Alarm)
- Use the communications function
- Calibrate input or transfer output
- It also features a watertight construction (NEMA4: equivalent to IP66)
This User's Manual describes how to use the E5AK compact, high-function digital controller.
Before using your E5AK, thoroughly read and understand this manual in order to ensure correct use.
About this manual
OMRON, 1996
(1) All rights reserved. No part of this publication may be reproduced, stored in a retrieval system, or transmitted, in any form, or by any means, mechanical, electronic, photocopying, recording, recording, or otherwise, without the prior written permission of OMRON.
(2) No patent liability is assumed with respect to the use of the information contained herein.
(3) Moreover, because OMRON is constantly striving to improve its high-quality products, the information in this manual is subject to change without notice. Every precaution has been taken in the preparation of this manual. Nevertheless, OMRON assumes no responsibility for errors or omissions. Neither is any liability assumed for damages resulting from the use of the information contained in this publication.
■ Meanings of Abbreviations
Sometimes the following abbreviations are used in parameter names, figures and in text explanations. These abbreviations mean the following.
| Abbreviation | Term |
| PV | Process value |
| SP | Set point |
| RSP | Remote set point |
| LSP | Local set point |
| LBA | Loop break alarm |
| HB | Heater burnout |
| AT | Auto-tuning |
| ST | Self-tuning |
■ How to Read Display Symbols
The following tables show the correspondence between the symbols displayed on the displays and alphabet characters.
| A | B | C | D | E | F | G | H | I | J | K | L | M |
| n | a | p | q | r | s | t | u | u | y | u | y | z |
| N | O | P | Q | R | S | T | U | V | W | X | Y | Z |
■“Reference” mark
This mark indicates that extra, useful information follows, such as supplementary explanations and how to apply functions.
Notice:
OMRON products are manufactured for use according to proper procedures by a qualified operator and only for the purposes described in this manual.
The following conventions are used to indicate and classify precautions in this manual. Always heed the information provided with them. Failure to heed precautions can result in injury to people or damage to the product.
DANGER
Indicates information that, if not heeded, is likely to result in loss of life or serious injury.
WARNING
Indicates information that, if not heeded, could possibly result in loss of life or serious injury.
Caution
Indicates information that, if not heeded, could result in relatively serious or minor injury, damage to the product, or faulty operation.
■ How this Manual is Organized
| Purpose | Title | Description |
| · Learning about the general features of the E5AK | Chapter 1 Introduction | This chapter describes the features of the E5AK, names of parts, and typical functions. |
| · Setting up the E5AK | Chapter 2 Preparations | This chapter describes the operations that you must carry out (e.g. installation, wiring and switch settings) before you can use the E5AK. |
| · Basic E5AK operations | Chapter 3 Basic Operation Chapter 5 Parameters | These chapters describe how to use the front panel keys and how to view the display when setting the parameters of the major functions for the E5AK. |
| · Applied E5AK operations | Chapter 4 Applied Operation Chapter 5 Parameters | These chapters describe the important functions of the E5AK and how to use the parameters for making full use of the E5AK. |
| · Using a Position-proportional Type Controller | Chapter 4 Applied Operation/4.1 Selecting the Control Method | This chapter describes the functions related specifically to position-proportional type controllers. |
| · Communications with a host computer | Chapter 6 Using the Communications Function | This chapter mainly describes the communications commands, and gives program examples. |
| · Calibration | Chapter 7 Calibration | This chapter describes how the user should calibrate the E5AK. |
| · Troubleshooting | Chapter 8 Troubleshooting | This chapter describes what to do if any problems occur. |
- If you remove the controller from its case, never touch nor apply shock to the electronic parts inside.
- Do not cover the area around the E5AK. (Ensure sufficient space around the controller to allow heat radiation.)
- Use a voltage (AC100-240V~ or AC/DC24V~ at 50 to 60 Hz). At power ON, the prescribed voltage level must be attained within two seconds.
- When wiring input or output lines to your controller, keep the following points in mind to reduce the influence from inductive noise:
- Allow adequate space between the high voltage/current power lines and the input/output lines.
- Avoid parallel or common wiring with high voltage sources and power lines carrying large currents.
- Using separating pipes, duct, and shielded line is also useful in protecting the controller, and its lines form inductive noise.
- Allow as much space as possible between the controller and devices that generate a powerful, high frequency (high-frequency welders, high-frequency sewing machines, and so forth) or surge. These devices may cause malfunctions.
- If there is a large power-generating peripheral device and any of its lines, attach a surge suppressor or noise filter to the device to stop the noise affecting the controller system. In particular, motors, transformers, solenoids and magnetic coils have an inductance component, and therefore can generate very strong noises.
- When mounting a noise filter, be sure to first check the filter's voltage and current capacity, then mount the filter as close as possible to the controller.
- Do not use the controller in places where icing, condensation, dust, corrosive gas (especially sulfurized gas or ammonia gas), shock, vibration, splashing liquid, or oil atmosphere occur. Also, avoid places where the controller can be subjected to intense heat radiation (like from a furnace) or sudden temperature changes.
- Ambient temperature must be kept between -10^ to 55^ . Ambient humidity must be kept between 35% RH to 85% RH (with no icing or condensation). If the controller is installed inside a control board, the ambient temperature must be kept under 55^ , including the temperature around the controller. If the controller is subjected to heat radiation, use a fan to cool the surface of the controller to under 55^ .
- Store the controller at an ambient temperature between -25^ to 65^ . The ambient humidity must be between 35% RH to 85% RH (with no icing or condensation).
- Never place heavy objects on, or apply pressure to the controller that may cause it to deform and deterioration during use or storage.
- Avoid using the controller in places near a radio, television set, or wireless installation. These devices can cause radio disturbances which adversely affect the performance of the controller.
Preface
Conventions Used in This Manual II
Pay Attention to the Following when Installing this Controller . V
CHAPTER 1 INTRODUCTION 1-1
This chapter introduces the E5AK. First-time users should read this chapter without fail.
For details on how to use the controller and parameter settings, see Chapters 2 onwards.
1.1 Names of parts 1-2
1.2 Input and Output 1-4
1.3 Parameters and Menus 1-7
1.4 About the Communications Function 1-10
1.5 About Calibration 1-11
CHAPTER 2 PREPARATIONS 2-1
This chapter describes the operations you should carry out before turning the E5AK ON.
2.1 Setting up 2-2
2.2 Installation 2-5
2.3 Wiring Terminals 2-8
This chapter describes an actual example for understanding the basic operation of the E5AK.
3.1 Convention Used in this Chapter 3-2
3.2 Setting Input Specifications 3-4
3.3 Setting Output Specifications 3-6
3.4 Setting Alarm Type 3-9
3.5 Protect Mode 3-12
3.6 Starting and Stopping Operation 3-13
3.7 Adjusting Control Operation 3-14
CHAPTER 4 APPLIED OPERATION 4-1
This chapter describes each of the parameters required for making full use of the features of the E5AK. Read this chapter while referring to the parameter descriptions in chapter 5.
4.1 Selecting the Control Method 4-2
4.2 Operating Condition Restrictions 4-5
4.3 How to Use Event Input 4-8
4.4 How to Use the Remote SP 4-11
4.5 How to Use the Heater Burnout Alarm 4-13
4.6 LBA 4-15
4.7 How to Use Transfer Output 4-17
CHAPTER 5 PARAMETERS 5-1
This chapter describes the parameters of the E5AK. Use this chapter as a reference guide.
Protect Mode 5-3
Manual Mode 5-5
Level 0 Mode 5-6
Level 1 Mode 5-10
Level 2 Mode 5-18
Setup Mode 5-25
Expansion Mode 5-32
Option Mode 5-37
Calibration Mode 5-46
CHAPTER 6 USING THE COMMUNICATIONS FUNCTION . . . 6-1
This chapter mainly describes communications with a host computer and communications commands.
6.1 Outline of the Communications Function 6-2
6.2 Preparing for Communications 6-3
6.3 Command Configuration 6-5
6.4Commands and Responses 6-6
6.5 How to Read Communications Error Information 6-12
6.6 Program Example 6-14
CHAPTER 7 CALIBRATION 7-1
This chapter describes procedures for each calibration operation. Read this chapter only when the controller must be calibrated.
7.1 Structure of Parameters 7-2
7.2 Calibrating Thermocouple 7-4
7.3 Calibrating Platinum Resistance Thermometer 7-7
7.4 Calibrating Current Input 7-9
7.5 Calibrating Voltage Input 7-10
7.6 Checking Indication Accuracy 7-12
CHAPTER 8 TROUBLESHOOTING 8-1
This chapter describes how to find out and remedy the cause if the E5AK does not function properly.
8.1 Initial Checks 8-2
8.2 How to Use the Error Display 8-3
8.3 How to Use Error Output 8-5
8.4 Checking Operation Restrictions 8-6
APPENDIX
SPECIFICATIONS A-2
ABOUT CURRENT TRANSFORMER (CT) ... A-5
CONTROL BLOCK DIAGRAM A-6
SETTING LIST A-8
MODEL LIST A-11
PARAMETER OPERATIONS LIST A-12
FUZZY SELF-TUNING A-14
X FORMAT A-17
ASCII CODE LIST A-20
INDEX
REVISION HISTORY
CHAPTER1
INTRODUCTION
This chapter introduces the E5AK. First-time users should read this chapter without fail.
For details on how to use the controller and parameter settings, see Chapters 2 onwards.
1.1 Names of parts 1-2
Main parts 1-2
Front panel 1-2
About the displays 1-3
How to use keys 1-3
1.2 Input and Output 1-4
Input 1-4
Output 1-5
1.3 Parameters and Menus 1-7
Parameter types 1-7
Selecting modes 1-8
Selecting parameters 1-9
Fixing settings 1-9
1.4 About the Communications Function 1-10
1.5 About Calibration 1-11
1.1 Names of parts
Main parts
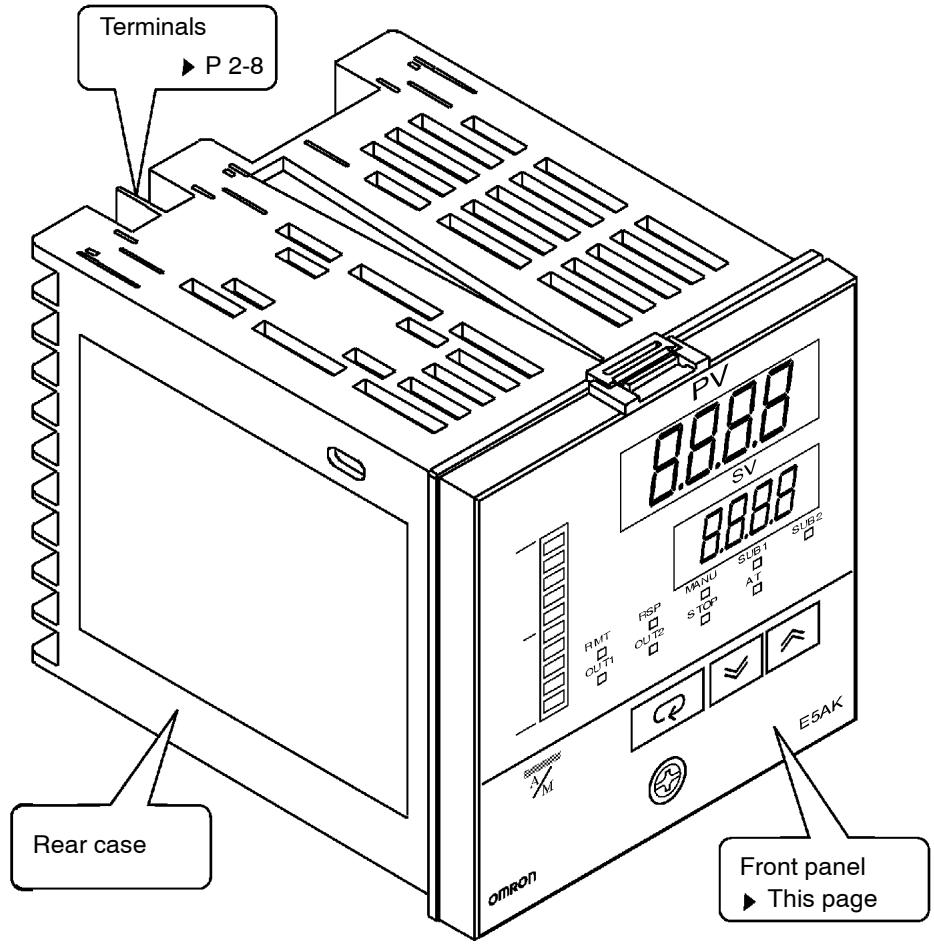
■ Front panel
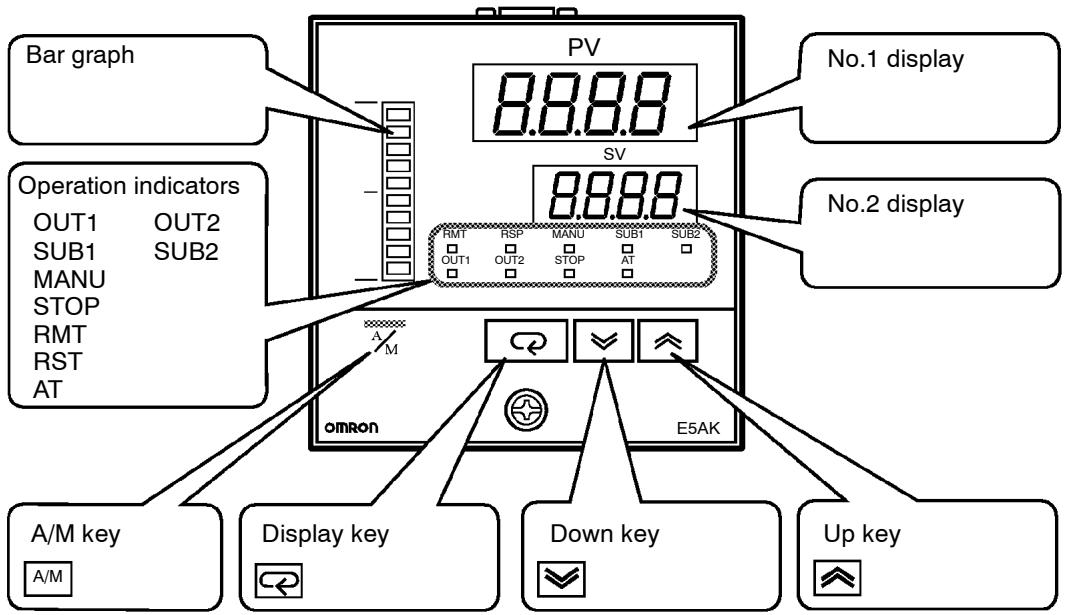
About the displays
No.1 display
Displays the process value or parameter symbols.
No.2 display
Displays the set point, manipulated variable or parameter settings.
Operation indicators
- OUT1 : Lit when the pulse output function assigned to "control output 1" is ON.
- OUT2 : Lit when the pulse output function assigned to "control output 2" is ON.
- SUB1 : Lit when the output function assigned to "auxiliary output 1" is ON.
- SUB2 : Lit when the output function assigned to “auxiliary output 2” is ON.
- MANU : Lit in the manual operation mode.
- STOP : Lit when operation has stopped.
RMT : Lit during remote operation.
RSP : Lit during remote SP operation. - AT : Flashes during auto-tuning.
Bar graph
On a standard type controller (E5AK-AA2), this bar graph indicates the manipulated variable (heat) in 10% increments per single segment. On a position-proportional type controller (E5AK-PRR2), this bar graph indicates the valve opening in 10% increments per single segment.
How to use keys
The following describes basic key operations.
A/M key
Each press of this key switches between the auto and manual operations.
key
The functions of this key change according to how long it is pressed. If the key is pressed for less than one second, the parameters are switched. If the key is pressed for one second or more, the menu display appears. In key operations from here on, "press the key" refers to pressing the key for less than one second.
For details on parameter switching and menu display items, see page 1-8.
key
Each press of the key increments or advances the values or settings on the No.2 display, while each press of the key decrements or returns the values or settings on the No.2 display.
Functions vary, for example, when the A/M key is held down simultaneously with the display key, or a key is held down continuously. For details, see page 1-8. Also, chapters 3 and 4 describe examples using various key combinations.
1.2 Input and Output
■ Input
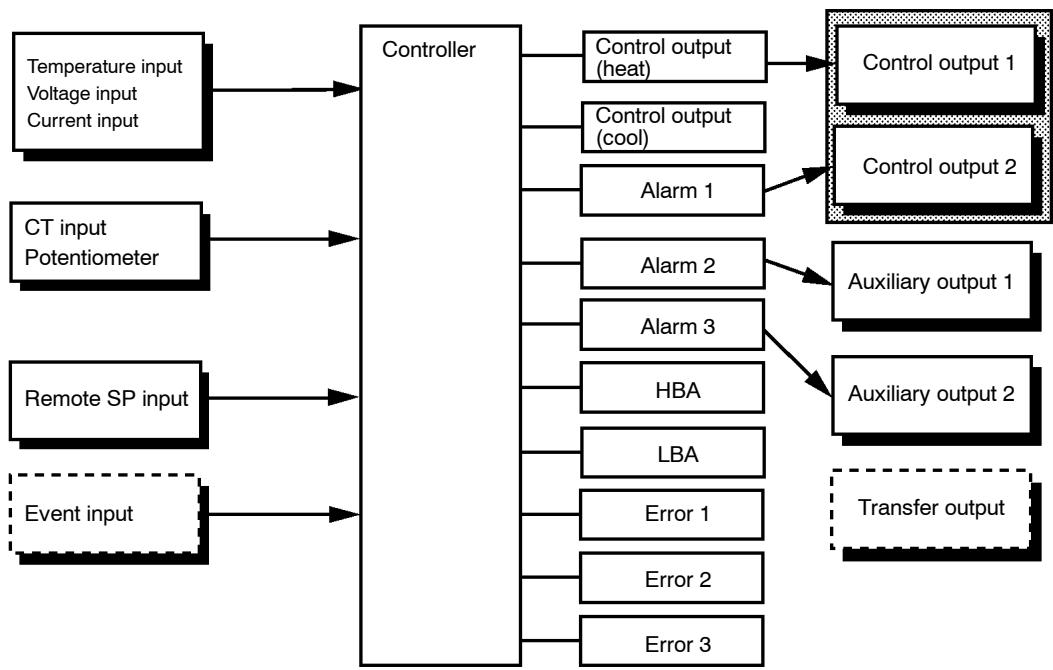
The E5AK supports following inputs: temperature input, current input, voltage input, CT input/Potentiometer, remote SP input and event input.
- Temperature input/Voltage input/Current input
- Only one of temperature input, voltage input and current input can be selected and connected to the controller. The above figure shows temperature input connected to the controller.
- The following input sensors can be connected for temperature input: Thermocouple: K, J, T, E, L, U, N, R, S, B, W, PLII Platinum resistance thermometer: JPt100, Pt100
- The following currents can be connected for current input: 4 to 20mA , 0 to 20mA
- The following voltages can be connected for voltage input: 1 to 5 VDC, 0 to 5 VDC, 0 to 10 VDC
CT input/Potentiometer
- Connect CT input when using the HBA (heater burnout alarm) function on a standard type controller (E5AK-AA2).
- Connect the potentiometer when monitoring the valve opening on a position-proportional type controller (E5AK-PRR2).
Remote SP input
When the remote SP function is enabled, inputs within the range 4 to 20mA are used as the remote SP.
Event input
When using event input, add on the input unit (E53-CKB).
You can select from the following five event inputs:
Multi-SP
Run/Stop
Remote/Local
Auto/Manual
SP mode
Output
The E5AK supports the following five outputs.
Control output 1
Control output 2
Auxiliary output 1
Auxiliary output2
Transfer output
When using control outputs 1 and 2, set the output unit (sold separately). Nine output units are available to suit the output circuit configuration.
When using transfer output, add on the communication unit (E53-AKF).
Note: The output functions of the E5AK do not operate for five seconds after the E5AK is turned ON.
Output assignments
The E5AK supports the following ten output functions.
Control output (heat)
Control output (cool)
Alarms 1 to 3
HBA
LBA
Error 1 (input error)
Error 2 (A/D converter error)
Error 3 (RSP input error)
Assign these output functions to control output 1, control output 2, auxiliary output1, and auxiliary output2.
However, note that as control output 1 is used as the open output and control output 2 is used as close output on a position-proportional type controller (E5AK-PRR2), control outputs 1 and 2 cannot be used as assignment destinations. Also, of the output functions, control output (heat), control output (cool), HBA and LBA are disabled.
On a standard type controller, there are restrictions on how assignment destinations (control output 1, control output2, auxiliary output1, and auxiliary output2) can be used. For details, see 3.3 Setting Output Specifications.
In the example on the previous page, "control output (heat)" is assigned to "control output 1", "alarm 1" is assigned to "control output 2", and "alarm 2" is assigned to "auxiliary output 1". Accordingly, the configuration is such that heating control output is connected to control output 1, and alarm output is connected to control output 2 and auxiliary output 1.
Control outputs 1 and 2 are used depending on the differences in control method as follows.
| Control Method | Model | Control Output 1/ Control Output 2 |
| Standard control | E5AK-AA2 AC100-240 E5AK-AA2 AC/DC24 | Control output (heat) / Alarm, etc., |
| Heating and cooling control | E5AK-AA2 AC100-240 E5AK-AA2 AC/DC24 | Control output (heat) / Control output (cool) |
| Position-proportional control | E5AK-PRR2 AC100-240 E5AK-PRR2 AC/DC24 | Open/Close |
Transfer output
The E5AK supports the following six transfer outputs.
Set point
Set point during SP ramp
Process value
Heating side manipulated variable
Cooling side manipulated variable
Valve opening
However, note that heating/cooling side manipulated variables can be output only standard type controllers, and valve opening can be output on position-proportional type controllers
These transfer outputs can be output after being scaled. Setting of an upper limit value smaller than the lower limit value is allowed, so reverse scaling can also be carried out.
1.3 Parameters and Menus
Parameter types
E5AK parameters are distributed between the following nine modes.
Protect mode
Manual mode
Level 0 mode
Level 1 mode
Level 2 mode
Setup mode
Expansion mode
Option mode
Calibration mode
The settings of parameters in each of seven modes (excluding the protect mode and manual mode) can be checked and modified by selection on the menu display.
Protect mode
This mode is used to limit use of the menu and A/M keys. The protect function is for preventing unwanted modification of parameters and switching between the auto and manual operation.
- Manual mode
In this mode, the controller can be switched manual operation. The manipulated variable can be manipulated manually only in this mode.
Level 0 mode
Set the controller to this mode during normal operation. In this mode, you may change the set point during operation, and stop and start operation. You can also monitor (not change) the process value, ramp SP and manipulated variable.
Level 1 mode
This is the main mode for adjusting control. In this mode, you can execute AT (auto-tuning), and set alarm values, the control period and PID parameters.
Level 2 mode
This is the auxiliary mode for adjusting control. In this mode, you can set the parameters for limiting the manipulated variable, switch between the remote and local modes, switch between the SP modes, and set the loop break alarm (LBA), alarm hysteresis and the digital filter value of inputs.
Setup mode
This is the mode for setting the basic specifications. In this mode, you can set parameters that must be checked or set before operation such as the input type, scaling, output assignments and direct/reverse operation.
- Expansion mode
This is the mode for setting expanded functions. In this mode, you can set ST (self-tuning), SP setting limiter, selection of advanced PID or ON/OFF control, specification of the standby sequence resetting method, time for automatic return to the monitoring display.
Option mode
This is the mode for setting option functions. You can select this mode only when the option unit is set in the controller. In this mode, you can
set the communications conditions, transfer output and event input parameters to match the type of option unit set in the controller. Heater burnout latch function, position-proportional travel time and remote SP scaling parameters are also located in this mode.
Calibration mode
This mode is provided so that the user can calibrate inputs and transfer output.
When calibrating input, the selected input type is calibrated. Whereas, transfer output can be calibrated only when the communications unit (E53-AKF) is set in the controller.
Selecting modes
The following diagram shows the order in which modes are selected.
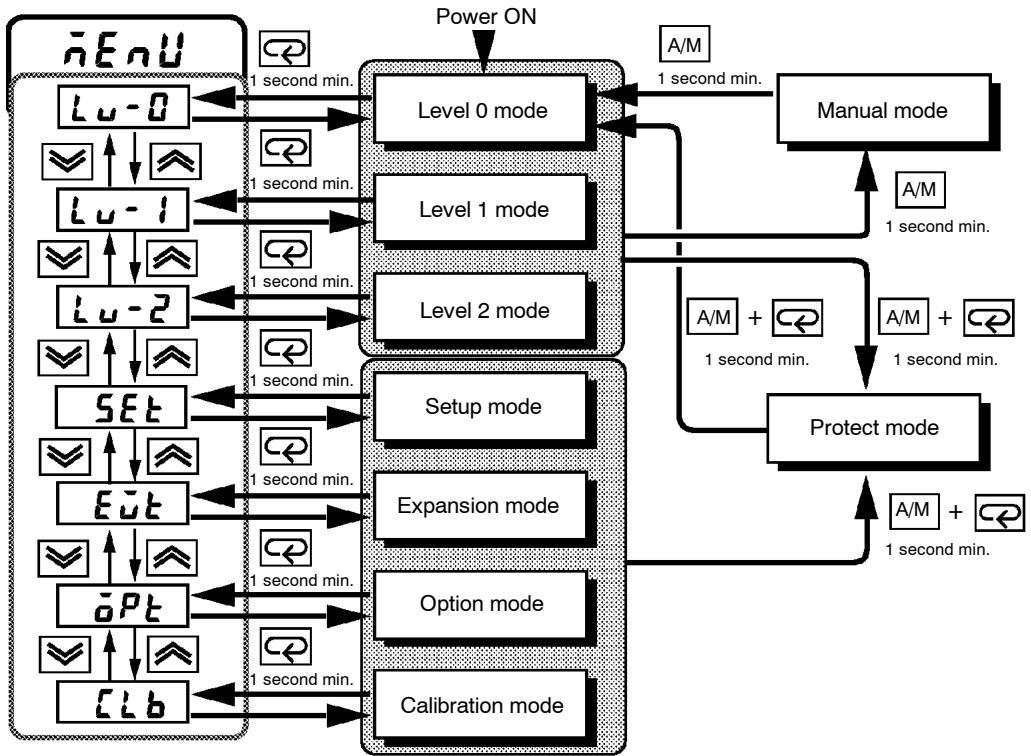
- Menu display
- To select the menu display in any of the above modes (excluding the protect mode and manual mode), press the key for 1 second minimum. If you select the desired mode using the or keys and press the key, the top parameter in the specified mode is displayed.
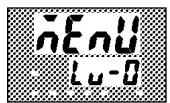
-
When you have selected the menu display, the previous mode is selected. For example, if you selected the menu display while in the level 0 mode, the No.2 display changes to [L · U - C] as shown on the left.
-
Protected modes cannot be selected. Also, the menu display does not appear when modes are protected up to the level 1 mode.
Level 0 to 2 modes
-
If you select [L - 0][L - t] or [L - 2] in the menu display, the level 0, level 1 and level 2 modes, respectively, are selected.
-
These modes are selected with control still continuing.
Setup mode
- Expansion mode
- Option mode
Calibration mode
- If you select [SET][Eut][aPt] or [Lb] in the menu display, the setup, expansion, option and calibration modes, respectively, are selected.
- When these modes are selected, the control is reset. So, control outputs and auxiliary output are turned OFF. When another mode is selected while in these modes, reset is canceled.
Protect mode
- To set the controller to the protect mode or to return to the level 0 mode from the protect mode, press the A/M key and key for 1 second minimum simultaneously.
Manual mode
- To set the controller to the manual mode, press the A/M key for 1 second minimum in the level 0 to 2 mode. To return to the level 0 mode from the manual mode, press the A/M key for 1 second minimum.
Selecting parameters
- When not in the manual mode, each press of the key switches the parameter.
- If you press the key when at the final parameter, the display returns to the first parameter.

Fixing settings
- When you have changed a parameter setting, specify the parameter using the or keys, and either leave the setting for at least two seconds or press the key. This fixes the setting.
- When another mode is selected, the content of the parameters before the mode was selected is fixed.
- When turning the power OFF, you must first fix the settings and parameter contents (by pressing the key or selecting another mode). The settings and parameter contents are sometimes not changed by merely pressing the or keys.
1.4 About the Communications Function
The E5AK can be provided with a communications function that allows you to check and set controller parameters from a host computer. If the communications function is required, add on the communications unit. For details on the communications function, refer to Chapter 6.
RS-232C
When using the communications function on the RS-232C interface, add on the communications unit (E53-AK01).
RS-422
When using the communications function on the RS-422 interface, add on the communications unit (E53-AK02).
RS-485
When using the communications function on the RS-485 interface, add on the communications unit (E53-AK03).
1.5 About Calibration
The E5AK controller is calibrated before shipment from the factory. So, the user need not calibrate the E5AK controller during regular use.
However, if the E5AK controller must be calibrated by the user, use the parameters provided for user to calibrate temperature input, analog input (voltage, current) and transfer output.
Also, note that calibration data is updated to the latest value each time the E5AK controller is calibrated. Calibration data set before shipment from the factory cannot be returned to after calibration by the user.
Calibrating inputs
The input type selected in the parameter is the item to be calibrated. The E5AK is provided with the following four calibration parameters.
Thermocouple
- Platinum resistance thermometer
- Current input
Voltage input
Two parameters are provided for thermocouple and voltage input.
Calibrating transfer output
Transfer output can be calibrated when the communications unit (E53-AKF) is added on.
Registering calibration data
When calibrating each item, the calibration data is temporarily registered. This data can be registered as final calibration data only when all items have been newly calibrated. So, all items must be temporarily registered when calibrating the E5AK controller.
When registering data, information regarding whether or not calibration has been carried out is also registered.
To calibrate these items, the user must prepare separate measuring devices and equipment. For details on handling these measuring devices and equipment, refer to the respective manuals.
For details, see Chapter 7 Calibration.
CHAPTER2
PREPARATIONS
This chapter describes the operations you should carry out before turning the E5AK ON.
2.1 Setting up 2-2
Draw-out 2-2
Setting up the output unit 2-3
Setting up the option unit 2-4
2.2 Installation 2-5
Dimensions 2-5
Panelcutout 2-5
Mounting 2-6
2.3 Wiring Terminals 2-8
Terminal arrangement 2-8
Precautions when wiring 2-8
Wiring 2-8
2.1 Setting up
Draw-out
- On a standard type controller, set up the output units for control outputs 1 and 2 before mounting the controller.
- On a position-proportional type controller, the relay output unit is already set. So, this setup operation unnecessary. (Do not replace with other output units.)
- When setting up the output units, draw out the internal mechanism from the housing and insert the output units into the sockets for control outputs 1 and 2.
When drawing out the internal mechanism from the housing, prepare a phillips screwdriver matched to the size of the screw on the lower part of the front panel.
(1) Press down on the hook on the top of the front panel and turn the phillips screwdriver to the left to loosen the screw on the lower part of the front panel.
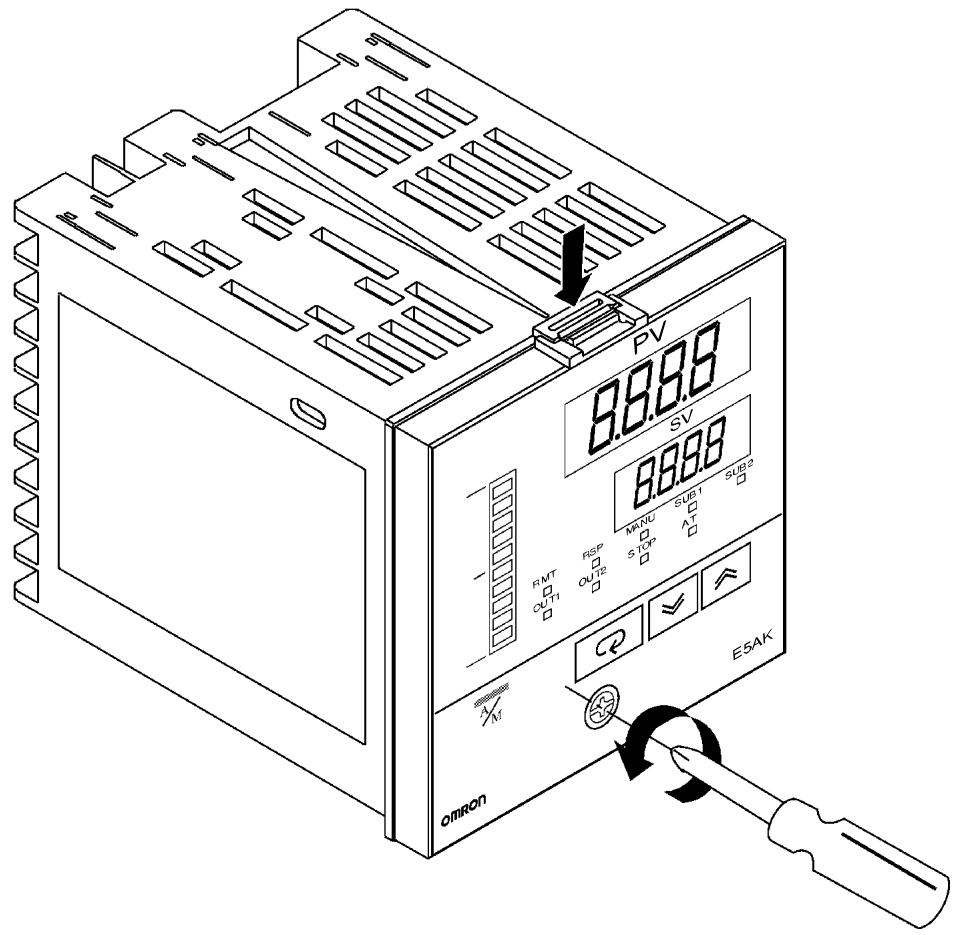
(2) Draw out the internal mechanism towards you holding both sides of the front panel.
Setting up the output unit
Before setup
- Check the type of the output unit you are about to set up.
- For details on types of output unit and main specifications, see page 2-9.
Procedure
(1) Check the positions of the sockets you are about to insert the output units into as shown in the following diagram.
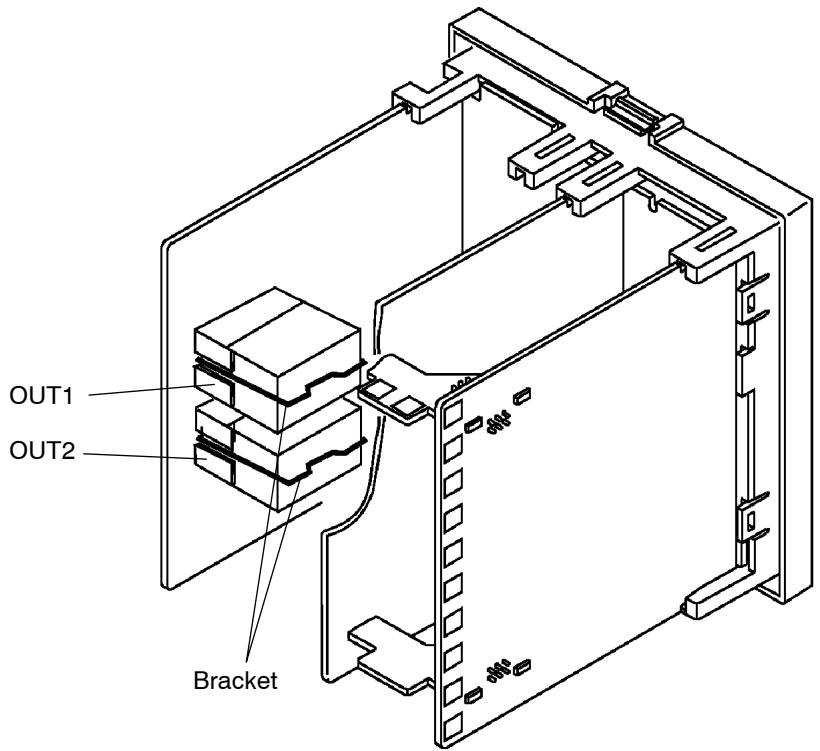
(2) Insert the output unit for control output 1 into the socket "OUT1" and the output unit for control output 2 into the socket "OUT2".
(3) Fasten the output units with the bracket (accessory).
Setting up the option unit
Before setup
- Check the type of the option unit you are about to set up.
- For details on types of option unit and main specifications, see Appendix, Model List (page A-11) and Appendix, Option Unit Ratings and Characteristics (page A-4).
- For details on the relationship between units and terminals, see page 2-8.
Procedure
(1) Remove the power board and option boards in the order shown in the following diagram.
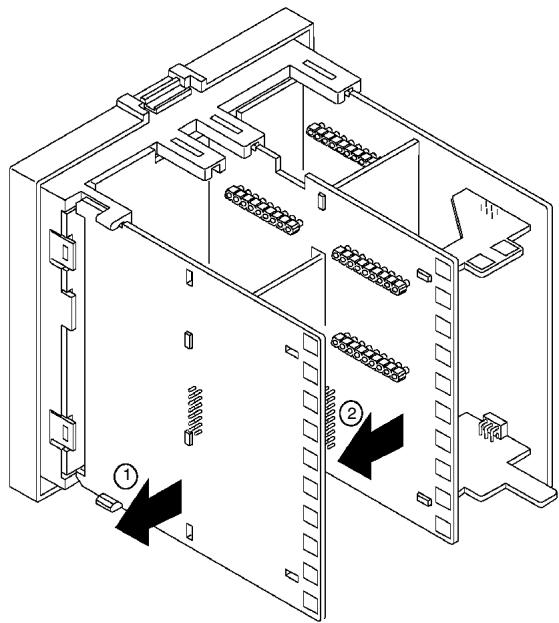
(2) Insert the option units into the sockets for options 1 to 3. The following diagram shows the relationship between option units and mounting positions.
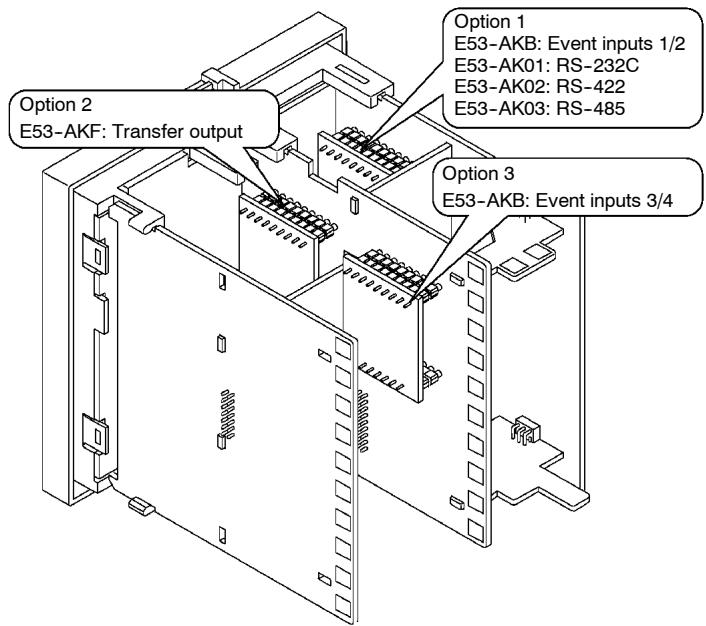
(3) Mount the option boards and the power board in the order shown.
2.2 Installation
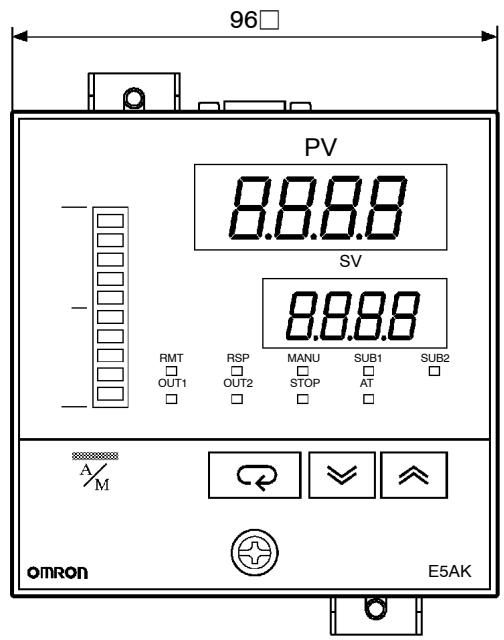
Dimensions
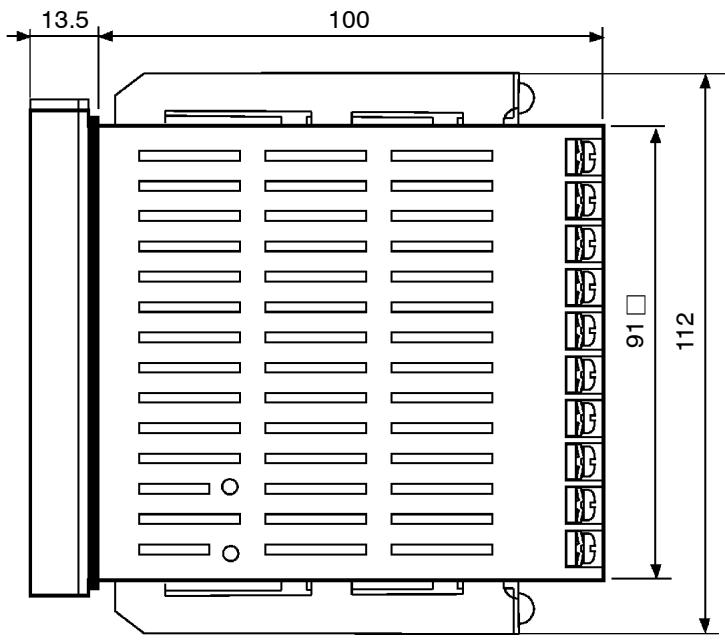
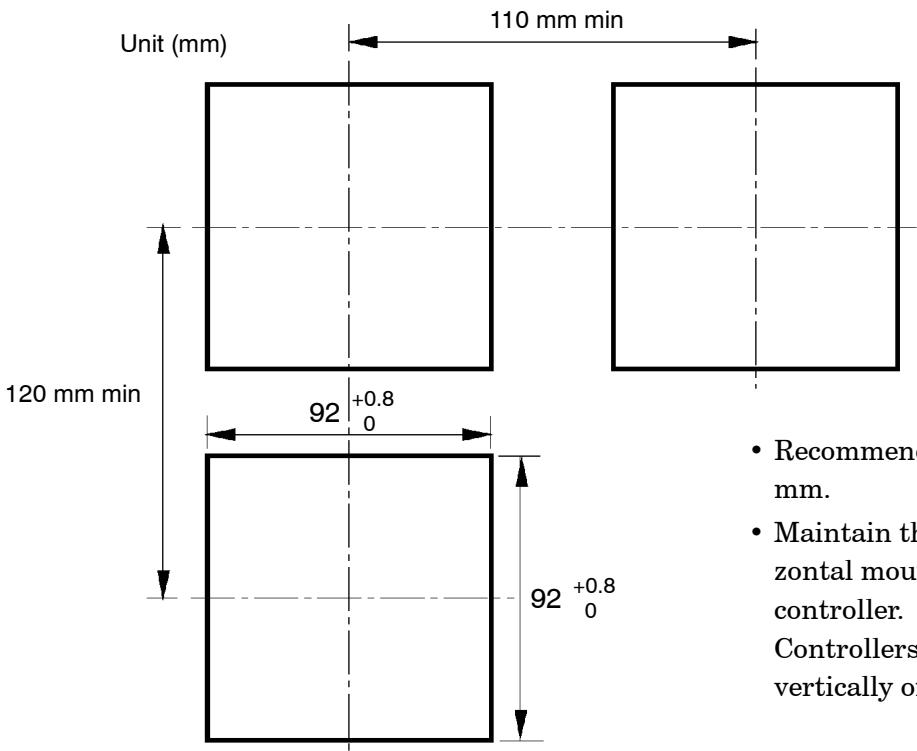
Panel cutout
- Recommended panel thickness is 1 to 8 mm.
- Maintain the specified vertical and horizontal mounting space between each controller.
Controllers must not be closely mounted vertically or horizontally.
Mounting
(1) Insert the E5AK controller into the mounting hole in the panel.
(2) Fit the mounting bracket (accessory) into the fixing slots on the top and bottom of the rear case.
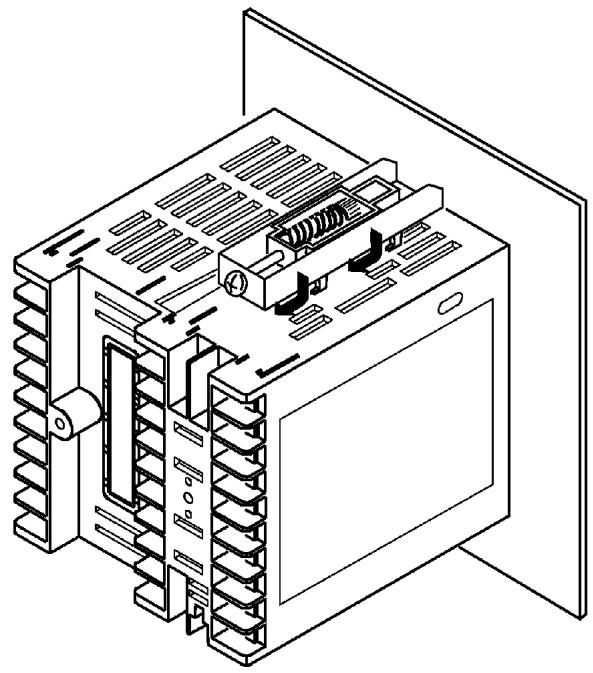
(3) Tighten the mounting bracket screws alternately a little at a time until the ratchet start to slide.
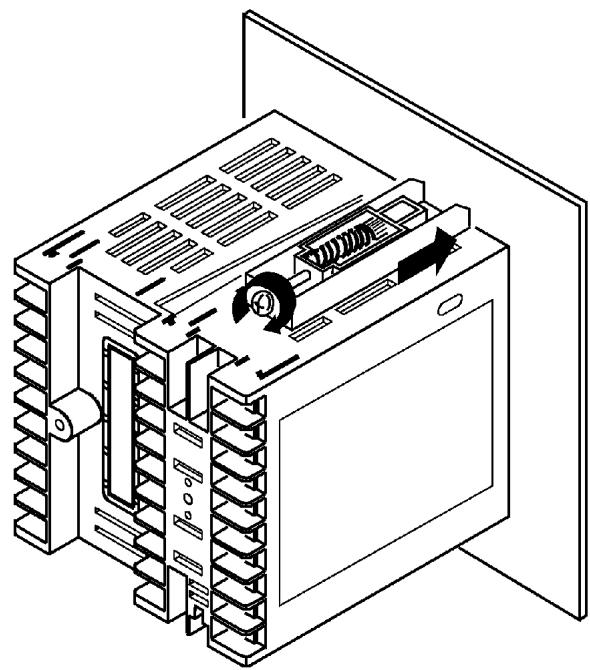
- Setting up the terminal covers
- Fasten the terminal covers (E53-COV0809) to protect terminals.
- E5AK- 2-500 controller is provided with terminal covers.
- Use E53-COV09 for terminals 1 to 10, and E53-COV08 for terminals 11 to 33.
- Fasten the terminal covers as follows by using the snap pins.
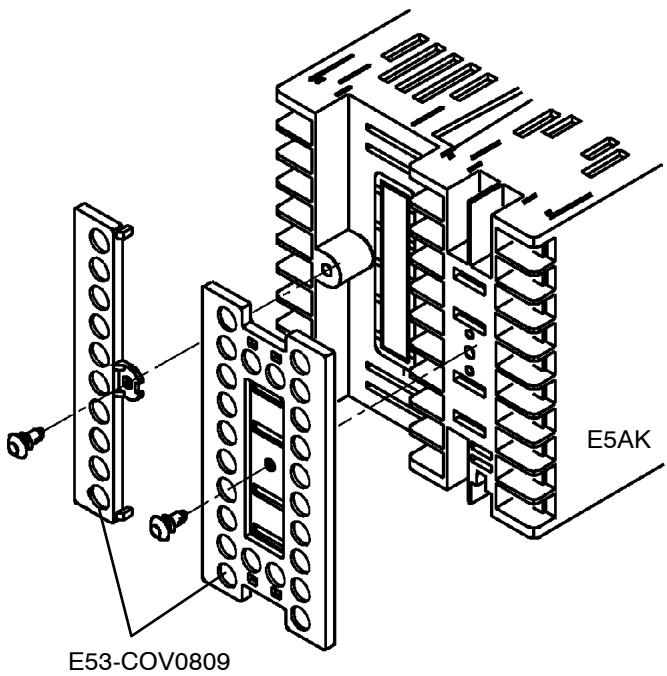
- To remove the terminal covers, pull the edges of the snap pins.
2.3 Wiring Terminals
Terminal arrangement
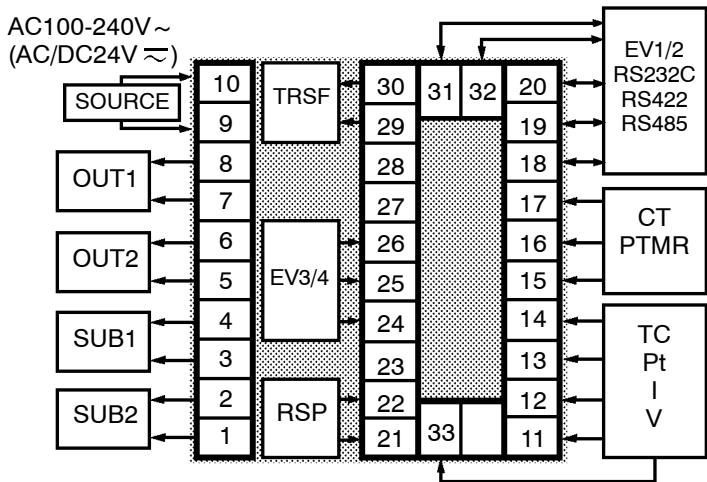
TRSF : Transfer output
EV1 to 4 : Event inputs
PTMR : Potentiometer
Precautions when wiring
- Use ducts to separate input leads and power lines in order to protect the controller and its lines from external noise.
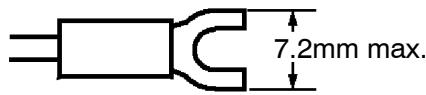
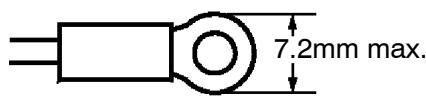
- We recommend using solderless terminals when wiring the controller.
- Tighten the terminal screws using a torque no greater than 0.78 N · m , or 8 kgf · cm max. Take care not to tighten the terminal screws too tightly.
- Use the following type of solderless terminals for M3.5 screws.
■ Wiring
In the following wiring diagrams, the left side of the terminal Nos. indicates the inside of the controller
Power supply
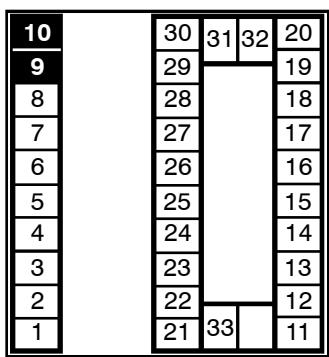
- Input power to terminal Nos. 9 and 10. Power specifications are as follows:
$$ \mathrm {A C 1 0 0 - 2 4 0 V \sim , 5 0 / 6 0 H z , 1 6 V A} $$
$$ (\mathrm {A C} / \mathrm {D C} 2 4 \mathrm {V} \approx , 5 0 / 6 0 \mathrm {H z}, 1 2 \mathrm {V A}, 8 \mathrm {W}) $$
Sensor input
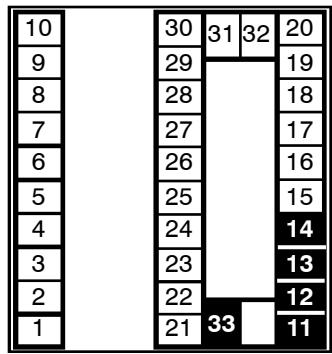
- Connect the sensor input to terminal Nos. 11 to 14 and 33 as follows according to the input type.
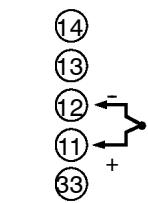
Thermocouple
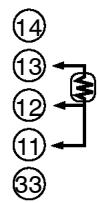
atimumdistancemometer
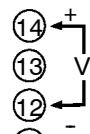
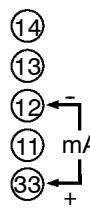
Voltage input
Current input
Control output
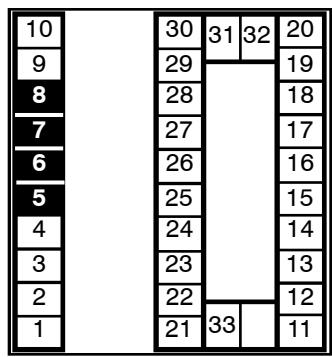
- Terminal Nos. 7 and 8 are for control output 1 (OUT1), and terminal Nos. 5 and 6 are for control output 2 (OUT2). The following diagrams show the available output units and their internal equalizing circuits.
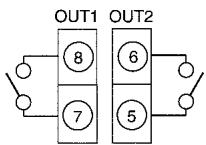
Relay
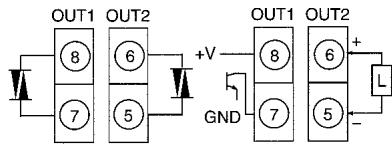
SSR
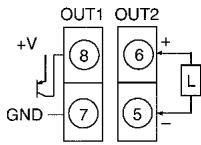
PNP
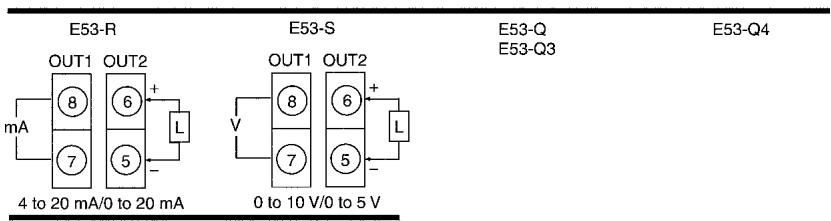
E53-C3
E53-C3D
E53-V
E53-V35
- With E53-V□□ output units, about 2 V is output for one second after the power is interrupted.
- The following table shows the specifications for each output unit.
| Model | Output Type | Specifications |
| E53-R | Relay | 250 VAC, 5 A |
| E53-S | SSR | 75 to 250 VAC, 1 A |
| E53-Q | Voltage (NPN) | NPN: 12 VDC, 40 mA (with short-circuit protection) |
| E53-Q3 | Voltage (NPN) | NPN: 24 VDC, 20 mA (with short-circuit protection) |
| E53-Q4 | Voltage (PNP) | PNP: 24 VDC, 20 mA (with short-circuit protection) |
| E53-C3 | 4 to 20 mA | 4 to 20 mA, Permissible load impedance: 600 Ω max., Resolution: Approx. 2600 |
| E53-C3D | 0 to 20 mA | 0 to 20 mA, Permissible load impedance: 600 Ω max., Resolution: Approx. 2600 |
| E53-V34 | 0 to 10 V | 0 to 10 VDC, Permissible load impedance: 1 kΩ min., Resolution: Approx. 2600 |
| E53-V35 | 0 to 5 V | 0 to 5 VDC, Permissible load impedance: 1 kΩ min., Resolution: Approx. 2600 |
With E5AK-PRR2 controllers, relay output (250 VAC, 1 A) is fixed. When replacing the output unit, use the E53-R. The following diagrams show the relationship between terminals and open/close relay settings.
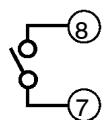
Open
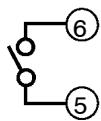
Close
Auxiliary output
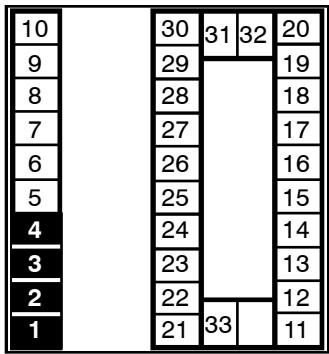
- Terminal Nos.3 and 4 are for auxiliary output 1 (SUB1) and terminal Nos.1 and 2 are for auxiliary output 2 (SUB2).
- The internal equalizing circuits for the auxiliary outputs are as follows:
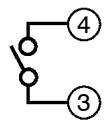
Auxiliary output 1
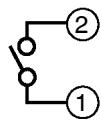
Auxiliary output 2
CT input/ Potentiometer
Output specifications are as follows: SPST-NO, AC250V, 3A
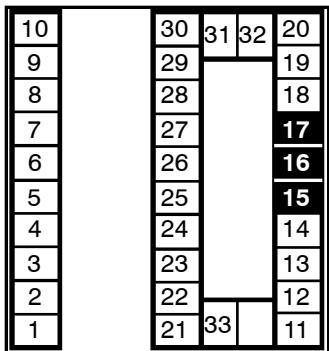
- When using the HBA function on the E5AK-AA2 controller, connect CT input (CT) to terminal Nos.15 to 17. When monitoring the valve opening on the E5AK-PRR2 controller, connect the potentiometer (PTMR) to terminal Nos.15 to 17. Connect each of these inputs as follows:
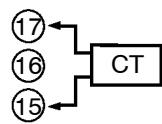
CT input
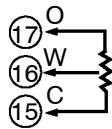
Potentiometer
- For details on CT inputs, see Appendix, About Current transformer.
- For details on the potentiometer, see the Instruction Manual for the valve connected to the controller. The variable resistance range is 100 Ω to 2.5 kΩ
Remote SP input
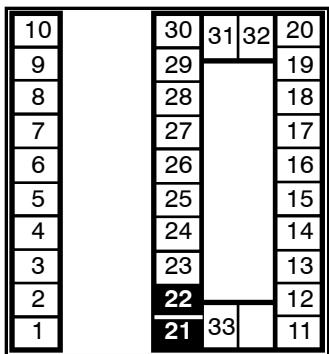
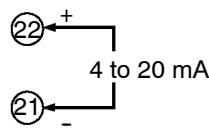
- Connect an input (RSP) to be used as the remote SP to terminal Nos.21 and 22.
- Only 4 to 20mA inputs can be connected. Connect the input as follows:

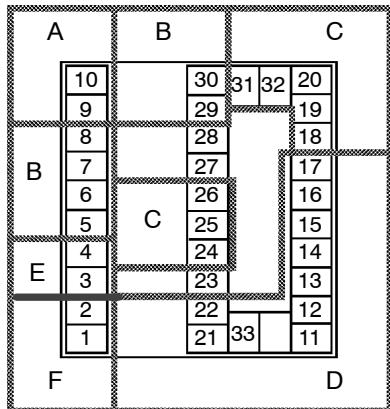
About the power blocks
The E5AK has independent power supplies for each of the terminal blocks shown on the right.
Event input
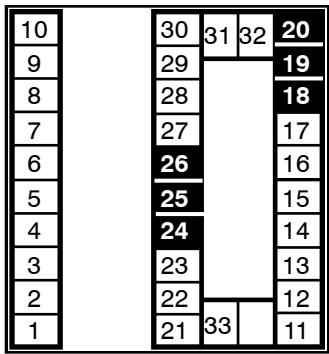
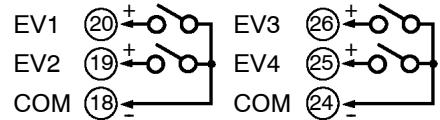
- Connect event inputs 1 and 2 (EV1/2) to terminal Nos.18 to 20, and event events 3 and 4 (EV3/4) to terminal Nos.24 to 26. However, note that terminal Nos.18 to 20 cannot be used on controllers having a communications function.
- Connect the event inputs as follows:
Event input 1 and 2
Event input 3 and 4
Terminals 18 and 24 (COM) are connected internally.
- Use event inputs under the following conditions:
| Contact input | ON: 1 kΩ max., OFF: 100 kΩ min. |
| No-contact input | ON: residual voltage 1.5 V max., OFF: leakage current 0.1 mA max. |
- Polarities during no-contact input are as follows:
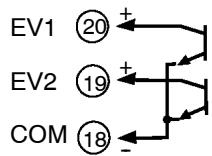
Event input 1 and 2
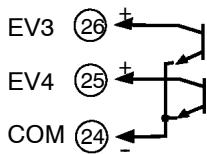
Event input 3 and 4
Transfer output
- Connect transfer output (TRSF) to terminal Nos. 29 and 30.
- The internal equalizing circuit for transfer output is as follows:
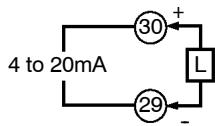
- Transfer output specifications are as follows:4 to 20mA , Permissible load impedance: 600 max., Resolution: Approx. 2600
Communications
- Terminal Nos.18 to 20, 31 and 32 can be used only on controllers having a communications units (E53-AK01/02/03).
- For details on wiring, see Chapter 6, Using the Communications Function.
CHAPTER3
BASIC OPERATION
This chapter describes an actual example for understanding the basic operation of the E5AK.
3.1 Convention Used in this Chapter 3-2
3.2 Setting Input Specifications 3-4
Input type 3-4
Scaling 3-4
3.3 Setting Output Specifications 3-6
Output assignments 3-6
Direct/reverse operation 3-7
Control period 3-7
3.4 Setting Alarm Type 3-9
Alarm type 3-9
Alarm value 3-9
Alarm hysteresis 3-10
Close in alarm/open in alarm 3-10
3.5 Protect Mode 3-12
Security 3-12
A/M key protect 3-12
3.6 Starting and Stopping Operation 3-13
3.7 Adjusting Control Operation 3-14
Changing the set point 3-14
Manual operation 3-14
Auto-tuning (A.T.) 3-16
3.1 Convention Used in this Chapter
This chapter describes basic E5AK operations such as how to set up parameters, start and stop operation, and adjusting control operation. For more complex control examples, refer to Chapter 4 Applied Operation and Chapter 5 Parameters.
Basic Operation Flow
The following diagram shows the basic operation flow.
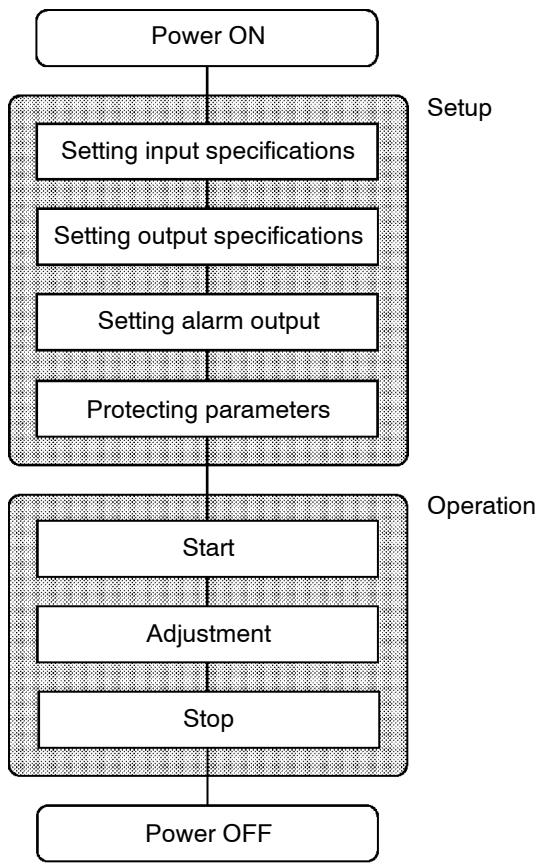
Setup
This description assumes that the controller is operated under the following conditions.
- A humidity sensor of output 4 to 20mA is connected to the controller. The measuring range of the humidity sensor is set to 10 to 95% .
- A humidifier is controlled by pulse output to maintain humidity at a constant 60% .
- An alarm is output when the humidity exceeds the upper limit value (70%) or lower limit value (50%).
- Output unit: relay type (E53-R) for OUT1.
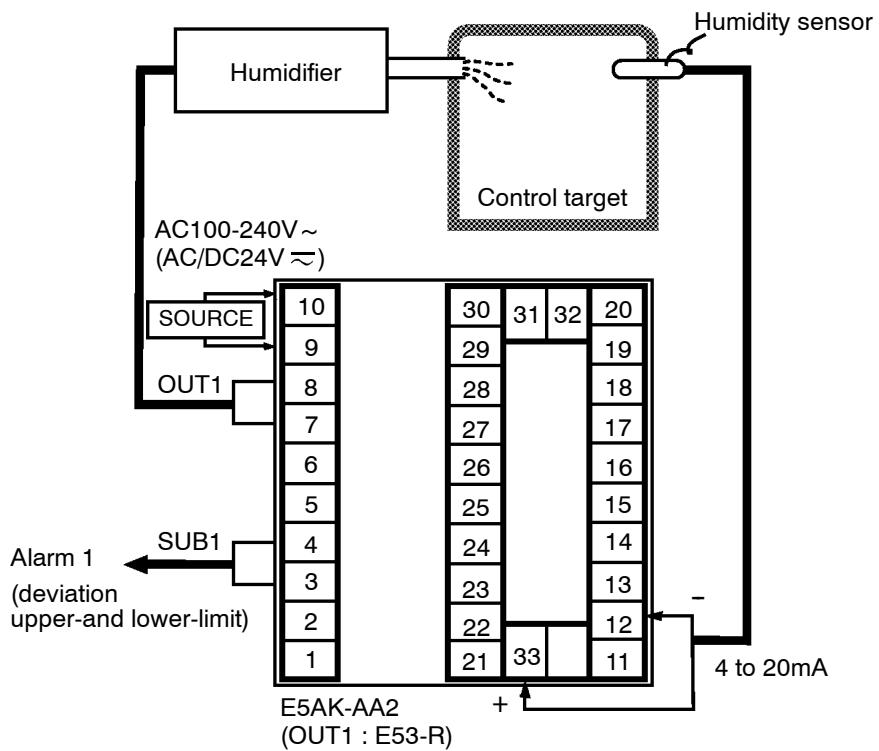
3.2 Setting Input Specifications
■Input type
Scaling
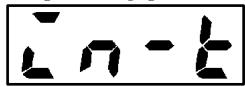
- Set the type No. (0 to 21) in the "input type" parameter. The factory setting is "2: K1 (thermocouple)."
-
For details on input types and setting ranges, see page 5-26.
-
When the voltage input and current input are selected, scaling matched to the control is required.
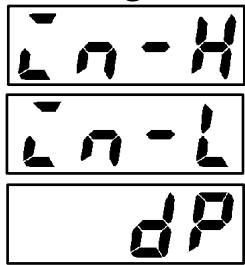
- The "scaling upper limit", "scaling lower limit" and "decimal point" parameters (setup mode) are used for scaling.
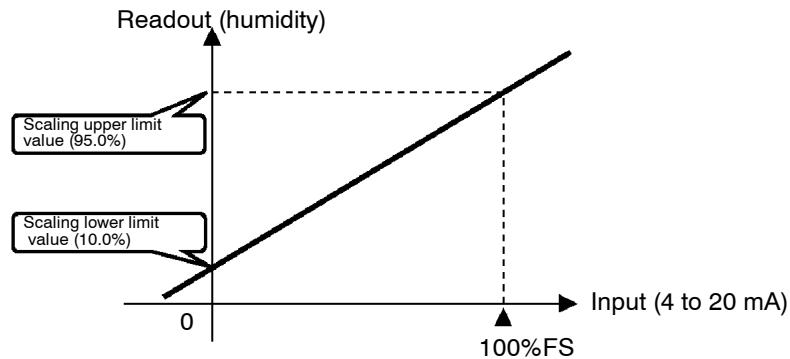
- The "scaling upper limit" parameter sets the physical quantity to be expressed by the upper limit value of input, and the "scaling lower limit" parameter sets the physical quantity to be expressed by the lower limit value of input. The "decimal point" parameter sets the number of digits past the decimal point.
- The following figure shows scaling example of 4 to 20mA input. After scaling, the humidity can be directly read. In this case, the "decimal point" parameter is set to "1".
Input shift
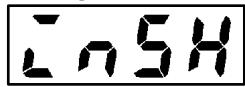
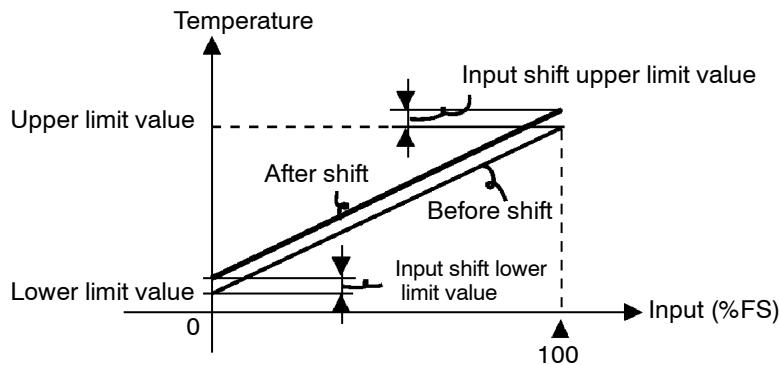
- When temperature input is selected, scaling is not required. This is because input is treated as the "temperature" as it is matched to the input type. However, note that the upper and lower limit values of the sensor can be shifted. For example, if both the upper and lower limit values are shifted by 1.2^ , the process value (before shift) is regarded as 201.2^ after shift when input is 200^ before shift.
- To set input shift, set shift values in the "input shift upper limit" and "input shift lower limit" parameters (level 2 mode).

About the temperature unit
To switch the temperature unit from “ C ” to “ F ” for temperature unit, switch the setting of the ^ C / ^ F selection” parameter to [ ] from [ ].
Setting Example
In this example, let's set the parameters as follows:
$$ \text {" i n p u t t y p e "} \quad = " 1 7 (4 \text {t o} 2 0 \mathrm {m A})" $$
$$ “ \text {s c a l i n g} ” = “ 9 5 0 ” $$
$$ “ \text {s c a l i n g} = “ 1 0 0 ” $$
$$ \text { " d e c i m a l p o i n t " } \quad = " 1 " $$
(1) Select the menu display, and select [SET] (setup mode) using the 必 or 必 keys. For details on selecting the menu display, see page 1-8.
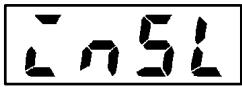
(2) Press the key to enter the setup mode. The top parameter in the setup mode [ n - ] "input type" is displayed. The parameter default is "2".
(3) Press the key until the display indicates "17".
(4) Press the key to fix the set value. The display changes to [ -H] ("scaling upper limit value" parameter). The parameter default is "100".
(5) Press the key until the display indicates "950".
(6) Press the key to fix the set value. The display changes to [ - ] ("scaling lower limit value" parameter). The parameter default is "0".
(7) Press the key until the display indicates "100".
(8) Press the key to fix the set value. The display changes to [] ("decimal point" parameter). The parameter default is "0".
(9) Press the key until the display indicates "1".
3.3 Setting Output Specifications
Some output specifications are different according to controller type, standard or position-proportional. The following table summarizes which output-related parameter settings are supported.
| Parameter | Standard Type | Position-proportional Type | |
| a u b i | Control output 1 assignment | ● | |
| a u b i | Control output 2 assignment | ● | |
| S u b i | Auxiliary output 1 assignment | ● | ● |
| S u b i | Auxiliary output 2 assignment | ● | ● |
| a r E u | Direct/reverse operation | ● | ● |
| C P | Control period (heat) | ● | |
| C - C P | Control period (cool) | ● | |
(Indicates that an output specification is supported.)
Output assignments
Standard type
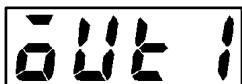
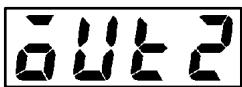
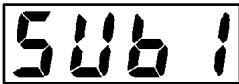
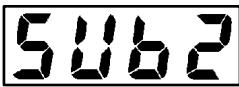
Output assignments are described according to controller type.
- Ten output are supported :
control output (heat)
control output (cool)
alarm outputs 1 to 3
HBA
LBA, and
error 1 (input error)
error 2 (A/D converter error)
error 3 (RSP input error).
These functions are assigned to control outputs 1 and 2, and auxiliary output 1 and 2.
- Restrictions on assignment destination are placed on some of the outputs. The following table shows where outputs may be assigned to.
| Output Function\Assignment Destination | Control Output | Auxiliary Output | ||
| 1 | 2 | 1 | 2 | |
| Control output (heat) | ● | ● | ||
| Control output (cool) | ● | ● | ||
| Alarm 1 | ● | ● | ● | ● |
| Alarm 2 | ● | ● | ● | ● |
| Alarm 3 | ● | ● | ● | ● |
| HBA | ● | ● | ● | ● |
| LBA | ● | ● | ● | ● |
| Error 1; Input error | ● | ● | ||
| Error 2; A/D converter error | ● | ● | ||
| Error 3; RSP input error | ● | ● | ||
With control output (cool), the conditions for switching from standard control to heating and cooling control are reached when the output function is assigned at the cooling side during heating and cooling control.
In other words, heating and cooling control is carried out when control output (cool) is assigned, and standard control is carried out when output is not assigned. For details on heating and cooling control, see 4.1 Selecting the Control Method (page 4-2).
Position-proportional type
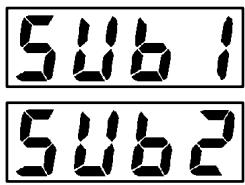
- Factory settings are as follows: control output 1 = Control output (heat) control output 2 = Alarm 1 auxiliary output 1 = Alarm 2 auxiliary output 2 = Alarm 3.
-
Output assignments are set in the "control output 1 assignment", "control output 2 assignment", "aux output 1 assignment" and "aux output 2 assignment" parameters (setup mode).
-
Position-proportional type controllers support six output functions. These are assigned to auxiliary outputs 1 and 2.
- Restrictions on assignment destinations are placed on some of the outputs. The following table shows where outputs may be assigned to.
| Output Function\Assignment | Control Output | Auxiliary Output | ||
| 1 | 2 | 1 | 2 | |
| Alarm 1 | ● | ● | ||
| Alarm 2 | ● | ● | ||
| Alarm 3 | ● | ● | ||
| Error 1: Input error | ● | ● | ||
| Error 2:A/D converter error | ● | ● | ||
| Error 3: RSP input error | ● | ● | ||
Direct/reverse operation
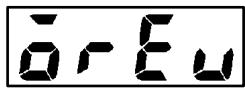
- “Direct operation” (or normal operation) refers to control where the manipulated variable is increased according to the increase in the process value. Alternatively, “reverse operation” refers to control where the manipulated variable is decreased according to the decrease in the process value.
For example, when the process value (PV), is lower than the set point (SP), in a heating control system, the manipulated variable increases by the difference between the PV and SP values.
Accordingly, this becomes "reverse operation" in a heating control system. Alternatively, this becomes "direct operation" in a cooling control system.
- Direct/reverse operation is set in the [ r - r] "direct/reverse operation" parameter (setup mode).
Control period
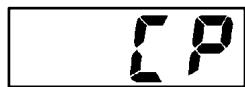
- When the output unit is pulse output such as relay output, set the pulse output cycle (control period). Though a shorter pulse period provides better control performance, the control period should be set taking the life expectancy of the output unit into consideration when the output unit is relay.
- The control period is set in the "control period (heat)" parameter (level 1 mode). Factory setting is "20:20 seconds."
- The "control period (cool)" output function is not allocated. So, the "control period (cool)" parameter cannot be set.
Setting Example
In this example, let's set the parameters as follows:
"control output 1 assignment" = "control output (heat)"
"control output 2 assignment" = "alarm output 1"
"direct/reverse operation" = "reverse operation"
"control period" = "20 secs"
"run/stop" = "run"
All of the above settings in this example are factory settings. So, in this example, we are only going to check the parameter settings.

1 second min.


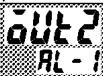

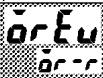

1 second min.
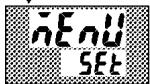

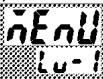

1 second min.
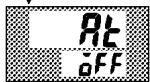

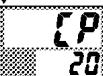
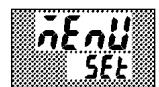
(1) Select the menu display, and select [SEk] (setup mode) using the or keys. For details on selecting the menu display, see page 1-8.
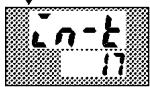
(2) Press the key to enter the setup mode. The top parameter in the setup mode [ n - ] "input type" is displayed. In this example, the parameter setting is "17: 4 to 20mA ".
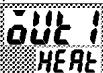
(3) Press the key until [ouk] ("control output 1 assignment" parameter) is displayed. The parameter default is [HEA].
(4) As the setting in this example is to be left as it is, press the key. The display changes to [aUe] ("control output 2 assignment" parameter). The parameter default is [RL - I].
(5) As the setting in this example is to be left as it is, press the key until [ r] ("direct/reverse operation" parameter) is displayed. The parameter default is [ r - r] .
(6) As the setting in this example is to be left as it is, press the or keys to select [L_U - I] (level 1 mode). For details on selecting the menu display, see page 1-8.
(7) Press the key to enter the level 1 mode. The top parameter in the level 1 mode [R] "AT execute/cancel" is displayed.
(8) Press the key until [[]] ("control period" parameter) is displayed. The parameter default is "20". As the setting in this example is to be left as it is, quit key operation.
3.4 Setting Alarm Type
Alarm type
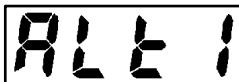
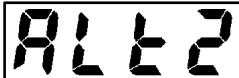
- Three alarm outputs are supported: alarms 1 to 3. Of these, only the alarm assigned as the output can be used.
- Alarm output conditions are determined according to the combination of the "alarm type", "alarm value" and "alarm hysteresis" parameter settings.
- The contact conditions when alarm output is ON can be set to "open" or "closed" in the "close in alarm/open in alarm" parameter.
- The following table shows the alarm types supported by the E5AK controller and their respective operations.
| Alarm Type | Alarm Output Operation | ||
| When X is positive | When X is negative | ||
| 1 | Upper-and lower-limit alarm (deviation) | ON OFF SP | Always ON |
| 2 | Upper-limit alarm (deviation) | ON OFF SP | ON OFF SP |
| 3 | Lower-limit alarm (deviation) | ON OFF SP | ON OFF SP |
| 4 | Upper-and lower-limit range alarm (deviation) | ON OFF SP | Always OFF |
| 5 | Upper-and lower-limit alarm with standby sequence (deviation) | ON OFF SP | Always OFF |
| 6 | Upper-limit alarm with standby sequence (deviation) | ON OFF SP | ON OFF SP |
| 7 | Lower-limit alarm with standby sequence (deviation) | ON OFF SP | ON OFF SP |
| 8 | Absolute-value upper-limit alarm | ON OFF 0 | ON OFF 0 |
| 9 | Absolute-value lower-limit alarm | ON OFF 0 | ON OFF 0 |
| 10 | Absolute-value upper-limit alarm with standby sequence | ON OFF 0 | ON OFF 0 |
| 11 | Absolute-value lower-limit alarm with standby sequence | ON OFF 0 | ON OFF 0 |
Alarm value
- Alarm types are set independently for each alarm in the "alarm 1 to 3" parameters (setup mode). Factory setting is "2: Upper-limit alarm (deviation)".
- Alarm values are indicated by "X" in the table above. Alarm output operation differs according to whether the value of the alarm is positive or negative.
- Alarm values are set independently for each alarm in the "alarm value 1 to 3" parameters (level 1 mode). Factory setting is "0".
Alarm hysteresis
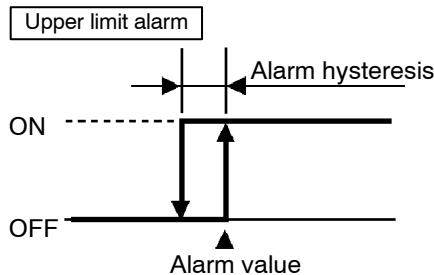
- The hysteresis of alarm outputs when alarms are switched ON/OFF can be set as follows.
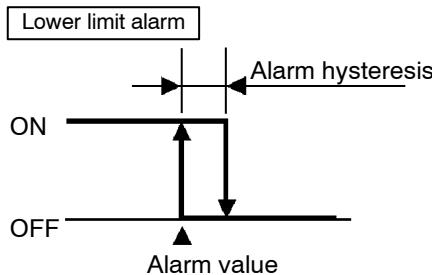
Standby sequence
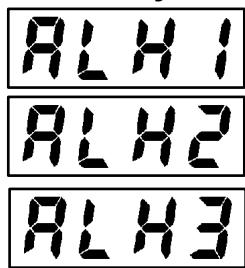
- Alarm hysteresis is set independently for each alarm in the "alarm 1 to 3 hysteresis" parameters (level 2 mode). Factory setting is "0.02: 0.02% FS^
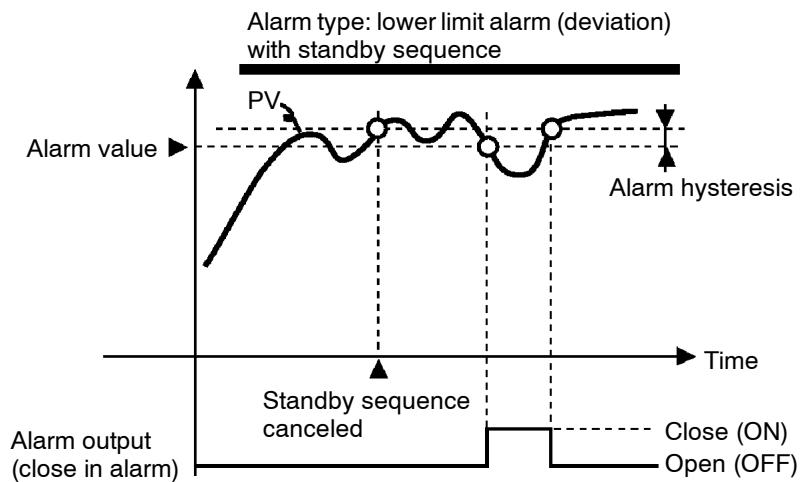
- "Standby sequence" is a function for unconditionally turning alarm output OFF when the process value has left the alarm range once and it next enters the alarm range.
- For example, when the alarm type is set to "deviation lower limit," generally the process value is within the alarm range, and alarm output becomes ON as it is as the process value when the power is turned ON is smaller than the set point. However, if the alarm type is set to "deviation lower limit with standby sequence", alarm output first becomes ON when the process value exceeds the alarm setting value to leave the alarm range and once again falls below the alarm value.
Close in alarm/open in alarm
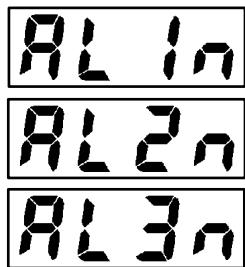
- When the controller is set to "close in alarm," the status of the alarm output function is output as it is. When set to "open in alarm," the status of the alarm output function is output inverted.
| Alarm | Output | Output LED | |
| Close in alarm | ON | ON | Lit |
| OFF | OFF | Not lit | |
| Open in alarm | ON | OFF | Lit |
| OFF | ON | Not lit |
- Alarm type and close in alarm (normally open)/open in alarm (normally close) can be set independently for each alarm.
- Close in alarm/open in alarm is set in the "alarm 1 to 3 open in alarm" parameters (setup mode). Factory setting is [n - ] "close in alarm".
Summary of alarm operations
The figure below visually summarizes the above description of alarm operations (when alarm type is set to "lower limit alarm (deviation) with standby sequence"):
Setting Example
When a set point for a temperature exceeds ± 10% , alarm1 will be output.
In this example, let's set the parameters as follows:
"alarm type 1" = "1: (deviation upper-and lower-limit)"
"alarm value 1" = "10"
"alarm hysteresis" = 0.20
"close in alarm/open in alarm" = "n - o: close in alarm"

Meanings of parameters, "alarm hysteresis" and "open in alarm/close in alarm" are the same settings at the shipment, so settings for operations are omitted.
(1) Select the menu display, and select [ ] (setup mode) using the 必 or 必 keys. For details on selecting the menu display, see page 1-8.
(2) Press the key to enter the setup mode. The top parameter in the setup mode [ n - ] "input type" is displayed. In this example, the parameter setting is "17: 4 to 20mA ".
(3) Press the key until [R L I] ("alarm type 1" parameter) is displayed. The parameter default is "2: deviation upper limit".
(4) Press the key to return to "1: deviation upper-and lower-lim-it".
(5) Select the menu key, and select [L - I] (level 1 mode) using the or keys. For details on selecting the menu display, see page 1-8.
(6) Press the key to enter the level 1 mode. The top parameter in the level 1 mode [ RE ] "AT execute/cancel" is displayed.
(7) Press the key until [ - I] ("alarm value 1" parameter) is displayed.
(8) In this example, the parameter setting is “0.0” so press the key until “10.0” is displayed.
3.5 Protect Mode
- This parameter allows you to protect until start of operation parameters that do not change during operation to prevent unwanted modification.
- The set value of the "security" (protect) parameter specifies the range of protected parameters.
- When this parameter is set to "0", parameters are not protected.
- When this parameter is set to "1" to "3", the number of modes that can be displayed on the menu display is limited.
When set to "1", level 0 to 2, setup, expansion and option modes only can be selected. When set to "2", only level 0 to 2 modes can be selected. When set to "3", only level 0 and 1 modes can be selected.
- When this parameter is set to "4" to "6", operations in only the level 0 mode can be selected, and the mode is not displayed on the menu display.
- When this parameter is set to "5", only the "PV/SP" parameter can be used.
- When this parameter is set to "6", only the "PV/SP" parameter can be used. (The set point can not change.)
- Default is "1".
A/M key protect
- This parameter disables use of the / M key during operation. For example, if you protect use of the / M key by the “ A / M key protect” parameter (protect mode) during auto operation, the controller cannot be set to the manual mode, preventing manual operation of the controller during operation.
Setting Example
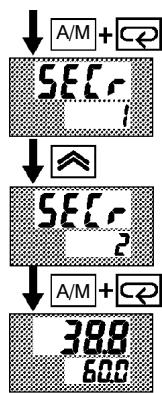
- Let's protect the setup, expansion, option and calibration modes. Set the parameters as follows:
"security" = "2: Usable only in level 0 to 2 modes"
(1) Press for 1 second minimum the / M and / Z keys simultaneously, the controller enters the protect mode.
(2) In the protect mode, the top parameter in the protect mode "security" is displayed. The parameter default is "1". Press the key to change the parameter setting to "2".
(3) Press for 1 second minimum the A/M and keys simultaneously, the display changes to the "PV/SP monitor" parameter (level 0 mode).
3.6 Starting and Stopping Operation
- You can start and stop operation by changing the setting of the "run/stop" parameter (level 0 mode).
- You can switch the RUN/STOP function up to 100,000 times.
- To stop operation, set the "run/stop" parameter to [5k0P] (stop). In a stop state, the "STOP" LED lights.
Operation cannot be stopped during auto-tuning.
Manipulated variable at stop
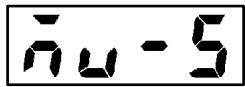
- On a standard type controller, specify the manipulated variable (-5.0 to 105.0%) in the "MV at stop" parameter (level 2 mode) to output the manipulated variable during stop.
Factory-set to 0.0:0.0% .
- On a position-proportional type controller, you can select either of the open, close or hold status. In an open status, only control output 1 is ON. In a close status, only control output 2 is ON. In a hold status, both control outputs 1 and 2 are OFF. Factory-set to "hold."
Setting Example
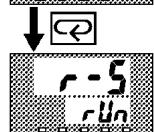
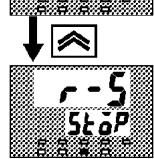
The following example describes the procedure to follow to stop control during operation of the controller.
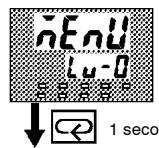
(1) Select the menu display, and select [L -0] (level 0 mode) using the or keys. For details on selecting the menu display, see page 1-8.
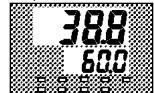
(2) Press the key to enter the level 0 mode. The PV and SP are displayed.
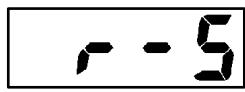
(3) Press the key until [r - 5] ("run/stop" parameter) is displayed.
(4) Press the key to select [5k0P] (stop). The "STOP" LED lights, and operation stops.
To resume operation, follow the above procedure to select [ run] ("run"). The "STOP" LED goes out and operation starts.
3.7 Adjusting Control Operation
Changing the set point
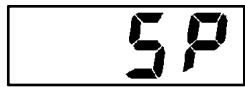
- You can change the set point in the "set point" parameter (level 0 mode).
- However, note that you cannot change the set point when the "security" parameter (protect mode) is set to "6".
- To change the set point, press the or keys to select the desired value. If you leave the setting for two seconds, the set point is updated to the new setting.
Setting Example
In the following example, let's change the temperature set point from "60°C" to "50°C".
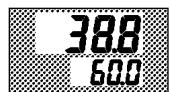
(1) Select the PV/SP monitor display.
(2) Press the key to change the setting to "50.0: 50.0^ ".
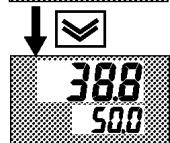
Manual operation
Standard type
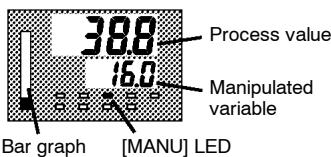
- On standard type controller, the manipulated variable is controlled, and on a position-proportional type controller, the valve opening is controlled.
-
To set manual operation and manually set the manipulated variable or the valve opening, press for 1 second minimum the A/M key. The controller enters the manual mode.
-
The process value is displayed on the No.1 display, and the manipulated variable is displayed on the No.2 display. The manipulated variable (heat) is also displayed on the bar graph in 10% increments.
- To change the manipulated variable, press the or keys. After two seconds, the manipulated variable is updated to the new setting.
- Other modes cannot be selected while in the manual mode. To select other modes, press for 1 second minimum the A/M key. The manual mode is quit.
- The automatic return of display function does not work while in the manual mode.
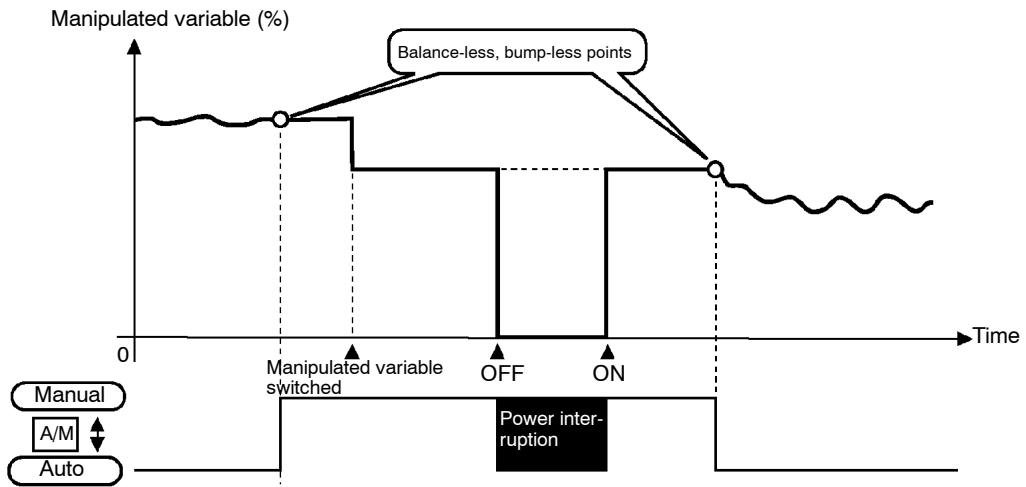
- When switching between manual and auto operation, the manipulated variable is subject to balance-less, bump-less operation.

Balance-less, Bump-less Operation
To prevent sudden changes in the manipulated variable when switching between manual and auto operation, operation is resumed using the value that was active immediately before operation was switched, and the value is brought gradually closer to the value immediately after operation was switched.
- If the power is interrupted during manual operation, manual operation is resumed at the manipulated variable at power interruption when the power is reset.
- You can switch the AUTO/MANUAL function up to 100,000 times. The following diagram summarizes manual operation.
Position-proportional type
- When a potentiometer is connected to the controller, the process value is displayed on the No.1 display, and the valve opening is displayed on the No.2 display. The valve opening is also displayed on the bar graph in 10% increments.
When a potentiometer is not connected to the controller, [ -] is displayed on the No.2 display, and nothing is displayed on the bar graph.
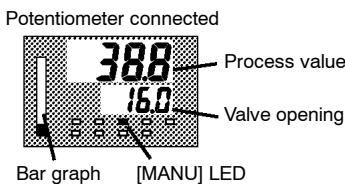
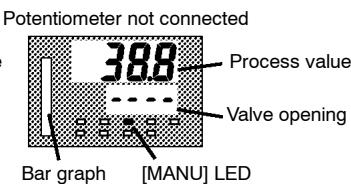
- When you press the key, the open side becomes ON. When you press the key, the close side becomes ON.
- Other modes cannot be selected while in the manual mode. To select other modes, press for 1 second minimum the A/M key. The manual mode is quit.
- The automatic return of display function does not work while in the manual mode.
- You can switch the AUTO/MANUAL function up to 100,000 times.
Auto-tuning (A.T.)
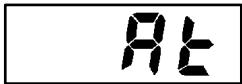
- AT (auto-tuning) cannot be executed while operation is canceled or during ON/OFF control.
- When you execute auto-tuning, the optimum PID parameters are automatically set by forcibly changing the manipulated variable to calculate the characteristics (called the "limit cycle method") of the control target. During auto-tuning, the AT LED flashes.
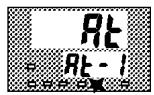
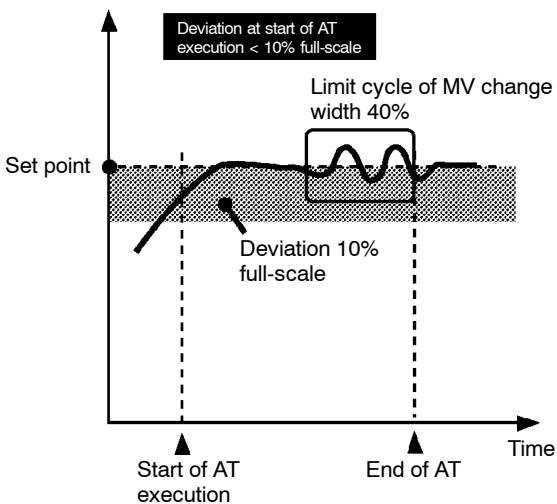
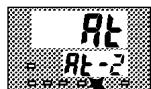
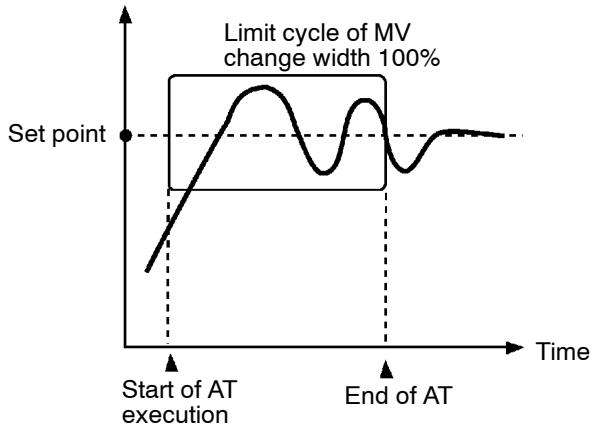
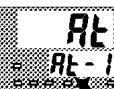
- 40% AT or 100% AT can be selected by the limit cycle of MV change width. Specify [At - 1] or [At - 2] , respectively, in the "AT execute/cancel" parameter (level 1 mode).
- During heating and cooling control and with position-proportional type, only 100% AT can be executed. (So, [A-E-I] (40%AT) will not be displayed.)
- To cancel AT execution, specify [ F F ] ("AT cancel").
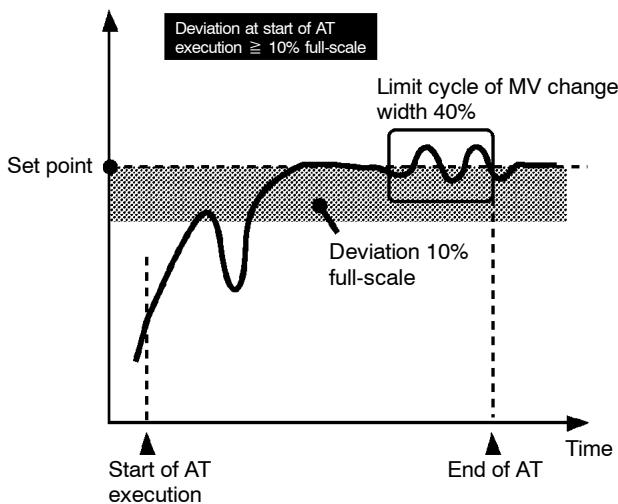
- 40%AT
In order to set the limit cycle of MV change width to 40% , select 40% AT to execute auto-tuning with fluctuations in the process value kept to a minimum. However, note that auto-tuning takes longer to execute compared with 100% AT.
The timing by which limit cycles are generated varies according to whether or not the deviation (DV) at the start of AT execution is 10% full-scale or less.
100%AT
In order to set the limit cycle of MV change width to 100% , select 100% AT to shorten the AT execution time without worrying about fluctuations in the process value.
Setting Example

1 second min.


execute
In this example, let's execute 40% AT.
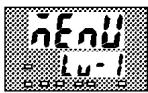
(1) Select [i, u - i] (level 1 mode) using the or keys. For details on selecting the menu display, see page 1-8.
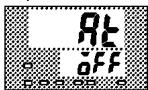
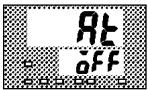
(2) Press the key to enter the level 1 mode. The top parameter in the setup mode [R] "AT execute/cancel" is displayed. In this example, the parameter setting is [aFF] "AT cancel"
(3) Press the key to specify [Rk - 1] .
(4) The AT LED flashes, and AT execution starts. When the AT LED goes out (end of AT execution), the parameter automatically returns to [ F F ] ("AT cancel").
In addition to AT, the E5AK is also provided with fuzzy self-tuning (ST) that allows automatic calculation of the PID parameters suited to the control target. However, note that the ST function operates only during standard control by temperature input. For further information regarding the ST, please see page 5-34 and A-14.
CHAPTER4
APPLIED OPERATION
This chapter describes each of the parameters required for making full use of the features of the E5AK. Read this chapter while referring to the parameter descriptions in chapter 5.
4.1 Selecting the Control Method 4-2
Heating and cooling control 4-2
Position-proportional control 4-3
ON/OFF control 4-4
4.2 Operating Condition Restrictions 4-5
Manipulated variable restrictions 4-5
Set point limiter 4-6
SP ramp 4-6
4.3 How to Use Event Input 4-8
Event input assignments 4-8
Multi-SP 4-9
Other event input functions 4-10
4.4 How to Use the Remote SP 4-11
Scaling 4-11
SP mode 4-11
Remote SP monitor 4-12
SP tracking 4-12
Operating conditions 4-12
4.5 How to Use the Heater Burnout Alarm . . . 4-13
Heaterburnout detection 4-13
Operating conditions 4-13
How to calculate
the heater burnout set value 4-14
4.6 LBA 4-15
4.7 How to Use Transfer Output 4-17
4.1 Selecting the Control Method
When selecting the control method, set the parameters according to the following table. (Parameters are factory-set to heating control.)
| Parameter Control Method | Control output 1 assignment | Control output 2 assignment | Direct/Reverse operations |
| Heating control (Standard) | Control output (heat) | - | Reverse operation |
| Cooling control (Standard) | Control output (heat) | - | Direct operation |
| Heating and cooling control | Control output (heat) | Control output (cool) | Reverse operation |
For details on how to assign outputs, see 3.3 Setting Output Specifications (page 3-6).
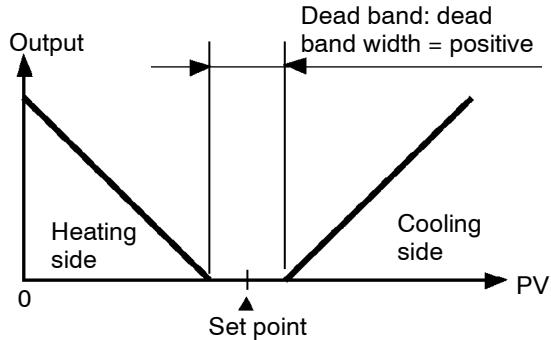
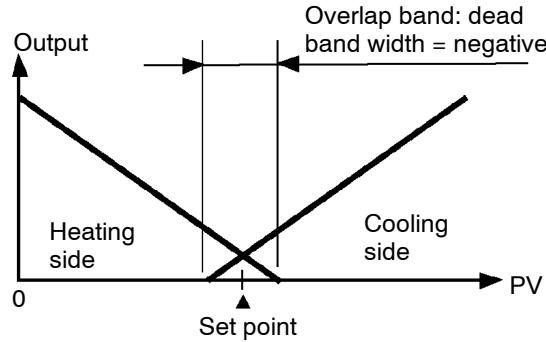
- When heating and cooling control is selected, the "deadband" and "cooling coefficient" parameters can be used.
The dead band is set with the set point as its center. The dead band width is the set value of the "dead band" parameter (level 1 mode). Setting a positive value produces a dead band, while setting a negative value produces an overlap band.
Heating and cooling control
Dead band
Cooling coefficient
Manipulated variable at stop
If the heating and cooling characteristics of the control target greatly differ, preventing satisfactory control characteristics from being obtained by the same PID parameters, adjust the proportional band (P at cooling side) using the cooling coefficient to balance control between the heating and cooling sides. In heating and cooling control, P at the heating or cooling side is calculated by the following formula:
Heating side P = P ; Cooling side P = cooling coefficient × P
- In heating and cooling control, the manipulated variable output that is output when controller operation is stopped is dependent on the set value of the "MV at stop" parameter (level 2 mode) in the same way as for standard control.
- However, note that in heating and cooling control, the manipulated variable at the cooling side is treated as a negative value for the sake of convenience. When the manipulated variable at STOP is a negative value, the manipulated variable is output to only the cooling side, and when a positive value, the manipulated variable is output to only the heating side. The factory setting is "0". If the controller is operated using the factory setting, the manipulated variable is not output to both the heating and cooling sides.
Position-proportional control
- Use the position-proportional type controller for position-proportional control.
- On a position-proportional type controller, control output 1 is used for open output, and control output 2 is used for close output. Accordingly, control outputs 1 and 2 cannot be used as output assignments. Special output units are already set on position-proportional type controllers.
- On a position-proportional type controller, the following functions are disabled.
ST
MV limiter
P and PD control
40% AT
LBA
HBA
ON/OFF control
Travel time
- The travel time is factory-set to "30 seconds."
- To change the travel time, either set in the "travel time" parameter (option mode), or execute motor calibration in the "motor calibration" parameter (option mode).
- Valve opening monitor
- The valve opening can be monitored when a potentiometer is connected to the controller. However, be sure to execute motor calibration after connecting the potentiometer.
- The monitored valve opening is displayed on the bar graph in 10% increments.
Manipulated variable at stop/PV error
- Open, close or hold can be selected as output at stop or PV error. Set these outputs in the "manipulated variable at stop" or "manipulated variable at PV error" parameters (level 2 mode).
Other functions
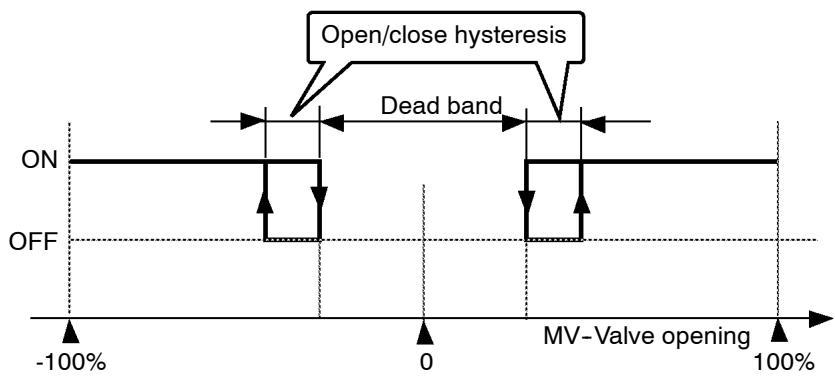
- Set the dead band in the "position-proportional dead band" parameter (level 1 mode).
- Set the open/close hysteresis in the "open/close hysteresis" parameter (level 1 mode).
ON/OFF control
Hysteresis
- Switching between advanced PID control and ON/OFF control is carried out by the "PID / ON/OFF" parameter (expansion mode). When this parameter is set to [P_Ld] , advanced PID control is selected, and when set to [aNaF] , ON/OFF control is selected. Default is [P_Ld] .
- During position-proportional control, ON/OFF control cannot be selected.
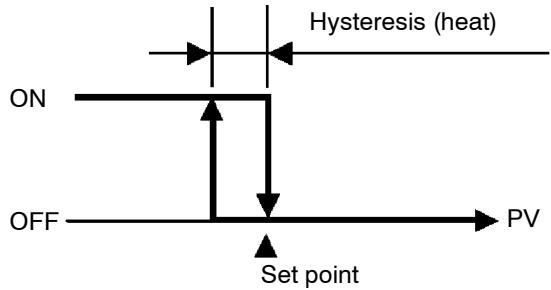
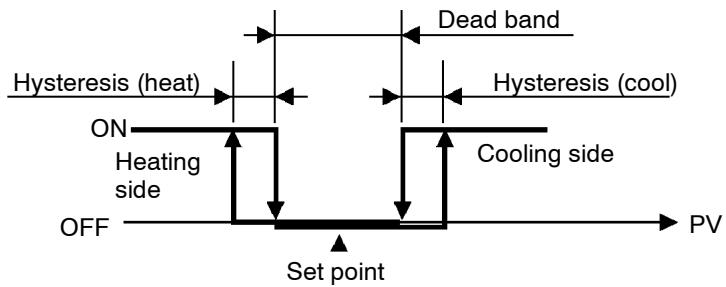
- In ON/OFF control, hysteresis is provided in the program when switching between ON and OFF to stabilize operation. The hysteresis width provided during ON/OFF control is simply referred to as "hysteresis." Control output (heat) and control output (cool) functions are set in the "hysteresis (heat)" and "hysteresis (cool)" parameters, respectively.
- In standard control (heating or cooling control), hysteresis can be set only for the heating side.
- In heating and cooling control, a dead band can be set. So, 3-position control is made possible.
Parameters
| Symbol | Parameter Name: Mode | Description | |
| ăut1 | Control output 1 assignment : Setup | For specifying control method | |
| ăut2 | Control output 2 assignment : Setup | For specifying control method | |
| ărEu | Direct/Reverse operation : Setup | For specifying control method | |
| C-db | Dead band : Level 1 | Heating and cooling control | |
| C-5c | Cooling coefficient : Level 1 | Heating and cooling control | |
| ău-5 | MV at stop : Level 2 | Manipulated variable when control operation is stopped | |
| ău-E | MV at PV error : Level 2 | Manipulated variable when control operation is PV error | |
| ăot | Travel time : Option | Position-proportional control | |
| CALb | Motor calibration : Option | Position-proportional control | |
| db | Positional-proportional dead band : Level 1 | Position-proportional control | |
| ăC-H | Open/close hysteresis : Level 2 | Position-proportional control | |
| HYS | Hysteresis (heat) : Level 1 | ON/OFF control | |
| CHYS | Hysteresis (cool) : Level 1 | ON/OFF control | |
| CONT | PID / ON/OFF : Expansion | ON/OFF control | |
4.2 Operating Condition Restrictions
Manipulated variable restrictions
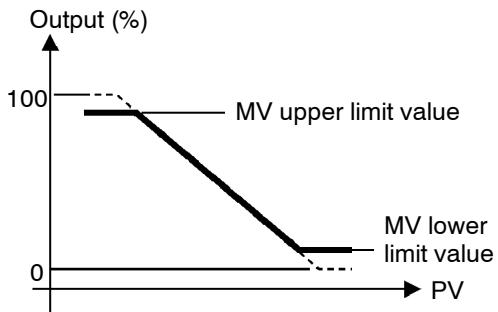
The upper-and lower-limit values of the manipulated variable can be restricted by the MV limiter, and the change rate of the manipulated variable can be restricted by the MV change rate limiter.
MV limiter
The upper-and lower-limit values of the manipulated variable are set in the "MV upper limit" and "MV lower limit" parameters (level 2 mode). When the manipulated variable calculated by the E5AK is outside of the range of the MV limiter, actual outputs are dependent on the set value of these parameters.
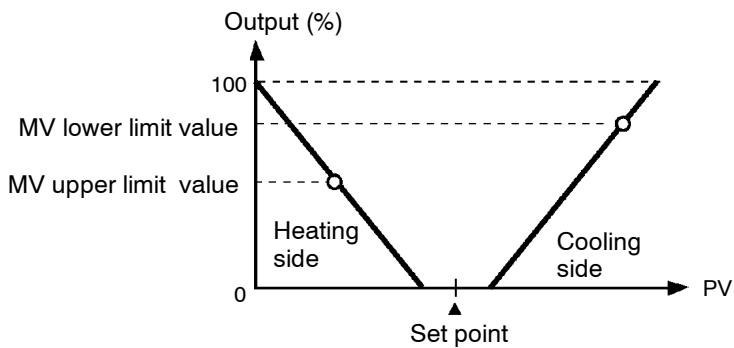
In heating and cooling control, the manipulated variable at the cooling side is treated as a negative value for the sake of convenience. The upper limit is set for the heating side (positive value), and the lower limit is set for the cooling side (negative value) as shown in the following figure.
MV change rate limiter
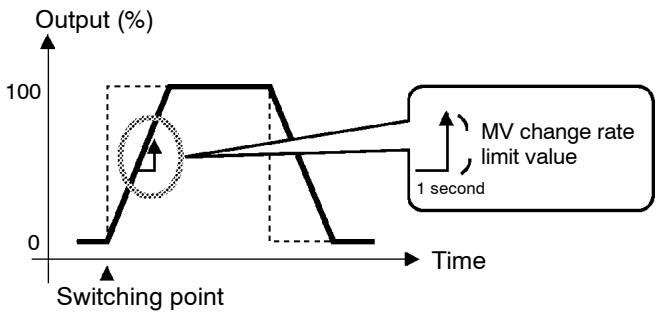
The "MV change rate limit" parameter (level 2 mode) sets the maximum permissible change width per second of the manipulated variable. If a change in the manipulated variable exceeds this parameter setting, the value calculated by the E5AK is reached while changing the value by the per-second value set in this parameter.
Limiter operation conditions
The limiters are invalid or cannot be set when any of the following conditions occurs:
- During ON/OFF control
- During ST execution
- During AT execution (only by MV change rate limiter)
- During manual operation
- When operation is stopped
- When an error has occurred.
- During position-proportional control (manipulated variable limiter only)
Set point limiter
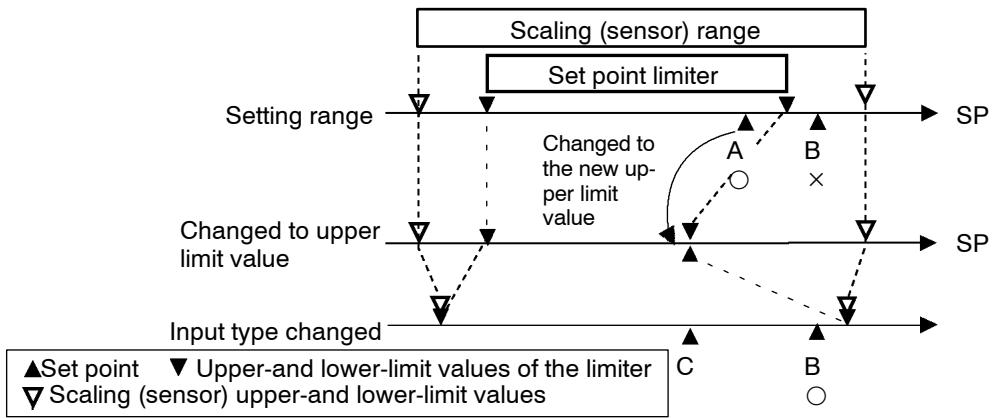
The setting range of the set point is limited by the set point limiter. The upper- and lower-limit values of this set point limiter are set in the "Set point upper limit" and "Set point lower limit" parameters (expansion mode), respectively. However, note that when the set point limiter is reset, the set point is forcibly changed to the upper-or lower-limit value of the set point limiter if the set point is out of the limiter range. Also, when the input type, temperature unit and scaling (sensor) range are changed, set point limiter is forcibly reset to the scaling (sensor) range.
SP ramp
With the SP ramp function, the controller operates according to the value (set point during SP ramp) limited by a change rate, instead of the changed set point when set point is changed. The interval in which the set point during SP ramp is limited is referred to as the "SP ramp".
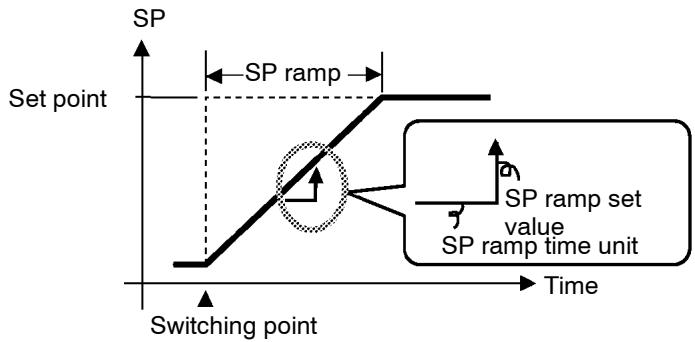
The change rate during the SP ramp is specified by the "SP ramp set value" and "SP ramp time unit" parameters. At the "SP ramp set value" default "0", the SP ramp function is disabled.
The set point changing in SP ramp can be monitored in the "Set point during SP ramp" parameter (level 0 mode).
Operation at start
The limiters are invalid or cannot be set when any of the following conditions occurs:
If the SP ramp function is enabled when the power is turned ON, and when "run" is switched to from "stop," process value may reach the set point after SP ramp in the same way as when the set point is changed. In this case, operation is carried out with the process value regarded as the set point before the change was made.
The direction of the SP ramp changes according to the relationship between the process value and the set point.
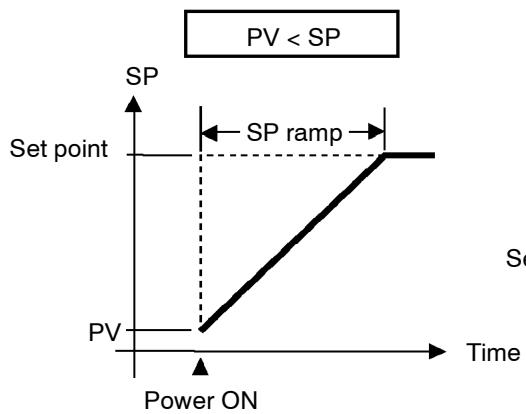
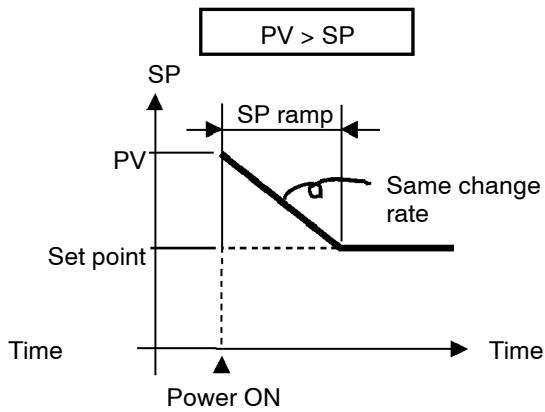
Restrictions during SP ramp
- Execution of auto-tuning starts after the end of SP ramp.
- When the controller is switched to the manual mode, the set point changes continuously until SP ramp ends.
- When the controller is in the stop state or an error occurs, the SP ramp function becomes invalid.
Parameters
| Symbol | Parameter Name: Mode | Description |
| \( \overline{a}L-H \) | MV upper limit : Level 2 | Manipulated variable restrictions |
| \( \overline{a}L-L \) | MV lower limit : Level 2 | Manipulated variable restrictions |
| \( \overline{a}r-L \) | MV change rate limit : Level 2 | Manipulated variable restrictions |
| \( S_L-H \) | SP setting upper limit: Expansion | SP setting restrictions |
| \( S_L-L \) | SP setting lower limit : Expansion | SP setting restrictions |
| \( S_P-t \) | SP ramp set value : Level 2 | SP changing restrictions |
| \( S_P-U \) | SP ramp time unit : Level 2 | SP changing restrictions |
4.3 How to Use Event Input
- When using event input, mount the option unit (E53-AKB). Up to two E53-AKB units can be mounted on the E5AK, and two event inputs can be used for each E53-AKB unit.
E53-AKB × 1 unit :2 event inputs
E53-AKB × 2 units :4 event inputs
Event inputs can be switched up to 100,000 times.
■ Event input assignments
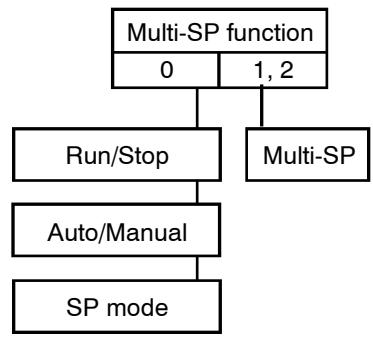
- You can choose from the following five event input functions:
Multi-SP
Run/Stop
Remote/Local
Auto/Manual
SP mode
-
In the case of the multi-SP function, the number of event inputs (event input 1 or 2) set in the "multi-SP function" parameter (option mode) are used. When four event inputs are used, the multi-SP function is automatically assigned to event inputs 1 and 2 for the designated number. When two event inputs are used, the multi-SP function is automatically assigned to event inputs 3 and 4 for the designated number.
-
Other functions are assigned to event inputs 1 to 4 not used for the multi-SP function according to the setting of the "event input assignment 1 to 4" parameters (option mode). However, note that "event input assignment 1/2 " parameters cannot be used when only one unit of the E53-AKB is installed.
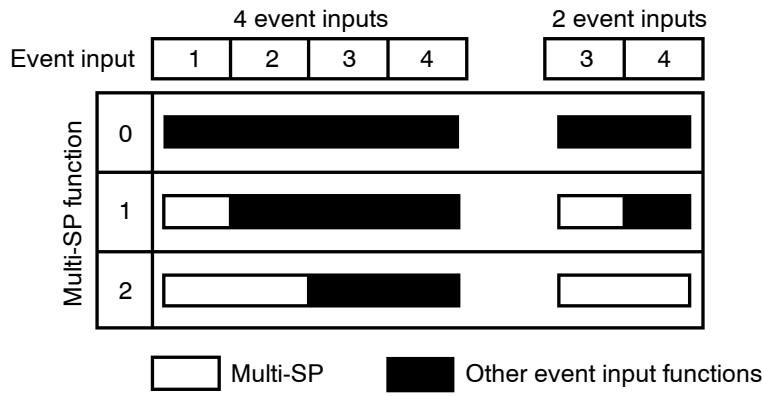
- The following table shows the relationship between the settings and functions of the "event input assignment 1 to 4" parameters.
| Setting | Function | |
| nan | Event input disabled | |
| 止P | ON:Stop | /OFF:Run |
| rak | ON:Remote | /OFF:Local |
| nRn | ON:Manual | /OFF:Auto |
| rSP | ON:RSP | /OFF:LSP |
Assignment example
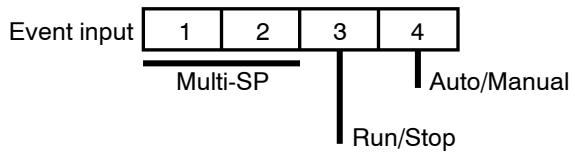
- In this example, set four event inputs are used, the multi-SP function to “2”, and event input 3 to “Run/Stop” and event input 4 to “Auto/Manual”. Set as follows:
(1) Set "multi-SP function" parameter to "2"
(2) Set "event input assignment 3" parameter to "5k oP"
(3) Set "event input assignment 4" parameter to "nRn"
Multi-SP
- Set points 0 to 3 are set as the set point according to event input. However, note that these parameters can not be set when the multi-SP function is not selected. The following table shows the relationship between event inputs and set points 0 to 3.
| Multi-SP Function | 1 | 2 | |
| Event Input | 1 (3)* | 1 (3)* | 2 (4)* |
| Set Point 0 | OFF | OFF | OFF |
| Set Point 1 | ON | ON | OFF |
| Set Point 2 | - | OFF | ON |
| Set Point 3 | - | ON | ON |
- When using 2 event inputs, the multi-SP function is assigned to event inputs 3 and 4.
- When you have changed the set point in the PV/SP display, the set point of the currently selected is also simultaneously changed.
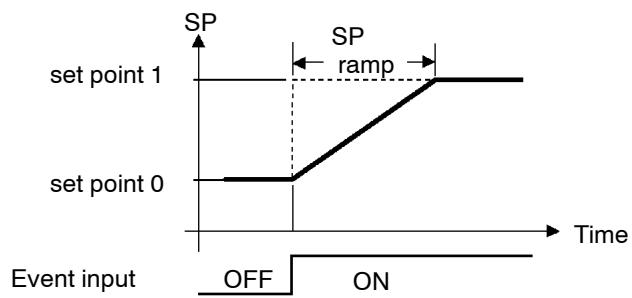
- When you have switched between set point 0 to 3, the SP ramp function works if the SP ramp function is enabled. The following example shows how the set point changes when you switch from set point 0 to set point 1.
Other event input functions
-
Switch the parameter settings for each of the run/stop, remote/local and SP modes.
-
The switching operation of auto/manual is the same as that of the A/M key.
- There is no order of priority in event input and key operations. However, run/stop or auto/manual event inputs must be set to either of ON or OFF. So, parameters will always follow event input even if you try to switch settings by key operation.
Run/Stop
- When event input is set to "ON", controller operation is stopped and the "STOP" LED lights. The content of event input is reflected in the "run/stop" parameter (level 0 mode).
Remote/Local
- This function is supported only when E53-AK01/02/03, the option unit for serial communications, is installed.
- When event input is set to "ON", parameters can be written only by using the communications function, and the "RMT" LED lights. The content of event input is reflected in the "remote/local" parameter (level 2 mode).
Auto/Manual
- When event input is set to "ON", the controller is switched for manual operation, and the "MANU" LED lights.
- Turn event input ON/OFF while the controller is ON.
SP mode
- This function is enabled only when the "SP mode enable" parameter (option mode) is set to "ON".
- When event input is set to "ON", the remote SP (RSP) is taken as the set point, and the "RSP" LED lights. When event input is set to "OFF", the local SP (LSP) is taken as the set point. The content of event input is reflected in the "SP mode" parameter (level 2 mode). For details on RSP/LSP, see 4.4 How to Use the Remote SP (page 4-11).
Parameters
| Symbol | Parameter Name: Mode | Application | |
| Eω - ∇ | Multi-SP function | : Option | Event input functions |
| Eω - * | Event input assignment 1 to 4 | : Option | Event input functions |
| S P - ** | Set point 0 to 4 | : Level 1 | Multi-SP |
*:1to4**:0to3
4.4 How to Use the Remote SP
Scaling
- Taking a remote SP input (4 to 20mA ) as the set point is referred to as the "remote SP" function. The remote SP function is enabled only when the "remote SP (RSP) enable" parameter (option mode) is set to "ON".
- Remote SP upper-and lower-limit values can be set by scaling.
- Inputs within the range 4 to 20mA (-10 to 110% ) are allowed as remote SP inputs. Inputs not within this range are regarded as out-of-range input values. In this case, input is clamped at the remote SP lower or upper limit values, and the "RSP" LED blinks.
- If the output function "RSP input error" is assigned for when an out-of-range remote SP is input, the "RSP input error" output is turned ON. Control output also switches to the setting of the "MV at PV error" parameter.
- Set the upper limit value in the "remote SP upper limit" parameter and the lower limit value in the "remote SP lower limit" parameter (option mode).
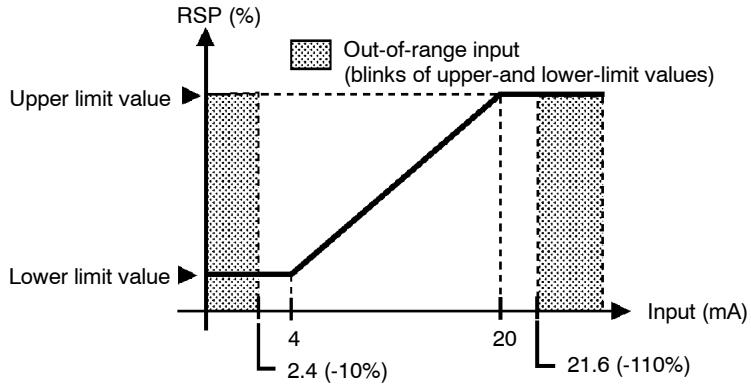
Relationship with set point limiter
- When the "Set point upper limit" or "Set point lower limit" parameters are changed, the remote SP upper-and lower-limit values are forcibly changed to the set point upper-and lower-limit values. The following example shows how the remote SP upper-and lower-limit values are changed when the set point upper limit value is changed from A to B.
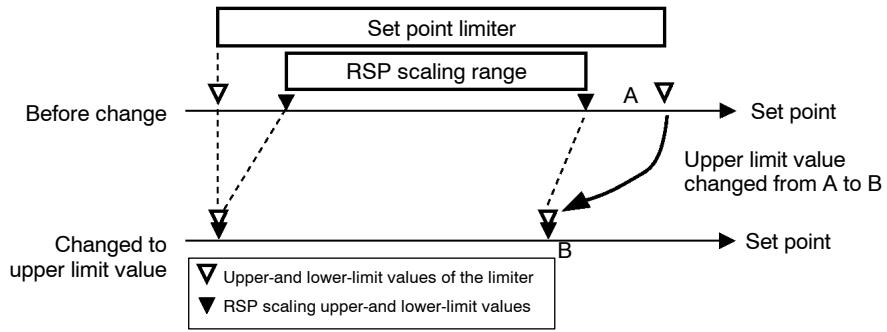
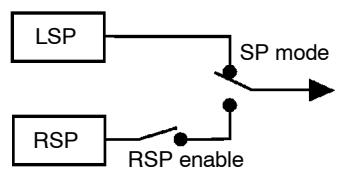
SP mode
- The set point held internally by the E5AK controller is referred to as the "local SP (LSP)."
- If the multi-SP function is enabled, set points 0 to 3 are enabled for use as the local SP.
- Use the "SP mode" parameter to switch between the remote SP and local SP. When the SP mode parameter is set to "rSP" (remote SP), the "RSP" LED lights. When the SP mode parameter is set to "LSP", the controller is in the local SP mode.
Remote SP monitor
SP tracking
- In the remote SP mode, the remote SP can be monitored on the No.2 display for PV/SP. In the local SP mode, the remote SP can be monitored in the "remote SP monitor" parameter.
- When the local SP is switched to from the remote SP when the SP tracking function is enabled, the local SP is changed so that the remote SP value is held at the SP value used immediately before switching.
To use the SP tracking function, set the "SP tracking" parameter to "ON".
- The following figure shows how SP tracking works when the SP mode is switched.
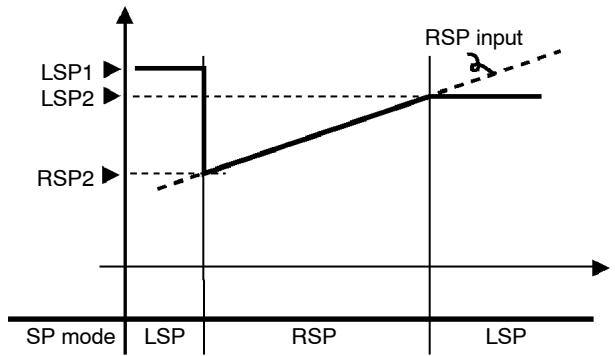
(1) When the remote SP is switched to when the set point is "LSP1", the SP is switched to "RSP2".
(2) The SP shifts according to remote SP input.
(3) When the local SP is switched to, the set point becomes "LSP2" if the SP tracking function is enabled. If this function is disabled, the SP will be switched to "LSP1".
- When the local SP is switched to the remote SP, the SP ramp will operate if the SP ramp function is enabled.
■Operating conditions
- When the SP function is set to "ON", the "SP mode" parameter is forcibly changed to [L5P] and the local SP is taken as the set point.
- During auto-tuning, remote SP input is not accepted. Auto-tuning is executed on the set point at the start of auto-tuning.
- Remote SP is not subject to the standby sequence reset conditions.
Parameters
| Symbol | Parameter Name: Mode | Application | |
| rSPU | Remote SP enable : Option | Remote SP function | |
| rSPH | Remote SP upper limit : Option | RSP scaling | |
| rSPL | Remote SP lower limit : Option | RSP scaling | |
| rPnd | SP mode : Level 2 | LSP/RSP switching | |
| SPtr | SP tracking : Option | LSP/RSP switching | |
4.5 How to Use the Heater Burnout Alarm
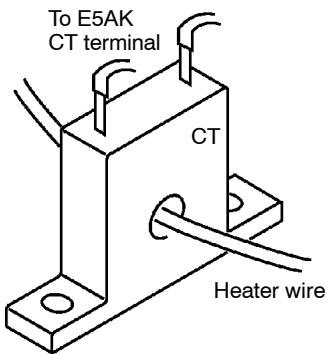
Heater burnout detection
HBA latch/release
■Operating conditions
- On a standard type controller, the HBA (heater burnout alarm) function can be used only when the assignment destination of the output function "control output (heat)" is set to pulsed output.
-
When using the HBA function, assign output function "heater burnout (HB) alarm" to auxiliary outputs 1 or 2.
-
Heater burnout detection works as follows.
(1) Connect the current transformer (CT) to terminal Nos.15 and 17, and insert the heater lead through the CT hole.
(2) When current flows through this lead, the current transformer generates AC current proportional to the current value. The E5AK measures this AC current to calculate the current flowing to the heater.
(3) If heater is burned out, the current measured at the current transformer decreases. This value is compared with the value set as the heater burnout set value and is output as the heater burnout alarm.
- Set the heater burnout set value in the "heater burnout alarm" parameter. To check the current value of the current transformer, use the "heater current monitor" parameter.
-
When you are not using the HBA function, set the "heater burnout alarm" parameter to "0.0 (disabled)".
-
When the HBA latch function is set to "ON", the heater burnout alarm is held until either of the following measures is taken:
a Set the heater burnout set value to "0.0".
b Reset the controller.
(Turn the controller's power OFF then back ON again.)
-
To enable the HBA latch function, set the "HBA latch" parameter to "ON".
-
Turn the heater power supply ON at the same time as or before turning the E5AK power supply ON. If the heater power supply is turned ON after turning the E5AK power supply On, the heater burnout alarm is output.
- Control is continued even when the heater burnout alarm is output. (That is, the controller attempts to control the heater as if the heater burnout alarm has not occurred.) So, remedy the condition such as repairs which are caused by the heater burnout alarm.
- The heater burnout alarm is detected only if the control output is continuously ON for 190ms or more.
- The rated current value may sometimes differ slightly from the actual current value flowing to the heater. Check the current value in an actual operating status in the "heater current monitor" parameter.
- If there is little difference between the current in a normal status and the current in a burnout status, detection may become unstable. On a heater of current 10.0A or less, maintain a difference of 1.0A or more. On a heater of current 10.0A or more, maintain a difference of 2.5A or more.
- Heater burnout alarm function cannot be used when controlling the heater by a phase control method or by a cycle control method. Also, 3-phase heaters cannot be used.
When detecting heater burnout on a 3-phase heater, use the K2CU-F□A-□GS (with gate input terminal). (For details, see the respective data sheet.)
How to calculate the heater burnout set value
- Calculate the set value n by the following formula:
$$ \text {S e t v a l u e} = \frac {\text {(c u r r e n t v a l u e a t n o r m a l o p e r a t i o n + c u r r e n t v a l u e a t b u r n o u t)}}{2} $$
- Set the current value at burnout when two or more heaters are connected to the CT to the value at the time that the heater having the smallest current value burns out (the value when one of the heaters burns out with all heaters at the same current).
- Make sure that the following condition is satisfied:
Heater of current 10.0 A or less
Current value at normal operation - current value at heater burnout ≥ 1 A
When resultant current is less than 1 A, detection is unstable.
Heater of current 10.0 A or more
Current value at normal operation - current value at heater burnout ≥ 2.5A
When resultant current is less than 2.5 A, detection is unstable.
- The setting range is 0.1 to 49.9 A. Heater burnout is not detected when the setting is "0.0" or "50.0". When the setting is "0.0", the heater burnout alarm is set to "OFF", and when the setting is "50.0", the heater burnout alarm is set to "ON".
- Set the total current value at normal heater operation to 50 A or less. When set to 55.0 A or more, [F F F F] is displayed in the "heater current monitor" parameter.
Example 1 : when using a 200 VAC, 1 kW heater
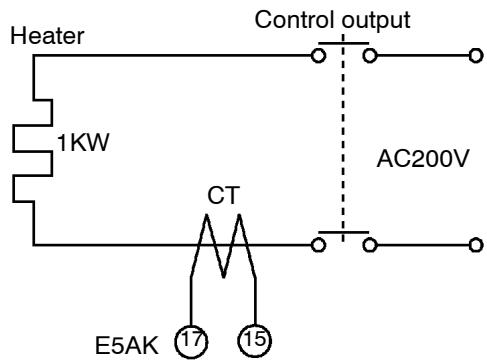
Examples of use
Current at normal operation = 1000200 = 5A(< 10A)
Current at heater burnout = 0A
Set value = 5 + 02 = 2.5A
Example 2 : when using three 200 VAC, 1 ~kW heaters
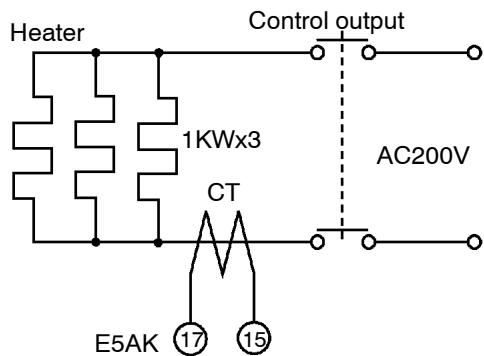
Current at normal operation = 1000200 × 3 = 15A (≥ 10A)
Current at burnout of one heater = 1000200 × 2 = 10A
Set value = 15 + 102 = 12.5A
(current at normal operation—current at heater burnout
$$ = 1 5 - 1 0 = 5 \mathrm {A} (\geq 2. 5 \mathrm {A}) $$
Parameters
| Symbol | Parameter Name: Mode | Application | |
| Ct | Heater current monitor | : Level 1 | Heater current value monitor |
| Hb | Heater burnout | : Level 1 | Heater burnout detection |
| HbI | Heater burnout latch | : Option | Heater burnout detection alarm latch |
4.6 LBA
LBA detection time
LBA detection width
LBA detection example
- The LBA (Loop Break Alarm) function can be used only on standard type controllers.
- The LBA function can be used only when assigned as an output. Also, the LBA function does not work when a memory error or A/D converter error results.
-
LBA (Loop Break Alarm) is a function for judging that an error has occurred somewhere on the control loop and outputting an alarm when the process value does not change with the manipulated variable at a maximum or minimum state. Accordingly, the LBA function can be used as a means for detecting a malfunctioning control loop.
-
Normally, when output is set to maximum or minimum, the process value rises or falls after the dead time has elapsed. LBA is output if the process value does not change in the predicted direction after a fixed amount of time has elapsed. This fixed amount of time is the "LBA detection time."
- LBA operation sometimes becomes unstable when the process value fluctuates considerably due to the control characteristics. The LBA detection width is provided so that changes with respect to output can be correctly detected. Changes smaller than the detection width due to LBA detection timing are not regarded as changes.
- The following example describes what happens when a heater burnout at maximum output.
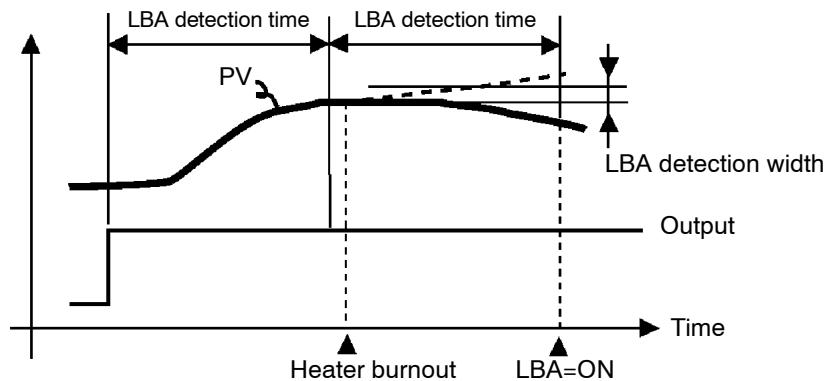
- LBA judgment is carried out at each LBA detection time from the point of maximum output. In above figure, the process value (PV) is changing greatly at the 1st judgment timing, so LBA remains OFF.
- At the 2nd judgment timing, the process value increases as indicated by the broken line of the process value is normal. This means that the change width exceeds the LBA detection width, and LBA output remains OFF.
- If the heater burns out at the point shown in the above figure, the process value "decreases." Accordingly, it is judged that "the process value is not changing in the increasing direction" at the 2nd judgment timing and the LBA output becomes ON.
Setting the LBA detection time
- The LBA detection time is automatically set by auto-tuning (except in heating and cooling control).
- If the optimum LBA detection time cannot be obtained by auto-tuning, set the time in the "LBA detection time" parameter (level 2 mode).
Determining the LBA detection time
- Calculate the LBA detection time as follows:
(1) Set output to maximum.
(2) Measure the time it takes for the input change width to reach the LBA detection width (default: 0.2% full-scale).
(3) Take a value twice that of the measurement time as the LBA detection time.
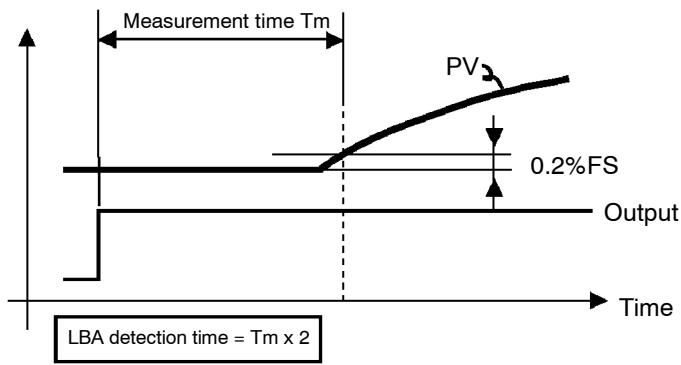
(4) In the case of ON/OFF operation, set the LBA detection time to a value longer than the control period.
Parameters
| Symbol | Parameter Name: Mode | Application |
| Rt | AT Execute/Cancel : Level 1 | Automatic setting of LBA detec-tion time |
| LbR | LBA detection time : Level 2 | Setting of LBA detection time |
| LbRb | LBA detection width : Expansion | Changing of LBA detection width |
4.7 How to Use Transfer Output
- When using transfer output, add on the communications unit (E53-AKF).
- Transfer output type
- You can select the following data items in the "transfer output type" parameter (option mode) as the transfer outputs:
Set point
Set point during SP ramp
Process value
Manipulated variable (heat)
Manipulated variable (cool), and
Valve opening.
However, note that heating/cooling side manipulated variables can be output only standard type controllers, and valve opening can be output on position-proportional type controllers
- If the output assignment is changed when either "manipulated variable (heat)" or "manipulated variable (cool)" parameter is selected, the default "set point" is returned to.
- Transfer output scaling
- These transfer outputs can be scaled according to the settings of the "transfer output upper limit" and "transfer output lower limit" parameters before output. Setting of an upper limit value smaller than the lower limit value is allowed, so reverse scaling can also be carried out. Also, the scale can be enlarged by the upper-and lower-limit width specified for each data item. The following example shows scaling of the reading side manipulated variable.
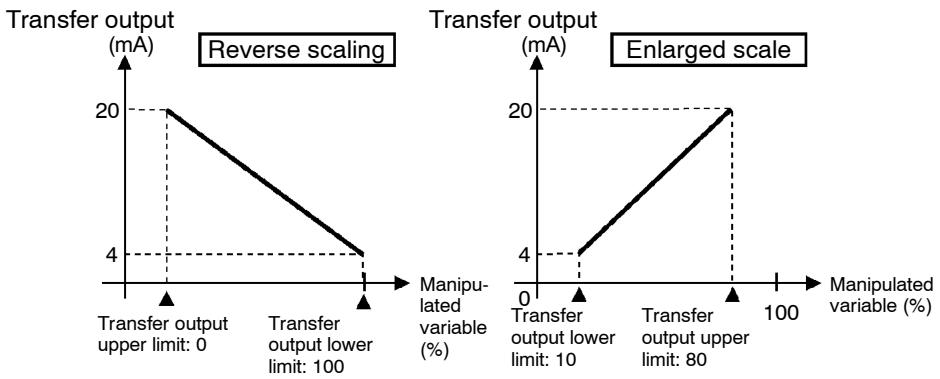
- If "input type", "scaling upper/ lower limit", "SP limitter upper/ lower limit", or ^ C / F selection" parameters is changed when "set point", "set point during SP ramp", or "process value" parameter is selected, each of the "transfer output upper limit" and "transfer output lower limit" parameters are forcibly changed to their respective upper or lower limit values.
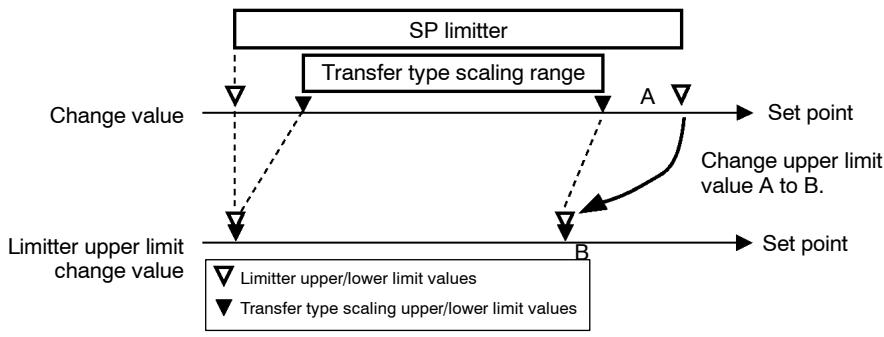
Parameters
| Symbol | Parameter Name: Mode | Application | |
| kr - k | Transfer output type | : Option | Transfer output designation |
| kr - H | Transfer output upper limit | : Option | Transfer output scaling |
| kr - L | Transfer output lower limit | : Option | Transfer output scaling |
CHAPTER5
PARAMETERS
This chapter describes the parameters of the E5AK. Use this chapter as a reference guide.
Conventions Used in this Chapter 5-2
Protect Mode 5-3
Manual Mode 5-5
Level 0 Mode 5-6
Level 1 Mode 5-10
Level 2 Mode 5-18
Setup Mode 5-25
Expansion Mode 5-32
Option Mode 5-37
Calibration Mode 5-46
The meaning of icons used in this chapter
Function
Describes the functions of the parameter.
Comment
Describes the range and defaults of the parameter setting.
Monitor
Used for monitor-dedicated parameters.
Describes the range of the monitor values.
Example of use
Describes a procedure using parameters in operating instructions.
See
Describes related parameters and items.
Model
Describes models of the E5AK or option units supporting the parameter being described.
About parameter display
On the E5AK controller, only parameters that can be used are displayed. These parameters are displayed only when the "Conditions of Use" on the right of the parameter heading are satisfied. However, note that the settings of protected parameters are still valid, and are not displayed regardless of the conditions of use.
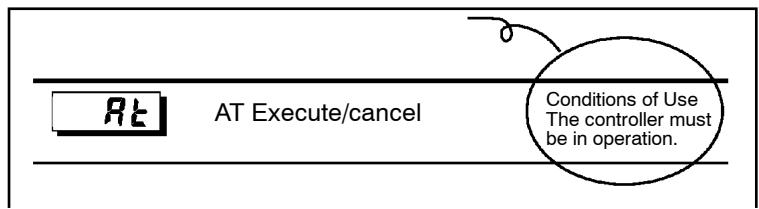
- The protect mode is for disabling (protecting) the functions of the menu key or A/M key. Before changing parameters in this mode, first make sure that protecting the menu key or A/M key will not cause any problems in operation.
- To select this mode, press the A/M key and key simultaneously for 1 second minimum. To exit this mode, press the A/M key and key down again simultaneously for 1 second minimum.
- The following table shows the parameters supported in this mode and the page where the parameter is described.
| Symbol | Parameter Name | Page |
| SEC | Security | 5-3 |
| KEYP | [A/M] key protect | 5-4 |
Security
Function
Comment
- This parameter specifies which parameters are protected. However, note that the protect mode and manual mode cannot be protected.
- When this parameter is set to “0” to “3”, only the modes indicated by the “○” mark in the table below can be selected on the menu display. For example, when this parameter is set to “2”, only level 0 to 2 modes can be selected.
- When this parameter is set to "4" to "6", operations in only the level 0 mode can be selected, and the mode is not displayed on the menu display.
- When this parameter is set to “5”, only the “PV/SP” parameter in the level 0 mode can be used.
- When this parameter is set to “6”, only the “PV/SP” parameter in the level 0 mode can be used. (The set point cannot change.)
- Default is "1". (Only the calibration mode is protected.)
See
Related article
3.5 Protect Mode (page 3-12)
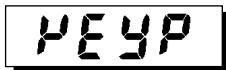
[A/M] key protect
![OMRON E5AK - [A/M] key protect - 1](/content/2025/01/168377/images/b8d49e2360bb022ad4ab2c9f90e2959240a6512cfe565b1bd5d48998f3e8b80f.jpg)
Function
- Invalidate the function of the key. In other words, you cannot switch between the auto and manual operations by key operation.
![OMRON E5AK - [A/M] key protect - 2](/content/2025/01/168377/images/37cc684a52bb986612bca8359efa83b8a66b913712f63f7d2b27e168326227b9.jpg)
Comment
·[ ]: / M keyprotectON
- [ F F]: / M key protect canceled
- Default = [ F F ]
![OMRON E5AK - [A/M] key protect - 3](/content/2025/01/168377/images/9fb25bad2d6e1980ed11a4a4983fe0f31df8c381528bbc5ad59e8037d126744b.jpg)
See
Related article
3.5 Protect Mode (page 3-12)
- In this mode, manual operations are possible, and the "MANU" LED lights.
- When this mode is selected, the manipulated variable that was active immediately before the mode was switched to is output. When changing the manipulated variable, change it using the or keys.
If this mode is switched to during auto-tuning, auto-tuning is canceled.
- To select this mode when in the level 0 to 2 modes, press the / M key for 1 second minimum. To exit this mode, press the / M key for 1 second minimum. The mode changes to the level 0 mode.
- "Manual MV" is the only parameter available in this mode.
![OMRON E5AK - [A/M] key protect - 4](/content/2025/01/168377/images/a1a8d8521d06574e091cec0fe65cea47683de16570fdcfd4d4376214a46f5546.jpg)
Manual MV
Function
- Sets the manipulated variable for manual operation or the valve opening. On a standard type controller when you press the or keys, the manipulated variable is changed. On a position-proportional type controller when you press the key, the open side becomes ON, and when you press the key, the close side becomes ON.
- On a standard type controller, the process value is displayed on the No.1 display and the manipulated variable is displayed on the No.2 display. The manipulated variable on the heating side is also displayed on the bar graph in 10% increments.
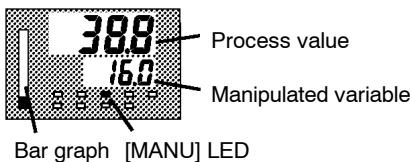
- When a potentiometer is connected on a position-proportional type controller, the process value is displayed on the No.1 displayed, and the valve opening is displayed on the No.2 display. The valve opening is also displayed on the bar graph in 10% increments. When a potentiometer is not connected to the controller, [] is displayed on the No.2 display, and nothing is displayed on the bar graph.
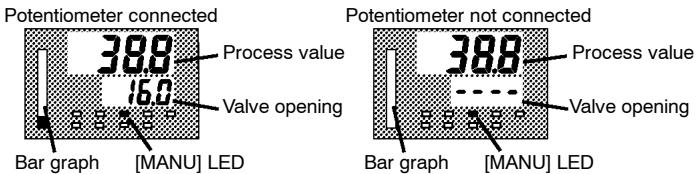
- On standard type controllers, the manual MV is held when the power is interrupted.
Comment
- Standard type
| Control Method | Setting Range | Unit | Default |
| Standard | -5.0 to 105.0 | % | 0 |
| Heating and cooling | -105.0 to 105.0 | % | 0 |
- Position-proportional type
| Control Method | Monitor Range | Unit |
| Position-proportional | -10.0 to 110.0 | % |
See
Related article
3.7 Adjusting Control Operation (page 3-14)
- The parameters in this mode can be used only when the "security" parameter (protect mode) is set to "0" to "4".
- The “PV/SP” parameter can be used when the “security” parameter is set to “5” or “6”. However, note that the SP cannot be changed when it is set to “6”.
- This mode is used for monitoring the process value, set point and manipulated variable during operation, and for checking and setting the SP setting value. It is also used for starting and stopping controller operation.
- To select this mode when in the levels 1 and 2, setup, expansion, option and calibration modes, press the key for 1 second minimum. The display changes to the menu display. If you select [L - ] then press key for 1 second minimum, the controller enters the level 0 mode.
- To select parameters in this mode, press the key. To change parameter settings, use the or keys.
- The following table shows the parameters supported in this mode and the page where the parameter is described.
| Symbol | Parameter Name | Page |
| PV/SP | 5-6 | |
| r-SP | Remote SP monitor | 5-7 |
| SP- | Set point during SP ramp | 5-8 |
| a | MV monitor (heat) | 5-8 |
| c - a | MV monitor (cool) | 5-8 |
| u - v | Valve opening monitor | 5-9 |
| r - S | Run/Stop | 5-9 |
PV/SP
Function
- The process value is displayed on the No.1 display, and the set point is displayed on the No.2 display. The set point can be set.
- Either of the local SP or remote SP is displayed as the set point depending on the SP mode. In the remote SP mode, the set point is only monitored.

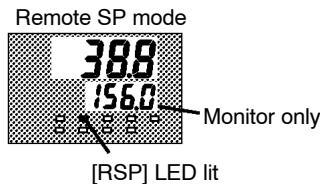
- The selected set point is linked when the multi-SP function is in use in the local SP mode. For example, when set point 1 is selected, set point 1 is displayed on the No.2 display, and the setting of the "set point 1" parameter (level 1 mode) also is changed when the value of set point 1 is changed.
- The decimal point position is dependent on the selected sensor during temperature input and on the results of scaling during analog input.
Comment
- Process value
| Monitor Range | Unit |
| Scaling lower limit -10%FS to scaling upper limit +10%FS | EU |
During temperature input, the range of the currently selected sensor is taken as the monitor range.
- Set point
| Setting Range/Monitor Range | Unit | Default |
| Local SP : Local SP lower limit to local SP setting upper limit | EU | 0 |
| Remote SP: Remote SP lower limit to remote SP upper limit | EU | - |
See
Related article
3.7 Adjusting Control Operation (page 3-14)
Related parameters
“Input type” “Scaling upper limit” “Scaling lower limit” “Decimal point” (setup mode)
"SP setting upper limit" "SP setting lower limit" (expansion mode)
"SP mode" (level 2 mode)
"Remote SP enable" "Remote SP upper limit" "Remote SP lower limit" (option mode)
-5p
Remote SP monitor
Conditions of Use
The controller must be in the local SP mode with the remote SP function enabled.
Function
- Monitors remote SP in the local SP mode.
Monitor
| Monitor Range | Unit |
| Remote SP lower limit to Remote SP upper limit | EU |
See
Related article
4.2 Operating Condition Restrictions/SP ramp (page 4-6)
Related parameters
"SP mode" (level 2 mode)
"Remote SP enable" "Remote SP lower limit" "Remote SP upper limit" (option mode)
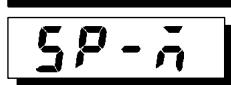
Set point during SP ramp
Conditions of Use
The remote SP function must be enabled. When the remote SP function is disabled, this function can be used only when the SP ramp function is enabled.
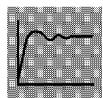
Function
- Monitors the set point during SP ramp
- Matches the set point of the "PV/SP" parameter when the set point is not during SP ramp.
Monitor
| Monitor Range | Unit |
| Local SP : Local SP setting lower limit to local SP setting upper limit | EU |
| Remote SP : Remote SP lower limit to remote SP upper limit | EU |
See
Related article
4.2 Operating Condition Restriction/SP ramp (page 4-6)
Related parameters
"PV/SP" (level 0 mode)
"SP ramp time unit" "SP ramp set value" (level 2 mode)
"Set point upper limit" "Set point lower limit" (expansion mode)
"SP mode" (level 2 mode)
"Remote SP enable" "Remote SP upper limit" "Remote SP lower limit" (option mode)
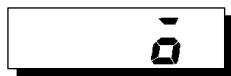
MV monitor (heat)
Conditions of Use
Control must be standard control or heating and cooling control.
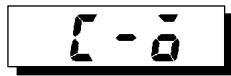
MV monitor (cool)
Function
- This parameter cannot be set.
- Monitors the manipulated variable on the heating or cooling side.
- The manipulated variable in a standard control system is checked in the "MV monitor (heat)" parameter.
- The "MV monitor (cool)" parameter can be used only during heating and cooling control.
Monitor
- MV monitor (heat)
| Control | Monitor Range | Unit |
| Standard | -5.0 to 105.0 | % |
| Heating and cooling | 0.0 to 105.0 | % |
- MV monitor (cool)
| Control | Monitor Range | Unit |
| Heating and cooling | 0.0 to 105.0 | % |
Model
E5AK-AA2 AC100-240
E5AK-AA2 AC/DC24
| Valve opening monitor Conditions of Use Control must be position-proportional control | ||
| Function | • Monitors the valve opening during position-proportional control. | |
| Monitor Range | Unit | |
| -10 to +110 | EU | |
| See | ● Related article 4.1 Selecting the Control Method/Position-proportional control (page 4-3) | |
| Model | E5AK-PRR2 AC100-240 E5AK-PRR2 AC/DC24 | |
| Run/Stop | ||
| Function | • This parameter is used for checking the operating status of the controller, and for specifying start and stop of operation. • When the “run/stop” function is assigned to event input, “stop” is set when event input is ON, and “run” is set when event input is OFF. Even if the setting of the Run/Stop parameter is changed using key operations, Controller operation will be determined by the status of the event input. | |
| Example of use | • To start operation, set this parameter to [ rUun] press the √ or keys. To stop operation, set this parameter to [ SbOP]. When operation is stopped, the “STOP” LED lights. • Default is [ rUun] | |
| See | ● Related article 3.6 Starting and Stopping Operation (page 3-13) | |
- The parameters in this mode can be used only when the "security" parameter (protect mode) is set to "0" to "3".
- This mode contains the main parameters for adjusting control. These parameters include parameters for executing AT (auto-tuning), setting the alarm values, setting the control period, and setting PID parameters.
- To select this mode when in the levels 0 and 2, setup, expansion, option and calibration modes, press the key for 1 second minimum. The display changes to the menu display. If you select [L_ - I] then press the key for 1 second minimum, the controller enters the level 1 mode.
- To select parameters in this mode, press the key. To change parameter settings, use the or keys.
- The following table shows the parameters supported in this mode and the page where the parameter is described.
| Symbol | Parameter Name | Page |
| Rt | AT Execute/Cancel | 5-11 |
| SP-0 | Set point 0 | 5-11 |
| SP-1 | Set point 1 | 5-11 |
| SP-2 | Set point 2 | 5-11 |
| SP-3 | Set point 3 | 5-11 |
| RL-1 | Alarm value 1 | 5-12 |
| RL-2 | Alarm value 2 | 5-12 |
| RL-3 | Alarm value 3 | 5-12 |
| P | Proportional band | 5-12 |
| c | Integral time | 5-12 |
| d | Derivative time | 5-12 |
| C-5C | Cooling coefficient | 5-13 |
| C-db | Dead band | 5-14 |
| db | Position-proportional dead band | 5-14 |
| aF-r | Manual reset value | 5-15 |
| Hys | Hysteresis (heat) | 5-15 |
| CHYS | Hysteresis (cool) | 5-15 |
| CP | Control period (heat) | 5-16 |
| C-CP | Control period (cool) | 5-16 |
| ct | Heater current monitor | 5-17 |
| Hb | Heater burnout | 5-17 |
| AT Execute/Cancel Conditions of Use The controller must be in operation, con- trol must be advanced PID control, and ST must be set to OFF. | |||
| Function | • Selects the limit cycle of MV change width (40% or 100%) for execution. After AT execution, the “PID” and the “LBA detection time” (LBA: Loop Break Alarm) parameters are set automatically. • During heating and cooling control or position-proportional control, only 100%AT can be executed. | ||
| Example of use | • When this parameter is selected, the setting becomes [OFF]. • To execute 40%AT, select [Rt - t], and to execute 100%AT, select [Rt - z]. During execution of auto-tuning, the AT LED flashes. However, note that during heating and cooling control or position-proportional control, [Rt - t] is not displayed. • When AT execution ends, the parameter setting automatically returns to [OFF]. | ||
| See | ● Related article 3.7 Adjusting Control Operation (page 3-16) ● Related parameters “Run/Stop” (level 0 mode) “Proportional band” “Integral time” “Derivative time” (level 1 mode) “LBA detection time” (level 2 mode) | ||
| SP-0 | Set point 0 | SP-2 | Set point 2 |
| SP-1 | Set point 1 | SP-3 | Set point 3 |
| Conditions of Use The controller must be in the local SP mode with the multi-SP function enabled. | |||
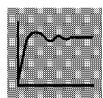
Function
- Switches set points 0 to 3 by event input for use as the set point (local SP).
- Of set points 0 to 3, the number of valid set points is designated by the "multi-SP function" parameter.
- The following table shows the relationship between event input and the selected parameter.
| Multi-SP Function | 1 | 2 | |
| Event Input | 1 | 1 | 2 |
| Set Point 0 | OFF | OFF | OFF |
| Set Point 1 | ON | ON | OFF |
| Set Point 2 | - | OFF | ON |
| Set Point 3 | - | ON | ON |
- When the set point has been changed, the setting of whichever is selected in event input, "set point 0" to "set point 3", is linked and changed.
- The decimal point position is dependent on the selected sensor during temperature input and on the results of scaling during analog input.
Level 1 Mode
Comment
| Setting Range | Unit | Default |
| Set point lower limit to Set point upper limit | EU | 0 |
See
Related article
4.3 How to Use Event Input (page 4-8)
Related parameters
"Multi-SP function" "Remote SP enable" (option mode)
"Set point" (level 0 mode) "SP mode" (level 2 mode)
“Input type” “Scaling upper limit” “Scaling lower limit” “Decimal point” (setup mode)
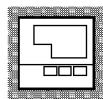
Model
Option unit
E53-AKB
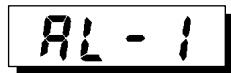
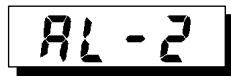
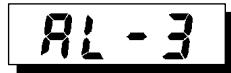
Alarm value 1
Alarm value 2
Alarm value 3
Conditions of Use
Alarms must be assigned as outputs.
For example, if alarm outputs 1 and 2 only are assigned as outputs, the "alarm value 3" parameter cannot be used.
Function
- This parameter is used for monitoring or changing the alarm values of alarm outputs 1 to 3.
- During temperature input, the decimal point position is dependent on the currently selected sensor, and during analog input on the results of scaling.
Comment
| Setting Range | Unit | Default |
| -1999 to 9999 | EU | 0 |
See
Related article
3.4 Setting Alarm Type (page 3-9)
Related parameters
“Input type” “Scaling upper limit” “Scaling lower limit” Decimal point” “Control output 1 assignment” “Control output 2 assignment” “Auxiliary output 1 assignment” “Auxiliary output 2 assignment” “Alarm 1 type” “Alarm 2 type” “Alarm 3 type” “Alarm 1 open in alarm” “Alarm 2 open in alarm” “Alarm 3 open in alarm” (setup mode)
"Alarm 1 hysteresis" "Alarm 2 hysteresis" "Alarm 3 hysteresis" (level 2 mode)
"Standby sequence reset method" (expansion mode)
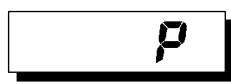
Proportional band
Conditions of Use Control must be advanced PID control, and ST must be set to OFF.
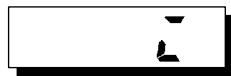
Integral time
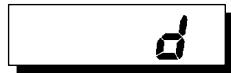
Derivative time
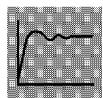
Function
- Sets the PID parameters. However, note that the PID parameter settings are changed to optimum values when auto-tuning is executed, and self-tuning is selected.
Comment
| Parameter | Setting Range | Unit | Default |
| Proportional band | 0.1 to 999.9 | %FS | 10.0 |
| Integral time | 0 to 3999 (see note1) | Second | 233 |
| Derivative time | 0 to 3999 | Second | 40 |
note1 : During position-proportional control, the setting range become 1 to 3999s.
See
Related parameter "AT Execute/Cancel" (level 1 mode)
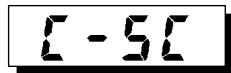
Cooling coefficient
Conditions of Use The control must be either heating and cooling control, or advanced PID control.
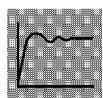
Function
- In heating and cooling control, P at the cooling side is calculated by the following formula: Cooling side P = cooling coefficient × P
Comment
| Setting Range | Unit | Default |
| 0.01 to 99.99 | None | 1.00 |
See
- Related article 4.1 Selecting the Control Method (page 4-2)
- Related parameter "Proportional band" (level 1 mode)
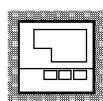
Model
E5AK-AA2 AC100-240
E5AK-AA2 AC/DC24
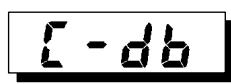
Dead band
Conditions of Use
The control system must be heating and cooling control.
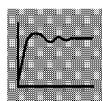
Function
- Sets the output dead band width in a heating and cooling control system. A negative setting sets an overlap band.
Comment
| Setting Range | Unit | Default |
| -19.99 to 99.99 | %FS | 0.00 |
Related article
4.1 Selecting the Control Method (page 4-2)
See
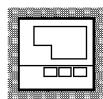
Model
E5AK-AA2 AC100-240
E5AK-AA2 AC/DC24
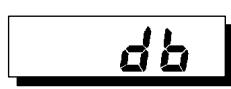
Position-proportional dead band
Conditions of Use
Control must be position-proportional control
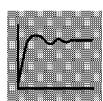
Function
- Sets the output hold width during position-proportional control (ON/OFF switching point for open and close output).
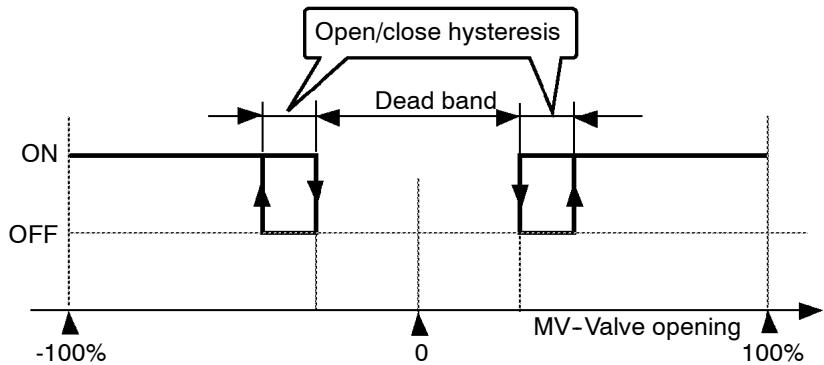
Comment
| Setting Range | Unit | Default |
| 0.1 to 10.0 | % | 2.0 |
Related article
4.1 Selecting the Control Method/Position-proportional Control (page 4-3).
Related parameter
"Open/close hysteresis" (Level 2 mode)
See
Model
E5AK-PRR2 AC100-240
E5AK-PRR2 AC/DC24
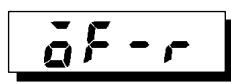
Manual reset value
Conditions of Use
The control must be either standard control or advanced PID control, ST must be set to OFF, and the "integral time" parameter must be set to "0".
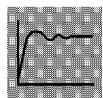
Function
- Sets the required manipulated variable to remove offset during stabilization of P or PD control.
Comment
| Setting Range | Unit | Default |
| 0.0 to 100.0 | % | 50.0 |
Model
E5AK-AA2 AC100-240
E5AK-AA2 AC/DC24
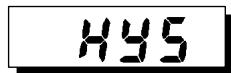
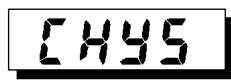
Hysteresis (heat)
Hysteresis (cool)
Conditions of Use
The control system must be ON/OFF control.
Function
- Sets the hysteresis for ensuring stable operation at ON/OFF switching.
- In standard control, use the "hysteresis (heat)" parameter. The "hysteresis (cool)" parameter cannot be used.
- In heating and cooling control, the hysteresis can be set independently for heating and cooling. Use the "hysteresis (heat)" parameter to set the heating side hysteresis, and use the "hysteresis (cool)" parameter to set the cooling side hysteresis.
Comment
| Parameter | Setting Range | Unit | Default |
| Hysteresis (heat) | 0.01 to 99.99 | %FS | 0.10 |
| Hysteresis (cool) | 0.01 to 99.99 | %FS | 0.10 |
See
Related article
4.1 Selecting the Control Method/ON/OFF control (page 4-4)
Related parameters
"Control output 1 assignment" "Control output 2 assignment" (setup mode)
"PID / ON/OFF" (expansion mode)
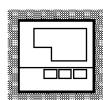
Model
E5AK-AA2 AC100-240
E5AK-AA2 AC/DC24
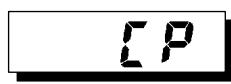
Control period (heat)
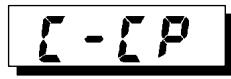
Control period (cool)
Conditions of Use
Relay or voltage output must be set as the outputs, and the control must be set to advanced PID control, standard control or heating and cooling control.
Function
- Sets the pulse output period. Set the control period taking the control characteristics and life expectancy of the controller into consideration.
- In standard control, use the "control period (heat)" parameter. The "control period (cool)" parameter cannot be used.
- In heating and cooling control, the control period can be set independently for heating and cooling. Use the "control period (heat)" parameter to set the heating side control period, and use the "control period (cool)" parameter to set the cooling side control period.
Comment
| Parameter | Setting Range | Unit | Default |
| Control period (heat) | 1 to 99 | Second | 20 |
| Control period (cool) | 1 to 99 | Second | 20 |
See
Related article
3.3 Setting Output Specifications (page 3-6)
Related parameters
"Control output 1 assignment" "Control output 2 assignment" (setup mode)
Model
E5AK-AA2 AC100-240
E5AK-AA2 AC/DC24
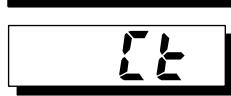
Heater current monitor
Conditions of Use The HBA output function must be assigned.
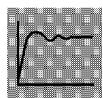
Function
- Measures the current value of the heater from CT input.
Monitor
| Monitor Range | Unit |
| 0.0 to 55.0 | A |
- [F F F F] is displayed when 55.0A is exceeded.
See
Related article
4.5 How to Use the Heater Burnout Alarm (page 4-13)
Related parameters
"Heater burnout" (level 1 mode) "HBA latch" (option mode)
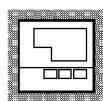
Model
E5AK-AA2 AC100-240
E5AK-AA2 AC/DC24
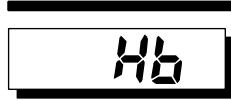
Heater burnout
Conditions of Use The HBA output function must be assigned.
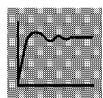
Function
- Outputs the heater burnout alarm when the heater current value falls below this parameter setting.
- When the set value is "0.0", the heater burnout alarm is "OFF". When the set value is "50.0", the heater burnout alarm is "ON".
Comment
| Setting Range | Unit | Default |
| 0.0 to 50.0 | A | 0.0 |
See
Related article
4.5 How to Use the Heater Burnout Alarm (page 4-13)
Related parameters
"Heater current monitor" (level 1 mode) "HBA latch" (option mode)
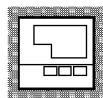
Model
E5AK-AA2 AC100-240
E5AK-AA2 AC/DC24
-
The parameters in this mode can be used only when the "security" parameter (protect mode) is set to "0" to "2".
-
This mode contains the auxiliary parameters for adjusting control. These parameters include parameters for limiting the manipulated variable and set point, parameters for switching between remote and local operation, and parameters for setting the LBA (Loop Break Alarm), alarm hysteresis, and input digital filter values.
-
To select this mode when in the levels 0 and 1, setup, expansion, option and calibration modes, press the key for 1 second minimum. The display changes to the menu display. If you select [L_ - ] using the key then press the key for 1 second minimum, the controller enters the level 2 mode.
-
To select parameters in this mode, press the key. To change parameter settings, use the or keys.
-
The following table shows the parameters supported in this mode and the page where the parameter is described.
| Symbol | Parameter Name | Page |
| r-L | Remote/Local | 5-19 |
| SP-n | SP mode | 5-19 |
| SP-U | SP ramp time unit | 5-20 |
| SP-t | SP ramp set value | 5-20 |
| LbA | LBA detection time | 5-21 |
| nU-S | MV at stop | 5-21 |
| nU-E | MV at PV error | 5-21 |
| aL-H | MV upper limit | 5-22 |
| aL-L | MV lower limit | 5-22 |
| aR-L | MV change rate limit | 5-22 |
| iNF | Input digital filter | 5-23 |
| aE-H | Open/close hysteresis | 5-23 |
| ALH1 | Alarm 1 hysteresis | 5-24 |
| ALH2 | Alarm 2 hysteresis | 5-24 |
| ALH3 | Alarm 3 hysteresis | 5-24 |
| cN5H | Input shift upper limit (temperature) | 5-24 |
| cN5L | Input shift lower limit (temperature) | 5-24 |
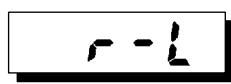
Remote/Local
Conditions of Use
The communications function must be in use.
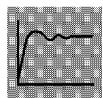
Function
- Switches between remote and local operation.
- To change the parameter setting during remote operation, use the communications function. To change the parameter setting during local operation, change the setting on the E5AK controller.
You can check the parameter setting by both communications and on the E5AK controller regardless of whether the controller is switched to remote or local operation.
- When the event input to which "remote/local" is assigned is ON, the controller switches to the remote mode. When the event input is OFF, the controller switches to the local mode.
Comment
| Setting Range | Default |
| [ r̅nB: remote / [ L[C]l: local | [ L[C]l |
See
Related article
Chapter 6 Using the Communications Function
Related parameters
"Communication stop bit" "Communication data length" "Communication parity" "Communication baud rate" "Communication unit No." "Event input assignment 1" "Event input assignment 2" "Event input assignment 3" "Event input assignment 4" (option mode)
Model
- Option units
E53-AK01/02/03
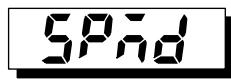
SP mode
Conditions of Use
The remote SP function must be enabled and ST must be set to OFF.
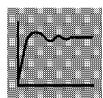
Function
- Switches between remote SP and local SP.
- Switches the SP to the remote SP when an event input to which the "SP mode" has been assigned is ON. Switches the SP to the local SP when an event input to which the "SP mode" has been assigned is OFF.
Comment
| Setting Range | Default |
| [ -5P ]: Remote SP/[ L5P ]: Local SP | L5P |
See
Related article
4.4 How to Use the Remote SP (page 4-11)
Related parameters
"Remote SP enable"
"Event input assignment 1" "Event input assignment 2" "Event input assignment 3" "Event input assignment 4" (option mode)
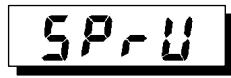
SP ramp time unit
Conditions of Use
ST must be set to OFF.
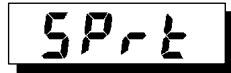
SP ramp set value
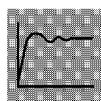
Function
- Specifies the change rate during SP ramp operation. Set the maximum permissible change width per unit of time (minute or hour) as the "SP ramp set value". However, note that when set to "0", the SP ramp function is disabled.
- The time unit and SP ramp set value are independent of each other. For example, when setting "30 per minute", set the "SP ramp set value" parameter to "30" and the "SP ramp time unit" parameter to [] ("minute"). However, if you change the time unit only to [] ("hour"), the set time becomes "30 per hour."
- During temperature input, the decimal point position of the SP ramp set value is dependent on the currently selected sensor, and during analog input on the results of scaling.
Comment
| Parameter | Setting Range | Unit | Default |
| SP ramp time unit | [ n]: minute/ [ H]: hour | None | n |
| SP ramp set value | 0 to 9999 | EU | 0 |
During temperature input, the range of the currently selected sensor it taken as the setting range for the "SP ramp set value" parameter.
See
Related article
4.2 Operating Condition Restrictions/SP ramp (page 4-6)
Related parameters
“Input type” “Scaling upper limit” “Scaling lower limit” “Decimal point” (setup mode)
L6R
LBA detection time
Conditions of Use
The LBA (Loop Break Alarm) function
must be assigned as an output.
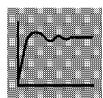
Function
- This parameter is automatically set by AT execution (excluding AT execution in a ON/OFF control).
- The LBA is output if the change width of the process value falls below 0.2% full-scale of the time preset to this parameter when the manipulated variable is set in the "MV upper limit" or "MV lower limit" parameters.
- The LBA function is disabled when this parameter is set to "0".
Comment
| Setting Range | Unit | Default |
| 0 to 9999 | Second | 0 |

See
Related article
4.4 LBA (page 4-9)
7.3 How to Use Error Output (page 7-5)
Related parameters
"AT Execute/Cancel" (level 1 mode)
"Control output 1 assignment" "Control output 2 assignment" "Auxiliary output 1 assignment" (setup mode)
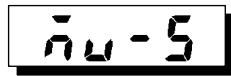
MV at stop
Conditions of Use
Advanced PID control
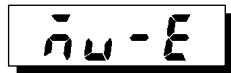
MV at PV error
Function
- The "MV at stop" parameter sets the manipulated variable when operation stops on a standard type controller. On a position-proportional type controller, this parameter sets the action (close/hold/open) when operation stops.
- The "MV at PV error" parameter sets the manipulated variable when an input error occurs. On a position-proportional type controller, this parameter sets the action (close/hold/open) when an input error occurs.
Comment
- Standard type
| Control Method | Setting Range | Unit | Default |
| Standard | -5.0 to 105.0 | % | 0 |
| Heating and cooling | -105.0 to 105.0 | % | 0 |
The manipulated variable at the cooling side during heating and cooling control is expressed as a negative value.
- Position-proportional type
| Setting Range | Unit | Default |
| [HöLD]: Hold/[ðPEn]: Open/[Løg]: Close | None | HöLD |

See
Related articles
MV at stop : 3.6 Starting and Stopping Operation (page 3-13)
MV at PV error : 8.2 How to Use the Error Display (page 8-3)
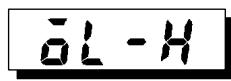
MV upper limit

MV lower limit
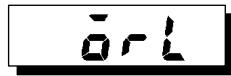
MV change rate limit
Conditions of Use
The control must be advanced PID control, and ST must be set to OFF.
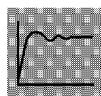
Function
- The "MV upper limit" and "MV lower limit" parameters set the upper and lower limits of the manipulated variable. When the manipulated variable calculated by the E5AK controller is outside of the upper-and lower-limit range, the upper limit or lower limit set to these parameters is output, respectively.
However, note that these parameters are disabled during position-proportional control.
- The "MV change rate limit" parameter sets the maximum permissible change width per second of the manipulated variable (on the position-proportional control, valve opening). If a change in the manipulated variable (on the position-proportional control, valve opening) causes this parameter setting to be exceeded, the calculated value is reached while changing the value by the per-second value set in this parameter.
This function is disabled when the set value is "0.0".
Comment
- MV upper limit
The setting ranges during standard control and heating and cooling control are different. Also, the manipulated variable at the cooling side during heating and cooling control is expressed as a negative value.
| Control Method | Setting Range | Unit | Default |
| Standard | MV lower limit +0.1 to 105.0 | % | 105.0 |
| Heating and cooling | 0.0 to 105.0 | % | 105.0 |
- MV lower limit
The setting ranges during standard control and heating and cooling control are different. Also, the manipulated variable at the cooling side during heating and cooling control is expressed as a negative value.
| Control Method | Setting Range | Unit | Default |
| Standard | -5.0 to MV upper limit -0.1 | % | -5.0 |
| Heating and cooling | -105.0 to 0.0 | % | -105.0 |
- MV change rate limit
| Setting Range | Unit | Default |
| 0.0 to 100.0 | % | 0.0 |
See
Related article
4.2 Operating Condition Restrictions/Manipulated variable restrictions (page 4-5)
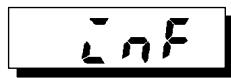
Input digital filter
Function
- Sets the time constant of the input digital filter. The following figures show the effect on data after passing through the digital filter.
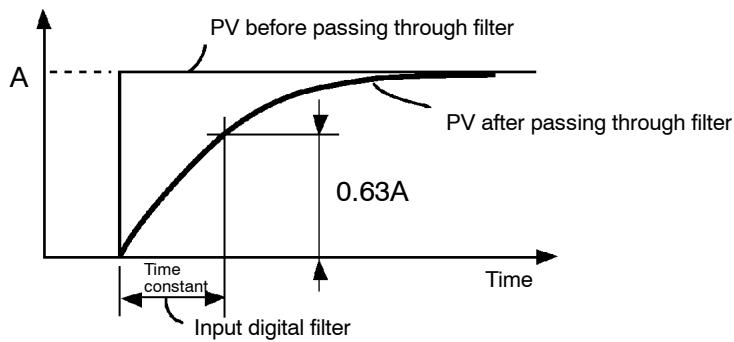
Comment
| Setting Range | Unit | Default |
| 0 to 9999 | Second | 0 |
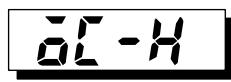
Open/close hysteresis
Conditions of Use Control must be position-proportional control.
Function
- Provides hysteresis at ON/OFF switching of open or close output in position-proportional control.
Comment
| Setting Range | Unit | Default |
| 0.1 to 20.0 | % | 0.8 |
See
Related article 4.1 Selecting the Control Method/Position-proportional Control (page 4-3)
Model
E5AK-PRR2 AC100-240
E5AK-PRR2 AC/DC24
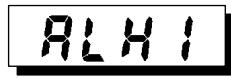
Alarm 1 hysteresis
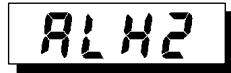
Alarm 2 hysteresis
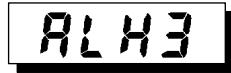
Alarm 3 hysteresis
Conditions of Use
Alarms must be assigned as outputs.
For example, if alarm outputs 1 and 2
only are assigned as outputs, the "alarm
3 hysteresis" parameter cannot be used.
Function
- This parameter is for checking the hysteresis of alarm outputs 1 to 3.
Comment
| Setting Range | Unit | Default |
| 0.01 to 99.99 | %FS | 0.02 |
See
Related article
3.4 Setting Alarm Type (page 3-9)
Related parameters
"Alarm 1 type" "Alarm 2 type" "Alarm 3 type" "Alarm 1 open in alarm" "Alarm 2 open in alarm" "Alarm 3 open in alarm" (setup mode)
"Alarm value 1" "Alarm value 2" "Alarm value 3" (level 1 mode)
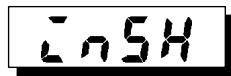
Input shift upper limit
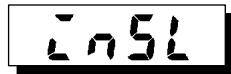
Input shift lower limit
Conditions of Use
The input type must be set to temperature input (thermocouple or platinum resistance thermometer).
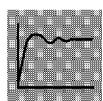
Function
- Sets each of the shift amounts for the input shift upper and lower limit values.
Comment
| Setting Range | Unit | Default |
| -199.9 to 999.9 | °C or °F | 0.0 |
See
Related article
3.2 Setting Input Specifications (page 3-4)
Related parameter
"Input type" (setup mode)
- The parameters in this mode can be used only when the "security" parameter (protect mode) is set to "0" and "1".
- This mode contains the parameters for setting the basic specifications of the E5AK controller. These parameters include parameters for specifying the input type, scaling, output assignments, and direct/reverse operation.
- To select this mode when in the levels 0 to 2, expansion, option and calibration modes, press the key for 1 second minimum. The display changes to the menu display. If you select [5E] using the key then press the key for 1 second minimum, the controller enters the setup mode.
- To select parameters in this mode, press the key. To change parameter settings, use the or keys.
- The following table shows the parameters supported in this mode and the page where the parameter is described.
| Symbol | Parameter Name | Page |
| cn-t | Input type | 5-26 |
| cn-H | Scaling upper limit | 5-27 |
| cn-L | Scaling lower limit | 5-27 |
| dP | Decimal point | 5-27 |
| d-U | °C/°F selection | 5-28 |
| init | Parameter initialize | 5-27 |
| out1 | Control output 1 assignment | 5-28 |
| out2 | Control output 2 assignment | 5-28 |
| sub1 | Auxiliary output 1 assignment | 5-29 |
| sub2 | Auxiliary output 2 assignment | 5-29 |
| ALT1 | Alarm 1 type | 5-30 |
| ALIn | Alarm 1 open in alarm | 5-31 |
| ALT2 | Alarm 2 type | 5-30 |
| AL2n | Alarm 2 open in alarm | 5-31 |
| ALT3 | Alarm 3 type | 5-30 |
| AL3n | Alarm 3 open in alarm | 5-31 |
| OR-Eu | Direct/Reverse operation | 5-31 |

Input type

Function
Comment
-
Sets the sensor type by the code.
-
Set the code according to the following table. Default is "2: K1 thermocouple".
| Set value | Input Type | |||
| 0 | JPt | -199.9 to 650.0 (°C) | /-199.9 to 999.9 (°F) | Platinum resistance thermometer |
| 1 | Pt | -199.9 to 650.0 (°C) | /-199.9 to 999.9 (°F) | |
| 2 | K1 | -200 to 1300 (°C) | /-300 to 2300 (°F) | Thermocouple |
| 3 | K2 | 0.0 to 500.0 (°C) | /0.0 to 900.0 (°F) | |
| 4 | J1 | -100 to 850 (°C) | /-100 to 1500 (°F) | |
| 5 | J2 | 0.0 to 400.0 (°C) | /0.0 to 750.0 (°F) | |
| 6 | T | -199.9 to 400.0 (°C) | /-199.9 to 700.0 (°F) | |
| 7 | E | 0 to 600 (°C) | /0 to 1100 (°F) | |
| 8 | L1 | -100 to 850 (°C) | /-100 to 1500 (°F) | |
| 9 | L2 | 0.0 to 400.0 (°C) | /0.0 to 750.0 (°F) | |
| 10 | U | -199.9 to 400.0 (°C) | /-199.9 to 700.0 (°F) | |
| 11 | N | -200 to 1300 (°C) | /-300 to 2300 (°F) | |
| 12 | R | 0 to 1700 (°C) | /0 to 3000 (°F) | |
| 13 | S | 0 to 1700 (°C) | /0 to 3000 (°F) | |
| 14 | B | 100 to 1800 (°C) | /300 to 3200 (°F) | |
| 15 | W | 0 to 2300 (°C) | /0 to 4100 (°F) | |
| 16 | PLII | 0 to 1300 (°C) | /0 to 2300 (°F) | |
| 17 | 4 to 20mA | Current input | ||
| 18 | 0 to 20mA | |||
| 19 | 1 to 5V | Voltage input | ||
| 20 | 0 to 5V | |||
| 21 | 0 to 10V | |||
See
Related article
3.2 Setting Input Specifications (page 3-4)
Related parameters
When input type is set to temperature input:
^ C / F selection" (setup mode)
When input type is set to voltage input or current input:
"Scaling upper limit" "Scaling lower limit" "Decimal point" (setup mode)
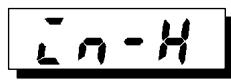
Scaling upper limit
Conditions of Use
The input type must be set to analog input (voltage or current input).
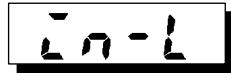
Scaling lower limit
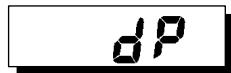
Decimal point
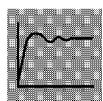
Function
- This parameter can be used only when voltage input or current input is selected as the input type.
- When voltage input or current input is selected as the input type, scaling is carried out. Set the scaling upper limit in the "scaling upper limit" parameter and the scaling lower limit in the "scaling lower limit" parameter.
- The "decimal point" parameter specifies the decimal point position of parameters (set point, etc.) whose unit is set to EU (Engineering Unit).
Comment
- Scaling upper limit, Scaling lower limit
| Parameter | Setting Range | Unit | Default |
| Scaling upper limit | Scaling lower limit +1 to 9999 | EU | 100 |
| Scaling lower limit | -1999 to scaling upper limit -1 | EU | 0 |
- Decimal point : default : 0
| Set Value | Setting | Example |
| 0 | 0 digits past decimal point | 1234 |
| 1 | 1 digit past decimal point | 123.4 |
| 2 | 2 digits past decimal point | 12.34 |
| 3 | 3 digits past decimal point | 1.234 |
See
Related article
3.2 Setting Input Specifications (page 3-4)
Related parameter
"Input type" (setup mode)
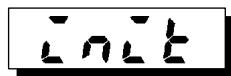
Parameter initialize
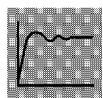
Function
- Returns parameter settings to their defaults. However, note that the following parameters are not affected by execution of this parameter: "input type", "scaling upper limit", "scaling lower limit", "decimal point" and "°C/°F selection".
Example of use
- When this parameter is selected, [ nə] ("no") is first displayed. To initialize parameters, press the key to specify [ yEs ] ("yes").
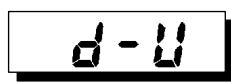
°C/°F selection
Conditions of Use The input type must be set to temperature input (thermocouple or platinum resistance thermometer).
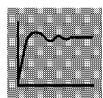
Function
- This parameter can be used when thermocouple or platinum resistance thermometer is selected as the input type.
- Set the temperature input unit to either of “°C” or “°F”.
Comment
| Setting Range | Default |
| [ :°C / F :°F | [ |
See
Related article
3.2 Setting Input Specifications (page 3-4)
Related parameter
"Input type" (setup mode)
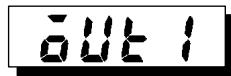
Control output 1 assignment
Conditions of Use
The control must be standard control or heating and cooling control.
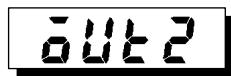
Control output 2 assignment
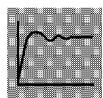
Function
- Assigns the output functions to either of control output 1 or 2.
- The following seven output functions can be assigned as outputs: Control output (heat), Control output (cool), Alarms 1 to 3, HBA, and LBA.
- Errors 1, 2 and 3 cannot be assigned as outputs.
- When the output function assigned to control output 1 is ON, the "OUT1" LED lights. However, note that the OUT1 LED does not light when control output (heat) or control output (cool) are assigned to linear outputs such as current and voltage.
- When the output function assigned to control output 2 is ON, the "OUT2" LED lights.
Comment
| Symbol | HEAT | COAL | RL-1 | RL-2 | RL-3 | HbA | LbA |
| Function | Control output (heat) | Control output (cool) | Alarm 1 | Alarm 2 | Alarm 3 | HBA | LBA |
Defaults:
"Control output 1" = [HEA], "Control output 2" = [AL - I]
See
Related article
3.3 Setting Output Specifications (page 3-6)
Related parameters
- Alarm-related parameters
- Heating and cooling related parameter
"LBA detection time" (level 2 mode)
Model
E5AK-AA2 AC100-240
E5AK-AA2 AC/DC24
Auxiliary output 1 assignment
Auxiliary output 2 assignment
Function
- Assigns output functions to either of auxiliary output 1 or 2.
- The following eight output functions can be assigned as outputs: Alarms 1 to 3, HBA, LBA, Error 1 (input error), Error 2 (A/D converter error), and Error 3 (remote SP input error).
- Control output (heat) and control output (cool) cannot be assigned as outputs.
- Error 3 can be assigned only when the remote SP function is enabled.
- When the output function assigned to auxiliary output 1 or auxiliary output 2 is ON, the "SUB1" or "SUB2" LED lights.
Comment
| Symbol | RL-1 | RL-2 | RL-3 | HbR | LbR | S.E-r | E333 | -5E-r |
| Function | Alarm 1 | Alarm 2 | Alarm 3 | HBA | LBA | Error 1 | Error 2 | Error 3 |
Defaults: "Auxiliary output 1" = [RL - 2], "Auxiliary output 2" = [RL - 3]
See
Related article
3.3 Setting Output Specifications (page 3-6)
Related parameter
- Alarm-related parameter
"LBA detection time" (level 2 mode)
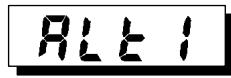
Alarm 1 type
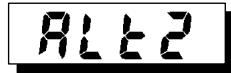
Alarm 2 type
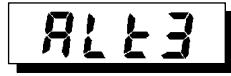
Alarm 3 type
Conditions of Use
Alarms must be assigned as outputs.
For example, if alarm outputs 1 and 2
only are assigned as outputs, the "alarm
3 type" parameter cannot be used.
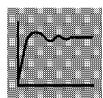
Function
- "Alarm 1 to 3 type" parameters specify the operation of the alarm by the one of the set values in the following table. For details of operation at an alarm, see page 3-9.
Comment
| Set Value | Settings | Set Value | Settings |
| 1 | Upper-and lower-limit alarm (deviation) | 7 | Lower-limit alarm with standby sequence (deviation) |
| 2 | Upper-limit alarm (deviation) | 8 | Absolute-value upper-limit alarm |
| 3 | Lower-limit alarm (deviation) | 9 | Absolute-value lower-limit alarm |
| 4 | Upper-and lower-limit range alarm (deviation) | 10 | Absolute-value upper-limit alarm with standby sequence |
| 5 | Upper-and lower-limit alarm with standby sequence (deviation) | 11 | Absolute-value lower-limit alarm with standby sequence |
| 6 | Upper-limit alarm with standby sequence (deviation) |
Defaults: 2 (Deviation upper limit)
See
Related article
3.4 Setting Alarm Type (page 3-9)
Related parameters
"Alarm value 1" "Alarm value 2" "Alarm value 3" (level 1 mode)
"Alarm 1 hysteresis" "Alarm 2 hysteresis" "Alarm 3 hysteresis" (level 2 mode)
"Alarm 1 open in alarm" "Alarm 2 open in alarm" "Alarm 3 open in alarm" "Control output 1 assignment" "Control output 2 assignment" "Auxiliary output 1 assignment" "Auxiliary output 2 assignment" (setup mode)
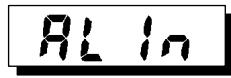
Alarm 1 open in alarm
Conditions of Use
Alarm 2 open in alarm
Alarms must be assigned as outputs. For example, if alarm outputs 1 and 2 only are assigned as outputs, the "alarm 3 open in alarm" parameter cannot be used.
Alarm 3 open in alarm
Function
- Selects the output states of alarms 1 to 3.
- When the controller is set to "close in alarm," the status of the alarm output function is output as it is. When set to "open in alarm," the status of the alarm output function is output inverted. The following table shows the relationship between alarm output functions, output and output LEDs.
| Alarm | Output | Output LED | |
| Close in alarm | ON | ON | Lit |
| OFF | OFF | Not lit | |
| Open in alarm | ON | OFF | Lit |
| OFF | ON | Not lit |
Comment
| Setting Range | Default |
| [ n - ŋ ] : Close in alarm/ [ n - ξ ] : Open in alarm | [ n - ŋ ] |

See
Related article
3.4 Setting Alarm Type (page 3-9)
Related parameters
"Alarm value 1" "Alarm value 2" "Alarm value 3" (level 1 mode)
"Alarm 1 hysteresis" "Alarm 2 hysteresis" "Alarm 3 hysteresis" (level 2 mode)
"Alarm 1 open in alarm" "Alarm 2 open in alarm" "Alarm 3 open in alarm"
"Control output 1 assignment" "Control output 2 assignment" "Auxiliary output 1 assignment" "Auxiliary output 2 assignment" (setup mode)
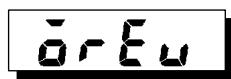
Direct/Reverse operation
Function
- "Direct operation" (or normal operation) refers to control where the manipulated variable is increased according to the increase in the process value. Alternatively, "reverse operation" refers to control where the manipulated variable is increased according to the decrease in the process value.
Comment
| Setting Range | Default |
| [ðr-r]: Reverse operation/ [ðr-d]:Direct operation | [ðr-r] |

See
Related article
3.3 Setting Output Specifications/Direct/reverse operation (page 3-7)
Expansion Mode
- The parameters in this mode can be used only when the "security" parameter (protect mode) is set to "0" and "1".
- This mode contains the parameters for setting expanded functions. These parameters include parameters for setting ST (self-tuning), setting the SP setting limiter, selecting advanced PID and ON/OFF control, specifying the standby sequence reset method, and automatic return of display mode.
- To select this mode when in the levels 0 to 2, setup, option and calibration modes, press the key for 1 second minimum. The display changes to the menu display. If you select [ ] using the key then press the key for 1 second minimum, the controller enters the expansion mode.
- To select parameters in this mode, press the key. To change parameter settings, use the or keys.
- The following table shows the parameters supported in this mode and the page where the parameter is described.
| Symbol | Parameter Name | Page |
| SL-H | Set point upper limit | 5-33 |
| SL-L | Set point lower limit | 5-33 |
| CntL | PID / ON/OFF | 5-33 |
| St | ST | 5-34 |
| St-b | ST stable range | 5-34 |
| ALFA | α | 5-34 |
| At-G | AT calculated gain | 5-35 |
| r-EST | Standby sequence reset method | 5-35 |
| r-ET | Automatic return of display mode | 5-36 |
| At-H | AT hysteresis | 5-36 |
| LbAb | LBA detection width | 5-36 |
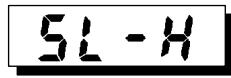
Set point upper limit
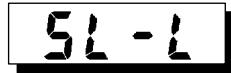
Set point lower limit
Function
- Limits the upper and lower limits of the set point. When the set point exceeds the settings of the "Set point upper limit" and "Set point lower limit" parameters, the E5AK controller regards the settings of the "Set point upper limit" and "Set point lower limit" parameters as the set points.
- When the input type is changed to temperature input, the set point upper and lower limits are changed to the upper and lower limits of the currently selected sensor. And when the input type is changed to analog input, the set point upper and lower limits are changed to the scaling upper and lower limits.
- During temperature input, the decimal point position is dependent on the currently selected sensor, and during analog input on the results of scaling.
Comment
| Parameter | Setting Range | Unit | Default |
| SP setting upper limit | SP setting lower limit +1 to scaling upper limit | EU | 1300 |
| SP setting lower limit | Scaling lower limit to SP setting upper limit -1 | EU | -200 |
During temperature input, the range becomes the range of use of the selected sensor instead of the scaling upper and lower limit values.
See
Related article
4.2 Operating Condition Restrictions (page 4-5)
Related parameters
“Input type” “Scaling upper limit” “Scaling lower limit” “Decimal point” (setup mode)
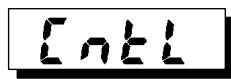
PID/ON/OFF
Condition of Use
Control must be standard control or
heating and cooling control.
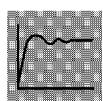
Function
- Selects advanced PID control or ON/OFF control.
Comment
| Setting Range | Default |
| [ P< d ] : advance PID/ [a n o F ] :ON/OFF | [ P< d ] |
See
Related article
4.1 Selecting the Control Method/ON/OFF control (page 4-4)
Related parameters
"Hysteresis (heat)" "Hysteresis (cool)" (level 1 mode)
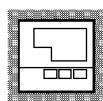
Model
E5AK-AA2 AC100-240
E5AK-AA2 AC/DC24
| ST 5t-b ST stable range | Conditions of Use The input type must be set to tempera- ture input, and the control must be stan- dard control and advanced PID control. | |||
| Function | ·When the “ST” parameter is set to “ON”, the self-tuning (ST) function is active. During operation of the ST function, the power on the load side connected to the control output must be turned ON at the same time or before start of E5AK operation. ·The “ST stable range” parameter sets the stable range width during self-tuning. However, note that this parameter cannot be used when the “ST” parameter is set to “OFF”. | |||
| Comment | Parameter | Setting Range | Unit | Default |
| ST | [øFF]: ST function OFF/[øn]: ST function ON | None | [øFF] | |
| ST stable range | 0.1 to 999.9 | °C or °F | 15.0 | |
| See | ●Related article Fuzzy self-tuning (page A-14) ●Related parameters “Input type” (setup mode) “PID / ON/OFF” (expansion mode) | |||
| ALFA α | Conditions of Use The control must be advanced PID con- trol, and ST must be set to OFF. | |||
| Function | ·Usually use the default value. ·Sets advanced PID-control parameter α. | |||
| Comment | Setting Range | Unit | Default | |
| 0.00 to 1.00 | None | 0.65 | ||
| See | ●Related parameter “PID / ON/OFF” (expansion mode) | |||
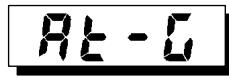
AT calculated gain
Conditions of Use
The control must be advanced PID control, and ST must be set to OFF.

Function
Usually use the default value.
- Sets the gain when adjusting the PID parameters by auto-tuning.
- To give priority to response, decrease the set value of this parameter. To give priority to stability, increase the set value of this parameter.
Comment
| Setting Range | Unit | Default |
| 0.1 to 10.0 | None | 1.0 |
See
Related parameters
"AT Execute/Cancel" (level 1 mode)
"PID / ON/OFF" (expansion mode)
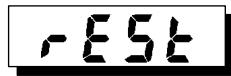
Standby sequence reset method
Function
- Selects the conditions for enabling reset after the standby sequence of the alarm has been canceled.
Condition A:
Control started (including power ON), and alarm value, input shift value or set point (except for changing SP mode or during Remote SP) changed.
Condition B:
Power ON
Comment
| Setting Range | Default |
| 0: Condition A / 1: Condition B | 0 |
See
Related parameters
"Alarm 1 type" "Alarm 2 type" "Alarm 3 type" (setup mode)
- E
Automatic return of display mode
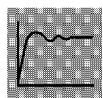
Function
- If you do not operate any of the controller keys for the time set in this parameter when in levels 0 to 2 modes, the display automatically returns to the PV/SP display.
- When this parameter is set to "0", this function is disabled.
- This parameter is invalid while the menu is displayed.
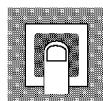
Comment
| Setting Range | Unit | Default |
| 0 to 99 | Second | 0 |
且 - H
AT hysteresis
Conditions of Use
The control must be advanced PID control, and ST must be set to OFF.
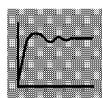
Function
Usually use the default value.
- The levels of limit cycle operations during AT execution are given hysteresis at event ON/OFF switching. This parameter sets this hysteresis width.
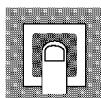
Comment
| Setting Range | Unit | Default |
| 0.1 to 9.9 | %FS | 0.2 |
LbRa
LBA detection width
Conditions of Use
The LBA (Loop Break Alarm) function must be assigned as an output.
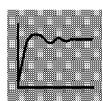
Function
- This parameter can be used when LBA is assigned as an output.
- When the change width of the manipulated variable is below the width set in this parameter, the controller regards this as detection of an LBA.
Comment
| Setting Range | Unit | Default |
| 0.0 to 999.9 | %FS | 0.2 |
- The parameters in this mode can be used only when the "security" parameter (protect mode) is set to "0" and "1".
- You can select this mode only when the option unit is set in the controller. In this mode, you can set the communications conditions, transfer output and event input parameters to match the type of option unit set in the controller.
- To select this mode when in the levels 0 to 2, setup, expansion and calibration modes, press the key for 1 second minimum. The display changes to the menu display. If you select [ ] using the key then press the key for 1 second minimum, the controller enters the option mode.
- To select parameters in this mode, press the key. To change parameter settings, use the or keys.
- The following table shows the parameters supported in this mode and the page where the parameter is described.
| Symbol | Parameter Name | Page |
| Eu- | Multi-SP function | 5-38 |
| Eu-1 | Event input assignment 1 | 5-39 |
| Eu-2 | Event input assignment 2 | 5-39 |
| Eu-3 | Event input assignment 3 | 5-39 |
| Eu-4 | Event input assignment 4 | 5-39 |
| Sbct | Communication stop bit | 5-40 |
| LEN | Communication data length | 5-40 |
| P_r_ty | Communication parity | 5-40 |
| bPS | Communication baud rate | 5-40 |
| U-na | Communication unit No. | 5-40 |
| t_r-t | Transfer output type | 5-41 |
| t_r-H | Transfer output upper limit | 5-41 |
| t_r-L | Transfer output lower limit | 5-41 |
| HbI | HBA latch | 5-42 |
| CALB | Motor calibration | 5-42 |
| not | Travel time | 5-43 |
| P-db | PV dead band | 5-43 |
| -SPL | Remote SP enable | 5-44 |
| -SPH | Remote SP upper limit | 5-44 |
| -SPL | Remote SP lower limit | 5-44 |
| SPtr | SP tracking | 5-45 |
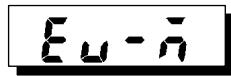
Multi-SP function
Conditions of Use
The event input function must be in use.
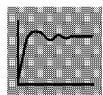
Function
- This parameter specifies the number of event inputs when switching set points (SP) 0 to 3.
- When set to "0", the set point cannot be switched by event input.
- When this parameter is set to "1", set points 0 and 1 can be used. When set to "2", set points 0 to 3 can be used.
Comment
| Setting Range | Unit | Default |
| 0 to 2 | None | 2 |
See
Related article
4.3 How to Use Event Input (4-8)
Related parameter
"Event input assignment 1" (option mode)
Model
Option unit
E53-AKB
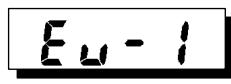
Event input assignment 1
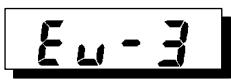
Event input assignment 3
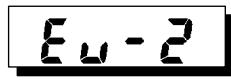
Event input assignment 2
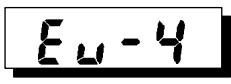
Event input assignment 4
Conditions of Use
Event input other than the multi-SP function must be specified when the event input function is in use.
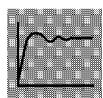
Function
- When one E53-AKB unit is mounted, only "Event input assignment 3" and "Event input assignment 4" can be used.
- This parameter specifies event input other than the multi-SP function. The following four functions can be specified:
Run/Stop, Remote/Local, Auto/Manual, SP mode.
The Remote/Local function can be used on E53-AK01/02/03 option units. The SP mode functions can be used only when the "Remote SP enable" parameter is ON.
- Event input (Run/Stop, Manual/Auto, and SP mode) is disabled while the menu is displayed.
It is also disabled in set up, expansion, option and calibration modes.
Comment
| Symbol | Function | Event Input Operation |
| nan | Not specified | Event input disabled |
| StaP | Run/Stop | ON: Stop/OFF: Run |
| rNt | Remote/Local | ON: Remote/OFF: Local |
| nRn | Manual/Auto | ON: Manual/OFF: Auto |
| rSP | SP mode | ON: Remote SP/OFF: Local SP |
- Default
| E53-AKB × 1 | E53-AKB × 2 | |
| Event input assignment 1 | - | nan |
| Event input assignment 2 | - | nan |
| Event input assignment 3 | nan | nan |
| Event input assignment 4 | nan | StaP |
See
Related article
4.3 How to Use Event input (page 4-8)
Related parameters
"remote SP enable" "multi-SP function" (option mode)
Model
Option unit
E53-AKB
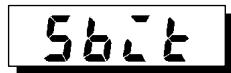
Communication stop bit
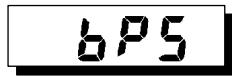
Communication baud rate
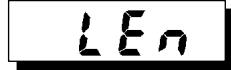
Communication data length
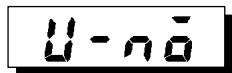
Communication unit No.
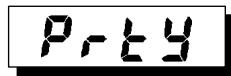
Communication parity
Conditions of Use
The communications function must be in use.
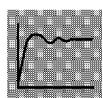
Function
- These parameters set the communications conditions. Make sure that the stop bit, data length, parity and baud rate of the host computer and the E5AK controller are matching. These parameters are valid when the power is turned ON again or when level 0 to 2 modes are switched.
- When connecting two or more E5AK controllers to the host computer, set unit Nos. that will not conflict with the unit Nos. of other controllers.
Comment
- "Communication stop bit" parameter
| Setting Range | Unit | Default |
| 1, 2 | Bits | 2 |
- "Communication data length" parameter
| Setting Range | Unit | Default |
| 7, 8 | Bits | 7 |
- "Communication parity" parameter
| Setting | Default |
| [nonE]: None/ [EuEr]:Even/[add]:Odd | [EuEn] |
- "Communication baud rate" parameter
| Setting Range | Unit | Default |
| 1.2, 2.4, 4.8, 9.6, 19.2 | kbps | 9.6 |
- "Communication unit No." parameter
| Setting Range | Unit | Default |
| 0 to 99 | None | 0 |
See
Related article
Chapter6 USING THE COMMUNICATIONS FUNCTION
Related parameter
"Remote/Local" (level 2 mode)
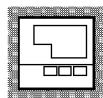
Model
Option unit
E53-AK01/02/03
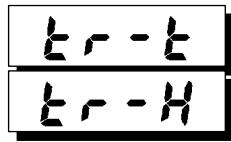
Transfer output type
Transfer output upper limit
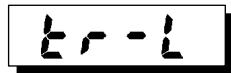
Transfer output lower limit
Conditions of Use
The transfer output function must be in use.
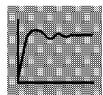
Function
- These parameters set the transfer output conditions.
- The "transfer output type" parameter selects one of the following as the transfer output type, and assigns this to transfer output:
Set point, Set point during SP ramp, Process value, Manipulated variable (heat) (standard type), Manipulated variable (cool) (This can be selected only during heating and cooling control on a standard type controller.), Valve opening (position-proportional control)
- The "transfer output upper limit" and "transfer output lower limit" parameters are used for scaling of transfer output. The setting range varies according to this output data. Also, a lower limit value larger than the upper limit value may be set.
- During temperature input, the decimal point position of the set point, set point during SP ramp or process value is dependent on the currently selected sensor, and during analog input on the results of scaling.
Comment
| Transfer output Type | Transfer Output Lower Limit to Transfer Output Upper Limit |
| [ P] Set point | Set point lower limit value to Set point upper limit value |
| [P - n] Set point during SP ramp | Set point lower limit value to Set point upper limit value |
| [ Pu] Process value | Scaling lower limit to scaling upper limit |
| [ ā] Manipulated variable (heat) | -5.0% to 105.0% (Standard control), 0.0 to 105.0% (heating and cooling control) |
| [ [ - ā] Manipulated variable (cool) | 0.0% to 105.0% |
| [ u - n] Valve opening | -10.0 to 110.0% |
- Default: [5P]
- The output ranges of the set point, set point during SP ramp or process value when temperature input is selected are the ranges supported by the selected sensor.
- When you have selected the "manipulated variable (heat)" parameter, the transfer output lower limit during heating and cooling control becomes "0.0".
See
Related article
4.7 How to Use Transfer Output (page 4-17)
Model
Option unit
E53-AKF
| H&L | HBA latch | Conditions of Use The HBA output function must be assigned. |
| Function | ·When this parameter is set to ON, the heater burnout alarm is held until either of the following conditions is satisfied: a Set the heater burnout set value to “0.0”. b Reset the controller. (Turn the controller's power OFF then back ON again.) | |
| Comment | Setting Range | Default |
| [an]: Enabled/[FF]: Disabled | [aff] | |
| See | ●Related article 4.5 How to Use the Heater Burnout Alarm (page 4-13) ●Related parameters “Control output assignment 1” “Control output assignment 2” “Auxiliary output assignments 1” “Auxiliary output assignments 2” (setup mode) | |
| Model | E5AK-AA2 AC100-240 E5AK-AA2 AC/DC24 | |
| CALG | Motor Calibration | Conditions of Use The control must be position-proportion control. |
| Function | ·Executes motor calibration. Be sure to execute this parameter when monitoring the valve opening. (Displays cannot be switched while motor calibration is being executed.) ·The “travel time” parameter is also reset when this parameter is executed. | |
| Example of use | ·The default setting is “off”. ·Motor calibration is executed when “on” is selected. ·After motor calibration is completed, the setting automatically returns to “off”. | |
| See | ●Related article 4.1 Selecting the Control Method/Position-proportional Control (page 4-3) ●Related parameter “Travel time” (option mode) | |
| Model | E5AK-PRR2 AC100-240 E5AK-PRR2 AC/DC24 | |
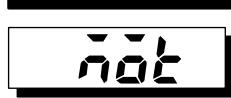
Travel Time
Conditions of Use The control must be position-proportion control.
Function
- Sets the time from valve fully opened to valve fully closed.
- The travel time is automatically set when the "motor calibration" parameter is executed.
Comment
| Setting Range | Unit | Default |
| 1 to 999 | Second | 30 |
See
Related article
4.1 Selecting the Control Method/Position-proportional Control (page 4-3)
Related parameter
"Motor Calibration" (option mode)
Model
E5AK-PRR2 AC100-240
E5AK-PRR2 AC/DC24
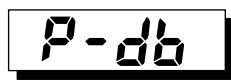
PV dead band
Conditions of Use
The control must be position-proportion control.
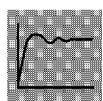
Function
- Sets a band within which valve will not move.
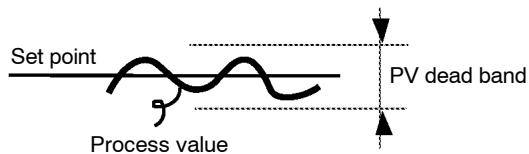
- This function is for use to reduce valve movement, but consequently reduces control performance within the PV deadband.
- The decimal point is dependent on scaling.
Comment
| Setting Range | Unit | Default |
| 0 to 9999 | EU | 0 |
See
Related parameters
“Input type” “Scaling upper limit” “Scaling lower limit” “Decimal point” (setup mode)
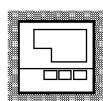
Model
E5AK-PRR2 AC100-240
E5AK-PRR2 AC/DC24
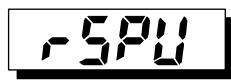
Remote SP enable
Conditions of Use ST must be OFF.
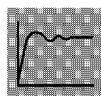
Function
- When this parameter is set to "ON", the remote SP and local SP can be switched for use. (That is, to the SP mode can be specified.). Also, the "set point during SP ramp" parameter is enabled at all times.
- When this parameter is set to "OFF", only the local SP can be used. The set point during SP ramp is enabled only when the SP ramp function is enabled.
Comment
| Setting Range | Default |
| [ ¬n]: Enabled/[¬FF]: Disabled | [ ¬FF] |
See
Related article
4.4 How to Use the Remote SP (page 4-11)
Related parameters
"Set point during SP ramp" (level 0 mode) "SP mode" (level 2 mode)
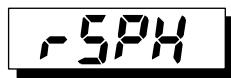
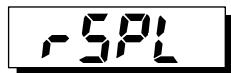
Remote SP upper limit
Remote SP lower limit
Conditions of Use The remote SP function must be enabled.
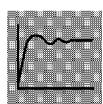
Function
- Sets the remote SP upper and lower limit values. The upper limit value is the equivalent to 20mA , and the lower limit value is equivalent to 4mA . Set the upper limit value in the "remote SP upper limit" parameter and the lower limit value in the "remote SP lower limit" parameter.
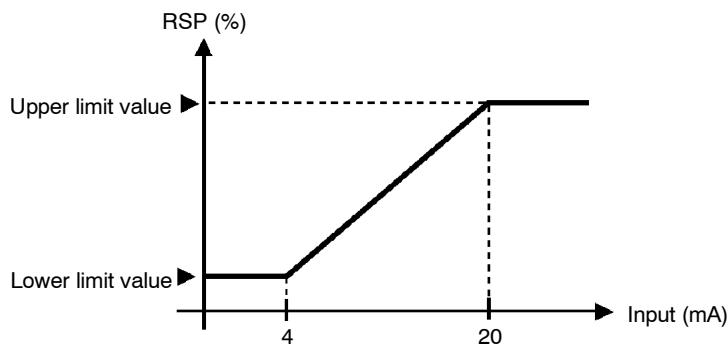
- When the "SP setting upper limit" or "SP setting lower limit" parameters are changed, the remote SP upper and lower limit values are forcibly changed to the SP setting upper and lower limit values.
Comment
| Parameter | Setting Range | Unit | Default |
| Remote SP upper limit | SP setting lower limit to SP setting upper limit | EU | 1300 |
| Remote SP lower limit | SP setting lower limit to SP setting upper limit | EU | -200 |
See
Related article
4.4 How to Use the Remote SP (page 4-11)
Related parameters
"Decimal point" (setup mode)
"SP setting upper limit" "SP setting lower limit" (expansion mode)
"Remote SP enable" (option mode)
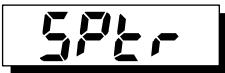
SP tracking enable
Conditions of Use
The remote SP function must be enabled.
Function
- Specifies the operation when the remote SP mode is switched to the local SP mode.
- When this parameter is set to "ON", the local SP is changed to the remote SP value used immediately before switching.
- When this parameter is set to "OFF", the local SP is not influenced by the remote SP.

Comment
| Setting Range | Default |
| [ ¬n]: Enabled/[¬FF]: Disabled | [ ¬FF] |
See
Related article
4.4 How to Use the Remote SP (page 4-11)
Related parameters
"Set point during SP ramp" (level 0 mode)
"SP mode" (level 2 mode)
Calibration Mode
- The parameters in this mode can be used only when the "security" parameter (protect mode) is set to "0". When selecting this mode for the first time after the E5AK has left the factory, return the "security" parameter to "0".
- This mode contains the parameters for user calibration of inputs and outputs. Only parameters relating to input types specified in the "input type" parameter (setup mode) can be used. Also, related output parameters can be used only when the communications unit (E53-AKF) is added on.
- To select this mode when in the levels 0 to 2, setup, expansion and option modes, press the key for 1 second minimum. The display changes to the menu display. If you select [Lb] using the key then press the key for 1 second minimum, the controller enters the calibration mode.
- For details on parameters in the calibration mode, see Chapter 7 Calibration.
CHAPTER6
USING THE COMMUNICATIONS FUNCTION
This chapter mainly describes communications with a host computer and communications commands.
6.1 Outline of the Communications Function 6-2
Outline 6-2
Transfer procedure 6-2
Interface 6-2
6.2 Preparing for Communications 6-3
Cable connections 6-3
Setting the communications specifications 6-4
6.3 Command Configuration 6-5
6.4 Commands and Responses 6-6
Reading/writing parameters 6-6
Issuing special commands 6-10
6.5 How to Read Communications
Error Information 6-12
End code 6-12
Undefined error 6-13
6.6 Program Example 6-14
How to use programs 6-14
Program list (language:
IBM PC COMPATIBLE MACHINE) 6-15
Examples of use 6-16
6.1 Outline of the Communications Function
Outline
The communications function allows you to monitor and set E5AK parameters by a program prepared and running on a host computer connected to the E5AK controller. This chapter describes operations as viewed from the host computer.
When using the communications function, the option unit for RS-232C, RS-422 or RS-485 communications must be added on. The E5AK communications function allows you to carry out the following:
- Reading/writing of parameters;
- Operation instructions; and
- Selecting the setting level.
The communications function assumes the following conditions:
- Writing of parameters is possible in during remote operation. Also, parameters cannot be written during execution of auto-tuning;
- Writing parameters are provided with a setting level. Writing conditions are as follows depending on the setting level:
Setting level 1: No restrictions
Setting level 0: Writing of parameters in the setup, expansion and option modes only is prohibited.
- For details on switching between setting levels, see page 6-11.
- The "run/stop", "remote/local" and "AT execute/cancel" parameters are set aside from other parameters as special commands for instructing operations.
■ Transfer procedure
The host computer sends a "command frame" to the controller, and the controller returns a "response frame" corresponding to the content of the command sent by the host computer. In other words, a response frame is returned for each command frame sent.
The following diagram shows command frame/response frame operations.

Interface
The host computer carries out communications conforming to the RS-232C, RS-422 or RS-485 interface specifications.
Option units supporting the RS-232C, RS-422 and RS-485 specifications are as follows:
- Option units
E53-AK01 (RS-232C)
E53-AK02 (RS-422)
E53-AK03 (RS-485)
6.2 Preparing for Communications
For details on wiring when using the communications, see Chapter 2 Preparations.
Cable connections
RS-232C
- Only one controller can be connected to the host computer.
- The cable length should not exceed 15 meters.
- Use shielded twisted-pair cables (AWG28 or more) for the cables.
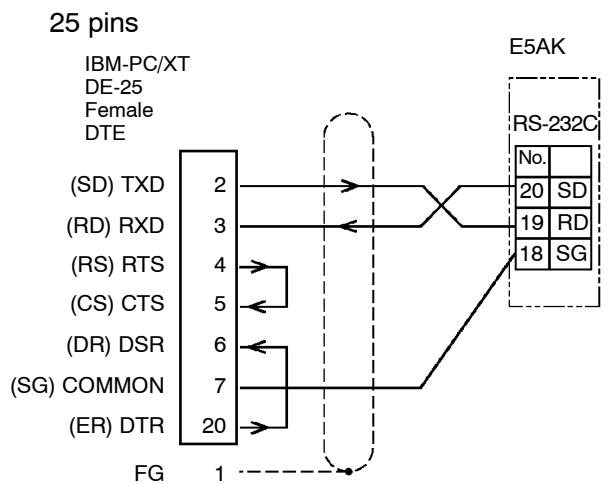
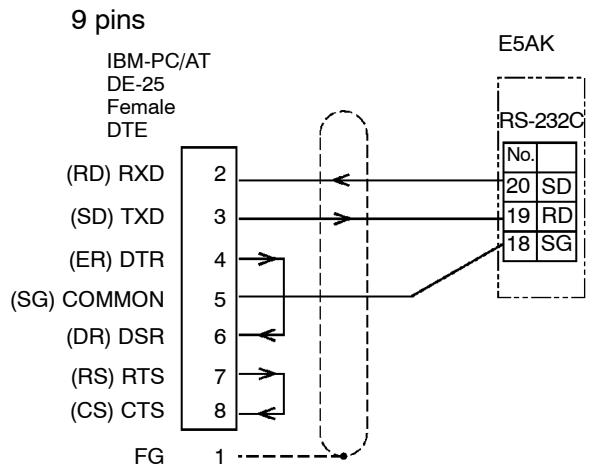
RS-422
- Up to 32 controllers including a computer can be connected to the host computer.
- The total cable length should not exceed 500 meters.
- Use shielded twisted-pair cables (AWG28 or more) for the cables.
- Attach terminators to the controllers at both ends of a series of controllers connected in an open configuration. For example, in the following configuration, connect the terminator to the host unit and unit No.30, and do not connect terminators to unit Nos.0 to 29.
- Use terminators having a resistance of 240 (1/2 W). The total resistance of both ends should be at least 100
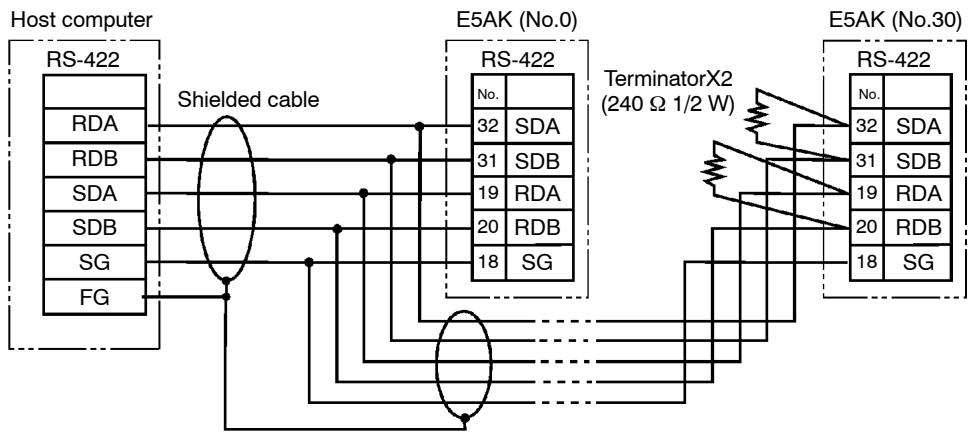
RS-485
- Up to 32 controllers including a computer can be connected to the host computer.
- The total cable length should not exceed 500 meters.
- Use shielded twisted-pair cables (AWG28 or more) for the cables.
- Attach terminators to the controllers at both ends of a series of controllers connected in an open configuration. For example, in the following configuration, connect the terminator to the host unit and the unit No.30, and do not connect terminators to unit Nos.0 to 29.
- Use terminators having a resistance of 120 (1/2 W). The total resistance of both ends should be at least 54 .
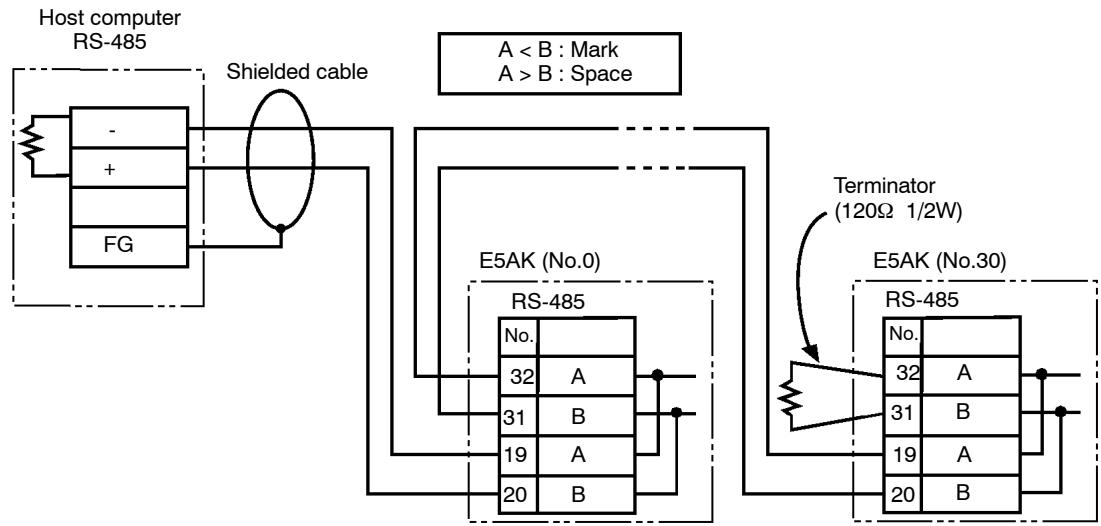
Setting the communications specifications
Match the communications specifications of the host computer and E5AK controller. When two or more controllers are connected to the host computer, make sure that the communications specifications of all controllers are the same.
This section describes how to set the communications specifications of the E5AK controller. For details on the host computer, see the relevant manual supplied with the host computer.
Communications parameters
Set the communications specifications of the E5AK in the controller's communications parameters. The communications parameters are set on the front panel of the E5AK controller.
The following table shows the communications parameters (option mode) provided on the E5AK controller and their respective settings.
| Parameter/Symbol | Setting | Set Value | |
| Unit No. | U- nă | 0 to 99 | 0 to 99 |
| Baud rate | bPS | 1.2/2.4/4.8/9.6/19.2 (kbps) | 1.2/2.4/4.8/ 9.6 /19.2 |
| Bit length | L En | 7/8 (bit) | 7 /8 |
| Parity | P rty | None/even/odd | nonE / e?en / ādd |
| Stop bit | S b i t | 1/2 | 1 / 2 |
Inverted items are factory-settings.
6.3 Command Configuration
Command configuration is as follows and are paired with a response.
Command
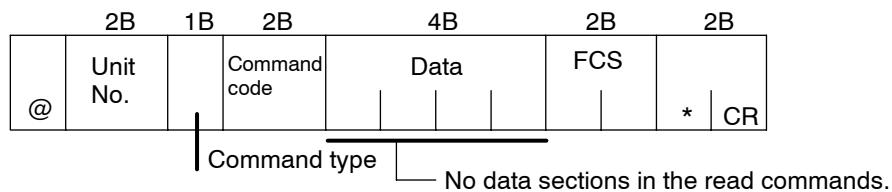
Response
End code = 00

Response
End code = 00
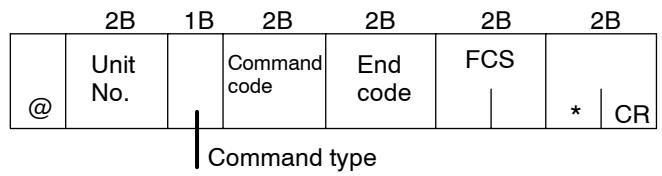
·“@”
The start character. This character must be inserted before the leading byte.
Unit No.
Specifies the "unit No." of the E5AK. If there are two or more transmission destinations, specify the desired destination using "unit No."
Command type
Specifies the command type by codes "1" to "3": parameter read, parameter write and special commands.
Command code
Specifies the command for each command type. With parameter read/write commands, this becomes the parameter No.
Data
Specifies the set value or setting content. In the parameter read command, set dummy data "0000". In the response, this is inserted only when the end code is "00".
End code
Sets the communication results. For details on the types and meanings of end codes, see 6.5 How to Read Communications Error Information (page 6-12).
- FCS (Frame Check Sequence)
Set the frame check results from the start character to the data section. For details on the frame check, see 6.6 Program Example (page 6-14).
- “*”“CR (Carriage Return) code”
Indicates the end (terminator) of the command or response block.
6.4 Commands and Responses
This section describes commands and response in detail. The conventions used in this section and data restrictions are as follows:
- Data is expressed in 1-byte units and in ASCII code.
- When the read or write data is a numerical value, the data to be set must conform to the following conditions:
(1) The decimal point ". ." is not indicated in fractions.
(2) The leftmost bit of minus numerical data must be expressed as follows:
[example]
Decimal Point Enabled (####.#)
$$ 1 0. 0 = [ 0 1 0 0 ], - 1 5 0. 0 = [ \mathrm {A} 5 0 0 ], - 1 5. 0 = [ \mathrm {F} 1 5 0 ] $$
Decimal Point Disabled (###
$$ 1 0 = [ 0 0 1 0 ], - 1 5 0 0 = [ \mathrm {A} 5 0 0 ], - 1 5 = [ \mathrm {F} 0 1 5 ] $$
■ Reading/writing parameters
Reading parameters


Writing parameters


Reading or writing of the parameters of a specified controller is executed.
- Writing is possible only during remote operation.
- Reading is impossible during executing auto-tuning.
- The following are set aside as special commands. For details, see page 6-10.
"run/stop", "remote/local", "AT execute/cancel"
- For details on parameters in each setting level, see the tables on pages 6-7 and 6-9.
| Parameter No. | Parameter | Data Setting and Monitor Range | Mode |
| 00 | PV monitor *1 | Scaling lower limit -10% to scaling upper limit +10% *2 | Level 0 |
| 86 | SP monitor during SP ramp | SP lower limit to SP upper limit | |
| 04 | MV monitor (heat) *1 | -5.0 to 105.0 *3 | |
| 42 | MV monitor (cool) *1 | 0.0 to 105.0 | |
| 24 | Remote SP monitor *1 | Scaling lower limit to scaling upper limit | |
| 14 | Valve opening monitor *1 | -10.0 to 110.0 | |
| 01 | Set point | SP lower limit to set point upper limit | |
| 10 | Set point 0 | SP lower limit to SP upper limit | Level 1 |
| 11 | Set point 1 | SP lower limit to SP upper limit | |
| 12 | Set point 2 | SP lower limit to SP upper limit | |
| 13 | Set point 3 | SP lower limit to SP upper limit | |
| 02 | Alarm value 1 | -1999 to 9999 | |
| 03 | Alarm value 2 | -1999 to 9999 | |
| 41 | Alarm value 3 | -1999 to 9999 | |
| 19 | Proportional band | 0.1 to 999.9 | |
| 20 | Integral time | 0 to 3999 *4 | |
| 21 | Derivative time | 0 to 3999 | |
| 22 | Cooling coefficient | 0.01 to 99.99 | |
| 09 | Dead band | -19.99 to 99.99 | |
| 87 | Position-proportional dead band | 0.1 to 10.0 | |
| 23 | Manual reset value | 0.0 to 100.0 | |
| 06 | Hysteresis (heat) | 0.01 to 99.99 | |
| 43 | Hysteresis (cool) | 0.01 to 99.99 | |
| 07 | Control period (heat) | 1 to 99 | |
| 08 | Control period (cool) | 1 to 99 | |
| 17 | Heater current monitor *1 | 0.0 to 55.0 | |
| 18 | Heater burnout alarm | 0.0 to 50.0 |
1 Possible only during reading
2 During temperature input, the range becomes the range of use of the selected sensor.
3 During heating and cooling control, the range becomes 0.0 to 105.0.
4 During position-proportional control, the range becomes 1 to 3999.
| Parameter No. | Parameter | Data Setting Range | Mode |
| 44 | SP ramp time unit | 0: Minutes, 1: Hours | Level 2 |
| 45 | SP ramp set value | 0 to 9999 | |
| 46 | LBA detection time | 0 to 9999 | |
| 47 | MV at stop | -5.0 to 105.0 *1 | |
| 48 | MV at PV error | -5.0 to 105.0 *1 | |
| 50 | MV upper limit | MV lower limit +0.1 to 105.0 *2 | |
| 49 | MV lower limit | -5.0 to MV upper limit -0.1 *3 | |
| 51 | MV change rate limit | 0.0 to 100.0 | |
| 56 | Input digital filter | 0 to 9999 | |
| 88 | Open/close hysteresis | 0.1 to 20.0 | |
| 25 | Alarm 1 hysteresis | 0.01 to 99.99 | |
| 26 | Alarm 2 hysteresis | 0.01 to 99.99 | |
| 52 | Alarm 3 hysteresis | 0.01 to 99.99 | |
| 53 | Input shift upper limit | -199.9 to 999.9 | |
| 54 | Input shift lower limit | -199.9 to 999.9 | |
| 57 | Input type | 0 to 21 *4 | Setup |
| 59 | Scaling upper limit | Scaling lower limit +1 to 9999 | |
| 58 | Scaling lower limit | -1999 to scaling upper limit -1 | |
| 60 | Decimal point | 0 to 3 | |
| 30 | °C/°F selection | 0: °C, 1: °F | |
| 61 | Control output 1 assignment | 0 to 6 *5 | |
| 62 | Control output 2 assignment | 0 to 6 *5 | |
| 63 | Auxiliary output 1 assignment | 2 to 9 *5 | |
| 64 | Auxiliary output 2 assignment | 2 to 9 *5 | |
| 65 | Alarm 1 type | 1 to 11 *6 | |
| 66 | Alarm 1 open in alarm | 0: closed in alarm, 1: open in alarm | |
| 67 | Alarm 2 type | 1 to 11 *6 | |
| 68 | Alarm 2 open in alarm | 0: closed in alarm, 1: open in alarm | |
| 69 | Alarm 3 type | 1 to 11 *6 | |
| 70 | Alarm 3 open in alarm | 0: closed in alarm, 1: open in alarm | |
| 71 | Direct/Reverse operation | 0: Reverse operation, 1: Direct operation |
1 During heating and cooling control, the range becomes -105 to 105.0. During position-proportional control, you can select between
0: Hold/1: Open/2: Close. (Default is 0: Hold.)
2 During heating and cooling control, the range becomes 0.0 to 105.0.
3 During heating and cooling control, the range becomes -105.0 to 0.0
4 See page 5-26.
5 0: Control output (heat), 1: Control output (cool), 2: to 4: Alarms 1 to 3, 5: HBA, 6: LBA, 7 to 9: Errors 1 to 3
6 See page 5-30.
| Parameter No. | Parameter | Data Setting Range | Mode |
| 28 | Set point upper limit *1 | Set point lower limit +1 to scaling upper limit | Expansion |
| 27 | Set point lower limit *1 | Scaling lower limit to Set point upper limit -1 | |
| 72 | PID / ON/OFF | 0: Advanced PID, 1: ON/OFF | |
| 73 | ST | 0: OFF, 1: ON | |
| 34 | ST stable range width | 0.1 to 999.9 | |
| 35 | α | 0.00 to 1.00 | |
| 85 | AT calculated gain | 0.1 to 10.0 | |
| 37 | Standby sequence reset method | 0, 1 *2 | |
| 36 | Automatic return of display mode | 0 to 99 | |
| 93 | AT hysteresis | 0.1 to 9.9 | |
| 55 | LBA detection width | 0.0 to 999.9 | |
| 74 | Multi-SP function | 0 to 2 | Option |
| 77 | Event input assignment 3 | -1 to 3 *3 | |
| 78 | Event input assignment 4 | -1 to 3 *3 | |
| 79 | Transfer output type | 0 to 5 *4 | |
| 81 | Transfer output upper limit | *4 | |
| 80 | Transfer output lower limit | *4 | |
| 82 | HBA latch | 0: OFF, 1: ON | |
| 89 | Travel time | 1 to 999 | |
| 38 | PV dead band | 0 to 9999 | |
| 29 | Remote SP enable | 0: Enabled, 1: Disabled | |
| 91 | Remote SP upper limit | SP setting lower limit to SP setting upper limit | |
| 90 | Remote SP lower limit | SP setting lower limit to SP setting upper limit | |
| 39 | SP tracking | 0: OFF, 1: ON |
1 During temperature input, the range becomes the range of use of the selected sensor instead of the scaling upper/ lower limit values
2 See page 5-35.
3 - 1: No specification, 0: Run/Stop, 1: Remote/Local, 2: Auto/Manual, 3: SP mode
4 The following table shows the output ranges of the Transfer output lower and upper limits.
| Transfer output Type | Transfer Output Lower Limit to Transfer Output Upper Limit | |
| 0: | Set point | Set point lower limit value to Set point upper limit value |
| 1: | Set point during SP ramp | Set point lower limit value to Set point upper limit value |
| 2: | Process value | Scaling lower limit to scaling upper limit |
| 3: | Manipulated variable (heat) | -5.0% to 105.0% (Standard control), 0.0 to 105.0% (heating and cooling control) |
| 4: | Manipulated variable (cool) | 0.0% to 105.0% |
| 5: | Valve opening | -10.0 to 110.0% |
■ Issuing special commands
| 2B | 2B | 4B | 2B | 2B | |||||
| @ | Unit No. | 3 | Command code | Instruction code | FCS | * | CR | ||
| 2B | 2B | 2B | 4B | 2B | 2B | |||||||
| @ | Unit No. | 3 | Command code | End code | Instruction code | FCS | * | CR | ||||
The following functions are issued as special commands.
- Run/Stop (number of writings: 100000 operations) Runs or stops programs. This command cannot be issued in setting level 1.
- Remote/Local (number of writings: 100000 operations)
Selects remote operation or local operation. - RAM Write mode (number of writings: 100000 operations) In the RAM mode, the local SP (set point and set points 0 to 3) are saved to RAM, and in the backup mode, the local SP is saved to EE-PROM.
- RAM data Save When this command is issued, set points are saved to EEPROM.
- AT Execute/Cancel Executes or cancels auto-tuning. This command cannot be issued in setting level 1.
- SP mode (number of writings: 100000 operations) Switches between local SP (LSP) and remote SP (RSP). This command cannot be issued in setting level 1.
- Move to setting level 1 Issue this command when writing parameters in the setup, expansion and option modes. On the E5AK, the parameter switches to the top parameter "input type" of the setup mode, and control is stopped.
- Software reset
- Resets E5AK operation by communications. A response is not returned to this command. Also, communications with the E5AK cannot be carried out for five seconds after reset.
- Status Monitors the status of the E5AK. Two command groups are available, A and B, depending on the command code. The response is returned in bit units to the command code (4B) of the response frame. For details on the monitoring details of each group, see page 6-11.
Command List
| Command No. | Command | Command Code |
| 00 | Run/Stop | 0000: Run, 0001: Stop |
| 02 | Remote/Local | 0000: Local, 0001: Remote |
| 05 | RAM write mode | 0000: Backup, 0001: RAM |
| 06 | RAM data save | 0000: |
| 07 | AT Execute/Cancel | 0000: Cancel, 0001: 40% AT execu-tion, 0002: 100% AT execution |
| 08 | SP mode | 0000: LSP, 0001: RSP |
| 09 | Move to setting level 1 | 0000: |
| 11 | Software reset | 0000: |
| 14 | Status | 0000: A group, 0001: B group |
A group
| Bit | Description | [1] | [0] |
| 0 | Heating side output *3 | ON | OFF *1 |
| 1 | Cooling side output *4 | ON | OFF *1 |
| 2 | Alarm output 1 | ON | OFF *2 |
| 3 | Alarm output 2 | ON | OFF *2 |
| 4 | Alarm output 3 | ON | OFF *2 |
| 5 | LBA output | ON | OFF *2 |
| 6 | HBA output | ON | OFF *2 |
| 7 | Run/Stop | Stop | Run |
| 8 | Auto/Manual | Manual | Auto |
| 9 | Remote/Local | Remote | Local |
| 10 | SP mode | RSP | LSP |
| 11 | Auto-tuning | AT execution | OFF |
| 12 | |||
| 13 | |||
| 14 | Event input 3 | ON | OFF |
| 15 | Event input 4 | ON | OFF |
1 Always "OFF" at linear output
2 Always "OFF" when output is not assigned
3 During position-proportional control, output is Open.
4 During position-proportional control, output is Close.
B group
| Bit | Description | [1] | [0] |
| 0 | Setting level | 1 | 0 |
| 1 | RAM write mode | RAM | Backup |
| 2 | Control output 1 type | Linear | Pulse |
| 3 | Control output 2 type | Linear | Pulse |
| 4 | EEPROM | RAM≠EEPROM | RAM = EEPROM |
| 5 | Input error | ON | OFF |
| 6 | A/D converter error | ON | OFF |
| 7 | CT overflow | ON | OFF |
| 8 | CT hold | ON | OFF |
| 9 | Potentiometer error | ON | OFF |
| 10 | RSP input error | ON | OFF |
| 11 | |||
| 12 | |||
| 13 | |||
| 14 | |||
| 15 |
About Setting Levels
To return to setting level 0 from setting level 1, issue the "software reset" command.
If the parameter write command is issued for the setup and expansion modes in setting level 0, an error occurs, and the end code (0D = Command cannot be executed) is returned.
6.5 How to Read Communications Error Information
The result of communications on the E5AK can be checked by the end code in the response frame. Use this end code to remedy errors that may occur.
End code
Communications are normal when the end code in the response is "00". If the end code is not "00", this indicates that an error other than that is not an undefined error has occurred. The end code format is as follows and does not contain a data area.
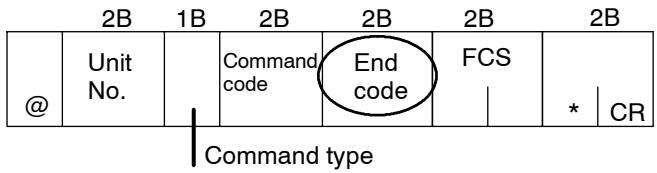
| End code | 0D | Code name | Command cannot be executed |
Description
- Writing was carried out during local operation.
- Writing was carried out during executing auto-tuning.
- An attempt was made to execute 40% AT during heating and cooling control or position-proportional control.
- An attempt was made to switch run/stop in setting level 1.
- An attempt was made to execute AT in setting level 1.
- Issue the parameter read or write commands in conditions other than above.
Action
| End code | 10 | Code name | Parity error |
Description
Parity check error was detected in the received data.
Action
Check the communications condition. If the communications condition of the host computer and E5AK controller match, then a probable cause is a problem in the communications circuit of one or both of the host computer and E5AK controller.
| End code | 11 | Code name | Framing error |
Description
Stop bit cannot be detected.
Action
Check the communications condition. If the communications condition of the host computer and E5AK controller match, then a probable cause is a problem in the communications circuit of one or both of the host computer and E5AK controller.
| End code | 13 | Code name | FCS error |
Description
The FCS (Frame Check Sequence) do not match.
Action
Check the FCS program.

About the unit No.
Responses are not returned unless the target unit for communications and the unit No. in the command match.
| End code | 14 | Code name | Format error |
Description
The received command length does not match the length defined in the frame format.
Action
Check the communications condition. If the communications condition of the host computer and E5AK controller match, then a probable cause is a problem in the communications circuit of one or both of the host computer and E5AK controller.
| End code | 15 | Code name | Setting range error |
Description
Numerical values or code values in the data are not within the setting range.
Action
Check the parameter and read or write data of special commands.
Undefined error
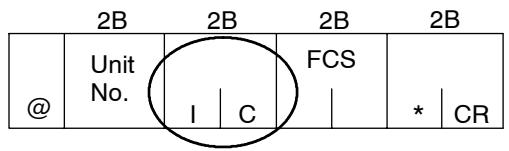
Description
-
An undefined header code has been received.
-
A currently invalid parameter (e.g. the scaling command during temperature input) has been received.
Action
- Check the parameter No.
6.6 Program Example
How to use programs
The program described below is for obtaining corresponding response frame data when some of the command frame data is input.
The input format is as follows. The FCS and terminator are automatically generated, and need not be input.
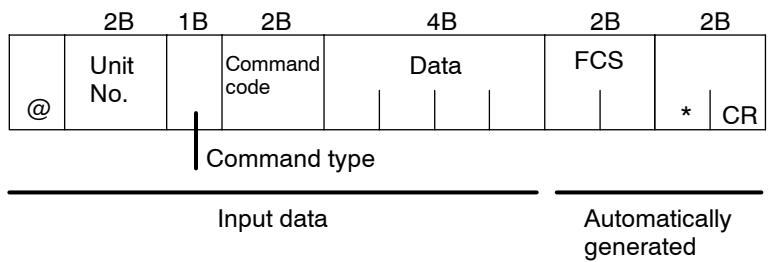
The output format is as follows. The content of the response frame is displayed as it is.

Procedure
(1) Read the program.
(2) Enter "RUN".
(3) When "send data:" is displayed, enter the command data (from @ to the command string).
(4) The content of the response frame is displayed following "receive data":
- Conditions when running a program
- Set the communications condition as follows:
Baud rate : 9600 bps
Bit length : 7 bits
Parity : Even
Stop bit : 2
- Make sure that the communications cable is properly connected.
■ Program list (language: IBM PC COMPATIBLE MACHINE)
1000
1010 ' PROGRAM : E5AK Communication Program
1020 ’ - For IBM PC COMPATIBLE MACHINE
1050
1060 ’ ----- RS-232C SPEED: 9600BPS, PARITY: EVEN, DATA: 7, STOP: 2
1070 OPEN "COM: 9600, E, 7, 2, CD0, CS0, DS0, RB256, RS "FOR RANDOM AS #1 LEN=256
1080 REPEAT
1090 ’-Make Command
1100 PRINT "send data : ";
1110 INPUT SEND$
1120’-FCS calculation
1130 FCS=0
1140 FOR IFCS=1 TO LEN (SEND$)
1150 FCS FCS XOR ASC (MID(SEND, IFCS, 1))
1160 NEXT
1170 FCS(=RIGHT) ("0" + HEX) (FCS), 2)
1180’-Send data to communication port
1190 PRINT #1, SEND+FCS+"
1200 ’ - - - Receive data from communication port
1210 RECCNT=0: TMP$=""
1220 DRECLOOP:
1230 IF LOC (1) <> 0 THEN DREC1
1240 RECCNT=RECCNT+1
1250 IF RECCNT=5000 THEN *DRECERR ELSE DRECLOOP
1260 'DREC1
1270 TMP =TMP +INPUT$ (LOC(1),#1)
1280 IF RIGHT (TMP&, 1)=CHR (13) THEN DRECEND
---- ELSE RECCNT=0: GOTO DRECLOOP
1290 DRECERR:
1300 TMP(= "No response !!"
1310 DRECEND:
1320 RECV=TMP
1330 PRINT "response: "; RECV$
1340' -Repeat to make Command
1350 ' GOTO REPEAT
1360’----END
1370 CLOSE #1
1380 END
Examples of use
Set the unit No. to "00"
- In the following examples, data is shown in individual blocks to make the examples easier to understand. However, when actually creating programs, do not leave spaces between frame items. Also, response are displayed without spaces between frame items.
- Set the set point to "300.0"
- Input data
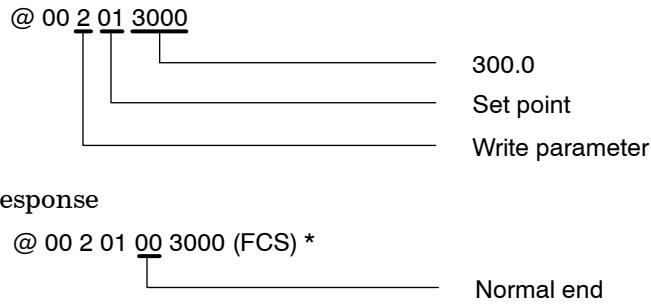
Start running
- Input data
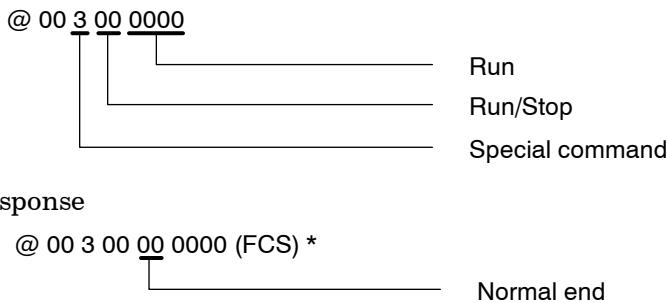
Monitor process value
- Input data
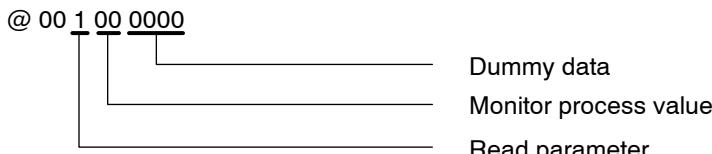
Response

CHAPTER7
CALIBRATION
This chapter describes procedures for each calibration operation. Read this chapter only when the controller must be calibrated.
7.1 Structure of Parameters 7-2
7.2 Calibrating Thermocouple 7-4
7.3 Calibrating Platinum Resistance Thermometer 7-7
7.4 Calibrating Current Input 7-9
7.5 Calibrating Voltage Input 7-10
7.6 Checking Indication Accuracy 7-12
7.1 Structure of Parameters
- To calibrate the E5AK controller, select [c b] in the menu display to select the calibration mode. [A] is displayed.
- However, note that [ Lb ] may not be displayed on the menu display when, for example, the user is calibrating the E5AK controller for the first time. If this happens, [ Lb ] is displayed by changing the "security" parameter (protect mode) to "0".
- The parameters in the calibration mode are configured as follows.
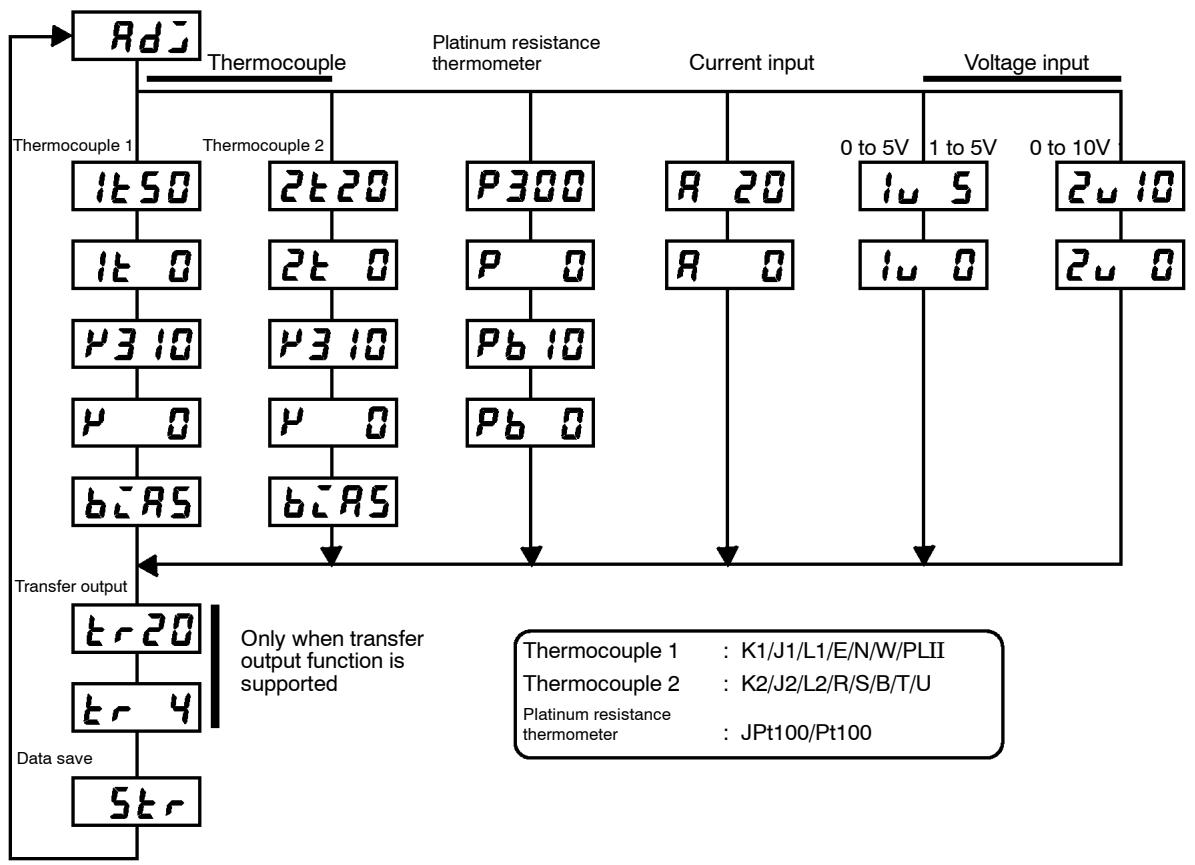
- To select the desired parameter, press the key. Parameters are displayed in the following order:
Calibration of inputs Calibration of transfer output Saving of calibration data
If the E5AK controller does not support the transfer output function, calibration of transfer output is automatically deleted from the calibration procedure as follows:
Calibration of inputs Saving of calibration data
- Only inputs that have been set in the "input type" parameter (setup mode) can be calibrated. To temporarily save data for each of the calibration parameters, press the key for 1 second.
- Transfer output can be calibrated only when the communications unit (E53-AKF) is set in the controller. To adjust data items, press the or keys.
- The data save menu is displayed only when all calibration items have temporarily been saved.
- After calibrating input, you must always check indication accuracy. For details, see page 7-12.
Calibration item menu
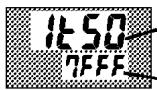
Calibration item parameter Process value
- Parameters are displayed on the No.1 display, and the process value is displayed in Hexadecimal on the No.2 display.
- Normally, the process value changes by several digits. The process value flashes, for example, when a sensor error causes the process value to stray from the calibration target range.
- When the process value display is flashing, the process value is not saved as data even if the key is pressed.
- Once the E5AK controller has been calibrated by the user, [Rd] is preceded by the ". . ." mark when the calibration mode is selected.
Calibration save mark
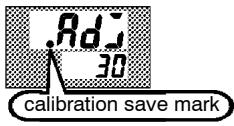
7.2 Calibrating Thermocouple
- Calibrate according to the type of thermocouple, thermocouple 1 group (K1, J1, L1, E, N, W, PLII) and thermocouple 2 group (K2, J2, L2, R, S, B, T, U).
- When calibrating, do not cover the bottom or top of the controller. Also, do not touch the input terminals (Nos. 11 and 12) and compensating conductor on the E5AK controller.
Preparations
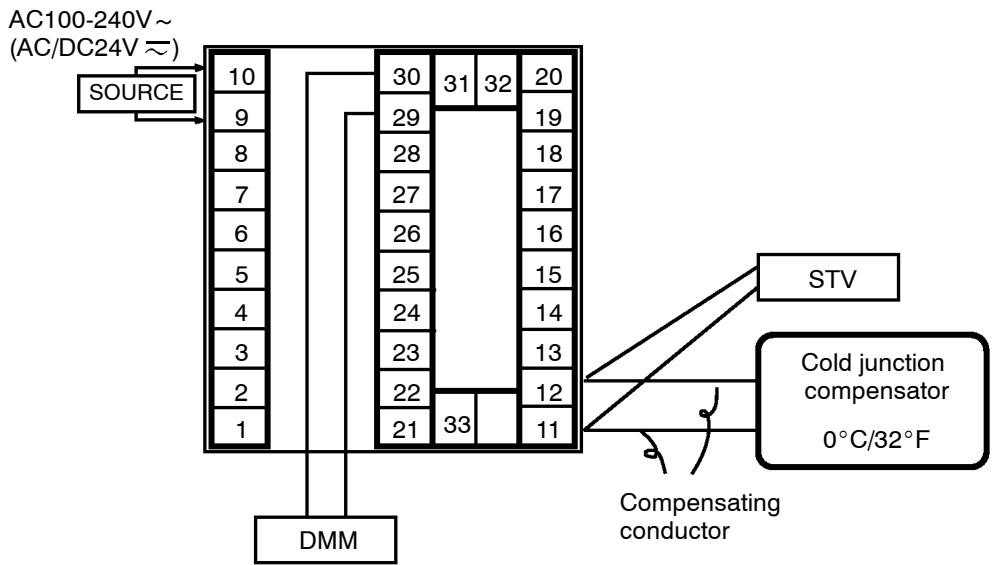
- Set the cold junction compensator to 0^ . However, make sure that internal thermocouples are disabled (tips are open).
- In the above figure, STV refers to a standard DC current/voltage source, and DMM refers to a precision digital multimeter. However, note that DMM is required only when the transfer output function is supported.
- Use the compensating conductor selected thermocouple. However, note that when thermocouple R, S, E, B, W or PLII is used, the cold junction compensator and the compensating conductor can be substituted with the cold junction compensator and the compensating conductor for thermocouple K.

Connecting the Cold Junction Conductor
Correct process values cannot be obtained if you touch the contact ends of the compensating conductor during calibration of a thermocouple. Accordingly, short (enable) or open (disable) the tip of the compensating conductor inside the cold junction compensator as shown in the figure below to create a contact or non-contact state for the cold junction compensator.
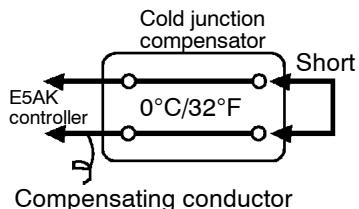
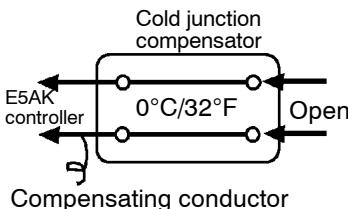
Calibration: thermocouple 1

This example describes how to calibrate a thermocouple when the transfer output function is supported. If the transfer output function is not supported, skips steps (7) to (10).
(1) When [Rd] is displayed, the 30-minute timer is displayed on the No.2 display and counts down. This timer serves as a guide for the aging time when aging is required.
(2) First, calibrate the main input. Press the 心 key to display [150] (50mV calibration display). Set STV output to 50mV. When the value on the No.2 display has stabilized (changes of several digits max.), press the 心 key to temporarily save the calibration data.
(3) Press the key to display [!k ] (0mV calibration display). Set STV output to 0mV. When the value on the No.2 display has stabilized (changes of several digits max.), press the key to temporarily save the calibration data.
(4) Next, calibrate the cold junction compensator. Press the key to display [310mV calibration display). Set STV output to 310mV. When the value on the No.2 display has stabilized (changes of several digits max.), press the key to temporarily save the calibration data.
(5) Press the key to display [ ] (0mV calibration display). Set STV output to 0mV. When the value on the No.2 display has stabilized (changes of several digits max.), press the key to temporarily save the calibration data.
(6) Finally, calibrate the bias compensation value. Disconnect the STV, and enable the thermocouple of the cold junction compensator. When carrying this out, make sure that the wiring on the STV is disconnected. Make sure that the cold junction compensator is set to 0^ and press the 心 key. The display changes to [b<RA5] (calibration display for the bias compensation value). When the value on the No.2 display has stabilized (changes of several digits max.), press the 心 key to temporarily save the calibration data.
(7) Next, calibrate the transfer output function. If the transfer output function is not supported, skip to step (11). Press the key. The display changes to [ r20 ] (20mA calibration display).
(8) Set the output to 20mA by the or keys while monitoring the voltage on the digital multimeter. In the example on the left, the display indicates that the value two digits smaller than before calibration is "20mA".
(9) Press the key. The display changes to [山 - 山] (4mA calibration display).
(10) Set the output to 4mA by the or keys while monitoring the voltage on the digital multimeter. In the example on the left, the display indicates that the value two digits smaller than before calibration is "4mA".
(11) Press the key until the display changes to the data save display. Press the key. The No.2 display changes to [ yE S], and two seconds later the calibration data is saved to internal memory. If you press the key when the No.2 display reads [ nə], the calibration data is invalidated.
(12) This completes calibration of the thermocouple 1 group. Press the key to return the display to [Rd].
Calibration: thermocouple 2

This example describes how to calibrate a thermocouple when the transfer output function is supported. If the transfer output function is not supported, skips steps (7) to (10).
(1) When [RdJ] is displayed, the 30-minute timer is displayed on the No.2 display and counts down. This timer serves as a guide for the aging time when aging is required.
(2) First, calibrate the main input. Press the key to display [乙 乙 乙 ] (20mV calibration display). Set STV output to 20mV. When the value on the No.2 display has stabilized (changes of several digits max.), press the key to temporarily save the calibration data.
(3) Press the key to display [24 0] (0mV calibration display). Set STV output to 0mV . When the value on the No.2 display has stabilized (changes of several digits max.), press the key to temporarily save the calibration data.
(4) Next, calibrate the cold junction compensator. Press the key to display [310mV calibration display). Set STV output to 310mV. When the value on the No.2 display has stabilized (changes of several digits max.), press the key to temporarily save the calibration data.
(5) Press the key to display [ ] (0mV calibration display). Set STV output to 0mV. When the value on the No.2 display has stabilized (changes of several digits max.), press the key to temporarily save the calibration data.
(6) Finally, calibrate the bias compensation value. Disconnect the STV, and enable the thermocouple of the cold junction compensator. When carrying this out, make sure that the wiring on the STV is disconnected. Make sure that the cold junction compensator is set to 0^ and press the 心 key. The display changes to [b:85] (calibration display for the bias compensation value). When the value on the No.2 display has stabilized (changes of several digits max.), press the 心 key to temporarily save the calibration data.
(7) Next, calibrate the transfer output function. If the transfer output function is not supported, skip to step (11). Press the 一 key. The display changes to [ -20] (20mA calibration display).
(8) Set the output to 20mA by the or keys while monitoring the voltage on the digital multimeter. In the example on the left, the display indicates that the value two digits smaller than before calibration is "20mA".
(9) Press the key. The display changes to [山 - 山] (4mA calibration display).
(10) Set the output to 4mA by the or keys while monitoring the voltage on the digital multimeter. In the example on the left, the display indicates that the value two digits smaller than before calibration is "4mA".
(11) Press the key until the display changes to the data save display. Press the key. The No.2 display changes to [yes], and two seconds later the calibration data is saved to internal memory. If you press the key when the No.2 display reads [no], the calibration data is invalidated.
(12) This completes calibration of the thermocouple 2 group. Press the key to return the display to [Rd].
7.3 Calibrating Platinum Resistance Thermometer
Preparation
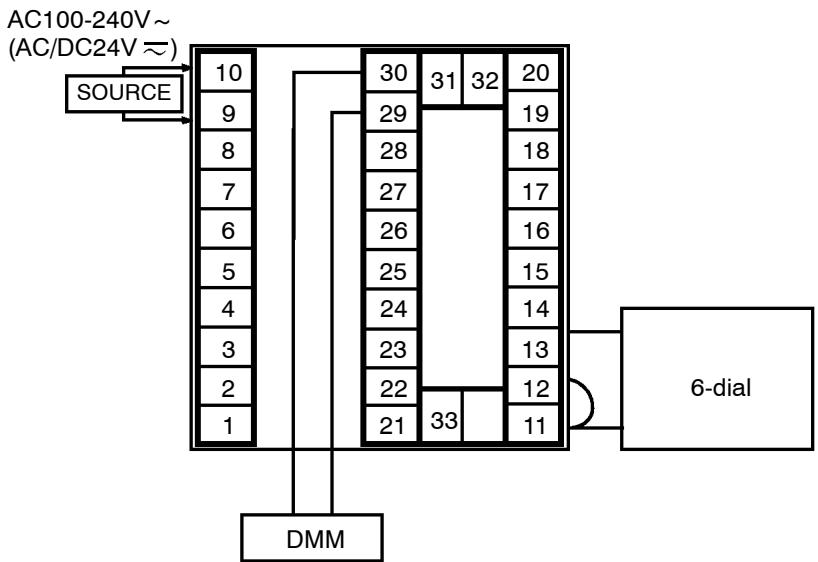
- Use leads of the same thickness when connecting to the platinum resistance thermometer.
- In the above figure, 6-dial refers to a precision resistance box, and DMM stands for a digital multimeter. However, note that the DMM is required only when the transfer output function is supported.
- Connect (short) the leads from terminal Nos. 11 and 12.
Calibration

Cont'd on next page
This example describes how to calibrate a platinum resistance thermometer when the transfer output function is supported. If the transfer output function is not supported, skips steps (7) to (10).
(1) When [RdJ] is displayed, the 30-minute timer is displayed on the No.2 display and counts down. This timer serves as a guide for the aging time when aging is required.
(2) First, calibrate the main input. Press the key to display [p300] (300Ω calibration display). Set the 6-dial to 300Ω When the value on the No.2 display has stabilized (changes of several digits max.), press the key to temporarily store the calibration data.
(3) Press the key to switch [ ] (0Ω calibration) display. Short terminal No. 11 to 13. When the value on the No.2 display has stabilized (changes of several digits max.), press the key to temporarily store the calibration data.
(4) Next, calibrate the B-B' input. Change the wiring as follows.
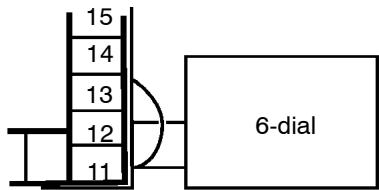
Make the connection across terminals 11 and 12 and the 6-dial as short as possible. Short terminals 11 and 13.
(5) Press the key to display [P I] (10Ω calibration display). Set the 6-dial to 10 . When the value on the No.2 display has stabilized (changes of several digits max.), press the key to temporarily store the calibration data.
From previous page

(6) Press the key to display [P ] (0Ω calibration display, Short terminal Nos. 11 to 13. When the value on the No.2 display has stabilized (changes of several digits max.), press the key to temporarily store the calibration data.
(7) Next, calibrate the transfer output function. If the transfer output function is not supported, skip to step (11). Press the key. The display changes to [± r± 0] (20mA calibration display).
(8) Set the output to 20mA by the or keys while monitoring the voltage on the digital multimeter. In the example on the left, the display indicates that the value two digits smaller than before calibration is "20mA".
(9) Press the key. The display changes to [山 - 山] (4mA calibration display).
(10) Set the output to 4mA by the or keys while monitoring the voltage on the digital multimeter. In the example on the left, the display indicates that the value two digits smaller than before calibration is "4mA".
(11) Press the key until the display changes to the data save display. Press the key. The No.2 display changes to [ yE5], and two seconds later the calibration data is saved to internal memory. If you press the key when the No.2 display reads [ nə], the calibration data is invalidated.
(12) This completes calibration of the platinum resistance thermometer. Press the key to return the display to [Rd].
7.4 Calibrating Current Input
Preparation
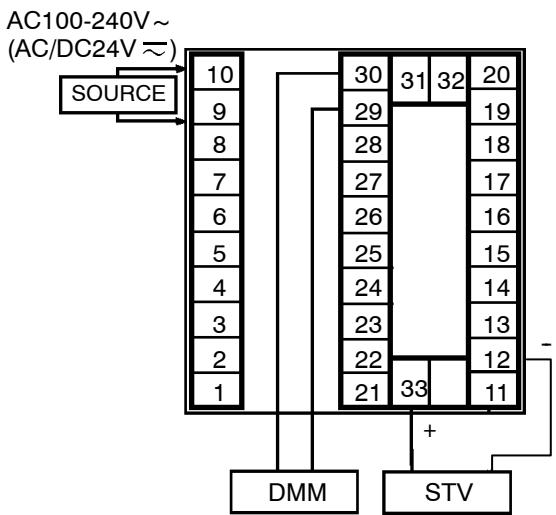
Calibration

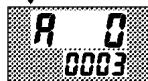
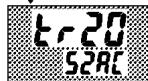

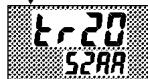
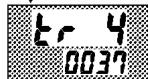

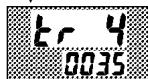
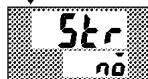
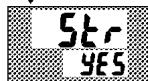
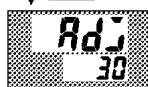
- In the above figure, STV refers to a standard DC current/voltage source, and DMM refers to a precision digital multimeter. However, note that the DMM is required only when the transfer output function is supported.
This example describes how to calibrate a current input when the transfer output function is supported. If the transfer output function is not supported, skips steps (4) to (7).
(1) When [Rd] is displayed, the 30-minute timer is displayed on the No.2 display and counts down. This timer serves as a guide for the aging time when aging is required.
(2) Press the key. The display changes to [R 20] (20mA calibration display). Set the STV output to 20mA. When the value on the No.2 display has stabilized (changes of several digits max.), press the key to temporarily store the calibration data.
(3) Press the key. The display changes to [R] (0mA calibration display). Set the STV output to 0 mA. When the value on the No.2 display has stabilized (changes of several digits max.), press the key to temporarily store the calibration data.
(4) Next, calibrate the transfer output function. If the transfer output function is not supported, skip to step (8). Press the key. The display changes to [k-20] (20mA calibration display).
(5) Set the output to 20mA by the or keys while monitoring the voltage on the digital multimeter. In the example on the left, the display indicates that the value two digits smaller than before calibration is "20mA".
(6) Press the key. The display changes to [ - 4 ] (4mA calibration display).
(7) Set the output to 4mA by the or keys while monitoring the voltage on the digital multimeter. In the example on the left, the display indicates that the value two digits smaller than before calibration is "4mA".
(8) Press the key until the display changes to the data save display. Press the key. The No.2 display changes to [yes], and two seconds later the calibration data is saved to internal memory. If you press the key when the No.2 display reads [no], the calibration data is invalidated.
(9) This completes calibration of current input. Press the key to return the display to [Rd].
7.5 Calibrating Voltage Input
Preparation
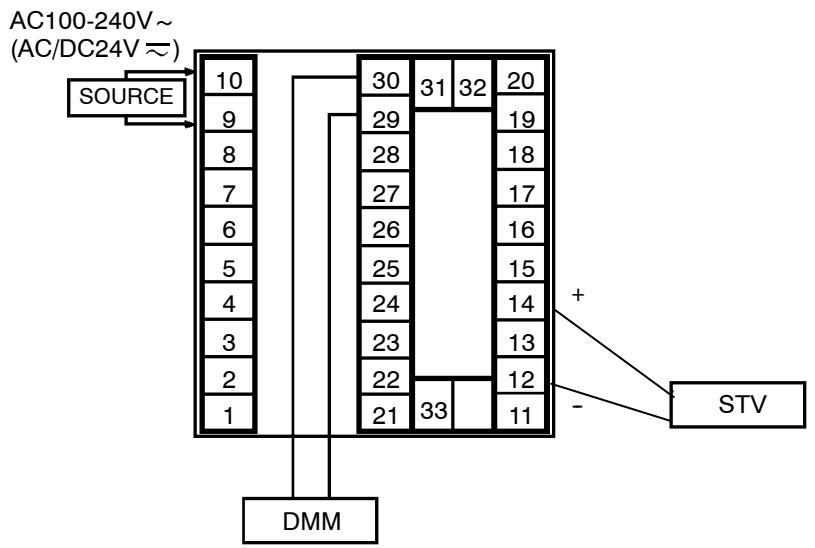
- In the above figure, STV refers to a standard DC current/voltage source, and DMM refers to a precision digital multimeter. However, note that the DMM is required only when the transfer output function is supported.
Calibration: 0 to 5 ~V, 1 to 5 ~V

This example describes how to calibrate voltage input when the transfer output function is supported. If the transfer output function is not supported, skips steps (4) to (7).
(1) When [RdJ] is displayed, the 30-minute timer is displayed on the No.2 display and counts down. This timer serves as a guide for the aging time when aging is required.
(2) Press the key. The display changes to [tu 5] (5 V calibration display). Set the STV output to 5V. When the value on the No.2 display has stabilized (changes of several digits max.), press the key to temporarily store the calibration data.
(3) Press the key. The display changes to [ ] (0V calibration display). Set the STV output to 0V. When the value on the No.2 display has stabilized (changes of several digits max.), press the key to temporarily store the calibration data.
(4) Next, calibrate the transfer output function. If the transfer output function is not supported, skip to step (8). Press the key. The display changes to [t - 20] (20mA calibration display).
(5) Set the output to 20mA by the or keys while monitoring the voltage on the digital multimeter. In the example on the left, the display indicates that the value two digits smaller than before calibration is "20mA".
(6) Press the key. The display changes to [k - 4] (4mA calibration display).
(7) Set the output to 4mA by the or keys while monitoring the voltage on the digital multimeter. In the example on the left, the display indicates that the value two digits smaller than before calibration is "4mA".
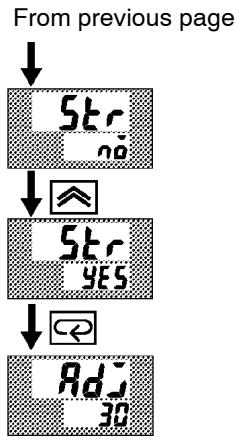
(8) Press the key until the display changes to the data save display. Press the key. The No.2 display changes to [ yE5], and two seconds later the calibration data is saved to internal memory. If you press the key when the No.2 display reads [ nə], the calibration data is invalidated.
(9) This completes calibration of voltage input (0 to 5V, 1 to 5V). Press the key to return the display to [Rd].
Calibration : 0 to 10V

This example describes how to calibrate voltage input when the transfer output function is supported. If the transfer output function is not supported, skips steps (4) to (7).
(1) When [RdJ] is displayed, the 30-minute timer is displayed on the No.2 display and counts down. This timer serves as a guide for the aging time when aging is required.
(2) Press the key. The display changes to [2u 10] (10V calibration display). Set the STV output to 10V. When the value on the No.2 display has stabilized (changes of several digits max.), press the key to temporarily store the calibration data.
(3) Press the 心 key. The display changes to [ u0] (0V calibration display). Set the STV output to 0V. When the value on the No.2 display has stabilized (changes of several digits max.), press the 心 key to temporarily store the calibration data.
(4) Next, calibrate the transfer output function. If the transfer output function is not supported, skip to step (8). Press the key. The display changes to [± r± 0] (20mA calibration display).
(5) Set the output to 20mA by the or keys while monitoring the voltage on the digital multimeter. In the example on the left, the display indicates that the value two digits smaller than before calibration is "20mA".
(6) Press the key. The display changes to [山 - 山 ] (4mA calibration display).
(7) Set the output to 4mA by the or keys while monitoring the voltage on the digital multimeter. In the example on the left, the display indicates that the value two digits smaller than before calibration is "4mA".
(8) Press the key until the display changes to the data save display. Press the key. The No.2 display changes to [ yE5], and two seconds later the calibration data is saved to internal memory. If you press the key when the No.2 display reads [ nə], the calibration data is invalidated.
(9) This completes calibration of voltage input (0 to 10V). Press the key to return the display to [Rd].
7.6 Checking Indication Accuracy
- After calibrating input, make sure that you check indication accuracy to make sure that the E5AK controller has been correctly calibrated.
- Operate the E5AK controller in the PV/SP monitor (level 0 mode) mode.
- Check the indication accuracy at the upper and lower limits and midpoint.
Thermocouple
- Preparation
The following figure shows the required device connection. Make sure that the E5AK controller and cold junction compensator are connected by a compensating conductor for the input type that is to be used during actual operation.
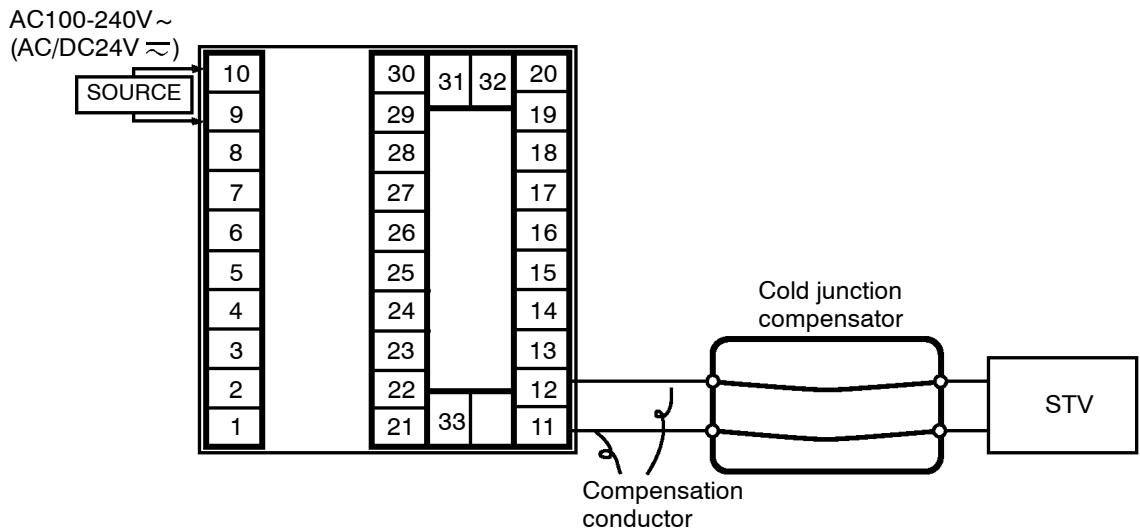
Operation
Make sure that the cold junction compensator is at 0^ , and set STV output to the voltage equivalent to the starting power of the check value.
Platinum resistance thermometer
- Preparation
The following figure shows the required device connection.
AC100-240V\~
(AC/DC24V)
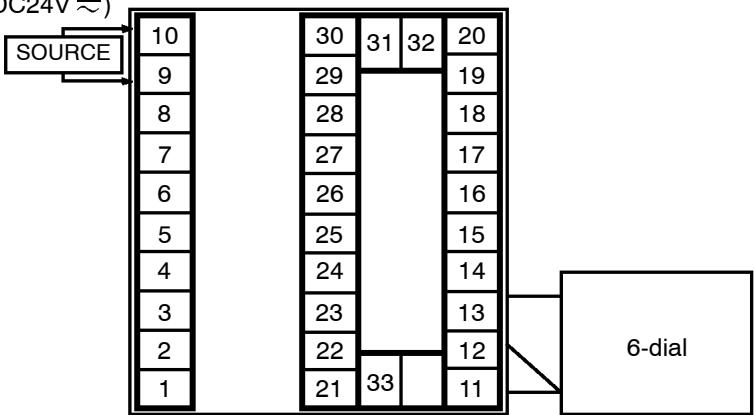
Operation
Set the 6-dial to the resistance equivalent to the check value.
Current input
- Preparation
- The following figure shows the required device connection.
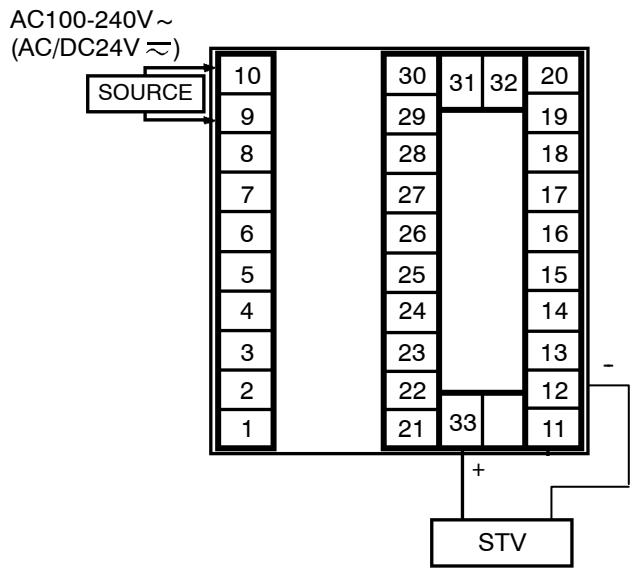
- Operation Set the STV to the current value equivalent to the check value.
Voltage input
- Preparation
- The following figure shows the required device connection.
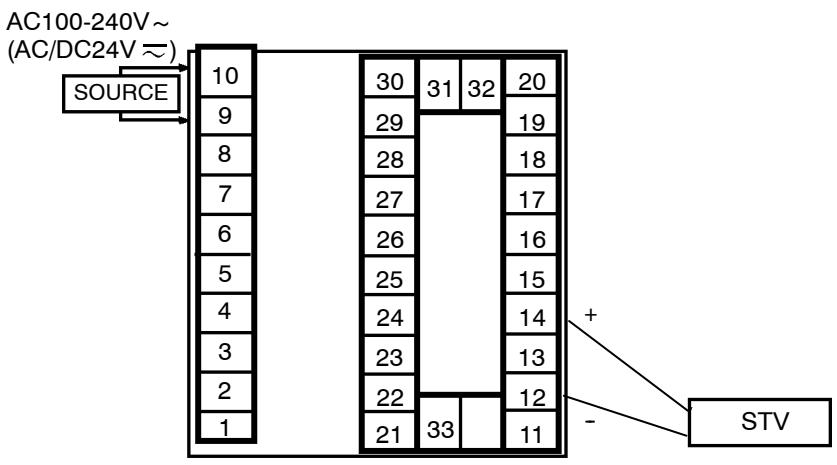
- Operation Set the STV to the voltage value equivalent to the check value.
CHAPTER8
TROUBLESHOOTING
This chapter describes how to find out and remedy the cause if the E5AK does not function properly.
8.1 Initial Checks 8-2
8.2 How to Use the Error Display 8-3
8.3 How to Use Error Output 8-5
8.4 Checking Operation Restrictions 8-6
8.1 Initial Checks
If trouble occurs, first of all check the following.
(1) Power supply
Make sure that the power supply is ON. Also, make sure that the power supply is within the rated voltage range.
(2) Wiring
Make sure that all cables are properly connected.
(3) Communications condition
When communicating using the RS-232C, RS-422 or RS-485 communications interfaces, make sure that the baud rate and other communications condition settings on the host computer and E5AK controller are matching, and are within the permissible ranges.
If there appears to be nothing wrong after checking the E5AK controller, and the same phenomenon continues, check the controller in more detail, for example, on the error display.
8.2 How to Use the Error Display
When an error has occurred, the No.1 display alternately indicates error codes together with the current display item.
This section describes how to check error codes on the display, and the actions you must be taken to remedy the problem.
5.Err Input error
Meaning
Input is in error.
Action
Check the wiring of inputs, disconnections, and shorts, and check the input type.
Operation at error
For control output functions, output the manipulated variable matched to the setting of the "MV at PV error" parameter (level 2 mode). Alarm output functions are activated when the upper limit is exceeded.
Memory error
Meaning
Internal memory operation is in error.
Action
First, turn the power OFF then back ON again. If the display remains the same, the E5AK controller must be repaired. If the display is restored to normal, then a probable cause can be external noise affecting the control system. Check for external noise.
Operation at error
Control output functions turn OFF (2mA max. at 4 to 20mA output, and output equivalent to 0% in case of other outputs). Alarm output functions turn OFF.
E333 A/D converter error
Meaning
Internal circuits are in error.
Action
First, turn the power OFF then back ON again. If the display remains the same, the E5AK controller must be repaired. If the display is restored to normal, then a probable cause can be external noise affecting the control system. Check for external noise.
Operation at error
Control output functions turn OFF (2mA max. at 4 to 20mA output, and output equivalent to 0% in case of other outputs). Alarm output functions turn OFF.
Calibration data error
This error is output only during temperature input, and is displayed for two seconds when the power is turned ON.
Meaning
Calibration data is in error.
Action
Must repair.
Operation at error
Both control output functions and alarm output functions operate. However, note that readout accuracy is not assured.
CCCC
Display range over
Meaning
Though not an error, this is displayed when the process value exceeds the display range when the control range (setting range ± 10% ) is larger than the display range (-1999 to 9999).
- When less than “-1999” [c c c c]
- When greater than "9999" [30]
Operation
Control continues, allowing normal operation.
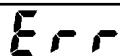
Motor calibration error (Displayed on the No. 2 Display)
Meaning
Motor calibration has ended with an error.
Action
First, correctly connect the wiring for the potentiometer, open output, and close output.
Execute the motor calibration again.
Operation procedure
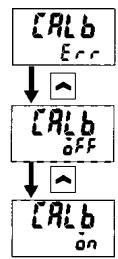
Operation at error
When motor calibration is executed, open output will operate and then close output will operate. However, as the value is incorrect, the result turns out to be an error.
8.3 How to Use Error Output
The E5AK controller allows you to assign error output to terminals as outputs.
For details on output assignments, see 3.3 Setting Output Specifications (page 3-6).
LBA
- LBA (Loop Break Alarm) can be used as a means for detecting loop breaks when the control loop is not functioning normally. For details, see page 4-15.
- LBA allows you to detect the following errors:
(1) Heater burnout
(2) Output error (contact weld, damaged transistors, etc.)
(3) Sensor error (constant input values, etc.)
- If you use the LBA function, set the loop break detection time matched to the control characteristics in the "LBA detection time" parameter (level 2 mode).
Input errors
- If you assign error 1 as the output, an error can be output to auxiliary output 1 or auxiliary output 2 when input is in error. When this error occurs, remedy by following the description for "Input error" (page 8-3).
A/D converter error
- If you assign error 2 as the output, an error can be output to auxiliary output 1 or auxiliary output 2 when the A/D converter is in error. When this error occurs, remedy by following the description for “A/D converter error” (page 8-3).
Remote SP input error
- If you assign error 3 as the output, an error can be output to auxiliary output 1 or auxiliary output 2 when the remote SP input error occurs while the remote SP function is enabled. For details on error displays and meanings, see Chapter 4 Applied Operation/4.4 How to Use the Remote SP (page 4-11).
- When an error occurs, check the state of the remote SP connection. If the lead is broken or disconnected, the remote SP scaling lower limit is displayed blinking on the PV/SP display or remote SP monitor display.
8.4 Checking Operation Restrictions
With the E5AK controller, auto-tuning or self-tuning sometimes do not operate depending on the way functions are combined. The table below summarizes the main operating restrictions.
If the E5AK controller is not operating properly, first check whether operating conditions violate the restrictions in this table.
| Restriction | Inoperable or Invalid Functions | |||
| ST Execution | AT Execution | Limiter Function | Other | |
| At analog input | × | |||
| At heating and cooling control | × | 40%AT | ||
| At position-proportional control | × | 40% AT | Manipulated variable | ON/OFF control |
| At ON/OFF control | × | × | Manipulated variableMV change rate | |
| ST = ON | × | Manipulated variableMV change rate | SP ramp function | |
| At AT execution | - | MV change rate | Parameter setting | |
| At stop | × | × | Manipulated variableMV change rate | |
Items marked by a "x" indicates combinations of conditions not acceptable during ST or AT execution.
Items marked by “-” are impossible combinations.
APPENDIX
SPECIFICATIONS A-2
ABOUT CURRENT TRANSFORMER (CT) A-5
CONTROL BLOCK DIAGRAM A-6
SETTING LIST A-8
MODEL LIST A-11
PARAMETER OPERATIONS LIST A-12
FUZZY SELF-TUNING A-14
X FORMAT A-17
ASCII CODE LIST A-20
SPECIFICATIONS
Ratings
| AC100-240V type | AC/DC24V type | |
| Supply Voltage | AC100-240V ~, 50/60 Hz | AC/DC24V ≈, 50/60Hz |
| Power Consumption | 16VA | 12VA, 8W |
| Operating Voltage Range | 85% to 110% of rated supply voltage | |
| Main Input | Thermocouple: K, J, T, E, L, U, N, R, S, B, W, PLII *1, *2 Platinum resistance thermometer: JPt100, Pt100 Voltage input: 4 to 20mA, 0 to 20mA (Input impedance 150Ω) Current input: 1 to 5V, 0 to 5V, 1 to 10V (Input impedance 1MΩ) | |
| Sub-Input | CT input: E54-CT1, E54-CT3 Potentiometer: 100Ω to 2.5kΩ Remote SP input: 4 to 20mA (Input impedance 150Ω) | |
| Control Output | According to output unit (see “Output Unit Ratings and Characteristics”) | |
| Auxiliary Output | SPST-NO, 3A at 250 VAC (resistive load) | |
| Control Method | Advanced PID or ON/OFF control | |
| Setting Method | Digital setting using front panel keys | |
| Indication Method | 7-segment digital display, Bar graph and LEDs | |
| Other Functions | According to option unit (see "Option Unit Ratings and Characteristics") | |
| Ambient Temperature | Operating: -10°C to 55°C (with no icing)/3-year warranty period: -10°C to 50°C Storage: -25°C to 65°C (with no icing) | |
| Ambient Humidity | 35% to 85% | |
1 Thermocouple W is W/Re5-26.
2 The following table shows the setting ranges and indication ranges for each of the inputs.
| Input | Setting Range | Indication Range | ||
| JPt100 | -199.9 to 650.0(°C) | /-199.9 to 999.9(°F) | -199.9 to 735.0(°C) | /-199.9 to 999.9(°F) |
| Pt100 | -199.9 to 650.0(°C) | /-199.9 to 999.9(°F) | -199.9 to 735.0(°C) | /-199.9 to 999.9(°F) |
| K1 | -200 to 1300(°C) | /-300 to 2300(°F) | -350 to 1450(°C) | /-560 to 2560(°F) |
| K2 | 0.0 to 500.0(°C) | /0.0 to 900.0(°F) | -50.0 to 550.0(°C) | /-90.0 to 990.0(°F) |
| J1 | -100 to 850(°C) | /-100 to 1500(°F) | -195 to 945(°C) | /-260 to 1660(°F) |
| J2 | 0.0 to 400.0(°C) | /0.0 to 750.0(°F) | -40.0 to 440.0(°C) | /-75.0 to 825.0(°F) |
| T | -199.9 to 400.0(°C) | /-199.9 to 700.0(°F) | -199.9 to 460.0(°C) | /-199.9 to 790.0(°F) |
| E | 0 to 600(°C) | /0 to 1100(°F) | -60 to 660(°C) | /-110 to 1210(°F) |
| L1 | -100 to 850(°C) | /-100 to 1500(°F) | -195 to 945(°C) | /-260 to 1660(°F) |
| L2 | 0.0 to 400.0(°C) | /0.0 to 750.0(°F) | -40.0 to 440.0(°C) | /-75.0 to 825.0(°F) |
| U | -199.9 to 400.0(°C) | /-199.9 to 700.0(°F) | -199.9 to 460.0(°C) | /-199.9 to 790.0(°F) |
| N | -200 to 1300(°C) | /-300 to 2300(°F) | -350 to 1450(°C) | /-560 to 2560(°F) |
| R | 0 to 1700(°C) | /0 to 3000(°F) | -170 to 1870(°C) | /-300 to 3300(°F) |
| S | 0 to 1700(°C) | /0 to 3000(°F) | -170 to 1870(°C) | /-300 to 3300(°F) |
| B | 100 to 1800(°C) | /300 to 3200(°F) | -70 to 1970(°C) | /10 to 3490(°F) |
| W | 0 to 2300(°C) | /0 to 4100(°F) | -230 to 2530(°C) | /-410 to 4510(°F) |
| PLII | 0 to 1300(°C) | /0 to 2300(°F) | -130 to 1430(°C) | /-230 to 2530(°F) |
| 4 to 20mA | One of following ranges depending on results of scaling | -10 to 110% of setting range. Note, however that max. value is -1999 to 9999 | ||
| 0 to 20mA | -1999 to 9999 | |||
| 1 to 5V | -199.9 to 999.9 | |||
| 0 to 5V | -19.99 to 99.99 | |||
| 0 to 10V | -1.999 to 9.999 | |||
Characteristics
| Indication Accuracy | Thermocouple: (±0.3% of indication value or ± 1°C, whichever greater) ± 1 digit max. (*) Platinum resistance thermometer: (±0.2% of indication value or ± 0.8°C whichever greater) ± 1 digit max. Analog input: ±0.2%± 1 digit max. CT input: ±5%FS ± 1 digit max. Potentiometer: ±5%FS ± 1 digit max. Remote SP: ±0.2%FS ± 1 digit max. | |
| Temperature variation influence (*2) | Platinum resistance thermometer: (±1% of PV or ± 2°C, whichever greater) ± 1 digit max. Thermocouple (R, S, B, W): (±1% of PV or ± 10°C, whichever greater) ± 1 digit max. Other thermocouples (K1, K2, J1, J2, E, N, T, L1, L2, U, PLII): (±1% of PV or ± 4°C, whichever greater) ± 1 digit max. Analog input (current, voltage, or remote SP input): ±1%FS±1 digit max. | |
| Voltage variation influence (*2) | ||
| Hysteresis | 0.01 to 99.99%FS (in units of 0.01%FS) | |
| Proportional Band (P) | 0.1 to 999.9% FS (in units of 0.1%FS) | |
| Integral (reset) Time (I) | 0 to 3999 s (in units of 1 second) (*3) | |
| Derivative (rate) Time (D) | 0 to 3999 s (in units of 1 second) | |
| Control Period | 1 to 99 s (in units of 1 second) | |
| Manual Reset Value | 0.0 to 100.0% (in units of 0.1%) | |
| Alarm Setting Range | -1999 to 9999 or -199.9 to 999.9 (decimal point position dependent on input type or result of scaling) | |
| Sampling Period | Temperature input: 250 ms, Analog input: 100 ms, Sub-input: 1s | |
| Insulation Resistance | 20 MΩ min. (at 500 VDC) | |
| Dielectric Strength | 2000 VAC, 50/60Hz for 1 min (between terminals of different polarities) | |
| Vibration Resistance | Malfunction | 10 to 55 Hz, 10 m/s2 (approx.1G) for 10 min each in X, Y, and Z directions |
| Destruction | 10 to 55 Hz, 20 m/s2 (approx.2G) for 2hrs each in X, Y, and Z directions | |
| Shock Resis-tance | Malfunction | 200 m/s2 min. (approx.20G), 3 times each in 6 directions (100 m/s2 (approx.10G) applied to the relay) |
| Destruction | 300 m/s2 min. (approx.30G), 3 times each in 6 directions | |
| Weight | Approx. 450 g, mounting bracket: approx. 65 g | |
| Enclosure Ratings | Front panel: NEMA4 for indoor use (equivalent to IP66) Rear case: IEC standard IP20 Terminals: IEC standard IP00 | |
| Memory Protection | Non-volatile memory (number of writings:100000 operations) | |
1 The indication accuracy of the K1, T, and N thermocouples at a temperature of -100°C or less is ±2°C ±1 digit maximum.
The indication accuracy of the U, L1 and L2 thermocouples at any temperature is ± 2^ ± 1 digit maximum.
The indication accuracy of the B thermocouple at a temperature of 400^ or less is unrestricted.
The indication accuracy of the R and S thermocouples at a temperature of 200^ or less is ± 3^ ± 1 digit maximum.
The indication accuracy of the W thermocouple is ± 1 digit max. of whichever is the greater of ± 0.3% or ± 3^ of the indicated value.
The indication accuracy of the PLII thermocouple is ± 1 digit max. of whichever is the greater of ± 0.3% or ± 2^ of the indicated value.
2 Ambient temperature: -10^ to 23^ to 55^
Voltage range: -15 to +10% of rated voltage
*3 On a position-proportional control type, 1 to 3999.
- Heater Burnout Alarm
| Max. heater current | Single-phase 50 A VAC (see note 1) |
| Heater current value display accuracy | ± 5%FS ± 1 digit max. |
| Heater burnout alarm setting range | 0.1 to 49.9 A (in units of 0.1 A) (see note 2) |
| Min. detection ON time | 190 ms (see note 3) |
Note: 1. Use the K2CU-F□A-□GS (with gate input terminals) for the detection of three-phase heater burnout.
2. The heater burnout alarm is always OFF if the alarm is set to 0.0A and always ON if the alarm is set to 50.0A.
3. No heater burnout detection or heater current value measurement is possible if the control output (heat) is ON for less than 190ms.
Output Unit Ratings and Characteristics
Ratings and characteristics conform to the output unit mounted on the controller. For details on the ratings of the output unit, see page 2-9.
The relay output unit is already mounted on the E5AK-PRR2. When replacing the output unit, use the E53-R.
Option Unit Ratings and Characteristics
| Event inputs | Contact input | ON: 1 kΩ max., OFF: 100 kΩ min. |
| No-contact input | ON: residual voltage 1.5 V max., OFF: leakage current 0.1 mA max. | |
| Communications | Interface | :RS-232C, RS-422 or RS-485 |
| Transmission method | :Half-duplex | |
| Synchronization method | :Start-stop synchronization (asynchronous method) | |
| Baud rate | :1.2/2.4/4.8/9.6/19.2 kbps | |
| Transfer output | 4 to 20 mA, Permissible load impedance: 600 Ω max. Resolution: Approx. 2600 | |
ABOUT CURRENT TRANSFORMER (CT)
- Specifications
| Item | Specifications | |
| Type | E54-CT1 | E54-CT3 |
| Max.continuous current | 50A | 120A (*1) |
| Dielectric Strength | AC 1000V (1min) | |
| Vibration Resistance | 50Hz, 98m/s2[10G] | |
| Weight | Approx. 11.5g | Approx. 50g |
| Accessory | - | Armature (2) Plug (2) |
*1 The maximum continuous current of the E5AK is 50 A.
- Dimensions
E54-CT1
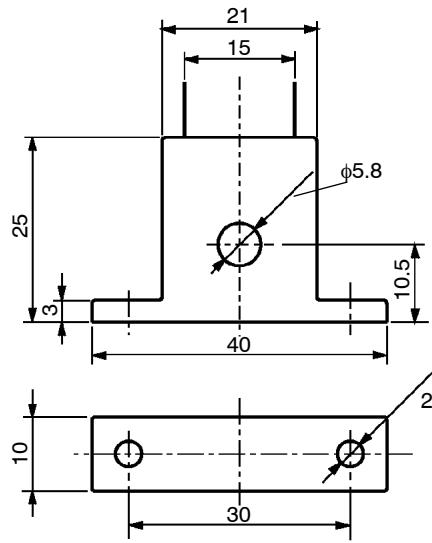
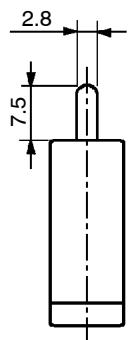
E54-CT3
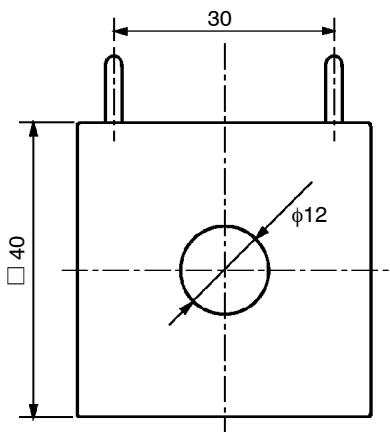
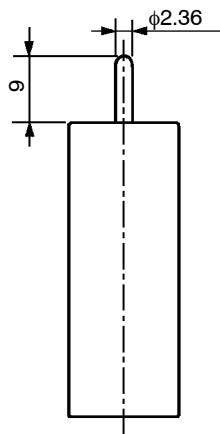
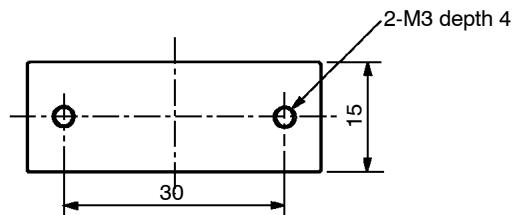
CONTROL BLOCK DIAGRAM
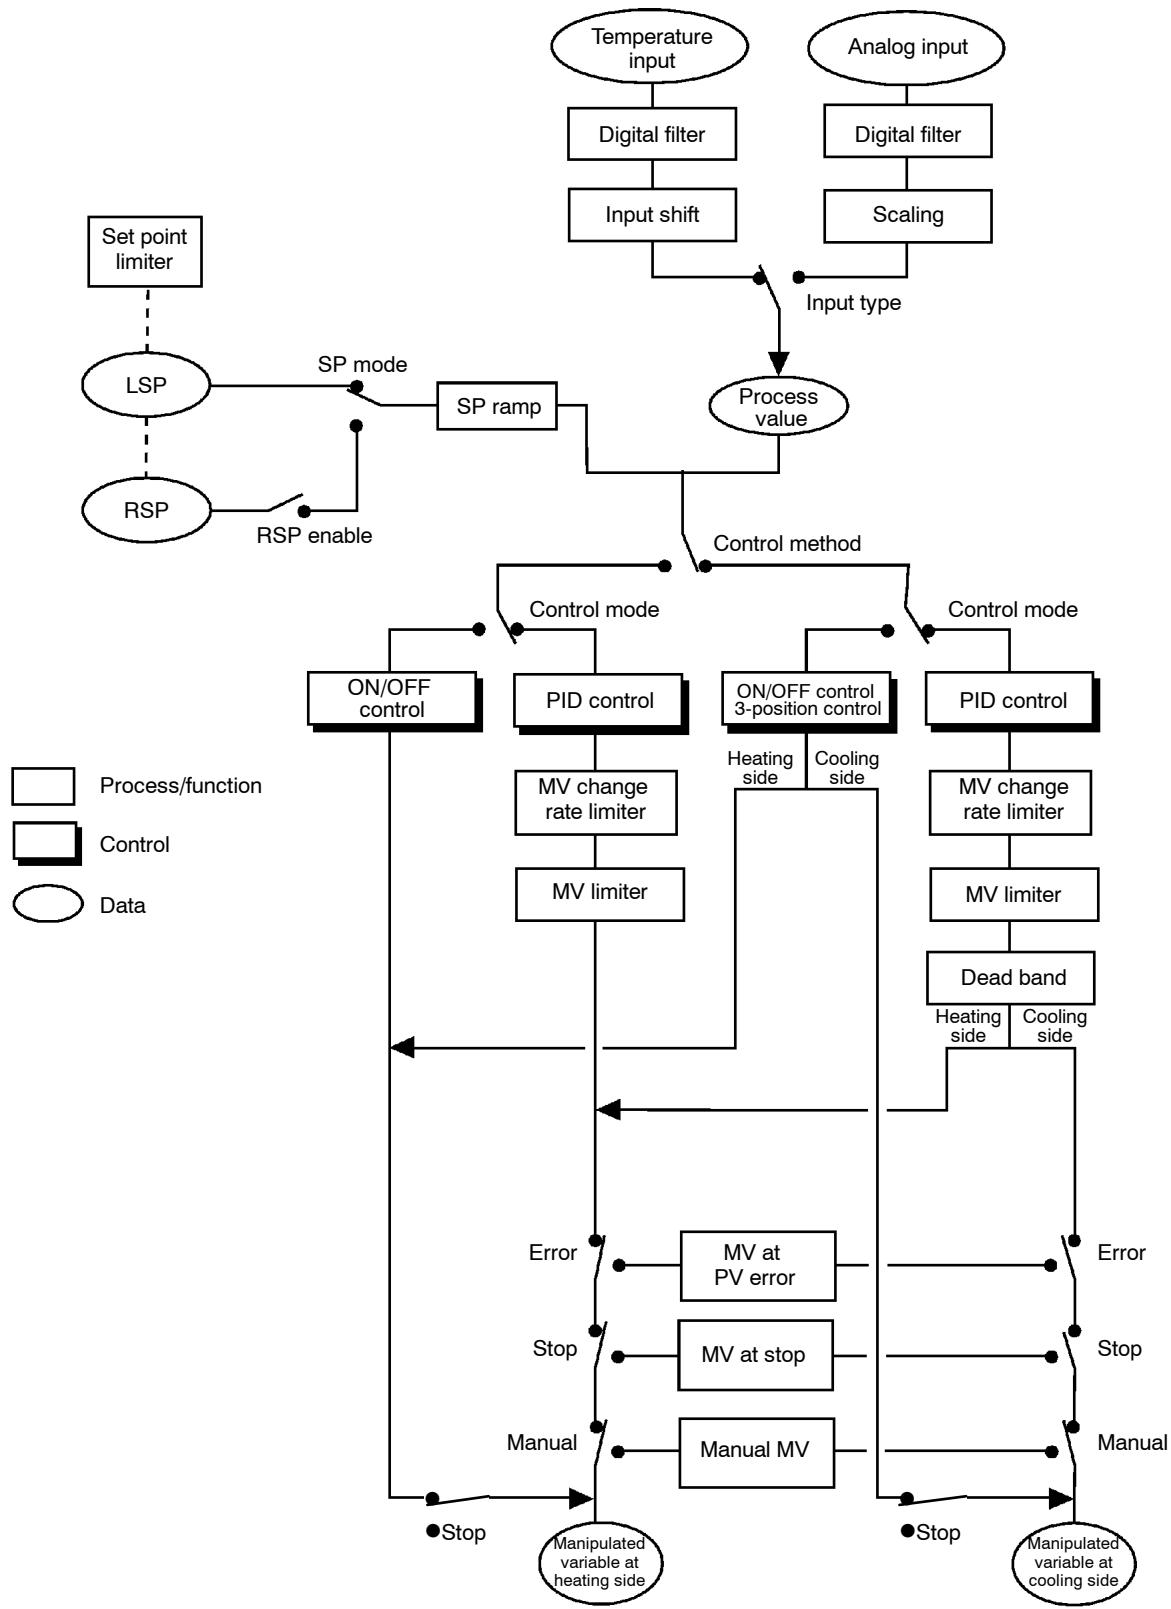
Standard type
Position-proportional type
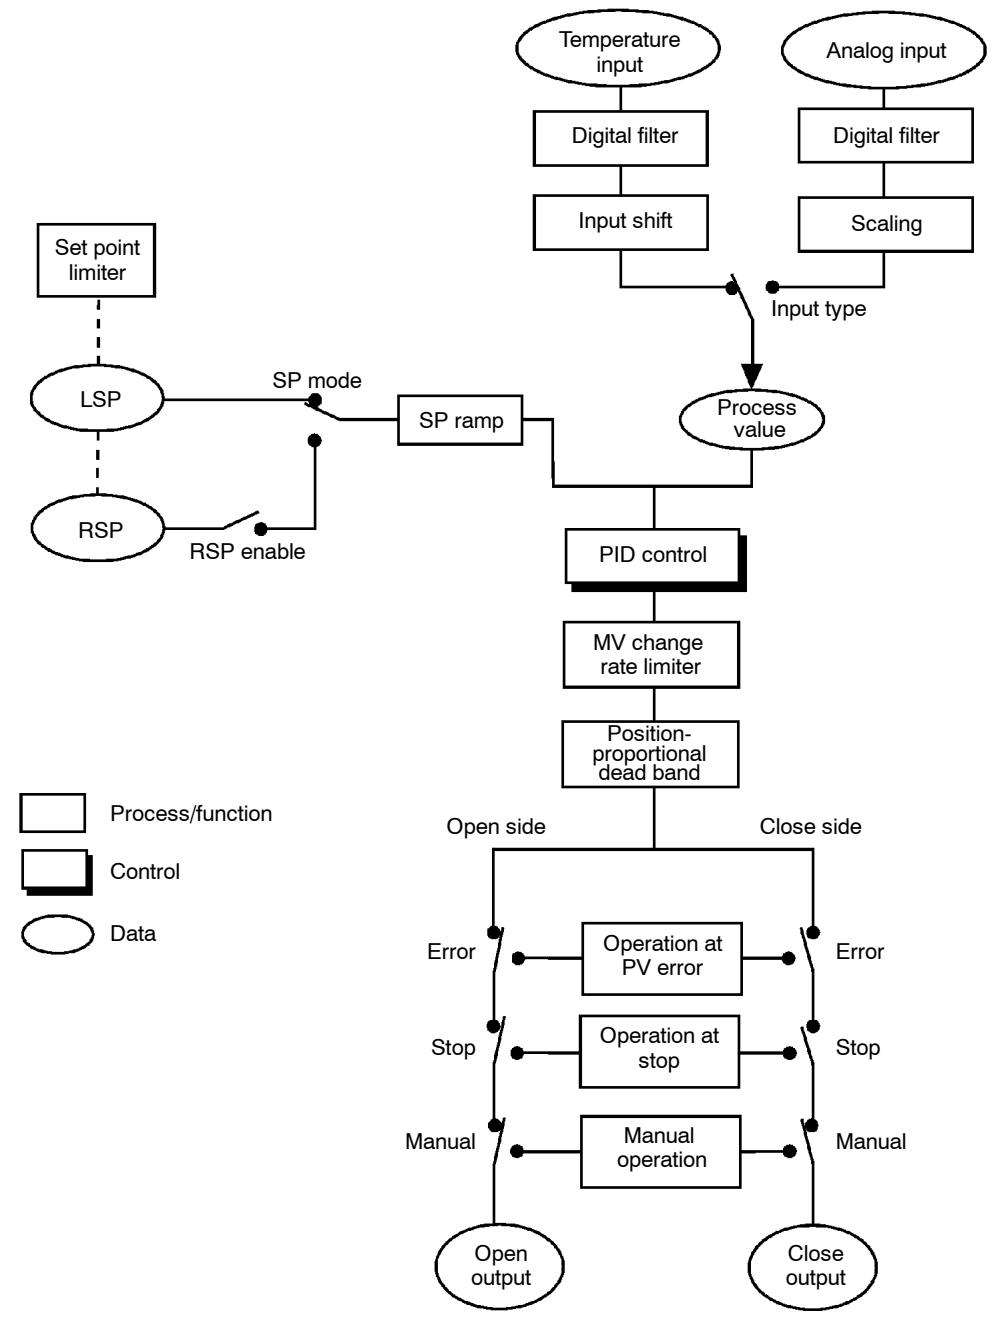
SETTING LIST
| Mode | Parameter Name | Setting Range | Unit | Default | Remarks | Setting |
| Protect | SEC r Security | 0 to 6 | None | 1 | ||
| PEYP [A/M] key protect | ON/OFF | None | OFF | |||
| Manual | Manual MV | -5.0 to 105.0 *1 | % | 0.0 | ||
| Level 0 | Set point | Set point lower limit to Set point upper limit | EU | 0 | ||
| r - S Run/Stop | Run/Stop | None | RUN | |||
| Level 1 | RE AT Execute/Cancel | OFF/AT-1/AT-2 | None | OFF | During running | |
| SP - O Set point 0 | Set point lower limit to Set point upper limit | EU | 0 | Multi-SP | ||
| SP - I Set point 1 | Set point lower limit to Set point upper limit | EU | 0 | Multi-SP | ||
| SP - Z Set point 2 | Set point lower limit to Set point upper limit | EU | 0 | Multi-SP | ||
| SP - E Set point 3 | Set point lower limit to Set point upper limit | EU | 0 | Multi-SP | ||
| AL - I Alarm value 1 | -1999 to 9999 | EU | 0 | |||
| AL - Z Alarm value 2 | -1999 to 9999 | EU | 0 | |||
| AL - E Alarm value 3 | -1999 to 9999 | EU | 0 | |||
| P Proportional band | 0.1 to 999.9 | %FS | 10.0 | |||
| C Integral time | 0 to 3999 | sec | 233 | |||
| d Derivative time | 0 to 3999 | sec | 40 | |||
| E - SC Cooling coefficient | 0.01 to 99.99 | None | 1.00 | At heating and cooling control | ||
| E - db Dead band | -19.99 to 99.99 | %FS | 0.00 | At heating and cooling control | ||
| db Position-proportional dead band | 0.1 to 10.0 | % | 2.0 | At position-proportional control | ||
| aF - r Manual reset value | 0.0 to 100.0 | % | 50.0 | |||
| HYS Hysteresis (heat) | 0.01 to 99.99 | %FS | 0.10 | |||
| CHYS Hysteresis (cool) | 0.01 to 99.99 | %FS | 0.10 | At heating and cooling control | ||
| CP Control period (heat) | 1 to 99 | sec | 20 | |||
| C - CP Control period (cool) | 1 to 99 | sec | 20 | At heating and cooling control | ||
| Hb Heater burnout | 0.0 to 50.0 | A | 0.0 | Heater burnout detection | ||
| Level 2 | r - L Remote/Local | RMT/LCL | None | LCL | Communications unit setting | |
| SPd SP mode | RSP/LSP | None | LSP | |||
| SPu SP ramp time unit | M(Minutes) / H(Hours) | None | M | |||
| SPt SP ramp set value | 0 to 9999 | EU | 0 | |||
| LbR LBA detection time | 0 to 9999 *1 | Sec | 0 | |||
| aU - S MV at stop | -5.0 to 105.0 *1 | % | 0.0 | |||
| aU - E MV at PV error | -5.0 to 105.0 *2 | % | 0.0 | |||
| aL - H MV upper limit | MV lower limit + 0.1 to 105.0 *3 | % | 105.0 | |||
| aL - L MV lower limit | -5.0 to MV upper limit -0.1 | % | -5.0 | |||
| aR - L MV change rate limit | 0.0 to 100.0 | %/sec | 0.0 | |||
| cN F Input digital filter | 0 to 9999 | sec | 0 | |||
| aC - H Open/close hysteresis | 0.1 to 20.0 | % | 0.8 | |||
| ALH1 Alarm 1 hysteresis | 0.01 to 99.99 | %FS | 0.02 | |||
| ALH2 Alarm 2 hysteresis | 0.01 to 99.99 | %FS | 0.02 | |||
| ALH3 Alarm 3 hysteresis | 0.01 to 99.99 | %FS | 0.02 | |||
| cN5H Input shift upper limit | -199.9 to 999.9 | °C/°F | 0.0 | Temperature input | ||
| cN5L Input shift lower limit | -199.9 to 999.9 | °C/°F | 0.0 | Temperature input |
1 During heat and cooling control, the lower limit becomes -105.0%.
During position-proportional control, the setting becomes HOLD, OPEN or CLOS.
2 During heat and cooling control, the setting range becomes 0.0 to 105.0%
*3 During heat and cooling control, the setting range becomes -105.0 to 0.0%.
| Mode | Parameter Name | Setting Range | Unit | Default | Remarks | Setting |
| Setup | cn-b Input type | 0 to 21 | None | 2 | ||
| cn-H Scaling upper limit | Scaling lower limit +1 to 9999 *4 | EU | -100 | Analog input | ||
| cn-L Scaling lower limit | -1999 to SP setting upper limit -0.1 *4 | EU | 0 | Analog input | ||
| dP Decimal point | 0 to 3 | None | 0 | Analog input | ||
| d-U °C/°F selection | °C/°F | None | °C | Temperature input | ||
| cnb Parameter initialize | Yes/No | None | NO | |||
| outl Control output 1 assignment | Heat/Cool/Alarm 1/Alarm 2/Alarm 3/HBA/LBA | None | HEAT | |||
| out2 Control output 2 assignment | Heat/Cool/Alarm 1/Alarm 2/Alarm 3/HBA/LBA | None | AL-1 | |||
| Sub Auxiliary output 1 assignment | Alarm 1/Alarm 2/Alarm 3/HBA/LBA/S_ERR/E333/RSER | None | AL-2 | |||
| Sub2 Auxiliary output 2 assignment | Alarm 1/Alarm 2/Alarm 3/HBA/LBA/S_ERR/E333/RSER | None | AL-3 | |||
| ALt1 Alarm 1 type | 1 to 11 | None | 2 | Output assignment needed | ||
| ALin Alarm 1 open in alarm | N-O/N-C | None | N-O | Output assignment needed | ||
| ALt2 Alarm 2 type | 1 to 11 | None | 2 | Output assignment needed | ||
| AL2n Alarm 2 open in alarm | N-O/N-C | None | N-O | Output assignment needed | ||
| ALt3 Alarm 3 type | 1 to 11 | None | 2 | Output assignment needed | ||
| AL3n Alarm 3 open in alarm | N-O/N-C | None | N-O | Output assignment needed | ||
| arEu Direct/Reverse operation | OR-R/OR-D | None | OR-R | |||
| Expan-sion | SL-H Set point upper limit | Set point lower limit +1 to scaling upper limit *2 | None | 1300 *4 | ||
| SL-L Set point lower limit | Scaling lower limit to Set point upper limit -1 *2 | None | -200 *4 | |||
| cntL PID/ON/OFF | PID / ON/OFF | None | PID | |||
| ST | OFF/ON | None | OFF | |||
| ST-b ST stable range | 0.1 to 999.9 | °C/°F | 15.0 | ST=ON | ||
| ALFA α | 0.00 to 1.00 | None | 0.65 | |||
| AT calculated gain | 0.1 to 10.0 | None | 1.0 | |||
| REST Standby sequence reset setting method | 0/1 | None | 0 | |||
| RET Automatic return of display mode | 0 to 99 | Sec | 0 | |||
| AT-h AT hysteresis | 0.1 to 9.9 | %FS | 0.2 | |||
| LbAb LBA detection width | 0.0 to 999.9 | %FS | 0.2 |
*4 When temperature input is selected, the sensor range selected in the "input type" parameter (setup mode) corresponds to the scaling upper and lower limit value.
| Mode | Parameter Name | Setting Range | Unit | Default | Remarks | Setting |
| Option | Eu- | Multi-SP function | 0 to 2 | None | 0 | |
| Eu-1 | Event input assignment 1 | NON/STOP/RMT/MAN/RSP | None | NON | ||
| Eu-2 | Event input assignment 2 | NON/STOP/RMT/MAN/RSP | None | NON | ||
| Eu-3 | Event input assignment 3 | NON/STOP/RMT/MAN/RSP | None | STOP | ||
| Eu-4 | Event input assignment 4 | NON/STOP/RMT/MAN/RSP | None | MAN | ||
| Sbct | Communication stop bit | 1/2 | bits | 2 | ||
| LEn | Communication data length | 7/8 | bits | 7 | ||
| Prty | Communication parity | None/Even/Odd | None | EVEN | ||
| bps | Communication baud rate | 1.2/2.4/4.8/9.6/19.2 | kbps | 9.6 | ||
| U-na | Communication unit No. | 0 to 99 | None | 0 | ||
| tr-t | Transfer output type | SP/SP-M/PV/O/C-O/V-M | None | SP | ||
| tr-H | Transfer output upper limit | *5 | *5 | *5 | ||
| tr-L | Transfer output lower limit | *5 | *5 | *5 | ||
| HbL | HBA latch | ON/OFF | None | OFF | ||
| CALb | Motor calibration | ON/OFF | None | OFF | ||
| nanb | Travel time | 1 to 999 | Sec | 1 | ||
| P-db | PV dead band | 0 to 9999 | EU | 0 | ||
| -RPU | Remote SP enable | ON/OFF | None | OFF | ||
| -RPH | Remote SP upper limit | SP setting lower limit to SP setting upper limit | EU | 1300 | ||
| -RPL | Remote SP lower limit | SP setting lower limit to SP setting upper limit | EU | -200 | ||
| SPtr | SP tracking | ON/OFF | None | OFF |
*5 Set the transfer output type parameter according to the following table.
| Transfer Output Type | Transfer Output Lower Limit to Transfer Output Upper Limit | |
| SP | :Set point | Set point lower limit to Set point upper limit |
| SP-M | :Set point during SP ramp | Set point lower limit to Set point upper limit |
| PV | :Process value | Scaling lower limit to scaling upper limit |
| O | :Manipulated variable (heat) | -5.0 to 105.0% |
| C-O | :Manipulated variable (cool) | 0.0 to 105.0% |
| V-M | :Value opening | -10.0 to 110.0% |
Default:SP
- The output ranges of the SP setting, set point or process value when temperature input is selected are the ranges supported by the selected sensor.
- When the heating side manipulated variable or cooling side manipulated variable is selected, the transfer output lower limit in a heating and cooling control becomes "0.0".
MODEL LIST
| Description | Type Name | Specification |
| Base unit | E5AK-AA2 AC100-240 | Standard model |
| E5AK-AA2-500 AC100-240 | Standard model with terminal cover | |
| E5AK-AA2 AC/DC24 | Standard model | |
| E5AK-AA2-500 AC/DC24 | Standard model with terminal cover | |
| E5AK-PRR2 AC100-240 | Position-proportional model | |
| E5AK-PRR2-500 AC100-240 | Position-proportional model with terminal cover | |
| E5AK-PRR2 AC/DC24 | Position-proportional model | |
| E5AK-PRR2-500 AC/DC24 | Position-proportional model with terminal cover | |
| Option unit | E53-AKB | Event input |
| E53-AK01 | Communication (RS-232C) | |
| E53-AK02 | Communication (RS-422) | |
| E53-AK03 | Communication (RS-485) | |
| E53-AKF | Transfer output | |
| Output unit | E53-R | Relay |
| E53-S | SSR | |
| E53-Q | Pulse (NPN) DC12V | |
| E53-Q3 | Pulse (NPN) DC24V | |
| E53-Q4 | Pulse (PNP) DC24V | |
| E53-C3 | Linear (4 to 20mA) | |
| E53-C3D | Linear (0 to 20mA) | |
| E53-V34 | Linear (0 to 10V) | |
| E53-V35 | Linear (0 to 5V) | |
| Terminal cover | E53-COV0809 | for E5AK |
PARAMETER OPERATIONS LIST
- Switching to modes other than manual or protect mode is carried out by mode selection in the menu display.
- The figure below shows all parameters in the order that they are displayed. Some parameters are not displayed depending on the protect mode setting and conditions of use.
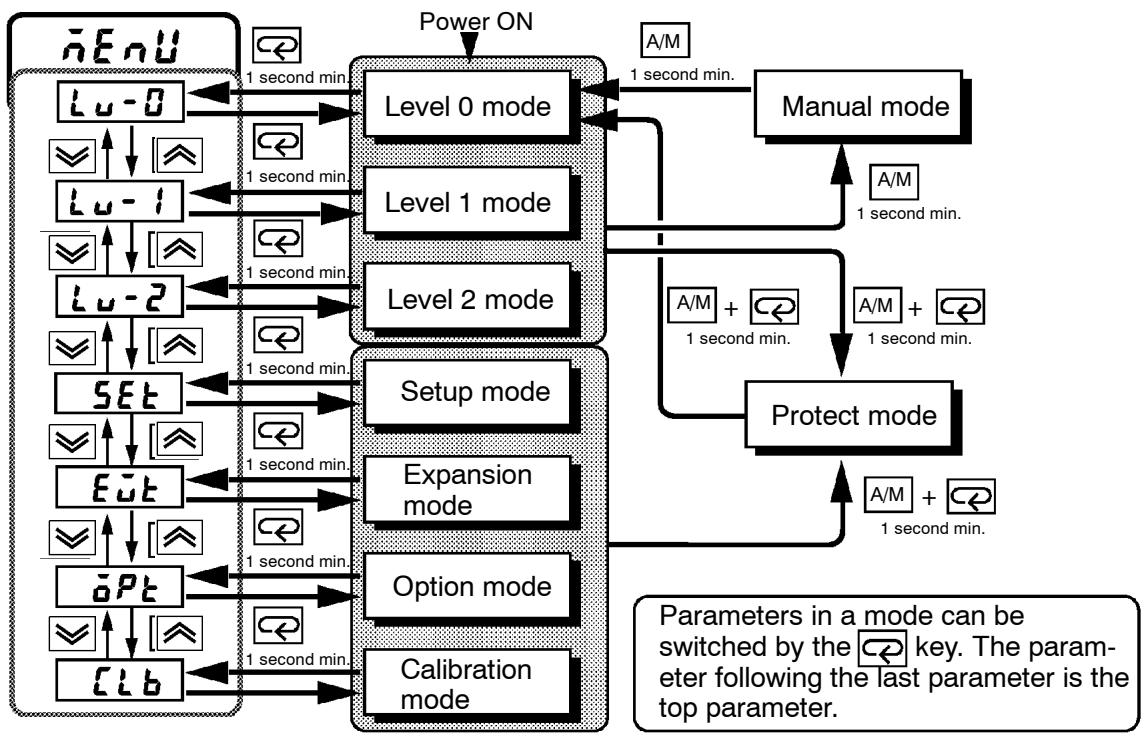
Level 0
PV/SP
Remote SP monitor

Set point during SP ramp
MV monitor (heat)

MV monitor (cool)

Valve opening monitor

Run/Stop
Manual mode

Manual MV
Protect mode
SEC

Security
[A/M] key protect
Level 1
F
AT Execute/Cancel

Set point 0

Set point 1

Set point 2

Set point 3

Alarm value 1

Alarm value 2

Alarm value 3

Proportional band

Integral time

Derivative time

Cooling coefficient

Dead band

Position-proportional dead band

Manual reset value

Hysteresis (heat)

Hysteresis (cool)

Control period (heat)

Control period (cool)

Heater current monitor
Heater burnout
Level 2
[1 - k]
Remote/Local

SP mode

SP ramp time unit

SP ramp set value

LBA detection time

MV at stop

MV at PV error

MV upper limit

MV lower limit

MV change rate limit

Input digital filter

Open/close hysteresis

Alarm 1 hysteresis

Alarm 2 hysteresis

Alarm 3 hysteresis

Input shift upper limit

Input shift lower limit
Setup mode
[2\left( {n - k}\right) + k \equiv 0]
Input type
n-1
Scaling upper limit
[2\left( {n - k}\right) ]
Scaling lower limit
db
Decimal point
d-4
^ C / ^ selection
i n_2 上
Parameter initialize
au1
Control output 1 assignment
out2
Control output 2 assignment
SUB1
Auxiliary output 1 assignment
5ub2
Auxiliary output 2 assignment
PLT
Alarm 1 type
即 m = 1 或 m = - 1
Alarm 1 open in alarm
PL2
Alarm 2 type
图2
Alarm 2 open in alarm
PL3
Alarm 3 type
A 3n
Alarm 3 open in alarm
orEu
Direct/Reverse operation
Expansion mode
5L-H
Set point upper limit
5l - l
Set point lower limit
[nt]
PID/ON/OFF
ST
5t-b
ST stable range
ALF
AT calculated gain
-EST
Standby sequence reset method
一
Automatic return of display mode
Rt - H
AT hysteresis
LbBb
LBA detection width
Option mode
E-W
Multi-SP function
E-1
Event input assignment 1
E-
Event input assignment 2
E-3
Event input assignment 3
E-4
Event input assignment 4
5bit
Communication stop bit
LEN
Communication data length
P-L
Communication parity
bP5
Communication baud rate
U-na
Communication unit No.
E--E
Transfer output type
E--H
Transfer output upper limit
[{L}{r} = - {L}{0}]
Transfer output lower limit
HbI
HBA latch
[Alt]
Motor calibration
not
Travel time
P-d
PV dead band
-5PU
Remote SP enable
-5PH
Remote SP upper limit
-5P2
Remote SP lower limit
5Pt
SP tracking
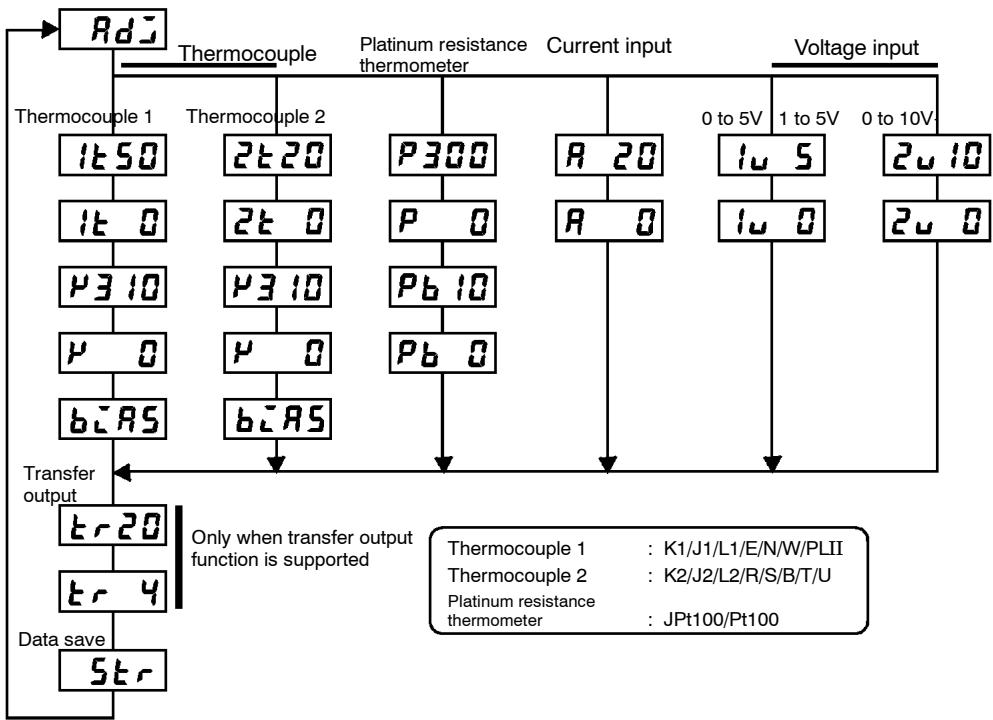
Calibration mode
FUZZY SELF-TUNING
Fuzzy self-tuning is a function that enables the E5AK to calculate the most suitable PID constants for the controlled object.
Features
- The E5AK determines by itself when to perform fuzzy self-tuning.
- At the time of fuzzy self-tuning, the E5AK does not output any signal that disturbs the temperature or output value.
Fuzzy Self-tuning Function
The fuzzy self-tuning function has three modes.
In SRT(step response tuning) mode, the PID constants are tuned using a step response method at the time the set point is changed. In DT(disturbance tuning) mode, the PID constants are amended so that the controlled temperature will be within the target range set in advance when there is external disturbance.
In HT(hunting tuning) mode, when hunting occurs, the PID constants are amended to suppress the hunting.
Note: Be sure to turn on the power supply to the load either before or simultaneously with the start of Temperature Controller operation. Dead time will be measured from the time the Temperature Controller starts operating. If a load such as a heater is turned on after the Temperature Controller is turned on, dead time longer than the actual value will be measured and inappropriate PID constants will be obtained. If an extremely large amount of dead time is measured, the control amount will be set to 0% for a short period of time before being returned to 100% , and the constants will then be returned. Retuning is performed only for large amounts of dead time, so be sure to follow the precaution given above when starting operation.
Startup Conditions of SRT
SRT will start if the following conditions are satisfied simultaneously when the E5AK is turned on or the set point is changed.
| At the time the E5AK starts operation | At the time set point is changed |
| 1) The set point at the time the E5AK starts operating is different from the set point used at the time SRT was last executed (see note). 2) The process value at the time the E5AK starts operating is smaller than the set point in reverse operation and larger than the set point in normal operation. | 1) The new set point is different from the set point used at the time SRT was executed last (see note). 2) The process value is in stable condition before the set point is changed. 3) A larger set point value is set in reverse operation and a smaller set point is set in normal operation. |
Note: The last SRT-executed set point is set to 0 before shipping and when changing from advanced PID control to advanced PID control with fuzzy self-tuning.
PID Constant Refreshing Conditions
If the step control amount is applied before the maximum temperature slope (R) is obtained, SRT will not renew any PID constant. If the proportional band obtained from the R and L values that were measured before the imposition had been completed is larger than the present proportional band, the PID constants will be renewed because the measured value is in the direction towards the suitable proportional band value, and the set point at that time will be the SRT-executed set point.
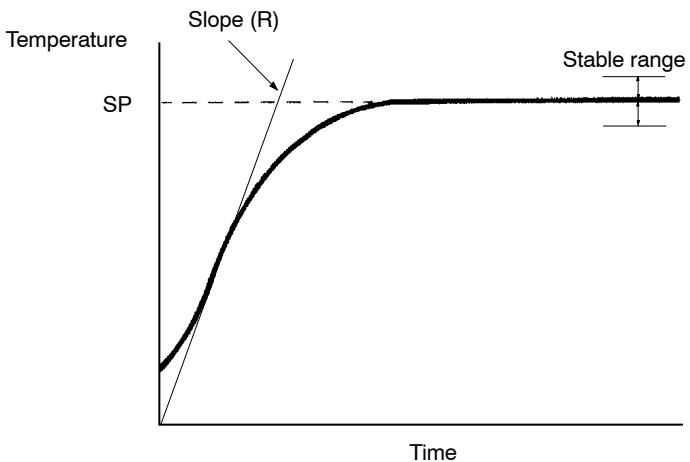
Stable Temperature Status
If the temperature is within the stable range for a certain time, it is deemed that the temperature is stable. This time is called stability judgement time. Like PID constants, stability judgement time is adjusted with fuzzy self-tuning according to the characteristics of the object to be controlled. Fuzzy self-tuning will not be activated if the temperature is stable because the Temperature Controller deems that temperature control is smooth.
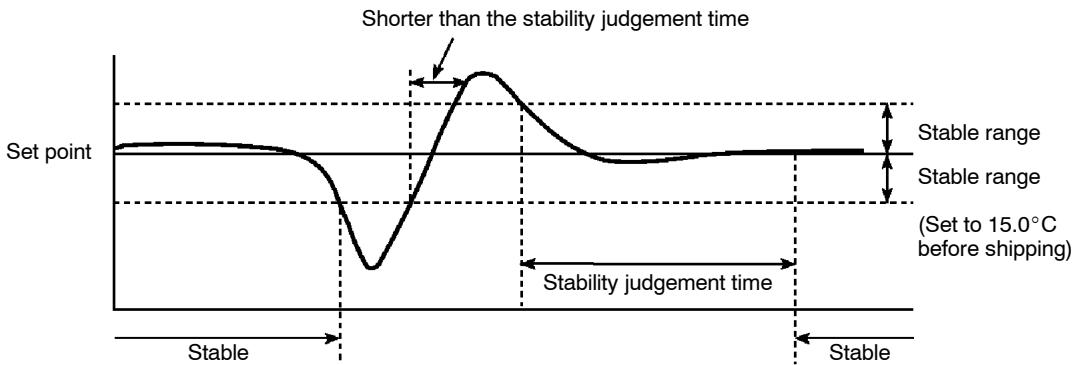
Balanced Status
If the process value is within the stable range for 60s when there is no output, it is deemed that the temperature is balanced.
Startup Conditions of DT
(1) DT will start if the temperature that has been stable varies due to external disturbance and the deflection of the temperature exceeds the stable range, and then the temperature becomes stable, provided that the number of maximum temperature values is less than four.
(2) DT will start if the set point is changed under the condition that SRT does not start and the temperature becomes stable, provided that the number of maximum temperature values is less than four. If there are four or more maximum temperature values, HT will start.
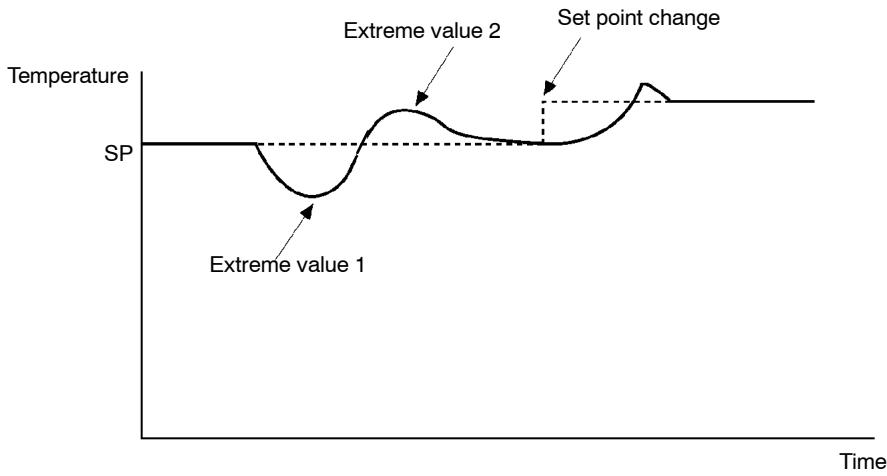
Startup Conditions of HT
HT will be ON when there is hunting with four or more maximum temperature values(extreme values) while SRT is not being executed.
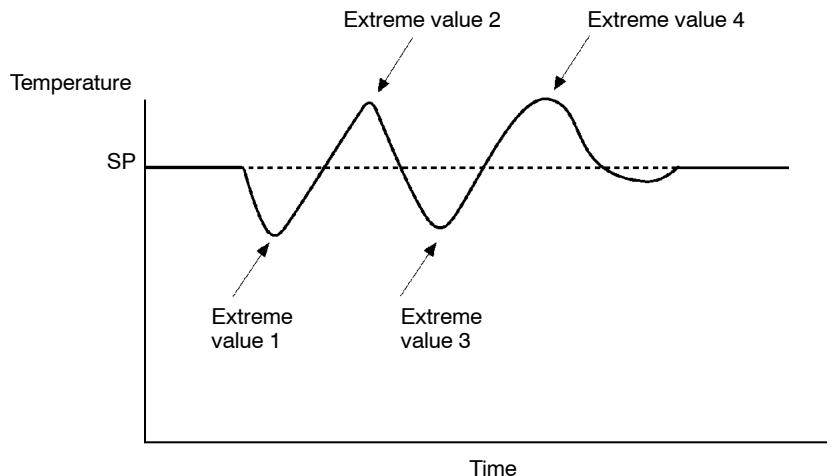
Note: In specific applications where temperature varies periodically due to disturbance, internal parameters need to be adjusted.
X FORMAT
The E5AK controller supports communications in the X format.
Some of the data, such as unit, may differ with the E5AX/EX series.
For details on commands and setting range, see Chapter 5 Parameters
and Chapter 6 Using the Communications Function.
Format
Commands are structured as follows and are paired with a response.
Command
| 2B | 2B | 2B | 4 to 8B | 2B | 2B | ||||
| @ | Unit No. | Header code | Data code | Data | FCS | * | CR | ||
Response
| 2B | 2B | 2B | 4 to 8B | 2B | 2B | ||||
| @ | Unit No. | Header code | End code | Data | FCS | * | CR | ||
·“@”
The start character. This character must be inserted before the leading byte.
Unit No.
Specifies the "unit No." of the E5AK. If there are two or more transmission destinations, specify the desired destination using "unit No."
- Header code/Data code
Specifies the command type. For details on the command type, see page A-18.
Data
Specifies the set value or setting content. The data length varies according to the command.
End code
Sets the communication results. For details on the types and meanings of end codes, see 6.5 How to Read Communications Error Information (page 6-12).
- FCS (Frame Check Sequence)
Set the frame check results from the start character to the data section. For details on the frame check, see 6.6 Program Example (page 6-14).
- “*”“CR (Carriage Return) code”
Indicates the end (terminator) of the command or response block.
X FORMAT HEAD LIST
| Header Code | Data Code | Command Content | R/W | Data | Remarks |
| AP | 01 | AT cancel | Write | None | |
| AS | 01 | AT start | Write | None | |
| IC | - | Undefined error | - | None | Error response |
| MB | 01 | Remote/Local | Write | 4B | |
| MA | 01 | RAM write mode | Write | None | |
| ME | 01 | Backup mode | |||
| MW | 01 | RAM data batch save | |||
| R% | 01 | Alarm value 1 read | Read | 4B | |
| 02 | Alarm value 2 read | ||||
| 03 | Alarm value 3 read | ||||
| RB | 01 | Proportional band read | |||
| RN | 01 | Integrated time read | |||
| RV | 01 | Derivative time read | |||
| RC | 01 | Cooling coefficient read | Read | 4B | During heating and cooling control |
| RD | 01 | Dead band read | |||
| RI | 01 | Input shift upper limit read | Read | 4B | |
| 02 | Input shift lower limit read | ||||
| RL | 01 | SP setting limit read | Read | 8B | Upper-and lower-limit batch read |
| RO | 01 | Manipulated variable read | Read | 4B | |
| RS | 01 | Set point read | |||
| RX | 01 | Process value read | Read | 8B | with status |
| RW | 01 | Heater burnout set value read | Read | 4B | |
| RZ | 01 | Heater current read | Read | 8B | with status |
| Rb | 01 | Valve opening read | |||
| W% | 01 | Alarm value 1 write | Write | 4B | |
| 02 | Alarm value 2 write | ||||
| 03 | Alarm value 3 write | ||||
| WB | 01 | Proportional band write | |||
| WN | 01 | Integrated time write | |||
| WV | 01 | Derivative time write | |||
| WC | 01 | Cooling coefficient write | Write | 4B | During heating and cooling control |
| WD | 01 | Dead band write | |||
| WI | 01 | Input shift upper limit write | Write | 4B | |
| 02 | Input shift lower limit write | ||||
| WS | 01 | Set point write | |||
| WW | 01 | Heater burnout set value write |
RX (process value read) command status
| Command | 2B | 2B | 2B | ||||||
| @ | Unit No. | R | X | 0 | 1 | FCS | * | CR | |
| Response | 2B | 2B | 4B | 4B | 2B | 2B | ||||||
| @ | Unit No. | R | X | End code | Process value | Status | FCS | * | CR | |||
| Bit | Content | “1” | “0” |
| 0 | Run/Stop | Stop | Run |
| 1 | Setting level | 1 | 0 |
| 2 | Input error | ON | OFF |
| 3 | A/D converter error | ON | OFF |
| 4 | LBA | ON | OFF |
| 5 | HBA | ON | OFF |
| 6 | |||
| 7 | EEPROM | RAM≠EEPROM | RAM=EEPROM |
| 8 | Alarm 1 | ON | OFF |
| 9 | Alarm 2 | ON | OFF |
| 10 | Alarm 3 | ON | OFF |
| 11 | AT | AT execution | OFF |
| 12 | RAM mode | RAM mode | Backup mode |
| 13 | Auto/Manual | Manual | Auto |
| 14 | SP mode | Remote SP | Local SP |
| 15 | Remote/Local | Remote | Local |
ASCII CODE LIST
| Hex | 0 | 1 | 2 | 3 | 4 | 5 | 6 | 7 | |
| Bin | 0000 | 0001 | 0010 | 0011 | 0100 | 0101 | 0110 | 0111 | |
| 0 | 0000 | SP | 0 | @ | P | p | |||
| 1 | 0001 | ! | 1 | A | Q | a | q | ||
| 2 | 0010 | ” | 2 | B | R | b | r | ||
| 3 | 0011 | # | 3 | C | S | c | s | ||
| 4 | 0100 | $ | 4 | D | T | d | t | ||
| 5 | 0101 | % | 5 | E | U | e | u | ||
| 6 | 0110 | & | 6 | F | V | f | v | ||
| 7 | 0111 | , | 7 | G | W | g | w | ||
| 8 | 1000 | ( | 8 | H | X | h | x | ||
| 9 | 1001 | ) | 9 | I | Y | i | y | ||
| A | 1010 | * | : | J | Z | j | z | ||
| B | 1011 | + | ; | K | [ | k | { | ||
| C | 1100 | , | < | L | ¥ | l | | | ||
| D | 1101 | - | = | M | ] | m | } | ||
| E | 1110 | . | > | N | ^ | n | ~ | ||
| F | 1111 | / | ? | O | - | o | DEL |
Upper 4 bits
Lower 4 bits
Symbols
[A/M] key protect 5-4
^ / ^ selection 5-28
Numbers
100%AT 3-16
40%AT 3-16
A
A group 6-11
A/D converter error 3-6,8-3,8-5
A/M key 1-3
A/M key protect 3-12
About Calibration 1-11
ABOUT CURRENT TRANSFORMER (CT) A-5
About invalid parameters 6-7
About parameter display 5-2
About PID Parameters 3-17
About the Communications Function . 1-10
About the Decimal Point of the Alarm Value 3-11
About the displays 1-3
About the power blocks 2-10
About the temperature unit 3-4
About the unit No. 6-12
Adjusting Control Operation 3-14
Alarm 1 hysteresis 5-24
Alarm 1 open in alarm 5-31
Alarm 1 type 5-30
Alarm 2 hysteresis 5-24
Alarm 2 open in alarm 5-31
Alarm 2 type 5-30
Alarm 3 hysteresis 5-24
Alarm 3 open in alarm 5-31
Alarm 3 type 5-30
Alarm hysteresis 3-10
Alarm type 3-9
Alarm value 3-9
Alarm value 1 5-12
Alarm value 2 5-12
Alarm value 3 5-12
Alfa 5-34
ASCII CODE LIST A-20
Assignment example 4-9
AT calculated gain 5-35
AT Execute/Cancel 5-11
AT hysteresis 5-36
Auto-tuning (A.T.) 3-16
Auto-turning key 1-3
Auto/Manual 4-10
Automatic return of display mode 5-36
Auxiliary output 2-10
Auxiliary output 1 assignment 5-29
Auxiliary output 2 assignment 5-29
B
B group 6-11
Balance-less, Bump-less Operation 3-14
Balanced Status. A-15
Bar graph 1-3
Basic Operation Flow 3-2
Before setup 2-3, 2-4
C
Cable connections 6-3
Calibrating Current Input 7-9
Calibrating inputs 1-11
Calibrating Platinum Resistance Thermometer 7-7
Calibrating Thermocouple 7-4
Calibrating transfer output 1-11
Calibrating Voltage Input 7-10
Calibration 7-7, 7-9
Calibration:0to10V. 7-11
Calibration data error 8-4
Calibration item menu 7-3
Calibration Mode 1-8, 1-9, 5-46
Calibration save mark 7-3
Calibration: 0 to 5V , 1 to 5V 7-10
Calibration: thermocouple 1 . 7-5
Calibration: thermocouple 2 7-6
Changing the set point 3-14
Characteristics A-3
Checking Indication Accuracy 7-12
Checking Operation Restrictions 8-6
Close in alarm/open in alarm 3-10
Command A-17
Command Configuration 6-5
Command List 6-10
Commands and Responses 6-6
Communication baud rate 5-40
Communication data length 5-40
Communication parity 5-40
Communication stop bit 5-40
Communication unit No. 5-40
Communications 2-11
Communications parameters 6-4
Conditions when running a program .. 6-14
Connecting the Cold Junction Conductor 7-4
CONTROL BLOCK DIAGRAM .A-6
Control output 2-9
Control output 1 assignment 5-28
Control output 2 assignment 5-28
Control period 3-7
Control period (cool) 5-16
Control period (heat) 5-16
Convention Used in this Chapter 3-2
Conventions Used in this Chapter 5-2
Cooling coefficient 4-2, 5-13
CT input/Potentiometer 1-4,2-10
Current input 1-4, 7-13
D
Dead band 4-2, 5-14
Decimal point 5-27
Derivative time 5-13
Determining the LBA detection time .. 4-16
Dimensions 2-5,A-5
Direct/Reverse operation 3-7,5-31
Display range over 8-4
Down key 1-3
Draw-out 2-2
E
End code 6-12
Event input 1-5,2-11
Event input assignment 1 5-39
Event input assignment 2 5-39
Event input assignment 3 5-39
Event input assignment 4 5-39
Event input assignments 4-8
Examples of use 4-14, 6-16
Expansion Mode 1-7, 1-9, 5-32
F
Features A-14
Fixing Screw for Front Panel 2-2
Fixing settings 1-9
Format A-17
Front panel 1-2
FUZZY SELF-TUNING A-14
Fuzzy Self-tuning Function A-14
H
HBA latch 5-42
HBA latch/release 4-13
Heaterburnout 5-17
Heaterburnout detection 4-13
Heater current monitor 5-17
Heating and cooling control 4-2
Heter Burnout Alarm A-3
How to calculate the heater burnout set value 4-14
How to Read Communications Error Information 6-12
How to Use Error Output 8-5
How to Use Event Input 4-8
How to use keys 1-3
How to use programs 6-14
How to Use the Error Display 8-3
How to Use the Heater Burnout Alarm 4-13
How to Use the Remote SP 4-11
How to Use Transfer Output 4-17
Hysteresis 4-4
Hysteresis (cool) 5-15
Hysteresis (heat) 5-15
1
Initial Checks 8-2
Input and Output 1-4
Input digital filter 5-23
Input error 3-6,8-3
Input errors 8-5
Input shift 3-4
Input shift lower limit 5-24
Input shift upper limit 5-24
Input type 3-4,5-26
Installation 2-5
Integral time 5-13
Interface 6-2
Issuing special commands 6-10
L
LBA 4-15,8-5
LBA detection example 4-15
LBA detection time 4-15, 5-21
LBA detection width 4-15, 5-36
Level 0 Mode 1-7, 1-8, 5-6
Level 1 Mode 1-7, 1-8, 5-10
Level 2 Mode 1-7, 1-8, 5-18
Limiter operation conditions 4-6
M
Main parts 1-2
Manipulated variable at stop 3-13, 4-2
Manipulated variable at stop/PV error 4-3
Manipulated variable restrictions 4-5
Manual Mode 1-7, 1-9, 5-5
Manual MV 5-5
Manual operation 3-14
Manual reset value 5-15
Memory error 8-3
Menu display 1-8
MODEL LIST A-11
Monitor process value 6-16
Motor Calibration 5-42
Motor calibration error 8-4
Mounting 2-6
Multi-SP 4-9
Multi-SP function 5-38
MV at PV error 5-21
MV at stop 5-21
MV change rate limit 5-22
MV change rate limiter 4-5
MV limiter 4-5
MV lower limit 5-22
MV monitor (cool) 5-8
MV monitor (heat) 5-8
MV upper limit 5-22
N
Names of parts 1-2
No.1 display 1-3
No.2 display 1-3
0
ON/OFF control 4-4
Open/closehysteresis 5-23
Operating Condition Restrictions 4-5
Operating conditions 4-12, 4-13
Operation at start 4-7
Operation indicators 1-3
Option Mode 1-7, 1-9, 5-37
Option Unit Ratings and Characteristics A-4
Other event input functions 4-10
Other functions 4-3
Outline 6-2
Outline of the Communications Function 6-2
Output assignments 1-5,3-6
Output Unit Ratings and Characteristics A-4
P
Panelcutout 2-5
Parameter initialize 5-27
PARAMETER OPERATIONS LIST .. A-12
Parameter types 1-7
Parameters and Menus 1-7
PID/ON/OFF 5-33
PID Constant Refreshing Conditions. A-15
Platinum resistance thermometer 7-12
Position-proportional control 4-3
Position-proportional dead band 5-14
Position-proportional type 3-7, 3-15, A-7
Power supply 2-8
Precautions when wiring 2-8
Preparation 7-7, 7-9, 7-10
Preparations 7-4
Preparing for Communications 6-3
Procedure 2-3, 2-4, 6-14
Program Example 6-14
Program list 6-15
Proportional band 5-13
Protect Mode 1-7, 1-9, 3-12, 5-3
PV dead band 5-43
PV/SP 5-6
R
Ratings A-2
Reading parameters 6-6
Reading/writing parameters 6-6
Registering calibration data 1-11
Relationship with set point limiter 4-11
Remote SP enable 5-44
Remote SP input 1-4, 2-10
Remote SP input error 8-5
Remote SP lower limit 5-44
Remote SP monitor 4-12,5-7
Remote SP upper limit 5-44
Remote/Local 4-10,5-19
Response A-17
Restrictions during SP ramp 4-7
RS-232C 1-10,6-3
RS-422 1-10,6-3
RS-485 1-10,6-4
RSP input error 3-6
Run/Stop 4-10,5-9
RX (process value read) command status. A-19
s
Scaling 3-4, 4-11
Scaling lower limit 5-27
Scaling upper limit 5-27
Security 3-12,5-3
Selecting modes 1-8
Selecting parameters 1-9
Selecting the Control Method 4-2
Sensor input 2-9
Set point 0 5-11
Set point 1 5-11
Set point 2 5-11
Set point 3 5-11
Set point during SP ramp 5-8
Set point limiter 4-6
Set point lower limit 5-33
Set point upper limit 5-33
Set the set point to "300.0" 6-16
Set the unit No. to "00" 6-16
Setting Alarm Type 3-9
Setting Input Specifications 3-4
SETTING LIST A-8
Setting Output Specifications 3-6
Setting the communications specifications 6-4
Setting the LBA detection time 4-16
Setting up 2-2
Setting up the option unit 2-4
Setting up the output unit 2-3
Setting up the terminal covers 2-7
Setup 3-3
Setup Mode 1-7, 1-9, 5-25
SP mode 4-10, 4-11, 5-19
SP ramp 4-6
SP ramp set value 5-20
SP ramp time unit 5-20
SP tracking 4-12
SP tracking enable 5-45
SPECIFICATIONS A-2
Specifications A-5
ST 5-34
ST stable range 5-34
Stable Temperature Status . A-15
Standard type 3-6, 3-14, A-6
Standby sequence 3-10
Standby sequence reset method 5-35
Start running 6-16
Starting and Stopping Operation 3-13
Startup Conditions of DT A-16
Startup Conditions of HT A-16
Startup Conditions of SRT A-14
Structure of Parameters 7-2
Summary of alarm operations 3-10
Switching with Manual operation 4-2
T
Temperature input 1-4
Terminal arrangement 2-8
The meaning of icons used in this chapter 5-2
Thermocouple 7-12
Transfer output 1-6,2-11
Transfer output lower limit 5-41
Transfer output scaling 4-17
Transfer output type 4-17, 5-41
Transfer output upper limit 5-41
Transfer procedure 6-2
Travel Time 4-3,5-43
U
Undefined error 6-13
Upkey 1-3
Using Event Input 3-13
V
Valve opening monitor 4-3, 5-9
Voltage input 1-4, 7-13
W
Wiring 2-8
Wiring Terminals 2-8
Writing parameters 6-6
X
X FORMAT A-17
X FORMAT HEAD LIST A-18
Revision History
A manual revision code appears as a suffix to the catalog number on the front cover of the manual.
Cat. No. H083-E1-03
The following table outlines the changes made to the manual during each revision. Page numbers refer to previous version.
| Revision code | Date | Revised content |
| 1 | July 1996 | Original productionPage 1-7: Modified the diagram of mode.Page 2-6: Modified the power specifications in "Terminal arrange-ment". |
| 2 | April 1997 | Page V: Changed "100 to 240 VAC" to AC100-240V ~ or AC/DC24V ≈Page 1-6: Modified the item of "Model" on the table.Page 2-8: Modified the diagram in "Terminal arrangement".Changed the Power specifications in "Power supply".Page 3-3: Modified the diagram in "Setup".Page 3-8: Added "run/stop" = "run" to Setting Example.Page 5-8: Added "Model" and "Power specifications" to MV monitor.Page 5-9: Added "Model" and "Power specifications" to Valve opening monitor.Page 5-13: Added "Model" and "Power specifications" to Cooling coefficient.Page 5-14: Added "Model" and "Power specifications" to Dead band and Posi-tion-proportional dead band.Page 5-15: Added "Model" and "Power specifications" to Manual reset value and Hysteresis.Page 5-16: Added "Model" and "Power specifications" to Control period.Page 5-17: Added "Model" and "Power specifications" to Heater current monitor and Heater burnout.Page 5-23: Added "Model" and "Power specifications" to Open/close hysteresis.Page 5-28: Added "Model" and "Power specifications" to Control output assign-ment.Page 5-33: Added "Model" and "Power specifications" to PID/ON/OFF.Page 5-42: Added "Model" and "Power specifications" to HBA latch.Added "Model" and "Power specifications" to Motor Calibration.Page 5-43: Added "Model" and "Power specifications" to Travel Time.Added "Model" and "Power specifications" to PV dead band.Page 6-3: Modified the diagram in "RS-232C".Page 7-4: Modified the diagram in "Preparations".Page 7-7: Modified the diagram in "Preparation".Page 7-9: Modified the diagram in "Preparation".Page 7-10: Modified the diagram in "Preparation".Page 7-12: Modified the diagram in "Thermocouple" and "Platinum resistance thermometer".Page 7-13: Modified the diagram in "Current input" and "Voltage input".Page 8-4: Added "Motor calibration error".Page A-2: Modified "Ratings specifications".Page A-11: Changed "Type Name" and "Specification" in "Base unit".Page A-14: Deleted 2) of "At the time the E5AK starts operation" in "Startup Conditions of SRT".Deleted 2) of "At the time set point is changed".Page A-15: Deleted "Imposition Completion Condition of Step Control Amount".Modified the diagram in "PID Constant Refreshing Conditions". |
| 02A | December 2003 | Page 2-9: Modified the diagram in "Control output".Page 4-8: Changed the title from "Input assignments" to "Event input assign-ments and deleted the flowchart below.Page 4-9: Modified the table contents for "Event input" and added a note below the table.Page 5-3: Modified the table.Page A-8: Changed the unit from "%" to "%FS" for Alarm 1 hysteresis, Alarm 2 hysteresis, and Alarm 3 hysteresis. |
| 02B | March 2005 | Page A-3: Added information to table and accompanying notes. |
| 02C | March 2007 | Page 5-9: Sentence starting "there is no order of priority" changed.Page 6-6: Example changed. |
| 03 | June 2010 | Page 4-8: Added figure. |
OMRON Corporation Industrial Automation Company
Tokyo, JAPAN
Regional Headquarters
OMRON EUROPE B.V.
No. 438A Alexandra Road # 05-05/08 (Lobby 2),
Alexandra Technopark,
Singapore 119967
Tel: (65) 6835-3011/Fax: (65) 6835-2711
OMRON ELECTRONICS LLC
One Commerce Drive Schaumburg,
IL 60173-5302 U.S.A.
Tel: (1) 847-843-7900/Fax: (1) 847-843-7787
OMRON (CHINA) CO., LTD.
Room 2211, Bank of China Tower,
200 Yin Cheng Zhong Road,
PuDong New Area, Shanghai, 200120, China
Tel: (86) 21-5037-2222/Fax: (86) 21-5037-2200
Authorized Distributor:
© OMRON Corporation 2010 All Rights Reserved.
In the interest of product improvement,
specifications are subject to change without notice.
Cat. No. H083-E1-03
Printed in Japan
0610
- About this manual
- ■ Meanings of Abbreviations
- ■ How to Read Display Symbols
- ■“Reference” mark
- Notice:
- DANGER
- WARNING
- Caution
- ■ How this Manual is Organized
- CHAPTER 1 INTRODUCTION 1-1
- CHAPTER 2 PREPARATIONS 2-1
- CHAPTER 4 APPLIED OPERATION 4-1
- CHAPTER 5 PARAMETERS 5-1
- CHAPTER 6 USING THE COMMUNICATIONS FUNCTION . . . 6-1
- CHAPTER 7 CALIBRATION 7-1
- CHAPTER 8 TROUBLESHOOTING 8-1
- APPENDIX
- INDEX
- CHAPTER1
- INTRODUCTION
- Names of parts
- Main parts
- ■ Front panel
- About the displays
- No.1 display
- No.2 display
- Operation indicators
- Bar graph
- How to use keys
- A/M key
- key
- Input and Output
- ■ Input
- - Temperature input/Voltage input/Current input
- CT input/Potentiometer
- Remote SP input
- Event input
- Output
- Output assignments
- Transfer output
- Parameters and Menus
- Parameter types
- Protect mode
- - Manual mode
- Level 0 mode
- Level 1 mode
- Level 2 mode
- Setup mode
- - Expansion mode
- Option mode
- Calibration mode
- Selecting modes
- - Menu display
- Level 0 to 2 modes
- About the Communications Function
- About Calibration
- Calibrating inputs
- Calibrating transfer output
- Registering calibration data
- CHAPTER2
- PREPARATIONS
- Setting up
- Draw-out
- Setting up the output unit
- Before setup
- Procedure
- Setting up the option unit
- Procedure
- Installation
- Mounting
- - Setting up the terminal covers
- Wiring Terminals
- Terminal arrangement
- Precautions when wiring
- ■ Wiring
- Power supply
- Sensor input
- Control output
- Auxiliary output
- CT input/ Potentiometer
- Remote SP input
- Communications
- CHAPTER3
- BASIC OPERATION
- Convention Used in this Chapter
- Basic Operation Flow
- Setup
- Setting Input Specifications
- ■Input type
- Scaling
- Input shift
- Setting Output Specifications
- Position-proportional type
- Direct/reverse operation
- Control period
- Setting Example
- Setting Alarm Type
- Alarm type
- Alarm value
- Alarm hysteresis
- Standby sequence
- Close in alarm/open in alarm
- Summary of alarm operations
- Protect Mode
- A/M key protect
- Starting and Stopping Operation
- Manipulated variable at stop
- Adjusting Control Operation
- Changing the set point
- Manual operation
- Standard type
- Auto-tuning (A.T.)
- - 40%AT
- 100%AT
- CHAPTER4
- APPLIED OPERATION
- Selecting the Control Method
- Heating and cooling control
- Dead band
- Cooling coefficient
- Position-proportional control
- Travel time
- - Valve opening monitor
- Manipulated variable at stop/PV error
- Other functions
- ON/OFF control
- Hysteresis
- Parameters
- Operating Condition Restrictions
- Manipulated variable restrictions
- MV limiter
- MV change rate limiter
- Limiter operation conditions
- Set point limiter
- SP ramp
- Operation at start
- Restrictions during SP ramp
- How to Use Event Input
- ■ Event input assignments
- Assignment example
- Multi-SP
- Other event input functions
- Run/Stop
- Remote/Local
- Auto/Manual
- SP mode
- How to Use the Remote SP
- Relationship with set point limiter
- Remote SP monitor
- SP tracking
- ■Operating conditions
- How to Use the Heater Burnout Alarm
- How to calculate the heater burnout set value
- LBA
- Setting the LBA detection time
- Determining the LBA detection time
- How to Use Transfer Output
- - Transfer output type
- - Transfer output scaling
- CHAPTER5
- The meaning of icons used in this chapter
- About parameter display
- Security
- [A/M] key protect
- Manual MV
- PV/SP
- Conditions of Use
- Set point during SP ramp
- MV monitor (heat)
- MV monitor (cool)
- Proportional band
- Integral time
- Derivative time
- Position-proportional dead band
- Manual reset value
- Hysteresis (heat)
- Hysteresis (cool)
- Control period (heat)
- Control period (cool)
- Heater current monitor
- Heater burnout
- Remote/Local
- SP ramp time unit
- SP ramp set value
- L6R
- LBA detection time
- MV at stop
- MV at PV error
- Input digital filter
- Open/close hysteresis
- Input shift upper limit
- Input shift lower limit
- Input type
- Scaling upper limit
- Scaling lower limit
- Decimal point
- Parameter initialize
- °C/°F selection
- Control output 1 assignment
- Control output 2 assignment
- Auxiliary output 1 assignment
- Auxiliary output 2 assignment
- Expansion Mode
- Set point upper limit
- Set point lower limit
- PID/ON/OFF
- AT calculated gain
- Standby sequence reset method
- - E
- Automatic return of display mode
- 且 - H
- AT hysteresis
- LbRa
- LBA detection width
- Multi-SP function
- Event input assignment 1
- Event input assignment 3
- Event input assignment 2
- Event input assignment 4
- PV dead band
- Remote SP enable
- Remote SP upper limit
- Remote SP lower limit
- SP tracking enable
- Calibration Mode
- CHAPTER6
- USING THE COMMUNICATIONS FUNCTION
- Outline of the Communications Function
- Outline
- ■ Transfer procedure
- Interface
- Preparing for Communications
- Cable connections
- RS-232C
- RS-422
- RS-485
- Setting the communications specifications
- Communications parameters
- Command Configuration
- Commands and Responses
- ■ Reading/writing parameters
- Reading parameters
- Writing parameters
- ■ Issuing special commands
- A group
- B group
- About Setting Levels
- How to Read Communications Error Information
- End code
- Description
- Action
- Undefined error
- Program Example
- How to use programs
- - Conditions when running a program
- ■ Program list (language: IBM PC COMPATIBLE MACHINE)
- Examples of use
- Set the unit No. to "00"
- - Set the set point to "300.0"
- Start running
- Monitor process value
- CHAPTER7
- CALIBRATION
- Structure of Parameters
- Calibration item menu
- Calibration save mark
- Calibrating Thermocouple
- Calibration: thermocouple 1
- Calibration: thermocouple 2
- Calibrating Platinum Resistance Thermometer
- Preparation
- Calibrating Current Input
- Calibration
- Calibrating Voltage Input
- Calibration: 0 to 5 ~V, 1 to 5 ~V
- Calibration : 0 to 10V
- Checking Indication Accuracy
- Thermocouple
- Platinum resistance thermometer
- Current input
- Voltage input
- CHAPTER8
- TROUBLESHOOTING
- Initial Checks
- How to Use the Error Display
- 5.Err Input error
- Memory error
- E333 A/D converter error
- Calibration data error
- Display range over
- Motor calibration error (Displayed on the No. 2 Display)
- How to Use Error Output
- LBA
- Input errors
- A/D converter error
- Remote SP input error
- Checking Operation Restrictions
- SPECIFICATIONS
- Ratings
- Characteristics
- - Heater Burnout Alarm
- Output Unit Ratings and Characteristics
- Option Unit Ratings and Characteristics
- ABOUT CURRENT TRANSFORMER (CT)
- - Specifications
- - Dimensions
- CONTROL BLOCK DIAGRAM
- Position-proportional type
- SETTING LIST
- MODEL LIST
- PARAMETER OPERATIONS LIST
- Level 0
- Manual mode
- Protect mode
- Level 1
- Level 2
- Setup mode
- Option mode
- FUZZY SELF-TUNING
- Features
- Fuzzy Self-tuning Function
- Startup Conditions of SRT
- PID Constant Refreshing Conditions
- Stable Temperature Status
- Balanced Status
- Startup Conditions of DT
- Startup Conditions of HT
- X FORMAT
- Format
- Command
- Response
- RX (process value read) command status
- ASCII CODE LIST
- Symbols
- Numbers
- A
- B
- C
- D
- E
- F
- H
- 1
- L
- M
- N
- 0
- P
- R
- s
- T
- U
- V
- W
- X
- Revision History
Brand : OMRON
Model : E5AK
Category : Temperature Controller