
M-ER803 - Audio Amplifier MARANTZ - Free user manual and instructions
Find the device manual for free M-ER803 MARANTZ in PDF.
| Product type | Stereo audio amplifier |
| Brand | MARANTZ |
| Model | M-ER803 |
| Output power | 2 x 100 W (8 ohms) |
| Frequency response | 20 Hz - 20 kHz (±0.5 dB) |
| Total harmonic distortion | < 0.02% (1 kHz, 8 ohms) |
| Signal-to-noise ratio | > 100 dB (line) |
| Audio inputs | Analog (RCA), optical, coaxial, USB |
| Outputs | Headphone output (6.35 mm), speakers (2 pairs) |
| Wireless connectivity | Bluetooth, Wi-Fi (optional) |
| Power supply | 230 V AC, 50 Hz |
| Power consumption | 200 W (max), < 0.5 W (standby) |
| Dimensions (W x H x D) | 440 x 150 x 400 mm |
| Weight | 12 kg |
| Maintenance and cleaning | Use a soft, dry cloth. Do not use solvents. |
| Safety | Overload, short-circuit and overheating protection. Automatic shutdown. |
| Spare parts and repairability | Parts available through authorized Marantz service center. Repairable by a professional. |
| General information | Compliant with CE standards, recyclable at end of life. |
Frequently Asked Questions - M-ER803 MARANTZ
User questions about M-ER803 MARANTZ
0 question about this device. Answer the ones you know or ask your own.
Ask a new question about this device
Download the instructions for your Audio Amplifier in PDF format for free! Find your manual M-ER803 - MARANTZ and take your electronic device back in hand. On this page are published all the documents necessary for the use of your device. M-ER803 by MARANTZ.
USER MANUAL M-ER803 MARANTZ
Blu-ray Disc Receiver
M-ER803
SAFETY PRECAUTIONS

CAUTION
RISK OF ELECTRIC SHOCK DO NOT OPEN

CAUTION:
TO REDUCE THE RISK OF ELECTRIC SHOCK, DO NOT REMOVE COVER (OR BACK). NO USER-SERVICEABLE PARTS INSIDE. REFER SERVICING TO QUALIFIED SERVICE PERSONNEL.

The lightning flash with arrowhead symbol, within an equilateral triangle, is intended to alert the user to the presence of uninsulated "dangerous voltage" within the product's enclosure that may be of sufficient magnitude to constitute a risk of electric shock to persons.

The exclamation point within an equilateral triangle is intended to alert the user to the presence of important operating and maintenance (servicing) instructions in the literature accompanying the appliance.
WARNING:
TO REDUCE THE RISK OF FIRE OR ELECTRIC SHOCK, DO NOT EXPOSE THIS APPLIANCE TO RAIN OR MOISTURE.
CLASS 1 LASER PRODUCT
LUOKAN 1 LASERLAITE
KCLASS 1 LASERAPPARAT
CLASS 1 LASER PRODUCT
LUOKAN 1 LASERLAITE
KCLASS 1 LASERAPPARAT
ADVARSEL: USYNLIG LASERSTRÄLING VED ÅBNING, NAR SIKKERHEDSAFBRYDERE ER UDE AF Funktion UNDGÅ UDSAETTELSE FOR STRÄLING.
VAROITUS! LAITTEEN KÄYTTÄMINEN MUULLA KUIN TÄSSÄ
KÄYTTOOHJEESSA MAINITULLA TAVALLA SAATTAA ALTISTAA KÄYTTÄJÄN TURVALLISUUSLUOKAN 1
YLITTVÄVILLE NAKYMÄMTTÖMÄLLE LASERSÄTEILYLLE.
VARNING: OM APPARATEN ANVÄNDS PÀ ANNAT SÄTT ÄN I DENNA BRUKSANVISING SPECIFICERATS, KAN ANVÄNDAREN UTSÄTTAS FÜR OSYNLIG LASERSTRÄLNING SOM ÖVERSKRIDER GRÄNSEN FÜR LASERKLASS 1

IMPORTANT SAFETY INSTRUCTIONS
- Read these instructions.
- Keep these instructions
- Heed all warnings
- Follow all instructions
- Do not use this apparatus near water
- Clean only with dry cloth.
- Do not block any ventilation openings. Install in accordance with the manufacturer's instructions.
- Do not install near any heat sources such as radiators, heat registers, stoves, or other apparatus (including amplifiers) that produce heat.
- Protect the power cord from being walked on or pinched particularly at plugs, convenience receptacles, and the point where they exit from the apparatus.
- Only use attachments/accessories specified by the manufacturer
- Use only with the cart, stand, tripod, bracket, or table specified by the manufacturer, or sold with the apparatus. When a cart is used, use caution when moving the cart/ apparatus combination to avoid injury from tip-over.
- Unplug this apparatus during lightning storms or when unused for long periods of time.
- Refer all servicing to qualified service personnel. Servicing is required when the apparatus has been damaged in any way, such as power-supply cord or plug is damaged, liquid has been spilled or objects have fallen into the apparatus, the apparatus has been exposed to rain or moisture, does not operate normally, or has been dropped.
- Batteries shall not be exposed to excessive heat such as sunshine, fire or the like.
CAUTION:
To completely disconnect this product from the mains, disconnect the plug from the wall socket outlet.
The mains plug is used to completely interrupt the power supply to the unit and must be within easy access by the user.
VORSICHT:
USE OF CONTROLS OR ADJUSTMENTS OR PERFORMANCE OF PROCEDURES OTHER THAN THOSE SPECIFIED HEREIN MAY RESULT IN HAZARDOUS RADIATION EXPOSURE.
THIS PRODUCT SHOULD NOT BE ADJUSTED OR REPAIRED BY ANYONE EXCEPT PROPERLY QUALIFIED SERVICE PERSONNEL.
NOTE ON USE / HINWEISE ZUM GEBRAUCH / OBSERVATIONS RELATIVES A L'UTILISATION / NOTE SULL'USO / NOTAS SOBRE EL USO / ALVORENSTE GEBRUIKEN / OBSERVERA ANGÄENDE ANVÄNDNINGEN
- DECLARATION OF CONFORMITY
We declare under our sole responsibility that this product, to which this declaration relates, is in conformity with the following standards: EN60065, EN55013, EN55020, EN61000-3-2 and EN61000-3-3. Following the provisions of Low Voltage Directive 2006/95/EC and EMC Directive 2004/108/EC, the EC regulation 1275/2008 and its frame work Directive 2009/125/EC for Energy-related Products (ErP).
A division of D&M Europe B.V.
A NOTE ABOUT RECYCLING:
This product's packaging materials are recyclable and can be reused. Please dispose of any materials in accordance with the local recycling regulations.
When discarding the unit, comply with local rules or regulations.
Batteries should never be thrown away or incinerated but disposed of in accordance with the local regulations concerning battery disposal.
This product and the supplied accessories, excluding the batteries, constitute the applicable product according to the WEEE directive.
HINWEIS ZUM RECYCLING:
Kabackn-ky,Kabackn-cn,KaHaraba
2108569,Японя
D&M Holdings Inc.
D&M Building, 2-1 Nisshin-Cho
Kawasaki-Ku, Kawasaki-Shi, Kanagawa
2108569, Japan
Getting started
Thank you for purchasing this Marantz product. To ensure proper operation, please read this user guide carefully before using the product. After reading the guide, be sure to keep it for future reference.
Contents
Getting started 1
Accessories 2
About this manual 2
Main features 2
Cautions on handling 2
About discs 3
Inserting a disc 3
Holding discs 3
Loading discs 3
Cautions on handling 3
Cautions on storing discs 3
Cleaning discs 3
About discs and files 4
Part names and functions 4
Front panel 4
Display 5
Rear panel 6
Remote control unit 6
Basic connections 8
Connecting speakers 8
Connecting a TV 9
Connecting a set-top box (Satellite tuner/Cable TV) 10
Connecting an antenna 10
Connecting a wireless receiver (RX101) 11
Remote control connection 11
Connecting the power cord 11
Basic operations 12
Important information 12
Preparations 12
Turning the power on 12
Turning the power off 12
Selecting the input source 12
Operations possible during playback 13
Adjusting the master volume 13
Turning off the sound temporarily 13
Switching the display's brightness 13
Adjusting the tone 13
Listening with headphones 13
Source direct mode 13
Setting the current time (24-Hour Display) 14
Playable media 14
Discs 14
Files 15
About playback information 15
Information bar display 15
Playing Blu-ray Disc, DVD-Video and CD 16
Operations using disc menu, top menu, and pop-up menu 16
Enjoying BD-LIVE Features 17
Playing BD-Video compatible with Bonus View 17
Playback (Basic) 18
Stop playback 18
Pause playback 18
Step-by-step playback 18
Fast forward/fast reverse playback 19
Slow forward playback 19
Skipping to the chapter/track/file 19
Looking for specific sections using the search modes 19
Repeat playback 20
Random playback 20
Switching the angle 20
Switching the audio 21
Switching the subtitles 21
Surround mode 21
Dolby Virtual Speaker playback 21
Dolby Headphone playback 21
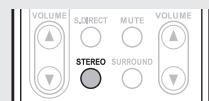
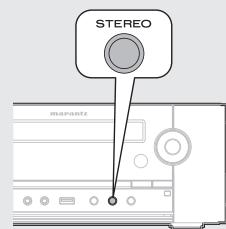
Stereo playback 21
Tuning in radio stations 22
Listening to FM/AM broadcasts 22
Listening to preset stations 23
RDS (Radio Data System) 23
PTY (Program Type) 24
TP (Traffic Program) 24
RT (Radio Text) 24
CT (Clock Time) 24
Advanced connections 25
Connecting an iPod or USB memory device to the
iPod/USB1 port 25
Using the iPod stand 25
Connecting a USB memory device to the USB2 port 261
Connecting a portable audio player 261
Connecting to the network 27
Advanced operations 28
Playing an iPod 28
Playing a USB memory device 29
Playing files 30
Playing a portable audio player 32
How to make detailed settings 33
Menu map 33
OSD (on-screen display) menu operation 34
System 34
Network 35
Display 36
Audio 36
Language 37
Parental 37
Other setting 38
Timer setup 38
Audio delay 39
Auto standby 40
Registering preset codes 40
Other functions 40
Other information 41
Explanation terms 42
Troubleshooting 44
Resetting the microprocessor 46
Specifications 47
Index 47
License End of this manual
List of preset codes End of this manual
Accessories
Check that the following parts are supplied with the product.
① Remote control unit (RC001ER)
② R03/AAA batteries. 2
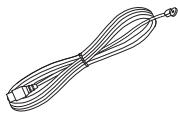
③ Power cord 1
④ AM loop antenna 1
⑤ FM indoor antenna 1
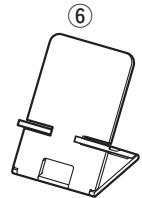
⑥ iPod stand. 1
⑦ User guide 1
①
3
(4)
5
About this manual
Operation buttons
The operations described in this guide are based mainly on remote control operation.
Symbols

This symbol indicates a reference page on which related information is described.

This symbol indicates a supplementary information and tips for operations.
NOTE
This symbol indicates points to remember operations or function limitations.
□ Illustrations
Note that the illustrations in this guide are for explanation purposes and may differ from the actual unit.
Main features
High quality amplifier stressing sound quality Equipped with a 70W + 70W (6 Ω) high-quality amplifier circuits.
Direct Play for iPod® and iPhone® via USB
Music data from an iPod can be played back if you connect the USB cable supplied with the iPod via the USB port of this unit, and also an iPod can be controlled with the remote control for this unit.
Weight and Dramatic sound
The board and circuit configuration has been redesigned to achieve lower impedance. Since stable current is supplied to the power amp and other sections, it is possible to realize as much as 70 watts of power.
"Simple & Straight" circuit design for sound purity and free of coloration
This unit gives you high sound quality based on the "simple & straight" concept. Circuitry is uncomplicated, signal paths are short, and all adverse influences on sound quality have been minimized.
Playback of MP3 and WMA files
Supports playback of discs and USB memory devices on which MP3 or WMA files are recorded. The unit's display can display the title of the track and the name of the artist of the current track.
Low standby power consumption
Designed with the environment in mind, the unit consumes just 0.5 W while in standby mode.
M-XPort (Marantz-eXtension Port)
This unit is equipped with the M-XPort, a Marantz original innovation that provides outstanding expandability. You can connect the Wireless Receiver RX101 (sold separately) to this port.
Cautions on handling
- Before turning the power switch on
Check once again that all connections are correct and that there are no problems with the connection cables.
- Power is supplied to some of the circuitry even when the unit is set to the standby mode. When going on vacation or leaving home for long periods of time, be sure to unplug the power cord from the power outlet.
- Image persistence (image burn-in)
Do not leave the still images of the disc menu, the unit menu, etc., displayed on the TV screen for long periods. This can result in image persistence (image burn-in) on the screen.
- About Condensation
If this unit is moved from a cold place to a warm place, or installed in a room subject to rapid temperature rise from a heater, etc., condensation (dew) may form on the internal parts of the unit (operating parts and lenses).
If used in this condition, this unit will not operate correctly and damage may result. If condensation is formed on the unit, leave this unit for 1 to 2 hours with the power off before use.
- Cautions on using mobile phones
Using a mobile phone near this unit may result in noise. If that occurs, move the mobile phone away from this unit when it is in use.
- Moving the unit
- Be sure to remove a disc, turn off the power and unplug the power cord from the power outlet. Next, disconnect the connection cables to other system equipment before moving the unit.
- About Care
- Wipe the cabinet and control panel clean with a soft cloth.
- Follow the instructions when using a chemical cleaner.
- Benzene, paint thinner or other organic solvents as well as insecticide may cause material changes and discoloration if brought into contact with the unit, and should therefore not be used.
- Sufficiently ventilate the place of installation
If the unit is left in a room full of the smoke from cigarettes, etc., for long periods of time, the surface of the optical pickup could get dirty, in which case it will not be able to read the signals properly.
About discs
Inserting a disc
- Set the disc with the labeled side facing up.
- Make sure the disc tray is fully open when inserting the disc.
- Place the disc horizontally in the tray, aligned with the tray guide.

"NO DISC" is displayed if a disc that cannot be played back on this unit is loaded and the disc tray reopens in the case of some discs.
NOTE
- Only load one disc at a time. Loading two or more discs can damage the unit or scratch the discs.
- Do not use cracked or warped discs or discs that have been repaired with adhesive, etc.
- Do not use discs on which the sticky part of cellophane tape or labels is exposed or on which there are traces of where labels have been removed. Such discs can get caught inside the player and damage it.
- Do not use discs with special shapes, as they could damage the player.


- Do not push the disc tray in by hand when the power is turned off. Doing so could damage the set.
Holding discs
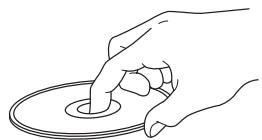
Do not touch the signal surface.
Loading discs
- Place the disc in the tray, label side up.
- Make sure the disc tray is fully open when inserting the disc.
- Place the discs flat, 12cm discs in the outer tray guide (Figure 1), 8cm discs in the inner tray guide (Figure 2).
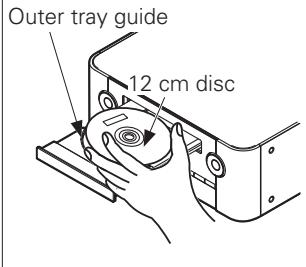
Figure 1
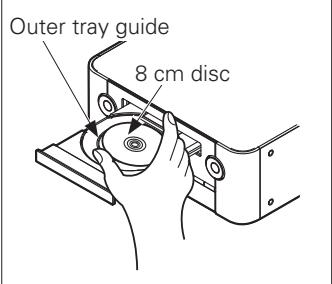
Figure 2
- Place 8 cm discs in the inner tray guide without using an adapter.

"NO DISC" is displayed if the disc is loaded upside-down or if no disc is loaded.
Cautions on handling
- Do not get fingerprints, oil or dirt on discs.
- Take special care not to scratch discs when removing them from their cases.
- Do not bend or heat discs.
- Do not enlarge the hole in the center.
- Do not write on the labeled (printed) surface with ball-point pens, pencils, etc., or stick new labels on discs.
- Water droplets may form on discs if they are moved suddenly from a cold place (outdoors for example) to a warm place, but do not try to dry them off using a hairdryer, etc.
Cautions on storing discs
- Be sure to remove discs after using them.
- Be sure to store discs in their cases to protect them from dust, scratches, warping, etc.
-
Do not store discs in the following places:
-
Places exposed to direct sunlight for long periods of time
- Dusty or humid places
- Places exposed to heat from heaters, etc.
Cleaning discs
- If there are fingerprints or dirt on a disc, wipe them off before using the disc. Fingerprints and dirt can impair sound quality and cause interruptions in playback.
- Use a commercially available disc cleaning set or a soft cloth to clean discs.
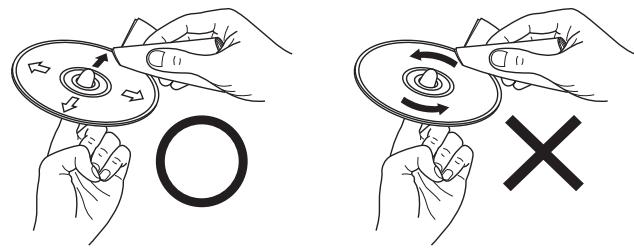
Gently wipe the disc from the inside towards the outside.
Do not wipe in a circular motion.
NOTE
Do not use record spray, antistatic agents, benzene, thinner or other solvents.
About discs and files
BD-Video, DVD-Video
BD-Video/DVD-Video discs are divided into several large sections (titles) and small sections (chapter). These sections are all allotted numbers, called the title numbers and chapter numbers.
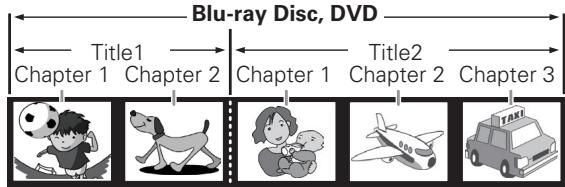
[Example]
CD
CDs are divided into several sections (tracks). These sections are all allotted numbers, called the track numbers.

File
MP3/WMA/JPEG/WMV/AVI files recorded on CD-R/RW are divided into large segments (folders) and small segments (files). Files are stored in folders, and folders can be placed for storage in a hierarchy. This unit can recognize up to 8 hierarchies of folder.
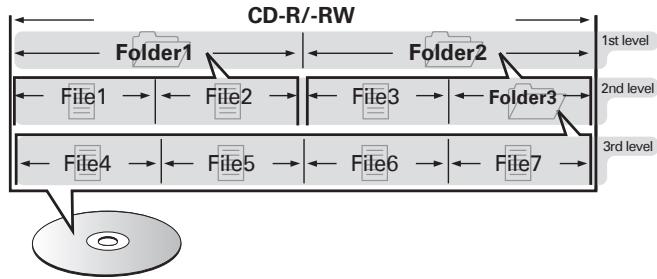

When writing MP3/WMA/JPEG/WMV/AVI files on a CD-R/-RW disc, set the writing software's format to "ISO9660". The files may not play properly if they are recorded in other formats. For details, refer to the instructions of your writing software.
Part names and functions
For buttons not explained here, see the page indicated in parentheses ( ).
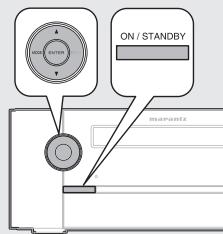
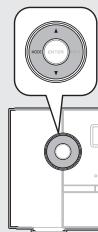
Front panel
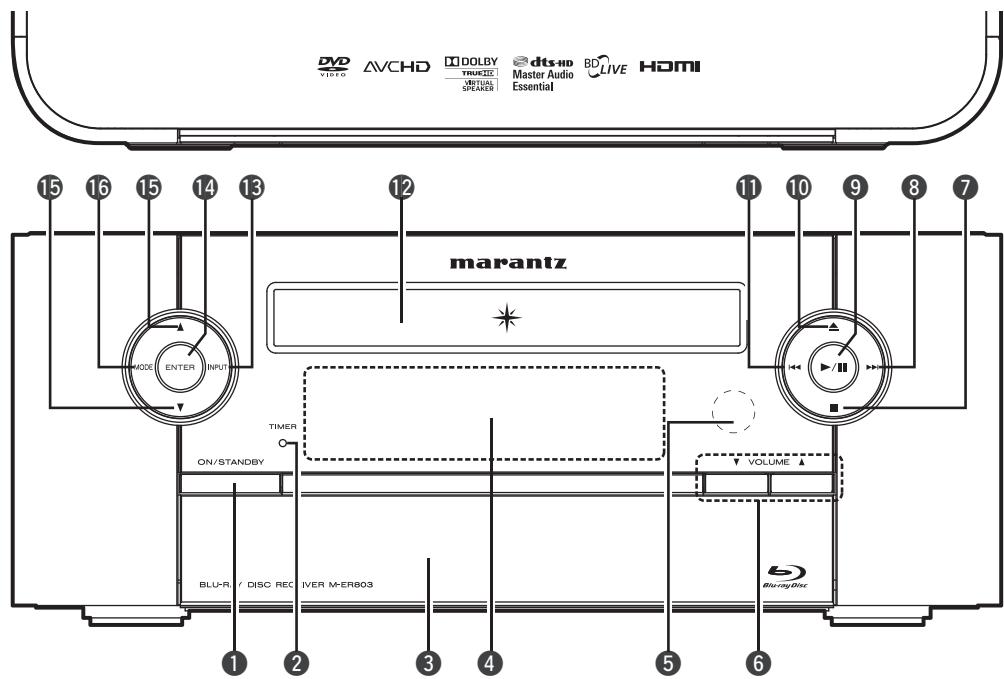

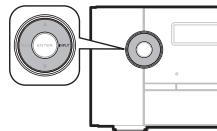
Power operation button
(ON/STANDBY) (11, 12, 46)

TIMER indicator (39)
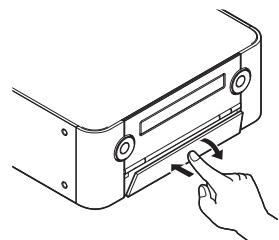
Door
When you are using buttons and/or terminals behind the door, press the bottom of the door to open it. When not using buttons and/or terminals behind the door, close it. Be careful not to catch your fingers when closing the door.

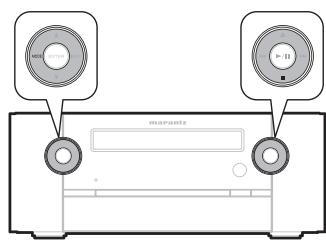
Display (5)

Remote control sensor (7)

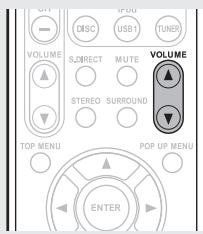
Master volume control buttons (VOLUME ▲,▼) (13)

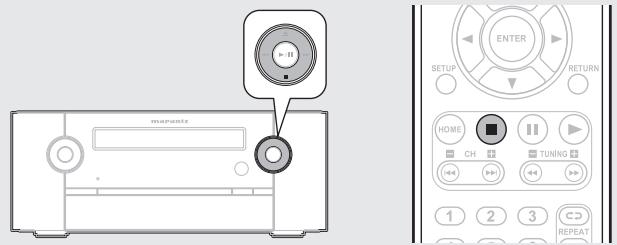
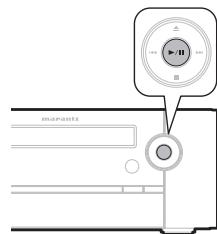
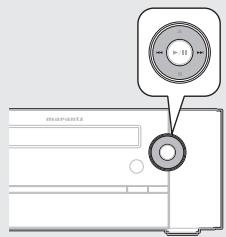
Stop button (■) (11, 18, 22)

Forward-skip/search button 119,23,46

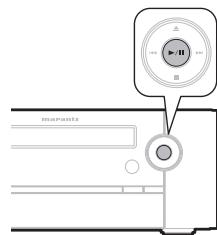
Play/Pause button (▶/III) (18, 40)

Disc tray open/close button (△) (16)

Reverse-skip/search button (19, 23, 46)

Disc tray (3)

nput source select button (INPUT) (12)
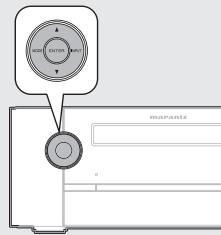
14 ENTER button (11, 38 - 40)
Used to confirm an item.
TUNER mode (22)
Used to register a broadcast station.
15△/V buttons
- SETUP mode (11, 38, 40)
Used to select the item to be set.
TUNER mode (22)
Used when switching frequencies.
DISC,iPod/USBmode (28-31)
Used to select the item.
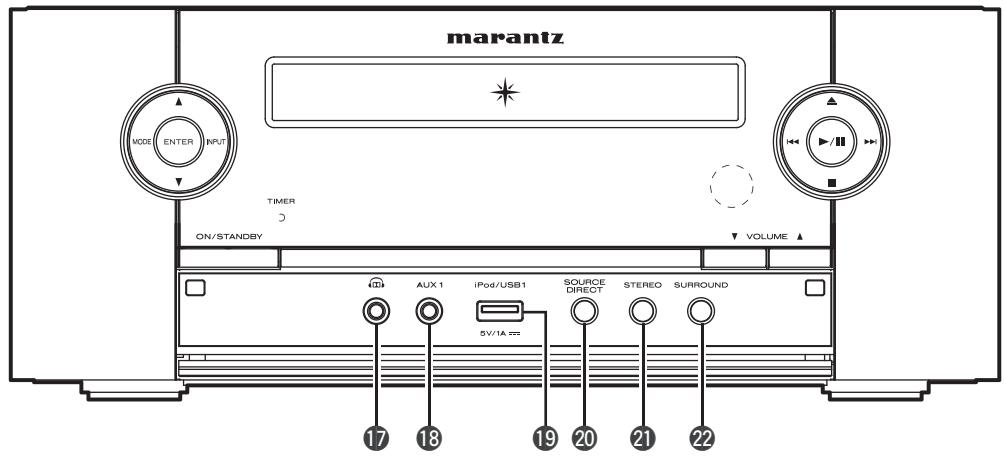
[With the door open]
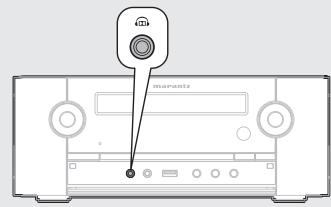
17 Headphones jack (13)
13 AUX1 input jack (26)
19 iPod/USB1 port (25)
16 MODE button
- SETUP mode (39)
Calls up the SETUP menu when pressed continuously.
TUNER mode (22)
Used to select reception band.
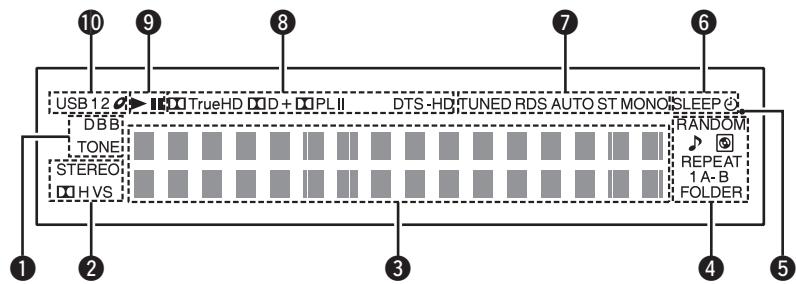
Display
1 Tone indicators
DBB: Lights when the dynamic bass boost function is set to "ON".
TONE: Lights when the tone (bass/treble) is being adjusted.
Surround mode indicators (21)
3 Information display
Various information is displayed here.
4 Play mode indicators
Lights when the random playback mode or repeat playback mode is used.
Remote control signal reception indicator
6 Timer operation indicator (39)
7 Tuner reception mode indicators (22)
These light according to the reception conditions when the input source is set to "TUNER".
TUNED: Lights when the broadcast is properly tuned in.
RDS: This light when receiving RDS broadcasts.
AUTO: Lights when "FM AUTO" is selected.
ST: In the FM mode, this light when receiving analog stereo broadcasts.
MONO: Lights when "FM MONO" is selected, or when an analog monaural broadcast is received.
Decoder indicators
These light when the respective decoders are operating.
9Playback mode indicators
:During playback
II:During pause
10 USB/DISC indicators
Lights when a disc or USB memory device is installed.
Rear panel
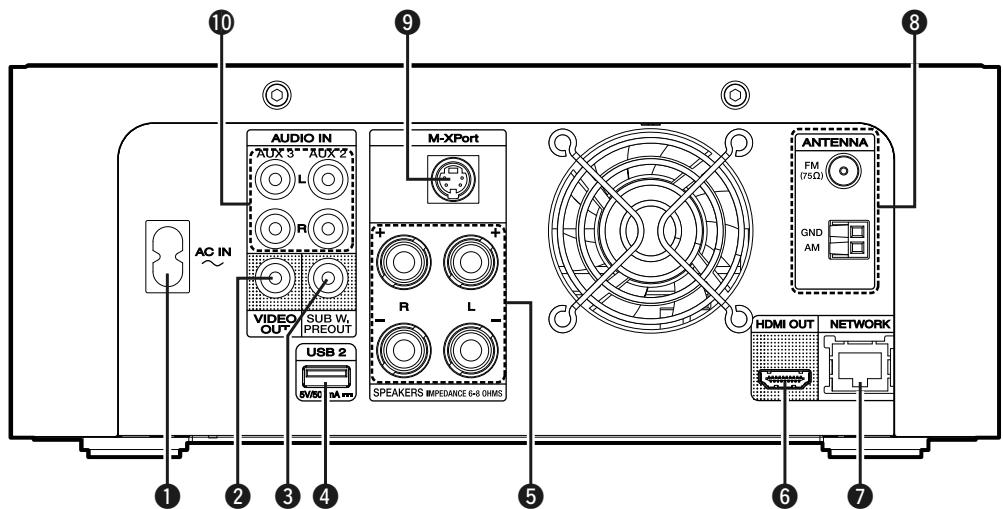
1 AC inlet (AC IN) (11)
VIDEO OUT connector (9)
PREOUT connector (SUB W.) (8)
4 USB 2 port (26)
Speaker terminals (8)
6 HDMI OUT connector (9)
7 NETWORK connector (27)
FM/AM antenna terminals (10)
M-XPort connector (11)
10 Analog audio connectors (AUX2, AUX3 IN) (9, 10)
NOTE
- Do not touch the inner pins of the connectors on the rear panel. Electrostatic discharge may cause permanent damage to the unit.
- Do not put your finger or foreign object in the fan opening. Doing so could cause injury or unit failure.
- While the fan is operating, the faint fan noise may be generated.
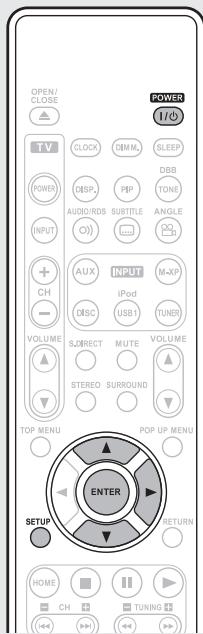
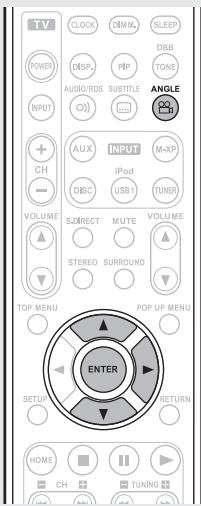
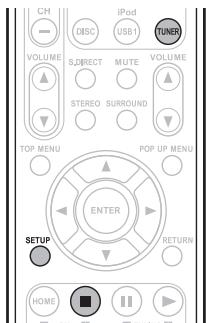
Remote control unit
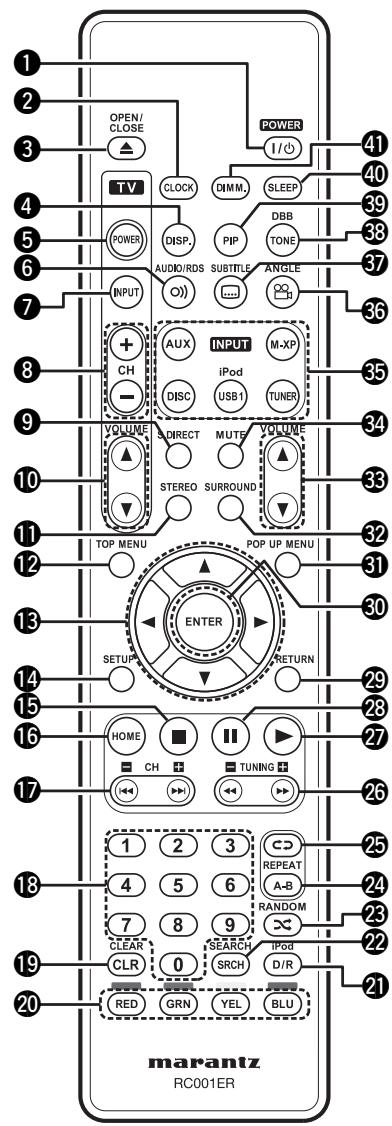
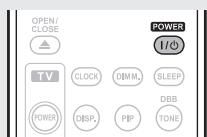
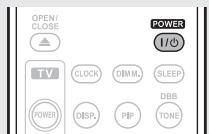
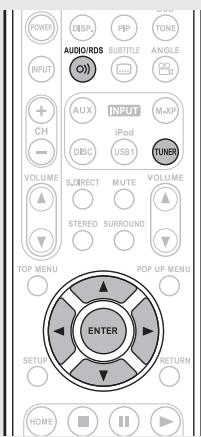
1 Power button (POWER) (12, 14, 39)
CLOCK button (14)
3 Disc tray open/close button (OPEN/CLOSE ) (16)
4 Display button (DISP.) (15)
5 TV POWER button (40)
6 AUDIO/RDS button (21, 23)
7 TV INPUT button (40)
8 TV channel buttons (TV CH +/-) (23)
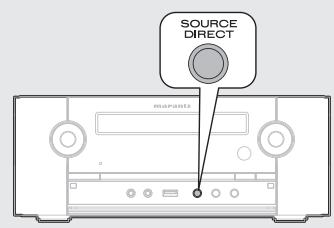
9 Source direct button (S.DIRECT) (13)
10 TV volume control buttons (TV VOLUME ▲▼) (40)
STEREO button (21)
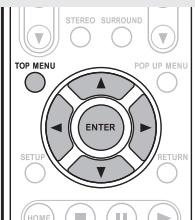
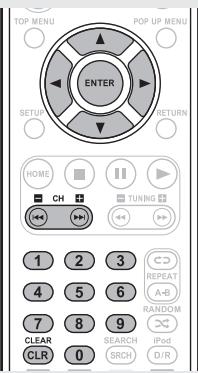
12 TOP MENU button (16)
13 Cursor buttons ( ) (34-37)
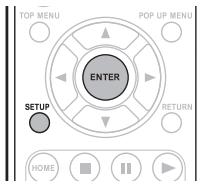
14 SETUP button (14, 22, 24, 38 - 40)
15 Stop button (■) (18)
16 HOME button (31, 34)
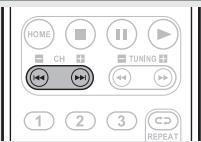
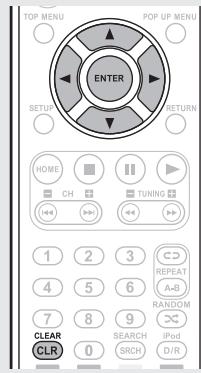
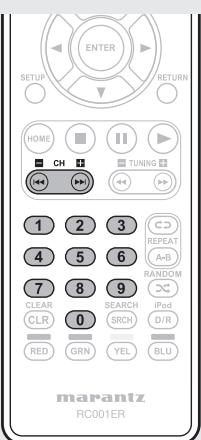
17 Reverse-skip/Forward-skip buttons (I<4/<▶I) (13, 19) Channel buttons (CH+/−) (23)
18 Number buttons (23, 35, 37)
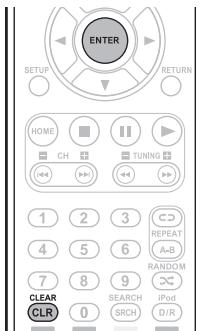
19 CLEAR button (19, 22, 23)
20 RED/GRN/YEL/BLU button
21 iPod Direct/Remote button (iPod D/R) ……(28)
22 SEARCH button (19)
23 RANDOM button (20)
24 REPEAT A-B button (20)
25 REPEAT button (20)
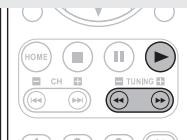
26 Fast-reverse-skip/Fast-forward buttons
(△/▶) (19)
TUNING buttons (+ / - ) (22)
Play button (▶) (18, 19, 28, 29)
28 Pause button (II) (18)
RETURN button (34-37, 39)
30 ENTER button (34-37)
POPUP MENU button (16)
32 SURROUND button (21)
3 Master volume control buttons (VOLUME ▲▼) (13)
MUTE button (13)
35 Input source select buttons (INPUT) (12)
36 ANGLE button (20)
SUBTITLE button (21)
DBB/TONE button (13)
39 Picture in picture button (PIP) (17)
40 SLEEP button (39)
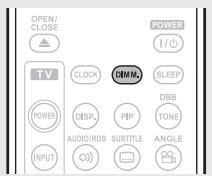
4 Dimmer button (DIMM.) (13)
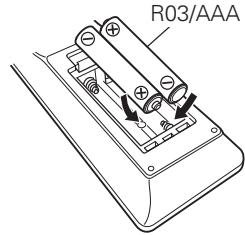
□ Inserting the batteries
① Remove the rear lid in the direction of the arrow and remove it.
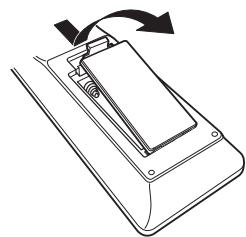
③ Put the rear cover back on.
② Load the two batteries properly as indicated by the marks in the battery compartment.
NOTE
- Replace the batteries with new ones if the set does not operate even when the "remote control" is operated close to the unit.
- The supplied batteries are only for verifying operation.
- Be sure to insert the batteries in the proper direction, following the and marks in the battery compartment.
- To prevent damage or leakage of battery fluid:
- Do not use a new battery with an old one.
- Do not use two different types of batteries.
- Do not attempt to charge dry batteries.
- Do not short-circuit, disassemble, heat or dispose of batteries in a fire.
- Do not keep the battery in a place exposed to direct sunlight or in places with extremely high temperatures, such as near a heater.
- If the battery fluid leaks, carefully wipe the fluid off the inside of the battery compartment and insert new batteries.
- Remove the batteries from the "remote control" if it will not be used for a long time.
- Used batteries should be disposed of in accordance with the local regulations regarding battery disposal.
□ Operating range of the remote control unit
Operate the remote control unit while pointing it at the remote sensor.
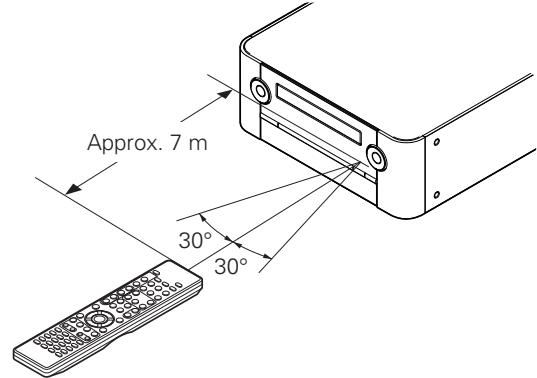
NOTE
The set may function improperly or the "remote control" may not operate if the remote control sensor is exposed in direct sunlight or strong artificial light such as a fluorescent or infrared light.
Basic connections
This section explains how to connect speakers, TV, set-top box, antennas and power cord. For other connections, see the sections below.
□ Connecting an iPod or USB memory device to the iPod/USB1 port ( page 25)
□ Connecting a USB memory device to the USB2 port (12 page 26)
□ Connecting a portable audio player (page 26)
□ Connecting to the network ( page 27)
NOTE
- Do not plug in the power cord until all connections have been completed.
- When making connections, also refer to the user guide of the other components.
- Be sure to connect the left and right channels properly (left with left, right with right).
- Do not bundle power supply cords together with connection cables.
Doing so can result in humming or noise.
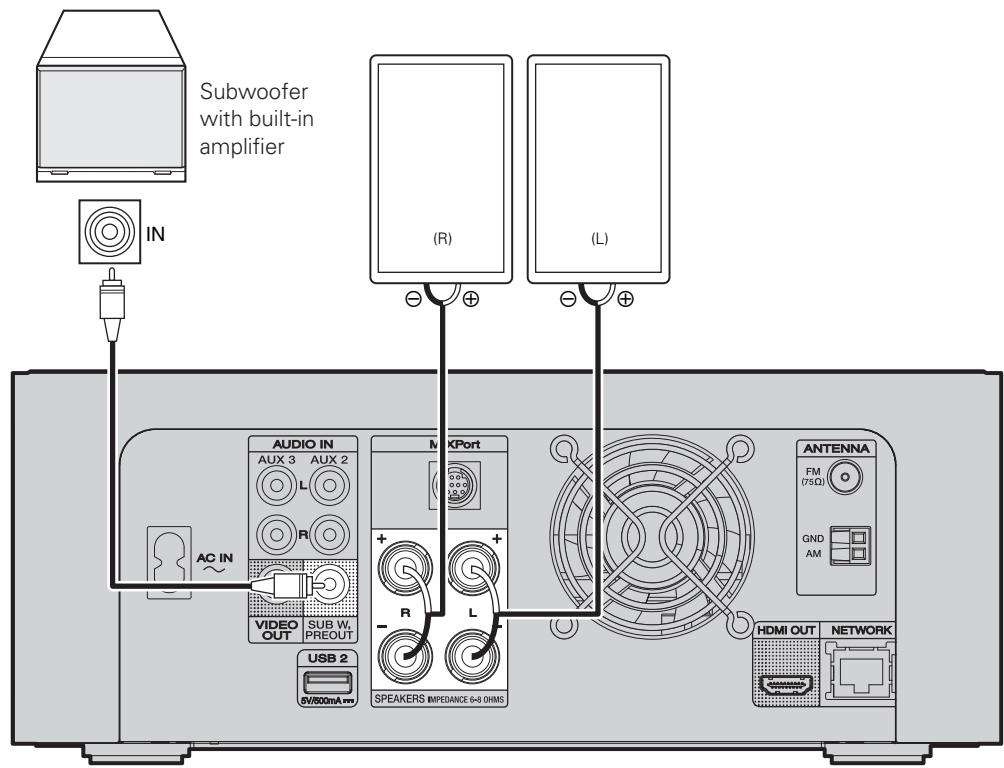
Connecting speakers
Carefully check the left (L) and right (R) channels and + (red) and - (black) polarities on the speakers being connected to the unit, and be sure to connect the channels and polarities correctly.
Cables used for connections
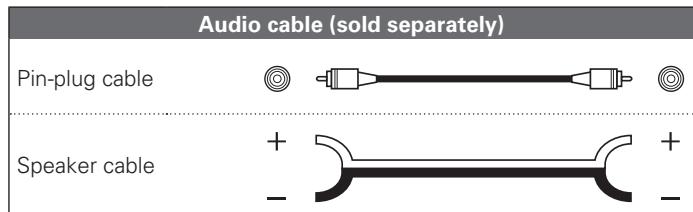
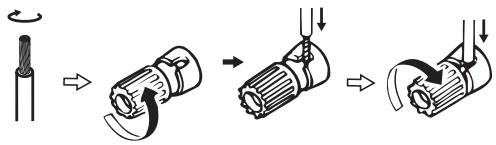
Connecting the speaker cables
Peel off about 10mm of sheathing from the tip of the speaker cable, then either twist the core wire tightly or terminate it.
NOTE
- Use speakers with an impedance of 6 to 8 . The protection circuit may be activated if speakers with an impedance other than specified are used.
- Connect the speaker cables so they do not stick out of the speaker terminals. The protection circuit may be activated if the wires touch the rear panel or if the + and - sides touch each other (page 43 "Protection circuit").
- Never touch the speaker terminals while the power supply is connected. Doing so could result in electric shock.
Protection circuit
The protection circuit is be activated in the following situations:
- If the speaker cable wire touches the rear panel or screws or if the speaker cable wire touches the speaker cable's + and - sides are touching
- If the surrounding temperature is extremely high
- If the inside of the amplifier gets hot to extended use at a high output
If this happens, unplug the power cord, then check the connections of the speaker cables and input cables. If the unit becomes very hot, wait for it to cool off and improve the ventilation around it. After doing this, plug the power cord back in.
If the protection circuit is activated even though there are no problems with the ventilation around the unit or in connections, the unit may be damaged. Turn off the power and then contact a Marantz service center.
Connecting a TV
Select the connector to use and connect the device.
Cables used for connections
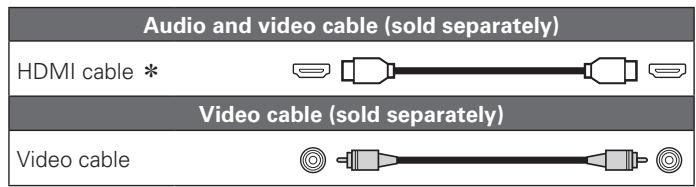
- This interface allows transfer of digital video signals and digital audio signals over a single HDMI cable.
HDMI function
- Deep Color ( page 36 "Color Depth")
Copyright protection system
In order to play back digital video and audio such as BD-Video or DVD-Video via HDMI connection, both this unit and TV need to support the copyright protection system known as HDCP (High-bandwidth Digital Content Protection System). HDCP is copyright protection technology comprised of data encryption and authentication of the connected AV device. This unit supports HDCP.
- If a device that does not support HDCP is connected, video and audio are not output correctly. Read the user guide of your television for more information.
About HDMI cables
- Use a cable on which the HDMI logo is indicated (a certified HDMI product) for connection to the HDMI connector. Normal playback may not be possible when using a cable other than one on which the HDMI logo is indicated (a non-HDMI-certified product).
- When a device supporting Deep Color signal transfer is connected, use a cable compatible with HDMI version 1.3a.
NOTE
- Do not connect the this unit's video output via a VCR (Video Cassette Recorder). Some media contain copy prohibit signals, which will disturb the screen image.
- When the HDMI video resolution is set to "HDMI Auto" as described in "Resolution" (12 page 36), the outputs the highest resolution video signal that is supported by the connected equipment.
- If the HDMI resolution is not set to "HDMI Auto", set it to correspond with the resolution of your television. Images will not be displayed normally if the television resolution and this unit's output resolution do not match.
- Audio and video will be temporarily interrupted if the power of the connected device currently playing back is turned off, or input is switched.
- When you change the HDMI video resolution of this unit, it takes from a few seconds up to about 10 seconds for validation between this unit and the connected device. Audio/video is not output during this period.
- If the resolution of video signal to be output from HDMI OUT does not match that of your TV, the picture is not clear, natural or displayed.
Should this happen, first make (composite) video connection between this unit and TV, and select the (composite) VIDEO as an input source on the TV to display the setting menu, then set the Resolution correctly. (For details on the resolution acceptable for your TV, refer to its operating instructions.)
- Among the components that support HDMI, some components can control other components via the HDMI connector. However, this unit cannot be controlled by another component via the HDMI connector.
Connecting to a device equipped with a DVI-D connector
When an HDMI/DVI conversion cable (sold separately) is used, the HDMI video signals are converted to DVI signals, allowing connection to a device equipped with a DVI-D connector.
NOTE
- No sound is output when connected to a device equipped with a DVI-D connector. Set "HDMI Output" (10 page 36) in the menu to "Off Speaker", and output audio from the speakers.
- Signals cannot be output to DVI-D devices that do not support HDCP.
- Depending on the combination of devices, the video signals may not be output.
The video signal will be in RGB format.
□ Settings related to HDMI connections
Set as necessary. For details, see the respective reference pages.
Audio ( page 36)
Make settings for HDMI video音频 output.
HDMI Output
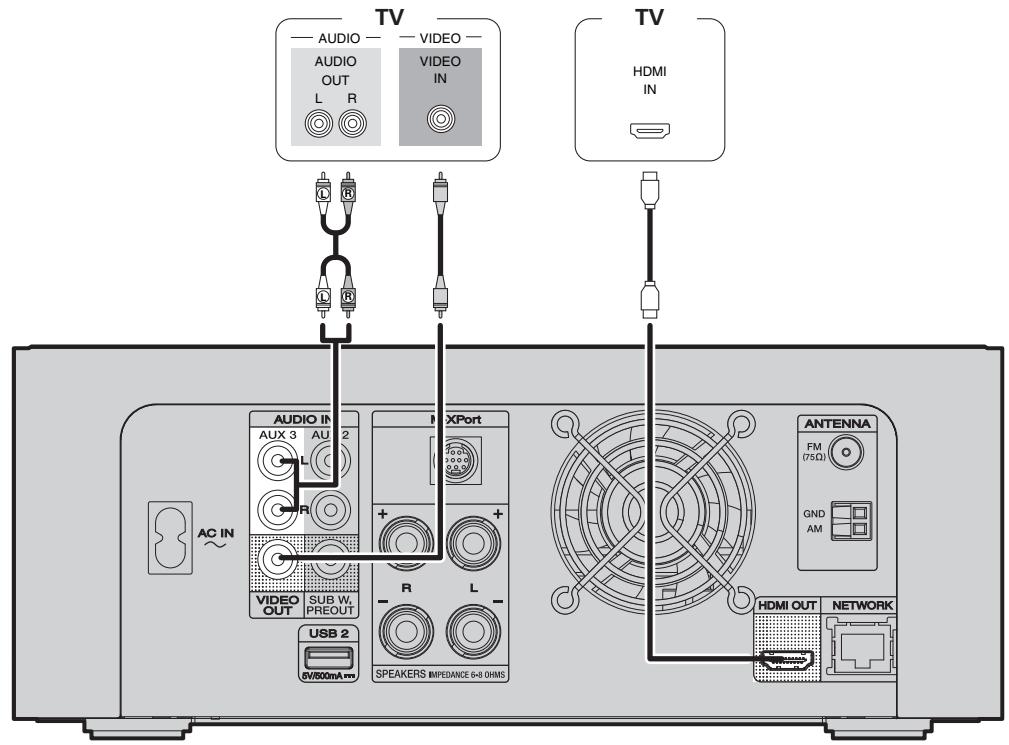
Connecting a set-top box (Satellite tuner/Cable TV)
You can watch satellite or cable TV.
Cables used for connections
| Audio cable (sold separately) | |
| Audio cable | (White) (Red) |
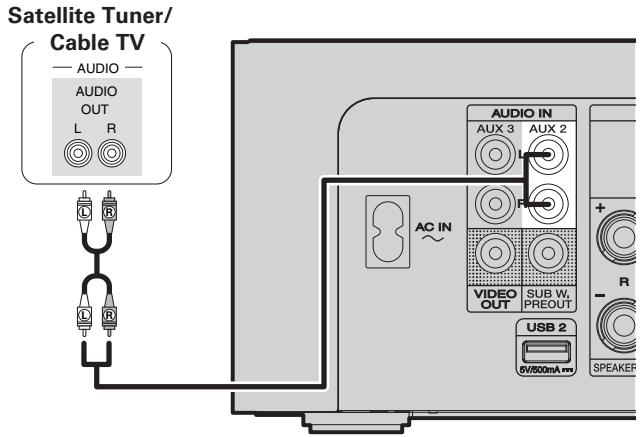
Connecting an antenna
- Connect the FM antenna or AM loop antenna supplied with the unit to enjoy listening to radio broadcasts.
- After connecting the antenna and receiving a broadcast signal (page 22 "Listening to FM/AM broadcasts"), fix the antenna with tape in a position where the noise level becomes minimal.
NOTE
- Do not connect two FM antennas simultaneously.
- Even if an external AM antenna is used, do not disconnect the AM loop antenna.
- Make sure the AM loop antenna lead terminals do not touch metal parts of the panel.
- If the signal has noise interference, connect the ground terminal (GND) to reduce noise.
- If you are unable to receive a good broadcast signal, we recommend installing an outdoor antenna. For details, inquire at the retail store where you purchased the unit.
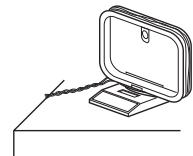
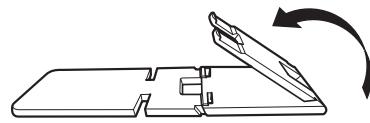
AM loop antenna assembly
1 Put the stand section through the bottom of the loop antenna from the rear and bend it forward.
2 Insert the projecting part into the square hole in the stand.
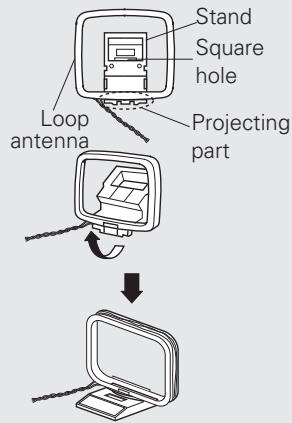
Using the AM loop antenna
Suspending on a wall
Suspend directly on a wall without assembling.

Standing alone
Use the procedure shown upper to assemble.
Connecting a wireless receiver (RX101)
By connecting a wireless receiver RX101 (sold separately) to this unit, you can receive and playback audio signals from other devices using the Bluetooth Communication Function.
- Use a Bluetooth device that is A2DP compatible ( page 42 "A2DP").
- You can also use wireless receiver RX101 as an external IR receiver.
- For instructions on the wireless receiver settings, refer to the RX101's operating instructions.
Wireless receiver RX101
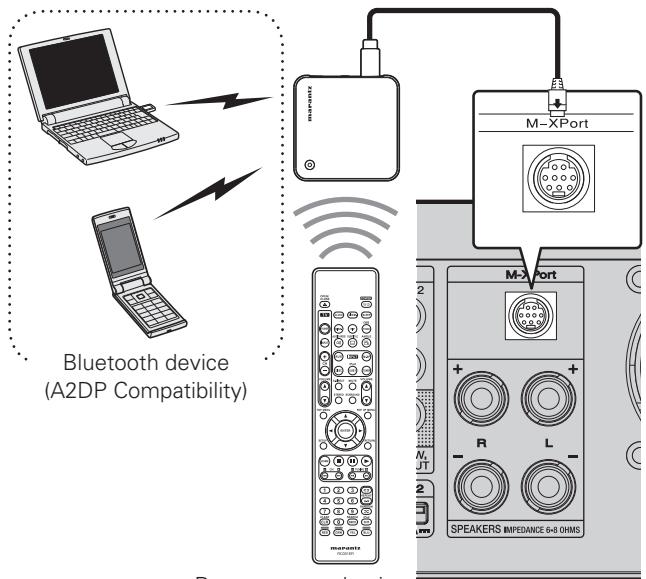
Remote control unit
Remote control connection
The unit can be controlled using the remote sensor of RX101 connected to the unit. Be sure to set "IR=DISABLE" when controlling in this way.
NOTE
When making this remote control connection, be sure to set the IR switch of RX101 that is connected to the unit, to ON.
Setting the remote control
1 Press ON/STANDBY to set the unit to standby mode.
2 Press and hold down and then press ON/STANDBY.
"IR=ENABLE" or
"IR=DISABLE" on the display.
3 Press to select "IR=DISABLE" or "IR=ENABLE" and then press ENTER.
NOTE
The unit cannot be controlled using the remote controller while "IR=DISABLE" is set.
Connecting the power cord
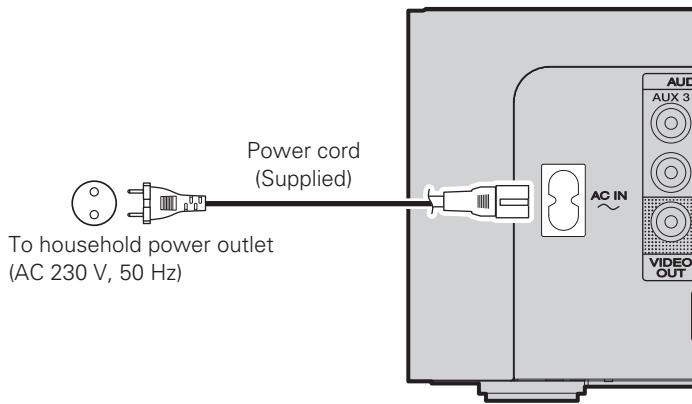
NOTE
- Do not plug in the power cord until all connections have been completed.
- Only use the supplied power cord.
- Be sure the power cord is unplugged from the power outlet before connecting or disconnecting it to the AC IN.
Basic operations
Turning the power on (page 12)
Turning the power off ( page 12)
□ Selecting the input source (page 12)
Adjusting the master volume ( page 13)
Turning off the sound temporarily (page 13)
Switching the display's brightness ( page 13)
Adjusting the tone ( page 13)
□ Listening with headphones (page 13)
Source direct mode ( page 13)
Setting the current time (24-Hour Display)
(1 page 14)
Playable media ( page 14)
□ About playback information ( page 15)
Playing Blu-ray Disc, DVD-Video and CD (page 16)
Playback (Basic) page 18
Advanced operations (page 28)
Important information
Before starting playback, make the connections between the different components and the settings on the receiver.
NOTE
Also refer to the operating instructions of the connected components when playing them.
Preparations
Turning the power on
Press POWER.
The power turns on.

You can also switch the power on by pressing ON/STANDBY on the main unit.
Press again to set the power to standby.

NOTE
- Power continues to be supplied to some of the circuitry even when the power is in the standby mode. When leaving home for long periods of time, either press ON/STANDBY or POWER to turn off the power, or unplug the power cord from the power outlet.
- Be sure to stop playback before turning the power off.
Turning the power off
Press POWER.
The power turns off.
NOTE
- Be sure to stop playback before turning the power off.
- Make sure that the disc tray is completely shut before turning off the power.
- Do not push the disc tray by hand when the power is turned off. Doing so could damage the set.
Completely turning off the power
Unplug the power cord from the wall outlet.
- Note that the time setting is cleared when the power cord is unplugged from the outlet.
- The settings made for the various functions may be cleared if the power cord is left unplugged from a power outlet for an extended period of time.
Selecting the input source
Press the input source select button (AUX*, M-XP, DISC, iPod/USB1, TUNER) to be played back.
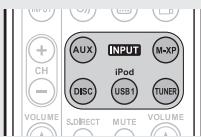
The desired input source can be selected directly.
- Each time AUX is pressed, the input source is changed as shown below.

Using the button on the main unit
Press INPUT
Each time INPUT is pressed, the input source is changed as shown below.

- "M-XPort" is displayed when a RX101 wireless receiver is connected to "M-XPort".
Operations possible during playback
Adjusting the master volume
Use VOLUME ▲▼ to adjust the volume.
The volume level is displayed.
[Adjustable range]
VOLUME 00 - 59, VOLUME MAX
- The variable range differs according to the input signal.

You can also operate via the main unit. In this case, perform the following operations. Press VOLUME to adjust the volume.

Turning off the sound temporarily
Press MUTE.
"MUTE ON" is displayed.


To cancel, press MUTE again. Muting can also be canceled by adjusting the master volume.
Switching the display's brightness
Press DIMM..

The display's brightness switches each time the button is pressed.
Adjusting the tone
1 Use DBB/TONE to select the tone parameter to be adjusted.

2 Adjust the volume with or .
- To make other tone adjustments at this time, press DBB/TONE.
- If no operation is performed for 5 seconds, the adjustment is retained and the normal display reappears.

DBB Emphasize the bass sound. (Dynamic Bass Boost)
[Selectable modes] ON - OFF
BASS Adjusts the bass sound.
[Variable range] -10dB +10dB
TREBLE Adjusts the treble sound.
[Variable range] -10dB +10dB
Settings made upon purchase:
- DBB............OFF
BASS. 0dB - TREBLE. 0dB

DBB and BASS can be set simultaneously. If the settings were performed at the same time, the BASS variable range may differ depending on the volume level.
Listening with headphones
Plug the headphones (sold separately) into the .
- The sound from the speakers is automatically cut off.
NOTE
To prevent hearing loss, do not raise the volume level excessively when using headphones.
Source direct mode
As the audio signal does not pass through the tone control circuit (DBB/ BASS/TREBLE) in source direct mode, the playback reproduction is closer to the original sound.
Press S.DIRECT.
- If SOURCE DIRECT on the main unit is pressed, the same function as with the remote control unit can be obtained.
Setting the current time (24-Hour Display)
[Example] Setting the current time to 10:15 am
1 Press POWER to turn on power to the unit.
- If you perform operations on this unit, press ON/STANDBY.
Press SETUP.
Various types of setting menus are displayed.
- If you perform operations on this unit, press and hold MODE for 3 seconds and longer.
3 Use to select "CLOCK SETUP", then press ENTER or .
SETUPMENU CLOCK SETUP
Use to set the "hours".
CLOCK SETUP 10:00
Press ENTER or
The "minutes" display flashes.
6 Use to set the "minutes".
CLOCKSETUP 10:15
7 Press ENTER or
The current time is set, and the normal display reappears.

You can also perform the same operations as on the remote control unit with the INPUT button on this unit, respectively.
□ Checking the current time when the power is on Press CLOCK.
Press once more and the display returns to its original condition.
□ Checking the current time when the power is set to standby
Press CLOCK.
The current time is displayed for 10 seconds.
NOTE
The time cannot be set when in the standby mode. Turn on the power first.
Playable media
Discs
| Playable discs | Playable formats/ modes | Playable region codes | Category type | |
| BD-Video, BD-ROM, BD-RE/ BD-R *1,*2,*3 | Blut-ray Disc AVCHD | BDMV, AVCHD format | Include region | BDAVCHD |
| DVD-Video *1,*2 | DVD VIDEO | Video mode | Include region ALL | DVD |
| DVD-R | DVD R | Video mode, AVCHD format | - | DVDAVCHD |
| DVD-RW | DVD RW AVCHD | |||
| CD | COMPACT DIGITAL AUDIO | CD-DA | - | CD |
| CD-R | COMPACT DIGITAL AUDIO RECORDABLE | |||
| CD-RW | COMPACT DIGITAL AUDIO (ReWritable) | |||
- Only BD-RE/-R, DVD-R/-RW and CD-R/-RW discs recorded in UDF or ISO9660 format can be played back.
1 BD-Video/DVD-Video discs may not operate as described in this guide due to menu structure.
2 The Blu-ray Disc player and BD-Video disc, and DVD player and DVD-Video disc each have their region codes (code assigned for each region). Playback is not possible if the codes do not match.
*3 This unit supports Ver 2.0 BD-ROM, Ver 3.0 BD-RE and Ver 2.0 BD-R.

The following discs will not play back on this unit.
DVD+R/DVD+RW
BD-RE Ver1.0 (BD disc with cartridge)
- BD-R/BD-RE in which BDAV is recorded
- HD DVD / DVD-RAM / DVD-Audio
- CDV (Only the audio part can be played)
- CD-G (Only the audio signals can be output)
Non-standard CD (CD with copy protection, etc.)
- Unauthorised disc (Pirated disc)
- Disc with recording area less than 55 mm in diameter
- Hybrid disc
Video Single Disc (VSD) / CVD / Video CD / Super Video CD / Compact Disc-Interactive (CD-I) / Photo CDs / Super Audio CD
Playable media
NOTE
- A disc may not be accessible or play back incorrectly due to audio and video interruptions, etc., depending on the recording conditions when recorded with a Blu-ray Disc recorder or DVD recorder.
- Un finalised BD-RE/-R, DVD-R/-RW, and CD-R/-RW discs may not play back. Finalise discs before playing.
- Some 8cm BD-REs/8cm BD-Rs cannot be played on this unit.
- When a BD-Java title is played, loading may take longer than a normal title, or some functions may perform slowly.
Files
| Playable Files (Extension) | File specification | Symbols |
| AVI (.avi) | Playable codec : Xvid Maximum size of image : 1920x1080-30 fps | AVI |
| WMV (.wmv) | Playable codec : WMV9 Maximum size of image : 1920x1080-30 fps | WMV |
| JPEG (.jpg) | Maximum Resolution 4272x2848 pixels | JPEG |
| MP3 (.mp3) | MPEG-1 Audio Layer 3. | MP3 |
| WMA * (.wma) | Windows Media Audio | WMA |
| AAC * (.m4a) | MPEG-4 AAC | AAC |
Playable file
| iPod/USB1 | MP3 | WMA | AAC | |
| USB2 | AVI | WMV | JPEG | MP3 |
| CD-R/RW | AVI | WMV | JPEG | MP3 |
- This unit cannot play back files recorded under DRM (Digital Rights Management).
NOTE
- The abovementioned file type may also fail to play back depending on conditions at the time of recording.
- If characters not supported on the menu screen are included in a file name, title, artist name or album title, those are not displayed correctly.
- JPEG format images stored in progressive format cannot be played back.
About playback information
Displays playback information on the information bar and media player screen.
Press DISP..
Disc information is displayed on the TV screen.
- To erase display, press DISP..

Displayed content differs depending on the media being played back. Also, the information displayed during playback.
NOTE
- The (prohibited mark) may appear on the top right of the TV screen during an operation. This means that the operation being conducted is prohibited.
- Depending on the disc, certain operations may not be as described in this guide. Check each disc user guide for more information.
- During playback of a 2-layered disc, pictures may stop momentarily. This happens when the first layer switches to the second layer. This is not a malfunction.
Information bar display
BD
DVD
CD
【Example】When playing a CD
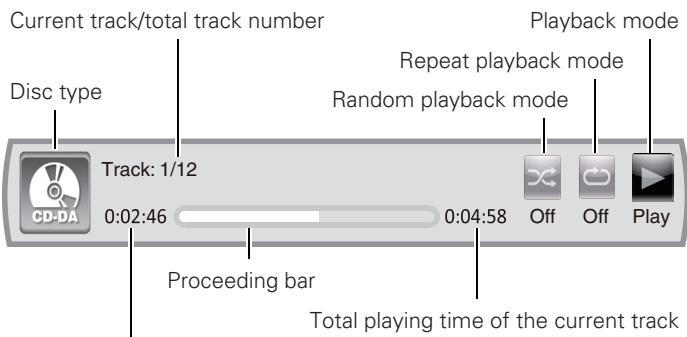
Elapsed time of the current track
Playing Blu-ray Disc, DVD-Video and CD
Prepare for playback.
① Turn on the TV and subwoofer power.
② Change the TV input to the input of this unit.
2 Press POWER to turn on power to the unit.
3 Press DISC to switch the input source to "DISC/USB2".
Insert a disc.
- Press to open/close the disc tray.
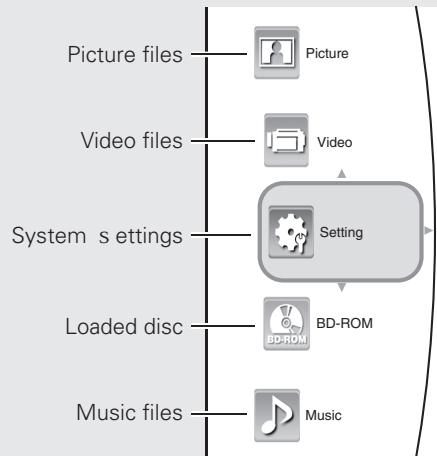
- The home menu will be displayed on the TV screen.
- When the "Optical Disc AutoPlay"
(10 page 34) is set to "ON", playback automatically starts.
Should this happen, ignore step 5.
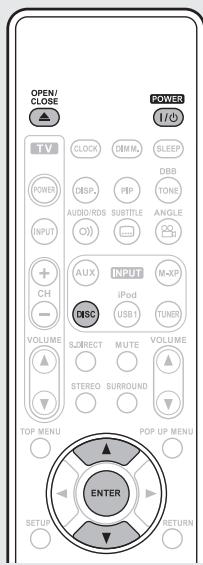

5 Use to select the disc, then press ENTER. Playback starts.
- For some discs, the menu may be displayed first.

- BD-Video or DVD-Video recorded in AVCHD format is displayed as "BD" on the TV screen.
- If a disc that cannot be played back is inserted, the disc tray opens.
Operations using disc menu, top menu, and pop-up menu
Many of BD-Video and DVD-Video contains disc menu, top menu or pop-up menu which guides you through the available functions in the disc.
NOTE
Contents of menus and corresponding menu operations may vary among discs. For details, refer to the disc manual.
□ Using the disc menu
BD
DVD
AVCH
1 During playback, press TOP MENU.
The disc menu is displayed on the TV screen if present on the disc.
2 Use to select the desired item, then press ENTER.
The selected item is played back.
□ Using the title menu
DVD
AVCHD
1 During playback, press POP UP MENU.
The title menu is displayed on the TV screen if present on the disc.
2 Use to select the desired item, then press ENTER.
The selected item is played back.
Using the pop-up menu
This is a special feature available for some BD-Video.
BD
1 During playback, press POP UP MENU.
The pop-up menu is displayed on the TV screen if present on the disc.
2 Use to select the desired item, then press ENTER.
The selected item is played back.
Press POP UP MENU to exit.
The pop-up menu will automatically disappear for some discs.
Enjoying BD-LIVE Features
BD
While playing back a disc compatible with BD-LIVE, you can connect to the BD-LIVE site for Blu-ray Discs via the Internet and display special features and caption information not available on the disc.
Connect a USB memory device on which BD-LIVE data is recorded to the USB2 port on the rear panel.
- The various functions that can be used with BD-LIVE differ depending on the disc used.
- For details on the functions and how to operate them, see the individual disc's on-screen displays and explanations.
- To play back a BD-LIVE-compatible Blu-ray Disc, you should first install an USB memory device in this unit.

- To use BD-LIVE functions, connect this unit to the Internet and make the settings described below, as necessary:
Connections: "Connecting to the network" (10 page 27)
Settings: "Network" (10 page 35)
- Depending on your network environment, in some cases time may be required to connect to the network or connection may not be possible.
NOTE
- Do not remove the USB memory device from this unit while playing a BD-LIVE compatible disc.
- BD-LIVE and Bonus View functions cannot be used with the iPod/USB1 port on the front panel.
NOTE for USB memory device
- Insert or remove a USB memory device while the power is in standby. If you insert a USB memory device while the power is ON, the USB memory device may not be read.
- Connect a USB memory device with a capacity of 1 GB or greater supporting FAT32 and USB 2.0 High Speed (480Mbit/s) to the USB connector.
- If a USB memory device containing other contents (previously recorded) is used, the video and audio may not play back properly.
Operation of USB memory devices is not guaranteed. - Do not use a USB extension cable when connecting a USB memory device to the USB connector.
Playing BD-Video compatible with Bonus View
BD
With a disc that is compatible with bonus view (picture-in-picture), besides the main video (primary video) stored on the disc, you can play back the video director's commentary and simultaneously ongoing sub-story, as well as sub-video such as alternative camera angle (secondary video).
- The playback method, etc., is determined by the disc, and varies depending on the disc.
- For details on the functions and how to operate them, see the individual disc's on-screen displays and explanations.
1 During playback at the scene that contains the secondary video, press PIP.
Then the PIP (picture-in-picture) setting menu is displayed for several seconds on the TV screen.
2 Press to enter the PIP mode menu.
3 Press to select the secondary video, and then press ENTER.
Main video — (primary video)
Sub video (secondary video)
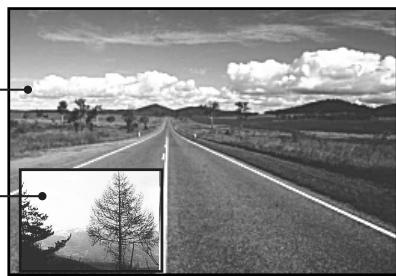
[Example] Bonus view
BD
Playback (Basic)
Preparations (page 12)
Operations possible during playback (1 page 13)
Setting the current time (24-Hour Display)
(11 page 14)
Playable media (page 14)
About playback information ( page 15)
Playing Blu-ray Disc, DVD-Video and CD (page 16)
Stop playback (page 18)
Pause playback (page 18)
Step-by-step playback ( page 18)
Fast forward/fast reverse playback ( page 19)
Slow forward playback (page 19)
□ Skipping to the chapter/track/file (page 19)
Looking for specific sections using the search modes ( page 19)
Repeat playback (page 20)
Random playback ( page 20)
Switching the angle ( page 20)
Switching the audio ( page 21)
Switching the subtitles (page 21)
Surround mode (page 21)
Tuning in radio stations (page 22)
Advanced operations (page 28)
Stop playback
| BD | DVD | AVCHD | CD | AVI | WMV | WMA | MP3 | JPEG |
During playback, press ■.
Playback stops.
BD
DV
AVCHI
1
About resume function
When playback is stopped, the stop position is memorized.
- When playing back data from the stop position, press while stop by the resume function.
To cancel the resume function
Perform one of the following operations.
- During stop, press.
- Switch to the playback contents of the USB memory device connected to a USB2 port.
- Open the disc tray.

The resume function is cancelled when the unit is switched to standby mode, or when the power is switched off by removing the power plug from the wall socket.
NOTE
The resume function does not work with menu playback or BD-J (Bluray Disc Java) compatible disc or CD.
Pause playback
B
DVD
CHD
CD
AVI
W
WI
M
JPEG
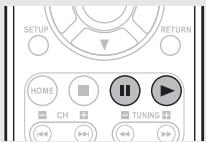
During playback, press I.
The indicator will light on the display.
- Resume normal playback by pressing

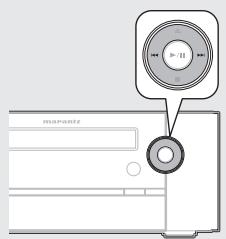
You can also operate via the main unit. In this case, perform the following operations.
During playback, press /II
- Resume normal playback by pressing again.
Step-by-step playback
B
DV
AVCHI
A
WMV
During pause, press II.
The disc advances frame by frame each time the button is pressed.
- Resume normal playback by pressing

You can also operate via the main unit. In this case, perform the following operations.
During playback, press /II
- Resume normal playback by pressing // again.
NOTE
Step-by-step reverse playback is not available with this unit.
Fast forward/fast reverse playback
1 + u1 - 1 = ( 1 + u) u1 < 1 = u
1
A
C
A
V
MP3
During playback, press or
The fast forward/fast reverse speed changes each time the button is pressed.
- Speed varies with the disc and file.
- Resume normal playback by pressing
NOTE
Audio is not output during fast forward/fast reverse of a Blu-ray Disc or DVD.
Slow forward playback
BD DVD AVCHD AVI WMV
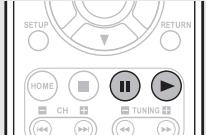
During pause, press
The speed changes each time the button is pressed.
- Resume normal playback by pressing


Audio is not output during slow forward playback.
Skipping to the chapter/track/file
BD
DVD
AVCHD
CD
AVI
WMA
MP3 | JPEG
During playback, press 1 or 2 .
Playback begins from the start of the chapter/track/file being played.
▶▶ Playback begins from the start of the next chapter/track/file.
- Continue pressing and skip to the chapter/ track/file with just the number of times pressed.
NOTE
Skipping to the start of a title may be prohibited depending on the disc.
Looking for specific sections using the search modes
BD
DVD
AVC
1
A
W
:
1 During playback, press SEARCH, and then search mode.
The search mode setting bar is displayed at the top of the screen.
- The search mode changes each time the button is pressed.

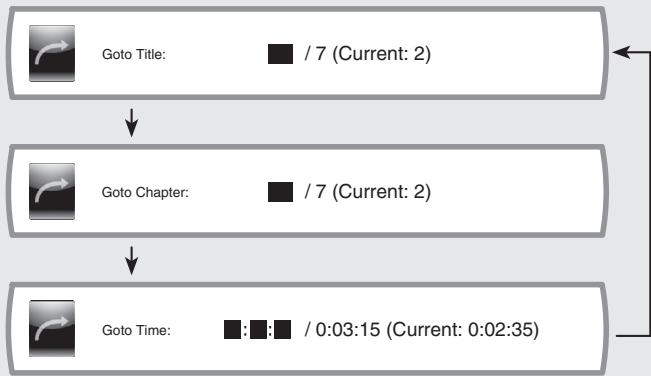
[Content compatible with search mode]
| Search mode\Contents | BDDVDAVCHD | CD | AVIWMWAMMP3 |
| Goto Chapter | ✓ | ||
| Goto Title | ✓ | ||
| Goto Track | ✓ | ||
| Goto Time | ✓ | ✓ | |
| Goto File | ✓ |
![MARANTZ M-ER803 - [Content compatible with search mode] - 1](/content/2025/01/166716/images/7d7c01d158cbf4e6adae7abe33dd012c476a122bea16dbede0d5c11f9f6acfb7.jpg)
When the entry mode for chapter/title/track search continues for about several seconds with no operation, it is canceled.
Playback (Basic)
2 Conducting search condition entry or setting on the search mode setting bar.
Search specified location on completion of entry.
When entering title, chapter, track number
[Example]
For "3" 3, ENTER
For "11" 1,1,ENTER
When entering the elapsed time
You can play a disc from the desired by specifying the elapsed time from the beginning of the current title/disc.
[Example]
For "3 min. 5 sec." 3, 0, 5, ENTER
For "1 hour. 9 min. 35 sec."
1,0,9,3,5,ENTER
![MARANTZ M-ER803 - [Example] - 1](/content/2025/01/166716/images/bad7974bf11bf6fd5a2a518316d9d55b30cb62637d0150ded5323f5928bcc563.jpg)
![MARANTZ M-ER803 - [Example] - 2](/content/2025/01/166716/images/9659516d57d85c9c69c4d35efbf0b2c9a39b34ceca8a48ec4c8b552e2ad0e032.jpg)
![MARANTZ M-ER803 - [Example] - 3](/content/2025/01/166716/images/f990a3f54a7ff81f397eecab7da697f936169d1c2c0e1c91bae34093d6d4e755.jpg)
When clearing the numbers entered
Use to select the number to be cleared, and then press CLEAR.
The selected number will be cleared.
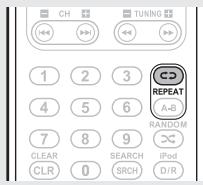
Repeat playback

Press REPEAT.
The "REPEAT" indicator lights on the display and the repeat mode icon is displayed on the TV screen.
- The repeat mode changes each time the button is pressed.
- When REPEAT is pressed during playback, the current setting is displayed.

Track: 1/12
Repeat playback mode
[About repeat mode]
Settable repeat modes vary depending on the disc or file you are playing back.
| Contents Mode | BD DVD AVCHD | CD | AVI WMV WMA MP3 | JPEG | Repeat mode display |
| Repeat Chapter | ✓ | ||||
| Repeat Track | ✓ | ||||
| Repeat File | ✓ | ||||
| Repeat Title | ✓ | ||||
| Repeat All | ✓ | ✓ | ✓ |
□ Stopping repeat playback
Press REPEAT repeatedly until "REPEAT" indicator on the display turns off or "Repeat Off" is displayed on the TV screen.
NOTE
- Some repeat modes may not be accessible depending on the disc.
- Depending on the disc, even when set to repeat playback, the disc may not return to the start of title or chapter, and may advance to the next scene.
- The "Repeat Off" setting is not available for repeat modes of a USB memory device connected to a iPod/USB1 port on the front panel.
Repeat playback between specified points (A-B repeat)


1 During playback, press REPEAT A-B at the desired starting point (A).
The "A-" indicator lights on the display.
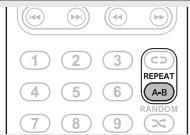
2 Press the REPEAT A-B again at the desired ending point (B).
The "B" indicator lights on the display, and A-B repeat playback will commence.
- To resume normal playback, press REPEAT A-B repeatedly until "Repeat Off" is displayed.

- Set the ending point (B) setting at least 5 seconds after the starting point (A) setting.
- If you perform a search operation during A-B repeat playback, A-B repeat playback is canceled.
- A-B repeat playback may not be enabled depending on the scene.
- A-B repeat playback of AVI/WMV/WMA/MP3/JPEG files is not available.
- A-B repeat playback is not available during repeat playback.
- A-B repeat playback may not be enabled depending on the AVCHD file.
- For some BD-Video discs which support Java applications, the A-B repeat function will not work.
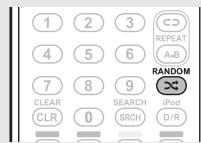
Random playback

During playback, press RANDOM.
The "RANDOM" indicator lights on the display and is displayed on the TV screen.
- When RANDOM is pressed during playback, the current setting is displayed.
- Stopping random playback
Press RANDOM repeatedly until "RANDOM" indicator on the display turns off or "Random Off" is displayed on the TV screen.
NOTE
- Random playback may not be enabled depending on the disc.
- Random playback is repeated until "Random Off" is set.
Switching the angle
BD
DVD
During playback of a Blu-ray Disc or DVD-Video recorded with several camera angles, you can change the angle.
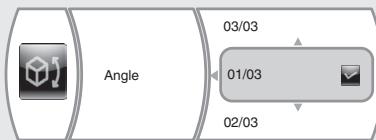
1 During playback, press ANGLE. The angle number currently being played is displayed.
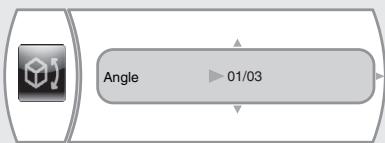
Press
Then audio menu is displayed.
3 Use to select angle and then press ENTER.
NOTE
Angle changing may be restricted, depending on the disc.
Switching the audio
BD
DVD
AVCHD
With discs and files that have multiple audio track recording, you can change the audio during playback.
With Blu-ray Disc, you can set sub-track audio such as interactive audio and audio commentary, etc., with "Secondary".
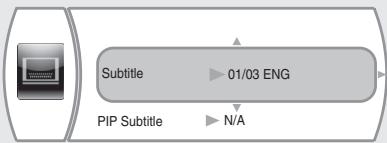
1 During playback, press AUDIO/RDS.
The audio number currently being played is displayed.

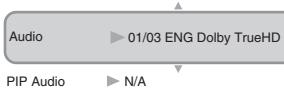
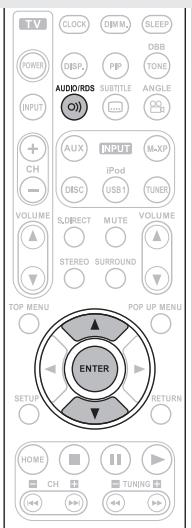
2 Use to select "Audio" or "PIP Audio", and then press ENTER.
【When "Audio" is selected】
- If multiple audio items are recorded, "the current audio number/number of recorded audio items" is displayed.
3 Use to select your desired audio language, and then press ENTER.

- Depending on the disc, audio switching may be restricted to operation of the disc menu. In this case, switch the audio on the disc menu.
- Depending on the Blu-ray Disc, even if picture-in-picture playback is set to "Off", Secondary Audio only may be output.
Playback (Basic)
Switching the subtitles
BD
DVD
AVCHD
During playback of a disc or file with recorded subtitles, you can switch subtitle on/off as well as subtitle language.
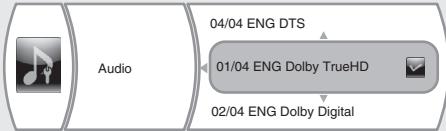
1 During playback, press SUBTITLE.
The subtitle number currently being played is displayed.
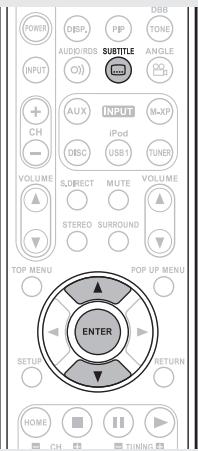
2 Use to select "Subtitle", "PIP Subtitle" and then press ENTER.

【When "Subtitle" is selected】
3 Use to select your desired subtitle language, and the press ENTER.

- Depending on the disc, subtitle switching may be restricted to operation of the disc menu. In this case, switch the subtitles on the disc menu.
- When the primary and the secondary subtitles are all switched, both will be displayed on the TV screen. If confused, set either of subtitles to Off.
Surround mode
When the input source is "DISC/USB2", virtual surround processing is performed for playback.
【Default】Stereo mode
Dolby Virtual Speaker playback
This delivers a full surround sound experience from two stereo speakers.
Sound is output from the front left and right speakers.
- If multichannel sources are played, they are mixed down to 2-channel audio.
Surround mode
Press SURROUND.
The "V5" indicator lights on the display. Dolby virtual speaker playback begins.
Dolby Headphone playback
You can enjoy listening to multi-channel surround sound through headphones using this mode.
1 Connect the headphone.
Press SURROUND.
The "H" indicator lights on the display.
Dolby Headphone playback begins.
Stereo playback
This is the mode for playing in stereo.
Sound is output from the front left and right speakers.
- If multichannel sources are played, they are mixed down to 2-channel audio.
Press STEREO.
The "STEREO" indicator lights on the display. Stereo playback begins.
Tuning in radio stations
Listening to FM/AM broadcasts
1 Press TUNER to switch the input source to "TUNER".
2 Press TUNER to select the reception band.

- If MODE on the main unit is pressed, the same function as with the remote control unit can be obtained.
FM AUTO
Select to automatically receive and listen to analog stereo or analog monaural FM broadcasts.
FM MONO
Select to receive and listen to analog stereo as an analog monaural FM broadcast.
AM
When listening to an AM broadcast.
3 Tune in the desired broadcast station.
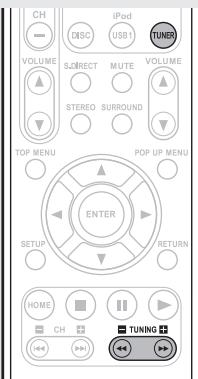

① To tune in automatically (Auto tuning)
Press and hold in TUNING + or TUNING - to select the station you want to hear.
- Stations whose signal is weak cannot be tuned in.
- To stop auto tuning, press TUNING + or TUNING -
② To tune in manually (Manual tuning)
Use TUNING + or TUNING - to select the station you want to hear.
- You can also perform the same operations by pressing on this unit.

- A humming sound may be heard when using a TV nearby while receiving AM programs. If this happens, move the system as far from the TV as possible.
- If the desired station cannot be tuned in with auto tuning, tune it in manually.
Preseting FM stations automatically (Auto preset)
Up to 40 stations can be preset.
Auto preset is not possible with AM broadcast stations.
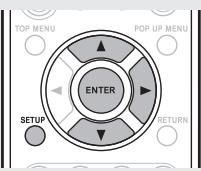
1 Press SETUP.
- If you perform operations on this unit, press and hold MODE for 3 seconds and longer.
2 Use to select "TUNER SETUP", then press ENTER or .
3 Use to select "FM AUTO PRESET", then press ENTER or .
"FM AUTO PRESET" display flashes.
4 Press ENTER while "FM AUTO PRESET" is flashing.
Broadcast stations are preset automatically.
Canceling auto presetting
Press TUNER, SETUP or
- If you perform operations on this unit, press MODE or ■.

Broadcast stations whose antenna signal are weak cannot be preset automatically. If you wish to preset such stations, tune them in manually.
NOTE
When auto preset is performed, the previously registered preset details are erased. The newly preset FM station is newly registered to the erased preset number.
Givingsationnamestopresetchannels
Names of up to 8 characters can be input.
1 Tune in the preset channel you want to name.
Press ENTER twice.
The display switches to the station name input display.
Input the station name.
- Buttons that can be operated are as follows.
: Selects the character.
: Moves the cursor to the left or right.
CLEAR : Deletes the currently selected character.
CLEAR (Press and hold): All text is erased.
- Characters that can be input are as follows.
$$ A \sim Z, 0 \sim 9, ^ {\wedge^ {\prime}} (.) * +, -, / = (\text {s p a c e}) $$
- You can also perform the same operations as and on the remote control unit with the MODE button and the INPUT button on this unit, respectively.
Press ENTER.
The characters you have input are entered.
To give names to other stations, repeat steps 1 to 4.
- Presetting FM/AM stations manually (Manual preset)
Your favorite broadcast stations can be preset so that you can tune them easily.
This unit can be preset with a total of 40 FM and AM broadcast stations.
1 Tune in the station you want to preset.
2 Press ENTER. The minimum number display "P- -" for the unregistered preset flashes.
3 Use , CH-, CH + or 0-9 to select the number to be preset, then press ENTER.
The reception frequency and reception mode are preset and the display switches to the station name input display.

You can also select preset numbers with 1 1 or 2 1 on this unit.
NOTE
When the registered preset number is selected, " * " is displayed. To overwrite this preset number, press ENTER.
FM*P01 106.95MHz
A Input the station name.
- Names of up to 8 characters can be input.
- Buttons that can be operated are as follows.
: Selects the character.
: Moves the cursor to the left or right.
CLEAR : Deletes the currently selected character.
CLEAR (Press and hold) : All text is erased.
- Characters that can be input are as follows.
A Z, 0 9, ^(.) * + , -· / = (space)
- You can also perform the same operations as and on the remote control unit with the MODE button and the INPUT button on this unit, respectively.

- If you do not want to input a station name, press ENTER without inputting anything else.
- If you make a mistake when inputting, perform the procedure again. Whatever was previously input is overwritten.
Press ENTER. The characters y
- To give names to other stations, repeat steps 1 to 5.
Listening to preset stations
Press CH - ,CH + or 0-9 to select the desired preset channel.

You can also select preset numbers with 1 or 2 on this unit.

Canceling preset channels
① Receive the preset channel that you want to erase.
② Press CLEAR.
③ When "DELETE OK?" is flashing, press either CLEAR or ENTER.
RDS (Radio Data System)
RDS (works only on the FM band) is a broadcasting service which allows a station to send additional information along with the regular radio program signal.
The following four types of RDS information can be received with this unit:
RDS Search
Use this function to automatically tune to FM stations that provide the RDS service.
Press TUNER to select "FM".
2 Press AUDIO/RDS.
3 Use to select "RDS SEARCH", then press ENTER or .
4 Press ENTER or △.
Automatically begin the RDS search operation.
- If no RDS station is found, "NO STATION" is displayed.
Viewing information during reception
Press DISP. while receiving a RDS to display the information currently being broadcast.


*Program service name
- If a station name is entered, it is displayed.
PTY (Program Type)
PTY identifies the type of RDS program.
The program types and their displays are as follows:
| NEWS | News | WEATHER | Weather |
| AFFAIRS | Current Affairs | FINANCE | Finance |
| INFO | Information | CHILDREN | Children's programmes |
| SPORT | Sports | ||
| EDUCATE | Education | SOCIAL | Social Affairs |
| DRAMA | Drama | RELIGION | Religion |
| CULTURE | Culture | PHONE IN | Phone In |
| SCIENCE | Science | TRAVEL | Travel |
| VARIED | Varied | LEISURE | Leisure |
| POP M | Pop Music | JAZZ | Jazz Music |
| ROCK M | Rock Music | COUNTRY | Country Music |
| EASY M | Easy Listening | NATION M | National Music |
| Music | OLDIES | Oldies Music | |
| LIGHT M | Light Classical | FOLK M | Folk Music |
| CLASSICS | Serious Classical | DOCUMENT | Documentary |
| OTHER M | Other Music |
PTY search
Use this function to find RDS stations broadcasting a designated program type (PTY).
For a description of each program type, refer to "PTY (Program Type)".
1 Press TUNER to select "FM".
2 Press AUDIO/RDS.
3 Use to select "PTY SEARCH", then press ENTER or D.
4 Use to call out the desired program type.
5 Press ENTER or D. Automatically begin the PTY search operation.
- If no program of the specified type is found, "NO STATION" is displayed.

TP (Traffic Program)
TP identifies programs that carry traffic announcements.
This allows you to easily find out the latest traffic conditions in your area before leaving home.
TP search
Use this function to find RDS stations broadcasting traffic programs (TP stations).
| 1 Press TUNER to select “FM”. | |
| 2 Press AUDIO/RDS. | |
| 3 Use △▽ to select “TPSEARCH”, then press ENTER or ▷. | |
| 4 Press ENTER or ▲ ▷. Automatically begin the TP search operation. ·“NO STATION” is displayed when there is no traffic information broadcast station. |
RT (Radio Text)
RT allows RDS stations to send text messages that appear on the display.

- When the RT mode is turned on while an RDS broadcast station not offering an RT service is tuned in, "NO TEXT" is displayed on the display.
- The RT mode cannot be set in the AM band or for FM stations not offering RDS broadcasts.
NOTE
The operations described below selecting "RDS Search" will not function in areas in which there are no RDS broadcasts.
CT (Clock Time)
Use this to correct the time of the clock on this unit.
① During CT reception, press SETUP.
The "AUTO Adj mm:ss" is displayed.
② Press ENTER to set.
The "mm:ss" is displayed.
- The time on the set's internal clock is updated to the currently displayed "CT" time.

Do not operate any buttons while the time is being updated. If buttons are operated, CT reception is not possible and the time is not updated.
Advanced connections
This section explains how to connect a USB memory device, iPod, portable player and the network. For other connections, see the sections below.
□ Connecting speakers ( page 8)
Connecting a TV ( page 9)
- Connecting a set-top box (Satellite tuner/Cable TV) (12 page 10)
□ Connecting an antenna (page 10)
□ Connecting the power cord ( page 11)
Connecting an iPod or USB memory device to the iPod/USB1 port
You can enjoy music, stored on an iPod or USB memory device.
NOTE
- iPod can only be connected to the iPod/USB1 port on the front panel.
Do not connect an iPod to the USB2 port on the rear panel. - A computer can not be connected to and operate the unit via its USB port.
- Do not use an extension cable when connecting a USB memory device.
- For details about USB memory devices, see "Playing a USB memory device" (12 page 29).
- When connecting an iPhone to this unit, place the iPhone at least 20cm away from this unit. If the iPhone is placed too close to this unit, noise may be output from this unit if a phone call is received by the iPhone.
Cables used for connections
To connect an iPod to this unit, use the USB cable supplied with the iPod.


Marantz does not guarantee that all USB memory devices will operate or receive power. When using a portable USB connection type HDD of the kind to which an AC adapter can be connected to supply power, use the AC adapter.
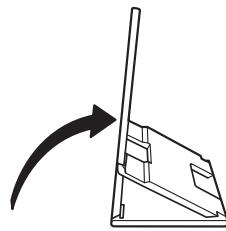
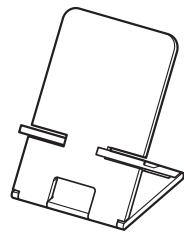
Using the iPod stand
You can set your iPod or iPhone on the supplied iPod stand.
iPod stand assembly
Use the procedure below to set up the iPod stand.
①
②
③
NOTE
- Make sure to place the iPod stand on a flat surface.
- Do not operate the iPod or iPhone while it is set on the iPod stand. Doing so could cause the iPod or iPhone to fall off from the stand.
- Some iPod models cannot be set on the iPod stand because the underside of the iPod is blocked when the iPod cable is connected.
- Make sure to disable the iPhone vibration function before you set it on the iPod stand. If the iPhone vibrates when it is set on the stand, it could fall off from the stand and be damaged.
- Do not use the iPod stand for purposes other than the one it is intended to perform.
- Marantz will accept no responsibility whatsoever for any damage of equipment connected to this unit while it is used.
Connecting an iPod or USB1 memory device to the iPod/USB1
port
Supported iPod models

iPod touch
2nd generation 8GB 16GB 32GB 64GB

iPod
5th generation (video) 60GB 80GB

iPod nano
2nd generation (aluminum) 2GB 4GB 8GB

iPod touch 1st generation 1GB 16GB 32GB

iPod 5th generation (video) 30GB

iPod nano 1st generation 1GB 2GB 4GB

iPod classic 120GB 160GB (2009)

iPod nano 5th generation (video camera) 8GB 16GB

iPhone 4GB 8GB 16GB

iPod classic 160GB (2007)

iPod nano 4th generation (video) 8GB 16GB

iPod classic 80GB

iPod nano 3rd generation (video) 4GB 8GB

iPhone 3G 8GB 16GB

iPhone 3GS 16GB 32GB
Connecting a USB memory device to the USB2 port
You can enjoy music, stored on a USB memory device.
NOTE
- iPod cannot be connected.
- A computer can not be connected to and operate the unit via its USB port.
- Do not use an extension cable when connecting a USB memory device.
- For details about USB memory devices, see "Playing files" (10 page 30).
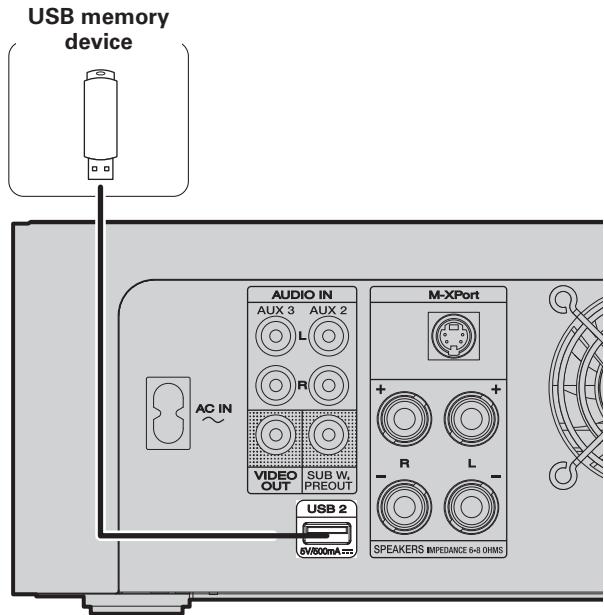
USB memory device for BD-LIVE
To enjoy the BD-LIVE functions, connect a USB memory device (1GB capacity or greater) supporting FAT32 and USB 2.0 High Speed (480 Mbit/s) to the USB2 connector ( page 17).
NOTE
The BD-LIVE function cannot be used with the iPod/USB1 port on the front panel.
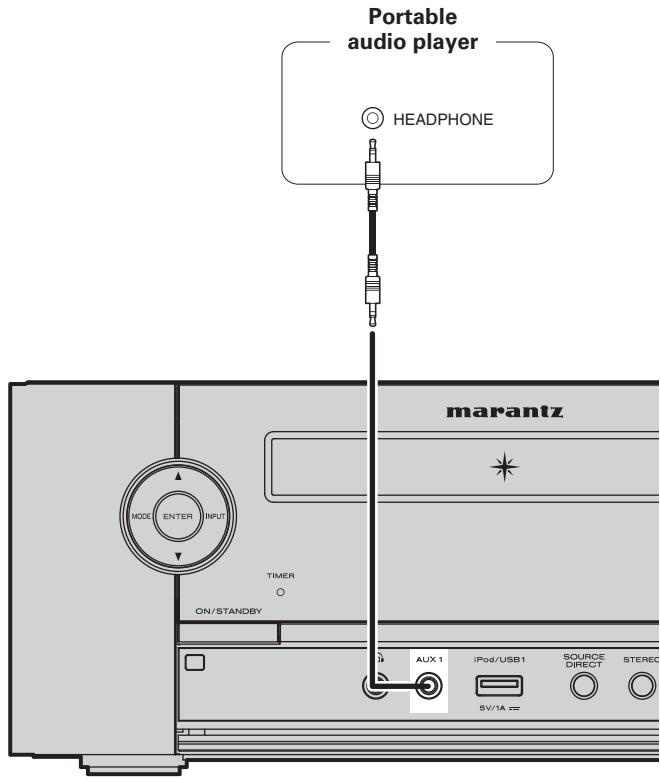
Connecting a portable audio player
Your portable audio player can be connected to this unit's portable jack to play tracks on the portable audio player.
Cables used for connections

Audio cable (sold separately)
Connecting to the network
- You can use a disc which offers BD-LIVE function by connecting the unit to the Internet (12 page 17).
- See "Network" (13 page 35) for more information on network setting.
Cables used for connections
For connections to the Internet, contact an ISP (Internet Service Provider) or a computer shop.
Required system
Broadband internet connection
Modem
Device that connects to the broadband circuit and conducts communications on the Internet.
A type that is integrated with a router is also available.
Router
- When using this unit, we recommend you use a router equipped with the following functions:
Built-in DHCP server
- This function automatically assigns IP addresses on the LAN.
Built-in 100BASE-TX switch
- When connecting multiple devices, we recommend a switching hub with a speed of 100 Mbps or greater.
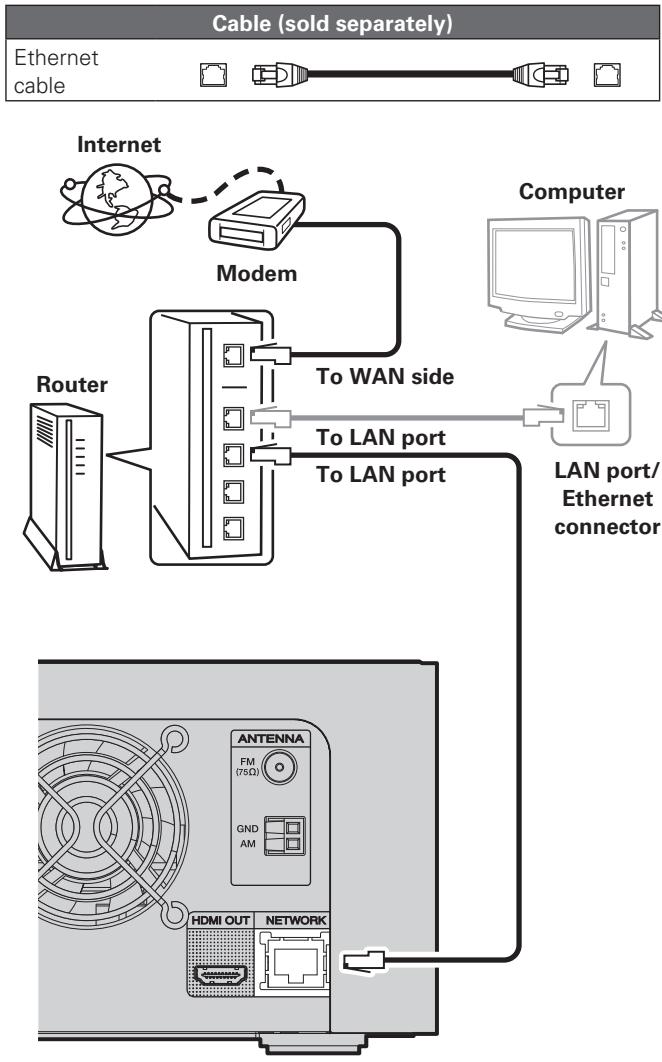
Ethernet cable
(CAT-5 or greater recommended)
- Use for wired LAN.
- Use only shielded STP or ScTP LAN cable which is available at retailer.
- Some flat type Ethernet cables are easily affected by noise.
- We recommend using a normal type cable.

- If you have an Internet provider contract for a line on which network settings are made manually, make the settings at "Network" (10 page 35).
- With this unit, it is possible to use the DHCP and Auto IP functions to make the network settings automatically.
- When using this unit with the broadband router's DHCP function enabled, this unit automatically performs the IP address setting and other settings.
When using this unit connected to a network with no DHCP function, make the settings for the IP address, etc., at "Network" (page 35).
- When setting manually, check the setting contents with the network administrator.
NOTE
- A contract with an ISP is required to connect to the Internet.
- No additional contract is needed if you already have a broadband connection to the Internet.
- The types of routers that can be used depend on the ISP. Contact an ISP or a computer shop for details.
- Marantz assumes no responsibility whatsoever for any communication errors or troubles resulting from customer's network environment or connected devices.
- This unit is not compatible with PPPoE. A PPPoE-compatible router is required if you have a contract for a type of line set by PPPoE.
- Do not connect an ETHERNET connector directly to the LAN port/ Ethernet connector on your computer.
Advanced operations
Basic operations (page 12)
Playback (Basic) (page 18)
Surround mode ( page 21)
Tuning in radio stations (page 22)
Playing an iPod® (page 28)
Playing a USB memory device ( page 29)
Playing files ( page 30)
Playing a portable audio player (page 32)
Playing an iPod®
Connect an iPod directly to the iPod/USB1 port to play back
You can use the USB cable provided with the iPod® to connect the iPod with the unit's USB1/iPod port and enjoy music stored on the iPod.
- This unit supports audio playback from the iPod (fifth generation or later), iPod nano, iPod classic, iPod touch and iPhone (it is not compatible with iPod shuffle).
The factory setting is "Direct mode".
1 Connect the iPod® to the iPod/USB1 port (page 25 "Connecting an iPod or USB memory device to the iPod/USB1 port").
2 Press POWER to turn on power to the unit.
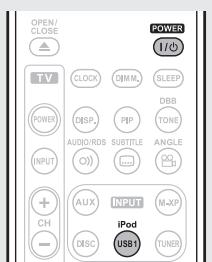
3 Press iPod/USB1 to switch the input source to "iPod/USB1".
4 Press iPod D/R to select the display mode.
- There are two modes for displaying the contents recorded on the iPod.
Remote mode Display iPod information on the display of this unit.
- English letters, numbers and certain symbols are displayed. Incompatible characters are displayed as ". ." (period).
Direct mode Display iPod information on the iPod screen.
- "Direct iPod" is displayed on the display of this unit.
- The Direct mode is not supported on fifth generation iPod or first generation iPod nano.
| Display mode | Remote mode | Direct mode | |
| Playable files | Music file | ✓ | ✓ |
| Video file | * | ||
| Active buttons | Remote control unit (This unit) | ✓ | ✓ |
| iPod® | ✓ | ||
- Only the sound is played.
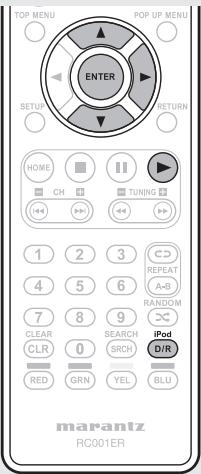
Use to select the item, then press ENTER or to select the file to be played.
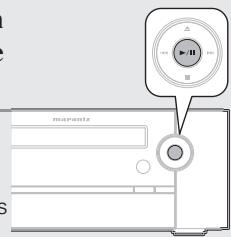
6 Press ENTER, or . Playback starts.
- You can also perform the same operations by pressing on this unit.

You can also perform the same operations as on the remote control unit with the MODE button on this unit, respectively.
NOTE
- Depending on the type of iPod and the software version, some functions may not operate.
- Note that Marantz will accept no responsibility whatsoever for any problems arising with the data on an iPod when using this unit in conjunction with the iPod.
iPod operation
| OPEN OBSERVATION | OPEN OBSERVATION | CLOSE OBSERVATION |
| CLOSE OBSERVATION | CLOSE OBSERVATION | CLOSE OBSERVATION |
| SUBJECTIVE OBSERVATION | SUBJECTIVE OBSERVATION | ANGULAR OBSERVATION |
| ANGULAR OBSERVATION | ANGULAR OBSERVATION | MID-OF OBSERVATION |
| IF PREDI SUBJECTIVE OBSERVATION | IF PREDI SUBJECTIVE OBSERVATION | MID-OF SUBJECTIVE OBSERVATION |
| VOLUNT SUBJECTIVE OBSERVATION | SUBJECTIVE SUBJECTIVE OBSERVATION | VOLUNT SUBJECTIVE OBSERVATION |
| STUDIO SUBJECTIVE OBSERVATION | STUDIO SUBJECTIVE OBSERVATION | VOLUNT SUBJECTIVE OBSERVATION |
| Operation buttons | Function |
| △▽◁▷ | Cursor operation |
| ENTER | Enter setting |
| iPod D/R | Direct/Remote mode switching |
| RETURN | Return |
| RANDOM | Shuffling playback |
| REPEAT | Repeat playback |
| ←►►(Press and hold) | Manual search (fast-reverse/fast-forward) |
| ► | Playback |
| I←►►I | Skipping to the file |
| II | Pause |
| ■ | Stop |
| DISP. | Switches between title name/artist name and title name/album name displays (in Remote mode) |
Playing a USB memory device
There are two methods for USB memory device playback.
Use the iPod/USB1 port on the front panel
Use the USB2 port on the rear panel
page 30 "Playing files")
NOTE
- Note that Marantz will accept no responsibility whatsoever for any problems arising with the data on a USB memory device when using this unit in conjunction with the USB memory device.
- USB memory devices will not work via a USB hub.
- Marantz does not guarantee that all USB memory devices will operate or be supplied power. When using a USB portable hard disk that can draw power from an AC adapter, we recommend using the AC adapter.
- It is not possible to connect and use a computer via the USB port of this unit using a USB cable.
- Copy protected files such as DRM (Digital Rights Management) protected files are not playable.
Use the iPod/USB1 port on the front panel
Files stored on USB memory devices created in the formats below can be played.
| Playable Files (Extension) | File systems | Sampling Frequency | Resolution/ size of image/ Bitrate | Maximum number of playable files and folders | Tag data |
| AVI (.avi) | (No Play) | - | - | - | - |
| WMV (.wmv) | (No Play) | - | - | - | - |
| JPEG (.jpg) | (No Play) | - | - | - | - |
| MP3 (.mp3) | FAT16/32 | 32 / 44.1 / 48 kHz | 32-320 kbps | File: 6000 Folder: 2000 | ID3-Tag (Ver. 2) |
| WMA (.wma) | FAT16/32 | 44.1 / 48 kHz | 48-192 kbps | META Tag | |
| AAC (.m4a) | FAT16/32 | 44.1 / 48 kHz | 64-192 kbps | - |
NOTE
- If the USB memory device is divided into multiple partitions, only the top partition can be selected.
- It is not possible to play back LPCM, JPEG or DivX files recorded on a USB memory device.
- The characters that can be displayed are as follows:
| A-Z | a-z | 0-9 |
! " # $ % & ; ; < > ? @ [] _ { } ^ { \prime } | { } ^ { \sim } \wedge ^ { \prime } ( ) * + , - . / = (space)
1 Connect the USB memory device to the iPod/USB1 port (page25“Connecting an iPod or USB memory device to the iPod/USB1 port”).
2 Press POWER to turn on power to the unit.
3 Press iPod/USB1 to switch the input source to "iPod/USB1".
4 Use to select the item, then press ENTER or to select the file to be played.
Press ENTER, or . Playback starts.
- You can also perform the same operations by pressing on this unit.
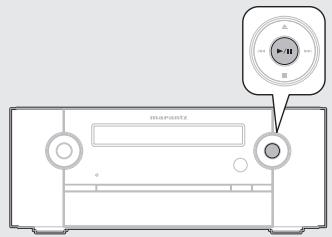
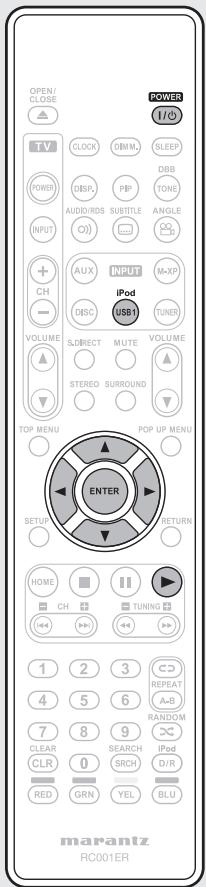

You can also perform the same operations as on the remote control unit with the MODE button on this unit, respectively.
USB operation
| TOP MENU | FOR UP MENU | ||
| ENTER | RETURN | ||
| 1 | 2 | 3 | 4 |
| 5 | 6 | 7 | 8 |
| 1/2 | 1/3 | 1/4 | 1/5 |
| CLEAR | SORT | ||
| CLRA | SMCH | ||
| RWD | GRN | YELI | BLU |
| Operation buttons | Function |
| △▽◇ | Cursor operation |
| ENTER | Enter setting |
| RETURN | Return |
| RANDOM | Random playback |
| REPEAT | Repeat playback |
| ←→(Press and hold) | Manual search (fast-reverse/fast-forward) |
| ▶ | Playback |
| I←→I | Skipping to the file |
| II | Pause |
| ■ | Stop |
| DISP. | Switches between title name/artist name and title name/album name displays (in the playback mode) |
Playing files
- You can play music files such as MP3 and WMA, picture files such as JPEG and video files such as AVI and WMV recorded onto a CD-R/-RW or a USB memory device (USB2 port only).
- USB memory device and CD-R/-RW disc created in the format described below can be played.
CD-R/-RW and USB2 port
| Playable Files (Extension) | File systems | Sampling Frequency | Resolution/ size of image/ Bitrate | Maximum number of playable files and folders |
| AVI (.avi) | FAT32 | - | 1920x1080 / 30 fps | Files: 999 Folder: 999 |
| WMV (.wmv) | FAT32 | - | 1920x1080 / 30 fps | |
| JPEG (.jpg) | FAT32 | - | 4272x2848 pixels | |
| MP3 (.mp3) | FAT32 | 44.1 / 48 kHz | Upto 320 kbps | |
| WMA (.wma) | FAT32 | 44.1 / 48 kHz | Upto 192 kbps | |
| AAC (.m4a) | (No Play) | - | - | - |

- CD-R/-RW discs recorded with UDF or ISO9660 format can be played back.
- The characters that can be displayed are as follows:
| A-Z | a-z | 0-9 | - |
If data that has more than 999 files is played back, the display contents may not be shown correctly.
Files playback
1 Press DISC to switch the input source to "DISC/USB2".
2 In the stop mode, load a disc or insert a USB memory device into the USB2 port.
The music, picture and video file symbols, etc are displayed on the home menu.
- If a USB memory device is connected to the USB2 port on the rear panel during disc playback, playback of the disc stops, and the home menu is displayed.
[Example] When a USB memory device is inserted
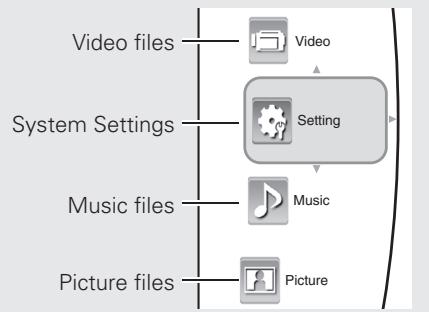
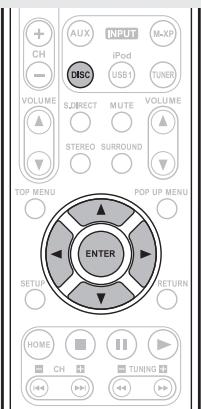
3 Press to select the type of file to be played, then press .
The play menu of the selected type of file is displayed.
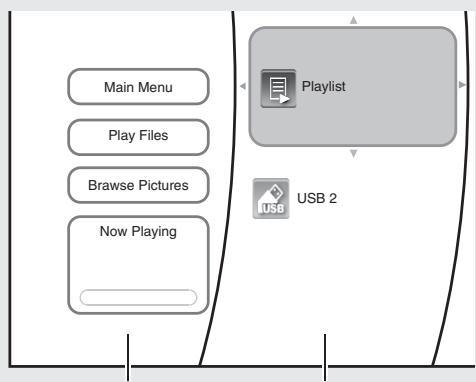
Play menu side
Media menu side
4 Use to select the desired media in the media menu, then press .
The folder and files recorded onto the selected media are displayed.
NOTE
- Even if a CD-R/CD-RW or a USB memory device contains a mix of music, picture and video files, you will only be able to browse the selected type of files (music, picture or video).
- When there are no files to be played onto the selected media or folder, "Empty" will be displayed.
Use to select the desired file or folder, then press ENTER.
If file is selected, the corresponding dialog box is displayed.
6 Press to go to "play menu side".
- The number of times needs to be pressed until reaching the "play menu side" differs depending on the folder construction.
7 Use to select "Play Files", then press ENTER.
Play mode is displayed.
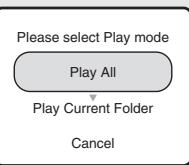
8 Use to select the desired mode, then press ENTER.
Only the selected file will be played (and the file information will be displayed on the TV screen when playing a music file).
【Example】When playing a music file
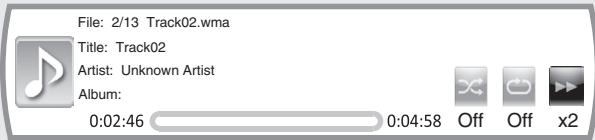
Playing Files
To make a playlist
1 "Files playback" (page 30) perform steps 1-4.
2 Use to select the desired file or folder, then press ENTER.
The corresponding dialog box is displayed depending on whether the playlist is selected as a media or not as follows.
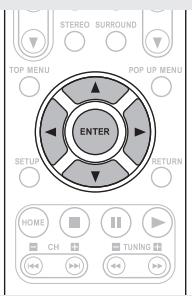
- When selecting the optical disc
- When the file added to the or the USB2 playlist is selected
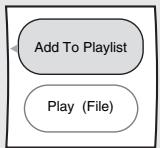
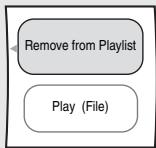
NOTE
When the JPEG file is selected as a type of file to be played, the "Play(File)" cannot be selected.
3 Use to select the desired item in the dialog box, then press ENTER.
□ When selecting "Remove from Playlist"
- The selected file is cleared in the playlist.
- Repeat the above steps 2 and 3 until other files are cleared.
When selecting "Add To Playlist"
- The selected file is added in the playlist.
- Repeat the above steps 2 and 3 until other files are added.
NOTE
- When a disc is unloaded or the USB memory device disconnected, the files are all cleared in the playlist.
- When the home menu reappears, all picture (JPEG) files are cleared in the playlist.
Selecting an item in the play menu
A
A
W
1
The items listed in the play menu may vary depending on the operation status and the selected media, etc.
NOTE
- During playback of file, press to display the play menu, etc.
- In the stop mode, use to select an item in the play menu, then press ENTER.
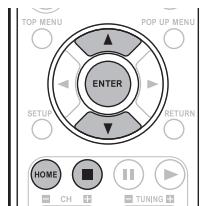
□ When selecting "home menu" with the HOME button
The home menu will be returned to.
□ When selecting "Play (File)"
- Press to select the desired play mode in the play menu, then press ENTER. Then playback will start according to the selected play mode.
NOTE
- When playing JPEG files, each file is displayed for the time interval you specified.
- The selectable play mode may vary depending on the operation status and the selected media, etc.
□ When selecting "Browse Pictures" or the "Browse Music"
- The JPEG file or the music file will be changed to as the type of file to be played.
□ When selecting "Add all to playlist"
- All the files are added in the playlist.
NOTE
You cannot add a folder in the playlist.
□ When selecting "Remove all from playlist"
- All the files are cleared in the playlist.
□ When selecting "Previous folder"
Each time this item is selected, the previous folder or the previous menu will be returned to.
□ When selecting "Now Playing"
The playback status for music files is displayed.
Stop playback (page 18) Press
Pause playback (page 18) Press
- You can also perform the same operations by pressing on this unit.
Step-by-step playback ( page 18) During pause, press
- You can also perform the same operations by pressing on this unit.
Fast forward/fast reverse playback ( page 19)
During playback, press
Slow forward playback ( page 19) During pause, press
□ Skipping to the file (page 19) During playback, press I▶▶I.
Repeat playback (page 20) Press REPEAT
Random playback ( page 20) Press RANDOM.
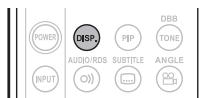
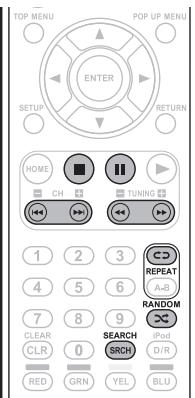
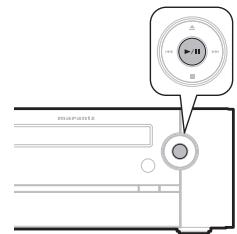
Rapid playback JPEG
During playback, press
Each time is pressed, the time interval to display is shortened as follows:

Displaying file information

pac
e 15)
AVI
WMV
JPEG
During playback, press DISP.
Playing the desired section of file ( page 19) During playback, press SEARCH.
To change the effect on displaying pictures
JPEG
You can display the JPEG files at the slide show options you select.
1 During playback, press POP UP MENU.
The slide show menu is displayed for several seconds.
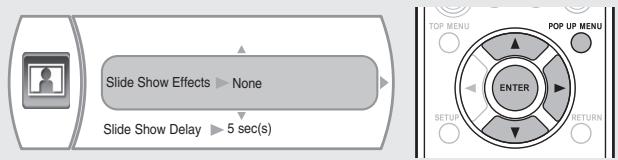
2 Use to select the desired item, then press. The selected item menu is displayed.
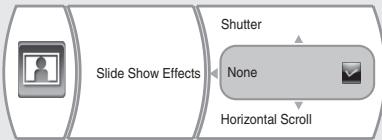
3 Use to select the desired option, then press ENTER.
When selecting the slide show effects
- You can select the desired of different display modes as follows:

When selecting the slide show delay
- You can select the desired of different time intervals to display the JPEG files as follows:

Playing both the music files and the JPEG files simultaneously
WMA
MP3
JPEG
1 During playback of music files, press ENTER.
The play menu, etc are displayed.
Use to select "Browse Pictures" in the play menu, then press ENTER.
3 Use to select "USB2" in the media menu, then press .
4 Use to select the desired JPEG file or folder, then press ENTER.
If file is selected, the corresponding dialog box is displayed.
Press to go to "play menu side".
- The number of times needs to be pressed until reaching the "play menu side" differs depending on the folder construction.
6 Use to select "Play Files", then press ENTER.
Play mode is displayed.
Please select Play mode
Play All
Play Current Folder
Cancel
To control the music files
① Press to stop the playback of the JPEG files.
The play menu, etc. will be displayed.
② Use to select the "Now Playing" in the play menu, then press ENTER.
The music file information is displayed and you can control the music files.
Playing a portable audio player
Your portable audio player can be connected to this unit's portable jack to play tracks on the portable audio player.
1 Connect the portable audio player to the AUX1 jack (page 26 "Connecting a portable audio player").
2 Press POWER to turn on power to the unit.
3 Press AUX to switch the input source to "AUX 1".
4 Play the portable audio player. The player's audio is output.
- Also read the portable audio player's operating instructions.
NOTE
When using the portable player's headphone jack, set the volume on the portable player to an appropriate level.
How to make detailed settings
Menu map
For menu operation, connect a TV to this unit and display the menu on the TV screen. For menu operations, see the following page.
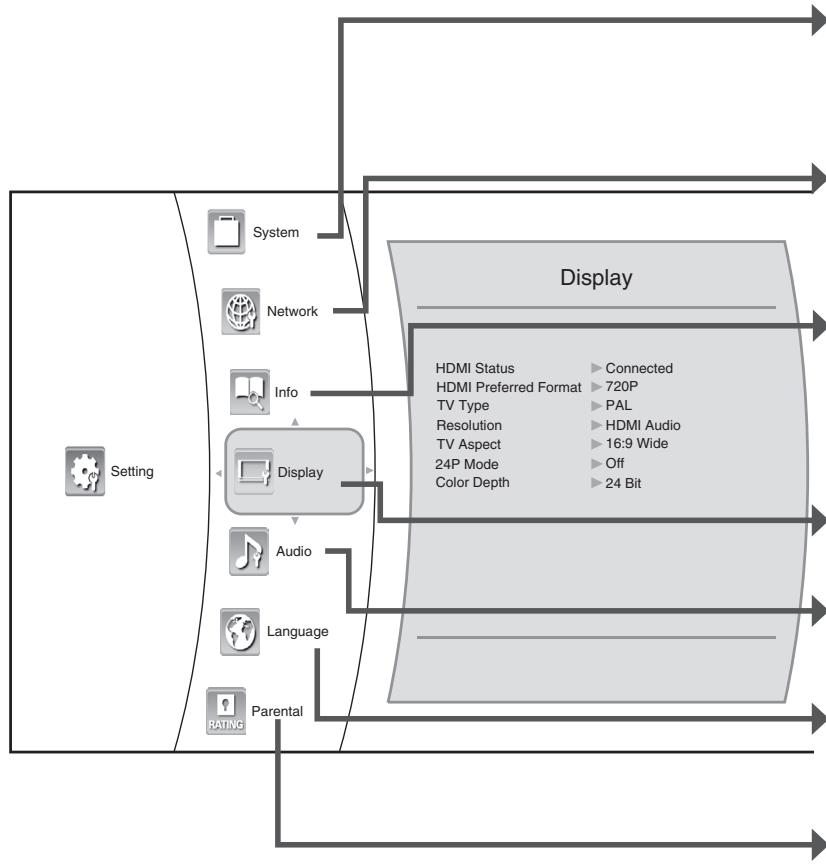
| Setting items | Detailed items | Description | Page |
| System | Optical Disc AutoPlay | Set whether to automatically play a disc or not when loading it or turning on the Power under the condition that it is loaded. | 34 |
| BD-Live Internet Access | Set the access restriction to BD-LIVE contents. | 34 | |
| BD-Live Storage (USB) | Set whether BD-LIVE contents is store into the USB memory device or the internal memory of this unit. | 34 | |
| Erase Blu-ray Storage? | Erase the Virtual Package and BD-LIVE contents stored into the internal memory and the USB memory storage. | 34 | |
| Screen Saver Duration | Set the period of time to activate screen saver function. | 34 | |
| Reset Settings | Reset all settings to the factory default except the Parental settings, etc. | 35 | |
| Network | Wired | Configs network settings depending on your internet environment, etc. when connecting to the internet. | 35 |
| Network Test | Detects the internet connection and automatically configures the network settings by the DHCP server function of the router or modem. | 35 | |
| Information | System information of this unit checked by the service adviser. | - | |
| Display | TV type | Set the video signal format depending on that of your TV and disc. | 36 |
| Resolution | Set the resolution of the HDMI video signal. | 36 | |
| TV Aspect | Set the picture size according to aspect ratio of your TV. | 36 | |
| 24P Mode | Set whether to output 1080/24p video signals from HDMI OUT connector when playing film-based materials (24 frame) on BD discs. | 36 | |
| Color Depth | Set whether to output the HDMI video signal with the color depth effect or not. | 36 | |
| Audio | HDMI Output | Select HDMI audio output device. | 36 |
| Dynamic Range Control | During Dolby Digital, Dolby Digital Plus or Dolby TrueHD audio playback, the dynamic range (range difference between quiet sounds and loud sounds) is compressed. | 36 | |
| Language | OSD | Set the language for unit's OSD (On-Screen Display). | 37 |
| Menu | Set the language for disc menu or pop-up menu. | 37 | |
| Audio | Set the language for audio. | 37 | |
| Subtitle | Set the language for subtitle. | 37 | |
| Parental | Parental Control | Set whether or not to parental control. | 37 |
| Parental Level | Set the parental control level. | 37 | |
| Parental Password | Change the password for the parental control settings. | 37 |
OSD (on-screen display) menu operation
When the input source is "DISC/USB2", settings for audio and video can be performed from the OSD menu.
The OSD (On-Screen Display) menu enables various audio/visual settings and adjustments.
1 In the stop mode, press to select "Settings" in the home menu, then press ENTER.
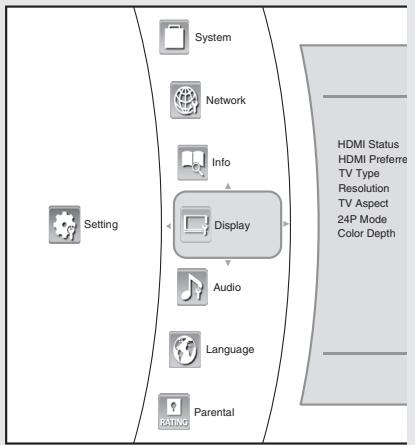
- During playback of BD-Video, DVD-Video or CD, if or HOME is pressed, then the home menu will be displayed.
- During playback of music, JPEG or video files, if HOME is pressed, then the home menu will be displayed.
2 Use to select the desired setting category, then press .
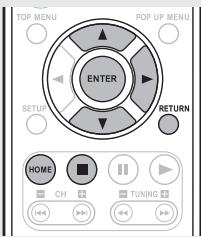
3 Use to select the desired setting item, then press .
The selected item's option menu will be displayed.
4 Use to select the desired option, then press ENTER to confirm your selection.
The previous screen will be displayed
- To go back to the previous screen, press or RETURN.
Settings
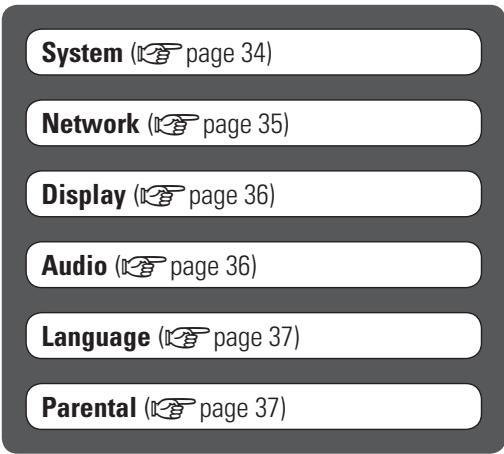
System
Default settings are underlined.
Perform system-related settings.
| Items | Setting details |
| Optical Disc AutoPlay Set whether to automatically play a disc or not when loading it or turning on the Power under the condition that it is loaded. | On: Starts play automatically. Off: Turns off the autopsy. |
| BD-Live Internet Access Set the access restriction to BD-LIVE contents. | Limit Access: Allows only the BD disc with owner certification to access contents from a BD-LIVE website. Always Allow Access: Allows all BD-LIVE discs to access contents from BD-LIVE websites. Prohibit Access: Prohibit all BD-LIVE discs from accessing contents from BD-LIVE websites. The available functions differ depending on the disc. Regarding playback method of BD-LIVE contents, etc., perform the operations in accordance with the instructions in the BD-LIVE disc manual. To enjoy BD-LIVE functions, perform the broadband internet connection and communication settings. (For details, refer to “Connecting to the network” (12 page 27) and “Network” (13 page 35).) |
| BD-Live Storage (USB) BD-LIVE contents is stored into the USB memory device. | USB2 (more than 1 GB) Displays the storable memory capacity. |
| Erase Blu-ray Storage? Erase the Virtual Package and BD-LIVE contents stored into the USB memory storage. | 1. Use △∇ to select “Erase Blu-ray Storage?” then press ENTER. 2. Use ▲▷ to select “Ok”, then press ENTER. |
| Screen Saver Duration Set the period of time to activate screen saver function. A TV screen may be burned out if a static picture is displayed for a long time in the stop mode, etc.. To prevent this, the unit automatically activate the screen saver function if a static picture is displayed over the period of time you set. | Off: Inactivates screen saver function. 5/10/20/30 Minutes: Activates screen saver function if a static picture is displayed over the period of time you set. To inactivate screen saver function, press any button. |
| Reset Settings | 1. Use △▽ to select “Reset Settings”, then press ENTER. |
| Reset all settings to the factory default except the Parental settings, etc. | 2. Use ↘ ➔ to select “Ok”, then press ENTER. |
| “Parental”(□→ page37)isnot reset. |
Network
Default settings are underlined.
- You can use a disc which offers BD-LIVE function by connecting the unit to the Internet (12 page 27 "Connecting to the network").
- When you set the communication setting manually, the following information of the connected router or modem is required. Confirm the information prior to the setting: IP address, Subnet mask, Gateway, Primary DNS and Secondary DNS.
| Setting items | Setting details |
| Wired Configures network settings depending on your internet environment, etc. when connecting to the internet. NOTE When IP Mode is set to Off, Network Test cannot be selected. | 1. Use △▼ to select "Wired", then press ENTER. 2. Use △▼ to select "IP Mode", then press ENTER. Off : Enables this unit's LAN capabilities. Manual : Configures network settings manually. Dynamic : Automatically configures the network settings by the DHCP server function of the router or modem. Select "Manual" only when the DHCP server function of the router or modem cannot be used for the automatic configuration. 3. Use △▼ to select the desired IP mode, then press ENTER. |
| □ When selecting "Off" The values for IP Address, Subnet Mask, Gateway, Primary DNS and Secondary DNS are all cleared. | |
| Setting items | Setting details |
| Wired (Continued) | □ When selecting “Manual” · You can select IP Address, Subnet Mask, Gateway, Primary DNS and Secondary DNS to configure them manually. · On the IP Settings menu, “Link Status” and “Mac Address” display the corresponding information merely. ① Use △▼ to select the desired option, then press ENTER. |
| Please enter a new IP Address. Valid range of each segment is 0 to 255. Current value 192.168.1.110 New value Ok Cancel | |
| □ Enter the new value pressing 0 - 9, then press ▼ to select “OK” and press ENTER. □ Repeat the above steps ① and ② until other new values are all entered. □ Use △▼ to select “Apply”, then press ENTER. Then the network test is automatically performed and the result is displayed. □ Press ENTER to confirm the test result. The network menu will be displayed. | |
| □ When selecting “Dynamic” When the network test is automatically performed and the result is displayed. □ Use △▼ to select “Apply”, then press ENTER. Then the network test is automatically performed and the result is displayed. □ Press ENTER to confirm the test result. The network menu will be displayed. | |
| Network Test Detects the internet connection and automatically configures the network settings by the DHCP server function of the router or modem. | 1. Use △▼ to select “Network Test”, then press ENTER. · Then the network test is automatically performed and the result is displayed. 2. Press ENTER to confirm the test result. The network menu will be displayed. |
Display
Default settings are underlined.
Set the video output signal according to the connected TV.
| Items | Setting details |
| TV type Set the video signal format depending on that of your TV and disc. | NTSC: Select this when the video signal format of your TV and the discs is NTSC color system for U.S.A., Canada, etc.. PAL: Select this when the video signal format is PAL color system for Europe, Australia, China, etc.. NOTE If the color system of this unit is different from that of your TV and the discs, the screen may be somewhat hard too see or the picture quality may be poor. Only in this case, set the video signal format to another. |
| Resolution Set the resolution of the HDMI video signal. | HDMI Auto: HDMI video resolution will be selected automatically depending on the HDMIcompatible TV. 1080p: Outputs 1080 lines of progressive video. 1080i: Outputs 1080 lines of interlaced video. 720p: Outputs 720 lines of progressive video. 576p: Outputs 576 lines(PAL) (or 480 lines(NTSC) of progressive video. 576i: Outputs 576 lines(PAL) (or 480 lines(NTSC)) of interlaced video. |
| TV Aspect Set the picture size according to aspect ratio of your TV. | 16:9 Wide: Select this when a wide-screen TV is connected. Discs recorded in widescreen format is played back over the entire TV screen. 16:9 Pillarbox: When playing back 4:3 images, the picture is displayed in the center of the 16:9 screen with a 4:3 aspect ratio. 4:3 Pan and Scan: Select this to play back the discs recorded in wide-screen format with 4:3 TV in the pan and scan mode (with the sides of the picture cut off). Discs which are not specified for pan and scan are played back in the letter box mode. 4:3 Letterbox: Select this to play back the discs recorded in wide-screen format with 4:3 TV in the letter box mode (with black strips at the top and bottom). |
| 24P Mode Set whether to output 1080/24p video signals from HDMI OUT connector when playing film-based materials (24 frame) on BD discs. | On: Select this to output 1080/24p video signals from HDMI OUT connector when playing film based materials (24 frame). Off: Select this when playing a materials other than film based materials (24 frame). NOTE • 1080/24p video signals are only output from the HDMI OUT connector. • 1080/24p video signals can be output when the following conditions are met. • HDMI OUT connector is connected to TV compatible with 1080/24p video signals. • Resolution is set to “HDMI Auto” or “1080p”. |
Display
| Items | Setting details |
| Color Depth Set whether to output the HDMI video signal with the color depth effect or not. | 36 Bit: Select this to output the HDMI video signal with the 36 Bit color depth to TV which supports 36 Bit HDMI deep color. 30 Bit: Select this to output the HDMI video signal with the 30 Bit color depth. 24 Bit: Select this to output the HDMI video signal without the color depth effect to TV which does not support HDMI deep color. For details on HDMI deep color which TV supports, refer to the operating instructions of TV. |
Audio
Default settings are underlined.
Perform audio-related settings.
| Items | Setting details |
| HDMI Output Select HDMI audio output device. | On (Auto) : HDMI audio is output from the TV connected to this unit. Off Speaker : Audio is output from the speakers connected to this unit. NOTE When an audio CD recorded in DTS-ES or Dolby Digital EX is played, no sound may be heard. |
| Dynamic Range Control During Dolby Digital, Dolby Digital Plus or Dolby TrueHD audio playback, the dynamic range (range difference between quiet sounds and loud sounds) is compressed. | On : Turns on the dynamic range compression to hear low sounds easier. Off : Turns it off. Auto : When Dolby TrueHD audio is played back, the dynamic range is automatically adjusted. NOTE Depending on status of connected TV HDMI, the dynamic range control may not be effect. |
Language
Default settings are underlined.
Set the language used for OSD, menus, playback dialogs and subtitle.
| Items | Setting details |
| OSD Set the language for unit's OSD (On-Screen Display). | English / Français /spanish / Italiano / Deutsch / Pusskyn |
| Menu Set the language for disc menu or pop-up menu. | Auto: Selects the language given priority in the disc. English / spanis / Italiano / Deutsch / Pusskyn / urdu/Vietnamese/Yoruba |
| Audio Set the language for audio. | Auto: Selects the language given priority in the disc. English / spanis / Italiano / Deutsch / Pusskyn / urdu / Vietnamese / Yoruba |
| Subtitle Set the language for subtitle. | Off: Displays no subtitles. English / spanis / Italiano / Deutsch / Pusskyn / urdu / Vietnamese / Yoruba |
NOTE
Depending on the discs, it may not be possible to change to the selected language. In this case, change the "Audio" and "Subtitle" by pressing AUDIO/RDS or SUBTITLE on the remote control.
Parental
The parental control allows you to set a limit, which prevents your children from viewing inappropriate materials. If the ratings exceed the levels you set, playback will be stopped, or inappropriate scenes such as violent scenes can be cut or replaced with other scenes depending on the disc type.
NOTE
- When you set the parental level low, some discs may not be played at all, in this case, set the parental level higher or the parental control to off.
- All discs may not respond to the parental level setting. Make sure this function works with your disc.
| Setting items | Setting details |
| Parental Control Set whether or not to parental control. | On: Parental control restricts playing discs according to parental level you set. Off: Parental control is inactive; all discs are played back. □ When selecting "On" The parental password entry screen appears as follows. Please enter a new parental control password: Password OK Cancel |
| TOP MENU POP UP MENU ENTER RETURN 1 2 3 4 5 6 7 8 9 CLEAR SEARCH CLR 0 SRCH D/DR | |
| 1. Press 0 - 9 to enter the 4-digit numbers, press ∇ to select "Ok". 2. Press ENTER. The parental menu will be displayed. NOTE Do not forget the password. The default setting is "3308". | |
| Parental Level Set the parental control level. | 1 [Kid Safe]: Suitable for children. 2 [G]: General audience. 3 [PG]: Parental guidance suggested. 4 [PG-13]: Unsuitable for children under 13. 5 [PG-R]: Parental guidance recommended. 6 [R]: Restricted; under 17 requires accompanying parent or adult guardian. 7 [NC-17]: No one under 17 admitted. 8 [Adult]: Discs of any grades (adult/general/children) can be played back. The lower the level value, the stricter the limitation. |
| Parental Password Change the password for the parental control settings. | 1. Press 0 - 9 to enter the new 4-digit numbers, press ∇ to select "Ok". 2. Press ENTER. The parental password entry screen for confirmation appears. 3. Perform the above step 1 and 2. |
Other setting
You can set the timers, Audio delay, Speaker Optimize, and Auto standby functions.
These settings are not displayed on the TV.
They are only displayed on the unit's display.
Timer setup (page 38)
Audio delay (page 39)
Auto standby ( page 40)
Registering preset codes ( page 40)
Other functions ( page 40)
Timer setup
You can set the timers (Everyday timer / Once timer) for playback input sources from "DISC", "TUNER", and "iPod/USB1".
Timer order of priority
The order of priority when the times set for the different timers overlap is as follows:
- Sleep timer
- Once timer
- Everyday timer

If the current time is not set, enter timer setting mode to get time setting mode.
Setting the timer
- Everyday timer ("EVERY DAY")
Playback starts and stops (the power turns off) at the set times each day. - Once timer ("ONCE")
Playback starts and stops (the power turns off) once only at the set times.
NOTE
- When the input source is set to "DISC/USB2", use CD-DA. Many BD-Video/DVD-Video cannot be played back using this function. Also, files from a CD-R/-RW disc and USB memory device (USB2 port) cannot be played back.
- If you playback with the timer by using CD-DA, do not connect USB memory devices to the USB2 port on the rear panel.
- If the input source is "DISC/USB2", and files are being played back from the USB memory device (USB2 port) with the power on, playback does not switch to disc playback even when the timer start time is reached.
1 Press SETUP.
- If you perform operations on this unit, press and hold MODE for 3 seconds and longer.
2 Use to select "TIMER SETUP", then press ENTER or .
3 Use to select the timer mode, then press ENTER or .
MODE SELECT ONCE TIMER
ONCE EVERYDAY
4 Use to select the input source, then press ENTER or .
INPUT SELECT
DISC TUNER iPod/USB1
5 Only when the input source "TUNER" function is selected
Use to select the preset number, then press ENTER or .
- When no name has been registered for the selected preset number, the frequency appears after the preset number is displayed.
6 Use to select "hours" for the timer start time, then press ENTER or .
ON TIME 10:00> 00:00
7 Use to select "minutes" for the timer start time, then press ENTER or .
ON TIME 10:30> 00:00
8 Use to select "hours" for the timer stop time, then press ENTER or .
10:30> 1:1:00
Timer setup
9 Use to select "minutes" for the timer stop time, then press ENTER or .

10 Use to select "ON" or "OFF" for the timer, then press ENTER.
- The indicator lights and the timer setting is entered
- The timer settings are displayed for 3 seconds.
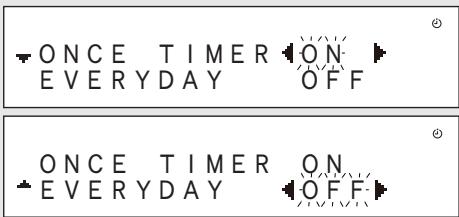
11 Press POWER to set the power to standby.
Timer standby mode is set, and the timer indicator lights red.
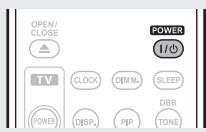
Setting the timer to on or off
① Press SETUP
- If you perform operations on this unit, press and hold MODE for 3 seconds and longer.
② Use to select "TIMER ON/OFF", then press ENTER.
③ Use to select "ONCE" or "EVERYDAY".
Use to select "ON" or "OFF" for the timer, then press ENTER.
The timer settings are displayed after this.
- When set to "OFF", time operation is disabled, but the timer settings remain unchanged.
To check the timer settings
① Press SETUP
- If you perform operations on this unit, press and hold MODE for 3 seconds and longer.
② Use to select "TIMER ON/OFF", then press ENTER.
③ When "ON" is displayed for the timer setting, press ENTER.
The timer settings are displayed for 3 seconds..
To change the timer settings
Perform the operations at "Setting the timer" ( page 38).
To change the setting while setting the timer
Press or RETURN
- If you perform operations on this unit, press MODE.
The setting returns to the previous step.
- Display the setting you want to change, then make the desired setting.
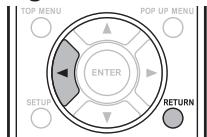
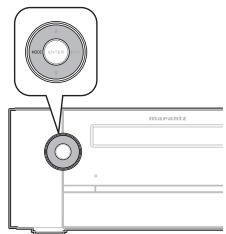
Setting the sleep timer
Use this function to automatically switch the power to the standby mode after a specific amount of time (minutes). The sleep timer can be set to up to 120 minutes.
During playback, press SLEEP and display the time you want to set.
After about 5 seconds, the setting is entered and the display returns to as it was before.
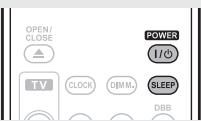

Canceling the sleep timer
Either press SLEEP to select "SLEEP OFF" or press POWER.
To check the time remaining until the sleep timer is activated
Press SLEEP.
Audio delay
When the input source is "DISC/USB2", timing delays between the audio and images can be corrected while images are viewed.
1 Press SETUP.
- If you perform operations on this unit, press and hold MODE for 3 seconds and longer.
2 Use to select "AUDIO DELAY", then press ENTER or .
SETUP.MENU AUDIO DELAY
3 Use to adjust a delay time.
AUDIO,DELAY 8.0m.sec
- Range: 0 to 160 msec
- Step : 10 msec
- Default: 0 msec
4 Press ENTER or

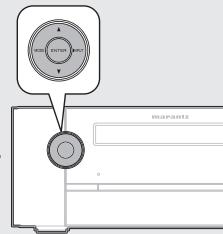
Auto standby
With the auto standby on, this unit will automatically enter the standby mode after about 30 continuous minutes of stop mode with no operation.
1 Press SETUP.
- If you perform operations on this unit, press and hold MODE for 3 seconds and longer.
2 Use to select "AUTO STANDBY", then press ENTER or .
3 Use to select "ON", then press ENTER or . The setting is entered.
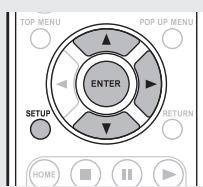
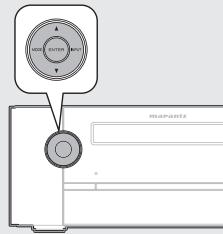
NOTE
In the following situations, the Auto standby function does not operate.
- When the disc is being played back or paused.
- When an iPod or USB memory device is connected to the USB1 port on the unit.
- When the input source is "TUNER", "AUX2" or "AUX3".
- When the input source is "AUX1" and a device is connected to the portable jack.
- When the input source is "M-XPort", and a RX101 wireless receiver is connected to M-XPort.
Registering preset codes
The preset codes of TVs of manufacturers other than Marantz are preset in the supplied remote control unit.
Use the preset codes table at the end of this manual to register the preset codes.
Buttons used for operating the TV
- TV POWER button
- TV INPUT button
- TV channel buttons (TV CH +/−)
- TV volume control buttons (TV VOLUME ▲▼)
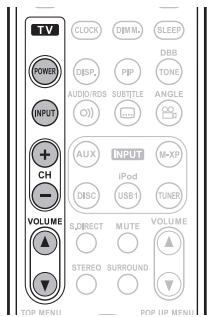
Press 0-9 while simultaneously pressing and ENTER.
- The numbers are shown in the preset code table (End of this manual).


Some manufacturers use more than one type of remote control code. Refer to the included list of preset codes to change the number and verify correct operation.
NOTE
Depending on the model and year of manufacture of your equipment, some buttons may not operate.
Other functions
Auto power on
When the power is in standby, the power turns on when any of the buttons below other than POWER on the remote control unit or ON/STANDBY on the main unit is operated, and the respective operation is performed.
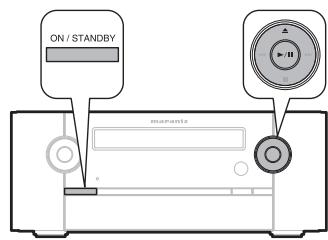
| TOP 100 | TOP 101 | ||
| TOP 102 | TOP 103 | ||
| TOP 104 | TOP 105 | ||
| TOP 106 | TOP 107 | ||
| TOP 108 | TOP 109 | ||
| TOP 110 | TOP 111 | ||
| TOP 112 | TOP 113 | ||
| TOP 114 | TOP 115 | ||
| TOP 116 | TOP 117 | ||
| TOP 118 | TOP 119 | ||
| TOP 120 | TOP 121 | ||
| TOP 122 | TOP 123 | ||
| TOP 124 | TOP 125 | ||
| TOP 126 | TOP 127 | ||
| TOP 128 | TOP 129 | ||
| TOP 130 | TOP 131 | ||
| TOP 132 | TOP 133 | ||
| TOP 134 | TOP 135 | ||
| TOP 136 | TOP 137 | ||
| TOP 138 | TOP 139 | ||
| TOP 140 | TOP 141 | ||
| TOP 142 | TOP 143 | ||
| TOP 144 | TOP 145 | ||
| TOP 146 | TOP 147 | ||
| TOP 148 | TOP 149 | ||
| TOP 150 | TOP 151 | ||
| TOP 152 | TOP 153 | ||
| TOP 154 | TOP 155 | ||
| TOP 156 | TOP 157 | ||
| TOP 158 | TOP 159 | ||
| TOP 160 | TOP 161 | ||
| TOP 162 | TOP 163 | ||
| TOP 164 | TOP 165 | ||
| TOP 166 | TOP 167 | ||
| TOP 168 | TOP 169 | ||
| TOP 170 | TOP 171 | ||
| TOP 172 | TOP 173 | ||
| TOP 174 | TOP 175 | ||
| TOP 176 | TOP 177 | ||
| TOP 178 | TOP 179 | ||
| TOP 180 | TOP 181 | ||
| TOP 182 | TOP 183 | ||
| TOP 184 | TOP 185 | ||
| TOP 186 | TOP 187 | ||
| TOP 188 | TOP 189 | ||
| TOP 190 | TOP 191 | ||
| TOP 192 | TOP 193 | ||
| TOP 194 | TOP 195 | ||
| TOP 196 | TOP 197 | ||
| TOP 198 | TOP 199 | ||
| TOP 200 | TOP 201 | ||
| TOP 202 | TOP 203 | ||
| TOP 204 | TOP 205 | ||
| TOP 206 | TOP 207 | ||
| TOP 208 | TOP 209 | ||
| TOP 210 | TOP 211 | ||
| TOP 212 | TOP 213 | ||
| TOP 214 | TOP 215 | ||
| TOP 216 | TOP 217 | ||
| TOP 218 | TOP 219 | ||
| TOP 220 | TOP 221 | ||
| TOP 222 | TOP 223 | ||
| TOP 224 | TOP 225 | ||
| TOP 226 | TOP 227 | ||
| TOP 228 | TOP 229 | ||
| TOP 230 | TOP 231 | ||
| TOP 232 | TOP 233 | ||
| TOP 234 | TOP 235 | ||
| TOP 236 | TOP 237 | ||
| TOP 238 | TOP 239 | ||
| TOP 240 | TOP 241 | ||
| TOP 242 | TOP 243 | ||
| TOP 244 | TOP 245 | ||
| TOP 246 | TOP 247 | ||
| TOP 248 | TOP 249 | ||
| TOP 250 | TOP 251 | ||
| TOP 252 | TOP 253 | ||
| TOP 254 | TOP 255 | ||
| TOP 256 | TOP 257 | ||
| TOP 258 | TOP 259 | ||
| TOP 260 | TOP 261 | ||
| TOP 262 | TOP 263 | ||
| TOP 264 | TOP 265 | ||
| TOP 266 | TOP 267 | ||
| TOP 268 | TOP 269 | ||
| TOP 270 | TOP 271 | ||
| TOP 272 | TOP 273 | ||
| TOP 274 | TOP 275 | ||
| TOP 276 | TOP 277 | ||
| TOP 278 | TOP 279 | ||
| TOP 280 | TOP 281 | ||
| TOP 282 | TOP 283 | ||
| TOP 284 | TOP 285 | ||
| TOP 286 | TOP 287 | ||
| TOP 288 | TOP 289 | ||
| TOP 290 | TOP 291 | ||
| TOP 292 | TOP 293 | ||
| TOP 294 | TOP 295 | ||
| TOP 296 | TOP 297 | ||
| TOP 298 | TOP 299 | ||
| TOP 300 | TOP 301 | ||
| TOP 302 | TOP 303 | ||
| TOP 304 | TOP 305 | ||
| TOP 306 | TOP 307 | ||
| TOP 308 | TOP 309 | ||
| TOP 310 | TOP 311 | ||
| TOP 312 | TOP 313 | ||
| TOP 314 | TOP 315 | ||
| TOP 316 | TOP 317 | ||
| TOP 318 | TOP 319 | ||
| TOP 320 | TOP 321 | ||
| TOP 322 | TOP 323 | ||
| TOP 324 | TOP 325 | ||
| TOP 326 | TOP 327 | ||
| TOP 328 | TOP 329 | ||
| TOP 330 | TOP 331 | ||
| TOP 332 | TOP 333 | ||
| TOP 334 | TOP 334 | ||
| TOP 336 | TOP 337 | ||
| TOP 338 | TOP 339 | ||
| TOP 340 | TOP 341 | ||
| TOP 342 | TOP 343 | ||
| TOP 344 | TOP 345 | ||
| TOP 346 | TOP 347 | ||
| TOP 348 | TOP 349 | ||
| TOP 350 | TOP 351 | ||
| TOP 352 | TOP 353 | ||
| TOP 354 | TOP 354 | ||
| TOP 356 | TOP 357 | ||
| TOP 358 | TOP 359 | ||
| TOP 360 | TOP 361 | ||
| TOP 362 | TOP 363 | ||
| TOP 364 | TOP 365 | ||
| TOP 366 | TOP 367 | ||
| TOP 368 | TOP 369 | ||
| TOP 370 | TOP 371 | ||
| TOP 372 | TOP 373 | ||
| TOP 374 | TOP 375 | ||
| TOP 376 | TOP 377 | ||
| TOP 378 | TOP 379 | ||
| TOP 380 | TOP 381 | ||
| TOP 382 | TOP 383 | ||
| TOP 384 | TOP 385 | ||
| TOP 386 | TOP 387 | ||
| TOP 388 | TOP 389 | ||
| TOP 390 | TOP 391 | ||
| TOP 392 | TOP 393 | ||
| TOP 394 | TOP 395 | ||
| TOP 396 | TOP 397 | ||
| TOP 398 | TOP 399 | ||
| TOP 400 | TOP 401 | ||
| TOP 402 | TOP 403 | ||
| TOP 404 | TOP 405 | ||
| TOP 406 | TOP 407 | ||
| TOP 408 | TOP 409 | ||
| TOP 410 | TOP 411 | ||
| TOP 412 | TOP 413 | ||
| TOP 414 | TOP 415 | ||
| TOP 416 | TOP 417 | ||
| TOP 417 | TOP 418 | ||
| TOP 419 | TOP 419 | ||
| TOP 420 | TOP 421 | ||
| TOP 421 | TOP 422 | ||
| TOP 422 | TOP 423 | ||
| TOP 423 | TOP 424 | ||
| TOP 424 | TOP 425 | ||
| TOP 425 | TOP 426 | ||
| TOP 426 | TOP 427 | ||
| TOP 427 | TOP 428 | ||
| TOP 428 | TOP 429 | ||
| TOP 430 | TOP 431 | ||
| TOP 431 | TOP 432 | ||
| TOP 432 | TOP 433 | ||
| TOP 433 | TOP 434 | ||
| TOP 434 | TOP 435 | ||
| TOP 435 | TOP 436 | ||
| TOP 436 | TOP 437 | ||
| TOP 437 | TOP 438 | ||
| TOP 438 | TOP 439 | ||
| TOP 440 | TOP 450 |
| ▲ | The disc tray opens. |
| ▲or ▲/II | The input source selected directly before the power was switched to standby is played back. ·If the last input source was "DISC/USB2", "AUX1", "AUX2", "AUX3" or "M-XPort", the disc set in the main unit is played back. (Certain types of disc cannot be played back.) |
| DISC | The input source switches to "DISC/USB2" and the disc starts playing. (When "Optical Disc AutoPlay" (B) page 34) is "On") |
| TUNER | Playback of the tuner starts. |
| iPod/USB1 | The input source switches to "iPod/USB1" and the USB memory device starts playing. |
| AUX | The input source switches to "AUX". |
| M-XP | The input source switches to "M-XPort". If the RX101 wireless receiver is not connected to M-XPort, the input source switches to "DISC/USB2". |
Last function memory
This stores the settings as they were immediately before going into the standby mode.
When the power is turned back on, the settings are restored to as they were immediately before going into the standby mode.
Other information
About copyright
- Unauthorised copying, broadcasting, public performance and lending of discs are prohibited.
- This item incorporates copy protection technology that is protected by U.S. patents and other intellectual property rights of Rovi Corporation. Reverse engineering and disassembly are prohibited.
- Portions of this product are protected under copyright law and provided under license by ARIS/SOLANA/4C.
Trademark information
This product uses the following technologies:
| DVD | DVD is a trademark of the DVD Format / Logo licensing Corporation. |
| Blu-ray Disc | "Blu-ray Disc" and are trademarks. Blu-ray Disc |
| AVCHD | "AVCHD" and "AVCHD" logo is the trademark of Panasonic Corporation and Sony Corporation. |
| BD-LIVE™ | "BD-LIVE" logo is trademark of Blu-ray Disc Association. |
| BONUS VIEW™ | "BONUSVIEW" is the trademark of Blu-ray Disc Association. |
| Java POWERED | Java and all other trademarks and logos are trademarks or registered trademarks of Sun Microsystems, Inc. in the United States and/or other countries. |
| dtds+HD Master Audio Essential | Manufactured under license under U.S. Patent #’s: 5,451,942; 5,956,674; 5,974,380; 5,978,762; 6,226,616; 6,487,535; 7,392,195; 7,272,567; 7,333,929; 7,212,872 & other U.S. and worldwide patents issued & pending. DTS and the Symbol are registered trademarks, & DTS-HD, DTS-HD Master Audio | Essential and the DTS logos are trademarks of DTS, Inc. Product includes software. © DTS, Inc. All Rights Reserved. |
| DOLBY TRUEHD VIRTUAL SPEAKER | Manufactured under license from Dolby Laboratories. "Dolby" and the double-D symbol are trademarks of Dolby Laboratories. |
| HDMI™ HIGH-DEFINITION MULTIMEDIA INTERFACE | HDMI, the HDMI logo and High-Definition Multimedia Interface are trademarks or registered trademarks of HDMI Licensing LLC. |
| Plays Windows Media™ | Windows Media and the Windows logo are trademarks or registered trademarks of Microsoft Corporation in the United States and/or other countries. |
| Made for iPod | "Made for iPod" and "Made for iPhone" mean that an electronic accessory has been designed to connect specifically to iPod or iPhone, respectively, and has been certified by the developer to meet Apple performance standards. Apple is not responsible for the operation of this device or its compliance with safety and regulatory standards. iPhone, iPod, iPod classic, iPod nano, iPod shuffle, and iPod touch are trademarks of Apple Inc., registered in the U.S. and other countries. ·Individual users are permitted to use iPhone, iPod, iPod classic, iPod nano, iPod shuffle, and iPod touch for private copy and playback of non-copyrighted contents and contents whose copy and playback is permitted by law. Copyright infringement is prohibited by law. |
Explanation terms
Numerics
4:3 LB (letterbox)
When a wide (16:9) disc is played back by connecting a 4:3 TV and this unit, this function plays back the image with black area at the top and bottom.
4:3 PS (pan scan)
When a wide (16:9) disc is played back by connecting a 4:3 TV and this unit, this function cuts left and right of the played back image to the 4:3 size according to the disc's control information.
A
A2DP
A2DP is one profile of Bluetooth defended for in-car devices or AV devices that use wireless communication instead of a cable.
AAC (Advanced Audio Coding)
This is an internationally standardized audio data compression scheme. It has a compression ratio 1.4 times higher than the "MP3 audio compression scheme adopted for MPEG-1.
Aspect ratio
This is the length and width ratio of the TV screen. The conventional TV's screen ratio is 4:3 and the wide screen TV's screen ratio is 16:9.
Audio commentary
This is an audio program included as a bonus feature in a DVD-Video or BD-Video. It uses a multi-audio function to provide an audio explanation or commentary by members of the crew or director, etc. to accompany the video.
AVCHD (Advanced Video Codec High Definition)
This is a high-definition digital camera (HD) standard using high-efficiency encoding technology for recording high-definition Hi-Vision signals to various media.
AVI (Audio Video Interleaving)
A format developed by Microsoft for handling video with audio on Windows computers. The RIFF format used when storing multimedia data on Windows is applied, and the format gets its name from the way in which the audio data and video data are interwoven.
B
BD-J (Blu-ray Disc Java)
With BD-Videos, there are fun software with more interactive functions (games) using Java applications.
BD-LIVE
This unit can be connected to the Internet to enjoy a number of features, including additional contents such as special videos or subtitles, network games, etc.
Bit rate
This expresses the read amount per 1 second of video/audio data recorded in a disc.
Blu-ray Disc
This is one-side 1 layer disc having 25 GB capacity and can record high vision video movie and games.
Bonus View
Special images for BD-Videos. It includes comment of the movie director, simultaneously developing sub-story, and images from different angles.
C
Chapter
This is a break intended by a producer who organizes the title of Blu-ray Disc or DVD-Video. The chapter search function searches the beginning of this break.
D
Deep Color
This technology allows expression of more number of colors than the conventional 8 bits and can reproduce colors close to natural ones without color streak.
DHCP (Dynamic Host Configuration Protocol)
This mechanism automatically perform network configuration such as IP address for network devices including the unit, PC, and broadband router.
Dolby Digital
Dolby Digital is a multi-channel digital signal format developed by Dolby Laboratories.
A total of 5.1 channels are played: 3 front channels ("FL", "FR" and "C"), 2 surround channels ("SL" and "SR") and the "LFE" channel for low frequencies.
Because of this, there is no crosstalk between channels and a realistic sound field with a "three-dimensional" feeling (sense of distance, movement and positioning) is achieved.
A realistic, powerful sense of presence is achieved when playing movie sources in AV rooms as well.
Dolby Digital EX
Dolby Digital EX is a 6.1-channel surround format proposed by Dolby Laboratories that allows users to enjoy in their homes the "DOLBY DIGITAL SURROUND EX" audio format jointly developed by Dolby Laboratories and Lucas Films.
The 6.1 channels of sound, including surround back channels, provide improved sound positioning and expression of space.
Dolby Digital Plus
Dolby Digital Plus is an improved Dolby Digital signal format that is compatible with up to 7.1 channels of discrete digital sound and also improves sound quality thanks to extra data bit rate performance. It is upwardly compatible with conventional Dolby Digital, so it offers greater flexibility in response to the source signal and the conditions of the playback equipment.
Dolby Headphone
The Dolby Headphone technology provides a surround sound listening experience over headphones.
When listening to multichannel content such as DVD movies over headphones, the listening experience is fundamentally different than listening to speakers. Since the headphone speaker drivers are covering the pinna of the ear, the listening experience differs greatly from traditional speaker playback. Dolby utilizes patented headphone perspective curves to solve this problem and provides a non-fatiguing, immersive, home theater listening experience. Dolby Headphone also delivers exceptional 3D audio from stereo material.
Dolby TrueHD
Dolby TrueHD is a high definition audio technology developed by Dolby Laboratories, using lossless coding technology to faithfully reproduce the sound of the studio master.
This format provides the facility to support up to 8 audio channels with a sampling frequency of 96kHz /24 bit resolution and up to 6 audio channels with a sampling frequency of 192kHz / 24 bit resolution. Dolby TrueHD is adopted for applications that put very high importance on sound quality.
Dolby Virtual Speaker
This is technology from Dolby Laboratories.
It is a surround system using just two speakers to create the effect of surround sound, with sound even coming from behind you as if it was a 5.1-channel system.
Downmix
This function converts the number of channels of surround audio to less number of channels and plays back.
DTS
This is an abbreviation of Digital Theater System, which is a digital audio system developed by DTS. When playing back audio by connecting this system with a device such as DTS amplifier, accurate sound field position and realistic sound effect as if you are in a movie theater can be obtained.
DTS 96/24
DTS 96/24 is a digital audio format enabling high sound quality playback in 5.1 channels with a sampling frequency of 96kHz and 24 bit quantization on DVD-Video.
DTS Digital Surround
DTS Digital Surround is the standard digital surround format of DTS, Inc., compatible with a sampling frequency of 44.1 or 48kHz and up to 5.1 channels of digital discrete surround sound.
DTS-ES™ Discrete 6.1
DTS-ESTM Discrete 6.1 is a 6.1-channel discrete digital audio format adding a surround back (SB) channel to the DTS digital surround sound.
Decoding of conventional 5.1-channel audio signals is also possible according to the decoder.
DTS-ES™ Matrix 6.1
DTS-ESTM Matrix 6.1 is a 6.1-channel discrete digital audio format inserting a surround back (SB) channel to the DTS digital surround sound through matrix encoding. Decoding of conventional 5.1-channel audio signals is also possible according to the decoder.
DTS Express
DTS Express is an audio format supporting low bit rates (max. 5.1 channels, 24 to 256 kbps).
Manufactured under license under U.S. Patent # s:5,451,942;5,956,674;5,974,380;5,978,762 6,226,616; 6,487,535; 7,212,872; 7,333,929; 7,392,195; 7,272,567 & other U.S. and worldwide patents issued & pending. DTS is a registered trademark and the DTS logos, Symbol, DTS-HD and DTS-HD Master Audio are trademarks of DTS, Inc. © 1996-2008 DTS, Inc. All Rights Reserved.
DTS-HD
This audio technology provides higher sound quality and enhanced functionality than the conventional DTS and is adopted as an optional audio for Blu-ray Disc. This technology supports multi-channel, high data transfer speed, high sampling frequency, and lossless audio playback. Maximum 7.1-channels are supported in Blu-ray Disc.
DTS-HD High Resolution Audio
DTS-HD High Resolution Audio is an improved version of the conventional DTS, DTS-ES and DTS 96/24 signals formats, compatible with sampling frequencies of 96 or 48kHz and up to 7.1 channels of discrete digital sound. High data bit rate performance provides high quality sound. This format is fully compatible with conventional products, including conventional DTS digital surround 5.1-channel data.
DTS-HD Master Audio
DTS-HD Master Audio is a lossless audio format created by Digital Theater System (DTS). This format provides the facility to support up to 8 audio channels with a sampling frequency of 96kHz / 24bit resolution and up to 6 audio channels with a sampling frequency of 192kHz / 24bit resolution.
It is fully compatible with conventional products, including conventional DTS digital surround 5.1-channel data.
Dynamic range
The difference between the maximum undistorted sound level and the minimum sound level that is discernible above the noise emitted by the device.
F
Finalise
This is processing that enables playing back of disc of BD/DVD/CD, which was recorded using a recorder, by other players.
H
HDCP
When transmitting digital signals between devices, this copyright protection technology encrypts the signals to prevent content from being copied without authorization.
HDMI
This is an abbreviation of High-Definition Multimedia Interface, which is an AV digital interface that can be connected to a TV or amplifier. Video signal and audio signal can be connected using 1 cable.
1
Interlacing (interlaced scanning)
This conventional method used to project images on a TV displays 1 frame of image in half and half, respectively as 2 fields.
Interactive audio
Audio such as click sound that is generated during operation and is recorded in the title of BD-Videos.
J
JPEG (Joint Photo graphic Experts Group)
This is a still picture data compression standard. Its ability to reduce the size of a file with relatively little deterioration in image quality means that it is widely used for storing images in video cameras, etc.
L
Linear PCM
This signal is uncompressed PCM (Pulse Code Modulation) signal. This is the same system as the CD audio but this uses 192kHz , 96kHz , and 48kHz sampling frequencies in Blu-ray Disc or DVD and provides higher sound quality than CD.
M
MP3 (MPEG Audio Layer-3)
This is an internationally standardized audio data compression scheme, using the "MPEG-1" video compression standard. It compresses the data volume to about one eleventh its original size while maintaining sound quality equivalent to a music CD.
MPEG (Moving Picture Experts Group), MPEG-2, MPEG-4
These are the names for digital compression format standards used for the encoding of video and audio. Video standards include "MPEG-1 Video", "MPEG-2 Video", "MPEG-4 Visual", "MPEG-4 AVC". Audio standards include "MPEG-1 Audio", "MPEG-2 Audio", "MPEG-4 AAC".
P
Picture-in-picture
This BD-Video function allows you to view making or commentary scenes in the secondary video while viewing the main story in the primary video.
Popup menu
This menu recorded in Blu-ray Disc software. While playing back a Blu-ray Disc, this menu can be displayed on the front of the screen and can be operated.
Primary audio
This audio signal is recorded in the main story in BD-Video.
Progressive (sequential scanning)
This is a scanning system of video signal that displays 1 frame of video as one image. Compared to the interlace system, this system provides images with less flickering and bleeding.
Protection circuit
This is a function to prevent damage to components within the power supply when an abnormality such as an overload or excess voltage occurs for any reason.
In this unit, the power indicator blinks and the unit enters standby mode when an abnormality occurs.
R
Rating
Depending on the age of the viewer, this function restricts playing back of BD-Video or DVD-Video. This unit can be set to restrict viewing in 0 to 254 level for BD-Video, and 1 to 8 level for DVD-Video.
Region code
This code indicates country or region where the Blu-ray Disc or DVD-Video can be played back.
s
Sampling frequency
Sampling involves taking a reading of a sound wave (analog signal) at regular intervals and expressing the height of the wave at each reading in digitized format (producing a digital signal).
The number of readings taken in one second is called the "sampling frequency". The larger the value, the closer the reproduced sound is to the original.
Secondary audio
This is audio signals of comment of movie director and other data recorded in the bonus view of BD-Video.
Speaker impedance
This is an AC resistance value, indicated in (ohms). Greater power can be obtained with this value smaller.
T
Title
This is the unit of content that consists of chapters of Blu-ray Disc or DVD-Video. Some Blu-ray Disc or DVD-Video may include multiple titles.
V
Virtual Package
For BD-Video discs compatible with Virtual Package, contents are copied from the discs or internet to local storage. It is automatically copied to the local storage prior to playback. You can enjoy a variety of additional functions including secondary video, secondary audio, subtitles, movie trailer, etc.
- The playback methods vary depending on the disc. (For details, refer to the disc manual.)
W
WMA (Windows Media Audio)
This is audio compression technology developed by Microsoft Corporation.
WMA data can be encoded using Windows Media® Player Ver.7, 7.1, Windows Media® Player for Windows® XP and Windows Media® Player 9 Series.
To encode WMA files, only use applications authorized by Microsoft Corporation. If you use an unauthorized application, the file may not work properly.
WMV (Windows Media Video)
A video format developed by Microsoft based on the video compression standard MPEG-4.
This is one of the formats supported as standard by Windows Media Player, the standard media player in the Windows operating system.
It was designed based on the assumption of network delivery, and has such features as a high compression rate, support for streaming playback, and support for DRM (Digital Rights Management Technology) to control copying.
Troubleshooting
If a problem should arise, first check the following:
- Are the connections correct?
- Is the set being operated as described in the user guide?
- Are the other components operating properly?
If this unit does not operate properly, check the items listed in the table below. Should the problem persist, there may be a malfunction.
In this case, disconnect the power immediately and contact your store of purchase.
[General]
| Symptom | Cause/Solution | Page |
| Power does not turn on. | ·Check whether the power plug is correctly inserted into the power outlet. ·Check whether the power cord is correctly inserted into the AC inlet. ·The protection circuit is active. Disconnect the power plug from the electric outlet, wait 5 to 10 seconds and then insert it back into the outlet. | 11 11 8 |
| Display is off. | ·The dimmer setting is set to “Off”. Set to something other than “Off”. | 13 |
| The timer indicator is blinking in intervals of approximately 0.5 seconds. | ·The temperature inside the unit has risen. Please disconnect the power plug from the electric outlet, and insert it back into the outlet after the temperature has fallen sufficiently. (Please re-install this unit in a place having good ventilation.) ·The speaker cable has shorted (is touching). Firmly twist the core wire in the speaker cable, and re-connect it to the speaker terminal. Then, disconnect the power plug from the electric outlet, and insert it back into the outlet. | - 8 |
| The timer indicator is blinking in intervals of approximately 0.25 seconds. | ·The protection circuit is active. Disconnect the power plug from the electric outlet, wait 5 to 10 seconds and then insert it back into the outlet. | 8 |
| After turning on the power, the timer indicator is blinking in intervals. | ·The unit has failed. Turn off the power and please contact the Marantz service adviser. | - |
| Set does not operate properly. | ·Reset the microprocessor. | 46 |
| A disc that cannot be played back was inserted, and now cannot be removed. | ·Press ON/STANDBY button on the unit to switch to standby mode, then press ▲ to open the disc tray and remove the disc. | - |
[Video]
| Symptom | Cause/Solution | Page |
| No picture appears. | ·Check the TV connection. ·Set the TV input correctly. | 9 - |
| No picture appears, the picture is disrupted, or the Blu-ray disc or DVD video picture appears in black and white. | ·The picture may be slightly disturbed directly after fast-forwarding or reversing. This is not a malfunction. ·Discs not compatible with this unit, or discs with different region codes, cannot be played back. The region codes compatible with this unit include “B” for BD-Video and “2” or “ALL” for DVD-Video. | 19 14 |
[Audio]
| Symptom | Cause/Solution | Page |
| Audio is not output. | ·Check the connections for all devices. ·Check the speaker connections. ·Check whether the audio device power is turned on. ·Adjust the master volume. ·Cancel the mute mode. ·Select a suitable input source. ·Disconnect the headphones. No sound is output from the speakers or the PRE OUT connector when headphones are connected. | 9, 10, 26 8 - 13 13 12 13 |
| No sound is produced from subwoofer. | ·Check the subwoofer connections. ·Turn on the subwoofer's power. | 8 - |
| DTS sound is not output. | ·Check the speaker and HDMI connections. | 8, 9 |
| Dolby TrueHD, DTS-HD, Dolby Digital Plus audio is not output. | ·Check the speaker and HDMI connections. | 8, 9 |
[HDMI]
| Symptom | Cause/Solution | Page |
| No audio is output with HDMI connection. | ·Check the connection of the HDMI connectors. ·To output HDMI audio from a connected device, set “HDMI Output” in the menu to “Off Speaker”. | 9 36 |
| No video is output with HDMI connection. | ·Check the connection of the HDMI connectors. ·Check whether the TV is compatible with copyright protection (HDCP). If connected to a device not compatible with HDCP, video will not be output correctly. ·Check whether the HDMI video resolution set in this unit is compatible with the TV resolution. If set to “HDMI Auto”, this unit sets it automatically. | 9 - |
| 36 |
[Blu-ray Disc]
| Symptom | Cause/Solution | Page |
| Picture freezes momentarily during playback. | ·The disc may not play back correctly if it is scratched or dirty. Either clean the disc or replace it. ·There may be a problem with the recorded disc. | - - |
| Playback does not start even when▲ is pressed, or starts but stops immediately. | ·Check whether there is condensation on the inside of the unit or disc. If there is condensation, turn off the power and let the unit stand for 1 to 2 hours. ·The disc may not play back correctly if it is scratched or dirty. Either clean the disc or replace it. ·Check whether the disc has been inserted upside down. Insert the disc so that the recording surface to be played back faces downward. ·Check whether a disc that cannot be played back on this unit has been inserted. | 2 3 3 14 |
| Subtitles are not displayed. | ·Subtitles cannot be displayed for BD-Video or DVD-Video files that do not contain subtitles. ·Check whether the subtitles setting is set to "Off". | 21 37 |
| Wallpaper is not displayed even after the disc has been removed. | ·An internal error may have occurred in the unit. Set the power to standby, wait awhile, then turn the power back on. | - |
| Button operation does not work. The unit fails to operate. | ·Operations may not be permitted by the disc. Refer to the instructions of the disc. ·The protection circuit is active. In this case, disconnect the power plug from the electric outlet, wait 5 to 10 seconds and then insert it back into the outlet. | 3 8 |
| The unit fails to read the disc. | ·The pickup lens may be dirty. Use a commercially available lens cleaner to clean the laser pickup. Avoid use of cleaners equipped with brushes, since they may scratch the lens. | - |
| Angle does not switch. | ·If a BD-Video or DVD-Video does not record multiple angles, angle cannot be switched. Also, multiple angles may be recorded for specific scenes. | 20 |
| Playback does not start when the title is selected. | ·Playback may be prohibited by the viewing restriction setting. Check "Parental" on the OSD menu. | 37 |
| The password for rating level has been forgotten. | ·The default setting is "3308". | - |
[Radio]
| Symptom | Cause/Solution | Page |
| Reception fails, or there is a lot of noise or distortion. | • Change the antenna orientation or position. | 10 |
| • Separate the AM loop antenna from the unit. | 10 | |
| • Use an FM outdoor antenna. | 10 | |
| • Separate the antenna from other connection cables. | 10 |
[USB memory device]
| Symptom | Cause/Solution | Page |
| When a USB memory device is connected, "USB" is not displayed on the OSD menu. | ·The OSD screen is only displayed when a USB memory device is connected to the USB2 port on the rear panel. Set the input source to "DISC/USB2". ·The set cannot recognize a USB memory device. Check the connection. ·A USB memory device not conforming to mass storage class is connected. Connect a USB memory device conforming to mass storage class. ·A USB memory device cannot be connected via a USB hub. | 30 26 30 29 |
| Files on a USB memory device cannot be played. | ·Set the USB memory device format to "FAT16" or "FAT32" for USB1 port and "FAT32" for USB2 port. For details, refer to the USB memory device's operating instructions. ·If the USB memory device is divided into multiple partitions, only files stored in the top partition can be played. ·The file is recorded in an incompatible format. Please record it in a compatible format. ·This unit cannot play back files covered by copyright protection. | 29, 30 - 29 29, 30 - |
| The sound quality is poor or there is noise during playback. | ·The file being played back has a low bit rate. | - |
| "Connection Error" is displayed. | ·Unable to communicate properly. Turn off the power to this unit, unplug the USB memory device and then plug it back in. | - |
| "Communication Error" is displayed. | ·The USB memory device is not responding. Turn off the power to this unit, unplug the USB memory device and then plug it back in. | - |
| "Overcurrent" is displayed. | ·The USB memory device is consuming too much power. When using a USB portable hard disk that can be powered by an AC adapter, connect its AC adapter. | - |
[iPod]
| Symptom | Cause/Solution | Page |
| iPod cannot be played. | ·Check the iPod connections. ·Switch the input source to “iPod/USB1”. ·If using an iPod connected to the USB terminal, incompatible iPod types cannot be played back. | 25 28 28 |
| The file names are not displayed properly (“...”, etc.). | ·Characters that cannot be displayed on this unit are replaced by“. ” (period). | 28 |
| “Connection Error” is displayed. | ·Unable to communicate properly. Turn off the power to this unit, disconnect the iPod and then reconnect it. | - |
| "Not Support" is displayed. | ·The iPod connected to the unit is not compatible. Please make sure the iPod you are connecting is compatible. ·The software version of the connected iPod is an old one. Please update to the latest version. | 25 - |
| “Communication Error” is displayed. | ·The iPod is not responding. Turn off the power to this unit, disconnect the iPod and then reconnect it. | - |
[Remote control unit]
| Symptom | Cause/Solution | Page |
| The set cannot be operated with the remote control unit. | ·Batteries are worn out. Replace with new batteries. ·Operate the remote control unit within a distance of about 7 m from this unit and at an angle of within 30°. ·Remove any obstacle between this unit and the remote control unit. ·Insert the batteries in the proper direction, checking the ⊕ and Ⓢ marks. ·The set's remote control sensor is exposed to strong light (direct sunlight, inverter type fluorescent bulb light, etc.). Move the set to a place in which the remote control sensor will not be exposed to strong light. | 7 7 - - |
| 7 | ||
| 7 | ||
| - |
NOTE
- Some function may not be used in some operation status and this is not failure of the unit. Read the description in this user guide for details on correct operations.
- The volume may differ from disc to disc. This is due to the differences in how the signals are recorded on the disc, and is not a malfunction.
- Some functions are prohibited on some discs.
Resetting the microprocessor
Perform this procedure if the display is abnormal or if operations cannot be performed. When the microprocessor is reset, all the settings are reset to their default values.
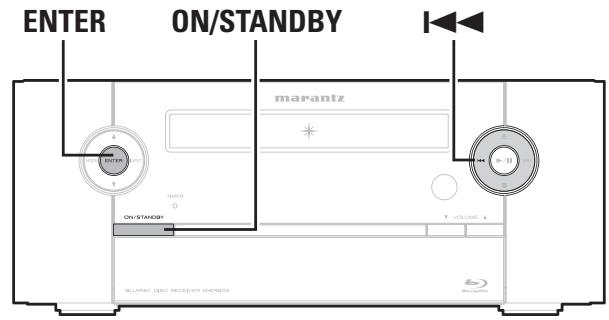
1 During standby, press ON/STANDBY while pressing and ENTER simultaneously.
2 Once the display starts flashing at intervals of about 1 second, release the two buttons. "INITIALIZING" is displayed.

If "INITIALIZING" does not display in step 2, start over from step 1.
Specifications
Audio Section
- Power amplifier
Rated output: 70W + 70W (1 kHz, 6 Ω, T.H.D. 10 %)
Effective maximum output: 55W + 55W (1 kHz, 6 Ω, T.H.D. 0.7 %)
Output connectors: 6-8Ω
- Analog
Input sensitivity/Input impedance: AUX1: 100mV / 25k
AUX2/3: 200 mV/47 kΩ
Video Section
S-Video connectors
Output level and impedance: 1 Vp-p, 75 Ω
Tuner section
Reception frequency range: 87.50 MHz - 108.00 MHz 522 kHz - 1611 kHz
Sensitivity (T.H.D. 3%, IHF): (S/N 30 dB):
FM stereo separation:
Applicable Discs:
BD-Video discs: 12 cm 1 side 1 layer, 12 cm 1 side 2 layers
DVD-Video discs : 12 cm 1 side 1 layer, 12 cm 1 side 2 layers/
12 cm 2 sides 2 layers (1 side 1 layer)
8cm1side1layer,8cm1side2layers/
8 cm 2 sides 2 layers (1 side 1 layer)
Compact Discs (CD-DA) : 12 cm / 8 cm discs
General
Power supply: AC 230 V, 50 Hz
Power consumption: 67 W 0.5 W (Normal standby)
Maximum external dimensions: 280 (W) x 111 (H) x 302 (D) mm
Weight: 5 kg
Remote Control Unit (RC001ER)
For purposes of improvement, specifications and design are subject to change without notice.
Index

Numerics
4:3 LB (letterbox) 36, 42
4:3PS (pan scan) 36,42
24P Mode 36

A
A2DP 11,42
AAC 15,29,30,42
Accessories 2
AM loop antenna 2
Angle 20
Aspect ratio 36,42
Audio 36
Audio commentary 42
Auto preset 22
AVCHD 14, 42
AVI 15,29,30,42

B
BASS 13
BD-J 18,42
BD-LIVE 17,42
BD-Live Internet Access 34
BD-Live Storage 34
BD-Video 14
Bit rate 42
Bluetooth 11
Blu-ray Disc 42
Bonus View 17, 42

C
Cable
Audio cable 10
Ethernet cable 27
HDMI cable 9
Pin-plug cable 8
Speaker cable 8
Portable audio player 26
Power cord 11
Satellite tuned 10
Set-top box 10
Speaker 8
TV. 9
USB memory device 25, 26
Wireless receiver (RX101) 11
Copyright protection 41
CT 24
Current time 14

DBB 13
Deep Color 9,42
DHCP 27,42
Direct mode 28
Display 5,36
Display's brightness 13
Dolby
Dolby Digital 42
Dolby Digital EX 42
Dolby Digital Plus 42
Dolby Headphone 21, 42
Dolby TrueHD 42
Dolby Virtual Speaker 21, 42
Downmix 42
DTS
DTS 96/24 42
DTS Digital Surround 42
DTS-ES Discrete 6.1 42
DTS-ES Matrix 6.1 42
DTS Express 43
DTS-HD 43
DTS-HD High Resolution Audio 43
DTS-HD Master Audio 43
DVD-R 14
DVD-R/DVD-RW 14
DVD-RW 14
DVD-Video 14
DVI-D terminal 9
Dynamic range 43
Dynamic Range Control 36
F
Fast forward 19
Fast reverse 19
File 4
Finalise 14, 43
FM indoor antenna 10
Front panel 4
H
HDCP 9,43
HDMI 9,43
HDMI Output 36
#
Information 33
Input source 12
Interactive audio 21, 43
Interlacing 43
J
JPEG 15,29,30,43
L
Language 37
Audio 37
Menu 37
OSD 37
Subtitle 37
LPCM (Linear PCM) 43
M
Manual preset 23
Menu map 33
MP3 15,29,30,43
MPEG 43
Mute 13
M
Network 35
Network Test 35
0
Operation
Fast forward 19
Fast reverse 19
Pause 18
Random 20
Repeat 20
Skip 19
Slow forward 19, 20
Step-by-step 18
Stop 18
Optical Disc AutoPlay 34
信P
Parental 37
Parental Control 37
Parental Level 37
Parental Password 37
Pause 18
Picture-in-picture 17,43
Playable discs 14
Playable files 15
Playback
Blu-ray Disc/DVD-Video 16
Dolby Headphone 21
Dolby Virtual Speaker 21
DVD 16
File 15
FM/AM broadcasts 22, 23
iPod (USB port) 28
Portable audio player 32
Stereo 21
USB memory device 29
Playback information 15
Play menu 31
Popup menu 16, 43
Preset codes 40
Primary audio 21, 43
Progressive 36, 43
Protection circuit 8, 43
PTY 24
R
Random 20
Rating 43
RDS 23
Rear panel 6
Region code 14, 43
Remote control unit 6
Inserting the batteries 7
Remote mode 28
Repeat 20
Reset Settings 35
Resetting the microprocessor 46
Resolution 36
Resume function 18
RT 24
S
Sampling frequency 29, 30, 43
Screen Saver Duration 34
Search mode 19
Secondary audio 21, 43
Skip 19
Slow forward 19
Source direct 13
Speaker impedance 43
Step-by-step 18
Stop 18
Subtitle 21
Subwoofer 8
Switching audio 21
System 34
T
Timer 38
Title 4, 43
Tone 13
TP 24
Trademark 41
TREBLE 13
Turn off power 12
Turn on power 12
TV Aspect 36
TV type 36
V
Virtual Package 34, 43
Volume 13
W
Wired 35
WMA 15,29,30,43
WMV 15,29,30,43
License / Lizenz / Licence / Licenza / License / Licentie- / Licens
This section describes software license used for this unit. To maintain the correct content, the original (English) is used.
Version 2, June 1991
Copyright (C) 1989, 1991 Free Software Foundation, Inc.
51 Franklin Street, Fifth Floor, Boston, MA 02110-1301, USA
Everyone is permitted to copy and distribute verbatim copies of this license document, but changing it is not allowed.
Preamble
The licenses for most software are designed to take away your freedom to share and change it. By contrast, the GNU General Public License is intended to guarantee your freedom to share and change free software—to make sure the software is free for all its users. This General Public License applies to most of the Free Software Foundation's software and to any other program whose authors commit to using it. (Some other Free Software Foundation software is covered by the GNU Lesser General Public License instead.) You can apply it to your programs, too.
When we speak of free software, we are referring to freedom, not price. Our General Public Licenses are designed to make sure that you have the freedom to distribute copies of free software (and charge for this service if you wish), that you receive source code or can get it if you want it, that you can change the software or use pieces of it in new free programs; and that you know you can do these things.
To protect your rights, we need to make restrictions that forbid anyone to deny you these rights or to ask you to surrender the rights. These restrictions translate to certain responsibilities for you if you distribute copies of the software, or if you modify it.
For example, if you distribute copies of such a program, whether gratis or for a fee, you must give the recipients all the rights that you have. You must make sure that
they, too, receive or can get the source code. And you must show them these terms so they know their rights.
We protect your rights with two steps: (1) copyright the software, and (2) offer you this license which gives you legal permission to copy, distribute and/or modify the software.
Also, for each author's protection and ours, we want to make certain that everyone understands that there is no warranty for this free software. If the software is modified by someone else and passed on, we want its recipients to know that what they have is not the original, so that any problems introduced by others will not reflect on the original authors' reputations.
Finally, any free program is threatened constantly by software patents. We wish to avoid the danger that redistributors of a free program will individually obtain patent licenses, in effect making the program proprietary. To prevent this, we have made it clear that any patent must be licensed for everyone's free use or not licensed at all.
The precise terms and conditions for copying, distribution and modification follow.
TERMS AND CONDITIONS FOR COOPYING, DISTRIBUTION AND MODIFICATION
- This License applies to any program or other work which contains a notice placed by the copyright holder saying it may be distributed under the terms of this General Public License. The "Program", below, refers to any such program or work, and a "work based on the Program" means either the Program or any derivative work under copyright law: that is to say, a work containing the Program or a portion of it, either verbatim or with modifications and/or translated into another language. (Hereinafter, translation is included without limitation in the term "modification.") Each licensee is addressed as "you".
Activities other than copying, distribution and modification are not covered by this License; they are outside its scope. The act of running the Program is not restricted, and the output from the Program is covered only if its contents constitute a work based on the Program (independent of having been made by running the Program). Whether that is true depends on what the Program does.
- You may copy and distribute verbatim copies of the Program's source code as you receive it, in any medium, provided that you conspicuously and appropriately publish on each copy an appropriate copyright notice and disclaimer of warranty; keep intact all the notices that refer to this License and to the absence of any warranty; and give any other recipients of the Program a copy of this License along with the Program.
You may charge a fee for the physical act of transferring a copy, and you may at your option offer warranty protection in exchange for a fee.
- You may modify your copy or copies of the Program or any portion of it, thus forming a work based on the Program, and copy and distribute such modifications or work under the terms of Section 1 above, provided that you also meet all of these conditions:
a) You must cause the modified files to carry prominent notices stating that you changed the files and the date of any change.
b) You must cause any work that you distribute or publish, that in whole or in part contains or is derived from the Program or any part thereof, to be licensed as a whole at no charge to all third parties under the terms of this License.
c) If the modified program normally reads commands interactively when run, you must cause it, when started running for such interactive use in the most ordinary way, to print or display an announcement including an appropriate copyright notice and a notice that there is no warranty (or else, saying that you provide a warranty) and that users may redistribute the program under these conditions, and telling the user how to view a copy of this License. (Exception: if the Program itself is interactive but does not normally print such an announcement, your work based on the Program is not required to print an announcement.)
These requirements apply to the modified work as a whole. If identifiable sections of that work are not derived from the Program, and can be reasonably considered independent and separate works in themselves, then this License, and its terms, do not apply to those sections when you distribute them as separate works. But when you distribute the same sections as part of a whole which is a work based on the Program, the distribution of the whole must be on the terms of this License, whose permissions for other licensees extend to the entire whole, and thus to each and every part regardless of who wrote it.
Thus, it is not the intent of this section to claim rights or contest your rights to work written entirely by you; rather,
the intent is to exercise the right to control the distribution of derivative or collective works based on the Program.
In addition, mere aggregation of another work not based on the Program with the Program (or with a work based on the Program) on a volume of a storage or distribution medium does not bring the other work under the scope of this License.
- You may copy and distribute the Program (or a work based on it, under Section 2) in object code or executable form under the terms of Sections 1 and 2 above provided that you also do one of the following:
a) Accompany it with the complete corresponding machine-readable source code, which must be distributed under the terms of Sections 1 and 2 above on a medium customarily used for software interchange; or,
b) Accompany it with a written offer, valid for at least three years, to give any third party, for a charge no more than your cost of physically performing source distribution, a complete machine-readable copy of the corresponding source code, to be distributed under the terms of Sections 1 and 2 above on a medium customarily used for software interchange; or,
c) Accompany it with the information you received as to the offer to distribute corresponding source code. (This alternative is allowed only for noncommercial distribution and only if you received the program in object code or executable form with such an offer, in accord with Subsection b above.)
The source code for a work means the preferred form of the work for making modifications to it. For an executable work, complete source code means all the source code for all modules it contains, plus any associated interface definition files, plus the scripts used to control compilation and installation of the executable. However, as a special exception, the source code distributed need not include anything that is normally distributed (in either source or binary form) with the major components (compiler, kernel, and so on) of the operating system on which the executable runs, unless that component itself accompanies the executable.
If distribution of executable or object code is made by offering access to copy from a designated place, then offering equivalent access to copy the source code from the same place counts as distribution of the source code, even though third parties are not compelled to copy the source along with the object code.
-
You may not copy, modify, sublicense, or distribute the Program except as expressly provided under this License. Any attempt otherwise to copy, modify, sublicense or distribute the Program is void, and will automatically terminate your rights under this License. However, parties who have received copies, or rights, from you under this License will not have their licenses terminated so long as such parties remain in full compliance.
-
You are not required to accept this License, since you have not signed it. However, nothing else grants you permission to modify or distribute the Program or its derivative works. These actions are prohibited by law if you do not accept this License. Therefore, by modifying or distributing the Program (or any work based on the Program), you indicate your acceptance of this License to do so, and all its terms and conditions for copying, distributing or modifying the Program or works based on it.
-
Each time you redistribute the Program (or any work based on the Program), the recipient automatically receives a license from the original licensor to copy, distribute or modify the Program subject to these terms and conditions. You may not impose any further restrictions on the recipients' exercise of the rights granted herein. You are not responsible for enforcing compliance by third parties to this License.
-
If, as a consequence of a court judgment or allegation of patent infringement or for any other reason (not limited to patent issues), conditions are imposed on you (whether by court order, agreement or otherwise) that contradict the conditions of this License, they do not excuse you from the conditions of this License. If you cannot distribute so as to satisfy simultaneously your obligations under this License and any other pertinent obligations, then as a consequence you may not distribute the Program at all. For example, if a patent license would not permit royalty-free redistribution of the Program by all those who receive copies directly or indirectly through you, then the only way you could satisfy both it and this License would be to refrain entirely from distribution of the Program.
If any portion of this section is held invalid or unenforceable under any particular circumstance, the balance of the section is intended to apply and the section as a whole is intended to apply in other circumstances.
It is not the purpose of this section to induce you to infringe any patents or other property right claims or to contest validity of any such claims; this section has the sole purpose of protecting the integrity of the free software distribution system, which is implemented by public license practices. Many people have made generous contributions to the wide range of software distributed through that system in reliance on consistent application of that system; it is up to the author/donor to decide if he or she is willing to distribute software through any other system and a licensee cannot impose that choice.
This section is intended to make thoroughly clear what is believed to be a consequence of the rest of this License.
- If the distribution and/or use of the Program is restricted in certain countries either by patents or by copyrighted interfaces, the original copyright holder who places the Program under this License may add an explicit geographical distribution limitation excluding those countries, so that distribution is permitted only in or among countries not thus excluded. In such case, this
License incorporates the limitation as if written in the body of this License.
- The Free Software Foundation may publish revised and/ or new versions of the General Public License from time to time. Such new versions will be similar in spirit to the present version, but may differ in detail to address new problems or concerns.
Each version is given a distinguishing version number. If the Program specifies a version number of this License which applies to it and "any later version", you have the option of following the terms and conditions either of that version or of any later version published by the Free Software Foundation. If the Program does not specify a version number of this License, you may choose any version ever published by the Free Software Foundation.
- If you wish to incorporate parts of the Program into other free programs whose distribution conditions are different, write to the author to ask for permission. For software which is copyrighted by the Free Software Foundation, write to the Free Software Foundation; we sometimes make exceptions for this. Our decision will be guided by the two goals of preserving the free status of all derivatives of our free software and of promoting the sharing and reuse of software generally.
NO WARRANTY
-
BECAUSE THE PROGRAM IS LICENSED FREE OF CHARGE, THERE IS NO WARRANTY FOR THE PROGRAM, TO THE EXTENT PERMITTED BY APPLICABLE LAW. EXCEPT WHEN OTHERWISE STATED IN WRITING THE COPYRIGHT HOLDERS AND/OR OTHER PARTIES PROVIDE THE PROGRAM "AS IS" WITHOUT WARRANTY OF ANY KIND, EITHER EXPRESSED OR IMPLIED, INCLUDING BUT NOT LIMITED TO, THE IMPLIED WARRANTYES OF MERCHANTABILITY AND FITNESS FOR A PARTICULAR PURPOSE. THE ENTIRE RISK AS TO THE QUALITY AND PERFORMANCE OF THE PROGRAM IS WITH YOU. SHOULD THE PROGRAM PROVE DEFECTIVE, YOU ASSUME THE COST OF ALL NECESSARY SERVICING, REPAIR OR CORRECTION.
-
IN NO EVENT UNLESS REQUIRED BY APPLICABLE LAW OR AGREED TO IN WRITING WILL ANY COPYRIGHT HOLDER, OR ANY OTHER PARTY WHO MAY MODIFY AND/OR REDISTRIBUTE THE PROGRAM AS PERMITTED ABOVE, BE LIABLE TO YOU FOR DAMAGES, INCLUDING ANY GENERAL, SPECIAL, INCIDENTAL OR CONSEQUENTIAL DAMAGES ARISING OUT OF THE USE OR INABILITY TO USE THE PROGRAM (INCLUDING BUT NOT LIMITED TO LOSS OF DATA OR DATA BEING RENDERED INACCURATE OR LOSSES SUSTAINED BY YOU OR THIRD PARTIES OR A FAILURE OF THE PROGRAM TO OPERATE WITH ANY OTHER PROGRAMS), EVEN IF SUCH HOLDER OR OTHER PARTY HAS BEEN ADVISED OF THE POSSIBILITY OF SUCH DAMAGES.
END OF TERMS AND CONDITIONS
How to Apply These Terms to Your New Programs
If you develop a new program, and you want it to be of the greatest possible use to the public, the best way to achieve this is to make it free software which everyone can redistribute and change under these terms.
To do so, attach the following notices to the program. It is safest to attach them to the start of each source file to most effectively convey the exclusion of warranty; and each file should have at least the "copyright" line and a pointer to where the full notice is found.
One line to give the program's name and a brief idea of what it does.
Copyright (C)
This program is free software; you can redistribute it and/or modify it under the terms of the GNU General Public License as published by the Free Software Foundation; either version 2 of the License, or (at your option) any later version.
This program is distributed in the hope that it will be useful, but WITHOUT ANY WARRANTY; without even the implied warranty of MERCHANTABILITY or FITNESS FOR A PARTICULAR PURPOSE. See the GNU General Public License for more details.
You should have received a copy of the GNU General Public License along with this program; if not, write to the Free Software Foundation, Inc., 59
Temple Place, Suite 330, Boston, MA 02111-1307 USA
Also add information on how to contact you by electronic and paper mail.
If the program is interactive, make it output a short notice like this when it starts in an interactive mode:
Gnomovision version 69, Copyright (C) year name of author Gnomovision comes with ABSOLUTELY NO WARRANTY; for details type 'show w'. This is free software, and you are welcome to redistribute it under certain conditions; type 'show c' for details.
The hypothetical commands 'show w' and 'show c' should show the appropriate parts of the General Public License. Of course, the commands you use may be called something other than 'show w' and 'show c'; they could even be mouse-clicks or menu items-whatever suits your program.
You should also get your employer (if you work as a programmer) or your school, if any, to sign a "copyright disclaimer" for the program, if necessary. Here is a sample; alter the names:
Yoyodyne, Inc., hereby disclaims all copyright interest in the program 'Gnomovision' (which makes passes at compilers) written by James Hacker. signature of Ty Coon, 1 April 1989
Ty Coon, President of Vice
This General Public License does not permit incorporating
you program into proprietary programs. If your program is subroutine library, you may consider it more useful to permit linking proprietary applications with the library. If this is what you want to do, use the GNU Library General Public License instead of this License.
License Information for the Software Used in the Unit
About GPL (GNU-General Public License), LGPL (GNU Lesser General Public License) License
This product uses GPL/LGPL software and software made by other companies.
After you purchase this product, you may procure, modify or distribute the source code of the GPL/ LGPL software that is used in the product.
Marantz provides the source code based on the GPL and LPGL licenses at the actual cost upon your request to our customer service center. However, note that we make no guarantees concerning the source code. Please also understand that we do not offer support for the contents of the source code.
DEVICE SELECT : TV
Television
| A | Acer | 1141 |
| Admiral | 1102, 1009, 1089 | |
| Aiko | 1059 | |
| Aiwa | 1117, 1118 | |
| Akai | 1001 | |
| Amtron | 1023 | |
| Anam | 1113 | |
| Anam National | 1023, 1069, 1092 | |
| AOC | 1003, 1024, 1049, 1127 | |
| Audiovox | 1023 |
B Bell & Howell 1009, 1025
Benq 1104, 1142
Broksonic 1003, 1097, 1098, 1113
Celebrity 1001
Citizen 1003, 1013, 1023, 1026, 1059, 1063
Colortyme 1003, 1043
Contec 1113
Contec/Cony 1023, 1045, 1047
Craig 1020, 1022, 1023, 1113
Crown 1023, 1067
Curtis Mathes 1003, 1013, 1025, 1026, 1062. 1103. 1110
D Daewoo 1003, 1013, 1024, 1035 1036, 1059, 1084, 1101
Daytron 1003, 1013, 1016
Dimensia 1103, 1110
Dumont 1003, 1010, 1153
E Electroband 1001
Electrohome 1001, 1003, 1069, 1133
1003, 1013, 1015, 1020, 1021, 1022, 1023, 1025
Emerson 1038, 1044, 1045, 1048
1055, 1061, 1094, 1096, 1099, 1101, 1113
Envision 1003
F Firstar 1025,1051,1091,1160
Fujitsu 1038, 1124, 1125, 1155
Funai 1023, 1038, 1113
G Gateway 1150
GE 1003,1018,1022,1046 1054,1069,1085,1103 1110,1113,1133,1136 1153
Goldstar 1045,1080,1100,1112, 1154
| Hallmark | 1003 |
| Hisense | 1116 |
| Hitachi | 1003, 1012, 1031, 1032, 1037, 1041, 1045, 1047, 1065, 1068, 1082, 1088, 1094, 1139, 1140, 1145, 1159 |
Infinity 1067
JJaneil 1134
JBL 1067
1003, 1013, 1018, 1019, 1024, 1026, 1046, 1047, 1054, 1063, 1083, 1085, 1100, 1103, 1110, 1112, 1133, 1154
Jensen 1003
JVC 1028,1029,1045,1047, 1050,1060,1065
K Kawasho 1001, 1003
Kenwood 1003
Kloss Novabeam 1023,1056,1057,1134
KTV 1013, 1023, 1033, 1034, 1073, 1099, 1113
LG 1024,1030
M.M.Wards 1002,1009,1038
Magnavox 1057,1063,1067,1081, 1106
Marantz 1003, 1031, 1067, 1122
Mitsubishi 1003, 1024, 1051, 1115, 1122, 1133
Motorola 1014, 1069
N NEC 1003, 1012, 1024, 1043, 1069
Net-TV 1037, 1150
0 Orion 1020, 1096
P Panasonic 1017,1067,1069,1095, 1111
1003, 1011, 1045, 1052 Philips 1054, 1056, 1057, 1058, 1063, 1067, 1069, 1106
Pioneer 1071,1094,1145,1147, 1149
Plasmsync 1135
Portland 1003, 1013, 1024, 1059
Price Club 1026
Prism 1018
Proscan 1004, 1005, 1006, 1007, 1008, 1085, 1103, 1110
Proton 1003, 1045
Q Quasar 1010, 1069, 1073, 1111, 1153
1003, 1013, 1015, 1023 Radio Shack 1024, 1025, 1045, 1100, 1103, 1110, 1113
| RCA | 1003, 1004, 1005, 1006, 1007, 1008, 1014, 1024, 1049, 1069, 1075, 1079, 1085, 1087, 1088, 1093, 1094, 1101, 1103, 1110, 1113, 1153 |
Realistic 1013, 1015, 1023, 1025, 1045, 1100, 1103, 1110
Runco 1010,1153
S Sampo 1150
1003, 1013, 1024, 1026
Samsung 1083,1090,1100,1105, 1114,1120,1121,1146, 1148,1157
Sansui 1119
1003, 1025, 1051, 1072
Sanyo 1077,1091,1156,1157, 1158
1003, 1013, 1014, 1015
Sharp 1045, 1055, 1064, 1066, 1076, 1089, 1123
Signature 1009
Sony 1001, 1102, 1108
Sounddesign 1003,1023,1038,1063, 1113
Starlite 1023
Supre-Macy 1134
1003, 1039, 1042, 1052
Sylvania 1053, 1056, 1057, 1063, 1067, 1089, 1151
Symphonic 1023, 1039, 1044
Tandy 1014
Tatung 1069
Technics 1018
Techwood 1003, 1018
1003, 1009, 1013, 1023, 1024, 1026, 1038, 1045
Tekhika 1047,1059,1063,1111, 1113
Telecaption 1074
1003, 1019, 1025, 1026
Toshiba 1042, 1074, 1098, 1107, 1111, 1135, 1136
Totevision 1013
Universal 1046, 1054
Video Concepts 1113
1006, 1022, 1109, 1128 Viewsonic 1129, 1130, 1131, 1138, 1143, 1145, 1150
1003, 1009, 1015, 1024, 1038, 1044, 1046, 1052
Wards 1054,1056,1057,1067, 1086,1103,1110
White 1101, 1001
Westinghouse
Y. Yamaha 1003, 1024
Z Zenith 1003, 1009, 1010, 1132, 1144, 1153

Unit: mm
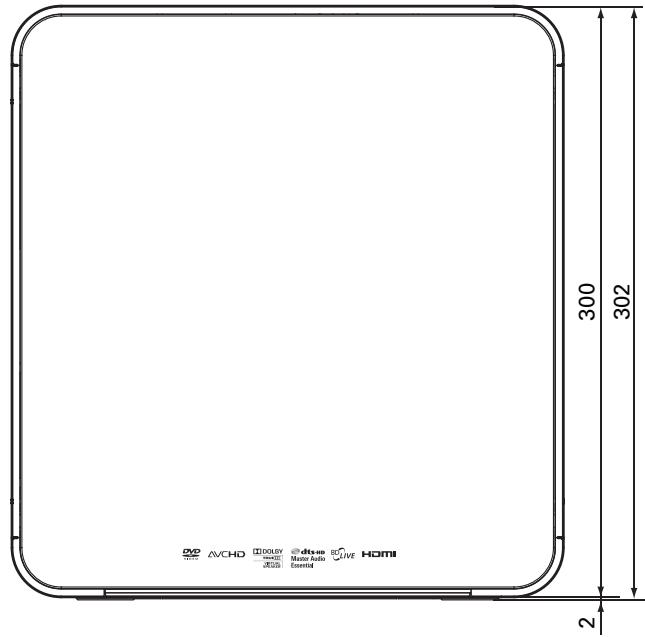
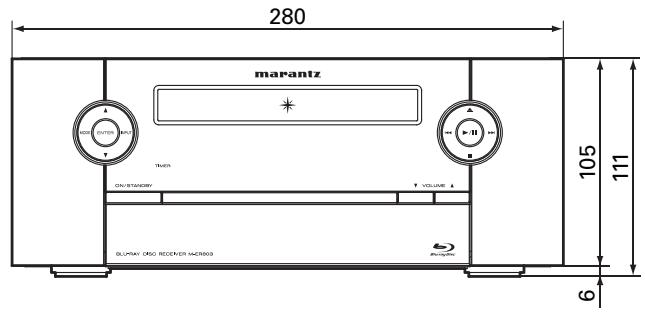
www.marantz.com
You can find your nearest authorized distributor or dealer on our website.
marantz® is a registered trademark.
- SAFETY PRECAUTIONS
- CAUTION
- RISK OF ELECTRIC SHOCK DO NOT OPEN
- CAUTION:
- WARNING:
- IMPORTANT SAFETY INSTRUCTIONS
- VORSICHT:
- - DECLARATION OF CONFORMITY
- A NOTE ABOUT RECYCLING:
- HINWEIS ZUM RECYCLING:
- Getting started
- Contents
- Getting started 1
- Basic connections 8
- Basic operations 12
- Advanced connections 25
- Advanced operations 28
- How to make detailed settings 33
- Other setting 38
- Other information 41
- Explanation terms 42
- Troubleshooting 44
- Specifications 47
- Index 47
- Accessories
- About this manual
- Operation buttons
- Symbols
- NOTE
- □ Illustrations
- Main features
- Direct Play for iPod® and iPhone® via USB
- Weight and Dramatic sound
- "Simple & Straight" circuit design for sound purity and free of coloration
- Playback of MP3 and WMA files
- Low standby power consumption
- M-XPort (Marantz-eXtension Port)
- Cautions on handling
- - Before turning the power switch on
- - Image persistence (image burn-in)
- - About Condensation
- - Cautions on using mobile phones
- - Moving the unit
- - About Care
- - Sufficiently ventilate the place of installation
- About discs
- Inserting a disc
- Holding discs
- Loading discs
- Cautions on storing discs
- Cleaning discs
- About discs and files
- BD-Video, DVD-Video
- CD
- File
- Part names and functions
- Front panel
- Door
- Rear panel
- Remote control unit
- □ Inserting the batteries
- □ Operating range of the remote control unit
- Basic connections
- Connecting speakers
- Cables used for connections
- Connecting the speaker cables
- Protection circuit
- Connecting a TV
- HDMI function
- Copyright protection system
- About HDMI cables
- Connecting to a device equipped with a DVI-D connector
- □ Settings related to HDMI connections
- Audio ( page 36)
- Connecting a set-top box (Satellite tuner/Cable TV)
- Connecting an antenna
- AM loop antenna assembly
- Using the AM loop antenna
- Suspending on a wall
- Standing alone
- Connecting a wireless receiver (RX101)
- Remote control connection
- Setting the remote control
- Connecting the power cord
- Basic operations
- Important information
- Preparations
- Turning the power on
- Press POWER.
- Turning the power off
- Completely turning off the power
- Selecting the input source
- Using the button on the main unit
- Press INPUT
- Operations possible during playback
- Adjusting the master volume
- Turning off the sound temporarily
- Switching the display's brightness
- Adjusting the tone
- Listening with headphones
- Source direct mode
- Press S.DIRECT.
- Setting the current time (24-Hour Display)
- Playable media
- About playback information
- Press DISP..
- Information bar display
- Playing Blu-ray Disc, DVD-Video and CD
- Prepare for playback.
- Press POWER to turn on power to the unit.
- Press DISC to switch the input source to "DISC/USB2".
- Insert a disc.
- Use to select the disc, then press ENTER. Playback starts.
- Operations using disc menu, top menu, and pop-up menu
- □ Using the disc menu
- During playback, press TOP MENU.
- Use to select the desired item, then press ENTER.
- □ Using the title menu
- During playback, press POP UP MENU.
- Using the pop-up menu
- Use to select the desired item, then press ENTER.
- Press POP UP MENU to exit.
- Enjoying BD-LIVE Features
- BD
- NOTE for USB memory device
- Playing BD-Video compatible with Bonus View
- Playback (Basic)
- Stop playback
- During playback, press ■.
- About resume function
- To cancel the resume function
- Pause playback
- During playback, press I.
- Step-by-step playback
- During pause, press II.
- Fast forward/fast reverse playback
- During playback, press or
- Slow forward playback
- During pause, press
- Skipping to the chapter/track/file
- During playback, press 1 or 2 .
- Looking for specific sections using the search modes
- During playback, press SEARCH, and then search mode.
- [Content compatible with search mode]
- Conducting search condition entry or setting on the search mode setting bar.
- When entering title, chapter, track number
- [Example]
- When entering the elapsed time
- When clearing the numbers entered
- Repeat playback
- Press REPEAT.
- [About repeat mode]
- □ Stopping repeat playback
- Repeat playback between specified points (A-B repeat)
- Random playback
- During playback, press RANDOM.
- - Stopping random playback
- Switching the angle
- Switching the audio
- During playback, press AUDIO/RDS.
- Switching the subtitles
- During playback, press SUBTITLE.
- Surround mode
- Dolby Virtual Speaker playback
- Press SURROUND.
- Dolby Headphone playback
- Connect the headphone.
- Stereo playback
- Press STEREO.
- Tuning in radio stations
- Listening to FM/AM broadcasts
- Preseting FM stations automatically (Auto preset)
- Press SETUP.
- Canceling auto presetting
- Givingsationnamestopresetchannels
- Tune in the preset channel you want to name.
- Press ENTER twice.
- Input the station name.
- Press ENTER.
- - Presetting FM/AM stations manually (Manual preset)
- A Input the station name.
- Press ENTER. The characters y
- Listening to preset stations
- Canceling preset channels
- RDS (Radio Data System)
- RDS Search
- Press TUNER to select "FM".
- Press AUDIO/RDS.
- Viewing information during reception
- PTY (Program Type)
- PTY search
- TP (Traffic Program)
- TP search
- RT (Radio Text)
- CT (Clock Time)
- Advanced connections
- Connecting an iPod or USB memory device to the iPod/USB1 port
- Using the iPod stand
- iPod stand assembly
- Supported iPod models
- Connecting a USB memory device to the USB2 port
- USB memory device for BD-LIVE
- Connecting a portable audio player
- Connecting to the network
- Required system
- Broadband internet connection
- Modem
- Router
- Ethernet cable
- (CAT-5 or greater recommended)
- Advanced operations
- Playing an iPod®
- Connect an iPod directly to the iPod/USB1 port to play back
- Press iPod D/R to select the display mode.
- iPod operation
- Playing a USB memory device
- Use the iPod/USB1 port on the front panel
- USB operation
- Playing files
- Files playback
- To make a playlist
- Selecting an item in the play menu
- To change the effect on displaying pictures
- When selecting the slide show effects
- When selecting the slide show delay
- Playing both the music files and the JPEG files simultaneously
- To control the music files
- Playing a portable audio player
- How to make detailed settings
- Menu map
- OSD (on-screen display) menu operation
- Settings
- System
- Network
- Default settings are underlined.
- Display
- Audio
- Language
- Parental
- Other setting
- Timer setup
- Timer order of priority
- Setting the timer
- Only when the input source "TUNER" function is selected
- Setting the timer to on or off
- To check the timer settings
- To change the timer settings
- To change the setting while setting the timer
- Setting the sleep timer
- During playback, press SLEEP and display the time you want to set.
- Canceling the sleep timer
- To check the time remaining until the sleep timer is activated
- Audio delay
- Auto standby
- Registering preset codes
- Buttons used for operating the TV
- Press 0-9 while simultaneously pressing and ENTER.
- Other functions
- Auto power on
- Last function memory
- Other information
- About copyright
- Trademark information
- Explanation terms
- Numerics
- 4:3 LB (letterbox)
- 4:3 PS (pan scan)
- A
- A2DP
- AAC (Advanced Audio Coding)
- Aspect ratio
- Audio commentary
- AVCHD (Advanced Video Codec High Definition)
- AVI (Audio Video Interleaving)
- B
- BD-J (Blu-ray Disc Java)
- BD-LIVE
- Bit rate
- Blu-ray Disc
- Bonus View
- C
- Chapter
- D
- Deep Color
- DHCP (Dynamic Host Configuration Protocol)
- Dolby Digital
- Dolby Digital EX
- Dolby Digital Plus
- Dolby Headphone
- Dolby TrueHD
- Dolby Virtual Speaker
- Downmix
- DTS
- DTS 96/24
- DTS Digital Surround
- DTS-ES™ Discrete 6.1
- DTS-ES™ Matrix 6.1
- DTS Express
- DTS-HD
- DTS-HD High Resolution Audio
- DTS-HD Master Audio
- Dynamic range
- F
- Finalise
- H
- HDCP
- HDMI
- 1
- Interlacing (interlaced scanning)
- Interactive audio
- J
- JPEG (Joint Photo graphic Experts Group)
- L
- Linear PCM
- M
- MP3 (MPEG Audio Layer-3)
- MPEG (Moving Picture Experts Group), MPEG-2, MPEG-4
- P
- Picture-in-picture
- Popup menu
- Primary audio
- Progressive (sequential scanning)
- R
- Rating
- Region code
- s
- Sampling frequency
- Secondary audio
- Speaker impedance
- T
- Title
- V
- Virtual Package
- W
- WMA (Windows Media Audio)
- WMV (Windows Media Video)
- Troubleshooting
- Resetting the microprocessor
- Specifications
- Audio Section
- Video Section
- Tuner section
- Applicable Discs:
- General
- Remote Control Unit (RC001ER)
- Index
- #
- 0
- 信P
- License / Lizenz / Licence / Licenza / License / Licentie- / Licens
- Preamble
- TERMS AND CONDITIONS FOR COOPYING, DISTRIBUTION AND MODIFICATION
- NO WARRANTY
- How to Apply These Terms to Your New Programs
- License Information for the Software Used in the Unit
- About GPL (GNU-General Public License), LGPL (GNU Lesser General Public License) License
- DEVICE SELECT : TV
- www.marantz.com
Brand : MARANTZ
Model : M-ER803
Category : Audio Amplifier