
DIMAGE G400 - Digital Camera MINOLTA - Free user manual and instructions
Find the device manual for free DIMAGE G400 MINOLTA in PDF.


| Product type | Digital camera |
| Brand | Minolta |
| Model | DIMAGE G400 |
| Sensor | CCD 4.0 megapixels |
| Optical zoom | 3x (35-105 mm equivalent) |
| Digital zoom | 4x |
| LCD screen | 1.5 inches, approx. 130,000 pixels |
| Power source | Rechargeable Li-ion battery NP-40 |
| Storage | SD / MMC memory card |
| Dimensions (W x H x D) | 94 x 56 x 29 mm |
| Weight | 145 g (without battery or card) |
| Maximum resolution | 2,272 x 1,704 pixels |
| Shutter speed | 4 to 1/1000 s |
| ISO sensitivity | Auto, 50, 100, 200, 400 |
| Built-in flash | Yes (effective range approx. 3 m) |
| Video mode | Yes (320x240, 15 frames/s) |
| Connections | USB 1.1, video output (PAL/NTSC) |
| Main functions | Auto shooting, programmed, portrait, landscape, sports, night |
| Maintenance and cleaning | Clean the exterior with a soft dry cloth; for the lens, use a blower brush and a microfiber cloth |
| Safety | Do not expose to humidity, extreme temperatures, or strong shocks |
| Spare parts and repairability | Battery and charger available from authorized dealers; repair by Minolta authorized service center |
| General information | Compact digital camera, compliant with Canadian standard NMB-003 (Class B) |
Frequently Asked Questions - DIMAGE G400 MINOLTA
User questions about DIMAGE G400 MINOLTA
0 question about this device. Answer the ones you know or ask your own.
Ask a new question about this device
Download the instructions for your Digital Camera in PDF format for free! Find your manual DIMAGE G400 - MINOLTA and take your electronic device back in hand. On this page are published all the documents necessary for the use of your device. DIMAGE G400 by MINOLTA.
USER MANUAL DIMAGE G400 MINOLTA
Please be sure to read this manual before use.
- Test shooting
Be sure to take some test shots before taking important pictures (such as business or weddings) to make sure that the camera is working properly.
• Results are not guaranteed
In the unlikely event that a problem arises in shooting or reproducing pictures due to the camera or memory card used, please understand that no compensation can be made.
- Be aware of Copyright
Any pictures that you take of existing images may be used for personal use only. Copyright law prohibits the use of pictures without the permission of the rightful owner. Also, please note that some occasions of the performing arts, demonstrations and exhibitions may restrict photography even for the purpose of personal enjoyment.
Caution for Extended Camera Use:
The camera body may become hot when used for a long period of time, but it doesn't mean that the camera is broken. However, if the camera keeps touching the skin for a long time, this may cause a cryogenic burn. Please be careful with it.
About trademarks
- Windows 98, Windows 98SE, Windows XP, Windows 2000 Professional and Windows Me are trademarks or registered trademarks of Microsoft Corporation in the U.S. and other countries.
- Apple, Macintosh, Mac OS, QuickTime and Power PC are trademarks or registered trademarks of Apple Computer in the U.S. and other countries.
- Other company names and product names are trademarks or registered trademarks of their respective owners.
Getting Started (Cont'd)
* The illustrations in this guide are for the purpose of explanation and may differ from the actual design of your camera.
* You can also order a digital print at a photo lab (except for some labs) such as a traditional photofinishing service. For detailed information, please contact your photo lab.
Getting Started 2
Important Safety Precautions....8
Preparation
Necessary Accessories 13
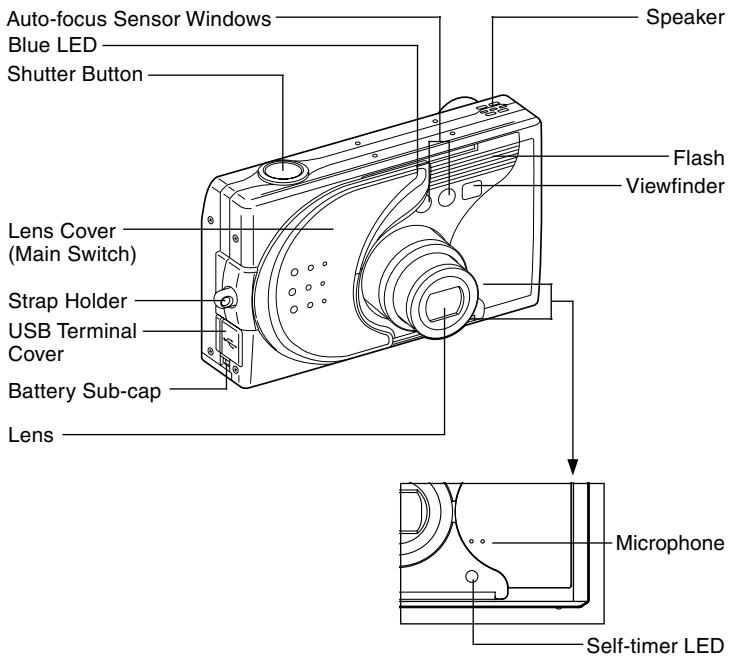
Names of Parts 16
Camera Body 16
Operation Buttons 18
Attaching the Strap....19
Preparing the Power Supply 20
Charging the (supplied) Battery Pack 20
Installing the (supplied) Battery Pack 21
Connecting the AC Adapter (sold separately) 24
Inserting/Removing Cards 26
Turning the Power ON/OFF 28
Setting the Menu Language/Date and Time 29
Basic Operation
Taking Pictures 31
Holding Your Camera 31
Viewfinder LED 31
Selecting the Shooting Mode 32
Taking Pictures using the LCD Monitor 34
Taking Pictures using the Viewfinder 40
Shooting with Focus Lock 41
Shooting Movies 42
Selecting the Flash/Macro Mode 44
AUTO (Auto Flash) 45
Fill-In 45
Off (Flash Override) 46
Macro-photo Mode 46
Playback 47
Playing Back Pre-recorded Images 47
Playing Back Movies 50
Erasing the Playback Image 51
Erasing Unwanted Images 51
Advanced Operations and Shooting
Using the Shooting Menu ....54
Using the Auto Mode Menu 54
Changing the color effects 56
Continuous Shooting 57
Selecting the Image Size 58
Setting Memory Priority 60
Using the Self-Timer 61
Using the Scene Select Mode Menu 62
Selecting the right mode for your shot 64
Using the Movie/Voice Mode Menu 66
Using After Recording 68
Making Voice Memos 70
Adjusting Exposure Compensation 71
Adjusting White Balance 72
Using the Manual Mode Menu 74
Taking Pictures in Program Mode 76
Taking Pictures in Aperture Mode 78
Taking photographs in manual exposure mode 79
Using the Auto Bracket Function 81
Changing the Sensitivity (ISO) 82
Taking photographs by fixing focus 82
Setting the Custom Function 83
Adjusting the Flash Brightness 84
Adjusting the Saturation 85
Adjusting the Contrast 85
Adjusting the Sharpness 86
Adjusting the Color 87
Changing slow shutter speed 88
Advanced Playback
Playback 89
Viewing Multiple Pages at Once (Index Playback) 89
Playing Back Enlarged Images (Digital Zoom) 90
Using the Quick-view Function 90
Playing back the sound of After Recording image 91
Playing Back Voice Memos 91
Using the PLAY Menu 92
Copying and Moving Images 94
Selecting/Deselecting Images to Print (DPOF) 97
Setting/Canceling Protection for Your Important Images ... 101
Reducing Image Size (Resizing) 104
Playing a Slide Show....105
Camera Settings
Using the Set-up Menu 106
Formatting a Memory Card 108
Specifying the LCD Monitor Settings 110
Setting QUICK VIEW 111
Hiding the image information 111
Changing the LCD monitor operation mode 111
Preventing the blue LED from switching on 111
Adjusting the Brightness and color of the LCD Monitor ... 112
Specifying the Shooting mode settings 113
Taking pictures using red-eye reduction 114
Using the Digital Zoom 114
Resetting the file number 115
Changing Auto-Exposure (AE) Modes 115
Changing the focus metering (AF) Mode 116
Changing the sound settings 117
Specifying the basic camera set up 118
Adjusting the Date and Time 119
Changing Languages 119
Setting the Auto Power-OFF Time 119
Specifying custom settings 120
Restoring the defaults 120
Connecting to your PC
Connecting to your PC 121
Operating Environments 121
Connecting with a USB cable 122
Installing software and downloading images .... 123
Installing USB Driver Software 123
Downloading (transferring) Images 125
How to Install and Use QuickTime (Windows only)...... 127
Using Windows 128
Using Macintosh 130
Others
When Carrying the Camera Overseas.... 131
Care and Storage 132
Troubleshooting 134
Main Specifications 136
Important Safety Precautions
This product has been designed with safety in mind; however, please read the following display marks, warnings and cautions for its correct usage.
The following warning and caution symbols are to prevent damage to the user, other persons and property.
Definitions of the symbols
The following categories explain the degree of danger or damage that may occur if the displayed content is not followed or the product is misused.

Warning
This symbol indicates that misuse may result in serious injury and even death.

Caution
This symbol indicates that misuse may result in bodily injury or physical damage.
The following categories explain the contents to be followed using symbols.

This symbol indicates that the content requires caution when performed.

This symbol indicates that the content is prohibited.

This symbol indicates that the content must always be followed.

Warning

Should any of the following occur, stop using the product immediately. Remove the batteries from the unit and disconnect the AC adapter. If using the AC adapter, disconnect the power plug from the wall outlet.
Consult the dealer from whom you bought the product for further assistance.
Continued use of the product may result in fire or electrical shock.
- If you notice any abnormality such as smoke or an abnormal smell, or if the camera becomes extremely hot.
- If liquid gets inside the camera.
- If any foreign object gets inside the camera.

Do not dismantle, modify or repair the camera yourself.
Fire and/or electrical shock may occur as a result.
For repair or internal inspection, consult the dealer from whom you bought the product.

Do not allow the camera to get wet.
Fire, electrical shock and/or malfunction of the unit may occur if internal parts are exposed to water or other liquids.

Do not drop or insert metal objects or combustible items inside the camera.
Fire, electrical shock and/or malfunction of the unit may occur as a result of metal objects, etc. getting inside the camera.

Do not use the camera while driving.
May cause traffic accidents.
When using the camera while walking, pay attention to the road surface, surroundings, etc.

Do not use the camera on unstable ground.
Serious injury and even death may occur as a result especially when falling from high places.

Warning

Do not directly look at the sun through the viewfinder.
Loss of or impaired eyesight may result.

Do not touch the metal parts on the camera during thunder and lighting.
Death may occur if lighting strikes the camera.

Do not use AC adapters other than those specified.
Fire may occur as a result of AC adapters other than those specified being used.

Do not dismantle, short-circuit, coat (solder, etc.), apply heat, apply pressure (with nail, etc.) to the battery, or throw into a fire. Furthermore, do not allow metals (wires, necklaces, etc.) to come into contact with batteries.
Fluid leakage, heat, fire and damage may occur as a result.

Caution

Do not point the lens directly at the sun or at a strong light source.
Malfunction of internal parts may occur from concentrated rays of light. Using the camera in such conditions may cause short circuits and breakdown of insulation, resulting in overheating and/or fire.

Take care not to get fingers caught in the battery/card cover.
Personal injury may occur as a result.

When using the camera inside an airplane, follow the directions of the airline company.
Electric waves emitted from the camera may affect airplane cockpit instruments.

Do not use the flash near eyes.
Eye injury may occur as a result.

Caution

When taking a picture, wipe off the flash surface and be careful not to cover the flash.
If the flash surface is dirty or you take a shot with the flash covered, it is possible for the flash surface quality or color to change, due to the high temperature of the flash.

Check that the polarity is correct when inserting batteries.
The battery may heat, damage or leak if the polarity is not correct, possibly causing skin burns and/or personal injury as a result.

Do not use batteries which have become soiled with oil or sweat.
If soiled, wipe the contacts with a dry cloth before use.

When cleaning or carrying out non-photographic operations on the camera, disconnect the AC adapter for safety.

Do not leave the camera in locations such as:
- A location exposed to direct sunlight or inside a car, etc. where the temperature may become extremely high.
Fire and/or damage to the unit may occur.
- Within the reach of children.
The strap may wrap around the neck causing strangulation, or accessories such as batteries, Memory Card, etc. may be swallowed.
- Unstable surfaces such as on an unstable table or an angled surface.
Camera dropping on the head or other body parts may not only cause personal injury but malfunction of the unit as well.
- A location exposed to lampblack, steam, high humidity, dust or vibration.
If dust or liquid enters the camera or if the internal parts are damaged by strong vibration, overheating, fire or electrical shock may occur as a result.

Caution

Remove the batteries when the camera will not be used for an extended period.

Do not use force when operating the camera.
The camera may become damaged, causing personal injury as a result.

Do not rotate the camera when mounting on a tripod.
About battery fluid leakage
- Should battery fluid leaks ever come into contact with hands or clothing, wash immediately with water.
- Loss of eyesight may occur if battery fluid enters the eye. In such case, do not rub the eye. Immediately flush the eye with water and seek medical attention.
About the LCD monitor
- Due to the characteristics of liquid crystals, the brightness of the LCD monitor may appear uneven with changes in temperature, etc.
- The LCD monitor has been developed using high-precision engineering and is superior in sharpness and picture quality. Due to the nature of liquid crystals, however, there may be missing or constantly lit pixels on the monitor. This is not a malfunction of the unit.
- If the LCD monitor becomes damaged for some reason, take care to prevent personal injury from broken glass, etc. Furthermore, take care that liquid crystals do not touch the skin or enter the eyes or mouth.
WARNING: Handling the cord on this product may expose you to lead, a chemical known to the State of California to cause cancer, and birth defects or other reproductive harm.
Wash hands after handling.
Checking the Packing Contents
The following accessories should be packed with your new camera; please make sure all are enclosed after opening the packaging. In the unlikely event that something is missing, please contact the sales outlet.
| Japan | Others countries | |
| 1) Rechargeable Lithium-ion Battery NP-600 | ○ | ○ |
| 2) Battery Charger BC-600 | ○ | ○ |
| 3) USB cable USB-810 | ○ | ○ |
| 4) DiMAGE Viewer CD-ROM | ○ | ○ |
| 5) INSTRUCTION MANUAL CD-ROM | - | ○ |
| 6) Neckstrap NS-DG130 | ○ | ○ |
| 7) INSTRUCTION MANUAL | ○ | - |
| 8) Quick Guide | - | ○ |
| 9) Warranty | ○ | ○ |
| 10) SD Memory Card | ○ | ○ |
This product can be used with the following power supplies:
1) Lithium-ion battery (the packaged item or purchased separately)
- Read the user's guide on the battery and the charger thoroughly, and use them accordingly.
- You cannot charge the battery in the camera.
- When disposing of rechargeable batteries, please support recycling by participating in the recovering system of the store from which you bought the batteries.
- The number of pictures you can take varies with the conditions of use and the performance of the rechargeable batteries.
* Please refer to page 22 for information on battery life.
2) Plugging in at home
- Connect the designated AC adapter AC-9 (sold separately).
Items Sold Separately
- AC Adapter AC-9
- Rechargeable Lithium-ion Battery NP-600
- Camera Case CS-DG700
Compatible Recording Media
In addition to the SD Memory Card bundled with the camera, the following commercially available memory cards can also be used.
- SD Memory Card
- MultiMedia Card
- Memory Stick
About the SD Memory Card/Multi-Media Card/Memory Stick

Caution
SD Memory Cards, Multi-Media Cards and Memory Stick are manufactured using precision electronic components. Do not perform the following as malfunction or damage may occur as a result.
- Do not touch the terminals with hands or metal objects. Damage to the components may occur as a result of static electricity. Before handling an SD Memory Card, Multi-Media Card or Memory Stick, discharge any static build-up from your body by touching grounded metal, etc.
- Do not bend, drop or apply excessive force.
- Avoid heat, liquid and direct sunlight when using and for storage.
- Do not open the battery/card cover or remove the SD Memory Card/Multi-Media Card/Memory Stick while data is being read or written.
- Do not dismantle or modify.


* The SD logo is a trademark.-
* "Memory Stick" and Memory Stick™ are trademarks of Sony Corporation.
Important
- In the event of malfunction or damage, it is possible that data may be lost. Konica Minolta can not accept responsibility in any way for such data loss.
• Always back-up important data. - When using SD Memory Cards/Multi-Media Cards/Memory Stick on a PC, do not change the attributes(read-only, etc.) of the files (image data) on the card. Doing so may prevent the camera from working properly when deleting images, etc.
- Do not change the file names or the directory name of image data saved on an SD Memory Card/Multi-Media Card/Memory Stick using a PC or save files other than image data taken by this camera. Images that have been changed or added will not only play back on the camera but may cause the camera to malfunction as well.
- Always format SD Memory Cards/Multi-Media Cards/Memory Stick using this camera. A card formatted in a PC may not operate properly.
- The SD Memory Card and Memory Stick includes a write-protect switch.
Sliding this switch downward prevents data from being written to the card and images, etc. saved on the card are protected.
Please note that pictures cannot be taken or deleted when the write-protect switch is on.
- When using a large-capacity card, card check and deletion may take some time.
- When using Multi-Media Cards, the operation response time may be longer during shooting and playback when compared with SD Memory Cards. However, this is due to the specification of the Multi-Media Card and is not a malfunction.
Camera Body
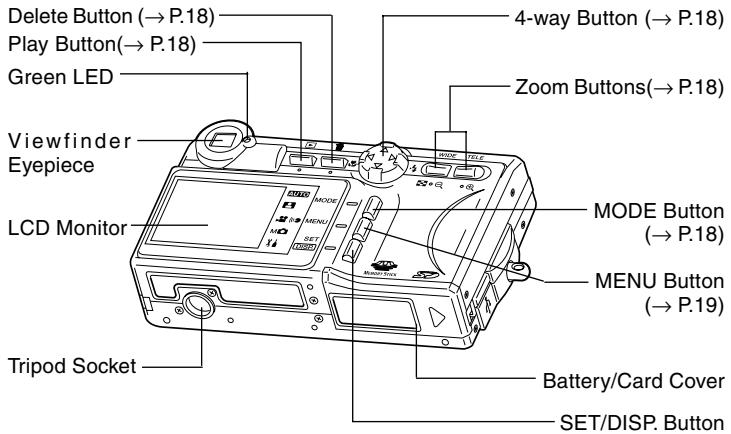
Operation Buttons
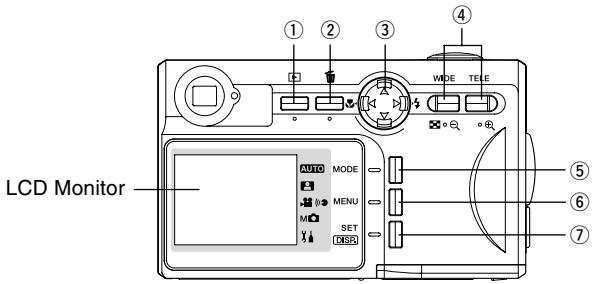
① Play Button (▶)
Use this button for playing back images, or setting up the play menu. This button can be used whether the camera's power is ON or OFF (p.28).
② Delete Button (☐)
For deleting unwanted photos.
③ 4-way Button (◀▶▲▼)
Use the different buttons ◀, ▶, ▲, and ▼, to select menu items, images, etc. This button is used for the following:
- Selecting shooting mode
- Selecting menus
- Selecting pictures
- Scrolling a picture in an enlarged display
- Shutter speed and aperture settings
④ Zoom Buttons
Use this button to operate the optical and digital zoom and for index playback.
⑤ MODE button
Use this button to select the shooting mode or setup mode.
⑥ MENU Button
Displays the menu screen.
You can also use this button to cancel menu settings.
⑦ SET/DISP. button
Confirms (sets) the selected menu option.
You can also use this button to switch the LCD monitor on and off and to show/hide image information.
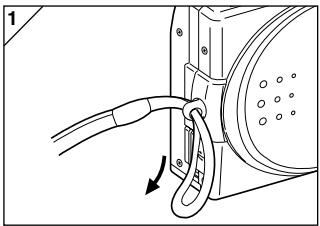
Attaching the Strap
natural_image
Diagram of a mechanical device with a curved pipe and connecting rod, showing motion direction (no text or symbols)- Push the loop on the small end of the strap through the strap holder.
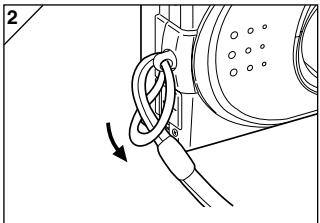
natural_image
Diagram of a mechanical assembly with a rope and hook, no text or symbols present- Pass the other end of the strap through the loop that is sticking out from the strap holder.

Warning: When using the camera with the strap attached, take care so that it does not wrap around the neck. On no account hang the camera round the neck of small children and infants. Strangulation may occur as a result if the strap wraps around the neck.

- When carrying the camera hanging from the strap, take care so that it is not accidentally hit nearby objects.
- Place the camera on a stable surface before installing the strap, to avoid the possibility of it being dropped and damaged.
Charging the (supplied) Battery Pack
- Charge the battery pack before you use it for the first time and when the LCD monitor indicates, "NO MORE POWER".
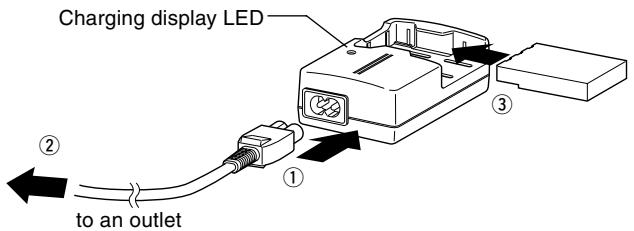
- Connect the power cord to the charger.
- Plug the cord into an outlet.
- Put the battery pack in the charger.
- While the battery pack is being charged, the charging display LED will be red; when the battery pack is fully charged, the light will turn green.
-
After charging, remove the battery pack from the charger and then the power cord from the outlet and the charger.
-
Please charge your battery pack in an area with a temperature between 0^ (32°F) and 40^ (104°F).
- Charging time will vary with the surrounding temperature and the condition of the battery pack.
- Before using new battery packs or battery packs that have not been used for some time, be absolutely sure to charge them.
- When a battery pack reaches the end of its useful life, it can be used only for a short time, even when fully charged. When that happens, replace with a new battery pack (sold separately, Rechargeable Lithium-ion Battery NP-600).
- During charging both the charger and the battery pack get hot; this is normal.
- If dirt gets on the battery contact points, the battery pack will not be fully charged or charging time will get longer. Please wipe them off with a soft, dry cloth.
Installing the (supplied) Battery Pack
- Before installing or changing battery packs, make sure the power is OFF (p.28), check that the LCD monitor is not lit and turn OFF all switches.
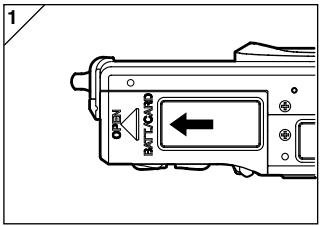
- Open the battery/card cover by sliding it in the direction of the arrow.
Do not change the battery with wet hands, as there is a danger of electric shock.
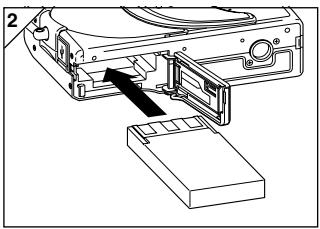
natural_image
Diagram of a mechanical device with an arrow indicating a component or assembly (no text or symbols present)- Install the battery with the terminals facing inside the camera. After making sure the battery pack is properly installed, close the battery/card cover securely.
Make sure that the battery pack is facing the right way. If the battery pack is installed incorrectly, there is a danger of injury or contamination, or the camera may be damaged due to leakage and/or heat.
● Battery level indicator
As the battery runs out of power, the battery level indicator displays the power remaining as follows:
(Remaining power is shown on the LCD monitor in two levels)
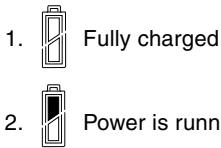
- Power is running out; change (charge) the battery.
Preparing the Power Supply (Cont'd)
Battery life guide (reference)
| Number of Pictures | ContinuousPlayback Time | |
| With LCD Monitor On | With LCD Monitor Off | |
| About 185 | About 330 | About 200 Minutes |
* Our test conditions: Normal humidity and temperature, flash intensity 50%, shot every 30 sec. Zoomed one direction, once, 2272 × 1704 pixels.
* The Battery life will vary depending on the environment, shooting mode, and shooting conditions.
* The above values are for reference only and are not guaranteed.
* Power is consumed by the following operations even when not recording and these will reduce the number of images that can be recorded.
- Repeated focus operations by pressing the shutter button halfway.
- Repeated zoom operations.
- Extensive use of the LCD monitor in the Playback mode.
- Communication with a PC.

Caution
- When you continue using the camera for a long time, the batteries become hot. Contact with the batteries can lead to burns.
- Never open the battery/card cover while the camera is accessing the card or processing images (p.36).
- To recharge the battery (NP-600), do not use any charger other than the supplied charger (BC-600). Also, do not use the supplied charger (BC-600) to recharge batteries other than our special battery (NP-600)
- Do not leave the battery anywhere where the temperature may reach 60C^ (140^) , such as inside a car, in the sun, near a heater, etc.
- Do not get the battery wet, drop it or subject it to violent shocks.
Please co-operate in recycling the lithium battery.
• This product uses a lithium battery.
- This battery is recyclable and a valuable resource.
- For recycling exhausted batteries or batteries removed from a used product, as a precaution against a short circuit, that could result in smoke or fire, please tape the terminals to insulate them or put them in a plastic bag and take them to a retailer participating in a recycling program, where you can deposit them in a recycling box for rechargeable batteries.
Warnings about recycling
Do not short circuit the battery. This may cause a fire or electrical shock.
Do not peel off the outer cover (insulation cover, tube, etc.) This may cause the battery to leak, get hot, catch fire, or explode.
Do not dismantle the battery. This may cause it to leak, get hot, catch fire, or explode.
FCC Compliance Statement:
Digital Camera: DiMAGE G400

Tested To Comply With FCC Standards
FOR HOME OR OFFICE USE
This device complies with Part 15 of the FCC Rules.
Operation is subject to the following two conditions: (1)
This device may not cause harmful interference, and (2) this device must accept any interference received, including interference that may cause undesired operation. Changes or modifications not approved by the party responsible for
compliance could void the user's authority to operate the equipment. This equipment has been tested and found to comply with the limits for a Class B digital device, pursuant to Part 15 of the FCC Rules. These limits are designed to provide reasonable protection against harmful interference in a residential installation. This equipment generates, uses and can radiate radio frequency energy and, if not installed and used in accordance with the instructions, may cause harmful interference to radio communications. However, there is no guarantee that interference will not occur in a particular installation. If this equipment does cause harmful interference to radio or television reception, which can be determined by turning the equipment off and on, the user is encouraged to try to correct the interference by one or more of the following measures:
- Reorient or relocate the receiving antenna.
- Increase the separation between the equipment and the receiver.
- Connect the equipment to an outlet on a circuit different from that to which the receiver is connected.
- Consult the dealer or an experienced radio/TV technician for help.
Tested by the Minolta Corporation 101 Williams Drive, Ramsey, New Jersey 07446, U.S.A. Do not remove the ferrite cores from the cables.
Industry Canada's Compliance Statement:
This Class B digital apparatus complies with Canadian ICES-003.
Connecting the AC Adapter (sold separately)
- If you do not want to worry about battery consumption, we recommend using the specified AC adapter AC-9 (sold separately) when shooting pictures, during playback, or when transferring data (USB connection).
- Only use the AC adapter (sold separately) specified for your camera as use of any other device may result in a breakdown, fire or electrical shock.
- Make sure the camera is OFF, check that the LCD monitor is not lit and turn OFF all power.
- After reading the “Important Safety Precautions” (pp.8-12) in this manual and the warnings supplied with the AC adapter, connect the adapter as instructed.
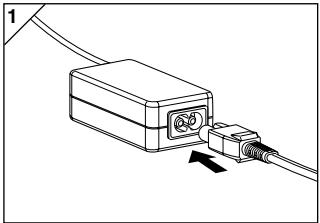
natural_image
Diagram of a device connected to a cable with an arrow indicating direction (no text or symbols present)- Connect the AC adapter to the power supply cord, and plug in the power supply plug.
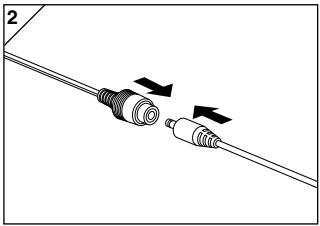
natural_image
Diagram of a cable connector with two connectors and directional arrows indicating connection (no text or symbols)- Insert the connecting plug of the battery type adapter to the AC adapter plug.
Preparing the Power Supply (Cont'd)
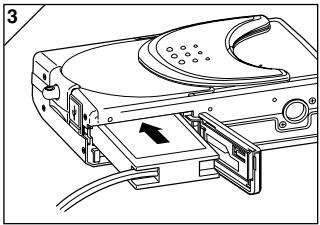
natural_image
Line drawing of a computer case with an open lid and cable connector (no text or symbols)- After opening the battery/card cover, remove the battery sub-cap. Insert the battery adapter in the battery compartment, and close the battery/card cover.
- When finished using the camera, turn OFF the power supply to the camera, and then disconnect the connecting plug of the battery-type plug from the AC adapter.
Never handle the adapter with wet hands. It may result in electric shock.
Inserting/Removing Cards
- Use the bundled SD Memory Card or a commercially available memory card.
If you wish to use an aftermarket card, any of the following are appropriate: SD Memory Card, Multi-Media Card, Memory Stick. (All three will be called “card” hereafter.) - First, turn OFF the main switch (lens cover closed), make sure the LCD monitor is OFF and turn OFF all power. If power is ON, damage may occur to the card or to the camera itself.
Inserting a Card
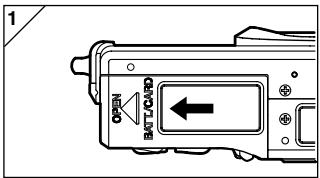
- Open the battery/card cover.
-
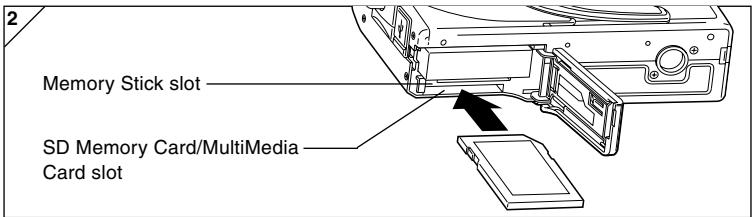
With the camera and the label of the card facing up, insert the card with the knocked out part first into the slot and push in until a click is heard.
-
Take care that the card is inserted facing the right way. If the card is forcefully inserted facing the wrong way, it will damage the connector.
-
There are two card slots. When a SD Memory card or MultiMedia Card are used, insert them in the slot at the back of the camera, and if a Memory Stick is used, insert it in the slot toward the front.
-
Close the battery/card cover.
Card Removal
natural_image
Technical line drawing of a mechanical device with an arrow indicating a component (no text or symbols present)-
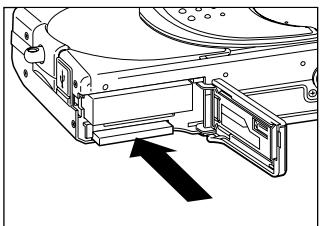
Open the battery/card cover.
-
If you gently push in on the card, the lock will release and the card will come out a little. Then carefully draw the card out.
-
Again, close the battery/card cover.
Warning!
Insert or remove cards only after making sure that absolutely all power is OFF as indicated by the viewfinder LED being off.
While the card is being accessed, or an image is being processed, the LCD monitor will show "Now COPY…", etc., and the green LED will come on.
If you open the battery/card cover while the green LED is lit, image processing may be interrupted or hindered.
While the green LED is still lit, make sure that you DO NOT open the battery/card cover.
- Also, it is possible to insert and use two cards simultaneously, such as an SD memory card (or multi-media card) and a Memory Stick.
When 2 cards are inserted at the same time, recording priority is given to the card that was used first. This priority can be changed in the menu settings (p.60).
Turning the Power ON/OFF
1
natural_image
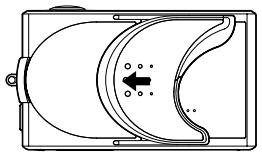
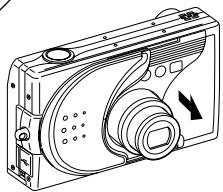
Technical line drawing of a mechanical component with curved internal structure and mounting bracket (no text or symbols)- Gently slide the lens cover (main switch) in the direction indicated by the arrow until it stops.
2
natural_image
Technical line drawing of a digital camera module with no visible text or symbols- Once the lens extends to the shooting position (wide-angle side), the power will come on.
- With the power ON it is possible to shoot pictures. Also, the LCD display will be lit.
3
natural_image
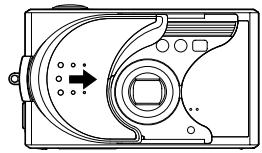
Technical line drawing of a mechanical device with no visible text or symbols- When you wish to turn the power OFF, slide the lens cover just a little in the direction indicated by the arrow. The power will turn OFF and the lens will retract. After you are sure the lens has fully retracted, you can close the lens cover to its fully closed position.
Setting the Menu Language/Date and Time
- The first time that you use your camera, a screen will automatically appear and prompt you to set the time, date and language. To make those settings, please follow the steps below.
- Check that the camera has a fully charged battery or that the AC adapter (sold separately) is connected.
1
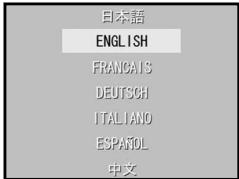
- Turn the power on by either opening the lens cover or pressing the ▶ PLAY button. The language selection screen will automatically appear on the LCD monitor. By pressing ▼ or ▲, select the desired language and push the SET/ DISP. button.
2
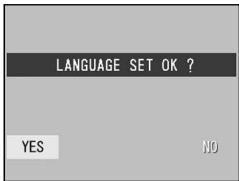
- You will be prompted to confirm your language selection; confirm the selected "YES" by pressing the SET/DISP. button.
- If you select "NO" with ▶ and press the SET/DISP. button, the current setting is invalidated and you will return to the first screen.
* Once you have finished language selection, the next screen "DATE SET" will appear.
3
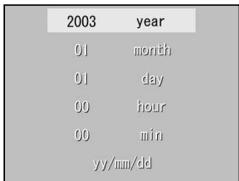
- With "YEAR" selected, use ◀ or ▶ to adjust to the appropriate year.
The date may be adjusted up to Dec. 31, 2050.
4
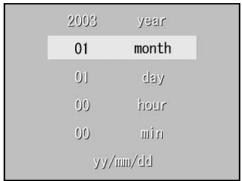
- (1) Once the "YEAR" has been adjusted, press ▼ to move to the "MONTH" setting mode.
(2) Use ◀ or ▶ to adjust the month in the same way as Step 3 on page 29.
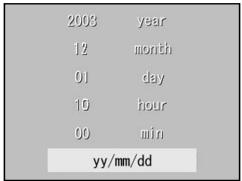
- By repeating procedures (1) and (2) above, adjust the date-and-time setting, and set the date format.
- The date format can be selected from among three patterns: yy/mm/dd, dd/mm/yy, and mm/dd/yy.
- By using ▲, you can return to the previous screen and make corrections.
5
-
Once you have finished making all of the settings, press the SET/DISP. button.
-
After finishing the settings...
-
If you turned the power ON with the main switch (by opening the lens cover), you can take pictures once the lens has reached its extended position.
- If you made the settings after pressing the ▶ PLAY button, the LCD monitor will display playback images.
* The internal clock is maintained by a back-up battery. Without a battery in the camera, the information will be maintained for about 24 hours. If the battery is removed for some time, you may have to reset the information (p.119).
* Do not remove the battery from the camera for at least three hours after making new date-and-time settings. They will be lost if the back-up battery is not fully charged.
Holding Your Camera
natural_image
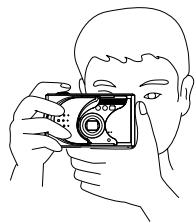
Line drawing of a person holding a small device with a camera lens (no text or symbols)- Hold the camera securely with both hands and your elbows against your body for a stable position.
- To take a vertical picture, hold the camera so that the flash is at the top.
Please be careful that your fingers, hair, or the strap do not cover the lens, flash, or the autofocus sensor windows.
Viewfinder LED
natural_image
Empty rounded rectangle with black border (no text or symbols)Viewfinder LED
Green LED
● Viewfinder LED Indicators
When the LED Indicators light, they mean the following:
- Green LED: (On)
Camera ready to shoot,
Flash charging, Formatting the card,
USB cable is being connected, Card being accessed
(Flashing) Warning that the camera cannot auto-focus (AF), hand shake warning (flash OFF mode),
System error; Card has insufficient memory, is faulty, not formatted; Insufficient battery warning
- In the macro-photo mode (p.46), we recommend that you use the LCD monitor for composing your pictures (p.34). If you use the viewfinder, what you can see and what the camera records may be different.
Selecting the Shooting Mode
- A range of shooting modes are provided and you can select the shooting mode that best suits your subject and the shooting conditions.
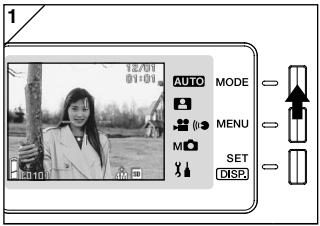
- Open the lens cover and turn the power on so that your subject appears on the LCD monitor. Then press the MODE button.
natural_image
Black-and-white photo of a woman holding a tree, captured in a camera interface (no text or symbols on the image itself)-
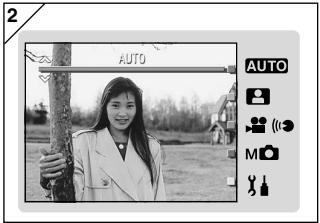
Use the ▲ or ▼ button to bring up the shooting mode icons and select the mode you want to use.
-
Once you have selected a mode, press the SET/DISP. button to complete the setting. The camera then goes back to being ready to shoot.
● Available modes
- AUTO AUTO
This is the normal mode for most shots. When you take pictures in this mode, the camera adjusts automatically itself to the suitable setting for you. (p.34)
- SCENE SELECT
You simply select a mode suited to the shot you are taking. Then the camera enables you take pictures in this mode. (p.62)
- MOVIE/VOICE
You can shoot movies with sound. (p.42)
- M MANUAL
In Manual mode, you can make fine adjustments to the camera settings to achieve just the effect you want. (p.74)
The default setting is "Program Mode". (p.76)
- SETUP
By selecting different options in the SETUP menu, you can customize the camera settings to make it even easier for you to use. (p.106)
- Select the camera settings that best suit the shooting conditions before taking pictures. See p.33 for information on the functions that are available in each mode.
● Available Functions by Mode (menu-based)
1. AUTO (p.54)
- Color (p.56)
- Continuous (p.57)
- Image Size (p.58)
- Memory Priority (p.60)
- Self Timer (p.61)
2. SCENE SELECT (p.62)
- Scene (p.64)
- Continuous (p.57)
- Image Size (p.58)
- Memory Priority (p.60)
- Self Timer (p.61)
3. MOVIE/VOICE (p.66)
- Postrecording (p.68)
- Recorded Message (p.70)
- Exposure Compensation (p.71)
- White Balance (p.72)
- Memory Priority (p.60)
- Self Timer (p.61)
4. MANUAL (p.74)
- Program (p.76)
- Aperture (p.78)
- Manual (p.79)
- Continuous & Bracket (p.81)
- Image Size (p.58)
- Memory Priority (p.60)
- Self Timer (p.61)
- Color (p.56)
- Exposure Compensation (p.71)
- White Balance (p.72)
- ISO (p.82)
- Fixed Focus (p.82)
- Custom (p.83)
5. SETUP (p.106)
- Format (p.108)
- Monitor (p.110)
- Photography Settings (p.113)
- Sound (p.117)
- Basic Set Up (p.118)
- Refer to the page given in parentheses for information on selecting menu options and detailed information on the menu options.
Taking Pictures using the LCD Monitor
- This section explains the basic procedure for shooting still images using AUTO mode.
- We recommend that you prepare a fully charged spare battery (sold separately, rechargeable lithium-ion battery NP-600) or use the AC adapter AC-9 (sold separately).
natural_image
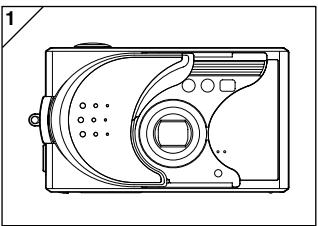
Technical line drawing of a mechanical device casing with no visible text or symbols- Opening the lens cover turns ON the power.
- If the surface of the lens is dirty, gently wipe it clean with a soft, dry cloth.
natural_image
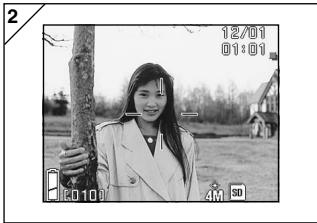
Black-and-white photo of a woman holding a tree outdoors, with no visible text or symbols in the main scene.- The LCD monitor lights up and the live image (the image seen through the camera lens) is displayed.
- The date and time display disappears after about 5 seconds.
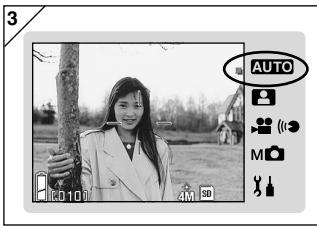
- Set the shooting mode to "AUTO". (p.32)
- Check that the shooting mode icon (■) is in the AUTO position.
-
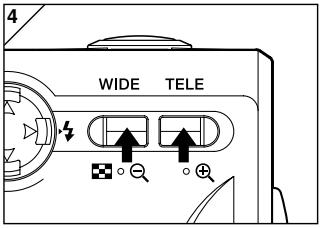
Compose the shot on the LCD monitor and use the zoom buttons to set the size of the subject. Take care also to position the auto-focus mark on the subject you want to focus on.
-
If you press the TELE (Telephoto) Zoom button, the camera zooms in, while if you press the WIDE (Wide-angle) button, it zooms out.
- If the subject you wish to focus on is not in the screen center, use “Shooting with Focus Lock” (p.41).
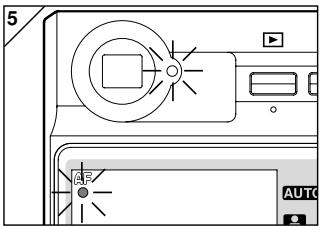
- Press the shutter button half way and a green LED lights in the viewfinder and on the LCD monitor, indicating that the focus and exposure are locked.
• The AF icon also appears.
- If it is difficult to focus, the green LED will flash. See page 37.
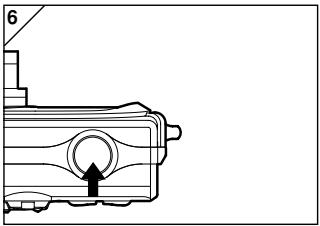
- Take a picture by pressing the shutter button further. When it makes a sound, the shot has been taken, and the image will be recorded on the card.
- If you set the shutter sound to "OFF" in the Sound settings (p.117), the camera makes no sound when you press the shutter button.
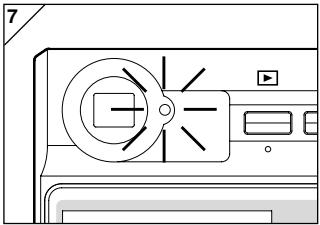
natural_image
Diagram of a camera or DVD device with no visible text, numbers, or symbols-
The green viewfinder LED lights while the data is being written to the card. Recording is finished when the green LED goes off.
-
Once all the data has been written to the card, the live image reappears.
- While the card is processing image data, you cannot operate the camera.

Do not open the battery/card cover while the green LED is lit.
- When you are finished taking pictures, close the lens cover and turn OFF the power supply.
Daytime (normal) shooting distances
| Focal Length | Shooting Distance |
| Wide-angle* | 0.5m (1.6ft) to |
| Telephoto** | 0.8m (2.6ft) to |
* Equivalent to 34mm in 35mm camera conversion
**Equivalent to 102mm in 35mm camera conversion
- If you wish to take a picture of a subject closer than the above ranges, use the macro-photo mode (pp.44, 46).
- When you press the shutter halfway and the green LED flashes...
This may suggest that the focusing on the subject is difficult, and/or the subject is too dark. Should this be the case, please take the following steps.
- Check that you are not too close to the subject and then position the autofocus mark over the subject. (See p.36 for information on shooting distances.)
- If the subject is too dark (such as a person in the shade), use the flash (pp.44-46).
- Use a similar subject, at the same distance and with the same brightness, to adjust the auto focus and exposure. After the focus lock is set, aim at your original subject and shoot your picture (p.41).
● About Auto Power Off Function
If you do not operate for a certain period of time with the camera power on and the lens cover open, the auto power off function (pause status) will be activated and power will be turned off (the lens retracts).
- When finished shooting, or if you are not going to take a picture for a long time, close the lens cover.
- The default auto power off time is set at three minutes. This can be changed in the set-up menu (p.119).
- When using an AC adapter, the auto power off function will be activated.
- Connecting the USB cable (p.122) disables the Auto Power Off function.
Image Display
Shooting with the LCD monitor displays the picture and the following other information:
- You can set the camera so information is not displayed (p.111).
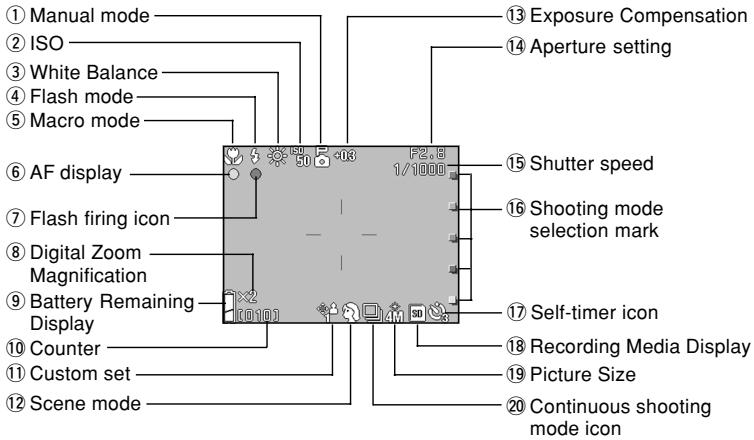
- The marks beside the items below indicate either the mode in which that item can be set or that the item is displayed when that mode is selected.
AUTO: Auto, 📋: Scene Select, 🚙️: Movie, M 📄: Manual
① Manual mode M
When the camera is set to Manual mode, the selected shooting mode is displayed. See pages 74-79 for information on setting the shooting mode.
② ISO M
Displayed when the ISO sensitivity setting is locked. See p.82 for information on setting the sensitivity.
White balance icon will be displayed. For details of how to select the white balance, see page 72.
④ Flash mode AUTO, 📁, M
Shows the selected flash mode. See p.44-46 and p.114 for information on setting the flash mode.
1) Displayed when Macro mode (p.46) is set.
When Macro mode is not set, the AF icon appears when the shutter button is pressed half way and the shot is focused.
2) Fixed focus M
When Fixed focus mode (p.82) is set, the selected shooting distance is displayed.
1) Appears when the shutter button is pressed half way and the shot is focused. This icon flashes when the image is not in focus.
2) AF lock M
The AF icon appears when the AF Lock function (p.77) is used.
⑦ Flash firing icon AUTO, 📁, M
1) Appears when the flash is used.
2) AE Lock M
The AE icon appears when the AE Lock function (p.77) is used.
⑧ Digital Zoom Magnification AUTO, 📁, M
This will be displayed when the digital zoom function is used (p.114).
⑨ Battery Remaining Display AUTO,
If the battery is being used, the remaining battery power will be displayed in two levels (p.21).
⑩ Counter AUTO, 📁, M
1) The remaining number of pictures you can take will be displayed.
2) Card storage level indicator ▶ Shows the amount of space left on the card during movie shooting.
⑪ Custom set M
Displayed when Custom function (p.83) is set.
⑫ Scene mode 📋/ Color display AUTO, M
1) Displays the shooting mode when Scene mode (p.64) is selected.
2) Displays the selected color icon when Color mode (p.56) is set.
⑬ Exposure Compensation ▶, M
The compensation value will be displayed. For details of how to adjust the exposure, see pages 71 and 77.
⑭ Aperture setting M
1) When Program mode (p.76) is set, the aperture setting is displayed when you press the shutter button half way. When Aperture (p.78) or Manual (p.79) mode is set, the aperture setting is displayed all the time.
2) Date and time display AUTO, 📋, M 🏠 The shooting date and time are displayed for roughly 5 seconds when the camera is switched on.
⑮ Shutter speed M
When Program mode (p.76) is set, the shutter speed is displayed when you press the shutter button half way. When Manual mode (p.79) is set, the shutter speed is displayed all the time.
⑯ Shooting mode selection mark AUTO, 📁, ▶, M
The selected shooting mode is displayed beside the mark on the LCD monitor panel.
⑰ Self-timer icon AUTO, 📷, ▶, M Displayed when Self-timer mode (p.61) is set.
⑱ Recording Media Display AUTO,
This shows the media type.
- SD Memory Card or MultiMedia Card : SD*
- Memory Stick : MS
* Even when a MultiMedia Card is used, the type will be displayed as SD.
⑲ Picture Size AUTO, M
1) The picture size of the photo being taken will be displayed.
2) When shooting a movie, ▶ is displayed.
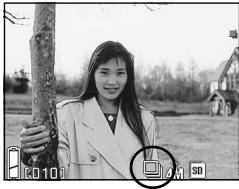
⑳ Continuous shooting mode icon AUTO, 📁, MI
Displayed when continuous shooting or bracket shooting is set. See p.57 and p.81 for information on setting continuous or bracket shooting. (Bracket shooting is only available in M mode.) 39
Taking Pictures using the Viewfinder
- This section describes how to use the camera's viewfinder to take pictures. Using the viewfinder uses less battery charge than taking pictures using the LCD monitor.
natural_image
Technical line drawing of a mechanical device casing with no visible text or symbols- Open the lens cover and turn the power on.
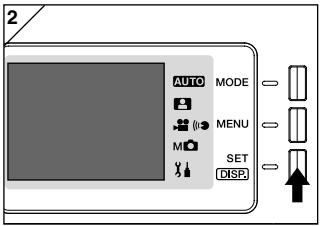
- Press the SET/DISP. button to switch the LCD monitor off.
-
Looking through the viewfinder, compose the shot so that the subject you want to photograph is in the center of the image. Then take the picture.
-
No auto-focus mark is displayed when you take pictures using the viewfinder.
Position the subject in the center of the image. - The procedure for taking the picture is the same as that described in “Taking Pictures Using the LCD Monitor”. (p.34-36)
- The process of recording the data to the card is finished when the green viewfinder LED goes off.
Shooting with Focus Lock
- If the subject you wish to focus on is not in the center of the screen, use the focus lock photography.
1
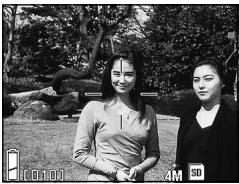
natural_image
Two women standing outdoors in a park-like setting, one holding a camera lens (no visible text or symbols)- Align the auto focus mark on the subject, and push the shutter button half-way. The green LED light will come on, locking the focus position.
- When you take pictures using the viewfinder, no auto-focus mark is displayed. Position the subject in the center of the image.
- The exposure is fixed at the same time the focus is locked.
- If you release your finger from the half-pushed shutter button, the focus lock will be released and you can repeat the procedure.
2
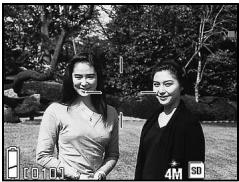
natural_image
Two women standing outdoors in a park setting, one holding a small object near the camera (no visible text or symbols)- With the shutter button pressed half-way, re-compose your photo and press the shutter button all the way to take the picture.
- When re-composing the photo, do not change the shooting distance. If the distance has changed, repeat the procedure.
● The following subjects may be difficult to bring into focus:
- Subjects with no contrast (variance in brightness, e.g., the sky, a white wall, the hood of a car)
- Subjects with only horizontal lines and no surface texture
- Quickly moving subjects
- Poorly lit subjects (in a dark place)
- Subjects with a strong light or reflected light behind them
- Subjects in a flickering light, such as a fluorescent light
In the above circumstances, take your picture after the focus lock is set to the same distance and brightness as the subject. 41
Shooting Movies
- You can take a movie with sound. Your camera records an image with a 320 × 240 pixel count.
- While you are shooting a movie, the LCD monitor stays on. Even if you press the SET/DISP. button, the LCD monitor will not turn off. Please view the LCD monitor while shooting your movies.
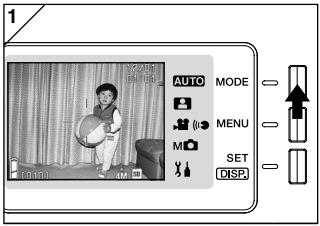
- Open the lens cover and turn the power on, so that the live image appears, then press the MODE button.
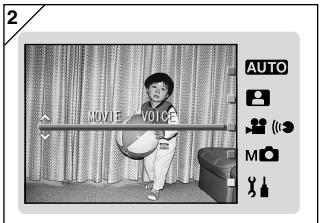
- Press the ▲ or ▼ button to select "MOVIE/VOICE" mode and then press the SET/DISP. button.
![3 SHUTTER SW START 00:00 [010MB] SD](/content/2025/01/165584/images/0caa3a6886489f4a9edfb4131785816de60ea6502a4ecde4463dea2f42b9f3a9.jpg)
- The movie screen appears and you are ready to start shooting.
- Press the MODE button to disable the setting and return to the screen in step 2.
4
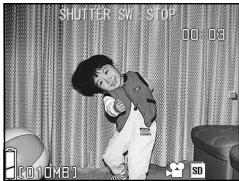
-
When you press the shutter button, your movie will start recording.
-
You need not hold the shutter button down.
- When the remaining time runs out, the camera stops recording automatically. If you wish to stop while the camera is recording, simply press the shutter button again.
- The elapsed time is displayed on the upper right of the screen.
- See p.50 for information on how to play back movies.
NOTE: 1) While recording a movie, the sound is also being recorded, so take care not to cover the microphone on the front of the camera with your fingers, etc.
2) Once you have pushed the shutter button, and started taking a movie, you cannot use the optical zoom.
3) The digital zoom is also inoperable.
4) While shooting a movie, the sound is always recorded with built-in microphone. Therefore, you cannot take the movie without sound.
Selecting the Flash/Macro Mode
- You can set the flash mode and macro that best suits the subject.
- Once a mode is set, you can shoot continuously. It is recommended that the mode should be returned to AUTO mode (no display) after shooting.
- Also, when you turn the camera OFF, the macro-mode you set is canceled and the camera automatically returns to AUTO-mode shooting operation (no display). But the flash-mode setting remains in effect even if you switch the power OFF and back ON.
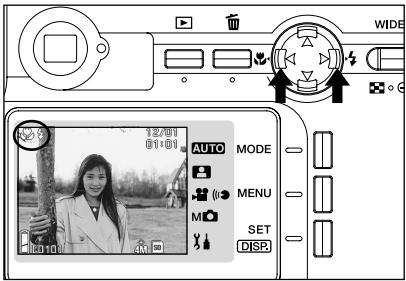
-
Turn the power on so that the LCD monitor is lit.
-
By pressing ◀ or ▶, bring up the desired mode icon on the LCD monitor.
Pressing ▶ enables the selection of the following modes.
1) AUTO (Automatic Flash) (p.45)
2) ↓ Fill-In (p.45)
3) Off (Flash Override) (p.46)
- Every time ▶ is pressed, the mode symbol will be displayed one by one, through the list.
Pressing ◀ enables the selection of the following modes.
1) AUTO mode (no display) (p.45)
2) Macro-photo mode (p.46)
- Every time ◀ is pressed, the mode symbol will be displayed one by one, through the list.
Switching the Flash Mode
AUTO (Auto Flash)
- This is the normal mode. When the camera is turned ON, it is set to Auto (Auto Flash). No icon will be displayed on the LCD monitor.
- The flash will operate automatically when it is dark.
When the flash will be used for a shot, the 🎨 icon appears on the LCD monitor and the red lamp lights when you press the shutter button half way.
- The green viewfinder LED that lights after you use the flash shows that the flash is recharging. The shutter will not operate until charging ends.
- The shutter speed is slower than 1/60 second at wide angle and 1/100 second at telephoto. Keep in mind that the picture will be blurry due to camera shake.
- It is best to use the red-eye reduction when using a flash with people. (p.114)
Flash Shooting Distances (ISO : AUTO)
| Focus Distance | Shooting Distance |
| Wide-Angle * | 0.5m (1.6ft) to 2.3m (7.5ft) |
| Telephoto ** | 0.8m (2.6ft) to 1.3m (4.3ft) |
* Equivalent to 34mm in 35mm camera conversion
**Equivalent to 102mm in 35mm camera conversion
- If the shooting range is not in the above range, the picture may appear too bright when it is too close, and the picture may appear dark without enough lighting when it is too far. It is recommended you check the photo with the LCD monitor after shooting.
- The shooting range above does not include the Macro Mode.

Fill-In
- Use this mode when a shadow falls on the subject's face due to shade or artificial lighting, or when taking a picture against the light.
- Regardless of the brightness of the surroundings, the flash will always comes on.

Off (Flash Override)
- Use this mode for places (such as museum) where flash is prohibited, or when taking a picture of a night view, or taking a picture using indoor lighting.
- The flash will not come on even when it is dark.
- Use a tripod to prevent shaking as shutter speeds are slower in the dark.
- If the green LED flashes when the shutter button pressed half-way, this is a warning that the lighting is not sufficient and the resulting picture will be dark.
Shooting Close Up Range

Macro-photo Mode
- Use this mode when you want to be close to the subject.
- If the distance between the camera and the subject is close, there will be a difference between the image in the viewfinder and the picture that is actually taken. It is recommended that the LCD monitor be used.
- If you use the TELE zoom button to zoom in fully on the image and then press the ◀ button, the camera switches to Super Macro mode, allowing you to zoom in even further on the subject.
- Use a tripod to prevent shaking as shutter speeds are slower when taking close-ups.
- If you use the TELE flash when shooting very close to the subject, the image may come out too bright. For information about the flash shooting distance, see page 45.
Macro-photo Mode Shooting Distances
| Focus Distance | Shooting Distance | ||
| Macro Mode (normal) | Wide-Angle | 5cm (2.in.) to | |
| Telephoto | 0.5m (1.6ft) to | ||
| Super Macro Mode | Telephoto | 0.2m (7.9ft) to 0.4m (15.7ft) | |
Playing Back Pre-recorded Images
- You can play back pre-recorded images on the LCD monitor.
- When you play back images, it doesn't matter whether the camera's power is OFF or ON.
- Just in case battery power runs low, have a spare charged battery pack (sold separately, Rechargeable Lithium-ion Battery NP-600) on hand. Alternatively, using the AC adapter AC-9 (sold separately) is recommended.
1
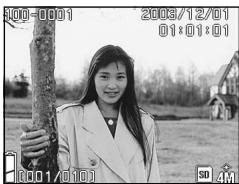
natural_image
Black-and-white photo of a smiling woman holding a tall object outdoors, with no visible text or symbols.- Press the ▶ PLAY button and the last recorded photo will be played back on the LCD monitor.
- If there isn't any image data recorded, the message "NO DISPLAY DATA" will be displayed.
-
Every time you press ◀ or ▶, the previous or next photo will be played back.
-
If you press the W side on the zoom button, Index Playback will start. For operation after play back please refer to page 89, Items 2 and 3.
- Pressing the T side of the zoom buttons zooms in on (enlarges) the subject. See p.90 for details.
- Half depress shutter button when power is ON and when playing back in normal image size. It will turn to through image and photographing will become available again.
- When you have finished playing back photos, turn off the LCD monitor by pressing the ▶ PLAY button again to prevent battery consumption. Also, if you will not be taking any photos, close the lens cover, turning OFF the power.
The Playback Image Display
In addition to the images you've taken, the following information is displayed.
- You can set the camera so information is not displayed (p.111).
![100-0001 2003/12/01 01:01:01 01:01 ① ② ③ [001/010] ④ ⑤ ⑥ ⑦ ⑧ ⑨ SD 4M](/content/2025/01/165584/images/62bfc9c4e3fa665c1e5ecc16a59ed05494d0bf5437948922f745546a2e13cde6.jpg)
① File Number
1) The file and directory numbers recorded in the card are displayed.
2) Shows the zoom ratio when you are playing the image back enlarged (digital zoom).
② Protected Display
If an image is protected, the Protected symbol is displayed.
③ Remaining Battery Power Display
When the battery is in use, the remaining power is displayed in two levels (p.21).
④ Image No. (Playback Frame No./Total Frame No.)
Your camera is capable of playing back up to 999 frames. If there are more than 999 frames on a card, it is not possible to use playback.
⑤ Date & Time Recorded
Shows the date and time of shooting.
⑥ Sound recording time
Shows the recording time when you play back a movie or image with sound. This also shows the playback time during sound playback.
⑦ After Recording
is displayed in still images with sound.
⑧ Image Size
1) Image size is displayed.
2) ▶ is displayed in movie images.
3) For images with voice memos, the (icon is displayed.
⑨ Recording Media Display
The type of media in use is displayed.
- The SD Memory Card or Multimedia Card* :SD
- Memory Stick :MS
* Even if a Multi-media Card is used, "SD" will be displayed.
Playing Back Movies
- Use the procedure below to play back movies you have shot (p.42).
1
![100-0001 2003/12/01 01:01:01 01:01 SUTTER SWE START [001/0100] 3D](/content/2025/01/165584/images/3e9e6281a8c7c1736f3f52f08394f957f7e22c555dd888bf4278dbf150fe669a.jpg)
- After pressing the ▶ PLAY button, use
◀ or ▶ to select the movie you wish to see.
• is displayed on the movie image.
2
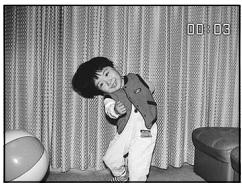
natural_image
Black-and-white photo of a young child in uniform playing with a ball, standing indoors near curtains (no visible text or symbols)-
If you press the shutter button, the movie images will be played back. When playback is finished, the display returns to screen 1.
-
Symbols displayed when a movie is played back is elapsed playback time only.
- If you want to stop during playback, press the shutter button again.
Erasing Unwanted Images
- You can erase unwanted still pictures, movie images etc. (you can select one frame, multiple frames or all frames.)
- Once images are erased, they cannot be recovered.
- Protected images (p.101) cannot be erased unless the protection is removed.
1
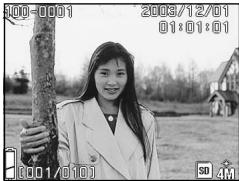
- After pressing the ▶ PLAY button, use ◀ or ▶ to select the image you wish to erase.
- When you are erasing all or some of the frames, it does not matter which frame is displayed.
2
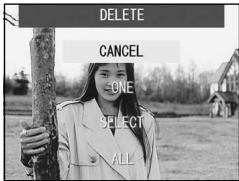
- When you press the Delete button, the frame selection screen appears. Press the ▲ or ▼ button to select "ONE" (the selected image), "SELECT" or "ALL".
- To cancel image deletion, select CANCEL and press the SET/DISP. button. The step 1screen reappears.
3
-
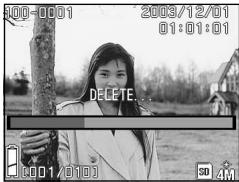
When you press the SET/DISP.button, deletion starts and the "DELETE..." message appears. When the process is finished, the display returns to the playback image.
-
If there isn't any image data, "NO DISPLAY DATA" is displayed.
- If you selected "SELECT", refer to p.52.
- If you chose "SELECT"
1
2
3
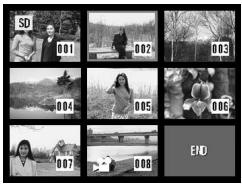
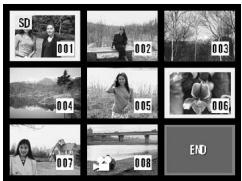
- If you selected "SELECT" on p.51-2 and then pressed the SET/DISP. button, an 8-frame image is displayed. Using ◀, ▶, ▲, or ▼, move the red frame to an image you wish to erase and press the SET/DISP. button.
- Pressing ◀ when the first frame is selected or ▶ on the last frame will switch the screen to the next eight images.
- A yellow frame appears around the selected image. To select additional images, repeat the selection procedure (return to step 1).
When you have finished selecting images, use the ◀, ▶, ▲, or ▼ button to select END and then press the SET/ DISP. button.
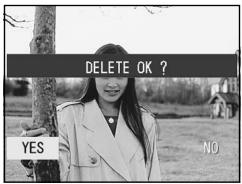
- A confirmation screen appears. To carry out erasing, select "YES" with ◀ or ▶, then press the SET/DISP. button.
- If you select "NO" and press the SET/DISP. button, you will return to the playback image without erasing anything.
Erasing the Playback Image (Cont'd)
4
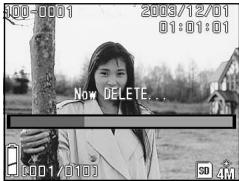
- Once erasing starts, "Now DELETE..." is displayed. Once erasing is completed, the disply returns to the playback image.
Using the Auto Mode Menu
- This section explains the menu options that are available in Auto mode.
- Unless otherwise stated, the settings for these menu options are retained until you change them, regardless of whether the power is turned off.
● Available menu options
- Color : Allows you to take pictures in color modes other than normal color photography, such as black & white and sepia. (p.56)
- Continuous : Allows continuous shooting. (p.57)
- Image Size : You can choose from 3 image sizes. (p.58)
- Memory Priority : Allows you to select the memory priority. (p.60)
- Self Timer : You can take pictures using the self-timer. (p.61)
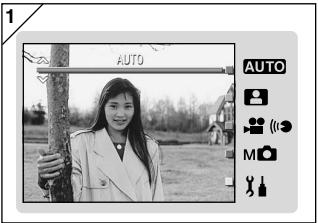
- Select "AUTO" and press the SET/DISP. button.
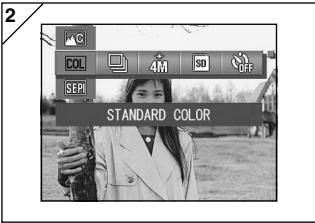
- Pressing the MENU button displays the available menu option icons.
Using the Shooting Menu (cont'd)
3
- Use the ◀ or ▶ buttons to select the option you want to set.
4
- Use the ▲ or ▼ buttons to select the desired mode from the menu.
5
natural_image
Black-and-white photo of a young woman holding a tree outdoors, with no visible text or symbols.- Press the SET/DISP. button to complete the setting and return the camera to shooting mode (live image displayed).
The selected mode icon appears on the LCD monitor.
- To set another menu option, without pressing the SET/DISP. button, use the ◀ or ▶ buttons to select the option you want to set.
Changing the color effects
- This feature allows you to change the color effects in your photos.
- This option is also available in the mode menu for Manual (p.74).
1
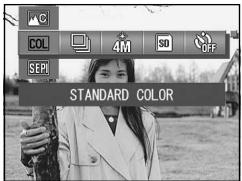
- Select the Color menu option.
- The current setting is displayed. "Standard color" is displayed as the default setting.
- Use the ▲ or ▼ buttons to select the desired color mode.
Press the SET/DISP. button to complete the setting and return the camera to shooting mode.
● Available modes
- COL Standard color (default): Normal color mode.
- BW Black & white : Allows you to shoot in black and white.
- SEPI Sepia : Allows you to shoot sepia-tone images.
- W (Warm) color : This setting gives quite soft tones and warm color hues similar to those of negative film.
This option is best for shooting subjects such as people and sunsets, etc.
- C (Cold) color : This setting gives harsher tones and cool color hues similar to those of reversal film.
This option is best for shooting subjects such as landscapes.
Continuous Shooting
- In this mode, the camera takes pictures continuously for as long as the shutter button is held down. This mode is ideal for taking consecutive pictures of moving subjects.
- This option is also available in the mode menus for Scene Select (p.62) and Manual (p.74).
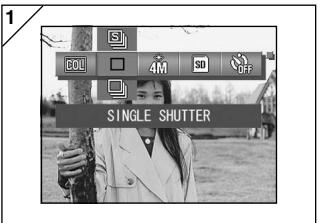
- Select the Continuous menu option.
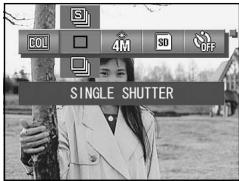
- The current setting is displayed. "SINGLE SHUTTER" is displayed as the default setting.
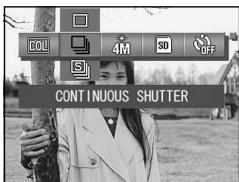
- Use the ▲ or ▼ buttons to select the desired continuous shooting mode. Press the SET/DISP. button to complete the setting and return the camera to shooting mode.
● Available modes
- □ Single Shutter (default) : Normal single-frame shooting mode.
- ☐ Continuous shutter : Allows you to take multiple shots by holding down the shutter button.
-
[S] Super Continuous : Shoots up to 3 consecutive pictures with a shorter interval between shots. Use the viewfinder to shoot pictures in this mode. The images are not displayed on the LCD monitor during continuous shooting.
-
The exposure and focus are fixed in the first frame.
- If you use the flash, the interval between shots becomes longer to allow the flash to recharge.
- The shooting interval also varies depending on the subject and the shooting conditions.
Selecting the Image Size
- You can choose from 3 image sizes depending on the sort of picture you want to take.
- All on the same card, you can choose a different image size for every picture. Every time you change the image size, the number of remaining photos also changes, which is displayed on the LCD monitor.
- This option is also available in the mode menus for Scene Select (p.62) and Manual (p.74).
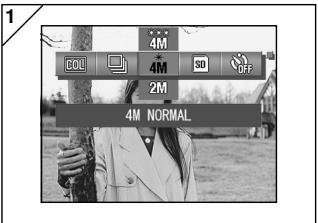
- Select the Image Size menu option.
- The current setting is displayed. "4M NORMAL" is displayed as the default setting.
- Use the ▲ or ▼ buttons to select the desired image size.
Press the SET/DISP. button to complete the setting and return the camera to shooting mode.
● Image size and pixel count (width) × (height)
1) 4M 4M: 2272 × 1704 pixels (approximately 3,870,000 pixels)
This is the highest quality image. Use this mode for important pictures you want to keep, for images you want to edit on your computer, etc. As it is the largest, it is also ideal for printing out your enlarged photos. To take better quality images, select "FINE".
2) 2M 2M: 1600 × 1200 pixels (approximately 1,920,000 pixels)
You can shoot pictures in high quality resolution with low memory requirements. This mode is suitable if you wish to take more shots and the memory does not have enough space.
3) VGA VGA: 640 × 480 pixels (approximately 300,000 pixels)
As this mode produces the smallest file size, it is best for sending via email, for use in home pages, etc.
Using the Auto mode menu (cont'd)
● Standard number of pictures you can take in each resolution mode (without sound and movie)
| Image Size | Compression Ratio | 64 MB SD Memory Card |
| 4M (2272 × 1704) | FINE | About 36 Photos |
| NORMAL | About 72 Photos | |
| 2M (1600 × 1200) | NORMAL | About 143 Photos |
| VGA (640 × 480) | NORMAL | About 574 Photos |
- The number of photos you can take may vary depending on the subject.
- When there are files other than images, or when the resolution and/or recording mode have been changed, the number of photos you can take is not limited to the table above. Please use the table is a guide for the number of photos you can take.
Setting Memory Priority
- When you have 2 cards in the camera at once, an SD memory card (or Multi-Media card) and a Memory Stick, you can decide which to record to first.
- This option is also available in the mode menus for Scene Select (p.62), Movie/Voice (p.66) and Manual (p.74).
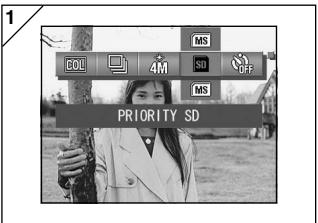
- Select the Memory Priority menu option.
- The current setting is displayed. "PRIORITY SD" is displayed as the default setting.
- Use the ▲ or ▼ buttons to select the card type to be given priority.
Press the SET/DISP. button to complete the setting and return the camera to shooting mode.
Using the Self-Timer
- Use a tripod.
- You can choose either "3 SEC" or "10 SEC" as the self-timer operation delay.
- This option is also available in the mode menus for Scene Select (p.62), Movie/Voice (p.66) and Manual (p.74).
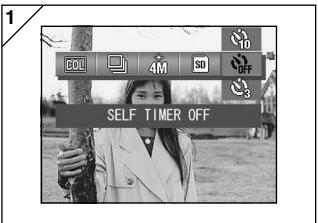
- Select the Self-timer menu option.
- The current setting is displayed. "SELF TIMER OFF" is displayed as the default setting.
- Use the ▲ or ▼ buttons to select "3 SEC" or "10 SEC".
Press the SET/DISP. button to complete the setting and return the camera to shooting mode.
-
When you press the shutter button, the self-timer lamp flashes and the shutter releases after either 10 seconds or 3 seconds.
-
If you wish to cancel the self-timer function, close the lens cover.
- The “10 SEC” setting is cancelled after each shot. If you intend to use the self-timer again, you should reset the delay each time.
The “3 SEC” setting is retained after you take the shot and can be used for subsequent self-timer shots. - To revert to normal shooting mode, select "SELF TIMER OFF". You can also cancel self-timer mode by turning the power off.
Using the Scene Select Mode Menu
- This section explains the menu options that are available in Scene Select mode.
- Unless otherwise stated, the settings for these menu options are retained until you change them, regardless of whether the power is turned off.
● Available menu options
- Scene mode: Six modes are available from which you can choose the best mode for the scene you are photographing. (p.64)
- Continuous (p.57)
- Image Size (p.58)
- Memory Priority (p.60)
- Self Timer (p.61)
- Because the details for the Continuous, Image Size, Memory Priority and Self Timer modes are as described in the menu options for Auto mode, these items are not explained in this section.
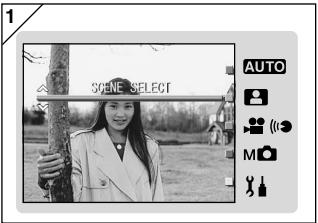
- Select "SCENE SELECT" and press the SET/DISP. button.
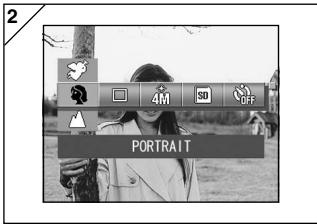
- Pressing the MENU button displays the available menu option icons.
Using the Scene Select Mode Menu (Cont'd)
- As described on p.55, use the ◀ or ▶ buttons to select the option you want to set.
- Use the ▲ or ▼ buttons to select the desired mode from the menu.
- Press the SET/DISP. button to complete the setting and return the camera to shooting mode (live image displayed).
The selected mode icon appears on the LCD monitor.
- To set another menu option, without pressing the SET/DISP. button, use the ◀ or ▶ buttons to select the option you want to set.
Selecting the right mode for your shot
- You can select the best mode for the scene you are shooting.
- In dark locations, you should use a tripod to prevent camera shake.
1
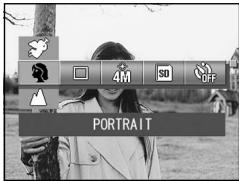
- Select the Scene Mode setting menu option.
- The current setting is displayed. "PORTRAIT" is displayed as the default setting.
- Use the ▲ or ▼ buttons to select the desired scene mode.
Press the SET/DISP. button to complete the setting and return the camera to shooting mode.
● Available modes
- Portrait : Use this mode when you want to soften the background so that the subject stands out clearly. This mode allows you to shoot soft attractive portrait shots with extra dimension.
- Scenery : The ideal mode for taking pictures of scenery or buildings, etc.
- Night : This is the best mode for shots taken at night or dusk, or for shots of people taken with the flash against a nighttime or evening backdrop. A tripod should be used to prevent camera shake.
- Snap : This mode is ideal for snapshots and you can take a photo between the ranges of 0.8m and 2.5m. Use this mode when you want someone to take a picture for you without having to worry about the auto-focus or for subjects that pose problems for the camera's auto-focus function. This mode works best with the zoom set to the wide-angle (W) position.
- Sports : This mode is the best choice for shots of fast-moving subjects, such as pictures taken as sporting events.
- Angel : This mode is intended for shots of children or women, since it gives particularly beautiful skin tones and also gives priority to the shutter response so that you can capture fleeting laughter or smiles.
Using the Movie/Voice Mode Menu
- This section explains the menu options that are available in Movie/Voice mode.
- Unless otherwise stated, the settings for these menu options are retained until you change them, regardless of whether the power is turned off.
● Available menu options
- Movie (default) : Allows you to shoot movies. (p.42)
- Postrecording : You can add voice comments to still images you have shot. (p.68)
- Recorded Message : You can record voice only. (p.70)
- Exposure Compensation: Allows you to adjust the brightness of your images. (p.71)
- White Balance : You can set the correct white balance for your light source. (p.72)
- Memory Priority (p.60)
- Self Timer (p.61)
- Because the details for the Memory Priority and Self Timer modes are as described in the menu options for Auto mode, these items are not explained in this section.
1
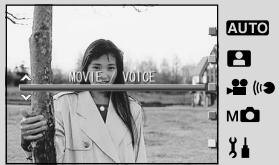
- Select "MOVIE/VOICE" and press the SET/DISP. button.
2
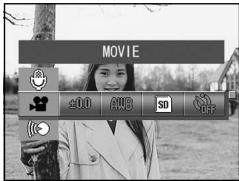
-
Pressing the MENU button displays the available menu option icons.
-
As described on p.55, use the ◀ or ▶ buttons to select the option you want to set.
- Use the ▲ or ▼ buttons to select the desired mode from the menu.
- Press the SET/DISP. button to complete the setting and return the camera to shooting mode (live image displayed).
The selected mode icon appears on the LCD monitor.
- To set another menu option, without pressing the SET/DISP. button, use the ◀ or ▶ buttons to select the option you want to set.
Using After Recording
- You can add voice comments (After Recording) to photos you have already taken. You can also erase previous voice comments, as well as re-write them.
1
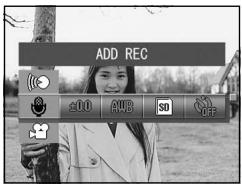
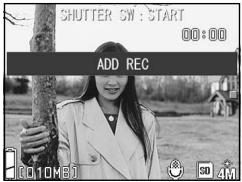
- Select "ADD REC" and press the SET/DISP. button.
2
-
Previously recorded photos are displayed. By pressing ◀ or ▶, select the still photo to which you wish to attach a voice comment.
-
Sound cannot be recorded to a photo displayed in the movie (▶) mode.
- If you press the MENU button, the selection is invalidated and you will return to screen 1.
3
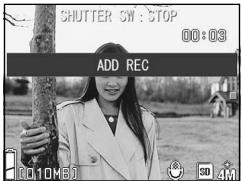
- Press the shutter button to start recording.
Record your comments facing the microphone on the front of the camera.
- When remaining time runs out, the camera stops recording automatically. You can stop recording at any time by simply pressing the shutter button again.
- While recording, the elapsed time is displayed on the side of the screen.
● Erasing recorded voice comments
1
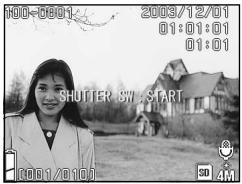
- After playing back the images, select the image from which you want to delete the sound and press the Delete button.
- Photos with voice comments have a displayed on them.

2
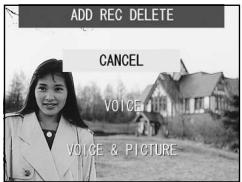
- If you wish to erase only the voice comments, select "VOICE", and if to erase all the voice comments attached to the pictures in one go, select "VOICE & PICTURE". Use ▲ or ▼ to select the appropriate setting, and then press the SET/DISP. button.
- If you decide not to erase, select "CANCEL" or press the SET/DISP. button again.
-
When the “Now DELETE…” sign disappears, erasing has finished and you will return to the through image.
-
To re-record, erase the recorded voice comments once using Step 1 to 2 on page 69, and then repeat the procedures again in Step 1 to 3 on page 68.
- It is not possible to record to a protected photo or when a card doesn't have enough space.
- Making recording with After Recording reduces the number of pictures you can take.
• See p.91 for information on playing back sound.
Making Voice Memos
- This feature allows you to record just sound.
- Take care not to cover the microphone on the front of the camera.
1
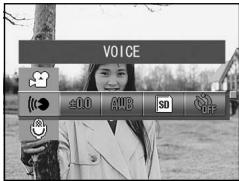
- Select "VOICE" and press the SET/DISP. button..
2
![SHUTTER SN : START 00:00 [010x8] (× SD)](/content/2025/01/165584/images/e6da1979575a725ec337576d418aa127f58418a6c89827bc35865eb92d08035c.jpg)
-
Screen 2 will appear and the camera enters in the voice recording mode. Press the shutter button and recording begins.
-
If you do not press the shutter button, you can return to screen 1 without making a recording by pressing the MENU button.
- When the available recording time runs out, recording will end automatically. If you wish to stop recording, simply press the shutter button again.
- While recording, the elapsed time is displayed on the upper right of the screen.
- To play back the recording, see page 91.
- Recording a voice memo reduces the number of photos you can take.
Adjusting Exposure Compensation
- If you wish to brighten or darken an entire image, use the exposure adjustment function.
- The exposure can be corrected ±2.0 EV in adjustment steps of 1/3 EV.
- The compensation value is displayed on the monitor.
- This option is also available in the mode menu for Manual (p.74).
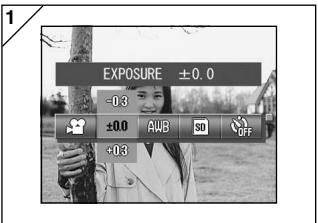
- Select the Exposure Compensation setting menu option.
- The current setting is displayed. "EXPOSURE ±0.0" is displayed as the default setting.
- Use the ▲ or ▼ buttons to select the desired exposure compensation.
Press the SET/DISP. button to complete the setting and return the camera to shooting mode.
- Even after a correction, there are times when the change is not apparent, such as when the subject is in a semi-dark place.
- When flash is used, the compensation effect may not be sufficient.
Adjusting White Balance
- The color tones in images vary depending on the type of light source used. While the AUTO setting can be used for most shots, you should change the setting when you want to take shots with the white balance set specifically for the ambient conditions and light source.
- The mode you set is displayed with icon on the LCD monitor (However, AUTO is not displayed.).
- This option is also available in the mode menu for Manual (p.74).
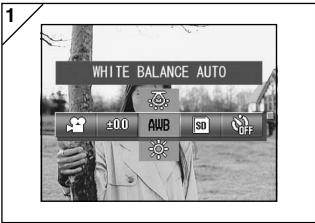
- Select the White Balance setting menu option.
- The current setting is displayed. "WHITE BALANCE AUTO" is displayed as the default setting.
- Use the ▲ or ▼ buttons to select the desired mode.
Press the SET/DISP. button to complete the setting and return the camera to shooting mode.
- To return to normal still-image shooting, set the mode to "AUTO".
● Available Modes
- AWB AUTO (Default) : The camera adjusts the white balance automatically.
• DAY LIGHT : Ideal for taking photos in strong sunlight.
• CLOUDY : Ideal for taking photos in the shade or when it is cloudy. - FLUORESCENT: Ideal for taking photos indoors with fluorescent lighting.
- TUNGSTEN : Ideal for taking photos indoors with normal incandescent lighting.
About White Balance
The human eye has the ability to compensate so that it sees white subjects as white, whatever the light source. Digital cameras and similar devices can also “see” white subjects as white by first adjusting the color balance of the ambient light to match the photo subject. This adjustment is called the White Balance.
Using the Manual Mode Menu
- This section explains the menu options that are available in Manual mode.
- Unless otherwise stated, the settings for these menu options are retained until you change them, regardless of whether the power is turned off.
● Available menu options
- Shooting modes
1) Program: This is the default mode. The camera automatically sets the shutter speed and aperture size. (p.76)
2) Aperture: The aperture is set manually and the camera then sets the shutter speed automatically. (p.78)
3) Manual : The shutter speed and aperture are both set manually. (p.79)
- Continuous & Bracket : Allows you to select the Auto Bracket function (p.81) as well as the Continuous Shooting function (p.57).
- Image Size (p.58)
- Memory Priority (p.60)
- Self Timer (p.61)
- Color (p.56)
- Exposure Compensation (p.71)
- White Balance (p.72)
- ISO : You can set the sensitivity. (p.82)
- Fixed Focus : Allows you to lock the focus setting. (p.82)
- Custom : You can specify a range of image quality settings. (p.83)
- The details of the Continuous, Image Size, Memory Priority, Self Timer, Color, Exposure Compensation and White Balance modes are not explained in this section.
Using the Manual Mode Menu (Cont'd)
1
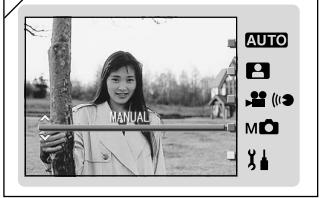
natural_image
Black-and-white photo of a person holding a tree, no visible text or symbols in the image itself- Select "MANUAL" and press the SET/DISP. button.
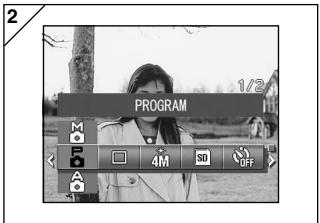
-
Pressing the MENU button displays the available menu option icons.
-
As described on p.55, use the ◀ or ▶ buttons to select the option you want to set.
- Use the ▲ or ▼ buttons to select the desired mode from the menu.
- Press the SET/DISP. button to complete the setting and return the camera to shooting mode (live image displayed).
The selected mode icon appears on the LCD monitor.
- To set another menu option, without pressing the SET/DISP. button, use the ◀ or ▶ buttons to select the option you want to set.
Taking Pictures in Program Mode
- This is the camera's default photography mode.
- In this mode, the camera automatically sets the shutter speed and aperture setting according to the brightness of the subject.
1
- Select "PROGRAM".
- The current setting is displayed. "PROGRAM" is displayed as the default setting.
2
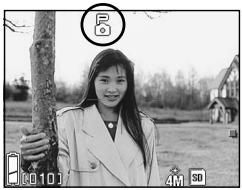
natural_image
Black-and-white photo of a woman holding a tree outdoors, with no visible text or symbols in the main image area.- Press the SET/DISP. button to set the camera to shooting mode.
- The icon appears on the LCD monitor.
Differences between the Auto and Program modes
- The shutter speed and aperture size combinations automatically set by the camera are the same in both modes.
-
The following functions can be used in Program mode but are not available in Auto mode:
-
AF (focus) lock can be used to take pictures.
- AE (exposure) lock can be used to take pictures.
- The white balance setting can be changed.
- Exposure compensation can be used.
- When you press the shutter button half way, the aperture setting and shutter speed are displayed on the LCD monitor.
AF Taking pictures with AF (focus) lock
If you press ◀ while activating focus lock (pressing the shutter button halfway on page 41), the focus setting locks and the AF icon appears on the LCD monitor. The setting becomes effective even after you take a shot.
* To cancel the AF-lock, turn the camera's power OFF or press the Zoom or ◀ button.
AE Taking pictures with AE (exposure) lock
If you press ▲ while activating focus lock (pressing the shutter button halfway on page 41), the exposure setting locks and the Ⓧ icon appears on the LCD monitor. The setting becomes effective even after you take a shot.
* To cancel the AE-lock, turn the camera's power OFF, press the Zoom button, or change the white balance setting.
AWB Changing the white balance setting
You can select the white balance mode by pressing ▼. Each time you press ▼, the mode alters, and the selected mode is displayed on the LCD monitor. For information on displayed icons and white balance modes, see page 73.
Using exposure compensation
Pressing the ▲ button when you take a pictures displays the exposure compensation setting on the LCD monitor. Exposure can be corrected with ◀ or ▶ button. The exposure compensation can be adjusted ±2.0EV in 1/3 EV increments either side of the default setting.
* Each time you press the ▲ button, the function of the ◀ and ▶ buttons changes. Pressing the ▲ button again changes the functions of the ◀ and ▶ buttons to Macro mode (◀) and Flash mode (▶) respectively.
* You can restore the normal white balance setting by pressing the ▼ button.
Taking Pictures in Aperture Mode
- In this mode, the camera automatically sets the shutter speed after you select the aperture setting.
- Focus value differs with zoom magnifications and can be switched to 2 levels according to magnification.
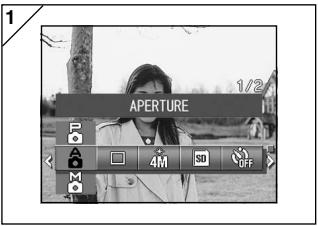
- Select "APERTURE".
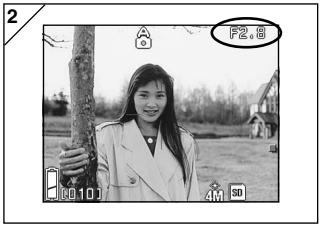
natural_image
Black-and-white photo of a smiling woman holding a tree outdoors, with no visible text or symbols in the main scene.- When you press the SET/DISP. button, the current aperture setting appears on the LCD monitor and you can then set the aperture to the desired setting.
Use the ▼ button to set the aperture and then take the picture.
- You can also use the ◀ or ▶ buttons to set the exposure compensation.
- Each time you press the ▲ button, the functions of the ▼, ◀ and ▶ buttons change. When the aperture setting is displayed in white, the aperture and exposure settings can be specified. However, by pressing the ▲ button, the functions of the ▼, ◀ and ▶ buttons can be changed to White Balance (▼), Macro mode (◀) and Flash mode (▶) respectively.
- As with Program mode (p.76), AE lock and AF lock (p.77) can be used to take pictures in Aperture mode.
Taking photographs in manual exposure mode
- Shutter speed and focus value can be set according to conditions and purpose.
- Shutter speed can be set between 15 and 1/1000 seconds. Focus value differs with zoom magnifications and can be switched to 2 levels according to magnification.
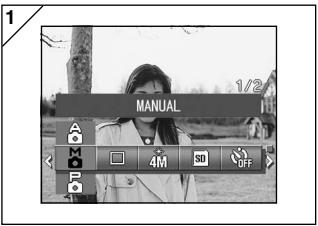
- Select "MANUAL".
![2 M o F2.8 1/1000 [00:10] 4M SD](/content/2025/01/165584/images/444ad0eb1391abc5577b5132db04d719235f006d1f349403c6eacc25c0eef9ae.jpg)
- When you press the SET/DISP. button, the current shutter speed and aperture setting appear on the LCD monitor and you can then set the shutter speed and aperture to the desired settings.
Set up focus value with ▼ button and shutter speed with ◀ or ▶ button.
- Please use a tripod to prevent movement during slow shutter speed exposure.
- When setting up manual exposure mode, the function of ▼, ◀ and ▶ button can be changed every time ▲ button is pressed.
When the shutter speed and aperture settings are displayed in white, the exposure settings can be specified manually. If you press the ▲ button, you can then use the ▼, ◀ and ▶ buttons to set the White Balance (▼), Macro mode (◀) and Flash mode (▶) respectively. - As with Program mode (p.76), AE lock and AF lock (p.77) can be used to take pictures in Manual mode.
Taking photographs in manual exposure mode (Cont'd)
- Focus value and shutter speed will be displayed on the LCD monitor all the time when setting up manual exposure mode.
Exposure value (exposure difference to brightness) will be displayed by half depressing shutter button. (Displays in 1/3EV steps within ±2.0 .)
Even if brightness around changes, the exposure value can be confirmed whenever the shutter button is half depressed.
- In manual exposure mode, if shutter mode is set slower than 1/2 second, it will take longer for processing due to the noise reduction function.
- Some of the functions will be restricted on manual exposure mode.
- You cannot set Exposure Compensation modes (p.71, 74) from other menus.
- ISO sensitivity (p.82) will be fixed to "ISO50" when it is set to "AUTO".
- Flash AUTO mode cannot be selected.
- When flash emits light on red-eye reduction mode (p.114), set up shutter speed will be used.
- When taking a photograph using a flash in manual exposure mode, the intensity may not be appropriate according to conditions. In such a case, please use flash intensity mode in image quality setting (p.84).
Using the Auto Bracket Function
- In this mode, the camera automatically shoots 3 frames with staggered exposure or focus settings (3-frame continuous shooting).
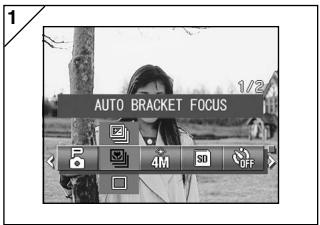
- Select the Bracket setting menu option.
- The current setting is displayed. "SINGLE SHUTTER" is displayed as the default setting.
- Use the ▲ or ▼ buttons to select "AUTO BRACKET EXPOSURE" or "AUTO BRACKET FOCUS".
Press the SET/DISP. button to complete the setting and return the camera to shooting mode.
● Available modes
- □ Single shutter (default) : This is the normal shooting mode in which the camera shoots one frame at a time.
- ☐ Continuous shutter : See p.57.
- Super Continuous : See p.57.
- Auto Bracket Exposure: The camera automatically shoots 3 frames with staggered exposure settings.
- Auto Bracket Focus : The camera automatically shoots 3 frames with staggered focus settings.
- Use Playback mode to check the images shot using the Auto Bracket function and select the best image.
Changing the Sensitivity (ISO)
- Sensitivity can be switched over.
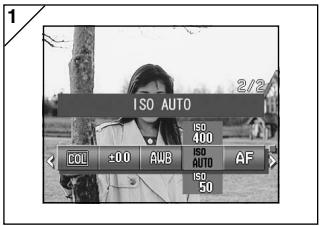
- Select the ISO setting menu option.
- The current setting is displayed. "ISO AUTO" is displayed as the default setting.
- Use the ▲ or ▼ buttons to select the desired sensitivity setting.
Press the SET/DISP. button to complete the setting and return the camera to shooting mode.
AUTO
; Normal sensitivity is equivalent to ISO100. Sensitivity can be changed automatically to adjust to the condition of an object.
50/100/200/400
; High sensitivity is suitable for an object with quick motion or for dark places. However, the higher the sensitivity is, the more noise image will have. Low sensitivity is suitable for bright place or slow shutter speed.
Taking photographs by fixing focus
- Use this mode if you want to take photographs using fixed focus.
- Distance can be set to infinity (long distance), 2.5m, 1.2m or 0.8m.
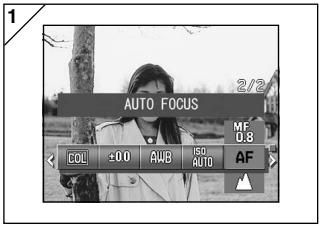
- Select the Focus setting menu option.
- The current setting is displayed. "AUTO FOCUS" is displayed as the default setting.
- Use the ▲ or ▼ buttons to select the desired distance.
Press the SET/DISP. button to complete the setting and return the camera to shooting mode.
Setting the Custom Function
- Setting the Custom function allows you to use the menu selections and settings on pages 84-88.
However, because the menu option default setting is "OFF", you first have to cancel the "OFF" setting for CUSTOM in the Setup menu. (p.120) - Once you cancel the "OFF" setting, the menu settings screen appears and you can set image quality parameters such as the flash brightness and image contrast to your preferred settings.
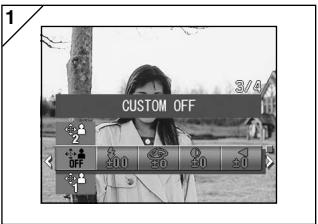
- Select the Custom setting menu option.
- The current setting is displayed. "CUSTOM OFF" is displayed as the default setting.
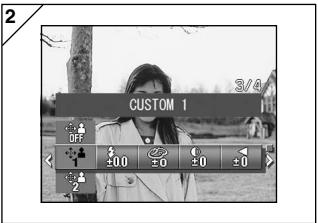
- Use the ▲ or ▼ buttons to select "CUSTOM 1". You can also select "2".
- You can specify 2 different custom image quality settings.
- After selecting the custom setting, use the ◀ or ▶ buttons to choose from the menu options on p.84-88 and specified your preferred settings.
- To take pictures using the normal (default) settings, select CUSTOM OFF and press the SET/DISP. button.
To take pictures using the specified custom image quality settings, select CUSTOM 1 or 2.
Adjusting the Flash Brightness
- Flash intensity can be adjusted.
1
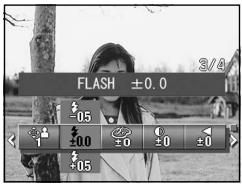
- Select the Flash setting menu option.
- The current setting is displayed. "FLASH ±0.0" is displayed as the default setting.
- Use the ▲ or ▼ buttons to select the desired setting.
Press the SET/DISP. button to complete the setting and return the camera to shooting mode.
- If you want to reduce the flash intensity, so as to take photograph of a close object, adjust the volume to the “—”.
If you want to increase the flash intensity, such as when the background of an object is far away, adjust to the “+”. - Flash intensity may be restricted by hardware depending on the conditions (focusing distance, focus value, distance to an object, sensitivity etc.)
Adjusting the Saturation
- Color clearness of images can be adjusted.
1

- Select the Saturation setting menu option.
- The current setting is displayed. "SATURATION ± 0 " is displayed as the default setting.
- Use the ▲ or ▼ buttons to select the desired setting.
Press the SET/DISP. button to complete the setting and return the camera to shooting mode.
- Adjust to the “+” to increase color clearness and adjust to the “−” to reduce color clearness.
Adjusting the Contrast
- Contrast of images (gap between bright and dark) can be adjusted.
1
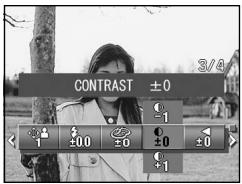
- Select the Contrast setting menu option.
- The current setting is displayed. "CONTRAST ±0" is displayed as the default setting.
- Use the ▲ or ▼ buttons to select the desired setting.
Press the SET/DISP. button to complete the setting and return the camera to shooting mode.
- Adjust to the “+” to increase the gap between brightness and darkness for sharp images and adjust to the “−” to decrease the gap for soft images.
Adjusting the Sharpness
- Sharpness of images (sharpness of outline) can be adjusted.
1
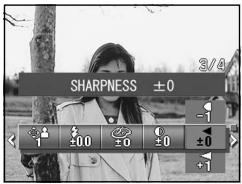
- Select the Sharpness setting menu option.
- The current setting is displayed. "SHARPNESS ± 0 " is displayed as the default setting.
- Use the ▲ or ▼ buttons to select the desired setting.
Press the SET/DISP. button to complete the setting and return the camera to shooting mode.
- Adjust to the “+” to make the image outline sharper and adjust to the “−” to make it softer.
Adjusting the Color
- Color of images can be adjusted. (Specified color can be emphasized.)
1
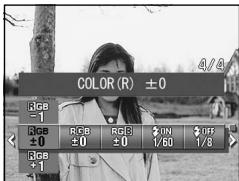
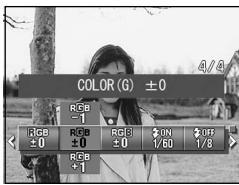
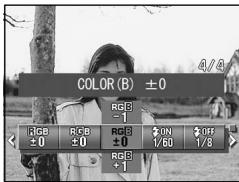
- Select the Color setting menu option (red, green or blue).
- The current setting is displayed. "±0" is displayed as the default setting for all 3 colors.
- Use the ◀ or ▶ buttons to set the color and then the ▲ or ▼ buttons to select the desired setting.
Press the SET/DISP. button to complete the setting and return the camera to shooting mode.
• Color (red, green, blue) is set up as a relative value.
0, 0, 0 and -2, -2, -2 are regarded as the same. For example, to emphasize the red most, colors need to be set up to +2 (red), -2 (green), -2 (blue) not +2 (red), 0 (green), 0 (blue).
Changing slow shutter speed
- Slow shutter speed can be changed according to the flash mode.
- Shutter speed will become slow when taking photographs in dark places, so please use a tripod to prevent movement during exposure.
1
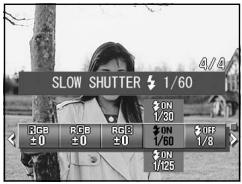
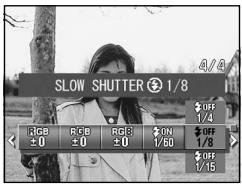
- To change the slow shutter speed when the flash mode is set to AUTO or FLASH ON (⚡), select "SLOW SHUTTER⚡".
- The current setting is displayed. See the explanation below (*) for more details of the shutter speeds displayed.
To change the slow shutter speed when the flash mode is set to OFF (💡), select "SLOW SHUTTER💡".
- The current setting is displayed. "1/8" seconds is displayed as the default setting.
- Use the ▲ or ▼ buttons to select the shutter speed.
Press the SET/DISP. button to complete the setting and return the camera to shooting mode.
\* Slow shutter speed display
Shutter speeds for SLOW SHUTTER are only displayed when wide-angle (W) is selected in the settings screen. The table below shows the corresponding shutter speeds for telephoto (T). The default speed displayed for wide angle (W) is 1/60 seconds.
Note also that the shutter speed does not change for each focal distance when SLOW SHUTTER is selected.
| Wide-angle (W) | 1/8 | 1/15 | 1/30 | 1/60 | 1/125 |
| Telephoto (T) | 1/12.5 | 1/25 | 1/50 | 1/100 | 1/200 |
Viewing Multiple Pages at Once (Index Playback)
- Up to nine frames can be displayed on the LCD monitor simultaneously. You can quickly access the images you want displayed. You can also erase unwanted images.
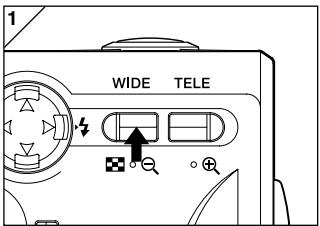
- Press the ▶ Play button to play back the images and then press the WIDE zoom button.
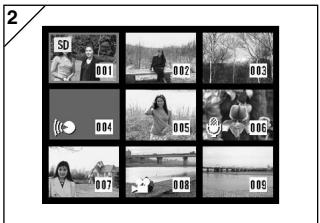
- The 9-frame index are displayed at the same time. The image selected when you entered the menu will be surrounded by a red frame. Use ◀, ▶, ▲, or ▼ to move the frame and select the image you wish to display (or erase).
- Pressing ◀ when the first frame is selected or ▶ on the last frame will switch the screen to the next nine images.
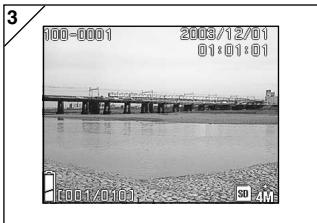
natural_image
Black-and-white photo of a waterfront scene with a bridge and sediment, no visible text or symbols- Press the TELE zoom button or the SET/DISP. button and the selected image will be displayed in the normal size.
- If you wish to delete the selected image, press the ☑ DELETE button. After pressing the ☑ DELETE button, the procedures are the same as explained at p.51-2 to p.53.
- If you wish to delete all the images on a card, it doesn't matter which image is displayed.
Playing Back Enlarged Images (Digital Zoom)
- You can play back your images as enlargements.
1
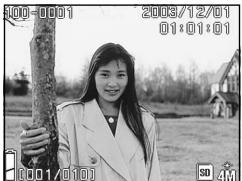
natural_image
Black-and-white photo of a smiling woman holding a cylindrical object outdoors, with no visible text or symbols.- After pressing the ▶ PLAY button, use ◀ or ▶ to select the image you wish to see.
Then use the TELE zoom button to zoom in; every time you press the TELE button, the image is enlarged further.
- The zoom ratio is displayed on the LCD monitor. - To zoom back out, press the WIDE zoom button.
Also, half depress shutter button to display the image in the normal size.
2
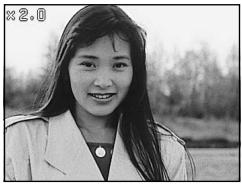
natural_image
Black-and-white portrait of a smiling woman outdoors (no visible text or symbols)- Use ◀, ▶, ▲, or ▼ to scroll around the photo to the part you want to see.
Using the Quick-view Function
- If you pre-set the camera to the Quick-view mode (p. 111), you can review pictures on the LCD monitor right after you've taken them.
When using the LCD monitor for shooting images:
1) After you take a picture, the LCD monitor automatically displays it.
2) After about three seconds, the LCD monitor returns to the through image.
When using the viewfinder to shoot images, with the LCD monitor off:
After the LCD monitor displays the last image that you have taken, it will automatically turn back to off.
Playing back the sound of After Recording image
- Playing back the sound of After Recording image (p.68).
1
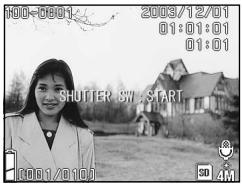
- Press the ▶ PLAY button and then select After Recording image with ◀ or ▶ button.
- When playing back After Recording image, a screen will be displayed as in 1. Recording time will be displayed at the upper-right of the screen.
- Press the shutter button to play back sound. It will revert back to image 1 when playback finishes.
- Playback time will be displayed in the upper-right of the screen.
Playing Back Voice Memos
- Play back the contents of your voice memos (p. 70).
1
![100-0001 2008/12/01 01:01:01 01:01 SHUTTER SW : START [001/019]](/content/2025/01/165584/images/9b3f889f712650aa194a1d21f22c58286828f76736f842fc78c8cc8c2b14a293.jpg)
- After pressing the ▶ PLAY button, use ◀ or ▶ to select a voice memo image.
- The voice memo time is displayed in the upper right of the screen.
- Press the shutter button and the voice memo is played back. When the memo finishes, the display returns to screen 1.
- The playback time (elapsed) is displayed in the upper right of the screen.
- Playing back voice memo and sound for After Recording image.
• Take care not to cover the speaker on the top of the camera (p.16).
- Press the shutter button again if you want to stop during playback.
Using the PLAY Menu
- You can use the PLAY menu to copy and protect your images and to specify DPOF print settings. It does not matter whether the camera's power is OFF or ON.
● Available menu options
- Copy & Move: Allows you to copy or move images to other media. (p.94)
- DPOF : Specifies the images to be printed and the number of copies of each image. (p.97)
- Protect : Used to prevent images from being deleted. (p.101)
- Resize :Allows you to reduce the size of an image. (p.104)
- Slide Show : Automatically plays back images as a continuous slide show. (p.105)
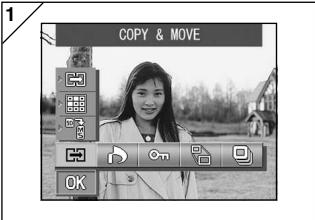
- After pressing the ▶ PLAY button, press the SET/DISP. button and the PLAY menu screen will be displayed.
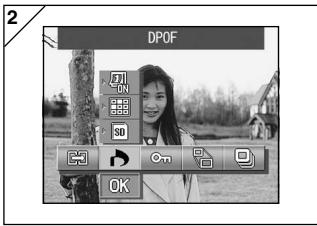
- Using ◀ or ▶, select the desired settings menu.
3
- Use the ▲ or ▼ buttons to select a mode from the menu and then press the SET/DISP. button to specify the mode settings.
- The icon for the selected mode is highlighted.
4
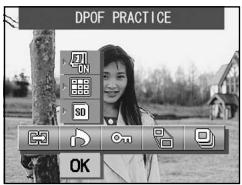
- When you have completed all the settings, use the ▼ button to select "OK" and press the SET/DISP. button.
- When the settings are completed the menu screen reappears. From the menu screen, press the MENU button to return to the playback image.
- For details on making settings for each menu, refer to the following pages.
Copying and Moving Images
- You can use the procedure described below to copy or move still images or movies you have shot to another media.
- For protected images, you must cancel their protection before you can move them.
1
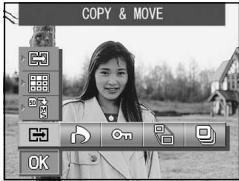
- Select "COPY & MOVE".
2
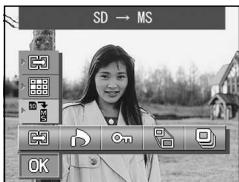
- Use the ▲ or ▼ buttons to select the mode.
After selecting the media mode, use the SET/DISP. button to select the media to which the data will be copied or moved.
- If there are no images on the selected media or no card is inserted, the media cannot be selected.
3
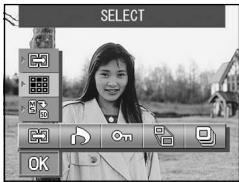
- Select the unit mode and then use the SET/DISP. button to select "SELECT" (to select one frame or multiple frames) or "ALL ON".
4
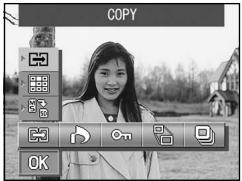
- After selecting the COPY/MOVE mode, use the SET/DISP. button to select COPY or MOVE.
5
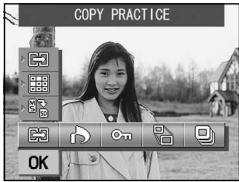
-
When you have completed all your selections, use the ▼ button to select "OK" and then press the SET/DISP. button.
-
Pressing the MENU button or pressing the SET/DISP. button on the icon position just above "OK" discards the settings and returns to the screen in step 1.
- If you selected "SELECT" as the unit mode, proceed to step 6. If you selected "ALL ON", proceed to p.96-8.
6
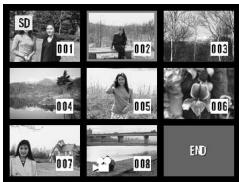
- An 8-frame image is displayed.
Pressing the ◀, ▶, ▲ or ▼ buttons moves the red frame around the screen. Use the red frame to select the image to be copied or moved and then press the SET/DISP. button.
- Pressing ◀ when the first frame is selected or ▶ on the last frame will switch the screen to the next eight images.
7
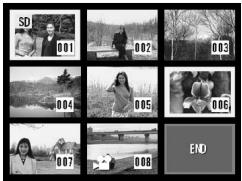
8
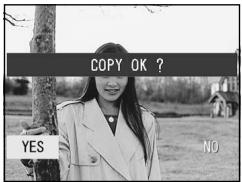
- Images selected at Step 6 are surrounded by a yellow frame.
To select other images, repeat the selection procedure. (Return to Step 6)
When you have finished selecting images, use ◀, ▶, ▲, or ▼ to select "END", and then press the SET/DISP. button.
- A confirmation screen appears. To move the image(s), select "YES" with ◀ or ▶, then press the SET/DISP. button.
- If you select "NO" and press the SET/DISP. button, you will return to screen 1 without moving anything.
- Copying or moving begins and the "Now COPY..." or "Now MOVE..." message is displayed.
When copying or moving ends, the step 1 screen reappears.
Selecting/Deselecting Images to Print (DPOF)
- You can also order a digital print at a photo lab (except for some labs) such as a traditional photofinishing service. For detailed information, please contact your photo lab.
- DPOF is short for Digital Print Order Format. DPOF is a format for recording information on memory cards, etc. so they can be used by DPOF compatible digital printers and lab print services for printing out images you've taken with your camera.
- You can select the frames (one frame, multiple frames or all frames) you want to print from all the still images you've taken. You can also deselect the settings. However, you cannot print movie images.
- The maximum number of prints that can be specified for one image is 999.
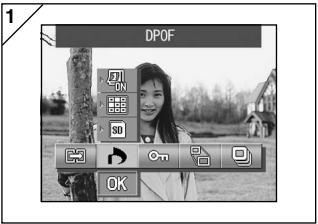
- Select "DPOF".
- Use the ▲ or ▼ button to select the mode.
After selecting the media mode, use the SET/DISP. button to select the media containing the images to be printed (or deselected).
- If there are no images on the selected media or no card is inserted, the media cannot be selected.
3
- After selecting the unit mode, use the SET/DISP. button to select "SELECT" if you want to print (or deselect) one frame or multiple frames. To print all the frames, select "ALL ON". To cancel all the print settings, select "ALL OFF".
4
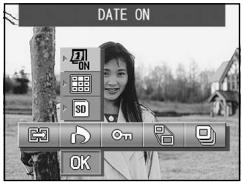
- After selecting the date mode, use the SET/DISP. button to select "DATE ON" or "DATE OFF".
- If you select "DATE ON", the date and time of shooting are also printed.
5
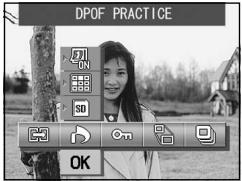
- When you have completed all your selections, use the ▼ button to select "OK" and then press the SET/DISP. button.
- Pressing the MENU button or pressing the SET/DISP. button on the icon position just above "OK" discards the settings and returns to the screen in step 1.
- If you selected SELECT as the unit mode, proceed to step 6 on p.99. If you selected ALL ON, proceed to step 9 on p.100. If you selected ALL OFF, proceed to step 10 on p.100.
6
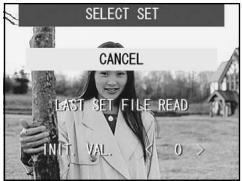
- The "SELECT SET" screen appears. Use the ▲ or ▼ button to select "LAST SET FILE READ" or "INIT. VAL. <0>" and then press the SET/DISP. button.
- If you do not want to specify any DPOF settings, select "CANCEL" and press the SET/DISP. button.
- By selecting "LAST SET FILE READ", you can re-use the file containing the previous print settings. If the previous settings are not stored in a file, this option is grayed out and cannot be selected. In this event, select "INIT. VAL. <0>"
- By selecting "INIT. VAL. <0>" and pressing the ◀ or ▶ button, you can reset all the frames to their default values beforehand.
7
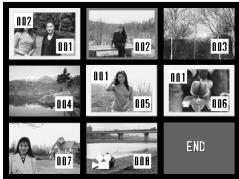
- An 8-frame image is displayed.
Use the ◀, ▶, ▲ or ▼ buttons to move the red frame around the screen. Using the red frame to select an image allows you to change or set (or cancel) the DPOF settings for the image.
- Images for which prints have been specified are surrounded by a yellow frame and the number of prints specified is shown in the top-left corner of the image. By using the red frame to select an image and pressing the zoom buttons (T and W), you can increase or decrease the number of prints.
- If you use the red frame to select an image with no prints specified and then press the SET/DISP button, the number prints for that image is set to 1. You can then use the zoom buttons (T and W) to increase or decrease the number of prints.
-
If you press the ◀ button at the first frame or the ▶ button at the last frame, the screen changes to show the previous 8 frames or next 8 frames.
-
To exit the selection screen, use the ◀, ▶, ▲ or ▼ button to select "END" and then press the SET/DISP. button. (Proceed to p.100-10.)
9
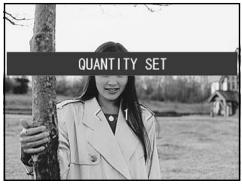
9. If you selected "ALL ON":
Use the ▲ or ▼ button or the zoom buttons (T or W) to specify the number of prints and then press the SET/DISP. button.
10
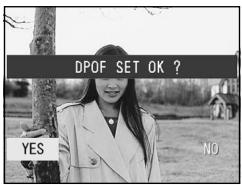
10. The confirmation screen is displayed. If you selected "ALL ON" or "SELECT":
Use the ◀ or ▶ button to select "YES" and then press the SET/DISP. button.
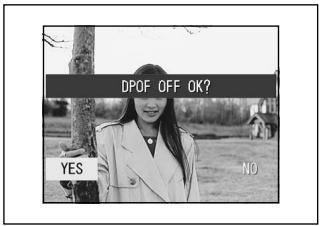
If you chose "ALL OFF":
Select "YES" and press the SET/DISP. button.
- If you select "NO" and press the SET/DISP. button, your settings will be invalidated and you will return to screen 1.
- The "Now DPOF SET..." (or "Now DPOF OFF...") screen is displayed. Once settings (or deselection) are completed, the display returns to screen 1.
Setting/Canceling Protection for Your Important Images
- You can protect your important still and moving images from being erased. (You can select some or all images to be protected). You can also cancel the protection.
- If you format a card (p.108), even protected images will be erased.
1
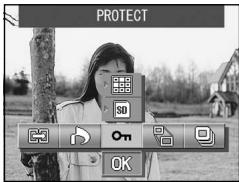
- Select "PROTECT".
2
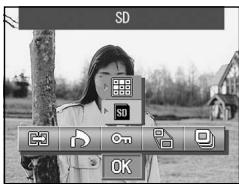
- Use the ▲ or ▼ button to select the mode.
After selecting the media mode, use the SET/DISP. button to select the media containing the images to be protected (or unprotected).
- If there are no images on the selected media or no card is inserted, the media cannot be selected.
3
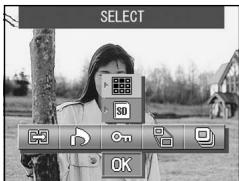
- After selecting the unit mode, use the SET/DISP. button to select "SELECT" if you want to protect (or unprotect) one frame or multiple frames. To protect all the frames, select "ALL ON".
To cancel all the protection settings, select "ALL OFF".
4
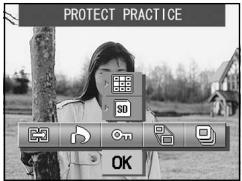
5
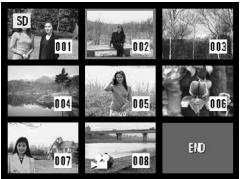
6
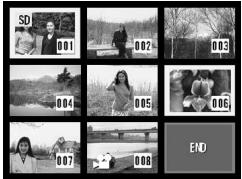
-
When you have completed all your selections, use the ▼ button to select "OK" and then press the SET/DISP. button.
-
Pressing the MENU button or pressing the SET/DISP. button on the icon position just above "OK" discards the settings and returns to the screen in step 1.
-
If you selected "SELECT" as the unit mode, proceed to step 5. If you selected "ALL ON" or "ALL OFF", proceed to p.103-7.
-
The 8-frame index appears. Using ◀, ▶, ▲, or ▼, move the red frame to an image you wish to protect (or cancel protect) and press the SET/DISP. button.
- Pressing ◀ when the first frame is selected or pressing ▶ on the last frame will switch the display to the next eight images.
- Images selected at Step 5 are surrounded by a yellow frame.
To select other images, repeat the selection procedure. (Return to Step 5) When you have finished selecting images, use ◀, ▶, ▲, or ▼ to select "END", and then press the SET/DISP. button.
7
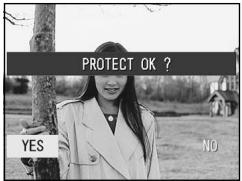
- A confirmation screen appears.
Select "YES" with ◀ or ▶ and press the SET/DISP. button.
- If you select "NO" with ◀ or ▶ and press the SET/DISP. button, your settings will be invalidated and you return to screen 1.
- The "Now PROTECT..." (or "Now PROTECT OFF") screen is displayed. Once settings (or cancel protect) are completed, the display returns to screen 1.
Reducing Image Size (Resizing)
- You can reduce the size of images you have taken. When you resize an image, a new, smaller file is created.
- Use this function when you send images as e-mail attachments or when you otherwise need a smaller image.
- The resize function is not available for movie images.
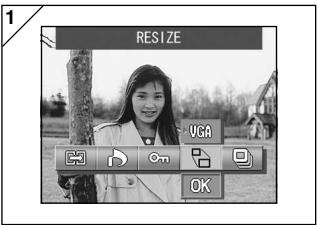
- Select the image to be resized in the playback screen and then select the "RESIZE" menu option.
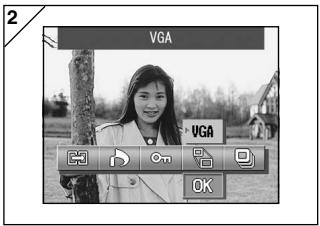
- Use the ▲ button to select the size mode and then use the SET/DISP. button to select the image size.
- VGA records at 640 × 480 pixels and QVGA at 320 × 240 .
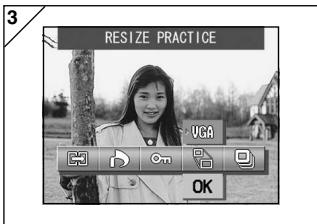
- When you have completed the selection, use the ▼ button to select "OK" and then press the SET/DISP. button.
- Pressing the MENU button or pressing the SET/DISP. button on the icon position just above "OK" discards the settings and returns to the screen in step 1.
4
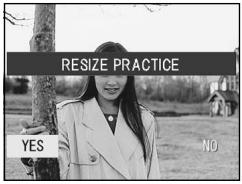
- Use the ◀ or ▶ button to select "YES" and press the SET/DISP. button to record the resized image as a new image file.
- To cancel image resizing, select "NO" and press the SET/DISP. button.
- If there is not enough memory to save the image, an error message "MEMORY FULL" is displayed.
Playing a Slide Show
- The slide show will proceed in order from the first image at a set interval.
1
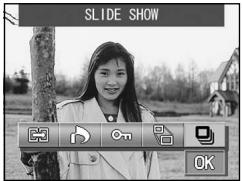
-
Select "SLIDE SHOW".
-
Use the ▼ button to select "OK" and then press the SET/DISP. button.
-
Slides will be displayed in order, starting with the 1st slide at about 2 second intervals. The slide show will finish with the last frame displayed.
- If you wish to stop during a slide show, press the SET/DISP.button. If stopped, the current frame will be displayed.
Using the Set-up Menu
- By setting each item on the set-up menu to your preferences, you can customize your camera to suit you.
- It does not matter whether the main power is ON or OFF, as the settings are saved by the camera until they are changed.
- You can select the Setup menu from Shooting mode (live image) or from the playback screen.
● Available menu options
- Format : Initializes a card. (p.108)
- Monitor : Allows you to specify settings for the LCD monitor. (p.110)
- REC. SET : Allows you to specify settings for Shooting mode. (p.113)
- Sound : You can turn the various camera sounds on and off. (p.117)
- Basic Set Up: Allows you to specify settings such as custom settings and the date and time. (p.118)
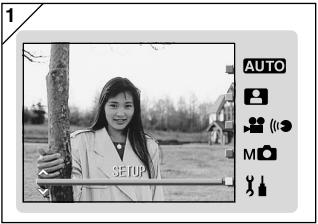
natural_image
Black-and-white photo of a young woman holding a tree, wearing a coat with 'SEUP' text (no other visible text or symbols)- With the live image on the screen, press the MODE button.
Use the ▲ or ▼ button to select "SET UP".
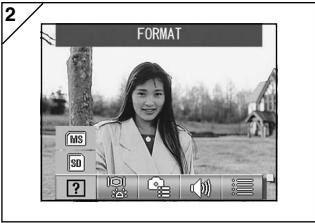
- Press the SET/DISP. button to display the icons for the available menu options.
- Pressing the MODE button from the image playback screen displays the SET UP menu.
3
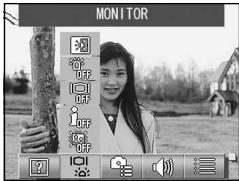
- Use the ▲ or ▼ button to select a mode from the menu and then press the SET/ DISP. button to specify the mode settings.
- When you have completed the settings, press the MENU button.
When the settings are completed, the SET UP menu screen (screen in step 1) reappears. If you accessed the SET UP menu from the playback screen, the playback image reappears.
- In the SET UP menu screen (screen in step 1), pressing the MENU button returns the camera to Shooting mode (live image).
- Refer to the following pages for details on making settings for each menu.
Formatting a Memory Card
- Formatting a card returns it to the initial state (when it was purchased).
- Caution: Formatting erases all data, even images that are protected (p.101).
- Always format cards inside the camera. If a card is formatted by a computer it may not perform normally.
1
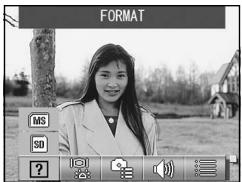
- Select "FORMAT".
Use the ▲ or ▼ button to select the type of media to be formatted and then press the SET/DISP. button.
2
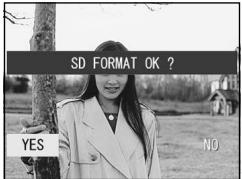
- You will be asked for confirmation. To execute formatting, select "YES" with ◀ or ▶ and press the SET/DISP. button.
- If you decide not to format, select "NO" and press the SET/DISP. button.
3
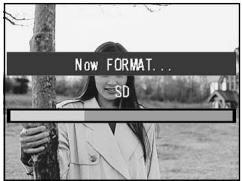
- Once formatting starts, the message "Now FORMAT..." will appear.
When formatting is complete, the camera returns to the Set-up menu mode.

During formatting be sure not to open the battery/card cover as damage to the card may result.
Specifying the LCD Monitor Settings
- Use the procedure below to specify the settings for the LCD monitor.
1
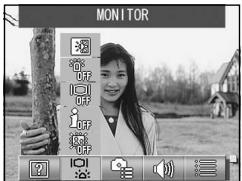
- Select "MONITOR".
2

- Use the ▲ or ▼ button to select the mode.
Then use the SET/DISP. button to turn each mode ON or OFF.
- When you have completed the settings, press the MENU button.
When the settings are completed, the SET UP menu screen reappears.
● Available modes
- QUICK VIEW : Allows you to set up the camera so that you can check your images right after you shoot them.
- INFORMATION : Allows you to switch between showing and hiding the image information.
- MONITOR : Allows you to change the LCD monitor operation mode.
- BLUE LED : You can turn the LED that lights when the camera is started up on and off.
- MONITOR COLOR : Allows you to adjust the LCD monitor brightness and color tones. (p.112)
Setting QUICK VIEW
- Set this mode to “QUICK VIEW ON” to display images on the LCD monitor immediately after they are photographed so that you can check images as and where you shoot them.
- The default setting is "QUICK VIEW OFF".
- See p.90 for more detailed information on this function.
Hiding the image information
- By selecting "INFORMATION OFF", you can stop the camera from displaying the image information (p.38, 48) shown during shooting or playback.
- The default setting is "INFORMATION ON" (show).
Changing the LCD monitor operation mode
- When you switch the camera on, the LCD monitor always lights up. However, you can stop the LCD monitor from lighting up when the camera is switched on by selecting the “MONITOR OFF” setting.
- The default setting is "MONITOR ON".
- When "MONITOR OFF" is selected, you can switch the LCD monitor on by pressing the SET/DISP. button after you switch the camera on.
Preventing the blue LED from switching on
- When the camera is running, the blue LED (see p.16) lights. However, selecting "BLUE LED OFF" stops the LED from switching on.
- The default setting is "BLUE LED ON".
Adjusting the Brightness and color of the LCD Monitor
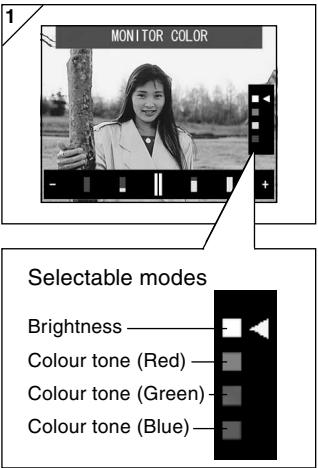
- Select "MONITOR COLOR" and press the SET/DISP. button to display the monitor adjustment screen.
- Select the mode (brightness or color) you want to adjust by moving the cursor ◀ within the selecting mode using ▼ or ▲ button.
Pressing the ◀ or ▶ buttons moves the cursor in the adjustment bar at the bottom of the screen. Use this to adjust the settings to the desired brightness and color.
After making the adjustments, press the SET/DISP. button complete the settings.
- To make screen brighter (to make color deeper.), move the cursor to the “+” with ▶ button. To make the screen darker (to make color lighter.), move the cursor to the “−” with ◀ button.
• Color is set up as a relative value.
For example, to emphasize red most, green and blue need to be set up to the furthest left as well as setting up red to the furthest right.
Specifying the Shooting mode settings
- Use the procedure below to specify the settings for Shooting mode.
1
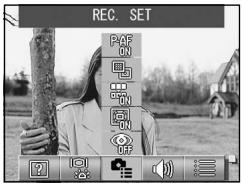
- Select "REC. SET".
2
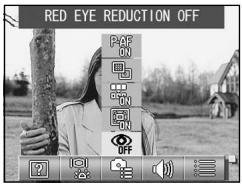
- Use the ▲ or ▼ button to select the mode.
Then use the SET/DISP. button to turn each mode ON or OFF.
- When you have completed the settings, press the MENU button.
When the settings are completed, the SET UP menu screen reappears.
● Available modes
- RED EYE REDUCTION: Allows you to take pictures using red-eye reduction. (p.114)
- DIGITAL ZOOM : Allows you to take pictures using the digital zoom. (p.114)
- NUMBER RESET : You can reset the file number. (p.115)
- CHANGE EXPOSURE : You can change the exposure metering (AE) mode. (p.115)
- CHANGE FOCUS : You can change the focus metering (AF) mode. (p.116)
Taking pictures using red-eye reduction
- By selecting RED EYE REDUCTION ON, you can minimize the "red-eye effect" that causes people's eyes to glow red when flash photography is used. (The default setting is OFF.) - When you press the shutter button, the pre-flash comes on, followed by the real flash which finishes the shot.
- Until the real flash comes on, do not move the camera or let the subject move.
- If the subject is not facing the pre-flash or final flash, or the distance to the subject is too far, the red-eye reduction effect may not be apparent.
Using the Digital Zoom
- If you select “DIGITAL ZOOM ON”, it can become 2x zoom furthermore from the maximum magnification of optical zoom, and pictures can be taken. (The default setting is OFF.)
- When using the digital zoom, view the field through the LCD monitor. Because the zoom effect is accomplished electronically, it is not possible to use the viewfinder.
- When shooting movies, the digital zoom function is not available.
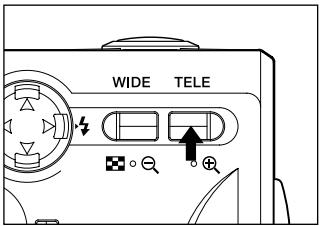
To take a picture, press the TELE zoom button until it reaches the end of the optical range, then release the button for a moment, then press and hold the TELE zoom button and the digital zoom is engaged.
- The LCD monitor will display the digital zoom ratio (×2).
- To return to normal mode, press the WIDE zoom button.
Resetting the file number
- The setting method of file numbers can be changed.
\* NUMBER RESET OFF (default setting)
Consecutive file numbers are assigned as shown below. (The file numbers are continued if a new card is inserted.)
XXXX1.jpg, XXXX2.jpg, XXXX3.jpg...
\* NUMBER RESET ON
Each time a new card is inserted, numbers are assigned starting from XXXX1.jpg. If a card that already contains images is inserted, the assigned file numbers continue on from the existing numbers already on the card.
Changing Auto-Exposure (AE) Modes
- Your camera uses center-weighted metering as the default, but it can be changed to spot metering.
- Spot metering is used to ensure matching the exposure to a targeted part of your subject.
\* Center-weighted metering (AE CENTER)
In this mode the camera sets the exposure according to the metering for the central part of the whole frame. It is ideal for taking photos where the brightness of the subject in the center of the frame is desired.
\* Spot metering (AE SPOT)
In spot metering the camera measures the light of just the subject in the center of the frame, and sets the exposure to it. This mode is ideal when the background of the picture is brighter than the subject, or there is a great deal of contrast between the two, as the camera allows you to take the photo with the exposure set to the brightness of your desired subject.
Changing the focus metering (AF) Mode
- The system of focus metering can be changed.
\* exo-AF sensor ON (default setting)
This is the normal setting.
This mode uses both external AF and image-plane AF using a CCD to set the focus. This mode uses the optimum AF on the camera for the scene being shot.
\* exo-AF sensor OFF
This modes sets the focusing using only image-plane AF with a CCD, with no external AF used. Select this option when more high-precision focusing is needed.
• These choices are available for all shots.
- If OFF is selected, the time required for focusing may be somewhat longer in Scene Select mode, etc.
Changing the sound settings
- Use this procedure to switch the camera's warning tones, effects sounds and the shutter sound on and off.
- The default is "ON" (emit sound) for all the sounds.
1
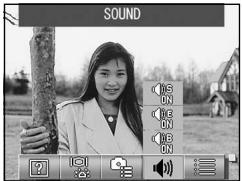
- Select "SOUND".
2
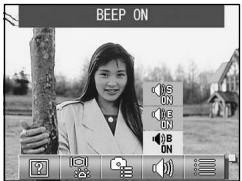
-
Use the ▲ or ▼ button to select the mode.
Then use the SET/DISP. button to turn each mode ON or OFF. -
When you have completed the settings, press the MENU button.
When the settings are completed, the SET UP menu screen reappears.
Specifying the basic camera set up
- You can use this procedure to specify basic camera settings such as the date and time and the custom settings.
1
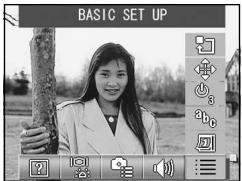
- Select "BASIC SET UP".
2
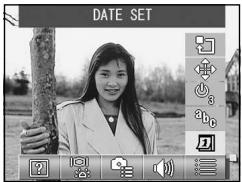
- Use the ▲ or ▼ button to select the mode.
Then use the SET/DISP. button to turn each mode ON or OFF.
- When you have completed the settings, press the MENU button.
When the settings are completed, the SET UP menu screen reappears.
● Available modes
- DATE SET : Allows you to adjust the date and time settings. (p.119)
- LANGUAGE : You can change the language setting. (p.119)
- AUTO POWER OFF: Allows you to change the time setting for the Auto Power Off function. (p.119)
- CUSTOM : You can specify custom settings for shooting modes. (p.120)
- DEFAULT : Allows you to restore the default camera settings. (p.120)
Adjusting the Date and Time
- If the battery is removed for approximately 24 hours or more, the date and time settings will be lost. In this case, please reset the date and time.
1
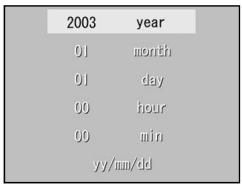
Select "DATE SET", press the SET/DISP. button and the date and time settings screen appears.
See Steps 3 to 5 on pages 29 and 30 about how to make the settings.
Changing Languages
- You can use the method below to change the language displayed on the LCD monitor.
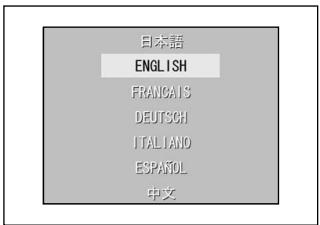
Select "LANGUAGE", press the SET/DISP. button and the language settings screen appears.
See step 1 to 2 on page 29 for instructions on making the settings.
Setting the Auto Power-OFF Time
- You can change the Auto Power-OFF not-in-use interval starting at 3 minutes (default).
- Select "AUTO POWER OFF" and then use the SET/DISP. button to select "10 MIN" or "OFF".
- If you select OFF, the Auto Power Off function is disabled and care is needed to avoid depleting the batteries. When you have finished taking pictures or playing back images, switch the power off by closing the lens cover or switching off the LCD monitor to prevent battery depletion.
Specifying custom settings
- You can use this feature to disable individual settings for the modes in the Manual Mode menu (p.74).
- You can also use this procedure to enable the Custom settings (p.83).
- If OFF is selected in this setting, only the default modes are valid and the specified mode functions are disabled.
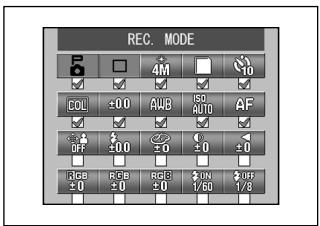
Select "CUSTOM" and press the SET/ DISP. button to display the settings screen. Modes set to ON are marked with a tick (√).
Use the ◀ or ▶ buttons to select a mode and the SET/DISP. button to set the mode to ON or OFF.
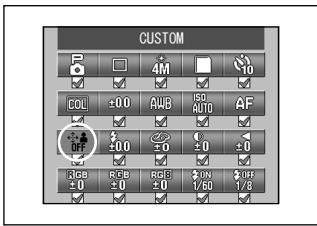
To enable the Custom settings (p.83), select "CUSTOM" and press the SET/DISP. button.
- You can also disable settings in each mode.
Restoring the defaults
- This feature allows you to change all the settings you have specified in the shooting mode menus and the setup menu back to their defaults settings at once.
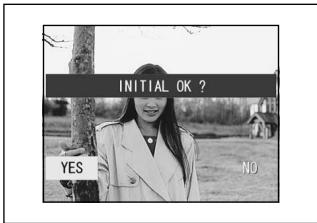
When you select "DEFAULT" and press the SET/DISP. button, a confirmation screen appears.
Use the ◀ or ▶ button to select "YES" and then press the SET/DISP. button.
- If you select "NO", the setting is ignored and the SET-UP menu screen reappears.
Operating Environments
- Images recorded with the camera can be transferred to a PC using the USB cable supplied.
1. Windows
OS: Preinstalled versions of Microsoft Windows 98, Windows 98 SE, Windows XP, Windows 2000 Professional or Windows Me
Memory: 16MB or more of available RAM (32MB or more recommended)
Display: 32,000 colors or more, resolution of 640 × 480 pixels or more
Others: CD-ROM drive, USB port (standard equipped)
2. Macintosh
OS: Mac OS 9.0/9.1/9.2/Mac OS X (Version 10.0.4-10.2)
CPU: PowerPC or more
Memory: 16MB or more of available RAM (32MB or more recommended)
Display: 32,000 colors or more, resolution of 640 × 480 pixels or higher
Others: CD-ROM drive, USB port (standard equipped)
Connecting with a USB cable
- Turn OFF the power supply to the camera.
- There is no need to turn off your PC power supply when connecting or disconnecting the USB cable to the camera.
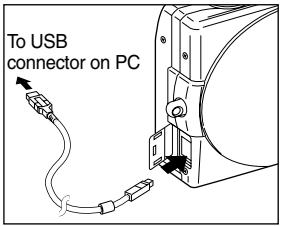
- Turn on the power supply to your PC, and start up the Windows or Mac OS.
-
When the normal Windows or Mac OS screen appears, open the cover on the camera's USB terminal and connect the camera to the computer with the USB cable.
-
Please use only the USB cable supplied with the camera.
- While the camera is connected to your PC, the camera is inoperable.
- While connected to your PC, do not detach the USB cable or open the battery/card cover.
- Turn the power supply to the camera OFF when detaching the USB cable. After detaching the USB cable, close the USB terminal cover.
- When communicating with your PC, we recommend using the AC adapter (sold separately). Attach/detach the AC adapter when the camera power supply is OFF and your PC and the camera are not connected.
Installing USB Driver Software
- Installing from attached DiMAGE Viewer CD-ROM.
- Install the software only if you are using Windows 98 or Windows 98SE. If you are using another OS, you do not need to install this.
- Turn OFF the power supply to the camera.
- To conserve the battery, using the AC adapter AC-9 (sold separately) is recommended.
1) Turn on the PC power and start Windows.
2) After connecting your camera and PC with USB cable (p.122), turn ON the power supply to the camera.
3) The "Add New Hardware Wizard" screen will appear.
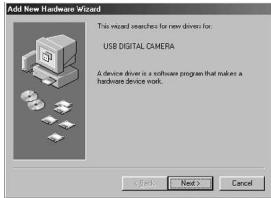
4) Insert the DiMAGE Viewer CD-ROM supplied into the CD-ROM drive.
5) Click "Search for the best driver for your device (Recommended)." and then click "Next".
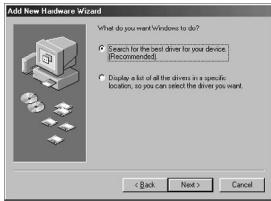
6) Click "Specify a location:" and input "D:\". Click "Next".
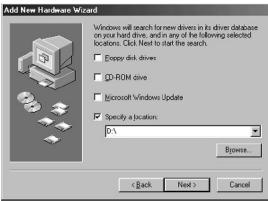
• Here, the CD-ROM drive is assumed to be drive D.
- The INF file necessary for the install is located in "D:\".
- When searching a different location, click "Browse".
7) Click "Next".
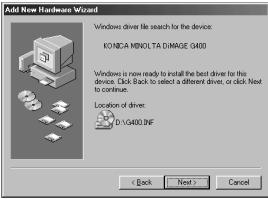
8) Click "Finish". The USB device driver is now installed.
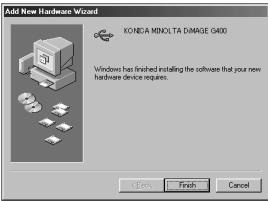
Downloading (transferring) Images
- To conserve the battery, using the AC adapter AC-9 (sold separately) is recommended.
-
If you are using Windows 98 or Windows 98SE, first install the "USB device driver software" (attached DiMAGE Viewer CD-ROM) (pp.123-124).
-
Turn on the power supply to your PC, and start up Windows or Mac OS, and connect your camera and PC with USB cable (p.122).
- If you are using Windows, open "My Computer" and double-click the newly created icon "removable device". If you are using Mac, an "Undefined Name" icon will be displayed on the desktop.
- Double-click the "DCIM" folder.
- If you double-click "100 KM001", the image file icon will be displayed.
- The first 3-digit number of "100 KM001" differs depending on the directory in the card.
- If you double-click the file, the image will be displayed. When saving the file, copy it to where you want to save it.

Notes
- You can only connect the camera to the computer if there is a card containing recorded image files inserted in the camera.
- When 2 memory cards are inserted in the camera, the Memory Priority will be displayed (p.27, p.60).
- Image files can be copied to a hard disk or other media and deleted as necessary. For details, refer to the instruction manual operating system in use.
Please note that Konica Minolta will not be responsible for any loss resulting from such operations.
• Always back up important data.
- The protect setting set with this camera is equivalent to the read-only attribute of a file.
Please note that, if the attribute of a file is changed using a PC the protect setting set with the camera will be disabled.
- Do not change the file name of image data saved on an SD Memory Card/Multi-Media Card/Memory Stick using a PC or save files other than image data taken by this camera. Images that have been altered or newly saved on an SD Memory Card/Multi-Media Card/Memory Stick using a device other than this camera will not only play back on the camera but may cause the camera to malfunction when inserted.
- Do not format the SD Memory Card or Multi-Media Card or Memory Stick using a PC. Data may become damaged.
- Before editing the image files, copy them to your PC hard disk.
How to Install and Use QuickTime (Windows only)
- In order to playback movies, movie playback software, such as QuickTime is needed. If it is not installed on the Windows computer you are using, please install it from the attached DiMAGE Viewer CD-ROM.
- For Macintosh users, QuickTime is normally already installed, so you can playback movies without doing anything else.
●QuickTime System Requirements
- IBM PC / AT Compatible
- Pentium-based computer
• 128MB or more of RAM - Windows 98, 98SE, NT, Me, 2000 Professional, or XP
* To install QuickTime, follow the instructions in the installer. Macintosh users can download the latest version of QuickTime free of charge from the Apple Computer web site: http://www.apple.com.
Using Windows
● Installing the included software (CD-ROM) and G400 INSTRUCTION MANUAL
1) Turn on the PC power and start Windows.
2) Put the attached INSTRUCTION MANUAL CD-ROM in your CD-ROM drive.
3) Check to see that "Adobe Acrobat Reader" and "DiMAGE G400, DiMAGE Viewer INSTRUCTION MANUAL" in the "DiMAGE G400 setup menu" are checked and click "OK".
- Be sure to install “Adobe Acrobat Reader” and “DiMAGE G400, DiMAGE Viewer INSTRUCTION MANUAL”.
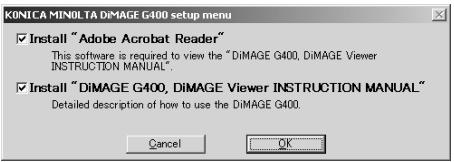
Installing software and downloading images (Cont'd)
4) Software checked in 3) will be installed in order. Follow the onscreen guidance to continue the installation.
Note: Clicking “Cancel” during the installation process will cancel installation. In this case, perform the installation again.
However, do not restart the PC until all the installations have been completed.
5) When all of the software checked in 3) have been installed, the "DiMAGE G400 Setup Menu" screen will appear. Click "OK" to finish the installation process.
- Viewing the "DiMAGE G400, DiMAGE Viewer INSTRUCTION MANUAL"
1) Double click the "DiMAGE G400, DiMAGE Viewer INSTRUCTION MANUAL" icon on the desktop.
2) The DiMAGE G400 INSTRUCTION MANUAL will be displayed.
Using Macintosh
●Installing the Adobe Acrobat Reader
QuickTime installation is not necessary.
- Be sure to install if Adobe Acrobat Reader is not already installed in your Macintosh. And it is not necessary to install the Adobe Acrobat Reader for Mac OS X users.
1) Turn on the power of your Macintosh, and set the included INSTRUCTION MANUAL CD-ROM in the CD-ROM drive.
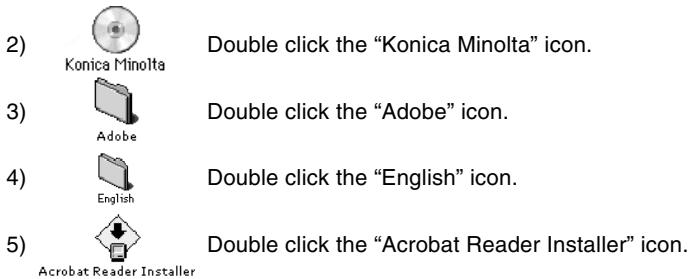
6) Follow the instructions shown on the screen.
- Installing the "DiMAGE G400, DiMAGE Viewer INSTRUCTION MANUAL"
- Be sure to install.
1) Set the included INSTRUCTION MANUAL CD-ROM in the CD-ROM drive.
5) Double click the copied "G400_EG" to display the "DiMAGE G400 INSTRUCTION MANUAL".
Using the AC Adapter AC-9
- Please do not use the AC adapter where the voltage is outside the displayed power supply voltage (AC 100V to AC240V).
- Please do not use the charger where the voltage is outside the displayed power supply voltage (AC 100V to AC240V).
Using the Attached Charger BC-600
Cleaning the camera
When cleaning the camera, do not use solvents such as benzene or paint thinner.
- Before cleaning, remove the batteries from the camera, or disconnect the power plug of the AC adapter from the wall outlet.
- The exterior casing surface consists of paint and printing. Wiping the casing with benzene or paint thinner may cause discoloration, or the paint or printing to be removed.
- When the camera becomes dirty, wipe off the dust with a soft, dry cloth. For stubborn dirt, dampen a cloth in diluted neutral detergent (kitchen detergent), wring thoroughly and wipe. When finished, wipe the camera with a dry cloth.
- When using a chemical cloth, follow the safety precautions of the product.
After using the camera
If the camera is not to be used for a long period, remove the batteries and ensure that the power plug of the AC adapter is disconnected from the wall outlet.
- Leaving the batteries inside the camera for a long time may cause the battery fluid to leak, resulting in malfunction of the unit.
- When storing, keep both camera and batteries in cool place with low humidity and under constant temperature as much as possible.
Recommended temperature: 15° – 25°C (59° – 77°F)
Recommended humidity: 40% – 60%
About the SD Memory Card/Multi-Media Card/Memory Stick
Handling
- Do not bend or apply excessive force.
- Do not store the card in places with high humidity, dusty places or where static electricity or electromagnetic fields are likely to occur.
- Keep dust, water and foreign objects away from the terminal section.
About image data
- Use a PC to delete images and files recorded with other models.
- The recorded data may be lost when you or a third part misuses the SD Memory Card/Multi-Media Card/Memory Stick, if the card is affected by strong static electricity or electrical shock, or during card repair or malfunction.
Konica Minolta will not be responsible in any way for the loss of recorded data or the consequences of such loss.
About the LCD monitor
- The LCD monitor has been developed using high-precision engineering. Although the percentage of active pixels is more than 99.98% , there may be missing or constantly lit pixels.
- When using the LCD monitor in a cold location, the screen may appear darker than normal immediately after starting use. The screen will return to normal brightness as the internal temperature of the camera rises.
- When the LCD monitor becomes dirty with finger prints or dust, wipe with a soft, dry cloth.
About After-Sales Service
- As a guideline, spare parts for this product are maintained for 5 years after the production finishes.
- If you have questions about your camera, contact your local camera dealer or write to the Konica Minolta distributor in your area.
- Before shipping your camera for repair, please contact a Konica Minolta Service Facility.
Troubleshooting
- If the following does not solve your problem, please contact the point of purchase.
| Symptom | Check this: | Page | |
| Power Supply | Power will not turn ON | Battery level too lowBattery inserted incorrectlyAC Adaptor attached incorrectly | 212124 |
| Power turns OFF right after turning on | Battery level too lowThe battery has reached the end of its service life.→ Fit a new batteryLow ambient temperature | 2113,20137 | |
| Shooting the pictures | Can’t take a picture even if pressing the shutter button | Power supply not on.SD Memory Card or Memory Stick’s write protected.Pictures taken have reached the maximum number.→ Erase unwanted pictures.Set to the Self-Timer mode.Flash being charged. | 2815516145 |
| Can’t focus | Subject not in the centerSubject hard to focusDirty lensIncorrect distance from the subject | 41413436 | |
| LCD monitor display and images are not clear | LCD brightness adjusted incorrectlyFinger prints or dirt on the monitor | 112133 | |
| Doesn’t Flash | Set to “Flash off” mode | 46 | |
| Play back | Won't play back | PLAY button not ONNo image dataAll image data is erased | 474751,108 |
| Image with no natural color | White balance incorrect | 72 | |
| Image appears dark | Distance too great, the flash didn't reach the subjectNot enough lightExposure correction is not adjusted properly | 4545,8471 | |
| Image too bright | Flash used with subject too closeExposure correction is not adjusted properly | 4571 | |
| Other | Can't transfer to your PC | Not connected to your PC correctlyNo image data inserted in the camera | 122126 |
| Incorrect date and time | Left without battery over 24 hours | 119 |
| Model | :Digital Still Camera with zoom lens |
| Effective picture resolution | :4.0 mega pixels |
| Recording media | :SD Memory Card, Multi Media Card, Memory Stick |
| Image recording capacity | :4 mega fine(About 36 frames/SD Memory Card at 64MB)4 mega normal(About 72 frames/SD Memory Card at 64 MB)2 mega normal(About 143 frames/SD Memory Card at 64 MB)VGA normal(About 574 frames/SD Memory Card at 64 MB) |
| Recording method | :Still picture; JPEG (DCF compatible ^1) ) /DPOF compatible^2) Still picture sound voice; WAV CompatibleMovie; AVI style Motion JPEG compatible |
| Image pickup | :1/2.5 inch CCDTotal resolution 2408 × 1758 pixels (4,230,000 pixels) |
| Sensitivity | :equivalent to ISO 100, changeable sensitivity (AUTO, 50, 100, 200, 400) |
| Lens | :F 2.8-4.9, f=5.6-16.8mm (7 elements in 6 groups)Equivalent to 35mm camera conversion of 34 to102mm |
| Focus adjustment/Photometric | :TTL center 5-point metering using CCD image plane brightness signals plus external passive central metering |
| Focal Range | :Normal; wide angle 0.5m to ∞ (1.6" to ∞),telephoto 0.8m to ∞ (2.6" to ∞)Macro-photo mode; wide angle 5cm to ∞infinity,telephoto 0.5m to ∞infinitySuper macro; 0.2 to 0.4 m (telephoto only) |
| Aperture | :Wide angle; F2.8/F4.7, Telephoto; F4.9/F8.3 |
| Shutter | :Program shutter with CCD electronic shutter |
| Shutter speed | :Still picture; about 1 to 1/2000sec. (Manual exposure mode : approx. 15 – 1/1000 seconds)Movie; about 1/30 to 1/5000sec |
| Exposure control | :Program AE (ISO100; 3EV-15.5EV) |
| White balance | :Auto correct, manual setting (daylight, cloudy, tungsten, fluorescent) |
| Viewfinder | :True-image zoom viewfinder |
Main Specifications (Cont'd)
| Flash | :Built-in auto adjust lighting flash, flash interval about 4 sec. Flash working range (ISO: AUTO); wide angle about 0.5m to 2.3m (1.6" - 7.5") telephoto about 0.8m to 1.3m (2.6" - 4.3") Viewfinder green LED on while charging |
| Shooting modes | :Single shooting/ Continuous/ Flash On/ Flash Off/Macro/ Self-timer (10 sec., 3 sec.)/ Portrait/Scenery/ Night/Snap/ Sports/ Angel/Movie (320 × 240 with sound)/ B & W/Sepia/ Red-eye reduction/ Digital Zoom (2 ×)/ Program/ Aperture/ Manual/ Bracket |
| LCD monitor | :1.5 inch low temperature poly-silicon TFT with back light LCD color monitor |
| Playback | :Single frame/ index playback/ slide show playback/ digital zoom playback |
| Erase function | :Single frame/ designated frames/ all frames/ format |
| LED display | :Self-timer LED, viewfinder LED |
| Auto-date function | :Year, month, date and time up to 2050 ^3) |
| Power supply | :Lithium battery (3.7V), dedicated AC adapter (sold separately) |
| I/O terminals | :USB terminal |
| Operating temperature | :0°(32°)-50°C(122°F) (humidity 20%-80%) |
| Dimensions | :93.5 × 55.5 × 23 mm (W × H × D)(except parts that stick out) |
| Weight | :145 g (5.1oz) excluding battery, card |
- The performance of the items above is according to the conditions used in our test.
- The specifications and/or appearance of the product may be altered without notification.
Main Specifications (Cont'd)
^1) DCF (Design rule for Camera File system) is a standard by JEITA mainly for the purpose of simplifying the use of image files taken by digital cameras with other related devices.
2) DPOF (Digital Print Order Format) specified by Canon, Inc., Kodak Co., Ltd., Fuji Photo Film Co., Ltd., and Matsushita Electric Industrial Co., Ltd. is a standard for recording specified information such as the images or quantity to print from the images taken by a digital camera on a recording medium.
^3) Manganese lithium silicon battery is in use as back-up battery for calendar system (Refer to p.30). It is recommended to replace with new ones at least once three to five years. (Additional charge is required at the time of replacement.)

natural_image
Simple black-and-white circular graphic with horizontal white lines on a dark background (no text or symbols)KONICA MINOLTA
KONICA MINOLTA CAMERA, INC.
©2003 KONICA MINOLTA CAMERA, INC. under the Berne Convention and the Universal Copyright Convention.
- Please be sure to read this manual before use.
- - Test shooting
- • Results are not guaranteed
- - Be aware of Copyright
- Caution for Extended Camera Use:
- About trademarks
- Getting Started (Cont'd)
- Preparation
- Basic Operation
- Advanced Operations and Shooting
- Using the Shooting Menu ....54
- Using the Auto Mode Menu 54
- Using the Scene Select Mode Menu 62
- Using the Movie/Voice Mode Menu 66
- Using the Manual Mode Menu 74
- Advanced Playback
- Playback 89
- Using the PLAY Menu 92
- Camera Settings
- Using the Set-up Menu 106
- Connecting to your PC
- Connecting to your PC 121
- Installing software and downloading images .... 123
- Others
- When Carrying the Camera Overseas.... 131
- Care and Storage 132
- Troubleshooting 134
- Main Specifications 136
- Important Safety Precautions
- Definitions of the symbols
- Warning
- Caution
- About battery fluid leakage
- About the LCD monitor
- Checking the Packing Contents
- This product can be used with the following power supplies:
- 1) Lithium-ion battery (the packaged item or purchased separately)
- 2) Plugging in at home
- Items Sold Separately
- Compatible Recording Media
- About the SD Memory Card/Multi-Media Card/Memory Stick
- Important
- Camera Body
- Operation Buttons
- ⑥ MENU Button
- ⑦ SET/DISP. button
- Attaching the Strap
- Charging the (supplied) Battery Pack
- Installing the (supplied) Battery Pack
- ● Battery level indicator
- Preparing the Power Supply (Cont'd)
- Battery life guide (reference)
- Warnings about recycling
- FCC Compliance Statement:
- Connecting the AC Adapter (sold separately)
- Inserting/Removing Cards
- Inserting a Card
- Card Removal
- Warning!
- Turning the Power ON/OFF
- Setting the Menu Language/Date and Time
- Holding Your Camera
- Viewfinder LED
- ● Viewfinder LED Indicators
- Selecting the Shooting Mode
- ● Available modes
- - AUTO AUTO
- - SCENE SELECT
- - MOVIE/VOICE
- - M MANUAL
- - SETUP
- ● Available Functions by Mode (menu-based)
- AUTO (p.54)
- SCENE SELECT (p.62)
- MOVIE/VOICE (p.66)
- MANUAL (p.74)
- SETUP (p.106)
- Taking Pictures using the LCD Monitor
- - When you press the shutter halfway and the green LED flashes...
- ● About Auto Power Off Function
- Image Display
- Taking Pictures using the Viewfinder
- Shooting with Focus Lock
- ● The following subjects may be difficult to bring into focus:
- Shooting Movies
- Selecting the Flash/Macro Mode
- Switching the Flash Mode
- AUTO (Auto Flash)
- Fill-In
- Off (Flash Override)
- Shooting Close Up Range
- Macro-photo Mode
- Playing Back Pre-recorded Images
- The Playback Image Display
- Playing Back Movies
- Erasing Unwanted Images
- - If you chose "SELECT"
- Erasing the Playback Image (Cont'd)
- Using the Auto Mode Menu
- ● Available menu options
- Using the Shooting Menu (cont'd)
- Changing the color effects
- Continuous Shooting
- Selecting the Image Size
- ● Image size and pixel count (width) × (height)
- Using the Auto mode menu (cont'd)
- ● Standard number of pictures you can take in each resolution mode (without sound and movie)
- Setting Memory Priority
- Using the Self-Timer
- Using the Scene Select Mode Menu
- Using the Scene Select Mode Menu (Cont'd)
- Selecting the right mode for your shot
- Using the Movie/Voice Mode Menu
- Using After Recording
- ● Erasing recorded voice comments
- Making Voice Memos
- Adjusting Exposure Compensation
- Adjusting White Balance
- About White Balance
- Using the Manual Mode Menu
- Using the Manual Mode Menu (Cont'd)
- Taking Pictures in Program Mode
- Differences between the Auto and Program modes
- AF Taking pictures with AF (focus) lock
- AE Taking pictures with AE (exposure) lock
- AWB Changing the white balance setting
- Using exposure compensation
- Taking Pictures in Aperture Mode
- Taking photographs in manual exposure mode
- Taking photographs in manual exposure mode (Cont'd)
- Using the Auto Bracket Function
- Changing the Sensitivity (ISO)
- Taking photographs by fixing focus
- Setting the Custom Function
- Adjusting the Flash Brightness
- Adjusting the Saturation
- Adjusting the Contrast
- Adjusting the Sharpness
- Adjusting the Color
- Changing slow shutter speed
- \* Slow shutter speed display
- Viewing Multiple Pages at Once (Index Playback)
- Playing Back Enlarged Images (Digital Zoom)
- Using the Quick-view Function
- When using the LCD monitor for shooting images:
- When using the viewfinder to shoot images, with the LCD monitor off:
- Playing back the sound of After Recording image
- Playing Back Voice Memos
- Using the PLAY Menu
- Copying and Moving Images
- Selecting/Deselecting Images to Print (DPOF)
- If you selected "ALL ON":
- The confirmation screen is displayed. If you selected "ALL ON" or "SELECT":
- If you chose "ALL OFF":
- Setting/Canceling Protection for Your Important Images
- Reducing Image Size (Resizing)
- Playing a Slide Show
- Using the Set-up Menu
- Formatting a Memory Card
- Specifying the LCD Monitor Settings
- Setting QUICK VIEW
- Hiding the image information
- Changing the LCD monitor operation mode
- Preventing the blue LED from switching on
- Adjusting the Brightness and color of the LCD Monitor
- Specifying the Shooting mode settings
- Taking pictures using red-eye reduction
- Using the Digital Zoom
- Resetting the file number
- \* NUMBER RESET OFF (default setting)
- \* NUMBER RESET ON
- Changing Auto-Exposure (AE) Modes
- \* Center-weighted metering (AE CENTER)
- \* Spot metering (AE SPOT)
- Changing the focus metering (AF) Mode
- \* exo-AF sensor ON (default setting)
- \* exo-AF sensor OFF
- Changing the sound settings
- Specifying the basic camera set up
- Adjusting the Date and Time
- Changing Languages
- Setting the Auto Power-OFF Time
- Specifying custom settings
- Restoring the defaults
- Operating Environments
- Windows
- Macintosh
- Connecting with a USB cable
- Installing USB Driver Software
- Downloading (transferring) Images
- Notes
- How to Install and Use QuickTime (Windows only)
- ●QuickTime System Requirements
- Using Windows
- ● Installing the included software (CD-ROM) and G400 INSTRUCTION MANUAL
- Installing software and downloading images (Cont'd)
- - Viewing the "DiMAGE G400, DiMAGE Viewer INSTRUCTION MANUAL"
- Using Macintosh
- ●Installing the Adobe Acrobat Reader
- - Installing the "DiMAGE G400, DiMAGE Viewer INSTRUCTION MANUAL"
- Using the AC Adapter AC-9
- Using the Attached Charger BC-600
- Cleaning the camera
- When cleaning the camera, do not use solvents such as benzene or paint thinner.
- After using the camera
- If the camera is not to be used for a long period, remove the batteries and ensure that the power plug of the AC adapter is disconnected from the wall outlet.
- Handling
- About image data
- About After-Sales Service
- Troubleshooting
- Main Specifications (Cont'd)
- KONICA MINOLTA
- KONICA MINOLTA CAMERA, INC.
Brand : MINOLTA
Model : DIMAGE G400
Category : Digital Camera