
TitanSteel Küchenspüle 45x39cm kratzfest - Kitchen sink Klarstein - Free user manual and instructions
Find the device manual for free TitanSteel Küchenspüle 45x39cm kratzfest Klarstein in PDF.


User questions about TitanSteel Küchenspüle 45x39cm kratzfest Klarstein
0 question about this device. Answer the ones you know or ask your own.
Ask a new question about this device
Download the instructions for your Kitchen sink in PDF format for free! Find your manual TitanSteel Küchenspüle 45x39cm kratzfest - Klarstein and take your electronic device back in hand. On this page are published all the documents necessary for the use of your device. TitanSteel Küchenspüle 45x39cm kratzfest by Klarstein.
USER MANUAL TitanSteel Küchenspüle 45x39cm kratzfest Klarstein
INHALTSVERZEICHNIS
LIEFERUMFANG
Werkzeuge
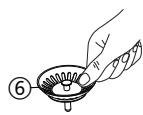
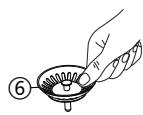
⑥ in ⑧ stecken.
Berlin Brands Group UK Limited
PO Box 42
272 Kensington High Street
London, W8 6ND
United Kingdom
Dear Customer,
Congratulations on purchasing this equipment. Please read this manual carefully and take care of the following hints on installation and use to avoid technical damages. Any failure caused by ignoring the items and cautions mentioned in the operation and installation instructions are not covered by our warranty and any liability. Scan the QR code to get access to the latest user manual and more product information.

CONTENTS
Contents 17
Parts List 18
Sink installation for Undermouting 20
Drain set Installation 25
Check Sealing Performance and Clean 29
Manufacturer 30
ARTICLE
| Article number | 10046016 |
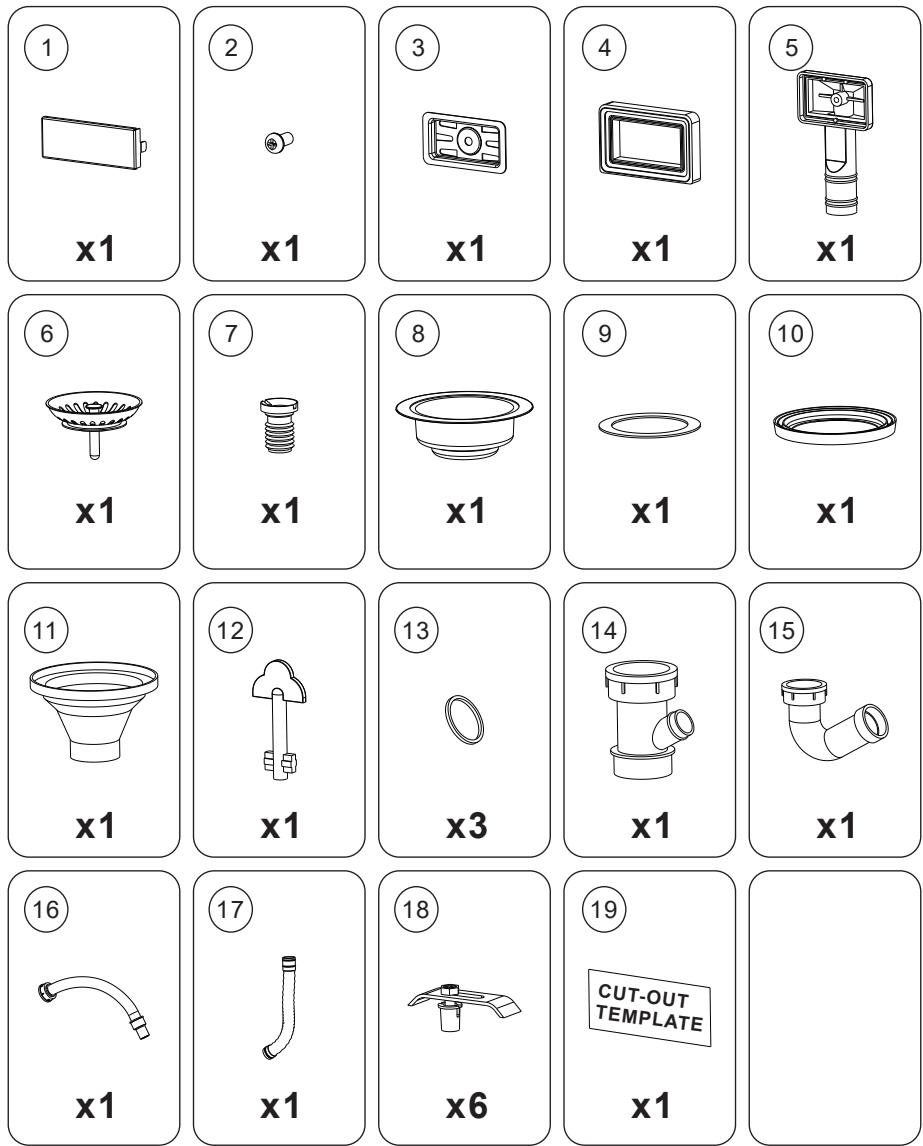
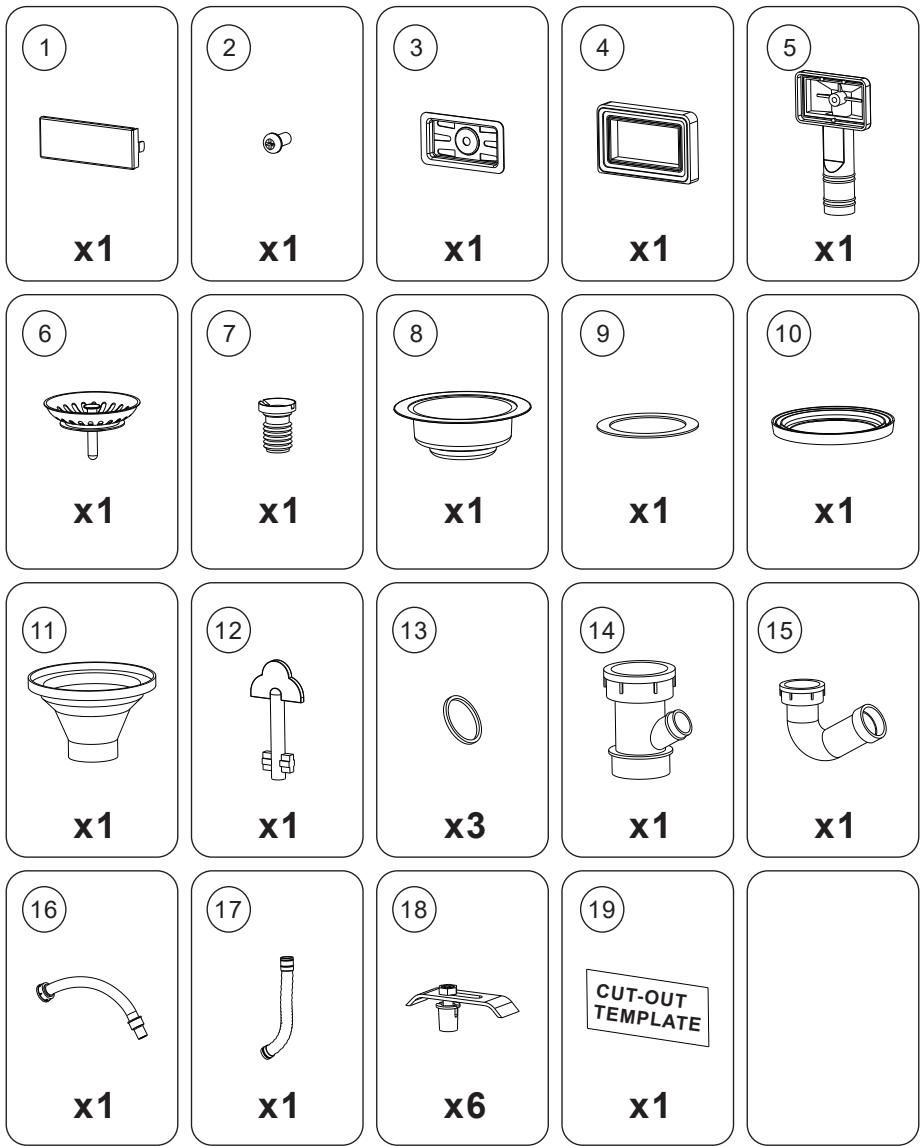
PARTS LIST

Tools
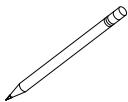 Pencil x1 Pencil x1 | 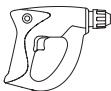 | φ 20 mm φ 10 mm φ 3 mmElectric drill x1 |  Ruler x1 Ruler x1 |
 Silicon x1 Silicon x1 |  Electric saw x1 Electric saw x1 |  Shovel x1 Shovel x1 | |
 Screw driver x1 Screw driver x1 | 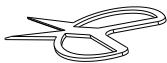 Scissor x1 Scissor x1 | ||
SINK INSTALLTION FOR UNDERMOUTING
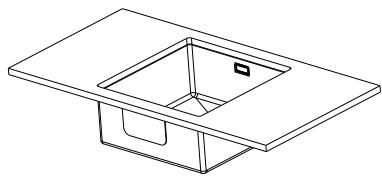
| No. | Description | Reference | Qty |
| A | Kitchen Sink | 1 | |
| B | Undermout Clips | 18 | 1 |
| C | Cutout Template | 19 | 1 |
- Cut the cut-out template along the wireframe with a scissor
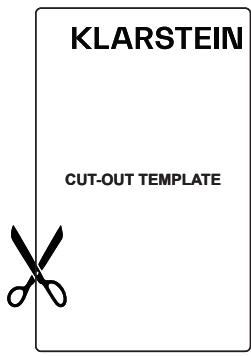
- Place the cut-out template on the counter and draw the wireframe on the counter with pencil and ruler.

Keep the template flat.
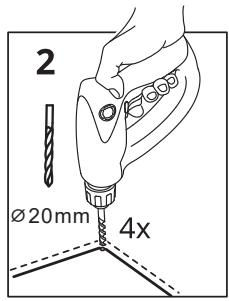
- Drill 4 small holes with electric drills. First cut with small drill(∅3), then cut with big drill (∅20), twice totally.

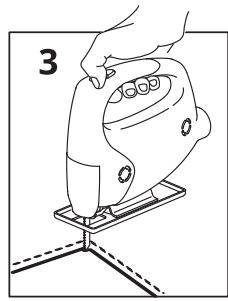
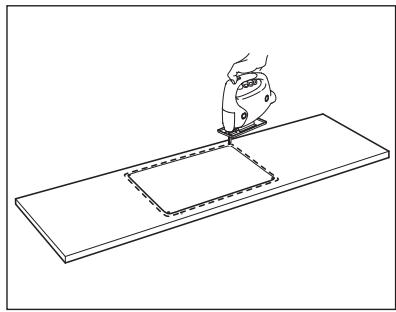
- Cut the counter along the cutting line with electric saw.
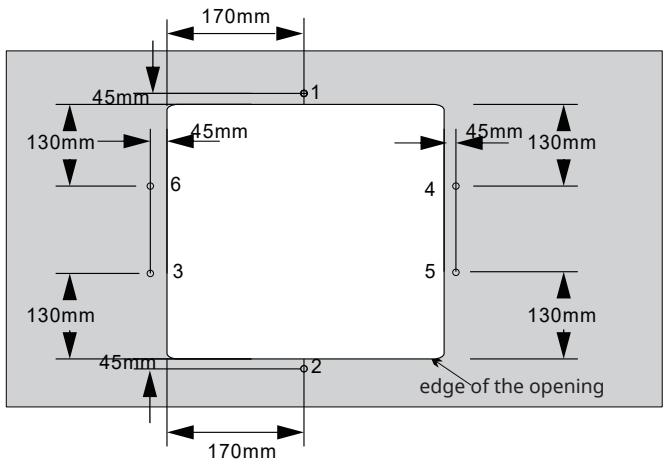
- Drill corresponding quantity holes according to the sink dimension at the back of counter with electric drills, please refer to the distance between holes and lines.
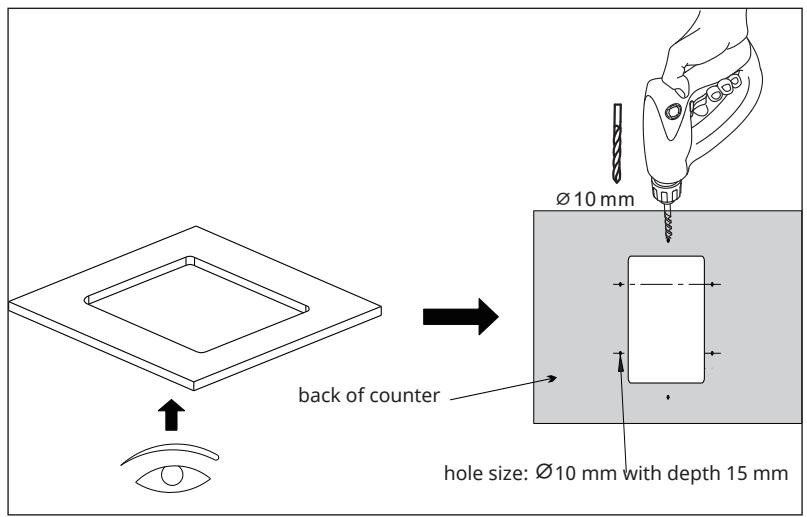
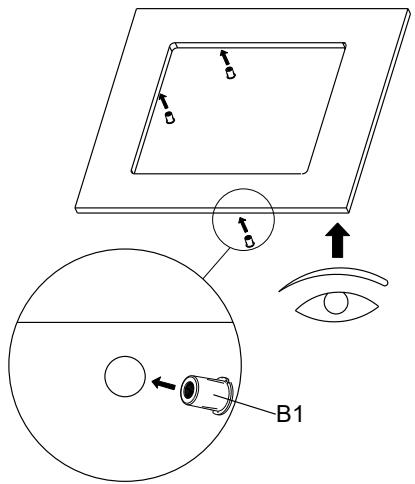
- According to the following drawing, drill 6 ∅10mm holes with a depth of 15 mm on the back of the counter around the opening holes successively.
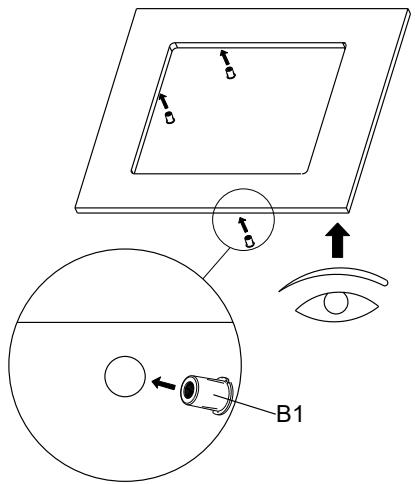
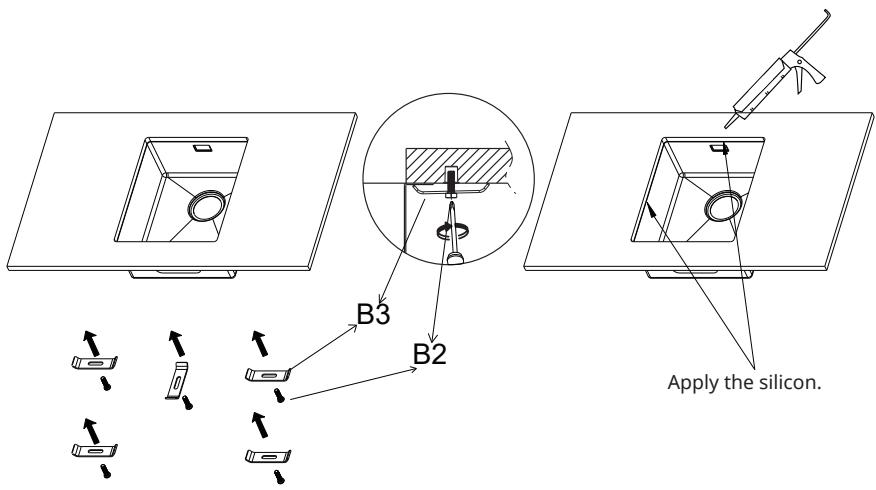
- Open the undermount clips, take out the anchors and install them to the holes under the counter.
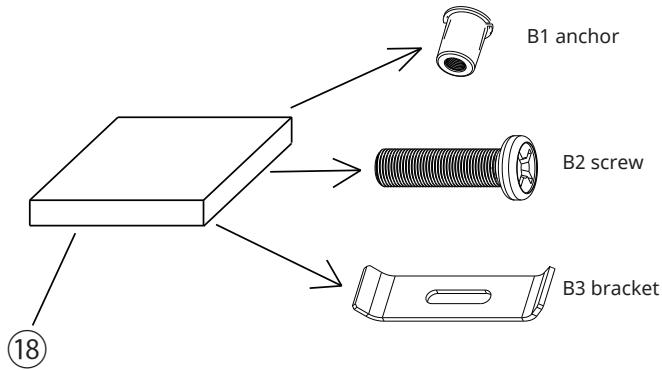
undermount clips
- Put a layer of silicon along side the cutting lines at the back of the counter and scrape the silicon to be even and level.
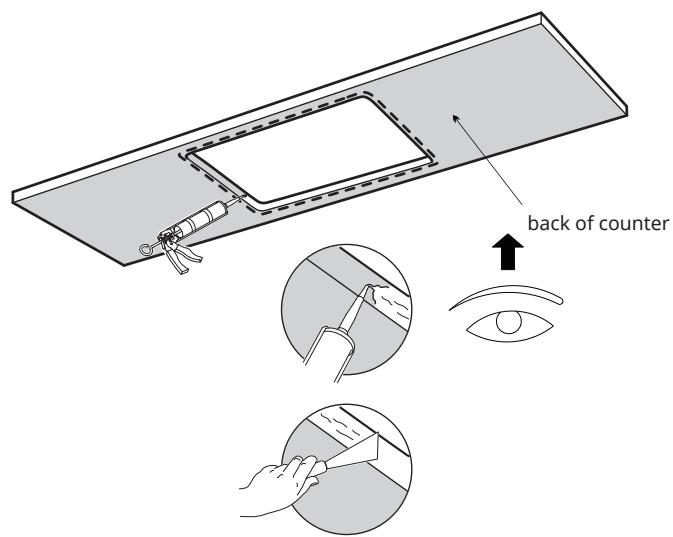
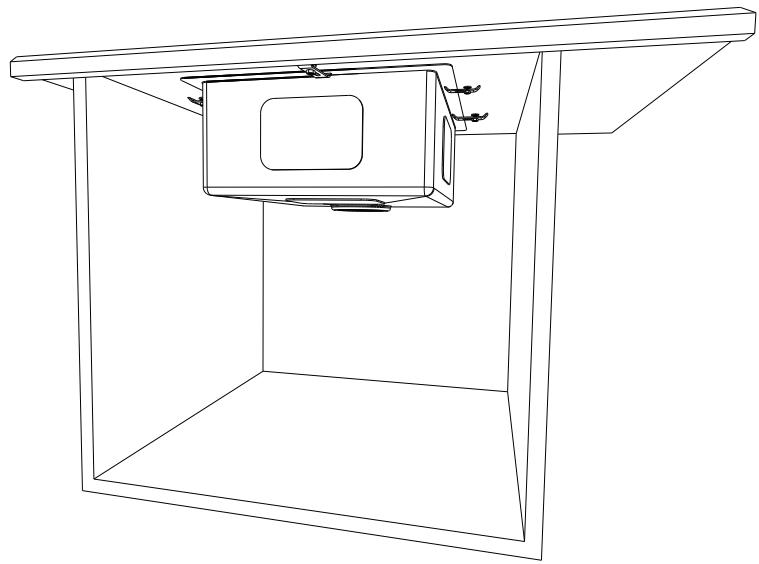
- Install the kitchen sink with undermount clips.
Connect the sink to the cut-out hole at the back of the counter, put the screws and brackets into the anchor and tighten, then to apply the silicon between counter and sink at the front.

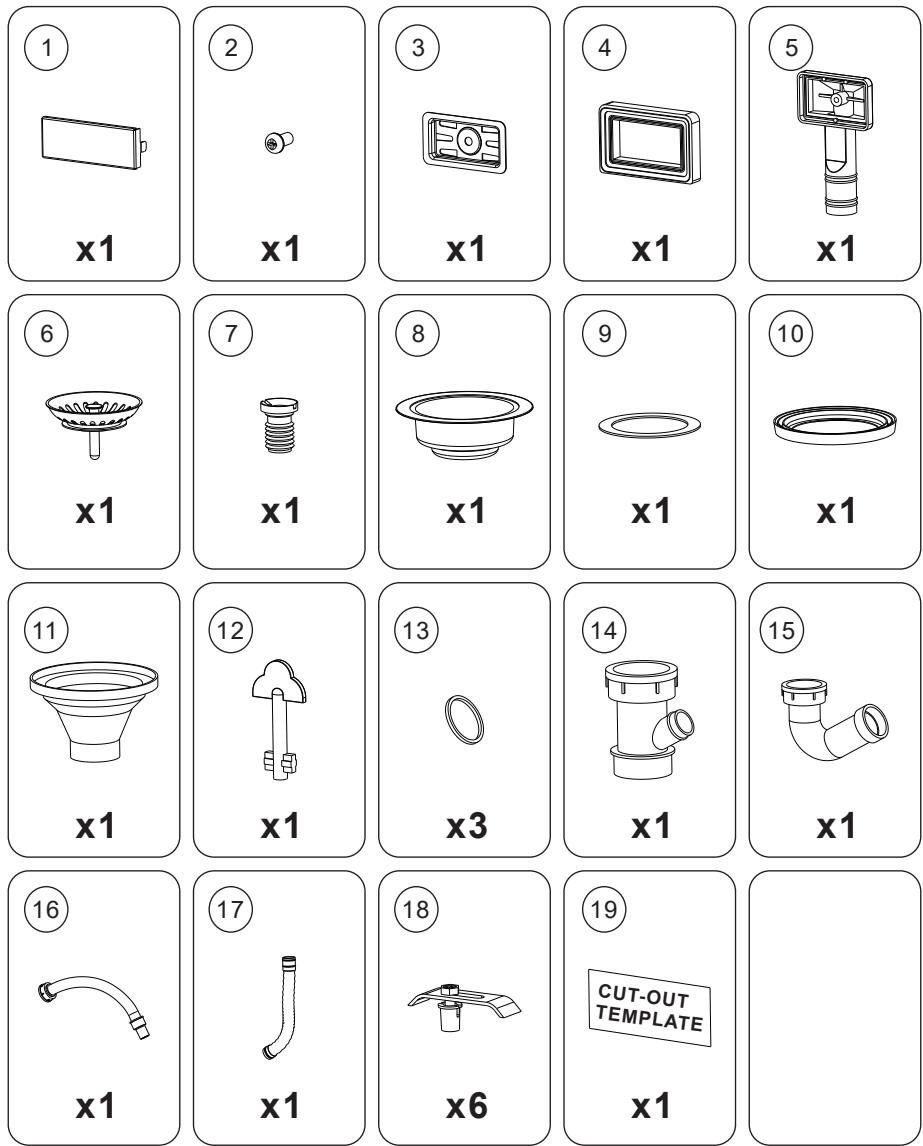
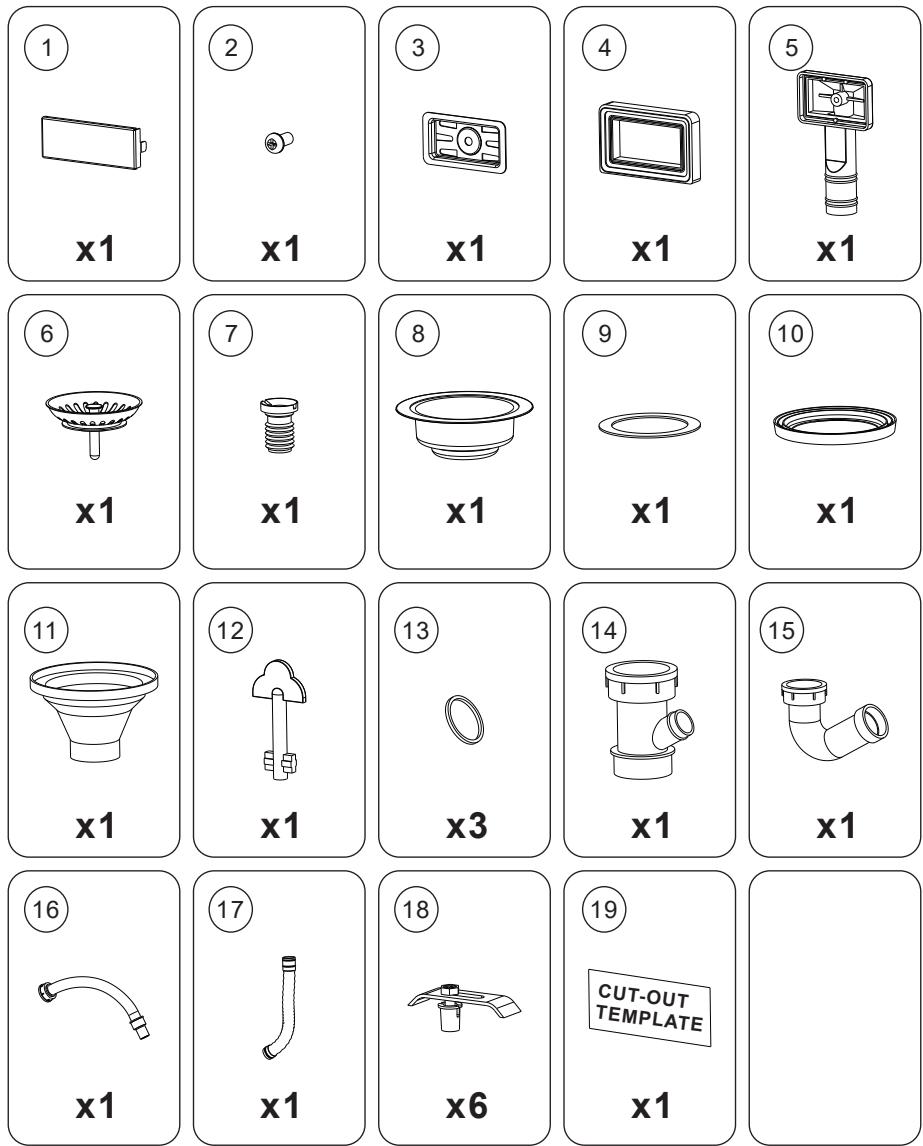
1 Overflow cover
2 ScrewA
3 Overflow base
4 Sealing ring
5 Overflow head
6 Strainer cover
7 Screw B
8 Strainer stainless steel base
9 Strainer sealing ring A
10 Strainer sealing ring B
11 Strainer plastic base
12 Screw tightening tool
13 Interface sealing ring
14 Three-way connectors
15 Bend pipe
16 PVC steel wire pipe
17 Overflow pipe
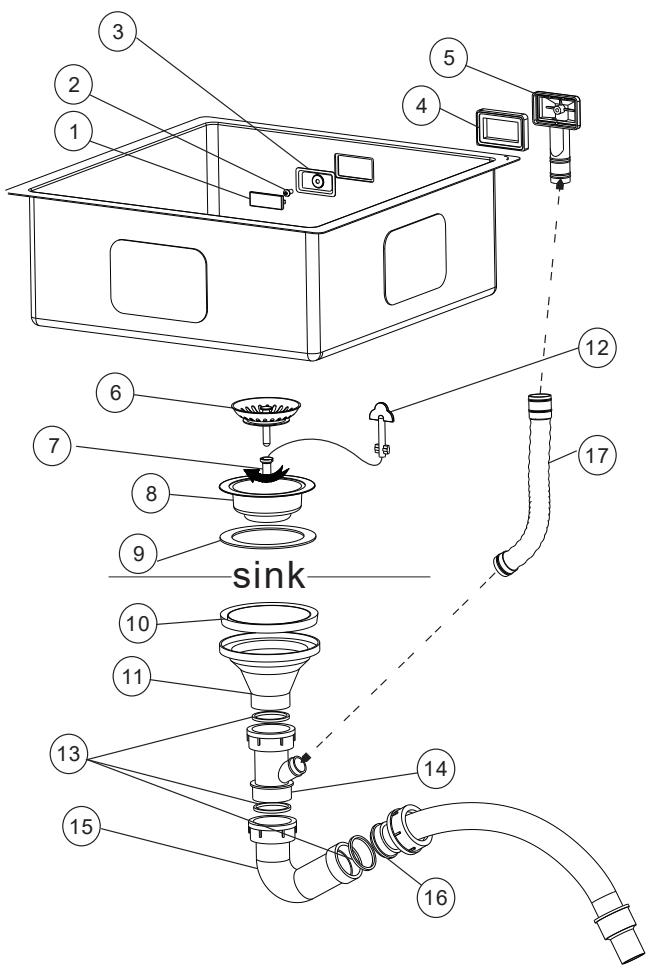
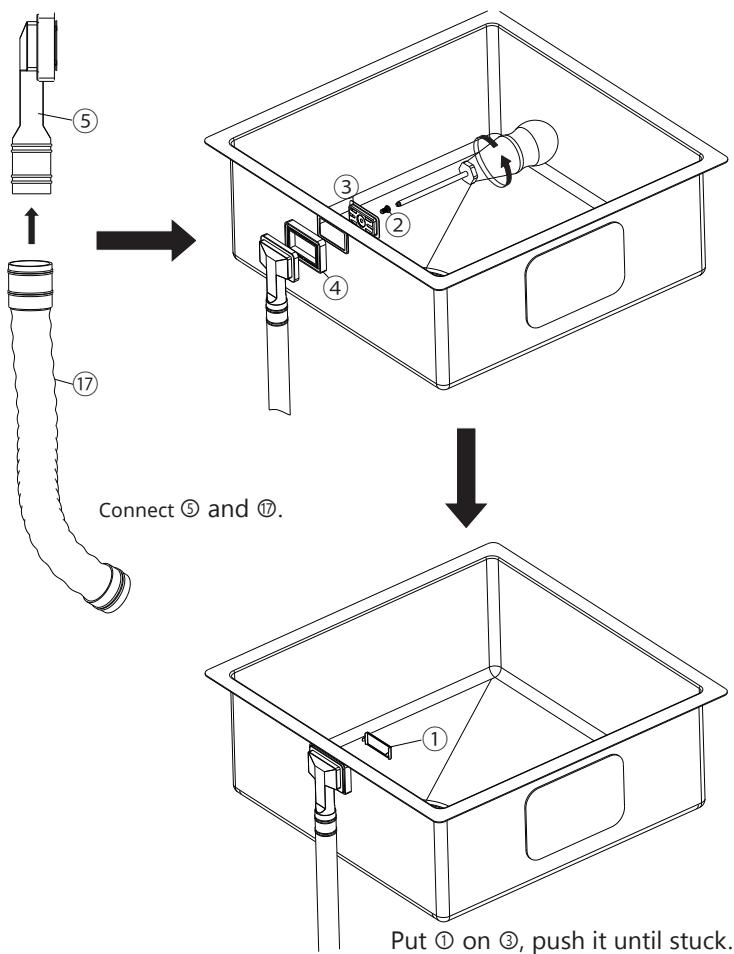
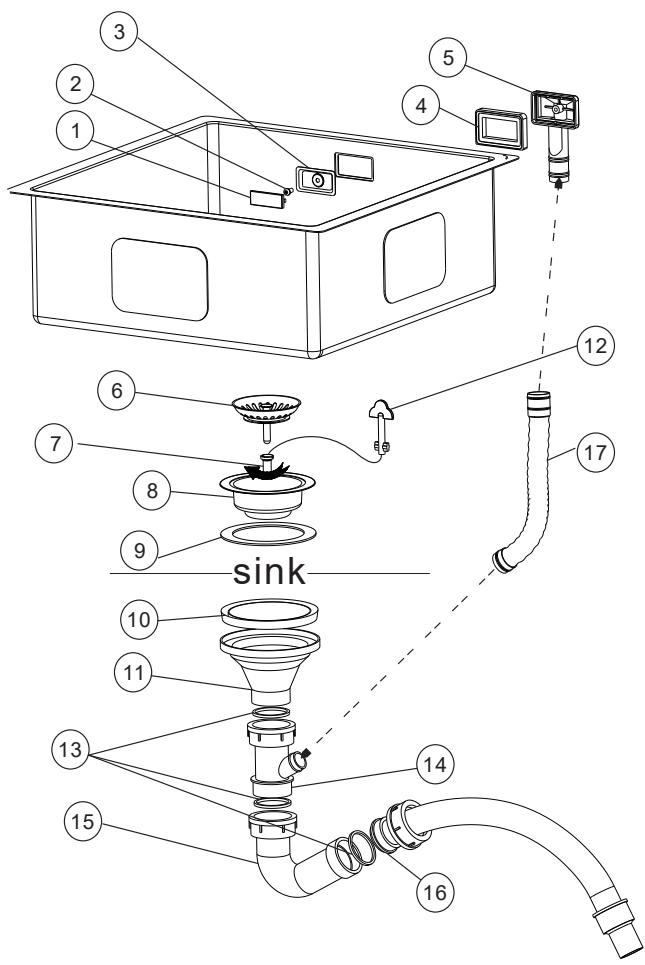
Install the overflow set
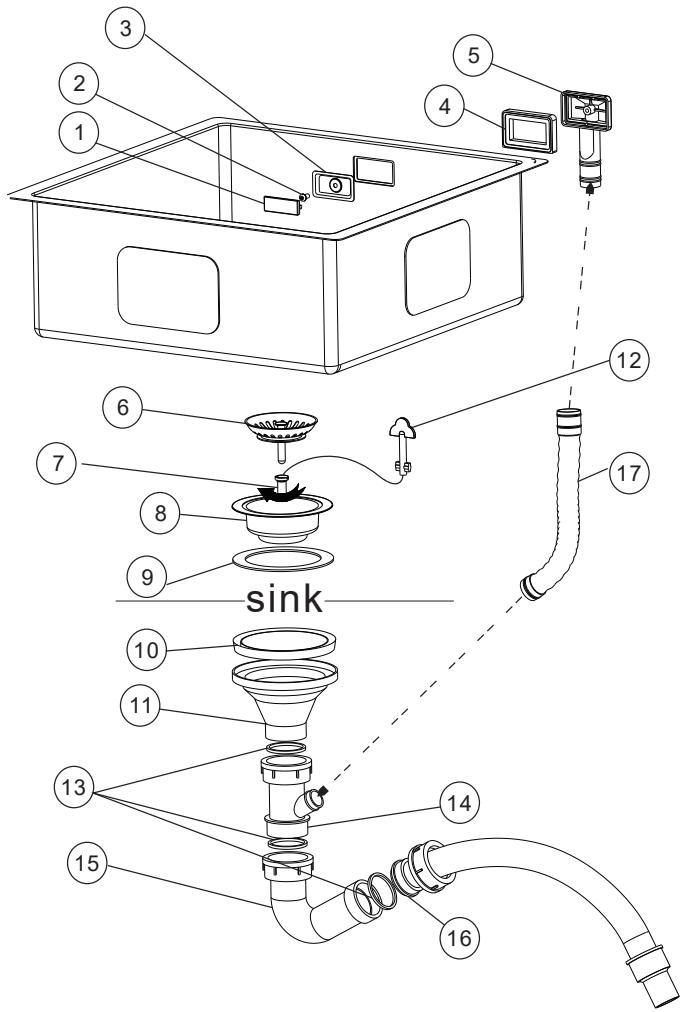
Put ④ on ⑤, put ② in ③, then put them together through the overflow hole, make sure ② is in ⑤, then tighten ②.
Install the strainer set
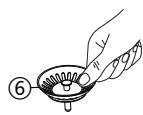
- Take out ⑥, dismiss to several parts as below:
Put ⑦ in ⑧ and tighten ⑦ with ⑫, put ⑨ under ⑧ and put the whole assembly into sink drain hole.
Put ⑩ in ⑪, then connect the above assembly and tighten.

- Take out the pipes
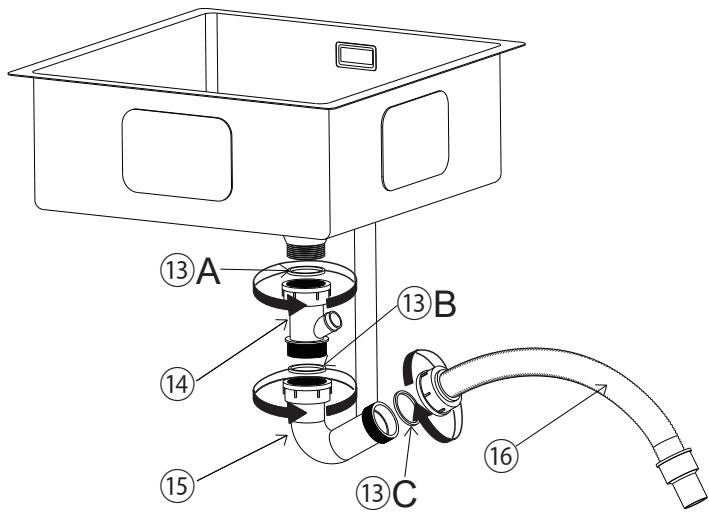
Put sealing ring ⑬A in ⑭, then connect ⑭ with ⑪ and tighten.
Put sealing ring ⑬B in ⑮, then connect ⑭ with ⑮ and tighten.
Put sealing ring ⑬C in ⑯, then connect ⑯ with ⑮ and tighten.
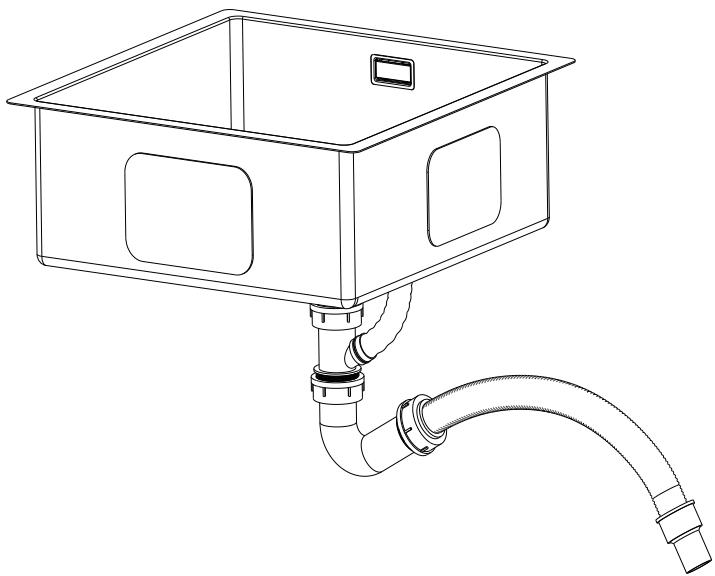
Install the waste pipe set

Connect ⑰ with ⑭, then put ⑯ into family waste pipe.
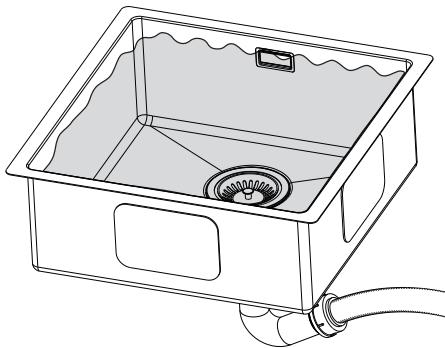
CHECK SEALING PERFORMANCE AND CLEAN
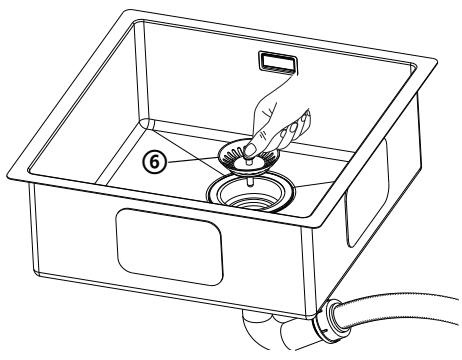
Put ⑥ into ⑧.
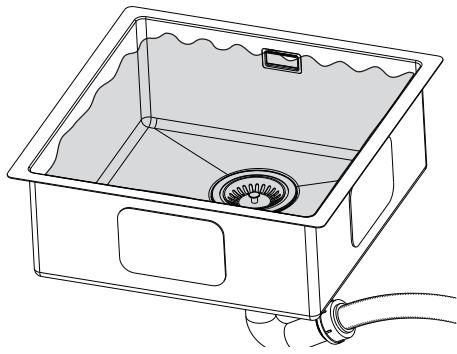
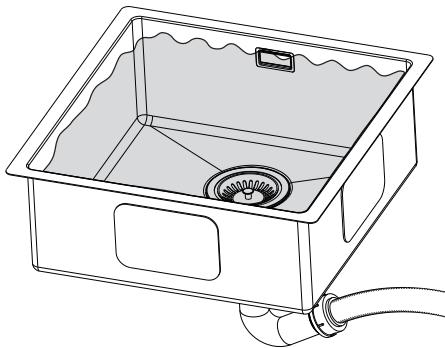
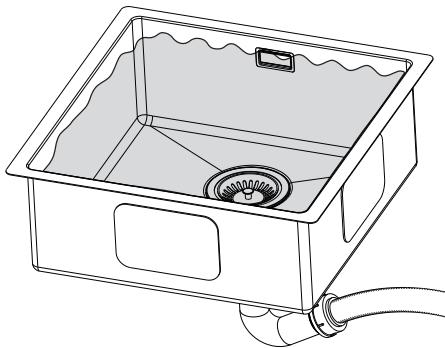
Fill in water to overflow hole. There is water coming out from overflow pipe.
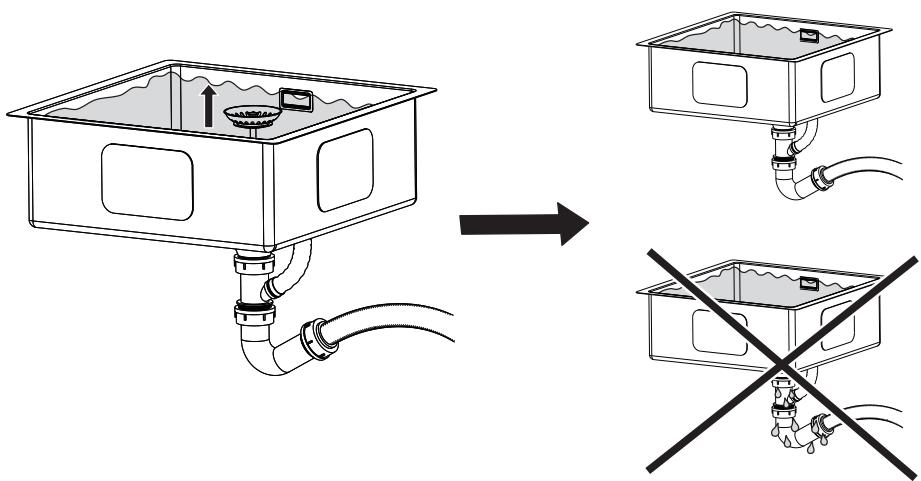
Take out ⑥, the water will drain
There is no water coming out outside the pipes. then it is successfully installed.
If there is water leakage, please check whether the fittings are tightened in this position to remove water leakage.
MANUFACTURER
Chal-Tec GmbH, Wallstraße 16, 10179 Berlin, Deutschland (Germany).
Importer for Great Britain
Berlin Brands Group UK Limited
PO Box 42
272 Kensington High Street
London, W8 6ND
United Kingdom
Cher client, chère cliente,
SOMMAIRE
Sommaire 31
CONTENU DE L'EMBALLAGE
Outillage
Supports de base
INSTALLATION DU KIT D'ÉVACUATION
- Dépose des tuyaux
Insérez ⑥ dans ⑧.
Berlin Brands GOIup UK Ltd
PO Box 42
272 Kensington High Street
London, W8 6ND
United Kingdom
Gentile cliente,
INDICE
Indice 45
VOLUME DI CONSEGNA
Attrezzi
INSTALLAZIONE DEL SET DI SCARICO

Inserire ⑥ in ⑧.

Berlin Brands Group UK Limited
PO Box 42
272 Kensington High Street
London, W8 6ND
United Kingdom
Estimado cliente:
ÍNDICE
Índice 59
CONTENIDO DEL ENVÍO
Herramientas
| Lápiz | [∅20 mmD5KA] ∅10 mm∅ 3 mmBroca | Regla plegable |
| Silicona | Sierra eléctrica | Espátula |
 Destornillador Destornillador |  Tijeras Tijeras |
Inserte ⑥ en ⑧.
Berlin Brands Group UK Limited
PO Box 42
272 Kensington High Street
London, W8 6ND
Reino Unido

KLARSTEIN


- INHALTSVERZEICHNIS
- LIEFERUMFANG
- WERKZEUGE
- DEAR CUSTOMER
- CONTENTS
- ARTICLE
- PARTS LIST
- TOOLS
- SINK INSTALLTION FOR UNDERMOUTING
- INSTALL THE OVERFLOW SET
- INSTALL THE STRAINER SET
- INSTALL THE WASTE PIPE SET
- CHECK SEALING PERFORMANCE AND CLEAN
- MANUFACTURER
- IMPORTER FOR GREAT BRITAIN
- CHER CLIENT, CHÈRE CLIENTE
- SOMMAIRE
- CONTENU DE L'EMBALLAGE
- OUTILLAGE
- INSTALLATION DU KIT D'ÉVACUATION
- GENTILE CLIENTE
- INDICE
- VOLUME DI CONSEGNA
- ATTREZZI
- INSTALLAZIONE DEL SET DI SCARICO
- ESTIMADO CLIENTE
- ÍNDICE
- CONTENIDO DEL ENVÍO
- HERRAMIENTAS
- KLARSTEIN
Brand : Klarstein
Model : TitanSteel Küchenspüle 45x39cm kratzfest
Category : Kitchen sink