
MMC09S5AOB - Microwave MIDEA - Free user manual and instructions
Find the device manual for free MMC09S5AOB MIDEA in PDF.
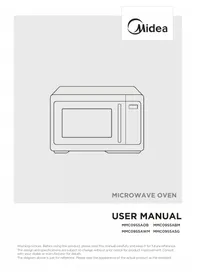


| Brand | MIDEA |
| Model | MMC09S5AOB |
| Product Type | Countertop Microwave Oven |
| Capacity | 0.9 cubic feet |
| Rated Power Output | 900 watts |
| Power Supply | 120V / 60Hz |
| Dimensions (W x D x H) | 17.3 x 12.9 x 10.2 inches |
| Weight | 28.7 lbs |
| Turntable Diameter | 10.5 inches |
| Control Type | Touch control with digital display |
| Power Levels | 10 levels |
| Preset Cook Modes | Popcorn, Potato, Pizza, Beverage, Frozen Dinner, Reheat |
| Timer Range | Up to 99 minutes 99 seconds |
| Child Lock | Yes |
| Interior Light | Yes |
| Cleaning | Wipe with a soft damp cloth; avoid harsh abrasives |
| Safety Certifications | UL/ETL listed |
| Spare Parts Availability | Contact MIDEA customer service |
Frequently Asked Questions - MMC09S5AOB MIDEA
User questions about MMC09S5AOB MIDEA
0 question about this device. Answer the ones you know or ask your own.
Ask a new question about this device
Download the instructions for your Microwave in PDF format for free! Find your manual MMC09S5AOB - MIDEA and take your electronic device back in hand. On this page are published all the documents necessary for the use of your device. MMC09S5AOB by MIDEA.
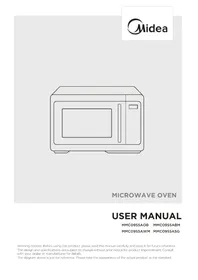
USER MANUAL MMC09S5AOB MIDEA
MICROWAVE OVEN
USER MANUAL
Warning notices: Before using this product, please read this manual carefully and keep it for future reference. The design and specifications are subject to change without prior notice for product improvement. Consult with your dealer or manufacturer for details.
The diagram above is just for reference. Please take the appearance of the actual product as the standard.
THANK YOU LETTER
Thank you for choosing Midea! Before using your new Midea product, please read this manual thoroughly to ensure that you know how to operate the features and functions that your new appliance offers in a safe way.
CONTENTS
THANK YOU LETTER 02
SAFETY INSTRUCTIONS 03
SPECIFICATION 13
PRODUCT OVERVIEW 14
PRODUCT INSTALLATION 16
OPERATION 17
TROUBLE SHOOTING 28
TRADEMARKS, COPYRIGHTS AND LEGAL STATEMENT ---- 30
DISPOSAL AND RECYCLING 31
DATA PROTECTION NOTICE 32
SAFETY INSTRUCTIONS
Intended Use
The following safety guidelines are intended to prevent unforeseen risks or damage from unsafe or incorrect operation of the appliance. Please check the packaging and appliance on arrival to make sure everything is intact to ensure safe operation. If you find any damage, please contact the retailer or dealer. Please note modifications or alterations to the appliance are not allowed for your safety concern. Unintended use may cause hazards and loss of warranty claims.
Explanation of Symbols
 | DangerThis symbol indicates that there are dangers to the life and health of persons due to extremely flammable gas. |
 | Warning of electrical voltageThis symbol indicates that there is a danger to life and health of persons due to voltage. |
 | WarningThe signal word indicates a hazard with a medium level of risk which, if not avoided, may result in death or serious injury. |
 | CautionThe signal word indicates a hazard with a low degree of risk which, if not avoided, may result in minor or moderate injury. |
 | AttentionThe signal word indicates important information (e.g. damage to property), but not danger. |
 | Observe instructionsThis symbol indicates that a service technician should only operate and maintain this appliance in accordance with the operating instructions. |
Read these operating instructions carefully and attentively before using/commissioning the unit and keep them in the immediate vicinity of the installation site or unit for later use!
PRECAUTIONS TO AVOID POSSIBLE EXPOSURE TO EXCESSIVE MICROWAVEENERGY
a. Do not attempt to operate this oven with the door open since open door operation can result in harmful exposure to microwave energy.
It is important not to defeat or tamper with the safety interlocks.
b. Do not place any object between the oven front face and the door or allow soil or cleaner residue to accumulate on sealing surfaces.
c. Do not operate the oven if it is damaged. It is particularly important that the oven door closes properly and that there is no damage to the:
- DOOR (bent)
- HINGES AND LATCHES (broken or loosened)
- DOOR SEALS AND SEALING SURFACES
d. The oven should not be adjusted or repaired by anyone except properly qualified service personnel.
IMPORTANT SAFETY INSTRUCTIONS
When using electrical appliances basic safety precautions should be followed, including the following:
WARNING
To reduce the risk of burns, electric shock, fire, injury to persons or exposure to excessive microwave energy:
-
Read all instructions before using the appliance.
-
Read and follow the specific: "PRECAUTIONS TO AVOID POSSIBLE EXPOSURE TO EXCESSIVE MICROWAVE ENERGY" found on page 04.
-
This appliance must be grounded. Connect only to properly grounded outlet. See "GROUNDING INSTRUCTIONS" found on page 08.
-
Install or locate this appliance only in accordance with the provided installation instructions.
-
Some products such as whole eggs and sealed containers - for example, closed glass jars - are able to explode and should not be heated in this oven.
-
Use this appliance only for its intended use as described in the manual. Do not use corrosive chemicals or vapors in this appliance. This type of oven is specifically designed to heat, cook or dry food. It is not designed for industrial or laboratory use.
-
HOT CONTENTS CAN CAUSE SEVERE BURNS. DO NOT ALLOW CHILDREN TO USE THE MICRO WAVE. Use caution when removing hot items.
-
Do not operate this appliance if it has a damaged cord or plug, if it is not working properly, or if it has been damaged or dropped.
-
This appliance should be serviced only by qualified service personnel. Contact nearest authorized service facility for examination, repair, or adjustment.
- Do not cover or block any openings on the appliance.
- Do not store this appliance outdoors. Do not use this product near water - for example, near a kitchen sink, in a wet basement, near a swimming pool, or similar location.
- Do not immerse cord or plug in water.
- Keep cord away from heated surface.
- Do not let cord hang over edge of table or counter.
- When cleaning surfaces of door and oven that comes together on closing the door, use only mild, nonabrasive soaps, or detergent applied with a sponge or soft cloth.
- To reduce the risk of fire in the oven cavity:
1). Do not overcook food. Carefully attend appliance when paper, plastic, or other combustible materials are placed inside the oven to facilitate cooking.
2). Remove wire twist-ties from paper or plastic bag before placing bag in oven.
3). If material inside of the oven ignite, keep oven door closed, turn oven off, and disconnect the power cord, or shut off power at the fuse or circuit breaker panel.
4). Do not use the cavity for storage purposes. Do not leave paper products, cooking utensils, or food in the cavity when not in use.
- Liquids, such as water, coffee, or tea are able to be overheated beyond the boiling point without appearing to be boiling. Visible bubbling or boiling when the container is removed from the microwave oven is not always present.
THIS COULD RESULT IN VERY HOT LIQUID SUDDENLY BOILING OVER WHEN THE CONTAINER IS DISTURBED OR A SPOON OR OTHER UTENSIL IS INSERTED INTO THE LIQUID.
To reduce the risk of injury to persons:
1) Do not overheat the liquid.
2) Stir the liquid both before and halfway through heating it.
3) Do not use straight-sided containers with narrow necks.
4) After heating, allow the container to stand in the microwave oven for a short time before removing the container.
5) Use extreme care when inserting a spoon or other utensil into the container.
SAVE THESE INSTRUCTIONS HOUSEHOLD USE ONLY (NOT FOR COMMERCIAL USE)
GROUNDING INSTALLATION
This appliance must be grounded. In the event of an electrical short circuit, grounding reduces the risk of electric shock by providing an escape wire for the electric current. This appliance is equipped with a cord having a grounding wire with a grounding plug. The plug must be plugged into an outlet that is properly installed and grounded.
WARNING
Improper use of the grounding can result in a risk of electric shock.
Consult a qualified electrician or serviceman if the grounding instructions are not completely understood, or if doubt exists as to whether the appliance is properly grounded. If it is necessary to use an extension cord, use only a 3-wire extension cord that has a 3-blade grounded plug, and 3-slot receptacle that will accept the plug on the appliance. The marked rating of the extension cord shall be equal to or greater than the electrical rating of the appliance.
DANGER
Electric Shock Hazard:
Touching some of the internal components can cause serious personal injury or death. Do not disassemble this appliance.
WARNING
Electric Shock Hazard
Improper use of the grounding can result in electric shock. Do not plug into an outlet until appliance is properly installed and grounded.
A short power-supply cord is provided to reduce the risks resulting from becoming entangled in or tripping over a longer cord.
Longer cord sets or extension cords are available and may be used if care is exercised in their use.
If a long cord or extension cord is used:
1) The marked electrical rating of the cord set or extension cord should be at least as great as the electrical rating of the appliance.
2) The extension cord must be a grounding-type 3-wire cord.
3) The longer cord should be arranged so that it will not drape over the counter top or tabletop where it can be pulled on by children or tripped over unintentionally.
CLEANING
Be sure to unplug the appliance from the power supply.
- Clean the cavity of the oven after using with a slightly damp cloth.
- Clean the accessories in the usual way in soapy water.
-
The door frame and seal and neighbouring parts must be cleaned carefully with a damp cloth when they are dirty.
-
Do not use harsh abrasive cleaners or sharp metal scrapers to clean the oven door glass since they can scratch the surface, which may result in shattering of the glass.
-
Cleaning Tip---For easier cleaning of the cavity walls that the food cooked can touch: Place half a lemon in a bowl, add 300ml (1/2 pint) water and heat on 100% microwave power for 10 minutes. Wipe the oven clean using a soft, dry cloth.
RADIO INTERFERENCE
- Operation of the microwave oven may cause interference to your radio, TV or similar equipment. - When there is interference, it may be reduced or eliminated by taking the following measures:
1) Clean door and sealing surface of the oven.
2) Reorient the receiving antenna of radio or television.
3) Relocate the microwave oven with respect to the receiver.
4) Move the microwave oven away from the receiver.
5) Plug the microwave oven into a different outlet so that microwave oven and receiver are on different branch circuits.
- This equipment generates, uses and can radiate radio frequency energy and, if not installed and used in accordance with the instructions, may cause harmful interference to radio communications. However, there is no guarantee that interference will not occur in a particular installation. If this equipment does cause harmful interference to radio or television reception, which can be determined by turning the equipment off and on, the user is encouraged to try to correct the interference by one or more of the following measures:
—Reorient or relocate the receiving antenna.
—Increase the separation between the equipment and receiver.
—Connect the equipment into an outlet on a circuit different from that to which the receiver is connected.
—Consult the dealer or an experienced radio/TV technician for help.
This device complies with part 18 of the FCC Rules.
UTENSILS
CAUTION
Personal Injury Hazard:
Tightly-closed utensils could explode. Closed containers should be opened and plastic pouches should be pierced before cooking.
See the instructions on "Materials you can use in microwave oven or to be avoided in microwave oven." There may be certain non-metallic utensils that are not safe to use for microwaving. If in doubt, you can test the utensil in question following the procedure below.
Utensil Test:
- Fill a microwave-safe container with 1 cup of cold water (250ml) along with the utensil in question.
- Cook on maximum power for 1 minute.
- Carefully feel the utensil. If the empty utensil is warm, do not use it for microwave cooking.
- Do not exceed 1 minute cooking time.
Materials you can use in microwave oven
Utensils Remarks
| Browning dish | Follow manufacturer's instructions. The bottom of browning dish must be at least 3/16 inch (5mm) above the turntable. Incorrect usage may cause the turntable to break. (For the model with a turntable) |
| Dinnerware | Microwave-safe only. Follow manufacturer's instructions. Do not use cracked or chipped dishes. |
| Glass jars | Always remove lid. Use only to heat food until just warm. Most glass jars are not heat resistant and may break. |
| Glassware | Heat-resistant oven glassware only. Make sure there is no metallic trim. Do not use cracked or chipped dishes. |
| Oven cooking bags | Follow manufacturer's instructions. Do not close with metal tie. Make slits to allow steam to escape. |
| Paper plates and cups | Use for short-term cooking/warming only. Do not leave oven unattended while cooking. |
| Paper towels | Use to cover food for reheating and absorbing fat. Use with supervision for a short-term cooking only. |
| Parchment paper | Use as a cover to prevent splattering or a wrap for steaming. |
| Plastic | Microwave-safe only. Follow the manufacturer's instructions. Should be labeled "Microwave Safe". Some plastic containers soften, as the food inside gets hot. "Boiling bags" and tightly closed plastic bags should be slit, pierced or vented as directed by package. |
| Plastic wrap | Microwave-safe only. Use to cover food during cooking to retain moisture. Do not allow plastic wrap to touch food. |
Thermometers Microwave-safe only (meat and candy thermometers).
Wax paper Use as a cover to prevent splattering and retain moisture.
Materials to be avoided in microwave oven
Utensils Remarks
| Aluminum tray | May cause arcing. Transfer food into microwave-safe dish. |
| Food carton with metal handle | May cause arcing. Transfer food into microwave-safe dish. |
| Metal or metal-trimmed utensils | Metal shields the food from microwave energy. Metal trim may cause arcing. |
| Metal twist ties May cause arcing and could cause a fire in the oven. | |
| Paper bags May cause a fire in the oven. | |
| Plastic foam | Plastic foam may melt or contaminate the liquid inside when exposed to high temperature. |
| Wood | Wood will dry out when used in the microwave oven and may split or crack. |
SPECIFICATION
| Model | MMC09S5AOB MMC09S5ABMMMC09S5AWM MMC09S5ASG |
| Power Supply | 120VAC 60Hz |
| Rated Input(Microwave) | 1400 W |
| Rated Output(Microwave) | 900 W |
PRODUCT OVERVIEW
Names of Oven Parts and Accessories
In case of any differences between the appliance and the pictures in this manual, the product shall prevail.
Remove the oven and all materials from the carton and oven cavity.
Your oven comes with the following accessories:

Glass Tray Turntable Ring Assembly Instruction Manual

Turntable Shaft

A) Safety interlock system
B) Observation window
C) Door assembly
D) Oven cavity
E) Turntable shaft
F) Control panel
PRODUCT OVERVIEW
TURNTABLE INSTALLATION
Cleaning the cooking compartment and putting the turntable in place. For new installations, make sure all packaging and shipping tape has been removed from the turntable shaft. Before using the appliance to prepare food for the first time, you will need to put the turntable in place correctly. You must clean the cooking compartment and accessories.

How to put the turntable in place:
- Place the turntable ring assembly ③ into the recess in the cooking compartment.
- Place the glass tray ① on the turntable ring assembly ③. Fit the raised, curved lines in the center of the glass tray bottom between the three spokes of the shaft. Make sure that the glass tray ① engages in the turntable shaft ② in the centre of the cooking compartment floor. The rollers on the shaft should fit inside the turntable bottom ridge.

Notes:
-
Never use the appliance without the turntable. Make sure that it is properly engaged. The turntable can turn clockwise or anti-clockwise.
-
Never place the glass tray upside down. The glass tray should never be restricted.
-
Both glass tray and turntable ring assembly must always be used during cooking.
-
All food and containers of food are always placed on the glass tray for cooking.
-
Never restrict the movement of the turntable.
-
If glass tray or turntable ring assembly cracks or breaks, contact your nearest authorized service center.
PRODUCT INSTALLATION
Countertop Installation
Remove all packing material and accessories. Examine the oven for any damage such as dents or broken door. Do not install if oven is damaged.
Cabinet: Remove any protective film found on the microwave oven cabinet surface. Do not remove the Waveguide cover that is attached to the oven cavity to protect the magnetron.
INSTALLATION
- Select a level surface that provide enough open space for the intake and/or outlet vents.

A minimum clearance of 3.0 inches (7.5cm) is required between the oven and any adjacent walls. One side must be open. The minimum installation height is 36 inches (91.4cm).
(1) Leave a minimum clearance of 12 inches (30cm) above the oven.
(2) Do not remove the legs from the bottom of the oven.
(3) Blocking the intake and/or outlet openings can damage the oven.
(4) Place the oven as far away from radios and TV as possible.
Operation of microwave oven may cause interference to your radio or TV reception.
- Plug your oven into a standard household outlet. Be sure the voltage and the frequency is the same as the voltage and the frequency on the rating label.
WARNING: Do not install oven over a range cooktop or other heat-producing appliance. If installed near or over a heat source, the oven could be damaged and the warranty would be void.
The accessible surface may be hot during operation.


BUTTON FUNCTION OVERVIEW
| Button | Description |
| TIME COOK | Enter the microwave cooking time setting |
| TIME DEFROST | Quickly defrost frozen foods based on the selected time |
| WEIGHT DEFROST | Quickly defrost frozen foods based on the selected weight |
| POWER | Set power level for microwave operation |
| CLOCK | Set time of day |
| TIMER | Countdown timer |
| POTATO PIZZA POPCORN FRZ.VEG.BEVERAGE DINNER | Auto menu with preset programs by weight |
 0 MEMORY 0 MEMORY | Use the number keys to enter customized values / Press the numbers “1-6” to start speedy cooking for 1 to 6 minutes / Use the number “0” to enter the memory function setting |
 | Mute function |
 | Unlock the safety lock |
 | Pause active cooking status / Cancel current operation / Eco function / Lock function for children |
 | Start speedy cooking for 30 seconds / Start operation / Add 30 seconds / Confirm input |
OPERATION
1. Safety Lock
Safety Lock is a system that safeguards against unintended activation of the oven, providing a protective measure to ensure child safety.
(1) How the safety lock works
Initiating the cooking automatically triggers the lock. The lock will also stay engaged for 30 minutes after cooking ends.
Safety Lock is active by default. It will only be deactivated if the user chooses to do so manually. Even in the event of a power disconnection, the oven will preserve the state of the safety lock, whether it is activated or deactivated.
(2) Unlock the door
Press UNLOCK during operation and open the door within 10 seconds, or the safety lock will re-engage. The door will stay unlocked until cooking is initiated.
Or:
Press UNLOCK within 30 minutes after cooking is complete to manually disable the door lock and switch to standby mode. If no key is pressed, the safety lock will automatically disengage after 30 minutes.
(3) Deactivate the safety lock
If there are no children in the house, you can choose to permanently deactivate the safety lock function.
Press “7”, “9” in consecutive order and then press and hold UNLOCK for three seconds within 30 seconds, the screen will display “ULoc”, indicating the successful deactivation of the safety lock.
![graph LR A["7"] -->|Once| B["9"] B -->|Once| C["UNLOCK"] C -->|Press and hold 3s| D["ULoc"] D --> E["The screen displays"]](/content/2026/08/1627906/images/2c3fce7969f3490f1511de03f428e4f68084b41c1915a11820c76020ec664d7c.jpg)
(4) Re-activate the safety lock
Press “7”, “9” in consecutive order and then press and hold UNLOCK for three seconds within 30 seconds, the screen will display “Loc”, indicating the successful re-activation of the safety lock.
OPERATION
Setting the Clock 2.
After connecting the oven to the power, the display shows “0:00”, the buzzer sounds, and the oven enters standby mode.
(1) Press “CLOCK” once and then “00:00” will display.
(2) Press the number keys to enter the current time.
For example, time is 12:10 now, please press "1, 2, 1, 0" in turn.
(3) Press “CLOCK” to confirm. The clock is set.

Notes
(1) In the process of clock setting, if “ STOP CANCEL/ECO ” is pressed or if there is no operation within 1 minute, the setting is invalid.
(2) To reset the clock, please repeat step 1 to step 3.
(3) The clock is a 12-hour display. If the clock is not set, it will not work when powered.
3. Setting the Kitchen Timer
(1) Press “ TIMER ” once and then “00:00” will display.
(2) Press the number keys to set the desired time. The maximum time value is "99:99".
(3) Press “ START +30 SEC. ” to confirm. The timer starts counting down.

Note
The kitchen timer is a timer.
OPERATION
4. Microwave Cooking
The 11 power levels are available.
| Power | 100% | 90% | 80% | 70% | 60% | 50% | 40% | 30% | 20% | 10% | 0% |
| Display | PL10 | PL9 | PL8 | PL7 | PL6 | PL5 | PL4 | PL3 | PL2 | PL1 | PL0 |
Method 1:
(1) Press “ TIME COOK ” once, the screen will display “00:00”.
(2) Press the number keys to set the cooking time. The maximum time value is "99:99".
(3) Press “ POWER ” once, and “PL10” will display.
(4) Press the number keys to set the power level. The 11 power levels are available.
(5) Press “ START +30 SEC. ” to start cooking.
Method 2:
(1) Press “ POWER ” once, and “PL10” will display.
(2) Press the number keys to set the power level. The 11 power levels are available.
(3) Press “ TIME COOK ” once, the screen will display “00:00”.
(4) Press the number keys to set the cooking time. The maximum time value is "99:99".
(5) Press “ START +30 SEC. ” to start cooking.
Notes
(1) In the process of setting, if the “STOP CANCEL/ECO” is pressed or if there is no operation within 1 minute, the setting is invalid.
OPERATION
(2) If “PLO” is selected, the oven will work with a fan for no power. You can use this level to remove the odor of the oven.
(3) The power level can be changed during operation. Press “ POWER ” once and then the current power will display for 3 seconds. Press the number keys to change the power. The oven will work with the selected power.
5. Speedy Cooking
(1) In standby mode, pressing the number keys 1 to 6 lets you quickly select a cooking time from 1 to 6 minutes. Then you can press “START +30 SEC.” to increase the cooking time. The maximum time value is “99:99”.
(2) In standby mode, press “START +30 SEC.” once to cook food at 100% power level for 30 seconds. Each press on the same key can increase 30 seconds and the maximum time value is “99:99”.

Note
In the microwave and defrosting by time cooking state, each press on “ START +30 SEC. ” can increase the cooking time by 30 seconds (except for the defrosting by weight and auto menu).
OPERATION
6. Defrost by Weight
(1) Press “WEIGHT DEFROST” once and then the screen will display “dEF1”.
(2) Press the number keys to set the weight of the food. The range of weight is 4\~100 Oz.
(3) Press “ START + 30 SEC. ” to start defrosting.
Note
The buzzer will sound to remind you to turn the food over during defrosting. If no operation, the oven will continue working.
7. Defrost by Time
(1) Press “TIME DEFROST” once and then the screen will display “dEF2”.
(2) Press the number keys to set the desired defrosting time. The maximum time value is "99:99".
(3) Press “ START + 30 SEC. ” to start defrosting.
Notes
(1) The buzzer will sound to remind you to turn the food over during defrosting. If no operation, the oven will continue working.
(2) The defrosting power is PL3 and it cannot be changed.
OPERATION
8. Multi-Stage Cooking
Example: Defrost food for 10Oz and then cook with 50% microwave power for
7 minutes.
(1) Press “WEIGHT DEFROST” once and then the screen will display “dEF1”.
(2) Press "1", "0" to set the weight of the food to 10Oz.
(3) Press “ TIME COOK ” once, the screen will display “00:00”.
(4) Press “7”, “0”, and “0” to set the cooking time to 7 minutes.
(5) Press “ POWER ” once and then “PL10” will display.
(6) Press "5" to set the power level to PL5.
(7) Press “ START +30 SEC. ” to start cooking.

Notes
(1) Two cooking stages can be set in multi-stage cooking.
(2) If you set the defrost function, it will work automatically in the first stage.
(3) The auto menu cannot be set as one of the multi-stage.
9. Lock Function for Children
You can use this function to disable the screen buttons and prevent your children from accidentally turning the oven on.
To activate the lock:
In standby mode, press and hold “ STOP CANCEL/ECO ” for three seconds. A beep sounds, and “ [...] ” will display.
To deactivate the lock:
In the locked state, press and hold “ STOP CANCEL/ECO ” for three seconds. A beep sounds.
OPERATION
10. Memory Function
You can save the settings for a dish in the memory and call it up again.
(1) Press “0” repeatedly to select the memory 1-3 procedure. “1”, “2”, and “3” will display in order.
(2) If the procedure has been set, press “START +30 SEC.” to start working. Otherwise, please continue to set.
(3) After finishing the setting, press “ START + 30 SEC. ” once to save the procedure.
Example: Set memory 2 (cook food with 80% microwave power for 3 minutes.)
(1) In standby mode, press “0” twice, and then the screen will display “2”.
(2) Press “TIME COOK” once and then press the number keys “3”, “0”, and “0” in order.
(3) Press “ POWER ” once and then press the number key “8”.
(4) Press “ START +30 SEC. ” to save the setting and “2” will display.
Notes
(1) If the power is not cut off, the procedure will be saved all the time.
(2) The auto menu, kitchen timer, and speedy cooking cannot be set as a memory function.
OPERATION
11. Auto Menu
(1) Press the corresponding menu key repeatedly to select the weight of the food you want.
Example: press “ POTATO ” twice and then “2” displays.
(2) Press “ START +30 SEC. ” to start cooking.
Auto Menu Chart
| Menu Weight Display | Power Level | ||
| POPCORN | 1.75Oz 1.75 | PL10 | |
| 3.2Oz | 3.2- | ||
| 3.5Oz | 3.5- | ||
| POTATO | 1 (8Oz) | 1 | PL10 |
| 2 (16Oz) | 2 | ||
| 3 (24Oz) | 3 | ||
| PIZZA | 4.0Oz | 4.0- | PL8 |
| 8.0Oz | 8.0- | ||
| 14.0Oz | 14.0- | ||
| FRZ. VEG. | 4.0Oz | 4.0- | PL10 |
| 8.0Oz | 8.0- | ||
| 16.0Oz | 16.0- | ||
| BEVERAGE | 1 cup (120ml) | 1 | PL10 |
| 2 cups (240ml) | 2- | ||
| 3 cups (360ml) | 3- | ||
| DINNER | 9.0Oz | 9.0- | PL10 |
| 12.0Oz | 12.0- | ||
| 18.0Oz | 18.0- | ||
OPERATION
12. ECO Function
To enter ECO mode:
In standby mode and the oven door is closed, press “ STOP CANCEL/ECO ” once.
The screen will turn off.
To cancel ECO mode:
In ECO mode, pressing any key or opening the door will cancel it.
13. Mute mode
To activate the mute mode:
In standby mode, press “ON/OFF” once. The buzzer will sound, and “OFF” will display. When you press the key, it does not make a sound.
To deactivate the mute mode:
In mute mode, press “ON/OFF” once. The buzzer will sound, and “On” will display.
14. Inquiring Function
(1) If the clock has been set, the current time will display for three seconds by pressing "CLOCK" once in the cooking state.
(2) In the microwave cooking state, press “ POWER ” to inquire about the power level. It will display for three seconds.
Troubleshooting
Before calling for service
Malfunctions can occur in all electrical appliances. This does not necessarily mean there is a defect in the appliance. For this reason, please check the tables to see if you can correct the malfunction. Read the troubleshooting information before contacting after-sales service. This will avoid unnecessary repair costs. If you cannot solve it by yourself, please contact your nearest brand authorized service center.
⚠ WARNING-Risk of injury!
Improper repairs are dangerous
Repairs to the appliance should only be carried out by professional technician. If the appliance is defective, call Customer Service.
Never try to repair a defective or suspected defective appliance by yourself.
| COMMON PROBLEM POSSIBLE CAUSE POSSIBLE REMEDY | ||
| The appliance is not working. | The mains plug of the power cord is not plugged in. | Unplug, then plug again tightly. |
| There has been a power cut. | Check whether the lighting in your kitchen or other appliances are working. | |
| The door is not fully closed. | Check whether food remains or foreign material are trapped in the door, and make sure the door is properly closed. | |
| No heating | The door is not closed well. | Make sure the door is properly closed. |
| Noise | Microwave ovens make noise while working, but if the noise becomes unusually loud or unusual, it may be due to the turntable was not placed in the correct position. (For the model with a turntable). | Place the turntable in the correct position. |
Troubleshooting
| COMMON PROBLEM POSSIBLE CAUSE POSSIBLE REMEDY | ||
| Improper defrosting | The microwave power setting is set to lower. The food is colder than usual. | - |
| Materials to be avoided were used. | Use microwave-safe cookware only. | |
| The cooking time, and power level is not suitable. | Use correct the cooking time, and power level. | |
| The food is not turned over or stirred. | Turn over or stir the food. | |
| Unevenly cooked foods; Undercooked foods | The microwave power setting is set to lower. | - |
| Materials to be avoided were used. | Use microwave-safe cookware only. | |
| The food is not defrosted completely. | Completely defrost food. | |
| The cooking time, and power level is not suitable. | Use correct the cooking time, and power level. | |
| The food is not turned or stirred. | Turn or stir the food from time to time during cooking. | |
| Overcooked foods | The microwave power setting is set to higher. The cooking time, and power level is not suitable. | Use correct the cooking time, and power level. |
| The microwave is sparking, and arcing occurs. | Materials to be avoided were used. | Use microwave-safe cookware only. |
| The oven is operated with no food in it. | It is forbidden to run the oven without any food inside. It is very dangerous. | |
| Spilled food remains in the cavity. | Clean the cavity with a wet towel. | |
TRADEMARKS, COPYRIGHTS AND LEGAL STATEMENT
Midea logo, word marks, trade name, trade dress and all versions thereof are valuable assets of Midea Group and/or its affiliates (“Midea”), to which Midea owns trademarks, copyrights and other intellectual property rights, and all goodwill derived from using any part of an Midea trademark. Use of Midea trademark for commercial purposes without the prior written consent of Midea may constitute trademark infringement or unfair competition in violation of relevant laws.
This manual is created by Midea and Midea reserves all copyrights thereof. No entity or individual may use, duplicate, modify, distribute in whole or in part this manual, or bundle or sell with other products without the prior written consent of Midea.
All the described functions and instructions were up to date at the time of printing this manual. However, the actual product may vary due to improved functions and designs.
DISPOSAL AND RECYCLING
Important instructions for environment
Compliance with the WEEE Directive and Disposing of the Waster Product: This product complies with EU WEEE Directive (2012/19/EU). This product bears a classification symbol for waster electrical and electronic equipment (WEEE).
This symbol indicates that this product shall not be disposed with other household wastes at the end of its service life. Used device must be returned to official collection point for recycling of electrical electronic devices. To find these collection systems please contact to your local authorities or retailer where the product was purchased. Each household performs important role in recovering and recycling of old appliance. Appropriate disposal of used appliance helps prevent potential negative consequences for the environment and human health.

Compliance with RoHS Directive
The product you have purchased complies with EU RoHS Directive (2011/65/EU). It does not contain harmful and prohibited materials specified in the Directive.
Package information
Packaging materials of the product are manufactured from recyclable materials in accordance with our National Environment Regulations. Do not dispose of the packaging materials together with the domestic or other wastes. Take them to the packaging material collection points designated by the local authorities.

DATA PROTECTION NOTICE
For the provision of the services agreed with the customer,
we agree to comply without restriction with all stipulations of applicable data protection law, in line with agreed countries within which services to the customer will be delivered, as well as, where applicable, the EU General Data Protection Regulation (GDPR).
Generally, our data processing is to fulfil our obligation under contract with you and for product safety reasons, to safeguard your rights in connection with warranty and product registration questions. In some cases, but only if appropriate data protection is ensured, personal data might be transferred to recipients located outside of the European Economic Area.
Further information are provided on request. You can contact our Data Protection Officer via MideaDPO@midea.com. To exercise your rights such as right to object your personal date being processed for direct marketing purposes, please contact us via MideaDPO@midea.com. To find further information, please follow the QR Code.
1 YEAR LIMITED WARRANTY
This warranty is provided to the delivery at retail (the “Purchaser” or “you”) by Midea America Corp. (“Midea” or “we”), which warrants all parts of this Product, as described below. Midea warrants this Product to the Purchaser for personal, family or household use. This warranty covers performance and quality issues in materials and workmanship that appear under normal use and maintenance appearing within one year from the date of purchase. This warranty gives you specific rights, and you may also have other rights that vary from state to state. The date of delivery establishes the warranty period, should service be required.
WARRANTY LIMITATIONS
This warranty is given only to the delivery at retail in either the United States or Canada and may not be transferred to any subsequent buyer. This warranty does not apply to purchasers of our products for use or resale in a business; a separate commercial warranty may protect those purchasers.
This warranty does not cover any Product failure caused by:
a. Abuse, damage or use of the Product in violation of the Product instructions.
b. Modification to any Product or part.
c. Failure to maintain the Product or part as described in accordance with the Product instructions.
d. Faulty installation or application.
e. Use of parts or accessories not compatible with this Product.
f. Floods, fires, winds, lightning, accidents, corrosive atmosphere , or other conditions beyond Midea's control.
g. Interruption in electrical service or inadequate electrical service.
h. Replacement of fuses and replacement or resetting of circuit breakers.
i. Frozen or broken water pipes, water damage, moisture intrusion, mold or other biological growth.
j. The use, combination or linking of the Product to other products, processes or materials not provided by Midea.
WARRANTY REMEDY
If any quality or performance issue covered by this warranty is discovered during the warranty period, we will, at our option, repair or replace any such Product. This warranty is limited to Product repair or replacement by an authorized Midea servicer or dealer and does not cover any shipping cost, labor cost, customs duties, inland logistics cost, or cost of service, including any diagnostics, removal, transportation, or reinstallation costs. If we ask, you must return the Product to us.
WARRANTY DISCLAIMER; EXCLUSION OF DAMAGES
This is the only express warranty to consumers that we offer on our Products. ANY IMPLIED WARRANTIES BY MIDEA, INCLUDING BUT NOT LIMITED TO WARRANTIES OF MERCHANTABILITY AND FITNESS FOR PARTICULAR PURPOSE, ARE LIMITED TO THE DURATION OF THIS EXPRESS WARRANTY. Some states and provinces do not allow the exclusion of express warranties and/or limitations on how long an implied warranty lasts, so the above exclusion and/or limitation may not apply to you.
THE REMEDY DESCRIBED ABOVE IS THE ONLY ONE THAT WE WILL PROVIDE, EITHER UNDER THIS WARRANTY OR UNDER ANY WARRANTY ARISING BY OPERATION OF LAW. WE WILL NOT BE RESPONSIBLE FOR ANY CONSEQUENTIAL OR INCIDENTAL DAMAGES ARISING FROM THE BREACH OF THIS WARRANTY OR ANY OTHER WARRANTY, WHETHER EXPRESS OR IMPLIED, NEGLIGENCE OR OTHER TORT, OR ON
ANY STRICT LIABILITY THEORY, INCLUDING BUT NOT LIMITED TO LOST PROFITS.
Some states do not allow the exclusion or limitation of incidental or consequential damages, so the above exclusion may not apply to you.
WARRANTY CLAIMS PROCESS
For more information or to make a warranty claim, please visit:
https://www.midea.com/us/support
Or contact us at:
Telephone: 1-866-646-4332
Email: customerserviceusa@midea.com
You must have Your bill of sale, delivery slip, or appropriate proof of purchase to submit a warranty claim. The date of purchase establishes the warranty period, should service be required.
DISPUTE RESOLUTION
ARBITRATION CLAUSE. IMPORTANT. PLEASE REVIEW THIS ARBITRATION CLAUSE. IT AFFECTS YOUR LEGAL RIGHTS.
a. Parties: This arbitration clause (this “Arbitration Clause”) affects your rights against Midea and any of its affiliates or employees or agents, successors, or assigns, all of whom together are referred to below as “we” or “us” for ease of reference.
b. ARBITRATION REQUIREMENT: EXCEPT AS STATED BELOW, ANY DISPUTE BETWEEN YOU AND ANY OF US SHALL BE DECIDED BY NEUTRAL, BINDING ARBITRATION RATHER THAN IN COURT OR BY JURY TRIAL. “Dispute” will be given the broadest possible meaning allowable by law. It includes any dispute, claim, or controversy arising from or relating to your purchase of this Product, any warranty upon the Product, or the Product’s condition. It also includes determination of the scope or applicability of this Arbitration Clause. The arbitration requirement applies to claims in contract and tort, pursuant to statute, or otherwise.
C. CLASS-ARBITRATION WAIVER: ARBITRATION IS HANDLED ON AN INDIVIDUAL BASIS. IF A DISPUTE IS ARBITRATED, YOU AND WE EXPRESSLY WAIVE ANY RIGHT TO PARTICIPATE AS A CLASS REPRESENTATIVE OR CLASS MEMBER ON ANY CLASS CLAIM YOU MAY HAVE AGAINST US OR WE AGAINST YOU, OR AS A PRIVATE ATTORNEY GENERAL OR IN ANY OTHER REPRESENTATIVE CAPACITY, TO THE MAXIMUM EXTENT PERMITTED BY LAW. YOU AND WE ALSO WAIVE ANY RIGHT TO CLASS ARBITRATION OR ANY CONSOLIDATION OF INDIVIDUAL ARBITRATIONS.
d. Discovery and Other Rights: Discovery and rights to appeal in arbitration are generally more limited than in a lawsuit. This applies to both you and us. Other rights that you or we would have in court may not be available in arbitration. Please read this Arbitration Clause and consult the rules of the arbitration organizations listed below for more information.
e. SMALL CLAIMS COURT OPTION: YOU MAY CHOOSE TO LITIGATE ANY DISPUTE BETWEEN YOU AND ANY OF US IN SMALL CLAIMS COURT, RATHER THAN IN ARBITRATION, IF THE DISPUTE MEETS ALL REQUIREMENTS TO BE HEARD IN SMALL CLAIMS COURT.
f. Governing Law: For residents of the United States, the procedures and effect of the arbitration will be governed by the Federal Arbitration Act (9 U.S.C. § 1 et seq.) rather than by state law concerning arbitration. For residents of Canada, the procedures and effect of the arbitration will be governed by the applicable arbitration law of the province in which you purchased your Product. The law governing your substantive warranty rights and other claims will be the law of the state or province in which you purchased your Product. Any court having jurisdiction may enter judgment on the arbitration award.
g. Rules of the Arbitration: If the amount in controversy is less than \$250,000, the
arbitration will be decided by a single arbitrator. If the amount in controversy is greater than or equal to \$250,000, the arbitration will be decided by a panel of three arbitrators. The arbitrator(s) will be chosen pursuant to the rules of the administering arbitration organization. United States residents may choose JAMS (1920 Main Street, Ste. 300, Irvine, CA 92614, www.jamsadr.com), or, subject to our approval, any other arbitration organization. In addition, Canadian residents may choose the ADR Institute of Canada (234 Eglinton Ave. East, Suite 405, Toronto, Ontario, M4P 1K5, www.amic.org). These organizations' rules can be obtained by contacting the organization or visiting its website. If the chosen arbitration organization's rules conflict with this Arbitration Clause, the provisions of this Arbitration Clause control. The award of the arbitrator(s) shall be final and binding on all parties.
h. Location of the Arbitration Hearing: Unless applicable law provides otherwise, the arbitration hearing for United States residents will be conducted in the federal judicial district in which you reside (in your hometown area) or, for Canadian residents, in the province in which you reside, and, if you choose, will be in-person.
i. Costs of the Arbitration: Each party is responsible for its own attorney, expert, and other costs and fees unless applicable law requires otherwise. Notwithstanding the preceding sentence, and unless applicable law requires otherwise, if you are a consumer under the JAMS rules or the rules of another agreed upon arbitration administrator, Midea will pay or reimburse you for all reasonable fees or costs to the extent required by law or the applicable arbitration administrator's rules. Whether or not required by law or such rules, if you prevail at arbitration on any claim against Midea, Midea will reimburse you for any reasonable fees paid to the arbitration administrator in connection with the arbitration proceedings. Under no circumstances will Midea seek from you payment or reimbursement of any reasonable fees that Midea incurs in connection with the arbitration. If you are required to advance any fees or costs to JAMS or other agreed upon arbitration administrator, but you ask Midea to do so in your stead, Midea will consider and respond to your request.
j. Survival and Enforceability of this Arbitration Clause: This Arbitration Clause shall survive the expiration or termination, or any transfer, of the warranty on your Product. If any part of this Arbitration Clause, except waivers of class-action rights, is found to be unenforceable for any reason, the remainder of this clause and the warranty shall remain enforceable. If, in a case in which class-action allegations have been made, the waiver of class-action rights under this warranty is found to be unenforceable with respect to any part of the dispute, the parts of the dispute as to which the waiver of class-action rights have been found unenforceable will be severed and will proceed in court without reference or application of this Arbitration Clause. Any remaining parts will proceed in arbitration.
QUEBEC RESIDENTS
The arbitration provisions of this warranty shall not apply to residents of Quebec.

make yourself at home


HORNO DE MICROONDAS
MANUAL DEL USUARIO
Notas:
https://www.midea.com/us/support
make yourself at home


- USER MANUAL
- THANK YOU LETTER
- CONTENTS
- SAFETY INSTRUCTIONS
- INTENDED USE
- PRECAUTIONS TO AVOID POSSIBLE EXPOSURE TO EXCESSIVE MICROWAVEENERGY
- IMPORTANT SAFETY INSTRUCTIONS
- WARNING
- SAVE THESE INSTRUCTIONS HOUSEHOLD USE ONLY (NOT FOR COMMERCIAL USE)
- GROUNDING INSTALLATION
- DANGER
- CLEANING
- RADIO INTERFERENCE
- UTENSILS
- CAUTION
- UTENSIL TEST
- MATERIALS YOU CAN USE IN MICROWAVE OVEN
- MATERIALS TO BE AVOIDED IN MICROWAVE OVEN
- PRODUCT OVERVIEW
- NAMES OF OVEN PARTS AND ACCESSORIES
- TURNTABLE INSTALLATION
- NOTES
- PRODUCT INSTALLATION
- COUNTERTOP INSTALLATION
- INSTALLATION
- OPERATION
- SAFETY LOCK
- SETTING THE CLOCK
- SETTING THE KITCHEN TIMER
- NOTE
- MICROWAVE COOKING
- SPEEDY COOKING
- DEFROST BY WEIGHT
- DEFROST BY TIME
- MULTI-STAGE COOKING
- LOCK FUNCTION FOR CHILDREN
- MEMORY FUNCTION
- AUTO MENU
- ECO FUNCTION
- MUTE MODE
- INQUIRING FUNCTION
- TROUBLESHOOTING
- BEFORE CALLING FOR SERVICE
- ⚠ WARNING-RISK OF INJURY
- IMPROPER REPAIRS ARE DANGEROUS
- TRADEMARKS, COPYRIGHTS AND LEGAL STATEMENT
- DISPOSAL AND RECYCLING
- IMPORTANT INSTRUCTIONS FOR ENVIRONMENT
- COMPLIANCE WITH ROHS DIRECTIVE
- PACKAGE INFORMATION
- DATA PROTECTION NOTICE
- YEAR LIMITED WARRANTY
- WARRANTY LIMITATIONS
- WARRANTY REMEDY
- WARRANTY DISCLAIMER; EXCLUSION OF DAMAGES
- ANY STRICT LIABILITY THEORY, INCLUDING BUT NOT LIMITED TO LOST PROFITS
- WARRANTY CLAIMS PROCESS
- DISPUTE RESOLUTION
- ARBITRATION CLAUSE. IMPORTANT. PLEASE REVIEW THIS ARBITRATION CLAUSE. IT AFFECTS YOUR LEGAL RIGHTS
- QUEBEC RESIDENTS
- MANUAL DEL USUARIO
- NOTAS
Brand : MIDEA
Model : MMC09S5AOB
Category : Microwave