Piccolina 400 A01 Eu01 113686 - Coffee maker CECOTEC - Free user manual and instructions
Find the device manual for free Piccolina 400 A01 Eu01 113686 CECOTEC in PDF.


| Product type | Coffee maker |
| Brand | Cecotec |
| Model | Piccolina 400 A01 Eu01 113686 |
| Capacity | 400 ml (approx. 4 cups) |
| Power | 800 W |
| Power supply | 220-240 V ~ 50/60 Hz |
| Dimensions (L × D × H) | 20 × 30 × 30 cm |
| Weight | 1.5 kg |
| Coffee type | Ground coffee |
| Filter | Permanent filter or paper filter size 1×4 |
| Automatic shut-off function | Yes, after 30 minutes |
| Anti-drip system | Yes |
| Visible water level | Yes, graduated |
| Maintenance | Regular descaling with white vinegar or descaling product |
| Cleaning | Clean removable parts with soapy water |
| Safety | Automatic shut-off, overheat protection |
| Spare parts | Water tank, filter, glass carafe available |
| Warranty | 2 years |
Frequently Asked Questions - Piccolina 400 A01 Eu01 113686 CECOTEC
User questions about Piccolina 400 A01 Eu01 113686 CECOTEC
0 question about this device. Answer the ones you know or ask your own.
Ask a new question about this device
Download the instructions for your Coffee maker in PDF format for free! Find your manual Piccolina 400 A01 Eu01 113686 - CECOTEC and take your electronic device back in hand. On this page are published all the documents necessary for the use of your device. Piccolina 400 A01 Eu01 113686 by CECOTEC.
USER MANUAL Piccolina 400 A01 Eu01 113686 CECOTEC
Cafetera italiana / Italian coffee maker

Safety instructions 9
-
Parts and components 53
-
Before use 53
-
Operation 54
-
Cleaning and maintenance 56
-
Technical specifications 57
-
Warranty and SAT 57
-
Copyright 58
-
Simplified EU Declaration of Conformity 58
SOMMAIRE
EN • The coding in this manual is generic and applies to all code variants of the appliance.
Read the following instructions carefully before using the product. Keep this manual for future reference or new users.
- Do not let children near the coffee machine when it is in use.
- Ensure that the steam jet is directed away from the user.
- Use the machine for its intended purpose.
- Do not operate the open/close system before the machine has cooled down and after removing it from the heat source.
- Do not touch hot surfaces, use the handle and the knob.
- Do not use the machine without water in the distiller.
- Use the appropriate heat source(s) according to the instructions for use.
- Use only spare parts from the manufacturer according to the appropriate model.
- Do not overheat the appliance or allow the flame to rise up the sides of the coffee machine. This could damage the handle of the product.
- Do not use the machine to store espresso coffee.
- Do not use the product until you have checked that all parts and components are included and assembled.
- The temperature of accessible surfaces may be high while the product is in use and may cause burns. Do not touch hot surfaces during and immediately after operation. Use protection to
prevent burns.
- Keep the coffee machine away from children while it is in operation and while its contents are hot.
- Do not use extracts or substances other than coffee.
- Do not press the coffee.
- The device is designed to be used only with water.
- Allow the device to cool down before opening it.
- During operation, hold the device by the handle.
- Use caution when opening the machine after use. There may be residual pressure inside. Wait a few minutes after removing from the heat for the pressure to release naturally or carefully lift the lid to release the steam before unscrewing completely.
- Make sure that all components of the coffee machine are food safe and heat resistant.
- Make sure that the coffee machine is placed in a stable position on the heat source to avoid spillage or accidents.
- Before first use, boil water in the brewer and discard it to clean out any manufacturing residues.
- Do not overfill the safety air valve when filling with water. Excess water may prevent proper operation and create hazards.
- Periodically check that the safety air valve is not obstructed and is working properly. A clogged valve can create a risk of overpressure.
- Serve coffee carefully, as it will be very hot. Avoid sudden movements that may cause spills and burns.
Warning: Stains may appear on the inside of the machine due to coffee and minerals in the water, as well as on the outside as a result of direct exposure to heat. This is a normal process that will occur over time.
INSTRUCTIONS DE SÉCURITÉ
- Water container
- Funnel with filter
- Seal and filter
- Coffee outlet
- Air valve
- Coffee container
NOTE: The graphs in this manual are schematic representations and may not match the following.
exactly with those of the product.
2. BEFORE USE
- This appliance is packaged in packaging designed to protect it during transport. Remove the
The device should be removed from its box and all packaging material should be removed. You can keep the original box and other
packaging items in a safe place to prevent damage to the appliance if you need to
transport it in the future. If you wish to dispose of the original packaging, be sure to recycle it.
all elements correctly.
- Make sure that all parts and components are included and in good condition. If
If any of them are missing or not in good condition, please contact immediately the
Official Cecotec Technical Service.
- Wash the product with warm soapy water to remove any dirt or oil.
- Dry it thoroughly before use.
Contents of the box
- Coffee maker
- Instruction manual
3. OPERATION
Assembly and disassembly
- To place the funnel over the water container, simply drop it into the water container until it locks into place.
- The coffee filter is placed concave in the base of the coffee container and the rubber seal is placed on top of it until it fits snugly. You will notice that the base of the filter fits snugly against the rubber seal.
Note: Make sure that the rubber gasket is correctly fitted and in good condition before each use. A damaged or incorrectly fitted gasket may affect the sealing and correct operation of the machine.
- The coffee tank, with the filter and gasket in place, is screwed to the water tank at the top of the tank and is fixed and stable.
Note: Screw the coffee container firmly onto the water tank, making sure that it is tightly closed to prevent steam leakage and to ensure the necessary pressure for the preparation of the coffee.
Operation
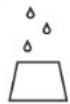
Fig. 2
- After cleaning the brewer and making sure that all parts are cold, fill the base with cold, clean water to just below the air valve. Do not overfill.
- Place the funnel in the base of the coffee machine. Fill the funnel with ground coffee. Place the funnel correctly into the water container. Fill the funnel with unpressed ground coffee, up to the top edge, but do not compact or overfill. Remove any excess coffee from the edges of the funnel to ensure a good seal with the coffee container.
NOTE: Too fine a grind may clog the filter and too coarse a grind will result in watery coffee. Do not press the coffee into the funnel, just fill it evenly. The amount of coffee influences the intensity; experiment to find your ideal taste, but do not overload the funnel. - Place the coffee tank on top of the water tank and screw in firmly, but without forcing. Make sure that the two parts are well aligned before screwing to avoid damaging the thread.
- Adjust the heat of the device you are using to heat:
- For gas cookers: Place the coffee maker on the stove, centered on the burner, with a medium-low flame that does not exceed the base of the coffee maker. Do not allow the flame to reach the handle.
- For electric/vitroceramic hobs: Place the machine on the hob and set the power to medium-high initially. Once coffee starts to come out, you can reduce the power slightly for a gentler extraction.
WARNING: If you use a gas cooker, make sure that the handle of the coffee maker is not directly exposed to the flame.
- In a few minutes (usually between 3 and 5, depending on the heat source), you will start to hear a slight hissing sound and the coffee will slowly start to flow up the spout into the upper reservoir. Observe the coffee flow. Initially it will come out with a dark and intense colour. When the flow becomes lighter, faster and frothy, and you hear a gurgling sound, remove the brewer from the heat. This indicates that the extraction is complete and will prevent the coffee from burning and tasting bitter.
- Serve coffee immediately in pre-warmed cups to maintain temperature. Stir the coffee gently in the upper reservoir before serving to homogenise the flavour and intensity.
- Wait for the brewer to cool completely before attempting to unscrew it. Hot metal can burn and the internal pressure may cause splashing. Once the brewer has cooled down, unscrew the top and clean the product thoroughly.
WARNING: Do not allow the machine to come into contact with salty or acidic substances.
NOTE: These coffee machine models are suitable for any type of heating surface.
An informative table with each Piccolina reference and the number of people and the number of cups of coffee that can be prepared is attached below:
| Piccolina | 200 | 400 | 600 | 900 |
| Number of cups | 2 | 4 | 6 | 9 |
4. CLEANING AND MAINTENANCE
- Do not pour cold water into the machine while it is hot. Sudden changes in temperature can affect the material, causing bending and deformation.
- Use specific cleaning products for metal surfaces to clean the outside of the coffee machine.
- It is recommended to wash the coffee machine immediately after each use, once it has cooled down completely. This will prevent coffee residues from drying and sticking, making cleaning easier and preventing rancid flavours in future brews.
- For gentle cleaning and to prolong the life of your coffee machine, hand washing is recommended. Use warm water and mild soap. You can use a soft brush or a non-abrasive sponge to remove coffee residue, especially inside the bottom tank and filter. Be sure to rinse all parts thoroughly with clean water to remove any soap residue.
- Dry it thoroughly before storing it to avoid stains. It is essential to dry all parts of the machine thoroughly after each wash before reassembly or storage. Dry each part with a clean, dry cloth or allow to air dry completely before storing.
- Do not use abrasives or chemicals to clean the device.
- Although the machine is dishwasher safe, occasional washing in a dishwasher is recommended, preferably at a low temperature. Place the parts (except the rubber seal) in the upper basket to avoid direct exposure to high temperatures and aggressive detergents. Always remove the rubber seal before putting the machine in the dishwasher and wash it by hand. Frequent washing in the dishwasher may shorten the life of the rubber gasket and in some cases affect the shine of the aluminium.
- Periodically check the condition of the rubber gasket. If it is cracked, hardened or deformed, replace it with a new original manufacturer's gasket to ensure proper sealing and prevent steam leakage.
- Store the brewer completely dry and assembled in a dry and safe place. If you will not be using the brewer for a long period of time, you can store the parts separately, making sure they are thoroughly dry, to allow for better ventilation.
5. TECHNICAL SPECIFICATIONS
Product reference: EU01_113685, EU01_113686, EU01_113687, EU01_113688, EU01_113689, EU01_113690, EU01_113691, EU01_113692, EU01_113693, EU01_113694, EU01_113695, EU01_113696, EU01_113697, EU01_113698, EU01_113699, EU01_113700, EU01_113701, EU01_113702, EU01_113703, EU01_113704, EU01_113705, EU01_113706, EU01_113707, EU01_113708, EU01_113709, EU01_113710, EU01_113711, EU01_113712.
Product: Piccolina 200, Piccolina 400, Piccolina 600, Piccolina 900, Piccolina 200 Beige, Piccolina 400 Beige, Piccolina 600 Beige, Piccolina 900 Beige, Piccolina 200 Green, Piccolina 400 Green, Piccolina 600 Green, Piccolina 900 Green, Piccolina 200 Blue, Piccolina 400 Blue, Piccolina 600 Blue, Piccolina 900 Blue, Piccolina 200 Red, Piccolina 400 Red, Piccolina 600 Red, Piccolina 900 Red, Piccolina 200 Bronze, Piccolina 400 Bronze, Piccolina 600 Bronze, Piccolina 900 Bronze, Piccolina 200 Gold, Piccolina 400 Gold, Piccolina 600 Gold, Piccolina 900 Gold.
Technical specifications may change without prior notification in order to improve the quality of the product.
product.
Made in China | Designed in Spain
6. WARRANTY AND SAT
Cecotec shall be liable to the end user or consumer for any lack of conformity that exists at the time of delivery of the product under the terms, conditions and deadlines established by the applicable regulations.
It is recommended that repairs be carried out by qualified personnel.
If you detect an incident with the product or have any queries, please contact the official Cecotec Technical Support Service on +34 96 321 07 28.
ENGLISH
7. COPYRIGHT
The intellectual property rights of the texts in this manual belong to CECOTEC. INNOVACIONES, S.L. All rights reserved. The contents of this publication may not, in whole or in part, be reproduced, stored in a retrieval system or transmitted, stored in a retrieval system or transmitted in any form or by any means
retrieved, transmitted or distributed by any means (electronic, mechanical, photocopying, photocopying or otherwise),
recording or similar) without the prior authorisation of CECOTEC INNOVACIONES, S.L.
8. SIMPLIFIED EU DECLARATION OF CONFORMITY
CE
Cecotec Innovations hereby declares that this product is in compliance with the essential requirements and other relevant provisions of the regulations applicable in the European Union. This product has been designed,
manufactured and tested in compliance with the required safety and quality standards. The full text of the EU Declaration of Conformity can be found at the following web address: https://cecotec.es/es/information/declaration-of-conformity
1. PIÈCES ET COMPOSANTS
Img. 1
EU01_113689, EU01_113690, EU01_113691, EU01_113692, EU01_113693,
EU01_113694, EU01_113694, EU01_113695, EU01_113696, EU01_113697,
EU01_113698, EU01_113699, EU01_113700, EU01_113701, EU01_113702,
EU01_113703, EU01_113704, EU01_113705, EU01_113706, EU01_113707,
EU01_113708, EU01_113709, EU01_113710, EU01_113711, EU01_113712.
Ürün: Piccolina 200, Piccolina 400, Piccolina 600, Piccolina 900, Piccolina 200
Bej, Piccolina 400 Bej, Piccolina 600 Bej, Piccolina 900 Bej, Piccolina 200 Yeşil, Piccolina 400 Yeşil, Piccolina 600 Yeşil, Piccolina 900 Yeşil, Piccolina 200 Mavi, Piccolina 400 Mavi, Piccolina 600 Blue, Piccolina 900 Blue, Piccolina 200 Red, Piccolina 400 Red, Piccolina 600 Red, Piccolina 900 Red, Piccolina 200 Bronze, Piccolina 400 Bronze, Piccolina 600 Bronze, Piccolina 900 Bronze, Piccolina 200 Gold, Piccolina 400 Gold, Piccolina 600 Gold, Piccolina 900 Gold.
Fig./Img./Abb./Afb./Rys.1
1
2

3

4

5

6

Fig./Img./Abb./Afb./Rys. 2
www.cecotec.es


Brand : CECOTEC
Model : Piccolina 400 A01 Eu01 113686
Category : Coffee maker