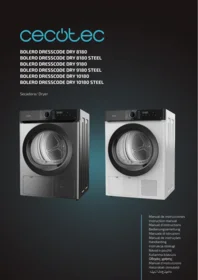
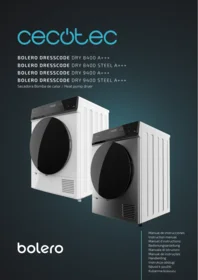
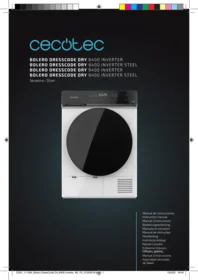
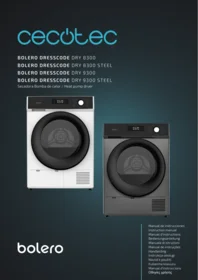
Bolero Dresscode Dry 8180 Steel - Tumble dryer CECOTEC - Free user manual and instructions
Find the device manual for free Bolero Dresscode Dry 8180 Steel CECOTEC in PDF.


| Product type | Heat pump dryer |
| Brand | Cecotec |
| Model | Bolero Dresscode Dry 8180 Steel |
| Maximum load capacity | 8 kg |
| Energy efficiency class | A++ |
| Annual energy consumption | 235 kWh |
| Noise level | 65 dB |
| Drum type | Stainless steel |
| Number of programs | 15 |
| Special programs | Wool, Synthetic, Cotton, Sport, Quick 30 min, Anti-allergy, Steam |
| Steam function | Yes, refreshes and removes wrinkles |
| Display | LED display |
| Delayed start | Yes, up to 24 hours |
| Moisture sensor | Yes, automatic stop when dry |
| Child safety | Yes, key lock |
| Lint filter | Easy cleaning, located on the door |
| Self-cleaning condenser | Yes, 3D Care system |
| Dimensions (H x W x D) | 85 x 60 x 58 cm |
| Net weight | 42 kg |
| Power supply type | 220-240 V, 50 Hz |
| Connection power | 800 W |
| Power cable length | 1.5 m |
| Repairability (index) | 7.5 / 10 |
Frequently Asked Questions - Bolero Dresscode Dry 8180 Steel CECOTEC
User questions about Bolero Dresscode Dry 8180 Steel CECOTEC
0 question about this device. Answer the ones you know or ask your own.
Ask a new question about this device
Download the instructions for your Tumble dryer in PDF format for free! Find your manual Bolero Dresscode Dry 8180 Steel - CECOTEC and take your electronic device back in hand. On this page are published all the documents necessary for the use of your device. Bolero Dresscode Dry 8180 Steel by CECOTEC.
USER MANUAL Bolero Dresscode Dry 8180 Steel CECOTEC
Safety instructions 12
-
Parts and components 119
-
Before use 119
-
Installation 120
-
Operation 121
-
Cleaning and maintenance 126
-
Troubleshooting 127
-
Recycling of electrical and electronic equipment 129
-
Copyright 129
-
Simplified EU Declaration of Conformity 129
SOMMAIRE
EN • The coding in this manual is generic and applies to all code variants of the appliance.
Read the following instructions carefully before using the appliance. Keep this instruction manual for future reference or new users.
| Symbol | Type | Meaning |
 | WARNING | Risk of serious injury or death |
 | RISK OF ELECTRIC SHOCK | Dangerous voltage |
| [2C0Z] | FIRE | Warning: Risk of fire/ flammable materials |
 | CAUTION | Risk of injury or damage to property |
 | IMPORTANT/NOTE | Information on the correct operation of the system |
 | Read the instructions | |
 | Hot surface | |
- This user manual contains information on safety and important instructions related to the use and maintenance
of the appliance. Take all the time you need to read this user manual before using the appliance and keep it in case you need to check it in the future or for new users.
- Each dryer has been tested by a quality control before commercialisation, guaranteeing its conditions of use.
- The warnings contained in this instruction manual do not cover all possible risks that may occur. Caution and care must be exercised during installation, maintenance and operation of the dryer.
- This symbol means: CAUTION! Read the instruction manual before using the appliance.
- This icon means: CAUTION! Risk of fire.

- Children under 3 years old must stay away, unless they are supervised.
- This appliance is intended for domestic use only and is not suitable for use in commercial establishments such as bars, restaurants, farms, hotels, motels, and offices.
- Use this appliance only for clothes whose care label specifies they are suitable for dryer.
- Cecotec is not liable for damage caused by improper use or transport.
- The appliance must only be installed and repaired by Cecotec's Official Technical Support Service or by an authorised repair agent. Cecotec is not liable for damage caused by repairs by unauthorised personnel.
- WARNING: Never spray or pour water inside the dryer to clean it. There is a risk of electric shock.
- Do not let any animal near the dryer.
- Fabric softeners or similar products should be used according to the manufacturer instructions.
- Remove all the objects from the pockets: lighters, matches,
etc.
- The appliance should not be installed behind a lockable door, a sliding door or a hinged door on the opposite side of the dryer door in such a way as to prevent the dryer
door from being fully opened. - WARNING: Keep ventilation openings in the appliance housing or built-in structure clear of obstruction.
- Install the dryer on a flat and stable surface.
- Do not install the tumble dryer in rooms with humidity, such as bathrooms, or outdoors.
- Run the dryer in an environment free from dust with good air ventilation.
- Once the dryer is installed, the connections must remain intact. When installing the tumble dryer, ensure the rear surface is not pressed against any objects (tap, socket, etc.).
- The operating temperature of the dryer ranges from +5°C to +35°C. When operating at temperatures outside this range, performance may be adversely affected and the appliance may be damaged. If the room temperature is below 0 °C, the dryer may be damaged by freezing.
- Be careful when transporting the tumble dryer. Always wear safety gloves.
- Do not place the dryer on the power cable.
- Do not place hot and heavy objects on top of the dryer.
- Do not misuse it, do not stand, sit or place any heavy object on the door of the dryer.
- Do not attempt to open the door while the dryer is in operation as there is a risk of burns. Do not leave the door open, as it could cause accidents.
- The tumble dryer door must only be opened after the drying programme has been completed. Do not force the
controls.
- The dryer must only be used for its intended purpose as described in this manual.
- Do not use the tumble dryer if any parts are missing or broken or if any protections or panel have been removed.
- Do not touch the plug with your hands wet. Always pull the plug to disconnect the appliance, otherwise you may suffer an electric shock.
- Do not use the dryer with wet hands or wet bare feet.
- Unplug the dryer if it will not be used for a considerable period of time and during installation, maintenance, cleaning and repair work. Failure to do so may damage the dryer.
- The socket must always be accessible after the installation.
- Check the power cable regularly for visible damage. If the power cord is damaged, it must be replaced by Cecotec's Official Technical Support Service or similar qualified personnel to avoid risks.
- A damaged cord/plug may cause a fire or electric shock. When damaged, it must be replaced. This should only be carried out by qualified personnel, Cecotec or the after-sales service, in order to avoid danger.
- To prevent any risk of fire or electric shock, do not use extension leads, multi-socket adapters or adapters to connect the dryer to the mains.
- When the dryer is in operation, do not unplug the power cable. When not in use, it is advisable to disconnect the plug, do not pull the power cable. Do not touch the power cable or plug with wet hands.
- This appliance can be used by children aged 8 and above and people with reduced physical, sensory, or mental
capabilities or lack of experience and knowledge, as long as they have been given supervision or instruction concerning the use of the appliance in a safe way and understand the hazards involved. Children shall not play with the appliance. Cleaning and user maintenance of this appliance should not be carried out by children without supervision.
- Keep the packaging material out of the reach of children.
- Do not let unattended children come near the machine. Children could get trapped inside the appliance, which could lead to death.
- Keep children away from the machine while in use. The surface becomes extremely hot and could cause damage in the skin.
- Keep the cleaning material out of the reach of children. If detergent or cleaning materials are swallowed or come into contact with your skin or eyes, poisoning and irritation may occur.
- Do not allow children to seat or climb on or inside the product.
Product safety
- Due to the risk of fire, NEVER introduce in the dryer the following garments:
o Do not load unwashed garments.
o Garments that have been stained with substances such as cooking oil, acetone, alcohol, petrol, paraffin, stain removers, turpentine, waxes or wax removers, must be washed in hot water with an extra amount of detergent before tumble drying.
o Cleaning cloths and mats containing residues of flammable cleaning agents, acetone, gases, petrol,
gasoline, stain removers, turpentine, waxes, wax removers, dry cleaning solvents or chemicals.
o Garments with residues of hairspray, nail varnish remover and similar substances.
o Garments that have been used for cleaning with industrial chemicals (as in chemical cleaning).
o Garments containing parts or accessories with any type of foam, sponge, rubber or rubber-like material, such as latex foam sponges, shower caps, waterproof fabrics, custom-made clothing and foam pillows.
o Garments with padding or damaged parts (pillows or jackets). Foam released from these garments could cause a fire during the drying process.
- Using the dryer in environments containing flour or coal dust may cause an explosion.
- Wet clothes can only be dried in the tumble dryer after being spin-dried, i.e., they must not be dripping water that could drip onto electrical components and damage the tumble dryer, causing a potential hazard.
- It is not advisable to load woollen fabrics or garments or leather materials. Fleece and leather can be damaged and wool can shrink and lose shape.
- Do not dry garments whose care labels show: do not tumble dry, hang to dry, drip dry, dry at room temperature.
- Try to distribute garments evenly within the drum to facilitate drying and avoid noise.
- It is advisable to use garments of similar fabrics in each drying cycle.
- When the tumble dryer is in operation, do not use flammable sprays nearby. If a gas leak occurs, do not connect or disconnect the plug or switch on the appliance.
- Do not store cigarettes, lighters, dry ice or other
flammable and/or explosive materials inside the tumble dryer.
- ATTENTION: Underwear with metal reinforcements should not be put in the dryer. Damage to the dryer may occur if the metal reinforcements become detached or lost during drying.
Correct use
- ATTENTION: Make sure that no animals enter the dryer. Check the interior of the dryer before use.
- ATTENTION: Never stop the dryer before the end of the drying cycle unless all items are quickly removed and spread out to dissipate the heat.
- WARNING: the appliance must not be supplied through an external switching device, such as a timer, or connected to a circuit that is regularly switched on and off.
- ATTENTION: Overheating of the laundry inside the dryer may occur if you cancel the programme or in case of an electrical failure during the operation of the dryer. This heat concentration may cause combustion, so ensure laundry is promptly removed from the dryer to spread out and dissipate heat.
- Operate the appliance only for domestic use and for drying fabrics labelled as suitable for tumble drying. Any use other than that for which it is intended is prohibited.
- In case of commercial use, the warranty will be void.
- Do not lean or sit on the dryer door. The dryer could tip over.
- ATTENTION: Never operate the dryer without the filter or with a damaged filter.
- You must not allow lint to accumulate around the tumble dryer.
INSTRUCTIONS DE SÉCURITÉ
- Power cord
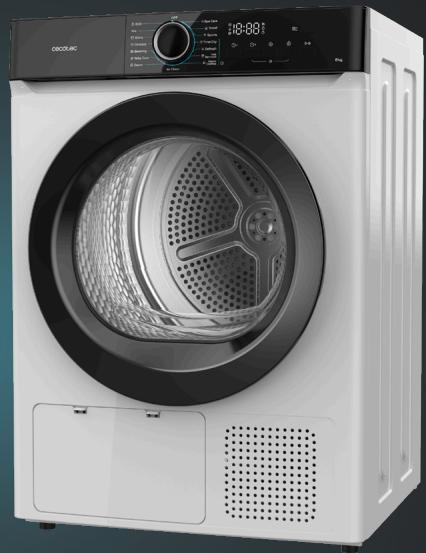
- Control panel
- Door
- Water tank
- Drum
- Drum filter
- Fan cover plate
- Lower filter cover
Note:
The graphics in this manual are schematic representations and may not exactly match the product.
2. BEFORE USE
- This appliance comes in a packaging designed to protect it during transport. Remove the appliance from its box. You can keep the original box and other packaging materials in a safe place to prevent damage to the appliance if you need to transport it in the future. If you wish to dispose of the original packaging, make sure all items are recycled properly.
- Check that all parts and components are included and in good condition. If any of them are missing or damaged, please contact Cecotec's Official Technical Support Service immediately.
Box content:
- Tumble dryer
- Shoe drying accesory
- External drain pipe assembly
- Instruction manual
- Do not remove the product's serial number in order to keep proper traceability if technical assistance is required.
3. INSTALLATION
- It is recommended to place the dryer and washing machine close to each other, so that the clothes can dry after washing and spinning.
- To avoid blocking the fan cover due to dust accumulation, the dryer should not be placed in a dusty location.
- Please remove all packaging from the dryer and place it on a firm, flat surface, not on a blanket or stand.
- When installing, adjust the feet so that the dryer is horizontal. Do not fill the space between the feet and the floor with thick carpets or wooden strips, so as not to interfere with the operation of the machine.
- Please note that the installation position must be at least 5 cm away from other furniture or walls.
Level adjustment
- When adjusting the feet, place the clothes dryer horizontally.
- The height can be adjusted by turning the feet.
- You can use tools to adjust the height of the clothes dryer feet. Fig. 2
Note: Please choose a screwdriver with a diameter of less than 4.5 mm as a tool for adjusting the feet.
Power connection
- Make sure that the power complies with the requirements on the clothes dryer's electrical rating plate.
- Do not use power strips or universal plugs for a secondary connection.
External drain hose installation
(Install if necessary; if not installed, use the water tank)
- Pull the upper drain pipe downward.
- Connect the upper drain pipe to the external drain pipe.
- Attach the external drain pipe to the buckle.
- Place the external drain pipe into the sink or floor drain.
(Note: Do not bend the external drain pipe).
ENGLISH
Fig. 3
- Buckle
- You can connect the drain pipe to the faucet with a rope or similar, to prevent water from spilling out of the sink.
Caution: Make sure all pipes are clear!
Shoe drying accessory installation
This special shoe accessory facilitates fast and gentle drying of shoes.
To install it:
- First attach the steel bracket following the instructions in step 2.
- Then mount the plastic bracket on the steel bracket, making sure that it fits correctly into the groove of the front bracket.
Fig. 4
- Bracket groove
- Filter screen
4. OPERATION
Quick start guide
Note: Before using the machine, make sure that it has been installed correctly following the installation instructions.
Step 1: Preparation for drying clothes
- Plug in the power cord.
- Put the clothes in the dryer.
- Close the door.
Step 2: Start drying
- Switch on the appliance.
- Press this icon to select the desired programme.
- Set the parameters or functions.
- Press "Start".
Step 3: Completion of drying
When drying is finished, the dryer will beep or display "End" on the screen.
-
Open the door and remove the laundry.
-
Remove the water storage tank.
- Empty water inside the tank.
- Clean the filter screen (there are two filters).
- Disconnect the power supply.
Notes:
If you use a plug with a switch, turn off the power by pressing the switch directly.
- When emptying the water from the water tank, do so directly without opening other parts.
Control panel
Fig. 5
Start/Stop
Turn the rotary knob to start the dryer. To turn it off, turn the knob to select OFF.
Delay Start

Touch the Delayed Start button to set the delayed start time. Touch it again to select the delay time and then touch "Start/Stop" to start (the corresponding light icon will illuminate).
The time must be selected after selecting the programme and before touching "Start/Stop". Once the delay has started, all icons, except "Start/Stop", become inactive.
Dry Level

Touch the drying level button to select the degree of drying you want to apply. The different programmes have different setting ranges. The dryness level cannot be selected in timed programmes.
There are 4 drying levels:
· L0 (Drying for ironing): Clothes remain slightly damp to facilitate ironing.
L1 (Normal drying): The clothes come out dry and ready to use directly.
L2 (additional drying): more drying than the previous level, the clothes are completely dry, perfect for storing them directly in the closet.
L3 (reinforced drying): For very thick, multi-layered or difficult to dry garments (such as towels, bathrobes or bed linen) that need additional drying.
Time-, Time+


These buttons are used to adjust the drying time of the laundry. It can only be used with the following programmes: Time Dry, Refresh, Hair Removal and Warm Clothes, the function of which is explained below.
ENGLISH
KidLock

To prevent children from tampering with the machine during operation, the child lock function can be activated.
During operation, press the add time and Delay Start icons to activate the lock; the indicator light will turn on.
Touch them again to deactivate the lock, and the indicator light will go out.
In the locked state, all icons are inactive.
Anti-crease function

This function is to avoid wrinkles when laundry accumulates after drying.
To use it, you must select it before starting the drying cycle by pressing the corresponding icon (you will know that it is activated since the corresponding indicator light will illuminate).
Once activated, the function will start automatically at the end of the programme.
The anti-wrinkle time is 180 minutes and is performed every 10 minutes.
Introduction to other functions
Filter Display Indicator

Notifies the user to clean the filter screen.
Water tank indicator

Notifies the user to empty the water tank.
Add clothes in the middle of cycle
During drying, touch the "Start/Stop" icon to pause the dryer so you can open the door to add or remove clothes from the dryer.
Programme completion
- When the programme is finished, if there are no alarms, "End" will be displayed, and music will play to alert the user.
- If the user does not perform any action within 10 minutes, the machine will automatically switch to wrinkle prevention mode, to prevent the clothes from wrinkling.
- After completing the Anti-wrinkle part of the function, the machine will automatically turn off. In the "End" state, if the door is opened, the machine will go directly into the shutdown state and emit a warning.
Functions and programmes
| Name | Rated capacity (kg) | Description |
| OFF | -- | Dryer off. |
| ECO | 8,0/ 9,0/ 10,0 | Efficient drying for cotton garments. |
| Mix | 4.0/ 4.5/ 5.0 | Ideal for blends of cotton and synthetic fibres. |
| Shirts | 1.0 | Special for drying shirts. |
| Delicate | 3.0 | For silk and other heat sensitive garments. |
| Bedding | 4.0/ 4.5/ 5.0 | Suitable for sheets and heavy loads. |
| Baby Care | 1.0 | Gentle drying for baby clothes. |
| Down | 1.5 | Ideal for coats and down comforters. |
| Air Clean | Small | Drying with warm air temperature. |
| Hygiene | ≤3.0 | For clothes that have been stored for a long time, perform a sterilization treatment. |
| Towel | 3.0 | Optimal drying for towels. |
| Sports | Small | For breathable clothing, such as sportswear |
| Time Dry | -- | Standard and medium temperature drying, with user-selectable drying time |
| Refresh | Small | Deodorizes and freshens garments, with user-selectable drying time |
| Hair Removal | Small | Cleans lint from garments, with user-selectable drying time |
| Warm clothes | Small | Heats laundry, with user-selectable drying time |
Notes:
- The above programmes are recommended, but users can choose the ones that suit their personal habits. If the laundry is not completely dry, they can opt for the time-adjustable programme to continue drying.
- In programmes for which the time can be set by the user, the degree of humidity is not automatically detected. If the laundry is still wet at the end of the programme, repeat the process or adjust the drying time until the laundry is dry.
- Large fabrics, such as sheets or curtains, tend to curl as they dry. If this occurs, stop the dryer, remove the fabrics, shake them out and place them back in the dryer to continue drying.
- When drying down coats, turn the inside of the garment inside out before drying.
ENGLISH
- The start time is the default value. During operation, factors such as temperature, ambient humidity, and the type and weight of the laundry can influence drying time. The humidity sensor automatically adjusts the time as needed, so it is normal for the time on the LED display to vary.
- The programme with the icon indicates that it is a timer programme (user selectable time) and will stop at the end of the running time.
Preparations before drying clothes
Note:
After moving the machine, leave it in an upright position for at least 2 hours before use. Clean the inner drum with soft cloth strips before the first use.
a) Place some fabric strips on the inner cylinder.
b) Connect the machine to the power supply and turn it on.
c) Select the Time Dry programme and touch the start/pause icon.
d) At the end of the programme, clean the filter.
! During dryer operation, the compressor and drain pump may generate sounds, which is normal.
Basic knowledge and use of the clothes dryer
- Remove as much water as possible from the clothes before placing them in the dryer. The drier it is at the start, the more time and energy will be saved.
- Shake out clothes and close zippers and buttons before placing them in the dryer. To reduce noise, turn clothes inside out.
- Clean the filter before starting the dryer.
- Select the appropriate drying programme according to the type of material and the care label.
- For optimal drying, sort the laundry and avoid mixing items of different thicknesses or moisture levels.
- For small loads of laundry, it is recommended to use the adjustable time programme.
- When drying sheets, curtains and other large fabrics, if they clump together, stop the dryer, shake them out and continue drying.
- Use fabric softener during washing for garments that need to be tumble dried.
- Some heavy garments (such as jeans and large towels) may not dry evenly. If they are still damp at the end of the programme, use the Time Dry programme to adjust the drying time.
5. CLEANING AND MAINTENANCE
Emptying the water tank
Fig. 6.
- Hold the tank with both hands and remove it.
- Pour the water out of the basin.
- Place the compartment back in its original position.
⚠Warnings:
- Clean the water tank after each use. If it fills up during drying, the programme will pause and the tank light on the display will come on. Empty the tank and press "Start/Stop" to restart the dryer.
- Condensed water is not drinkable!
- Do not use the dryer without the water tank.
Cleaning the filter assembly
The machine can have one or two filters, depending on the model. They must be cleaned after each use.
Drum filter cleaning
Fig. 7
- Open the door and remove the filter from the drum.
- Open the filter and clean it.
- Place the filter back in its original position.
Cleaning steps:
- Clean the filter and vent, remove accumulated lint and rinse under running water or use a soft brush.
- Make sure the filter is completely dry before reinstalling it.
!WARNINGS
- Too much lint on the filter screen will block air circulation, which will delay drying time and increase energy consumption.
- Do not use the dryer if there is no filter screen.
- Clean the filter screen after each use.
ENGLISH
Heat exchanger cleaning
Fig. 8
Recommendation: Clean the heat exchanger at least once a month or as needed.
- Open the filter hatch in the lower left corner of the machine.
- Turn the programme knob and remove the lower filter screen.
- Use a soft brush to clean the exchanger.
- Once cleaned, return the filter screen, knob and damper to their original positions.
Notes:
- Do not press hard when cleaning the heat exchanger, as this may damage the heat exchanger.
- Unplug the dryer before cleaning.
- Clean the dryer drum regularly.
⚠Warnings:
- Be sure to unplug the dryer before cleaning.
- Wear gloves to protect your hands during cleaning.
- To clean the surface and other parts of the dryer, use a damp cloth with clean water.
Avoid damaging plastic surfaces. - Do not use hoses or high-pressure water guns to clean the dryer.
General cleaning
- Use a damp cloth with clean water.
- Carefully clean the door, paying attention to the internal windows.
- Clean the sealing ring around the door.
- Clean the moisture sensor inside the drum. Fig. 9
Fig. 9 key
-
Humidity sensor (2 iron plates)
-
Remove any lint from the air duct.
- Before turning the machine back on, be sure to dry it with a soft cloth.
Note: The moisture sensor is located inside the tumbler drum of the clothes dryer, under the loading door.
Do not clean the drum with corrosive detergents or scratch the humidity sensors.
6. TROUBLESHOOTING
Only authorized service technicians are allowed to repair the clothes dryer.
Before contacting the Cecotec Technical Assistance Service, check if you can solve the problem yourself or if the machine is being used correctly.
| Problem | Possible cause | Possible solution |
| The screen does not display any content. | The power supply is disconnected or the plug is defective. | Check that the plug and power supply are in good condition and that the switch is turned on. |
| The dryer will not start. | The door is not properly closed or a programme has not been selected. | Make sure the door is properly closed. Verify that you have selected a programme and press “Start/Stop”. |
| The door opens automatically. | The zipper is not locked or there are too many clothes. | Make sure the zipper is securely locked and check for excess clothing. |
| Drying is not adequate or takes too long. | Filters are dirty or ventilation is obstructed. | Clean the drum and bottom filters. Use a suitable drying programme and make sure that the ventilation is clear. |
Error codes
| Error code | Cause | Solution |
| OE | Water tank full or drain pump failure. | Empty the tank. If the problem persists, contact Cecotec's Official Technical Support Service. |
| dE | Door not properly closed. | Make sure to close the door securely. If the problem persists, contact Cecotec's Official Technical Support Service. |
| LE | Dirty filter or motor failure. | Clean the filter. If the problem persists, contact Cecotec's Official Technical Support Service. |
| HE | Compressor failure | Contact Cecotec's Official Technical Support Service. |
| tE1 | Abnormal temperature in the front air duct. | Switch off the machine and contact Cecotec's Official Technical Support Service. |
| tE2 | Abnormal condenser temperature. | |
| SE | Moisture sensor failure |
ENGLISH
Notes:
- If the water tank symbol ☐ appears during operation of the machine, check whether the water tank is full. If so, empty it and restart the machine. If not, simply restart it.
- If the filter symbol 📋 appears during machine operation, check whether the drum filter and the bottom filter are full. If the filter is full of lint, clean it and restart the machine; otherwise, simply restart it.
7. RECYCLING OF ELECTRICAL AND ELECTRONIC EQUIPMENT
This symbol indicates that, according to the applicable regulations, the product and/or battery must be disposed of separately from household waste. When this product reaches the end of its shelf life, you should dispose of the batteries/accumulators and take them to a collection point designated by the local authorities.
For detailed information on how to properly dispose of electrical and electronic
equipment and/or the corresponding batteries, consumers should contact their local authorities.
Compliance with the above guidelines will help protecting the environment.
Information regarding national packaging recycling systems and their marking can be found on our website.
8. COPYRIGHT
The intellectual property rights over the texts in this manual belong to CECOTEC INNOVACIONES, S.L. All rights reserved. The content of this publication may not, either in part or in its entirety, be reproduced, stored in a retrieval system, transmitted or distributed by any means (electronic, mechanical, photocopying, recording or similar) without prior authorisation from CECOTEC INNOVACIONES, S.L.
9. SIMPLIFIED EU DECLARATION OF CONFORMITY
CE Cecotec Innovaciones hereby declares that this appliance complies with the essential requirements and other relevant provisions of the regulations applicable in the European Union. This appliance has been designed, manufactured and tested in compliance with required safety and quality standards. The full text of the EU Declaration of Conformity can be found on the following website: https://cecotec.es/es/information/declaration-of-conformity
1. PIÈCES ET COMPOSANTS
Image 1
6. PROBLEEMOPLOSSING
! Alleen erkende servicetechnici mogen de wasdroger repareren.
Fig./Img./Abb./Afb./Rys.1

Fig./Img./Abb./Afb./Rys. 2

Fig./Img./Abb./Afb./Rys. 3

Fig./Img./Abb./Afb./Rys. 4

Fig./Img./Abb./Afb./Rys. 5
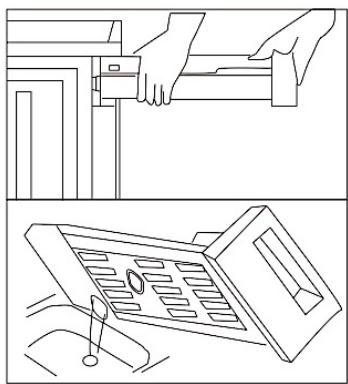
Fig./Img./Abb./Afb./Rys. 6

Fig./Img./Abb./Afb./Rys. 7

Fig./Img./Abb./Afb./Rys. 8
www.cecotec.es
- SOMMAIRE
- Product safety
- Correct use
- INSTRUCTIONS DE SÉCURITÉ
- Note:
- BEFORE USE
- Box content:
- INSTALLATION
- Level adjustment
- Power connection
- External drain hose installation
- ENGLISH
- Fig. 3
- Shoe drying accessory installation
- To install it:
- Fig. 4
- OPERATION
- Quick start guide
- Step 1: Preparation for drying clothes
- Step 2: Start drying
- Step 3: Completion of drying
- Notes:
- Control panel
- Start/Stop
- Delay Start
- Dry Level
- Time-, Time+
- KidLock
- Anti-crease function
- Introduction to other functions
- Filter Display Indicator
- Water tank indicator
- Add clothes in the middle of cycle
- Programme completion
- Preparations before drying clothes
- Basic knowledge and use of the clothes dryer
- CLEANING AND MAINTENANCE
- Emptying the water tank
- Fig. 6.
- ⚠Warnings:
- Cleaning the filter assembly
- Drum filter cleaning
- Fig. 7
- Cleaning steps:
- !WARNINGS
- Heat exchanger cleaning
- Fig. 8
- General cleaning
- Fig. 9 key
- TROUBLESHOOTING
- RECYCLING OF ELECTRICAL AND ELECTRONIC EQUIPMENT
- COPYRIGHT
- SIMPLIFIED EU DECLARATION OF CONFORMITY
- PIÈCES ET COMPOSANTS
- Image 1
- PROBLEEMOPLOSSING
Brand : CECOTEC
Model : Bolero Dresscode Dry 8180 Steel
Category : Tumble dryer