
MS-50G - Guitar effect pedal ZOOM - Free user manual and instructions
Find the device manual for free MS-50G ZOOM in PDF.


| Product type | Guitar effect pedal |
| Brand | ZOOM |
| Model | MS-50G |
| Dimensions | 130.3 x 77.5 x 58.5 mm (depth x width x height) |
| Weight | 350 g |
| Power supply | DC 9 V (center negative) 500 mA power adapter (ZOOM AD-16) or 2 AA alkaline batteries (battery life ≈ 7 hours) |
| Effect types | 55 types (compressor, overdrive, distortion, modulation, delay, reverb, etc.) |
| Max number of simultaneous effects | 6 |
| Patch memories | 50 |
| Display | Backlit LCD |
| Sampling frequency | 44.1 kHz |
| A/D and D/A conversion | 24-bit with 128x oversampling |
| Signal processing | 32-bit floating point and 32-bit fixed point |
| Frequency response | 20 Hz - 20 kHz (+1 dB / -3 dB) |
| Input | Standard mono phone jack (1 MΩ impedance) |
| Outputs | Standard mono phone jack (MONO) and stereo output (L/MONO, R) |
| USB connectivity | Firmware update |
| Main functions | Chromatic tuner, tap tempo, automatic setting saving, power management, effect selection by category, editable effect chain |
| Cleaning | Soft dry cloth; if necessary, slightly damp cloth, well wrung out |
| Safety | Use only the ZOOM AD-16 adapter; do not open the housing; use in a temperate and dry environment |
| Repairability | Spare parts not specified; contact ZOOM customer service in case of failure |
| Included accessories | Not specified (user manual available online) |
Frequently Asked Questions - MS-50G ZOOM
User questions about MS-50G ZOOM
0 question about this device. Answer the ones you know or ask your own.
Ask a new question about this device
Download the instructions for your Guitar effect pedal in PDF format for free! Find your manual MS-50G - ZOOM and take your electronic device back in hand. On this page are published all the documents necessary for the use of your device. MS-50G by ZOOM.
USER MANUAL MS-50G ZOOM
Thank you very much for purchasing the ZOOM MS-50G.
Please read this manual carefully to learn about all the functions of the MS-50G so that you will be able to use it fully for a long time.
Keep this manual in a convenient place for reference when necessary.
- A printed list of effect parameters is not included with the MS-50G.
Please download a copy from the ZOOM website. http://wwwzoomo.co.jp/downloads/
If the MS-50G is not used for 10
hours, it will turn off automatically
by default.
If you want the power to stay ON all the time, please see "4 To set the Power Management function" on page 19 and set the value to OFF.
Contents
Usage and Safety Precautions 3
Part Names 4
Turning the Power ON 6
Adjusting Effects 8
Selecting and Saving Patch Memories 10
Changing Patch Memories with the Footswitch ... 11
Using 2 or More Effects 12
Using the Tuner 14
Tapping the Tempo 16
Changing Various Settings 18
Updating the Firmware 23
Effect Types 24
Restoring the MS-50G to its Factory Default Settings... 28
Troubleshooting 29
Specifications 30
Tuner Types 31
Terms used in this manual
Patch memory
The ON/OFF status and the parameter settings of each effect are stored as "patch memories." The MS-50G can store 50 patch memories.
Effect unit
The MS-50G can use between 1 and 6 effects at a time and you can change the number used as you like. Each one of these is called an "effect unit."
Copyrights
All other trademarks, product names and company names mentioned in this documentation are the property of their respective owners. Note: All trademarks and registered trademarks mentioned in this manual are for identification purposes only and are not intended to infringe on the copyrights of their respective owners.
SAFETY PRECAUTIONS
In this manual, symbols are used to highlight warnings and cautions that you must read to prevent accidents. The meanings of these symbols are as follows:

Warning
Something that could cause serious injury or death.

Caution
Something that could cause injury or damage to the equipment.
Other symbols

Required (mandatory) actions

Prohibited actions

Warning
Operation using an AC adapter
Use only a ZOOM AD-16 AC adapter with this unit.
Do not use do anything that could exceed the ratings of outlets and other electrical wiring equipment.
Operation using batteries
Use 4 conventional 1.5-volt AA batteries (alkaline or nickel-metal hydride).
Always close the battery compartment cover when using the unit.
Alterations
Never open the case or attempt to modify the product.

Precautions
Product handling
1 Do not drop, bump or apply excessive force to the unit.
1 Be careful not to allow foreign objects or liquids to enter the unit.
Operating environment
Do not use in extremely high or low temperatures.
Do not use near heaters, stoves and other heat sources.
Do not use in very high humidity or near splashing water.
Do not use in places with excessive vibrations.
Do not use in places with excessive dust or sand.
AC adapter handling
When disconnecting the AC adapter from an outlet, always pull the body of the adapter itself.
Battery handling
Install the batteries with the correct +/- orientation.
Use a specified battery type. Do not mix new and old batteries or use the same battery type in all of the units. The unit for an extended period of time, remove the batteries from the unit.
If a battery leak should occur, wipe the battery compartment and the battery terminals carefully to remove all battery residue.
Connecting cables with INPUT and OUTPUT jacks
Always turn the power OFF for all equipment before connecting any cables.
Volume
Do not use the product at a loud volume for a long time.
Usage Precautions
Cleaning
Use a soft cloth to clean the panels of the unit if they become dirty. If necessary, use a damp cloth that has been wrung out well.
Malfunction
If the unit becomes broken or malfunctions, immediately disconnect the AC adapter, turn the power OFF and disconnect other cables. Contact the store where you bought the unit or ZOOM service with the following information: product model, serial number and specific symptoms of failure or malfunction, along with your name, address and telephone number.
DC9V AC adapter jack
To power the unit from an outlet, connect an AD-16 adapter here ( P6) .
OUTPUT jacks
Connect to an amp or another effector.
Use the MONO jack for a mono connection.
ON/OFF indicator
Lights when the current effect is ON. Does not light when the effect is OFF ( P8)
Cursor keys ( P5)
USB connector
Use to connect to a computer and update firmware ( P23)
INPUT jack
Connect a guitar.
Display
Shows the currently selected effect and various other screens ( P7)
Parameter knobs
( P5)
Footswitch
Turns the effect shown on the display ON and OFF ( P8)
Press and hold for 1 second to open the Tuner or Tap Tempo ( P14, 16)
Parameter knobs
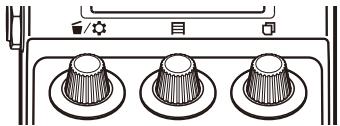
From the left
Parameter knob 1 [ ]
Turn left and right to adjust the parameter.
Press to open the MENU where you can remove and rearrange effects and make various settings ( P12, 18).
You can also check the firmware version ( P22)
Parameter knob 2 [目]
Turn left and right to adjust the parameter.
Press to open the MEMORY screen where you can select and save patch memories, and change patch memories using the footswitch ( P10, 11) .
Parameter knob 3 [ ]
Turn left and right to adjust the parameter.
Press to change the parameter page ( P9)
Cursor keys
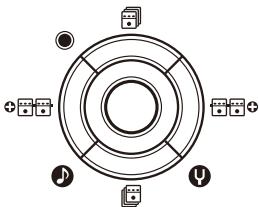
Up and down cursor keys [ ]
Press to change the effect type.
Press and hold for 1 second to select the effect category ( P8)
Left and right cursor keys [0/0]
Press to show the effect to the left or right.
Press and hold for 1 second to add a new effect left or right of the current effect ( P12) .
1 | To turn the power ON
- Lower the amplifier's volume all the way.
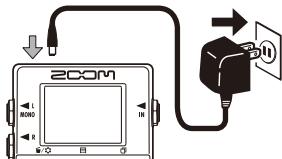
- Power the unit with batteries or an adapter.
Open the cover on the bottom of the unit and insert batteries in the compartment.
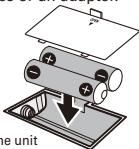
Bottom of the unit
Connect an AD-16 adapter.
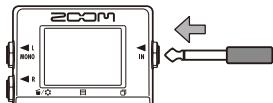
- Plug a guitar cable into the INPUT jack.
HINT
-
When using batteries, the power will turn on when the cable is connected to the INPUT jack.
-
Connect to an amp, then turn the amp on and raise the volume.
2 Display information
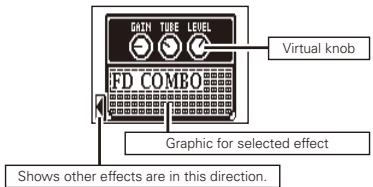
The Home Screen shows the current effect
HINT
- The positions of the virtual knobs change with the parameter values.
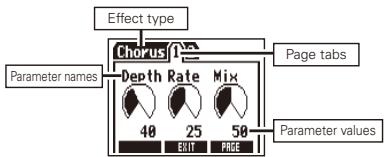
Edit Screen shows parameter being edited
HINT
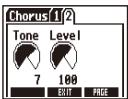
- If there are 4 or more parameters that can be adjusted, multiple page tabs will be shown.
Confirm that the Home Screen is shown.
1 | To turn an effect ON and OFF
Press


OFF


ON
NOTE
- When an effect is ON, the footswitch LED lights.
- When an effect is OFF, the footswitch LED is unlit.
2 | To select an effect type
Press either

HINT
Press and hold to select the effect category. See step 2 of "To add an effect". (See page 12.)
3 To adjust parameters
Turn

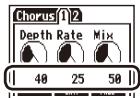
4 | To change the page
Press
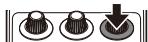

The next page opens.
Effect processing limit
The MS-50G allows you to combine 6 effects as you like. However, if you combine effect types that require great amounts of processing power (amp models, for example), the available processing
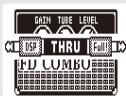
capacity might not be enough. If the processing required for an effect exceeds the available capacity, the effect is bypassed and a "DSP Full!" message appears. This can be avoided by changing 1 or more of the effect types or setting them to THRU.
NOTE
- An effect requires the same amount of processing power whether it is ON or OFF.
HINT
Press and hold the at least 1 second to THRU.

button for
at least 1 second to immediately set an effect to THRU.
Confirm that the Home Screen is shown.
1 | To select a patch memory
When shipped from the factory, the automatic patch memory saving function is active. As soon as a parameter is adjusted this change is automatically saved.
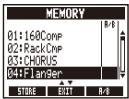
- Open the MEMORY list.
Press

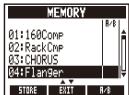
- Select a patch memory.
Turn
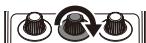
2 To save a patch memory with a new name
- Open the MEMORY list.
Press
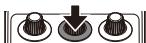
- Select the patch memory to be saved with a new name.
Turn
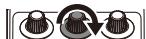

Press

- Change the name and select where to save the patch memory.
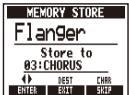
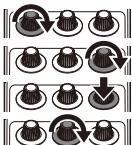
- Turn to move the cursor :
- Turn to change the character :
Press to change the type of character/symbol
Turn to select where to save the patch memory
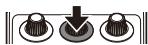
- Save the patch memory with the new name.
Press

Confirm that the Home Screen is shown.
1
To add or remove patch memories to a list that the footswitch cycles through
- Open the MEMORY list.
Press
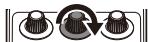
- Select a patch memory to add to or remove from the footswitch (A/B) list.
Turn
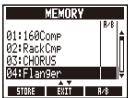
- Add or remove it.
Press

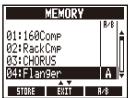
HINT
Press and hold

to remove all patch
memories from the footswitch list.
2
To cycle through patch memories in the list in order using the footswitch
- Open the MEMORY list.
Press
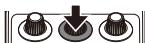
- Change the patch memory.
Press

HINT
- In the example on the right, pressing the footswitch cycles through the patch memories in alphabetical order like this.
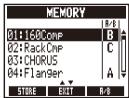
[04:Flanger] [01:160Comp] [02:RackComp] [04:Flanger] [01:160Comp] ...
Confirm that the Home Screen is shown.
1 | To add an effect
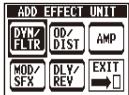
- Open the ADD EFFECT UNIT screen.
Press and hold either

for 1 second
- Select the effect category.
Press any

Press

HINT
- Select EXIT to return to the Home Screen without adding any effect.
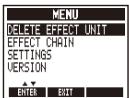
2 | To remove an effect
- Open the MENU.
Press

- Select DELETE EFFECT UNIT.
Turn

Press
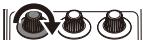
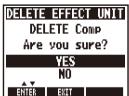
- Select YES.
Turn

Press

3 | To scroll through the effects shown
When multiple effects are in use, scroll to change the visible one.

Press either
Shows the effect number counting from the right.
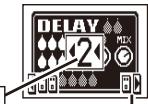
Shows how many effects are in this direction.
4 | To change the order of effects
- Open the MENU.
Press
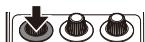
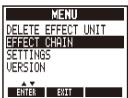
- Select EFFECT CHAIN.
Turn

Press
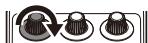

- Select the effect to move and "lift" it.
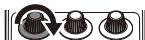
Turn
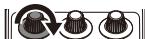
(Select)
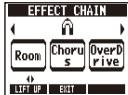

Press

(Lift)
HINT
-
Effects that are OFF appear gray.
-
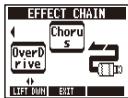
Select the new location for the effect and "drop" it.
Turn
(Select)

Press
(Drop)
- To complete these procedures
Press
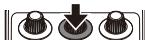
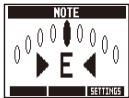
1 | To activate the Tuner
Press and hold

for 1 second
NOTE
- A setting must be changed to make pressing and holding the footswitch activate Tap Tempo. (See page 18.)
2 | To end tuning
Press

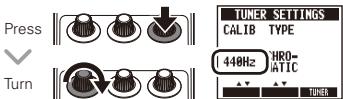
3 | To change the tuner's standard pitch
Confirm that the Tuner Screen is open.
4 | To select the tuner type
Confirm that the Tuner Screen is open.
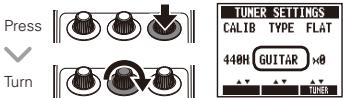
CHROMATIC
The chromatic tuner shows the nearest pitch name (semitone) and how far the input sound is from that pitch.
Other tuner types
Depending on the selected type, the nearest string name and how far the sound input is from that pitch are shown.
Please see the table at the end of this manual for the types that can be selected. (See page 18.)
5 To use a drop tuning
Confirm that the Tuner Screen is open.
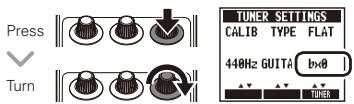
NOTE
- Drop tuning is not possible when the TYPE is set to CHROMATIC.
6 | To tune a guitar
Play the open string that you want to tune and tune it.
Chromatic tuner
The name of the nearest note and the pitch accuracy are shown.
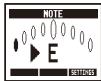
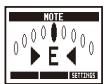
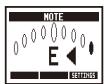
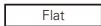
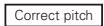
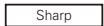
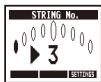
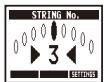
Other tuners
The number of the nearest string and the pitch accuracy are shown.
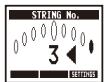
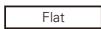
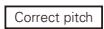
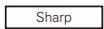
Delay effects and some modulation and filter effects can be synchronized to the tempo. Select an effect that can be synchronized, and set its Time, Rate or other parameter that can be synchronized to a or note value.
The tempo can be set by tapping the footswitch or a knob.
To set the tempo by tapping the footswitch
NOTE
-
By default, when pressed and held, the footswitch is set to activate the Tuner. To tap the tempo with the footswitch, the setting must be changed so that it activates Tap Tempo when pressed and held. (See page 18.)
-
Open the Tap Tempo Screen.
Press and hold

for 1 second
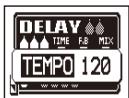
- Tap the footswitch 2 or more times at the desired tempo.
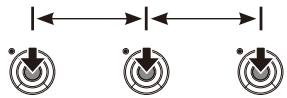

The ON/OFF indicator flashes in time with the tempo.
- Complete the setting.
Press and hold

for 1 second
NOTE
- If you press the footswitch when the effect is ON, the ON/OFF indicator becomes unlit and the effect turns OFF for 1 second.
2 | To tap tempo by hand
- Open an effect that can be synchronized to the tempo on the Home Screen. (See page 8, 24.)
- Open the parameter editing screen.
Press

- Tap the knob 2 or more times at the desired tempo.
Press


The ON/OFF indicator flashes in time with the tempo.
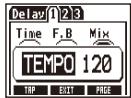
NOTE
- Tempo settings are saved separately for each patch memory.
1 | To change various settings
- Open the MENU.
Press
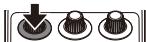
- Select SETTINGS.
Turn

Press
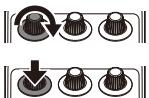
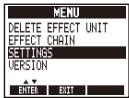
NOTE
These settings are shared by all patch memories.
2
To set the function activated by pressing and holding the footswitch
Set the function activated by pressing the footswitch continuously for 1 second to TUNER or TAPETEMPO.
- Select HOLD FORTUNER/TAP from the SETTINGS menu.
Turn
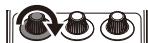
D.

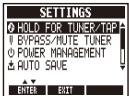
- Set the function activated by pressing and holding the footswitch
Turn
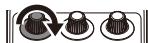
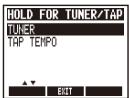
Press
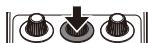
HINT
TUNER: Activates the Tuner (default setting).
- TAP TEMPO: Activates Tap Tempo.
3 | To set the tuner mode
- Select BYPASS/MUTE TUNER from the SETTINGS menu.
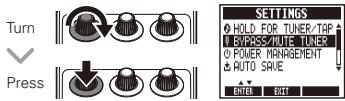
- Set the tuner mode
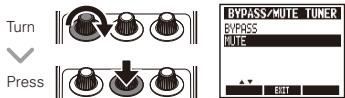
HINT
- BYPASS: The effects are bypassed when the tuner is being used.
- MUTE: The output is muted when the tuner is being used.
4
To set the Power Management function
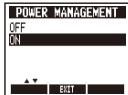
- Select POWER MANAGEMENT from the SETTINGS menu.
Turn
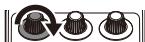
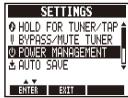

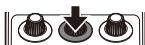
Press
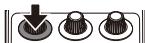
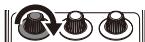
- Set the Power Management function.
Turn

Press
HINT
- ON (default): The Power Management function is enabled. If left unused for 10 hours, it turns off automatically.
OFF:The Power Management function is disabled.
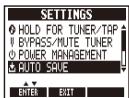
5 | To set the Auto Save function
- Select AUTO SAVE from the SETTINGS menu.
Turn
Press
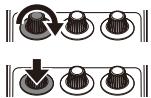
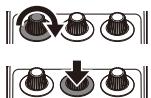
- Set the Auto Save function.
Turn

Press
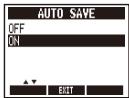
HINT
- ON (default): Changes to presets are automatically saved.
- OFF: Changes to preset are not saved until they are saved manually. (See page 10.)
6 | To select the battery type
- Select BATTERY TYPE from the SETTINGS menu.
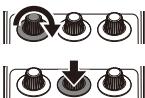
Turn
Press
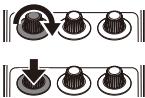
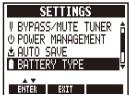
- Set the type of batteries used.
Turn

Press
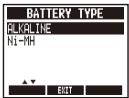
HINT
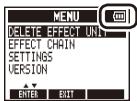
- You can confirm the remaining battery charge on the MENU.
- Low Battery! appears when the batteries need to be changed.
7
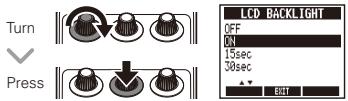
To set the amount of time until the backlight dims
- Select LCD BACKLIGHT from the SETTINGS menu.
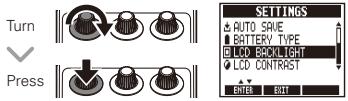
- Set the amount of time until the backlight dims.
8
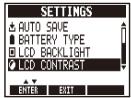
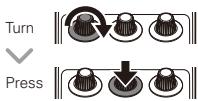
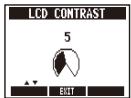
To adjust the display contrast
- Select LCD CONTRAST from the SETTINGS menu.
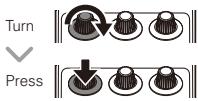
- Adjust the display contrast.
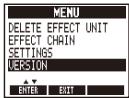
9 | To view the firmware versions
- Open the MENU.
Press
- Select VERSION.
Turn

Press


The firmware version is shown.
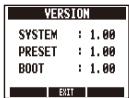
HINT
- Check the ZOOM website (http://www.zoom.co.jp) for the latest firmware versions.
1 | To update the firmware
- While pressing both the up and down cursor keys, use a USB cable to connect the USB connector to the computer.
While pressing both

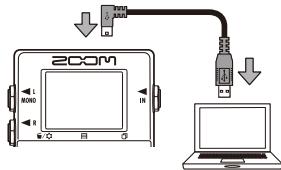
The FIRMAWARE UPDATE screen appears.
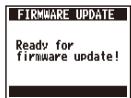
- Launch the firmware update application on your computer, and execute the update.
NOTE
- Do not disconnect the USB cable while the firmware is being updated.
HINT
-
See the ZOOM website for instructions about how to use the application.
-
Confirm that the firmware has been updated.
When the MS-50G has finished updating, "Complete!" appears on the display.

Disconnect the USB cable.
HINT
- Updating the firmware will not erase saved patch memories.
| Category | Effect type | Effect explanation | Tempo sync. |
| DYN/ FLTR | Comp | This compressor in the style of the MXR Dyna Comp. | |
| RackComp | This compressor allows more detailed adjustment than Comp. | ||
| SlowATTCK | This effect slows the attack of each note, resulting in a violin-like performance. | ||
| ZNR | ZOOM's unique noise reduction cuts noise during pauses in playing without affecting the tone. | ||
| LineSel | Sound input into the LineSel effect is sent directly to the OUTPUT jacks when OFF and to the next effect in order when ON. | ||
| GraphicEQ | This unit has a 6-band equalizer. | ||
| ParaEQ | This is a 2-band parametric equalizer. |
| Category | Effect type | Effect explanation | Tempo sync. |
| DYN/ FLTR | AutoWah | This effect varies wah in accordance with picking intensity. | |
| Cry | This effect varies the sound like a talking modulator. | ||
| M-Filter | This envelope filter has the flavor of a Moog MF-101 low pass filter and can be set in a wide range. | ||
| Step | This special effect gives the sound a stepped quality. | 7 | |
| SeqFLTR | The sequence filter has the flavor of a Z.Vex Seek-Wah. | 7 | |
| OD/DIST | Booster | The booster increases signal gain to make the sound more powerful. | |
| OverDrive | Simulation of the BOSS OD-1, the compact effect box that was the first to take the "overdrive" title. | ||
| OD/DIST | T Scream | Simulation of the Ibanez TS808, which is loved by many guitarists as a booster and has inspired numerous clones. | |
| Dist+ | Simulation of the MXR distortion+ effect that made distortion popular worldwide. | ||
| Dist 1 | Simulation of the BOSS DS-1 distortion pedal, which has been a long-seller. | ||
| Squeak | Simulation of the popular Pro Co Rat famous for its edgy distortion sound. | ||
| GreatMuff | Simulation of the Electro-Harmonix Big Muff, which is loved by famous artists around the world for its fat, sweet fuzz sound. | ||
| MetalWRLD | Simulation of the BOSS Metal Zone, which is characterized by long sustain and a powerful lower midrange. |
| Category | Effect type | Effect explanation | Tempo sync. |
| OD/DIST | HotBox | Simulation of the compact Matchless Hotbox pre-amplifier with a built-in tube. | |
| Z Clean | ZOOM original unadorned clean sound. | ||
| ExtremeDS | This distortion effect boasts the highest gain in the world. | ||
| Aco.Sim | This effect changes the tone of an electric guitar to make it sound like an acoustic guitar. | ||
| AMP | FD COMBO | Modeled sound of a Fender Twin Reverb ('65), which is loved by guitarists in various genres. | |
| DELUXE-R | This models the sound of a Fender Deluxe Reverb made in 1965. | ||
| US BLUES | Crunch sound of a Fender Tweed Bassman. | ||
| AMP | VX JMI | This simulates the sound of an early model of a class-A British combo amp. | |
| TW ROCK | This crunch sound uses the drive channel of a Two Rock Emerald 50, an American boutique amplifier. | ||
| MS 1959 | This models the sound of a Marshall 1959 Plexi made in 1969. | ||
| DZ DRIVE | The 3-channel high gain sound of a Diezel Herbert, which is a handmade German guitar amplifier that allows control of three independent channels. | ||
| ALIEN | This simulates the high-gain sound of the Engl invader, which features a powerful lowend. | ||
| MOD/SFX | Tremolo | This effect varies the volume at a regular rate. | \( \blacklozenge \) |
| Category | Effect type | Effect explanation | Tempo sync. |
| MOD/SFX | Phaser | This effect adds a phasing variation to the sound. | ▷ |
| TheVibe | This vibe sound features unique undulations. | ||
| Chorus | This effect mixes a shifted pitch with the original sound to add movement and thickness. | ||
| Detune | By mixing an effect sound that is slightly pitch-shifted with the original sound, this effect type has a chorus effect without much sense of modulation. | ||
| StereoCho | This is a stereo chorus with a clear tone. | ||
| SuperCho | This models the sound of a BOSS CH-1 SUPER CHORUS. | ||
| Flanger | This is a jet sound like an ADA flanger. | ▷ | |
| MOD/SFX | Vibrato | This effect automatically adds vibrato. | \( \triangleright \) |
| Octave | This effect adds sound 1 octave and 2 octaves below the original sound. | ||
| PitchSHFT | This effect shifts the pitch up or down. | ||
| MonoPitch | This is a pitch shifter with little sound variance for monophonic (single note) playing. | ||
| HPS | This intelligent pitch shifter outputs the effect sound with the pitch shifted according to scale and key settings. | ||
| DLY/REV | Delay | This long delay has a maximum length of 4000 ms. | \( \triangleright \) |
| TapeEcho | This effect simulates a tape echo. Changing the "Time" parameter changes the pitch of the echoes. | \( \triangleright \) |
| Category | Effect type | Effect explanation | Tempo sync. |
| DLY/REV | ModDelay | This delay effect allows the use of modulation. | \( \triangleright \) |
| AnalogDly | This analog delay simulation has a long delay with a maximum length of 4000 ms. | \( \triangleright \) | |
| ReverseDL | This reverse delay is a long delay with a maximum length of 2000 ms. | \( \triangleright \) | |
| StompDly | By turning the feedback up on this stomp-style delay, you can make it self-oscillate. | \( \triangleright \) | |
| HD Hall | This is a dense hall reverb. | ||
| Hall | This reverb effect simulates the acoustics of a concert hall. | ||
| Room | This reverb effect simulates the acoustics of a room. | ||
| Spring | This reverb effect simulates a spring reverb. |
1 | To execute the All Initialize function
The All Initialize function restores all the factory default settings.
NOTE
-
Executing the All Initialize function will restore all the settings of the MS-50G, including its patch memories, to factory defaults. Do not use this function unless you are certain that you want to do this.
-
While pressing and holding
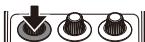
turn the power ON.

The All INITIALIZE screen appears.
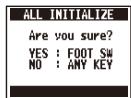
- Press the footswitch to execute it.
Press

The unit will not turn ON
- When running on batteries, connect a cable to the INPUT jack to start the unit.
No sound or very low volume
- Check the connections ( P6)
- Adjust the levels of the effects being used ( P8)
- Confirm that unit is not in mute mode ( P19)
There is a lot of noise
- Check shielded cables for defects.
- Use only a genuine ZOOM AC adapter ( P6)
An effect is not working
- If the effect processing capacity is exceeded, "DSP Full!" appears on the effect graphic. In this case, the effect is bypassed ( P9) .
Batteries lose their charge quickly
- Confirm that you are not using manganese batteries. Alkaline batteries should provide about 7 hours of continuous operation.
- Check the battery setting ( P6) . Set the type of battery being used to enable the remaining charge to be shown more accurately ( P20) .
- Due to the characteristics of the batteries, they might be used more quickly in cold.
| Effect types | 55 types |
| Maximum number of simultaneous effects | 6 |
| Number of patch memories | 50 |
| Sampling frequency | 44.1kHz |
| A/D conversion | 24-bit with 128x oversampling |
| D/A conversion | 24-bit with 128x oversampling |
| Signal processing | 32-bit floating point & 32-bit fixed point |
| Frequency characteristics | 20-20kHz (+1dB/-3dB) (10kΩ load) |
| Display | LCD |
| Input | Standard monaural phone jackRated input level: -20dBm, Input impedance 1MΩ |
| Output | Standard monaural phone jackMaximum output level: Line +5dBm (with output load impedance of 10 kΩ or more) |
| Power | AC adapterDC9V (center minus plug), 500 mA (ZOOM AD-16)BatteriesAbout 7 hours of continuous operation using 2 AA alkaline batteriesUSB |
| Dimensions | 130.3mm(D) x 77.5mm(W) x 58.5mm(H) |
| USB | Firmware update |
| Weight | 350g |
-0dBm=0.775Vrms
Tuner Types
| Display | Meaning | String number / Note name | ||||||
| 7 | 6 | 5 | 4 | 3 | 2 | 1 | ||
| GUITAR | Standard tuning for guitars, including 7-string guitars | B | E | A | D | G | B | E |
| OPEN A | In open A tuning, the open strings make an A chord | - | E | A | E | A | C# | E |
| OPEN D | In open D tuning, the open strings make a D chord | - | D | A | D | F# | A | D |
| OPEN E | In open E tuning, the open strings make an E chord | - | E | B | E | G# | B | E |
| OPEN G | In open G tuning, the open strings make a G chord | - | D | G | D | G | B | D |
| DADGAD | This alternate tuning is often used for tapping, etc. | - | D | A | D | G | A | D |
FCC regulation warning (for U.S.A.)
This equipment has been tested and found to comply with the limits for a Class B digital device, pursuant to Part 15 of the FCC Rules. These limits are designed to provide reasonable protection against harmful interference in a residential installation. This equipment generates, uses, and can radiate radio frequency energy and, if not installed and used in accordance with the instructions, may cause harmful interference to radio transmission. The equipment is designed to be able to detect interference with or not occur in a particular installation. If this equipment does cause harmful interference to radio or television reception, which can be determined by turning the equipment off and on, the user is encouraged to try to correct the interference by one or more of the following measures:
Reorient or relocate the receiving antenna.
- Increase the separation between the equipment and receiver.
- Connect the equipment to an outlet on a circuit different from that to which the receiver is connected.
- Consult the dealer or an experienced radio/TV technician for help.
For EU Countries

Declaration of Conformity: This product complies with the requirements of EMC Directive 2004/108/EC and Low Voltage Directive 2006/95/EC and
ErP Directive 2009/125/EC and
RoHS Directive 2011/65/EU

Disposal of Old Electrical & Electronic Equipment
(Applicable in European countries with separate collection systems) This symbol on the product or on its packaging indicates that this product shall not be treated as household waste. Instead it shall be handed over to the applicable collection point for the recycling of electrical and electronic equipment. By ensuring this product is disposed of correctly, you will help prevent potential negative consequences for the environment and human health. The recycling of this product will reduce waste handling of this product. The recycling of materials will help to conserve natural resources. For more detailed information about recycling of this product, please contact your local city office, your household waste disposal service or the shop where you purchased the product.

ZOOM CORPORATION
4-4-3 Surugadai, Kanda, Chiyoda-ku, Tokyo 101-0062 Japan
http://wwwzoomo.co.jp
- Contents
- Terms used in this manual
- Patch memory
- Effect unit
- Copyrights
- SAFETY PRECAUTIONS
- Warning
- Operation using an AC adapter
- Operation using batteries
- Alterations
- Precautions
- Product handling
- Operating environment
- AC adapter handling
- Battery handling
- Connecting cables with INPUT and OUTPUT jacks
- Volume
- Usage Precautions
- Cleaning
- Malfunction
- DC9V AC adapter jack
- OUTPUT jacks
- ON/OFF indicator
- USB connector
- INPUT jack
- Display
- Parameter knobs
- Footswitch
- Parameter knob 1 [ ]
- Parameter knob 2 [目]
- Parameter knob 3 [ ]
- Cursor keys
- Up and down cursor keys [ ]
- Left and right cursor keys [0/0]
- | To turn the power ON
- HINT
- Display information
- | To turn an effect ON and OFF
- NOTE
- | To select an effect type
- To adjust parameters
- | To change the page
- Effect processing limit
- | To select a patch memory
- To save a patch memory with a new name
- | To add an effect
- | To remove an effect
- | To scroll through the effects shown
- | To change the order of effects
- | To activate the Tuner
- | To end tuning
- | To change the tuner's standard pitch
- | To select the tuner type
- CHROMATIC
- Other tuner types
- To use a drop tuning
- | To tune a guitar
- Chromatic tuner
- Other tuners
- | To tap tempo by hand
- | To change various settings
- 2
- To set the function activated by pressing and holding the footswitch
- | To set the tuner mode
- 4
- To set the Power Management function
- | To set the Auto Save function
- | To select the battery type
- 7
- 8
- | To view the firmware versions
- | To update the firmware
- | To execute the All Initialize function
- The unit will not turn ON
- No sound or very low volume
- There is a lot of noise
- An effect is not working
- Batteries lose their charge quickly
- FCC regulation warning (for U.S.A.)
- For EU Countries
- Disposal of Old Electrical & Electronic Equipment
- ZOOM CORPORATION
Brand : ZOOM
Model : MS-50G
Category : Guitar effect pedal