
HHS1A-2G - Media player HAIER - Free user manual and instructions
Find the device manual for free HHS1A-2G HAIER in PDF.
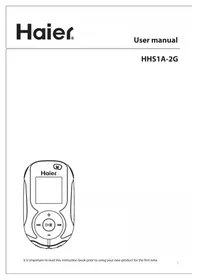


| Product Type | Media Player |
| Brand | Haier |
| Model | HHS1A-2G |
| Dimensions (W x H x D) | approximately 120 x 40 x 100 mm |
| Weight | approximately 0.2 kg |
| Power Supply | USB powered (5V, 1A) or external DC adapter (optional) |
| Supported Video Formats | MPEG-1/2/4, AVI, MKV, MOV, WMV, RMVB |
| Supported Audio Formats | MP3, WMA, WAV, AAC, OGG, FLAC |
| Supported Image Formats | JPEG, BMP, PNG, GIF |
| Output Resolution | up to 1080p Full HD via HDMI |
| Video Output | HDMI 1.4, Composite (AV) |
| Audio Output | HDMI, Stereo RCA, Coaxial/Optical (via adapter) |
| Storage Media | USB 2.0 host, SD/MMC card slot |
| Supported USB File System | FAT32, NTFS, exFAT |
| Remote Control | Infrared remote included |
| Maintenance | Clean with a soft, dry cloth. Do not use liquids or solvents. |
| Safety | Keep away from water and heat sources. Do not disassemble. |
| Spare Parts | Contact Haier customer service for replacement parts. |
| General Information | Supports playback of media files from USB drives and SD cards. |
Frequently Asked Questions - HHS1A-2G HAIER
User questions about HHS1A-2G HAIER
0 question about this device. Answer the ones you know or ask your own.
Ask a new question about this device
Download the instructions for your Media player in PDF format for free! Find your manual HHS1A-2G - HAIER and take your electronic device back in hand. On this page are published all the documents necessary for the use of your device. HHS1A-2G by HAIER.
USER MANUAL HHS1A-2G HAIER
Safety information. Improving FM radio sound.
Before you begin. Recording FM radio.
Copyright warning. . . . . . . . . . . . . . . . . . . . . . . . . . . . . . . . . . . . . . . . . . . . . . . . . . . . . . . . . . . . . . . . . . . . . . . . . . . . . . . . . . . . 17 Playing back FM radio recordings.
Back up your data. Copying recordings to your PC. 1
Unpacking your player. Favorites.
Computer system requirements. ....... Creating a "Favorites" playlist. ....... 1
Secure music transfer requirements. ...... Removing files from "Favorites" playlist. ...... 18
Using the armband. Sports.
Connecting to the computer. . . . . . . . . . . . . . . . . . . . . . . . . . . . . . . . . . . . . . . . . . . . . . . . . . . . . . . Stopwatch.
Charging the player....Sports mode....
Managing files on your Haier Player. . . . . . . . . . . . . . . . . . . . . . . . . . . . . . . . . . . . . . . . . . . . . . . . . . . . . . . . . . . . . . . . . . . . . . . . . . . . . . . . . . . . . . Pedometer.
Using Windows Explorer.... Personal info....
Deleting files from the player. ...... BMI (Body Mass Index)......
Disconnecting the player from the PC. . . . . . . . . . . . . . . . . . . . . . . . . . . . . . . . . . . . . . . . . . . . . . . . . . . . . . . . . . . . Settings.
Turning the player on and off. .... Shuffle....
Locking the player controls. .... Equalizer....
Resetting the player. . . . . . . . . . . . . . . . . . . . . . . . . . . . . . . . . . . . . . . . . . . . . . . . . . . . . . . . . . . . . . . . . . . . . . . . . . . . . . . . Customize.
Using the menus. . . . . . . . . . . . . . . . . . . . . . . . . . . . . . . . . . . . . . . . . . . . . . . . . . . . . . . . . . . . . . . . . . . . . . . . . . . . . . . . Brightness.
Menu types. ...... Screensaver. ......
Menu navigation. . . . . . . . . . . . . . . . . . . . . . . . . . . . . . . . . . . . . . . . . . . . . . . . . . . . . . . . . . . . . . . . . . . . . . . . . . . . . . . . . . . . . . . . . . . Power saver.
The Home menu. ....../FreqStep (Frequency Step). ....../
Music. RegDur (Record duration).
Playing music files. Language.
Music playback controls. .... Urit. ....
Option menu (music playback).....Prgtocol....
Music playback display. MTP (Media Transfer Protocol) modes when. 23
Pictures. Flip display.
Playing picture files....System info....
Picture viewing controls. Date and time.
Option menu (picture viewing). ...... Theme. ......
Videos....Restore defaults....
Playing video files. ...... Additional information. ...... 2
Video playback controls. . . . . . . . . . . . . . . . . . . . . . . . . . . . . . . . . . . . . . . . . . . . . . . Tips and troubleshooting. . . . . . . . . . . . . . . .
Option menu (video playback). Specifications.
Radio....16 Sport MP3 Player warranty....
Playing FM radio....16
Storing and recalling preset stations....16
Safety information
Important Safety Information Product Guide
Read this guide carefully and keep it in a safe place. Following all guidelines is important for your health and safety when using the Sport MP3 Player.
Important Safety Information
- Read and keep these guidelines.
- Follow all warnings and instructions carefully.
- Do not use the Sport MP3 Player in or near water.
• To clean, wipe with a soft dry cloth only. - Use only in accordance with this manual and the Sport MP3 Player User Guide.
- Do not use near heat sources such as ovens, radiators, etc.
- Use only accessories and attachments provided or recommended by the manufacturer.
- Unplug this product during lightning storms.
- Unplug this product when it is not used for a long period of time.
- This product must only be serviced by a qualified professional. Service is required when the product is damaged or altered in any way. This includes damage to the adapter, exposure to water, rain, and moisture, and hard impact (dropping or crushing the Sport MP3 Player). When the Sport MP3 Player does not work normally, it must be brought in for service.
Caution: Do not expose this product to water, rain, or moisture. This will reduce the risk of fire or electric shock.
Batteries: The Sport MP3 Player has a built-in battery. If used incorrectly, this battery could explode and cause physical harm. Do not open or alter the battery, or expose it to heat. Puncturing or mutilating the battery is dangerous. Do not throw the battery or Sport MP3 Player device into fire.
Sunlight: Do not leave the Sport MP3 Player in direct sunlight for extended periods of time. This may cause it to melt, or cause damage to the battery.
Earphones and Volume Control
Damage to Hearing: The Sport MP3 Player can operate at volumes loud enough to cause damage to your hearing. To avoid this and protect your hearing, follow these guidelines:
Keep the volume low. Set the volume at a level where you can hear noises around you clearly. You should be able to hear someone nearby speaking in a normal tone of voice. If you cannot hear people around you speaking, even with noise-canceling headphones, the volume is too loud. You could damage your hearing.
Do not increase the volume while listening. After listening to the Sport MP3 Player for some time, you will become accustomed to the volume and may want to turn it louder. However, this can still cause damage to your hearing. Do not change the volume while using the Sport MP3 Player.
Minimize the amount of time spent listening to loud sounds. The more exposure to loud sounds, the more likely you are to damage your hearing. Your hearing can be damaged in as little as 15 minutes when exposed to very loud music or sounds.
Even when volume is lower, your hearing can still be damaged after a long period of time.
The louder the sound, the less time it takes to damage your hearing.
Hearing loud sounds or music during a day is cumulative: it adds up. If you are exposed to other loud sounds during the day, it will take less time for the Sport MP3 Player to damage your hearing.
As a general guideline, keep the Sport MP3 Player volume at a level where you can converse normally with people nearby.
If you replace the earphones on your Sport MP3 Player, you must reset the volume starting at a low level. Different kinds of earphones may produce different volumes, even if the volume setting on the Sport MP3 Player is the same.
Safety information
Improper Surroundings for Using the Sport MP3 Player
Do not use the Sport MP3 Player while driving, riding a bike, or walking on the sidewalk or near traffic. Always keep the volume low enough to hear people speaking around you, and make sure that you can hear any warning sounds like fire alarms, while wearing the headphones. We strongly advise that you do not use headphones with your Sport MP3 Player while driving. Use of headphones while driving is illegal in some states. Stop using the Sport MP3 Player if it distracts you or is disruptive while you are operating any type of vehicle, or performing any task that requires your concentration and full attention.
Hearing Loss Symptoms
If you experience any of these hearing loss symptoms, stop using the Sport MP3 Player and have your hearing checked by an audiologist:
- Hearing loss
- Ringing in the ears
- Your speech sounds quiet or muffled to you
- Sounds seem flatter or duller than usual. Getting your hearing checked regularly by an audiologist is a good way to prevent and detect hearing loss.
Prevent Infections from Sport MP3 Player Headphones
Using earphones for your Sport MP3 Player that are dirty can lead to ear infections. Clean your earphones regularly with isopropyl alcohol or another antiseptic. If you find that the earphones are irritating your ears or the skin around them, stop use immediately. This might indicate a developing or future infection.
Prevent Seizures, Blackouts, and Eye Strain
If you have ever had a seizure or blackout, or if these symptoms exist in your family's medical history, please speak with a doctor before using the video functions on the Sport MP3 Player device (if available). Stop using the Sport MP3 Player immediately if you experience eye twitches, muscle twitches, convulsion, disorientation, or uncontrollable movements. When using the video function on the Sport MP3 Player device (if available), take frequent breaks and avoid prolonged use to protect your eyes from damage or strain.
Protecting the Sport MP3 Player Device
- When carrying the Sport MP3 Player, make sure you do not drop, bend, or crush the device. A protective carrying case, included with the device, may help to protect the surface from scratches and damage.
- Keep the Sport MP3 Player device at a temperature between -20° and 45°C (-4° to 113°F). Parked cars can get extremely hot in the summer, so be sure to take your Sport MP3 Player device out of the car when you leave it. Recommended temperature for using the Sport MP3 Player is between 0° and 35°C (32° - 95°F). At this temperature you will get the maximum playing time. Extremely cold temperatures will shorten playing time temporarily.
Note: When in use or being charged, the Sport MP3 Player will become warm. This is normal, and will not hurt the device.
Safety information
Guidelines for All Sport MP3 Player Products
Warning! Failure to follow the guidelines for setup and use for this product can lead to serious injury or death, or harm to the device. Make sure you read this guide carefully and follow all instructions. Keep this guide in a safe place. If you need to replace this guide, contact Haier customer service or visit
www.haieramerica.com/support.
Repairs: Do not repair or alter this product on your own! Attempts to fix this product may result in electric shock or other hazards. If we determine that you have tried to repair the product by yourself, evidenced by peeling, puncturing, or removal of labels, your warranty will be voided.
Qualified service professionals must do all servicing on this device. Service is required when the product is damaged in any way or does not operate normally. This includes exposure to water, extreme heat, and being dropped.
Make sure you understand all warnings and instructions before using this device.
Keep Away From Water
Do not use or store this product near water, including any moisture or rain. This will reduce the risk of fire or shock.
Care of Cable and Cord
All cables and cords for this product and its accessories should be arranged out of the way, so that people and pets cannot trip over them. Do not leave cables and cords in a place where children can reach them and play with them.
Use and Cleaning of Sport MP3 Player
Follow all directions in this manual and the Sport MP3 Player User Guide for proper use of the Sport MP3 Player.
Do not use near any source of heat, such as fire or ovens.
Use only accessories and attachments provided or recommended by Haier.
Clean gently with a soft, dry cloth.
Using a Connector and a Port
Do not force a connector into a port. If they don't connect easily, check for any blockage or obstructions. If you can't find anything wrong, then the connector and port probably don't match and can't be used together.
Sport MP3 Player Radio Feature
In compilation with the FCC RF exposure compliance requirements, this device must not be located or operating in conjunction with any other transmitter or antenna.
Sport MP3 Player Headphones
The Sport MP3 Player headphones have low intensity magnets in them. This magnetic charge may disrupt pacemakers, or erase magnetic storage data in certain devices, including credit cards and ATM cards. Keep the headphones several inches away from these items, and anything that is sensitive or could be affected by a magnetic field.
Disposing of the Sport MP3 Player Device
Disposal of the Sport MP3 Player device may be regulated by certain recycling laws regarding electronic and electrical waste. You may not be able to throw out the Sport MP3 Player with your household garbage. It is your responsibility to dispose of the Sport MP3 Player device in a proper way that follows all recycling laws and regulations. Improper disposal could lead to damaging the environment or putting human health in danger. To learn more about the proper ways to dispose of electronic and electrical devices, contact your local city office, your waste disposal service, or the store where you purchased your Sport MP3 Player.
Before you begin
Dear Haier Customer,
Thank you for purchasing the Playport MP3 This product will play mp3 and Windows Media™ audio (WMA) content as well as content purchased from most online music download services.
Copyright warning
This player is for your personal use only. Unauthorized recording or duplication of copyrighted material may infringe upon the rights of third parties and may be contrary to copyright laws.
Back up your data
As with any portable player, you must back up the drive regularly. The manufacturer is not responsible for lost data.
Unpacking your player
All of the items listed below should have been packed in the box with your player.
- Haier player
- Quick Start Guide
- USB cable
- Earphones
- Armband
Computer system requirements
• Pentium III 500MHz or higher recommended
- Windows XP (service pack 1 or higher) or Windows Vista TM
- Internet Explorer 6.0 or higher with Internet access
• Windows Media Player 10 or higher
• 250MB or more free hard disk space for the software
• 128MB RAM (256MB recommended)
• CD-ROM drive capable of digital audio extraction
• USB port (2.0 recommended)
- Sound card
Secure music transfer requirements The default setting of this player is in MSC (Mass Storage Class) mode when connected to your PC. To enable function of transferring subscription music content to the player, select MTP (Media Transfer Protocol) mode under Protocol in the player's Settings menu (refer to page 23).
Using the armband
- Slide the player into the holder of the armband by aligning with the arrow on the holder.
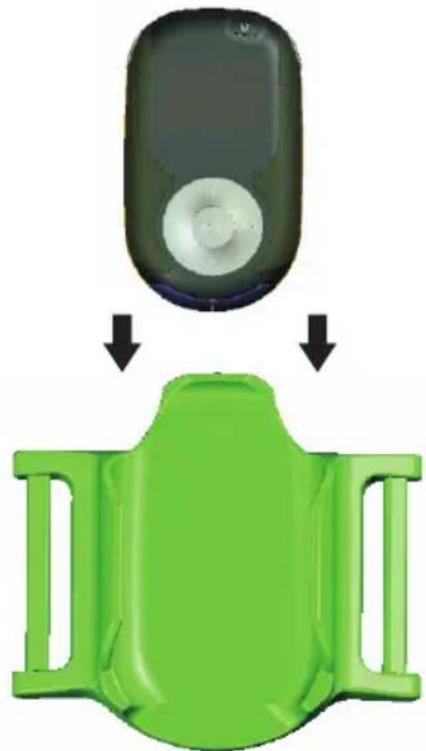
- Slide the end of the armband through the ring and secure with the velcro tape.
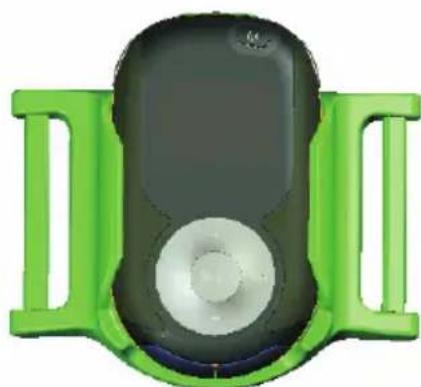
Before you begin
Connecting to the computer
- Connect the player to your computer with the USB cable provided. The player will turn on automatically.
• The player will be connected in MSC (Mass Storage Class) mode. It will appear as a drive letter on your computer and behave as a detachable drive for file transfer in one or both directions. - The software installer can be deleted from the player after installation to free up more storage spaces.
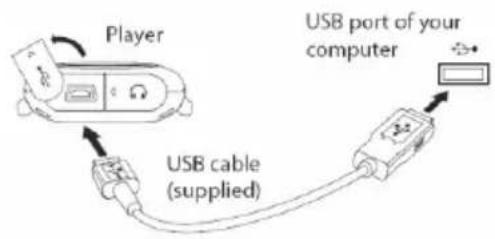
- It might take several seconds for the player to be detected. Click Refresh in My Computer or Windows Explorer to make sure the player has been detected.
- The player is capable of transferring files at USB 2.0. If USB 2.0 port is available on your computer, use it to connect to your player. The player is still backward compatible with the older USB 1.1 ports. However, you will not be able to take full advantage of the potential speed increase.
Charging the player
The player charges automatically every time you connect it to your computer. To fully charge the player, make sure your computer is on and the device is connected for at least 3 hours. Refer to the battery level icon ☐ on the display to check the battery level. Recharge the player when the icon is empty.

Managing files on your Haier Player
Acrsoft Software Installation Instructions
Insert your CD into your CD-ROM drive. The CD will automatically run and launch the on-screen setup prompt. Follow the instructions to complete the installation.
If your system does not automatically run the CD, open the My Computer icon on your desktop then double-click on your CD ROM drive. Locate and double-click the 'Setup' or 'Setup.exe' file to start the installation process.
Converting Files for your Haier Device:
-
Launch 'MediaConverter' by double-clicking the application icon on your desktop or from the Start Menu.
-
Plug-in your Haier MP3 Sports Player. The player's device icon will appear on the application screen.
-
Drag & drop media files directly to the player's icon. Files will be automatically converted and transferred to the device.
For full usage details, please reference the 'Help' included in the application.
Managing files on your Haier Player
Using Windows Explorer
To copy files in Windows XP with Windows Media Player 10 installed:
-
Open the player in Windows Explorer.
-
Drag and drop music files onto the Media folder.
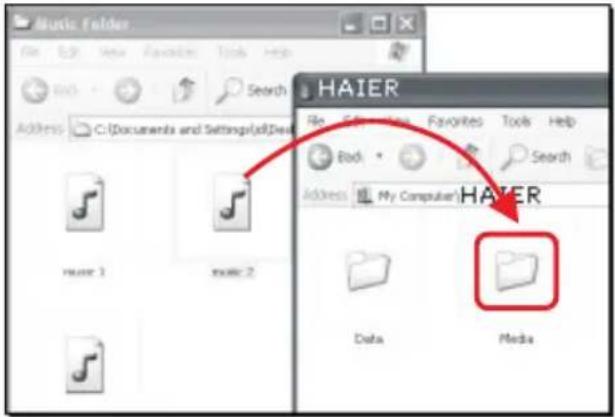
To copy files in Windows Vista or Window XP with Windows Media Player 11 installed:
-
Open the player in Windows Explorer
-
Open Internal Storage.
Internal Storage
1.92 GB
- Drag and drop music files.
- Drag-and-drop picture files onto the root level or a specific folder of the player for viewing.
• Video files must be converted to SMV format by Acrsoft Software.

Deleting files from the player
For any files you have transferred to the player, you may delete them while you have connected the player with your computer.
-
Open the player in Windows Explorer and then navigate to the folder containing the files.
-
Select the files you want to remove and then press the Delete key on the keyboard of your PC.
- It is best to remove subscription files from the player by using Windows Media Player.
Disconnecting the player from the PC If Windows sees the player as an MTP device:
- Unplug the player from the PC when no file transfer is in progress.
If Windows sees the player as a removable disk:
-
In the Windows system tray, click the Safely Remove Hardware icon and then select the player from the list of devices.
-
When the Safe to remove hardware message appears, unplug the player from the PC.
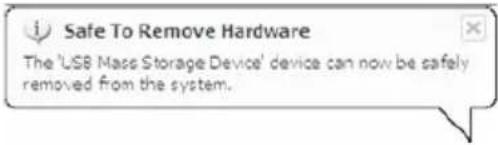

- Do not disconnect the USB connection during file download.
- Doing so may corrupt system files or the files being downloaded.
General controls
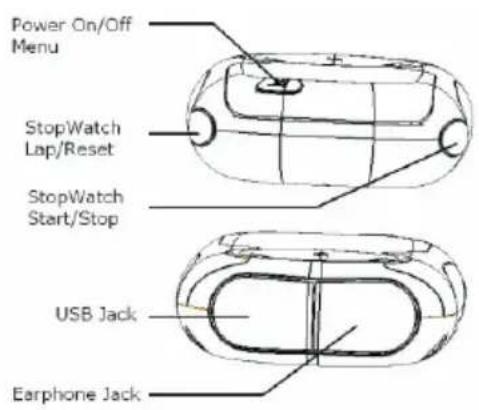
Turning the player on and off
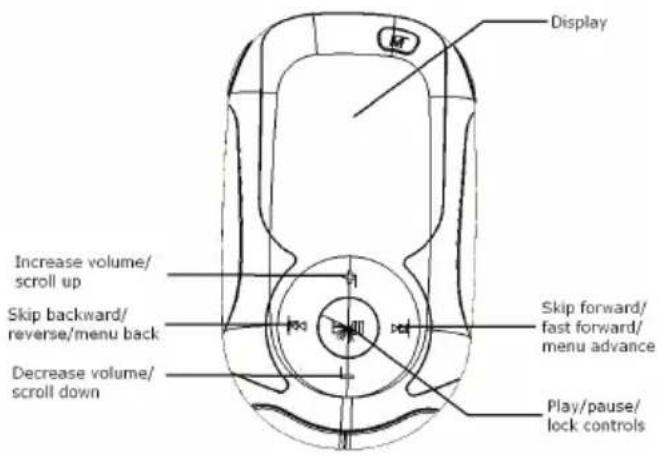
To turn the player on, press and hold MENU. Press and hold MENU again to turn the player off.
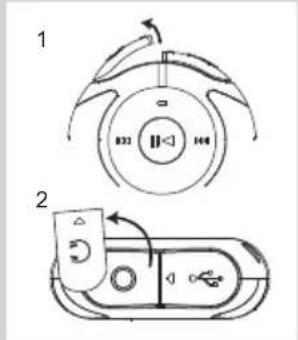
Follow the diagram to open the USB or earphone jack cover.
Locking the player controls
To lock the player controls to prevent them from being activated accidentally, press and hold ▶II To unlock the controls, press ▶again. When the controls are locked, the lock icon 🎨 appears on the display.
Resetting the player
If the player stops operating properly, you can reset it by pressing and holding MENU for more than 10 seconds.
Using the menus
Menu types
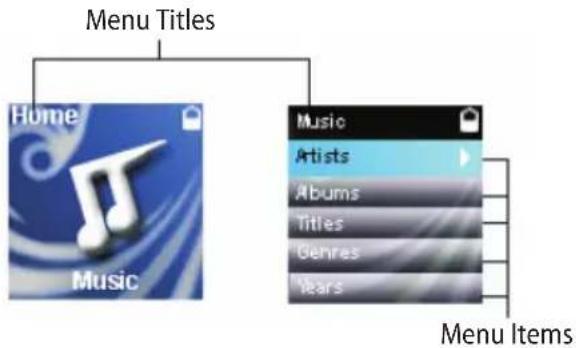
The player has two types of menu:
Player menu
The player menu appears when you turn on the player or if you press /MENU while listening to the player. It lets you:
- Browse for and play music, video and picture files
- Listen to the radio
- Access the Sports functions – stopwatch, pedometer, calorie counter, body mass index (BMI) calculator, etc.
- Change the player's settings – language, display brightness, etc.
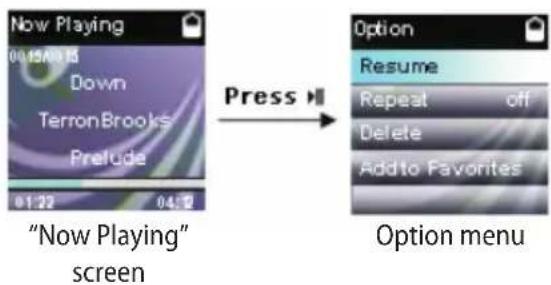
Option menu
The option menu appears if you press ▶while listening to the player. It provides different options depending on what you are listening to when you press ▶II.
Menu navigation
When a menu is displayed:
- Press + and – to scroll up and down the list of menu items. (The Home menu shows one item at a time; other menus show four at a time.)
- Press ▶Ito go to the next menu level. Press return to the previous menu level.
![graph TD A["Music\nArtists\nAlbums\nTitles\nGenres\nYears"] -->|Press| B["Artists\nArtist1\nArtist2\nArtist3\nArtist4\nArtist5"] B -->|Press| C["Music\nArtists\nAlbums\nTitles\nGenres\nYears"] C -->|Press +| D["End"]](/content/2026/07/1512622/images/97d14c46b8beed784f568d3c318d281726a469ba76cd37ab72388f962e7640a8.jpg)
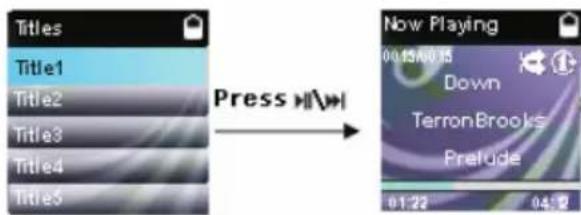
- If the highlighted item is playable (for example, an audio file), press ▶br ▶to start playback.
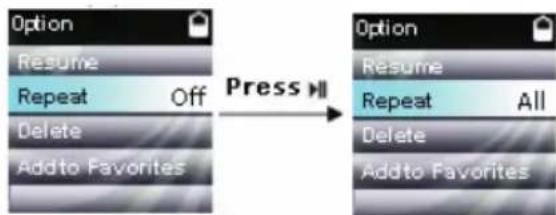
- If the highlighted item indicates the current setting (for example, the repeat mode setting), press ▶to change the setting.
Using the menus
The Home menu
The top-level or "Home" menu is always displayed when you press /MENU. The menu options are:
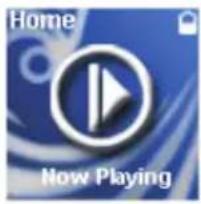
Now Playing
Available only during playback. Press ▶ nor ▶ to return to the currently playing file.

Sports
Press ▶II or ▶I to enter the Sports menu, which lets you:
• Record your running details
- Change the stopwatch settings
- Check your results
- Use the pedometer
- Use the calorie counter
- Enter personal data, such as sex, height and weight, for the BMI calculator and pedometer
• Calculate your body mass index (BMI)
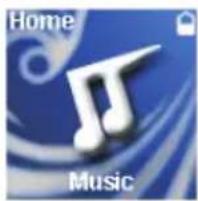
Music
Press ▶■or ▶▶to enter the Music menu and choose an artist, album, genre, year, or individual title.
Pictures
Press ▶ nor ▶ to enter the Pictures menu and choose a particular folder or image.
Settings
Press to enter the Settings menu, which lets you:
- Choose the shuffle playback mode
- Choose an equalizer setting
- Customize the music menu
- Change the screen brightness
- Change the screensaver setting
- Turn on/off the automatic shutdown feature
- Switch between US and European radio frequency steps
- Choose a record duration setting
- Change the language of the player's menus
- Switch between English (Imperial) and metric units
- Switch between MTP and MSC modes
- Flip the display 180°
• Display the firmware version, space used, and space available - Set date and time
- Change the theme of player
- Reset the player's settings to the factory defaults

Videos
Press ▶llor ▶to enter the Videos menu and choose a particular video.
Radio
Press onto either listen to the radio or play recordings of previous radio shows.
Favorites
As you listen to music, you can add individual titles to a "favorites" playlist.
Press ▶ nor ▶ to enter the Favorites menu and choose a particular title or edit the playlist.
Music
Playing music files
The player sorts your music files by artist, album, track name (title), genre and year.
- Press MENU to display the Home menu, then press + or – to select Music.
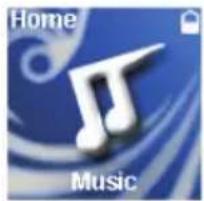
- To start playback at a particular artist, album, title, genre or year, press ▶to enter the Music menu. Use + or - and ◀or ▶to navigate through the menus and select the desired item, then press ▶II.
The item that you can select for playback is not limited to a single file, you may select an artist, an album and then press ▶II to start playback of all files within your selected item.

Music playback controls
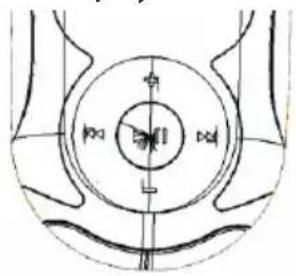
| Skips to the previous file*, press and hold to scan backward within a file | |
| Skips to the next file, press and hold to scan forward within a file | |
| Starts/pauses playback and shows/ hides the Option menu | |
| + or - | Increases or decreases the volume during playback |
* Press within the beginning 5 seconds of the current music file to skip to previous file. Otherwise, you will return to the beginning of the current file.
Option menu (music playback)
Press ▶II to show or hide the Option menu during playback. Press + or – to highlight an option and then press ▶Ito confirm the selection or change the setting.
The following options are available:
- Resume – to resume playback
- Repeat – press ▶repeatedly to select repeat current [for all files] (corresponding icon shows on the display)
- Delete File – to remove current file from the player
- Add to Favorites – to add the current file in the Favorites playlist. If the file is already in the playlist, this option changes to Clear from Favorites to remove the current file from the playlist
Music playback display
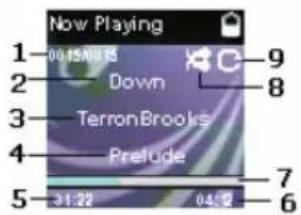
- Current file number/total number of files
- Song name
- Artist name
- Album name
- Elapsed playback time
- File total time
- Playback progress bar
- Shuffle icon (display only when it is not off)
- Repeat icon (display only when it is not off)
The information provided in the playback screen depends upon the ID3 tags that have been set up for the music file.
Pictures
Playing picture files
- Press MENU to display the Home menu, then press + or - to select Pictures.
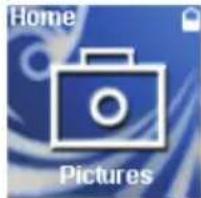
- Press ▶ nor ▶ to enter the Pictures menu and choose a particular image.
Picture viewing controls
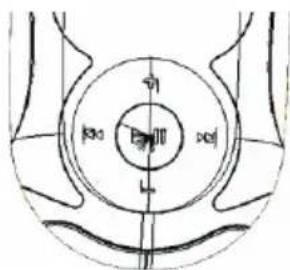
| Goes back, skips backward | |
| Advances, skips forward | |
| Starts/pauses slideshow if it is activated, shows/hides the Option menu |
Option menu (picture viewing)
Press ▶II to show or hide the Option menu during playback. Press + or - to highlight an option and then press ▶Ito confirm the selection or change the setting.
The following options are available:
- Resume – to resume playback
- Slideshow – to select the slideshow image duration. Press repeatedly to select among off, 3, 5, 10 and 15 seconds
- Delete File – to remove current file from the player
Videos
Playing video files
- Press MENU to display the Home menu, then press + or - to select Videos.

- Press ▶llor ▶▶to enter the Videos menu and choose a particular video.
Video playback controls
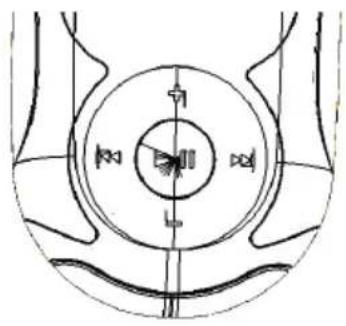
| Skips to the previous file*, press and hold to scan backward within a file | |
| Skips to the next file, press and hold to scan forward within a file | |
| Starts/pauses playback and shows/hides the Option menu | |
| + or - | Increases or decreases the volume during playback |
* Press within the beginning 5 seconds of the current music file to skip to previous file. Otherwise, you will return to the beginning of the current file.
Option menu (video playback)
The option menu appears if you press ▶while listening to the player. It provides different options depending on what you are listening to when you press ▶II.
- Resume – to resume playback
- Repeat – press repeatedly to select repeat current or all files (corresponding icon shows on the display)
- Delete File – to remove current file from the player
Video files must be converted to optimal format by the included Arcsoft software for playback on this player.

Playing FM radio
To turn the radio on:
-
Press /MENU to display the player menu.
-
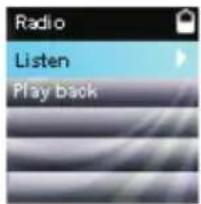
Press + or - to select Radio and press
to enter the radio menu.
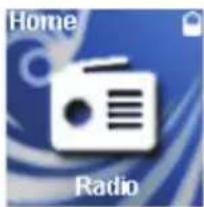
- While Listen is highlighted, press start listening. The frequency screen appears.
To tune the radio:
Press and hold ▶pr ◀until "Searching" shows and then release the button to start scanning through the frequency range. The player stops scanning when it detects the next station.
Press ▶▶ or ◀◀ to step through the frequency range.
To turn the radio off:
Either turn the player off or press MENU and choose a different option.
Storing and recalling preset stations
You can store up to 20 preset stations in the player.
To store the currently playing station as a preset:
-
Press ▶II to display the Option menu.
-
Press + or - to highlight Save to Preset and then press ▶▶.
- If all 20 preset station numbers are occupied, the option changes to Replace Preset.
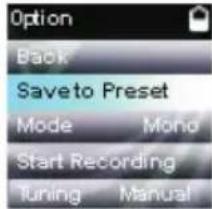
- The first available preset number is displayed. Press + or - to select a different preset number if desired.
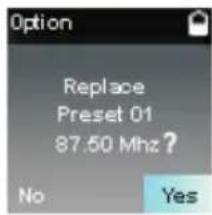
- If you choose a preset number that already contains an FM station, you will replace the existing station with the new station.
- Press ▶▶to highlight Yes and then press ▶▶
To listen to a preset station:
-
When the radio is playing, press ▶b display the Option menu.
-
Press + or - to highlight Tuning and press ▶II to switch from Manual to Preset.
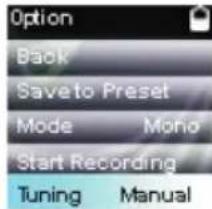
- Press + or - to highlight Back and press ▶to return to the frequency screen.
Playing FM radio
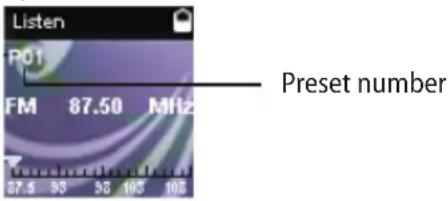
- Press ▶▶ or ◀◀ to choose the desired station preset number. The preset number shows at the top left of the screen.
Improving FM radio sound
If stereo reception is noisy, you can often reduce the noise by switching to mono.
To switch between stereo and mono:
-
While the radio is playing, press ▶ to display the Option menu.
-
Press + or – to highlight Mode and then press to switch between Stereo and Mono.
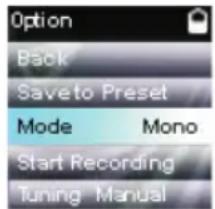
- Press + or - to highlight Back and press return to the frequency screen.
Recording FM radio
You can record the radio and play back recordings as well as copy the recordings (WAV files) to your PC.
To record the currently playing radio station:
-
Press ▶to display the Option menu.
-
Press + or – to highlight Start Recording and then press ▶Ito to start recording.
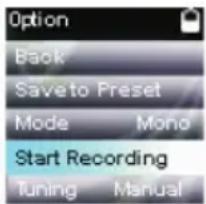
Press ▶II to pause or resume recording.
- Press /MENU to stop recording.
- The player names each recording FMRecXXX.wav where XXX is a unique number.
To record for a specific duration
Refer to RecDur on page 22
Playing back FM radio recordings To play back a recording:
-
Press /MENU to display the player menu.
-
Press + or - to select Radio and press to enter the radio menu.
-
Press + or - to highlight Playback and press to see the list of recordings.
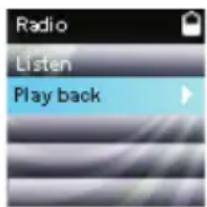
- Press + or - to select a recording and press to start playback.
Option menu (recording playback)
Press ▶ to show or hide the Option menu during playback. Press + or – to highlight an option and then press ▶ to confirm the selection or change the setting.
The following options are available:
- Resume – to resume playback
- Repeat – press ▶ repeatedly to select repeat current or all files (corresponding icon shows on the display)
- Delete File – to remove current file from the player
Copying recordings to your PC
Recordings are stored as WAV files in the "FMRecord" folder on the player.
To copy recordings to the PC:
- Plug the player into the PC.
- Open the player's Record folder.
- Select the files you want to copy and drag and drop them onto a folder on the PC.
- Almost all audio applications can play WAV files.
Favorites
Creating a "Favorites" playlist
You can create a playlist of your favorite music, adding new files to the playlist as you listen to them. This function is not available for other media formats such as videos, pictures and recordings.
To add the currently playing music file in the playlist:
- Press ▶II to pause playback and display the Option menu.
- Press + or - to highlight Add to Favorites and then press ▶II.
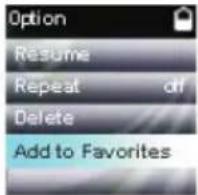
- Added Successfully shows on the display.
- Repeat the above steps for adding more music files.
To listen to the Favorites playlist:
- Press /MENU to display the Home menu.
- Press + or - to select Favorites.
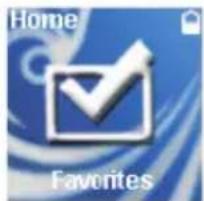
- To play back a particular file, press to enter the Favorites menu and then press to list the files. Press + or - to select the desired file and press
Removing files from "Favorites" playlist To remove a music file from the playlist:
- While the music file is playing, press ▶to pause playback and display the Option menu.
- Press + or - to highlight Clear from Favorites and press ▶II.
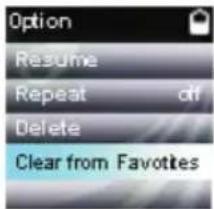
- Press ▶ to highlight Yes and then press ▶ to remove the file from the playlist.
To remove all music files from the playlist:
- Press MENU to display the Home menu.
- Press + or - to select Favorites and press▶ to enter the Favorites menu.
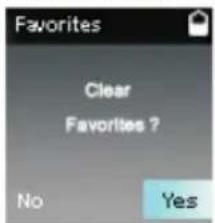
- Press + or - to highlight Clear Favorites and press ▶II.
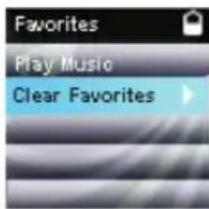
- Press ▶▶ to highlight Yes and then press ▶▶ remove all files from the playlist.
Sports
Stopwatch
For single lap timing:
- Press START/STOP to show the stopwatch.
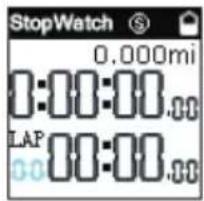
- Press START/STOP again to start the stopwatch.
- Press START/STOP to pause the stopwatch and again to resume timing.
- Press LAP/RESET to reset the stopwatch when it is stopped.
For multiple lap timing:
- Press START/STOP to show the stopwatch.
- Press START/STOP again to start the stopwatch.
- Press LAP/RESET at the start of the second, third lap and so on (maximum 99 laps).
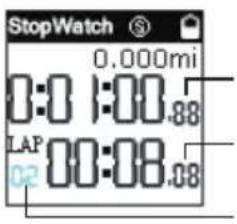
Total elapsed time
Latest lap time
Lap counter
- Press START/STOP to stop the stopwatch when all laps are finished.
- Press + or - to review all the lap times.
- Press LAP/RESET to clear all lap times and reset the stopwatch.
To use the count down timer:
- Press MENU to display the Home menu.
- Press + or - to select Sports and press ▶II or ▶▶ to enter the sports menu.

- Press + or - to highlight Stopwatch Setup and then press ▶▶.
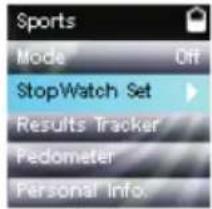
- Press ▶II to select Act. Count Down and then press ◀◀.
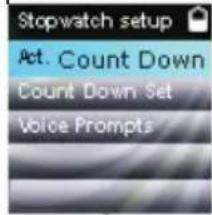
- Press + or - to highlight Count Down Set up and then press ▶▶
- Press ◀◀ or ▶▶ to shift between minute and second settings and press + or - to adjust the values.
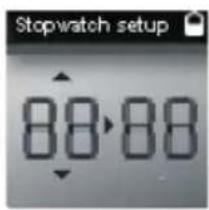
- When finished, press
- Press START/STOP to start the count down timer.
To activate voice prompts to remind you the time passed or remains:
- Press /MENU to display the Home menu.
- Press + or - to select Sports and press ▶▶ to enter the Sports menu.
- Press + or - to highlight Stopwatch Setup and then press ▶▶.
- Press + or - to highlight Voice Prompts and then press ▶▶
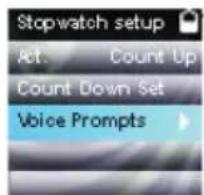
Sports
- Press + or - to highlight Period or Voice and then press ▶to change the settings.
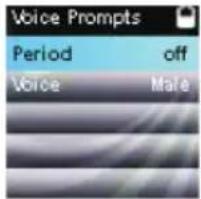
• Period: Every 1, 5, 10, 20 or 30 minutes (count up), last 1, 5, 10, 20 or 30 minutes (count down) or Off
• Voice: Male, female
Sports mode
To record your run details:
To record your run details (calorie burnt and distance completed).
- Press MENU to display the Home menu.
- Press + or – to select Sports and press to enter the Sports menu.
- Press + or – to highlight Mode and then press ▶Ito Stop Watch Screen
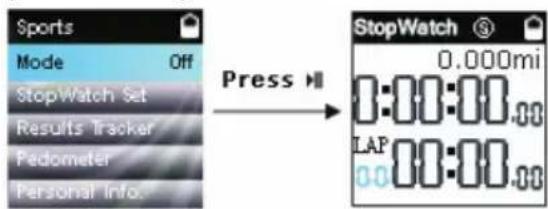
- Once Sports mode is turned on, the stopwatch and pedometer will be activated. Start your running now!
- Press MENU to display the Home menu and perform other operations (e.g. Selecting music). It will not affect the record of your run details.
- When you have finished running, repeat steps 1-3 and select Mode as Off.
To track your records:
- Press MENU to display the Home menu.
- Press + or – to select Sports and press to enter the Sports menu.
- Press + or – to highlight Results Tracker and then press ▶.
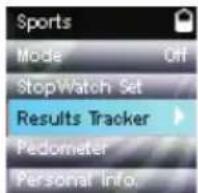
- Press + or - to highlight a record and then press ▶ to check the details.
Pedometer
To activate the pedometer:
- Press MENU to display the Home menu.
- Press + or - to select Sports and press ▶▶ to enter the Sports menu.
- Press + or - to highlight Pedometer and then press ▶▶.
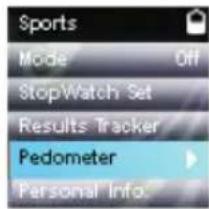
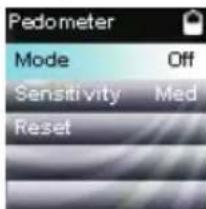
- Press + or - to highlight Mode and press ▶II to change the setting:
-
Off = pedometer is off
• Steps = number of steps to be displayed
• Distance = estimated distance to be displayed
• Calories = estimated calorie-burnt to be displayed -
On the display, the selected mode is indicated by St (for Steps mode), mi or km (for Distance mode) or kcal (for Calories mode).
• Estimated distance = number of steps x stride length - Estimated calorie-burnt = weight x estimated distance (x 0.73 for English unit)
- For accurate measurement, use the player on your arm with the armband provided.
To change the sensitivity of pedometer:
- Press MENU to display the Home menu.
- Press + or - to select Sports.
- Press + or - to highlight Pedometer and then press ▶▶.
- Press + or - to highlight Sensitivity and press ▶II to change the setting (low, medium or high).
Sports
To reset the pedometer:
- Press MENU to display the Home menu.
- Press + or - to select Sports.
- Press + or - to highlight Pedometer and then press ▶▶.
- Press + or - to highlight Reset and press▶II to reset the pedometer.
Personal info
For accurate use of the pedometer, calculation of the BMI (Body Mass Index), personal information are required.
To enter personal information:
- Press MENU to display the Home menu.
- Press + or - to select Sports and press ▶▶ to enter the Sports menu.
- Press + or - to highlight Personal Info and then press ▶.
- Press + or - to highlight Sex, Weight, Height or Stride and then press ▶to confirm selection.
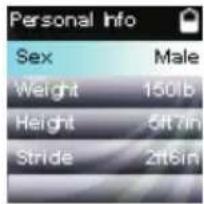
- Press + or - to adjust the value while it is blinking (except for sex, press ▶for selection).
- When finished, press ▶Repeat step 4-5 for other adjustments.
• To switch between English (Imperial) and metric units when entering personal information, refer to Settings on page 28.
• To measure your stride length, measure the distance traveled by walking 20 steps and divide the distance by 20.
BMI (Body Mass Index)
What's BMI?
BMI is a measure which takes into account a person's weight and height to estimate total body fat in adults. It may vary depending on your body type and composition. BMI is calculated by the following formula:
BMI = Body weight (kg) / [Body height (m)] 2 = 703 x Body weight (lb) / [Body height (inch)] 2
You should have entered your personal information before checking this index (refer to Personal info).
To check your BMI:
- Press MENU to display the Home menu.
- Press + or - to select Sports and press ▶▶ to enter the Sports menu.
- Press + or - to highlight BMI and then press
Meanings of BMI:
Different BMI ranges correspond to different health condition..
| Health Condition | Male | Female |
| Underweight | Less than 20 (<20) | Less than 18 (<18) |
| Ideal | Greater than or equal to 20 but less than 25 (≥20 but <25) | Greater than or equal to 18 but less than 23 (≥18 but <23) |
| Overweight | Greater than or equal to 25 but less than 30 (≥25 but <30) | Greater than or equal to 23 but less than 30 (≥23 but <30) |
| Obese | Greater than or equal to 30 (≥30) | Greater than or equal to 30 (≥30) |
BMI is a general indicator of your health. The information above is a rough estimation only. To have a full understanding of your health condition, consult with your doctor.

Settings
Changing the player's settings
To change the player settings:
-
Press MENU to display the Home menu.
-
Press + or - to select Settings and press ▶▶ to enter the settings menu.
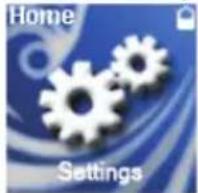
- Press + or - to select a setting and then press to change it.
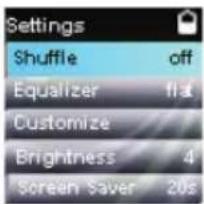
Shuffle
- Press ▶Irepeatedly to select shuffle on or off. Music files (mp3/wma/wav) will be played randomly when shuffle is activated.
- The shuffle icon shows on display when shuffle is on.
Equalizer
- Press ▶II repeatedly to choose an equalizer setting (Flat, Bass, Graphic, Pop, Rock and Jazz).
Setting Graphic mode:
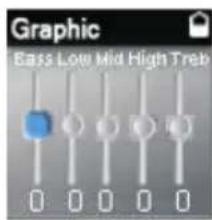
- Press ▶ repeatedly until Graphic appears and then press ▶ In graphic mode, you can customize the five band equalizer. Press ◀ or ▶ to select a band and then press + or – to adjust the band level. When finished, press MENU to exit.
Customize
To select what you wish to display in the submenu of the Music menu: Artists, Album, Titles, Genres, and Years.
Brightness
To adjust the display light brightness.
Screensaver
To set the duration (10s, 20s, 30s and 1m) before the screensaver activates.
Power saver
To set the time interval (Off, 1m, 2m, 5m and 10m) before the player turns off if no key is pressed.
FreqStep (Frequency Step)
To changes the way that the player scans through the radio frequencies. Switch to EU if you bring the player to Europe; switch back to US when you return to North America.
RecDur (Record duration)
To change the duration (Max, 5 minutes, 30 minutes, 1 hour) for radio recording.
Language
To change the language of the player menus.
Settings
Unit
To switch between English (Imperial) and metric units when entering personal information. Refer to page 26 for details.
Protocol
To switch between MSC (Mass Storage Class) and MTP (Media Transfer Protocol) modes when connected to your PC. To enable function of transferring subscription music content, select MTP mode.
Flip display
To flip the display 180°.
System info
To show the amount of free space available and the firmware version.
Date and time
To set the date and time (for Sports mode).
Theme
Change the theme of the player. We have two themes(male and female).
Restore defaults
To reset all menus to factory defaults.
Additional information
Tips and troubleshooting
Cannot delete files on the player.
- For any files you have transferred to the player, you may delete them while you have connected the player with your computer. Highlight the unwanted file in the player's file directory on your computer and press the delete key on your computer to delete the file. Subscribed files are best to be removed through Windows Media Player.
- For deleting files from the player, refer to Option menu from page 16-22 for details.
Player repeats same tracks or all tracks.
- Repeat play is turned on. Press the PLAY button to show the option menu and change the play mode.
Audio distorted at high volume.
- Change the Equalizer mode to Flat.
- Turn down the volume.
Player turns itself off.
- Your player turns itself off if you leave it in pause mode or navigation mode for the duration specified in PowerSave setting.
The player cannot be turned on.
- Battery is empty.
- Ensure the keys lock is not activated.
- Reset the player by pressing and holding MENU for more than 10 seconds.
- If the player still cannot be turned on after resetting, perform a firmware upgrade to restore it.
Player does not respond to key presses.
- If your player stops responding to key presses, you can reset it by pressing and holding MENU for more than 10 seconds. Most of your settings will be preserved; only the settings that you have changed after your last power off will be lost.
- This player may temporarily cease to function if subjected to electrostatic disturbance. To resume normal operation, it may be necessary to cycle the power off and back on or you can reset it by pressing and holding MENU for more than 10 seconds.
Player cannot play WMA songs.
- Secure music download files must be transferred to your player through the Windows Media Player or the application recommended by your online music download service (Note: Services and applications must be Windows Media audio-compliant and support Digital Rights Management.) (Apple iTunes music content is not supported). The player takes a long time to read files in a folder.
- File reading may take longer if too many files are put in a single folder. Re-organize your files into a number of folders.
Song information is not showing correctly.
- Song information may not match your current player's language setting. Change the language setting.
Cannot view picture files.
- The player only supports .jpg extension file, and do not support other formats like .bmp, .tiff, .jpeg.
Cannot play video files.
- All video contents must be converted by video2smv. Other format of video file will not be supported.
Cannot play audible files.
- Make sure the file format is correct. The player supports Format 4 Audible file. The player reports that it is full.
- You have filled the capacity of the internal memory of the player.
- You have exceeded the maximum number of items that this player supports. Your player can only support up to 2000 media files within eight hierarchy of folder in maximum.
Additional information
Cannot playback tracks on the player.
- Make sure audio tracks are encoded in the mp3 or Windows Media formats at supported bitrates.
- Bitrates support by the player: mp3 – 32 to 320 kbps wma – 48 to 192 kbps
- WMA files may be DRM protected and you don't have the proper rights (license) to play the files.
- Check the website and/or application help system of the music download service provider from where the content was purchased from for license acquisition details. For more information on how license acquisition works, go to www.microsoft.com/windowsmedia/drm.
Cannot playback songs downloaded from my paid Music Server Provider subscription service.
- The internal clock in your portable player may not be up to date. Downloading a new subscription song from your Music Server Provider should update your player's clock and allow it to playback all your songs again.
- The license for your subscription songs may have expired. Synchronize your device with your PC again to obtain an update to your license. If the problem persists, please contact your Music Service Provider for additional support.
Cannot transfer subscription music content to the player.
- To enable function of transferring subscription music content, select MTP mode under Protocol in the Settings menu. Refer to page 23 for more information.
What is MTP mode?
- MTP (Media Transfer Protocol) mode is essential if you want to transfer DRM content to your player. In MTP mode your player will no longer show up as a drive letter. So programs that were designed to work with a player that shows up as a drive letter will not be able to work directly with the player.
Specifications
Hardware
• Dimensions: 71.11 mm H, 40.51 mm W, 15.00 mm D
• Unit Weight: 34.3g, 1.225oz
- Stereo Headphones jack
- USB Connection Jack
- Battery Operated: Rechargeable lithium battery.
USB Drive
- External USB Drive: When connected to a computer via USB, the player is capable of storing any file type allowing the user a fast, convenient method of storing, retrieving, and transferring files. This includes word processing files, presentations, spreadsheets and any other computer files.
Capacity: 2GB
Connection: USB 2.0, Hi-speed capable
Haier guarantees that this Haier brand product, when shipped and received in its original packaging, is free from any defects in workmanship and materials during the time periods stated below. If the product is defective, Haier will, at its option,
(1) repair the product using new or refurbished replacement parts.
(2) replace the product with a new or re-manufactured equivalent product at no charge to the purchasing consumer.
(3) refund to the purchaser up to the price of the product. (This refund may take into account a deduction for depreciation of value based on the consumer's actual use.)
This warranty does not apply for the following:
(1) damage caused by use with non-Haier products and accessories.
(2) damage caused by accident, misuse, abuse, flood, fire, earthquake, or other external causes.
(3) damage caused by using this product outside of the intended uses as described by Haier in the user manual.
(4) damage caused by service, including expansion and upgrade, that was performed by anyone who is not a representative for Haier.
(5) to the appearance of the product or the exterior of the product, which has been damaged or defaced, altered or modified in design or construction.
(6) to any and all of the additional excluded items set forth below:
The warranty commences on the date the item was purchased and the original purchase receipt must be presented to the authorized service center before warranty repairs are rendered.
The limited warranty described herein is in addition to whatever implied warranties may be granted to purchasers by law.
ALL IMPLIED WARRANTIES INCLUDING THE WARRANTIES OF MERCHANTABILITY AND FITNESS FOR USE ARE LIMITED TO THE PERIOD(S) FROM THE DATE OF PURCHASE SET FORTH BELOW.
Some states do not allow limitations on how long an implied warranty lasts, so the above limitation may not apply to you.
Neither the sales personnel of the seller nor any other person is authorized to make any warranties other than those described herein, or to extend the duration of any warranties beyond the time period described herein on behalf of Haier.
The warranties described herein shall be the sole and exclusive warranties granted by Haier and shall be the sole and exclusive remedy available to the purchaser. Correction of defects in the manner and for the period of time described herein, shall constitute complete fulfillment of all abilities and responsibility of Haier to the purchaser with respect to the product, and shall constitute full satisfaction of all claims, whether based on contract, negligence, strict duality or otherwise. In no event shall Haier be liable, or in any way responsible for any damages or defects in the product which were caused by repairs or attempted repairs performed by anyone other than an authorized service center or dealer; nor shall Haier be liable, or in any way responsible for incidental or consequential economic or property damage. Some states do not allow the exclusion of incidental or consequential damages, so that above exclusion may not apply to you.
THIS WARRANTY GIVES YOU SPECIFIC LEGAL RIGHTS. YOU MAY ALSO HAVE OTHER RIGHTS, WHICH VARY FROM STATE TO STATE.
Warranty period for this product is: One Year for Labor and parts.
Any defects discovered after the Warranty Period ends are not covered by this warranty or any conditions.
Where to obtain service: For the location of the nearest Haier authorized service center or to obtain in product literature, accessories, supplies or customer assistance, please call 1-877-337-3639
How to obtain service from your warranty: Ship or carry in your product to a Haier authorized service center. You must have the proof of purchase with you. If you ship this product to a service center, make sure that it is carefully packaged. Remove or delete any private or personal files and data before you send the Sport MP3 Player device to Haier or bring it in for service.
Failure to follow the instructions stated above may affect your warranty by causing delays, additional charges, or a voided warranty.
Sport MP3 Player Warranty
BY SHIPPING OR CARRYING IN YOUR SPORT MP3 PLAYER TO A HAIER AUTHORIZED SERVICE CENTER, YOU AGREE THAT HAIER IS NOT LIABLE FOR ANY LOSS OF DATA OR CONTENT AS A RESULT OF REPAIR OR REPLACING PARTS ON YOUR SPORT MP3 PLAYER PRODUCT.
After the Warranty Period is over, Haier may charge you for any work in diagnosing problem on and/or servicing an Sport MP3 Player product.
Haier will use all reasonable efforts to diagnose and attempt to fix, or suggest possible solutions for, an Sport MP3 Player product defect that is covered by the limited warranty stated above.
HAIER DOES NOT HAVE ANY WARRANTY REGARDING ITS WARRANTY SERVICE(S). HAIER DISCLAIMS ALL DUTIES (IF APPLICABLE) OF WORKMANLIKE EFFORT OR LACK OF NEGLIGENCE, EXCEPT FOR THE SENTENCE ABOVE.
The Limited Warranty detailed above does not cover your data on the Sport MP3 Player, or any separate content or software (whether or not it is packaged and included with the Sport MP3 Player product). The warranty also does not cover any Sport MP3 Player accessories or devices that are not manufactured by or for Haier.
ADDITIONAL CONDITIONS
The software that comes included with this Sport MP3 Player product is licensed to you only, and is not sold to you. You are licensed to use this software in your Sport MP3 Player product only. You are not permitted to reverse engineer it, except as is specifically permitted by applicable law notwithstanding this limitation.
You are entirely responsible to comply with any copyright laws that apply to you in your use of music, video and other content with this Sport MP3 Player product.
Your Sport MP3 Player product and all of its internal parts and components are new pursuant to industry standards, unless it is otherwise indicated on the Sport MP3 Player product's original retail packaging as "Refurbished."
You agree to follow all export laws and regulations that apply to you if you choose to export the Sport MP3 Player product outside of the United States.
The Limited Warranty stated above applies only to the original consumer who purchased the product. The warranty may not be assigned or transferred to anyone else. However, some jurisdictions that extend the protection of implied warranties for subsequent consumers may exist, so the above limitation may not apply to you.
GOVERNING LAW
This Limited Warranty is valid in the United States of America only. The laws of the State of New York, U.S.A., will apply to this Limited Warranty.
Digital Rights Management
Content owners use Windows Media digital rights management technology (WMDRM) for protection of intellectual property, including all copyrights. This device uses the WMDRM software for access to WMDRM protected content. If the WMDRM software fails to protect certain content, content owners may ask Microsoft to revoke the software's ability to use WMDRM to play or copy protected content. This revocation will not affect unprotected content. When you download licenses for protected content, you agree that Microsoft may include a revocation list with the licenses. You may be required by content owners to upgrade WMDRM to access their content. If you decline an upgrade, you will not be able to access any content that requires the upgrade.
Sport MP3 Player Warranty
Patent Information
United States and/or international patents pending.
Customer Service and Support
For information about Sport MP3 Player, read all documentation included with the product. If you still have a question, go to
www.haieramerica.com/support to search the information base, and to get support using chat or -mail.
In the United States, call:
Haier America, New York, NY
1-877-337-3639
For Customers in the United States
This equipment has been tested and found to comply with the limits for a Class B digital device, pursuant to part 15 of the FCC Rules. These limits are designed to provide reasonable protection against harmful interference in a residential installation. This equipment generates, uses and can radiate radio frequency energy and, if not installed and used in accordance with the instructions, may cause harmful interference to radio communications. However, there is no guarantee that interference will not occur in a particular installation. If this equipment does cause harmful interference to radio or television reception, which can be determined by turning the equipment off and on, the user is encouraged to try to correct the interference by one or more of the following measures:
- Reorient or relocate the receiving antenna.
- Increase the separation between the equipment and receiver.
- Connect the equipment into an outlet on a circuit different from that to which the receiver is connected.
- Consult the dealer or an experienced radio/TV technician to help.
This device complies with Part 15 of the FCC Rules. Operation is subject to the following two conditions:
(1) This device may not cause harmful interference.
(2) This device must accept any interference received, including interference that may cause undesired operation.
Declaration of Conformity
Model Name: Sport MP3 Player
Trade Name: Haier
Responsible Party: Haier America Trading LLC
Address: 1356 Broadway, New York, NY 10018 USA
Telephone No.: 877-339-3639
Warning: Changes or modifications to this device that are not expressly approved by Haier America may void your authority to operate this equipment.
- SAFETY INFORMATION
- IMPORTANT SAFETY INFORMATION PRODUCT GUIDE
- IMPORTANT SAFETY INFORMATION
- EARPHONES AND VOLUME CONTROL
- IMPROPER SURROUNDINGS FOR USING THE SPORT MP3 PLAYER
- HEARING LOSS SYMPTOMS
- PREVENT INFECTIONS FROM SPORT MP3 PLAYER HEADPHONES
- PREVENT SEIZURES, BLACKOUTS, AND EYE STRAIN
- PROTECTING THE SPORT MP3 PLAYER DEVICE
- GUIDELINES FOR ALL SPORT MP3 PLAYER PRODUCTS
- KEEP AWAY FROM WATER
- CARE OF CABLE AND CORD
- USE AND CLEANING OF SPORT MP3 PLAYER
- USING A CONNECTOR AND A PORT
- SPORT MP3 PLAYER RADIO FEATURE
- SPORT MP3 PLAYER HEADPHONES
- DISPOSING OF THE SPORT MP3 PLAYER DEVICE
- BEFORE YOU BEGIN
- DEAR HAIER CUSTOMER
- COPYRIGHT WARNING
- BACK UP YOUR DATA
- UNPACKING YOUR PLAYER
- COMPUTER SYSTEM REQUIREMENTS
- USING THE ARMBAND
- CONNECTING TO THE COMPUTER
- CHARGING THE PLAYER
- MANAGING FILES ON YOUR HAIER PLAYER
- ACRSOFT SOFTWARE INSTALLATION INSTRUCTIONS
- TO COPY FILES IN WINDOWS XP WITH WINDOWS MEDIA PLAYER 10 INSTALLED
- TO COPY FILES IN WINDOWS VISTA OR WINDOW XP WITH WINDOWS MEDIA PLAYER 11 INSTALLED
- DISCONNECTING THE PLAYER FROM THE PC IF WINDOWS SEES THE PLAYER AS AN MTP DEVICE
- GENERAL CONTROLS
- TURNING THE PLAYER ON AND OFF
- LOCKING THE PLAYER CONTROLS
- RESETTING THE PLAYER
- USING THE MENUS
- MENU TYPES
- PLAYER MENU
- OPTION MENU
- MENU NAVIGATION
- THE HOME MENU
- NOW PLAYING
- SPORTS
- MUSIC
- PICTURES
- SETTINGS
- VIDEOS
- RADIO
- FAVORITES
- PLAYING MUSIC FILES
- OPTION MENU (MUSIC PLAYBACK)
- PLAYING PICTURE FILES
- OPTION MENU (PICTURE VIEWING)
- PLAYING VIDEO FILES
- OPTION MENU (VIDEO PLAYBACK)
- PLAYING FM RADIO
- TO TURN THE RADIO ON
- TO TUNE THE RADIO
- TO TURN THE RADIO OFF
- STORING AND RECALLING PRESET STATIONS
- TO STORE THE CURRENTLY PLAYING STATION AS A PRESET
- TO LISTEN TO A PRESET STATION
- TO SWITCH BETWEEN STEREO AND MONO
- RECORDING FM RADIO
- TO RECORD THE CURRENTLY PLAYING RADIO STATION
- PLAYING BACK FM RADIO RECORDINGS TO PLAY BACK A RECORDING
- OPTION MENU (RECORDING PLAYBACK)
- COPYING RECORDINGS TO YOUR PC
- TO COPY RECORDINGS TO THE PC
- CREATING A "FAVORITES" PLAYLIST
- TO ADD THE CURRENTLY PLAYING MUSIC FILE IN THE PLAYLIST
- TO LISTEN TO THE FAVORITES PLAYLIST
- REMOVING FILES FROM "FAVORITES" PLAYLIST TO REMOVE A MUSIC FILE FROM THE PLAYLIST
- TO REMOVE ALL MUSIC FILES FROM THE PLAYLIST
- STOPWATCH
- FOR SINGLE LAP TIMING
- FOR MULTIPLE LAP TIMING
- TO USE THE COUNT DOWN TIMER
- TO ACTIVATE VOICE PROMPTS TO REMIND YOU THE TIME PASSED OR REMAINS
- SPORTS MODE
- TO RECORD YOUR RUN DETAILS
- TO TRACK YOUR RECORDS
- PEDOMETER
- TO ACTIVATE THE PEDOMETER
- TO CHANGE THE SENSITIVITY OF PEDOMETER
- TO RESET THE PEDOMETER
- PERSONAL INFO
- TO ENTER PERSONAL INFORMATION
- BMI (BODY MASS INDEX)
- WHAT'S BMI
- TO CHECK YOUR BMI
- MEANINGS OF BMI
- CHANGING THE PLAYER'S SETTINGS
- TO CHANGE THE PLAYER SETTINGS
- SHUFFLE
- EQUALIZER
- SETTING GRAPHIC MODE
- CUSTOMIZE
- BRIGHTNESS
- SCREENSAVER
- POWER SAVER
- FREQSTEP (FREQUENCY STEP)
- RECDUR (RECORD DURATION)
- LANGUAGE
- UNIT
- PROTOCOL
- FLIP DISPLAY
- SYSTEM INFO
- DATE AND TIME
- THEME
- RESTORE DEFAULTS
- ADDITIONAL INFORMATION
- TIPS AND TROUBLESHOOTING
- CANNOT DELETE FILES ON THE PLAYER
- PLAYER REPEATS SAME TRACKS OR ALL TRACKS
- AUDIO DISTORTED AT HIGH VOLUME
- PLAYER TURNS ITSELF OFF
- THE PLAYER CANNOT BE TURNED ON
- PLAYER DOES NOT RESPOND TO KEY PRESSES
- PLAYER CANNOT PLAY WMA SONGS
- SONG INFORMATION IS NOT SHOWING CORRECTLY
- CANNOT VIEW PICTURE FILES
- CANNOT PLAY VIDEO FILES
- CANNOT PLAY AUDIBLE FILES
- CANNOT PLAYBACK TRACKS ON THE PLAYER
- CANNOT PLAYBACK SONGS DOWNLOADED FROM MY PAID MUSIC SERVER PROVIDER SUBSCRIPTION SERVICE
- CANNOT TRANSFER SUBSCRIPTION MUSIC CONTENT TO THE PLAYER
- WHAT IS MTP MODE
- SPECIFICATIONS
- HARDWARE
- USB DRIVE
- CAPACITY: 2GB
- THIS WARRANTY DOES NOT APPLY FOR THE FOLLOWING
- THIS WARRANTY GIVES YOU SPECIFIC LEGAL RIGHTS. YOU MAY ALSO HAVE OTHER RIGHTS, WHICH VARY FROM STATE TO STATE
- SPORT MP3 PLAYER WARRANTY
- ADDITIONAL CONDITIONS
- GOVERNING LAW
- DIGITAL RIGHTS MANAGEMENT
- PATENT INFORMATION
- CUSTOMER SERVICE AND SUPPORT
- IN THE UNITED STATES, CALL
- FOR CUSTOMERS IN THE UNITED STATES
- DECLARATION OF CONFORMITY
Brand : HAIER
Model : HHS1A-2G
Category : Media player