
HV18A-4G - Media player HAIER - Free user manual and instructions
Find the device manual for free HV18A-4G HAIER in PDF.


| Product Type | Media Player |
| Brand | Haier |
| Model | HV18A-4G |
| Dimensions (approx.) | 140 x 85 x 25 mm |
| Weight (approx.) | 200 g |
| Power Supply | 5V DC via USB or AC adapter |
| Video Output | HDMI 1.4, Composite AV |
| Audio Output | HDMI, RCA stereo |
| Internal Storage | 4 GB |
| Expandable Storage | microSD card (up to 32 GB) |
| Supported Video Formats | MP4, AVI, MKV, MOV, WMV, FLV |
| Supported Audio Formats | MP3, WAV, AAC, WMA |
| Supported Image Formats | JPEG, BMP, PNG, GIF |
| Connectivity | USB 2.0, microSD slot, HDMI, AV out |
| Remote Control | IR remote included |
| Power Consumption | < 5 W |
| Operating Temperature | 0°C to 40°C |
| Cleaning Instructions | Wipe with a soft dry cloth; avoid liquids |
| Safety Precautions | Keep away from moisture; do not disassemble |
Frequently Asked Questions - HV18A-4G HAIER
User questions about HV18A-4G HAIER
0 question about this device. Answer the ones you know or ask your own.
Ask a new question about this device
Download the instructions for your Media player in PDF format for free! Find your manual HV18A-4G - HAIER and take your electronic device back in hand. On this page are published all the documents necessary for the use of your device. HV18A-4G by HAIER.
USER MANUAL HV18A-4G HAIER
Please read this instruction manual carefully before operating this product, and store it well for future reference. Product images and illustrations are for illustrative purposes only. Please always refer to the real product. This user guide is subject to changes for improvement without prior notice.
Safety Warnings and Maintenance

Please read ALL safety warnings and precautions before attempting to use your player to avoid injury.
Important Safety Information
WARNING: Failure to follow the following safety instructions could result in fire, electric shock, or other injury or damage.
- Avoid water, liquid and wet/damp locations. Do not use the player in rain, near washbasins or any other wet locations. In the instance where the player gets wet, unplug all cables, turn the player off and dry it out thoroughly before switching it back on again.
- Repairing the player. Never attempt to repair the player yourself, as it does not contain any user serviceable parts. The rechargeable battery in the player should only be replaced by an authorized service center.
- Listening to loud sounds for prolonged periods may permanently damage your hearing. Before putting on the earphones turn the volume down then put the earphones on and slowly increase the volume until you reach a comfortable listening level. If you experience ringing in your ears or muffled speech, stop listening and have your hearing checked. Hearing experts suggest that to protect your hearing as follows:
- Limit the amount of time using earphones or headphones at high volumes.
- Avoid turning up the volume to block out noise from the surroundings.
- Turn the volume down if you can't hear people speaking near you.
- Using earphones or headphones while operating a vehicle or machinery is not recommended and is illegal in some areas. Be careful and attentive, stop using your player if you find it disruptive or distracting while operating any type of vehicle/machinery or performing any other activity that requires your full attention.
Important Handling Information
Caution: Failure to follow these handling instructions could result in damage to your player and/or other equipment.
- Never force a connector into a port. Check for obstructions in the port. If the connector and port do not interface with reasonable ease, they probably do not match. Make sure that the connector is matching and is positioned correctly in relation to the port.
- When connected to a USB port, do not remove the USB device while it is being accessed. Electrical interference and electrostatic discharges may cause malfunction and damage to the USB device and thus may result in loss of data. It is strongly recommended to back up all important data on a PC in order to protect against corruption, data loss, or device malfunction. Please note that the manufacturer shall not accept any liability for damage or loss of stored data.
- The player operates best in temperatures between -5° and 40° C. Its play time may temporarily shorten when it is operating in low-temperature conditions.
- Store your player in a place where the temperature is always between -5° C and 40° C. Do not leave your player in the car as temperature in parked cars may exceed this range.
- To clean the player, unplug all cables and turn the player off. Then use a soft, slightly damp, lint-free cloth. Avoid getting moisture in openings. Do not use window cleaners, household cleaners, aerosol sprays, solvent cleaners, or abrasives to clean your player.
- To minimize static electricity, avoid operating the player in an extremely dry environment. In an environment with electrostatic discharge, this may cause malfunction to the product and reset may be required.
Table of Contents
Safety Warnings and Maintenance.... 1
Important Safety Information .... 1
Important Handling Information 2
Table of Contents 3
Package Content......6
Getting Started 6
Features 6
Touch Pad....6
Product Overview 7
Charging the Battery....7
Turning On/Off the Player 8
Hold Function 8
Reset Feature....9
Connecting to the Computer....9
System Support 9
Connecting the Player to the Computer....9
Transferring Files.... 10
For Windows® Users....10
MSC Mode - For Windows® 2000/XP Service Pack 1 users....10
MTP Mode - For Windows® XP Service Pack 2 (with WMP 10) users:....11
MTP Mode - For Windows® XP Service Pack 2 + WMP11/ Vista (with WMP 11) users: ...... 13
Formatting the Player 16
For Windows® Users....16
MSC Mode 16
MTP Mode 17
Disconnecting the Player from the Computer 18
For Windows® Users....18
MSC Mode 18
MTP Mode 18
Basic Operation 18
Calling up the Menu.... 18
How to Navigate the Menu 18
Now Playing....19
Starting Playback.... 19
Pausing Playback.... 19
Selecting Next/Previous Track.... 19
Fast Forwarding/Rewinding Current Track 19
Adjusting the Volume Level 19
Music Player 20
Loop Repeating 20
Music....21
Video 21
Starting Playback....21
Pausing Playback 22
Stop Playback....22
Select Next/Previous Track.... 22
Fast Forwarding/Rewinding Current Track 22
Adjusting the Volume Level 22
Record....22
Start Record.... 22
Start Recording 23
Pause Recording....23
Stop Recording 23
Settings 23
Format....23
Channel....23
Rate 24
Voice....24
Playing a Voice Record 24
FM 25
Starting the FM Radio.... 25
Listening to FM Radio 25
Manual Tune.... 25
Add to Preset.... 26
Load Preset 26
Auto Scan.... 26
Delete One 27
Delete All 27
Photo 28
Settings....28
Equalizer Setting 28
Repeat 29
Contrast....29
Backlight 29
Power Savings.... 30
Language 30
Default 30
Format 31
Navigation.... 31
About....32
Appendix....33
Video Conversion Tool.... 33
Troubleshooting.... 34
Technical Specifications 35
Warranty.... 36
Additional Conditions.... 37
Governing Law 37
Digital Rights Management 37
Patent Information 38
Customer Service and Support.... 38
Declaration of Conformity 39
Package Content
Main Unit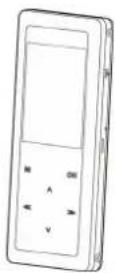
User Guide
USB cable (for PC connection and battery charging)
Earphone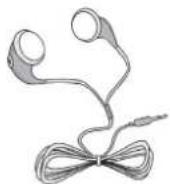
Installation CD
Getting Started
Features
- Touch pad
- WMA/MP3 player
- Video player
- Photo player
- Voice recorder
- FM Tuner
- WMA DRM support • USB mass storage device
- Integrated USB connector
- Backlight display
- Superb audio quality
Touch Pad
The player is designed with a high sensitivity touch pad. Tap the pad slightly with your finger to perform operation. To protect the touch pad, do not touch it with strong force or any pointed object.
Product Overview
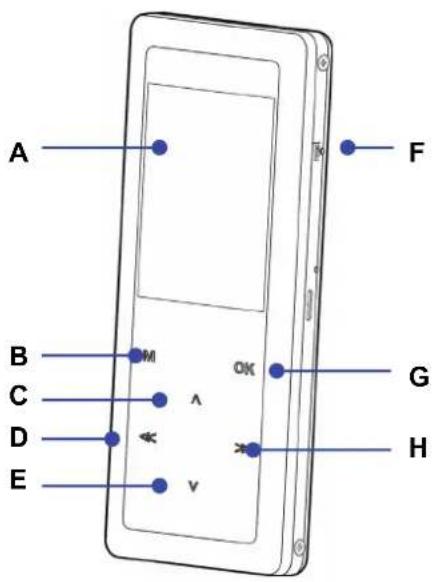
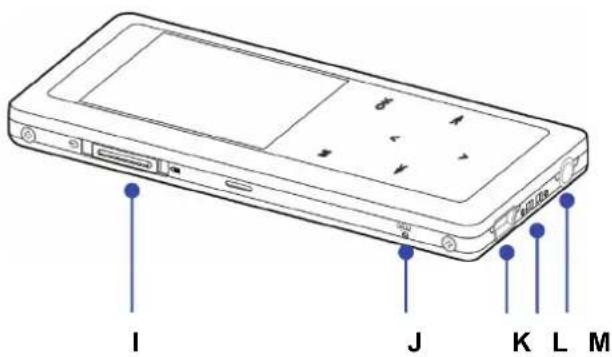
A. Screen B. Menu M C. Volume Up D. Previous/Rewind E. Volume Down F. Reset Opening G. Confirm OK
H. Next/Fast Forward I. Power/Hold Switch / J. Microphone mic K. USB Port L. Hand/Neck Strap Holder M. Earphone Socket


Charging the Battery
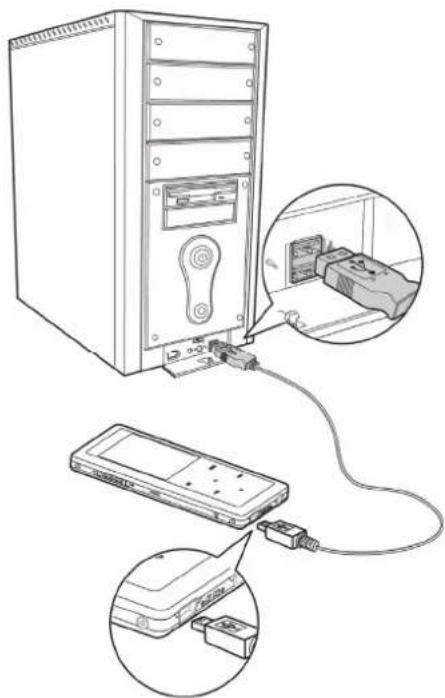
The player comes with a rechargeable battery. On the first charge before using, this will take approximately 8 hours for the battery to be fully charged. But thereafter it would normally take 3 hours to be fully charged.
- Turn on the computer.
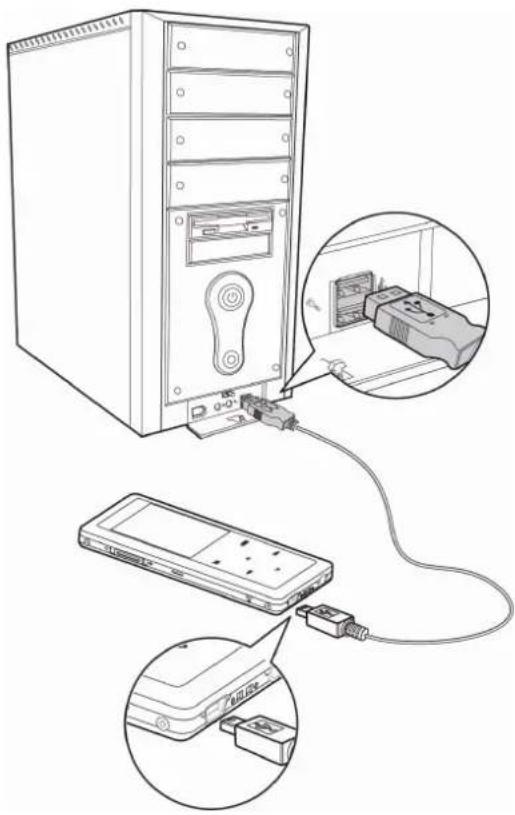
- Connect the player to the computer with a USB cable.
A battery icon progresses indicates a charge. The icon stays full when charging finished.

NOTE:
Fully charge the battery every two or three months when the player is not used for a long period of time. Otherwise, the battery voltage may be too low to power the player on.
Turning On/Off the Player
Power On: Slide and hold the Power/Hold switch in the direction of the ⏻ icon till the screen is activated.
Power Off: Slide and hold the Power/Hold switch in the direction of the ⏻ icon until the screen is deactivated.
NOTE:
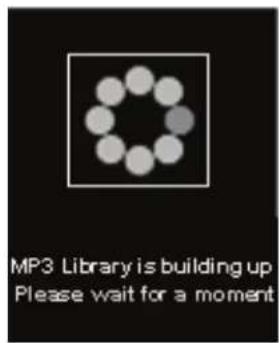
The time for the player to start up will be longer when files are added to or removed from the memory. This is normal, as the start-up time depends on the number of files stored. The more files stored, the longer the start-up time will be. However, the start-up time will return to normal on the next start-up.
When the player boots up, the startup image appears in sequence. The player automatically goes to music playback mode after boot-up.
Hold Function
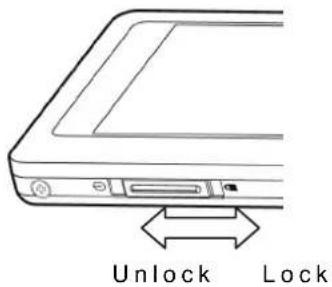
You may lock the touch pad to prevent accidental operation. Slide the Power/Hold switch down to the lock icon, and then a screen with a lock appears, indicating that the touch pad is now locked. If the touch pad is tapped in lock mode, a screen with a lock and keys will appear, indicating that you need to unlock it before any operation can take place. To unlock the touch pad, slide the Power/Hold switch back to the middle position.

Locked

To unlock

Reset Feature
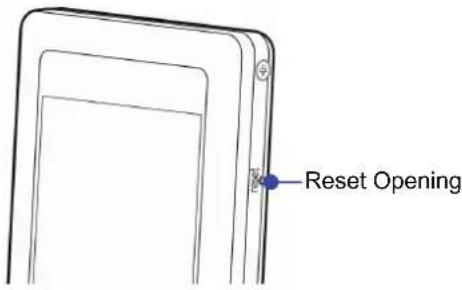
The player is designed with a reset feature. If the player works abnormally, reset it by pressing the reset opening with a paper clip. Turn on the player again, and it will resume normal operation.
Connecting to the Computer
System Support
• Supports Windows® 2000/XP/Vista.
Connecting the Player to the Computer
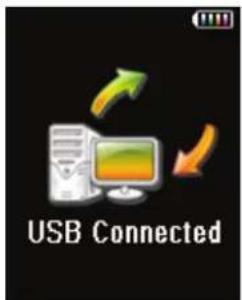
Connect the player to the computer with the USB cable. The screen displays "USB Connected", indicating that the player is in USB mode.
Windows® will show Found New Hardware when the player is first attached. The player will then be recognized as a new device under My Computer.
NOTE:
It may take several minutes for Windows® to recognize the device for the first time depending on the hardware configuration.
Transferring Files
After connecting the player to the computer, the player works in Mass Storage Class (MSC) or Media Transfer Protocol (MTP) mode. The player's working mode depends on the operating system and Windows® Media Player which the computer works on.
| Windows® 2000 Windows® XP SP1 without WMP10/11 | Windows® XP SP2 with WMP10/11 | Windows® Vista | ||
| MSC √ | √ | |||
| MTP | √ √ | |||
NOTE:
MSC stands for Mass Storage Class. It doesn't require separate drive installation when it's first connected to PC and it can be used as an external mass storage device using 'drag and drop method' with 'Windows Explorer'.
MTP stands for Media Transfer Protocol. It is to facilitate communication between devices and connected host. It also enables command and control of the connected device. For further details, you may go to:
http://msdn2.microsoft.com/en-us/library/ms867188.aspx
For Windows® Users
MSC Mode - For Windows® 2000/XP Service Pack 1 users
The player is recognized as a MSC device for Windows® 2000/XP Service Pack 1 (without Windows® Media Player 10/11).
- Double-click My Computer in Windows Explorer, the player is recognized by the computer as a removable disk. Double-click it to explore the device.

2. Drag the files of your favorite songs to Removable Disk.
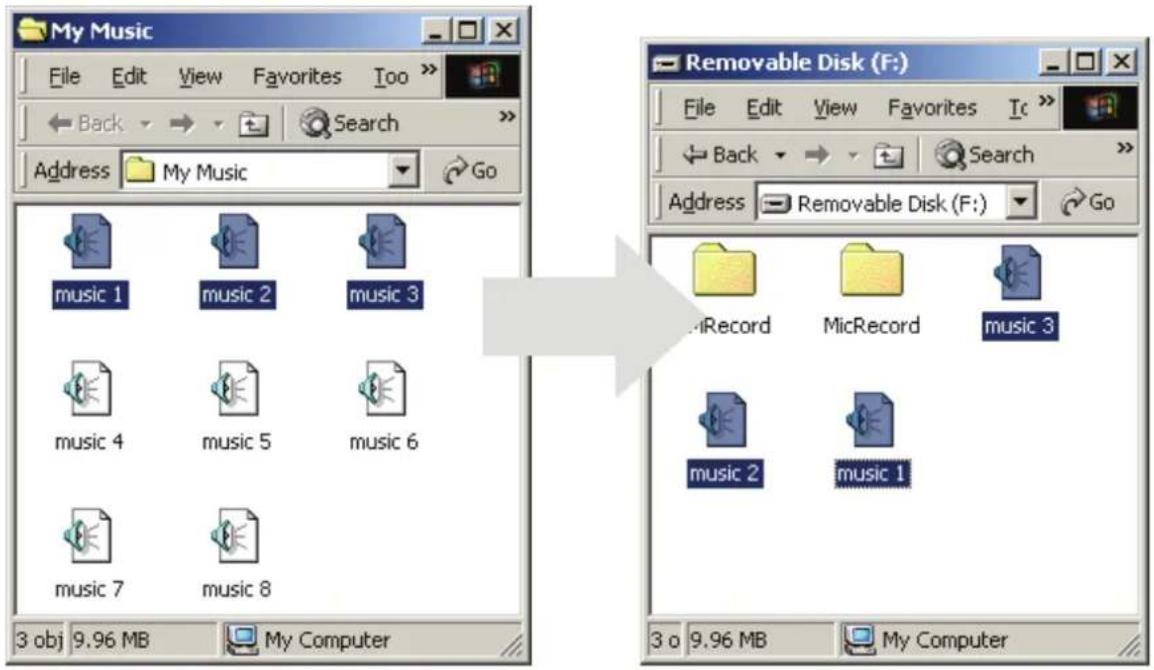
NOTE:
You are strongly recommended to organize your songs in different folders systematically so that you can locate your songs easily in the Navigation mode.
MTP Mode
The player is recognized as a MTP device for:
- Windows® XP Service Pack 2 (with Windows® Media Player 10/11)
- Windows® Vista (with Windows Media Player 11)
MTP Mode - For Windows® XP Service Pack 2 (with WMP 10) users:
- After connecting the player to the computer, the MTP Media Player window appears. 2a. Select Sync digital media files to this device and click OK.
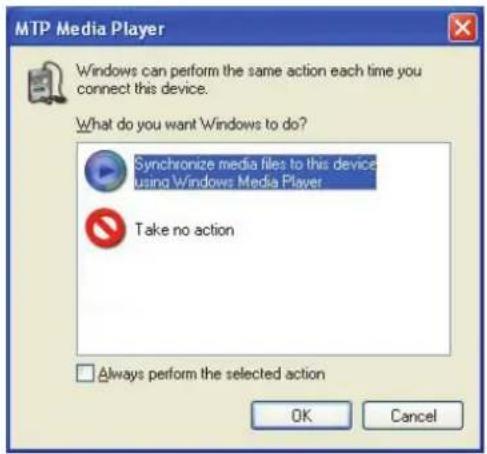
3a. Select Manual and click Finish.
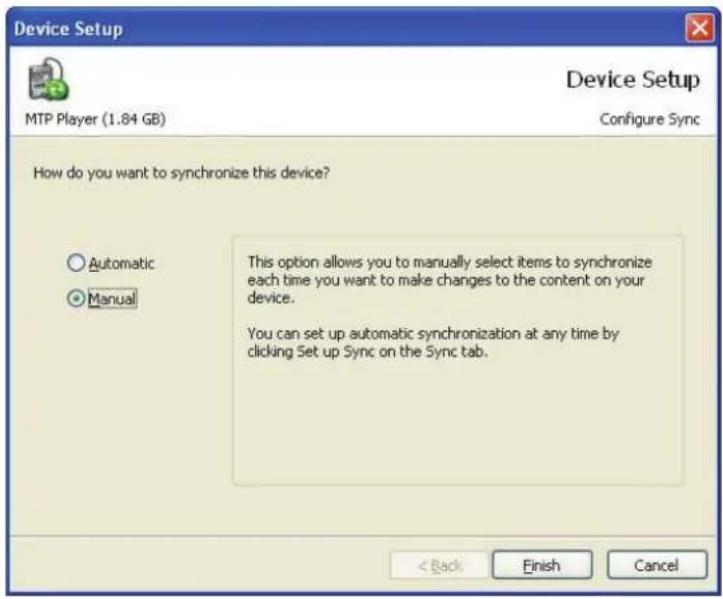
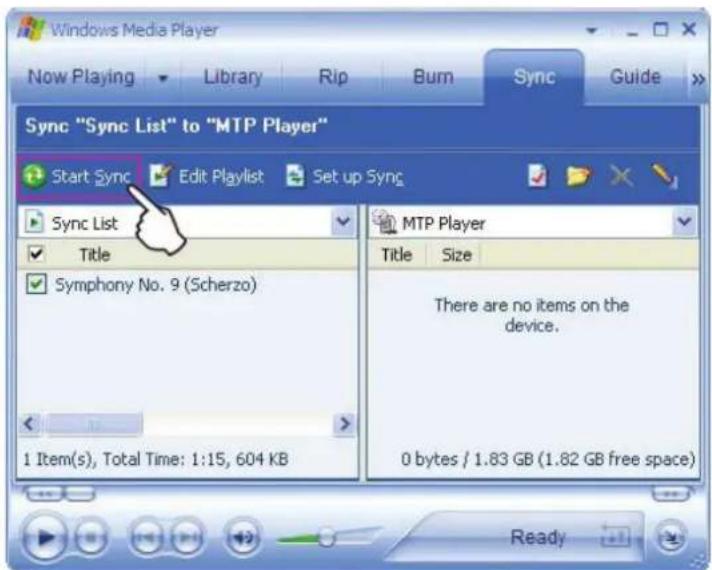
4a. Click Sync and drag the file you want to transfer to the left window.
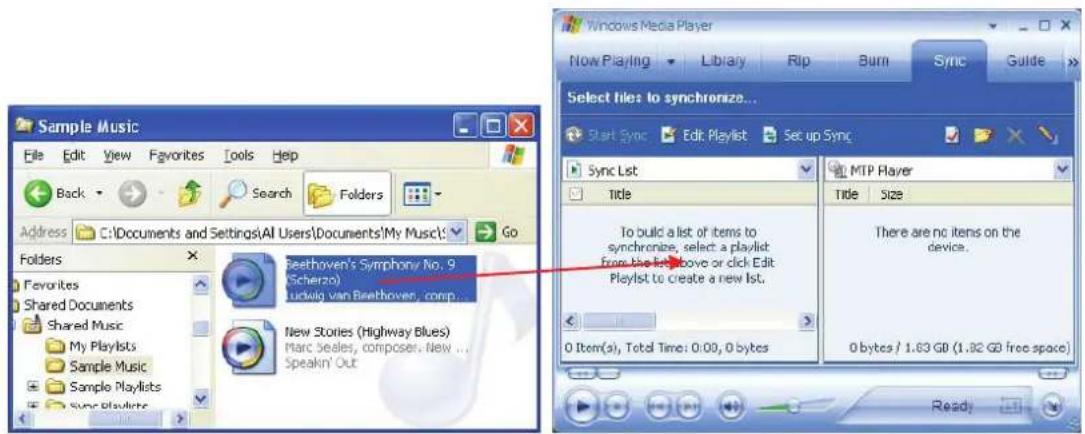
5a. Click Start Sync.
You also can copy the media files to the player by the drag-and-drop method.
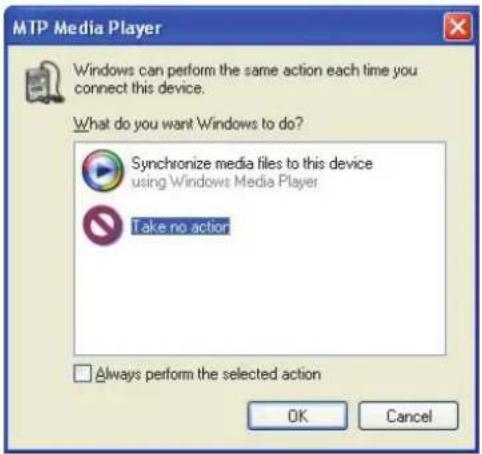
2b. Select Take no action and click OK.
3b. Double-click My Computer.
4b. Double-click Haier Video MP3 Player.
Data folder: You can drag and drop all data files to the Data folder.
Media folder: You can only drag and drop the media files (music and photos) the player supports to the Media folder.
5b. Drag the file to the portable media drive.
NOTE:
- To play the DRM protected music, you should use Windows® Media Player 10 via MTP connection to store the DRM files to the player.
- If encountering any problem about DRM file transfer, Windows® Media Player 10 users visit the following link for instruction: http://support.microsoft.com/kb/922814
MTP Mode - For Windows® XP Service Pack 2 + WMP11/ Vista (with WMP 11) users:
- After connecting the player to the computer, the Portable Device (for Windows® XP SP2) or AutoPlay (for Windows® Vista) window appears. 2a. Select Sync digital media files to this device and click OK.

For Windows® XP SP2
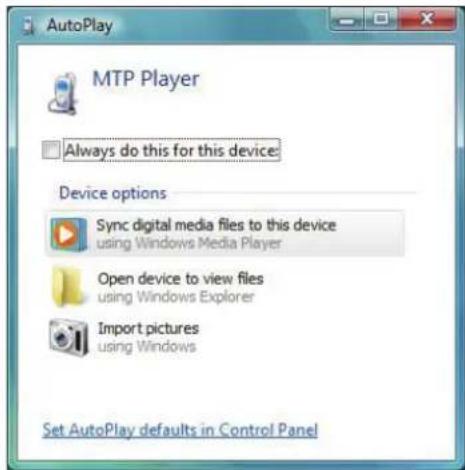
For Windows® Vista
3a. Click Sync on the menu bar.
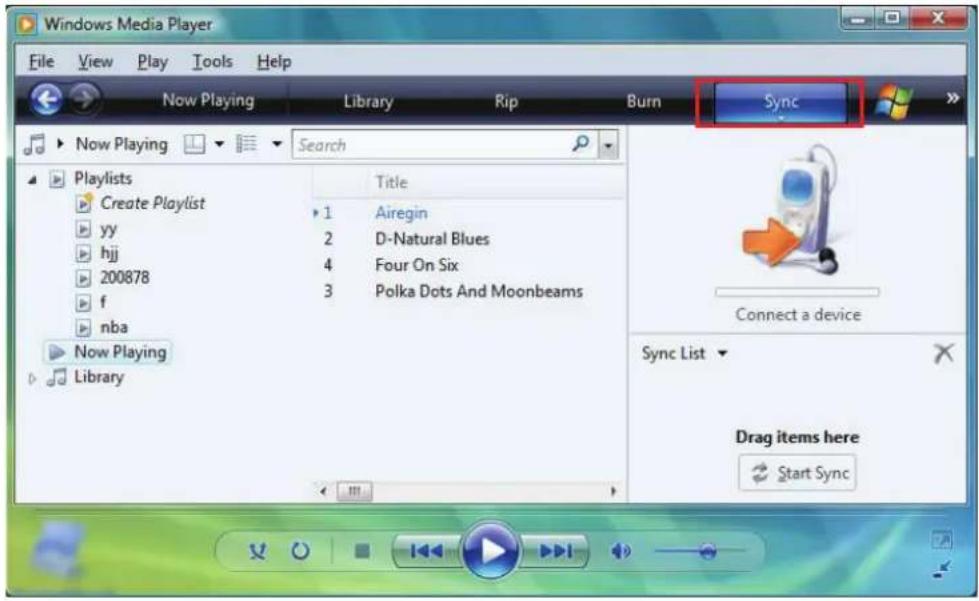
4a. Select the file you want to synchronize to the player and drag it to the Sync List. Click Start Sync.
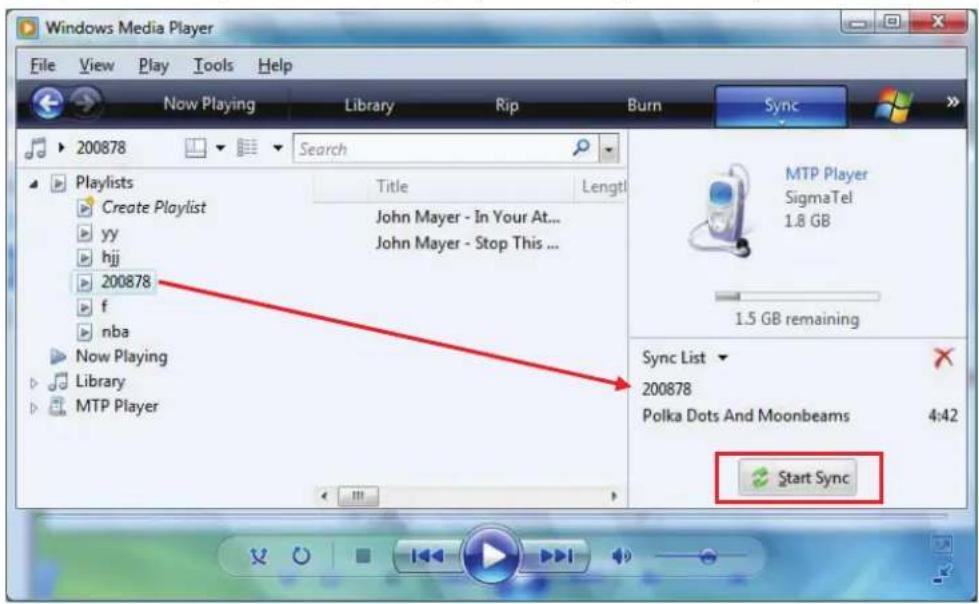
You also can copy the media files to the player by the drag-and-drop method.
2b. Select Open device to view files and click OK.

For Windows® XP SP2
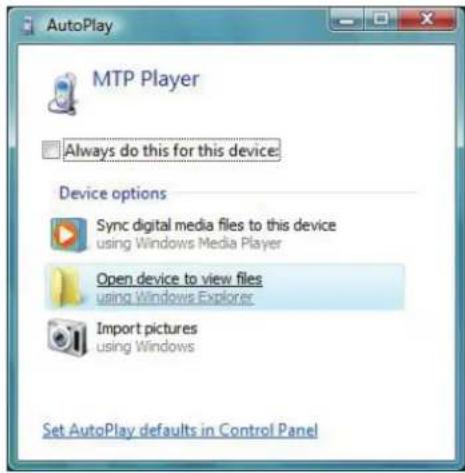
For Windows® Vista
3b. Double-click Haier Video MP3 Player. 4b. Drag the files to the Internal Storage.
NOTE:
- Do not disconnect the player from the computer during data reading or writing.
- To play DRM-protected music, you should use Windows® Media Player 11 via MTP connection to store the DRM files to the player.
- If you have any problem about DRM file transfer,
√ For Windows® Media Player 11 users, visit the following link to restore the Windows® Media Player 11: http://www.microsoft.com/downloads/details.aspx?FamilyID=1d224714-e238-4e45-8668-5166114010ca&DisplayLang=en √ For Windows® Media Player 11 users, visit the following link for instructions on how to sync files to this Player: http://www.microsoft.com/windows/windowsmedia/knowledgecenter/howto/mp11/sync.aspx
- Windows® Vista users must use Windows® Media Player 11 to transfer music files to the player.
Formatting the Player
If you want to erase all files in the internal memory of the player, format the player on the computer.
NOTE:
Please back up all your songs or other media files before formatting your player.
For Windows® Users
MSC Mode
- Double-click My Computer.
- Right-click the removable disk for the player.
- Select Format.

- Click Start.
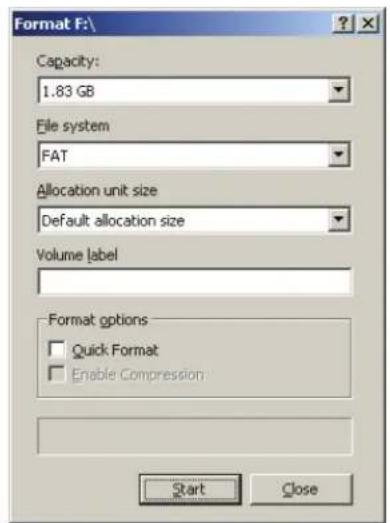
- Click OK.

- Click OK when formatting finishes.
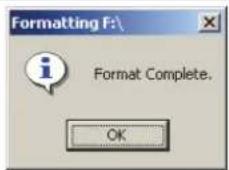
NOTE:
Do not select NTFS under the File System tab. Otherwise, the player cannot work and will need to be reformatted.
MTP Mode
For Windows® XP (with WMP10) users:
- Double-click My Computer.
- Right-click the disk named Haier Video MP3 Player and select Format.
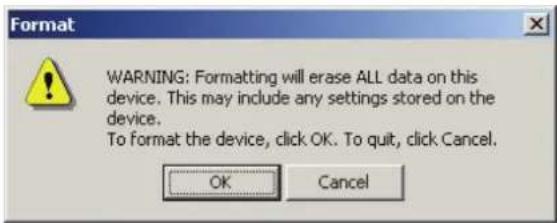
- Click OK.
- Click OK when formatting finishes.
For Windows® XP (with WMP11) / Windows® Vista users:
- Double-click My Computer and then double-click the device Haier Video MP3 Player.
- Right-click Internal Storage and select Format.
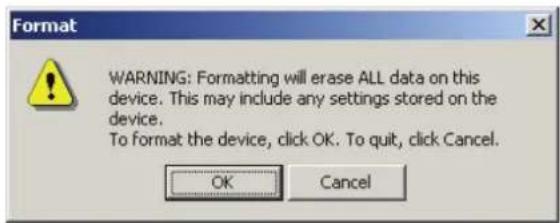
For Windows XP
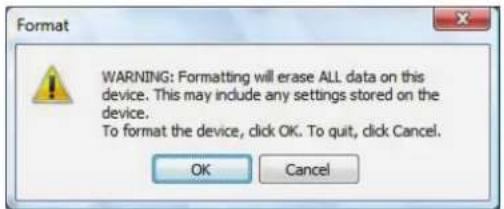
For Windows Vista
- Click OK.
- Click OK when formatting finishes.
NOTE:
The screen will display USB Connected again when the file transfer or formatting is completed. Disconnect the player from the computer only when all data reading/writing is finished.
Disconnecting the Player from the Computer
For Windows Users
MSC Mode
- The screen will display USB Connected again when the file transfer or formatting is completed. Disconnect the player from the computer only when all data reading/writing is finished.

- Double-click the Unplug or Eject icon in the system tray.
- Select USB Mass Storage Device and click Stop.
- Click OK.
- Disconnect the USB cable from the computer.
MTP Mode
- The screen will display USB Connected again when the file transfer or formatting is completed. Disconnect the player from the computer only when all data reading/writing is finished.
- Disconnect the USB cable directly from the computer.
Basic Operation
Calling up the Menu
Tap M to call up the menu. Menu options include Now Playing>>Music>>Video>>Record>>Voice>>FM>>Photo>>Settings>>Navigation>>About. The player automatically returns to the music playback mode after about 10 seconds of no further operation.
How to Navigate the Menu
Tap << or >> to scroll menu options left or right respectively.
Tap OK to enter the submenu list.
Tap << or >> to scroll the submenu list up or down respectively.
Tap OK to confirm the selection.
Tap M to return to the upper level menu or exit.
Now Playing
You can jump back to the current music playback screen by the following steps.
- Tap M.
- Tap << or >> to select Now Playing.
- Tap OK.

Starting Playback
The player automatically enters music playback mode when you turn it on.
Tap OK to start playback.
Pausing Playback
Tap to pause during playback.
Selecting Next/Previous Track
Tap > during playback to play the next track.
Tap << within the first five seconds of playback to play the previous track.
Tap << after five seconds of playback to play the current track from the beginning.
Fast Forwarding/Rewinding Current Track
Touch and hold >> to fast forward the current track, and release to stop forwarding.
Touch and hold << to fast rewind the current track, and release to stop rewinding.
Adjusting the Volume Level
Tap A to increase the volume level, or touch and hold A to increase fast.
Tap V to decrease the volume level, or touch and hold V to decrease fast.
Music Player
A. ID3 Tag (Artist, Album, Genre, Year) B. Progress Bar C. Play/Pause/Stop D. Elapsed Time E. Lock Indicator F. Equalizer Mode G. Volume Level H. Play Mode
- Battery Power Level J. Current Track Number
/Total
Track
Number

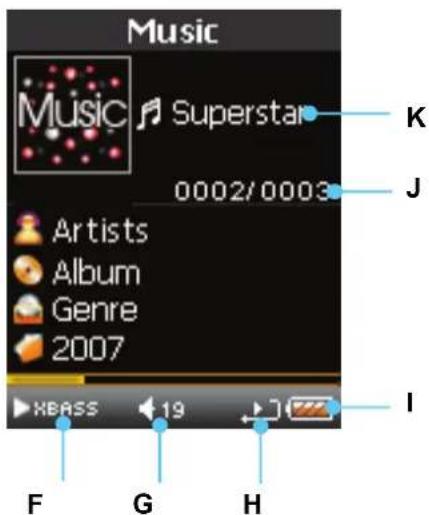
K. Title of Music
Loop Repeating
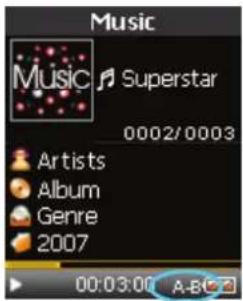
- While playback, touch and hold M at the beginning of the loop you want to set.
A- appears in the display.
- Touch and hold M again to set the end of the loop.
A-B appears in the display. The loop is played repeatedly.
Tap and hold M again to cancel the loop.
Music
The music files can be sorted by categories, such as artist, album, genre and time of issuance, so that you can choose the songs easily.
- Tap M to display the menu.
- Tap or to select Music.
- Tap OK.
- Tap or to select an option (All Songs/Artists/Albums/Genres/Year).
- Tap OK to confirm the selected category.


| All Songs | Play all music files in the player. |
| Artists | Play music files in the albums by different artists. |
| Albums | Play music files by album. |
| Genres | Play music files by genre. |
| Year | Play music files by time of issuance. |
Video
The player only supports video files in .smv format. For other files, convert them into the .smv format by using the supplied video conversion tool. See Video Conversion Tool in Appendix for more details.
NOTE:
To play the video files, you must first store the .smv files in the player.
- Connect the player to your PC as described previously.
- Create a folder named as "Video" in the Root Directory for MSC mode/ in the Data folder for MTP mode (with WMP10)/ in the Internal Storage disk for MTP mode (with WMP11).
- Drag and drop the .smv files to this folder.
- Disconnect the player from your PC.
Starting Playback
- Tap M to display the menu.
- Tap << or >> to select Video.
- Tap OK.
- Tap << or >> to select a video file.
- Tap OK to play the selected video file.


Pausing Playback
Tap to pause during playback.
Stop Playback
Tap M to stop playback and return to the video file list.
Select Next/Previous Track
Tap > during playback to play the next file.
Tap << within the first five seconds of the playback to play the previous file.
Tap << after five seconds of the playback to play the current file from the beginning.
Fast Forwarding/Rewinding Current Track
Touch and hold >> to fast forward the current file.
Touch and hold ≪ to fast rewind the current file.
Adjusting the Volume Level
Tap Λ to increase the volume level, or touch and hold Λ to increase fast.
Tap V to decrease the volume level, or touch and hold V to decrease fast.
Record
Start Record
NOTE:
Recording FM
When the player is switched from FM mode to RECORD mode, the current FM channel will be recorded.
Recording Voice
When the player is switched from MUSIC or PHOTO mode to RECORD mode, surrounding sound will be recorded.
Start Recording
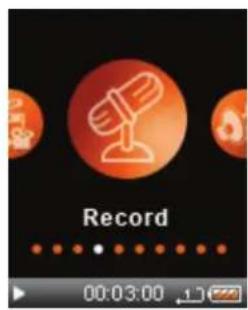
- Tap M to display the menu.
- Tap << or >> to select Record.
- Tap OK.
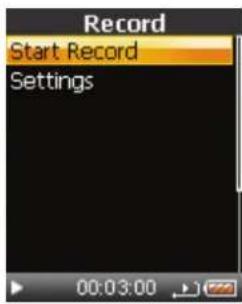
- Tap << or >> to select Start Record.
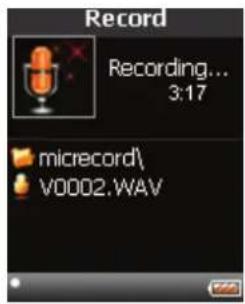
- Tap OK.
Pause Recording
Tap OK during recording to pause and tap OK again to resume recording.
Stop Recording
Tap M to stop recording.
Settings
In the Record submenu,
- Tap << or >> to select Settings.
- Tap OK.
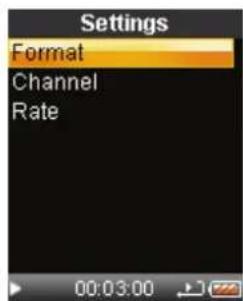
- Tap << or >> to select an option (Format, Channel and Rate).

Format
- Tap << or >> to select Format.
- Tap OK.
- Tap << or >> to select an option (IM ADPCM/MS ADPCM/PCM).
- Tap OK to confirm.
| IM ADPCM | Low recording quality. |
| MS ADPCM | Medium recording quality. |
| PCM | High recording quality. |

Channel
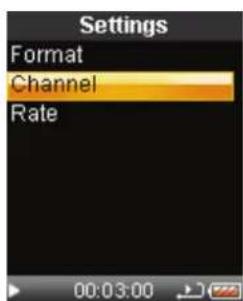
- Tap or to select Channel.
- Tap OK.
- Tap << or >> to select an option (Mono/ Stereo).
- Tap OK to confirm.

Rate
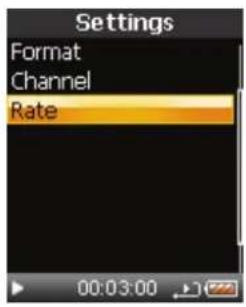
- Tap << or >> to select Rate.
- Tap OK.
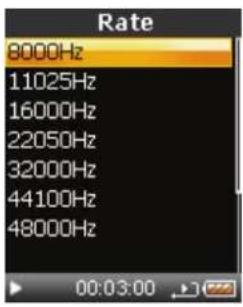
- Tap or to select a recording rate.
- Tap OK to confirm.
NOTE:
The higher rate you select, the better quality the record is but the more space the file occupies.
Voice
Playing a Voice Record
- Tap M to display the menu.
- Tap << or >> to select Voice.
- Tap OK.
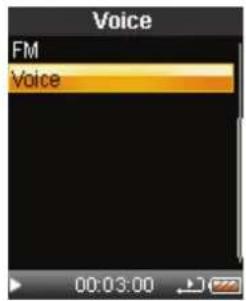
- Tap << or >> to select FM or Voice and tap OK.
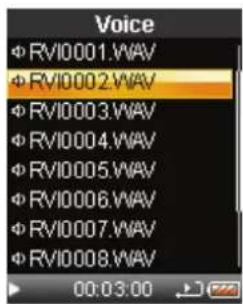
- Tap or to select a record file.
- Tap OK to play the selected record file.

NOTE:
The record files can be found in the folders "FMRecord" or "MicRecord" when connecting your player to PC.
FM
Listen to FM radio with the built-in digital FM tuner.
NOTE:
The earphones must be connected to the player. Otherwise, the FM tuner cannot find any FM channel.
Starting the FM Radio
- Tap M to display the menu.
- Tap << or >> to select FM.
- Tap OK to confirm.
When using the FM radio for the first time, the player automatically starts to seek all available FM radio channels and save them to the preset list.

Listening to FM Radio
After finishing automatic seeking, the FM radio stops at the first preset frequency (P1). You may tap OK each time to switch to the next FM radio frequency in the preset list that you want to listen to.

Manual Tune
- Tap << or >> to make tuning forward or backward by 0.1 MHz.
- Touch and hold << or >> to fast tune the radio forward or backward. Release << or >> to manually stop at any desired frequency.
Add to Preset
The player allows saving up to 20 radio frequencies to the preset list.
- Select a radio frequency.
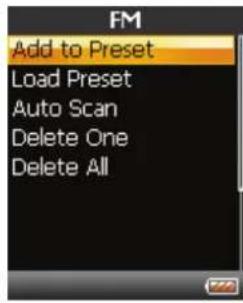
- Touch and hold OK for a while and release it. A FM window pops up.
- Select Add to Preset and tap OK.
- Tap << or >> to select a preset number which is used for the current radio frequency.
- Tap OK to save.

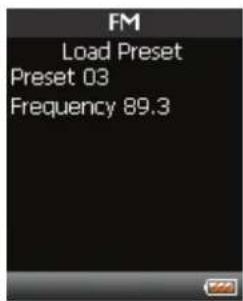
Load Preset
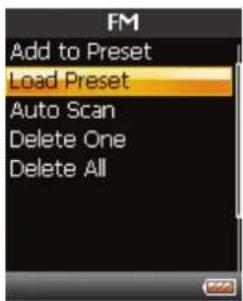
- Touch and hold for a while and release it. A FM window pops up.
- Select Load Preset and tap OK.
- Tap << or >> to select a preset radio frequency.
- Tap OK.
Auto Scan
- Touch and hold for a while and release it. A FM window pops up.
- Select Auto Scan and tap OK.
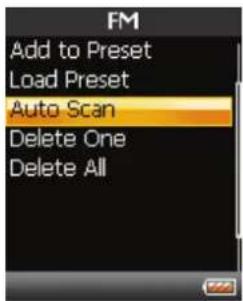
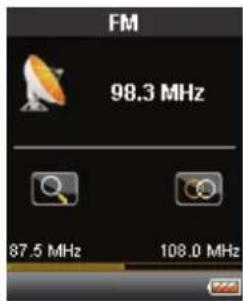
The player starts seeking available radio frequencies and updates the preset list with new radio frequencies.
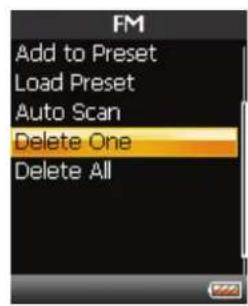
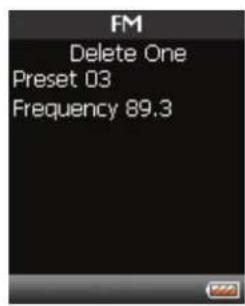
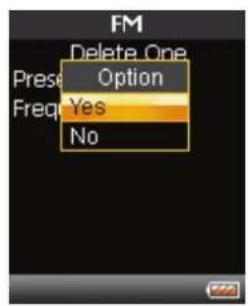
Delete One
- Touch and hold OK for a while and release it. A FM window pops up.
- Select Delete One and tap OK.
- Tap << or >> to select the preset radio frequency you want to delete.
- Tap OK to confirm.
- Tap << or >> to select Yes to delete the preset frequency and No to cancel the operation.
- Tap OK to confirm.
Delete All
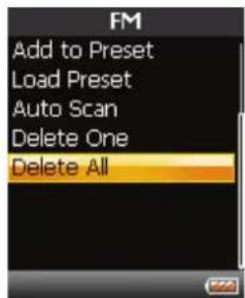
- Touch and hold OK for a while and release it. A FM window pops up.
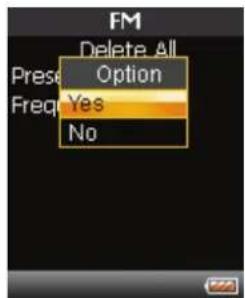
- Select Delete All and tap OK.
- Tap OK again.
- Tap << or >> to select Yes to delete all preset frequencies and No to cancel the operation.
- Tap OK to confirm.

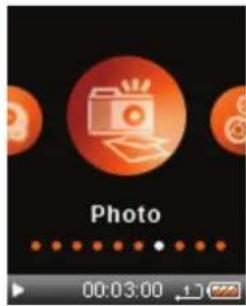
Photo
- Tap M to display the menu.
- Tap << or >> to select Photo.
- Tap OK.
- Tap << or >> to select an option (All Photo/ Manual/ Slide Show/ Thumbnail).
- Tap OK to confirm.
- During photo playback, press or to skip to the previous or next photo.

| All Photo | Taporto select a photo file. Tapokto view it. |
| Manual | Taporto manually view photos one by one. |
| Slide Show | The player automatically displays all photos one by one. |
| Thumbnail | A maximum of nine photos in the thumbnail size can be shown on the screen per a time. |
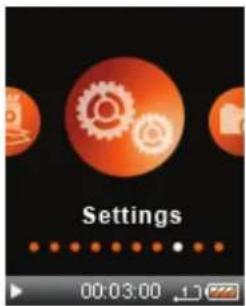
Settings
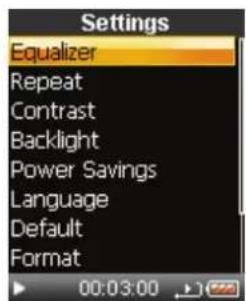
To navigate the Settings list:
- Tap M to display the menu.
- Tap << or >> to select Settings.
- Tap OK.
- Tap << or >> to select a setting in the list.
Equalizer Setting
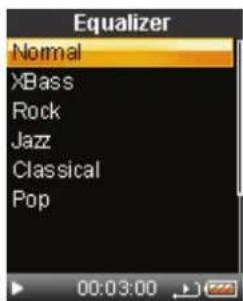
There are six preset equalizer settings for music playback effect: Normal, XBass, Rock, Jazz, Classical, and Pop.
- Tap << or >> to select Equalizer in the Settings list.
- Tap OK.
- Tap << or >> to select an option (Normal/ XBass/ Rock/ Jazz/ Classical/ Pop).
- Tap OK to confirm the selected equalizer.
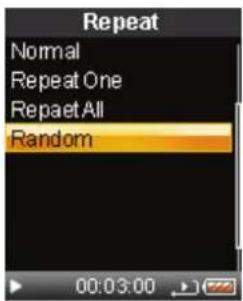
Repeat
Select the play mode for music playback. There are four modes.

Normal
Playing tracks in sequential order and the music playback stops when each track has been played once.

Repeat One
Playing one track repeatedly.

Repeat All
Playing all tracks repeatedly.

Random
Playing tracks randomly.
- Tap or to select Repeat.
- Tap OK.
- Tap << or >> to select an option (Normal/Repeat One/ Repeat All/ Random).
- Tap OK to confirm the selected play mode.

Contrast
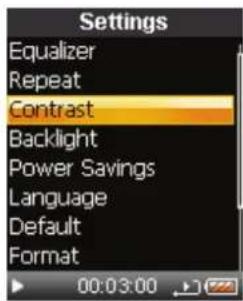
- Tap << or >> to select Contrast.
- Tap OK.
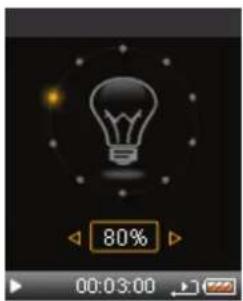
- Tap «« or »» to decrease or increase the contrast level.
- Tap OK to confirm the screen contrast.
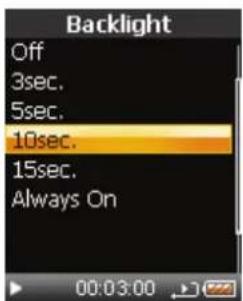
Backlight
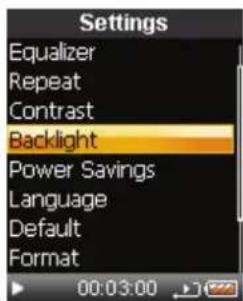
Backlight time is the time for the backlight to be on after a button is tagged. When the set time passes with no button being tagged, the backlight will go off automatically.
- Tap «« or »» to select Backlight.
- Tap OK.
- Tap «« or »» to select an option (Off/ 3sec./5sec./ 10sec./ 15sec./ Always On).
- Tap OK to confirm the backlight time.
Power Savings
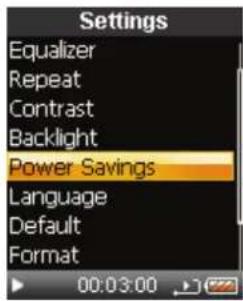
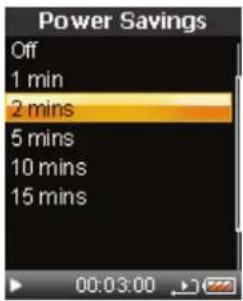
To save the battery when the music or video playback is paused or stopped, you can set the auto-off time on the menu. When the player keeps idle for the set time, it will shut down automatically.
- Tap or to select Power Savings.
- Tap OK.
- Tap or to select an option (Off/ 1min/ 2mins/ 5mins/ 10mins/ 15mins).
- Tap OK to confirm the auto-off time.
Language
- Tap or to select Language.
- Tap OK.
- Tap << or >> to select your favorite OSD language.
- Tap OK to confirm.

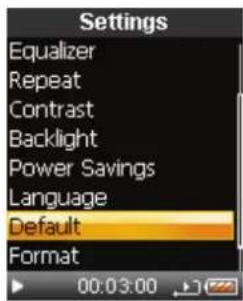
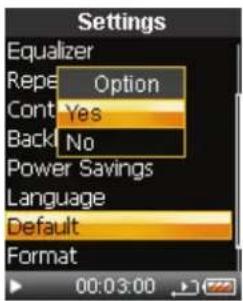
Default
- Tap << or >> to select Default.
- Tap OK.
- Tap << or >> to select Yes or No. Select Yes to load factory default settings, or No to cancel operation.
- Tap OK to confirm.
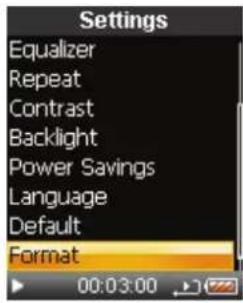
Format
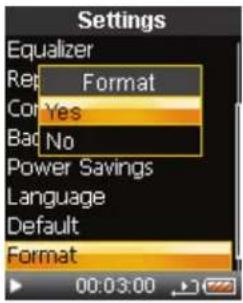
You also can format the player by using its format function.
- Tap << or >> to select Format.
- Tap OK.
- Tap << or >> to select Yes or No.
Select Yes to format the player, or No to cancel operation.
- Tap OK to confirm.
Please refer to Formatting the Player in the section of Connecting to the Computer for details on formatting the player on the computer.
Navigation
- Tap M to display the menu.
- Tap << or >> to select Navigation.
- Tap OK.
- Tap or to select an option (Internal Media/ All Audio Tracks/ All Video Tracks/ All Image Tracks).
- Tap OK to confirm.

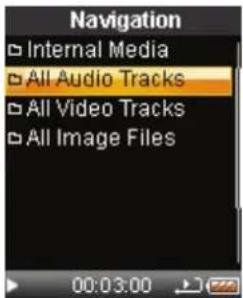
| Internal Media | List all folders and media files in the player. |
| All Audio Tracks | List all audio files in the player. |
| All Video Tracks | List all video files in the player. |
| All Image Tracks | List all image files in the player. |
- Tap << or >> to select a file.
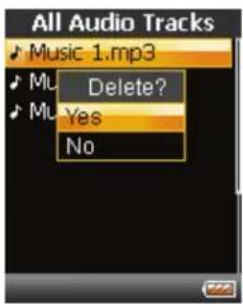
- Touch and hold OK and an Option submenu pops up when you release OK.
- Tap << or >> to select Play/ Delete/ Cancel.
| Play | Select Play and tap OK to play the selected file. |
| Delete | Select Delete and tap OK. Tap or ➞ to select Yes to delete the file or select No to cancel the operation. |
| Cancel | Select Cancel and tap OK to cancel the operation. |

About
You may check the player's system information, including firmware version, used memory and free memory.
- Tap M to display the menu.
- Tap << or >> to select About in the menu.
- Tap OK.
- Tap M to exit and return back to menu.

Appendix
Video Conversion Tool
Installing the Software
ArcSoft MediaConverter 3 is a powerful all-in-one multimedia file converter. This utility quickly and effortlessly converts the MP4, AVI, WMV, MOV, 3GP/3G2 and RM video files to the format that the player supports (.smv format).
- Insert the support disk supplied with the player into the CD-ROM drive.
- Click the ArcSoft MediaConverter 3 button on the splash screen to install the conversion tool. (If the splash screen fails to appear automatically, browse the disk contents by using Windows Explorer and double-click the Setup.exe file to run it.)
- Follow the on-screen instructions to complete the installation.
File Conversion
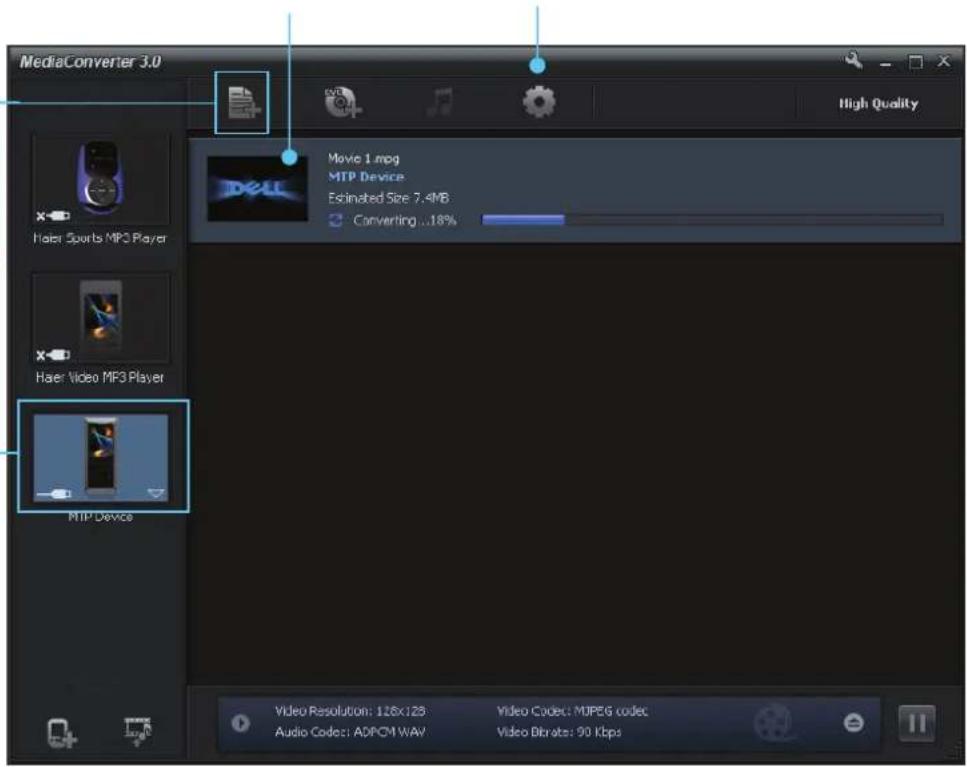
- Click Start -> Programs -> ArcSoft MediaConverter 3 -> MediaConverter3 to run the software.
- To add media, you can click and drag media files to the device icon, or click on the "+" icon to select media files from your computer. Conversion automatically starts after file loading finishes.
The progress bar appears, indicating the conversion progress.
- Click the triangle button when rolling over the converted file to preview the video while converting. The screen prompts the file ready to transfer when conversion finishes.
- Connect the player with the computer and the converted file automatically transfers to the player.
- Play the converted file on the player.
To add media files, drag and drop media files to the device icon, or click "+" when rolling over the device icon and select the media files that you want.
Before starting to convert files, you need to set up the file format, destination, quality, etc. for the converted files. Preview the video while converting.
NOTE:
If you encounter failures for converting your video files, please check if your PC has the necessary codecs installed. Please download the missing codecs from the Internet if necessary.
Troubleshooting
Problems/Symptoms Solutions
| Cannot turn on the player. | Battery power is exhausted. Recharge the battery. |
| Not enough space is reserved for system files. Free some memory space by erasing some files. | |
| The player works abnormally and needs to be reset. Reset the player by pressing the reset opening. | |
| No sound. | Earphones are not inserted. Insert earphones. |
| Volume level is too low. Increase the volume level. | |
| Music and video files are corrupted. Download uncorrupted files. | |
| Sound distorts. Battery | power is exhausted. Recharge the battery. |
| The computer does not recognize the player. | No secure connection with the computer. Make sure the player is securely connected. |
| The computer is not compatible with the player. The player only works on Windows® 2000/XP/Vista OS. | |
| Cannot play copy-protected music files. | Incorrect downloading methods. Transfer copy-protected music files to the player by using the Windows® Media Player's sync function of the music management software provided by the online music store where you purchased the files. Refer to the respective software FAQs. |
| No response when tapping the touch pad. | Touch pad is locked. Disable the hold feature. |
| The player works abnormally and needs to be reset. Reset the player by pressing the reset opening with a paper clip. | |
| Cannot turn on the player after formatting the player. | Used an incorrect file system for formatting. Reformat the player with a correct file system. See Formatting the Player in the section of Connecting the Player to the Computer for details. |
Technical Specifications
| Built-in Memory | 4GB/8GB NAND flash (some memory is reserved for firmware and system management) |
| Interface | USB 2.0 high speed |
| Power | Built-in 280mAh Li-Polymer battery |
| Max. Playtime | Up to 26 hours |
| Max. time for charging | Approx. 3 hours via PC |
| Display | 128x160 Dot-Matrix 1.8” TFT with touch pad |
| File Support | Audio: WMA, MP3Video: SMVImage: JPEG (Progressive JPEG is not supported) |
| Signal to Noise Ratio | >90 dB |
| Frequency Response | 20 Hz ~ 20 KHz |
| Headphones Output | < 4.4 mW (each output) |
| Firmware | Flash based. Upgradeable (for Windows® users only). |
| Supported OS | Windows® 2000/XP/Vista |
| Max. number of folders | 1000 |
| Max. number of files | 2000 |
| Max. layers of nested folder | 11 |
| Earphone | Impedance: 32 ohms±15%Sensitivity: 114±3dB at 1KHz. |

The mark above is in compliance with the Waste Electrical and Electronic Equipment Directive 2002/96/EC (WEEE). The mark indicates the requirement NOT to dispose of the equipment, including any spent or discarded batteries, as unsorted municipal waste, but to use the return and collection systems available. If the batteries or accumulators included with this equipment display the chemical symbol Hg, Cd, or Pb, then it means that the battery has a heavy metal content of more than 0.0005% Mercury, or more than 0.002% Cadmium, or more than 0.004% Lead.
Warranty
Haier guarantees that this Haier brand product, when shipped and received in its original packaging, is free from any defects in workmanship and materials during the time periods stated below. If the product is defective, Haier will, at its option, (1) repair the product using new or refurbished replacement parts, (2) replace the product with a new or re-manufactured equivalent product at no charge to the purchasing consumer, (3) refund to the purchaser up to the price of the product. (This refund may take into account a deduction for depreciation of value based on the consumer's actual use.)
This warranty does not apply to the following: (1) damage caused by use with non-Haier products and accessories, (2) damage caused by accident, misuse, abuse, flood, fire, earthquake, or other external causes, (3) damage caused by using this product outside of the intended uses as described by Haier in the user manual, (4) damage caused by service, including expansion and upgrade, that was performed by anyone who is not a representative for Haier, (5) damage to the appearance of the product or the exterior of the product, which has been damaged or defaced, altered or modified in design or construction, (6) any and all of the additional excluded items set forth below:
The warranty commences on the date the item was purchased, and the original purchase receipt must be presented to the authorized service center before warranty repairs are rendered.
The limited warranty described herein is in addition to whatever implied warranties may be granted to purchasers by law.
ALL IMPLIED WARRANTIES INCLUDING THE WARRANTIES OF MERCHANTABILITY AND FITNESS FOR USE ARE LIMITED TO THE PERIOD(S) FROM THE DATE OF PURCHASE SET FORTH BELOW.
Some states do not allow limitations on how long an implied warranty lasts, so the above limitation may not apply to you.
Neither the sales personnel of the seller nor any other person is authorized to make any warranties other than those described herein, or to extend the duration of any warranties beyond the time period described herein on behalf of Haier.
The warranties described herein shall be the sole and exclusive warranties granted by Haier and shall be the sole and exclusive remedy available to the purchaser. Correction of defects in the manner and for the period of time described herein shall constitute complete fulfillment of all liabilities and responsibilities of Haier to the purchaser with respect to the product, and shall constitute full satisfaction of all claims, whether based on contract, negligence, strict liability or otherwise. In no event shall Haier be liable, or in any way responsible, for any damages or defects in the product which were caused by repairs or attempted repairs performed by anyone other than an authorized service center or dealer; nor shall Haier be liable, or in any way responsible, for incidental or consequential economic or property damage. Some states do not allow the exclusion of incidental or consequential damages, so the above exclusion may not apply to you.
THIS WARRANTY GIVES YOU SPECIFIC LEGAL RIGHTS. YOU MAY ALSO HAVE OTHER RIGHTS, WHICH VARY FROM STATE TO STATE.
Warranty period for this product is: One Year for Labor and Parts.
Any defects discovered after the Warranty Period ends are not covered by this warranty or any conditions.
Where to obtain service: For the location of the nearest Haier authorized service center or to obtain product literature, accessories, supplies or customer assistance, please call 1-877-337-3639.
How to obtain service from your warranty: Ship or carry in your product to a Haier authorized service center. You must have the proof of purchase with you. If you ship this product to a service center, make sure that it is carefully packaged. Remove or delete any private or personal files and data before you send the Video MP3
Player device to Haier or bring it in for service.
Failure to follow the instructions stated above may affect your warranty by causing delays, additional charges, or a voided warranty.
BY SHIPPING OR CARRYING IN YOUR VIDEO MP3 PLAYER TO A HAIER AUTHORIZED SERVICE CENTER, YOU AGREE THAT HAIER IS NOT LIABLE FOR ANY LOSS OF DATA OR CONTENT AS A RESULT OF REPAIR OR REPLACING PARTS ON YOUR VIDEO MP3 PLAYER PRODUCT.
After the Warranty Period is over, Haier may charge you for any work in diagnosing problems on and/or servicing a Video MP3 Player product.
Haier will use all reasonable efforts to diagnose and attempt to fix, or suggest possible solutions for, a Video MP3 Player product defect that is covered by the limited warranty stated above.
HAIER DOES NOT HAVE ANY WARRANTY REGARDING ITS WARRANTY SERVICE(S). HAIER DISCLAIMS ALL DUTIES (IF APPLICABLE) OF WORKMANLIKE EFFORT OR LACK OF NEGLIGENCE, EXCEPT FOR THE SENTENCE ABOVE.
The Limited Warranty detailed above does not cover your data on the Video MP3 Player, or any separate content or software (whether or not it is packaged and included with the Video MP3 Player product). The warranty also does not cover any Video MP3 Player accessories or devices that are not manufactured by or for Haier.
ADDITIONAL CONDITIONS
The software that comes included with this Video MP3 Player product is licensed to you only, and is not sold to you. You are licensed to use this software in your Video MP3 Player product only. You are not permitted to reverse engineer it, except as is specifically permitted by applicable law notwithstanding this limitation.
You are entirely responsible to comply with any copyright laws that apply to you in your use of music, video and other content with this Video MP3 Player product.
Your Video MP3 Player product and all of its internal parts and components are new pursuant to industry standards, unless it is otherwise indicated on the Video MP3 Player product's original retail packaging as "Refurbished."
You agree to follow all export laws and regulations that apply to you if you choose to export the Video MP3 Player product outside of the United States.
The Limited Warranty stated above applies only to the original consumer who purchased the product. The warranty may not be assigned or transferred to anyone else. However, some jurisdictions that extend the protection of implied warranties for subsequent consumers may exist, so the above limitation may not apply to you.
GOVERNING LAW
This Limited Warranty is valid in the United States of America only. The laws of the State of New York, U.S.A., will apply to this Limited Warranty.
Digital Rights Management
Content owners use Windows Media digital rights management technology (WMDRM) for protection of intellectual property, including all copyrights. This device uses the WMDRM software for access to WMDRM
protected content. If the WMDRM software fails to protect certain content, content owners may ask Microsoft to revoke the software's ability to use WMDRM to play or copy protected content. This revocation will not affect unprotected content. When you download licenses for protected content, you agree that Microsoft may include a revocation list with the licenses. You may be required by content owners to upgrade WMDRM to access their content. If you decline an upgrade, you will not be able to access any content that requires the upgrade.
Patent Information
United States and/or international patents pending.
Customer Service and Support
For information about Video MP3 Player, read all documentation included with the product. If you still have a question, go to www.haieramerica.com/support to search the information base, and to get support using chat or e-mail.
In the United States, call: Haier America, New York, NY
1-877-337-3639
For Customers in the United States
This equipment has been tested and found to comply with the limits for a Class B digital device, pursuant to part 15 of the FCC Rules. These limits are designed to provide reasonable protection against harmful interference in a residential installation. This equipment generates, uses and can radiate radio frequency energy and, if not installed and used in accordance with the instructions, may cause harmful interference to radio communications. However, there is no guarantee that interference will not occur in a particular installation. If this equipment does cause harmful interference to radio or television reception, which can be determined by turning the equipment off and on, the user is encouraged to try to correct the interference by one or more of the following measures:
- Reorient or relocate the receiving antenna.
- Increase the separation between the equipment and receiver.
- Connect the equipment into an outlet on a circuit different from that to which the receiver is connected.
- Consult the dealer or an experienced radio/TV technician to help.
This device complies with Part 15 of the FCC Rules. Operation is subject to the following two conditions:
This device may not cause harmful interference, and
This device must accept any interference received, including interference that may cause undesired operation.
Declaration of Conformity
Model Name: Music and Video Multimedia Player
Trade Name: Haier
Responsible Party: Haier America Trading LLC
Address: 1356 Broadway, New York, NY 10018 USA
Telephone No.: 877-339-3639
Warning: Changes or modifications to this device that are not expressly approved by Haier America may void your authority to operate this equipment.
- SAFETY WARNINGS AND MAINTENANCE
- IMPORTANT SAFETY INFORMATION
- IMPORTANT HANDLING INFORMATION
- TABLE OF CONTENTS
- PACKAGE CONTENT
- GETTING STARTED
- CONNECTING TO THE COMPUTER
- BASIC OPERATION
- NOW PLAYING
- MUSIC
- VIDEO
- RECORD
- VOICE
- FM
- PHOTO
- SETTINGS
- NAVIGATION
- ABOUT
- APPENDIX
- TROUBLESHOOTING
- TECHNICAL SPECIFICATIONS
- WARRANTY
- FEATURES
- TOUCH PAD
- PRODUCT OVERVIEW
- CHARGING THE BATTERY
- NOTE
- TURNING ON/OFF THE PLAYER
- HOLD FUNCTION
- RESET FEATURE
- SYSTEM SUPPORT
- CONNECTING THE PLAYER TO THE COMPUTER
- TRANSFERRING FILES
- FOR WINDOWS® USERS
- MSC MODE - FOR WINDOWS® 2000/XP SERVICE PACK 1 USERS
- DRAG THE FILES OF YOUR FAVORITE SONGS TO REMOVABLE DISK
- MTP MODE
- MTP MODE - FOR WINDOWS® XP SERVICE PACK 2 (WITH WMP 10) USERS
- MTP MODE - FOR WINDOWS® XP SERVICE PACK 2 + WMP11/ VISTA (WITH WMP 11) USERS
- FORMATTING THE PLAYER
- MSC MODE
- DISCONNECTING THE PLAYER FROM THE COMPUTER
- FOR WINDOWS USERS
- CALLING UP THE MENU
- HOW TO NAVIGATE THE MENU
- STARTING PLAYBACK
- PAUSING PLAYBACK
- SELECTING NEXT/PREVIOUS TRACK
- FAST FORWARDING/REWINDING CURRENT TRACK
- ADJUSTING THE VOLUME LEVEL
- MUSIC PLAYER
- LOOP REPEATING
- STOP PLAYBACK
- SELECT NEXT/PREVIOUS TRACK
- START RECORD
- START RECORDING
- PAUSE RECORDING
- STOP RECORDING
- FORMAT
- CHANNEL
- RATE
- PLAYING A VOICE RECORD
- STARTING THE FM RADIO
- LISTENING TO FM RADIO
- MANUAL TUNE
- ADD TO PRESET
- LOAD PRESET
- AUTO SCAN
- DELETE ONE
- DELETE ALL
- EQUALIZER SETTING
- REPEAT
- CONTRAST
- BACKLIGHT
- POWER SAVINGS
- LANGUAGE
- DEFAULT
- VIDEO CONVERSION TOOL
- INSTALLING THE SOFTWARE
- FILE CONVERSION
- ADDITIONAL CONDITIONS
- GOVERNING LAW
- DIGITAL RIGHTS MANAGEMENT
- PATENT INFORMATION
- CUSTOMER SERVICE AND SUPPORT
- IN THE UNITED STATES, CALL: HAIER AMERICA, NEW YORK, NY
- FOR CUSTOMERS IN THE UNITED STATES
- DECLARATION OF CONFORMITY
Brand : HAIER
Model : HV18A-4G
Category : Media player