
LAN-8660EK1 - NAS LG - Free user manual and instructions
Find the device manual for free LAN-8660EK1 LG in PDF.
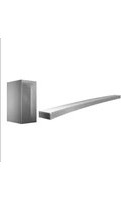


| Product Type | Network Attached Storage (NAS) |
| Model | LAN-8660EK1 |
| Brand | LG |
| Dimensions (approx.) | 200 x 200 x 200 mm (7.9 x 7.9 x 7.9 in) |
| Weight (approx.) | 2.0 kg (4.4 lbs) |
| Power Supply | AC 100-240V, 50/60Hz, external adapter |
| Hard Drive Bays | 2 x 3.5" SATA (hot-swappable) |
| Maximum Capacity | Up to 32 TB (2 x 16 TB drives) |
| Processor | ARM Cortex-A72 quad-core 1.5 GHz |
| Memory | 2 GB DDR4 RAM |
| Network Interface | 1 x Gigabit Ethernet (RJ-45) |
| USB Ports | 2 x USB 3.0 (Type-A) |
| RAID Support | RAID 0, 1, JBOD |
| File System Support | EXT4, Btrfs, NTFS (read), FAT32 (read/write) |
| Management | Web-based interface, mobile app |
| Supported Protocols | SMB/CIFS, AFP, NFS, FTP, WebDAV, iSCSI |
| Backup Functions | Time Machine, rsync, cloud backup (Google Drive, Dropbox) |
| Media Streaming | DLNA, iTunes server, Plex Media Server support |
| Security | AES-256 encryption, firewall, antivirus |
| Noise Level | Less than 22 dB (idle) |
| Operating Temperature | 0°C to 40°C (32°F to 104°F) |
| Maintenance | Keep vents clear; clean with dry cloth; avoid liquids |
| Safety Precautions | Use surge protector; do not expose to moisture; disconnect during storms |
| Spare Parts / Repairability | HDD, power adapter, fan (user-replaceable); screws and tray available |
| Warranty | 2 years limited (check local regulations) |
Frequently Asked Questions - LAN-8660EK1 LG
User questions about LAN-8660EK1 LG
0 question about this device. Answer the ones you know or ask your own.
Ask a new question about this device
Download the instructions for your NAS in PDF format for free! Find your manual LAN-8660EK1 - LG and take your electronic device back in hand. On this page are published all the documents necessary for the use of your device. LAN-8660EK1 by LG.
USER MANUAL LAN-8660EK1 LG
CAR NAVIGATION/DVD Receiver
OWNER'S MANUAL
MODEL : LAN-8660EK
Please read this instruction booklet carefully and completely before connecting, operating or adjusting this product.


Table of contents
Safety note 5-8
Basic operation 9-12
Front panel....9
Remote control (Optional) 10
Using the REAR ON/OFF button .....10
Parts supplied (Optional) 10
Connecting the system 11
Turn the unit on ....12
Turn the unit off 12
Insert a disc 12
Changing the monitor angle ....12
Adjust the volume .....12
AV OFF (Audio/Video off) .....12
Setup operation 13-14
SETUP 13
RDS 13
Device Info. (Device information) .....14
Bell Sound Vol. (Bell sound volume) 14
LCD Brightness 14
Language 14
LCD Off 14
Bluetooth operation 15-22
Using a Bluetooth wireless connection .....15
Starting Bluetooth on your phone 15
Pairing your unit and Bluetooth phone .....15-17
Headset function 17
PHONE SETUP ....18
CONNECT PHONE 18
BT INFO. (Bluetooth information) .....18
RENAME 19
PHONE BOOK 19
PHONE BOOK INFO. (Phone book information) .....20
Making a call from recent calls .....20
Making a call from speed dial numbers .....21
Making a call 21
Answering calls 22
Missed call notification 22
Alternating between car speaker and phone
during a call .....22
Dial using RSA....22
Radio operation 23
Listening to radio stations .....23
AS (Auto search memory) .....23
Storing and recalling stations .....23
Table of contents

Radio (RDS) operation 24-25
RDS display options .....24
AF (Alternative frequency) .....24
TA (Traffic announcement identification) .....25
PTY (Program type recognition) .....25
Radio (sound) operation 26
R TEXT (Radio text recognition) .....26
EQ (Equalizer) .....26
SOUND 26
CD/MP3/WMA operation 27-29
Playing an audio CD and MP3/WMA disc .....27
AV OFF (Audio/Video off) .....27
Skip to the next track .....27
Skip to the previous track .....27
Return to the beginning of the current track .....27
Search 27
Locating a folder/track using the list .....27
Marking a track using the list .....28
Marking during playback .....28
REPEAT....28
SCAN 28
SHUFFLE....29
EQ (Equalizer) .....29
SOUND 29
DVD/VCD operation 30-35
Playing a DVD/VCD disc ....30
If menu screen is display ....30
AV OFF (Audio/Video off) .....31
Pause 31
Skip to the next chapter/track .....31
Skip to the previous chapter/track .....31
Return to the beginning of the current chapter/track . . . .31
Search ....31
Operating the MENU .31
Operating the TITLE ....32
Operating the NUMBER 32
Operating the ◇....33
Using the RSE ON/OFF button .....33
AUDIO 34
SUBTITLE 34
ANGLE 34
SCREEN....34-35
EQ (Equalizer) 35
SOUND 35

Table of contents
NAVI operation 36-60
What is GPS? 36
Memory navi mode ....36
Navigation in the memory navi mode .....36
Installing the new map data in the memory .....37
Map description .....38-39
Scrolling the map display 40
Changing the map scale ....41
Marking your first journey .....41-42
Adding a destination....43
My destination 43
Destination 44
Memory points .....44
Modifying memory points .....45
Previous Dest. (Previous destination) .....46
Address Search: Street 47
Address Search: City → Street .....48
Junction Search : Street1 → Street2 .....49
POI (Point of interest) Search : Name .....50
POI (Point of interest) City → Name .....51
POI (Point of interest) Category → Name .....52
POI (Point of interest) City → Category → Name .....53
POI (Point of interest) Category → City → Name .....54
Nearest POI (Point of interest) 55
ROUTE 56
OK 56
Detour ....56
Cancel Route ....57
Route Overview 57
Route Options ....58
New Start Point ....58
SETUP....59
Map 59
Guidance 60
Volume 60
GPS Information 60
Initialize 60
Troubleshooting (Navigation) 61-62
Troubleshooting 63-65
Specifications
66

CAUTION
RISK OF ELECTRIC SHOCK DO NOT OPEN

TO REDUCE THE RISK OF ELECTRIC SHOCK DO NOT SPLIT THE COVER (OR BACK). THERE ARE NO USER SERVICEABLE PARTS INSIDE. REFER SERVICING TO QUALIFIED SERVICE PERSONNEL.
The lightning flash with an arrowhead symbol within an equilateral triangle is intended to alert the user about the presence of uninsulated dangerous voltage within the product's enclosure that may be of sufficient magnitude to constitute a risk of electric shock.
The exclamation point within an equilateral triangle is intended to alert the user about the presence of important operating and maintenance (servicing) instructions in the literature accompanying the appliance.
Always operate the vehicle in a safe manner. Do not become distracted by the vehicle while driving, and always be fully aware of all driving conditions. Do not change settings, or any functions. Pull over in a safe and legal manner before attempting such operations.
To promote safety, certain functions are disabled unless the handbreake is on.
Do not use for many hours at extremely low or high temperature. (-10\~60°C)
To reduce the risk of electric shock, do not remove the cover or back of this product. There are no user-serviceable parts inside. Refer servicing to qualified service personnel.
To reduce the risk of fire or electric shock, do not expose this product to dripping or splashing water, rain, or moisture.
Due to high temperature outside of the unit, please use the unit only installed in a car.
While driving, keep the sound volume at a proper level.
Do not drop it and avoid heavy impact at anytime.


Safety note

The driver must not watch the monitor while driving. If the driver watches the monitor while driving, it may lead to carelessness and cause an accident.

This unit id is for vehicles with a 12-volt battery and negative grounding. Before installing it in a recreational vehicle, lorry or bus, check the battery voltage. To avoid shorts in the electrical system, be sure to disconnect the ● battery cable before beginning installation.

Disposal of your old appliance
- When this crossed-out wheeled bin symbol is attached to a product, it means the product is covered by the European Directive 2002/96/EC.
- All electrical and electronic products should be disposed of separately from the municipal waste stream via designated collection facilities appointed by the government or the local authorities.
- The correct disposal of your old appliance will help prevent potential negative consequences for the environment and human health.
- For more detailed information about disposal of your old appliance, please contact your city office, waste disposal service or the shop where you purchased the product.

This product has been manufactured to comply with the radio interference requirements of EEC DIRECTIVE 89/336/EEC, 93/68/EEC and 73/23/EEC.
Safety note

A section whose title has one of the following symbols is applicable only to the disc represented by the symbol.

DVD

Video
CDs

About the Symbol Display
When you are watching a DVD and attempt to perform an operation, it may not be performed by the program on the disc. When this happens, this unit shows the button @n the screen.
Types of Playable Discs
DVD
(12 cm disc)
Video CD (VCD)
(12 cm disc)
Audio CD
(12 cm disc)

VIDEO


In addition, this unit plays DVD±R, DVD±RW and CD-R or CD-RW that contains audio titles, MP3 or WMA.
- Depending on the conditions of the recording equipment or the CD-R/RW (or DVD±R/±RW) disc itself, some CD-R/RW (or DVD±R/±RW) discs cannot be played in the unit.
- Do not attach any seal or label to either side (the labeled side or the recorded side) of a disc.
- Do not use irregularly shaped CDs (e.g., heart-shaped or octagonal). It may result in malfunctions.
Notes on DVDs and Video CDs
Some DVDs and Video CDs playback operations may be intentionally programmed by software manufacturers. This unit plays DVDs and Video CDs according to disc content designed by the software manufacturer, therefore some playback features may not be available or other functions may be added.

Safety notes

- A defective or soiled disc inserted into unit can cause the sound to drop during playback.
- Handle the disc by holding its inner and outer edges.
- Do not touch the surface of the unlabeled side of the disc.
Do not stick paper or tape etc. on the surface.

Do not expose the disc to direct sunlight or excessive heat.

8 cm discs cannot be played in this unit (please 12 cm discs only)

- Clean the disc before playing. Wipe the disc from the center outwards with a cleaning cloth.
- Never use solvents such as benzine or alcohol to clean the disc.
Regional code

This unit is designed and manufactured for playing back of region "2" encoded DVD software. This unit can only play DVD discs labeled "2" or "ALL".

Notes on Regional Codes
- Most DVD discs have a globe with one or more numbers on it clearly visible on the cover. This number must match your Car DVD Receiver's regional code or the disc cannot play.
- If you try to play a DVD with a different region code from your player, the message "DVD region code error" appears on the screen.
CAUTION : VISIBLE AND INVISIBLE LASER RADIATION WHEN OPEN AND INTERLOCKS DEFEATED.
CAUTION : This product uses a Laser System.
To ensure proper use of this product, please read this owner's manual carefully and keep it for future reference. Should the unit require maintenance, contact an authorized service center.
Performing controls, adjustments, or carrying out procedures other than those specified herein may result in hazardous radiation exposure.
To prevent direct exposure to laser beam, do not try to open the enclosure.
Visible laser radiation when open. DO NOT STARE INTO BEAM.

Basic operation

Front panel


Power ON/OFF
- Turn on/off main unit. VOL
- Adjust the volume.

BAND
- Select the band.

DISC
- Select the disc.

PHONE
- Select the phone.


- Open the monitor.

TILT
- Adjust the monitor angle.

AV OFF
- Audio and video pause.

- Diminish the map level.
- Diminish the map level.
- Diminish the map level.
- Diminish the map level.
- Diminish the map level.
- Diminish the map level.
- Diminish the map level.
- Diminish the map level.
- Diminish the map level.
- Diminish the map level.
- Diminish the map level.
- Diminish the map level.
- Diminish the map level.
- Diminish the map level.
- Diminish the map level.
- Diminish the map level.
- Diminish the map level.
- Diminish the map level.
- Diminish the map level.

Basic operation
Remote control (Optional)

Using the REAR ON/OFF button
You can output the sound and video of a disc in the built-in DVD drive to the rear display regardless of whether the DVD drive is selected as the source or not (rear ON mode). To turn the rear mode OFF, press the "REAR ON/OFF" button again.
Parts supplied (Optional)

Exterior GPS

Mini MIC External Cable


Power Cable (16 Pin)

Remote Control
Basic operation

Connecting the system

| Terminal Name Terminal Name | |||
| 1 | EXT AMP Front L-ch (+) | 13 | EXT AMP Front L-ch (-) |
| 2 | EXT AMP Front R-ch (+) | 14 | EXT AMP Front R-ch (-) |
| 3 | EXT AMP Rear R-ch (+) | 15 | EXT AMP Rear R-ch (-) |
| 4 | EXT AMP Rear L-ch (+) | 16 | EXT AMP Rear L-ch (-) |
| 5 ILL (+) 17 I-LL (-) | |||
| 6 NC 18 GND | |||
| 7 NC 19 NC | |||
| 8 NC 20 GND | |||
| 9 NC 21 NC | |||
| 10 NC 22 NC | |||
| 11 ACC 23 ANT B+ | |||
| 12 BACK UP (+) 24 GND | |||

Basic operation

Turning the unit on
Press the "ON/VOL" button.
Turning the unit off
Press the "ON/VOL" button again.

Insert a disc
- Press the "▲" button to open the monitor.
- The disc is drawn in, and starts playback automatically.

Changing the monitor angle
Press the "TILT" button to adjust the monitor panel to an easily viewable angle.
- The monitor panel angle continues changing as long as you press the "TILT" button and hold.
- The adjusted the LCD panel angle will be memorized and the monitor panel will automatically return to this angle the next time the monitor panel is opened.

Adjusting the volume
Rotate the "ON/VOL" knob to adjust the sound level.
Note
When you turn the unit off, the current volume level is automatically memorized. Whenever you turn the unit back on, it will operate at the memorized volume level.

AV OFF (Audio/Video off)
- Press the "AV OFF" button during playback.
- To return to playback, press the "AV OFF" button again.
Setup operation

SETUP
You can set the setup on the screen so it works according to your particular needs.
- Press the "INFO" button to select the setup.
- The "SETUP" screen appears on the screen.

RDS
You can set the RDS setting.
● EON TA (Enhanced Other Network)
LOCAL
When the found strength level of EON linked is less than the threshold level, the radio does not switch that station, and customer can hardly listen to any disturbances.
DIST (Distance)
EON TA switch is used to implement the information provided by of current station.

●REG (Regional)
REG ON
Network-Tracking is activated.
The unit switches to another station, within the same network, broadcasting the same program when the receiving signals from the current station become weak.
REG OFF
Network-Tracking is activated.
The unit switches to another station, within the same network when the receiving signals from the current station become weak. (In this mode, the program may differ from the one currently being received.)

Setup operation

Device Info. (Device information)
You can check the Software version, Hardware version, Map version and OS version.

Bell Sound Vol. (Bell sound volume)
You can set the ringer volume on incoming calls. Touch the + or - buttons to adjust the settings.

LCD Brightness
You can set the monitor brightness. Touch the + or - buttons to adjust the settings.

Language
You can set the display language. 1. Touch the language button you want. 2. Touch the "OK" button.

LCD Off
You can set the monitor backlight off To cancel, touch the screen.
Note
Touch the button in the current screen to exit the previous screen.
Bluetooth operation

Using a Bluetooth wireless connection
Your unit supports Bluetooth wireless connections. You can set up a wireless link with a Bluetooth phone.
Starting Bluetooth on your phone
Your phone's Bluetooth feature may be set to off by default. To use your car Bluetooth feature, Bluetooth must be turned on in your phone.
Note
Refer to your phone's user guide.
Pairing your unit and Bluetooth phone
- Connection through the unit
- Press the PHONE button to select the phone.
- Touch the button. The "PHONE SETUP" screen appears on the screen.
- Touch the "Connect" button. The "CONNECT PHONE" screen appears in the screen.
- Touch the "Search" button. The "Searching" pop-up screen appears on the screen. It will take about 20 seconds, to discontinue the process. To cancel, touch the "STOP" button.
- Select a mobile phone you want from the search findings, and then press the "Connect" button.
Notes
- During the Bluetooth phone settings selection, make sure to select "visible to all devices" from Visibility. Otherwise, the device will not be able to search Bluetooth phones.
- The successfully connected mobile phone will be registered in the "CONNECT PHONE" screen. Once registered, the phone can be connected without searching.


Bluetooth operation


- In an initial connection, the user will see the "INPUT PIN CODE" screen as shown in the figure. To successfully connect, make sure to enter the same PIN code for the mobile phone and the unit.
- Touch the number 0\~9 buttons, then confirm.
- Touch the "Enter" button to complete the pairing.
- The Bluetooth phone will be registered once successfully connected. The user can confirm with the √ checking mark in the "CONNECT PHONE" screen.
Notes
- The 📋 icon will be displayed on the upper right side of the "PHONE" screen once successfully connected.
- The icon is displayed with hands-free connections. Refer to "Headset functionality" for headset connections.
- Icon for hands-free connections
- Icon for headset connections
●Auto connection
- A Bluetooth phone with a previous record showing that it has successfully connected will automatically start the connecting process when starting a car.
- The Auto connection function operates if there is a registered mobile phone in the "CONNECT PHONE" screen and the "Auto Connection" is selected on the "PHONE SETUP" screen.
- To cancel, touch the "STOP" button.
Notes
- Auto connection operates continuously from the recently connected mobile phone (from the top of the list on the "CONNECT PHONE" screen)
- The Auto connection process will take about 20 seconds for each mobile phone. (e.g. for 5 registered mobile phones, 100 seconds maximum)
Bluetooth operation

- Connection through a bluetooth phone
Refer to your phone's user guide.
- Press the PHONE button to select the phone.
- Touch the button.
The "PHONE SETUP" screen appears on the screen. - Touch the "Connect" button.
The "CONNECT PHONE" screen appears on the screen. LAN-8660EK can be found (searched) only on the "CONNECT PHONE" screen. - Perform a "searching a Bluetooth device" in the Bluetooth phone.
- Initiate the Pairing and Connection process on the LAN-8660EK searched.
- During an initial connection, the user will see the "INPUT PIN CODE" screen.
Note
- To successfully connect, make sure to enter the same PIN code for the Bluetooth phone and the LAN-8660EK.
- The same instructions as "connecting through LAN-8660EK".
Headset function
The connection method is the same as with "Hands-free connection", but the icon appears on the upper right side of "PHONE" screen right after connection.
- Operation is the same as with the wired headset for mobile phones. The headset function is for telephone conversations. It is not for listening to music.
- Unlike the hands-free function, Headset connection will allow only two functions: "answering calls" and "making a call from the latest call".
Also the caller's number is not displayed when answering calls.
Notes
- If connecting through a LAN-8660EK, initiate the hands-free connection first. If your Bluetooth phone does not support the hands-free connection, then initiate the headset connection.
- If connecting through a Bluetooth phone, the hands-free connection or headset connection may operate depending on the type of the phone.


Bluetooth operation

PHONE SETUP
- Touch the PHONE SETUP button.
- PHONE SETUP screen appears on the screen.
- Connect
You can check the connected Bluetooth phone.
● BT Info. (Bluetooth Information)
You can check the Bluetooth phone information.
- Connection Mode
Auto : If the Bluetooth phone has already been connected successfully in the past, it would be registered at the "CONNECT PHONE" stage and it will connect automatically.
Manual : It will try to connect from the list registered at the "CONNECT PHONE" stage.
- Visibility
Shown : You can try to connect from the Bluetooth phone to this SET.
Hidden: You can connect only with this SET, not by a bluetooth handphone.
Note
Touch the button in the current screen to exit the previous screen.

CONNECT PHONE
- Connect/Disconn. (Disconnect)
Alternates between Connect and Disconnect. lists.
● BT Addr. (Bluetooth Address)
The Bluetooth address screen appears on the screen.
- Rename
You can rename the Bluetooth phone name. - Please see page 19 for details. (RENAME)
Delete
You can delete the selected Bluetooth phone. Touch and hold to delete the whole list.
- Search
- Please see page 15 for details. (Paring your unit and Bluetooth phone.)


BT INFO. (Bluetooth information)
- Rename
- Please see page 19 for details. (RENAME)
●End
Exit to the previous screen.
Bluetooth operation

RENAME
• The entered name is displayed
- Keypad button

- Erase all entered characters
- Delete the previous characters at the cursor position
- Inserts a space at the cursor position
• Alternates between number and symbol lists
- Confirms the entered name
PHONE BOOK
You can view all the entry's numbers by Phone, Home, Office.
Touch the "PHONE BOOK" button.
- Send
You can call to dial the phone book entry.
● Info. (Information)
You can check the phone book lists by Name, Phone, Home, Office, Default.
Delete
You can delete the phone book entry.
- Search
You can search the phone book entries.
- Please see page 15 for details.
- Add
You can copy the phone book entries supplied on the memory of phone to the unit.
- The "waiting..." screen appears on the screen.
- When you choose "Telephone No. Item Transmission" in the bluetooth phone, to search LAN-8660EK. (The way to control the bluetooth handphone may vary according to the manufacturer. Refer to the Owner's manual.)
- Press the "Sending the phone number" in the Bluetooth phone.
- The telephone no. is transmitted to the LAN-8660EK from the Bluetooth phone.
Note
If the hands-free or headset connection has been already made, disconnect the corresponding item to add a new contracts entry.


Bluetooth operation

PHONE BOOK INFO. (Phone book information)
You can view all entries' numbers or select which phone number is dialed when you default dial the phone book entries. (If the entry has more than one phone number.)
- Touch a phone number you want to set as the default number for phon book lists.
- Touch the Default button to change the entry's default phone number.
- Touch END.
Note
When connecting to a phone, the hands-free connection should be already made.

Making a call from recent calls
Your unit keeps lists of calls you recently received and dialed. The lists are sorted from newest to oldest entries.
(A maximum of 50 call numbers can be saved.)
- Touch the "SEND" button.
- Touch the ▲ or ▼ buttons to select a phone number you want.
- Touch the "Send" button.
Note
The oldest entries are deleted as new entries are added.
Bluetooth operation

Making a call from speed dial numbers
To make a call from speed dial numbers, press "SEND" for long after pressing the speed dial number assigned to the mobile phone or press the last digit of the speed dial number for long.
- When making a call from speed dial number 10, press 10 and press the "SEND" button for long.
- When making a call from speed dial number 10, press 1 and press 0 for long.
Note
Make sure that the speed dial function in the Bluetooth phone is enabled before using.
Making a call.
There are many ways to make calls with your unit. To make a call by entering numbers with your number buttons.
- Enter a phone number you want to call by touching the number buttons.
- Touch the "SEND" button to place a call to the entered phone number.
- To end the call and hang up the phone when you are finished, touch the "END" button.
Notes
- Touch the "SEND" button for long to make a call from the latest call.
- The user's recent call history applies only to hands-free connection. (Making a call from a recent call with a headset connection depends on the call history of the mobile phone.)
- The headset connection only allows making a call from a recent call.


Bluetooth operation

Answering calls
When you receive a call, your phone rings and appears on the screen an incoming call message.
- The "CALL FROM" screen appears on the screen.
- Touch the "RECEIVE" button to answer the call. If you want to switch over by the phone, touch the "REJECT" button.
Note
- If the phone number is available, the caller's phone number appears on the display.
- If the phone number is in the phone book, the phone book entry's name is display.
- If the incoming call is from a number stored in your Contacts, the entry's name is displayed. The caller's phone number may also be displayed, if available.
- If the "REJECT" button displays unusable, then the phone connected to the device does not support the rejecting calls function.

Missed call notification
When an incoming call is not answered, the missed call message appears on the screen.
- The "Missing Call" message appears on the screen.
- Touch the "CALL" button to answer the call.
- To end the call and hang up the phone, touch the "OK" button.

Alternating between car speaker and phone during a call ↔
When you turn the car speaker on, your unit display the button on the screen. The car speaker remains on until you press the button.

Dial using RSA
If you want to contact the call center, touch the button.
Note
If you make a mistake while dialing, touch the button to erase one digit at a time.
Radio operation

Listening to radio stations
- Press the "BAND" button to select the radio.
- Press the "BAND" repeatedly to select a band.
The indicator lights up in the following order.
FM1 → FM2 → FM3 → MW
- Seek tuning:
Touch the ◀◀◀ or ▶▶▶ I buttons.
The tuner will scan the frequencies until a broadcast with strong enough reception is found.
Manual tuning:
Touch the ◀◀ or ▶▶ buttons repeatedly until the preset number you want is selected.

AS (Auto search memory)
This function lets you automatically store the 6 strongest broadcast frequencies.
- Select the band (FM1, FM2, FM3, MW) you want to store a station into.
- Touch the "AS" button. Local stations with the strongest signals are searched and stored automatically in the selected radio band.
- To cancel, touch it again.
Storing and recalling stations.
You can easily store up to 6 preset stations for later recall at the touch of a button.
- Select the band (FM1, FM2, FM3, MW) you want to store a station into.
- Touch the ◀◀ or ▶▶ buttons to select the desired band.
- Touch one of the number buttons (1-6). The preset station information will be displayed. The selected preset station has been stored in memory.
- Repeat steps 2 and 3 to preset other stations. The next time, you touch the number button (1-6), the station is recalled from the memory.
Notes
- As FM1, FM2, FM3 have the same frequency range, up to 18 stations can be preset for FM.
- When a station is preset on the preset station button on which another station of the same band has already been preset, the previously preset station is automatically erased.


Radio (RDS) operation

RDS display options
The RDS system is capable of transmitting a wide variety of information in addition to the initial call sign that appears when a station is first tuned. In normal RDS operation the display will indicate the station name, broadcast network or call letters.
• AF (Alternative Frequencies for the actual program)
• TA (Traffic Announcement Identification)
• PTY (Program type recognition)
• RT (Radio text recognition)
• PS (Program Service name)
• PI (Program Identification) : contains additional information for regional program operation
• AF (Alternative Frequencies for the actual program)
• TP (Traffic Program Identification)
• TA (Traffic Announcement Identification)
• EON (Enhanced Other Networks) : Information on other programs to use their services like traffic announcement etc
AF (Alternative frequency)
When the reception quality drops, the tuner automatically changes to another station in the network, broadcasting a better reception quality, using the PI and AF codes. This mean s that: wherever you drive, you can continue listening to the same program without interruptions. (Refer to figure.)
- Touch the "AF" button.
The "AF" indicator appears on the screen. - To cancel, touch it again.

Radio (RDS) operation

TA (Traffic announcement identification)
This is an On/Off switching signal that indicates when a traffic announcement is on air.
-
Touch the "TA" button.
The "TA" indicator appears on the screen. -
To cancel, touch it again.
PTY (Program type recognition)
To select a certain program type from the reception band, please make sure to follow this procedure.
-
Touch the "PTY" button.
-
The "PTY LIST" appears on the screen.
-
Touch the "PTY LIST" button.
-
"PTY Searching" pop-up screen appears on the screen.
-
To cancel, touch the "OFF" button.

Notes
• RDS is only available for FM reception.
- Touch the ▲ or ▼ buttons to select the PTY LIST you want to view.
▲▼ : Previous/Next page of the list.
- Touch the button in the current screen to exit the previous screen.


Radio (sound) operation

R TEXT (Radio text recognition)
The radio station's information appears on the screen.
- Touch the "R TEXT" button. Radio text appears on the screen.
- To cancel, touch it again.
Note
Some RDS stations may not choose to include some of these additional features. If the data required for the selected mode is not being transmitted, the screen will show a "No Radio Text" message.

EQ (Equalizer)
Touch the "EQ" button during playback. The item changes as follows.
FLAT → CLASSIC → JAZZ → ROCK → FLAT...
- FLAT : Cancels equalizer play.
- CLASSIC: Optimized for orchestral music.
• JAZZ : Sweet sound with soft feeling. - ROCK : Optimized for Hard Rock and Heavy Metal music.

SOUND
Touch the "SOUND" button during playback.
●BALANCE/FADER
- Touch the "LEFT" or "RIGHT" button. Adjust the balance—speaker output balance between the left and right speakers.
- Touch the "FRONT" or "REAR" button.
Adjust fader—speaker output balance between the front and rear speakers.
●TONE CONTROL Touch the + or - buttons to make the BASS/MID/TREB adjustment as you like. BASS/MID/TREB
Note
Touch the button in the current screen to exit the previous screen.
CD/MP3/WMA operation

Playing an audio CD and MP3/WMA disc
- Please see page 12 for details.
Note
The unit can play MP3/WMA formatted recordings on CD-ROM, CD-R or CD-RW discs. Before playing MP3/WMA recordings, read the notes on MP3/WMA Recordings on page 29.

AV OFF (Audio/Video off)
- Press the AV OFF button during playback.
- To return to playback, press the "AV OFF" button again.

Skip to the next track
Touch briefly the ▶▶I button to select the next track.
Skip to the previous track
Touch briefly the ◀◀◀ button within 4 seconds of playing time.

Return to the beginning of the current track
Touch briefly the ◀◀◀ button after 4 seconds of playing time.
Search
Touch and hold the ◀◀ or ▶▶ buttons during playback and then release at the point you want.
Locating a folder/track using the list
This functions only with MP3 WMA
- Touch the "LIST" button during playback.
- Touch the "TOP" button to select the root folder.
- Touch the folder button you want.
- Touch the "ENTER" button.
- Touch the file you want.
▲/▼ : Previous/Next page of the list. - Touch the "PLAY" button to playback.


CD/MP3/WMA operation

Marking a track using the list
This functions only with MP3 WMA
-
Move to the file you want.
-
Touch the "MARK" button.
The selected file is marked √. To cancel, touch it again.
- Repeat steps 1 and 2 to mark an other track.
- Touch the "END" button to return to play screen.

Marking during playback
This functions only with MP3 WMA
- Touch the ◀◀◀ or ▶▶▶I buttons to select the track you want.
- Touch the "MARK" button during the track playback.
The current track is marked √.

REPEAT
Touch the "REPEAT" button during playback.
The item changes as follow.
OFF → ONE → FOLDER → MARK → OFF...
- ONE : Plays repeatedly all tracks on the disc.
- FOLDER : Plays repeatedly all tracks of the current folder.
- MARK: Plays repeatedly all marked files.
• OFF : Cancels repeat play.

SCAN
Touch the "SCAN" button during playback.
The item changes as follow.
OFF → ALL → FOLDER → OFF...
- ALL: Plays the first 10 seconds of all tracks on the disc.
• OFF : Cancels scan play. - FOLDER: Plays the first 10 seconds of the first track in all folders on the disc.
CD/MP3/WMA operation

SHUFFLE
Touch the "SHUFFLE" button during playback.
The item changes as follow.
OFF → ALL → FOLDER → OFF...
• OFF : Cancels shuffle play.
- ALL: Plays randomly all tracks on the disc.
- FOLDER : Plays randomly all tracks of the current folder.
EQ (Equalizer)
Touch the "EQ" button during playback.
- Please see page 26 for detail.
SOUND
Touch the "SOUND" button during playback.
Please see page 26 for detail.

Notes
MP3/WMA Disc compatibility with this unit is limited as follows:
- Sampling Frequency / 8 - 48kHz (MP3) 22.05 - 48 kHz (WMA).
- Bit rate / within 8 - 320 kbps (include VBR) (MP3) 32 - 320 kbps (WMA).
- CD-R/CD-RW file system should be "ISO 9660"
- If you record MP3/WMA files using software which cannot create a FILE SYSTEM, for example "Direct-CD" etc., you will not be able to playback MP3/WMA files.
We recommend that you use "Easy-CD Creator" which creates an ISO9660 file system.
Customers should also note that permission is required in order to download MP3/WMA files and music from the Internet.
Our company has no right to grant such permission.
Permission should always be sought from the copyright owner.


DVD/VCD operation

Playing a DVD/VCD disc
The disc is drawn in, and "Disc reading" appears on the display window, and playback starts automatically. If playback does not start, press the ▶ button.
Notes
- It takes several seconds for the unit to detect a disc type.
• In some cases, the disc menu might appear instead. - If “ ② appears on the screen, the disc cannot accept the operation you have tried.
- DVDs may have a region code. Your unit will not play discs have a region code different from your unit. The region code for this unit is "2"
If menu screen is display
The menu screen may be displayed first after loading a menu activated DVD or Video 2.0.
DVD
- Touch the ◀, ▶, ▲ or ▼ buttons to select the title/chapter you want to view.
- ▲/▼ : Move a cursor up or down.
• ◀/▶ : Move a cursor left or right. - MOVE: Move a menu bar up or down.
-
ENTER: Enter a sub menu.
-
Touch the PLAY button to start playback.
VCD
- Touch the number 0\~9 buttons, then confirm.
- BACK : Exit to previous screen.
• ◀▶ : Change the menu by number. -
MOVE: Move a menu bar to up or down.
• NUMBER : Change the menu with ◀/▶.
• ◀/▶ : Move a cursor to left or right. -
Touch the ENTER button to start the playback.
DVD/VCD operation

AV OFF (Audio/Video off)
Please see page 12 for details.

Pause
- Touch the II button during playback.
- To return to the playback, press the ▶ button.
Skip to the next chapter/track
Touch briefly the ▶▶▶I button to select the next chapter/track.
Skip to the previous chapter/track
Touch briefly the I◄◄ button within 4 seconds of playing time.
Return to the beginning of the current chapter/track
Touch briefly the ◀◀ button after 4 seconds of playing time.
Search
Touch and hold the ◀◀ or ▶▶ buttons during playback and then release at the point you want.
Operating the MENU DVD
The menu may contain camera angle, spoken language, subtitle option and chapter for the title.
-
Touch the screen during playback. The setup screen displays on the screen.
-
Touch the "MENU" button.
-
Touch the ▲,▼,◄ or ► buttons to select a title you want. ENTER : Enter sub-menu.
-
Touch the "PLAY" button to start playback.


DVD/VCD operation
TITLE

Operating the TITLE DVD
When a disc has more than one title, you can move to another title as follows.
- Touch the screen during playback.
The setup screen displays on the screen. - Touch the "TITLE" button.
- Touch the ▲,▼, ◀ or ▶ buttons to select a title you want.
- Touch the PLAY or ENTER button to playback.
NUMBER

Operating the NUMBER
Use the number buttons to select the chapter or title you want to view.
- Touch the screen during playback.
The setup screen displays on the screen. - Touch the "NUMBER" button.
The number screen appears on the screen. - Touch the number 0\~9 buttons, then confirm.
- Touch the "ENTER" button.
Note
If “∅appears on the screen, the disc cannot accept the operation you have tried.

VCD

DVD/VCD operation

Operating the

DVD
It is the function to use at the display requiring menu selection, while playing a DVD.
(The various playing displays are required at the recorded DVD title during playing.)
The menu screen appears on the screen.
Please see page 31 for details.

Using the RSE ON/OFF button
You can output the sound and video of a disc in the built-in DVD drive to the rear display regardless of whether the DVD drive is selected as the source or not in RSE ON mode. To turn the rear mode off, touch the "RSE ON/OFF" button again.


DVD/VCD operation

AUDIO DVD
Touch the "AUDIO" button during playback.
If the disc contains multi- audio languages, you can change to a different audio language during playback.
The menu item changes.

SUBTITLE DVD
Touch the "SUBTITLE" button during playback.
If the disc contains multi- subtitle languages, you can change to a different subtitle language during playback.
The menu item changes.

ANGLE DVD
Touch the "ANGLE" button during playback.
If the disc contains multi-angle views, you can change to a different camera angle during playback.
The menu item changes.

SCREEN
Touch the "SCREEN" button during playback.
You can change to a different monitor type and ambient light level during playback.
The menu screen displays on the screen.
- Please see page 35 for details.
Note
If “∅appears on the screen, the disc cannot accept the operation you have tried.
DVD/VCD operation

●○Aspect Ratio
Select the monitor type your unit to play DVD recorded with aspect ratio of 16:9.
16:9 → 4:3 → ZOOM1 → ZOOM2...
16:9
Select when the aspect ratio of your screen fixed to 16:9 (Wide screen).
4:3
Select when the aspect ratio of your screen fixed to 4:3 (Conventional screen).
ZOOM1
A 4:3 picture is enlarged in the horizontal direction only, enabling you to enjoy a 4:3 TV picture (normal picture) without any omissions.
ZOOM2
The picture is enlarged slightly at the center and the amount of enlargement increases horizontally toward the ends of the picture, enabling you to enjoy a 4:3 picture without sensing any disparity even on a wide screen.

●○Brightness
Adjust the brightness.
Touch the + or - buttons to make adjustments as you like.
- Contrast
Adjust the contrast.
Touch the + or - buttons to make adjustments as you like.
●○Color
Adjust the color of screen. (Thinner or thicker)
Touch the + or - buttons to make adjustments as you like.
●○Tint
Adjust the color tone. (Red is emphasized or green emphasized)
Touch the + or - buttons to make adjustments as you like.
EQ (Equalizer)
Touch the EQ button during playback.
- Please see page 26 for details.
SOUND
Touch the SOUND button during playback.
- Please see page 26 for details.

NAVI operation

What is GPS?
The Global Positioning System (GPS) is a satellite-based navigation system made up of a network of 24 satellites placed into orbit by the U.S.
Department of Defense. GPS was originally intended for military applications, but in the 1980s, the government made the system available for civilian use.
GPS works in any weather conditions, anywhere in the world, 24 hours a day.
There are no subscription fees or setup charges to use GPS.
Memory navi mode
While the map disc is inserted, you can store the data on the map disc into the memory of the navigation unit. If the map disc is removed from the navigation unit after the data is stored, navigation is performed using the data in the memory (memory navi mode). In the memory navi mode, you can play a music CD or DVD video on the navigation unit while navigation is taking place. The operation is automatically switched to the memory navi mode when the map disc is removed from the navigation unit.
Navigation in the memory navi mode
During the memory navi mode, navigation is performed only using the data read into the memory. Therefore, some functions are restricted compared with the navigation using the map disc (DVD navi mode).
Functions which cannot be used in the memory navi mode. - Please see page 47 for details. (Address Search : Street) - Please see page 49 for details. (Junction Search )
NAVI operation

Installing the new map data in the memory
If you want to use these functions, please insert the map disc again. In addition, you may need to insert the map disc and store new data in the memory during navigation operation.
- Insert the DVD map disc to the disc loading slot.
- Touch the "MENU" button.
- Touch the "Setup" button.
- Touch the "Download" button.
- Touch the map you want to use.
- Touch the "Download" button.
- The map data from the map disc is download into the memory.
- Touch the "OK" button when the installation complete screen is displayed.


NAVI operation


Map description
There are various buttons and buttons on the map screen that are used to plan and view a route.
- Press the "NAVI" button to select the navigation.
- The map screen appears on the screen.
The current location of your vehicle.
The arrow indicates your heading, and the display moves automatically as you drive.
Compass indicator. (The red arrow indicates north.)
Each touch changes the map's display direction.
(North UP or Heading UP.)
GPS status indicator
- Please see page 39 for detail. (GPS Information)
Each touch changes the indicator.
Road name indicator.
Destination indicator.
When voice command is possible.
When voice command is impossible.
Map scale indicator.
This figure gives the distance represented by the orange bar
You can reduce the menu to a short icon.
The "MENU" button provides access to most of the important functions of your Mobile Navigation System. There is also a Settings menu, which you use to customize the appearance and behavior of your system. The various options presented in these menus are selected using the finger touch mode on your Navigation commander.
- Please see page 43 for details.
Scroll location.
The cross hairs indicate a position on the map when you scroll away from your current location.
- Please see page 40 for details. (Scrolling the map display)
You can save the current point in the "MEMORY POINTS".
- Please see page 44 for details. (Memory points)
NAVI operation

- Guide mode
The map of your surroundings is shown on the left, and an arrow indicating the direction of travel is shown on the right.
- Please see page 57 for details. (Route Overview)
Each touch changes the guide mode.
- Trace mode
You can check information about the route between your current location and your destination.
◀ : Go ◀ from current position.
▶ : Go ▶ from current position.
◀ : Go to start point.
II: Pause
x2 : Check the trace mode at x1, x2 and x3 speed.
- Simulation mode
You can review the route you would go on before instructing Navigator to calculate your route.
●○GPS Information
You can check the reception signals from the GPS satellites, such as information about your satellite, the latitude, longitude and altitude of your position.
The color of the icons indicates the signal reception status. The green represents a satellite whose signals are actually being used for positioning.
Red means that signals are being picked up but are not currently in use for positioning.


NAVI operation

Scrolling the map display
Whenever you switch to the map display, your current position is shown just below the center of the display. However, you can scroll the map in any direction using the finger touch in the direction you wish to scroll.
To stop scrolling, release the finger touch and allow it to return to the center position. Scrolling will stop immediately.
Note
If you hold down the finger touch while scrolling the map, minor roads will be suppressed from the display. This increases the scrolling speed.
- Please see page 43 for details.
Your point is manually registered to the "Memory points". - Please see page 44 for details. (Memory points)
Touch the "DEST." button.
You can set a destination for easy and quick routing from any current location.

![graph TD A["OK"] --> B["ADD DESTINATION"] B --> C["CANCEL"] C --> D["PROGRESS"] D --> E["CANCEL"] E --> F["ROUTE OVERVIEW"]](/content/2026/07/1502589/images/5d7666e3c4bb506e73905ec06772207240073f2c65d9a1505c717644425a63d8.jpg)
Touch the "OK." button. Route calculation starts automatically.
Whenever you add a point, your point is manually added to the "ADD DESTINATION". - Please see page 43 for details. (Add destination)
Exit previous screen.
The "ROUTE OVERVIEW" screen appears on the screen. - Please see page 57 for details. (Route Overview)
NAVI operation

Changing the map scale
The current map scale is indicated by the map scale indicator towards the bottom right of the map. You can easily increase or decrease the map scale (zoom in or zoom out) using the ⊖ and ⊕ buttons on the Navigation commander. Each click steps the scale up or down in the following order:
50 m ↔ 100 m ↔ 200 m ↔ 500 m ↔ 1 km ↔ 2 km ↔ 5 km ↔ 10 km ↔ 20 km ↔ 50 km ↔ 100 km ↔ 200 km ↔ 500 km ↔ 1000 km ↔ 2000 km


Note
Hold the button down to zoom in or out in smaller increments.
Marking your first journey.
-
Touch the "MENU" button.
-
Touch the "Destination" button.
-
Touch the "Address Search" button.
-
Start to type the name or street of the town where you want to go.
Touch the "OK" button.
- Touch the street from the list.
The listing is highlighted in orange.
- Touch the "Select" button.


NAVI operation


- Map screen displays on the screen.
-
Touch the "OK" button.
-
Route calculation starts automatically.

- The "ROUTE OVERVIEW" screen displays on the screen.
-
Touch the "Guide" button.
-
To guide you to your destination.
The navigation will give you spoken instructions and visual instructions on the screen.

NAVI operation

Adding a destination
You can select way points (locations you want to visit on the way to your destination) and you can calculate the route to pass through these locations.

Notes
- You can add up to four way points.
- This function is useful when you have more than one destination along your route.
If you wish to confirm the selected point on the map before setting a route, touch the "Show Map" button. The map is displayed with the selected point at the center.
Permanently deletes the listing from the destination list.
Whenever you set a destination, your point is manually added to the "ADD DESTINATION".

Show Map
Delete
Add New
My destination
You can add these items from memory point.
Touch the "My destination" button.
The menu appears on the screen.
Touch the "My destination" button. The menu appears on the screen.
- Please see page 45 for detail (Modify memory point).
You are given a chance to register your home location with the system. Doing so will make it very easy to route home from any location.
Sets up the starting point after arrival at the destination as a new destination. (This menu is used in reciprocation travel through a path).
This point is automatically registered in the Last Start Point after searching for destination path.
You can select a favorite from the list stored memory.
A favorite is a destination previously stored by you for quick and easy retrieval.


Home

Last Start Point

Favourite 1

Favourite 2

NAVI operation

Destination
Touch the "Destination" button.
The menu appears on the screen.

Memory Points
You can register a single stored location for easy and quick routing from any current location. One use of this feature might be to store the location of your office, for example. Or you might enter a favorite restaurant that you often visit.
- Touch the the "Memory Points" button.
The item displays only after a stored location is registered. - Touch the "Add New" button.
You can register a location by choosing of item. - Please see the next page for detail.
Show Map
If you wish to confirm the selected point on the map before setting a route, touch the "Show Map" button. The map is displayed with the selected point at the center.
Modify
However, you are free to make changes to any listing in the point list at a later time.
- Please see page 45 for detail (Modify memory point).
Delete
Permanently deletes the listing from the destination list.
Alternates between "By Name" and "By Entry".
By Name
By Entry
Whenever you set a point, your point is manually added to the "MEMORY POINTS".
Notes
- Touch the ▲ or ▼ buttons to select the list you want to view. ▲/▼ : Previous/Next page of the list.
- If the sub list is highlighted from the screen, touch the "SUB LIST" button.
- Touch the button in the current screen to exit the previous screen.
NAVI operation

Modifying memory points
You can select a point from the list of stored "MEMORY POINT". You can also save or edit points from this item.
- Touch an item from the list.
The listing is highlighted in orange. - Touch the "Modify" button.
The "MODIFY MEMORY POINT" screen appears on the screen.

Modify

Rename
You can change the name. Enter the new name.
- Please see page 19 for details. (RENAME)
You can select the alarm type.
Touch a button you want from the items.
Voice, Alarm, Warn, None

Save as...

You can select a point in "My Destination" list.
Touch a button you want from the items.
- Please see page 43 for details.
(The screen describes how to save an item to your "My Destination" list.)

OK
You can see and modify the position of the selected point.
You can save a point to "My Destination".

NAVI operation
Previous Dest.

Previous Dest. (Previous destination)
The "Previous Dest" is a convenient list of places that you have routed to in the past. Up to previous destinations are stored in the list, and you can register or delete particular listings at any time. To set a route back to one of these listings, all you have to do is to select it from the list.
- Touch the the "Previous Dest." button.
The screen displays a list of your previous destinations. - Touch a destination from the list.
The listing is highlighted in orange.
Show Map
If you wish to confirm the selected destination on the map before setting a route, touch the "Show Map" button. The map appears with the selected destination at the center.
Register

However, you are free to make changes to any listing in the destination list at a later time. Touch the the "Register" button to open "MODIFY MEMORY POINT" screen.
- Please see page 45 for details (Modify memory point).
Delete
By Name
By Entry
Permanently deletes the listing from the destination list.
Alternates between "By Name" and "By Entry".

Notes
- Touch the ▲ or ▼ buttons to select the list you want to view. ▲/▼ : Previous/Next page of the list.
- Touch the button in current screen to exit previous screen.
NAVI operation

Address Search : Street
This function, which cannot be used in the memory navi mode : Street .
If you know the address of your destination, you can use it to set a route.
- Touch the "Address Search" button.
The text entry palette appears on the screen. -
Touch the letter you want to input the name of. (Street) You may enter only the first few letters and then highlight "OK" button.
-
Touch the item from the list (STREET LIST).
The listing is highlighted in orange.
-
Touch the "Select" button.
-
The map screen is displayed on the screen.
-
Touch the "OK" button.
Route calculation starts automatically.
- The "ROUTE OVERVIEW" screen appears on the screen.
- Please see page 57 for detail. (Route Overview)


Notes
- Touch the ▲ or ▼ buttons to select the list you want to view. ▲/▼ : Previous/Next page of the list.
- If the sub list is highlighted from the screen, touch the "Sublist" button.
- Touch the button in the current screen to exit the previous screen.

NAVI operation
Address Search


Address Search : City → Street
- Touch the "Address Search" button.
The text entry palette appears on the screen. -
Touch the first letter of the city you want to input the name. (City)
You may enter only the first few letters, highlight "OK" button. -
Touch the item from the list (CITY LIST).
The listing is highlighted in orange.
-
Touch the "Select" button.
-
Touch the first letter of the city you want to input the name. (Street)
You can enter only the first few letters, then highlight the "OK" button.
- Touch the item from the list (STREET LIST).
The listing is highlighted in orange.
-
Touch the "Select" button.
-
The Map screen appears on the screen.
-
Touch the "OK" button.
Route calculation starts automatically.
- The "ROUTE OVERVIEW" screen appears on the screen.
- Please see page 57 for details. (Route Overview)

Notes
- Touch the ▲ or ▼ buttons to select the list you want to view. ▲/▼ : Previous/Next page of the list.
- If the sub list is highlighted on the screen, touch the "Sublist" button.
- Touch the button in the current screen to exit the previous screen.
NAVI operation

Junction Search : Street1 → Street2
This function cannot be used in the memory navi mode : Street1 → Street2.
If you failed to obtain a city, town, or village name in the "Address Search" above, or if there is more than one street matching the name you have input, you will be presented with a list of cities, towns, and villages that have a matching road or street.
- Touch the "Junction Search" button.
The text entry palette appears on the screen. -
Touch the first letter of the street you want to input the name of (Street1).
You may can only the first few letters, then highlight then "OK" button. -
Touch the item from the list (STREET LIST).
The listing is highlighted in orange.
-
Touch the "Select" button.
-
Touch the letter you want to input the name. (Street2) You may enter only the first few letters, then highlight then "OK" button.
-
Touch the item from the list (STREET LIST). The listing is highlighted in orange.
-
Touch the "Select" button.
-
The map screen appears on the screen.
-
Touch the "OK" button.
Route calculation starts automatically.
- The "ROUTE OVERVIEW" screen displays on the screen.
- Please see page 57 for details (Route Overview).
Notes
- Touch the ▲ or ▼ buttons to select the list you want to view. ▲/▼ : Previous/Next page of the list.
- If the sub list is highlighted on the screen, touch the "Sublist" button.
- Touch the button in the current screen to exit the previous screen.


NAVI operation
POI Search


POI (Point of interest) Search : Name
Information about various facilities (Point of Interest POI), such as petrol stations, amusement parks or restaurants is available. By selecting the category (or entering the POI Name or City), you can search for a POI.
- Touch the "POI Search" button.
The text entry palette appears on the screen. - Touch the "Name" button.
- Touch the first letter of the POI you want to input the name of. (Name).
You can enter only the first few letters, then highlight the "OK" button. - Touch the item from the list (POI LIST).
The listing is highlighted in orange. - Touch the "Select" button.
- The map screen appears on the screen.
- Touch the "OK" button.
Route calculation starts automatically. - The "ROUTE OVERVIEW" screen appears on the screen.
- Please see page 57 for details (Route Overview).

Notes
- Touch the ▲ or ▼ buttons to select the list you want to view. ▲/▼ : Previous/Next page of the list.
- If the sub list is highlighted on the screen, touch the "Sublist" button.
- Touch the button in the current screen to exit the previous screen.
NAVI operation

POI (Point of interest) Search :
City → Name
- Touch the "POI Search" button.
The text entry palette displays on the screen. - Touch the "City" button.
- Touch the first letter of the POI you want to input the name of. (City)
You can enter only the first few letters, then highlight the "OK" button. - Touch the item from the list (CITY LIST).
The listing is highlighted in orange. - Touch the "Select" button.
- Touch the first letter of the city you want to input the name of. (Name)
You can enter only the first few letters, then highlight the "OK" button. - Touch the item from the list (POI LIST).
The listing is highlighted in orange. - Touch the "Select" button.
- The map screen appears on the screen.
- Touch the "OK" button.
Route calculation starts automatically. - The "ROUTE OVERVIEW" screen displays on the screen.
- Please see page 57 for details. (Route Overview)

Notes
- Touch the ▲ or ▼ buttons to select the list you want to view. ▲/▼ : Previous/Next page of the list.
- If the sub list is highlighted on from the screen, touch the "Sublist" button.
- Touch the button in the current screen to exit the previous screen.


NAVI operation
POI Search


POI (Point of interest) Search :
Category → Name
- Touch the "POI Search" button. The text entry palette appears on the screen.
- Touch the the "Category" button.
- Touch the item from the list (CATEGORY LIST). The listing is highlighted in orange.
- Touch the "Sublist" button.
- Touch the item from the list. The listing is highlighted in orange.
- Touch the "Select" button.
- The text entry palette appears on the screen.
- Touch the first letter of the word you want to input the name of. (Name). You can enter only the first few letters, highlight "OK" button.
- Touch the item from the list (POI LIST). The listing is highlighted in orange.
- Touch the "Select" button.
- The map screen appears on the screen.
- Touch the "OK" button. Route calculation starts automatically.
- The "ROUTE OVERVIEW" screen displays on the screen.
- Please see page 57 for details. (Route Overview)

Notes
- Touch the ▲ or ▼ buttons to select the list you want to view. ▲/▼ : Previous/Next page of the list.
- If the sub list is highlighted on the screen, touch the "Sublist" button.
- Touch the button in the current screen to exit the previous screen.
NAVI operation

POI (Point of interest) Search :
City → Category → Name
- Touch the "POI Search" button.
The text entry palette appears on the screen. - Touch the "City" button.
- Touch the first letter of the POI you want to input the name of. (City).
You can enter only the first few letters, then highlight the "OK" button. - Touch the item from the list (CITY LIST).
The listing is highlighted in orange. - Touch the "Select" button.
- The text entry palette appears on the screen.
- Touch the the "Category" button.
- Touch the item from the list (ENTERTAINMENT).
The listing is highlighted in orange. - Touch the "Select" button.
- The text entry palette appears on the screen.
- Touch the first letter of the word you want to input the name of. (Name).
You can enter only the first few letters, then highlight the "OK" button. - Touch the item from the list (POI LIST).
The listing is highlighted in orange. - Touch the "Select" button.
- The map screen appears on the screen.
- Touch the "OK" button.
Route calculation starts automatically. - The "ROUTE OVERVIEW" screen appears on the screen.
- Please see page 57 for details. (Route Overview)

Notes
- Touch the ▲ or ▼ buttons to select the list you want to view. ▲/▼ : Previous/Next page of the list.
- If the sub list is highlighted on the screen, touch the "Sublist" button.
- Touch the button in the current screen to exit the previous screen.


NAVI operation
POI Search


POI (Point of interest) Search :
Category → City → Name
- Touch the "POI Search" button. The text entry palette appears on the screen.
- Touch the "Category" button.
- Touch the item from the list (CATEGORY LIST). The listing is highlighted in orange.
- Touch the "Sublist" button.
- Touch the item from the list (PUBLIC SERVICE). The listing is highlighted in orange.
- Touch the "Select" button.
- The text entry palette displays on the screen.
- Touch the "City" button.
- Touch the first letter of the city you want to input the name of. (City). You may enter only the first few letters, highlight "OK" button.
- Touch the item from the list (CITY LIST). The listing is highlighted in orange.
- Touch the "Select" button.
- Touch the item from the list (POI LIST). The listing is highlighted in orange.
- Touch the "Select" button.
- The map screen appears on the screen.
- Touch the "OK" button. Route calculation starts automatically.
- The "ROUTE OVERVIEW" screen appears on the screen.
- Please see page 57 for details. (Route Overview)
Notes
- Touch the ▲ or ▼ buttons to select the list you want to view. ▲/▼ : Previous/Next page of the list.
- If the sub list is highlighted on the screen, touch the "Sublist" button.
- Touch the button in the current screen to exit the previous screen.
NAVI operation

Nearest POI (Point of interest)
The map information on the memory includes the location of many points of interest. These range from railway stations to amusement parks and restaurants. You can use this function to quickly locate and route to any one of these points of interest. You can, for example, look for a particular type of restaurant within a certain distance of your present location and set a route there. Also, you can choose a museum from a list and route there.
- Touch the "Nearest POI" button.
The POI categories displays on the screen. -
Touch the item from the list (CATEGORY LIST).
The listing is highlighted in orange. -
Touch the "Sublist" button.
-
Touch the item from the list (NEARBY POI LIST). The listing is highlighted in orange.
-
Touch the "Select" button.
-
The map screen appears on the screen.
-
Touch the "OK" button.
Route calculation starts automatically.
- The "ROUTE OVERVIEW" screen appears on the screen.
- Please see page 57 for details. (Route Overview)

Notes
- Touch the ▲ or ▼ buttons to select the list you want to view. ▲/▼ : Previous/Next page of the list.
- If the sub list is highlighted on the screen, touch the "Sublist" button.
- Touch the button in the current screen to exit the previous screen.


NAVI operation


ROUTE
Touch the "ROUTE" button. The menu appears on the screen.

OK
The route from the current position to your destination is recalculated.
- Route calculation starts automatically.
- The "ROUTE OVERVIEW" screen appears on the screen.
Detour
You can set the length of the area, and avoid just that area, or you can even search a new route from the current location to your destination.
- Touch the distance from the list.
- Route calculation starts automatically.
- The "ROUTE OVERVIEW" screen appears on the screen.

Notes
Try the operation on the map screen during route guidance.
NAVI operation

Cancel Route
If you no longer need to travel to your destination or if you want to change your destination.
Route Overview
You can check information about the route between your current location and destination.
Touch the "Route Overview" button.
The "ROUTE OVERVIEW" screen appears on the screen.
●○Guide
Drive in accordance with the screen and voice information.
This option display is also given through on-screen instructions whenever the system is in guide mode. Here you will learn how to interpret the various information presented to you on the screen, and how to customize the display of guidance information.
- Please see page 39 for details.
- Trace
This is the mode that is displayed with guidance tracing. In this mode, the position of your vehicle is superimposed on the map. It provides an easily understood view of progress toward your destination. The route is marked by a bold bright blue line.
- Please see page 39 for details.
●○Simulate
This is the mode that is displayed with guidance simulation. In this mode, the position of your vehicle is superimposed on the map. It provides an easily understood view of progress towards your destination.
The route is marked by a bold bright blue line.
- Please see page 39 for details.
●○End
Cancel routing altogether.


NAVI operation

Route Options
You can set the route option on the screen to make it operate according to your particular needs. (This option is included because some drivers do prefer it) Touch the "Route Options" button. The "ROUTE OPTIONS" screen appears on the screen.
- Route Condition
Fast : The unit calculates the route by picking the shortest distance and highest speed limits. Short : The unit calculates the route by picking the shortest distance.
●○Toll Road
If you select this option, the route will be calculated by including toll roads that are needed. If you select the "Avoided" option, the route will be calculated without any toll roads.
●○Ferry
If you select this option, the route will be calculated by including the ferry crossings that are needed. If you select the "Avoided" option, the route will be calculated without any ferry crossings.

New Start Point
The New Start Point is the function to change the start point site simulating where to drive using the navigation before driving. When changing the start point site, the New Start Point button changes into the Current Position button.
New Start Point > Current Position
Touch the Current Position button when you want to return to the current start point where it receives the GPS signal.

Touch the Simulation button when you want to return to the current start point where it receives the GPS signal.
NAVI operation

SETUP
Touch the "SETUP" button.
The menu appears on the screen.
Map
- Orientation
North up : Orients the map so that north is always at the top.
Head up : Orients the map so that your forward direction is always at the top.
●○Color
Day : Always use to day-driving background colour.
Night : Always use night-driving background colour.
Auto :
Automatic switching to night-driving background when headlights are switched on.
● Distance Unit
Km : Always display and announce in kilometers.
Mile : Always display and announce in miles.
●○Memory Point
Show: You can show specific categories of points on the navigation and map view.
Hide: You can hide all of them from the main navigation view.
View
2D : The 2D view is the straight-forward two-dimensional view. This is the default map view. In this view, the map is dynamically updated, and allows for manual panning and zooming.
3D : The 3D view is a simplified three-dimensional view showing the map in a basic 3D relief. It shows the basic outline and details of the surrounding roads and general area.


NAVI operation

Guidance
The navigation allows warnings and alerts which, when selected ON, will provide voice prompts.
●○Confluence
●○Memory Points
●○Service Area

Volume
This sound volume for the navigation can be set.
Touch the + or - buttons to change the guidance volume.
Mute : the Items related to sound volume muting can be set.
Note
The volume of the audio source is adjusted by the VOL dial of the unit.

GPS Information
You can check the reception signals from the GPS
satellite such as information about your satellite. as well as the latitude, longitude and altitude of your position.
The color of the icons indicates the signal reception status. Green represents a satellite whose signals are actually being used for positioning.
Red means that signals are being picked up but are not currently in use for positioning.

Initialize
Delete Memory : You can delete all the listing from the memory.
Default Settings : You can set all the function to their factory setting.
Troubleshooting (Navigation)

Cannot identify the current location. (GPS not receiving)
GPS cannot be used indoors and must be connected to a power source with ACC to a vehicle in a location where the sky can be seen well.
When initially connecting the GPS, it usually takes about 10 minutes to be normally operating, but the connection speed can differ depending on the weather condition, and surrounding obstacles.
If the GPS connection is unstable for a long period of time, try the following:
- Check if the power is connected to the product.
- Check if the back of the GPS product is in a location where the sky can be seen well.
- If there are high buildings or if you are under a tree, move to a location where there aren't any obstacles.
- Check the GPS receiving condition from the GPS menu.
- Please make sure it is changed to the start point for simulation at MENU > Route > New Start Point.
Cannot hear the voice guide
You can hear the voice guide when you select the "SETUP>Volume".
But during actual driving, the voice guide is provided.
If the volume is too low, adjust the volume on the left side.
If the volume is mute, press the AV OFF button on the right side.
There is a difference between the driving road and the road on the map in the product
Even though GPS is usually very accurate, it has an error range.
When the GPS receiver is installed, there can be an error of about 5 to 15m. But for newly constructed roads, the problem could be from the data update to the map.
Cannot see the map
This is when you cannot see the map even when you have executed the navigation menu. This happens when the data within the memory is damaged. Delete all the data within the memory and newly install the data.
If the issue persists after installation, contact the A/S center.
Map data and dangerous area information are not newly updated
You must periodically update the map data.
Inquire to Shop that customer who want to buy Europe Map buys vehicles

Troubleshooting (Navigation)
The path guide can be different from the actual path (Path guide error)
- When the road is closely parallel.
- When the splitting road angle is very small.
- When there is an adjacent road when turning.
- When driving on a road that is narrowing fast.
- When driving through the mountain or where the road is too curvy.
- When starting, passing and arriving locations are too close within 10km.
- When you have set the starting, passing or arriving location more than 1km away from the road.
- When driving through the tunnel.
- When driving through high buildings.
Map matching
The GPS used by this Mobile Navigation System is susceptible to certain errors. Its calculations may on occasion place you in a location on the map where no road exists. In this situation, the processing system understands that vehicles travel only on roads, and is able to correct your position by adjusting it to a nearby road. This is called map matching.


With map matching. With no map matching.
Troubleshooting

| Symptom Cause Correction | ||
| Power doesn't turn on.The unit doesn't operate. | Leads and connectors are not properly connected.The fuse is blown.Noise and other factors are causing the built-in microprocessor to operate incorrectly. | Confirm once more that all connections are correct.Rectify the problem that caused the fuse to blow, and then replace it. Be very sure to install the correct fuse with the same rate.Turn the unit off and then on. |
| Playback is not possible. | The disc is dirty.The loaded disc is of a type this unit cannot play. | Clean disc.Check what type the disc. |
| No sound is heard.The volume level will not rise. | Cables are not connected correctly. | Connect the cables correctly. |
| There's no sound. | The volume level is low. | Adjust the volume. |
| There's audio skipping. | This unit is not firmly secured. | Secure this unit firmly. |
| The unit does not operate correctly even when the appropriate remote control buttons are pressed. | Battery power is low.Some operations are prohibited with certain discs. | Load new battery.Check using another disc. |

Troubleshooting
Language Codes
Use this list to input your desired language for the following initial settings: Disc Audio, Disc Subtitle, Disc Menu.
| Language | Code | Language | Code | Language | Code | Language | Code |
| Abkhazian | 6566 | Fiji | 7074 | Lingala | 7678 | Singhalese | 8373 |
| Afar | 6565 | Finnish | 7073 | Lithuanian | 7684 | Slovak | 8375 |
| Afrikaans 6570 | French 7082 | Macedonian | 7775 | Slovenian | 8376 | ||
| Albanian 8381 | Frisian | 7089 | Malagasy | 7771 | Somali 8379 | ||
| Ameharic | 6577 | Galician | 7176 | Malay 7783 | Spanish | 6983 | |
| Arabic | 6582 | Georgian 7565 | Malayalam | 7776 | Sudanese 8385 | ||
| Armenian | 7289 | German | 6869 | Maltese 7784 | Swahili 8387 | ||
| Assamese | 6583 | Greek 6976 | Maori | 7773 | Swedish | 8386 | |
| Aymara 6588 | Greenlandic | 7576 | Marathi | 7782 | Tagalog | 8476 | |
| Azerbaijani | 6590 | Guarani | 7178 | Moldavian 7779 | Tajik | 8471 | |
| Bashkir | 6665 | Gujarati 7185 | Mongolian | 7778 | Tamil 8465 | ||
| Basque | 6985 | Hausa | 7265 | Nauru 7865 | Tatar | 8484 | |
| Bengali; Bangla | 6678 | Hebrew 7387 | Nepali | 7869 | Telugu | 8469 | |
| Bhutani | 6890 | Hindi | 7273 | Norwegian 7879 | Thai | 8472 | |
| Bihari 6672 | Hungarian | 7285 | Oriya | 7982 | Tibetan | 6679 | |
| Breton | 6682 | Icelandic | 7383 | Panjabi | 8065 | Tigrinya | 8473 |
| Bulgarian | 6671 | Indonesian | 7378 | Pashto, Pushto | 8083 | Tonga | 8479 |
| Burmese | 7789 | Interlingua | 7365 | Persian | 7065 | Turkish | 8482 |
| Byelorussian | 6669 | Irish | 7165 | Polish 8076 | Turkmen | 8475 | |
| Cambodian | 7577 | Italian 7384 | Portuguese | 8084 | Twi | 8487 | |
| Catalan 6765 | Japanese | 7465 | Quechua | 8185 | Ukrainian | 8575 | |
| Chinese | 9072 | Javanese | 7487 | Rhaeto-Romance | 8277 | Urdu | 8582 |
| Corsican | 6779 | Kannada | 7578 | Rumanian 8279 | Uzbek | 8590 | |
| Croatian | 7282 | Kashmiri 7583 | Russian | 8285 | Vietnamese | 8673 | |
| Czech | 6783 | Kazakh | 7575 | Samoan | 8377 | Volapuk | 8679 |
| Danish 6865 | Kirghiz 7589 | Sanskrit | 8365 | Welsh | 6789 | ||
| Dutch 7876 | Korean | 7579 | Scots Gaelic | 7168 | Wolof 8779 | ||
| English | 6978 | Kurdish | 7585 | Serbian 8382 | Xhosa | 8872 | |
| Esperanto 6979 | Laothian 7679 | Serbo-Croatian | 8372 | Yiddish | 7473 | ||
| Estonian 6984 | Latin | 7665 | Shona | 8378 | Yoruba 8979 | ||
| Faroese | 7079 | Latvian, Lettish | 7686 | Sindhi | 8368 | Zulu | 9085 |
Area Codes
Choose a area code from this list.
| Area Code | Area Code | Area Code | Area Code | ||||
| Afghanistan AF | Ethiopia ET | Malaysia | MY | Saudi Arabia | SA | ||
| Argentina AR | Fiji | FJ | Maldives | MV | Senegal | SN | |
| Australia AU | Finland FI | Mexico | MX | Singapore SG | |||
| Austria AT | France FR | Monaco | MC | Slovak Republic | SK | ||
| Belgium BE | Germany | DE | Mongolia | MN | Slovenia | SI | |
| Bhutan BT | Great Britain | GB | Morocco MA | South Africa | ZA | ||
| Bolivia BO | Greece | GR | Nepal NP | South Korea | KR | ||
| Brazil BR | Greenland | GL | Netherlands | NL | Spain ES | ||
| Cambodia KH | Islands | HM | Netherlands Antilles | AN | Sri Lanka | LK | |
| Canada CA | Hong Kong | HK | New Zealand | NZ | Sweden SE | ||
| Chile CL | Hungary | HU | Nigeria | NG | Switzerland CH | ||
| China CN | India | IN | Norway | NO | Taiwan | TW | |
| Colombia CO | Indonesia | ID | Oman | OM | Thailand | TH | |
| Congo CG | Israel | IL | Pakistan | PK | Turkey TR | ||
| Costa Rlca CR | Italy | IT | Panama | PA | Uganda UG | ||
| Croatia | HR | Jamaica | JM | Paraguay PY | Ukraine | UA | |
| Czech Republic | CZ | Japan JP | Philippines | PH | United States | US | |
| Denmark | DK | Kenya KE | Poland PL | Uruguay | UY | ||
| Ecuador | EC | Kuwait KW | Portugal | PT | Uzbekistan UZ | ||
| Egypt | EG | Libya | LY | Romania | RO | Vietnam | VN |
| El Salvador | SV | Luxembourg | LU | Russian Federation | RU | Zimbabwe | ZW |
Troubleshooting

Bluetooth phone compatibility list
- If even a phone as described in this list meets requirements of Bluetooth Hand-free Profile 1.0 and Object Push Profile 1.1, it can operate. However, it is noted that we cannot assure for operation by function.
- As difference in functional operation by model is mainly resulted from feature of a hand-free phone, consult manufacturer of a phone if you have any question.
| Manufacturer Model | Manufacturer Model |
| Nokia 3230 | Motorola L6 (L7) |
| 6021 | V3 |
| 6230 | E1 |
| 6230i | Sony Ericsson W550i |
| 6680 | W810i |
| 8800 | K700i |
| N70 | LG U8210 |
| Samsung SGH-Z500 | U8290 |
| SGH-E7700 | KU730 |
| SGH-D500 | KG800 |
| SGH-D600 | U880 |
| Siemens SL75 | P7200 |
| M75 | S5200 |
| Sagem MyX6-2 |

Specifications
GENERAL
Output Power 50W x 4CH (Max.)
Power Source DC 12V
Speaker impedance....4 Ω
Ground System ...... Negative
Dimensions (W x H x D) 182 x 51 x 173 mm (Without Front Panel)
Net Weight 2.9 kg
DISPLAY
LCD. 6.5 inch TFT LCD
Resolution....400 X 234
Color 65.000 color
Back Light .... CCFL type (L-type)
CD/DVD/VCD SELECTION
Frequency Response 20 Hz-20 kHz
S/N Ratio....60 dB
Distortion 1%
Channel Separation (1kHz) 45 dB
RADIO SELECTION
FM
Frequency Range 87.5-108 MHz
S/N Ratio....50 dB
Distortion 1.0%
Usable Sensitivity 15 dBμV
AM (MW)
Frequency Range 520-1720 or 522-1620 kHz
S/N Ratio....40 dB
Distortion 1.0%
Usable Sensitivity 35 dBμV
NAVIGATION SELECTION
CPU Renesas SH-7760 200 MHz (360MIPS)
OS. QNX v 6.2.1B
SDRAM....128 MB
Memory (Map) 1 or 2 GB CFC
Memory (OS) 16 MB NOR Flash
Graphic Fujitsu Coral-LB
GPS SiRF mini2t
Map Navteq
Map Update. DVD ATAPI
User Interface.....Touch screen

P/NO : ????


- CAR NAVIGATION/DVD RECEIVER
- OWNER'S MANUAL
- MODEL : LAN-8660EK
- TABLE OF CONTENTS
- SAFETY NOTE
- BASIC OPERATION
- SETUP OPERATION
- BLUETOOTH OPERATION
- RADIO OPERATION
- RADIO (RDS) OPERATION
- RADIO (SOUND) OPERATION
- CD/MP3/WMA OPERATION
- DVD/VCD OPERATION
- NAVI OPERATION
- TROUBLESHOOTING (NAVIGATION)
- TROUBLESHOOTING
- CAUTION
- DISPOSAL OF YOUR OLD APPLIANCE
- ABOUT THE SYMBOL DISPLAY
- TYPES OF PLAYABLE DISCS
- NOTES ON DVDS AND VIDEO CDS
- SAFETY NOTES
- REGIONAL CODE
- NOTES ON REGIONAL CODES
- USING THE REAR ON/OFF BUTTON
- TURNING THE UNIT ON
- TURNING THE UNIT OFF
- INSERT A DISC
- CHANGING THE MONITOR ANGLE
- ADJUSTING THE VOLUME
- NOTE
- AV OFF (AUDIO/VIDEO OFF)
- SETUP
- RDS
- ● EON TA (ENHANCED OTHER NETWORK)
- LOCAL
- DIST (DISTANCE)
- ●REG (REGIONAL)
- REG ON
- REG OFF
- DEVICE INFO. (DEVICE INFORMATION)
- BELL SOUND VOL. (BELL SOUND VOLUME)
- LCD BRIGHTNESS
- LANGUAGE
- LCD OFF
- USING A BLUETOOTH WIRELESS CONNECTION
- STARTING BLUETOOTH ON YOUR PHONE
- PAIRING YOUR UNIT AND BLUETOOTH PHONE
- CONNECTION THROUGH THE UNIT
- NOTES
- ●AUTO CONNECTION
- CONNECTION THROUGH A BLUETOOTH PHONE
- HEADSET FUNCTION
- PHONE SETUP
- CONNECT PHONE
- BT INFO. (BLUETOOTH INFORMATION)
- RENAME
- PHONE BOOK
- PHONE BOOK INFO. (PHONE BOOK INFORMATION)
- MAKING A CALL FROM RECENT CALLS
- MAKING A CALL FROM SPEED DIAL NUMBERS
- MAKING A CALL
- ANSWERING CALLS
- MISSED CALL NOTIFICATION
- ALTERNATING BETWEEN CAR SPEAKER AND PHONE DURING A CALL ↔
- DIAL USING RSA
- LISTENING TO RADIO STATIONS
- MANUAL TUNING
- AS (AUTO SEARCH MEMORY)
- STORING AND RECALLING STATIONS
- RDS DISPLAY OPTIONS
- AF (ALTERNATIVE FREQUENCY)
- TA (TRAFFIC ANNOUNCEMENT IDENTIFICATION)
- PTY (PROGRAM TYPE RECOGNITION)
- R TEXT (RADIO TEXT RECOGNITION)
- EQ (EQUALIZER)
- SOUND
- ●BALANCE/FADER
- PLAYING AN AUDIO CD AND MP3/WMA DISC
- SKIP TO THE NEXT TRACK
- SKIP TO THE PREVIOUS TRACK
- RETURN TO THE BEGINNING OF THE CURRENT TRACK
- SEARCH
- LOCATING A FOLDER/TRACK USING THE LIST
- MARKING A TRACK USING THE LIST
- MARKING DURING PLAYBACK
- REPEAT
- SCAN
- SHUFFLE
- PLAYING A DVD/VCD DISC
- IF MENU SCREEN IS DISPLAY
- DVD
- VCD
- PAUSE
- SKIP TO THE NEXT CHAPTER/TRACK
- SKIP TO THE PREVIOUS CHAPTER/TRACK
- RETURN TO THE BEGINNING OF THE CURRENT CHAPTER/TRACK
- OPERATING THE MENU DVD
- OPERATING THE TITLE DVD
- OPERATING THE NUMBER
- OPERATING THE
- USING THE RSE ON/OFF BUTTON
- AUDIO DVD
- SUBTITLE DVD
- ANGLE DVD
- SCREEN
- ●○ASPECT RATIO
- ●○BRIGHTNESS
- CONTRAST
- ●○COLOR
- ●○TINT
- WHAT IS GPS
- MEMORY NAVI MODE
- NAVIGATION IN THE MEMORY NAVI MODE
- INSTALLING THE NEW MAP DATA IN THE MEMORY
- MAP DESCRIPTION
- GUIDE MODE
- TRACE MODE
- SIMULATION MODE
- ●○GPS INFORMATION
- SCROLLING THE MAP DISPLAY
- CHANGING THE MAP SCALE
- MARKING YOUR FIRST JOURNEY
- ADDING A DESTINATION
- MY DESTINATION
- DESTINATION
- MEMORY POINTS
- SHOW MAP
- MODIFY
- DELETE
- BY NAME
- BY ENTRY
- MODIFYING MEMORY POINTS
- PREVIOUS DEST
- PREVIOUS DEST. (PREVIOUS DESTINATION)
- REGISTER
- ADDRESS SEARCH : STREET
- ADDRESS SEARCH : CITY → STREET
- JUNCTION SEARCH : STREET1 → STREET
- THIS FUNCTION CANNOT BE USED IN THE MEMORY NAVI MODE : STREET1 → STREET
- POI (POINT OF INTEREST) SEARCH : NAME
- POI (POINT OF INTEREST) SEARCH
- CITY → NAME
- CATEGORY → NAME
- CITY → CATEGORY → NAME
- CATEGORY → CITY → NAME
- NEAREST POI (POINT OF INTEREST)
- ROUTE
- OK
- DETOUR
- CANCEL ROUTE
- ROUTE OVERVIEW
- ●○GUIDE
- TRACE
- ●○SIMULATE
- ●○END
- ROUTE OPTIONS
- ROUTE CONDITION
- ●○TOLL ROAD
- ●○FERRY
- NEW START POINT
- MAP
- ORIENTATION
- ● DISTANCE UNIT
- ●○MEMORY POINT
- VIEW
- GUIDANCE
- VOLUME
- GPS INFORMATION
- INITIALIZE
- CANNOT IDENTIFY THE CURRENT LOCATION. (GPS NOT RECEIVING)
- CANNOT HEAR THE VOICE GUIDE
- THERE IS A DIFFERENCE BETWEEN THE DRIVING ROAD AND THE ROAD ON THE MAP IN THE PRODUCT
- CANNOT SEE THE MAP
- MAP DATA AND DANGEROUS AREA INFORMATION ARE NOT NEWLY UPDATED
- THE PATH GUIDE CAN BE DIFFERENT FROM THE ACTUAL PATH (PATH GUIDE ERROR)
- MAP MATCHING
- LANGUAGE CODES
- AREA CODES
- BLUETOOTH PHONE COMPATIBILITY LIST
- SPECIFICATIONS
- GENERAL
- DISPLAY
- CD/DVD/VCD SELECTION
- RADIO SELECTION
- NAVIGATION SELECTION
Brand : LG
Model : LAN-8660EK1
Category : NAS