
N2B1D - NAS LG - Free user manual and instructions
Find the device manual for free N2B1D LG in PDF.


| Product Type | Network Attached Storage (NAS) |
| Brand | LG |
| Model | N2B1D |
| Drive Bays | 2 (supports 3.5" or 2.5" SATA HDD/SSD) |
| Processor | ARM Cortex-A9 dual-core 1.2 GHz |
| Memory | 512 MB DDR3 RAM |
| Storage Capacity | Up to 32 TB (with 2 x 16 TB drives) |
| RAID Modes | RAID 0, RAID 1, JBOD |
| Network Interface | 1 x Gigabit Ethernet (RJ-45) |
| USB Ports | 2 x USB 3.0 (USB 2.0 compatible) |
| File System Support | ext4, NTFS, FAT32, HFS+ (read-only) |
| Supported Protocols | SMB/CIFS, NFS, FTP, AFP, WebDAV |
| Power Supply | External power adapter, 36W (12V/3A) |
| Dimensions (W x H x D) | 170 x 120 x 220 mm (6.7 x 4.7 x 8.7 inches) |
| Weight | 1.2 kg (2.65 lbs) without drives |
| Operating Temperature | 0°C to 40°C (32°F to 104°F) |
| Cooling Fan | 1 x 80mm (low noise) |
| Software Features | File server, media server, backup server, download manager |
| Mobile App Support | LG NAS Manager (iOS/Android) |
| Security | User/group management, Access Control List (ACL), encryption |
| Maintenance | Web-based management, firmware update via interface |
| Spare Parts | Power adapter, fan, drive trays (optional) |
| Repairability | Easily replaceable drives and fan; power adapter external |
| Warranty | 2 years (depending on region) |
Frequently Asked Questions - N2B1D LG
User questions about N2B1D LG
0 question about this device. Answer the ones you know or ask your own.
Ask a new question about this device
Download the instructions for your NAS in PDF format for free! Find your manual N2B1D - LG and take your electronic device back in hand. On this page are published all the documents necessary for the use of your device. N2B1D by LG.
USER MANUAL N2B1D LG
User Guide and Instruction Manual
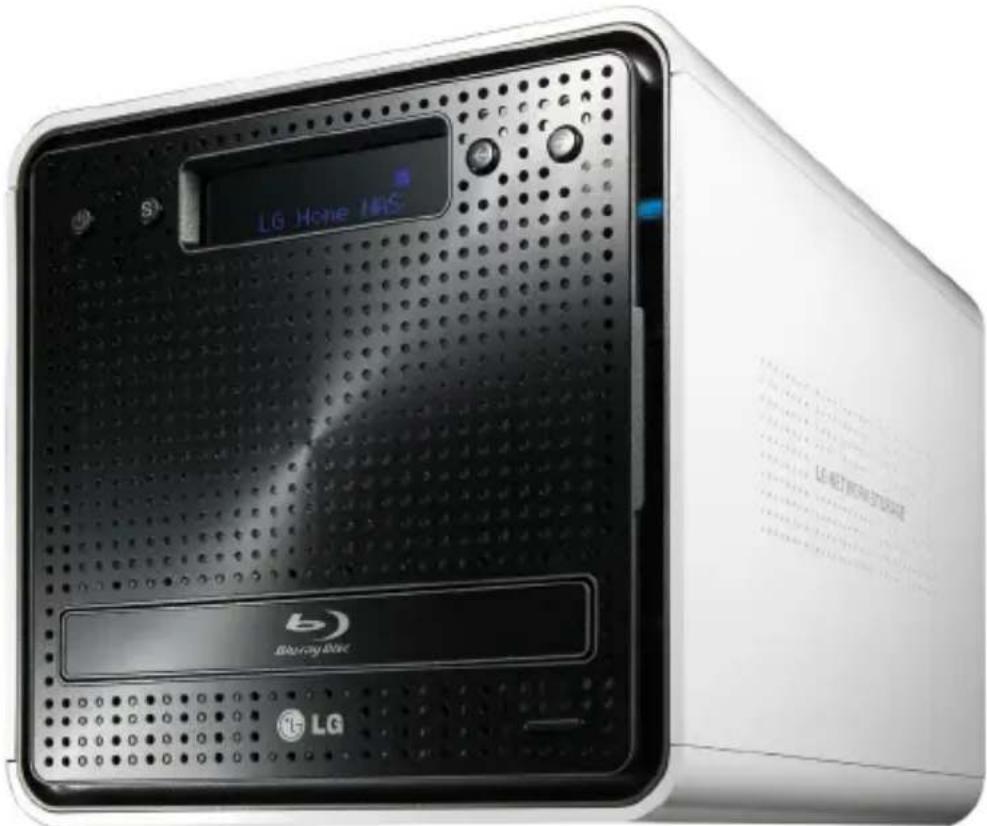
LG Network Storage
N2B1 / N2R1
Safety warning

| Note | |
| 1 | Do not place any objects within 15cm of the unit. The unit reaches high temperatures creating the risk of burn injuries. |
| 2 | Only use compatible devices with the system ports, or the system and devices risk being damaged. |
| 3 Do not use damaged disks. Product can be damaged. | |
| 4 | Do not dismantle or change the structure of the system in any way. This may cause electric shock. |
| 5 | When dealing with system components, strictly abide by the instruction manual. Physical contact with the soldering on the backside of components may cause severe injury. |
| 6 | When transporting the system, first turn off the system and disconnect the unit from the power source. Sudden tension in cables can cause severe damage to the system. Loose cables can cause injury. |
| 7 | Take caution when handling the system so as not to corrupt the hard disk data. - Take caution not to bump or expose the system to extreme temperatures, as it may damage the sensitive hard disk. - Take caution when turning on the electricity, as during this time any external bumps to the system may corrupt the hard disk data. - The manufacturer disclaims all responsibility for loss of hard disk data. |
| 8 | Related to damage to the HDD and data:- during installation or disconnection of the system, ensure that the system does not experience any external physical shocks.- During the operation of the HDD, short surges and stoppages of power may cause the system to turn off and on quickly.- there may be a sudden stoppage of electricity during operation- avoid moving the system during operation of the HDD, which may cause external physical shock- during the configuration of new volumes.i) if during use, existing volumes are deleted and new volumes are created, data will be lost.ii) Before configuration of new volumes, each user must back up data, as well as when creating new volumes, to ensure the possibility of restoration.- e.g. virus infections.※ Always back up hard disk data to avoid accidental data loss. |
| 9 | In the event of the administrator forgetting the password, restoration is impossible. Hence safeguard the password.※ To create a new password, the system must be re-initialized. In this case, all data will be lost, and data recovery will be impossible, for security reasons. The manufacturer disclaims all responsibility in the event of this occurrence. |
| 10 | In the event of the cover being removed during operation, the user risks electric shock, injury, and damage to the system. |

| Warning | |
| 1 | Do not use damaged electrical cords. This may cause electric shock, and is a fire hazard. |
| 2 | Use a grounded cord and grounded socket to avoid electric shock and damage to components. |
| 3 | Do not handle the electrical cord with wet hands, as this may cause shock and injury. |
| 4 | When removing the plug from the socket, ensure that the plug is handled and not the cord. Otherwise this may cause damage to the plug and even fire. |
| 5 | Always check and use correct voltage to avoid electric shock, severe damage to the system, and fire. |
| 6 | Always use grounded cords and grounded sockets with correct capacity (voltage / current) to avoid the danger of damage, electric shock, and injury. |
| 7 | In the event of noise emanating from the electrical cords or sockets, to avoid fire and injury immediately disconnect, and contact the service centre. |
| 8 | Ensure that electrical cords are correctly plugged into the sockets to avoid fire. |
| 9 | Ensure that electrical cords are not damaged or do not have heavy objects placed on them. Keep electrical cords away from children and pets. Damaged cords may cause electrical shock or fire. |
| 10 | Keep the power cords and sockets clean at all times to avoid fire and electrical shock. |
| 11 | In the event of moisture entering the system, immediately disconnect the power and contact the service centre, to avoid the danger of system damage, electrical shock, and fire. |
| 12 | Do not block vents, as this will cause system damage. |
| 13 | Prior to cleaning the system, always disconnect the power, to avoid damage and electric shock. |
| 14 | In the event of lighting and thunderstorms, immediately physically disconnect the system from any power source, to avoid damage to the system. |
| 15 | In the event of dropping the system, contact the service centre for advice and possible service. Not doing this creates the risk of damage, fire and electric shock. |
| 16 | Keep the system away from direct sunlight to avoid overheating, and melting of the case, which may eventuate in fire and injury. |
| 17 | Do not place flammable objects, candles or cigarettes on the system, as this may cause fire |
| 18 | In the event of a burning smell or smoke emanating from the system, immediately disconnect the power, and contact the service centre. |
| 19 | Keep heating devices and other electrical components at a distance from the system to avoid case melting, and hence the danger of damage, fire, and electric shock. |
| 20 | Before disassembling the system, always ensure physical disconnection of the electrical cable from the socket. |
| 21 | Do not disassemble the power supply, to avoid the danger of electric shock. |
| 22 | Keep children away from the system, as consuming any parts will cause serious injury. In the event of swallowing any parts, such as screws, immediately seek medical treatment. |
| 23 | Ensure that multipoint power sockets are not overloaded, to avoid the danger of fire and electric shock. Ensure that cords are always neatly arranged and are not trapped under the system or other heavy objects. When connecting and disconnecting the electrical cord, take care in handling the socket to avoid the danger of electric shock. |
| 24 | Ensure that there are no loose or exposed metallic objects inside the case, to avoid the danger of damage, fire and electric shock. |
| 25 | Ensure that hands are never used, to avoid damaging the system and electric shock. Always use screw drivers for work inside the system. |
Contents
Safety warning 2
1. Introduction ...... 10
LG Network Storage Introduction....10
Supported OS ....11
Package Contents ....12
Name of Each Part ....13
2. LG Network Storage Installation ....14
Hard disk installation and setup 14
‘LG Network Storage Installer’ installation (LG Network Storage system file installation, volume and RAID configuration) .....18
LG Network Storage Connection ....20
‘LG Network Storage PC S/W Installer’ installation (PC Application program installation and usage) ......21
PC application program installation 23
PC Application Program Usage 24
3. LCD panel and front button usage .....32
Power Off / On (POWER button) 32
Icon Description 33
Action set-up ('←', '→' buttons) 34
Information Mode 35
IP SETTING MODE 37
USB Back-up Mode 39
ODD Backup Mode 41
Backup data on discs using LG Network Storage (ODD Backup) ....41
Hibernation Mode ....44
Tray open / close (DISC OPEN button) 45
4. LG Network Storage Web Menu Use (for LG Network Storage administrators) 46
System Settings 46
Network 46
Host 47
Interface 47
Workgroup/Domain....50
Remote Access 51
DDNS (Dynamic DNS) 51
Date & Time 53
Date and Time Setup 53
NTP Set-up 54
Mail Notification 54
Volume Set-up.... 56
Volume Configuration 56
Add disk 58
Remove disk 59
Hot Swap....59
Trahsbox 60
Selective Mirror (Selective data protection for folders) 61
Add Selective Mirror List ....61
Edit Selective Mirror List 62
Delete Selective Mirror List 62
Use Selective Mirror 62
Conditions 63
Power 63
Hibernation Setup 64
UPS Power Setting 65
Hibernation Mode On/Off 66
Language Setting 70
Firmware 71
Upgrade 71
Initialization 73
Configuration Back-up 74
LG Network Storage Share Management 76
User 76
Group 78
Folder 80
Blu-ray / DVD 82
Burning 82
Service 86
DLNA(Digital Living Network Alliance) 86
Network Server 90
FTP 90
AFP 92
Network Printer 93
iTunes 97
Time Machine 99
[Web Set-up] 99
[Mac OS]....101
iSCSI 103
[iSCSI Initiator Installation] 103
[Server Synchronization]....104
[iSCSI Connection] 104
Torrent 113
[Download] 113
[Use] 113
[Set-up]....114
USB Sync 115
USB Device & Memory Card 115
Information 120
Status 120
Log 122
Top menu 124
WebDAV 124
My Information 126
5. LG Network Storage web menu usage (Regular users) 127
Blu-ray / DVD 127
Burning 127
Top menu 131
My Information 131
6. LG Network Storage via network drive 132
Accessing the LG Network Storage data in Windows OS ..... 132
MAC OS connection 136
Linux OS access 139
7. LG Network Storage Maintenance .... 142
LG Network Storage shut down/restart 142
Administrator password and network set up initialization ..... 143
System information checking and saving 144
Self-diagnosis execution 144
System failure or malfunction 145
Power cut or failure 145
System temperature protection 145
8. RAID trouble shooting 146
Appendix A Volume Construction & RAID Configuration ..... 148
Appendix B Technical Support 152
Appendix C Open source software notice 153
Appendix D Compatible/Recommended Device List 159
1. Introduction
1. Introduction
LG Network Storage Introduction
Thank you for purchasing the LG Network Storage.
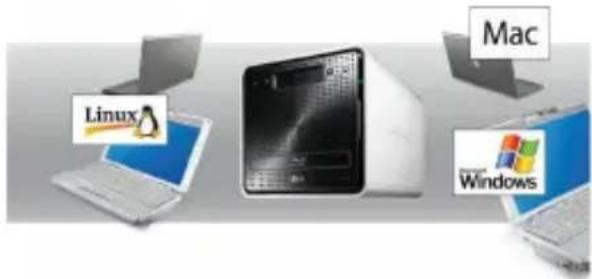
1) Now the LG Network Storage basic data-save and share functions can be used in Windows, Mac and Linux operating systems.
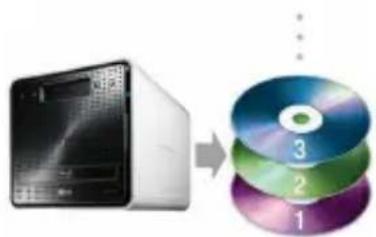
2) Similarly, the internal Blu-ray / DVD rewriter can be used to efficiently save data securely for long periods.
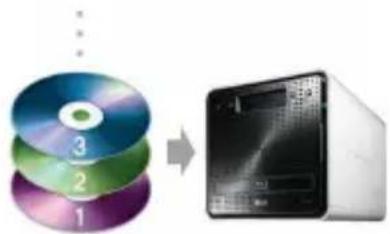
3) Furthermore, the Blu-ray / DVD drive can be used when directly copying data from discs to LG Network Storage.
1. Introduction
4) The LG Network Storage also allows for mobile synchronization, without the use of a PC, as mobile devices can be directly synchronized to the LG Network Storage.
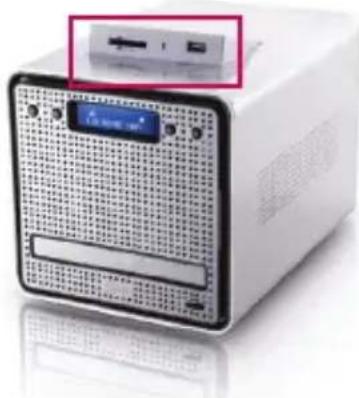
natural_image
White electronic device with grid-patterned front panel and a small inset showing a USB port (no visible text or symbols)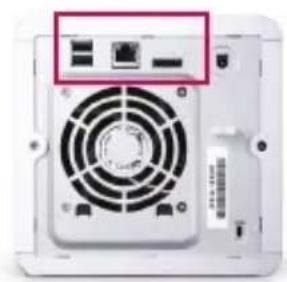
natural_image
Back view of a computer tower fan with ventilation grille and power strip (no visible text or symbols)This user manual contains express installation information as well as detailed options and functions.
Supported OS
LG Network Storage
• Windows XP, Server 2003, Vista
• Mac OS 10.x or later
• Linux (Redhat, Suse, Ubuntu)
PC S/W
| PC S/W Supported OS | |
| NAS Detector Windows | XP, Server 2003, Vista, Mac OS 10.x or later |
| NAS Monitor Windows XP | XP, Server 2OO3, Vista |
| Comnso Backup Windows XP | XP, Server 2OO3, Vista |
| Photo DVD Album Windows XP | XP, Server 2OO3, Vista |
| CyberLink Windows XP | SP2 or later, Vista |
| Acrobat Reader Windows, Mac | |
| Flash Player Windows, Mac | |
1. Introduction
Package Contents
| LG Network Storage • Product warranty | |
 |  |
| ‘LG Network Storage PC Software Installer’ | • Quick install guide |
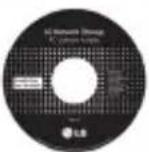 |  |
| • Power cord and adaptor • LAN cable | |
 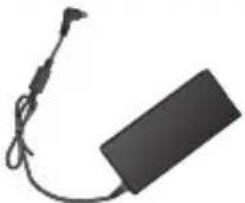 | 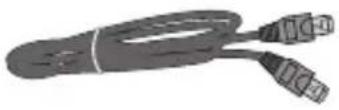 |
| • Hard disk fastening screw (x8) - enclosure only | |
 | |
* Photographs of images from the manual may differ depending on model components.
Name of Each Part
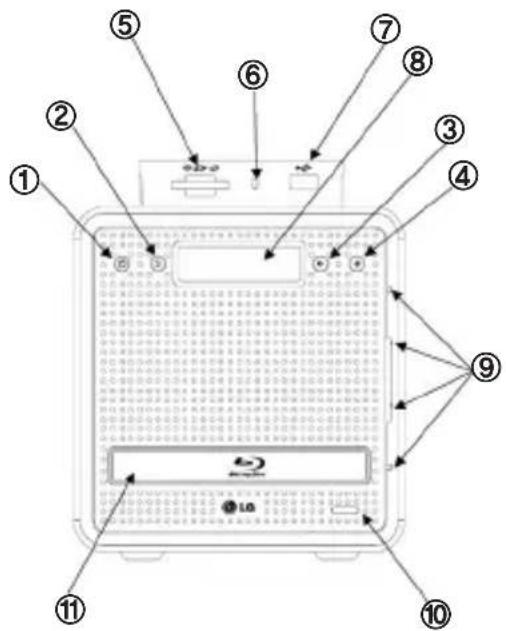
① Power button: power on, off (to turn off power, hold button in for 3 seconds without release).
② SET (S) button: selects mode. Pressing the SET button at waiting mode allows a quick view of the IP information. Button is used to change number setting during IP set-up
③ Left arrow button (<-): navigates menu, moves cursor for IP settings
④ Right arrow button (->): navigates menu, moves cursor for IP settings
Mode button: changes mode
⑤ Memory card reader: supports SD, MMC, MS and XD
⑥ Memory card Current state display
LED: - Blue : running correctly
⑦ USB port: USB 2.0 interface
⑧ LCD window: displays current state
⑨ HDD/ODD state display LED:
- Blue : running correctly
- Red : abnormal state
⑩ Disk Open button: opens/closes optical disc drive tray
⑪ Blu-ray/DVD Drive
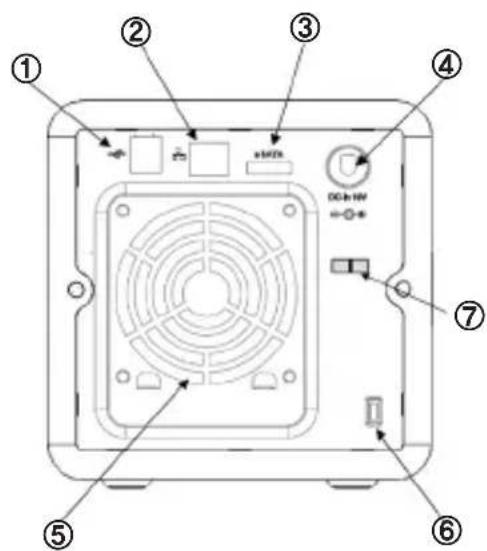
① USB port: USB 2.0 interface
② LAN port: LAN cable connection.
③ e-SATA: External SATA II device support
④ DC jack: Power adaptor connection
⑤ Fan
⑥ Kensington lock: Antitheft lock
⑦ Adaptor cable holder: Prevents the adaptor cable from unplugging.
2. LG Network Storage Installation
Follow these instructions to install the LG Network Storage. If the LG Network Storage is internal, go to
Hard disk installation and setup
The LG Network Storage hard disk rack is shown below. Refer to each part while installing the HDDs.
Components of Hard Disk Rack
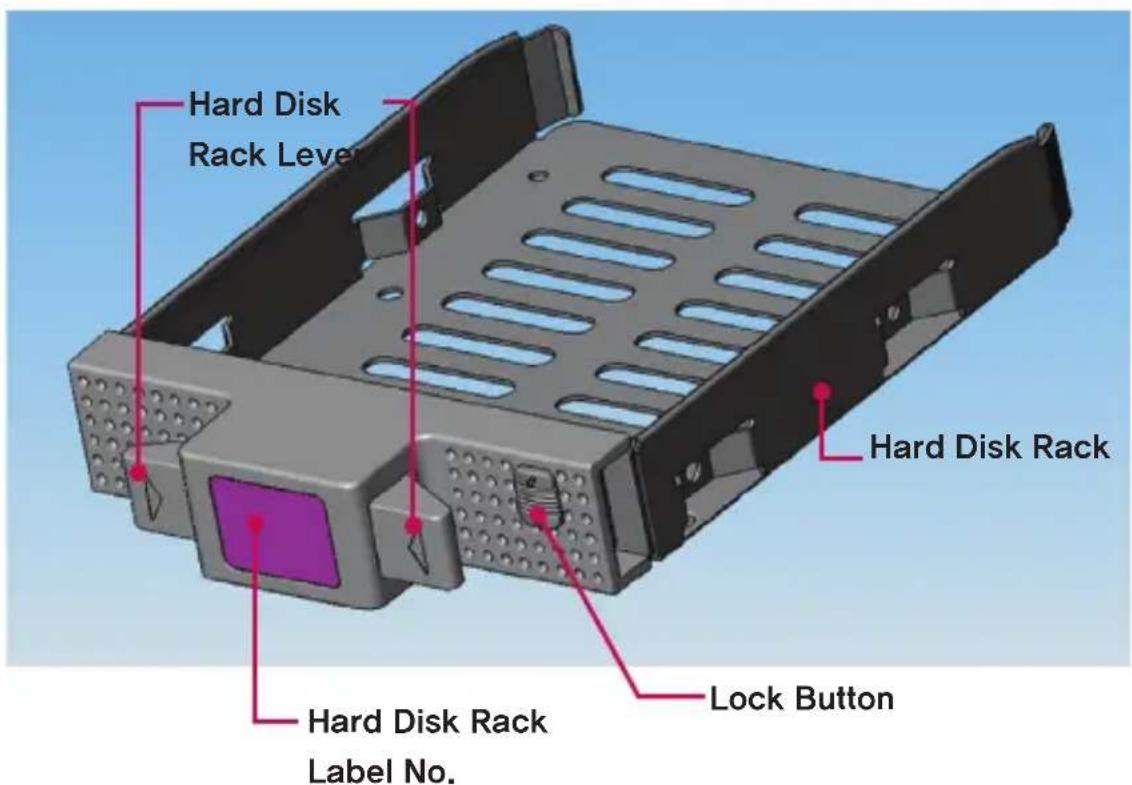
Note) If the disk sizes differ, the RAID configuration will use the smallest disk as a reference to measure all disk sizes, therefore the remainder can not be utilized and durability decreases.
2. LG Network Storage Installation
① First, ensure that the power is off.
② Open the front cover of the LG Network Storage main system.
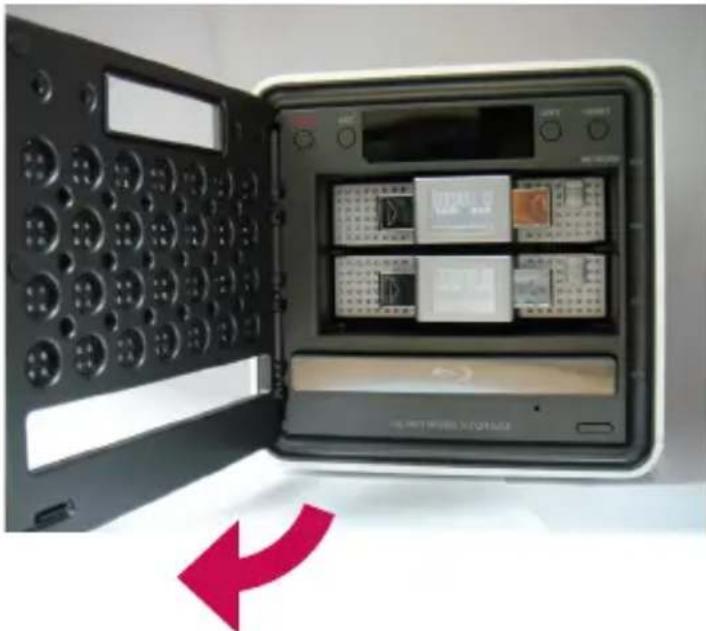
natural_image
Open digital kitchen appliance with grid and buttons, showing internal compartments and a red arrow pointing to the front panel (no readable text or symbols)③ Unlock the hard disk rack by pushing the lock button upward.
④ Hold down the hard disk rack lever and pull the hard disk rack to separate it from the main system.
⑤ Insert the hard disk into the hard disk rack, and with a screw driver, screw the four screws into place.
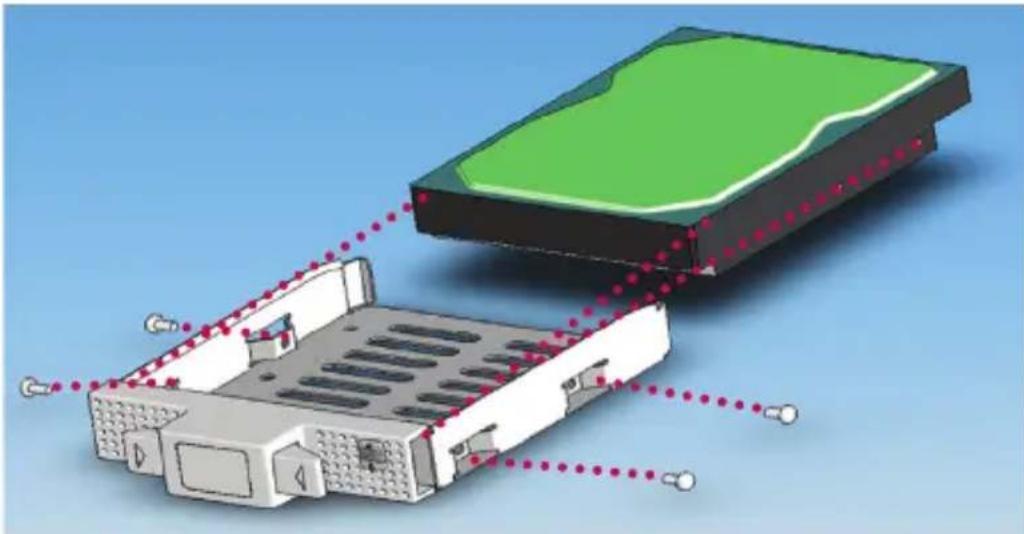
natural_image
3D diagram of a device housing with internal components and dotted lines indicating alignment or connection (no text or symbols)* If the Hard disk has been in use, all the data on it will be lost.
2. LG Network Storage Installation
⑥ Match the hard disk rack label number and the LG Network Storage front panel number, to insert the hard disk rack into the slot.
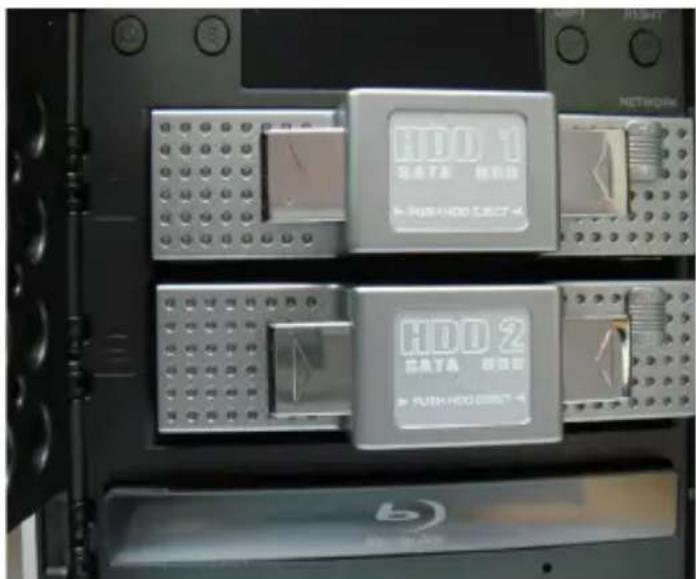
⑦ Push the hard disk rack into the LG Network Storage main system until it makes a click.
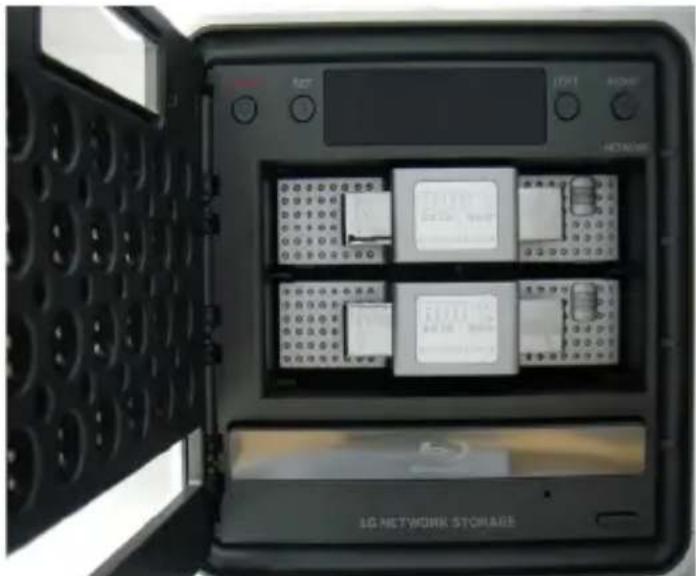
natural_image
Interior view of an 1G network storage device with multiple modules and a control panel open (no readable text or symbols)2. LG Network Storage Installation
⑧ To prevent accidental detachment of the hard disk rack, push down the lock button.
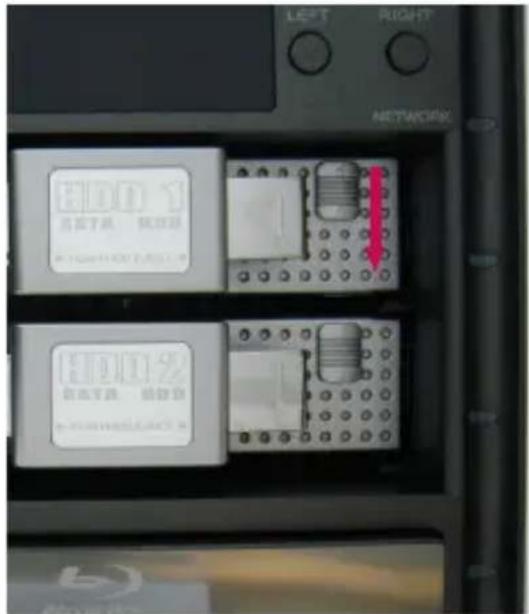
⑨ Similarly repeat the installation procedure for all the hard disks, one by one.
‘LG Network Storage Installer’ installation (LG Network Storage system file installation, volume and RAID configuration)
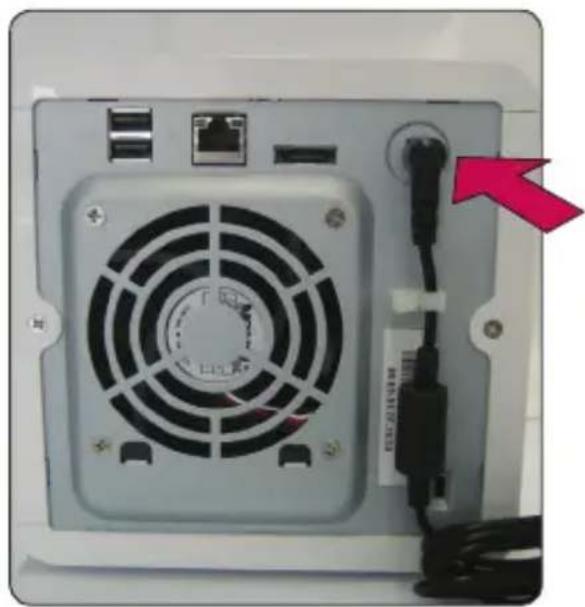
① Connect the enclosed power adaptor to the DC jack. Plug the “power cord” into an electrical outlet.
natural_image
Back panel of a computer power drive showing fan, ports, and cable (no text or symbols visible)Once the power adaptor is connected to the DC jack, connect the power cord to the outlet.
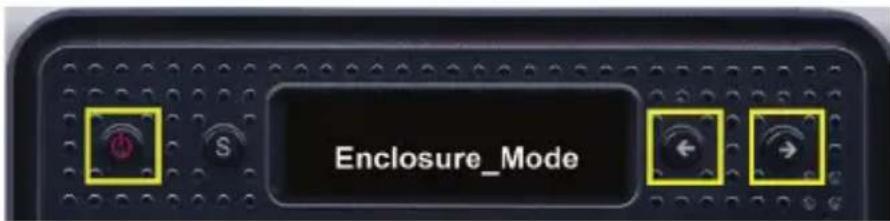
② While holding down both ‘<–’ and ‘->’ buttons, press the POWER button once. Once the “Enclosure_Mode” message pops up, let go of the arrow buttons.
9
③ Once “Enclosure mode” is complete, the LG Network Storage will automatically reboot itself. In the case that the power shut down abnormally before the system successfully reached “Enclosure mode,” please return to step 2 and re-run “Enclosure mode.”
2. LG Network Storage Installation
④ System loads system files as it reboots. LG Network Storage shall not be accessed during the system reboot process.
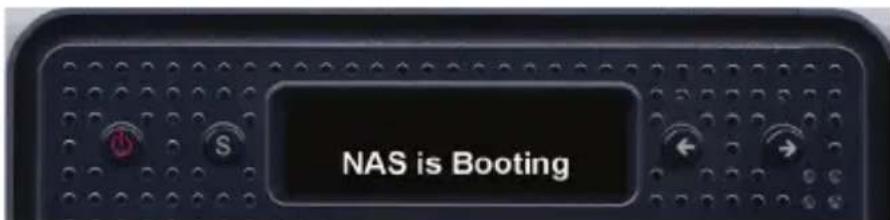
⑤ After approximately 60 seconds, system reboot is completed with a light alarm sound. (In the case that network connection has been activated)
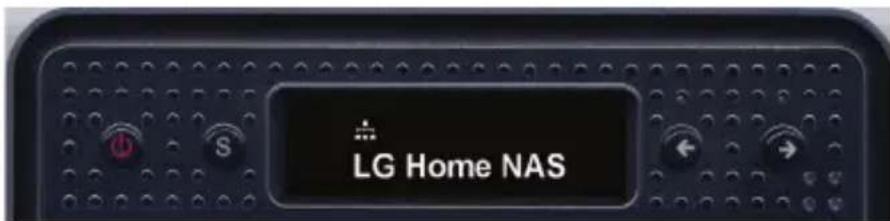
⑥ All basic installation required for running the LG Network Storage has been completed.
In order to configure the volume required for storage of the LG Network Storage user data, please refer to Chapter 4 and use the web.
* At RAID configuration, the hard drive number and size will determine the RAID configuration time.
| Total HDD Capacity System File Installation | Volume and RAID [Individual disks] | Volume and RAID [RAID 1] |
| 500GB (250 GB * 2) Approx. 10 minutes | Approx. 5 minutes | Approx. 1 hour |
| 1TB (500 GB * 2)) Approx. 10 minutes | Approx. 10 minutes | Approx. 1-2 hour |
| 2TB (1 TB * 2) Approx. 10 minutes | Approx. 20 minutes | Approx. 4-5 hour |

Note: It is recommended not to use the LG Network Storage while RAID configuration, as this will cause retardation.
* If the Hard disk has been in use, all the data on it will be lost.
LG Network Storage Connection
In an environment with a DHCP server, selecting automatic IP search after connecting the LG Network Storage to the IP router/switch/hub will acquire the network information from the DHCP server. For a particular IP address allocated from the Network IP administrator, installation using an IP address, subnet mask, default gateway and allocated DNS information is simple.
① Using the included LAN cables, connect LAN ports on LG Network Storage and network devices(home router/router/switch/hub) to each other or directly plug them into the LAN port on the PC.
A. If the network component (home router/router/switch/hub) is used to connect
the LG Network Storage (home router/router/switch/hub) to the PC, use the following
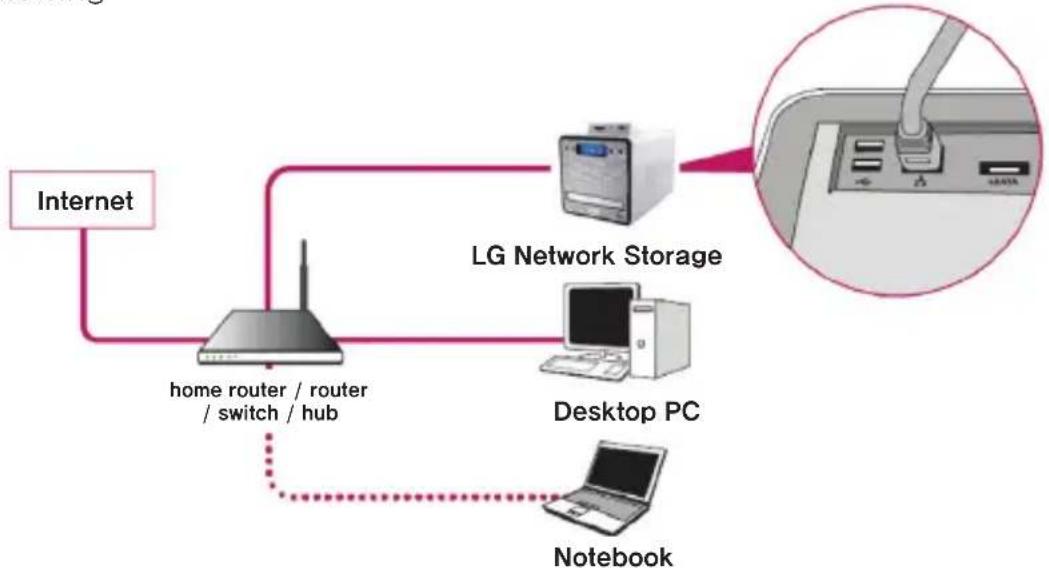
flowchart
graph TD
    A["Internet"] --> B["home router / router / switch / hub"]
    B --> C["LG Network Storage"]
    C --> D["Desktop PC"]
    D --> E["Notebook"]
B. If the LG Network Storage is connected directly to the PC without another network device,
it must be connected directly to the PC using a LAN cable, the LG Network Storage IP must be set to DHCP, the PC's IP set to automatic setting and the network will be automatically set up after approximately 2 minutes
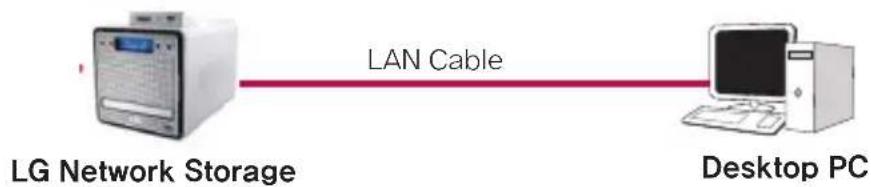
flowchart
graph LR
    A["LG Network Storage"] -->|LAN Cable| B["Desktop PC"]
2. LG Network Storage Installation
* If the LG Network Storage is directly connected to the PC through a LAN cable, the PC's local internet will not be accessed In this case, PC Internet may be disconnected.
② After checking that the LG Network Storage power cable has been connected, press the power button in the front to activate the LG Network Storage.
‘LG Network Storage PC S/W Installer’ installation (PC Application program installation and usage)
The “LG Network Storage PC Software Intaller” CD enclosed with the LG Network Storage product purchased includes the following programs:
1. NAS Detector
The “NAS Detector” quickly and easily detects the LG Network Storage on the user’s network.
2. NAS Monitor
The “NAS Monitor” allows real-time access to the status of LG Network Storage and scheduled back-up programs
3. Comnso Backup
The “Comnso Backup” program allows real-time or scheduled back-ups of important data from the client’s PCs to the LG Network Storage. Files backed up may be recovered any time for use as necessary.
4. CyberLink
CyberLink helps utilizing the ODD of the LG Network Storage.
5. Photo DVD Album
The Photo DVD Album program is a search program of all media files stored within the user's PC or the LG Network Storage. It also provides functions to burn media or play movies
Available programs for installation may vary depending on user's OS environment
| Program | Supported Operating System | ||
| Windows Mac Linux | |||
| Acrobat Reader O | O - | ||
| Flash Player O O | - | ||
| NAS Detector O O | - | ||
| NAS Monitor O | - | ||
| Comnso Backup O | -- | ||
| CyberLink O | - | ||
| Photo DVD Album O | -- | ||
PC application program installation
① Insert the “LG Network Storage PC Software Installer” CD in the PC’s optical drive (CD/DVD/BD drives). After a short while, the following menu will appear.
* Installation on PCs without a fiber optic drive may be processed using the iSCSI function of LG Network Storage. Please refer to 4 Service - iSCSI.
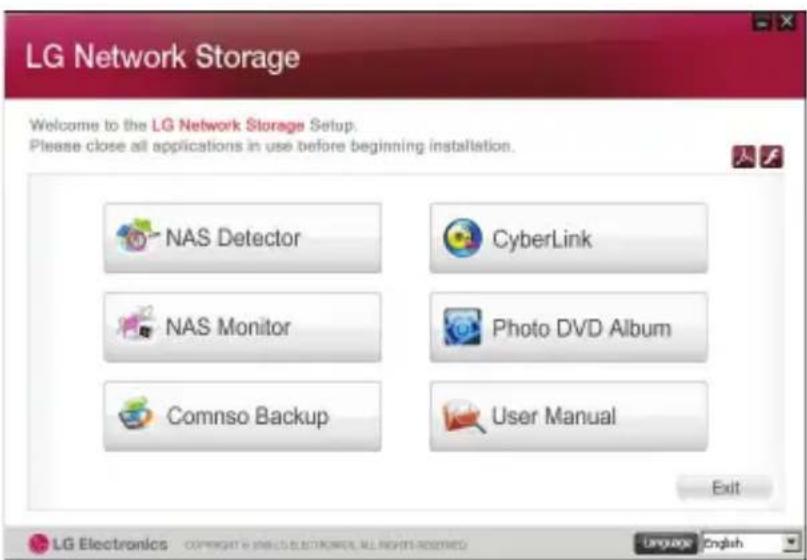
② Flash Player Installation is required to fully utilize the LG Network Storage web menu. If the user's PC doesn't not already have the Flash Player installed, proceed with installation by clicking on the icon
③ Click the “NAS Detector” button and install “NAS Detector” on the user’s PC. After installation the shortcut icon will appear.

natural_image
Illustration of a house connected to a magnifying glass over a device, symbolizing digital security or cloud computing (no text present)④ To install the "Comnso Backup" program, click on the "Comnso Backup" button.
⑤ To see the LG Network Storage User Manual, click on the "User Manual" button.
PC Application Program Usage
This explains how to use "NAS Detector"
For a detailed explanation for the bundle program, please refer to the built-in manual after installing the program. (Comnso back-up/Photo DVD Album/CyberLink group)
<“NAS Detector” usage>
① After checking that the PC network is intact, double click the “NAS Detector” icon on the desk top to open the program.

natural_image
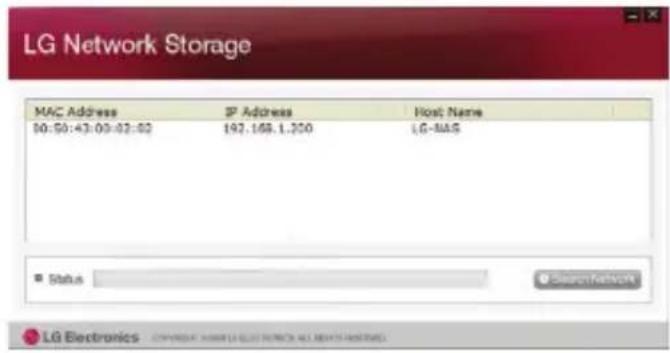
Illustration of a house connected to a folder and magnifying glass, symbolizing home security or data access (no text or symbols present)② The ‘NAS Detector’ will automatically search the LG Network Storage connected to the user’s PC.
When the searching is completed, the LG Network Storage IP Address, MAC Address, and Host Name information are displayed on the screen.
The factory default settings are shown below.
- MAC Address: serial number for each LG Network Storage product is printed in the back label.
- Host Name : LG-NAS
2. LG Network Storage Installation

* If the desired LG Network Storage is not found, click again on the 'Search Network' button to restart the search. If the search on the 'NAS Detector' is unsuccessful, re-check the Network connection. For manual setup see section
③ If the search result of the LG Network Storage information is chosen, as well as default network information of the LG Network Storage, including the Subnet mask, Default Gateway and DNS, 'Change Network Info', 'Open Web Menu' and 'Open Network Folder' buttons will appear.
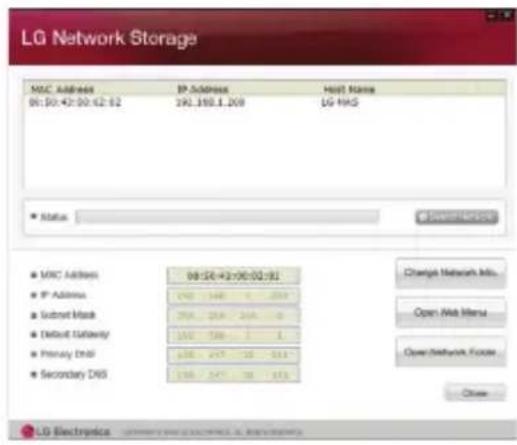
* For the 'NAS Detector' to properly function, the PC needs to be connected to the same home router/router / switch / hub as the LG Network Storage.
2. LG Network Storage Installation
④ 'Change Network Info' can be selected to change the IP address.
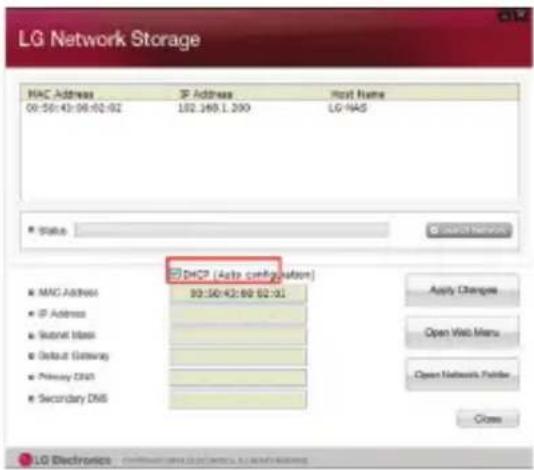
The DHCP selection option appears if a router is used or if there is a DHCP server on the network.
* If no IP address is allocated, use the IP address "NAS Detector" or check the DHCP option and automatically assign an IP address
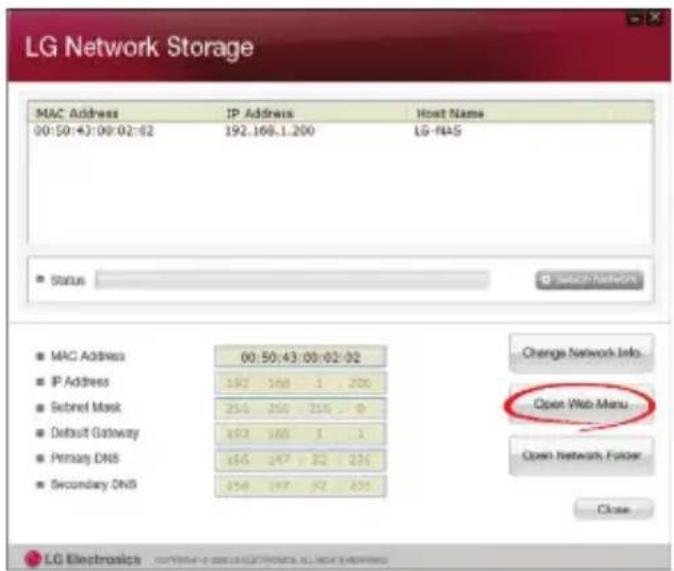
⑤ If the ‘Open Web Menu’ button is clicked, the web menu of the selected LG Network Storage can be accessed.
2. LG Network Storage Installation
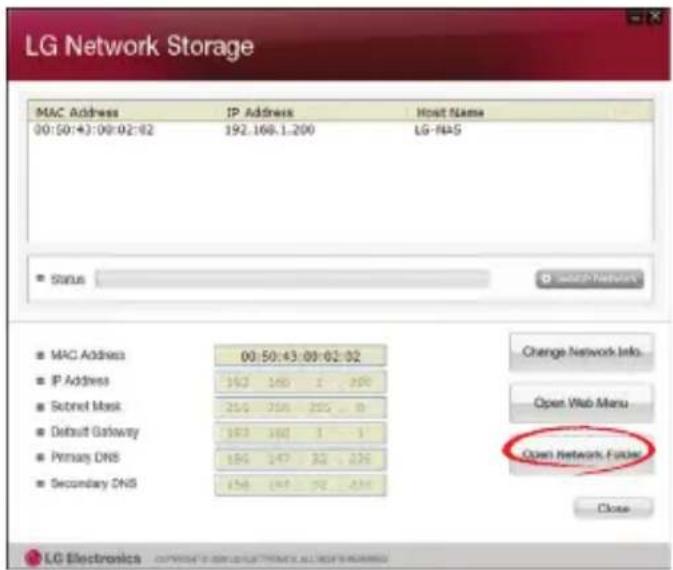
⑥ If the 'Open Network Folder' button is clicked, the LG Network Storage network folder can be accessed.
⑦ In selecting “Open Web Menu” or “Open Network Folder”, a pop up message appears with “Yes”, which when selected will produce a shortcut icon on the desk top, and after which the LG Network Storage web menu and network folder can be easily accessed.
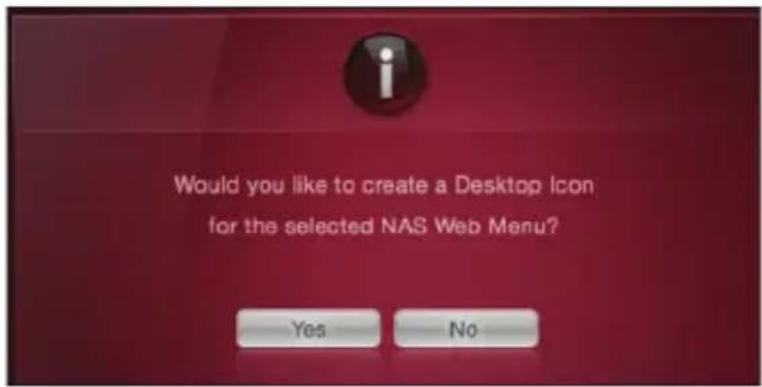

NAS web menu shortcut

network folder shortcut
< Using the LG Network Storage web menu >
The web menu offers LG Network Storage management features such as Network Information, Share management, and Service management. It also offers menus to setup data storing using Blu-ray/DVD drives and synchronized storage of mobile devices.
① Double click on the LG Network Storage web menu shortcut button.

② The LG Network Storage web menu can be used, after inputting user ID and password. The LG Network Storage default ID and password are ‘admin’ and ‘admin’.
* A system idle for 40 minutes after log-in will automatically log off for security purposes.
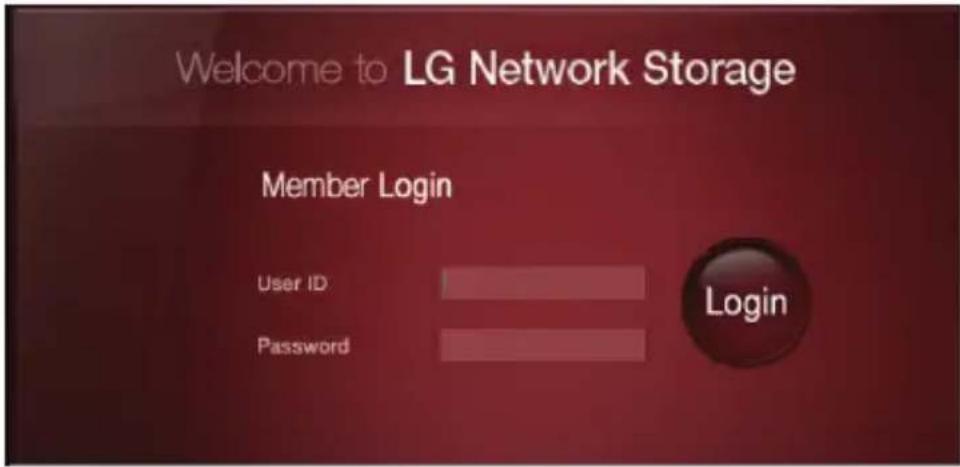
③ After logging in, use the LG Network Storage data set-up, share management, service management, Blu-ray/DVD drive, and mobile sync. features. The detailed information can be found in
![LG Network Storage Home Lograr Work Fast Items Short Menu Help System Information • NoD Name • NoD Description • Hardware Version • Current Data and Time • Time Zone • Fast Type • DDNG • BCCB • CLNA • e-Mail • Fan Status LG-NAS LG-NAS Server 8 (9,1676) 2009-06-28 13:31:29 Audio/Street [VOLUME1 VOLUME2] Disable Disable Disable Disable EPM_GREEN T 1000 RPM](/content/2026/05/979433/images/0e8106c0687f1ba5dcb516e7887e28260ed697fdefc75267af57ecf0df002cc3.jpg)
File share and store can be performed, similar to the internal or external HDDs connected to the PC.
① Double click the LG Network Storage network folder shortcut.

② The LG Network Storage Blu-ray/DVD drive under folder name “cdrom” and “service” / “volume” will appear.
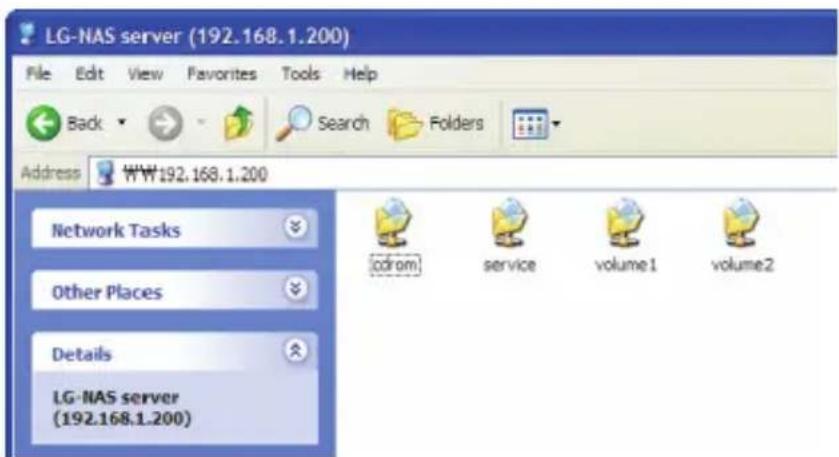
③ To view the contents of the disc inserted in the LG Network Storage, double-click on the 'cdrom' folder, and to access the LG Network Storage hard disc, double-click on either folder 'volume1' or 'volume2'.
* If the contents of the LG Network Storage 'cdrom' folder are not displayed correctly, please push the refresh button.
* The default ID and password for the LG Network Storage are 'admin' and 'admin'.
* Folders 'volume' / 'service' will only appear after the user has completely configured the volume through the web menu.
2. LG Network Storage Installation
The NAS Monitor offers various functions for the user to easily utilize the LG Network Storage. For example, user can access the network folder or web pages by simply clicking the MAS Monitor menu.
The NAS Monitor basically obtains an IP address through automatic connection with LG Network Storage. This allows the user to easily access the network folder or the web even after a change of IP address without changing the settings.
![[LG NAS]--{LG-NAS:192.168.100.13} NAS Network Information Host Name : LG-NAS IP Address : 192.168.100.13 Subnet Mask : 255.255.255.0](/content/2026/05/979433/images/6b8103954ad59c07b17fa2e6e9080e93f5ad5e7db4e576bc0bf68b0516a4e81c.jpg)
The NAS Monitor icon will show up as Windows' tray icon when the program running, on the right bottom side of the desktop. The below screenshot captures the menu shown when the user hits the right-click of the mouse.
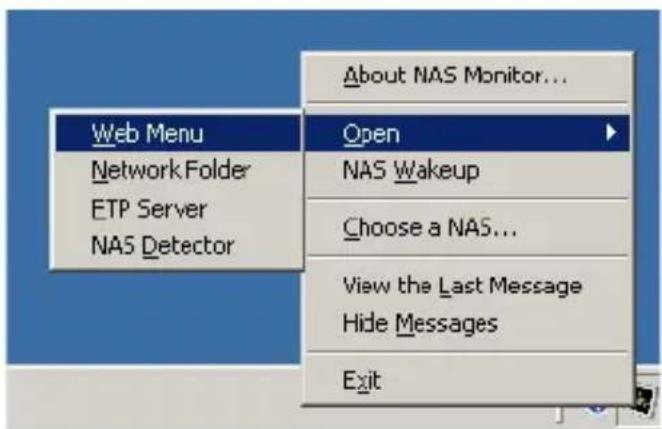
Web menu is used to access the web page.
Network folder is used to open the network folder. Double-clicking the left button of the mouse will open the network folder.
This is used to log on to the FTP server.
The NAS Detector program is run to change the IP address of the LG Network Storage. This menu will properly function only after the NAS Detector has been completely installed.
This function is used to change the LG Network Storage mode from maximum energy save mode to normal mode. This procedure usually takes approximately 1 minute.
Using one LG Network Storage will automatically set up an IP address for the NAS monitor. However, using multiple LG Network Storages may forward too many messages to the NAS Monitor while not knowing to which LG Network Storage the message is being sent at the selection of a menu. Therefore, designating one LG Network Storage may allow information for that specific LG Network Storage to be processed.
This menu shows the last message sent.
This menu hides the message sent from LG Network Storage.
3. LCD panel and front button usage
3. LCD panel and front button usage
Once the booting is complete, the default LG Network Storage screen will be as follows.
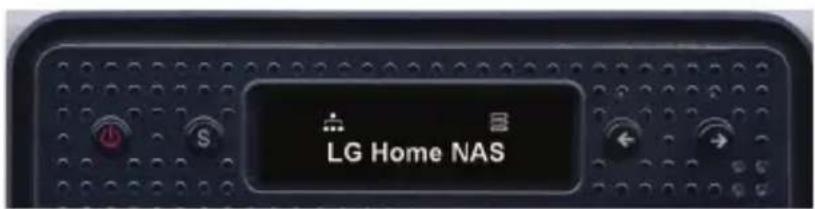
* If the LAN cable is unplugged, the network icon will not appear on the LCD window. If the network connection is unstable or in the middle of acquiring the IP address, the network icon may blink.
Power Off / On (POWER button)
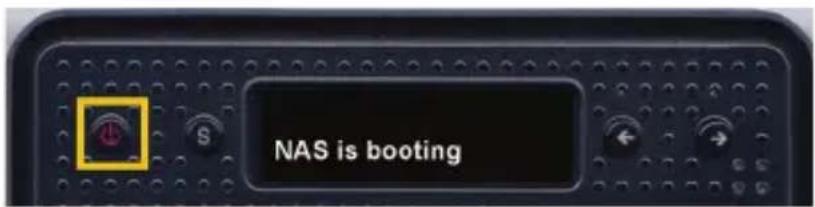
Power On
After pushing the POWER button on the front panel, the following message appears, activating the LG Network Storage.
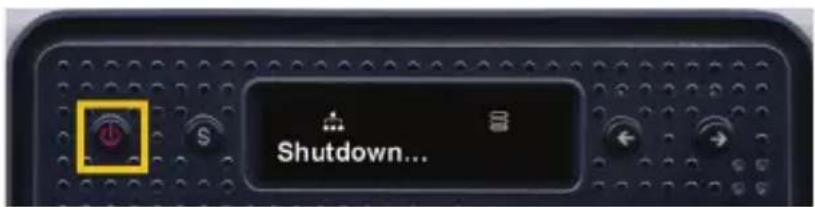
Power Off
Pressing the POWER button for longer than 3 seconds will shut down the system after showing the below message.
Icon Description

①

②

③

④

⑤
① Icon shows the status of the network connection. It is deactivated if the LAN cable is disconnected and blinking if connected. The icon will also blink if the IP address has been set up to be acquired automatically (DHCP) or in the process of acquiring IP address.
② Icon is activated when user has logged on to LG Network Storage by opening the network folder.
③ Icon is activated when the memory card/USB/e-SATA devices are connected.
④ Icon is activated when CD/DVD/BD media are inserted to the BD/DVD drive.
⑤ Icon is activated when volume is configured to save the user's data. If this icon is not yet activated, user may not send any file to LG Network Storage even by opening the network folder and may not be able to use the USB back-up or the ODD back-up functions.
Action set-up ('←', '→' buttons)
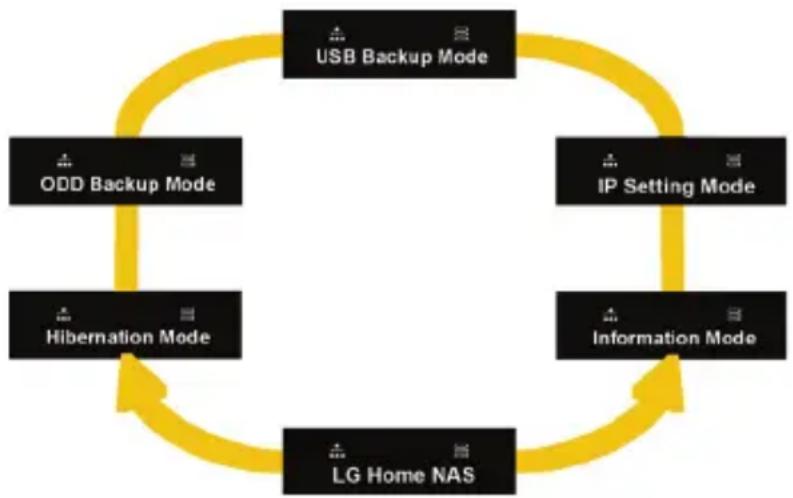
Pressing the ‘←’, ‘→’ buttons in the front will allow access to various functions of LG Network Storage. Action modes activated by using the arrow keys are as follows:
flowchart
graph TD
    A["USB Backup Mode"] --> B["ODD Backup Mode"]
    B --> C["Hibernation Mode"]
    C --> D["IP Setting Mode"]
    D --> E["Information Mode"]
    E --> F["LG Home NAS"]
    F --> A
Action modes comprises 6 modes of [Stand-by Screen] - [Information Mode] - [IP Setting Mode] - [USB Back-Up Mode] - [ODD Back-Up Mode] - [Hibernation Mode] in order and user may navigate through the modes by using either ‘←’ or ‘→’ button. For each action mode press the Set (S) button in the relevant mode.
Information Mode
Information Mode shows the current status and information of LG Network Storage. Once in the [Information Mode], user may use the arrow keys to move through [IP Address Information] - [System Firmware Version] - [HDD Usage Capacity] - [Date and Time] - [Fan RPM Information].
[IP Address Information]
Mode allows user to check the IP address set up.
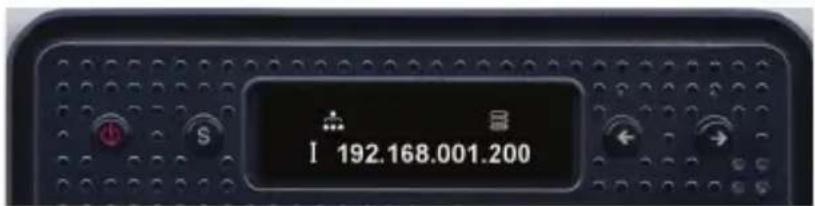
* Pressing the Set key from the stand-by screen will allow a quick view of the IP address
* If IP address is set up for automatic acquisition (DHCP), IP address may temporarily appear as 000.000.000.000 in the process connecting to the DHCP server.
[System Firmware Version Information]
This shows the version of the system firmware installed.
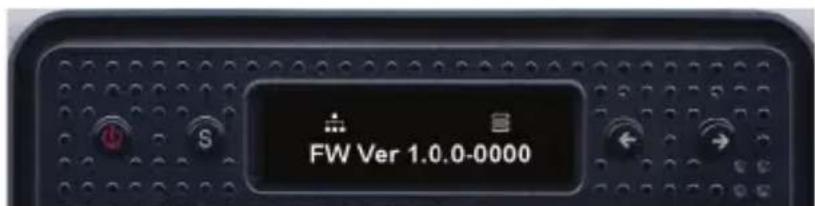
[Micom Firmware Version Information]
This shows the version of the Micom firmware installed.
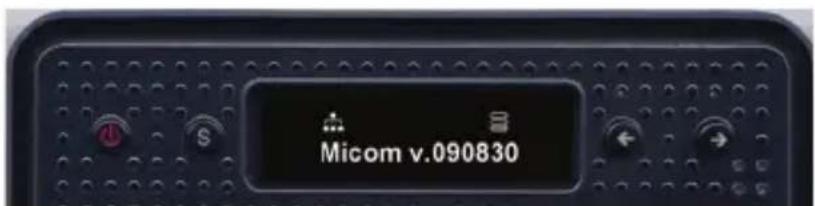
3. LCD panel and front button usage
[HDD Usage Capacity]
This shows the hard disk's used-up capacity in comparison to its total capacity in percentage (%).
![HDD USAGE[1%]](/content/2026/05/979433/images/fa0e5875cd528509b8f1daead229a36f1e7695b9d553d448de4f43e740a99cba.jpg)
* If the volume is not configured in advance, 'HDD Config First' will appear.
[Date and Time Information]
This shows the current date and time set up in the LG Network Storage.
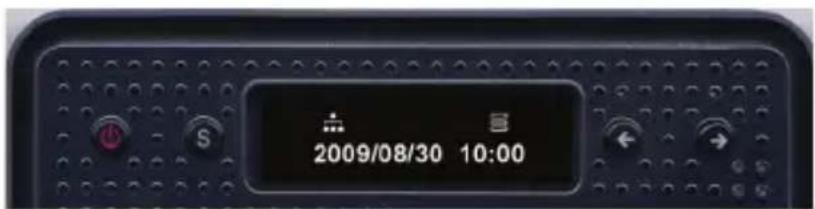
[FAN RPM Information]
This allows to check the current Fan rotation per minute of LG Network Storage.
![FAN[1000]](/content/2026/05/979433/images/255e1615f41549c58177b30f956608c95f2c50ccb799170f9046d8849ea0fd13.jpg)
IP SETTING MODE
The LG Network Storage IP can be set up by using the Set key and entering [IP SETTING MODE].
The arrow keys may be used to navigate through menus [Manual IP set-up] - [Automatic IP set-up] - [Return to stand-by screen], and the Set key may be used to enter any of the menus.

flowchart
graph LR
    A["1"] Static IP --> B["2"] D HCP IP --> C["3"] Cancel Se tup
    C --> A
For Manual IP set-up, please follow the following orders:
① Press the Set button once [1] Static IP appears. The below message will pop up.

② Press the Set button again.
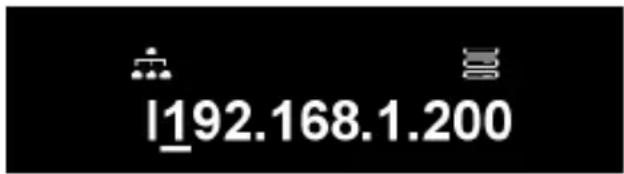
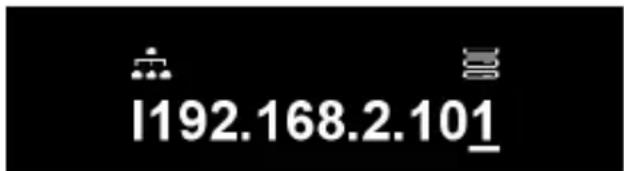
③ It will show the current IP address and the cursor will be placed on the first digit. Pressing the Set button will increase the number by 1. Once the intended number is reached, press the right arrow key to move onto the next digit. To return to the previous number, press the left arrow key to move the cursor to the left.
3. LCD panel and front button usage
④ Pressing the right arrow key from the last digit will move the cursor to the next setup value.

⑤ Press the Set key.
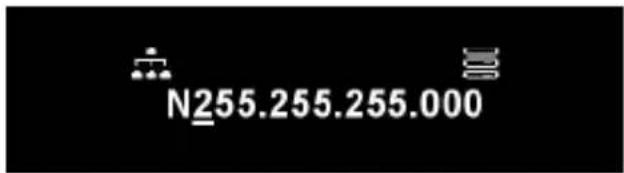
⑥ Set up the network mask value following the procedure for the IP address set-up.
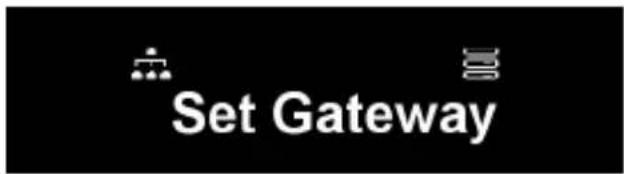
⑦ Press the Set key.
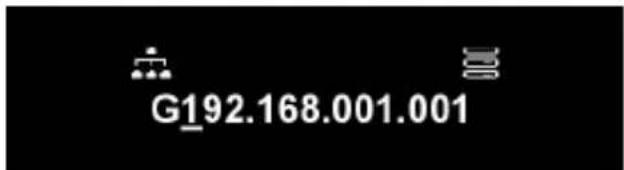
⑧ Set up the gateway address following the procedure for the IP address set-up.
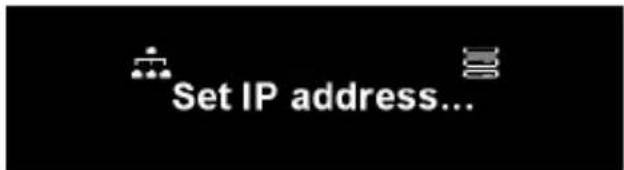
* LG Network Storage recommends that user manually sets up the IP address given to the IP administrator in order to prevent potential clashes with a router or any other network devices.
USB Back-up Mode
LG Network Storage provides functions to easily store data from USB, memory card, or other removable disks to the LG Network Storage with a simple click of a button.
Note: Certain memory cards may require an adaptor. (A list of memory cards compatible with LG Network Storage may be found on http://www.lge.com. LG Network Storage may not function properly if a memory card, not listed on the website, is to be used.
[Simple Back-up - OneTouch Back-up]
Connect the USB or the memory card to LG Network Storage. As soon as the system reads the device, the following message will pop up.
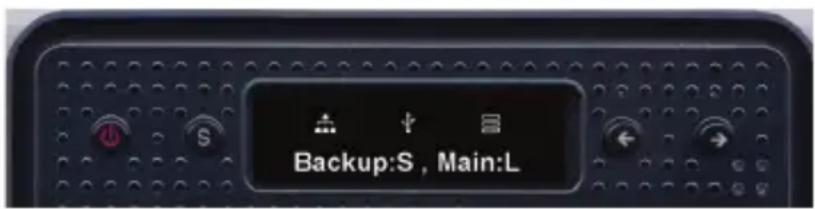
① To back-up press the Set(S) button, and to cancel press the left button (L) ‘←’.
※ *In the case that several types of external devices are plugged in, back-up will take place for the device plugged in last.
② Progress of data saved will appear in percentage (%).
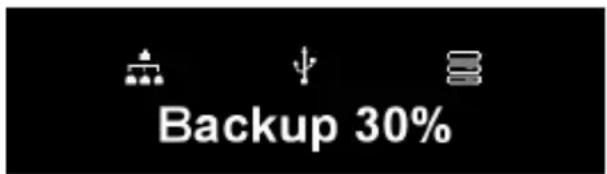
③ Once back-up is completed, a folder named after the manufacturer company of the storage device will be created within the service/back-up/USB folder. This will allow to distinguish this folder from other devices in the future. Subfolders will be created by back-up date to save all contents of the USB or the memory card in LG Network Storage.
3. LCD panel and front button usage
Folder names will be set up automatically as follows:
| Saved in Folder name | |
| Service/back-up/USB | Manufacture company name_Serial No./ File back-up format /Date folder created |
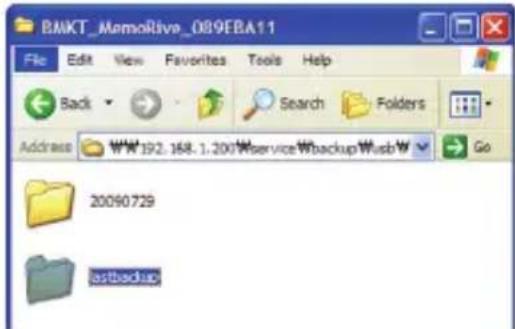
※ In the case of simple back-ups, if one storage device is backed up several times, the data from the final back-up will be saved under the Last Backup folder. If one device is backed up more than once on one day, a serial number will follow the date. The folder created for the very first back-up will include all data from the external storage device, and subsequent back-ups will only save additional folders or files compared against the previous back-up data.
For more details on the Last Backup folder, refer to Chapter 4 - USB Synchronize Set-Up.
[USB Back-up Mode]
Using the arrow keys to move to USB Back-up Mode and pressing the Set key will activate the same way as the simple back-up.
For USB back-up, user may log on to the webpage and set up the relevant sections. For more details on the Last Backup folder, refer to Chapter 4 - USB Synchronize Set-Up.
ODD Backup Mode
Backup data on discs using LG Network Storage (ODD Backup)
LG Network Storage provides functions to back up data saved in optic disks such as CD/DVD/Blu-Ray on to LG Network Storage with a simple click of a button.
① Insert the optic disk to be backed up in the LG Network Storage BD/DVD drive.
② Once the system reads the optic disk, the optic disk type will appear in the front of the LCD.
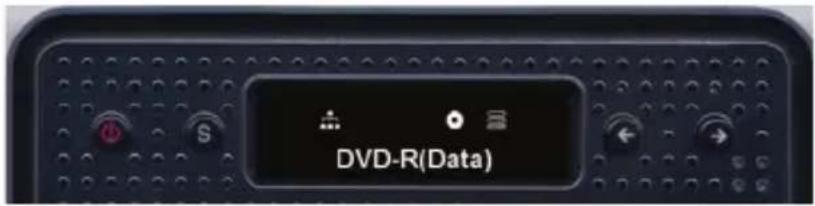
③ Once the optic disk is recognized, use the arrow keys to mode to [ODD Back-up Mode] and select using the Set key.
④ Once in the [ODD Back-up Mode], use the arrow keys to select the 3 types of menus as shown below:

flowchart
graph LR
    A["[1"] Data Copy] --> B["[2"] Image Copy]
    B --> C["[3"] Cancel C op y]
⑤ Select the preferred back-up method and pressing the Set key will initiate back-up.
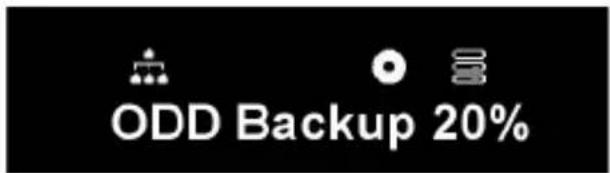
⑥ Progress of data saved will appear in percentage (%).
3. LCD panel and front button usage
⑦ Pressing ‘←’ button will cancel the job at any time.
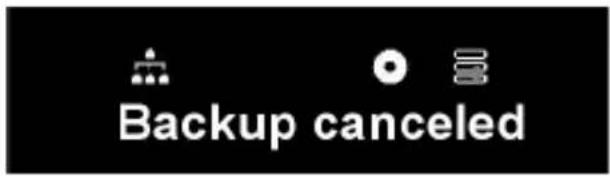
⑧ Once back-up is completed, the following message will pop up:

[Data Copy]
This is a function to back up the content of the disk on to LG Network Storage just as it was originally in the disk.
Selecting the Data Copy function will back up user's data in subfolders created by back-up date under service/back-up/disc-data folders. If Data Copy is executed more than once on one day, a serial number will follow the date.
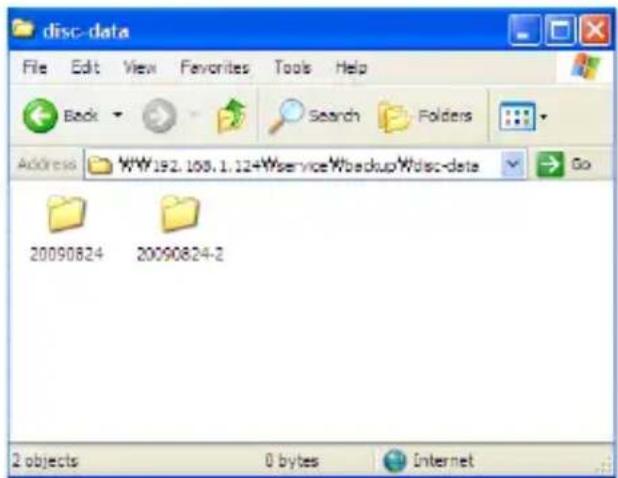
3. LCD panel and front button usage
[Image Copy]
This backs up contents in the disk in iso image file formats.
Once back-up is complete, user's data is saved in subfolders created by back-up date under service/back-up/disc-image folders. If back-up takes place more than once on one day, a serial number will follow the date.
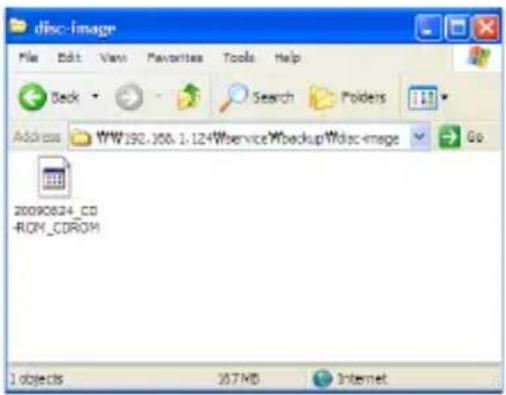
However, Image Copy will not function properly in one of the following cases:
① If the optic disk is copyrighted, ‘unsupported disc’ message will appear on the LCD and back-up will not be processed.
② Disks recorded in multi-sessions will not support Image Back-ups.
Hibernation Mode
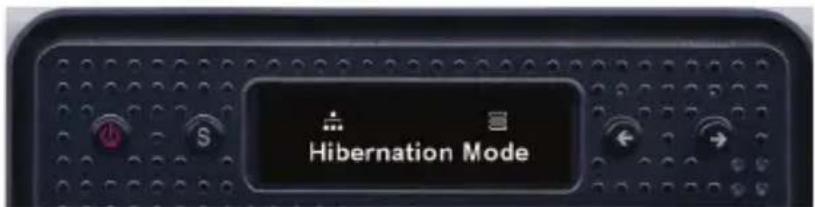
Hibernation Mode shuts down all services of NAS and minimizes the energy used in the overall system including the HDD to run NAS in maximum energy save mode. In the maximum energy save mode, all of the above icons will disappear.
Now Working...
Hibernation Done
To change from the Hibernation Mode to normal mode, press any one of the keys except the Power button. Logging on to the webpage and entering the administrator's password will also change the setting to normal mode.
In the Hibernation Mode, the majority of the services will not be accessed including SMB (Samba). Maximum energy save mode will not be available while iSCSI function is activated.
Tray open / close (DISC OPEN button)
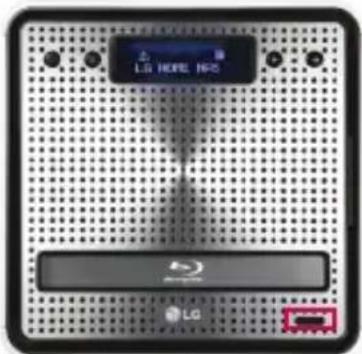
Pressing the “DISC OPEN” button in the bottom front will open the tray on which the disc can be placed. Pressing the “DISC OPEN” button or softly pushing the tray when the tray is open will close the tray.
- LG Network Storage Web Menu Use (for LG Network Storage administrators)
4. LG Network Storage Web Menu Use (for LG Network Storage administrators)
System Settings
Network
In the Network setting menu, an important set-up needs to be made to connect the LG Network Storage to the network. If the set up is not performed correctly, connection problems will arise at later stages, hence care must be taken.
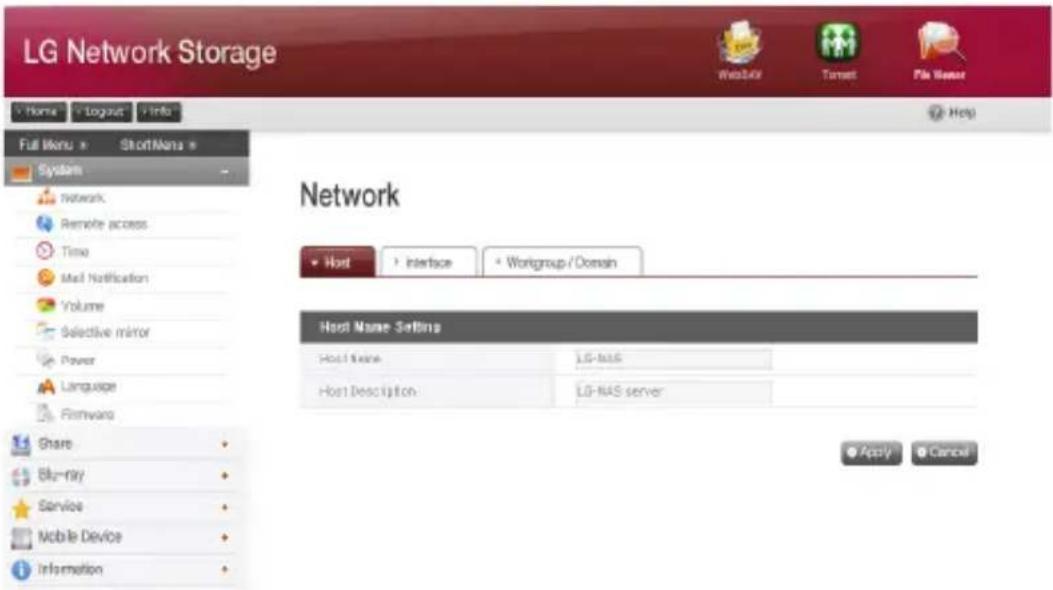
Host
① Designate an LG Network Storage host name.
The server name has a limit of 12 characters, this can be a combination of letters, digits, underscores and hyphens; the first characters though must be a letter or a number.
Names permitted: LG-NAS, LGNAS-123
Names not permitted: LG_NAS, -LGNAS, 123-LG, LG-#, LG/N
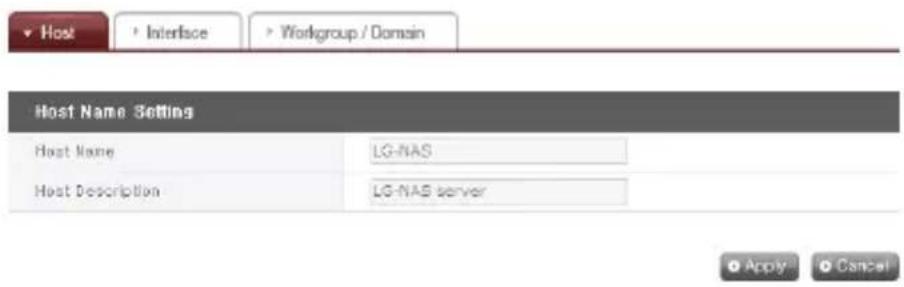
② Type in host description.
The host description has a limit of 24 characters; this can be a combination of letters, digits, underscores, hyphens and spaces. This explanation only affects the Windows client.
Interface
The Network interface's IP properties are specified. During system connection, care must be taken as restrictions may be created.
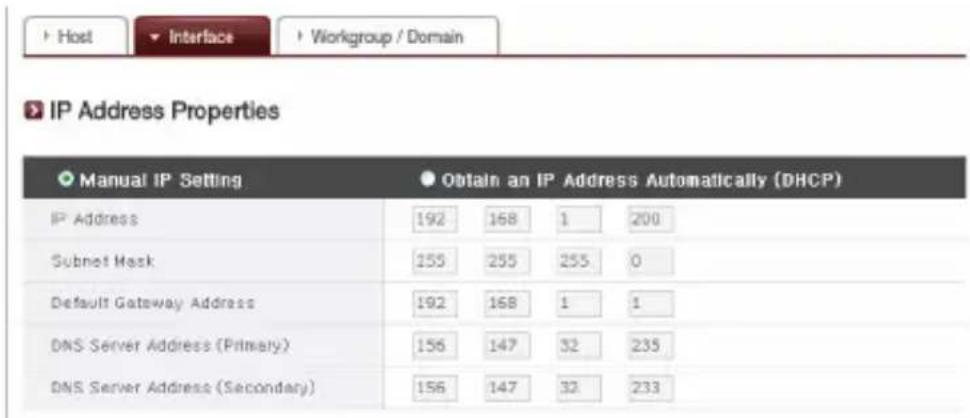
If an IP address is provided by the network administrator or there is a specific IP address user would like to use, select 'Manual IP Set-up' and enter the IP address, subnet mask, default gateway and DNS address.
4. LG Network Storage Web Menu Use (for LG Network Storage administrators)
• IP address: Enter desired IP address.
- Subnet Mask: Enter the subnet mask that suits the current network environment.
- Default Gateway: Define the outgoing route. If no gateway exists on the network, enter the IP address.
- Default DNS server address: The DNS handles conversions between domain names and IP addresses. If the DNS is not correctly configured, e-mails, DDNSs or domains will not function normally.
- Secondary DNS server address: Enter the secondary DNS server address.

* If accurate values are unknown, please contact the internet service provider (ISP) or the network administrator.
[To acquire an IP address automatically]
In order to acquire an IP address automatically, select ‘Acquire IP address automatically (DHCP)’. This option may used if there is a DHCP server (or internet router) within the network. Once the DHCP option is activated, the connection with the web menu will be terminated and a new IP address should be confirmed through the LCD screen or the NAS Detector program. DHCP set-up will regularly renew the user’s IP address from the DHCP server, causing unintended IP address changes, and require close attention.
In the case that it is set up for automatic IP address without a DHCP server within the network, a Link Local address such as 169.254.XXX.XXX will automatically be set up automatically. This can be used when the PC and network cable are directly connected and the PC's address is also set up to 'Acquire IP address automatically'.
4. LG Network Storage Web Menu Use (for LG Network Storage administrators)
[Ethernet Frame Size Set-up]
Configure ethernet frame size. If frame size is unknown, set it to 1500.
Ethernet Frame Size Properties

* Ethernet Frame Size: If the Ethernet frame size is at least 1500 gigabits, specified files can be sent quickly and with ease. In this case, the LG Network Storage alone does not change, but so do the PC and home router/router/hub/switch frame sizes. Otherwise performance will be reduced.
Workgroup/Domain
Set up a workgroup and domains that the Windows network supports. This will allow for access to the LG Network Storage shared folder in Windows. In addition to this, the LG Network Storage domain service supports a Windows Active Directory, enabling the import of existing user information, with ease and speed.
① Select the appropriate ‘Workgroup’ or ‘Domain’ considering the environment where the LG Network Storage will run.
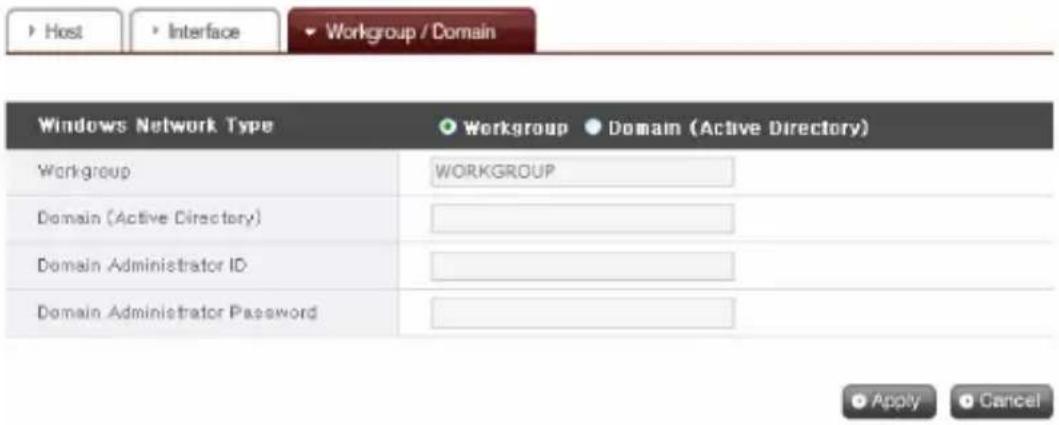
② When selecting 'Workgroup', input workgroup name required. Or when selecting 'Domain', input domain name, domain administrator ID and password.
* Domain: In the active directory user environment, the domain settings should not be created in the local User/Group folder, but should be created in the domain User/Group folder. When the domain settings are created, the network administrator must be available to provide assistance, as the user must have access to all information concerning the Name server. If wrong information is inputted, sharing and use of the LG Network Storage will be limited. In the event of unfamiliarity with the Workgroup/Domain, use of default values is recommended.
Remote Access
DDNS (Dynamic DNS)
Using DDNS and connecting the LG Network Storage externally by domain name is possible. (Example: http://myname.lgnas.com or ftp://myname.lgnas.com). To record and connect the server IP address to the in the case of using a fixed IP is possible, though the DDNS allows for a convenient connection in a dynamic IP environment, where IP changes in time. Variation of IP address is monitored and mapped to a domain name in real time. Therefore, there is no need to remember IP address as there will be a fixed address. (e.g. myname.lgnas.com)


① DDNS: Select 'Enable'
② Domain name: Input domain name to be used.
③ DDNS password: Input password.
♣ Password is required in the case that domain name needs to be re-registered for reasons of system initialization, replacement of LG Network Storage among others. It is important to remember the password.
④ Click on the 'Apply' button.
♣ If ‘Disable’ is selected after a domain name is registered, the previously registered domain will be removed, thus the domain name cannot be registered in other LG Network Storages. Caution must be taken at set-up.
[UPnP]
The UPnP port forwarding is used for LG Network Storage to directly receive requests from the router connected to the LG Network Storage. Access to the LG Network Storage from the outside using a DDNS usually requires a special set-up for the router to forward network requests received by the router to the LG Network Storage, and the UPnP port forwarding function allows the router to forward data without a separate router set-up. (This option is only available if the router is such that supports the UPnP port forwarding function.

① Check whether the address of the router currently connected to the Network Storage is properly displayed.
② If the router address is properly displayed, it should display whether the router's port forwarding function has been activated.
③ Select the 'Apply' button.
♣ If the router does not support the UPnP port forwarding function or the function is deactivated, the UPnP port forwarding may not perform properly.
Date & Time
Set up the system time. In order for the files uploaded in the shared folder to display the accurate time and log times, the system time should be properly set up.
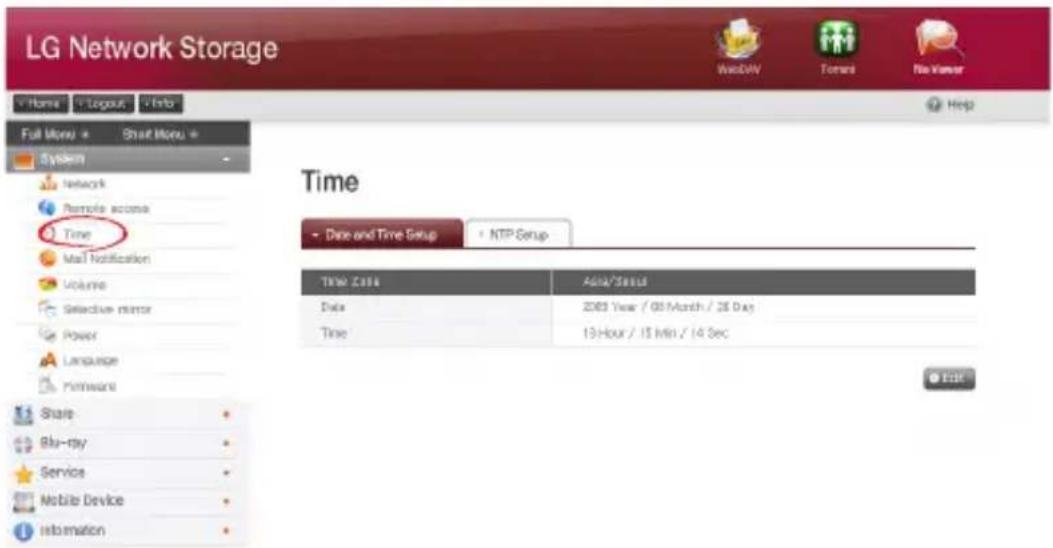
Date and Time Setup
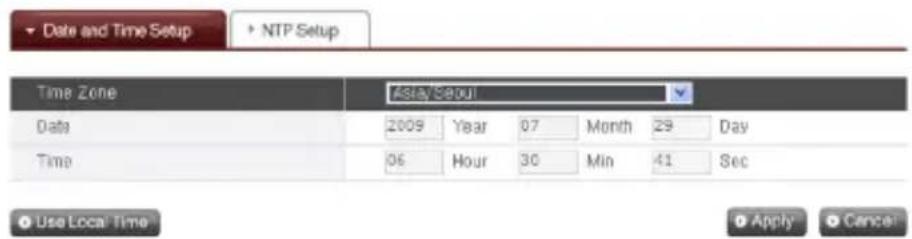
① To manually set the date and time, click on the 'Edit' button. Use 'standard time zone' to designate the current local region for LG Network Storage. The standard time zone set-up may affect the NTP and domain user certification, so exact values must be entered.
② Local time will be used by clicking the 'Use Local Time' button.
NTP Set-up
The Network Time Protocol (NTP) periodically aligns itself with an external time server to obtain and synchronize itself with accurate time. This accurate time should continuously activate the NTP. To use the Default Time Server, refer to pool.ntp.org server time.
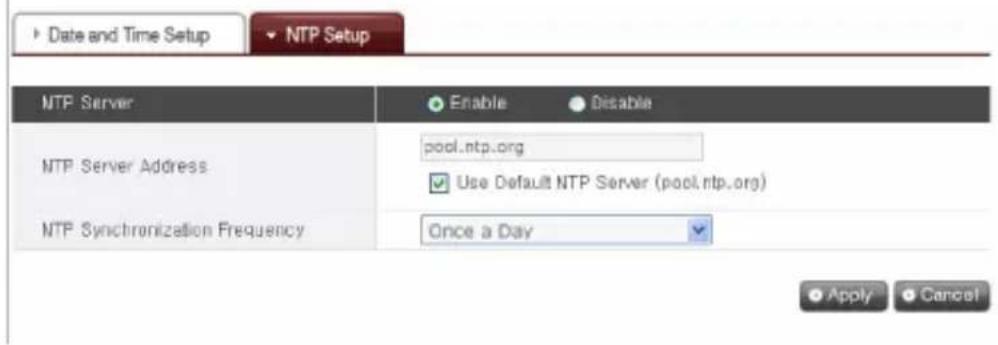
Mail Notification
To use Mail Notification, the LG Network Storage usage amount can be periodically checked. Registration information and results will be sent to users subsequent to their new registration.
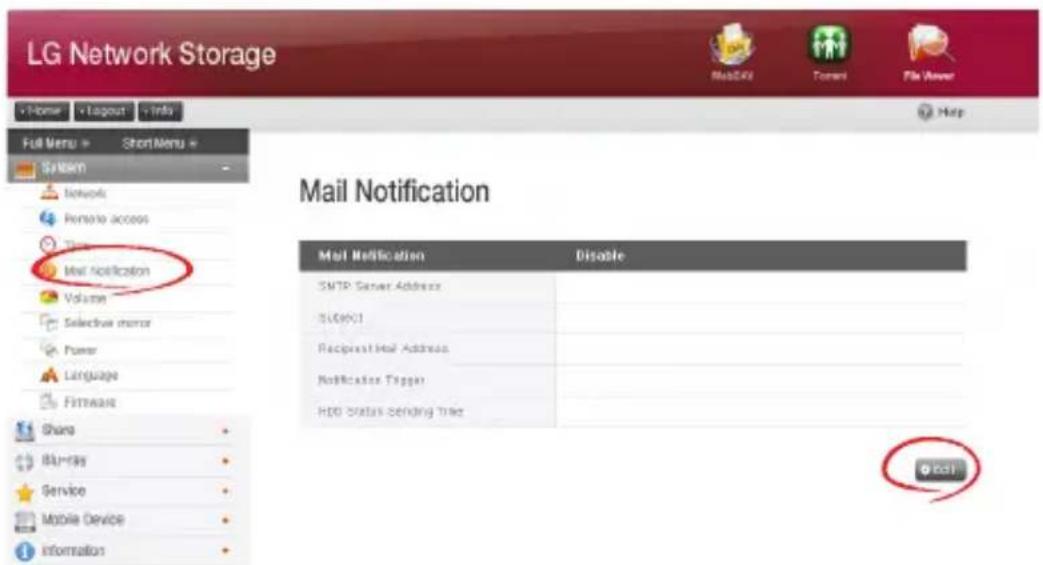
① To configure the mail notification, click on the 'Edit' button.
4. LG Network Storage Web Menu Use (for LG Network Storage administrators)
② To use it check 'Enable' if 'Disable' is not used. If 'Enable' is checked, proceed with the following steps:
| Mail Notification | Enable Disable |
| SMTP Server Address | |
| SMTP Authentication | SMTP Server Requires Authentication |
| SMTP Server USER ID | |
| SMTP Server USER PASSWORD | |
| SMTP SSL Support | SMTP Server Requires Secure Connection(SSL) |
| Subject | NAS Status Report |
| Recipient Mail Address | |
| Notification Trigger | HDD Status Report |
| HDD Status Sending Time | Every Day |

③ SMTP Server Address: Input the Mail Server address. Refer to the information page in the network administrator Mail Service, and input the accurate SMTP Server Address value. (e.g. smtp.mail.yahoo.com) In the case that the port number used for the mail server is not the default value, the port number should be recorded next to the server address. This would generally be the case when the SMTP SSL has been designated. (e.g. smtp.gmail.com:446)
④ SMTP Authentication: When sending mail, dependant on the mail server, login may be required. In the case of own mail server, the SMTP Authentication must be activated. (e.g. Smtp.Webmail SMTP servers such as yahoo.com perform certification processes. Refer to the user webmail service help)
⑤ SMTP SSL Support: Some mail servers' login information is encrypted and sent. At this time the SMTP SSL Support must be activated. (e.g. Smtp.Webmail smtp servers such as gmail.com perform certification processes. Refer to the user webmail service help)
⑥ Subject: The information email subject can be specified or changed.
⑦ Recipient Mail Address: Input the mail receipt administrator's address.
⑧ Notification Trigger: Set up the information concerning the periodic use of the HDD. In the case of not wanting to receive message periodically, the option may be disabled.
⑨ HDD Status sending time: The HDD use information mail out frequency can be determined (daily/weekly/monthly).
Volume Set-up
In order for data to be saved on to LG Network Storage, volume must be set up. If the volume is configured the hard disk icon will appear on the far right side of the LCD in the front, but if the volume is not configured, the disk icon does not appear and the network drive connection, USB back-up, ODD back-up among other functions will not be available.
This product provides the following 5 volume configuration methods for the user's requirement:
- RAID 0 (striping)
- RAID 1 for important data (mirroring)
- Linear (JBOD) volume
- RAID 1 (mirroring) + JBOD volume
- Single disks (disk 1, disk 2)
Appendix A includes detailed instructions on volume construction and it is recommended to refer to the list of recommended hard disks by visiting the URL provided in Appendix D.
When volume is configured, part of the hard disk is allocated to the LG Network Storage system. Consequently, after volume configuration has been completed, the size of the volume will appear smaller than the hard disk size.
Volume Configuration
To configure the volume, follow the below procedures. Configuration of the volume will remove all existing user's data in the hard disk and will not be recovered.
① Log on to the web and open system → volume.
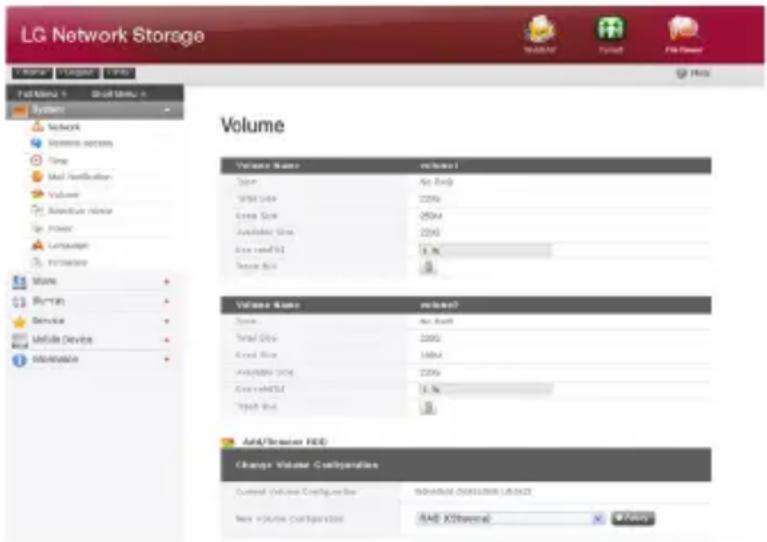
② On the top are the current volume array and a detailed description. If the volume has not yet been configured, there will not be any detailed description.
③ The “new volume configuration” menu under “change volume configuration” below comprises “RAID 1 (striping)”, “RAID 1 for important data (mirroring)”, “linear (JBOD) volume”, “RAID 1 (mirroring) + linear (JBOD) volume”, and single disks (disk 1, disk 2). Select one of the above and press the “apply” button.
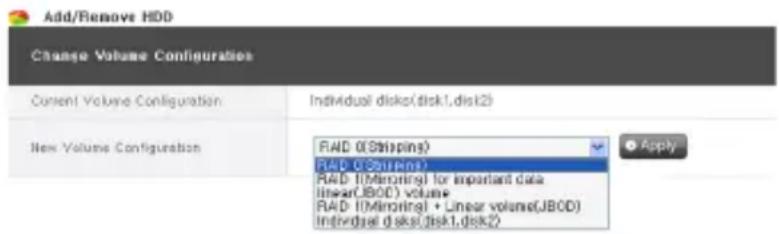
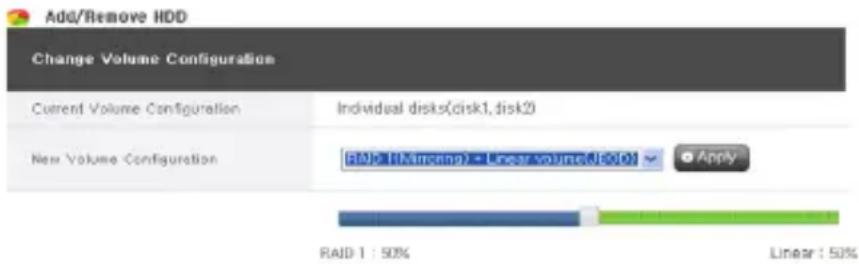
④ RAID 1 (mirroring) + linear (JBOD) selection activates the slide bar below for size selection. Move the slide bar to determine the size and press the “apply” button.
⑤ To use only one disk, user must set up "single disks".
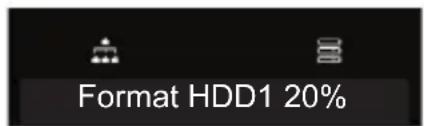
⑥ In the process of volume configuration, the web menu and the buttons in the front will not be available. The configuration progress may be viewed through the LCD in the front.
4. LG Network Storage Web Menu Use (for LG Network Storage administrators)
⑦ If either “RAID 1 (mirroring)” or “RAID 1 (mirroring) + linear (JBOD)” is selected, the synchronization progress for the RAID 1 portion may be viewed on the web screen.
| Volume Name | volume1 |
| Type | raid1 |
| Total Size | 220G |
| Used Size | 188M |
| Available Size | 220G |
| Use rate[%] | 1 % |
| Trash Box | |
| Resync Rate | 2.2 % |
Add disk
In the case that “single disks” is being used, new disks may be added by following the below procedures.
① Press the End button in the web, system → power → end.
② Insert the second disk in the LG Network Storage and turn the power on. To add new hard disks, refer to Chapter 2 LG Network Storage Installation.
③ In the web, log in and open system → volume
④ Press the “add/remove disk” button above the “change volume configuration”.

Add/Remove HDD
⑤ Check the second disk inserted and press the "add" button.
Select the bay to edit
| Bay No | Status | Capacity |
| B1 | active | 233 GB |
| B2 | inactive | 233 GB |

Remove disk
Forced removal of the hard disk without following the remove disk functions provided in this screen may cause future complications with system performance and loss of user's important data. Therefore, it is strongly recommended that user uses the remove disk button on the web when removing hard disks.
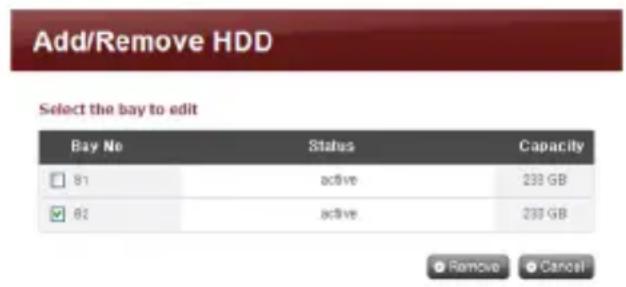
In the case that “single disks” is being used, existing disks may be removed by following the below procedures.
① In the web, log in and open system → volume
② Press the “add/remove disk” button above the “change volume configuration”.
③ Check the disk to be removed and push the "remove" button.
Hot Swap
This device allows the replacement of hard disks without turning off the system power. This option is only available when the volume configuration is set to RAID 1 or single disks. Using this option for other volume configuration types may cause to lose even the remaining hard disk data in the device.
① Remove the disk following the procedures set out in [Remove disk].
② With the power turned on, insert the new hard disk in the device by referring to Chapter 2 LG Network Storage Installation.
③ Move to the webpage and select "add/remove HDD".
④ Select the hard disk currently inactive and press the "add" button.
Trahsbox
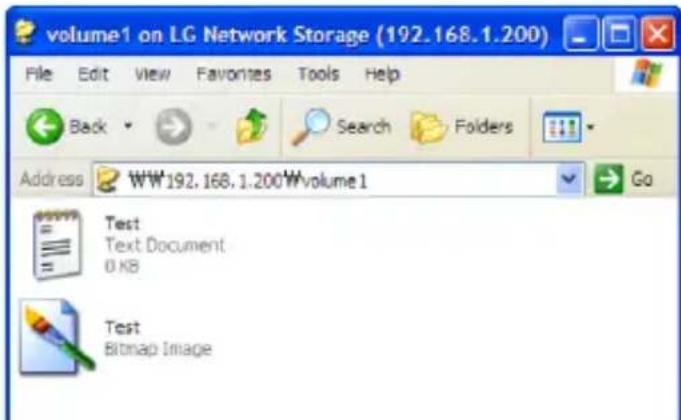
Removing a file or folder when the network drive is still connected creates a trashbox and all deleted files are temporarily moved here. If user were to recover the deleted data, user may find the file or folder from the trashbox and move them to the intended location.
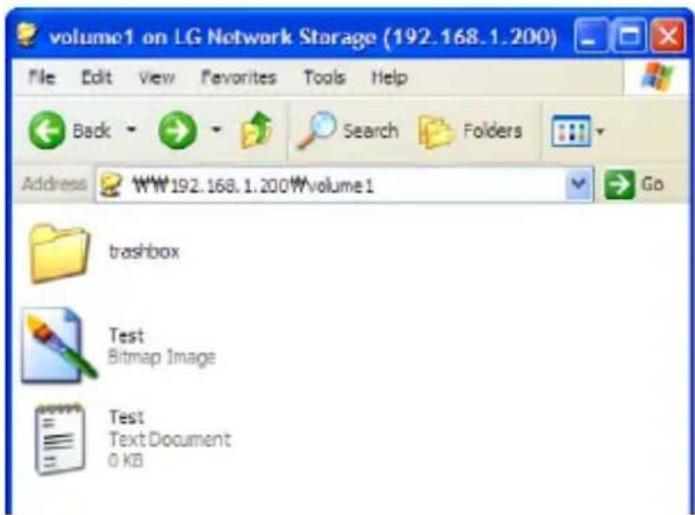
However, trashbox is created for each highest level folder and there will be as many trashboxes as the number of user's folders. In the case that user runs out of hard disk capacity and must empty all trashboxes, user may click on the "recycle bin" icon on the volume web screen and empty all contents of the trashbox.
Selective Mirror (Selective data protection for folders)
The Selective Mirror function automatically generates copies of certain folders, which allows data recovery even after the loss of source data.
![LG Network Storage Home > Logwin > Info Full Name > Short Menu > System Network Marketing access Time Mail modification Volume Selective mirror Power Language Formats Share Blur-day Service Webible Device Information Selective Mirror Enable > Disable Service Destination My default, if you want to add a new task, please click me [Add] button OK Cancel Cancel](/content/2026/05/979433/images/32ba603e63267b9e12329a1dba70d2f937974d1f2799661f5aaf3c6b34688e78.jpg)
Add Selective Mirror List
① Choose Selective Mirror activation.
② Pressing the add button will move the screen to add a new list.
![Add [Selective Mirror] List Source Destination](/content/2026/05/979433/images/58c6a53d729fcebec1c2b2af163a5331f253b9a6cfba8a4b76dddf9b25b786b9.jpg)
④
③ Under “source path”, select the folder to be backed up and under “destination path” select the folder that will save the back-up data.
④ Once the save button is pushed, a new list will have been added.
Edit Selective Mirror List
① Checkbox the item to be edited and press the 'edit' button.
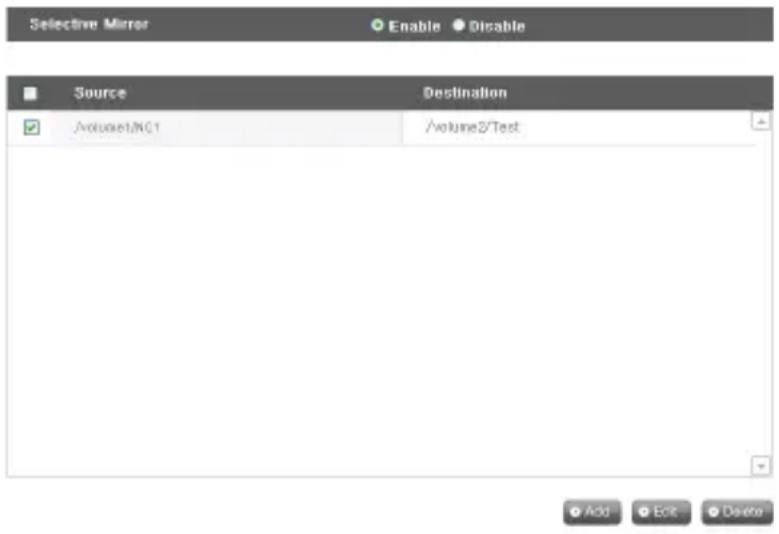
* Only one item can be edited at a time.
② Edit the “source path” and the “destination path” and press “OK” to confirm the edited set-up.
Delete Selective Mirror List
① Checkbox the item to be deleted.
* More than one item at a time can be deleted.
② Press the "delete" button to confirm the deleted set-up.
Use Selective Mirror
If SMB (Samba) and FTB is used to store data in the LG Network Storage and a change incurs in the source folder, the same change will apply to the destination folder and the source folder will be double protected.
* To maximize the effects of Selective Mirror, it is recommended to set up different volumes for the source folder and the destination folder. (for the single disks setting or the RAID 1+ linear volume setting)
Example)
source folder: volume1/source
destination folder: volume2/destination
Conditions
① The source folder and the destination folder cannot be the same folder.
② One source folder may have up to 4 destination folders.
③ A folder designated as a source folder cannot be designated as a destination folder in another setting.
④ A subfolder of a source folder cannot be designated a destination folder.
⑤ A folder designated as a destination folder cannot be designated as a source folder in another setting.
Power
Settings related to power for the LG Network Storage can be adjusted (Hibernation, UPS and System Shutdown).
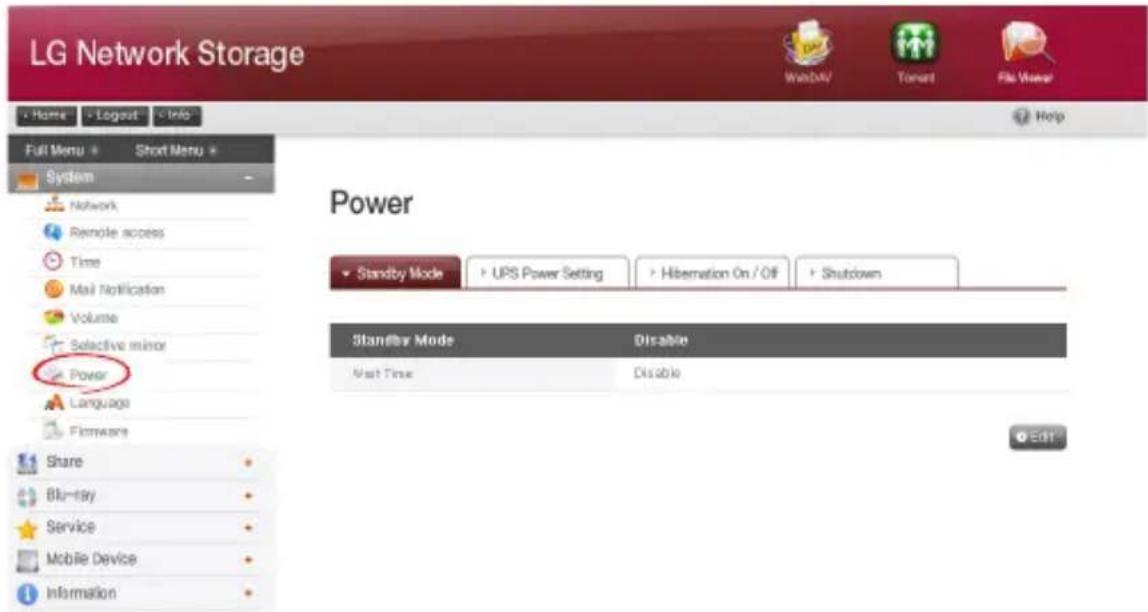
Hibernation Setup
This allows all LG Network Storage hard disks to transition into stand-by to minimize energy consumption after a certain period of no data transfer. Reading or writing LG Network Storage data during the hibernation mode will gradually reactivate the LG Network Storage hard disks and fully activate after 3–15 seconds.
* It is recommended to utilize the stand-by function if user expects to leave the system unattended or NAS is not being used for an extended period of time.
① To set up the hibernation function, click on the 'Edit' button.
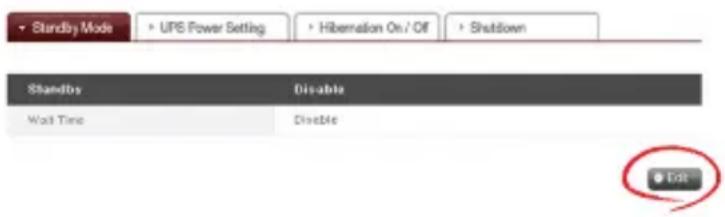
② Check ‘Enable’ to select hibernation mode, or ‘Disable’ to deactivate. When selecting ‘Enable’, proceed to the next step.
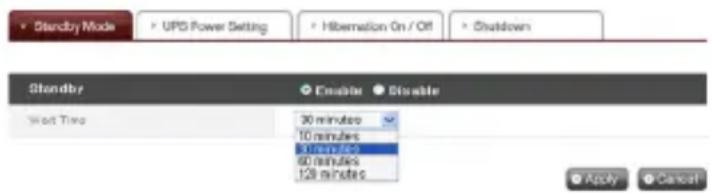
③ Set stand-by time.
④ If there is no data traffic during the given time, the LG Network Storage will enter hibernation mode. Time can be set to 10/30/60/120 minutes.
⑤ Click on the 'Apply' button to dictate changes to the LG Network Storage. Click on the 'Cancel' button to discard changes.
UPS Power Setting
An external UPS is effective for sudden power stoppages. When connecting an external UPS to the LG Network Storage, confirm the actions of the UPS.
① Click on the 'Edit' button to configure UPS.
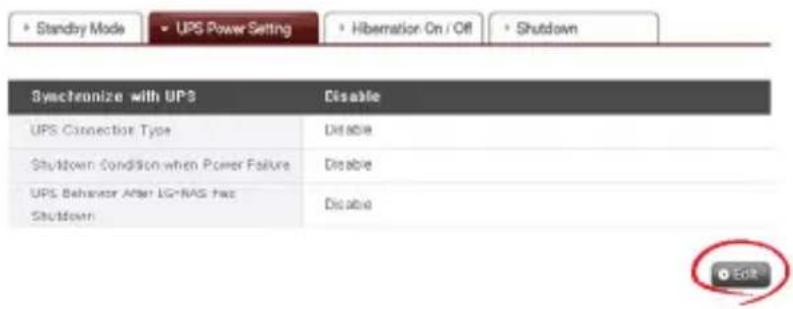
② Check ‘Enable’ to activate UPS, or ‘Disable’ to deactivate. When selecting ‘Enable’, proceed to the next step.
* LG Network Storage supports APC Style USB UPS only.
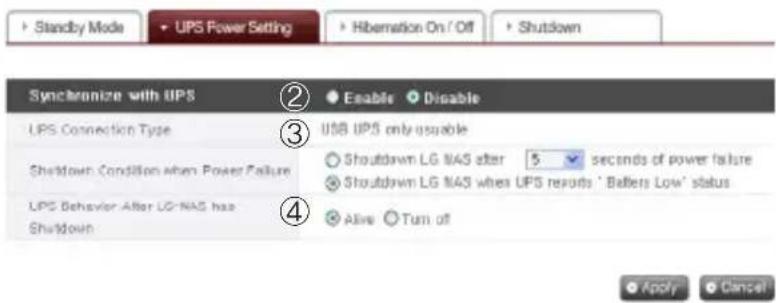
③ Decide whether to shut down LG Network Storage after designated time interval or when UPS power becomes low in case of unexpected external power cut.
* When setting it to shut down depending on remaining power of LG Network Storage, The time interval might differ from one UPS type to another.
④ Decide whether to maintain UPS power when LG Network Storage shuts down due to unexpected power cut.
* If another device is connected to UPS, Please do not turn off UPS but keep the power on.
⑤ Click on the 'Apply' button to enter changes to the LG Network Storage. Click on the 'Cancel' button to discard changes.
Hibernation Mode On/Off
LG Network Storage can cut off the HDD power for a designated time the user does not make use of the program, running LG Network Storage with minimum energy. Any time interval during the day may be set up for the max energy save mode. It should be noted that once the max energy save mode is set to begin at a certain time, it may terminate any work being processed.
* When the network is being used to transfer data or the BD/DVD drive is being used, the max energy save mode will not be initiated.
① For a new configuration, press the "edit" button.
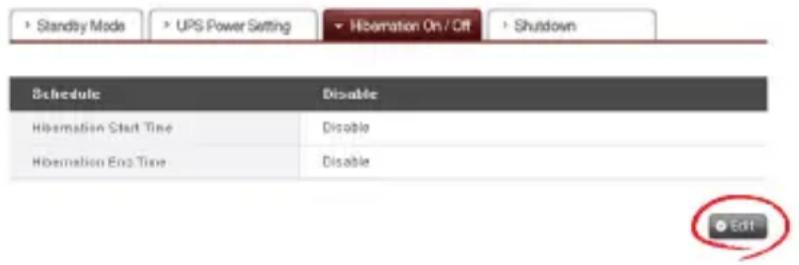
② Select “apply” to activate or “cancel” to deactivate.
③ To select “apply”, select “apply” in the schedule window and enter the beginning and ending time for LG Network Storage. The set-up time must have at least 5 minutes gap from the current time. For example, if the current time was 12:00, the max energy save mode beginning time must be set to after 12:05.
④ To save the current setting, press “apply”.
4. LG Network Storage Web Menu Use (for LG Network Storage administrators)
⑤ Once it reaches the beginning time set up, the system automatically transitions into max energy save mode and on the LCD will appear a message, "Now Working...
Now Working...
⑥ Once the system is fully in max energy save mode, the following message will appear on the LCD. At this stage, it is no longer possible to connect the network drive and various functions provided by LG Network Storage will be unavailable.
Hibernation Done
♣ Max energy save mode may also be accessed through the button in the front.
Shutdown
Do not go directly to the LG Network Storage, as LG Network Storage can be turned on and shut down via the web.
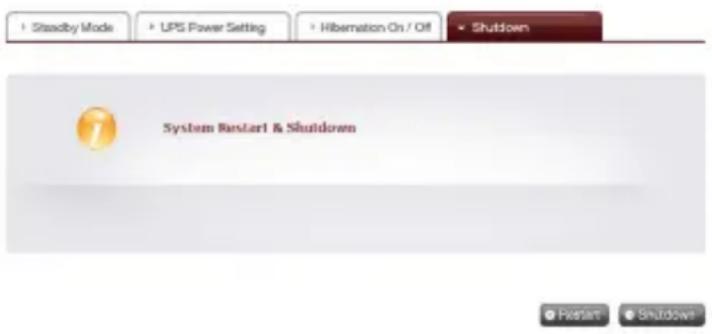
① Restart
- Ends all current operations and restarts the LG Network Storage.
- A warning will appear when clicking the button, and the system can be restarted by clicking on the 'OK' button.
- During restart web access is not available.
② Shutdown
- Ends all current processes and shuts down the LG Network Storage.
- A warning will appear when clicking the button, and the system can be restarted by clicking on the 'OK' button.
- During restart web access is not available
Activating the System Remotely
Once LG Network Storage has entered its max energy save mode, it can be activated through remote internet access. The screen accessible through the internet is slightly different from the log-in screen in the normal mode, and only the administrator can use the password to activate the system. Synchronization may take approximately a minute. * In maximum energy save mode, log-in will only be accessible through http.
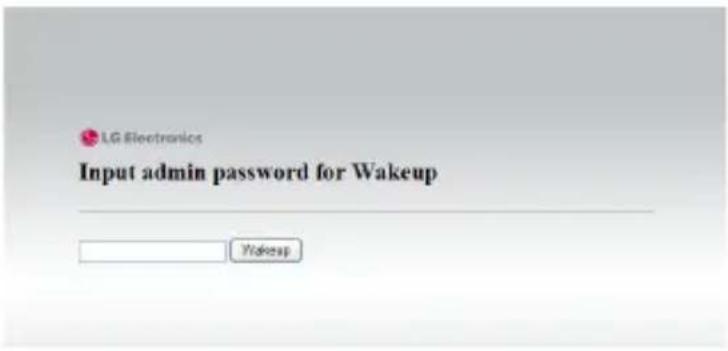
If the correct administrator's password is entered, the system will be synchronized automatically.
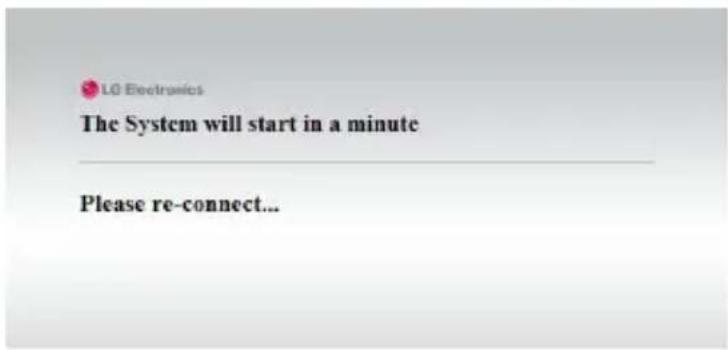
Language Setting
The web menu indicates a language selection capability.
① Click on the 'Edit' button to set language.
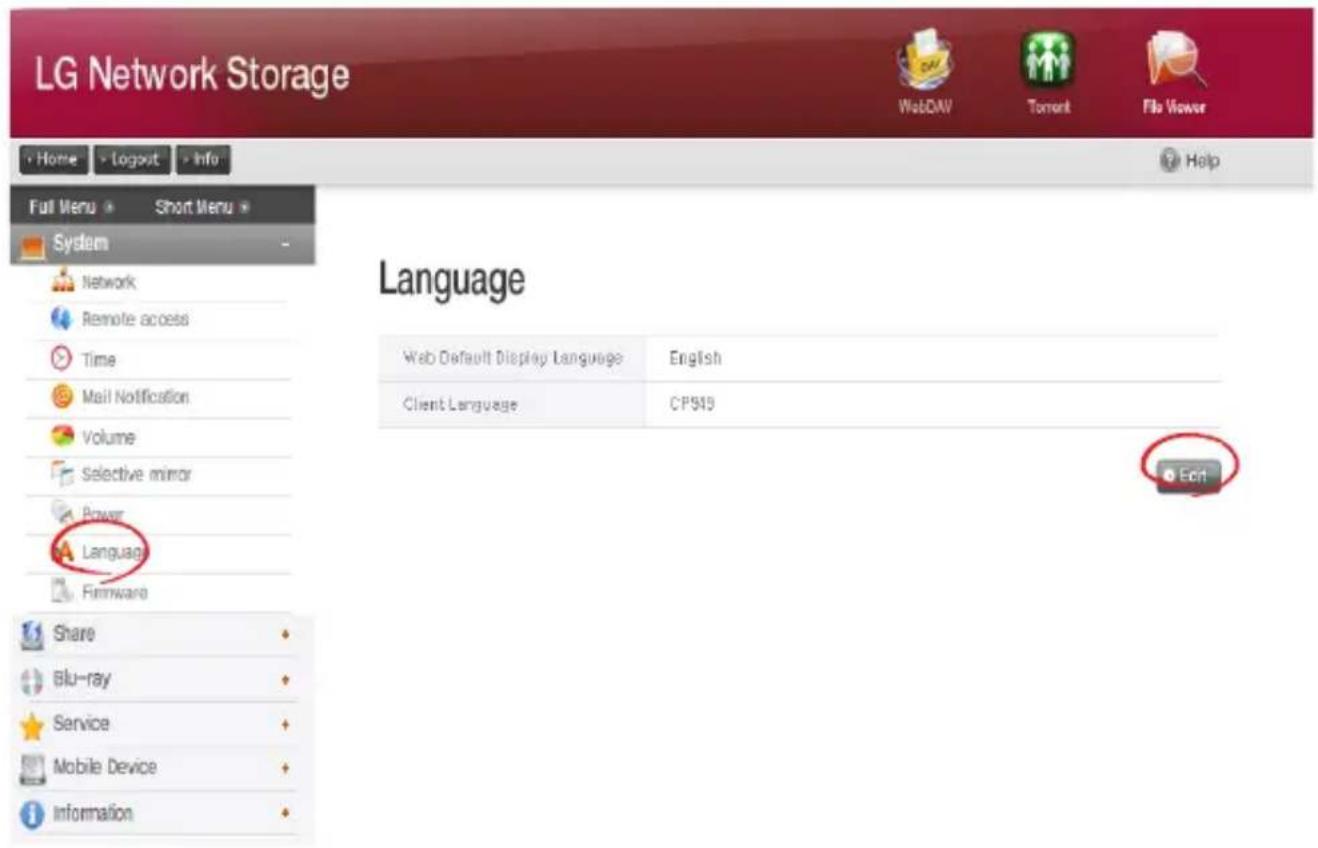
② Select a desired language out of Korean, English, French, Spanish, and German and click on the 'Apply' button.
* The language of selection will be the default language used when the user first accesses the web.
* If the browser has been set up to use cookies, the last language used for the computer in its previous log-in will be the default language for the next log-in.
* Client language: Select the language that fits user's client environment. (e.g.: FTP available). For use of multiple luagues, select unicode. Unicode can be selected only if user's program supports it.
Firmware
LG Network Storage firmware settings can be changed (Upgrade, Initialization, Configuration and Backup/Restore).
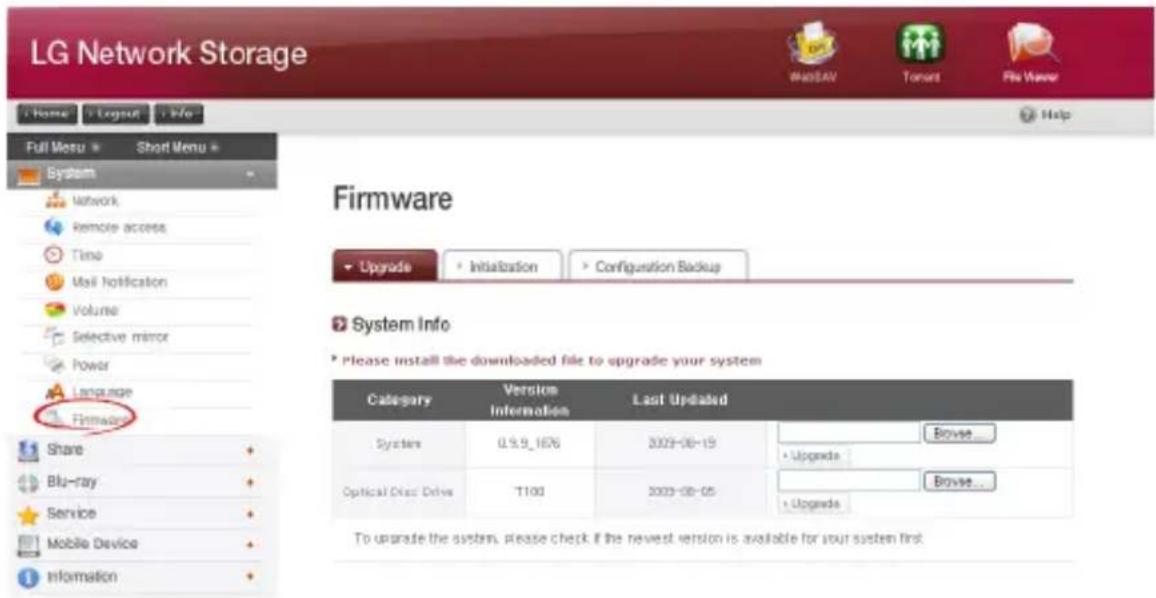
Upgrade
LG Network Storage system and Blu-ray/DVD Driver firmware can be downloaded from the product web site, and can be used for upgrading.
Systems with a fire wall do not allow upgrades to be installed
Please install the downloaded file to upgrade your system
| Category | Version Information | Last Updated | |
| System | 0.9.8_1661 | 2009-07-29 | Browse... Upgrade |
| Optical Disc Drive | T100 | 2009-07-29 | Browse... Upgrade |
To upgrade the system, please check if the newest version is available for your system first
[System Firmware Upgrade]
① Verify connection to the Internet and download system firmware for the LG Network Storage from the product site linked below.
http://www.lge.com
② Press the "find" button to select the system firmware downloaded from the product site.
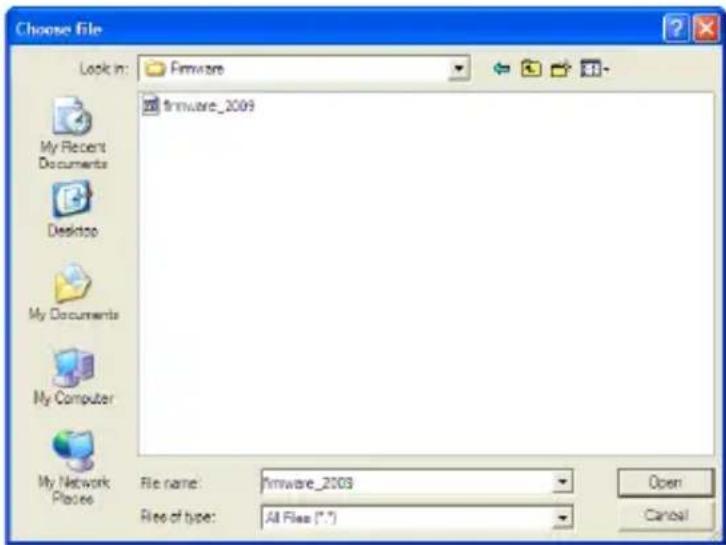
③ Press the “upgrade” button to install the selected system firmware to LG Network Storage. The upgrade progress may be viewed on the LCD in the front.
④ When upgrade is finished, the system will automatically reboot. The web connection will be automatically terminated and therefore should be reconnected.
[Blu-ray/DVD Drive Firmware Upgrade]
① Verify connection to the Internet and download the firmware for the Blu-ray/DVD drive attached to the LG Network Storage from the product site linked below.
http://www.lge.com
② Select the Blu-ray/DVD drive firmware downloaded from the product site.
③ Install selected Blu-ray/DVD drive firmware.
④ When upgrade is finished, the version of installed Blu-ray/DVD drive firmware will be indicated
![LG N2B1D - [Blu-ray/DVD Drive Firmware Upgrade] - 1](/content/2026/05/979433/images/56793d399f3465488b13c090ea94622c17f822f8d30625db9ab8a6aabe3ea4c7.jpg)
* For stability of data, a backup of the LG Network Storage is strongly recommended before upgrading. Installation takes between 1 to several minutes. Advance access of other client users to the LG Network Storage while upgrading firmware is forbidden.
Initialization
LG Network Storage initialization function. Clicking on the ‘Initialization’ will Initialize the system.
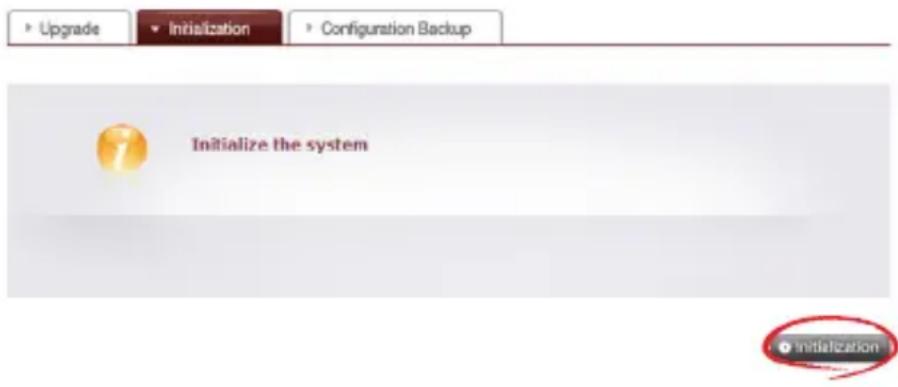

* Caution must be taken when changing the settings, for post Initialization all-user information and data will be deleted.
* Initialization will take about 10 minutes.
Configuration Back-up
This allows the back-up/recovery of settings for LG Network Storage at a certain time. Network settings (host name, IP address, workgroup), time setting (date/time, NTP), mail notification service setting, share administration (user, group, folder security), service setting values may be backed up but user data requires separate back-up.
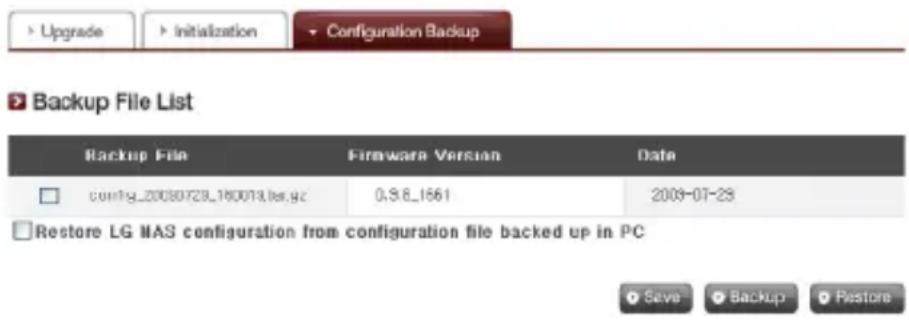
[Backup]
Save the current user configuration.
* 5 backup files can be saved at maximum.
[Restore]
① Select the backup file of the time point to restore.
② Click on the 'Restore' button and reconfigure the user configuration.
[Save Settings to PC and Restore]
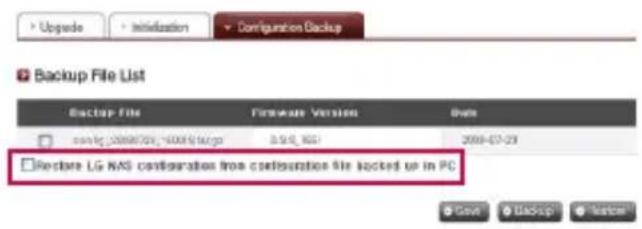
During initialization of NAS, configuration files can be saved to PC for later restoration.
[Save Configuration Files to PC]
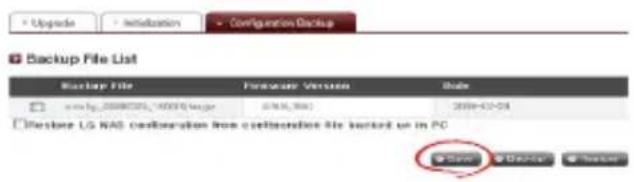
Choose configuration files to be saved to PC and click on the 'Save' button to save them to PC.
[Restore NAS User Settings Saved on PC]
NAS settings can be restored using configuration files saved on the PC.
-
Choose the 'Restore LG Network Storage configuration from configuration file backed up in PC' menu and select from saved configuration files using 'Find'.
-
Select the configuration file to use for restoration and click on 'Restore' to change NAS settings as selected.
LG Network Storage Share Management
This function allows you to create users and groups as well as folders, and hence change settings for their access authorization.
User
Current registered users appear, so new users can be created and registered user information can be modified or deleted.
7 Registered User List
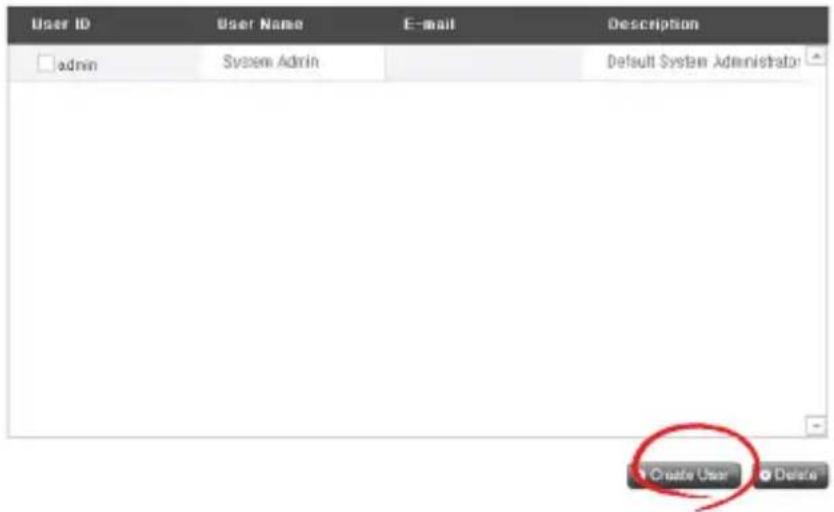
[Create User]
① Click on the 'Create User' button.
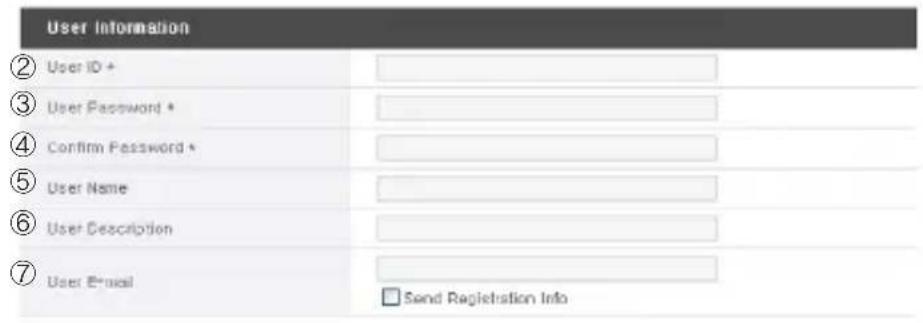
② Enter user ID. User ID cannot be overlapped.
Create User
![LG N2B1D - [Create User] - 2](/content/2026/05/979433/images/ba6bf88852c1c8779c4d7b2050f37f4c3ccbbaf6bb5c4e4a789c3683b214938d.jpg)
4. LG Network Storage Web Menu Use (for LG Network Storage administrators)
③ Enter user password.
④ Enter user password again for confirmation.
⑤ Enter user's name.
⑥ User description can be added.
⑦ Enter user e-mail
As long as mail server settings are correct, the registration result will be sent to he entered e-mail address. For details concerning mail server settings, refer to
[Edit User]
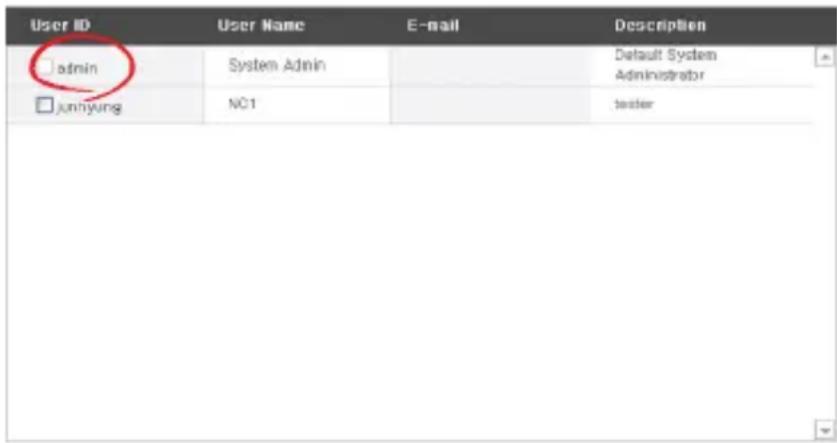
Entering editing mode by clicking on the user name in the registered user list, with the exception of the ID, all user information can be altered.
Registered User List
![LG N2B1D - [Edit User] - 2](/content/2026/05/979433/images/af3abbd52558edcbe96473c0b49622d782008a5cd6353b8a0d50a25bfee8acf3.jpg)
![LG N2B1D - [Edit User] - 3](/content/2026/05/979433/images/6266f914cbb8afc9ce3241687f292eb736ad4dd2df781f5a37cb8923865d15bc.jpg)
Group
Current registered groups are displayed. Groups can be created and deleted, as well as the addition or removal of users in registered groups.
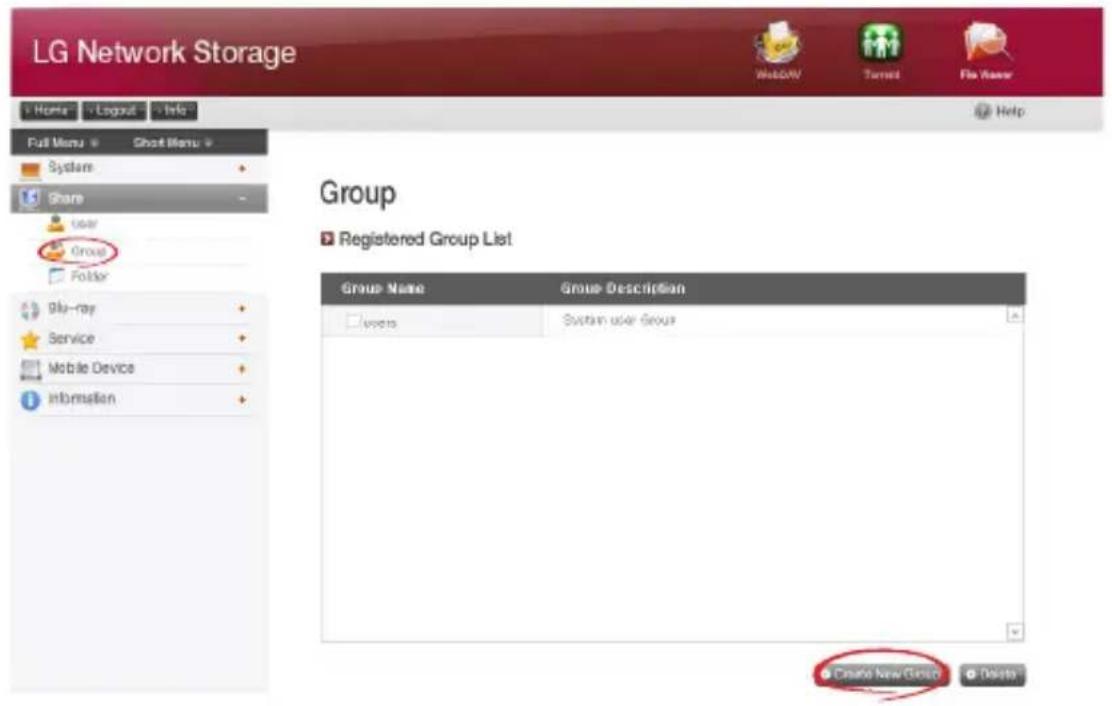
[Creating a New Group]
① Click on the 'Create New Group' button.
② Enter group name.
Create New Group

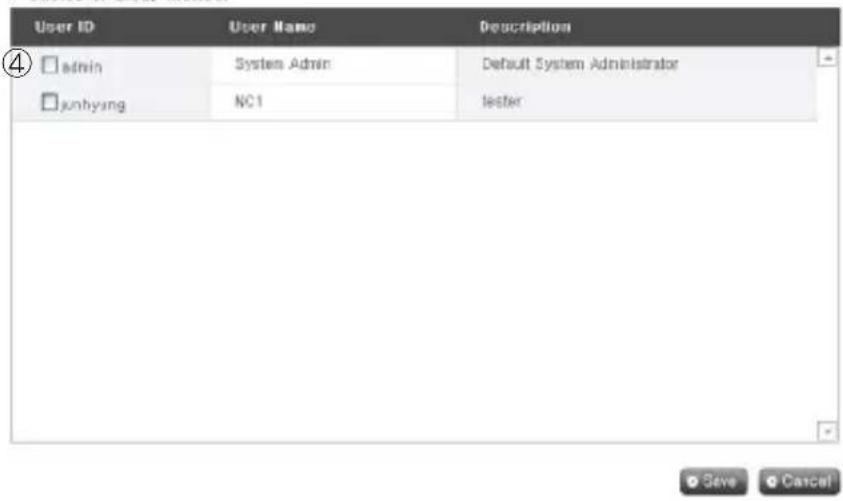
Choice of Group Member
4. LG Network Storage Web Menu Use (for LG Network Storage administrators)
③ Enter group description.
④ Select user to be added to the group by clicking on the corresponding checkbox. To remove a user from the group, deselect the user by clicking on the the checkbox again.
⑤ When user selection is done, click on the 'Save' button to create the group.
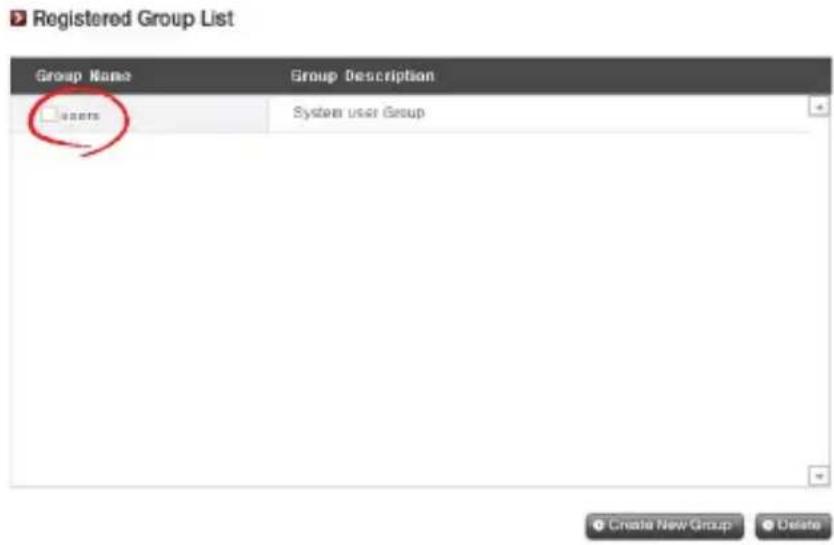
[Editing Groups]
By clicking on the 'Group Name' link in the registered group list, group attributes can be altered.
Folder
Current registered folders are displayed. A folder can be created/changed/deleted for file sharing and/or authorization settings access changed to the created folder.
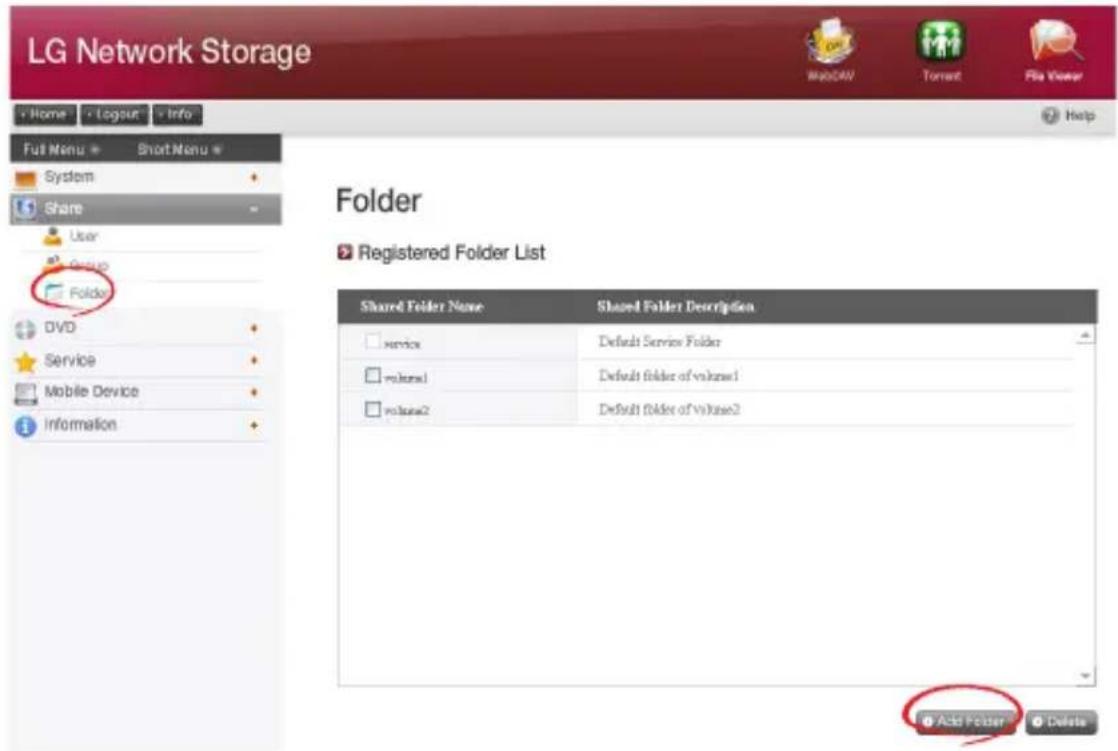
[Create New Folder]
① Click on the 'Add Folder' button.
② Enter the shared folder name.
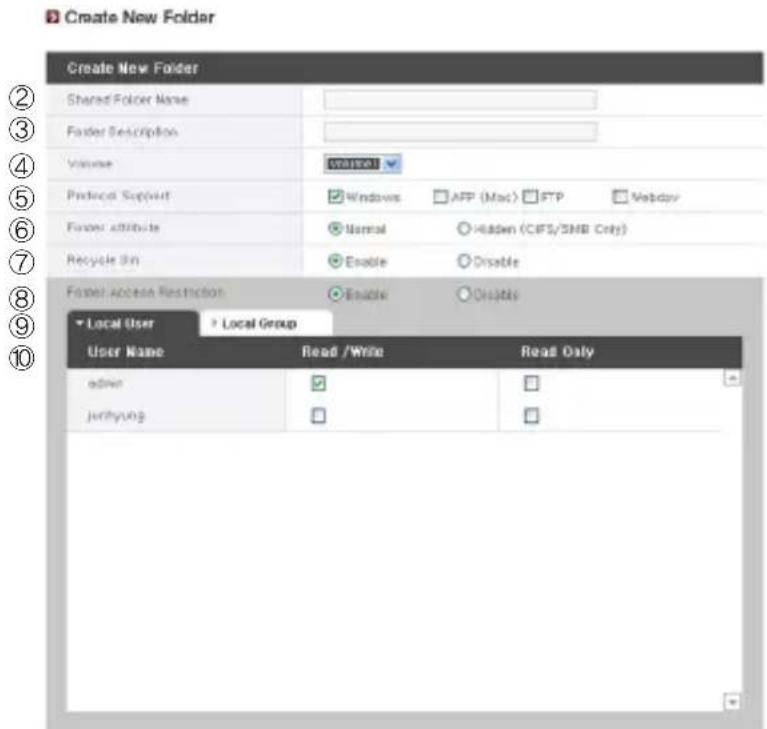
③ Enter folder description.
④ Set the volume where the folder will be created if there is more than one.
⑤ Decide whether to permit folder sharing through SMB, AFP, FTP or Webday protocol.
- Windows: Activates folder sharing through SMB protocol on Windows/Mac/Unix. Refer to chapter 6 for connection details.
- AFP (Mac): Activates folder sharing through AFP on Mac client.
- FTP: Activates folder sharing through FTP.
- Webday: Activates folder sharing through Webday
⑥ During network search, currently shared folders can be set up not to appear.
* If ‘hidden’, such folders will not be available for sharing through AFP/FTP/Webday.
⑦ Create a trash box within the folder.
When deleting data while the trash box is active, all the deleted files will go to 'trash box' folder within the shared folder.
⑧ Set folder access restriction. If 'Disable' is checked, users can access/use without restriction.
⑨ Assign user/group to use the folder. Unassigned uses do not have access to the folder.
* When a directory is activated at the ‘Network > Workgroup/Domain’ menu on the left, additional users and groups will appear.
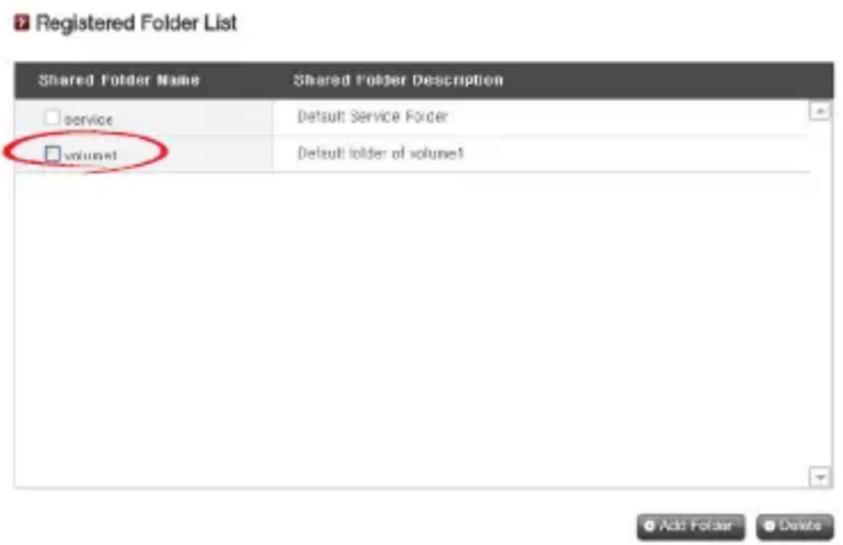
[Folder Attributes]
By clicking on the folder name in the registered folder list, with the exception of the folder name, all its information can be altered.
Blu-ray / DVD
The built-in Blu-ray/DVD drive allows direct copy of data from discs to LG Network Storage. Furthermore, secondary backup of data using the Blu-ray drive makes data management safer and more efficient.
Burning
Burning the LG Network Storage data to disc is possible using the Blu-ray/DVD drive.
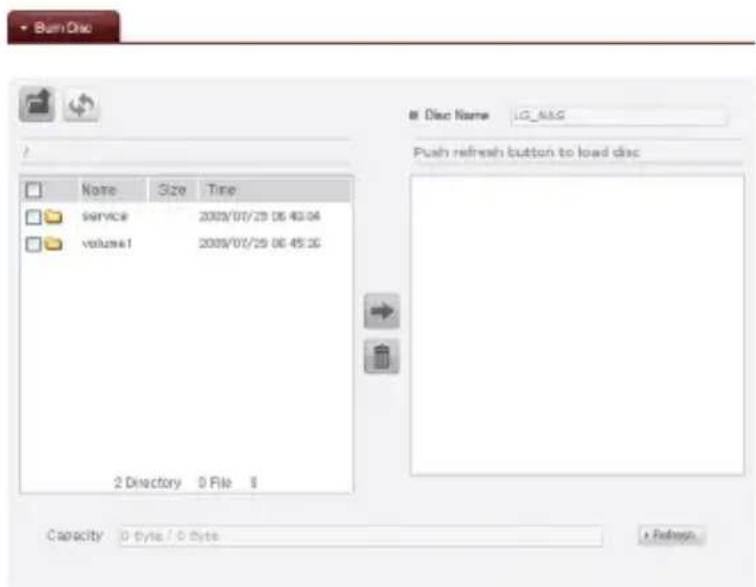
Burn Disc
Burning LG Network Storage files to disc is possible.
[Button functions]
: Moves to upper folder.
: Refreshes the current folder.
: Files or folders selected on the left window are sent to the right window to organize a list for recording.
: Deletes selected files or folders from the list organized for recording on the right window.
4. LG Network Storage Web Menu Use (for LG Network Storage administrators)
① Move the intended folder or file to the destined location.
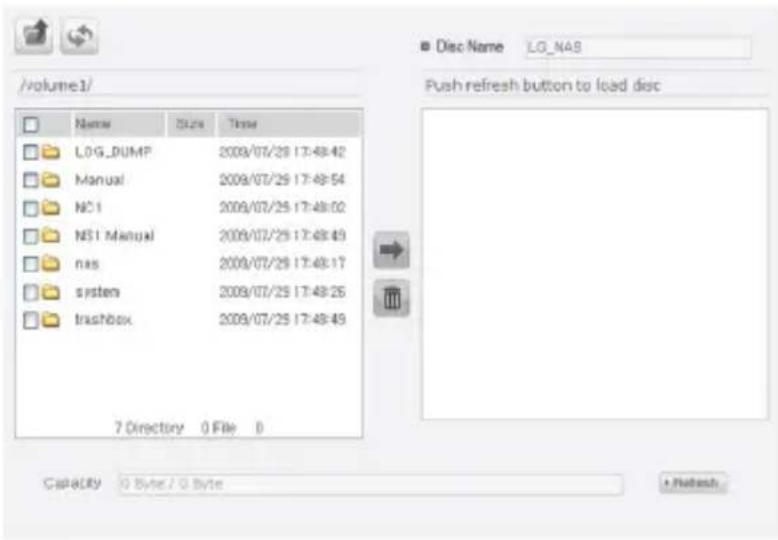
② Selecting a folder or file to record and move to the right side produces a configuration data list.
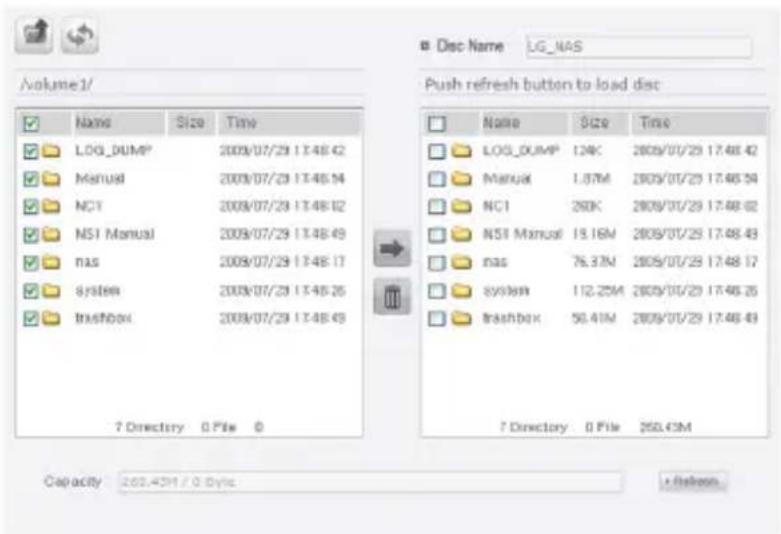
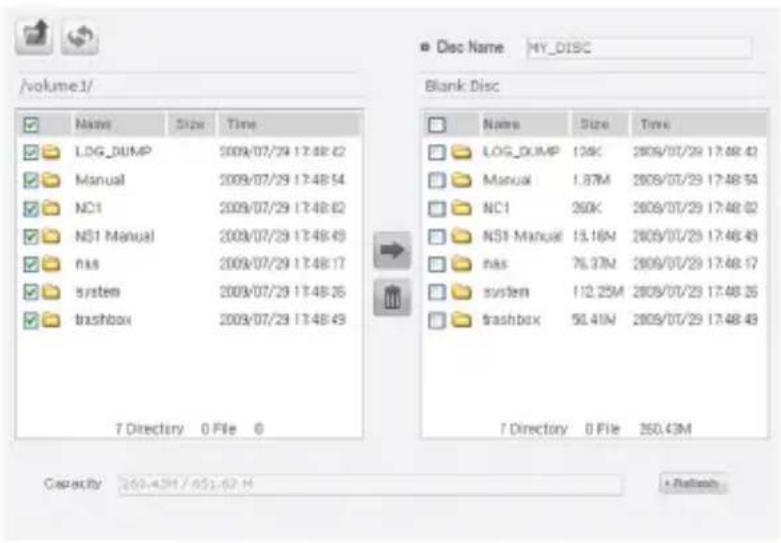
③ Specify disc name in the “Disc Name” window

4. LG Network Storage Web Menu Use (for LG Network Storage administrators)
④ Click on the button and confirm that disc writing is possible as indicated in the disc status box.
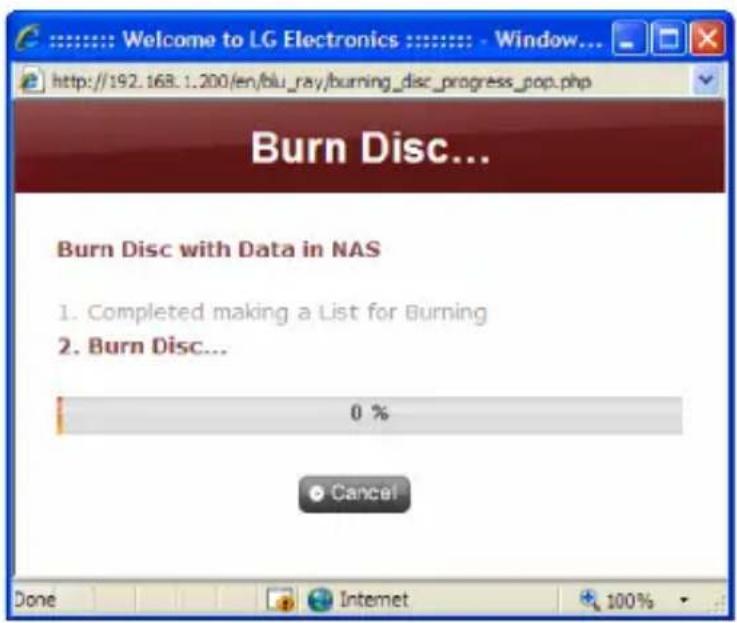
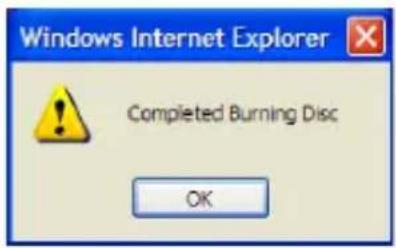
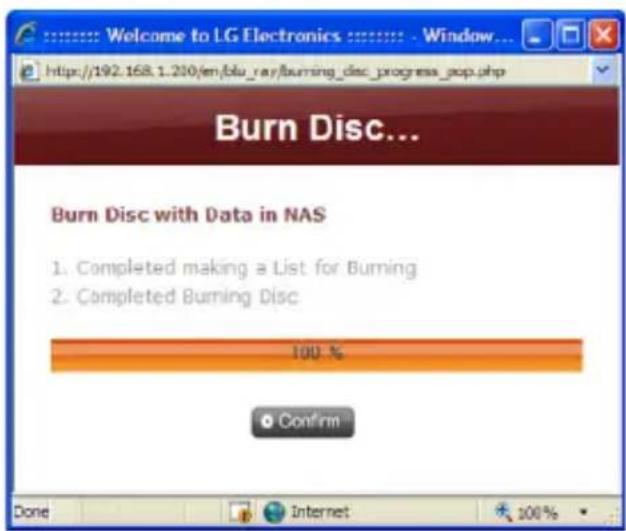
⑤ Pressing the button begins the burning process. The burning process is accompanied by a progress bar display. To cancel the process, click on the 'Cancel' button, which appears with the progress bar.
4. LG Network Storage Web Menu Use (for LG Network Storage administrators)
⑥ At the end of the burning process, the tray ejects and the disc can be removed.
Service
DLNA(Digital Living Network Alliance)
DLNA, which stands for Digital Living Network Alliance, allows sharing multimedia data such as music, video, or images saved in other devices through connecting digital devices such PC, hard disks, or digital TVs through the home network. DLNA comprises DMS (Digital Media Server), which sends images, music and movie data, and DMP (Digital Media Player), which receives data. In order to fully utilize the DLNA function, the product must be DLNA certified. This product adheres to the Digital Media Server (DMS) function of the DLNA standard functions. In order to fully utilize the DLNA function, the product must be DLNA certified. This product adheres to the Digital Media Server (DMS) function of the DLNA standard functions.
[Activate/Deactivate DLNA]
In order to activate or deactivate DLNA, the below procedures should be followed.
Follow the below instructions.
① Open DLNA from the webpage.
② The top section will show the current status of DLNA. To activate the Media Server (DMS), click “apply”.
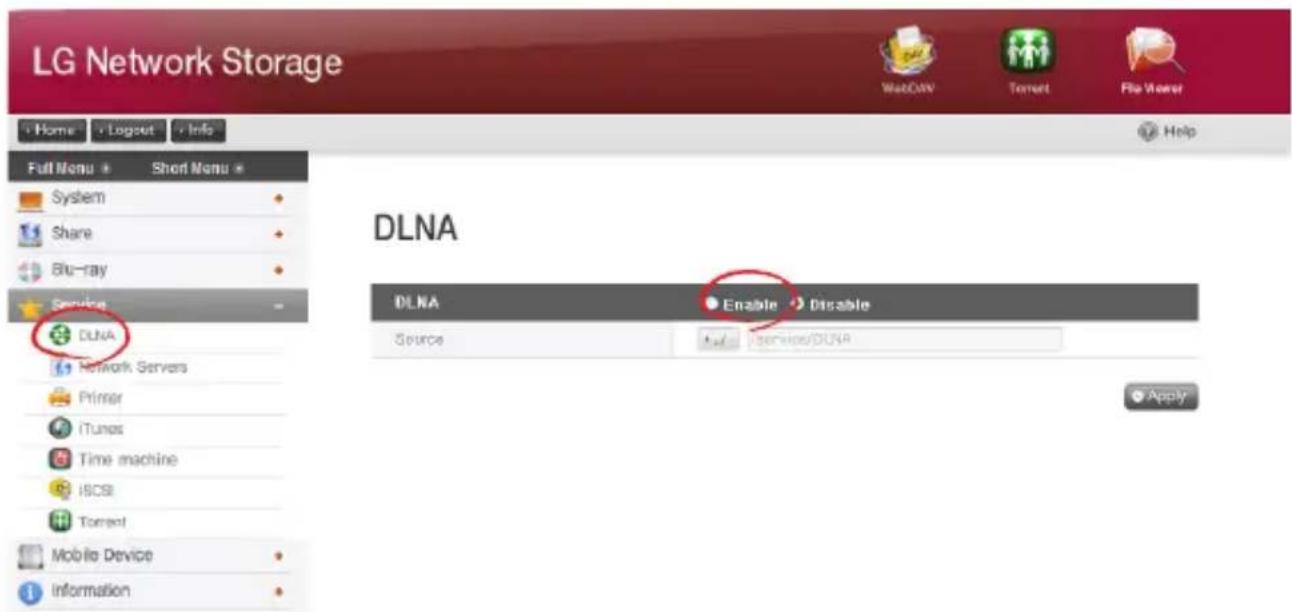
③ The source path refers to the location the multimedia data is currently saved. In order to utilize the multimedia data through DLNA, locations of the saved data must be determined. DLNA service will only be applicable to pre-set DLNA source folders.
④ To activate, please press the "apply" button. To deactivate, please select "Do not apply" and press the "apply" button.
[Save Multimedia data in source path]
Multimedia data in LG Network Storage may be read, written and shared through the network.
① Run Internet Explorer.
② Copy the multimedia file in service\DLNA.
Note
① Do not delete the selected source path (default: \service\DLNA). This may terminate the multimedia sharing.
② Use compatible multimedia file formats. Incompatible file formats may not run properly.
③ Formats incompatible with the Digital Media Player, such as TV, may not run properly even if they were compatible with LG Network Storage.
[View Multimedia Using DLNA]
Using DLNA of a PC with Microsoft® Windows7®
① Go to Control Panel > Hardware and Sound > Add a device.
② Once LG Network Storage is selected, click Next and recognize device.
③ Run Windows Media Center or Windows Media Player.
④ The multimedia data saved in LG Network Storage may be viewed by selecting LG Media Server under Library.
Note
- For detailed instructions on Windows Media® Player 11, refer to the Help function of Windows Media® Player 11.
- Some user PC may have installed its own unique DLNA server software. For detailed instructions, refer to the user manual of the user PC.
[Playing DLNA server contents on PS3 ^TM ]
Once PS3 ^™ is turned on, the DLNA server within the network will automatically be
searched and the found server icon will appear on images) / (music) / (video).
① Select the DLNA server icon for log-in from
![LG N2B1D - [Playing DLNA server contents on PS3 ^TM ] - 1](/content/2026/05/979433/images/4024a855a8d1d3ca194ef58723572b5f65816dab89659a1e8c4c3d1e84168da5.jpg)
(video) of the home menu. All applicable folders and files supported by PS3 ^™ will be displayed.
![Search for Media Servers LG-NAS [LG Network Storage] Sin-209 TwonkyMedia [TS-239]](/content/2026/05/979433/images/ea603a6589ba20caf86e3a9ae91197eb20974a10e84e7941fa03d5b1f62e0a2b.jpg)
② Select the file to play.
Note
- PS3™ must be connected to the network. For detailed instructions on the network set-up, refer to (Set-up) > (Network set-up) > [Internet connection set-up].
- If IP address allocation method has been altered from AutoIP to DHCP in the current network, go to (Media server search) and re-locate DLNA server.
- The DLNA server icon will only appear if (Set-up) > (Network set-up) > [Media Server Connection] has been activated.
- Displayed folder name may vary depending on the DLNA server. LG-NAS is the default value.
- Certain files may not play or may have limited access during play depending on the user's device.
• Copyright protected contents shall not play. - Data file names of data saved in server not compatible to DLNA may include “*”. These files may not play in PS3™. Some files may play in PS3™ but not play in other devices.
[Manually search DLNA server in PS3 ^TM ]
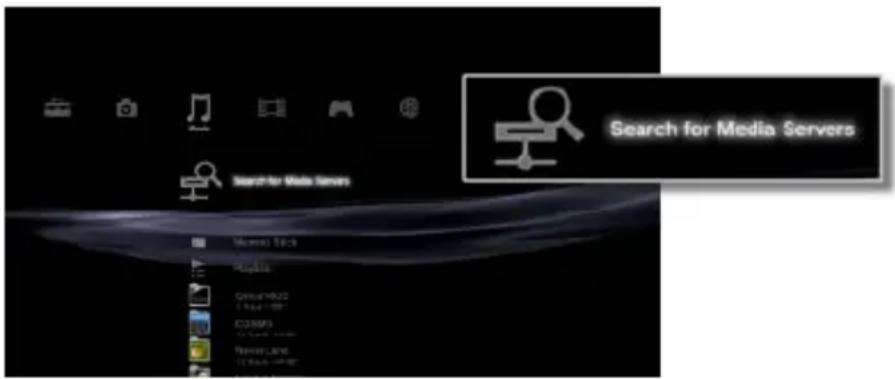
DLNA server within the same network may be manually located. This may be useful when DLNA server does not appear automatically after PS3 ^™ has been turned on.
Select media server search) from (images) / (music) / (video). Results should appear and returning to home menu will list available DLNA server.
![LG N2B1D - [Manually search DLNA server in PS3 ^TM ] - 2](/content/2026/05/979433/images/54267ce8fbb932ba604834b48c1c55561d79731c7efd116c483173d5e6d9f391.jpg)
Note
(Media server search) will only appear if (Set-up) [Network set-up] [Media server search] has been activated.
[Using DLNA in Digital Image Frame]
① Activate the DLNA function in LG Network Storage.
② Perform a default set-up and driver set-up following the Digital Image Frame user manual.
③ Search the LG Network Storage in the network using the Digital Image Frame's Explore function.
④ Set up to connect LG Network Storage in Digital Image Frame.
⑤ View images in Digital Image Frame.
![LG N2B1D - [Using DLNA in Digital Image Frame] - 1](/content/2026/05/979433/images/303f8f69ce43247cec480b945a0ebe866da5dda55352974d77d80127fdc3997d.jpg)
Note
- To see compatible image file format and how to access and view images, refer to the Digital Image Frame user manual.
- For information on connection between the Digital Frame and LG Network Storage, refer to the Digital Image Frame's DMA user manual.
[Using DLNA as AV Device]
Use contents by activating the DLNA function connected to the network. Set-up procedure may vary depending on connected device. For detailed instructions, refer to the relevant device user manual.
Network Server
Access to the LG Network Storage through FTP/FTPs or AFP is configured with this function.
* For router use, the router settings need to be changed. Please refer to port forwarding of DMZ settings in the router's manual.
FTP
An FTP offers a handy environment when accessing LG Network Storage on the Internet.
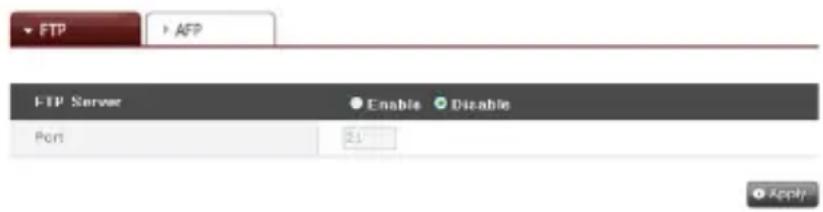
The use of FTP service can be established through “Enable”. The Windows image is explained here. The method below is applicable to other OSs.
① Use the FTP connection program, or open explorer and input the address ftp://[address]:[port number]. If the IP address is unknown, refer to

4. LG Network Storage Web Menu Use (for LG Network Storage administrators)
* Using the DDNS service offered by LG Network Storage will log on to ftp:// myname.lgnas.com:port number. For more details, please refer to system remote control
* To use the default port value 21, user may log on without inputting the port number through ftp://IP address or ftp://myname.ignas.com.
② Input the user name and password and login
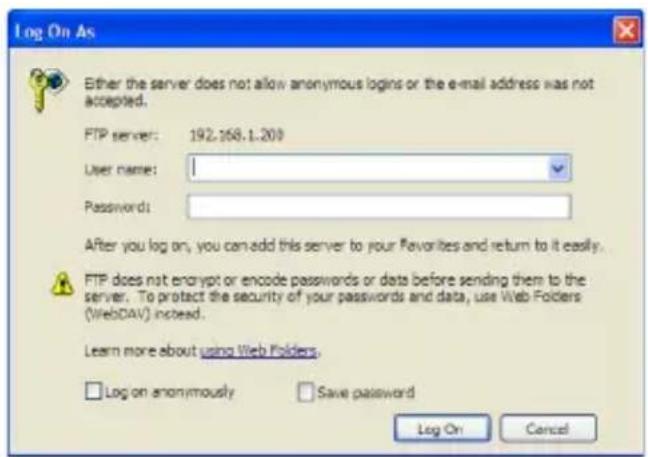
③ Look at the sharing folder. Folders and files can be managed via drag and drop, allowing for name change and delete. Depending on the local network environment, use of the firewall in the FTP server may be prohibited. For FTP server problems, consult the router's manual or contact the network administrator.
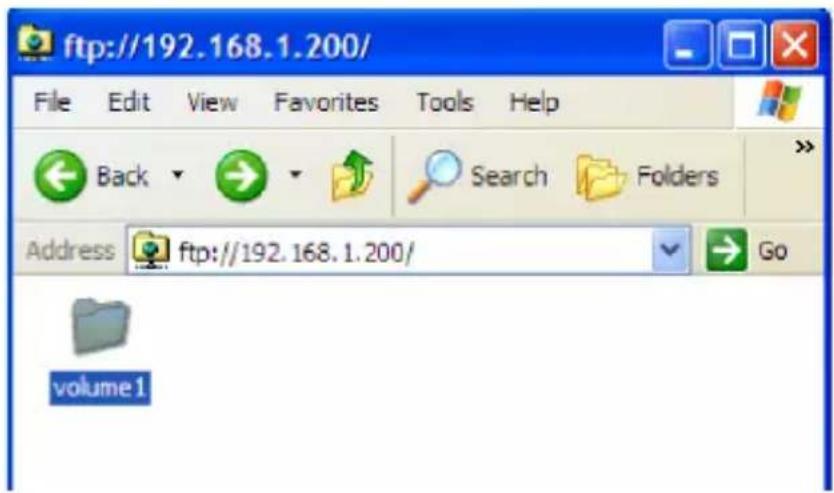
4. LG Network Storage Web Menu Use (for LG Network Storage administrators)
* LG Network Storage supports FTPS with advanced security on the existing FTP for better protection of the user's data traveling through the internet. To use FTPS, an FTP connection program that supports FTPS must be used. The explorer program supported by the Windows operating system does not support FTPS. Generally most commercial FTP connection programs support FTPS and more details may be found in the relevant program manual. (A typical free FTP connection program such as File Zila does not allow access to LG Network Storage through FTPS.)
AFP
The AFP offers a similar environment to Windows folder sharing.
* AFP is available within networks with the installed LG Network Storage, but not for external access without network setting changes due to firewall and other restrictions.
* If there are no special reasons Windows Sharing is recommended, as the Mac OS X basically supports Windows Folder Sharing.
Network Printer
The network printer can be used by connecting the USB printer to the LG Network Storage.
① Select Service > Network Printer from the administrator's web menu.
② Check "Enable", click the "Apply" button.

[Windows users]
① In the web menu go to "Enable" to connect the network printer, after which an LG Network Storage printer icon appears.
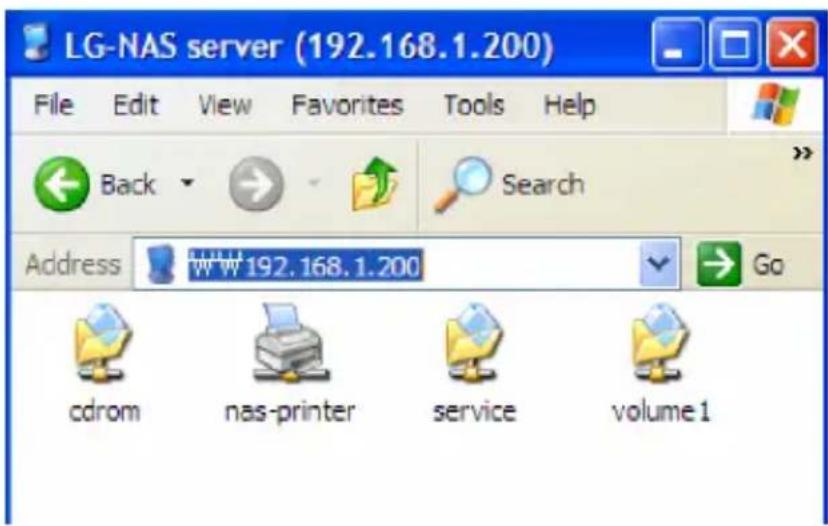
② Doubling clicking on the icon shows the progress of the printer driver installation. For installation issues refer to the printer manual.
③ If installation is unsuccessful use the network printer service.
[Mac users]
① Click on Go/ Utilities in the tool menu.
![Finder File Edit View Go Window Help Back ⌘[ Forward ⌘] Enclosing Folder ⌘↑ Computer ⌘C Home ⌘H Network ⌘K iDisk Applications ⌘A Utilities ⌘U Recent Folders Go to Folder... ⌘G Connect to Server... ⌘K](/content/2026/05/979433/images/28a479833d8f3f2f2f88e6fdb9c35840585a24b2dd9bfc7c6e17429c9bbb7f10.jpg)
② Click on the Printer Setup Utility.
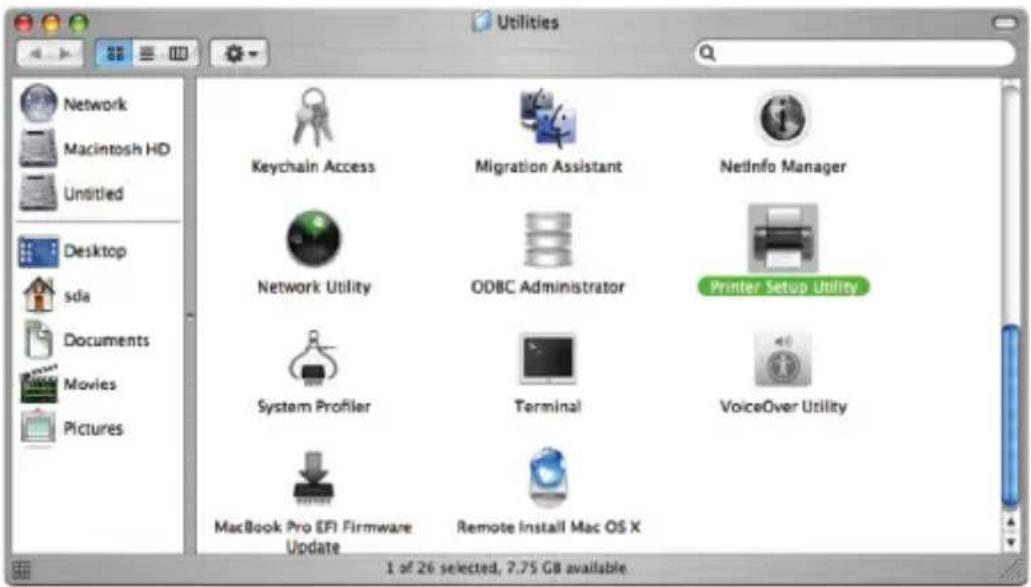
4. LG Network Storage Web Menu Use (for LG Network Storage administrators)
③ Click on Add.
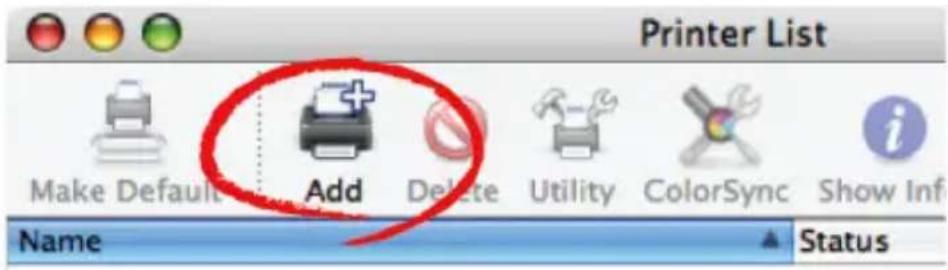
④ Hold the alt key down while clicking on More Printers.
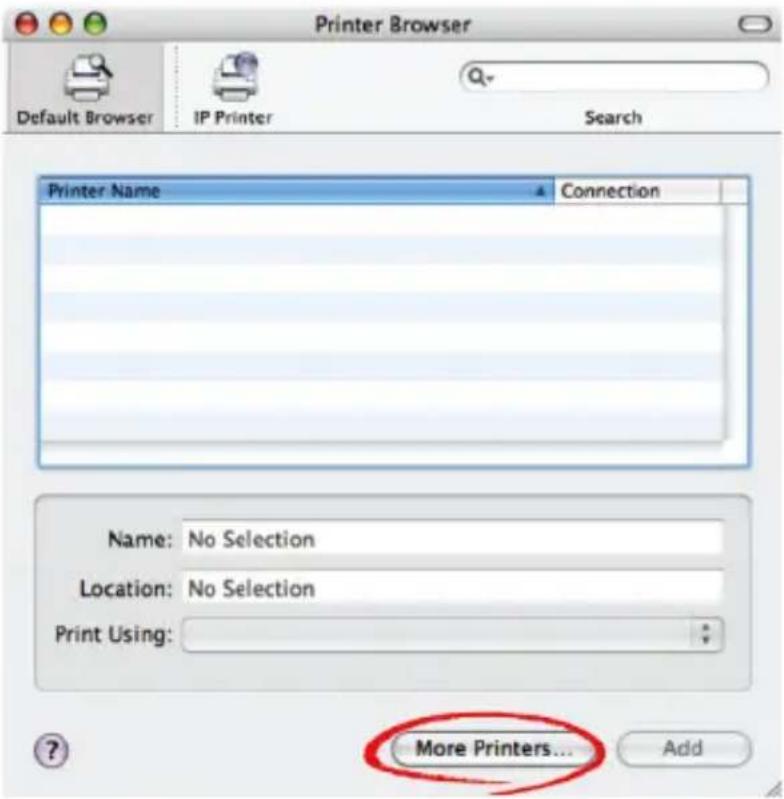
4. LG Network Storage Web Menu Use (for LG Network Storage administrators)
⑤ In the pop up window:
i. Select Advanced.
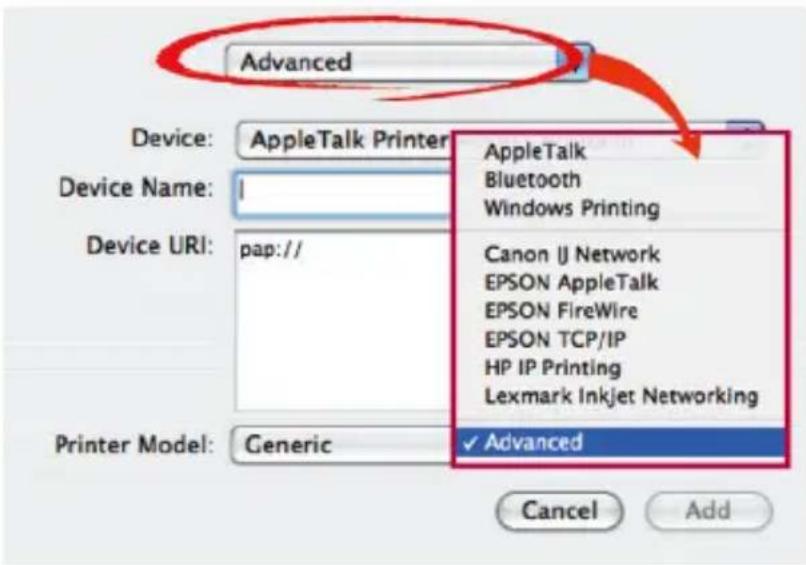
ii. Select Windows Printer via SAMBA.
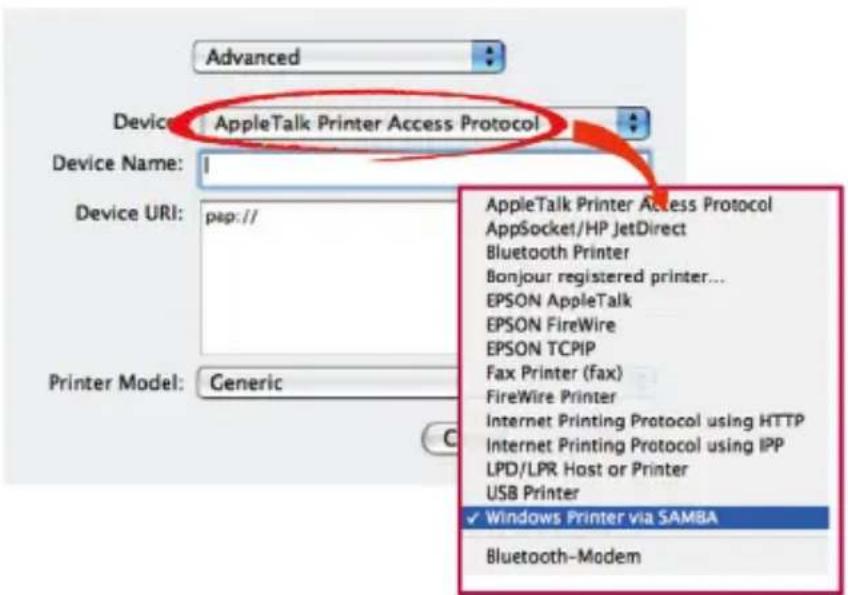
4. LG Network Storage Web Menu Use (for LG Network Storage administrators)
iii. Input the printer URI. The form name is smb: /LG Network Storage IP/printer. The printer name can be found in the Device Configuration(device config)/ USB Printer page.
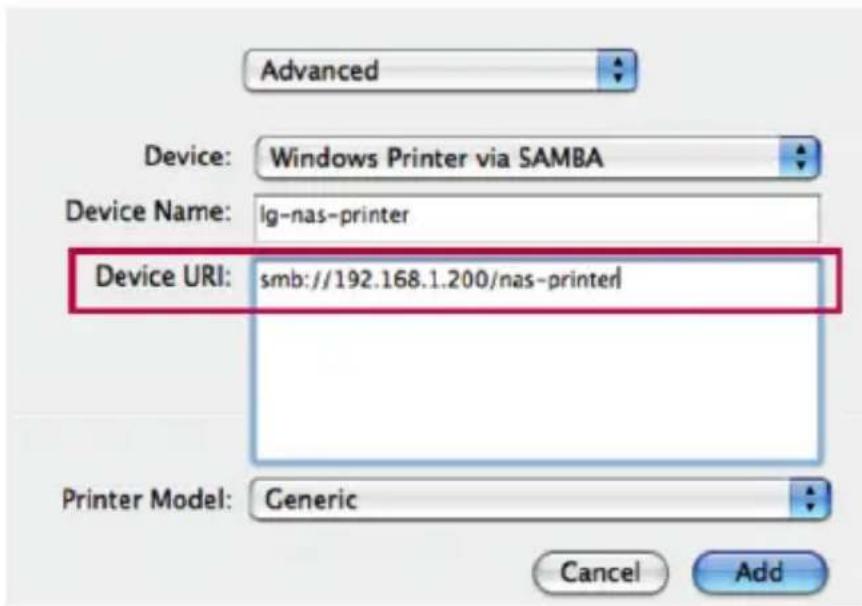
iv. In Printer Model, select Generic.
v. Click Add.
* By pressing the alt key while clicking on More Printers, a range of printers can be seen. There are no other options.
vi. The printer appears in the printer list. Now the printer is ready for use.
* Linux users must consult the OS manual, or inquire at the printer company.
iTunes
Using the iTunes services and recreating music files stored to the LG Network Storage through PC/Mac iTunes programs is possible. Music does not affect the PC/Mac storage space as transfer is done through streaming.
4. LG Network Storage Web Menu Use (for LG Network Storage administrators)

① For required use, select 'Enable' for iTunes Streaming Service.
② Set Music Library Update Frequency.
- Forced update (manual): Activate once the music file service for Streaming to begin the service. To create a music file, time is needed hence manual updates are recommended.
- Every 5 minutes (auto): Every 5 minutes, the music file list is updated periodically. For updated music lists, the client program must be restarted.
* Itemizing a music file list may be time consuming, the Foced update option is recommended unless music files are updated frequently.
Time Machine
The Time Machine service is the automatic back-up function built in Mac OS X and allows the Mac data copies to be stored in LG Network Storage in their latest version.
♣ This service is available in only Mac OS X version 10.5 Leopard or later versions.
[Web Set-up]
① Enter the host name.
The host name is the local host name after deleting “.local” found under “System Environment Set-up” → “Shared” → “Edit”.
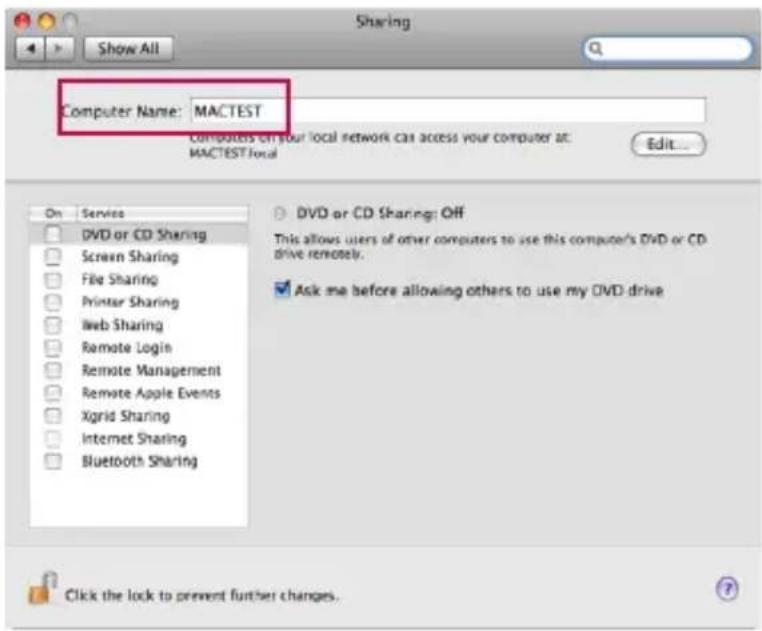
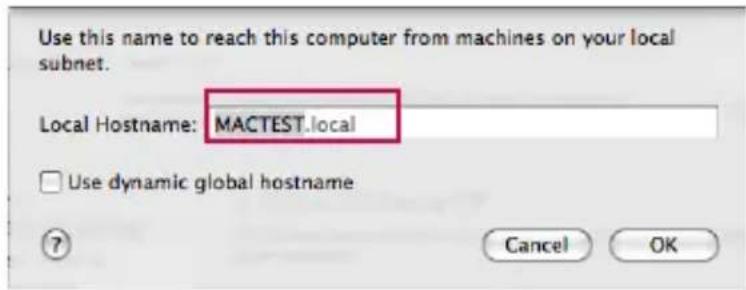
② Enter the MAC address.
The Mac address can be found by going to “Application Programs” → “Utilities” → “Terminal” and running the “ifconfig” command. Enter the “ether” address under en0.
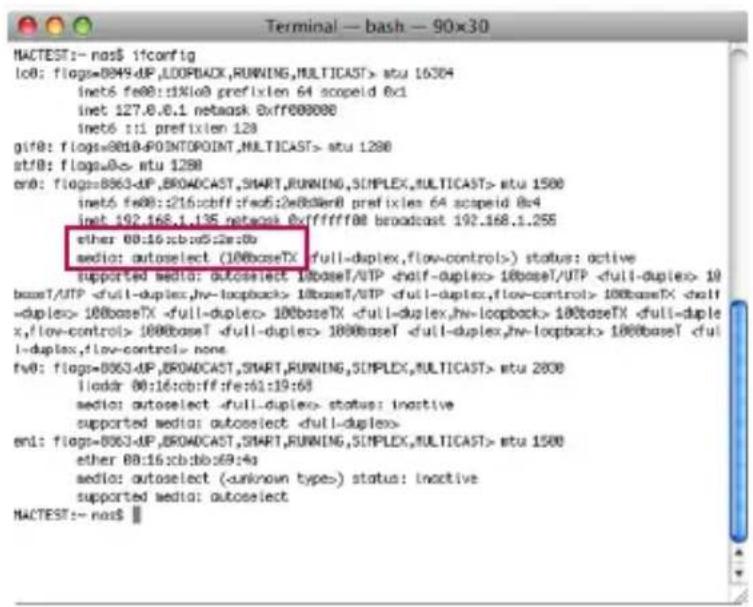
③ Select "enable" and press "apply".
[Mac OS]
① Go to "Move" → "Connect to Server" and enter "afp://LG Network Storage IP address" under "Server Address", then click "Connect".
* The AFP function must already be activated under network server settings.
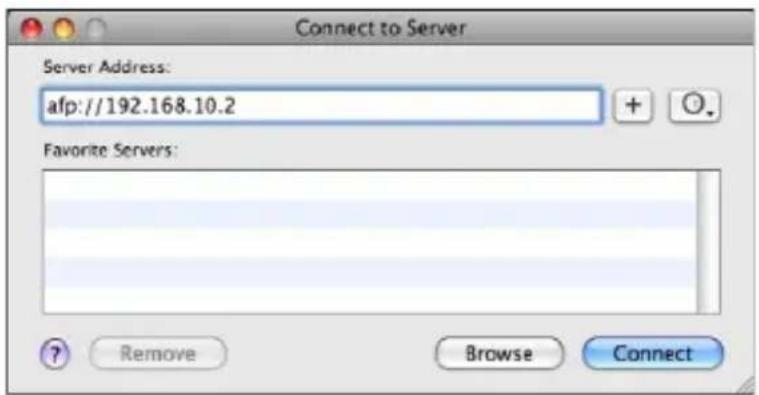
② If the log-in window appears, enter the name and password and click "Connect". Enter "admin" for name and the administrator's password for password.
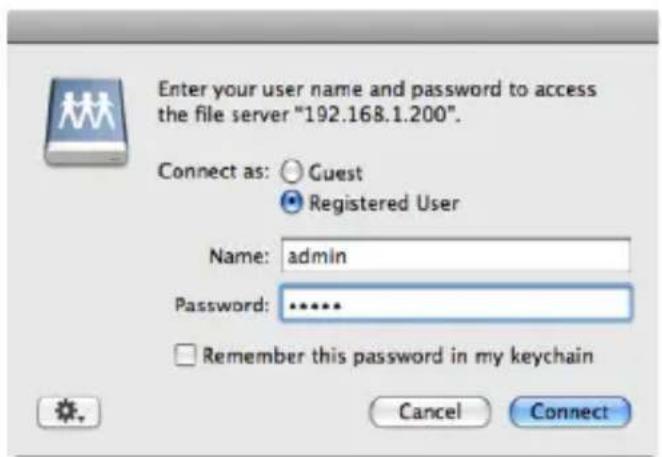
4. LG Network Storage Web Menu Use (for LG Network Storage administrators)
③ When the mount volume window opens, select "Timemachine" and press the "OK" button.
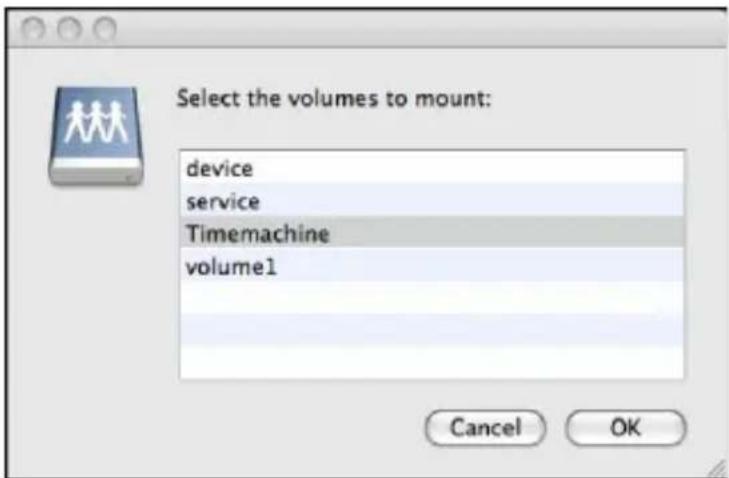
④ Go to “Settings” → “Time Machine”, press “Change disk…”, select LG Network Storage “Timemachine” and press “Enable as back-up”.
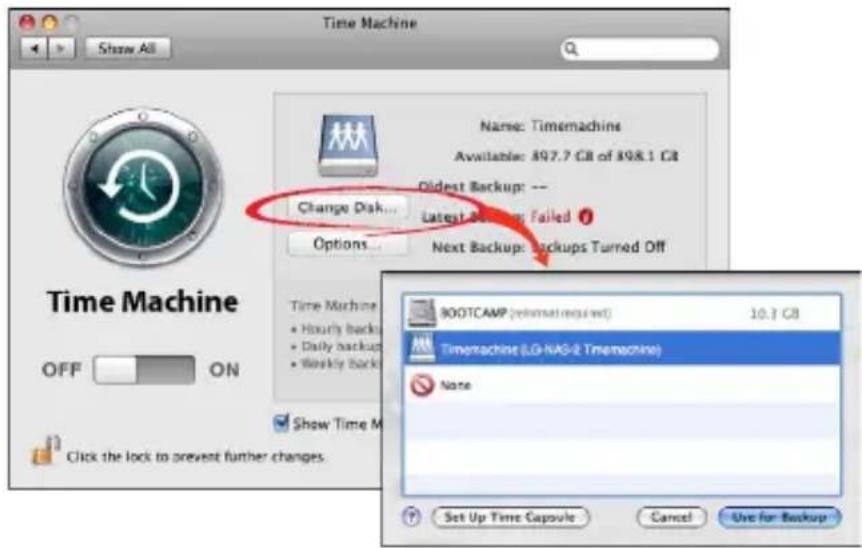
⑤ When the log-in window appears again, repeat instruction (2) and the Time Machine will be "On" and back-up begins in LG Network Storage.
iSCSI
This allows for the user to use the LG Network Storage Blue-ray/DVD drive as a CD drive. The LG Network Storage iSCSI service allows multiple users' log-in and usage.
[iSCSI Initiator Installation]
In order to use the iSCSI, the Initiator program must be installed in the computer
A. Initiator Installation on a Windows PC
For Windows XP, download the installation program from the below Microsoft website
Website
http://www.microsoft.com/downloads/details. aspx?familyid=12cb3c1a-15d6-4585-b385-befd1319f825&displaylang=en
For Windows Vista, the operating system already includes a program and no additional installation is required.
B. Initiator Installation on a Linux PC
For Linux, the Initiator may be installed automatically from the website.
For ubuntu Linux, enter
\$ sudo apt-get install open-iscsi
and for fedora, enter
\$ yum install open-iscsi
to automatically install the Initiator.
Website
http://www.open-iscsi.org/
4. LG Network Storage Web Menu Use (for LG Network Storage administrators)
C. Initiator Installation on a Mac
Install the globalsan iSCSI initiator. This can be downloaded from the “studio network solutions” homepage.
Website
http://www.studionetworksolutions.com
[Server Synchronization]
On the webpage, click "Enable" and then click "Apply". Once the iSCSI is activated, certain functions such as web burning will be limited.
[iSCSI Connection]
A. Connection on a Windows PC
① Activate the iSCSI initiator.
For Windows Vista, go to "Control panel iSCSI Initiator" and activate the Initiator. For Windows XP, go to the Start menu and select iSCSI Initiator from the program list.
If a mandatory certification (CHAP) procedure has been set up in the web setting, enter the required information under the General tab by pressing the Secret button.
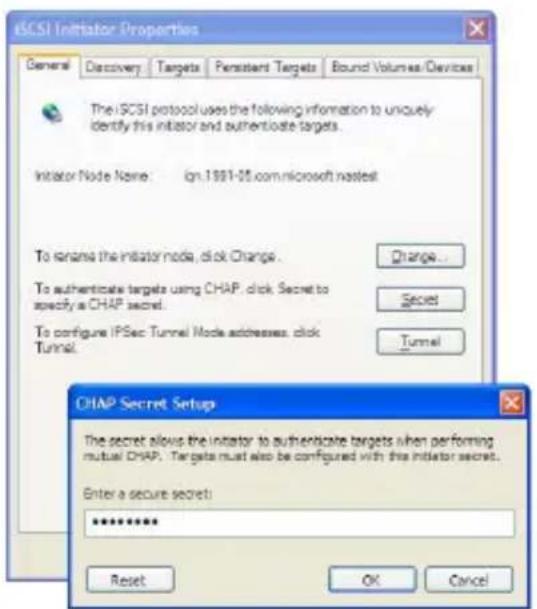
4. LG Network Storage Web Menu Use (for LG Network Storage administrators)
② Find the iSCSI target (LG-NAS).
Click on the Discover tap on the top of the iSCSI Initiator program. Then click the "Add" button on the bottom. Then a new window to Add Target Portal (picture below) should appear. Enter the target (LG Network Storage) IP address.
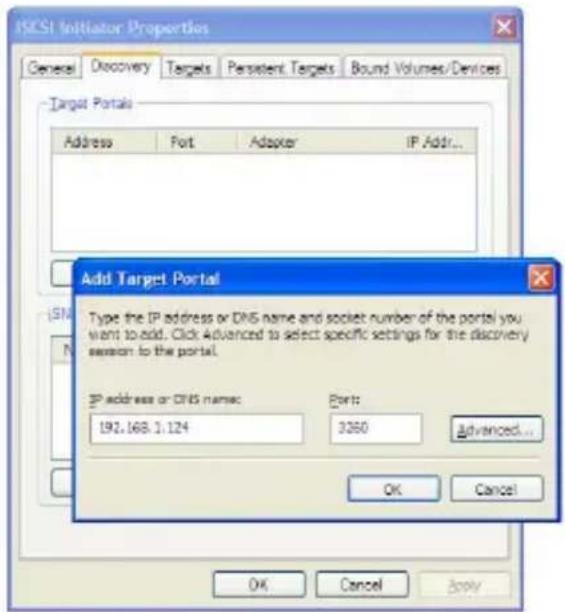
If a mandatory certification (CHAP) procedure has been set up in the web setting, enter the required information by pressing the Advanced button in the above window.
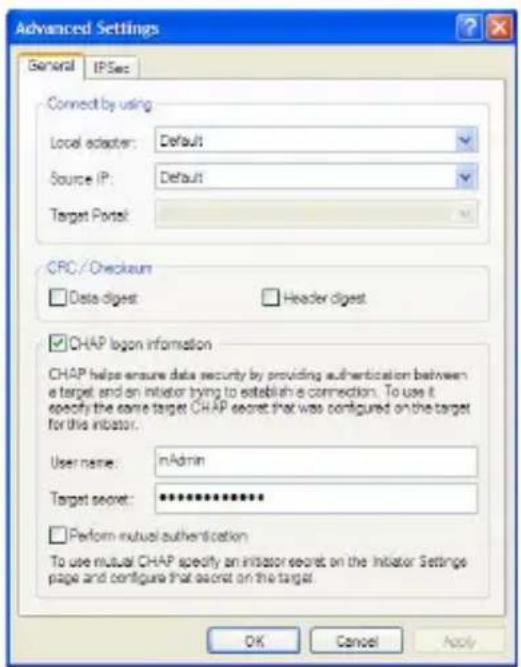
4. LG Network Storage Web Menu Use (for LG Network Storage administrators)
③ Log in.
Go to the Targets tab on the cop of the iSCSI Initiator program. If all of the above procedures have been followed properly, the iSCSI Initiator will find and list the information for the target (LG-NAS). Select the relevant target name and press the “Log On . . .” and click “OK” from the pop-up window.
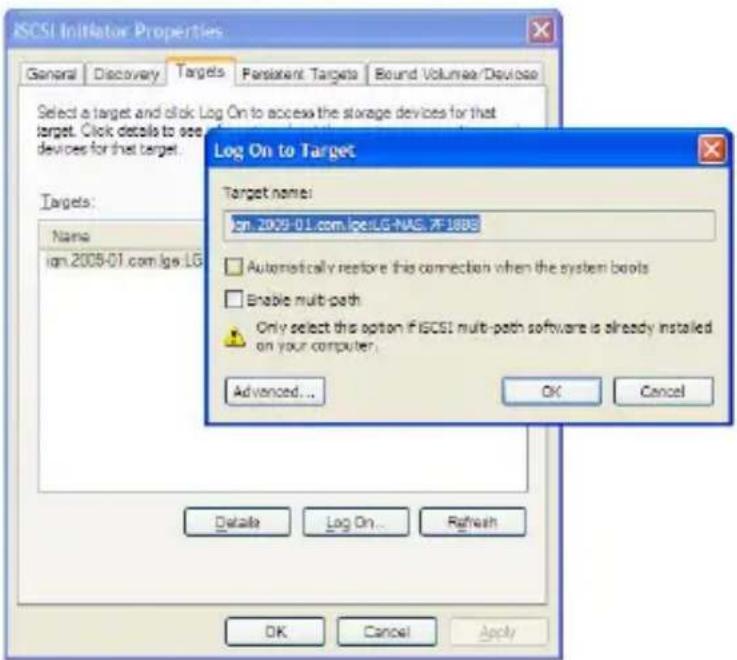
④ Check that the target has been connected as follows.
Target can be checked by going to Device administrator → DVD/CD-ROM drive.
⑤ NAS built-in ODD can be accessed by using tools such as CyberLink Power2Go.
4. LG Network Storage Web Menu Use (for LG Network Storage administrators)
⑥ Log out when done.
Go to the Targets tab on the top of the iSCSI Initiator program. Then click on the Details button on the bottom.
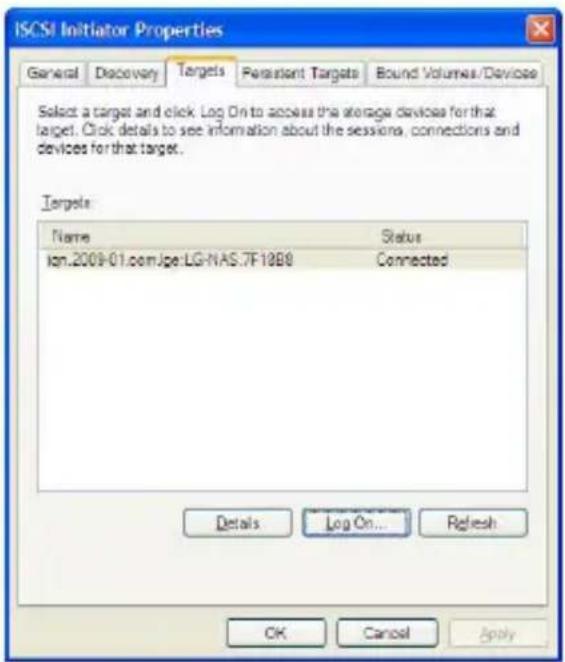
Select the relevant Target Name and click "Log Off...
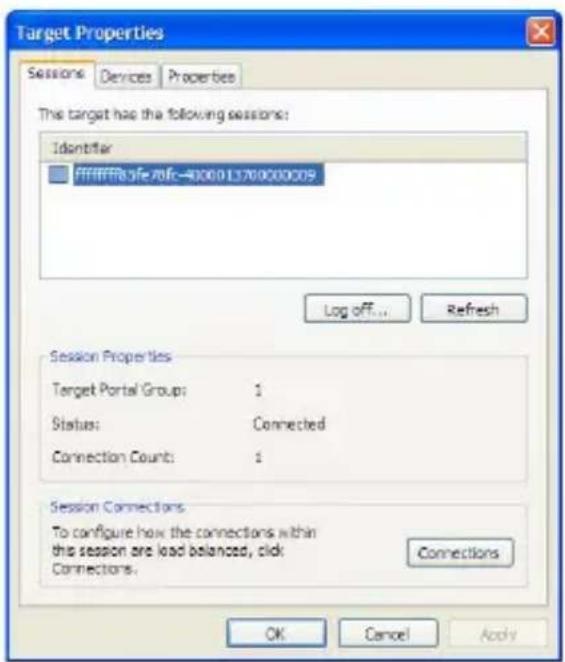
※ Due to compatibility issues between iSCSI Initiator and Windows Vista, the Windows Vista built-in ODD record functions, mastered or live file system, may not be available.
B. Connection on a Linux PC
① Activate the iSCSI initiator.
\$ /etc/init.d/open-iscsi start
② Find the iSCSI target. If the LG NAS (target)'s IP address is 192.168.10.2, the target is:
\$ iscsiadm -m discovery -t sendtargets -p 192.168.10.2
Once target is found, execute the above command, which will display the target name. The following is an example:
\$ 192.168.10.2:3260,1 iqn.2009-01.com.lge:LG-NAS.123456
③ Log in. Log-in command for the above target name is:
\$ iscsiadm --mode node --targetname iqn.2009-01.com.lge:
LG-NAS.123456 --portal 192.168.10.2:3260 --login
④ Confirm the target connection using the below command.
\$ cdrecord -scanbus
⑤ ODD tools such as cdrecord can be used to utilize the NAS built-in ODD.
Website
http://cdrecord.berlios.de/private/cdrecord.html
⑥ Log out when done. Use the following command:
\$ iscsiadm --mode node --targetname iqn.2009-01.com.lge:
LG-NAS.123456 --portal 192.168.10.2:3260 --logout
[Connection for CHAP certification]
① Open the open-iscsi set-up file "/etc/iscsi/iscsid.conf" and set up the CHAP certification. Follow the below instructions. (The CHAP certificate password must match the password set up for the iSCSI service on the LG Network Storage webpage.)
discovery.sendtargets.auth.authmethod = CHAP
discovery.sendtargets.auth.username = inAdmin
discovery.sendtargets.auth.password = password set up (Target Secret)
node.session.auth.authmethod = CHAP
node.session.auth.username = outAdmin
node.session.auth.password = password set up (Initiator Secret)
② Activate open-iscsi. \$ /etc/init.d/open-iscsi start
If the open-iscsi was already activated, restart.
$ /etc/init.d/open-iscsi restart
③ The rest of the procedures are the same as for [Connection to a Linux PC].
Websites
http://www.cyberciti.
biz/faq/howto-setup-debian-ubuntu-linux-iscsi-initiator/print/
http://manpages.ubuntu.com/manpages/hardy/man8/iscsiadm.8.html
http://wiki.debian.org/iSCSI/open-iscsi
C. Connection on a Mac
① Activate iSCSI initiator.
Go to System Preferences -> globalSAN iSCSI-
② Find the iSCSI target. If the IP address is 192.168.10.2, see below.
Go to globalSAN iSCSI -> Portals and press “+” and enter 192.168.10.2 and press “OK”.
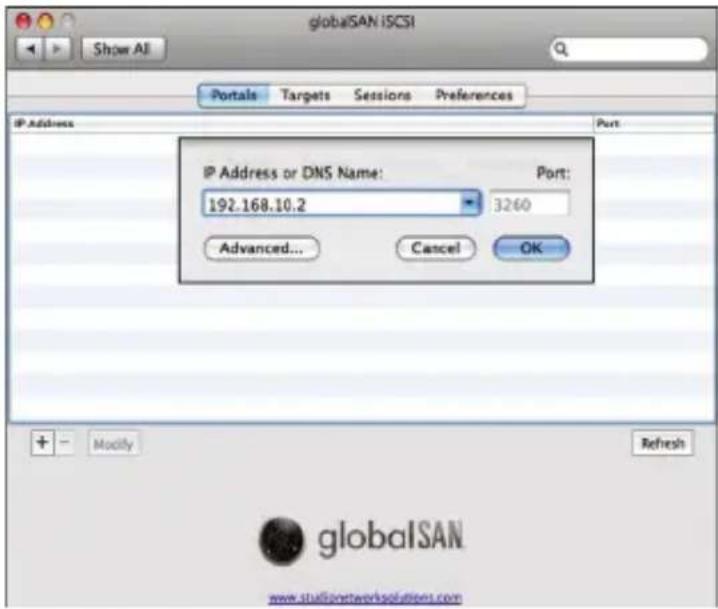
If a mandatory certification (CHAP) procedure has been set up in the web setting, enter the required information by pressing the Advanced button in the above window.
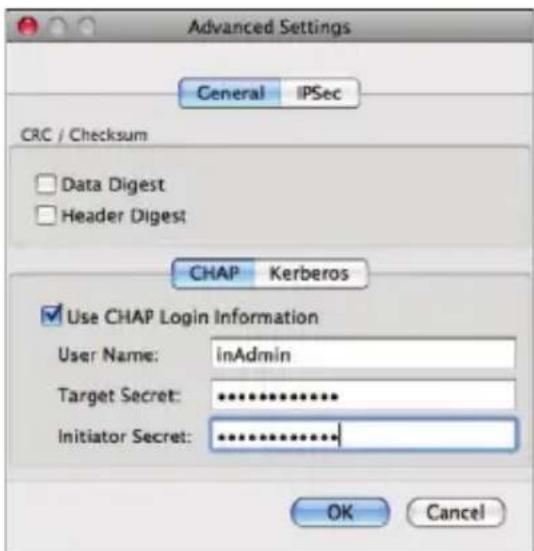
4. LG Network Storage Web Menu Use (for LG Network Storage administrators)
③ Log in.
Go to globalSAN iSCSI -> Targets, select the relevant target name and click "Log On. . . ." and then "Connect" on the pop-up window.
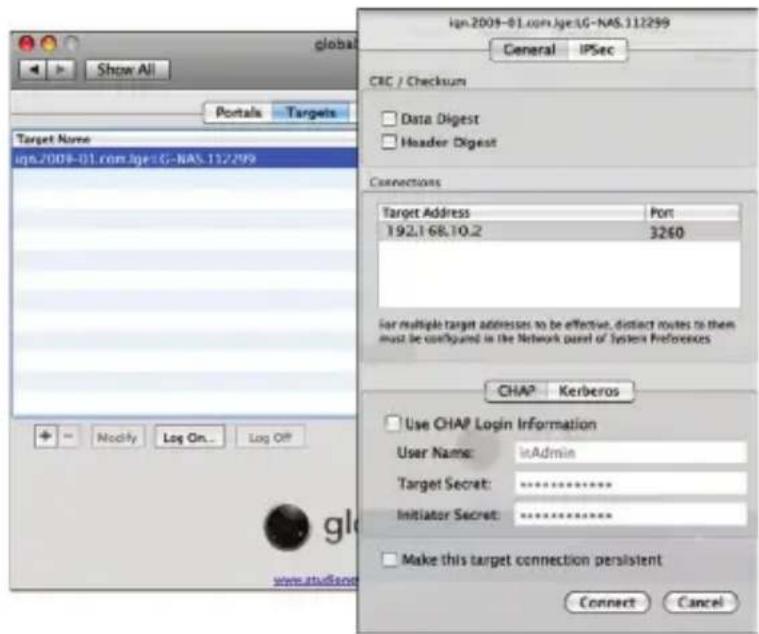
④ Confirm that the target is connected as follows.
Go to Utilities -> System Profiler and check that "iSCSI" appears under "Disc Burning" interconnect.
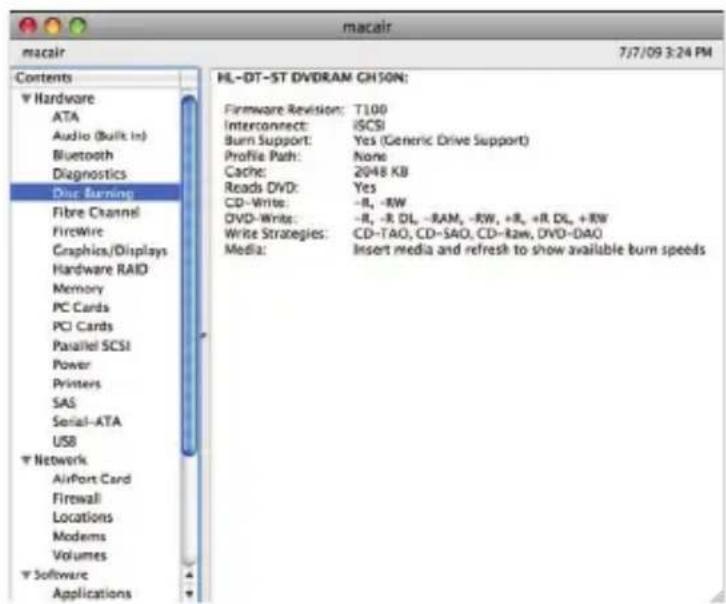
Tools such as Disc Utility/Finder can be used to utilize the NAS built-in ODD.
4. LG Network Storage Web Menu Use (for LG Network Storage administrators)
⑤ Log out when done.
Go to globalSAN iSCSI -> Targets, select the relevant target name and click "Log Off. . . ." and then "Disconnect" on the pop-up window.
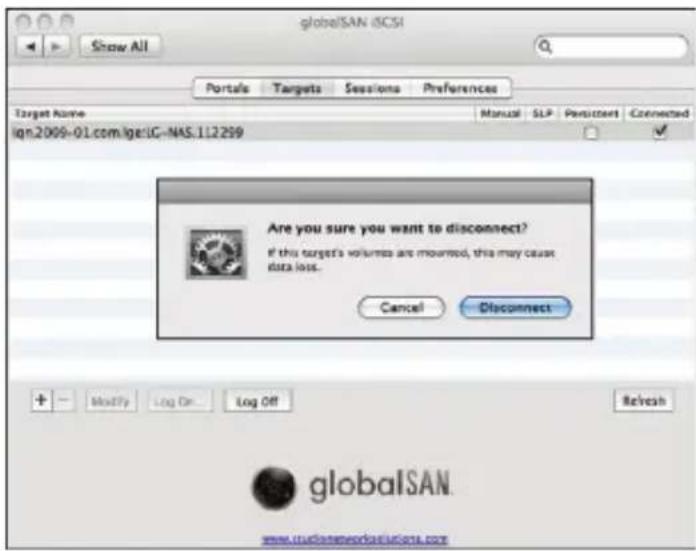
* Notes
Because the LG Network Storage Blue-ray drive network connection allows any logged-in user to use the program, it is important that other users are not interrupted. For example, in the case that other users are burning data using the Blue-ray drive, it is recommended to avoid commands that may interfere with the work, such as “open tray”.
In addition, if data writing/reading on the LG Network Storage is in progress through the network drive connection, there may be substantial data transfers within the network and cause difficulty in data transfers through the iSCSI, resulting in slower and limited writing/reading speed per disk.
Website
http://www.studionetworksolutions.com
Torrent
A P2P file sharing program that allows simultaneous download of files from multiple locations. Torrent does not have its own search engine, so user must obtain a file in format .torrent, register to the torrent program and download the file.
To use the Torrent function, user must "Enable" the Torrent from the service menu. Click on the Torrent icon on the top and open the Torrent program administration window.

[Download]
① Click on the Open icon.
② On the pop-up window:
i. Click the Find button and select the .torrent file previously downloaded.
ii. Or enter the path to the .torrent file in "or enter a URL".
③ Once completely downloaded, the file can be found in the network folder [Refer to How to Use the LG Network Storage Network Folder] under \service\Torrent.
[Use]

① Open: Register the file to download (.torrent).
② Remove: Removes the selected file from the list. This does not delete the file itself.
③ Remove Data: Removes the selected file from the list. This deletes the file.
④ Pause: Temporarily stops the downloading process of the selected file.
⑤ Resume: Resumes the downloading process of the selected file temporarily stopped.
⑥ Pause all: Temporarily stops the downloading process of all files.
⑦ Resume all: Resumes the downloading process of the all files temporarily stopped.
4. LG Network Storage Web Menu Use (for LG Network Storage administrators)
⑧ Filter: Hides or unhides the filter item.
⑨ Inspector: Hides or unhides the information for the selected file.
[Set-up]
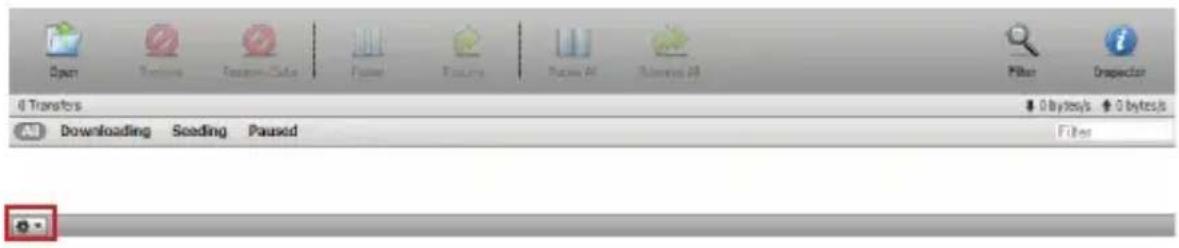
① Click on the set-up icon.
② Select Preferences and set up the port to be used, transfer speed limit, etc.
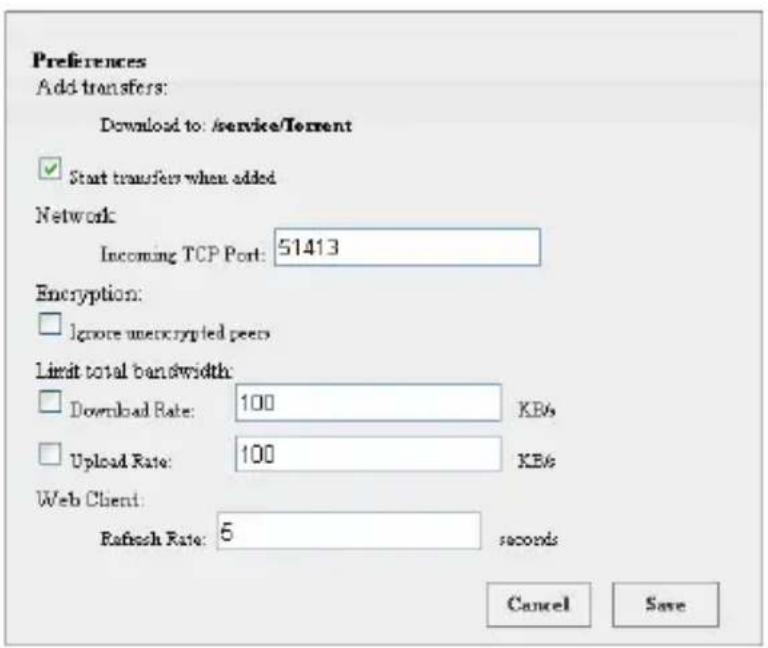
USB Sync
This function enables data transfer between USB devices, memory cards or external e-SATA devices and the LG Network Storage.
*Note: Some particular devices may require an adapter. (For a compatible memory card list, please refer to the homepage, http://www.lge.com. Use of an incompatible device may cause malfunction of the LG Network Storage.)
USB Device & Memory Card
USB device and memory card data can be backed up with the LG Network Storage. A separate process can be created for each USB device. One task can be performed using the USB device ID, target folder and back up method information, as well as back up period information.
Mobile Sync
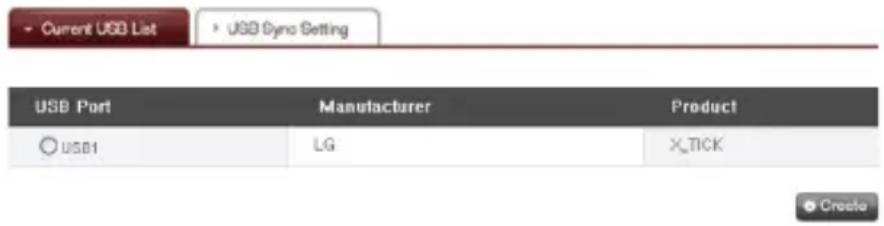
[Current USB List]
USB device and memory card lists on the LG Network Storage are displayed.
① Connect a USB or memory device to the LG Network Storage.
* On the back panel of the LG Network Storage there are 2 USB ports, on the front panel of the LG Network Storage there is 1 USB port and 1 memory slot.
② Refresh the list to itemize.
Depending on which ports they are plugged in, USB1, USB2, USB3 and MemCard will appear.
③ Select the device for backup and click on the 'Create' button.
④ Specific options for Backup are listed.
4. LG Network Storage Web Menu Use (for LG Network Storage administrators)
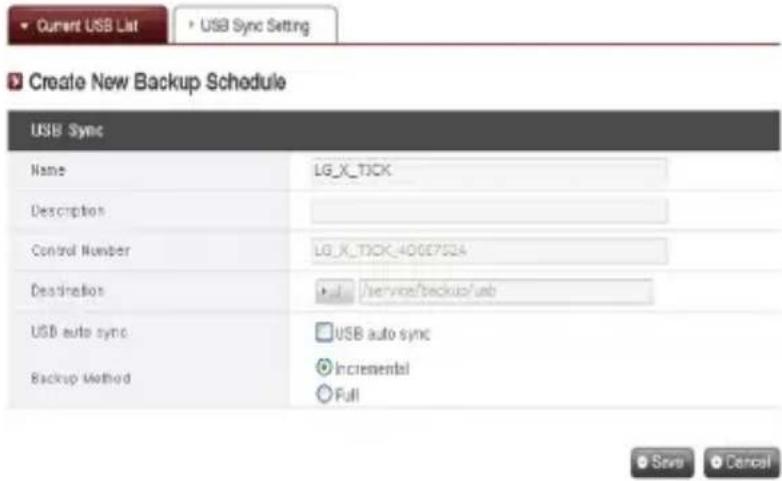
⑤ The task name is saved. (automatically generated)
⑥ The task information description is specified.
⑦ The selected device's unique ID is displayed. ID specific to the manufacturer information, product information, etc, are displayed.
⑧ The port with the device is displayed.
⑨ Each time the USB is plugged the USB is automatically recognized and back-up begins according to the settings. There is no need to press any button as a One Touch back-up. In the case that USB automatic synchronization is not selected, once the USB is recognized in the system, a message asking whether to back-up the USB will pop up on the LCD and back-up begin at the press of the Set button using the settings information from the Web. (One Touch back-up)
⑩ The backup method is specified.
- Incremental: Backs up only additional information to the data previously backed up
- Full: Backs up the entire source files.
Folders are created by "back-up date". For more information, refer to [Incremental Back-up and Full Back-up] on the back.
The current task list is indicated and tasks may be created, edited, deleted or synched.
① Clicking on the 'Create' button allows for a new task to be created.
- If the task name is selected, and the 'Delete' button is clicked, the task is deleted.
② If the list task name is clicked, editing is possible.
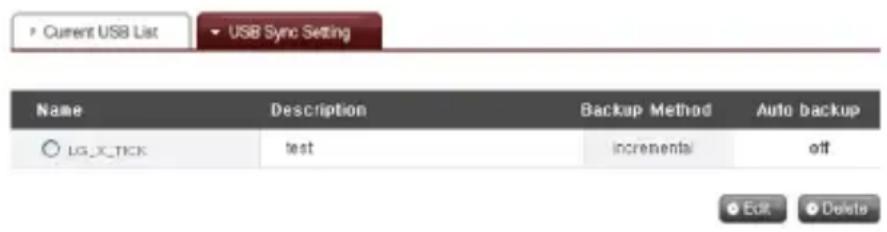
For back-ups of removable storage devices, LG Network Storage supports Incremental back-up and Full back-up. Back-up data are saved in a folder designated by the user and in the Last Backup folder.
- Incremental: The Last Backup folder contains all data from the removable storage device. The user designated folder only contains additional data in the removable disk when compared to the Last Backup folder.
- Full: Backs up the entire source files. Unlike the Incremental back-up, Full back-up saves all files in the user designated folder. (Last Backup folder is not used.)
The following is an example of Incremental back-up and Full back-up. For the 1st back-up (Jan 1, 2009) the USB contained the following files:
a.txt
b.txt
c.txt
The Incremental back-up will create a folder for the back-up date with the above files. It also creates a Last Backup folder containing all of the files in the USB. The system folder structure is as follows:
-- USB_LG_XTICK
| -- 20090101
| | -- a.txt
| | -- b.txt
| `-- c.txt
` -- lastbackup
| -- a.txt
| -- b.txt
` -- c.txt
For the 2nd back-up (Jan 2, 2009), a.txt and b.txt had been deleted and d.txt and e.txt had been added.
c.txt
d.txt
e.txt
The 2nd back-up will also create a folder for the back-up date containing only the added or modified files. In this case, only d.txt and e.txt will be saved and the Last Backup file will contain all files in the current USB.
-- USB_LG_XTICK
| -- 20090101
| | -- a.txt
| | -- b.txt
| `-- c.txt
| -- 20090102
| | -- d.txt
| `-- e.txt
`-- lastbackup
| -- c.txt
| -- d.txt
`-- e.txt
For the 3rd back0up (Jan 3, 2009), e.txt has been opened, modified and saved. Only e.txt file will be saved in the new folder. In the Last Backup folder, all files in the current USB, c.txt, d.txt and e.txt, will be saved as is.
-- USB_LG_XTICK
| -- 20090101
| | -- a.txt
| | -- b.txt
| `-- c.txt
| -- 20090102
| | -- d.txt
| `-- e.txt
| -- 20090103
| `-- e.txt
`-- lastbackup
| -- c.txt
| -- d.txt
`-- e.txt
If Full back-up had been selected for all 3 back-ups above, then the folder structure after the 3 back-ups will be as follows:
-- USB_LG_XTICK
| -- 20090101
| | -- a.txt
| | -- b.txt
| `-- c.txt
| -- 20090102
| | -- c.txt
| | -- d.txt
| `-- e.txt
`-- 20090103
| -- c.txt
| -- d.txt
`-- e.txt
Information
This shows network, volume, device status of the LG Network Storage and information about system log, connection log and self-diagnosis.
Status
Status of the LG Network Storage Network, Volume and external devices can be viewed. For more specific details or to make changes, clicking on the icons on the bottom will direct the users to the relevant webpage.
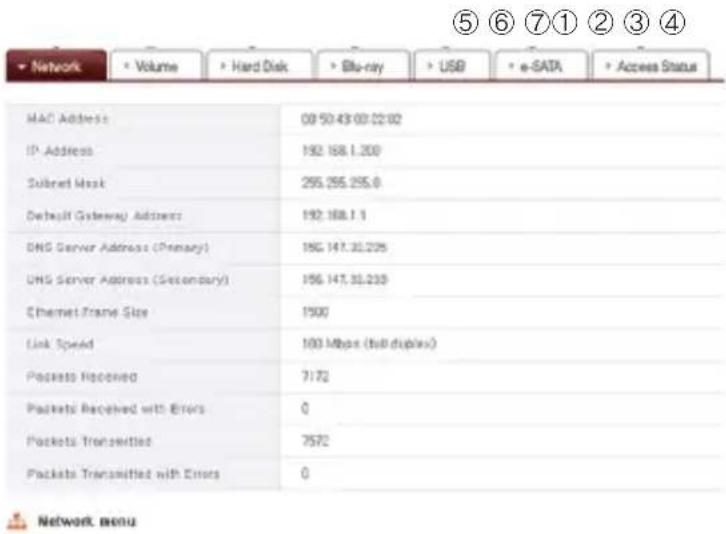
① Mac Address, IP, Subnet Mask, Gateway, DNS Server, Ethernet Frame Size, link Speed, etc information can be viewed.
② Configured volume list and usage/RAID state information etc can be viewed.
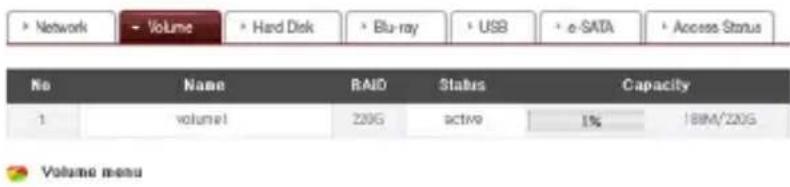
4. LG Network Storage Web Menu Use (for LG Network Storage administrators)
③ All hard disk information connected to the LG Network Storage can be viewed by Bay position
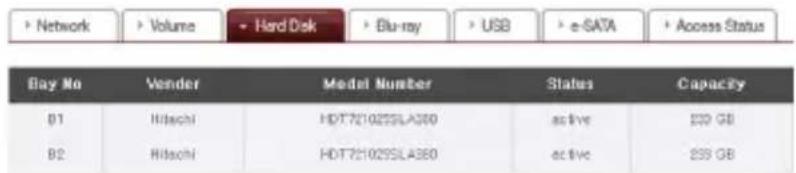
④ The information pertaining to the Blu-ray drive connected to the LG Network Storage can be viewed.

⑤ The information pertaining to the USB device and memory card connected to the LG Network Storage can be viewed.

⑥ The information pertaining to the e-SATA device connected to the LG Network Storage can be viewed.

⑦ User state currently connected to the LG Network Storage can be viewed. (SMB, FTP)

Log
The LG Network Storage service history can be displayed/saved.
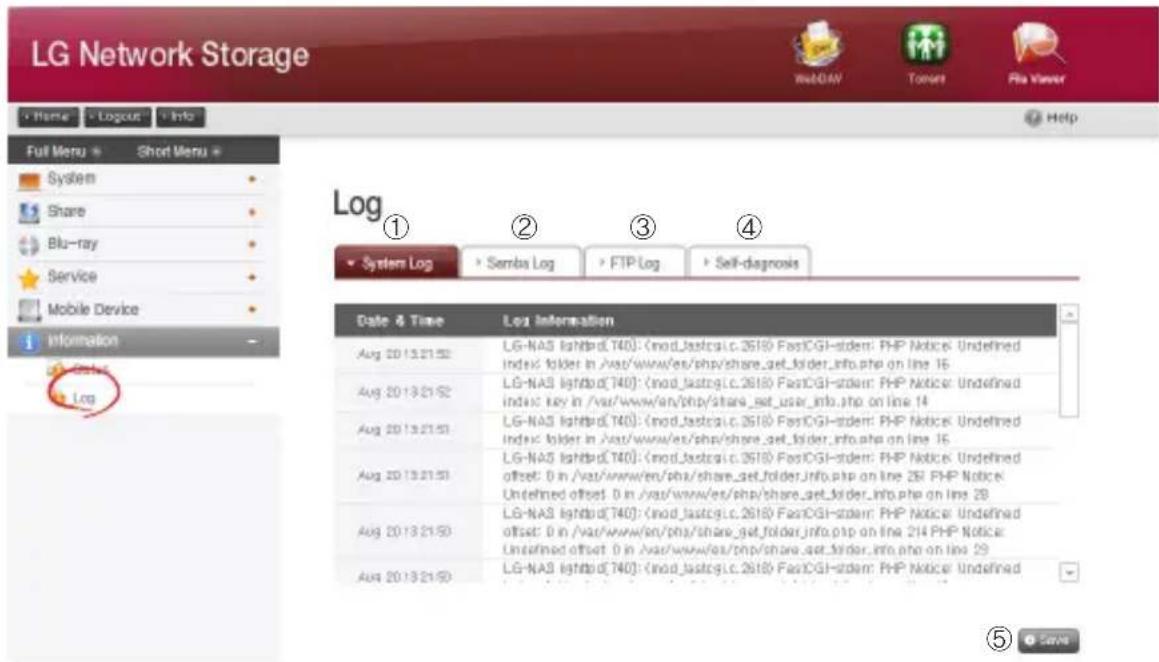
① The system use history can be viewed.
② The share folder use history can be viewed.
| Apr 30 10:03:29 | LG-NAS smbd_audit[9151]: unlink myfolder/N_A____R.jpg |
| Apr 30 10:03:29 | LG-NAS last message repeated 2 times |
| Apr 30 10:03:23 | LG-NAS smbd_audit[9151]: close fd 0 |
| Apr 30 10:03:23 | LG-NAS smbd_audit[9151]: mkdir myfolder failed: File exists |
| Apr 30 10:03:14 | LG-NAS smbd_audit[9151]: unlink myfolder/news.txt |
| Apr 30 10:03:12 | LG-NAS smbd_audit[9151]: close fd 0 |
| Apr 30 10:03:11 | LG-NAS smbd_audit[9151]: close fd 0 |
③ The FTP use history can be viewed.
| Apr 30 10:12:37 | LG-NAS proftpd[10820]: localhost (192.168.0.7[192.168.0.7]) - FTP session closed. |
| Apr 30 10:12:37 | LG-NAS proftpd[10820]: localhost (192.168.0.7[192.168.0.7]) - USER admin: Login successful. |
| Apr 30 10:12:36 | LG-NAS proftpd[10820]: localhost (192.168.0.7[192.168.0.7]) - Preparing to chroot to directory '/mnt/disk' |
| Apr 30 10:12:36 | LG-NAS proftpd[10820]: localhost (192.168.0.7[192.168.0.7]) - FTP session opened. |
| Apr 30 10:12:26 | LG-NAS proftpd[10820]: localhost (192.168.0.7[192.168.0.7]) - mod_tls/2.2.1: notice: unable to open TLSLog: No such file or directory |
| Apr 30 10:12:26 | LG-NAS proftpd[10820]: localhost (192.168.0.7[192.168.0.7]) - inappropriate log file: TLSLog |
| Apr 30 10:05:55 | LG-NAS proftpd[9932]: localhost (192.168.0.7[192.168.0.7]) - USER admin: Login successful. |
④ The diagnosis is und and the result can be viewed
- The service code for proper functions is displayed as [SVC_CODE: 00_00].
| SYC_CODE | Service Code | SVC_CODE[00_00] |
| MAC | Address | 00 50 43 FC 36 2F |
| Version | Main IC | RD-88F6192A-NAS |
| Version | System | 0.9.7_1607 |
| Version | Uboot | 3.4.15 |
| Version | Micom | 090622ES |
| Version | Kernel | Linux LG-NAS 2.8.22.18.#14 Fri Jul 24 11/24/04 KST 2009 armv5tejl unknown REV.34 |
⑤ Selected tab log can be downloaded to the client PC.
Top menu
WebDAV
LG Network Storage supports the WebDAV function which allows to remotely drag and drop, open and save functions after logging on to LG Network Storage from the web. ("MS Office file" only)
* The WebDAV function will allow the user logged in through the webpage to access files in the LG Network Storage as if they were files in the user's PC.
The PC must have Microsoft's MS Office installed in order for the WebDAV to be available.
To use WebDAV, user folder must be generated and WebDAV must be selected from the support protocol.
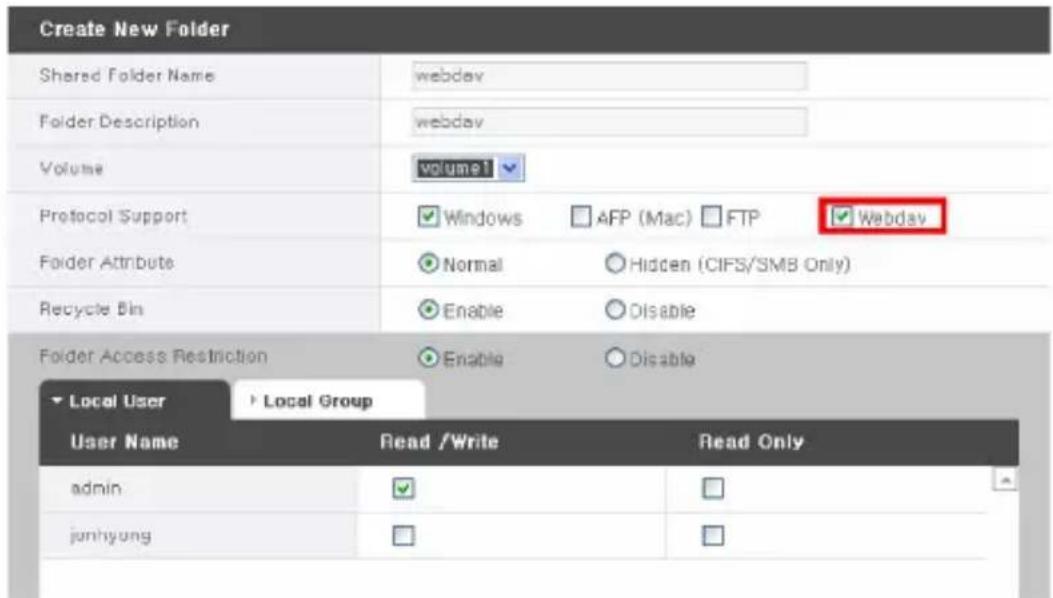
4. LG Network Storage Web Menu Use (for LG Network Storage administrators)
① Select the WebDAV icon on the top.

② Go through user certification. This is the same as the user certification required for network folder access.
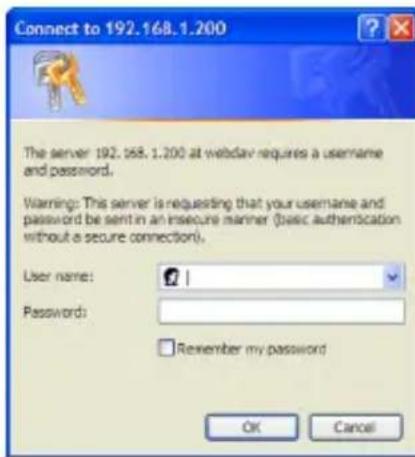
③ Once certified, the following screen will pop up and file drag and drop, open, edit and save functions will be made possible.
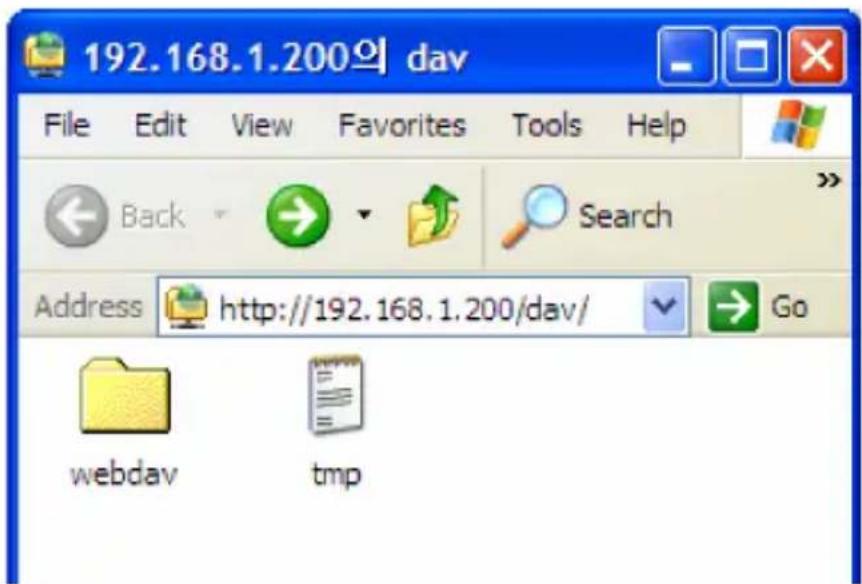
* This information is for Windows XP users only. Other OS users should refer to the information found online.
My Information
① Click the "My information" button on the left top corner. This displays the user information.
② Click on the "Edit" button on the right bottom corner.
Edit My Information
| User Name | System Admin | |
| User ID | admin | |
| User Password + | ||
| New Password | ||
| Confirm New Password | ||
| User E-mail | ||
| User Description | Default System Administrator |

③ Enter the modified information, enter the existing password in "User password" and click on "OK".
* To change the password, enter the existing password in "User password" and enter the new password in "New password" and "Confirm new password".
5. LG Network Storage web menu usage (Regular users)
Blu-ray / DVD
The built-in Blu-ray/DVD drive allows direct copy of data from discs to LG Network Storage. Furthermore, secondary backup of data using the Blu-ray drive makes data management safer and more efficient.
Burning
Burning the LG Network Storage data to disc is possible using the Blu-ray/DVD drive.
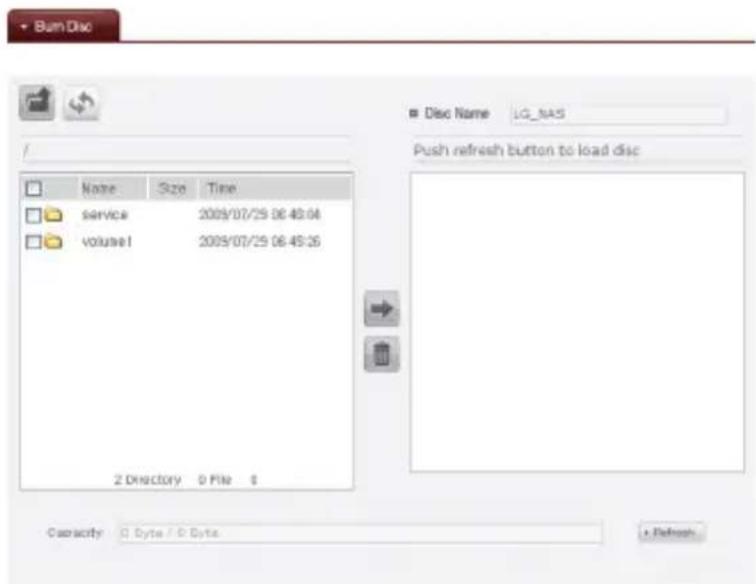
Burn Disc
Burning LG Network Storage files to disc is possible.
[Button functions]
: Moves to upper folder.
: Refreshes the current folder.
: Files or folders selected on the left window are sent to the right window to organize a list for recording.
: Deletes selected files or folders from the list organized for recording on the right window.
5. LG Network Storage web menu usage (Regular users)
① Move the intended folder or file to the destined location.
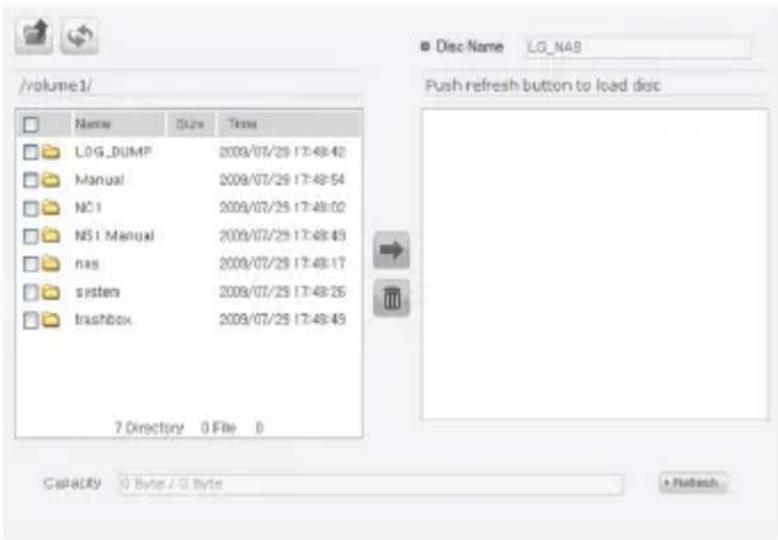
② Selecting a folder or file to record and move to the right side produces a configuration data list.
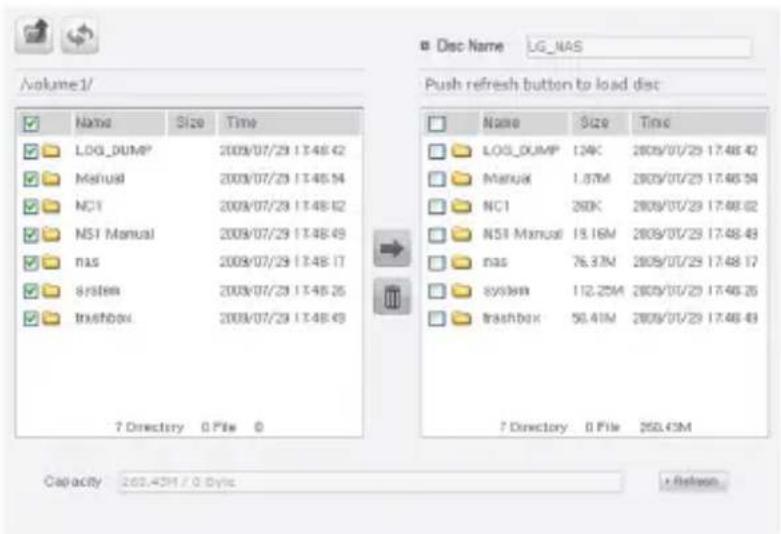
③ Specify disc name in the “Disc Name” window

5. LG Network Storage web menu usage (Regular users)
④ Click on the button and confirm that disc writing is possible as indicated in the disc status box.
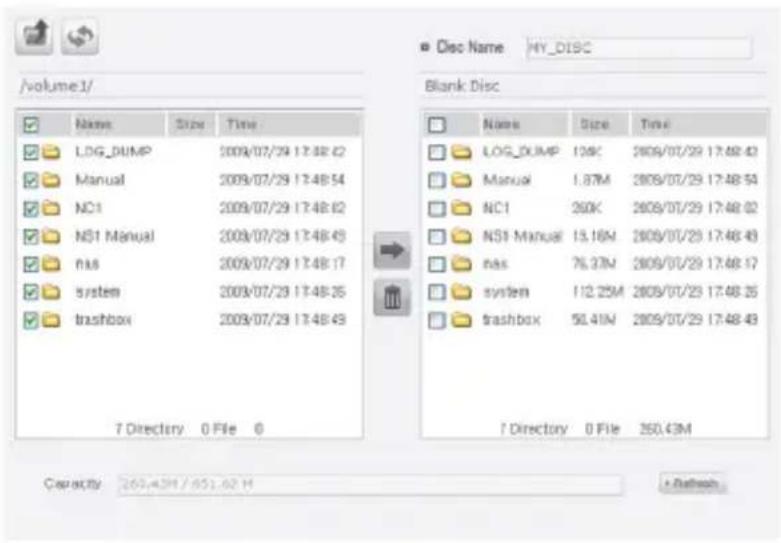
⑤ Pressing the button begins the burning process. The burning process is accompanied by a progress bar display. To cancel the process, click on the 'Cancel' button, which appears with the progress bar.
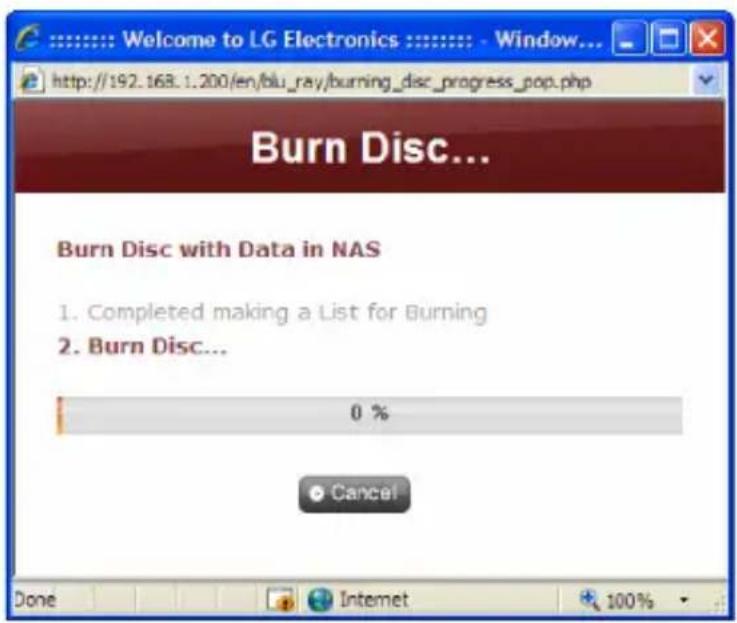
5. LG Network Storage web menu usage (Regular users)
⑥ At the end of the burning process, the tray ejects and the disc can be removed.
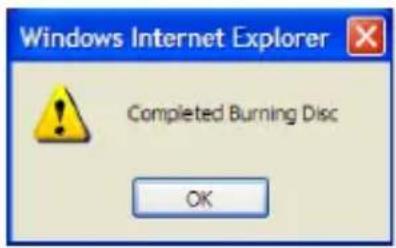
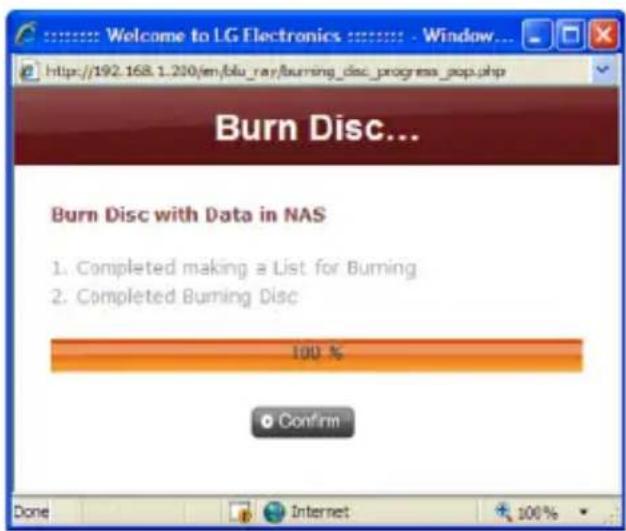
Top menu
My Information
① Click the "My information" button on the left top corner. This displays the user information.
② Click on the "Edit" button on the right bottom corner.
Edit My Information
| User Name | System Admin |
| User ID | admin |
| User Password * | |
| New Password | |
| Confirm New Password | |
| User E-mail | |
| User Description | Default System Administrator |
③ Enter the modified information, enter the existing password in "User password" and click on "OK".
* To change the password, enter the existing password in "User password" and enter the new password in "New password" and "Confirm new password".
6. LG Network Storage via network drive
The file sharing service is the most important function in LG Network Storage. This section pertains to Windows, Mac, Linux OS, which are explained in reference to their use with the LG Network Storage network drive.
Accessing the LG Network Storage data in Windows OS
For Windows users, observe the following procedure to access the LG Network Storage.
PC Application Program Usage
After setting up the ‘LG Network Storage PC Software Installer’ disc NAS Detector program and desktop icon use, execute and clicking on the “Open Network Folder” button will allow access to LG Network Storage’s sharing folder. For detailed setting information refer to
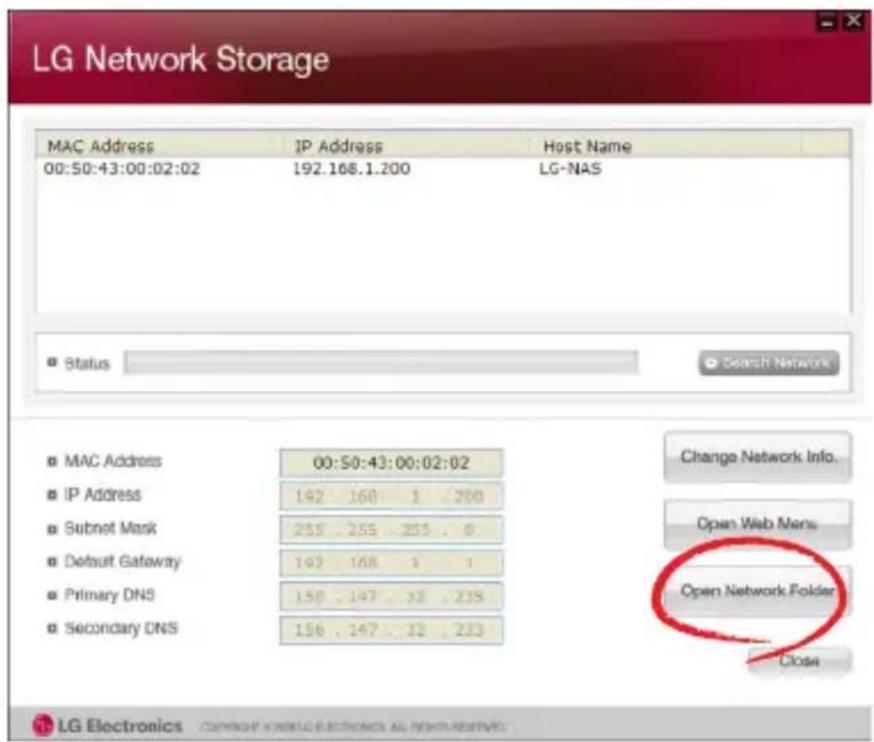
Windows OS "Execute" function use
Clicking on “Execute” in the Windows OS can start a new menu with inputting the \IP Address to the LG Network Storage can be accessed. If IP address is unknown, refer to
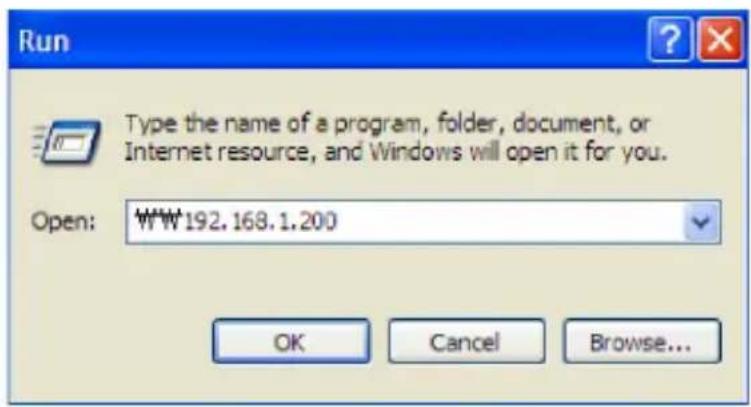
Windows File Sharing Use
Open the web browser and input『\IP address』 in the address bar. The server can be accessed after the log in. If the IP address is unknown, refer to
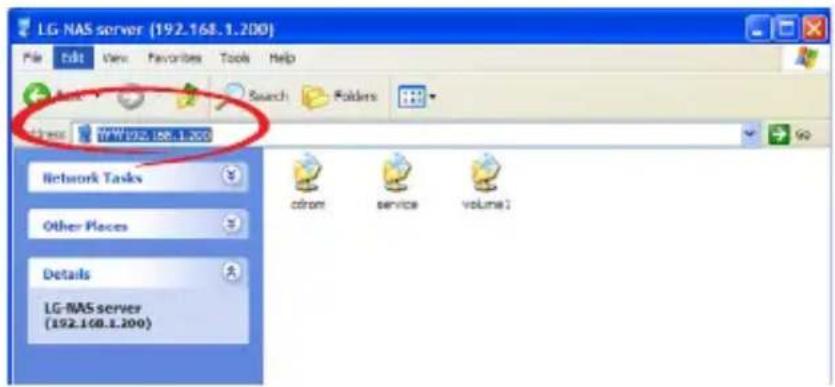
Tip) Post server connection, network drive set-up
If there is a connection to the LG Network Storage, all sharing folders are registered. If settings involve the network drive using the
"Tools > Map Network Drive…", future connection to the LG Network Storage server becomes more convenient.
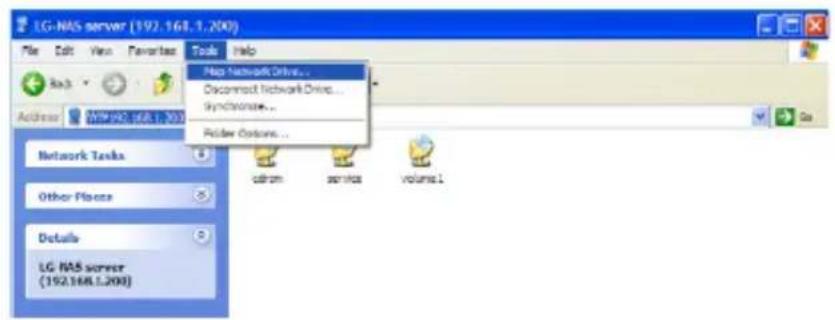
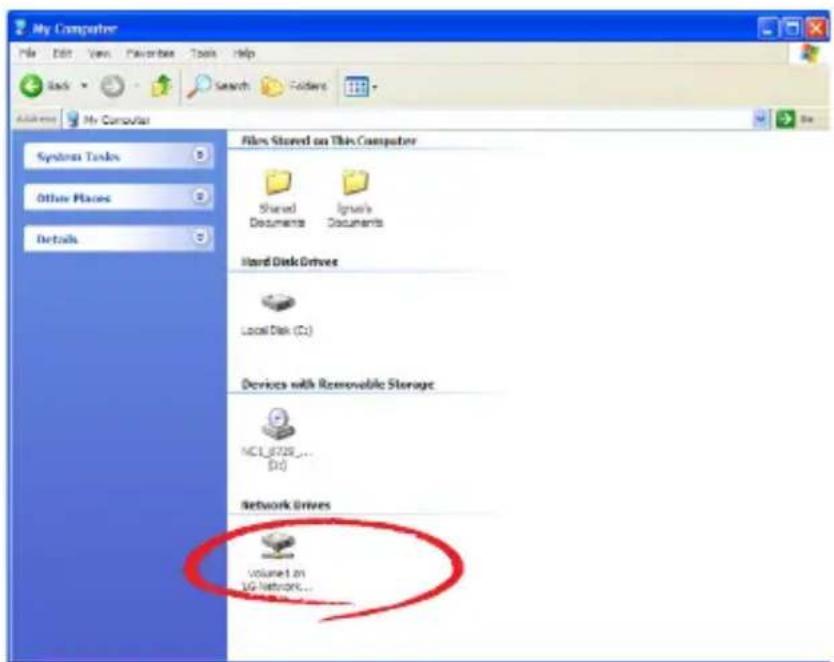
6. LG Network Storage via network drive
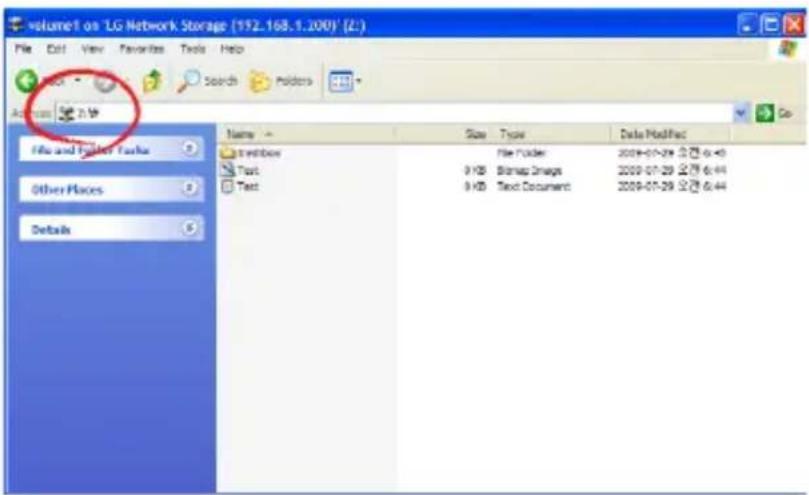
* Multiple folders can be set up in different network drives in the same way.
MAC OS connection
MAC users can connect to the LG Network Storage by methods such as explained below.
["Server connect" function use]
The LG Network Storage sharing folder can be added to the Mac server list on the desk top. The connection order is as follows.
① Select "Connect to server" after clicking on "Go" at menu bar.
![Finder File Edit View Go Window Help Back %[ Forward %] Enclosing Folder %↑ Computer %C Home %H Desktop %D Network %K iDisk ▶ Applications %A Utilities %U Recent Folders ▶ Go to Folder... %G Connect to Server... %K](/content/2026/05/979433/images/2e6bea4db14c1ffc4a82160ea7c2aad9d92eacd3b1c2fab186d8e36b8873ee06.jpg)
② At the server address field, input the LG Network Storage IP address『smb://LG Network Storage IP Address』, and click the “Connect” button. If the LG Network Storage IP address is not known, refer to
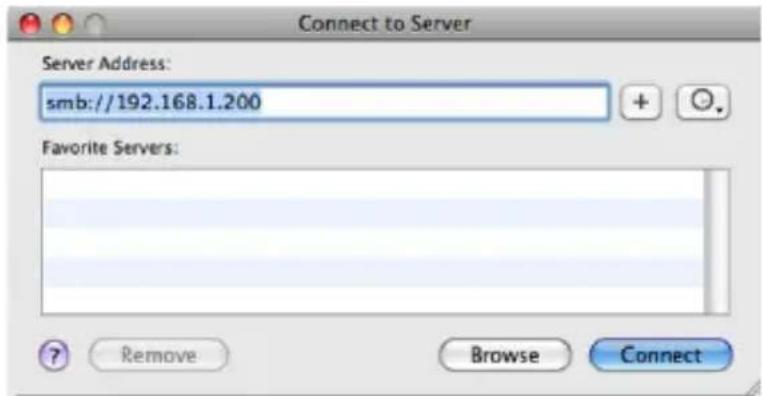
③ Input the log in ID and password and click on the 'OK' button. The initial settings are as follows: ID: admin, password: admin. For future security, it is recommended that password is changed after logging on to the web administrator page.
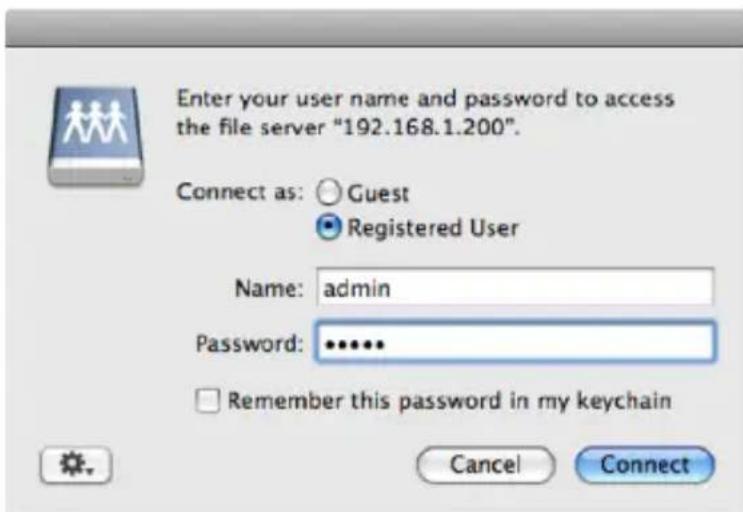
6. LG Network Storage via network drive
④ Select the volume to be used (e.g. cdrom/service/volume1) in the LG Network Storage folder list and click "OK".
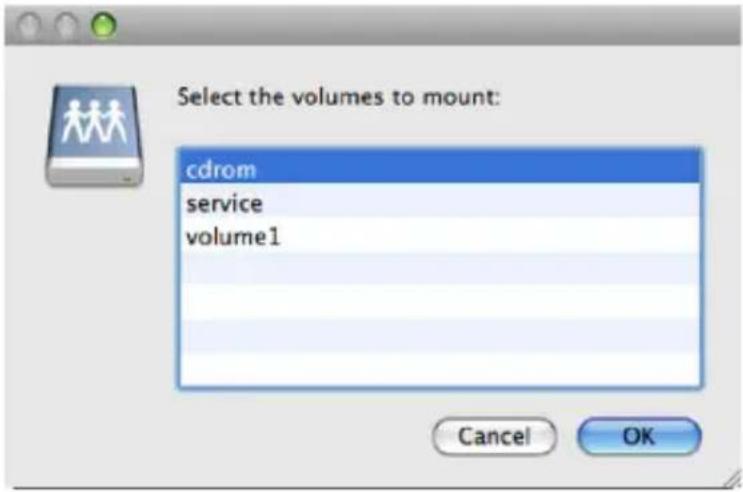
⑤ The relevant shared folder will open and the contents displayed.
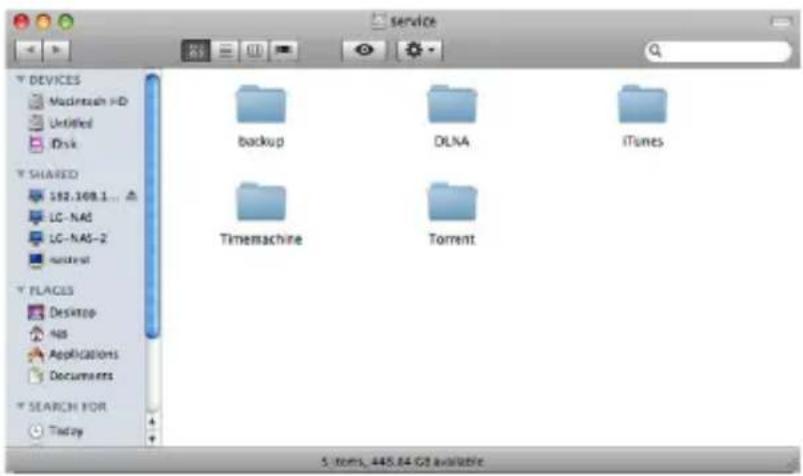
Linux OS access
LG Network Storage supports Windows, MAC, and Linux OS, through the SMB service. The Linux system connection is as follows. Ubuntu will be used as a reference.
① Click on the menu bar and then select 'network'.
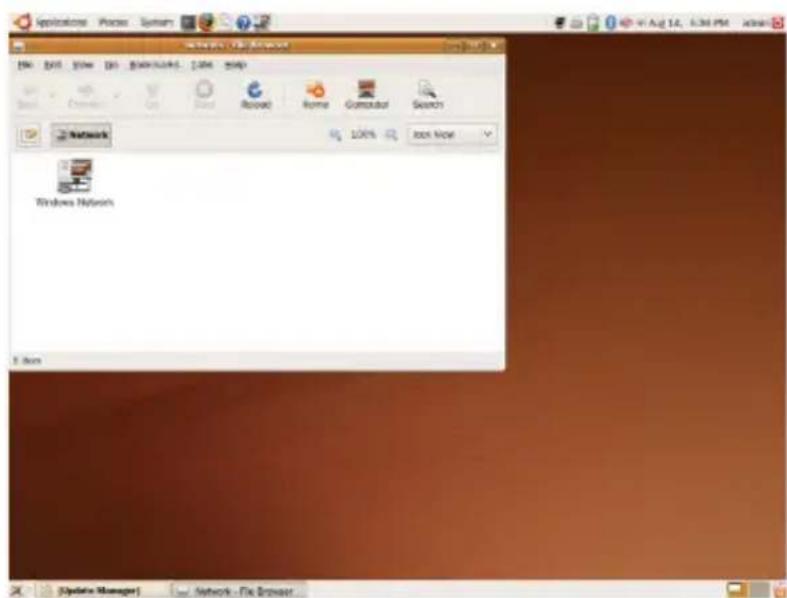
② Click on “Windows Network” and select “workgroup” to display the LG Network Storage connected. Select the name of the LG Network Storage to connect to.
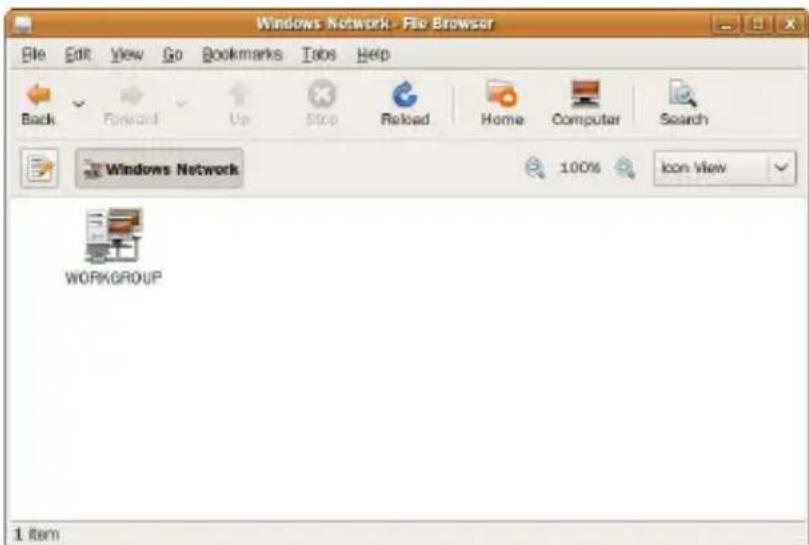
6. LG Network Storage via network drive
③ Selecting LG Network Storage will display the folder list of LG Network Storage. Select the volume to be used (e.g. cdrom/service/volume1).
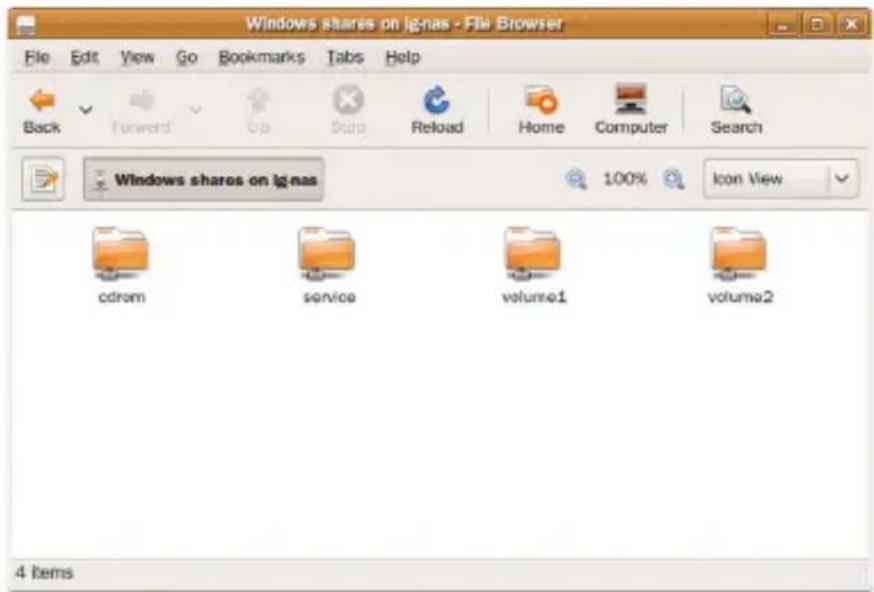
④ If the ID and passwords are inputted then connection to the LG Network Storage is allowed. Initial default information is ID: admin, password: admin. For future security, it is recommended that password is changed after logging on to the web administrator page.
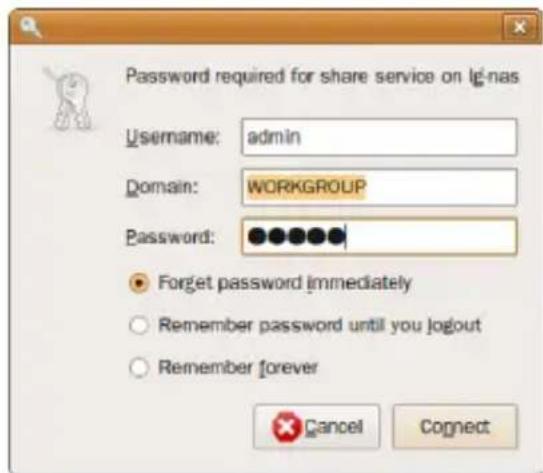
6. LG Network Storage via network drive
⑤ After logging in, the LG Network Storage share folder appears.
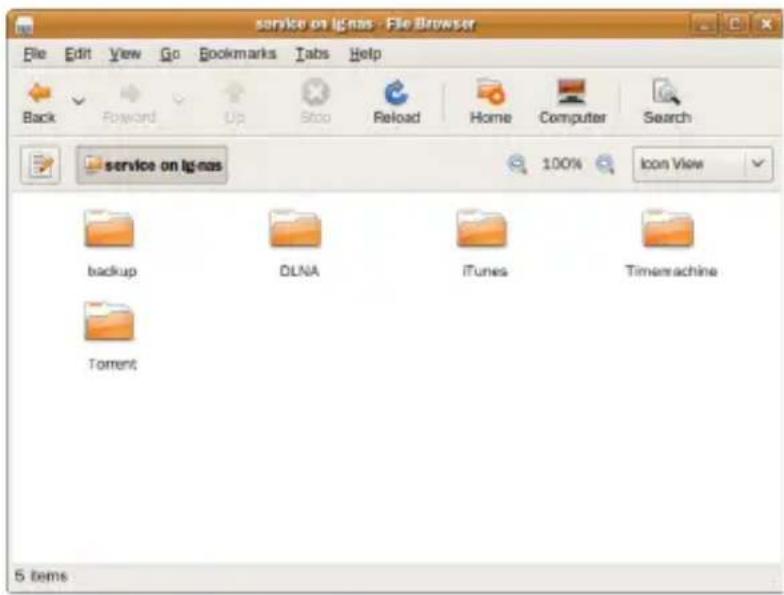
7. LG Network Storage Maintenance
This section explains about general LG Network Storage maintenance and self-diagnosis.
LG Network Storage shut down/restart
The following steps pertain to server shut down/restart.
① Inform all connected users to save files in operation and stop use of the LG Network Storage.
② Open the administrator web page, and go to the 'System > Power > Shutdown' tab. Follow the description and press the 'Restart' button to restart or the 'Shut down' button to shut down.
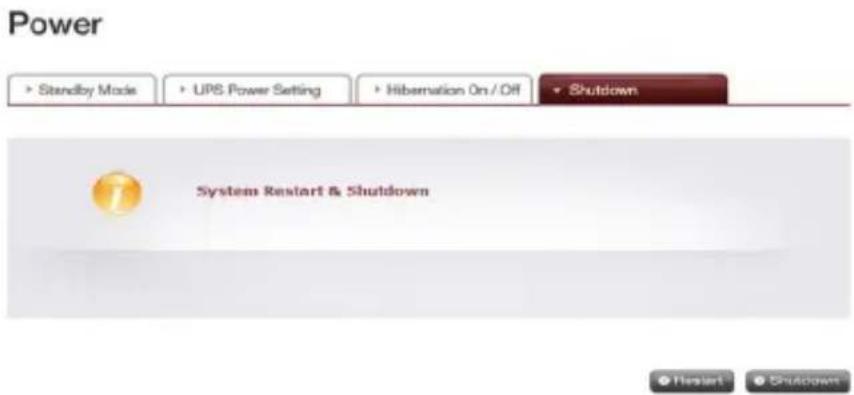

For a compulsory shut down of LG Network Storage, press the power button for more than 3 seconds. A message saying that system will shut down will pop up and LG Network Storage will shut down.
Administrator password and network set up initialization
Open the administration web menu and go to the ‘Initialization’ tab of the ‘System > Firmware’ menu. Following the explanation, push the ‘Initialization’ button and initialize the default system values.
Warning: As this time all registered user information and data will be deleted, and cannot be recovered.
• LG Network Storage default value initialized items
① System administrator ID, password: admin, admin
② Network set up /TCP/IP configuration: DHCP mode will be set up as default mode
③ Network set up/TCP/IP configuration : Jumbo frame inactivity
④ System device/IP filter: All connections are allowed
⑤ RAID components
⑥ Service set-up value
⑦ User/folder/group list
- Log in to the LG Network Storage using the default user name and password: ID: admin, password: admin
System information checking and saving
Open the administration web menu and go to the 'Log' of the 'Information' menu then check and save settings in 'System Log', 'Samba Log' and 'FTP Log'.
![Log System Log Sambe Log FTP Log Self-diagnosis Date & Time Los Information Jul 25 17:02:18 LG-NAS bi_udus/AT [IP_38TUP] Received command [r Jul 25 17:02:18 LG-NAS on/wareclicent[67Z] admin[192.168.1.100] version1 Jul 25 16:30:40 LG-NAS on/wareclicent[67Z] admin[192.168.1.100] version1/Test.txt Jul 25 16:30:13 LG-NAS on/wareclicent[67Z] admin[192.168.1.100] version1 Jul 25 16:30:20 LG-NAS on/wareclicent[67Z] admin[192.168.1.100] Jul 25 16:30:14 LG-NAS with-Genera[150N] : Service "LG-NAS-2" /kdc/kda/servico/ltp.service/ SUCCEEDUP ESD/BFEG Jul 25 16:30:14 LG-NAS with-Genera[150N] : Service "LG-NAS- 2" /kdc/kda/servico/la/bra.service/ successfully installed notes.](/content/2026/05/979433/images/376f36bf8b268f7e7b1d1c62285d62567c2d9adf3c82758635cdbe556ec2f802.jpg)
Self-diagnosis execution
The LG Network Storage, by virtue of built in self-diagnosis mode, helps users easily recognize and handle problems arising on the server.
* The volume must first be constructed before running self-diagnosis.
① Open the administrator's web menu and go to "Information → Log" menu and select "Self-diagnosis" tab to immediately execute the LG Network Storage self-diagnosis.
![Log • System Log • Gambe Log • FTP Log • Cell-diagnosis Dias Item Sub Item Test result VOC_CODE Version Code DAC_CODE[30_30] MAC Address 20.90.82 30.02.92 Version Main IC AD-00F6100A-NAS Version System 3.5.6_1001 Version User 3.4.15 Version Mites 90070150 Version Kernel Update:UG-RAS 2.8.22.18 #97 Mon Jul 27 20/35/48 KST 2008 arm-dial #NOSVR FEV.35](/content/2026/05/979433/images/869c5f528c98bb3e22f38ddef9d8e5ffae885b299d20e9075a03ab6a965687ab.jpg)
② Even in the middle of usage, the administrator can open up the administrator web menu and select the 'Self-diagnosis' tab in the 'Information > Log' menu, so the LG Network Storage immediately runs self-diagnosis.
System failure or malfunction
If the LG Network Storage does not display SVC_CODE[00_00] which verifies normal status and seems to have encountered a problem after running a 'Self-diagnosis' on the administrator web as stated above in section 7.4, follow the steps below.
① For technician's reference, write down the error code appearing on the LCD '[SVC_CODE xx_yy] and make a record on tasks done before the accident and messages you witnessed.
② For error messages mentioned in ①, you can get help from LG electronics Service Site if such errors were caused by negligence. http://www.lge.com.
③ When no solution exists, do not disassemble and call the service center for remote technical support.
Power cut or failure
When power failure occurs, the LG Network Storage will return to its former pre-power-failure state after reboot. In case of system malfunctions under normal environment, observe the following procedure.
① If the system settings are modified, the user must perform a new set up after reboot.
② If the system is still acting strangely contact the service centre.
To prevent data loss, frequently back up files.
① Follow the above description for shutdown/restart.
② In the case that a potential shut down is expected, all files must be saved and backed up. After the power is restored, reboot the system.
System temperature protection
If HDD temperature within the system exceeds 67 degrees Centigrade or 153 degrees Fahrenheit, the system ends automatically and to protect hardware.
8. RAID trouble shooting
The LG Network Storage RAID configuration is abnormal when error messages appear, hence resort to another solution:
Note: To avoid data obstacles, first perform a back-up of all important data from the LG Network Storage.
1. RAID configuration error checkup
- Confirm whether there is an error on the RAID configuration:
① On the Status Information/Volume page, the volume configuration state will show as "degraded/destroyed".
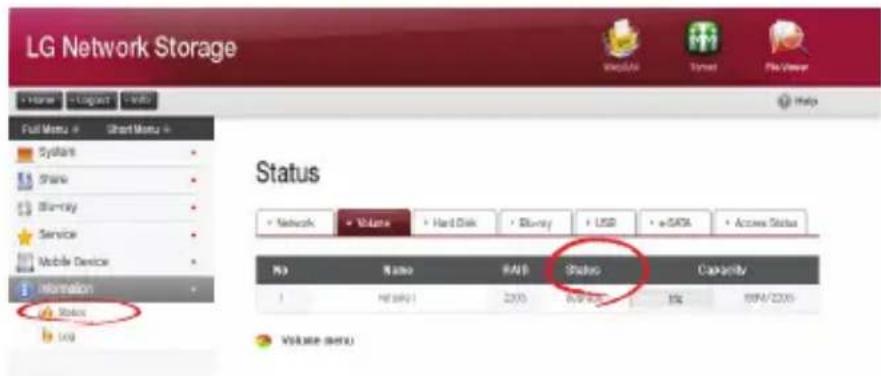
- Confirm which HDD is causing the RAID error.
① LED: The LG Network Storage state LED will appear as red.
② Hard disk with error will not appear in the hard disk status window.
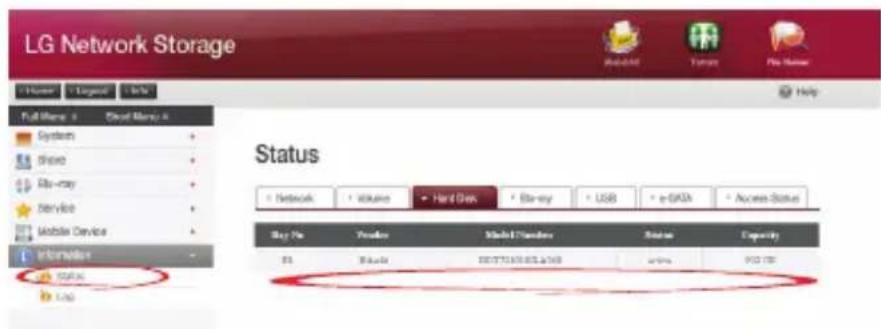
8. RAID trouble shooting
2. Problem solutions
Removing the HDD with the error and connecting a new hard drive (e.g. HDD 2) will display the new hard disk status to be inactive on the system/volume/add or remove HDD page. Select the hard disk and click the Add button and RAID will reconfigure. This will delete all contents of the new hard disk.
RAID reconstruction entails to RAID 1 only.
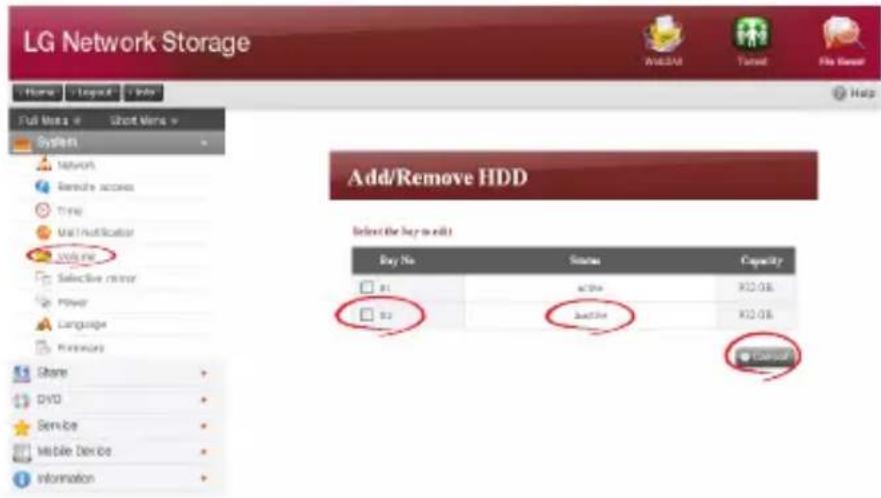
If there is another failure during reconfiguration, another hard disk should be connected in place of the hard disk at work and reconfigure RAID.

When connecting or disconnecting the HDD, strictly adhere to the following procedure and avoids abnormal system operation or data obstruction.
- In the LG Network Storage, one HDD can be connected or disconnected at a time.
- 10 seconds will lapse before 2 tones are heard when the LG Network Storage is connected to or disconnected from a new hard drive. Next, connect or disconnect the HDD.
Appendix A Volume Construction & RAID Configuration
This section describes volume configuration and supported RAID level. When configuring volume using RAID, the use of Disks of the same manufacturer and capacity is recommended to maximize stability and efficiency of configuration. In the case that the Disks differ in capacity and trademark, data may be lost due to low system stability and efficiency. In the case that the volume of the damaged Disk must be amended, relevant data must first be backed up.
• Single Disk (None) volumes
The volume can be configured to each Disk without configuring the RAID. This is similar to methods with general PCs that use Disks.
If the Disk is damaged, the damaged Disk data may be lost.
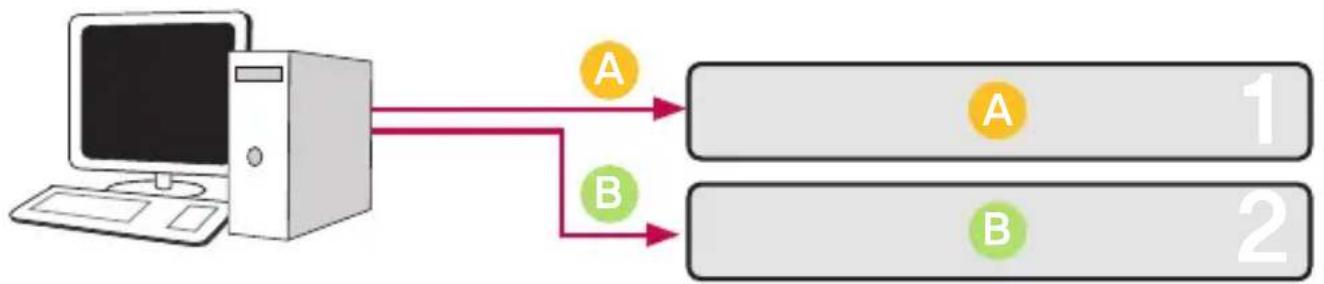
flowchart
graph TD
    A["Computer"] -->|A| B["Block 1"]
    A -->|B| C["Block 2"]
8. RAID trouble shooting
- Mirroring volumes
Data can be exactly replicated to the Disk through this technique. If one Disk becomes damaged in the volume, data can be efficiently transferred, saved and backed up to another configured Disk. The volume's storage capacity is equal to that of the smallest Disk in the RAID1, as the data is reproduced from Disk to Disk. The data backup is a priority during RAID1.
The saving of important data is recommended.
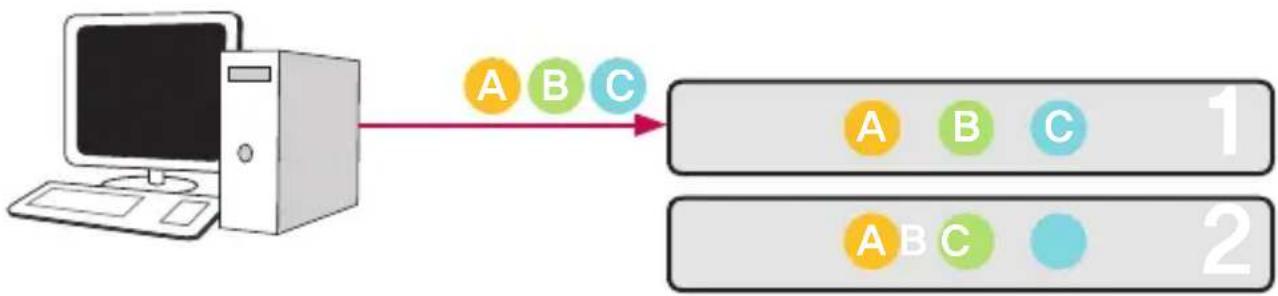
flowchart
graph LR
    A["Computer"] --> B["Block 1: A B C"]
    B --> C["Block 2: A B C"]
8. RAID trouble shooting
• RAID0 striping volume
The Disks are configured in parallel so that they are all being used at once to store data, as if they were one Disk in summation. Because the data is saved to each Disk in parallel, many files of low capacity are read simultaneously but with superior efficiency. Many low capacity files are read because multiple blocks of data are stored to each Disk, though the performance is excellent at this time. In order to secure data stored, Information is not read when at least one Disk is damaged. Subsequently, if the Disk is damaged, the saved data in the volume will be lost. The storage capacity of the volume as a whole is the sum of the capacities of all of the Disks.
This technique must not be used for the saving of important data, but rather for fast data access and for maintenance of the security of its volume capacity.
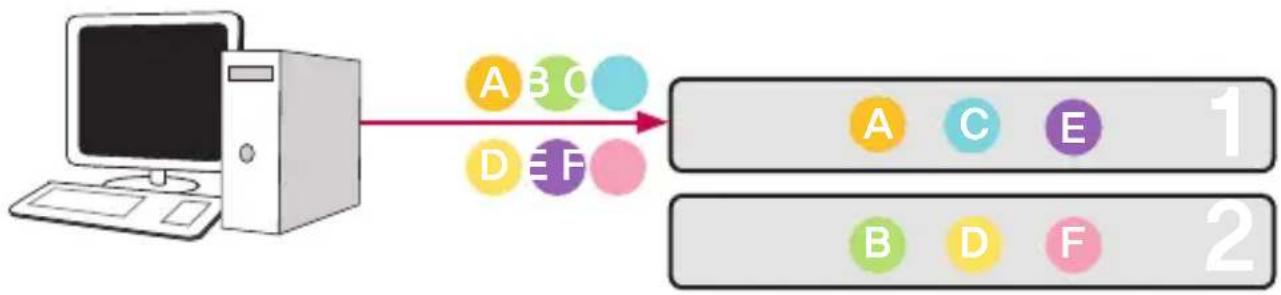
flowchart
graph LR
    A["Computer"] --> B["Block 1: A C E 1"]
    A --> C["Block 2: B D F 2"]
8. RAID trouble shooting
- JBOD Linear volume
The Disks are configured in series so that they are all being used at once to store data, as if they were one Disk in summation. The volume's storage capacity can be maximized, as the data is stored to the Disks in sequence. Data must not be written in the event of a damaged Disk to safeguard saving capacity. In this way, if a Disk is damaged, saved date in the volume will be lost. The storage capacity of the volume as a whole is the sum of the capacities of all of the Disks. To maximize the safeguard of capacity of the volume, saving of important data is not recommended.
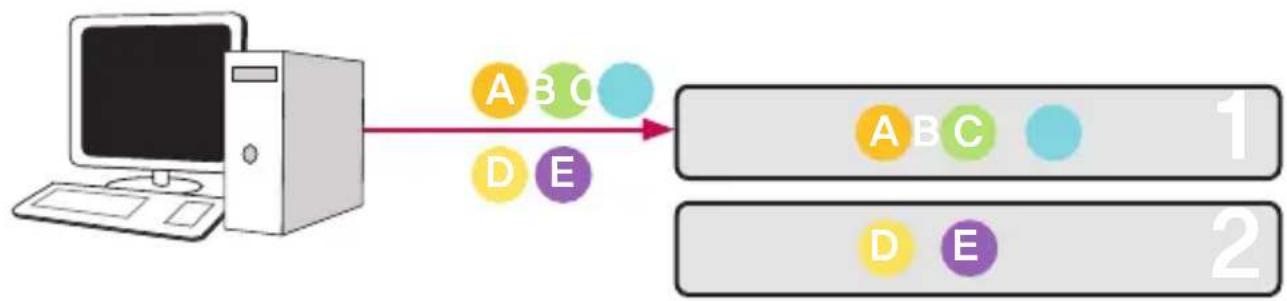
flowchart
graph LR
    A["Computer"] --> B["Block 1: ABC, DE"]
    B --> C["Block 2: D E"]
Appendix B Technical Support
LG Network Storage provides dedicated online support and customer service via instant messenger.
You can contact us by the following means:
-. Online Support : http://www.lgservice.com
LG Electronics U.S.A. Inc, 1000 Sylvan Ave.
Englewood Cliffs NJ 07632 U.S.A or http://www.lgusa.com
D-47877 Willich, Germany
Goldstar France E.U.R.L Paris Nord II 22, Avenue des Nations-B.P.50372
VILLEPINTE 95945 ROISSY CDG CEDEX France
LG Electronics España Complejo Europa Empressaries (Edif. Bruselas)
Ctra, N-VI 28230 Las Rozas Madrid Spain
Appendix C Open source software notice
The following GPL executables and LGPL libraries used in this product are subject to the GPL/LGPL License Agreements:
GPLv2.0 :
- apcupsd
- apt
- base-files
- base-passwd
- bash
- bootchart
- busybox
- bzip2
- ca-certificates
- cdrtools
- dbus
- debian-archive-keyring
- debianutils
- dpkg
- dvd+rw-tools
- e2fsprogs
- file-rc
gcc - gpm
- grep
- hostname
- ifplugd
- ifupdown
- inadyn
- inotify-tools
- jQuery
- krb5
- libcap
- libgdbm
- libid3tag
- Linux Kernel
8. RAID trouble shooting
- lockfile-progs
- logrotate
- lprng
- Isb
- Izo
- module-init-tools
- mtd
- mt-daapd
- netataTalk
- netbase
- net-tools
- noflushd
- ntfs-3g
- pam
- perl
• proftpd - psmisc
- readline
- scst-iscsi
- sed
- sg3-utils
- shadow
- smbwebclient
- ssmtp
- sysklogd
- time
- transmission
- u-boot
- udev
- util-linux
GPLv3.0 :
- binutils
- gnupg
- parted
- rsync
- samba
- wget
LGPLv2.1 :
- acl
- Ajaxplorer
- attr
- avahi
- codepress
- confuse
- debmapper
- dialog
- glib2.0
- glibc
- gmp
- gnutls8
- keyutils
- libdaemon
- libexif
- libgcrypt
- libgpg-error
- libiconv
- libidn
- liblockfile
- libscew
- libtasn1
- libusb
- Izma
- mpfr
- packer
- ufo
8. RAID trouble shooting
LG Electronics offers to provide source code to you on CD-ROM for a charge covering the cost of performing such distribution, such as the cost of media, shipping and handling upon e-mail request to LG Electronics at:
opensource@lge.com
This offer is valid for a period of three (3) years from the date of the distribution of this product by LG Electronics.
You can obtain a copy of the GPLv2.0, GPLv3.0, LGPLv2.1 licenses from
http://www.gnu.org/licenses/old-licenses/gpl-2.0.html,
http://www.gnu.org/licenses/gpl-3.0.html
http://www.gnu.org/licenses/old-licenses/lgpl-2.1.html.
Also you can obtain the translation of GPLv2.0, GPLv3.0, LGPLv2.1 licenses from
http://www.gnu.org/licenses/old-licenses/gpl-2.0-translations.html, http://www.gnu.
org/licenses/translations.html,
http://www.gnu.org/licenses/old-licenses/lgpl-2.1-translations.html.
This product includes
- Berkeley DB under Berkeley DB license (http://www.oracle.com/technology/software/products/berkeley-db/htdocs/oslicense.html) Copyright © 1990–2008 Oracle Corporation.
Copyright © 1990, 1993, 1994, 1995 The Regents of the University of California Copyright © 1995, 1996 The President and Fellows of Harvard University.
- openLDAP under openLDAP Public License (http://www.OpenLDAP.org/license.html.)
Copyright © 1998-2007 The OpenLDAP Foundation
WebFX under Apache License 2.0(http://www.apache.org/licenses/)
Apache HTTP Server under Apache License 2.0
Copyright © 2006 The Apache Software Foundation.
This product includes software developed at The Apache Software Foundation (http://www.apache.org/).
Portions of this software were developed at the National Center for Supercomputing Applications (NCSA) at the University of Illinois at Urbana-Champaign.
This software contains code derived from the RSA Data Security Inc. MD5 Message-Digest Algorithm, including various modifications by Spyglass Inc., Carnegie Mellon University, and Bell Communications Research, Inc (Bellcore)
This work includes the Expat xml parsing library Copyright (c) 1998, 1999 James Clark, distributed under and subject to the Mozilla Public License Version 1.1.
This work includes the regex library Copyright 1992, 1993, 1994 Henry Spencer, all rights reserved.
This product includes other open source software.
- bind9 :
Copyright © 2004-2008 Internet Systems Consortium, Inc. ("ISC")
Copyright © 1996-2003 Internet Software Consortium.
Copyright © 1996-2001 Nominum, Inc. - cyrus-sasl2: Copyright © 1998-2003 Carnegie Mellon University
- debconf: Copyright © 1999-2006 Joey Hess joeyh@debian.org.
- dhcp3: Copyright © Internet Systems Consortium (ISC) dhcp-users@isc.org
• dibi : Copyright © 2005, 2008 David Grudl (http://davidgrudl.com) - file:
Copyright © 1985–1995 Ian F. Darwin
Copyright © 1994-2008 Christos Zoulas christos@zoulas.com
Javascript MD5 : Copyright © 1998 – 2009, Paul Johnston & Contributors
- Libcurl: Copyright (c) 1996 – 2008, Daniel Stenberg, daniel@haxx.se
- Libpcap: Copyright © 1993–2008 The Regents of the University of California.
- Libssh :
Copyright (c) 2004-2007 Sara Golemon sarag@libssh2.org
Copyright (C) 2006-2007 The Written Word, Inc.
- Libxml:
Copyright © 1998-2002 Daniel Veillard.
Copyright © 1998-200 Bjorn Reese and Daniel Stenberg.
Copyright © 2000 Gary Pennington and Daniel Veillard.
• Lighttpd: copyright © 2004, Jan Kneschke, incremental
- Ncurses: Copyright © 1998 Free Software Foundation, Inc.
- ntp: Copyright © David L. Mills 1992–2006
- pcre:
Copyright © 1997-2007 University of Cambridge
Copyright © 2007, Google Inc.
- PHP5 software, freely available from http://www.php.net/software/.
Copyright © 1999 – 2009 The PHP Group.
- popt: Copyright © 1998 Red Hat Software
- portmap:
Copyright © 1983,1991 The Regents of the University of California
Copyright © Sun Microsystem.
8. RAID trouble shooting
- Prototype JavaScript framework: Copyright © 2005–2008 Sam Stephenson
- Scriptaculous : Copyright © 2005–2008 Thomas Fuchs (http://script.aculo.us, http://mir.aculo.us)
- sudo:
Copyright © 1994–1996, 1998–2005, 2007 Todd C. Miller Todd.Miller@courtesan.com Copyright © 1987, 1989, 1990, 1991, 1993, 1994 The Regents of the University of California - tcp-wrappers: Copyright © 1995 by Wietse Venema
- Expat: copyright © 2006 expat maintainers.
- OpenSSL: software developed by the OpenSSL Project for use in the OpenSSL Toolkit. (http://www.openssl.org/)
- cryptographic software written by Eric Young (eay@cryptsoft.com).
- software written by Tim Hudson (tjh@cryptsoft.com).
- software developed by the OpenSSL Project for use in the OpenSSL Toolkit. (http://www.openssl.org)
• Zlib: Copyright © 1995-2002 Jean-loup Gailly and Mark Adler.
All rights reserved.
Permission is hereby granted, free of charge, to any person obtaining a copy of this software and associated documentation files (the "Software"), to deal in the Software without restriction, including without limitation the rights to use, copy, modify, merge, publish, distribute, sublicense, and/or sell copies of the Software, and to permit persons to whom the Software is furnished to do so, subject to the following conditions:
THE SOFTWARE IS PROVIDED "AS IS", WITHOUT WARRANTY OF ANY KIND, EXPRESS OR IMPLIED, INCLUDING BUT NOT LIMITED TO THE WARRANTIES OF MERCHANTABILITY, FITNESS FOR A PARTICULAR PURPOSE AND NONINFRINGEMENT. IN NO EVENT SHALL THE AUTHORS OR COPYRIGHT HOLDERS BE LIABLE FOR ANY CLAIM, DAMAGES OR OTHER LIABILITY, WHETHER IN AN ACTION OF CONTRACT, TORT OR OTHERWISE, ARISING FROM, OUT OF OR IN CONNECTION WITH THE SOFTWARE OR THE USE OR OTHER DEALINGS IN THE SOFTWARE.
Appendix D Compatible/Recommended Device List
For the latest compatible/recommended device list, please visit http://www.lge.com.
Recommendation hard disk list
The following is a list of hard disks possibly compatible with the LG Network Storage.
The following hard disks are recommended. In the case of using hard disks not
recommended by LG Electronics, malfunctions in the LG Network Storage can occur.
For updated hard disk recommendations, go to the link http://www.lge.com.

- User Guide and Instruction Manual
- LG Network Storage
- Safety warning
- Contents
- Safety warning 2
- Introduction ...... 10
- LG Network Storage Installation ....14
- LCD panel and front button usage .....32
- LG Network Storage Web Menu Use (for LG Network Storage administrators) 46
- System Settings 46
- LG Network Storage Share Management 76
- Blu-ray / DVD 82
- Service 86
- USB Sync 115
- Information 120
- Top menu 124
- LG Network Storage web menu usage (Regular users) 127
- LG Network Storage via network drive 132
- LG Network Storage Maintenance .... 142
- RAID trouble shooting 146
- Introduction
- LG Network Storage Introduction
- Supported OS
- Package Contents
- Name of Each Part
- LG Network Storage Installation
- Hard disk installation and setup
- ‘LG Network Storage Installer’ installation (LG Network Storage system file installation, volume and RAID configuration)
- LG Network Storage Connection
- If the network component (home router/router/switch/hub) is used to connect
- If the LG Network Storage is connected directly to the PC without another network device,
- ‘LG Network Storage PC S/W Installer’ installation (PC Application program installation and usage)
- NAS Detector
- NAS Monitor
- Comnso Backup
- CyberLink
- Photo DVD Album
- PC application program installation
- PC Application Program Usage
- <“NAS Detector” usage>
- < Using the LG Network Storage web menu >
- LCD panel and front button usage
- Power Off / On (POWER button)
- Power On
- Power Off
- Icon Description
- Action set-up ('←', '→' buttons)
- Information Mode
- [IP Address Information]
- [System Firmware Version Information]
- [Micom Firmware Version Information]
- [HDD Usage Capacity]
- [Date and Time Information]
- [FAN RPM Information]
- IP SETTING MODE
- USB Back-up Mode
- [Simple Back-up - OneTouch Back-up]
- [USB Back-up Mode]
- ODD Backup Mode
- Backup data on discs using LG Network Storage (ODD Backup)
- [Data Copy]
- [Image Copy]
- Hibernation Mode
- Tray open / close (DISC OPEN button)
- LG Network Storage Web Menu Use (for LG Network Storage administrators)
- System Settings
- Network
- Host
- Interface
- [To acquire an IP address automatically]
- Workgroup/Domain
- Remote Access
- DDNS (Dynamic DNS)
- [UPnP]
- Date & Time
- Date and Time Setup
- NTP Set-up
- Mail Notification
- Volume Set-up
- Volume Configuration
- Add disk
- Add/Remove HDD
- Remove disk
- Hot Swap
- Trahsbox
- Selective Mirror (Selective data protection for folders)
- Add Selective Mirror List
- Edit Selective Mirror List
- Delete Selective Mirror List
- Use Selective Mirror
- Conditions
- Power
- Hibernation Setup
- UPS Power Setting
- Hibernation Mode On/Off
- Now Working...
- Hibernation Done
- Shutdown
- Activating the System Remotely
- Language Setting
- Firmware
- Upgrade
- [System Firmware Upgrade]
- [Blu-ray/DVD Drive Firmware Upgrade]
- Initialization
- Configuration Back-up
- [Backup]
- [Restore]
- [Save Settings to PC and Restore]
- [Save Configuration Files to PC]
- [Restore NAS User Settings Saved on PC]
- LG Network Storage Share Management
- User
- [Create User]
- [Edit User]
- Group
- [Creating a New Group]
- [Editing Groups]
- Folder
- [Create New Folder]
- [Folder Attributes]
- Blu-ray / DVD
- Burning
- Burn Disc
- [Button functions]
- Service
- DLNA(Digital Living Network Alliance)
- [Activate/Deactivate DLNA]
- [Save Multimedia data in source path]
- Note
- [View Multimedia Using DLNA]
- Using DLNA of a PC with Microsoft® Windows7®
- [Playing DLNA server contents on PS3 TM ]
- [Manually search DLNA server in PS3 TM ]
- [Using DLNA in Digital Image Frame]
- [Using DLNA as AV Device]
- Network Server
- FTP
- AFP
- Network Printer
- [Windows users]
- [Mac users]
- iTunes
- Time Machine
- [Web Set-up]
- [Mac OS]
- iSCSI
- [iSCSI Initiator Installation]
- Initiator Installation on a Windows PC
- Website
- Initiator Installation on a Linux PC
- Initiator Installation on a Mac
- [Server Synchronization]
- [iSCSI Connection]
- Connection on a Windows PC
- ③ Log in.
- Connection on a Linux PC
- [Connection for CHAP certification]
- Websites
- Connection on a Mac
- ④ Confirm that the target is connected as follows.
- Torrent
- [Download]
- [Use]
- USB Sync
- USB Device & Memory Card
- [Current USB List]
- Information
- Status
- Log
- Top menu
- WebDAV
- My Information
- LG Network Storage web menu usage (Regular users)
- LG Network Storage via network drive
- Accessing the LG Network Storage data in Windows OS
- Windows OS "Execute" function use
- Windows File Sharing Use
- Tip) Post server connection, network drive set-up
- MAC OS connection
- ["Server connect" function use]
- Linux OS access
- LG Network Storage Maintenance
- LG Network Storage shut down/restart
- Administrator password and network set up initialization
- System information checking and saving
- Self-diagnosis execution
- System failure or malfunction
- Power cut or failure
- System temperature protection
- RAID trouble shooting
- RAID configuration error checkup
- Problem solutions
- Appendix A Volume Construction & RAID Configuration
- • Single Disk (None) volumes
- - Mirroring volumes
- • RAID0 striping volume
- - JBOD Linear volume
- Appendix B Technical Support
- Appendix C Open source software notice
- GPLv2.0 :
- GPLv3.0 :
- LGPLv2.1 :
- This product includes
- Appendix D Compatible/Recommended Device List
Brand : LG
Model : N2B1D
Category : NAS