
HBP 413BL8-80 - Washing machine HOOVER - Free user manual and instructions
Find the device manual for free HBP 413BL8-80 HOOVER in PDF.
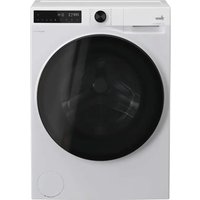


| Product Type | Freestanding Washing Machine |
| Model | HBP 413BL8-80 |
| Brand | Hoover |
| Capacity | 8 kg |
| Spin Speed | 1400 rpm |
| Energy Class | A+++ |
| Dimensions (HxWxD) | 85 x 60 x 52 cm |
| Weight | 65 kg |
| Power Supply | 220-240 V / 50 Hz |
| Water Connection | Cold water only |
| Number of Programs | 15 |
| Key Programs | Cotton, Synthetics, Delicates, Wool, Eco, Quick 30 min |
| Additional Features | Delay start, Child lock, Variable spin speed |
| Display | LED digital |
| Noise Level (Wash/Spin) | 52 dB / 72 dB |
| Annual Water Consumption | 9600 L |
| Annual Energy Consumption | 190 kWh |
| Maintenance | Clean detergent drawer and door gasket regularly; run drum cleaning program monthly |
| Safety Features | Overflow protection, unbalanced load detection, safety lock |
| Spare Parts Availability | Spare parts available for 10 years |
| Repairability Index | 8.5 / 10 |
| Warranty | 2 years |
Frequently Asked Questions - HBP 413BL8-80 HOOVER
User questions about HBP 413BL8-80 HOOVER
0 question about this device. Answer the ones you know or ask your own.
Ask a new question about this device
Download the instructions for your Washing machine in PDF format for free! Find your manual HBP 413BL8-80 - HOOVER and take your electronic device back in hand. On this page are published all the documents necessary for the use of your device. HBP 413BL8-80 by HOOVER.
USER MANUAL HBP 413BL8-80 HOOVER
Thank you for purchasing a Hoover Product.
Please read these instructions carefully before using this appliance. The instructions contain important information which will help you get the best out of the appliance and ensure safe and proper installation, use and maintenance.
Keep this manual in a convenient place so you can always refer to it for the safe and proper use of the appliance.
If you sell the appliance, give it away, or leave it behind when you move house, make sure you also pass this manual so that the new owner can become familiar with the appliance and safety warnings.
Legend

Warning - Important Safety information
General information and tips
Environmental information
NOTE: FOR U.K. ONLY

On receipt of your appliance please check it carefully for damage. Any damage found must be reported to the delivery driver immediately. Alternatively damage found must be reported to the retailer within 2 days of receipt.
Environmental conditions
This appliance is marked according to the European directive 2012/19/EU on Waste Electrical and Electronic Equipment (WEEE).
WEEE contains both polluting substances (which can cause negative consequences for the environment) and basic components (which can be reused). It is important to have WEEE subjected to specific treatments, in order to remove and dispose properly all pollutants, and recover and recycle all materials. Individuals can play an important role in ensuring that WEEE does not become an environmental issue; it is essential to follow some basic rules:
• WEEE should not be treated as household waste;
- WEEE should be handed over to the relevant collection points managed by the municipality or by registered companies. In many countries, for large WEEE, home collection could be present.
In many countries, when you buy a new appliance, the old one may be returned to the retailer who has to collect it free of charge on a one-to-one basis, as long as the equipment is of equivalent type and has the same functions as the supplied equipment.

WARNING!
Risk of injury disinfoca
Disconnect the appliance from the mains supply. Cut off the mains cable and dispose of it. Remove the door catch to prevent children and pets to get closed in the appliance.
1 - Safety information.... 4
2- Installation....7
3- Practical hints.... 11
4- Product description....13
5- Control panel....14
6-Programmes 19
7-Consumption 22
8- Dlase....23
9- Remote.control.(Wi-Fi).... 28
10- Care and cleaning.... 30
11- Troubleshooting.... 33
12- Technical data 36
13 - Customer service 37
Before switching on the appliance for the first time read the following safety hints!

WARNING!
Daily use
This appliance is intended to be used in household and similar applications such as:
- Staff kitchen areas in shops, offices and other working environments;
- Farm houses;
- By clients in hotels, motels and other residential type environments;
- Bed and breakfast type environments.
A different use of this appliance from household environment or from typical housekeeping functions, as commercial use by expert or trained users, is excluded even in the above applications. If the appliance is used in a manner inconsistent with this it may reduce the life of the appliance and may void the manufacturer's warranty. Any damage to the appliance or other damage or loss arising through use that is not consistent with domestic or household use (even if located in a domestic or household environment) shall not be accepted by the manufacturer to the fullest extent permitted by law.
This appliance can be used by children aged from 8 years and above and persons with reduced physical, sensory or mental capabilities or lack of experience and knowledge if they have been given supervision or instruction concerning use of the appliance in a safe way and understand the hazards involved.
Children shall not play with the appliance. Cleaning and user maintenance shall not be made by children without supervision.
▶ Children should be supervised to ensure that they do not play with the appliance.
Children of less than 3 years should be kept away unless continuously supervised.
If the supply cord is damaged, it must be replaced by a special cord or assembly available from the manufacturer or its service agent.
▶ Only use the hose-sets supplied with the appliance for the water supply connection (do not reuse old hose-sets).
▶ Water pressure must be between 0.03 MPa and 1 MPa.
▶ Make sure carpets or rugs do not obstruct the base or any of the ventilation openings.
▶ After installation, the appliance must be positioned so that the plug is accessible.
The maximum load capacity of dry clothes depends on the model used (see control panel).
▶ To consult the product technical specification please refer to the manufacturer website.
Electrical connections and safety instructions
The technical details (supply voltage and power input) are indicated on the product rating plate.
▶ Make sure that the electrical system is earthed, complies with all applicable law and that the (electricity) socket is compatible with the plug of the appliance. Otherwise, seek qualified professional assistance.
The use of converters, multiple sockets or extension cords is strongly advised against.
Before cleaning or maintaining the washing machine, unplug the appliance and turn off the water tap.
▶ Do not pull on the power cord or appliance to unplug the machine.
▶ Make sure there is no water in the drum before opening the door.

WARNING!
Water may reach very high temperatures during the wash cycle.
▶ Do not expose the washing machine to rain, direct sunlight or other weather elements. Protect from possible freezing.
When moving, do not lift the washing machine by the knobs or detergent drawer; during transport, never rest the door on the trolley. We recommend two people lift the washing machine.
In the event of fault and/or malfunction, turn off the washing machine, close the water tap and do not tamper with the appliance. Immediately contact the customer service centre and only use original spare parts. Failure to observe these instruction may jeopardise appliance safety.
1-Safety information
EN
Intended use
This appliance is intended for washing machine-washable laundry only. Anytime follow the instructions given on the label of each garment label. It is designed exclusively for domestic use inside the house. It is not intended for commercial or industrial use.
Changes or modifications to the device are not allowed. Unintended use may cause hazards and loss of all warranty and liability claims.
2.1 Preparation
▶ Make sure there is no transport damage.
▶ Make sure all transport bolts are removed.
▶ Handle the appliance always with at least two persons because it is heavy.
▶ Take the appliance out of the packaging.
Remove all packaging material including protecting film on cabinet, polystyrene base, keep them out of children reach. While opening the package, water drops may be seen on plastic bag and porthole. This normal phenomenon results from water tests in the factory.

Note: Packaging disposal
Keep all packaging materials out of children's reach and dispose them in an environmentally friendly manner.
2.2 OPTIONAL: Install noise reduction pads
- When opening the shrink package, you will find four noise reduction pads. These are used for reducing noise (Fig. 2-1).
- Lay the washing machine down to its side, porthole pointing upwards, bottom side towards operator.
- Take out the noise reduction pads and remove the double-sided adhesive protective film; paste around the bottom; the noise reduction pads under the washing machine cabinet as shown in Figure 3 (two longer pads in position 1 and 3, two shorter pads in position 2 and 4). Finally set the machine upright again.

2.3 Dismantle the transportation bolts
The transport protection on the rear side is designed for clamping anti-vibration components inside the appliance during transportation to prevent inner damage. All elements (T1, T2, T3 and T4, Fig 2-2) must be removed before use.

- Remove all 4 bolts (T1 - T4) (Fig. 2-3).
- Fill the 5 holes with blanking plugs.


Note: Keep in safe place
Keep all parts of the transport protection in a safe place for later use. Whenever the appliance is to be moved at first reinstall the protection parts.
2.4 Moving the appliance
If the machine is to be moved to a distant location, replace the transportation bolts removed before installation to prevent damage: The assembly takes place in reverse order.

2.5 Aligning the appliance
Adjust all feet (Fig.2-4) to achieve a complete level position. This will minimize vibrations and thus noise during use. It will also reduce wear and tear. We recommend to use a spirit level for adjustment. Floor should be as stable and flat as possible.
- Loose the locknut (1) by using a wrench.
- Adjust the high turning the foot (2).
- Tighten locknut (1) against the housing.
2.6 Aligning the appliance
Fix the water drain hose properly to the piping. The hose has to reach at one point a height between 80 and 100 cm above the appliance bottom line! if possible keep always drain hose fixed to the clip at the appliance back.

WARNING!
▶ Use only the supplied hose set for the connection.
▶ Never reuse old hose sets!
▶ Only connect to cold water supply.
Before connection, check whether the water is clean and clear.
Following connections are possible:
2.6.1 Drain hose to sink
▶ Hang the drain hose with the U-support over the edge of a sink with adequate size (Fig. 2-5).
▶ Protect the U-support sufficiently against slipping.
2.6.2 Drain hose to waste water connection
The internal diameter of the stand pipe with vent-hole must be minimum 40 mm.
Put the drain hose for 80-100 mm in the wastewater pipe.
▶ Attach the U-support and secure it sufficiently (Fig. 2-6).

2.6.3 Drain hose to sink connection
The Junction must lie above the siphon.
▶ A spigot connection is usually closed by a pad (A). That must be removed to prevent any disfunction (Fig. 2-7).
▶ Secure the drain hose with a clamp.


CAUTION!
The drain hose should not be submerged in water and should be securely fixed and leak-free. If the drain hose is placed on the ground or if the pipe is at a height of less than 80 cm, the washing machine will continuously drain while being filled (self-siphoning).
Drain hose is not to be extended. If necessary contact after sales service.
2.7 Drain hose to sink connection
Make sure that the gaskets are inserted.
-
Connect the water inlet hose with the angled end to the appliance (Fig.2-8). Tighten the screw Joint by hand.
-
The other end connects to a water tap with a 3/4 thread (Fig.2-9).


2.8 Electrical Connection
Before each connection check if:
▶ power supply, socket and fusing are appropriate to the rating plate.
the power socket is earthed and no multi-plug or extension are used.
▶ the power plug and socket are strictly according.
▶ Only UK: The UK plug meets BS1363A standard.
Put the plug into the socket (Fig. 2-10).

WARNING!
▶ Ensure always that all connections (power supply, drain and fresh water hose) are film, dry and leack free!
▶ Take care these parts are never to be crushed, kinked, or twisted.
If the supply cord is damaged, it must be replaced by the service agent (see warranty card) in order to avoid a hazard.
3.1 Load tips
When sorting laundry, make sure:
- have eliminated metallic objects such as hair clips, pins, coins, from laundry;
- to have buttoned pillow cases, closed zips, tied loose belts and long robe ribbons;
- to have removed rollers, hooks or clips from curtains;
- to have carefully read clothing washing labels;
- to have removed any persistent stains using specific detergents.
When washing rugs, bedcovers or other heavy clothing, we recommend you avoid the spinning cycle.
▶ To wash wool, make sure the item can be machine washed. Check the fabric label.
Leave the appliance's door slightly open between washes, to prevent possible bad smells developing inside the machine.
3.2 Useful advice for saving
Tips on how to save money and not damage the environment when using your appliance.
Load the machine with suggested capacity shown in the programme table for each programme - this will allow you to SAVE energy and water.
▶ Noise and residual laundry moisture are affected by spin speed: a faster spin is associated with greater noise and lower residual moisture in the laundry.
The most efficient programmes in terms of combined use of water and energy are usually the longer-lasting ones with lower temperature.
▶ Scan QR code on energy label for energy consumption information. The actual energy consumption may differ from the declared one according to local conditions.
Maximise the load size
▶ Achieve the best use of energy, water, detergent and time by using the recommended maximum load size.
Save up to 50% energy by washing a full load instead of 2 half loads.
Do you need to pre-wash?
▶ For heavily soiled laundry only!
SAVE detergent, time, water and energy consumption by NOT selecting Prewash for slight to normally soiled laundry.
Is a hot wash required?
▶ Pretreat stains with stain remover or soak dried in stains in water before washing to reduce the necessity of a hot wash programme. Save energy by using a low temperature wash programme.
3.3 Dosing the detergent
Below is a short guide with tips and advice on the use of detergent
▶ Only use detergents suit wash fog machine.
▶ Select your detergent according to the type of fabric (cotton, delicates, synthetics, wool, silk, etc.), the colour, the type and level of soiling and the programmed washing temperature.
▶ To use the right amount of detergent, softener or any other additives, carefully follow
The manufacturer's instructions every time: correctly using the appliance with the right dose allow you to avoid waste and to reduce the environmental impact.

When washing heavily soiled whites, we recommend using cotton programs of 60° C or above and a normal washing powder (heavy duty) that contains bleaching agents that at medium/high temperatures provide excellent results.
For washes between 40° C and 60° C the type of detergent used needs to be appropriate for the type of fabric and level of soiling. Normal powders are suitable for "white" or colour fast fabrics with high soiling, while liquid detergents or "colour protecting" powders are suitable for coloured fabrics with light levels of soiling.
For washing at temperatures below 40° C, we recommend the use of liquid detergents or detergents specifically labeled as suitable for low temperature washing.
For washing wool or silk, only use detergents specifically formulated for these fabrics.
▶ Too much detergent leads to excessive foam, which prevents the cycle being carried out correctly. It could also affect the quality of the washing and rinsing.
The use of ecological detergents without phosphates may cause the following effects:
- cloudier rinse drain water: This effect is tied to the suspended zeolites which do not have negative effects on rinse efficiency.
- white powder (zeolites) on laundry at the end of the wash: this is normal, the powder is not absorbed by fabric and does not change its colour.
To remove the zeolites, select a rinse programme. In the future consider using slightly less detergent.
- foam in the water at last rinse: this does not necessary indicate poor rinsing. Consider using less detergent in future washes.
- abundant foam: This is often due to the anionic surfactants found in the detergents which are hard to eliminate from laundry.
In this case, do not re-rinse to eliminate these effects. It is invalid.
We suggest conducting a maintenance wash using a proprietary cleaner.
If the problem persists or if you suspect a malfunction, immediately contact an
Authorised Customer Service Centre.

Note:
Due to technical changes and different models, the illustrations in the following chapters may differ from your model.
4.1 Picture of appliance
Front (Fig. 4-1): Rear side (Fig. 4-2):

4.2 Accessories
Check the accessories literature in accordance with t t (Fig 45-3):

5-1

1 Programme selector
3 Detergent/Softener drawer
5 "Start/Pause" button
2 Display
4 Function buttons

Note: Acoustic signal
The acoustic signal can be selected or canceled if necessary; see DAILY USE (see P27 8.12).
5-2

5.1 Power button
Turn on/off the machine through this power button (Fig.5-2).
5-3
5.2 Programme selector
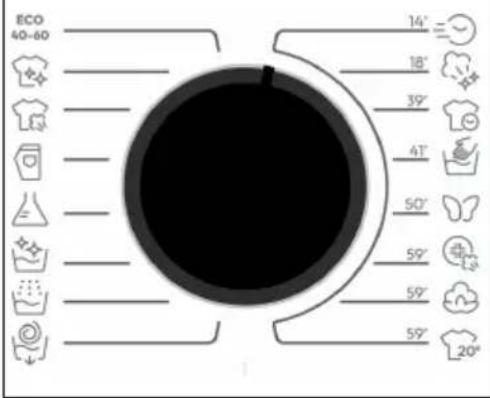
By turning the knob (Fig.5-3) one of 16 programmes can be selected, its default settings will be displayed.
5-4

5.3 Display
The display (Fig.5-4) shows following information:
▶ Program name
▶ Remaining time
▶ Reservation remaining time
▶ Alarm information and prompt information
▶ Pause end information
▶ Delay time
5.4 Detergent drawer
Open dispenser drawer, the following components can be seen (Fig. 5-5):
1: Compartment for powder or liquid detergent.
2: Detergent flap selector, lift it up for powder detergent, keep it down for liquid detergent.
3: Put a small amount of washing powder.
4: Compartment for softener.
5: Lock tab, press it down to pull out dispenser drawer.
The recommendation on the type of detergents is suitable for the various washing temperatures, please refer to the manual of detergent (see P27).

5.5 Function buttons
The function buttons (Fig. 5-6) enable additional options in the selected programme before programme starts. The related indicators are displayed.
By switching off the appliance or setting a new programme, all options are displayed.
If a button has multiple options, the desired option can be selected by pressing the button sequentially.
By touching the buttons, when it is in dull light, the function is unselected; when it is in bright light, the function is selected.


Note: Factory settings
To get best results in each programme, Hoover has defined specific default settings. If there is no special requirement, default setting are recommended.
5.5.1 Function button

- Touch this button(Fig.5-7) to display the corresponding temperature. If "0" is selected, the water will not be heated.
5.5.2 Function button

- Touch this button (Fig.5-8) to change or deselect the spin of programme. If no light is illuminated and display "----", the appliance will not spin.
5.5.3 Function button

- Touch this button, the screen will display "TURN THE DIAL AND PRESS THE SETUP KEY TO CONFIRM". Languages and beep types can be selected by the button.
- Touch the START/PAUSE button, the screen will display "LANGUAGE". Click again to display the language type, such as ENGLISH. Switch the language types by the knob, and touch the START/PAUSE button again to confirm it.
- The display for buzzing sound is "VOICE", then touch the START/PAUSE button to set the buzzing. Rotate the knob to display"ON"or"OFF" and touch the START/PAUSE button again to confirm.


5-10

5.5.4 Function button

- This button (Fig.5-10) allows you to preprogramme the wash cycle to with a maximum of 24 hours delay.
● To delay the start using the following procedures:
Select the required programme.
- Press the button once to activated the delay start and then press it again to set the desired delay. The delay increases in steps of 30 minutes, with a maximum of 24 hours delay.
- Confirm by pressing the START/PAUSE button. The delay countdown begin and when it has finished, the programme will start automatically.
- It is possible to cancel the delay start by turning the programme selector.
5-11

5.5.5 Function button

● The first icon is half load, which used for situations with less load or dirt.
- The second icon is intensive wash, which used for situations with high loads or dirty conditions, and the washing time will be longer.
● Half load and intensive wash can not run simultaneously.
5-12

5.5.6 Function button

- The first icon is easy iron, when this icon lights up, the maximum spin speed decrease.
Select the easy iron function, keep the washing machine running intermittently after dehydration, shake the clothes to prevent mildew and odor, while reducing wrinkles and making them smoother after drying. During the operation, the LED display shows "TUMBLING" and "-"---""----"and this phase lasts for 12 hours at most, users can touch "Start / Pause" to terminate the programme at any time.
- The second icon is night wash. Selecting this mode will turn off the beep and reduce the spin speed except for the alarm.
Under the "night wash" function, clothes are kept soaked in water after the last rinse to perfectly diffuse fibers. During the drum water retention stage, the machine will pause the timer, the LED display shows "PRESS PLAYTO COMPLETE THE CYCLE", which can last for 12 hours at most. After 12 hours, dehydration will begin and complete the program; during this period, press "Start/Pause" at any time to start dehydration and terminate the programmeat.
5.5.7 Function button

- The first icon is prewash, it allows you to make a prewash and it is particularly used for heavily soiled loads (only can be used on some programmes shown in the table. We recommend you use no or a small amount of detergent shown on the detergent pack.
- The second icon is extra rinse, it allows you to add one rinse at the end of the washing cycle. It is useful for people with delicate and sensitive skin, for which a small amount of residue may cause allergies. It is advisable to use this pro-gram for children clothes and for the washing of heavily soiled items, which require a large amount of detergent or for the washing of toweling items, whose fibre have the tendency to hold the detergent.

5.5.8 Function button

- Touch this button (Fig.5-14) to select the network. If the machine is not paired to "hOn" App, short press the button is to start the pairing process.
- If the appliance has been paired to "hOn" App, short press the button is to start the remote control.
- Long press this button is to delete the pairing credentials.

5.5.9 Function button ">||"
- Touch this button (Fig.5-15) gently to start or interrupt the currently displayed programme.

5.5.10 Function button

- Press the SPEED and SETTING S button simultaneously to activate the child lock mode.
- Child Lock cannot be set up or cancelled through hOn APP.

5-Control panel
5.6 First starting
5.6.1 Language setting
- Power on the machine and press this button ">>| |" to set languages and sounds.
- To switch languages, rotating the knob and click "">|| to confirm your choice.
- Rotating the knob to turn on or off the beep sound, then click "">|| to confirm.
Yes
○ Optionals
/ No

Detergent compartment for:
① Detergent
② Softener or care product
③ Prewash 1)
1) A little detergent can be added only with the pre-wash function.
2) This button also for selecting duration of rapid care and different steam intensities as explained in the delicated paragraphs, but the light is not illuminated.
3) This function can only be selected after adjusting the temperature to cancel the icon.
4) The marked time is under the default function option and maximum load state. If the above conditions are not met, the displayed time shall prevail. The display time on the display screen is the reference time. Due to reasons such as water temperature and pressure, it may differ from the actual operating time.
Description of programmes
To clean different types of fabrics and various levels of dirt, the washing machine has specific programs to meet every need of washing (see table of programmes).

Choose programme in accordance with the laundry instructions appearing on labels, especially the maximum recommended temperature.

WARNING!
IMPORTANT WASH PERFORMANCE ADVICE.
New, coloured garments should be washed separately for at least 5 or 6 washes.
▶ Certain large dark items such as jeans and towels should always be washed separately.
▶ Never mix NON COLOURFAST fabrics.
ECO 40-60
The ECO 40-60 programme is able to clean normally soiled cotton laundry declared to be washable at 40° C to 60° C, together in the same cycle. This programme is used to assess the compliance with the EU Ecodesign legislation(environmentally friendly products design).
WHITES
This programme is suitable for washing coloured cotton garments at 40° C or for ensuring the highest degree of cleanliness for cotton resistant laundry washing at 60° C or 90° C. The final spin is at maximum speed that ensures excellent water removal.
SMART WASH
The new power care technology, through a perfect mix of water and detergent, guarantees the maximum care of your clothes, at a 30° C temperature with a perfect washing performance. This innovative programme is capable to automatically the cleaning action to the capacity and typology of the load for the best results without any worries. This program can wash lightly soiled mixed laundry of cotton and synthetics.
JEANS
The programme is suitable for jeans or some machine washable denim garments. The maximum washing temperature is 60° C.
SYNTHETICS
This programme allows you to wash different fabrics and different colours all together. The rotation movement of the drum and the water levels are optimized, both during the washing rinsing phase. The accurate spin action ensures a reduced formation of creases in the fabrics.
HAND WASH
This programme performs a wash cycle dedicated to the delicate fabrics that can be washed the washing machine, the articles to be washed by hand.
DRUM CLEAN
This program can carry out the self-cleaning of the washing machine.
We recommend a bucket self-cleaning after using the washing machine for 50 times.
When using this program, please do not put any clothes detergent or machine cleaner.
DRAIN&SPIN
The program completes the drain and a maximum spin. It is possible to delete or reduce the spin through the spin selection button.
SPECIAL 39'
This programme allows you to wash different fabrics together such as cuttons, synthetics and mixed fabrics in only 39 minutes at 40° C (or less) temperature. This programme is particularly suited to slightly dirty fabrics, up to half of nominal load.
RAPID'
This new programme may be used to obtain excellent results while saving water, energy, detergent and time. This option washes at a medium temperature suitable for lightly soiled mixed laundry of cotton and synthetic. Recommended for small loads and lightly soiled items.
20°C COLD WASH
This innovative programme, allows you to wash different fabrics and colours together, such as cottons, synthetics and mixed fabrics at only 20° C and provides an excellent cleaning performance.
FRESH VAPOR
This exclusive program uses steam to remove odor. During the operation, there will be steam condensation, and it is normal for clothes to get wet. You can shake them and dry after finishing. Do not use this program for clothes that can not get wet.
This program used for deodorizing high-temperature dry clothes such as cotton, linen, and chemical fibers.
HYGIENE PLUS 59'
This washing programme is capable of reaching a temperature of 60° C for an extended period of time, combining the steam action with a powerful rinsing action for thoroughly clean and hygienic clothing. Recommended for cotton fabrics.
COTTON
This programme is suitable for washing coloured cotton garments at 40° C or for ensuring the highest degree of cleanliness for cotton resistant laundry washing at 60° C or 90° C.
The final spin is at maximum speed that ensures excellent water removal.
DELICATE
Developed to take good care of delicate items, this programme washes at a low temperature in short time. An extended, in-depth rinse nourishes fabric fibres.
RINSE
This program performs 2 rinses with an intermediate spin (which can be reduced or excluded by using the appropriate button). It is used for rinsing any type of fabric, for example after a wash carried out by hand.

Note: The procedure to check the number of cycle that the machine has run.
Procedure: under "COTTON" programme, press "TEMPERATURE" and "SPEED" simultaneously, it will display the number of running cycle for 2 seconds, and then back to "COTTON" programme. The cumulative running cycles will add after the programme ending. The running cycle will be displayed in hexademical. It is over 9999.
7-Consumption
Scan QR code on energy label for energy consumption information. The actual energy consumption may differ from the declared one according to the local conditions.

Note: Auto Weight
The appliance is equipped with a loading recognition. At low loading, energy, water and washing time will be reduced automatically in some programmes. The display default time may vary depending on the load weight, involving the "Smart Wash, Eco 40-60, Synthetics, Cotton, Hygiene Plus 59',20°C Cold Wash" programme.
Indicative information(as per Commission Regulation (EU) 2019/2023):
| Rated Capacity | Programme |  (kg) (kg) |  (HH:MM) (HH:MM) | ENERG ✝ (kWh/cycle) |  (L/cycle) (L/cycle) | Max Temperature(°C) | Max Speed(RPM) |  Residual Moisture(%) Residual Moisture(%) |
| 7 kg(1400r) | Eco 40-60 | 7 | 3:28 | 0.540 | 50.0 | 30 | 1330 | 53.0 |
| Eco 40-60 | 3.5 | 2:42 | 0.270 | 32.0 | 26 | 1330 | 53.0 | |
| Eco 40-60 | 2 | 2:38 | 0.190 | 28.0 | 25 | 1330 | 55.0 | |
| COTTON 20°C | 7 | 0:55 | 0.220 | 75.0 | 20 | 1000 | 65.0 | |
| COTTON 60°C | 7 | 1:23 | 2.100 | 75.0 | 57 | 1400 | 53.0 | |
| Synthetics 40°C | 3.5 | 1:45 | 0.800 | 60.0 | 40 | 1200 | 40.0 | |
| Rapid 30°C | 1 | 0:14 | 0.250 | 38.0 | 30 | 1000 | 65.0 | |
| 8 kg(1400r) | Eco 40-60 | 8 | 3:38 | 0.520 | 54.0 | 28 | 1330 | 53.0 |
| Eco 40-60 | 4 | 2:48 | 0.330 | 35.0 | 26 | 1330 | 53.0 | |
| Eco 40-60 | 2 | 2:38 | 0.190 | 30.0 | 25 | 1330 | 55.0 | |
| COTTON 20°C | 8 | 0:55 | 0.220 | 75.0 | 20 | 1000 | 65.0 | |
| COTTON 60°C | 8 | 1:23 | 2.100 | 75.0 | 57 | 1400 | 53.0 | |
| Synthetics 40°C | 3.5 | 1:45 | 0.850 | 65.0 | 40 | 1200 | 40.0 | |
| Rapid 30°C | 1 | 0:14 | 0.250 | 38.0 | 30 | 1000 | 65.0 | |
| 9 kg(1400r) | Eco 40-60 | 9 | 3:48 | 0.635 | 62.0 | 28 | 1330 | 53.0 |
| Eco 40-60 | 4.5 | 2:52 | 0.390 | 36.0 | 28 | 1330 | 53.0 | |
| Eco 40-60 | 2.3 | 2:48 | 0.200 | 30.0 | 25 | 1330 | 55.0 | |
| COTTON 20°C | 9 | 0:55 | 0.220 | 75.0 | 20 | 1000 | 65.0 | |
| COTTON 60°C | 9 | 1:23 | 2.100 | 75.0 | 57 | 1400 | 53.0 | |
| Synthetics 40°C | 4.5 | 1:45 | 0.900 | 70.0 | 40 | 1200 | 40.0 | |
| Rapid 30°C | 1 | 0:14 | 0.250 | 38.0 | 30 | 1000 | 65.0 | |
| 10 kg(1400r) | Eco 40-60 | 10 | 3:58 | 0.670 | 65.0 | 28 | 1330 | 53.0 |
| Eco 40-60 | 5 | 2:58 | 0.440 | 42.0 | 28 | 1330 | 53.0 | |
| Eco 40-60 | 2.5 | 2:48 | 0.220 | 32.0 | 25 | 1330 | 55.0 | |
| COTTON 20°C | 10 | 0:55 | 0.220 | 85.0 | 20 | 1000 | 65.0 | |
| COTTON 60°C | 10 | 1:23 | 2.500 | 85.0 | 57 | 1400 | 53.0 | |
| Synthetic 40°C | 5 | 1:45 | 0.900 | 70.0 | 40 | 1200 | 40.0 | |
| Rapid 30°C | 1 | 0:14 | 0.250 | 40.0 | 30 | 1000 | 65.0 | |
| 11 kg(1400r) | Eco 40-60 | 11 | 3:58 | 0.700 | 72.0 | 28 | 1330 | 35.0 |
| Eco 40-60 | 5.5 | 2:58 | 0.370 | 42.0 | 26 | 1330 | 52.0 | |
| Eco 40-60 | 3 | 2:48 | 0.200 | 32.0 | 25 | 1330 | 55.0 | |
| COTTON 20°C | 11 | 0:55 | 0.300 | 100.0 | 20 | 1000 | 65.0 | |
| COTTON 60°C | 11 | 1:23 | 2.800 | 100.0 | 57 | 1400 | 55.0 | |
| Synthetic 40°C | 5.5 | 1:45 | 0.950 | 75.0 | 40 | 1200 | 40.0 | |
| Rapid 30°C | 1 | 0:14 | 0.300 | 45.0 | 30 | 1000 | 65.0 | |
| Rated Capacity | Programme |  (kg) (H) (kg) (H) |  H:MM) ( H:MM) ( | ENERG 1 (kWh/cycle) |  L/cycle) L/cycle) | Max Temperature(°C) | Max Speed(RPM) |  Residual Moisture (%) Residual Moisture (%) |
| 12 kg(1400r) | Eco 40-60 | 53.013303374 | ||||||
| Eco 40-60 | 52.013303047 | |||||||
| Eco 40-60 | 55.013302533 | |||||||
| COTTON 20°C | 10.2500:5510065.0100020 | |||||||
| COTTON 60°C | 12.8001:2310055.0140057 | |||||||
| Synthetics 40°C | 6 1:45 80.401.0020040 | |||||||
| Rapid 30°C | 1 | 0:14 | 0.280 | 45.0 | 30 | 1000 | 65.0 | |
| 13 kg(1400r) | Eco 40-60 | 13 | 3:58 | 0.950 | 78.0 | 38 | 1330 | 52.0 |
| Eco 40-60 | 6.5 | 2:58 | 0.610 | 48.0 | 35 | 1330 | 52.0 | |
| Eco 40-60 | 3 | 2:48 | 0.230 | 36.0 | 25 | 1330 | 55.0 | |
| COTTON 20°C | 13 | 3:58 | 0.950 | 78.0 | 38 | 1330 | 52.0 | |
| COTTON 60°C | 12.8001:23100. | 100020 | 65.0 | |||||
| Synthetics 40°C | 6.5 | 1:45 | 1.000 | 80.0 | 120040 | 40.0 | ||
| Rapid 30°C | 1 | 0:14 | 0.280 | 45.0 | 30 | 1000 | 65.0 | |
The values given for programmes other than the Eco 40-60 programme and the wash and dry cycle are indicative only.
8.1 Power supply
Connect the washing machine to a power supply (220V to 240V\~/50Hz; Fig. 8-1). Please also refer section INSTALLATION (see P10).
8.2 Water connection
Before connecting check the cleanliness and clarity of the water inlet.
▶ Turn on the tap (Fig.8-2).


Note: Tightness
Before use check for leakage in the joints between the tap and the inlet hose by turning on the tap.
8.3 Preparing laundry
Sort out clothes according to fabric (cotton, synthetics, wool or silk etc.) and how dirty they are (Fig.8-3). Pay attention to the care labelling of washing labels.
Separate white clothes from coloured ones. Wash coloured textiles first by hand to check if they fade or run.
▶ Empty pockets (keys, coins, etc.) and remove harder decorative objects (e.g. brooches).
▶ Garments without hems, delicates and finely woven textile such as fine curtains are to be put into a wash bag to care for this delicate laundry (hand or dry cleaning would be better).
▶ Close zippers, velco fastener and hooks, make sure the buttons are sewn on tightly.
Place sensitive items like laundry without firm hem, delicate underwear (Dessous) and small items such as socks, belts, bras, etc. in a wash bag.
▶ Unfold large pieces of fabric such as bed sheets, bedspreads etc.
▶ Turn jeans and printed, decorated or color intensive textiles inside out; possibly wash separately.


CAUTION!
Non-textile, as well as small, loose or sharp-edged items may cause malfunctions and damage of clothes and appliance.
Care chart
Washing
 | Washable up to 95°C normal process |  | Washable up to 60°C normal process |  | Washable up to 60°C mild process |
 | Washable up to 40°C normal process |  | Washable up to 40°C mild process |  | Washable up to 40°C very mild process |
 | Washable up to 30°C normal process |  | Washable up to 30°C mild process |  | Washable up to 30°C very mild process |
 | Wash by hand max. 40°C |  | Do not wash |
Bleaching
 | Any bleaching allowed |  | Only oxygen/ non-chlorine |  | Do not bleach |
Drying
 | Tumble drying possible normal temperature |  | Tumble drying possible lower temperature |  | Do not tumble dry |
 | Line drying Flat drying |  |
Ironing
 | Iron at a maximum temperature up to 200 °C |  | Iron at a medial temperature up to 150°C |  | Iron at a low temperature up to 110°C; without steam (steam ironing may cause irreversible damage) |
 | Do not iron |
Professional Textile Care
 | Dry cleaning in tetra-chloroethene |  | Dry cleaning in hydrocarbons |  | Do not dry clean |
 | Professional wet clean | Do not professional wet clean |
8.4 Loading the appliance
▶ Put in the laundry piece by piece.
Don't overload. Note the different maximum load according to programmes! Rule of thumb for maximum load: Keep six inches between load and drum top.
▶ Close the door carefully. Make sure that no pieces of laundry are pinched.

Note: Auto Weight
The display default time may vary depending on the load weight, involving the "Smart Wash, Eco 40-60, Synthetics, Cotton, Hygiene Plus 59', and 20 °C Cold Wash" programme.
8.5 Selecting detergent
▶ Washing efficiency and performance is determined by used detergent quality.
▶ Use only machine wash approved detergent.
If needed use specific detergents, e.g for synthetic and woolen fabric.
Do not use dry cleaning agents such as trichloroethylene and similar products.
Choose the best detergent
| Programme | Kind of detergent | ||||
| Universal Colour Delicate | Special | Softener | |||
| Eco 40-60 | √ | √ | - | - | √ |
| Special 39' | √ | √ L | - | - | √ |
| Rapid | L | √ L | - | - | √ |
| 20°C Cold Wash | √ | √ | - | - | √ |
| Fresh Vapor | - | - | - | - | - |
| Hygiene Plus 59' | √P | √ | - | - | √ |
| Cotton | √ | √ | - | - | √ |
| Delicate | - | - | √ | √ | √ |
| Rinse | - | - | - | - | √ |
| Drain & Spin | - | - | - | - | - |
| Drum Clean | - | - | - | √ | - |
| Smart Wash | √ | √ | - | - | √ |
| Hand Wash | - | - | √ | √ | √ |
| Synthetics | - | √ | - | - | √ |
| Jeans | - | √L | - | √ | √ |
| Whites | √P | √ | - | - | √ |
L = gel-/liquid detergent P = powder detergent O = no √ =Reconommended -=Not recommended
If using liquid detergent, it is not recommended to activate the time delay.
We recommend by using:
▶ Laundry powder: 20°C to 90°C* (best use: 40-60°C)
▶ Color detergent: 20°C to 60°C (best use: 30-60°C)
▶ Wool/delicate detergent: 20°C to 30°C (best use: 20-30°C)
* Choose 90 °C wash temperature only for special hygienic requirements.
* If you choose the water temperature 60°C or above, we would like to advise you to use less detergent.
* It is better to use less or free detergent powder.
* Suggested detergent type on remote control depends on the program chosen on APP.

8.6 Adding detergent
- Slide out the detergent drawer.
- Put the required chemicals into corresponding compartments (Fig. 8-4).
- Push back the drawer gently.

Note:
Remove detergent residues before next wash cycle from the detergent drawer.
▶ Do not overuse detergent or softener.
▶ Please follow the instruction on the detergent package.
▶ Always fill the detergent just before the beginning of the wash cycle.
▶ Concentrated liquid detergent should be diluted before adding.
Do not use liquid detergent if function "Delay" is selected.
Carefully choose the programme settings according to the care symbols on all laundry labels and according to the programme table.

8.7 Select a programme
To get the best washing results, select a programme which the degree of soiling and sort of laundry type. Turn the programme knob (Fig. 8-5) to select the right programme. The display will show the selected programme name.

Note: Odour removal
Before first use we recommend to run programme "DRUM CLEAN" to remove possibly corruptive residues. Please don't put any detergent or special machine cleaner in washing agent compartment.

8.8 Add individual selections
Select required options and settings (Fig. 8-6); refer to Control Panel.
8.9 Start wash programme
Touch "START/PAUSE" button (Fig. 8-7) to start.
Appliance operates according to present settings.
Changes are only possible by cancelling the programme.

8.10 Interrupt / cancel wash programme
To interrupt a running programme, press"START/PAUSE", the LED above the button is flashing. Press it again to resume operation.
To cancel a running programme and all its individual settings:
- Touch "START/PAUSE button to interrupt the running programme.
- Turn the knob to the programme DRAIN & SPIN and select "NO SPIN" to drain the water.
- After closing the program to restart the appliance, select a new programme and start it.
8.11 After washing

Note: Door lock
For safety reasons the door is locked partially during the washing cycle. It is only possible to open the door at the end of the programme or after the programme was cancelled correctly (see description above).
In case of high water level, high water temperature and during spinning it is not possible to open the door; Lock is displayed.
- At programme cycle END is displayed.
- The appliance switches off automatically.
- Remove laundry as soon as possible to go easy on it and to prevent more wrinkling.
- Turn off the water supply.
- Unplug the power cord.
- Open the door to prevent formation of moisture and odours. Let it open while not used.

Note: Standby-mode / energy-saving mode
The switched on appliance will go into standby-mode if it will not be activated within 2 minutes before starting the programme or at the end of programme, except REMOTE CONTROL. The display switches off. This saves energy. To interrupt the standby mode turn the knob to any other programme except "OFF".
8.12 Activate or deactivate the buzzer
The acoustic signal can be selected :
Select the beep mode by pressing the "Settings" button: Press the "Settings" button for the first time to select the language, and press the "Settings" button again to enter the beep mode.
Turn the knob to select the sound switch.
When the sound is on, the screen display "ON"
When the sound is off, the screen display "OFF"
Press the start and stop keys to select the current sound switch status.
9.1 General
This appliance is equipped with Wi-Fi technology that allows you to control it remotely via App.

WARNING!
Please observe the safety precautions in this user manual and make sure that these are complied even when operating the appliance via the hOn APP while you are away from home. You must also follow the instructions in the hOn.
9.2 Requirements
- One wireless router (802.11b/g/n protocol) which supports only the frequency band of 2.4 GHz. Length of Router SSID is 1-31 characters(including 1 and 31), and password is 8-64 characters. Minimum length of password must be 8 characters. Router encryption methods include open, WPA-PSK and WPA2-PSK.
- The App is available for devices running Android, Huawei or iOS, both for tablets and for smartphones.
- The appliance shall be installed in a position where it can receive a strong Wi-Fi signal. Once the appliance has been correctly associated with the APP, if it is not properly connected to the wireless router, no Wi-Fi icon appears on the display.
9.3 Download and installation of hOn APP
Download the hOn App on your device by framing the following QR code:

Download the

App


Download on the App Store

ANDOLED APP ON Google play

EXPLORE IT ON
AppGallery
or by the link: go.haier-europe.com/download-app
| Frequency rate(OFR) | 2400 MHz - 2483.5 MHz |
| Max. power (EIRP) | 20dBm |
| Wireless standard | IEEE802.11b/g/n & BLE V4.2 |

Note: Registration
Registration is required when first time to use or the formal account has been deleted/closed. For further use, you need to enter user name and password when you log in.
9.4 Appliance pairing (on app)
-
The App is available for devices running both Android and iOS, both for tablets and for smart phones.
-
Get all the details of the Wi-Fi functions by browsing the App in DEMO mode.
- The frequency of the home Wi-Fi network has to be set on the 2.4 GHZ band. You cannot configure the machine if your home network is set to the 5 GHZ band.
- Open the App, create the user profile (or log-in if it is already created previously) and pairing the appliance following the instructions on the device display.

Note: Wi-Fi network
It is not possible to connect the appliance to a public Wi-Fi network. It may cause malfunction.

Note: Use same Wi-Fi
Connect with your smartphone to the network you want to connect the product to.
9.5 To enable Remote Control
- Check that the router is switched on and connected to the Internet.
- Load the laundry and close the door.
- Press the " " button, the door locks.
- Start the cycle using the app, control panel will be disabled except for "POWER" and "START/PAUSE" button. After starting the program, only child lock is available.
- The Remote Control can be also activated by pressing "button during the cycle running. After remote authorization, the main control board is still available.
- Once the cycle has been completed, the door unlocks and Romote Control turns off.
- After 2 minutes the appliance goes to OFF mode.

Note: Remote Control expiration
Once the remote control is activated, if the end user doesn't start any cycle from app in 10 minutes, the appliance will go to Networked Standby Mode, and keeps remote control up to 24 hours, then shut off.
9.6 To disable Remote Control
- To exit remote control while a cycle is running, press "button on the control panel. The appliance will keep running the cycle and go to READ ONLY mode.
- To resume the Remote Control by pressing the "button again."
- Control the appliance using the App.
9.7 End of cycle with Remote Control on
- At the end of the cycle, the door will unlock and the Remote Control will deactivated.
- After 2 minutes the appliance will automatically switch off.
10.1 Cleaning the detergent drawer
Take always care there are no detergent residues. Clean the drawer regularly (Fig. 10-1):
- Pull out the drawer until it stops.
- Press the release button and remove the drawer.
- Flush the drawer with water until it is clean and insert the drawer back in the appliance.
10.2 Cleaning the machine
▶ Unplug the machine during cleaning and maintenance.
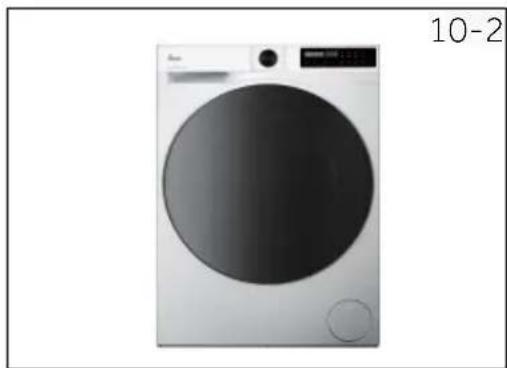
▶ Use a soft cloth with soap liquid to clean the machine case (Fig.10-2) and rubber components.
▶ Do not use organic chemicals or corrosive solvents.

10.3 Water inlet valve and inlet valve filter
To prevent blockage of water supply by solid substances like lime clean regularly the inlet valve filter.
▶ Unplug the power cord and turn off the water supply.
▶ Unscrew the water inlet hose at the back (Fig.10-3) of the appliance as well as on the tap.
▶ Flush the filters with water and a brush (Fig.10-4).
▶ Insert the filter and install the inlet hose.


10.4 Cleaning the drum
▶ Remove accidentally washed items, especially metal parts such as pins, coins, etc. from the drum (Fig.10-5) because they cause rust stains and damage.
▶ Use a non-chloride cleaner for removing rust stains. Observe the warning hints of the cleaning agent manufacturer.
▶ Do not use any hard objects or steel wool for cleaning.
10-Care and cleaning

10.5 Long periods of disuse
If the appliance is left idle for a longer period:
- Pull out the electrical plug (Fig. 10-6).
- Turn off water supply (Fig. 10-7).
- Open the door to prevent formation of moisture and odours. Let the door open when not in use.
Before next usage, check the power cord, water inlet and drain hose carefully. Make sure that everything is properly installed and without leakage.
10.6 Pump filter
Clean the filter once a month and check the pump filter for instance if the appliance:
▶ Doesn't drain water.
▶ Doesn't spin.
▶ Cause unusual noise while running.

WARNING!
Scalding Risk! Water in the pump filter can be very hot! Before any action please ensure water has cooled down.
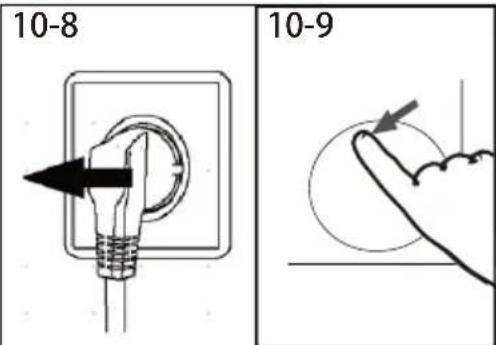
- Turn off and unplug the machine (Fig.10-8).
- Push and open the filter door(Fig.10-9).
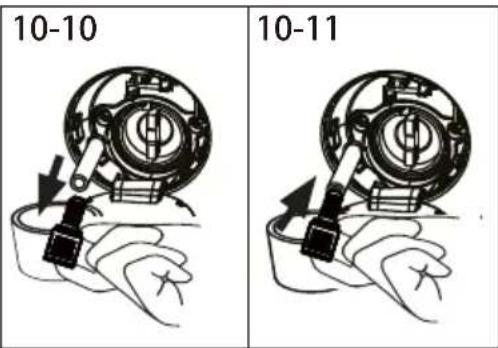
- Provide a flat container to catch leach water (Fig.10-10). There could be bigger amounts.
- Pull the drainhose out and hold its end above the container(Fig.10-10).
- Taking the sealing plug out of the drainhose. (Fig.10-10).
- After completing drainage, close the drainhose and push it back to the machine(Fig.10-11).
- Unscrew and remove the pump filter counter clockwise(Fig.10-12).
- Remove contaminants and dirt(Fig.10-13).

- Clean carefully pump filter, e.g. using running water (Fig. 10-14).
- Refix it thoroughly (Fig. 10-15).
- Close service flap.


CAUTION!
▶ Pump filter sealing has to be clean and unhurt. If the lid is not full tightened, water can escape.
The filter must be in place, or it may lead to leakage.
11 - Troubleshooting
Many occurring problems could be solved by yourself without specific expertise. In case of a problem please check all shown possibilities and follow below Instructions before you contact an after sales service. See CUSTOMER SERVICE.

WARNING!
Before maintenance, deactivate the appliance and disconnect the mains plug from the mains socket.
Electrical equipment should be serviced only by qualified electrical experts, because improper repairs can cause considerable consequential damages.
▶ A damaged power cable should only be replaced by the manufacturer, its service agent or similarly qualified persons in order to avoid a hazard.
11.1 Information codes
Following codes are displayed only for information referring to the washing cycle. No measures must be performed.
| Code | Message |
| 1:25 | The remaining wash cycle time will be 1 hour and 25 minutes. |
| 6:30 | The remaining delay time will be 6 hours and 30 minutes. |
| CLO+ | Function child lock is activated. |
| End | The washing cycle is finished. The appliance shuts off automatically. |
| Lock | Door is closed because of high water level,high water temperature or spinning cycle. |
11.2 Troubleshooting with display code
| Problem | Cause | Solution |
| CLR FLTR | Drainage error, water is not fully drained within 6 minutes. | Clean pump filterCheck drain hose installation. |
| E2 | Lock error. | Shut the door properly. |
| E4 | Water level not reached, drain hose is self-syphoning. | Make sure that tap is fully opened and water pressure is normal.Check the inlet hose installation. |
| E8 | Water protective level error. | Contact the After sales service. |
| Problem Cause Solution | ||
| F3 | • Temperature sensor error. | • Contact the After sales service. |
| F4 | • Heating error. | • Contact the After sales service. |
| F7 | • Motor error. | • Contact the After sales service. |
| FA | • Water level sensor error. | • Contact the After sales service. |
| FC0,FC1 or FC2 | • Abnormal communication error. | • Contact the After sales service. |
| FH | • The iot module fails to be configured. | • Contact the after sales service to replace the iot module. |
| E5 | • Drainage error. | • Water is not fully drained in set time. |
| Eb | • Clothes jamming alarm. | • Pause operating, open the door and place garments again before restarting. |
11.3 Troubleshooting without display code
| Problem | Cause Solution | |
| Washing machine fails to operate. | Programme is not yet started. Door is not properly closed. Machine has not been switched on. Power failure. Child lock is activated. | Check programme and start it. Close the door properly. Switch the machine on. Check power supply. Deactivate child lock. |
| Washing machine will not be filled with water. | No water. Inlet hose is kinked. Inlet hose filter is blocked. Water pressure is less than 0,03 MPa. Door is not properly closed. Water supply failure. | Check water tap. Check inlet hose. Unblock inlet hose filter. Check water pressure. Close the door properly. Ensure the water supply. |
| Machine is draining while being filled. | Height of drain hose is below 80 cm. Drain hose end could reach into water. | Make sure that drain hose is properly installed. Make sure the drain hose is not in water. |
| Drainage failure. | Drain hose is blocked. Pump filter is blocked. Drain hose end is higher than 100 cm above floor level. | Unblock drain hose. Clean pump filter. Make sure that drain hose is properly installed. |
| Strong vibration while spinning. | Not all transportation bolts have been removed. Appliance has no solid position. Machine load is not correct. | Remove all transportation bolts. Ensure solid ground and a levelled position. Check load weight and balance. |
| Operation stops before completing wash cycle. | Water or electric failure. | Check power and water supply. |
| Operation stops for a period of time. | Appliance displays error code. Problem due to load pattern. Programme performs soaking cycle. | Consider display codes. Reduce or adjust load. Cancel programme and restart. |
11 - Troubleshooting
| Problem | Cause Solution | |
| floats drum and/or detergent drawer. | ·Detergent is not appropriate foam·Excessive use of detergent. | ·Check detergent recommendations.·Reduce amount of detergent. |
| adjustment of washing time. | ·Washing programme duration will be adjusted. | ·This is normal and doesn't affect automatic functionality. |
| Spinning fails. | ·Unbalance of laundry. | ·Check machine load and laundry and run a spinning programme again. |
| Unsatisfactory washing result. | ·Degree of pollution does not agree with selected programme·Detergent quantity was not sufficient.·Maximum load has been exceeded.·Laundry was unevenly distributed in the drum. | ·Select an other programme.·Choose the detergent acc. to the degree of pollution and according to manufacture·Reduce loading.·Loose the laundry. |
| Washing powder residues are on the laundry. | ·Insoluble particles of detergent can remain as white spots on the laundry. | ·Perform extra rinse.·Try to brush the points from the dry laundry.·Choose an other detergent. |
| Laundry has grey patches. | ·Caused by fats such as oils, creams or ointments. | ·Pretreat the laundry with a special cleaner. |

Note: Foam formation
If too much foam is inspected during spin cycle, motor stops and drain pump will be activated for 90 seconds. If that elimination of foam fails up to 3 times, programme ends without spinning.
Should the error messages reappear even after the taken measures, switch off the appliance, disconnect the power supply and contact the customer service.
11.4 In case of power failure
The current programme and its setting will be saved. When power supply is restored, operation will be resumed.
If a power failure cuts an operating wash programme, door opening is mechanically blocked. To get out any laundry water level should not be seen in the glassy porthole of the door. - Danger of burns! Water level has to be lowered as described in "Pump filter". Not till then pull lever (A) beneath service flap (Fig. 11-1) until door is unlocked by a gentle click. Afterwards refix all parts.


When the washing machine in a safe state (under the water level below the window along a certain distance, barrel temperature below 55° C, the inner barrel did not turn), may unlock the doors of the machine operation.
12.1 Additional technical data
| HBP 49SBL8-80HBP 49SBL8G-80 | HBP 410BL8-80HBP 410BL8G-80 | HBP 411BL9-80HBP 411BL9G-80HBP 413BL8-80HBP 413BL8G-80 | |
| Voltage in V 220-240 V~/50Hz | |||
| Current in A | 10 | ||
| Max power in W | 1950 | ||
| Water pressure in MPa | 0.03≤P<1 | ||
| Net weight in kg | 59 | 65 | 71 |
12.2 Product dimensions


| HBP 49SBL8-80HBP 49SBL8G-80 | HBP 410BL8-80HBP 410BL8G-80 | HBP 411BL9-80HBP 411BL9G-80HBP 413BL8-80HBP 413BL8G-80 | |
| H Overall height of product mm | 850 | 850 | 850 |
| W Overall width of product mm | 595 | 595 | 595 |
| D5 overall depth of product(From top panel to maincontrol board size) mm | 460 | 518 | 620 |
| D1 Overall depth of product mm | 522 | 580 | 681 |
| D2 Depth of door open mm | 1004 | 1062 | 1164 |
| D4 Minimum door clearance toadjacent wall mm | 305 | 305 | 305 |

The exact height of your washer is dependent on how far the feet are extended from the base of the machine. The space where you install your washer needs to be at least 40mm wider and 20mm deeper than its dimensions.
12.3 Standards and Directives CE
This product meets the requirements of applicable EC directives with the corresponding harmonised standards, which provide for CE marking.
13-Customer service
We recommend our Hoover Customer Service and the use of original spare parts. If you have a problem with your appliance, please first check section11- TROUBLE-SHOOTING.
If you cannot find a solution there, please contact:
▶ your local dealer.
▶ the Assistance Area on the Hoover website where you can find information on Warranties, Accessories and Spare Parts and Contact numbers.
To contact our Service, ensure that you have the following data available.
Each product is identified by a unique code, also called the "serial number", printed on a sticker. This can be found inside the door opening.
Model
Serial No. ____
Also check the Warranty Card supplied with the product in case of warranty.
It is always recommended to use original spare parts, that are available at our Authorised Customer Service Centres.
Warranty
The product is guaranteed under the terms and conditions stated on the certificate included with the product. The certificate has to be stored so as to be shown to the Authorized Customer Service Centre in case of need. You can also check the warranty conditions on our web site. To obtain assistance, please fill in the form on-line or contact us at the number indicated on the support page of our web site.
The standard manufacturer warranty covers faults caused by electrical or mechanical faults in the product due to an act or omission of the manufacturer. If a fault is found to be caused by factors outside the product supplied, miss-use or as a result of the instructions on use not being followed, a charge may be applied.
The manufacturer declines all responsibility for any printing errors in the booklet included with this product. Moreover, it also reserves the right to make any changes deemed useful to its products without changing their essential characteristics.

-0020509288DXD-
- THANK YOU FOR PURCHASING A HOOVER PRODUCT
- LEGEND
- NOTE: FOR U.K. ONLY
- ENVIRONMENTAL CONDITIONS
- WARNING
- RISK OF INJURY DISINFOCA
- BEFORE SWITCHING ON THE APPLIANCE FOR THE FIRST TIME READ THE FOLLOWING SAFETY HINTS
- DAILY USE
- ELECTRICAL CONNECTIONS AND SAFETY INSTRUCTIONS
- WATER MAY REACH VERY HIGH TEMPERATURES DURING THE WASH CYCLE
- SAFETY INFORMATION
- INTENDED USE
- PREPARATION
- NOTE: PACKAGING DISPOSAL
- OPTIONAL: INSTALL NOISE REDUCTION PADS
- DISMANTLE THE TRANSPORTATION BOLTS
- NOTE: KEEP IN SAFE PLACE
- MOVING THE APPLIANCE
- ALIGNING THE APPLIANCE
- DRAIN HOSE TO SINK
- DRAIN HOSE TO WASTE WATER CONNECTION
- DRAIN HOSE TO SINK CONNECTION
- CAUTION
- ELECTRICAL CONNECTION
- LOAD TIPS
- USEFUL ADVICE FOR SAVING
- MAXIMISE THE LOAD SIZE
- DO YOU NEED TO PRE-WASH
- IS A HOT WASH REQUIRED
- DOSING THE DETERGENT
- NOTE
- PICTURE OF APPLIANCE
- ACCESSORIES
- NOTE: ACOUSTIC SIGNAL
- POWER BUTTON
- PROGRAMME SELECTOR
- DISPLAY
- DETERGENT DRAWER
- FUNCTION BUTTONS
- NOTE: FACTORY SETTINGS
- FUNCTION BUTTON
- CONTROL PANEL
- FIRST STARTING
- LANGUAGE SETTING
- DESCRIPTION OF PROGRAMMES
- IMPORTANT WASH PERFORMANCE ADVICE
- ECO
- WHITES
- SMART WASH
- JEANS
- SYNTHETICS
- HAND WASH
- DRUM CLEAN
- DRAIN&SPIN
- SPECIAL
- RAPID
- °C COLD WASH
- FRESH VAPOR
- HYGIENE PLUS
- COTTON
- DELICATE
- RINSE
- NOTE: THE PROCEDURE TO CHECK THE NUMBER OF CYCLE THAT THE MACHINE HAS RUN
- CONSUMPTION
- NOTE: AUTO WEIGHT
- POWER SUPPLY
- WATER CONNECTION
- NOTE: TIGHTNESS
- PREPARING LAUNDRY
- CARE CHART
- LOADING THE APPLIANCE
- SELECTING DETERGENT
- ADDING DETERGENT
- SELECT A PROGRAMME
- NOTE: ODOUR REMOVAL
- ADD INDIVIDUAL SELECTIONS
- START WASH PROGRAMME
- INTERRUPT / CANCEL WASH PROGRAMME
- AFTER WASHING
- NOTE: DOOR LOCK
- NOTE: STANDBY-MODE / ENERGY-SAVING MODE
- ACTIVATE OR DEACTIVATE THE BUZZER
- GENERAL
- REQUIREMENTS
- DOWNLOAD AND INSTALLATION OF HON APP
- NOTE: REGISTRATION
- APPLIANCE PAIRING (ON APP)
- NOTE: WI-FI NETWORK
- NOTE: USE SAME WI-FI
- TO ENABLE REMOTE CONTROL
- NOTE: REMOTE CONTROL EXPIRATION
- TO DISABLE REMOTE CONTROL
- END OF CYCLE WITH REMOTE CONTROL ON
- CLEANING THE DETERGENT DRAWER
- CLEANING THE MACHINE
- WATER INLET VALVE AND INLET VALVE FILTER
- CLEANING THE DRUM
- CARE AND CLEANING
- LONG PERIODS OF DISUSE
- PUMP FILTER
- TROUBLESHOOTING
- INFORMATION CODES
- TROUBLESHOOTING WITH DISPLAY CODE
- NOTE: FOAM FORMATION
- IN CASE OF POWER FAILURE
- STANDARDS AND DIRECTIVES CE
- CUSTOMER SERVICE
- WARRANTY
Brand : HOOVER
Model : HBP 413BL8-80
Category : Washing machine