
E764XDE - Epilator BABYLISS - Free user manual and instructions
Find the device manual for free E764XDE BABYLISS in PDF.
| Brand | BABYLISS |
| Model | E764XDE |
| Product type | Hair clipper |
| Power supply | Mains (with supplied transformer) and rechargeable (NiMH battery) |
| Transformer voltage | 3.0 V / 1000 mA |
| Battery life | 30 minutes after full charge |
| Initial charging time | 16 hours before first use and every 3 months |
| Number of cutting guides | 2 guides (large and small) with integrated height adjustment |
| Cutting height range (main guides) | From 3 mm to 18 mm and from 21 mm to 36 mm (1.5 mm steps) |
| Precision guide | 5 positions from 0.5 mm to 2.5 mm |
| Blades | Moving blade: CMS steel (chrome-molybdenum-stainless) sharpened by 3D electrochemistry; fixed blade: titanium coating |
| Turbo function | Yes, dedicated button to increase power and cutting speed |
| Thinning function | Yes, "THIN" position on the thinning guide |
| Height display | Yes, on the right and left sides of the device |
| Height maintenance system | Smart Adjusting System: maintains height regardless of angle |
| Blade maintenance | Removable blades for cleaning; self-lubricating with refillable reservoir pad using BaByliss oil |
| Supplied accessories | Precision guide, cleaning brush, comb, transformer |
| Weight | Approximately 250 g (estimated, not specified) |
| Dimensions | Not specified |
| Spare parts available | Replacement blades and specific BaByliss oil |
Frequently Asked Questions - E764XDE BABYLISS
User questions about E764XDE BABYLISS
0 question about this device. Answer the ones you know or ask your own.
Ask a new question about this device
Download the instructions for your Epilator in PDF format for free! Find your manual E764XDE - BABYLISS and take your electronic device back in hand. On this page are published all the documents necessary for the use of your device. E764XDE by BABYLISS.
USER MANUAL E764XDE BABYLISS
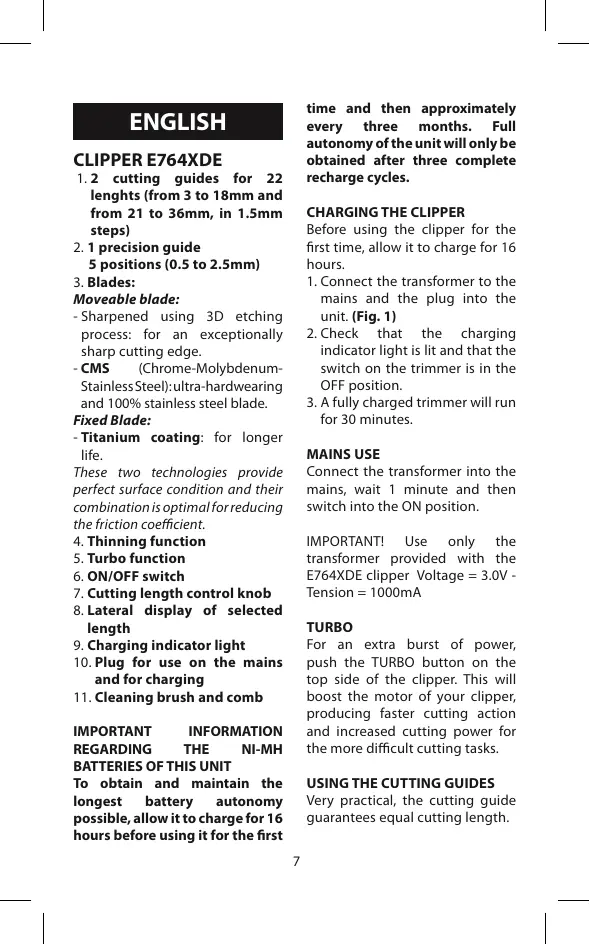
1.2 cutting guides for 22 lenghts (from 3 to 18mm and from 21 to 36mm , in 1.5mm steps)
2.1 precision guide 5 positions (0.5 to 2.5mm
-
Blades: Moveable blade:
-
Sharpened using 3D etching process: for an exceptionally sharp cutting edge.
CMS (Chrome-Molybdenum-StainlessSteel): ultra-hardwearing and 100% stainless steel blade.
Fixed Blade:
Titanium coating: for longer life.
These two technologies provide perfect surface condition and their combination is optimal for reducing the friction coefficient.
- Thinning function
- Turbo function
- ON/OFF switch
- Cutting length control knob
- Lateral display of selected length
- Charging indicator light
- Plug for use on the mains and for charging
- Cleaning brush and comb
IMPORTANT INFORMATION
REGARDING THE NI-MH BATTERIES OF THIS UNIT
To obtain and maintain the longest battery autonomy possible, allow it to charge for 16 hours before using it for the first
time and then approximately every three months. Full autonomy of the unit will only be obtained after three complete recharge cycles.
CHARGING THE CLIPPER
Before using the clipper for the first time, allow it to charge for 16 hours.
- Connect the transformer to the mains and the plug into the unit. (Fig. 1)
- Check that the charging indicator light is lit and that the switch on the trimmer is in the OFF position.
- A fully charged trimmer will run for 30 minutes.
MAINSUSE
Connect the transformer into the mains, wait 1 minute and then switch into the ON position.
IMPORTANT! Use only the transformer provided with the E764XDE clipper Voltage = 3.0V - Tension = 1000mA
TURBO
For an extra burst of power, push the TURBO button on the top side of the clipper. This will boost the motor of your clipper, producing faster cutting action and increased cutting power for the more difficult cutting tasks.
USING THE CUTTING GUIDES
Very practical, the cutting guide guarantees equal cutting length.
IMPORTANT: Always attach the cutting guide BEFORE turning the trimmer on, and turn it off before changing the guide.
To attach the cutting guide, first adjust the cutting length to 3mm or 21mm and place it on the support guide adjusting first both sides and then pushing on the bottom of the guide until you hear a 'click' (Fig. 2)
To remove the cutting guide, first adjust the cutting length to 3mm or 21mm and push the guide out of the support lifting it up with your thumb. (Fig. 3)
NOTE: The precision guide must be placed like the cutting guides but it is adjusted manually and independently of the grooved wheel.
TURNING ON AND USING
To adjust the clipper's cutting length, turn the grooved wheel (7) up or down.
The selected length is displayed on the right or left side of the clipper.
Switch the ON/OFF button.
You can change the cutting length at any time.
Thanks to the SMART ADJUSTING SYSTEM, the length of the cut is maintained even if the angle of the clipper varies, so it guarantees precise result.
CUTTING TECHNIQUES AND ADVICE FROM THE EXPERTS
- Use the clipper on clean, dry hair.
- To familiarize yourself with the clipper, begin with the cutting guide for a longer cut, then, if you want a shorter cut, adjust it by pushing the knob. You will soon know the lengths of each guide and each position.
Always move the clipper against the direction of hair growth. - Begin at the nape. Place the guide on the scalp and move the clipper toward the crown of your head. Move your clipper slowly, pointing the teeth of the guide slightly upward. Keep the clipper in contact with your head at all times. (Fig. 4)
- For the crown of the head, move from front to back, that is, from your forehead to the crown of your head.
- For the finishing touches, that is, around the nape and sideburns, use the clipper without a cutting guide. Turn your clipper over and move it from top to bottom. (Fig. 5)
- If you want a length greater than 30mm , or if you are experienced, you can create 'comb' or 'finger' cuts:
-Work without a cutting guide. - Take up a small section of hair with a comb or in your fingers.
-
Move the comb or your fingers along the section of hair to the desired length.
-
Cut your hair along the comb or your fingers.
- Remove the cut hair using a comb and check the evenness of the cut regularly. (Fig. 6)
Using the thinning guide
Switch the clipper to the 'THIN' position. The thinning guide is in front of the blades.
This technique allows you to thin out hair to make styling easier.
The technique is particularly good for the crown of the head where hair is usually thicker.
To thin you hair, take a section of hair (rest your little and ring fingers on your scalp, using the middle and index fingers to set the length), hold 1 to 2 cm below the cutting length. Then, using the clipper, cut the section of hair steeply and at an angle to create a saw-toothed 'edge'.
MAINTENANCE
Remove the cutting guide after each use.
Cleaning the clipper blades regularly will maintain their optimal performance.
Removable blades
To make cleaning easier, the BaByliss clipper blades can be removed. Make sure the clipper is turned off. Hold the clipper with the blades pointing up and remove them by pressing the top of the blade. (Fig. 7)
Brush the blades using the cleaning brush to remove any hair.
Self-lubricating blades
The blades of your clipper have a reservoir pad that dispenses the amount of oil necessary for your clipper to operate properly, every time. It is nevertheless recommended that you occasionally refill, when you notice the clipper isn't performing as well.
Remove the blades as described above.
Carefully squeeze a few drops of BaByliss oil onto the pad. (Fig. 8) Then put the blades back on the clipper.
BaBylliss oil is specially formulated for clippers, it will not evaporate or slow the blades down.
You can get new blades when these are worn or damaged.
DEUTSCH
SCHERGERAT E764XDE
Volte a colocar as lamedas maquina deURTARcabo
Iatate to kouuni ON/OFF.
Mtopeite va aalaeTe to uyooc konnc ooniaabntote otiymu.
Xapn 0to SuotmaSMARTADJUSTINGSYSTEM,touocntkomncnou exei emiyei diatnpetai otaepo onoiadnote kiv eivai nyuvia klanc ntc koueutiknc nuvanc kaiac,eyyuaata ev anotelaeuma me akipieia.
KAK 3APRdntb MAUHKNY
PmpJe, Yem nepBbI pa3 BocNoJIb3OBAtCb MaunHKnOe, ee CneJyET a3apJYb Tbe TcYeHe 16 cAcob.
1.ПодключITEТрансформатОК сеTNиВCTaBte WtBtpeK Bannapat.(Puc.1)
2.Y6eIntecbTOM,TOaTaTHN3aPdKn 3aOpencn,HTo nepeKIOuATEbMaHINHKn HaxOJNTcBN oNoXeHN OFF (bIKn.)
3.ПОПНСТБЗЗAPЯЖЕнэМАИSHКА можетяботаь Teчспгп 30 MINHT.
PABOTA OT CETN
BkIouHte MaunHky B cetb, nooKdnte 1 MNHyT u noCTabTe nepeKIOUaTeB b nIoXeHne ON (BKN.)
OBPATITE BHIMAHINE! CneJeYet
NoJIb3OBAJbC8 NCKJIQUHTeJIbHO
TpaHcΦopMatOpOM, BXOДЯшIM B
KOMPJIeKT NOCTaBKN MaSHINKH
E76X4DE HANpЯЖенE = 3,0V -CnlaToKa = 100mA
TYP60
TtO6bI pe3KO yBENuHTb MOHOCb TcPnKn, Bbl MoKeTe BO-ONb3oBaTbc FyHKuNee TTyp60, HaKaB HA KOnkY TURBO. DoCTrHyTOE TAKIM Ocbpa3OM yBEnueHeMoUHocTHN KcOpOCTM Ma-UNHKn N03BOJNT BamnpOdoJNKTb CTPnKxJa He Na cambIx TpydNbIx yUcTaKx.
KAKIIOJIb3OBATbcHANPABJIAIOUIMN
HnapBaJIIOUHne IJNCTpIXKNI OeHb npaKTNUHb, OHn rapAHTIpyIO TaBHOmePHyIOINHy CTpIXKN.
OBPATITE BHIMAHINE: HanpablaHIOJIe DnA CTPNKKn CneJyET YCTaHABINBtHa MaSHINKY DO TOTO,KaK BKNIOUHTb ee;Ia 3aMeHb HApabNIOUIHc N DaPyrHy CNEJyET OTKJIIOUHTb MaSHINKY.
PpeIe TEm, KAK yCTaHOBt b HaprablaHouyO, OTpyrNpUryTe DInHy CTpnXkN Ha 3 MM INn Ha 21 MM; YCTaHOBt HaprabLAHouyTo Ha onOpHyO duKky, PnpDaburTebHo OTpyrNpUryTe o6e NomeeHHbte CTOPOhBi HA tAmE 3aueNKHITE HIXHQIO qactb HaprablaHooie (Pnc.2)
TTO6b CHaTB HnPaBnIOuIyO, ChauJana OtpErpyNpyIe DInHy CTpIKKn HA 3 MM INH Na 21 MM; 3aTEM OTcoeDINHTe HnPaBnIOUoYOT ONOpHOn dyKKN,OTcEKNHYB e B NIXHe aCTn 60JIbSnIM naJIbsem. (Pnc.3)
BHIMAHHE! Hanpablaiouaa dI na DOBOKN yctaHablnBaetcHa Ma- shnKy TOnHO TAKHe KAc N HapabLAIOUne dIaNINbI cTpnKKn, Ho perynPnyeTCBpyHyu N He3aBNCMO OT KOleCnKa peYunPoBKn dINHbCTpnKKn.
BKJIQUEHNE IMCIOJIb3OBAHHE
YtO6b OtpErpyInpOBat bIINHy CTnJXKII, BOCNOb3yTecb KONEcNKOM (7),Bpaaeraero BBepx INHBM3.
Bb6paHnHaJaIInHaCTpNnKKnIONaJIeTcHaNkPaHeC pIpaBoN cLeBOB CTOPHOblMaINHKn.
HaxmnteHa KhoIky ON/OFF (BkI./ BblKl.).
BbMoKeTe BJIIO6OIMoMeHT N3-MeHnTbDINHyCTPnKKn.
Bnaoradapar yctpoiCTby SMART ADJUSTING SYSTEM BbI6paHnAa DmHa CTpNkN NOdepKNaBaETc Hes3AbcIMo OyTgna HAcJIOHa MaunHKU,TO rapaHTnpyEt BAM TOHOCtbepeYbTaTa.
TEXHIMKA CTPNXKKN I COBETBI CNEUMAJINCTA

- Fixed Blade:
- CHARGING THE CLIPPER
- MAINSUSE
- TURBO
- USING THE CUTTING GUIDES
- TURNING ON AND USING
- CUTTING TECHNIQUES AND ADVICE FROM THE EXPERTS
- Using the thinning guide
- MAINTENANCE
- Removable blades
- Self-lubricating blades
- DEUTSCH
- SCHERGERAT E764XDE
- KAK 3APRdntb MAUHKNY
- PABOTA OT CETN
- TYP60
- KAKIIOJIb3OBATbcHANPABJIAIOUIMN
- BKJIQUEHNE IMCIOJIb3OBAHHE
- TEXHIMKA CTPNXKKN I COBETBI CNEUMAJINCTA
Brand : BABYLISS
Model : E764XDE
Category : Epilator