
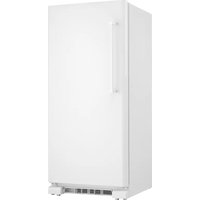
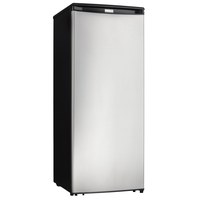
DFF100C1BSLDB - Freezer DANBY - Free user manual and instructions
Find the device manual for free DFF100C1BSLDB DANBY in PDF.
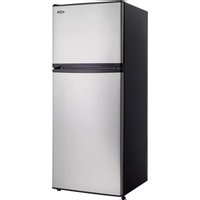


| Product Type | Freezer |
| Brand | Danby |
| Model | DFF100C1BSLDB |
| Net Capacity | 100 L |
| Dimensions (H × W × D) | 85 × 55 × 55 cm |
| Net Weight | 25 kg |
| Power Supply | 220-240 V, 50 Hz |
| Energy Class | E |
| Annual Energy Consumption | 200 kWh |
| Noise Level | 40 dB |
| Main Functions | Adjustable temperature control, power indicator light |
| Defrost | Manual |
| Closure Type | Lockable handle |
| Maintenance and Cleaning | Interior cleaning with baking soda solution |
| Safety | Secure closure, child protection |
| Spare Parts | Available on Danby website |
| Repairability | Repairability index not communicated |
| Warranty | 1 year |
Frequently Asked Questions - DFF100C1BSLDB DANBY
User questions about DFF100C1BSLDB DANBY
0 question about this device. Answer the ones you know or ask your own.
Ask a new question about this device
Download the instructions for your Freezer in PDF format for free! Find your manual DFF100C1BSLDB - DANBY and take your electronic device back in hand. On this page are published all the documents necessary for the use of your device. DFF100C1BSLDB by DANBY.
USER MANUAL DFF100C1BSLDB DANBY
Owner's Use and Care Guide....1-9
- Safety Instructions • Installation Instructions • Care and Maintenance
- Troubleshooting
- Warranty
FROST-FREE REFRIGERATOR
Read and follow all safety rules and operating instructions before first use of this product.

PRECAUTION:
Welcome
Welcome to the Danby family. We are proud of our quality products, and we believe in dependable service, like you will find in this Owner's Use and Care Guide, and like you will receive from our friendly customer service department. Best of all, you will experience these values each and every time you use your Danby appliance. That is important, because your new appliance will be a part of your family for a long time.
Note the information below; you will need this information to obtain service under warranty. To receive service, you must provide the original receipt.
Model Number:
Serial Number:
Date of Purchase:
NEED HELP?
Before you call for service, here are a few things you can do to help us serve you better:
Read this Owner's Use and Care Guide:
It contains instructions to help you use and maintain your appliance properly.
If you received a damaged appliance:
Immediately contact the retailer (or builder) that sold you the appliance.
Save time and money:
Check the Troubleshooting section at the end of the guide before calling. This section helps you solve common problems that may occur.
If you do need service, you can relax, knowing help is only a phone call away.

1-800-26- Danby
(1-800-263-2629)

Important Safety Information
READ AND FOLLOW ALL SAFETY INSTRUCTIONS
ELECTRICAL REQUIREMENTS
This appliance must be grounded. In the event of an electrical short circuit, grounding reduces the risk of electrical shock by providing an escape wire for the electrical current.
This appliance is equipped with a cord having a grounding wire with a grounding plug. The plug must be plugged into an outlet that is properly installed and grounded.
WARNING - Improper use of the grounding plug can result in a risk of electric shock. Consult a qualified electrician or serviceman if the grounding instructions are not completely understood, or if doubt exists as to whether the appliance is properly grounded.
DO NOT USE AN EXTENSION CORD
Use an exclusive 115V wall outlet. Do not connect your refrigerator to extension cords or together with any other appliance in the same wall outlet. Do not splice the cord.

IMPORTANT WARNING!
An empty refrigerator is a very dangerous attraction to children. Remove the gasket, latches, lids or doors from unused appliances, or take some other action that will guarantee the appliance harmless.
DANGER: Risk of child entrapment. Before you throw away your old refrigerator:
• Take off the doors. - Leave the shelves in place so that children may not easily climb in.
DON'T WAIT! DO IT NOW!

WARNING! EXPLOSION HAZARD!
Risk of fire or explosion due to puncturing of refrigerant tubing. Do not use sharp objects to aid in defrost. Please handle with care. Keep flammable materials and vapors such as gasoline away from the refrigerator. Use nonflammable cleaner.
Disposal of this unit should be in accordance with federal and local regulations.
Please ensure that component parts shall be replaced with like components and that servicing shall be done by factory authorized service personnel, so as to minimize the risk of possible ignition due to incorrect parts or improper service.
SAVE THESE INSTRUCTIONS!

Installation Instructions
Remove exterior and interior packing, wipe the outside thoroughly with a soft dry cloth and the inside with a wet, lukewarm cloth. Avoid placing the unit in a narrow recess or near any heat source, direct sunlight, or moisture. Let air circulate freely around the unit. Keep the rear of the refrigerator 2 inches away from the wall.
LOCATION
1) Select a place with a strong, level floor. 2) Allow 2 inches of space between the refrigerator and any adjacent wall. 3) Avoid direct sunlight and heat. Direct sunlight may affect the acrylic coating on the refrigerator exterior. Heat sources nearby will cause higher electricity consumption.
The refrigerating system in this refrigerator is a “Frost Free” system. This type of system requires no user intervention (i.e. defrosting) other than selecting required cooling temperatures and the usual care and maintenance.
To avoid vibration, the unit must be set level. This is accomplished by adjusting the (2) front leveling legs, located under the refrigerator.
The refrigerator temperature will vary depending on the quantity of food stored and the frequency with which the door is opened.
NOTES:
- This appliance is intended for FREE-STANDING INSTALLATION ONLY, and is NOT intended to be built-in.
- Before connecting this appliance to electrical power supply, leave it to stand for approx. 24 hours, which will reduce the possibility of malfunction in the cooling system due to transport handling.
- This appliance is approved for INDOOR USE ONLY and is NOT intended for outdoor operation.
IMPORTANT
Install this appliance in an area where the ambient temperature is between 55°F (13°C) and 110°F (43°C). If the temperature around the appliance is too low or high, cooling ability may be affected.
DOOR REVERSAL INSTRUCTIONS
Your refrigerator is built with a reversible door. You have the choice of either opening it from the left or the right side. In order to reverse the opening direction of your door, please follow these simple instructions:
IMPORTANT
Before you begin, unplug refrigerator or disconnect power. Remove food and any adjustable door or utility bins from doors.
DOOR AND HINGE REMOVAL
- Unplug refrigerator or disconnect power.
- Keep both doors closed until you are ready to lift them free from the cabinet.
NOTE: Provide additional support for the doors while the hinges are being moved. Do not depend on the door magnets to hold the doors in place while you are working.
- Remove the parts for the top hinge as shown in Top Hinge graphic. Lift the freezer door from the cabinet.
- Remove the parts for the center hinge as shown in the Center Hinge graphic. Lift the refrigerator door free from the cabinet.
- Remove the parts for the bottom hinge as shown in the Bottom Hinge graphic.
DOOR REVERSAL CABINET
- Remove the cover of upper hinge hole from left side and move them to opposite side (see Graphic 1).
- Remove hole plugs from left side and move them to opposite side (see Graphic 2)
DOORS
- Remove door hinge hole plug from the top of freezer and refrigerator door (see graphic 4)
- Remove the door stop from refrigerator door and move to the other side (see graphic 5)
- Take out the left door stop of freezer door and screw from the accessory bag and fix it on the handle (see graphic 3)
DOOR REVERSAL INSTRUCTIONS
NOTE: The left door and the right door stop of the freezer door are different. They can't replace each other.
DOOR AND HINGE REPLACEMENT
- Replace the parts for the bottom hinge as shown (see Bottom Hinge graphic). Tighten screws. Replace the refrigerator door. NOTE: Provide additional support for the doors while the hinges are being moved. Do not depend on the door magnets to hold the doors in place while you are working.
- Assemble the parts for the center hinge as shown and tighten all screws (see Center Hinge graphic). Replace the freezer door.
- Assemble the parts for the top hinge as shown (see Top Hinge graphic). Do not tighten screws completely.
- Line up the doors so that the bottom of the freezer door aligns evenly with the top of the refrigerator door. Tighten all screws.
FINAL STEPS
- Check all holes to make sure that hole plugs and screws are in place.
- Plug in refrigerator or reconnect power.
- Reset the controls (see "temperature control" section).
- Return all removable door parts to doors and food to product.


Installation Instructions
FEATURES

1) FREEZER DOOR BIN 2) REFRIGERATOR DOOR BIN 3) FREEZER SHELF 4) FREEZER TEMPERATURE CONTROL PANEL 5) REFRIGERATOR TEMPERATURE CONTROL 6) INTERIOR LIGHT 7) REFRIGERATOR SHELF 8) CRISPER 9) LEVELING LEGS
ICE CUBE TRAY

The ice cube tray is flexible. Twist tray to remove the ice cubes. If the ice cube tray is frozen solid, run a little water over the tray. Never use a knife or other metal instruments to remove the ice cube tray, as this may damage the evaporator.
Installation Instructions
CHANGING LED LIGHT
Please follow the steps below
We recommend that you start by unplugging your refrigerator unit.
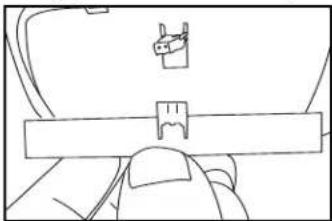
- Take off the light cover by flicking the bottom tab up (the bottom tab is located at the bottom middle of the light cover).
- Take out the LED display by pulling it down and unhooking it from the port. It is best to use your thumb on the front of the LED and your fingers at the back near the port.
- Put in the new LED by inserting it into the port.
- Once the LED is secured, put the cover back on by inserting the two top tabs into their slots and pushing the bottom tab back into place. You should hear a quiet click.
Once you have secured the light cover back on, you can plug your refrigerator back in.

Unhook the LED display using your thumb and fingers.
You will see the LED display.
Hook the new LED display to the port.
Pull the LED display down.


REFRIGERATOR TEMPERATURE CONTROL
- There is a digital temperature display panel in the REFRIGERATOR compartment (See Fig.2.). The digits on the upper line are in degrees Celsius, while the bottom digits are in degrees Fahrenheit.
- Press the “-” sign or “+” sign to reach the desired temperature.
- The first time you turn the unit on, please select 2°C / 36°F and let the unit run for at least 2 hours before putting food inside. This will ensure the refrigerator compartment is thoroughly chilled before food is put in. The recommended factory setting is 4°C / 39°F.
NOTE:
- If the unit is unplugged, you must wait 3 to 5 minutes before restarting the unit (plugging the unit back in). If you attempt to restart before 3 to 5 minutes, the refrigerator will not start.
- If the power goes out, the unit should restart itself when the power comes back on.
- Large amounts of food will lower the cooling efficiency of the appliance.
- Do not place food so that it blocks an air vent, and leave adequate space between food items for air flow in the cabinet.
- Allow several hours for temperature to stabilize between two temperature selections.
- Selecting different temperatures on the refrigerator digital temperature display will affect the temperature in BOTH the fridge and the freezer compartments.
Freezer Temperature Control
- Your refrigerator has one vent control for regulating the temperature in the freezer compartment (See Fig. 4). The temperature control is located on the center of the freezer compartment's interior back panel.
- The first time you turn the unit on, adjust the temperature control knob to "MAX" and let the unit run for at least 2 hours before putting food inside. This will ensure that the freezer cabinet is thoroughly chilled before food is put in.
- The FREEZER temperature control ranges from "MIN" (the warmest) to "MAX" (the coldest). Adjust this control to get the desired temperature. The recommended factory setting is MEDIUM (half way between "MIN" and "MAX").
THE FREEZER COMPARTMENT
- This compartment is designed for the long-term storage of frozen food. Storage time period is up to three months.
- The storage life of frozen foods varies and the recommended storage time should not be exceeded.
- Place frozen food into the freezer as quickly as possible after purchase. If there are instructions on the package, carefully follow these instructions regarding storage times.

Care and Maintenance
COOLING SYSTEM
This refrigerator is inclusive of a "Frost Free" type cooling system, which means you never have to defrost the freezer compartment. Defrosting is done automatically by means of a defrost heating element and a defrost timer factory-programmed to operate (cycle) approximately every 8 hours. The defrost water is routed into a defrost pan located directly above the compressor, where it then evaporates.
CLEANING
Before cleaning the refrigerator or freezer, always disconnect the refrigerator from the power supply. To clean the inside, use a soft cloth and a solution of a tablespoon baking soda to one quart (4 cups) of water, or a mild soap suds solution or mild detergent. Wash ice cube tray, drip tray, and glide out shelves in a mild detergent solution, then wipe dry with a soft cloth. Clean the outside with a damp soft cloth and some mild detergent or appliance cleaner.
SETTING THE THERMOSTAT
The thermostat setting can be adjusted from minimum setting through maximum (coldest setting). We recommend setting the thermostat at medium setting. However, if you find this setting inadequate for your cooling requirements, adjust as needed by rotating the thermostat dial. The thermostat dial is located on the front top section of the refrigerator compartment. The thermostat controls temperature for both the freezer and refrigerator compartments.
VACATION TIME
For short vacation periods, leave the control knob at the usual setting. During longer absences:
a) remove all food.
b) disconnect from electrical outlet.
c) leave the door open to avoid possible formations of condensation, mold, or odors.
POWER FAILURE
Most power failures are corrected within an hour or two, and will not affect your refrigerator temperatures. However, you should minimize the number of times you open the door while the power is off. During power failures of longer duration, take steps to protect your food.
IF YOU MOVE
Remove, or securely fasten down, all loose items inside the refrigerator. To avoid damaging the leveling legs, turn them all the way into the base.
Some Important Rules for the Correct Use of the Refrigerator
- Never place hot foods in the refrigerator.
- Beverages should be stored in sealed containers.
- Foods to be stored for a long time should be wrapped in cellophane or polyethylene, or kept in glass containers. Never place spoiled food in the refrigerator.
- Don't overload the refrigerator.
- Don't open the door unless necessary.
- Should the refrigerator be stored without use for long periods, it is suggested, after careful cleaning, to leave the door ajar to allow the air to circulate inside the unit in order to avoid the possible formation of condensation, mold, or odors.
FOOD STORAGE SUGGESTIONS
Fresh Food Compartment
- Never cover food compartment shelves with aluminum foil or any other shelf covering material which may prevent air circulation.
- Always remove porous store wrapping paper from meats, poultry, and fish. Meats should be wrapped individually and placed in a dish for storage. Wrap fish and poultry in foil or heavy waxed paper. Most fish should be used the same day of purchase. Packaged meats such as ham, bacon, dried beef, or frankfurter, store best in their original packages.
- Allow warm foods to cool to room temperature before placing them in the refrigerator. Always cover open dishes of food, especially leftovers. Use leftovers within 2 or 3 days.
VEGETABLE CRISPER
The tray at the bottom of the refrigerator is covered to retain moisture. The crisper compartment will enable you to store vegetables and fruits which would otherwise dry out rapidly.
Occasionally, a minor problem may arise, and a service call may not be necessary - use this troubleshooting guide for a possible solution. If the unit continues to operate improperly, call an authorized service depot or Danby's Toll Free Number for assistance.
Tel: 1-800-26-(1-800-263-2629)
| PROBLEM | POSSIBLE CAUSE | SOLUTION |
| 1) Unit does not work. | No power to unit.Power cord is unplugged.Wrong voltage is being used. | Check connection of power cord at power source.Plug in unit.Use proper voltage. |
| 2) Refrigerator running too frequently. | Temperature control too cold.Door not closed.Hot food inserted.Doors open too long/often.Close proximity to heat source or direct sunlight. | Check/adjust settings as needed.Close the door securely.Cool food before inserting.Minimize door openings/duration.DO NOT place unit close to heat sources or in direct sunlight. |
| 3) Internal temperature too cold. | Temperature set too cold. | Check/adjust settings as needed. |
| 4) Internal temperature not cold enough. | No power to unit.Power cord is unplugged.Wrong voltage is being used.Temperature control too warm.Hot food inserted.Doors open too long/often.Air flow obstruction.Close proximity to heat source or direct sunlight. | Check connection of power cord at power source.Plug in unit.Use proper voltage.Check/adjust settings as needed.Cool food before inserting.Minimize door openings/duration.Allow room for air to circulate around the unit.DO NOT place unit close to heat sources or in direct sunlight. |
| 5) Freezer not cold enough. | Temperature control too warm.Door not closed.Hot food inserted.Doors open too long/often.Wrong voltage is being used. | Check/adjust settings as needed.Close door securely.Cool food before inserting.Minimize door openings/ duration.Use proper voltage. |
| 6) Light will not work. | No power to unit.Power cord is unplugged.Bulb is loose/needs replacing.Door switch is stuck. | Check connection of power cord to power source.Plug in unit.Tighten or replace bulb.Check the switch for obstructions, clean if necessary. |
LIMITED IN-HOME APPLIANCE WARRANTY
This quality product is warranted to be free from manufacturer's defects in material and workmanship, provided that the unit is used under the normal operating conditions intended by the manufacturer.
This warranty is available only to the person to whom the unit was originally sold by Danby Products Limited (Canada) or Danby Products Inc. (U.S.A.) (hereafter "Danby") or by an authorized distributor of Danby, and is non-transferable.
TERMS OF WARRANTY
Plastic parts are warranted for thirty (30) days only from purchase date, with no extensions provided.
| First year | During the first twelve (12) months, any functional parts of this product found to be defective, will be repaired or replaced, at warrantor's option, at no charge to the ORIGINAL purchaser. |
| To obtain service | Danby reserves the right to limit the boundaries of “In Home Service” to the proximity of an Authorized Service Depot. Any appliance requiring service outside the limited boundaries of “In Home Service”, it will be the consumer's responsibility to transport the appliance (at their own expense) to the original retailer (point of purchase) or a service depot for repair. See “Boundaries of In Home Service” below. Contact your dealer from whom your unit was purchased, or contact your nearest authorized Danby service depot, where service must be performed by a qualified service technician. If service is performed on the units by anyone other than an authorized service depot, or the unit is used for commercial application, all obligations of Danby under this warranty shall be void. |
| Boundaries of in-home service | If the appliance is installed in a location that is 100 kilometers (62 miles) or more from the nearest service center your unit must be delivered to the nearest authorized Danby Service Depot, as service must only be performed by a technician qualified and certified for warranty service by Danby. Transportation charges to and from the service location are not protected by this warranty and are the responsibility of the purchaser. |
Nothing within this warranty shall imply that Danby will be responsible or liable for any spoilage or damage to food or other contents of this appliance, whether due to any defect of the appliance, or its use, whether proper or improper.
EXCLUSIONS
Save as herein provided, by Danby, there are no other warranties, conditions, representations or guarantees, express or implied, made or intended by Danby or its authorized distributors and all other warranties, conditions, representations or guarantees, including any warranties, conditions, representations or guarantees under any Sale of Goods Act or like legislation or statute is hereby expressly excluded. Save as herein provided, Danby shall not be responsible for any damages to persons or property, including the unit itself, howsoever caused or any consequential damages arising from the malfunction of the unit and by the purchase of the unit, the purchaser does hereby agree to indemnify and hold harmless Danby from any claim for damages to persons or property caused by the unit.
GENERAL PROVISIONS
No warranty or insurance herein contained or set out shall apply when damage or repair is caused by any of the following:
1) Power failure. 2) Damage in transit or when moving the appliance. 3) Improper power supply such as low voltage, defective house wiring or inadequate fuses. 4) Accident, alteration, abuse or misuse of the appliance such as inadequate air circulation in the room or abnormal operating conditions (extremely high or low room temperature). 5) Use for commercial or industrial purposes (i.e., if the appliance is not installed in a domestic residence). 6) Fire, water damage, theft, war, riot, hostility, acts of God such as hurricanes, floods, etc. 7) Service calls resulting in customer education. 8) Improper installation (i.e., building-in of a free standing appliance or using an appliance outdoors that is not approved for outdoor application). Proof of purchase date will be required for warranty claims; so, please retain bills of sale. In the event warranty service is required, present this document to our AUTHORIZED SERVICE DEPOT.
Warranty Service
In-home
Danby Products Limited
PO Box 1778, Guelph, Ontario, Canada N1H 6Z9
Telephone: (519) 837-0920 FAX: (519) 837-0449
1-800-263-2629
07/13
Danby Products Inc.
PO Box 669, Findlay, Ohio, U.S.A. 45840
Telephone: (419) 425-8627 FAX: (419) 425-8629
Welcome
1-800-26-Danby
(1-800-263-2629)

SAVE THESE INSTRUCTIONS!

REVERSIBLE DOOR INSTRUCTIONS
REVERSIBLE DOOR INSTRUCTIONS (continued)
NOTE:
1) STORAGE BIN IN FREEZER DOOR 2) STORAGE BIN IN REFRIGERATOR DOOR 3) FREEZER SHELF 4) FREEZER TEMPERATURE CONTROL KNOB 5) REFRIGERATOR TEMPERATURE CONTROL KNOB 6) INTERIOR LIGHT 7) REFRIGERATOR SHELF 8) CRISPER 9) LEVELING FEET
ICE TRAY


OPERATING YOUR REFRIGERATOR

Fig.3
FREEZER

Danby Products Limited
PO Box 1778, Guelph, Ontario, Canada N1H 6Z9
You will be able to see the LEDs.

Upper tabs
FREEZER
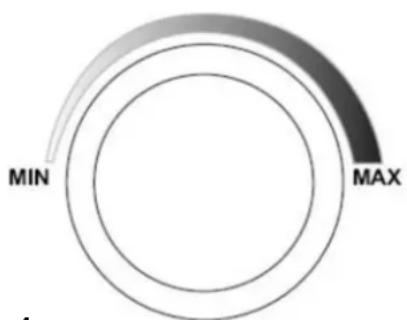
Fig.4 Freezer temperature control
REFRIGERATOR TEMPERATURE CONTROL
Danby Products Limited
PO Box 1778, Guelph, Ontario, Canada N1H 6Z9
Telephone: (519) 837-0920 FAX: (519) 837-0449
1-800-263-2629
07/13
Danby Products Inc.
PO Box 669, Findlay, Ohio, U.S.A. 45840
Telephone: (419) 425-8627 FAX: (419) 425-8629
FROST FREE REFRIGERATOR
All repair parts are available for purchase or special order when you visit your nearest service depot. To request service and/or the location of the service depot nearest you, call the TOLL FREE number.
When requesting service or ordering parts, always provide the following information:
- Product Type
- Model Number
- Part Number
- Part Description
FROST-FREE REFRIGERATOR

- FROST-FREE REFRIGERATOR
- PRECAUTION
- WELCOME
- NEED HELP
- READ THIS OWNER'S USE AND CARE GUIDE
- IF YOU RECEIVED A DAMAGED APPLIANCE
- SAVE TIME AND MONEY
- IMPORTANT SAFETY INFORMATION
- READ AND FOLLOW ALL SAFETY INSTRUCTIONS
- ELECTRICAL REQUIREMENTS
- DO NOT USE AN EXTENSION CORD
- IMPORTANT WARNING
- WARNING! EXPLOSION HAZARD
- SAVE THESE INSTRUCTIONS
- INSTALLATION INSTRUCTIONS
- LOCATION
- NOTES
- IMPORTANT
- DOOR REVERSAL INSTRUCTIONS
- DOOR AND HINGE REMOVAL
- DOOR REVERSAL CABINET
- DOORS
- DOOR AND HINGE REPLACEMENT
- FINAL STEPS
- FEATURES
- ICE CUBE TRAY
- CHANGING LED LIGHT
- REFRIGERATOR TEMPERATURE CONTROL
- NOTE
- THE FREEZER COMPARTMENT
- CARE AND MAINTENANCE
- COOLING SYSTEM
- CLEANING
- SETTING THE THERMOSTAT
- VACATION TIME
- POWER FAILURE
- IF YOU MOVE
- SOME IMPORTANT RULES FOR THE CORRECT USE OF THE REFRIGERATOR
- FOOD STORAGE SUGGESTIONS
- FRESH FOOD COMPARTMENT
- VEGETABLE CRISPER
- LIMITED IN-HOME APPLIANCE WARRANTY
- TERMS OF WARRANTY
- EXCLUSIONS
- GENERAL PROVISIONS
- WARRANTY SERVICE
- IN-HOME
- REVERSIBLE DOOR INSTRUCTIONS
- REVERSIBLE DOOR INSTRUCTIONS (CONTINUED)
- ICE TRAY
- OPERATING YOUR REFRIGERATOR
- FREEZER
- FROST FREE REFRIGERATOR
Brand : DANBY
Model : DFF100C1BSLDB
Category : Freezer