
KH 1283 - Iron LERVIA - Free user manual and instructions
Find the device manual for free KH 1283 LERVIA in PDF.
User questions about KH 1283 LERVIA
0 question about this device. Answer the ones you know or ask your own.
Ask a new question about this device
Download the instructions for your Iron in PDF format for free! Find your manual KH 1283 - LERVIA and take your electronic device back in hand. On this page are published all the documents necessary for the use of your device. KH 1283 by LERVIA.
USER MANUAL KH 1283 LERVIA
Safety instructions 2
Items supplied 3
Operating Elements 3
Before the First Use 3
Filling with mains water. 4
Plugging in and ironing 5
Steam ironing 5
Ironing with steam blast 5
5
Taking the steam iron out of service 6
Drip-Stop Function 6
Cleaning 6
Self-cleaning function 6
Housing 6
Metal parts. 7
Troubleshooting 7
Technical data 7
Disposal 7
Warranty and Service 7
Importer 8
Read these operating instructions carefully before using the appliance for the first time and preserve this maul for later reference. Pass this manual on to whoever might acquire the appliance at a future date.
CORDLESS STEAM IRON KH1283
Intended Use
The steam iron is intended exclusively for the ironing of textiles. The iron may only be used indoors and in private households. All other use is deemed improper use.
Safety instructions
Risk of burns!
- Grasp the steam iron only by the handle when it is hot.
- This appliance is not intended for use by individuals (including children) with restricted physical, physiological or intellectual abilities or deficiencies in experience and/or knowledge unless they are supervised by a person responsible for their safety or receive from this person instruction in how the appliance is to be used.
Children should be supervised to ensure that they do not play with the appliance. - Never hold your hand over the steam spray or on hot metal parts.
- You should not open the filler opening of the water reservoir while the iron is in use. First allow the steam iron to cool down and remove the plug from the power socket.
Risk of fire!
- Never leave the steam iron unattended when it is hot or switched on.
-
Put the steam iron into storage only when it has cooled down completely.
-
When ironing, use only the temperatures detailed in the garment care instructions, or those suitable for the material. Otherwise, you could damage the textiles. Should care instructions not be given or known, start with the lowest temperature setting.
- NEVER permit children to use the steam iron.
- Place the station on a level and heat-resistant surface. The station must be stable when you place the steam iron onto it.
- Place the steam iron only on the supplied station when you put it down.
Risk of electrical shocks.
- The rating of the local power supply must tally completely with the details given on the rating plate of the appliance.
- To avoid potential risks, arrange for a defective appliance to be checked and possibly repaired by qualified technicians, or contact our Customer Service Department.
- Arrange for defective power plugs and/or cables to be replaced at once by qualified technicians or our Customer Service Department.
- To disconnect from the power source, pull only on the plug itself, not on the cable.
- Never bend (kink) or crush the power cable. Arrange it in such a way that it cannot come into contact with hot surfaces and so that no-one can step on or trip over it.
- After every use, before cleaning and when refilling with water, remove the plug from the power socket.
Always unroll the power cable fully before switching on and do not use an extension cable. -
Never touch the power cable or the power plug with wet hands.
-
Under no circumstances should you submerge the steam iron in any liquid or permit liquids to penetrate into the housing of the steam iron. Do not expose the appliance to humidity and do not use it outdoors. Should liquids enter the housing, unplug the appliance from the power socket immediately and arrange for it to be repaired by a qualified technician.
- Never use the steam iron adjacent to water contained in a bath, shower, wash basin or other vessels. The proximity of moisture presents a danger, even when the appliance is switched off.
- You may not open the housing of the steam iron. Permit only authorised technicians to repair a defective appliance should repairs be necessary.
- Under no circumstances should you use the steam iron if it bears visible signs of damage, has fallen or leaks water. Arrange for it to be repaired by qualified specialists.
Attention!
- Should the clothing care instructions forbid ironing, (Symbol), the clothing item may not be ironed. If you do so, the clothing item could be permanently damaged.
- The water tank is to be filled exclusively with mains or distilled water. You will otherwise damage the steam iron.
- You may not clean the steam iron with solvents, alcohol or abrasive cleaning agents. These could damage it.
Items supplied
Steam iron
Station
Cable base
Measuring beaker
Operating instructions
Operating Elements
Water jet
2Filler opening for the water tank
3 Steam regulator
4 Button for fine water spray
5 Button for steam blast
6 Temperature control lamp
Temperature regulator
Cable base
Power cable
10 Unlocking switch
1 Station
12 Cable retainer
13 Ironing sole
14 Self-clean button
Before the First Use
- Remove the steam iron from the packaging.
- Remove all protective coverings and protective foils from the steam iron and from the sole of the iron 18.
- Plastic bags can be dangerous. To avoid the risks of asphyxiation, keep plastic bags out of the reach of toddlers and small children.
- Connect the steam iron with the cable base 8 and with the station 11, should it not be attached (see chapter "Tips for utilisation").
-
Insert the plug into a wall power socket supplying an electrical current as detailed on the rating plate.
-
Place the temperature regulator ① into the position "MAX"
- Heat the steam iron up for several minutes at this highest setting.
- Remove the steam iron from the station (see chapter "Tips for utilisation").
- Then iron a piece of material that is no longer required, to remove possible contamination from the sole of the iron ⑥.
In addition to the typical utilisation with a cable, you can also separate the steam iron from the cable base for a short period to iron textiles which are not located close to an electrical power socket.
To separate the steam iron from the cable base 8:
- Place the steam iron, with the cable base engaged, onto the station 1. The unlocking switch 10 must be in the position
- Slide the unlocking switch 10 into the position 2. The steam iron now allows itself to be lifted off. The cable base 3 remains combined with the station 11.
① Note:
As the steam iron cannot be heated up without the cable base 8, you can only work for a short period without the cable base 8. Reconnect the steam iron with the cable base 8 as soon as the steam blast or the ironing quality diminishes.
To reconnect the steam iron with the cable base 8:
- Insert the steam iron into the cable base ③ connected to the station ①. Slide the unlocking switch ⑩ to ⑨. You can now lift the steam iron with the cable base ⑧ from the station ①.
Should you wish to secure the steam iron to the station 1, for safekeeping for example, slide the unlocking switch 1 with the preplaced steam iron to The steam iron can now no longer be removed from the station 1.
Operation
Filling with mains water
- In a cooled condition, place the steam iron horizontally on its sole 13.
- Slide off the cover of the filler opening for the water tank 2.
- Using the measuring beaker, fill the water tank with water to the "Max" marking, but no further.
- Slide the cover of the filler opening for the water tank ② back to close it.
Note
Should the mains water at your locality be rated as hard, it is recommended that you mix mains water with some distilled water. Otherwise, the jets for the steam blast function could calcify (become blocked) prematurely.
To extend the optimal steam blast function, mix mains water with distilled water according to the table.
| Water hardness | Ratios - distilled water to mains water |
| very soft / soft | 0 |
| medium | 1:1 |
| hard | 2:1 |
| very hard | 3:1 |
The water hardness level can be queried at your local water works.
Plugging in and ironing
Dry ironing without steam is possible at all temperatures, steam ironing is first possible from the adjustment range on the temperature regulator 7.
- Insert the plug into a power socket.
Attention!
Should the clothing care instructions forbid ironing, (Symbol l ), the clothing item may not be ironed. If you do so, the clothing item could be permanently damaged.
- Check the care instructions on the labels in the garment to see if it is suitable for being ironed, and at which temperature setting.
- Select the best suitable temperature setting with the temperature controller 7.
The control lamp for the temperature ⑥ glows. When the set temperature has been reached, the temperature control lamp ⑥ goes out.
- Wait until the temperature control lamp 6 extinguishes.
To moisten the laundry, press the spray button 4.
This function is suitable for very dry and very crumpled garments.
Steam ironing
Programme the steam regulator 3 to the desired steam setting.
- The temperature regulator ① must be turned into at least the adjustment range. Otherwise it cannot produce any steam.
Ironing with steam blast
The steam blast is especially suitable for smoothing difficult to reach parts of a garment.
- Slightly raise the steam iron.
For a steam blast, press the steam blast button 5.
Temporarily setting the steam iron aside
Risk of fire!
Never leave the steam iron unattended when it is hot or switched on.
- Place the temperature regulator ① into the position "MIN".
- Place the steam iron only on the cable base 8 and insert it onto the station 11.
Taking the steam iron out of service
- Remove the plug from the wall power socket.
- Empty the water tank and clean the sole of the iron 13.
- Place the cooled down steam iron on the station 1 and secure it, in that you slide the unlocking switch 10 into the position
- The power cable ⑨ can be wrapped and stored around the cable retainer ⑫ on the underside of the station ⑬:
Drip-Stop Function
With conventional steam irons it can happen that water drips from the iron sole 13 at low temperatures. This iron however possesses a new equipment characteristic, the DRIP-STOP function. At low temperatures the iron automatically switches off the steam-blast function. When this happens, a "CLICK" is to be heard. You must then re-set a suitable temperature with the temperature controller 7. As soon as this is reached, steam production is continued.
Cleaning
Self-cleaning function
- Connect the steam iron with the cable base 8.
- Fill the water tank to the marking MAX.
- Insert the plug into a wall socket.
- Place the temperature regulator ① into the position MAX.
- Adjust the steam regulator ③ to maximum steam power.
- Allow the steam iron to heat up until the heat control lamp ⑥ extinguishes and once again glows.
- Hold the steam iron horizontally over a catchment receptacle.
- Position the steam regulator ③ at the maximal steam power level. Press and hold down the button Self-clean 14 . Thereby, steam and boiling water flows from the steam exit holes in the sole of the iron 15 . Impurities that may be present are washed out.
- Release the Self-clean button 14 as soon as all of the water has exited.
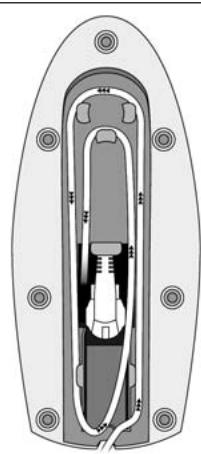
- Thoroughly dry the sole of the iron 13. For this, slide the sole of the iron 13 back and forth over a hand towel or an old piece of material several times.
- Allow the steam iron to cool down before placing it in storage.
Housing
Risk of personal injury!
ALWAYS remove the plug before cleaning the appliance. There is a danger of electric shock! Allow the appliance to cool down. Risk of Burns!
- Clean the housing with a soft, dry cloth only.
Important!
Do not use aggressive, abrasive or chemical cleaning agents. These could attack the surfaces and cause irreparable damage to the appliance.
Metal parts
- Clean the metal components with a lightly water-moistened cloth and a mild, non-abrasive cleaning agent.
Troubleshooting
The steam iron blows out no or very little steam:
The reserves of water in the steam iron are depleted. Fill the water tank with mains water (See "Filling with mains water").
The steam iron does not get hot:
The steam iron is not plugged in or is not switched on. Insert the plug into a wall power socket and adjust the temperature regulator ① to the desired ironing temperature.
The steam iron is defect. Arrange for the steam iron to be repaired by qualified specialists.
Technical data
Power Supply Voltage: 220 - 240 V~/50 Hz
max. power consumption: 2200 W
Disposal

Do not dispose of the appliance in your normal domestic waste. This appliance is subject to the provisions of European Directive 2002/96/EG.
Dispose of the appliance through an approved disposal centre or at your community waste facility. Observe the currently applicable regulations. In case of doubt, please contact your waste disposal centre.

Dispose of all packaging materials in an environmentally friendly manner.
Warranty and Service
You receive a 3-year warranty for this device as of the purchase date. The appliance has been manufactured with care and meticulously examined before delivery. Please retain your receipt as proof of purchase. In the case of a warranty claim, please make contact by telephone with our service department. Only in this way can a post-free despatch for your goods be assured.
The warranty covers only claims for material and manufacturing defects, not for worn parts or for damage to fragile components, e.g. buttons or batteries. This product is for private use only and is not intended for commercial use.
The warranty becomes void in the event of abusive and improper handling, use of force and internal modifications not carried out by our authorized Service Centre. Your statutory rights are not restricted in any way by this warranty.
GB DES Ltd
Units 14-15
Bilston Industrial Estate
Oxford Street
Bilston
WV147EG
Tel.: 0870/787-6177
Fax: 0870/787-6168
e-mail: support.uk@kompernoss.com
IE Irish Connection
Harbour view
Howth
Co. Dublin
Tel: 00353 (0) 87 99 62 077
Fax:0035318398056
e-mail: support.ie@kompernass.com
Importer
KOMPERNASS GMBH
BURGSTRASSE 21
44867 BOCHUM, GERMANY
www.kompernass.com