
Focus DW5112 - Iron ROWENTA - Free user manual and instructions
Find the device manual for free Focus DW5112 ROWENTA in PDF.
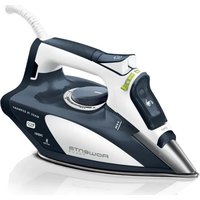


| Product type | Steam iron |
| Brand | Rowenta |
| Model | Focus DW5112 |
| Dimensions (L x W x H) | 30 x 15 x 20 cm |
| Weight | 1.5 kg |
| Power supply | 220-240 V, 50-60 Hz, 2400 W |
| Soleplate type | High-performance ceramic |
| Tank capacity | 300 ml |
| Anti-scale system | Yes, built-in |
| Vertical steam function | Yes |
| Spray function | Yes |
| Automatic shut-off | Yes, after 8 minutes of inactivity |
| Cord length | 2.5 m |
| Maintenance and cleaning | Clean the soleplate with a damp cloth, empty the tank after each use |
| Safety | Automatic shut-off, thermal fuse |
| Spare parts and repairability | Available through Rowenta customer service |
| Warranty | 2 years |
| Country of manufacture | China |
Frequently Asked Questions - Focus DW5112 ROWENTA
User questions about Focus DW5112 ROWENTA
0 question about this device. Answer the ones you know or ask your own.
Ask a new question about this device
Download the instructions for your Iron in PDF format for free! Find your manual Focus DW5112 - ROWENTA and take your electronic device back in hand. On this page are published all the documents necessary for the use of your device. Focus DW5112 by ROWENTA.
USER MANUAL Focus DW5112 ROWENTA

EN * Depending on model - DE * je nach Modell - FR * Selon modèle - NL * al naar gelang het model - DA * afhængig af model - NO * avhengig av modell - SV * beroende på modell - FI * mallista riippuen - ES * según el modelo - IT * a seconda del modello - PT * consoante modelo - EL * ανάλογα με το μοντέλο AR * ____
fig.1 fig.2 fig.3


fig.4 fig.5 fig.6


fig.7 fig.8 fig.9


fig.10 fig.11 fig.12


fig.13 fig.14 fig.15


fig.16 fig.17 fig.18


fig.19
SAFETY INSTRUCTIONS
- Please read these instructions carefully and keep them for further reference.
- Never leave the appliance unattended when it is connected to a power source; if it has not cooled down for approximately 1 hour.
- The iron must be used and rested on a flat, stable, heat-resistant surface.
- When you place the iron on the iron rest, make sure that the surface on which you place it is stable. • Always unplug your appliance: before filling, or rinsing the water tank, before cleaning it, after each use. • Children must be supervised to ensure that they do not play with the appliance.
- Keep the iron and its cord out of reach of children less than 8 years of age when it is energized or cooling down.
- This appliance can be used by children aged from 8 years and above and persons with reduced physical, sensory or mental capabilities, or lack of experience and knowledge, if they have been given supervision or instruction concerning use of the appliance in a safe way and understand the hazards involved.
- Cleaning and user maintenance shall not be made by children without supervision.
- Damages on the iron's soleplate and the steaming function due to use of the wrong water (see 'what water may be used ?') and missing maintenance (see 'Anti calc') cannot be accepted as return under warranty.
- The appliance must not be used if it has fallen to the floor, shows evidence of damage, leaks or fails to function correctly. Never dismantle your appliance. To avoid any danger, have it inspected in an approved service centre.

- The surfaces which are marked with this sign and the soleplate are very hot during the use of the appliance. Don't touch these surfaces before the iron is cooled down.
IMPORTANT RECOMMENDATIONS
- The voltage of your electrical installation must correspond to that of the iron (220-240V). Always plug your iron into an earth socket. Connecting to the wrong voltage may cause irreversible damage to the iron and will invalidate the guarantee.
- If you are using a mains extension lead, ensure that it is correctly rated (16A) with an earth, and is fully extended.
- If the electric power cord is damaged, it must be replaced by an Approved Service Centre in order to prevent any danger.
- Do not unplug your appliance by pulling on the cord.
- Never immerse your steam iron in water or any other liquid. Never hold it under the water tap.
- Never touch the electric cord with the soleplate of the iron.
- Your appliance gives off steam, which may cause burns, especially when you are ironing close to the edge of your ironing board.
- Never direct the steam towards people or animals.
- For your safety, this appliance conforms to the applicable standards and regulations (Low Voltage, Electromagnetic Compatibility, Environmental Directives).
- This product has been designed for domestic use only. Any commercial use, inappropriate use or failure to comply with the instructions, the manufacturer accepts no responsibility and the guarantee will not apply.

ENVIRONMENT PROTECTION FIRST!
Your appliance contains valuable materials which can be recovered or recycled.
Leave it at a local civic waste collection point.
Keep these instructions
DESCRIPTION
1 Spray nozzle 2 Filling inlet
(with slide-button opening)
3 Variable steam control
a Dry ironing b Steam max. position
4 Anti Calc
5 Spray button 6 Shot of steam button


7 Cord 8 Handle 9 Thermostat control light* 10 Temperature control dial 11 Water tank 12 Maximum water level indicator 13 Soleplate 14 Auto-Off*
BEFORE USE
WARNING! Remove any labels from the soleplate before heating up the iron.
WARNING! Before using your iron with the steam function for the first time, we recommend that you operate it in a horizontal position for a few moments, away from your linen, i.e. press the Shot of Steam button a few times.
Upon the first use, you may notice small particles coming out of the soleplate. This is part of the manufacturing process and is not harmful to you or your garments. It will disappear after several uses. You may accelerate this by using the Anti Calc function (fig 5a – 5b) and shaking the iron gently.
1 • What water may be used?
Your iron has been designed to operate using untreated tap water. If in doubt, check with your local water authority. However, if your water is very hard, you can mix 50% untreated tap water with 50% distilled or demineralised water.
IMPORTANT: Heat concentrates the elements contained in water during evaporation. The types of water listed below contain organic waste or mineral elements that can cause spitting, brown staining, or premature wear of the appliance: water from clothes dryers, scented or softened water, water from refrigerators, batteries, or air conditioners, pure distilled or demineralised water, or rain water should not be used in your iron. Also, do not use boiled, filtered, or bottled water.
IRONING BOARD: Due to the powerful steam output, a mesh type ironing board must be used to allow any excess steam to escape and to avoid steam venting sideways.
IMPORTANT: Before filling the water tank, unplug the iron and set the steam control to dry position.
Tilt the iron. Open the filling inlet (fig.6). Pour in water up to the max mark (fig.7). Close the filler inlet (fig.8) and return the iron to the horizontal.
3 • Temperature and steam adjustment
Set the iron temperature to suit the type of material using the temperature control dial (fig.3).
Temperature control*: The temperature control light indicates that the soleplate is heating up. When the temperature control light goes off (fig.10), the set temperature is reached and you can begin ironing.
| Ironing label Fabric | Temperature control | |
 | Synthetic fibres, e.g. viscose, polyester... | ● |
 | Silk, wool | ●● |
 | Cotton, linen | ●●● |
IMPORTANT: The iron takes longer to cool down than to heat up. We recommend that you start with fabrics to be ironed at a low temperature.
For mixed fabrics, set the temperature for the most delicate fabric.
TIP: Always spray starch onto the reverse side of the fabric to be ironed.
4 • Dry ironing
Set the variable steam control to (fig.11) and set the temperature to suit the type of material (care points •, ••, •••).
5 • Steam ironing
You can steam iron from temperature setting • upwards.
Steam function*: The steam quantity can be set to between no steam (minimum steam quantity) and maximum steam quantity (fig.12).
We recommend setting to maximum steam quantity only when the iron is at temperature setting ...
6 • Shot of steam
(from temperature setting •• upwards)
Press the shot of steam button to generate a powerful jet of steam (fig.13).
Wait a few seconds between each shot before pressing the button again.
7 • Vertical shot of steam
(from temperature setting •• upwards)
TIP Hold the iron 10 to 20 centimetres away from the garment to avoid burning delicate fabrics.
Hold the iron to the vertical and press the shot of steam button (fig.14) to remove creases from suits, jackets, skirts, hanging curtains etc.
Wait a few seconds between each shot before pressing the button again.
IMPORTANT Never direct the steam at persons or animals!
8 • Spray
Press the spray button to dampen stubborn creases (fig.15).
9 • Anti-Drip system*
This prevents water escaping from the soleplate when the temperature is too low.
10 • Automatic electronic 3-position cut-off*
If, although switched on, the appliance is not moved, it will automatically switch off and the auto off light will blink after the following intervals:
- After 30 sec., if the iron is left resting on the soleplate or lying on its side.
- After 8 mins., if the iron is left resting on its heel.
To switch the iron back on, move the iron gently.
AFTER USE
11 • Emptying
Unplug the iron (fig.4), pour away remaining water (fig.16) and set steam control to
Open and close the steam control several times (fig.16) to prevent the valve hole into the steam chamber from scaling or blocking up.
12 • Storing
Allow the appliance to cool down before storing the iron standing on its heel (fig.17).
IMPORTANT Do not wind the cord around the hot soleplate. Never store your iron placed down on the soleplate.
MAINTENANCE AND CLEANING
IMPORTANT: Unplug the iron and allow it to fully cool down before performing any maintenance or cleaning.
13 • Anti-scale system
Your iron contains an anti-scale cartridge that reduces scale deposits, considerably prolonging the operational life of the iron.
The anti-scale cartridge is an integral part of the water tank and does not need to be replaced.
IMPORTANT: Do not use descaling agents, as they can damage the lining of the steam chamber and impair the steam function.
14 • Anti Calc function
(prolongs the life of the iron)
The Anti Calc function flushes dirt and scale particles out of the steam chamber. Fill the water tank with untreated tap water up to the max mark and heat the iron to the recommended temperature. Unplug the iron and hold it horizontally over a sink. Hold the steam control in the Anti Calc position (fig. 5) and shake the iron gently: steam will begin to build up. After a few seconds, water will emerge from the soleplate, rinsing dirt and scale particles out of the steam chamber.
Move the steam control to the off position after approximately 1 minute.
Plug in the iron and allow it to heat up again. Wait until the remaining water has evaporated. Unplug from the mains and allow the iron to fully cool down. When cool, wipe the soleplate with a damp cloth.
TIP: Use the Anti Calc function approximately every 2 weeks. If the water is very hard, clean the iron weekly.
15 • Cleaning the iron
When the appliance has cooled down, wipe it down with a damp cloth or sponge as required.
Remove dirt from the soleplate with a damp cloth or sponge.
IMPORTANT Do not use sharp or abrasive cleaning agents or objects to clean the soleplate and other parts of the iron. If the appliance has been standing unused for long periods, use the Anti Calc function (see § 14).
| Problems Cause | Solution | |
| The iron is plugged in, but the soleplate of the iron remains cold. | No mains supply. Check that | the mains plug is properly inserted or try plugging the iron into a different socket. |
| Temperature control set too low. | Set the temperature control to a higher temperature. | |
| The automatic electronic cut-off* is active. | Move your iron. | |
| None or too little steam is being emitted. | Steam control set on dry position | Turn the steam control to the required setting area. |
| Not enough water in the water tank. | Fill the water tank. | |
| Anti-Drip* is active (§ 11). | Wait for the soleplate to reach the correct temperature. | |
| Brown streaks come through the holes in the soleplate and stain the linen. | Residues in the steam chamber or on the soleplate. | Use the Anti Calc function then clean your iron. |
| Use of chemical descaling agents. | Do not add any descaling agents to the water in the water tank. Use the Anti Calc function and clean your iron. | |
| Fabric fibres have accumulated in the holes of the soleplate and are burning. | Clean the soleplate with a non-metallic sponge. Vacuum the holes of the soleplate from time to time. | |
| Your linen is not rinsed sufficiently or you have ironed a new garment before washing it. | Ensure linen is rinsed thoroughly to remove any soap deposits or chemicals on new garments which may be sucked by the iron. | |
| Use of starch. Always spray | starch onto the reverse side of the fabric to be ironed and clean your iron soleplate. | |
| Pure distilled / demineralised or softened water is being used. | Only use untreated tap water or mix half tap water with half distilled/demineralised water. Use the Anti Calc function and clean your iron. | |
| Iron is leaking. | Overuse of shot of steam button. | Allow more time between each shot. |
| Soleplate temperature too low. | Set the temperature control to a higher temperature. |
If you have any product problems or queries, please contact our Customer Relations Team first for expert help and advice:
0845 602 1454 - UK (01) 677 4003 - Ireland or consult our website - www.rowenta.co.uk
Subject to modifications!
FOR YOUR SAFETY
IMPORTANT RECOMMENDATIONS
DESCRIPTION OF THE APPLIANCE
1 Spray nozzle
13 • Anti-calc system




- SAFETY INSTRUCTIONS
- IMPORTANT RECOMMENDATIONS
- ENVIRONMENT PROTECTION FIRST
- KEEP THESE INSTRUCTIONS
- DESCRIPTION
- BEFORE USE
- WHAT WATER MAY BE USED
- TEMPERATURE AND STEAM ADJUSTMENT
- DRY IRONING
- STEAM IRONING
- SHOT OF STEAM
- VERTICAL SHOT OF STEAM
- SPRAY
- ANTI-DRIP SYSTEM
- AUTOMATIC ELECTRONIC 3-POSITION CUT-OFF
- AFTER USE
- EMPTYING
- STORING
- MAINTENANCE AND CLEANING
- ANTI-SCALE SYSTEM
- ANTI CALC FUNCTION
- CLEANING THE IRON
- FOR YOUR SAFETY
- DESCRIPTION OF THE APPLIANCE
- ANTI-CALC SYSTEM
Brand : ROWENTA
Model : Focus DW5112
Category : Iron