
XP Pro E - Telephone SONIM - Free user manual and instructions
Find the device manual for free XP Pro E SONIM in PDF.
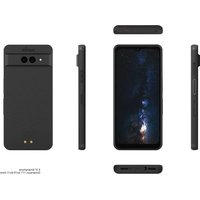


| Product Type | Rugged Smartphone |
| Brand | Sonim |
| Model | XP Pro E |
| Dimensions (H x W x D) | 6.5 x 3.0 x 0.6 in (approx.) |
| Weight | 10.2 oz (approx.) |
| Battery Capacity | 5000 mAh Li-Ion |
| Operating System | Android (likely version) |
| Display | 5.0 inch Gorilla Glass |
| Water & Dust Resistance | IP68 certified |
| Drop Protection | MIL-STD-810G compliant |
| Camera | Rear: 16 MP, Front: 8 MP |
| Memory | 4 GB RAM, 64 GB internal |
| Connectivity | 4G LTE, Bluetooth, Wi-Fi, GPS |
| Input Method | Touchscreen + programmable keys |
| Audio | Loudspeaker, 3.5mm jack, noise cancellation |
| Care & Cleaning | Wipe with soft cloth; avoid harsh chemicals |
| Safety Instructions | Do not disassemble; avoid extreme temperatures |
| Spare Parts Available | Battery, screen, charging port (contact support) |
| Warranty | Standard manufacturer warranty |
| General Information | Designed for harsh environments; supports Push-to-Talk |
Frequently Asked Questions - XP Pro E SONIM
User questions about XP Pro E SONIM
0 question about this device. Answer the ones you know or ask your own.
Ask a new question about this device
Download the instructions for your Telephone in PDF format for free! Find your manual XP Pro E - SONIM and take your electronic device back in hand. On this page are published all the documents necessary for the use of your device. XP Pro E by SONIM.
USER MANUAL XP Pro E SONIM
sonim®
XP Pro E
USER GUIDE
GENERAL INFORMATION
Congratulations on your purchase of the Sonim XP Pro E mobile phone! This phone is an ultra-rugged 5G smartphone with an intuitive, feature-rich user interface that helps you make the most of its capabilities.
Durable Design
The Sonim XP Pro E is engineered for ultra durability, featuring IP68 and IPX9K ratings that certify its resistance to dust and water. This means the device can be submerged in up to 2 meters (6.56 feet) of fresh or salt water for 1 hour without sustaining damage, making it ideal for harsh and unpredictable environments. It also meets the rigorous MIL-STD-810H military standard, ensuring resilience against extreme conditions such as drops from up to 1.5 meters (4.92 feet), shock, vibration, temperature fluctuations, and is resistant to salt fog, enhancing its suitability for maritime or coastal environments 1.
Device Models Covered
This user guide covers the Sonim XP Pro E (model number X802, Type S3012), and Android 14 software.
What's in the box?
The Sonim XP Pro E package includes:
- Sonim XP Pro E phone
- SIM Tool
- USB C Cable
- Quick Start Guide.
For environmental reasons, this package does not include a charger. This device can be powered with most USB power adapters and a cable with a USB C plug.
Register Your Phone
Please register your phone at https://sonimtech.my.site.com to receive product information and updates.

Sonim devices are covered by a 3-Year manufacturer's warranty. The battery is covered by a 2-Year limited warranty.
Sonim Support Information
Web: http://www.sonimtech.com/support/device-support-guides#xpproe
Technical Support: globalsupport@sonimtech.com
Phone: For local contact numbers and hours of operation, please visit our website at www.sonimtech.com/support
Manufacturer's address: Sonim, a NEXA company. 2057 Coolidge Street Hollywood, FL, 33020 United States
Copyright © 2026. Sonim, a NEXA company. All rights reserved.
Sonim and the Sonim logo are trademarks of Sonim, a NEXA company.
Other company and product names may be trademarks or registered trademarks of the respective owners with whom they are associated.
THIRD-PARTY MARKS
Google, Google Play, Gmail, and other marks are trademarks of Google LLC.

IMPORTANT: The XP Pro E provides IP68 and IPX9K protection only when the SIM, USB, and SecureAudio™ doors are closed.
TABLE OF CONTENTS
GENERAL INFORMATION......2
What's in the box? 2
Register Your Phone ....3
Sonim Support Information....3
GETTING STARTED....7
How to use the Touchscreen....7
Charging the Battery 8
Inserting SIM and SD Storage Cards....11
USING YOUR XP PRO E....13
Switching On the Phone 14
Switching Off the Phone 14
Phone Operations Without SIM Card....15
Setting Up Your Phone....15
Managing the Home Screen 21
Notification and Status Icons 22
Notification Panel....24
Quick Settings Panel....24
Setting Up and Using the Lock Screen.... 24
Changing the Wallpaper 25
Capturing a Screenshot....26
The SecureAudio™ Connector....26
Making a Call....27
SETTINGS MENU 28
Network & Internet....28
Connected Devices 35
Apps....40
Notifications....41
Battery Settings......45
Storage Settings....48
Sound & Vibrations Settings 49
Display Settings....51
Wallpaper 54
Accessibility 54
Programmable Keys....60
Security & Privacy....61
Location Settings....68
Safety & Emergency 70
Passwords and Accounts 72
Digital Well Being and Parental Controls....73
Google....75
System....76
System Updates 83
About Phone....83
MANAGING CONTACTS 86
Adding a Contact....86
Creating a New Contact....86
Editing Contact Details......87
Sending a Message from Contacts....87
Managing Contacts Settings....88
Searching for a Contact 90
Sharing a Contact....90
Sharing a Contact....91
MANAGING CALL SETTINGS....92
Caller ID & spam....92
Accessibility 92
Assisted Dialing 92
Blocked Numbers....93
Calling Accounts * 93
Display Options....94
Quick Responses....94
Sounds and Vibrations....94
Voicemail....98
Caller ID Announcement 98
Flip to Silence....98
SENDING MESSAGES & EMAILS....99
Sending SMS/MMS Message....99
Deleting Messages 100
Setting Up Gmail Accounts 100
SONIM SCOUT 101
USING APPLICATIONS......103
Camera....103
Calendar 108
Calculator 109
Clock....109
Screen Saver....113
Sound Recorder 114
Files....115
SAFETY INFORMATION GUIDELINE....116
Product Information.... 116
Battery Info....118
Safety Guidelines 122
RF Device Warning 126
EEA market....134
ECO 1670 REGULATION REQUIREMENTS....136
NOTE: Device visuals are for general reference only. The physical product and screen illustrations in this user guide may differ in appearance and functionality, especially after any future software updates.
DISPOSAL OF OLD ELECTRICAL AND ELECTRONIC EQUIPMENT
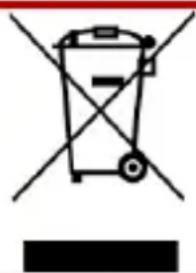
The symbol of the crossed-out wheeled bin indicates that this product and any enhancements marked with this symbol cannot be disposed of as unsorted waste; instead, they must be taken to separate collection for end-of-life disposal.
GETTING STARTED
How to use the Touchscreen
Familiarize yourself with the following finger actions for navigating the phone's touchscreen features.
| HOME SCREEN | This is the screen displayed when the phone is in standby mode. |
| TOUCH AND HOLD | Touch and hold an item on the screen by touching it and not lifting your finger until an action occurs. |
| DRAG | Touch and hold an item for a moment, and then, without lifting your finger, move your finger on the screen until you reach the target position. |
| SWIPE OR SLIDE | Quickly move your finger across the screen's surface, without pausing when you first touch. For example, you can slide a home screen left or right to view the other home screens. |
| DOUBLE TAP | Tap quickly twice on a web page, map, or other screens to zoom. |
| PINCH | In some applications, you can zoom in and out by placing two fingers on the screen simultaneously and pinching them together or spreading them apart. |
Charging the Battery
The battery delivered with your mobile phone is not fully charged. We recommend fully charging your phone before first use.
Optimal Charging Temperature Guidelines
For best battery performance and longevity, charge your smartphone within these temperature ranges:
- Acceptable charging temperature: 0°C to 45°C (32°F to 113°F). • Optimal charging temperature: 20°C to 30°C (68°F to 86°F).
When battery temperature rises above 45°C (113°F), two negative effects occur:
- Battery lifespan is reduced.
- Charging speed automatically slows down to protect the battery (fast charging naturally produces more heat, pushing your device into higher temperatures).
A USB fast-charging wall charger is required. For the fastest charging speed, the charger should be capable of delivering 18 Watts*. (A minimum of 10 Watts (5V DC and 2A) is required, but this will result in slower charging.)

NOTE: Only the power supplies with outputs that meet the Safety Extra Low Voltage (SELV) requirements² can be used for charging. The phone will only allow a maximum input voltage of 9V DC and 2A.

*NOTE: Using a PD (Power Delivery) charger with more than 18 Watts of power is acceptable, but does not provide additional benefits.

NOTE: If the battery is fully discharged, the charging icon may take several minutes to appear after the charger is connected.
- Insert the charger
Insert the charger plug into a power outlet
- Connect to the phone
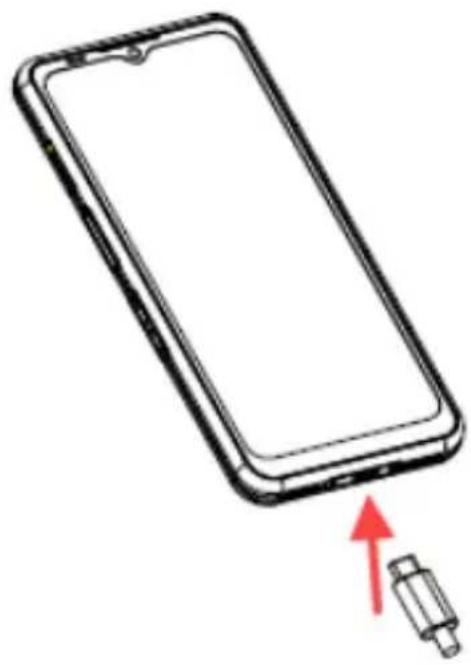
The charging port is located at the bottom of the phone and is covered by the rubber charging port cap.
i. Open the charging port cap. ii. Insert the charging connector.
Charging Animation/Icon
- If the battery is charged when the phone is switched off, a battery charging animation with the current battery level is displayed.
- After the battery is fully charged, the charging animation stops, and the battery level displays 100%.
- Please disconnect the charger from the phone.
- If the battery is charged while the phone is switched on, the battery icon on the status bar shows the lightning bolt, indicating that the battery is being charged.
- After the battery is fully charged, the display shows “100%” next to the battery.
- Please disconnect the charger from the phone. Once unplugged, the battery icon will return to a solid image.


Inserting SIM and SD Storage Cards
The SIM (Subscriber Identity Module) card associates your network services (for example, phone number, data services, etc.) with your phone. The Sonim XP Pro E device comes with a hybrid tray that supports ( 4th Form Factor) 4FF SIM cards and Memory card trays.
Insert a SIM card
Your Sonim XP Pro E does not come with a pre-installed SIM card. To install/replace a SIM card, first, power down the phone:

NOTE: The XP Pro E has a dual-sided 4FF SIM tray. Insert your nano-sized SIM card into the SIM tray. If applicable, a second SIM card can be placed on the underside of the tray.
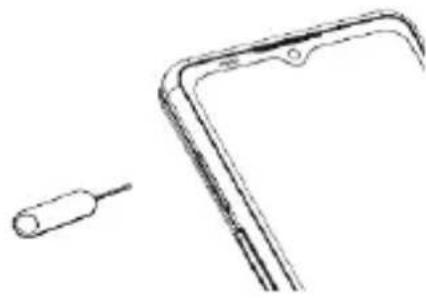
- Pull out SIM tray: Insert the Sonim SIM tool into the SIM tray hole to pop out the tray.
- Place the SIM on the tray: Insert the SIM card with the gold contacts up on the tray.
- Gently push in the tray: Gently push the SIM tray into the phone slot.


CAUTION: Any abrasion or folding could easily damage the SIM card, MicroSD card, or SIM card tray; therefore, please handle them with extreme care.
Insert a MicroSD card
To access the MicroSD card slot, use your Sonim SIM tool to pull out the SIM/MicroSD card tray. Notice that with the phone facing up, the SIM primary tray is located on the top-facing side, and the underside tray can accept either a MicroSD card, as illustrated below, or a second SIM card (turned 90° sideways).
- Pull out SIM tray: Insert the Sonim SIM tool into the SIM tray hole to pop out the tray.
- Place the MicroSD on the tray: Insert the MicroSD card on the tray with the gold contacts facing up (opposite side of the SIM tray).
- Gently push in the tray: Place the phone face down and reinsert the SIM tray back into the slot. Please continue to the chapter, STORAGE SETTINGS, for instructions on how to manage the SD memory card through the phone.


USING YOUR XP PRO E

- Secondary Microphone
- Emergency Button
- Primary Microphone
- USB C Port
- Dual Loudspeaker
- SIM Tray (dual-sided)
- Push-to-Talk Button
- Volume Keys
- 16MP Front Camera
- Earpiece
- Status and Notifications Bar
- Google Search Bar
- Display
- Android Hotseat
- Lanyard hook
- Flashlight (Torch)
- SecureAudio™ Connector
- Power Button / Fingerprint Sensor
- 50MP Main Camera
- 13MP Wide Camera
- Charging Pins
Switching On the Phone
Press and hold the Power button for 2 seconds to turn ON your phone.
When the phone is switched on, it tries to register with the network.
After successful registration, the service provider's name is displayed at the top left of the status bar.

NOTE: Ensure a valid SIM card is activated, or your device will not work correctly on the network.
Switching Off the Phone
By default, in Android 14, the Power button is set to activate your Digital Assistant.
- If you prefer to set your power button to access the power menu, then go to MAIN MENU > SETTINGS > SYSTEM > GESTURES > PRESS & HOLD POWER BUTTON > select POWER MENU.
- If you still want easier/faster access to the Digital Assistant, you can use PROGRAMMABLE KEYS to set the “Assistant” application as the action of either the Push to Talk key or the Emergency Key.
Method #2 for turning off the phone
- Swipe down on the Status bar to open the Notification panel.
- Swipe down again and locate the power button icon at the bottom of the screen.
- Tap the power button and make a selection from the following options: Emergency, Lockdown, Power off, and Restart.
Phone Operations Without SIM Card
You can perform the following operations without a SIM card in your phone:
• Make an emergency call • View & modify all settings except data usage and mobile network-related settings • Activate and share files through Bluetooth - Access the Internet using Wi-Fi connectivity - Access your phonebook, File Explorer, multimedia files & all tools and applications • View and modify your profile settings
Setting Up Your Phone
Follow the steps below to set up your device. For more information, follow the instructions displayed on your device screen.
- When you turn on your device for the first time, this screen is displayed. Follow the prompts to complete the setup process.
- Tap on START and the following screen is displayed.
You have two options:
- Copy your data
- Set up as new

- Tap on Set up as new, and the Connect to Wi-Fi screen is displayed. The device will start checking for updates.
- Connect to a network to quickly set up your phone. If you are not connected to the network, you will not have the ability to:
• Sign in to your Google account - Restore apps & data • Get software updates • Automatically set up time and date


NOTE: Connect to the available Wi-Fi network to download the apps or copy data.
- The Connect to mobile network screen appears.
a. Please refer to your service provider's SIM setup instructions. b. Please see the quick start guide if you need to manually install the SIM card. c. If no action is needed, tap Skip.

- The Copy apps & data screen appears. You can copy your data from any of the following methods:
• A backup from an Android phone • A backup from the cloud • An iPhone® device - If you do not wish to copy the data, tap Don't copy.

- You can use different Google services. Tap on More to learn about the services.
- By tapping on Accept you agree to the Google Terms of Services.
- After adding your Google account. The following screen will appear, asking if you want to use Google services to back up your Photos & videos and/or Other device data. Make your selections to proceed.

- For added security, set up a screen lock.
- Follow the screen instructions to set up your backup screen lock method (PIN, Pattern, or Password).
a. If Fingerprint will be used, choose from the following combinations:
- Fingerprint + Pattern
- Fingerprint + PIN • Fingerprint + Password

IMPORTANT: When you reboot device, the fingerprint and face unlock will not work. You must use PIN or password to unlock the device for the first unlock. After the first unlock, the fingerprint or face unlock will function as expected.
- Set up your fingerprint. The fingerprint sensor is on the power button. Locate the fingerprint sensor, and follow instructions by placing your finger on the sensor, and lift the finger after you feel a vibration. Tap on Do it later to perform this task later.
- Now that the fingerprint has been added, you can use your fingerprint to unlock your phone or to approve any purchases. Tap on Next to proceed further.

NOTE: Your fingerprint may be less secure than a strong pattern or PIN.

NOTE: You can add multiple fingerprints if multiple users use the same device.
- You can add another fingerprint by tapping on Add another. Otherwise, tap Next.

- The screens below are displayed after setting up the screen lock and fingerprint. Continue to make your selections at the bottom of each screen to complete the initial set up.
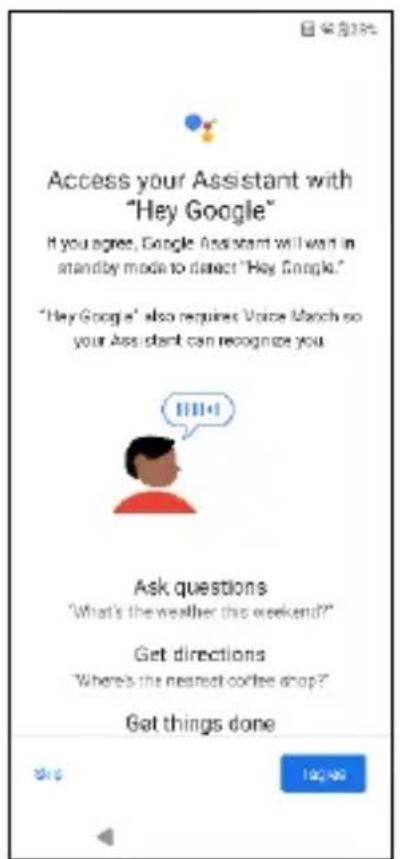


- You can also use the Settings menu to add another email account or set up other services. • Tap on No, thanks to proceed to the Home Screen.
Managing the Home Screen
After you complete the phone setup, the home screen is displayed. The home screen is the beginning point to access all the device's features.

- Notification Indicators
- Status Indicators
- Google Search Bar
- Home Screen
- Applications
| BUTTONS DESCRIPTION | ||
| 6. Back Button |  | Tap to return to the previous screen. |
| 7. Home Button |  | Tap to display the main Home screen. |
| 8. Recent Apps Button |  | Tap to display a list of recently used apps.Double-tap to swap between your last two used apps |
Notification and Status Icons
The icons displayed at the top of the screen provide information about the status of the device. The details such as date and time, battery charge status, and data service are displayed when the phone is in standby mode. Other indicators such as Bluetooth connectivity status, airplane mode, alarm, Call Forward (only if Always Forward is enabled), and Wi-Fi connectivity are displayed if the feature is activated. Not inclusive:
| ICONS DESCRIPTION | |
 | 4G network connected |
 | 5G network connected |
 | Airplane mode |
 | Alarm activated |
 | Battery charging in progress |
 | Battery level indicator |
 | Bluetooth activated |
 | Call forward (only if Always forward is enabled) |
 | Call in progress |
 | Device storage space is running out |
[W02X] | Do not disturb/ Silent modeError/information notification - attention |
 | Flashlight |
 | Missed call |
 | Music is played |
 | New SMS or MMS |
 | Near-Field communication (NFC) feature in use |
 | New E-mail |
 | No signal |
 | No SIM card |
 | Roaming |
 | Screen rotation |
 | Screenshot captured |
 | SD Card inserted |
 | Signal strength (full signal) |
 | Vibration mode activated |
 | Volume is off / Silent Mode |
 | Wi-Fi connected |
 | Wi-Fi Calling is enabled |
Notification Panel
From the Home screen, swipe down on the Status bar to open the Notification panel. Swipe left or right on a notification to delete it, or tap Clear all to clear all event-based notifications.
Quick Settings Panel
Swipe down on the Status bar again from the Notification panel. Tap a setting to turn it on or off. You can tap Settings ( ⏻ ) to access full settings or tap Power off ( ⏻ ) to turn your phone off.
Setting Up and Using the Lock Screen
To protect your phone from unauthorized access, you must set up your lock screen feature and lock your device.
- From the Home screen, swipe up to access the App screen. Scroll to and tap Settings.
- Scroll up and select Security & Privacy, then select Device Unlock.
Select Screen lock and select one of the following options to configure the phone:
• None: Disables the screen lock. - Swipe: This is not a lock and only requires a swipe of the screen.
- Pattern: When enabled, enter your own pattern. When the phone is locked, unlock it using the pattern. When the phone screen is locked, you can answer an incoming call without unlocking the screen.
- PIN: When enabled, enter your own PIN. When the phone is locked, unlock it using the PIN. When the phone screen is locked, you can answer an incoming call without unlocking the screen.
- Password: When enabled, enter your own password. When the phone is locked, unlock it using the password. When the phone screen is locked, you can answer an incoming call without unlocking the screen.
Changing the Wallpaper
You can set an image or a photo stored in your phone as your home screen wallpaper. To change the wallpaper, select from one of the following Wallpaper collections.
Touch and hold an empty space on the Home screen, then tap Wallpapers. You can also access the Wallpapers menu from the Settings menu. From the home screen, swipe up and tap Settings > Wallpapers. Select the wallpaper from the following folders.
• Live Wallpaper Picker - Photos: It includes photos and screenshots taken using the phone's camera. (Default Sonim wallpaper is Black Paint Sponge wallpaper.) - Wallpaper & style: Includes images that are pre-loaded with the phone.
GUIDELINE FOR HEADPHONE AND EARPHONE

To prevent potential hearing damage, please refrain from listening at high volume levels for extended periods.
Capturing a Screenshot
You can take an image of what is on your screen, and it will be stored in the Photos or Files app.
To take a screenshot:
- Ensure that the image to be captured is displayed on the current screen.
- Press the Power and Volume down keys simultaneously. The screenshot is captured and stored in Photos > Collections > Screenshots OR Files > Images > Screenshots.
The SecureAudio™ Connector
The SecureAudio™ Connector is not a USB C port. It is used for specific, compatible audio Push-to-Talk (PTT) accessories.
For USB C cable connectivity, please refer to location #4 in the callouts at the beginning of the “Using Your XP Pro E” section above.
Please visit the Sonim Accessory store for examples of PTT accessories. https://www.sonimtech.com/products/accessories

Making a Call
From the Home screen, tap Telephone ( ).
To dial a number, use one of the following options:
Dial pad: Tap the Dial pad ( ), enter the phone number, and tap the telephone button ( ) to make a call.
a. To dial an international number, include the respective country code before dialing the international phone number.
Favorites: Tap the Favorites button to access your favorite contact list. Tap the contact you want to call.
Recents: Tap the Recents button to access your call log. Tap the Telephone icon next to the contact, or tap the contact and then tap the number.
Contacts: Tap the Contacts button to access the complete contact list, then tap the contact you want to call, and tap the phone icon to start the call.
SETTINGS MENU
Network & Internet
From the Home screen, swipe up to access App screen, scroll to and tap Settings > Network & Internet.
Wi-Fi
Wi-Fi is a wireless network technology that can provide Internet access at distance up to 100 feet, depending on the Wi-Fi router and surroundings.
You can access the Internet when you connect your XP Pro E to a Wi-Fi network. To connect your phone to a Wi-Fi network;
- On the Network & Internet screen, tap Internet.
- Turn ON Wi-Fi.
- A list of Wi-Fi access points present within your phone's accessible range is displayed.
- Select your preferred network. Enter the WEP/WPS/WPA key (if it is a secured network) and select Connect. To verify the password before connecting, enable Show password.

NOTE: It is always recommended to make your Wi-Fi network connection secure and also to connect your phone to a secure network.
CONNECT TO NETWORK
- On the Wi-Fi screen, tap any of the listed Wi-Fi access points displayed on your device. Enter the network password.
- The other network setting details such as Advanced options, Proxy, IP settings can be updated.
- Tap Connect to get connected to the network.
ADD NETWORK MANUALLY
- On the Wi-Fi screen, tap Add network.
- Enter the Network name and select Security from the dropdown list. You can set the network password.
- Tap Advanced options. Settings, such as Proxy and IP, can be updated using the drop-down list.
- Tap Save to save the network settings.
You can also join Wi-Fi by scanning a QR code. Tap the QR code icon ( ) on the right side of Add network, and then scan the network QR code to join in.
FORGET NETWORK
- On the Wi-Fi screen, tap the connected network.
- Tap FORGET.
The selected network disconnects and appears in the Wi-Fi list.
If you need to connect to the same network, tap the network and enter the password.
MODIFY NETWORK
- On the Wi-Fi screen, tap the connected network.
- Tap (☐) at the top right corner of the screen. You can change the network password. The other network setting details, such as Advanced options, Proxy, and IP settings, can be updated.
- Select Save to save the changes.
NETWORK PREFERENCES
- On the Wi-Fi screen, tap Network preferences.
- Turn on Wi-Fi automatically: Wi-Fi will be turned on automatically when you are near high-quality saved networks, like your home network.
- Notify for public networks: Enable this option to get a notification when a high-quality public network is available. • Passpoint: Seamlessly connect to Passpoint™ enabled Wi-Fi access points without needing a password. • Install certificates: You can browse a certificate for installation.
- Wi-Fi Direct: Tap Searching to search for the peer devices, and also select Rename device to rename the device.
SAVED NETWORKS
On the Wi-Fi screen, tap Saved networks to view your saved Wi-Fi networks.
NON-CARRIER DATA USAGE
On the Wi-Fi screen, tap Non-carrier data usage to view the Wi-Fi data usage for each app.
Mobile Network
On the Network & Internet screen, tap Internet, then tap the info icon on the right of a SIM carrier network.
Mobile data: Turn On to enable data access on your mobile network.
Roaming: Turn On to enable data roaming to connect to data services while roaming.
App data usage: View the mobile data usage of each app.
Data warning & limit: View the following data management options:
- Mobile data usage cycle: Set the date the usage cycle resets.
- Set data warning: Turn On to enable alerts when your mobile data usage reaches the amount set.
- Data warning: Set the data usage amount. Your phone will notify you when it reaches the amount set. Data usage measured by your phone is an approximate amount, and it may differ from the actual amount.
- Set data limit: Turn On to enable data limits.
- Data limit: Set a data limit. Your phone will turn off mobile data when it reaches the limit set.
Preferred network type: 5G is recommended; however, you can select LTE or 3G if you desire.
WI-FI CALLING
The default is ON. Turning this on allows your device to make and receive calls and send text messages via Wi-Fi networks or your carrier's network, depending on your preference and which signal is stronger.
This service may require additional activation from your carrier and may also result in additional charges. Before activating, please contact your carrier.

NOTE: For those using TTY devices, they are not compatible with Wi-Fi Calling.
Automatically select network: The default is ON.
Access Point Names: The following options are available: select or add APNs, user controlled PLMN, Allow 2G, and Delete SIM.
SIMs
On the Network & Internet screen, tap SIM Manager for the following options:
- SIM cards: The phone accepts up to two SIM Cards. Tap on the SIM to explore additional management options for that SIM.

NOTE: When using multiple SIM cards, set a primary card (Preferred SIM card) to be used for calls, texts, and data.
Airplane Mode
When your phone is set to Airplane mode, network and mobile data connectivity are disabled; however, you can still access your camera, media files, and other features that do not require mobile data.
To activate Airplane mode:
- On the Network & Internet screen, tap Airplane mode.
- Turn On Airplane mode.
You can enable or disable Airplane mode directly in the Quick Settings Panel.
Hotspot & Tethering
Hotspot and Tethering provide Internet to other devices through your mobile data connection. Apps can also create a hotspot to share content with nearby devices.
On the Network & Internet screen, tap Hotspot & Tethering.
WI-FI HOTSPOT
The Mobile hotspot feature uses your mobile data plan when you are not connected to Wi-Fi.
- On the Hotspot & tethering screen, tap Wi-Fi hotspot.
- Turn On to enable the mobile hotspot.
When this option is disabled, you cannot share the Internet or content with other devices.
• Hotspot name: Set the hotspot name. • Security: Select the desired security from the drop-down list. - Hotspot password: The password must have at least eight (8) characters. • AP Band: Select AP Band from the drop-down list. - Keep Mobile Hotspot on: Set the timer for: Always, idle after 5, 10, 20, 40, or 60 minutes • Maximum connections: Tap to set the maximum number of users allowed to connect to the hotspot. • Connected users: View your connected users. - Help & Tips: Instructions for using your phone as a mobile hotspot and sharing your mobile data with other Wi-Fi capable devices.
USB TETHERING
Using USB tethering, you can share your phone's internet connection via USB. To enable USB Tethering, connect the device to the PC using a USB cable. This feature will only be available when the XP Pro E is connected via USB to a compatible device.
- On the Hotspot & tethering screen, tap USB tethering.
- Turn On USB tethering.
BLUETOOTH TETHERING
You can share the phone's internet connection via Bluetooth. For sharing internet, you have to pair your Bluetooth with another device.
- On the Hotspot & tethering screen, tap Bluetooth tethering.
- Turn on Bluetooth tethering.
- Pair your Bluetooth device with another device.
Data Saver
Data usage refers to the amount of data your phone uses during internet data transfers. The data usage charges are dependent on the wireless plan provided by your service provider.
To monitor your data usage, adjust your data usage settings.
- On the Network and Internet screen, tap Data Saver.
- Turn on Data Saver.
- Unrestricted data: Set apps to be allowed to use restricted data when Data Saver is on.
VPN
- On the Network & Internet screen, tap VPN.
- Tap (+) at the top right corner of the screen to add a new VPN profile.
- In the Edit VPN profile screen, enter the Name, Type (select from the drop-down list), and the server address.
- Enter Username and password. Select Save.
Private DNS
- On the Network & Internet screen, tap Private DNS.
- Select your Private DNS mode.
Connected Devices
From the Home screen, swipe up to access the App screen, scroll to and tap Settings > Connected devices (☐).
Bluetooth
Bluetooth is a short-range wireless communication technology that allows you to connect to multiple Bluetooth devices, such as headsets, hands-free car kits, Bluetooth-enabled handhelds, computers, printers, and wireless phones. The communication range for Bluetooth is approximately 30 feet.
On the Connected devices screen, tap Connection preferences > Bluetooth.
PAIR NEW DEVICE
To activate Bluetooth and pair your XP Pro E device with other Bluetooth devices:
- With Android 14, Bluetooth will automatically turn On when scanning for a new device.
- Select the desired device from the list. It starts pairing with the selected device. A confirmation message is displayed to pair the device. Select Pair.
SONIM BLE
Sonim BLE (Bluetooth Low Energy) enables low-power connections with compatible devices. If your Bluetooth device supports Sonim BLE, you will need to follow these steps to complete the BLE process:
- Refer to the Bluetooth section to pair your device.
- Open Sonim Scout, then Utilities, then Sonim BLE Connect.
- Ensure the device you want to pair with BLE is powered on and in pairing mode. The Sonim BLE app will search for available devices. If your device is not listed, you will be prompted to connect manually via the Sonim BLE Connect application.
- The Sonim BLE Connect app will then display a connected status for those paired devices.
FORGET A BLUETOOTH DEVICE
- On the Bluetooth screen, tap the Settings icon (💡) next to the device you wish to forget.
- Tap Forget > Forget device
- The device will be unpaired from your phone. To reconnect with the device, you will need to pair again.
SEND INFORMATION VIA BLUETOOTH
You can use Bluetooth to transfer files between your phone and other Bluetooth-enabled devices, such as phones or computers. You can send photos, videos, calendar events, contacts, and more.
RECEIVE FILES
When another device attempts to send a file to your phone via Bluetooth, you will see a request to accept the file. Tap Accept to receive the file.
To view the files you've received via Bluetooth, tap Connection preferences > Files received via Bluetooth on the Connected devices screen.
USB
USB is a plug-and-play interface that allows a computer to communicate with peripherals and other devices.
On the Connected devices screen, tap USB. You can use USB for the following tasks:
- File Transfer: Tap this option to transfer the data from one device to another. • USB tethering: Select to set the USB tethering mode.
- MIDI: Musical Instrument Digital Interface (MIDI). Select to enable the phone to act as a digital interface for connecting musical instruments and other devices. This means you can connect your phone to a MIDI keyboard or controller and use it to play or record music, or connect it to a computer to send and receive MIDI data. • PTP: Tap this option to transfer photos.
- No data transfer: Select this option to enable the no data transfer mode. This will ONLY appear when you connect your device via a USB cord to a laptop or computer.
- File Transfer Options: Click to enable Convert videos to AVC
NFC
NFC (Near-Field Communication) is a set of communication protocols that enable two electronic devices, typically a portable device such as a smartphone, to establish communication by bringing them within 4 cm of each other.
NFC is turned ON by default.
- On the Connected Devices screen, tap Connection Preferences > NFC. Select Enable prompt for NFC, which will alert you when an NFC card is nearby.
- To set up Contactless payments, click Contactless payments from the NFC page and follow the prompts to set up your payment methods.
Cast
- On the Connected devices screen, tap Connection preferences > Cast.
- You can cast your screen from your Android device. Connect your Android device to the same Wi-Fi network as your Chromecast or TV with Chromecast built-in. In the top left corner of the app's Home screen, tap Menu > Cast Screen > Audio.
- Ensure that your Android device and Chromecast are connected to the same Wi-Fi network.
- Tap (☐) on the top right corner of the screen and check Enable wireless display to view a list of nearby devices you can cast to.

NOTE: When you connect the Sonim XP Pro E phone to a computer, it appears as a drive rather than a device.
Printing
- On the Connected devices screen, tap Connection preferences > Printing.
- Tap Default Print Service. Turn On the default print service.
- Tap Add service. The Google Play screen is displayed. You can sign in with your Google credentials and add any desired service.
Chromebook
You can use your phone to unlock your Chromebook screen and send and receive text messages on it.
- On the Connected devices screen, tap Connection preferences > Chromebook.
- Tap the drop-down list to view the Gmail accounts that are configured on your device.
Quick Share
Quick Share enables the rapid, short-range exchange of images, videos, text, contact information, directions, YouTube videos, and other data via Bluetooth.
- On the Connected devices screen, tap Connection preferences > Quick Share.
- Turn On the Quick Share. You can enable or disable the Quick Share feature directly in the Quick Settings Panel.
For more information on Quick Share, please visit support.google.com.
Android Auto
Use the Android Auto app to control your phone's maps, media, and messaging functions, with the Google Assistant, while you drive.
- On the Connected devices screen, tap Connection preferences > Android Auto.
- Before using, please visit the Google Play Store and ensure you have the latest version installed on your device.
Apps
View current running applications, manage default apps, and more.
From the Home screen, swipe up, scroll to and tap Settings >
Apps ( ).
Default Apps
The default apps are listed.
- On App screen, tap Default apps.
- Set the default app for the browser, phone, messages, and other applications. You can also set default apps for opening links.
Screen Time
- On the App screen, tap Screen time.
- You can tap (☒) on the right side of most apps to set daily timers. When the app timer ends, the app is paused for the rest of the day.
Unused Apps
If an app is unused for a few months, it will be listed:
- Permissions are removed to protect your data.
- Notifications are stopped to save battery. • Temporary files are removed to free up space.
To allow permissions and notifications again, open the app.
App Battery Usage
Review and set the battery usage parameters for individual apps.
Special App Access
A list of permission levels will be shown. Click on a permission level to view a list of apps allowed to perform that permission/task/access, etc.
- On the App screen, tap Special app access.
- View app access for special functions, such as battery optimization, display over other apps, unrestricted data, usage access, etc.
- To disable an app's permission, tap on the app and disable the permission.

NOTE: You can use FIND MY DEVICE under Device admin apps. Activating this service will enable you, using Google Play services, to change the screen lock, lock the screen, disable certain screen lock features, or even completely wipe the device by performing a factory data reset.
The default setting of Find My Device is OFF.
Notifications
Manage the settings on notifications.
From the Home screen, swipe up to access the App screen, scroll to and tap Settings > Notifications ( ).
App Settings
- On the Notifications screen, tap the App notifications.
- Apps are categorized into four types: Most recent, Most frequent, All apps, or Turned off. Select a category from the drop-down list, and choose the app you want to adjust the notification settings for.
Notification History
View your recent and snoozed notifications.
- On the Notifications screen, tap Notification history.
- The default setting is OFF. Turn On Notification history.
- When you turn this ON, your recent and snoozed notifications will appear.
Conversation
Conversations
View priority and modified conversations.
- On the Notifications screen, tap Conversations.
- Your priority and modified conversations are displayed. To change conversation settings, follow the steps below.
- Swipe the Status bar down to display the Notification panel.
- Touch and hold a conversation.
Bubbles
Enable message conversations to display as bubbles that float on top of other apps.
- On the Notifications screen, tap Bubbles.
- Turn On Bubbles to allow apps to show bubbles.
Privacy
Device & App Notification
Control which apps and devices can read notifications.
- On the Notifications screen, tap Device & app notifications.
- You can see the devices and apps that are allowed and not allowed to access notifications.
Notifications On Lock Screen
- On the Notifications screen, tap Notifications on lock screen.
- Select how you want notifications to be displayed on the lock screen.

NOTE: SENSITIVE NOTIFICATIONS
This setting determines whether sensitive content is displayed when the device is locked.
- Turn ON to show sensitive content; or
- Turn OFF to not show sensitive content.
General
Do Not Disturb
- On the Notifications screen, tap Do Not Disturb.
- Tap (TURN ON NOW) to turn On Do Not Disturb mode.
- You can set Do Not Disturb behavior, exceptions, schedules, etc.
Flash Notifications
You can set your XP Pro E to flash the camera light or the screen when notifications are received or when alarms sound.
- Set the Camera Flash to ON to activate the camera light when notifications are received or when alarms are activated.
- Set the Screen Flash to ON to activate the screen illumination when notifications are received or when alarms are activated. Touch Screen Flash to select the color you would like to illuminate.
Wireless Emergency Alerts
- On the Notifications screen, tap Wireless Emergency Alerts.
- Enable the Allow alerts feature (Wireless Emergency Alerts).
ALERTS
- Extreme threats: Turn On this option to get alerts for extreme threats to life and property.
- Severe threats: Turn On this option to get severe threats to life and property displayed. • AMBER alerts: Turn On this option to get child abduction emergency bulletins.
- Public safety messages: Turn On this option to get public safety alerts.
- State and local tests: Turn On this option to get state and local test alerts displayed.
- Emergency alert history: You can view the emergency alert history.
ALERT PREFERENCES
- Vibration: Enable this option to set the device to vibrate during the alert.
- Alert reminder: You can set the alert reminder for the following time frames: Once, Every 2 minutes, Every 15 minutes, and Never.
- Speak alert message: Enable to hear text-to-speech wireless emergency alert messages.
Hide Silent Notifications In Status Bar
- On the Notifications screen, tap Hide silent notifications in the status bar.
- Enable this option to hide silent notifications in the status bar.
Allow Notification Snoozing
- On the Notifications screen, tap Allow notification snoozing.
- Turn on this option to allow temporarily snoozing certain notifications.
Notification Dot on App Icon
The default setting is enabled. This option lets you display notification dots on an app icon to alert you to new notifications.
Enhanced Notifications
Enhanced notifications can access notification content, including personal information like contact names and messages. This feature can also dismiss or respond to notifications, such as answering phone calls, and controls Do Not Disturb.
The default setting is enabled. This option automatically shows suggested actions and replies.
Battery Settings
From the Home screen, swipe up to access the App screen, scroll to and tap Settings > Battery ( ). The current battery percentage and the estimated remaining charge time (in days and hours) are shown.
Battery Usage
View battery usage from the last full charge.
- On the Battery screen, tap Battery usage.
- You can view the battery percentage that each app uses.
Battery Saver
Battery Saver mode turns on the Dark theme and limits or turns off background activity, some visual effects, certain features, and some network connections.
On the Battery screen, tap Battery Saver.
- Use Battery Saver: Turning this setting ON will enable the Battery Saver mode, and it will automatically turn off when the phone is plugged in.
- Set a schedule: Tap Based on percentage (Min Settings 5%, Max Settings 75%) and drag the slider to the percentage you desire. The Battery Saver will turn on automatically when your phone reaches that battery percentage.
- Turn off at 90%: This option is enabled by default. While this setting is enabled, the Battery Saver feature will turn off when the battery reaches 90%.
Battery Percentage
The default setting is enabled. While this setting is enabled, the battery percentage will show in the Status bar.
Reduce Battery Aging
This feature is OFF by default. When enabled, it limits battery charging to 80% capacity, which helps extend your battery's overall lifespan. This is beneficial for any situation where your device remains connected to a power source for extended periods, such as when using desk chargers, nightstand chargers, or vehicle mounts. Your phone will occasionally charge to 100% to ensure accurate battery capacity readings.
To activate this feature, go to Settings > Battery > Reduce Battery Aging.
USB Power Saving
You can enable specific settings relative to USB charging.
- Automatic power ON: The default setting is OFF; however, enabling this feature will automatically power your device on when a USB device is connected.
You also have two options related to powering your device OFF when tied to USB charging:
- Automatic power OFF: The default setting is OFF; however, enabling this feature allows you to set a specific time for your device to power off.
- Automatic power OFF: The default setting is OFF; however, enabling this feature allows you to set the time (in hours) after which your device will power off when disconnected from USB power.
Battery Health
• Manufacture date: Date the battery was manufactured, represented by month and year. - First usage: Date the battery was first used, represented by month and year. - Fully charged cycles: This is the number of times the device has used the battery capacity. - Maximum capacity: The maximum capacity is an estimate of your device's current battery capacity compared to when it was new. A lower percentage means less usage time between charges. Battery endurance: A minimum of 1000 full charged cycles. After 1000 full charge cycles, the battery has, in a fully charged state, a remaining capacity of at least 80% of the rated capacity.
For more information on battery performance, storage & charging, please refer to the section, "Battery Info" on page 118.
Storage Settings
The Storage settings menu lets you manage internal storage on your phone and includes options for an optional SD card (not included).
From the Home screen, swipe up to access the App screen, scroll to and tap Settings > Storage ( )
SD Card
You must have an SD card inserted to manage settings.
- On the Storage screen, tap (THIS DEVICE) > SD Card to view files stored on your SD card.
- Tap (☐) on the top right corner of the screen to access the following options:
- Rename: change the SD card name.
- Eject: eject the SD card to allow for safe removal.
- Format: format the SD card.
Storage Manager
Storage manager removes backed-up photos and videos from your device.
- From the Storage screen, tap Storage manager.
- Turn On to enable Storage manager.
- Tap on Storage Manager. Then tap Remove photos & videos to select which photos and videos to remove.
You can set it to remove photos & videos that are Over 30 days old, Over 60 days old, or Over 90 days old.
You can go to the Files app to manage and free up space by tapping Free up space.
Sound & Vibrations Settings
Control your phone's audio, from ringtones and alerts to tap tones and notifications.
From the Home screen, swipe up to access the App screen, scroll to and tap Settings > Sound & vibration ( ).
- Drag the sliders to adjust the volumes of Media, Call, Notification, Ring, and Alarm.
Do Not Disturb
- On the Sound & Vibrations screen, tap Do Not Disturb.
- Tap (TURN ON NOW) to turn On Do Not Disturb mode.
- You can set Do Not Disturb behavior, exceptions, schedules, etc.
Phone Ringtone
- On the Sound & Vibrations screen, tap Phone ringtone.
- Select a ringtone for incoming phone calls.
- You can customize your ringtone by tapping Add ringtone.
Live Caption
Live Caption detects speech on your device and automatically generates captions. When speech is captioned, this feature uses additional battery. All audio and captions are processed locally and never leave the device.
- On the Sound & Vibrations screen, tap Live Caption.
- Enable the feature by selecting Use Live Caption
SETTINGS
• Languages: Your phone will show captions for languages that are loaded. You can manually search for a language.
- Hide Profanity: Profanity will be replaced with an asterisk symbol (*). • Show sound labels: Include sounds like laughter, applause, and music. Live Caption in volume control: When enabled, all audio, captions, and typed responses during calls are processed on your device (they are never sent to Google). Live caption increases battery usage. Song lyrics aren't captioned. • Help: Wi-Fi or cellular data is required to view helpful tips.
Media
- On the Sound & Vibrations screen, tap Media.
- Turn On Pin media player to keep the media player open in the Quick Settings Panel when the media session has ended.
- Turn On Show media on lock screen so it stays open on the lock screen & quickly resumes playback.
- Turn On Show media recommendations to show media recommendations based on your activities.
Vibration & Haptics
- On the Sound & Vibrations screen, tap Vibration & haptics.
- You can then enable or disable Vibration for calls, Notifications and alarms, and Interactive haptics.
Shortcut To Prevent Ringing
To activate this feature, press and hold the Power button and the Volume Up key to mute the ringtone or set it to vibrate.
Default Notification Sound
- On the Sound screen, tap Default notification sound.
- Select the default notification sound.
- You can customize your notification sound by scrolling down to the bottom of the list and tapping Add notification.
Default Alarm Sound
- On the Sound & Vibrations screen, tap Default alarm sound.
- Select the default alarm sound.
- You can customize your alarm sound by scrolling down to the bottom of the list and tapping Add alarm.
Additional Sound Parameters
You can also enable or disable Dial pad tones, Screen locking sound, charging sounds and vibration, Tap & click sounds, and Always show icon when in vibrate mode.
Display Settings
Adjust items such as wallpaper, brightness, screen timeout, and more. From the Home screen, swipe up to access the App screen, scroll to and tap Settings > Display ( )
Brightness Level
- On the Display screen, tap Brightness level.
- Drag the slider to adjust the screen brightness level manually.

NOTE: The higher the brightness with the display on, the more battery power is used.
Adaptive Brightness
The default setting is enabled. While this setting is enabled, the screen brightness automatically adjusts based on the lighting conditions.
Lock Screen
- On the Display screen, tap Lock screen.
- Set what to display and when to display it while the screen is locked.
Screen Timeout
- On the Display screen, tap Screen timeout to select a time.
- Your screen will automatically go to sleep after a predetermined set amount of time. This setting also affects battery use.
- Screen attention: This feature is OFF by default. Prevents your screen from turning off while you're looking at it.
Dark Theme
- On the Display screen, tap Dark theme.
- Turn On this option to use a black background to help keep the battery alive longer on some screens.
Display Size And Text
- On the Display screen, tap Display size and text.
- From this screen:
- Drag the slider to set the font size of the text to make the text smaller or larger.
- Drag the slider to set the display size of everything on your screen. • Activate BOLD TEXT to bold all text on your screen
- Activate HIGH CONTRAST TEXT to change text color to black or white.
- Touch RESET SETTINGS to return your display size & text settings to the phone's original settings.
Night Light
- On the Display screen, tap Night light to add an amber tint to the screen, making it easier to look at your screen or read in dim light.
- You can set the schedule and intensity of the night light on your screen.
Colors
Choose from Natural, Boosted, and Adaptive. There are three photos to view and see how the photo appears based on the selection.
Auto-Rotate Screen
- On the Display screen, tap Auto-rotate screen.
- The Default setting is ON. This option enables screen rotation automatically.
Screen Saver
- On the Display screen, tap Screen Saver.
- Turn On the Screen Saver.
- You can select to use either the Clock, Colors, or Photos as your screen saver.
Wallpaper
Use Wallpapers to customize your screen display with device
wallpapers or your own photos. You can use it with a dark theme and change the grid layout.
From the Home screen, swipe up to access the App screen, scroll to and tap Settings > Wallpaper ( ).
The Choose wallpaper form sub-menu will provide options for where you want to choose your image from.
Wallpaper & Style: will allow you to choose a color theme, Dark theme mode, Themed icons (Beta), and the app grid (3x3 or 4x4).
Accessibility
You can make websites and applications more accessible to people with disabilities when they are using mobile phones and other devices.
From the Home screen, swipe up to access the App screen, scroll to and tap Settings > Accessibility ( )
SCOUT Remote Support: The default is OFF. We use this
Accessibility service to offer you remote control of this device during a remote connection.
Screen Reader
Talk Back
Talk Back provides spoken feedback, allowing you to use your device without looking at the screen. The default is OFF.
Talk Back Shortcut
A Talk Back shortcut is available to make this feature easier to use when activated. You can tap the Accessibility button on the screen or press and hold both volume keys.
Settings
Use this section to adjust various audio settings & controls for colors, gestures, image & icon descriptions, various Braille keyboard and display settings, and general device settings.
From this section, you can see the current installed version of Talk Back and link directly to the Play Store to update if needed, as well as access various tutorials, access Google support for Talk Back, and connect directly with Google Disability Support.
Display
Select to Speak
On the Accessibility screen, tap Select to Speak to enable you to tap specific items on your screen to hear them read aloud or described.
Display size and Text
See the instructions in the previous section above, Display Settings.
Color and motion
On the Accessibility screen, tap Color and motion.
• Color correction: can be helpful when you want to see colors more accurately or remove colors to help you focus. • Color conversion: turns light screens dark. It also turns dark screens light. - Dark theme: uses a black background to help keep the battery alive longer on some screens. You may also set a schedule.
- Remove animations: reduce movement on the screen, • Large mouse pointer: make the mouse pointer more noticeable.
Extra Dim
On the Accessibility screen, tap Extra dim. Dim screen beyond your phone's minimal brightness.
Magnification
On the Accessibility screen, tap Magnification.
- Magnification shortcut: Turn On magnification shortcut. To magnify the screen, tap the ( ) icon.
- Magnification type: Magnify full screen, part of screen, or switch between both options. • Magnify typing: Magnifier follows texts as you type.
- Keep on while switching apps: Allows the magnifier to stay on and zoom out when you switch apps.
Glove Touch Mode
- On the Accessibility screen, tap Glove touch mode.
- By default, this setting is OFF; however, turn it on to increase the capability of using your device with gloves.

NOTE: Enabling Glove Touch mode can make your display very sensitive, resulting in potentially false touches.
Interaction Controls
Accessibility Menu
This menu provides a large on-screen menu to control your device. You can lock your device, control volume & brightness, take screenshots, and more.
Switch Access
Switches can assist you if you have difficulty using the touchscreen.
These can be connected externally to your device, such as a keyboard or a large button.
There are multiple options for using facial gestures to control the camera and trigger actions/assignments.
Within the Settings menu of this feature, there is a more in-depth setup guide and help options.
Timing Controls
On the Accessibility screen, tap Timing controls.
- Touch & hold delay: Set the touch & hold delay to Short, Medium, or Long.
- Time to take action (Accessibility timeout): Choose how long to show messages that ask you to take an action. Note that not all apps are compatible with this.
- Auto-click (dwell timing): Enable automatic clicking when using a mouse and adjust the amount of time between the mouse stopping and the click. If clicking the mouse is a challenge, this could be helpful.
System Controls
On the Accessibility screen, tap System controls.
- Navigation Mode: Set system navigation by gestures or using Back, Home, and Recent Apps buttons located at the bottom of the screen.
- Power button ends call: Enable ending calls by pressing the Power key. • Auto-rotate screen: Enable or disable screen rotation.
Vibration & Haptic Strength
On the Accessibility screen, tap Vibration & haptic strength.
- Ring vibration: Enable or disable vibration for ringing. • Vibrate first then ring gradually: Enable or disable.
- Notification vibration: Enable or disable vibration for notifications. • Alarm Vibration: Enable or disable vibration for alarms.
- Touch feedback: Enable or disable vibration for touch. • Media Vibration: Enable or disable vibration for media.
Captions
Live Caption
Automatically caption media. Please refer to Settings > Sound & Vibrations > Live Caption for details.
Caption Preferences
On the Accessibility screen, tap Caption preferences.
Please refer to Settings > Sound & Vibrations > Live Caption for details.
Audio
Audio Description
Hear a description of what's happening on screen in supported movies and shows.
Flash Notifications
Flash the camera light or the screen when you receive notifications or when alarms sound.
Audio Adjustment
On the Accessibility screen, tap Audio adjustment.
- Mono audio: Enable combining channels when playing audio. • Audio balance: Drag the slider left or right to adjust the audio balance from the speaker.
General
Accessibility Shortcuts
On the Accessibility screen, tap Accessibility shortcuts.
- Accessibility button: Manage the settings of the accessibility button, including location, size, and other options.
- Shortcut from lock screen: Allow a feature shortcut to turn on from the lock screen.
Text-To-Speech Output
On the Accessibility screen, tap Text-to-speech output.
- Preferred engine: Set the text-to-speech engine (Google is the default). Tap to manage text-to-speech settings. • Language: Set the language for using this function.
- Speech rate: Drag the slider to adjust speech rate.
- Pitch: Drag the slider to adjust pitch.
Tap PLAY to play the example.
Tap RESET to reset all the Text-to-speech settings back to default.
Programmable Keys
Your device has two programmable keys. You can assign these buttons to specific on-board applications.
From the Home screen, swipe up to access the App screen, scroll to and tap Settings > Programmable Keys ( | ).
Select PTT Key App
The PTT (Push-to-Talk) key is on the left side of the device. The default setting selection is Phone.
If you wish to change this from the Programmable Keys menu on the device, press Select PTT Key App, and scroll through the list of available applications to assign to this key. Touch the application you would like to assign to this key. You can choose 'No Action' if you prefer not to take any action.
There is also an option to set a timer to activate the PTT Key button. The default setting for this timer is OFF, which means as soon as you press the button, the application assigned to that button will launch.
Select Emergency Key App
On the top right-hand side of the device is the Emergency key. The default setting is “unassigned.”
If you wish to change this, from the Programmable Keys menu on the device, press Select Emergency Key and scroll through the list of available applications to assign to this key. Touch the application you would like to assign to this key. You can choose 'No Action' if you prefer not to take any action.
Select Press And Hold Timer To Engage PTT Key
If you wish to assign a delay to this action, touch the SELECT Press and Hold Timer to engage PTT Key option, and from the menu displayed, select the appropriate delay you would like to assign. The default setting is OFF.
To engage this application, press and hold the PTT Key for the specified duration; the application will launch.
Push To Talk (PTT)
Push-to-talk requires a subscription to work. Additional charges may apply. Contact your carrier for more information about PTT service offerings.

NOTE: To use the PTT service, you must activate your PTT subscription with the carrier.
Security & Privacy
From the Home screen, swipe up to access the App screen, scroll to and tap Settings > Security & Privacy ( )
Settings
APP Security (Google Play Protect)
On the Security screen, tap Scan device. Google will regularly check your device and prevent/warn you of potential harm. Only apps on Google Play will be checked.
Device Unlock
SCREEN LOCK
Set your Screen lock. The options are: None, Swipe, Pattern, PIN or Password.
FACE & FINGERPRINT UNLOCK
In addition to unlocking your phone, you can also use your fingerprint to authorize purchases and access apps.

IMPORTANT: You will not be able to unlock with a fingerprint on first boot/power-on.
Face Unlock
This feature allows users to unlock their phone by looking at it. On the Security & Privacy screen, tap Face & Fingerprint Unlock > Face Unlock.

IMPORTANT: To improve facial recognition accuracy when unlocking your device, we recommend enrolling in face unlock in good lighting.
Set Up Face Authentication
- Enter your pattern, PIN, or password.
- Keep your eyes open and make sure your face is fully visible and not covered by any object, such as a hat or sunglasses.
Unlock Your Phone With Your Face
To unlock your phone, press the Power key to turn on the screen and automatically trigger Face Unlock.

NOTE: Using Face Unlock works best in well-lit environments.
Fingerprint
On the Security & Privacy screen, tap Device unlock > Face & Fingerprint Unlock > Fingerprint.
Tap on “Add fingerprint” and follow the on-screen prompts to place your thumb on the side fingerprint sensor (power button).
Account Security
This will allow you to review the Google Security settings and any passwords saved to your Google Account.
Some settings, such as Find My Device and system updates, won't work until you add a Google Account.
Device Finders
Use Google's Find My Device to locate your device or any connected Fast Pair accessories.
To use this feature, the user must have previously signed in to their phone with a Google account.
For more information on Find My Device, please reference this link: https://www.google.com/android/find/about.
System & Updates
This section lists the dates of your most recent Google security and Google Play system updates and provides a tool to back up your device to your Google Account to protect your data.
Privacy
From here, you will be able to access your Permission Manager, privacy dashboard, ads, health content, data sharing updates for location, as well as controls for clipboard access, password character display, apps accessing your location, and Google's Activity Controls.
PERMISSION MANAGER
- On the Privacy screen, tap Permission manager.
- Control permission for apps that use your camera, location, microphone, contacts, storage, etc.
PRIVACY DASHBOARD
- On the Privacy screen, tap Privacy dashboard.
- Show which apps used permissions in the past 24 hours.
ADS
Manage the information used to show you ads and measure ad performance.
- Reset advertising ID: This generates a new advertising ID for apps to use.
- Delete advertising ID: Apps can no longer use this advertising ID to show personalized ads.
- Enable debug logging for ads: Enable to instruct apps to write ads debugging information (such as network traffic) to the system log.
HEALTH CONNECT
Health Connect stores your health and fitness data, giving you a simple way to sync the different apps on your device.
DATA SHARING UPDATES FOR LOCATION
Review apps that changed the way they may share your location data.
Controls
SHOW CLIPBOARD ACCESS
Default is ON; Show a message when apps access text, images or other content you've copied.
SHOW PASSWORDS
Default is ON; Display characters briefly as you type
LOCATION ACCESS
See apps and services that have access to location.
ACTIVITY CONTROLS
Choose the activities and info you allow Google to save.
Other Settings
More Security & Privacy
This section will provide more controls over privacy & security.
PRIVACY
- Notifications on lock screen: Show all notification content. • Show media on lock screen: Quickly resumes the playbook, and the media player will stay open on the lock screen.
- App Content: Allows apps to send content to the Android system.
- Android System Intelligence: Get suggestions based on the people, apps, and content you interact with. • Autofill Service from Google: Lists your saved passwords, credit cards & addresses. • Usage & diagnostics: Share data to help improve Android.
SECURITY
Extend Unlock
This Google feature keeps your device unlocked when it's with you.
Extend Unlock can recognize when:
- You are holding the device • You are near home or another trusted place
- Your watch or another trusted device is nearby
Tap on the blue GOT IT button.
On-body detection: Enable this feature to keep the device unlocked while it's in motion, such as when you're walking with it.
Add trusted place: Tap Add trusted place, then follow the on-screen prompts.
- After you unlock your phone, it stays unlocked as long as you're at or close to a trusted place.
- Your phone will stay unlocked for up to 4 hours or until you leave one of your trusted places. For accuracy, this uses your precise location.
Add trusted device: After you unlock your phone, it stays unlocked when connected to a trusted device listed above, such as a Bluetooth watch or car system.
- Your phone will stay unlocked for up to 4 hours or until it disconnects from all trusted devices.
- When Smart Lock is active, you can force your phone to lock anytime. Just open the power menu and tap Lockdown
Android Safe Browsing
Safe Browsing alerts you to security threats, like harmful links and webpages, when you browse within supported apps.
Theft Protection
Lock the device's screen if theft is detected. Use built-in safeguards to protect your personal data if your device is stolen.
- Theft Detection Lock. Tap to turn on the feature. The screen will lock if this setting detects that someone has taken your device and run away.
- Offline Device Lock. Tap to turn on the feature. The screen will lock shortly after your device goes offline to help protect your data.
- Remote Lock. If your device is lost or stolen, you can lock its screen with just a phone number.
- Find and erase your device. Use Find My Device to locate and/or erase your device.
Device Admin Apps
Access FIND MY DEVICE and other admin apps in this section.
Sim Lock
You have the option to lock the SIM. Default is OFF; enabling this feature would require a PIN to use the device. If SIM is locked and PIN is unknown, please contact your service provider.
Encryption & Credentials
Manage your credential storage within this sub-menu
- Encrypt phone: Your phone is already encrypted. • Trusted credentials: View trusted security certificates.
- User credentials: View and modify stored credentials. • Install a certificate: Install certificates from the SD card. • Clear credentials: Remove all certificates. • Certificate management app: Tap to view apps where the credentials can be used for authentication
Trust Agents
From the Security & Privacy screen, scroll to and tap More security & privacy, then scroll to and tap Trust agents.
Slide the switch to the On position to turn them on.
App Pinning
- From the Security screen, tap App pinning. Slide the switch to the On position to turn it on.
- When turned on, you can use app pinning to keep the current screen in view until you unpin.
Confirm SIM deletion
Enable this option to require verification before deleting a SIM.
Location Settings
From the Home screen, swipe up to access the App screen, scroll to and tap Settings > Location ( 🔒 ).
• Turn On location services.
RECENT ACCESS
View a list of apps that have recently requested your location.
App Location Permissions
View which apps have permission to access location services and at what level: Allowed all the time, Allowed only while in use, and Not allowed.
Location Services
Earthquake alerts: The default setting is ON; you will receive an alert with the initial estimated magnitude and distance from your location. Alerts are managed by Google.
Emergency Location Service: Turn On Google ELS.
If ELS is supported in your region, when you contact an emergency number, your device may automatically send its location to emergency responders using ELS.
Google Location Accuracy: Turn On this option to use GPS, Wi-Fi, Bluetooth, mobile networks, and sensors to determine your location.
Google Location History: Default is ON; Saves where you go with your device, even when you aren't using a specific Google service.
Google Location Sharing: Default is OFF; Location Sharing lets you share your real-time location from your device with people you choose.
Trusted places: This feature requires a screen lock. Some settings use trusted places to determine when more security is needed. For example, when your device is away from your trusted locations, such as your home or office, some settings may require additional steps to verify that it's you.
Wi-Fi scanning: Turn On this option to improve location services by allowing the system apps and services to detect Wi-Fi networks at any time.
Bluetooth scanning: Turn On this option to improve location services by allowing the system apps and services to detect Bluetooth devices at any time.
Safety & Emergency
Store your medical and emergency information, view emergency alerts, and manage settings on emergency SOS and location service.
From the Home Screen, swipe up to access App screen, scroll to and tap Settings > Safety & emergency ( * ).
- Open Google's PERSONAL SAFETY to add your medical information, emergency contacts & emergency info access.
Medical Information
Gives you the ability to enter your name, date of birth, blood type, height, weight, allergies, pregnancy status, medications, address, any medical notes, and organ donor status. This information is only stored on your device.
Emergency Contacts
Add your emergency contacts. In an emergency, this information is available, so these contacts can be called without unlocking your device.
Emergency SOS
Press the POWER button quickly 5 times (or more) in an emergency to call emergency services, share information with emergency contacts & record a video.
Car Crash Detection
This is a Google service that is not available on this device.
Crisis Alerts
Default is OFF: Get notified about natural disasters and public emergencies affecting your area. Using this feature requires location permissions.
Emergency Location Service
When activated and in an area that supports this feature, calling or texting an emergency number may automatically send your device's location and other critical information to emergency responders.
Earthquake Alerts
Default is ON. You will get an alert with the initial estimated magnitude and distance from your location.
Unknown Tracker Alerts
Default is ON. Trackers work with Find My Device network-compatible tags.
When alerts are on, you'll get a notification if an unknown tracker is detected traveling with you. These alerts are deleted after 48 hours.
Silence Notifications While Driving
Default is OFF. This acts as a Do Not Disturb while driving.
When ON, this will automatically silence incoming calls, texts, and notifications when driving is detected.
Wireless Emergency Alerts
Enabling Wireless Emergency Alerts will provide notifications for Extreme & Severe threats to life and property, AMBER Alerts, Public Safety messages, State & local tests. You can turn each one of these on or off individually.
Please refer to Settings > Notifications > Wireless Emergency Alerts for further information.
Passwords and Accounts
From the Home screen, swipe up to access the App screen, scroll to and tap Settings > Passwords and accounts ( ).
PASSWORDS
See, change, or remove passwords you saved in your Google Account.
AUTOFILL SERVICE
Autofill your information from your Google Account when needed. Fill in the categories with the information you want autofilled, such as addresses and payment methods.
ACCOUNT FOR OWNER
On the Passwords & accounts screen, tap Add account.
- Tap the type of account you want to add.
- Follow the prompts to enter your credentials and set up the account.
Automatically Sync App Data
On the Passwords & accounts screen, tap Automatically sync app data.
Turn On this option to activate automatic data syncing.
Digital Wellbeing and Parental Controls
From the Home screen, swipe up to access the App screen, scroll to and tap Settings > Digital Wellbeing & parental controls.
DIGITAL WELLBEING
- Use app timers and other tools to keep track of screen time and unplug more easily.
- Touch the timer in the center of the screen to view the usage time of Screen Time, the number of notifications received, and the number of times it was opened.
- You can also set timers for each application to set the amount of time each application is made available for that day. The clock, for timing purposes, runs 12:00am-11:59pm.
View Activity Details (also known as Dashboard): Touch the timer in the center of the screen to view Screen time usage, the number of Notifications received, or the number of Times opened.
This section lets you set daily screen time limits for most apps. When the app limit ends, the app is paused for the rest of the day.
WAYS TO DISCONNECT
App Limits
View your screen time & set timers for your applications.
Bedtime mode
Silence your phone, dim the screen, and set the display to black-and-white at your designated bedtime.
- Use Do Not Disturb for Bedtime Mode and allow only calls from starred contacts, repeat callers, and alarms.
Focus mode
Set a schedule to pause distracting apps and hide their notifications.
Screen time reminders
Stay in control of your digital habits with screen time reminders. Get occasional reminders showing how much time you spend on the app. To enable, click on the Turn on button.
REDUCE INTERRUPTIONS
Manage Notifications
Enable or disable app notifications.
Do Not Disturb
Turn ON to only get notified by important people and apps. Use this section to specify which people, applications, alarms, reminders, and calendar events can interrupt Do Not Disturb mode.
What can interrupt Do Not Disturb
• People: Choose which of your contacts can still reach you. - Apps: Choose which apps can still reach you. - Alarms & other interruptions: Choose if alarms, media sounds, touch sounds, reminders, or calendar events can still interrupt.
General
- Schedules: Set your schedule for sleeping and events. • Duration for Quick Settings: Until you turn off, for 1 hour, or ask every time
- Display options for hidden notifications: When Do Not Disturb is turned ON, set whether 1) sound will play when a
notification arrives or 2) no visuals or sound when a notification arrives.
• You can also set custom settings.
Heads Up
- Receive a reminder from Google when walking while using your phone to focus on what's around you. • Show icon in the app list: Turn on to show the icon in the application list.
FAMILIES
Parental Controls
You can add content restrictions and set other limits to help your child balance their screen time.
Configure your device's Google settings. Available options depend on your Google Account.
From the Home screen, swipe up to access the App screen, and tap Settings > Google (G).
If you have not logged into your Google account yet, you can use this menu to sign in.
- On the Google screen, tap SIGN IN TO YOUR Google ACCOUNT.
- Tap Google ACCOUNT.
- Follow the screen instructions to finish the setup.
- Choose from Recommended Services or All Services.
- You will see your current backup status and your current Google storage usage.
- From this menu, you will have the capability to access Find My Device, Password Manager, Google Wallet, and Quick Share.
System
Configure your device's language, gestures, time, and backup settings. From the Home screen, swipe up to access the App screen, scroll to and tap Settings > System ( ).
Languages
You can set the phone language and input options to any of the languages displayed in the language lists.
- On the System screen, tap Languages.
- From here, you can change languages for the System, for Apps, and for regional preferences.
- English is set as the default System language; however, to change this, touch System Languages and either select an alternative language or touch Add a language.
- When more than one language has been added, you can touch and hold the language, then drag it up to the first position to set it as the default display language.
- To remove a language, tap REMOVE.
- To change APP LANGUAGES, touch App Languages and select the application you would like to change the language for, and on the next screen, select the language you would like associated with that application.
- For REGIONAL PREFERENCES, you can change the • Temperature between Fahrenheit and Celsius, • Set the First day of the week, and
- Select your Number preferences.
SPEECH
These tools will assist with voice input and recognition, as well as text-to-speech output.
• Voice input: Speech recognition and Synthesis from Google. - On-Device recognition: Choose a language for on-device speech recognition.
• Text-to-Speech output:
i. Preferred engine: The default is Speech Services by Google; however, click the settings icon and you can install voice data (various voice languages), control how the voice data is downloaded (Wi-Fi vs. Cellular), amplify speech volume to make it easier to hear, set your language detection (off, conservative, or aggressive) and other settings.
ii. Language: The default setting is the system language. However, you can change the primary language to any one of the listed languages.
iii. From this sub-menu, you can also adjust the Speech Rate and the Pitch of the text-to-speech.
Keyboard
You can select the on-screen keyboard you wish to use from this sub-menu, as well as other tools such as Spell Checker, Personal Dictionary, and Pointer Speed.
On-Screen Keyboard
Gboard: You can use Google Keyboard, which is a multilingual typing keyboard. Click this, and you will open up a submenu where you can change the settings of the Gboard.
Google voice typing: You can use Google voice typing for entering the text instead of using the keyboard.
Spell checker
Turn ON to use the spell checker.
You can select the language from the list of languages.
From the Default spell checker, you can click on the Settings icon, and you can include your contacts' first and last names as part of your dictionary, as well as mark words that are potentially misspelled with a blue underline.
Personal dictionary
You can add words to your dictionary. Press the Add (+) button to add additional words to your personal dictionary.
Pointer speed
Use this slider to adjust the pointer's speed on the screen.
Gestures
You can use this menu to manage gestures on your device. From your Home screen, scroll to Settings > System > Gestures.
Quickly open camera
Enabling this option allows you to activate the camera by pressing the power button twice from any screen.
Navigation mode
You can choose how to manage navigation: either Gesture navigation or 3-button navigation.
Press & Hold Power Button
Pressing and holding the power button can be set up for two different actions:
- Displaying the Power menu: Choosing this displays options to make an emergency call, lock your phone, restart your device, or power it off.
- Opening the Digital Assistant.
The default is to open the digital assistant.
When choosing the Digital Assistant, you can set the sensitivity for how long you must press and hold the power button before the digital assistant activates.
If you choose the Digital Assistant and want to access the Power Menu, press the power and volume up buttons simultaneously.
If you choose the Digital Assistant and want to silence an incoming phone call, press any volume button.
Prevent ringing
When the power button is pressed to access the Power menu, you can select to vibrate or mute the ringer by simultaneously pressing the Power button and the volume up button.
Toggle Flashlight
When enabled, you can activate the flashlight by double-shaking the device.

NOTE: Sudden movements can inadvertently activate the flashlight. Please note that the flashlight consumes battery life and can generate heat, so please check this setting to ensure your device is performing as expected.
Date & Time
From the Home screen, click Settings > System > Date & time
The device defaults to using the network date and time. If you disable
this, you can manually change the date and time to your preferred setting.
TIME ZONE
The device defaults to ON, automatically detecting the time zone you are currently in.
You can also allow the device to use your location to identify your time zone.
TIME FORMAT
You can select Use locale default, which is set to OFF by default.
You can also format the time to either a 12-hour or 24-hour format. The default is a 12-hour time format.
Backup
From here, you will be able to manage the storage of your Google account, as well as back up your Google account.
Backup by Google One is enabled by default.

NOTE: If you turn this off, a TURN OFF AND DELETE BACKUP message is displayed. This will turn off backup for device data on this device AND you will also delete backed-up device data, including Device Settings, Apps & app data, Contacts & Call history, and SMS/MMS messages.
Backup only uses Wi-Fi connections to back up data.
You can determine what you would like to backup:
- Applications
- Photos & videos
- SMS & MMS messages
- Call history
- Device settings
- Google Account data
Advance Settings
You may also choose to back up over mobile or metered Wi-Fi data. The default setting here is OFF.

NOTE: Charges may apply if you use this feature.
Please contact your cellular provider for details about your pricing plan.
Multiple Users
You can allow multiple users to use your device by enabling this feature. The default setting is OFF.
Each user will have a personal space on your device for custom home screens, accounts, apps, settings & more.
From this menu, you can also delete guest activity.
You can enable the guest to use phone capabilities. The default for this is OFF. If you activate this, note that your call history will be shared with the guest user.
You can also add users from the lock screen.
Reset Options
From here, you can:
- Reset Mobile Network Settings
- Reset Bluetooth & Wi-Fi (Note: This action cannot be undone.)
- Reset app preferences. This will reset all preferences for:
○ disabled apps - disabled app notifications - default applications for actions - background data restrictions for apps - permission restrictions ○ battery usage settings ○ (You will not lose any app data.)
- Erase eSIMs (Note: This will not cancel any mobile service plans. To download replacement SIMs, please contact your carrier.)
- Erase all data. (Factory data reset * ). Completely wipe your device clean as if it were brand new from the factory.
- Reset Settings. Reset systems back to default settings.

*BACK UP YOUR IMPORTANT DATA FIRST!
WARNING! The factory data reset function deletes
EVERYTHING from your device, including your Google account, all apps and app settings, all contacts, photos, downloaded music, and text messages. Back up important data before proceeding, as you will not be able to recover it if you do not.
System Updates
This section lets you check for available software updates for your device.
About Phone
To access specific information about your device, from the Home screen, swipe up to access the App screen, scroll to and tap Settings
About phone.
The following information is displayed:
Basic Info
Device name
Tap on this to show your device name. You can change this. Note that this is what others will see when/if you connect to Bluetooth devices, Wi-Fi networks, or hotspots.
Phone number (SIM slot 1)
Tap to show info.
Phone number (SIM slot 2)
Tap to show info.
Legal & Regulatory
Legal information
Tap to display additional information.
Device Details
Device Unlock
View your device's unlock status information.
SIM status (SIM slot 1)
Tap to display more information about the network connection and device performance stats.
SIM status (SIM slot 2)
If a second SIM is in use, tap to display additional information.
Model
Tap to display Model, Type number, Serial number, and Hardware version number.
EID
Tap to display the QR code for your EID.
IMEI (SIM slot 1) (Primary)
Tap to show info.
IMEI (SIM slot 2)
If a second SIM is in use, tap to show info.
Android version
- Tap to display Android version
- Latest Android security update
- Latest Google Play system update
- Baseband version
- Kernel version • Build (Software) version number
Device Identifiers
IP address
The device IP address is displayed.

NOTE: MAC addresses are only available when the service is enabled.
IP addresses are only available when the device is connected to Wi-Fi or mobile data.
Device Wi-Fi MAC address
The Wi-Fi MAC address of the device is displayed.
Bluetooth address
This address is used to identify the phone when connecting to other Bluetooth devices.
Up time
Displays the time elapsed in hours since the device was last restarted or powered up.
FCC ID
The FCC ID is displayed.
Build Number
This is the software version of your device, and it is important that you keep it up to date with the latest improvements and enhancements to the device software package.
MANAGING CONTACTS
The phonebook lets you store phone numbers and other contact details. This feature enables you to add and dial phone numbers, and send SMS and MMS messages.
From the Home screen, swipe up to access the App screen, scroll to and tap the Contacts ( ) app.
Adding a Contact
When you switch on the device for the first time, there are no contacts added to the device or SIM. Contacts can be imported when you sync your Google account.
Creating a New Contact
- On the Contacts screen, tap ( + ).
- Enter all the details, select where to save the contact, and tap Save. The contact is added to the phonebook.
To add a new contact from the dialer/phone path:
- Tap the Phone ( ) app.
- Now tap on the dialer (甲).
- Enter a phone number.
- Tap Create new contact. Enter all the details and tap Save.
- The contact will be added to your phonebook.
To add a picture to the contact:
On the Contacts screen, scroll to the desired contact and tap it to view its details.
- Tap the pencil icon (edit) at the top of the screen, and then tap on the picture + icon (add) at the top and follow the prompts.
- Press Save.
Editing Contact Details
On the Contacts screen, scroll to the desired contact and tap it to view its details.
- Tap the Edit pencil icon, which is present in the top right corner.
- Edit the required details. Tap Save to save the details.
Sending a Message from Contacts
You can send SMS and MMS messages to contacts in your phone book.
On the Contacts screen, scroll to the desired contact and tap to open it.
- Tap the Messages icon (☐).
- Tap in the Text Message box at the bottom of the page and enter your message.
- If you wish to attach a photo/video, tap the photo/video icon, and select the desired photo/video.
- If you wish to attach an emoji/GIF/sticker, tap the smiley face icon, and select the desired emoji/GIF/sticker.
- To record a voice memo, tap the sound wave icon and follow the on-screen prompts.
- When ready to send, tap the arrow in the text field on the right side of the screen to send your message.

NOTE: If you attach a media file or a contact to your SMS message, it will automatically be converted to an MMS message.
Managing Contacts Settings
ORGANIZE
App Screen > Contacts > Organize icon ( )
- Contact ringtones: Set ringtones for specific contacts.
- Tap on the Add contact ringtone button.
- Tap on the Contact to assign a ringtone.
- Tap on the desired ringtone.
- Tap OK.
- Manage SIM: Import or delete contacts from the SIM.
- Import from file: Import a VCF file to populate your Contacts. Select the .vcf file > choose the account/device to which the contacts should be imported.

NOTE: This will add contacts to your phone's contacts list, creating duplicates if the same contact already exists.

NOTE: If the device has only one .vcf file, it is imported without any selection window.
- Export to file: save your contacts as a .vcf file.
- Tap the SAVE button to create a contact.vcf file. It will be saved to your Downloads folder.
- You may share that file through text messaging, or for more options, view the file in your Download folder.
All Apps Screen > Files > Categories: Downloads.
- Blocked numbers: Numbers you won't receive calls or texts from.
Unknown: Enable this feature to block calls from unidentified callers.
Add a number: enter the 10-digit number you want to block, then tap Block.
- Settings: Customize how you want to view/use your contacts.
App Screen > Contacts > Organize icon ( )> Settings

- Your info: Set up your profile. Enter the details and tap Save. • Accounts: Manage accounts.
Display
- Sort by: Sort the contacts by their First name or Last name. • Name format: Set contact name format.
- Theme: Choose between Light, Dark, or System default.
Edit Contacts
- Default account for new contacts: Choose the device or add another account.
- Phonetic name: Choose always to show the phonetic name or hide if empty.
- Undo changes.
Searching for a Contact
On the Contacts screen, tap the search icon at the top. Enter the first few letters or numbers of the contact name or phone number to be searched. All contacts containing the search term will be displayed.
Sharing a Contact
App Screen > Contacts app > Contacts icon.
- Quick path (send all details): On the Contacts screen, touch and hold the desired contact to select it. Tap Share and choose from several modes to share the contact.
- Choose the contact's details you want to send:
- Tap on the contact(s) you would like to share.
- Tap the options icon: > Share.
- Scroll down the notification bar and select the exporting contacts item(s) from the notification curtain.
- You can choose the desired method from the list, such as Bluetooth, Drive, message, etc. Tap "Just once" if it is not how you always share your data or "Always."
- Follow the on-screen instructions for the next steps, which vary depending on the method you choose from the list.
Sharing a Contact
App Screen > Contacts app > Contacts icon.
On the Contacts screen, touch and hold the contact you want to select.
Tap on the trashcan icon (☐) to delete.
A confirmation message is displayed: "This contact will be permanently deleted from your device."
Tap Delete to confirm. The contacts are deleted.
MANAGING CALL SETTINGS
From the Call Settings screen, you can adjust volume levels, ringtones, vibration options, and other settings, such as setting up your voicemail. You can also customize the sounds and volume levels of the ringtones, alarms, and navigation feedback.
From the HOME screen, Tap Phone ( ), then Tap ( ) on the top right corner of the screen, then tap Settings.
ASSISTIVE
Caller ID & spam
Enable the feature to see the caller and spam ID. Identify business and spam numbers.
GENERAL
Accessibility
From here, you can:
- Activate TTY mode • Turn on hearing aid compatibility
- Turn on Real-time text (RTT) calling, which allows messaging within a voice call.

NOTE: RTT calls are saved as a message transcript. RTT is not available for video calls.
Assisted Dialing
Enable the ability to predict and add a country code when you are making a call while traveling abroad.
Blocked Numbers
Unknown: Enable the ability to block calls from unidentified callers.
You will not receive any calls or text messages from the blocked numbers.
If you want to add a number to block, tap Add a number. Enter the number to block, then tap Block. The number will then be blocked, and you will not receive any calls or messages from that number.
Calling Accounts*
SETTINGS
Tap on your carrier's name. From here you can:
- Activate Wi-Fi calling when the mobile network is not available.
- Activate video calling
- Set calls to auto-answer between 3 and 30 seconds.
- Boost the speaker during a phone call.
- IMS Settings
- Set Call Forwarding
- Always forward
- When busy
- When unanswered
- When unreachable
- Call Barring
- All outgoing
- Outgoing international
- Outgoing international roaming
- All incoming
- Incoming international
- Deactivate all
- Change password
• Additional Settings
- Caller ID
Network default
- Hide number
- Show number
- Call Waiting
Enable or disable being alerted during a call when you receive an incoming call.
*These are network-related features. Menu options will be visible only if your provider's network supports them.
Display Options
From here, you can set how your contacts are displayed in the address book.
- Sort by: Use this to sort your address book by first name or last name.
- Name format: Use this to sort your address book by first name first or last name first.
- Choose Theme: Choose a theme from the available options.
Quick Responses
Four quick responses are available here for replying to SMS or MMS messages. Each of these can be edited. Tap the response to edit as desired.
Sounds and Vibrations
This submenu lets you adjust the volume levels for your media, in-call, ring, notification, and alarm.
Do Not Disturb
You can turn Do Not Disturb on or off, and from here you can also identify specific people, applications, alarms & sounds, reminders, and calendar events that can override the Do Not Disturb mode.
You can enable a Do Not Disturb schedule and specify which events are included in Do Not Disturb management.
What can interrupt Do Not Disturb
People:
- Choose the types of Messages that will be allowed.
- Choose the types of Calls that will be allowed.
Apps:
Select the apps that are allowed to interrupt.
Alarms & other interruptions
Select if alarms, media sound, touch sounds, reminders, or calendar events should be allowed to interrupt.
General
Schedules:
- Sleeping*: Set a schedule to enable Do Not Disturb automatically.
- Event*: Enable the feature if you do not want to be interrupted during calendar events on your calendar.
*Customize this activity's Do Not Disturb behavior by either using default settings or creating a custom setting.
Duration for Quick Settings
Determine the duration of your quick settings. Choose between Until you turn it off, For 1 hour, or Ask every time.
Display options for hidden notifications
Determine how your options for hidden notifications are when "Do Not Disturb" is on:
• You will see notifications on your screen, but no sound. - You won't see or hear notifications, or - You can set custom settings based on when the screen is off or on.
Phone Ringtone
Use this submenu to set the preferred ringtone for incoming calls.
Live Caption
Live Caption detects speech on your device and automatically generates captions. Settings allow you to choose languages, suggest detected languages, set your caption preferences, hide profanity, display sound labels, and adjust volume control. For additional details, please refer to Settings > Sound & Vibrations > Live Caption.
Media
- Pin media player: Enable this feature to quickly resume playback, as the media player will stay open in the Quick Settings Panel.
- Show media on lock screen: Enable this feature to quickly resume playback, as the media player will stay open in the Quick Settings Panel. • Show media recommendations: Based on your activity, recommendations will be displayed for your consideration.
Vibration & Haptics
You can enable ring vibration, set the device to vibrate first, then ring gradually, set your notifications & alarms to vibrate, and enable touch feedback and media vibration.
Shortcut To Prevent Ringing
Enabling this feature lets you vibrate or mute the ringtone when you press the volume up and power buttons simultaneously.
Default Notification Sound
Select the default sound for notifications on your device.
Default Alarm Sound
Select the default sound to play when an alarm is triggered.
Dial Pad Tones
Enable this, and tones will be played when dial pad buttons are pressed.
Screen Locking Sound
Enable this for a sound to be played when the screen is locked
Charging Sounds And Vibration
Enable this to play sound/vibration when the device enters charging mode.
Tap & Click Sounds
Choose whether or not you want to hear the tap and clicking sounds as you interact with your phone.
Always Show Icon When In Vibrate Mode
Choose whether or not you want to see the vibrate mode icon (☐) in the navigation bar.
Voicemail
From this submenu, you can change various settings for voicemail sounds and notifications.
• Sound: The default notification sound is selected. You can select any other sound from the list. • Vibrate: Turn on to get vibration when a voicemail is received. • Show notification dot: Turn on the toggle button to show a notification dot when a voicemail is received. • Override Do Not Disturb: Turn on this option when notifications continue to interrupt when Do Not Disturb is set to Priority only.
ADVANCED
Caller ID Announcement
This feature enables the caller's name and number to be read out loud for incoming calls.
Announce caller ID: choose Always, Only when using a headset, or Never.
Flip to Silence
Enable the feature to silence an incoming call by placing your device face down on a flat surface.
SENDING MESSAGES & EMAILS
SMS (Short Message Service) and MMS (Multimedia Messaging)
Service) are convenient communication channels. You can send a text message to other people via SMS service. MMS allows you to send messages that include multimedia content such as images, audio, and video.
You can use the Messages app on your phone to send SMS and MMS to other mobile phones or any device that supports SMS and MMS.
An active mobile data connection is required to send an MMS.
From the Home screen, swipe up to access the App screen, and tap
Messages ().
Sending SMS/MMS Message
You can send SMS and MMS messages to contacts in your phonebook and to numbers not in your phonebook.
- From the Messages app screen, tap the Start chat button.
- Enter the contact name or the phone number in the To field. When entering letters, contacts that start with and contain the entered letters are displayed. Scroll down to select the desired contact.
- Type the message in the Text message field. When you add an attachment, the message automatically converts to a multimedia message.
- Add an attachment option
Multimedia: You can add any multimedia attachment up to a size of <=1 MB*. To add an attachment,
i. Tap the Attach (⊕) icon.
ii. In the next step, select the attachment type from the options: emoji, Location, Contact, or Attach file.
iii. Select the multimedia file to be attached.
*file size may vary based on carrier requirements.
Photo: You can add a previously captured photo or take a photo
i. Tap the camera ( ) icon.
ii. In the next step, take a photo by tapping on the grey circle, or tap on an existing photo(s) to share.
- To send your message, tap on the send ( ▶ ) icon on the right side of the text message field.
Deleting Messages
To delete a message, click on the message you wish to delete.
Tap the options icon (●) and tap delete. A pop-up message will appear.
- Tap the options icon (●) and tap delete. A pop-up message will appear.
- NOTE: Once deleted, items cannot be recovered or undeleted.

NOTE: Once deleted, items cannot be recovered or undeleted.
Setting up your Gmail account(s) will allow you to access your email and email services.
Setting up your Gmail account(s) will allow you to access your email and email services.
From the Home screen, tap the Google application.
- From the Home screen, tap the Google application.
- Tap the screen above Recommended and All Services.
- Click ADD ANOTHER ACCOUNT.
Sonim Scout
The Sonim Scout app is a solution that enables users to register with Sonim and utilize several key enterprise features.
A Sonim Cloud account is required to fully utilize Scout capabilities. For more information, visit https://www.sonimcloud.com.
To access Sonim Scout, from the Home screen, swipe up to access App screen, scroll to and tap Sonim Scout ( ).
NOTE: The initial launch of the app will require acceptance of the Terms and Conditions and End User License Agreement.
SETUP
The Setup tab consists of the following features:
- Sonim Setup Wizard
- SafeGuard
- App Updater
- Kiosk Mode
- MDM Helper

UTILITIES
The Utilities tab consists of the following features:
- Contact Transfer
- Sonim BLE Connect
- Call Screening
- Stealth Mode
- Device Settings
- Repeat Notifications
- USB C Connect
- Messages
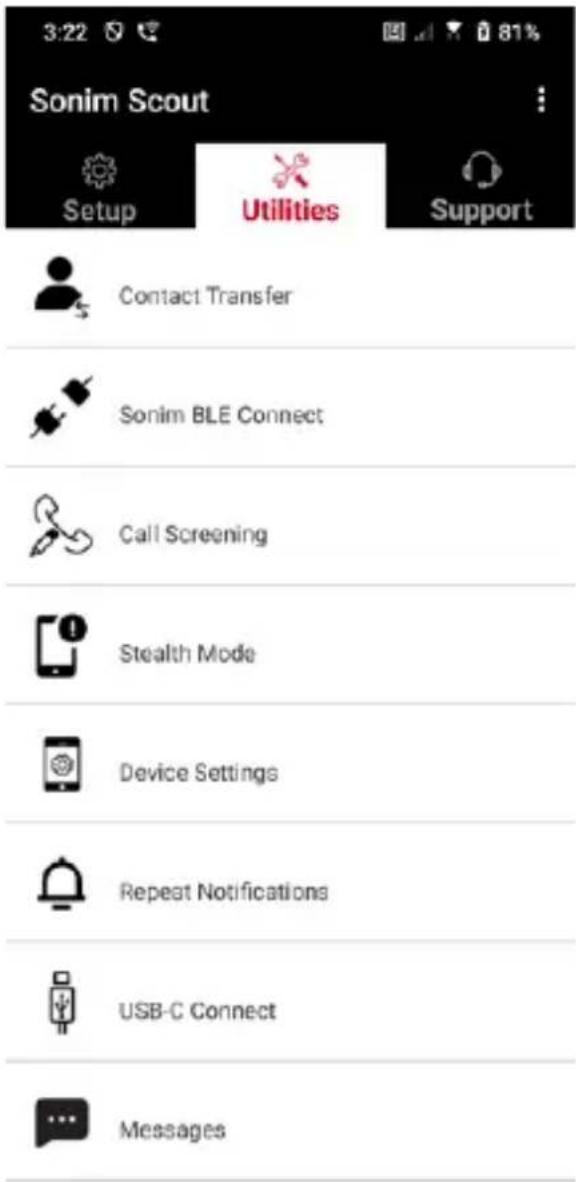
SUPPORT
The Support tab consists of the following features:
- Remote Support
- Sonim Care
- Warranty Registration
- Remote Log Capture • Device Information • SCOUT Information
- Support Contact

USING APPLICATIONS
Camera
The Sonim XP Pro features a 50MP primary rear camera and a 16MP front camera with fixed focus for capturing images. Saved pictures can be accessed via the Photos app or by clicking the gallery button in the lower-left corner of the screen.
From the Home screen, swipe up to access the App screen, and tap the Camera app.
- Camera mode: Tap the soft key in the bottom center of the screen to take a photo. Use the Volume Up and Volume Down keys as alternative capture keys.
- Continuous Shot mode: Press and hold the Volume Up or Volume Down key to activate Continuous Shot mode, which captures up to 20 pictures in rapid succession. Releasing the button at any point during the long press will end the continuous mode shooting.
When you activate the camera, you will see a series of options along the lower edge of the screen above the camera soft key. These options are:
Pro
Several professional settings are available for you to adjust picture-taking parameters manually. You can adapt any of the following:
- Manual focus
- ISO
- Shutter speed
- Exposure
- White Balance
- Auto focus
Night
This mode reduces noise and sharpens details for low-light photography. Keep your phone still when taking photos.
Video
You will have access to Beauty & Filter settings, as well as an Auto Zoom setting (0.6x, 1x, or 2x).
Photo
You will have access to Beauty & Filter settings, as well as an Auto Zoom setting (0.6x, 1x, or 2x).
Portrait
For best “bokeh” (or blur) effects, keep a distance of 0.5-1.5 meters between your phone and the subject.
50M and More
- Panorama
- AR Sticker
- Watermark
- Time-lapse
- QR Code
- Macro
Just below these “modes,” there are three buttons that support your photo/video efforts.
Gallery soft key is the soft button on the left side of the screen. This will give you access to all photos and videos stored on your device.
Camera Soft key is the button you use to take a picture or to start and stop a video.
Mirror Soft key is the button used to flip the front camera, allowing you to take a selfie. This feature does not work with the rear camera.
Utilize the following features when in Camera mode. These are the

NOTE: These descriptions apply to the camera app installed on the Sonim XP Pro E. If you are using a different camera, these descriptors may differ.
These icons are seen at the top of the screen from left to right:
FLASH: Tap the Flash icon to toggle flash. If the flash icon is orange, it is activated; if the icon has a slash through it, the flash is deactivated; if the icon has a small "a" in the bottom-right corner, it is in Automatic mode.
HDR (High Dynamic Range): Tap the HDR icon to enable or disable HDR. If the HDR icon is orange, it is activated; if the icon has a slash through it, the flash is deactivated; if the icon has a small "a" in the bottom right, it is in Automatic mode.
AI: Tap the AI icon to activate or deactivate auto scene detection.
Google Lens: Tap the Google Lens icon to activate Google Lens. When active, use your camera to snap a picture, and Google will provide a description (where available) of the image in your shot.
MOTION PLAY
Enable or disable this Google Camera feature to capture photos with creative blur effects.
SETTINGS
Picture Size: Ability to adjust the size while in Pro or Photo modes.
- 1.2MP (1:1)
- 13MP (4:3)
- 8MP (16:9)
- 7MP (Full screen)
Shutter Sound: It can turn on or off.
QR Code recognition
Geotagging: When enabled, it records coordinates where pictures are taken. Details are available in the image details.
Camera Screen Brightness:
- Minimum brightness
- Normal • Maximum brightness
Volume Key Functions: While the default is to capture a shot, including Continuous Shot mode, you can set the volume key to operate as follows when the camera is engaged:
• Volume - Capture - Zoom
Self-Timer: Can set the self-timer to any of the following options:
- Off
- 3 seconds
- 5 seconds
- 10 seconds • 15 seconds
Touch Shot: Enabling this feature lets you capture a photo by touching anywhere on the touchscreen.

NOTE: This does NOT work when in video mode.
Face Detection: Enable this feature to automatically detect and track a face, keeping it in focus as you move the camera.
Watermark: This Google Camera feature lets you add a time, device, and/or location watermark.
To create a custom watermark, select device watermark. This custom watermark can contain up to 16 characters, including letters, numbers, and special characters.

NOTE: Emojis cannot be used in your custom watermark.
Grid: Enable this feature to overlay a grid on the screen, helping you align your image before taking a photo or video.
Video: Ability to adjust the video parameters while in the video mode.
• Video frame rate: Select 30FPS or 60FPS. • Video quality: Select High, Medium, or Low.
Smile capture: Turn on this feature to snap a photo whenever the camera detects a smile, while in the Photo mode.
Advanced Features:
- Anti-Flicker: Select from Auto, Off, 50 Hz, or 60 Hz settings.
- Correct ultra-wide angle distortion: Enable or disable.
Restore Default Settings: This option restores all settings to their factory defaults.
Calendar
The Calendar helps you set up appointments, schedule reminders and alerts, and repeat them as needed. You can also view your saved tasks on a daily or weekly basis.
To access your calendar:
- From the App screen, tap Calendar ( ).
- To change the calendar view, tap Option (≡) and you can view the calendar in:
- Schedule,
- Day, • 3 Days,
- Week, and • Month format.
To schedule an event or a task, tap the “+” button on the lower right side of the screen, and then tap either Task or Event and follow the prompts.
To view events on your calendar, ensure they are selected for display.
Go to Settings by clicking on the three lines in the upper left-hand
corner of your device. Scroll to the bottom and tap Settings (

Follow the prompts to select which activities and calendars you want synced to your phone.
Calculator
The default calculator on this phone is designed to perform basic mathematical operations.
- To access the calculator, from the App screen,
tap Calculator (

- To enter numbers, tap the respective numeric soft keys.
- To perform your calculations, touch the respective operation soft keys on the screen.
For more mathematical operators, tap the "v" soft key above the division soft key on the right side of the screen.
Within the Calculator app, there is a Settings menu. From here, you can gain access to:
• History: You can get a list of previous calculations you have performed on the device. - Choose theme: You can choose a light, dark, or system default theme. - You can access Google's Privacy Policy as well as send Google feedback on their application and access the Google help menu.
Clock
To access the Clock, from the App screen, scroll to and tap
Clock ( ). The following features are available:
Alarm
- To schedule a new Alarm, Tap Alarm ( ), then tap the “+” button and set the specific time of your alarm.
- You can then add a label, select the frequency of the alarm, set the tone, whether you want it to vibrate, whether you
If you wish to add this alarm to your Google Assistant Routine, or delete the alarm.
Clock
- The clock automatically displays the current time for your location by using data from the nearest connected cell tower.
- To check the time in other cities around the world, tap the “+” button and start typing the first few letters of a city’s name. A list of city options will appear based on your input. Select the cities you want, and they will be added to the Clock screen for easy viewing.
- If you want to remove a city from the Clock screen, swipe left on the city name, and it will be deleted.
Timer
- Set the desired timer and press the round Play key at the bottom center of your screen.
- You will then be able to pause, add 1 minute to the timer, or create another timer. You can add as many timers as you like.
Stopwatch
To start the Stopwatch, press the start ( ) button on your screen. You have options to restart (left soft key) or create a split (right soft key).
Bedtime
Setting Up Your Sleep Routine.
• Set a Regular Wake-Up Alarm
○ Choose a consistent wake-up time to start your day. If you prefer a gentler wake-up, enable the Sunrise Alarm feature. This gradually brightens your screen before the alarm activates.
- Customize Alarm Settings
- Select a preferred alarm tone to wake up to. Enable or disable vibration based on your preference.
- Add the alarm to your Google Assistant Routine to seamlessly integrate it with your daily tasks.
- Set Up Bedtime Notifications
Configure a consistent bedtime to help you develop a healthy sleep pattern. Enable Bedtime Notifications to remind you to prepare for sleep. You can choose when to receive notifications—15 minutes, 30 minutes, 45 minutes, or 1 hour before your set bedtime. You can also disable notifications if you prefer no reminders.
- Enable Bedtime Mode
Turn on Bedtime Mode to minimize distractions and create a sleep-friendly environment. When enabled:
- Your phone will automatically silence notifications. The wallpaper will dim. The display will switch to black and white to reduce screen stimulation.
You can customize Bedtime Mode to allow specific people, alarms, or notifications to bypass these settings for essential communication.
• Additional Tips for Better Sleep
- Disconnect from your device as you approach bedtime.
- Listen to soothing sounds to relax and prepare for a restful night.
To access Clock settings directly from the Clock application, tap the three dots in the upper-right-hand corner of your screen.
The following tools are available:
Screensaver: You will enable the screensaver when you access this screen.
Settings:
- Clock Settings:
○ Style: Digital or Analog ○ Display time with seconds: on or off ○ Automatic home clock: Enabling this feature allows you to have a second clock for when you are traveling in an area outside of your home time zone, displaying the correct time at your home.
○ Home time zone: Use this to set your official home time zone
○ Change date & time: Use this to adjust the date & time manually.
ALARM SETTINGS
Silence after: Set the time to cancel the alarm sound after a specific duration. Options are:
- 1 minute
- 5 minutes
- 10 minutes
- 15 minutes
- 20 minutes • 25 minutes, or
- Never
Snooze after: Set the time to snooze after you silence your alarm.
Options are from 1 minute to 30 minutes.
You can also:
- Adjust the volume of your alarm • Gradually increase the volume of your alarm from 5 seconds to 60 seconds (in 5-second increments)
- Set the volume buttons, when tied to an alarm, to control volume, snooze, stop the alarm, or do nothing.
- Set what day of the week your calendar starts. Options are Sunday, Friday, Saturday, or Monday.
TIMER SETTINGS
You can customize the timer:
- Select the sound used by the Timer, or add your own sound.
- Gradually increase the sound of your timer counter from 5 seconds to 60 seconds (in 5-second increments).
- Enable or disable the Timer vibrate feature.
Screen Saver
You can customize the screen saver:
• Set a digital or analog screen saver - Activate Night Mode to decrease the display to a very dim setting to decrease the impact on your eyes in dark rooms.
Privacy Policy
This will take you to the Google Privacy Policy.
Help
This will take you to the Google Help resources. Popular topics will be listed on the main screen; however, you can use the search window to search the entire Google help database.
Send feedback
This link lets you provide feedback directly to Google.
Sound Recorder
You can record voice memos using the device's sound recorder.
- To access the sound recorder, from the App screen, tap Sound Recorder.
- To record an audio file, tap the red record button located in the bottom center of the screen.
- To STOP the recording, press the STOP soft key on the bottom left side of the screen.
- To PAUSE the recording, press the PAUSE soft key in the bottom center of the screen.
Once you have stopped the recording, you will be prompted to save the recording with a file name. You can use the prepopulated file name or create one of your own.
- Press SAVE when you have named the file.
- Once you have saved audio files to the device, you will see the MENU soft key brighten (it is dark and inactive on the screen when no audio files are present). Press this to see the list of audio files saved to your device, and tap any file to play it.
Sound Recorder Settings Menu: view specific attributes of sound recordings or set custom values such as BitRate, SampleRate, Channel, and Codec by tapping the checkbox next to Custom Settings in the upper-left corner of the screen.
Files
Files stored on your phone (e.g., photos, videos, screenshots, recordings, documents) can be viewed, edited, deleted, and shared using Files. If you are using an external storage SD card, you can also manage those files from your device.
From the App screen, tap Files. You will see:
Recent files are listed and grouped at the top of the screen. Collections include files you have marked as Favorites (Starred) and a Safe Folder. Categories of files appear below the Recent files. These include:
Downloads, Images, Videos, Audio, Documents, Apps
Collections include files you have marked as Favorites (Starred) and a Safe Folder.

IMPORTANT: Files stored in the Safe Folder are protected by a lock (either PIN or Pattern). If you forget this lock (password), there is no way to recover it, and these files will be lost. Please protect your lock code. Neither Google nor Sonim can recover this lock code for you or reset it without a factory reset, which would delete all folders within this Safe Folder.
All Storage devices appear at the bottom of the screen, which includes internal storage and other storage options.
SAFETY INFORMATION GUIDELINE
Product Information
Applicable models
X802(S3112); X802(S3111); X802(S3012); X802(S3011), X802 (S1101)
Spec:
| GSM 850/900/1800/1900 MHz (Not for USA and Canada market) | |
| UMTS I, II, IV, V, VIII | |
| LTE | 1, 2, 3, 4, 5, 7, 8, 12, 13, 14, 20, 25, 26, 28, 29, 30, 32, 38, 39, 40, 41, 42, 43, 48, 66,68, 71 |
| 5G FR1 n1, n2, n3, n5, n7, n8, n14, n20, n25, n26, n28, n30, n38, n40, n41, n48, n66, n70, n71, n75, n77, n78 | |
| OS | Android 14, Google AER Certified |
| Platform Qualcomm SM7550 (Snapdragon 7 Gen 3), 1x 2.63GHz, 3x 2.4GHz, 4x 1.8GHz | |
| Memory | 8GB DDR4X, 256GB UFS (ROM). Micro SD up to 2TB |
| Display | 6.58", 1080x2408, 90Hz. Gorilla Glass Victus II |
| Camera | 50MP Main Camera; 13MP Wide Camera; 16MP Front Camera |
| Wi-Fi | 802.11 a/b/g/n/ac/ax, Up to 10 connections, 2.4G/5G/6GHz |
| BT BT5.3, BLE | |
| LBS | GPS/a-GPS, Galileo Glonass, Beidou, SBAS |
| SIM Dual 4FF SIM slots | |
| Charging | USB C port with fast charging (18W), Wireless charging (WPC), 2-pin on back |
| Loud Speaker | Bottom-facing, Dual loudspeaker, 100+dB at 10cm |
| Side buttons | Programmable key, Volume keys on left, Emergency button on top, Power with Fingerprint on right |
| Battery | 5000mAh, non-removable |
| Dimensions | 171.5x80x11.5mm |
| Weight 267g | |
| NFC Loop Antenna | |
| WPT | Rx, 100kHz~ 148.5 kHz Coil Antenna |
Battery Info
Model: BAT-05000-21S
Battery Usage
Your Sonim XP Pro E phone has a non-removable battery. If you have any battery-related questions, please contact the Sonim Customer Experience Center at 1-833-MY-SONIM (1-833-697-6646) or email us at globalsupport@sonimtech.com.
- Use only a Sonim XP Pro E (X802) certified battery that is designed for this phone model.
- The use of other batteries may cause permanent damage to your device, thus voiding the warranty.
- It is recommended to protect the phone and battery from extreme temperature environments and moisture.
- Please keep the battery out of the reach of children.
Verifying And Optimizing Battery Usage
- You can check the battery usage status and close some applications to save battery power. From the Home screen, swipe up to access the App screen, tap on Settings ( )
Battery ( ).

- The current battery level (charging or not charging) is displayed at the top of the screen. From the Home screen, swipe up to access the App screen, tap on Settings ( ) >

Battery ( ). Tap on Battery usage to view the discharge graph, which shows the battery level over time since you last charged the device, how long you have been running on battery power, and approximately how much battery life you have left.
- The list at the bottom of the screen shows the breakdown of battery usage for individual apps and services. Touch any
listed items for more details. The details screen in some apps includes buttons to adjust settings that affect power usage or to stop the application completely.
- If you Force Stop an application, it may affect not only the overall performance of that application but also the device's performance. If you notice any performance issues, power-cycle the device.
Tips To Extend The Battery Life
- Follow these tips to extend your phone’s battery life.
- If you are not using Wi-Fi, Bluetooth, or GPS, use the Settings to turn them off. The GPS setting is located in Settings > Location.
- Set screen brightness to Low and set a shorter Sleep timeout (15 seconds). The display settings are located in Settings > Display.
- If you are traveling and do not have access to mobile data or a Wi-Fi network, switch to Airplane mode. Select Airplane mode from Quick Settings.
Charging The Battery
• We recommend that you give your device a full charge before you use it for the first time. - The ambient temperature during charging shall be in the range 0°C to 45°C (32°F to 113°F) - Only the power supplies with outputs meeting the SELV requirements can be used for charging. The maximum allowable input voltage for the phone is 9V and 2A. - There is a risk of explosion while charging if the battery has been replaced with an incorrect type. • If the battery is completely out of charge, it can take several
minutes for the charging icon to appear when the charger is connected.
Properly Charging The Device
1. Insert the charger
Insert the charger plug into a power outlet
2. Connect to the phone
The charging port is located at the bottom of the phone and is covered by the rubber charging port cap.
i. Open the charging port cap. ii. Insert the charging connector.
Charging Animation/Icon
- If the battery is charged when the phone is switched off, a battery charging animation with the current battery level is displayed.
- After the battery is fully charged, the charging animation stops, and the battery level displays 100%.
- Please disconnect the charger from the phone.
- If the battery is charged while the phone is switched on, the battery icon on the status bar shows the lightning bolt, indicating that the battery is being charged.
- After the battery is fully charged, the display shows “100%” next to the battery.
- Please disconnect the charger from the phone. Once unplugged, the battery icon will return to a solid image.


Storing Your Phone and Battery
If you plan to store your phone (which includes the non-removable battery) for an extended time, please follow the recommendations below to ensure long battery life and minimize battery self-discharge:
- Charge your battery to a level between 40% and 60%.
- Protect the battery terminals to avoid discoloration and potential short circuits with other battery terminals.
- Store the phone in a dry, cool environment that is free from vibration.
- If you use a climate-controlled storage location, set the temperature to 59° to 77°F (15° to 25°C) and keep the relative humidity ≤ 85% RH.
- Recharge the battery once every 6 months using a USB power adapter and a charging cable with a USB C connection.

WARNING! Never charge, plug in, or unplug your phone when in an inherently unsafe environment (i.e., combustible or explosive atmospheres caused by flammable gases or fumes, dust, etc.).
Charging Safety Warning

WARNING! Risk of electrical shock. Dry location use only.
Safety Guidelines
Please read and understand the following safety guidelines before you use the phone. These guidelines provide details to help you use your phone safely and comply with applicable legal requirements for cellular phone use.
 | Observe restrictions when using radio equipment at fuel depots, chemical plants, or where blasting operations are in progress. |
 | Electrical interference may interfere with your phone's use. Observe restrictions in hospitals and near medical equipment. |
 | Switch off your cellular phone when in an aircraft. Wireless phones can cause interference or pose a safety risk to an aircraft. In an aircraft, the phone can be used in Airplane mode. |
 | Do not expose the device to temperatures exceeding 55°C (131°F). |
 | Adhere to road safety laws. Do not hold/ use a phone while you are driving; find a safe place to stop first. Use a hands-free microphone while you are driving. |
 | Avoid using the phone in close proximity to personal medical devices, such as pacemakers and hearing aids. |
 | Use only Sonim Model-approved charging equipment to charge your phone; doing so helps prevent damage. |
 | Ensure that only qualified personnel install or repair your phone. |

The Sonim XP Pro E is water resistant and can be submerged to a depth of up to 6.56 feet (2 meters) of fresh or salt water for 1 hour.
Ensure that the audio connector door is closed correctly. This prevents water droplets from forming on the connectors when the phone is submerged in water.
Water droplets may condense under the display cover if the phone is immersed in water and the ambient temperature drops significantly. This does not indicate water leakage. The droplets will disappear at room temperature.
The Sonim XP Pro E is dust-resistant, rugged, and shock-resistant. However, it is not dust-proof or unbreakable if subjected to overwhelming impact. For optimal results and extended product life, it is recommended to protect the Sonim XP Pro E from salt water, dust, and strong impacts.
Avoid High Temperatures
Leaving the device in hot or cold environments, such as a closed car in summer or winter, reduces the battery's capacity and lifespan. For optimal results, use the device within the temperature range of -20°C to +55°C (-4°F to 131°F). A device with a hot or cold battery may temporarily stop working, even when the battery is fully charged. Battery performance is particularly limited in temperatures well below freezing.
Personal Medical Devices
Mobile phones can interfere with the operation of cardiac pacemakers and other implanted medical devices. Please avoid placing your mobile phone over a pacemaker, for example, in your breast pocket. When using a mobile phone, hold it against the ear opposite the pacemaker.
Maintaining a minimum distance of 15 cm (6 inches) between the mobile phone and the pacemaker limits the risk of interference. If you suspect interference, immediately turn off your mobile phone. Contact your cardiologist for more information. For other medical devices, consult your physician and the device's manufacturer. Comply with instructions to switch off the device or deactivate the RF transmitter when required, especially when posted in hospitals
and airplanes. Equipment used in these places may be sensitive to radio waves emitted by the device and may adversely affect its operation. Also, observe restrictions at gas stations or in other areas with flammable atmospheres, or when near electro-explosive devices.
Child Safety
Do not allow children to play with your mobile phone or its accessories. Keep it out of their reach. They could hurt themselves or others, or could accidentally damage the mobile phone or its accessories. Your mobile phone and its accessories may contain small parts that could detach and create a choking hazard.
Battery Usage Safety
- Risk of explosion if the battery is replaced with an incorrect type.
- Dispose of used batteries according to the instructions.
- Do not disassemble or open, crush, bend or deform, puncture or shred.
- Do not modify or re-manufacture, attempt to insert foreign objects into the battery, immerse or expose to water or other liquids, or expose to fire, explosion, or other hazard.
- Only use the battery with a charging system that the system has qualified according to the CTIA Certification Requirements for Battery Systems Compliant with IEEE 1725. Using an unqualified battery or charger may pose a risk of fire, explosion,
leakage, or other hazards.
- Do not short-circuit a battery or allow metallic conductive objects to contact battery terminals. • Battery usage by children should be supervised.
- Avoid dropping the phone or battery. If the phone or battery is dropped, especially on a hard surface, and the user suspects damage, take it to a service center for inspection.
- Improper battery use may result in a fire, explosion, or other hazard.

WARNING! Do not replace an embedded (non-removable) battery pack. Improper replacement may pose risks of fire, explosion, leakage, or other hazards. Contact the manufacturer for a replacement. The device recognizes the battery via battery ID.
ECO Warning

The symbol of the crossed-out wheeled bin indicates that this product, and any enhancements marked with this symbol, cannot be disposed of as unsorted waste but must be taken to separate collection for end-of-life disposal.
Audio Device Warning

To prevent possible hearing damage, please do not listen at high volume levels for long periods.
Emergency Calls
Mobile phones operate using radio signals, which cannot guarantee a connection under all conditions. Therefore, you should never rely solely on any mobile phone for essential communications, such as medical emergencies.
Emergency calls may not be possible in all areas, on all cellular networks, or when certain network services and/or mobile phone features are in use. Check with your local service provider.
RF Device Warning
USA and Canada Market
USA market FCC INTERFERENCE STATEMENT
This mobile phone complies with part 15 of the FCC Rules.
Operation is subject to the following two conditions:
- This device may not cause harmful interference, and
- This device must accept any interference received, including interference that may cause undesired operation.
This mobile phone has been tested and found to comply with the limits for a Class B digital device, pursuant to Part 15 of the FCC Rules.
These limits are designed to provide reasonable protection against harmful interference in a residential installation. This equipment generates, uses, and can radiate radio frequency energy and, if not installed and used in accordance with the instructions, may cause harmful interference to radio communications. However, there is no guarantee that interference will not occur in a particular installation. If this equipment does cause harmful interference to radio or television reception, which can be determined by turning the equipment off and on, the user is encouraged to try to correct the interference by one or more of the following measures:
• Reorient or relocate the receiving antenna. - Increase the separation between the equipment and receiver. - Connect the equipment into an outlet on a circuit different from that to which the receiver is connected. - Consult with the dealer or an experienced radio or TV technician for assistance.
FCC NOTE
Caution: Any Changes or modifications not expressly approved by the party responsible for compliance could void the user's authority to operate the equipment.
USA market FCC RF EXPOSURE INFORMATION (SAR)
This device is designed and manufactured not to exceed the emission limits for exposure to radio frequency (RF) energy set by the Federal Communications Commission of the U.S. Government.
The exposure standard for wireless device employs a unit of measurement known as the Specific Absorption Rate, or SAR. The SAR limit set by the FCC is 1.6W/kg. *Tests for SAR are conducted using standard operating positions accepted by the FCC with the device transmitting at its highest certified power level in all tested frequency bands. Although the SAR is determined at the highest certified power level, the actual SAR level of the device while operating can be well below the maximum value. This is because the device is designed to operate at multiple power levels so as to use only the power required to reach the network. In general, the closer you are to a wireless base station antenna, the lower the power output.
• when tested for use at the head is 1.20 W/kg - when worn on the body, as described in this user guide, is 1.20 W/kg (Body-worn measurements differ among device models, depending upon available accessories and FCC requirements.)
While there may be differences between the SAR levels of various devices and at various positions, they all meet the government requirement.
The FCC has granted an Equipment Authorization for this model device with all reported SAR levels evaluated as in compliance with the FCC RF exposure guidelines. SAR information on this model device is on file
with the FCC and can be found under the Display Grant section of www.fcc.gov/oet/ea/fccid after searching on FCC ID: WYPS3111
For body-worn operation, this device has been tested and meets the FCC RF exposure guidelines for use with an accessory that contains no metal and is positioned a minimum of 10 mm from the body. When the device is set to hotspot mode, please use it at least 10 mm away from your body. Use of other accessories may not ensure compliance with FCC RF exposure guidelines.
This phone is designed and manufactured not to exceed the emission limits for exposure to radio frequency (RF) energy set by the Federal Communications Commission of the United States.
USA Market WIFI 6E warning
Transmitters in the 5.925-7.125 GHz band are prohibited from operating to control or communicate with unmanned aircraft systems.
Canada market INTERFERENCE STATEMENT
This device complies with Industry Canada license-exempt RSS standard(s). Operation is subject to the following two conditions:
- This device may not cause interference, and
- This device must accept any interference, including interference that may cause undesired operation of the device.
Canadian market IC Radiation Exposure Statement (SAR)
This equipment complies with ISED radiation exposure limits set forth for an uncontrolled environment. End users must follow the specific operating instructions for satisfying RF exposure compliance. This transmitter must not be co-located or operating in conjunction with any other antenna or transmitter.
The portable device is designed to meet the requirements for exposure to radio waves established by the ISED. These requirements set a SAR limit of 1.6 W/kg averaged over one gram of tissue. The highest SAR value reported under this standard during product certification for use when properly worn on the body & head. This equipment should be installed and operated with a minimum distance of 1.0 cm between the radiator and your body.
These requirements set a SAR limit of 4 W/kg averaged over ten grams of tissue. The highest SAR value reported under this standard during product certification for use when properly worn on the limbs.
This device has been tested and found to comply with IC:8090A-S3111.
Canadian market Wi-Fi warning
Devices shall not be used on aircraft, except for low-power indoor access points, indoor subordinate devices, low-power client devices, and very low-power devices operating in the 5925-6425 MHz band, which may be used on large aircraft as defined in the Canadian Aviation Regulations, while flying above 3,048 meters (10,000 feet).
The device for operation in the band 5150–5250 MHz is only for indoor use to reduce the potential for harmful interference to co-channel mobile satellite systems.
* Hearing Aid Compatibility
This phone is hearing aid compatible as determined by ANSI C63.19-2019.
This phone has been tested and certified for use with hearing aids for some of the wireless technologies that it uses. However, some newer wireless technologies used in this phone may not have been tested yet for compatibility with hearing aids. It is important to thoroughly test the various features of this phone in different locations, using your hearing aid or cochlear implant, to determine if you experience any interfering noise. Consult your service provider or the manufacturer of this phone for information on hearing aid compatibility. If you have questions about return or exchange policies, please consult your service provider or contact the retailer directly.
The ANSI C63.19-2019 standard does not use the M/T rating system for showing hearing aid compatibility with the phone that older versions of the standard used; instead, the 2019 version of the standard uses conversational gains for the phone's hearing aid compatible capabilities.
The volume control performance has been evaluated according to ANSI C63.19-2019 and waiver DA-23-914. The lowest conversational gain is 6.0 dB with a hearing aid, and 10.9 dB without a hearing aid.
The table below shows the wireless technologies (including frequencies/bands by air interface and codec) that are tested or not tested according to FCC rules and limited waiver DA23-914:
| Air Interface | Bands | Codec | HAC | ||
| RF | T-Coil | Volume control | |||
| LTE/NR/WIFI | LTE:2/4/5/7/12/13/14/ /25/26/30/38/41/42/4 3/48/66/71 NR: n2/5/7/14/25/26/30/3 8/41/48/66/70/71/77/ 78 WIFI:2.4GHz, UNII1/2A/2C/3/4/5(1) | EVS-NB/WB | Yes | Yes | Yes |
| AMR-NB/WB | Yes | Yes | Yes (2) | ||
| EVS-SWB, Opus | Yes | Yes | No | ||
| UMTS/GSM | UMTS: II/IV/V | EFR (GSM only) AMR-NB/WB | Yes | Yes | Yes (2) |
| Opus | Yes | Yes | No | ||
| NR/WIFI UNII | 5(1)/6/7/8 AMR-NR | R/WB EVS- NB/WB/SWB Opus | No | No | No |
| (1) The UNII-5 is tested for Hearing Aid Compatibility for operations which are entirely below 6 GHz. Above 6 GHz is not tested due to outside of the current scope of ANSI C63.19 and FCC HAC regulations.(2) According to FCC waiver DA 23-914, Hearing Aid compatibility only partially tested for the conversational gain. | |||||
EEA market
RED compliance
The device complies with Directive 2014/53/EU. Please visit www.sonimtech.com for the Radiation Exposure Statement (SAR).
This device meets applicable international safety requirements for exposure to radio waves. The mobile device is a radio transmitter and receiver. It is designed not to exceed the limits for exposure to radio waves (radio frequency electromagnetic fields) recommended by international guidelines from the independent scientific organization ICNIRP (International Commission on Non-Ionizing Radiation Protection). The radio wave exposure guidelines use a unit of measurement known as the Specific Absorption Rate, or SAR. The SAR limit for mobile devices is 2.0 W/kg averaged over 10 grams of tissue and includes a substantial safety margin designed to assure the safety of all persons, regardless of age and health.
Tests for SAR are conducted using standard operating positions with the device transmitting at its highest certified power level in all tested frequency bands. The highest SAR values under the ICNIRP guidelines for this device model are:
| Test Position | Test value | Test distance | Limit |
| Head | 1.552 W/kg | 0 mm | 2.0 W/kg |
| Body | 1.571 W/kg | 5 mm | 2.0 W/kg |
| Limb | 3.232 W/kg | 00 mm | 4.0 W/kg |
WIFI warning
The device is restricted to indoor use only when operating in the 5250 to 5350 MHz, 5945 to 6425MHz (WIFI 6E LPI) frequency range.
 | AT | BE | BG | HR | CY | CZ | DK |
| EE | FI | FR | DE | EL | HU | IE | |
| IT | LV | LT | LU | MT | NL | PL | |
| PT | RO | SK | SI | ES | SE | UK(NI) |
EU Variant power table
| Conducted Power / dBm |
| GSM900: 32.5, GSM1800: 29.5WCDMA B1: 24.5, WCDMA B5/8: 25LTE B1/3/5/7/8/20/28/38/40/42/43/68: 25LTE B41 for HPUE : 275G n1/3/7/38/40: 25.55G n5/8/20/28: 255G n41/78 for HPUE: 27.55G n77 for HPUE: 27 |
| EIRP Power / dBm |
| BT(2400-2483.5MHz): 9.12WIFI2.4G(2400-2483.5MHz): 19.92WIFI5G5150-5250MHz: 21.815250-5350MHz: 19.965470-5725MHz: 19.975725-5850MHz: 13.96WIFI6G(5945-6425MHz): 21.45 |
| NFC: -18.19 dBμA/m@10m |
ECO 1670 Regulation Requirements
- Manufacturers, importers, or authorized representatives shall provide in the technical documentation and make publicly available on free-access websites of the manufacturer, importer, or authorized representative the following information:
a. Compatibility with removable memory cards, if any; -- See the section topic "Insert a MicroSD card" on page 11. b. Indicative weight range of the following critical raw materials and environmentally relevant materials:
i. cobalt in the battery (weight range: less than 2 g, between 2 g and 10 g, above 10 g); -- Above 10g
ii. tantalum in capacitors (weight range: less than 0,01 g, between 0,01 g and 0,1 g, above 0,1 g); -- 0g iii. neodymium in loud speakers, vibration motors, and other magnets (weight range: less than 0,05 g, between 0,05 g and 0,2 g, above 0,2 g); -- Between 0.05g and 0.2g iv. gold in all components (weight range: less than 0,02 g, between 0,02 g and 0,05 g, above 0,05 g).-- Between 0.02g and 0.05g
c. The indicative value of the recyclability rate Rcyc; -- Recyclability rate: 90.4% (for XP Pro E). d. The indicative percentage of recycled content for the product or a part thereof, where available; if not available, the recycled content should be indicated as “not known” or “not available”; -- Not known. e. Ingress protection rating; -- See the section topic "Durable Design" on page 2. f. Minimum battery endurance in cycles in number of cycles; -. -- See the section sub-topic "Battery Health" on page 477.
- Manufacturers, importers, or authorized representatives shall provide user instructions in the form of a user manual on a free access website of the manufacturer, importer, or authorized representative, and shall include:
a. How to access on the device information from the battery
management system on: -- See the section topic "Battery Health" on page 47.
i. date of manufacturing of the battery; ii. date of first use of the battery after the set-up of the device by the first user; iii. number of full charge/discharge cycles (reference: rated capacity); iv. measured state of health (remaining full charge capacity relative to the rated capacity in %);
b. Instructions for battery maintenance, including the following:
i. impacts on battery lifetime related to exposure of the device to elevated temperatures, suboptimal charging patterns, fast charging, and other known adverse factors; -- See the section topic "Charging the Battery" on page 8, and the section "Battery Info" on page 1188.
ii. effects of switching off radio connections, such as Wi-Fi, Bluetooth, on power consumption; -- See the section "Tips To Extend The Battery Life" on page 1199.
iii. information about whether the device supports other features, which extend battery lifetime, such as smart charging, and about how these features are activated or under which conditions they work best. -- See the section topic "Battery Settings" on page 45.
c. Where the package does not include a charger, the user instructions referred to in point 2 shall include the following information: "For environmental reasons this package does not include a charger. This device can be powered with most USB power adapters and a cable with USB C plug.". -- See the section topic "What's in the box?" on page 2.


- SONIM®
- XP PRO E
- USER GUIDE
- GENERAL INFORMATION
- DURABLE DESIGN
- DEVICE MODELS COVERED
- WHAT'S IN THE BOX
- REGISTER YOUR PHONE
- SONIM SUPPORT INFORMATION
- THIRD-PARTY MARKS
- TABLE OF CONTENTS
- GETTING STARTED
- USING YOUR XP PRO E
- SETTINGS MENU
- MANAGING CONTACTS
- MANAGING CALL SETTINGS
- SENDING MESSAGES & EMAILS
- SONIM SCOUT
- USING APPLICATIONS
- SAFETY INFORMATION GUIDELINE
- ECO 1670 REGULATION REQUIREMENTS
- DISPOSAL OF OLD ELECTRICAL AND ELECTRONIC EQUIPMENT
- HOW TO USE THE TOUCHSCREEN
- CHARGING THE BATTERY
- OPTIMAL CHARGING TEMPERATURE GUIDELINES
- CHARGING ANIMATION/ICON
- INSERTING SIM AND SD STORAGE CARDS
- INSERT A SIM CARD
- INSERT A MICROSD CARD
- SWITCHING ON THE PHONE
- SWITCHING OFF THE PHONE
- METHOD #2 FOR TURNING OFF THE PHONE
- PHONE OPERATIONS WITHOUT SIM CARD
- SETTING UP YOUR PHONE
- MANAGING THE HOME SCREEN
- NOTIFICATION AND STATUS ICONS
- NOTIFICATION PANEL
- QUICK SETTINGS PANEL
- SETTING UP AND USING THE LOCK SCREEN
- CHANGING THE WALLPAPER
- GUIDELINE FOR HEADPHONE AND EARPHONE
- CAPTURING A SCREENSHOT
- THE SECUREAUDIO™ CONNECTOR
- MAKING A CALL
- NETWORK & INTERNET
- WI-FI
- CONNECT TO NETWORK
- ADD NETWORK MANUALLY
- FORGET NETWORK
- MODIFY NETWORK
- NETWORK PREFERENCES
- SAVED NETWORKS
- NON-CARRIER DATA USAGE
- MOBILE NETWORK
- WI-FI CALLING
- SIMS
- AIRPLANE MODE
- HOTSPOT & TETHERING
- WI-FI HOTSPOT
- USB TETHERING
- BLUETOOTH TETHERING
- DATA SAVER
- VPN
- PRIVATE DNS
- CONNECTED DEVICES
- BLUETOOTH
- PAIR NEW DEVICE
- SONIM BLE
- FORGET A BLUETOOTH DEVICE
- SEND INFORMATION VIA BLUETOOTH
- RECEIVE FILES
- USB
- NFC
- CAST
- PRINTING
- CHROMEBOOK
- QUICK SHARE
- ANDROID AUTO
- APPS
- DEFAULT APPS
- SCREEN TIME
- UNUSED APPS
- APP BATTERY USAGE
- SPECIAL APP ACCESS
- NOTIFICATIONS
- APP SETTINGS
- NOTIFICATION HISTORY
- CONVERSATION
- CONVERSATIONS
- BUBBLES
- PRIVACY
- DEVICE & APP NOTIFICATION
- NOTIFICATIONS ON LOCK SCREEN
- NOTE: SENSITIVE NOTIFICATIONS
- GENERAL
- DO NOT DISTURB
- FLASH NOTIFICATIONS
- WIRELESS EMERGENCY ALERTS
- ALERTS
- ALERT PREFERENCES
- HIDE SILENT NOTIFICATIONS IN STATUS BAR
- ALLOW NOTIFICATION SNOOZING
- NOTIFICATION DOT ON APP ICON
- ENHANCED NOTIFICATIONS
- BATTERY SETTINGS
- BATTERY USAGE
- BATTERY SAVER
- BATTERY PERCENTAGE
- REDUCE BATTERY AGING
- USB POWER SAVING
- BATTERY HEALTH
- STORAGE SETTINGS
- SD CARD
- STORAGE MANAGER
- SOUND & VIBRATIONS SETTINGS
- PHONE RINGTONE
- LIVE CAPTION
- SETTINGS
- MEDIA
- VIBRATION & HAPTICS
- SHORTCUT TO PREVENT RINGING
- DEFAULT NOTIFICATION SOUND
- DEFAULT ALARM SOUND
- ADDITIONAL SOUND PARAMETERS
- DISPLAY SETTINGS
- BRIGHTNESS LEVEL
- ADAPTIVE BRIGHTNESS
- LOCK SCREEN
- SCREEN TIMEOUT
- DARK THEME
- DISPLAY SIZE AND TEXT
- NIGHT LIGHT
- COLORS
- AUTO-ROTATE SCREEN
- SCREEN SAVER
- WALLPAPER
- ACCESSIBILITY
- SCREEN READER
- TALK BACK
- TALK BACK SHORTCUT
- DISPLAY
- SELECT TO SPEAK
- COLOR AND MOTION
- EXTRA DIM
- MAGNIFICATION
- GLOVE TOUCH MODE
- INTERACTION CONTROLS
- ACCESSIBILITY MENU
- SWITCH ACCESS
- TIMING CONTROLS
- SYSTEM CONTROLS
- VIBRATION & HAPTIC STRENGTH
- CAPTIONS
- CAPTION PREFERENCES
- AUDIO
- AUDIO DESCRIPTION
- AUDIO ADJUSTMENT
- ACCESSIBILITY SHORTCUTS
- TEXT-TO-SPEECH OUTPUT
- PROGRAMMABLE KEYS
- SELECT PTT KEY APP
- SELECT EMERGENCY KEY APP
- SELECT PRESS AND HOLD TIMER TO ENGAGE PTT KEY
- PUSH TO TALK (PTT)
- SECURITY & PRIVACY
- APP SECURITY (GOOGLE PLAY PROTECT)
- DEVICE UNLOCK
- SCREEN LOCK
- FACE & FINGERPRINT UNLOCK
- FACE UNLOCK
- SET UP FACE AUTHENTICATION
- UNLOCK YOUR PHONE WITH YOUR FACE
- FINGERPRINT
- ACCOUNT SECURITY
- DEVICE FINDERS
- SYSTEM & UPDATES
- PERMISSION MANAGER
- PRIVACY DASHBOARD
- ADS
- HEALTH CONNECT
- DATA SHARING UPDATES FOR LOCATION
- CONTROLS
- SHOW CLIPBOARD ACCESS
- SHOW PASSWORDS
- LOCATION ACCESS
- ACTIVITY CONTROLS
- OTHER SETTINGS
- MORE SECURITY & PRIVACY
- SECURITY
- EXTEND UNLOCK
- ANDROID SAFE BROWSING
- THEFT PROTECTION
- DEVICE ADMIN APPS
- SIM LOCK
- ENCRYPTION & CREDENTIALS
- TRUST AGENTS
- APP PINNING
- CONFIRM SIM DELETION
- LOCATION SETTINGS
- RECENT ACCESS
- APP LOCATION PERMISSIONS
- LOCATION SERVICES
- SAFETY & EMERGENCY
- MEDICAL INFORMATION
- EMERGENCY CONTACTS
- EMERGENCY SOS
- CAR CRASH DETECTION
- CRISIS ALERTS
- EMERGENCY LOCATION SERVICE
- EARTHQUAKE ALERTS
- UNKNOWN TRACKER ALERTS
- SILENCE NOTIFICATIONS WHILE DRIVING
- PASSWORDS AND ACCOUNTS
- PASSWORDS
- AUTOFILL SERVICE
- ACCOUNT FOR OWNER
- AUTOMATICALLY SYNC APP DATA
- DIGITAL WELLBEING AND PARENTAL CONTROLS
- DIGITAL WELLBEING
- WAYS TO DISCONNECT
- APP LIMITS
- BEDTIME MODE
- FOCUS MODE
- SCREEN TIME REMINDERS
- REDUCE INTERRUPTIONS
- MANAGE NOTIFICATIONS
- WHAT CAN INTERRUPT DO NOT DISTURB
- HEADS UP
- FAMILIES
- PARENTAL CONTROLS
- SYSTEM
- LANGUAGES
- SPEECH
- KEYBOARD
- ON-SCREEN KEYBOARD
- SPELL CHECKER
- PERSONAL DICTIONARY
- POINTER SPEED
- GESTURES
- QUICKLY OPEN CAMERA
- NAVIGATION MODE
- PRESS & HOLD POWER BUTTON
- PREVENT RINGING
- TOGGLE FLASHLIGHT
- DATE & TIME
- TIME ZONE
- TIME FORMAT
- BACKUP
- ADVANCE SETTINGS
- MULTIPLE USERS
- RESET OPTIONS
- BACK UP YOUR IMPORTANT DATA FIRST
- SYSTEM UPDATES
- ABOUT PHONE
- DEVICE NAME
- PHONE NUMBER (SIM SLOT 1)
- PHONE NUMBER (SIM SLOT 2)
- LEGAL INFORMATION
- SIM STATUS (SIM SLOT 1)
- SIM STATUS (SIM SLOT 2)
- MODEL
- EID
- IMEI (SIM SLOT 1) (PRIMARY)
- IMEI (SIM SLOT 2)
- ANDROID VERSION
- DEVICE IDENTIFIERS
- IP ADDRESS
- DEVICE WI-FI MAC ADDRESS
- BLUETOOTH ADDRESS
- UP TIME
- FCC ID
- BUILD NUMBER
- ADDING A CONTACT
- CREATING A NEW CONTACT
- EDITING CONTACT DETAILS
- SENDING A MESSAGE FROM CONTACTS
- MANAGING CONTACTS SETTINGS
- ORGANIZE
- EDIT CONTACTS
- SEARCHING FOR A CONTACT
- SHARING A CONTACT
- CALLER ID & SPAM
- ASSISTED DIALING
- BLOCKED NUMBERS
- CALLING ACCOUNTS
- DISPLAY OPTIONS
- QUICK RESPONSES
- SOUNDS AND VIBRATIONS
- PEOPLE
- ALARMS & OTHER INTERRUPTIONS
- SCHEDULES
- DURATION FOR QUICK SETTINGS
- DIAL PAD TONES
- SCREEN LOCKING SOUND
- CHARGING SOUNDS AND VIBRATION
- TAP & CLICK SOUNDS
- ALWAYS SHOW ICON WHEN IN VIBRATE MODE
- VOICEMAIL
- ADVANCED
- CALLER ID ANNOUNCEMENT
- FLIP TO SILENCE
- SENDING SMS/MMS MESSAGE
- DELETING MESSAGES
- SETTING UP YOUR GMAIL ACCOUNT(S) WILL ALLOW YOU TO ACCESS YOUR EMAIL AND EMAIL SERVICES
- SETUP
- UTILITIES
- SUPPORT
- CAMERA
- PRO
- NIGHT
- VIDEO
- PHOTO
- PORTRAIT
- M AND MORE
- MOTION PLAY
- QR CODE RECOGNITION
- CAMERA SCREEN BRIGHTNESS
- ADVANCED FEATURES
- CALENDAR
- CALCULATOR
- CLOCK
- ALARM
- TIMER
- STOPWATCH
- BEDTIME
- ALARM SETTINGS
- TIMER SETTINGS
- PRIVACY POLICY
- HELP
- SEND FEEDBACK
- SOUND RECORDER
- FILES
- PRODUCT INFORMATION
- APPLICABLE MODELS
- BATTERY INFO
- VERIFYING AND OPTIMIZING BATTERY USAGE
- TIPS TO EXTEND THE BATTERY LIFE
- PROPERLY CHARGING THE DEVICE
- INSERT THE CHARGER
- CONNECT TO THE PHONE
- STORING YOUR PHONE AND BATTERY
- CHARGING SAFETY WARNING
- SAFETY GUIDELINES
- AVOID HIGH TEMPERATURES
- PERSONAL MEDICAL DEVICES
- CHILD SAFETY
- BATTERY USAGE SAFETY
- ECO WARNING
- AUDIO DEVICE WARNING
- EMERGENCY CALLS
- RF DEVICE WARNING
- USA AND CANADA MARKET
- USA MARKET FCC INTERFERENCE STATEMENT
- FCC NOTE
- USA MARKET FCC RF EXPOSURE INFORMATION (SAR)
- USA MARKET WIFI 6E WARNING
- CANADA MARKET INTERFERENCE STATEMENT
- CANADIAN MARKET IC RADIATION EXPOSURE STATEMENT (SAR)
- CANADIAN MARKET WI-FI WARNING
- EEA MARKET
- RED COMPLIANCE
- WIFI WARNING
Brand : SONIM
Model : XP Pro E
Category : Telephone