CDM7600X - Dishwasher Elvita - Free user manual and instructions
Find the device manual for free CDM7600X Elvita in PDF.


| Product Type | Built-in Dishwasher |
| Brand | Elvita |
| Model | CDM7600X |
| Dimensions (H x W x D) | 85 x 60 x 60 cm |
| Weight | Approx. 47 kg |
| Power Supply | 220-240 V, 50/60 Hz |
| Power Consumption | 1.95 kW |
| Water Consumption | Approx. 10 L per cycle |
| Capacity | 14 place settings |
| Noise Level | 44 dB(A) |
| Energy Class | A++ |
| Programs | Eco 50°C, Intensive 65°C, Normal 60°C, Rapid 30 min, Glass 45°C, Pre-rinse |
| Drying Type | Condenser |
| Control Type | Electronic with LED display |
| Material | Stainless steel interior |
| Safety Features | Child lock, anti-flood system, door lock |
| Installation | Built-in, adjustable feet, requires plumbing |
| Accessories | Cutlery basket, adjustable upper rack, salt and rinse aid dispenser |
| Maintenance | Clean filters regularly, use salt and rinse aid, clean spray arms |
| Repairability | Spare parts available via authorized service centers |
Frequently Asked Questions - CDM7600X Elvita
User questions about CDM7600X Elvita
0 question about this device. Answer the ones you know or ask your own.
Ask a new question about this device
Download the instructions for your Dishwasher in PDF format for free! Find your manual CDM7600X - Elvita and take your electronic device back in hand. On this page are published all the documents necessary for the use of your device. CDM7600X by Elvita.
USER MANUAL CDM7600X Elvita
CDM7600X - 2025-07-30
![graph LR A["i"] --> B["www.elvita.se"] B --> C["Model code"] C --> D["i"]](/content/2026/07/1463990/images/ad8b671512c0ca9b6810c64d43a1f30f700bd36ea90d23027045ffa4a370a8be.jpg)
You can find the latest updated manual online. Please go to elvita.se and use the search function and the product's model code to find the manual.
CONTENTS/INHALT/INNEHÅLL/INNHOLD/INDHOLD/SISÄLLYSLUETTELO/EFNISYFIRLIT
ENGLISH 2
DEUTSCH....82
SVENSKA 164
NORSK 244
DANSK 324
SUOMI 404
ÍSLENSKA 484
Contents
SAFETY 5
Admonitions 5
Intended use 5
Safety for children and people with disabilities.... 5
General safety 6
Safety during installation 7
Safety during operation 9
Safety during maintenance 11
Disposal.... 11
QUICK START 12
GETTING STARTED 14
Getting to know your dishwasher.... 14
Control panel 14
Symbols on the display 14
Detergent dispenser and rinse aid dispenser 14
Accessories.... 15
Installation parts.... 15
Find the model code.... 16
Before first use 27
Adjust the water softener level 27
Determine the water hardness level 28
Run an empty load.... 29
WASHING 30
Before each wash 30
Start washing 30
Add dishes during a wash 31
Cancel the programme during a wash.... 31
Purpose of detergent 32
Fill the detergent dispenser.... 32
Switch from tablet detergent to powder detergent.... 33
Purpose of rinse aid 33
Fill the rinse aid dispenser.... 33
Adjust the rinse aid consumption 33
Purpose of salt for the water softener 34
Add salt to the water softener 34
After each wash 35
Items suitable for use in dishwasher 36
Adjusting baskets and racks before loading 37
Fold up and fold down cup racks 37
Fold back the plate racks 37
Adjust the height of the upper basket.... 38
Loading the dishwasher efficiently 39
Guidelines for loading the upper basket 40
Guidelines for loading the lower basket 40
Guidelines for loading the cutlery rack.... 41
Options, settings and functions.... 41
Use the Auto open function 42
Use the Delay function 42
Use the Extra drying option 43
Use the Fast+ option 43
Use the Hygiene+ option 43
Use the Tablet detergent function 43
Use the Turbo wash option.... 44
Programmes.... 44
Auto (P1) Auto (P2) 44
ECO (P1) ECO (P4) 45
Glass care (P5) Glass care (P6) 45
Intensive (P3) Intensive (P4) 45
Mini 30 (P7) 45
Mix Wash+ (P2) 45
Pre-wash (P6) Pre-wash (P8) 46
Quick & Dry (P6) 46
Drying time 46
CLEANING 48
Clean the door and door seals 48
Clean the interior.... 49
Clean the spray arms.... 49
Remove and clean the filtering system.... 50
Clean the hose filter 51
Prepare for longer periods of non-use 51
TROUBLESHOOTING 53
The machine does not start 53
Water is not pumped out of dishwasher 53
Residue, deposits and stains.... 54
Detergent left in dispenser 54
Foam forms in the machine.... 54
Odours from the machine.... 54
Noises.... 55
Knocking noise in the dishwasher 55
Rattling noise in the dishwasher 55
Knocking noise in the water pipes 55
Dirty dishes.... 55
The dishes are not clean.... 55
White spots on dishes and cloudiness on glasses.... 57
There are stains on glasses that look like milk stains 57
Rust, discolouration or surface deterioration occurs on dishes.... 58
Decorations and ornaments on dishes are being erased.... 59
The dishes are scratched.... 59
The dishes are broken 59
The dishes are not drying 59
Error messages.... 60
The E:01 error code is displayed 60
The E:02 error code is displayed 61
INSTALLATION 62
Installation tools 62
Unpack the machine.... 62
Connect the cold-water supply hose to a tap 64
Connect the safety supply hose to a tap 64
Connect to an external drain.... 65
Position the drain hose into a floor drain 66
Connect the drain hose to a sink drain pipe.... 66
Position the drain hose into a sink 67
Connecting to the electrical supply 67
Fit the condensation strip 68
Install the hose holder.... 69
Position the machine.... 69
Install the longer feet 72
Level the machine 72
Secure the machine in place - for normal work surfaces.... 73
Secure the machine in place - for marble or granite surfaces.... 74
Install the kick plate 75
Install wooden kick plate 77
SPECIFICATIONS 79
Technical specifications....79
Dimensions.... 80
Consumption values.... 80
EU directives and standards.... 81
SAFETY
Carefully read the instructions before you install and use the product. Save the instructions and keep them near the product for future reference. All kinds of warranties shall be invalid if these instructions are not followed.
Admonitions

DANGER!
Used when there is a risk for personal injury or death.

WARNING!
Used when there is a risk for personal injury.

CAUTION!
Used when there is a risk for damage to the product.

NOTE!
General information that you should be aware of.

Helpful tips that you may find useful.
Intended use
This product is only intended for indoor use in a household or a household environment such as:
- staff kitchen areas in shops, offices and other working environments;
- farm houses;
- by clients in hotels, motels and other residential type environments;
- bed and breakfast type environments.
This product is not intended to be used as a built-in product.
This product is not suitable for commercial use or shared use (for example by several families in an apartment building).
This product must be used to do domestic type dishes only.
Safety for children and people with disabilities

WARNING!
Only let the following groups use the product if they are supervised or if instructions are provided to them about how to use the product in a safe way. They must understand the hazards involved.
- Children 8 years and older. (Children younger than 8 years must be continuously supervised, or be kept away from the product.)
- Children aged 3 to 8 years are allowed to load and unload the product.
- Children of less than 3 years should be kept away unless continuously supervised.
- People with reduced physical, sensory or mental capabilities. • People with a lack of experience and knowledge.

WARNING!
- Do not let children and pets play with, climb on, or enter inside the product. Electrical products can be dangerous for children and pets.
- Do not let children clean the product without supervision.

WARNING!
- Keep all packaging away from children as there is a risk of suffocation.
- Keep all dishwasher detergent out of the reach of children. Dishwasher detergent is corrosive.
- Do not leave the door of the product open when it is unsupervised to prevent children and pets from getting stuck inside the product and suffocating.
General safety

WARNING!
- Electrical installation, repair, and maintenance must only be performed by an authorized service agent or a qualified technician.
- Some dishwasher detergents are strongly alkaline. They can be extremely dangerous if swallowed. Avoid contact with the skin and eyes and keep children away from the dishwasher when the door is open.
- If the Aquasafe+ system is damaged, unplug the product and call the authorized service agent.
- Do not place any heavy objects on, sit, or stand on the door when it is open. The product could tip forward. When you pull the upper and lower baskets out completely, the door of the product will bear all the weight of the baskets.
- Do not touch the power plug with wet hands.

WARNING!
Do not leave the door in the open position since this could present a tripping hazard.

WARNING!
Risk of electric shock!
- Disconnect electrical power before installing or moving the product. Failure to do so could result in death or electrical shock.
- Do not immerse the unit, power cord, or plug in water or other liquid.
- This product must be earthed. In the event of a malfunction or breakdown, earthing will reduce the risk of an electric shock by providing a path of least resistance for electric current. This product is equipped with a plug with an earthing conductor.

CAUTION!
- Do not wash plastic items unless they are marked "dishwasher safe" or the equivalent. For plastic items that do not have this marking, check the manufacturer's recommendations.
- Use only detergent and rinse agents recommended for use in a dishwasher.
- Never use soap, laundry detergent, or hand washing detergent in your dishwasher.
- Do not abuse, sit on, or stand on the door or dish rack of the dishwasher.
- Make sure to have 2 or more people present when moving or installing the product to prevent the risk of injury.
- Do not hold the door or panel when moving the product.
- Before transporting the product, make sure to unplug and disconnect the drain and water supply connections, and fully drain any remaining water from the product.
- When moving the product, keep it in an upright position and hold it from the rear side. Tilting the product forward may cause its electronic parts to get wet and become damaged.

NOTE!
Turn off and unplug the product and close the tap if you are not going to use it for an extended period of time.
Safety during installation

WARNING!
- Electrical equipment must be installed by professionals.
- Hoses should be installed by professionals.

WARNING!
Risk for electric shock!
- Disconnect electrical power before installing or moving the product. Failure to do so could result in death or electrical shock.
- The plug must be plugged into an appropriate power socket that is installed and earthed in accordance with all local laws and regulations.
- Improper connection of the earthing conductor can result in the risk of an electric shock.
- Check with a qualified electrician or service representative if you are in doubt whether the product is properly earthed.
- Do not modify the plug provided with the product if it does not fit the power socket.
- Have a proper power socket installed by a qualified electrician.
- Ensure the dishwasher is correctly earthed before use.
- Do not use an extension cord or an adapter plug with this product.
- Do not, under any circumstances, cut or remove the earthing connection from the power cord. Take care to avoid kinking, squeezing, pinching, or crushing the power cord.

WARNING!
- When positioning the product, ensure the power plug is accessible. If this is not possible, the electrical installation to which the product is connected must contain a device that conforms to the electrical regulations and disconnects all poles from the grid.
- Do not pull at the power cord to unplug the product. Always pull at the power plug.
- Do not install the product near heat sources such as stoves, fires or heaters or under the cooking area of a hob.
- Take care to avoid kinking, squeezing or crushing the hoses while placing the product into its location after installation or cleaning procedures.
- Do not install the product if it is damaged or has defects.
- Do not install the product in environments where the temperature falls below 0°C.
- Do not install the product on carpets or similar surfaces. This may cause a fire hazard since the product will not be ventilated from below.
- Install the product on a clean, flat, and solid surface and balance it with adjustable feet. If the product is unstable, the door will not close completely, causing hot steam to escape, resulting in serious burns and injuries, and potentially harming your furniture.
- Do not place heavy objects on the power cord.
- Do not let the power cord come in contact with any heat source.
- If the product is going to be used inside a wardrobe, cabinet, or module, keep the doors open during operation, especially if there are no openings to provide sufficient air circulation.
- Use the new hose sets supplied with the machine. Do not reuse old hose sets.
- Do not plug in the product if the power socket is loose, dislocated, broken, dirty, greasy, or at risk of coming into contact with water, such as in areas where water may leak from the counter.
- Route the power cord and hoses in a way to minimize the risk of tripping.
- Install the product near the tap and drain hole. Select the installation location considering that it will not be changed after the connections are made.
- Do not shorten or lengthen the hose with extension hoses as the hose set contains electrical connections and assemblies.
- The specified voltage must be equal to your mains voltage.
- Damaged power cord must be replaced by the authorised service agent.
- Do not extend the hoses.
- Do not use extension cords, multi-plugs or adapters to operate the product.
- Look at the rating label to check the rating voltage and connect the dishwasher to the appropriate power supply.

CAUTION!
- Do not install or store the product in environments where the temperature falls below 0 °C. Take care when moving the product to avoid damaging the floor, walls, piping, etc.
- Do not install the product where the door cannot be fully opened. There must not be a lockable, sliding, or hinged door that will restrict the full opening of the product's door.
- The water supply and draining hoses must be securely fastened and remain undamaged.
- The maximum number of place settings to be washed is 16.
- The maximum number of place settings to be washed is 14.
- The inlet water pressure must be between 0.03 MPa and 1 MPa. If the water pressure exceeds 1 MPa, a pressure relief valve should be installed in between.
- The product must be connected to the water supply using new hoses. Do not reuse old hoses.
- Connect the water inlet hose directly to the water tap.

NOTE!
- Preparation of the location and installation of electrical, tap water, and waste water systems at the place of installation are under the customer's responsibility.
- The front of the product may not be removed on free-standing or under-the-counter models. The warranty will be void if this is done.
- Open the taps completely after making the connections to check for water leaks.
- The drain pipe must be connected to the sewage system and it should not be connected to any surface water.

- It is recommended to install a filter at the water inlet to prevent dirt (such as sand, clay, or rust) from the mains or water installation in your home from damaging the machine or dishes.
- When installing the product, make sure it allows for easy loading and unloading of dishes effectively and comfortably.
Safety during operation

WARNING!
Risk of explosion!
Do not put chemical solvents into the detergent dispenser. There is the risk of explosion.

WARNING!
- Do not let any item stick through the basket bottom.
- Knives and other utensils with sharp points must be loaded in the basket with their points facing down or placed in a horizontal position.

WARNING!
Keep dishwasher detergent out of the reach of children. Dishwasher detergent is corrosive.

WARNING!
- It is dangerous to open the door mid-wash programme, as hot steam may scald you.
- Open the door very carefully if the dishwasher is operating. There is a risk of water squirting out.
- When removing dishes items will be hot. Wait 15 minutes after the wash cycle has ended before removing glass or cutlery.
- Do not start the product if it is damaged. Unplug the product or switch off the fuse it is connected to, turn off the water tap, and contact an authorised service agent.
- Do not place burning candles, cigarettes, or other items with naked flames on or near the product to avoid the risk of fire.
- Do not keep combustible or flammable substances close to the product.
- Do not climb on the product.
- Detergents containing chlorine and phosphate can be harmful to the environment. Liquid detergents without chlorine may not remove tea and coffee stains from cups.

CAUTION!
• After each wash, check that the detergent dispenser is empty. - Only use detergent that is specifically intended for dishwasher use. Keep your detergent fresh and dry. - Do not put powdered detergent into the dispenser until you are ready to wash dishes. - Only use branded rinse aid that is formulated for dishwashers. Never fill the rinse aid dispenser with any other substances (e.g., dishwasher cleaning agent, liquid detergent). This would damage the product. - Only use salt specifically designed for dishwasher use. Any other type of salt that is not specifically designed for dishwasher use, especially table or rock salt, will damage the water softener. The manufacturer's warranty does not cover any damage that results from the use of unsuitable salt. - Only fill with salt before running a cycle. This will prevent any grains of salt or salty water that may have been spilled from remaining on the bottom of the machine for any period of time, which may cause corrosion. In cases where you will not start washing immediately, run your machine empty using the shortest programme. - When you pull the upper and lower baskets out completely, the door of the product will bear all the weight of the baskets. Do not sit or put other loads on the door; otherwise, the product may tilt. - Do not force the door to close if the power is interrupted while the shafts are moving out. The operation shall be completed, and the shafts shall be retracted when the power is restored. The Auto Door Opening feature opens the door at the end of the washing cycle, thanks to the 'door opening shafts'. - The wash-water inside the product is not potable and is not meant for human consumption. - Never use the dishwasher without the filters in place. Incorrect replacement of the filters may reduce the performance of the product and damage dishes and utensils. - Place sharp items so that they are not likely to damage the door seal.

NOTE!
- Do not put more detergent than suggested on the detergent package.
- Read the warnings on the detergent packaging to get better washing and drying results. Contact the manufacturer of the detergent for further questions.
- Read and follow the instructions on the detergent package when using tablet detergents. If your dishes are wet and/or if you notice limescale spots particularly on your glasses, after the washing program is over when using a tablet detergent, contact the detergent manufacturer.
- The mains water hardness must be softened if it is over 7° dH. Otherwise, hardness ions will accumulate on the dishes that are washed and may affect the washing, rinsing and drying performances of the machine.
- When you start the product, the salt container will be filled with water. Therefore, add salt before operating the machine.
- It is recommended to use powder or liquid/gel detergent when using shorter programmes without a prewash, as the solubility of tablet detergent may vary depending on the temperature and duration of the cycle.
- Rinse aid that is spilled and left on the bottom of the machine may cause foaming in the next wash. If rinse aid is spilled, use an absorbent cloth to remove the spill.

Washing dishes using this dishwasher consumes less energy and water than doing it by hand, provided that you use the machine for household purposes and follow the instructions in this manual.
Safety during maintenance

WARNING!
• Installation and repair must only be carried out by a qualified technician. - Any repair performed by someone who is not a qualified technician puts the users of the product at risk of personal injury. - If the power cord is damaged, it must be replaced by the manufacturer, the manufacturer's service agent or a similarly qualified person in order to avoid a hazard. - Do not make any technical modifications to the product. - Do not replace the lamps in the product. If the lamps are broken, contact the support. - Do not repair or replace any part of the product unless specified expressly in the user manual. - Only use original parts and accessories.

WARNING!
Disconnect the product from the mains before cleaning and carrying out maintenance on the product.

CAUTION!
- Do not use solvents or abrasive cleaning products to clean the exterior, interior, or rubber parts of the dishwasher.
- Do not rinse directly with water or other liquids onto the product to avoid damaging it.
- Do not use sharp or abrasive tools, household cleaning products, detergents, gas, gasoline, thinner, alcohol, varnish, etc., for cleaning. They may damage the surface of the product and could cause a fire.
- Do not forget to reinstall the product's filter after cleaning it to avoid the pumps from getting clogged and damaging the product.
- Clean the filter and impellers at least once a week in order for the machine to operate efficiently.

CAUTION!
- When cleaning the filters, do not over-tighten the filters. Refit the filters securely in the correct order, otherwise coarse debris could get into the system and cause a blockage.
- Never use the dishwasher without the filters in place. Incorrect replacement of the filters may reduce the performance of the product and damage dishes and utensils.
Disposal

Before you dispose of the product, cut off the power cord and ensure that the door lock is disabled.
Dispose of packaging in an environmentally-friendly manner. Recycling packaging, while observing national and local regulations, can reduce the consumption of raw materials and the amount of waste in landfill sites.
This product is marked in compliance with European Directive 2012/19/EU, Waste Electrical and Electronic Equipment (WEEE). The symbol on the product or on its packaging indicates that this product must not be treated as household waste. Instead it shall be handed over to the applicable collection point for the recycling of electrical and electronic equipment.
By ensuring this product is disposed of correctly, you will help prevent potential negative consequences for the environment and human health, which could otherwise be caused by inappropriate waste handling of this product. For more detailed information about recycling of this product, please contact the relevant municipal body in charge of waste management, your household waste disposal service or the store where you purchased the product.
QUICK START
Before washing
1
●
●
4
5
* Optional
Washing
1
●
●

After washing
1
●

●


GETTING STARTED
Getting to know your dishwasher
Control panel
A. On/Off B. Programme selection C. Options, settings, and functions D. Menu touch area E. Menu direction touch area F. Delay touch area G. Confirmation touch area H. Display I. Start/Stop/Cancel J. Programme time display
Symbols on the display
Auto open Delay

End of programme
Liquid detergent
Rinse aid
Salt
Tablet detergent
Water cut-off
Detergent dispenser and rinse aid dispenser

A. Detergent dispenser B. Release catch C. Rinse aid dispenser

WARNING!
Do not use soap, laundry detergent, or hand washing detergent in your dishwasher. Only use detergent and rinse aid that is specifically intended for dishwasher use.

CAUTION!
Inside the detergent dispenser, there are level markings to help guide the use of the appropriate amount of powder detergent. Fill the detergent up to level marking 15 cm³ or 25 cm³ according to the fullness of the dishwasher and the degree of soiling on the dishes.
One tablet is sufficient if you are using detergent tablets.
Accessories

Salt funnel: For adding salt to the water softener.
Installation parts
| Position Part Description | |
| A Sealing strip For lowering the sound of the dishwasher. | |
| B Condensation strip For protection against moisture. | |
| C Support brackets For securing the dishwasher to the work surface when the cabinet width is longer than 600 mm. |
| Position Part Description | ||
| D Small kick plate For covering the service panel | under the dishwasher door when the cabinet height is 820 to 840 mm. | |
| E Medium kick plate For covering the service panel | under the dishwasher door when the cabinet height is 841 to 870 mm. | |
| F Large kick plate For covering the service panel | under the dishwasher door when the cabinet height is 871 to 920 mm. | |
| G Mounting brackets For installing the kick plate. | ||
| H Screws (∅ 4 x 6 mm x2) For attaching the mounting brackets to the kick plate. | ||
| I Screws (∅ 4 x 13 mm x4) For securing the dishwasher to the work surface when the cabinet width is longer than 600 mm. | ||
| J Screws (∅ 3,5 x 14 mm x2) | For installing the kick plate. | |
| K Screws (∅ 4 x 36 mm x4) | For securing the dishwasher to the cabinet side when the cabinet width is 600 to 610 mm. | |
| L Screw caps (x2) For covering holes on the kick plate. | ||
| M Hole caps (x4) | For covering holes on the side of the dishwasher when the cabinet width is 600 to 610 mm. | |
| N Water hose clamp | For securing the drain hose to the water supply. | |
| O Longer feet For increasing the height of the machine. | ||
Find the model code


The model code is printed on a label on the product. You need the code to find the complete and most recent information, service, and support for your product model.

NOTE!
This product and label text are examples. Your product and text may have a different look and content.
Before first use

CAUTION!
Before washing, make sure the dishwasher is correctly installed.
You need to add salt to the water softener to remove minerals and salts from the water that would have an adverse effect on the operation of the dishwasher. See section "Add salt to the water softener", page 34.
Adjust the water softener level
Set the water softener level according to the hardness of the water in your area. See the following table to select the appropriate level. Your local water authority can advise you on the local water hardness, or determine the water hardness level using the included test strip.
When moving, you will need to reset the water hardness level of your dishwasher based on the water hardness of your new location. If the water hardness level of your machine was previously adjusted, it will display the most recent setting.
The dishwasher's water softening system can regenerate during the drying step of any programme. This regeneration increases the duration, energy, and water consumption of the programme.
- If the water hardness is above 7*dH, the water should be softened. Otherwise, excessive ions may accumulate on washed dishes, potentially affecting washing, rinsing, and drying performance.
- If the water hardness is below 7 °dH and the water softener level is set to level 0 or 1, salt is unnecessary, and the salt indicator will remain lit.
- If the water hardness is above 50 °dH from a well source, using filter and water purification devices is advised.

NOTE!
- If there are stains on tableware items after washing, the water softener level must be increased, and if there is a blue trace after wiping them by hand, it must be decreased.
- If the water softening system is adjusted properly, the washing performance will increase.
| Water hardness Hardness level Water softener level German °dH mmol/l | indicator | Regeneration occurs every x litres | Salt consumption (grams/regeneration) | ||
| 0 - 4 | 0 - 0.8 | Level 0 r1 is displayed | No regeneration | - | |
| 5 - 7 | 0.9 - 1.3 | Level 1 | r1 is displayed | No regeneration | - |
| 8 - 12 | 1.4 - 2.2 | Level 2 | r2 is displayed | 105 | Average 70 g |
| 13 - 15 | 2.3 - 2.7 | Level 3 | r3 is displayed | 52 | Average 70 g |
| 16 - 19 | 2.8 - 3.4 | Level 4 | r4 is displayed | 30 | Average 70 g |
| 20 - 50 | 3.5 - 9.0 | Level 5 | r5 is displayed | 9 | Average 70 g |
To adjust the water softener level, follow these steps:
- If you need to determine the water hardness level, see section "Determine the water hardness level", page 28.
- Touch Ⓐ to turn on the machine.
- Touch and hold for 3 seconds to enter water softener setup mode.
- Touch and hold ← and + until r3 is displayed. NOTE! The default setting is r3.
- Touch ☑ to cycle through the available water hardness levels.
- Touch ① to confirm and to exit the water softener setup mode.
- Close the door.
Determine the water hardness level
To improve the washing, rinsing, and drying performance of your dishwasher, determine the local water hardness level. To improve the washing, rinsing, and drying performance of your dishwasher, ensure that the water softener level is set to the hardness of the water in your area.
| Hardness level | |
| Level 0 | |
| Level 1 | |
| Level 2 | |
| Level 3 | |
| Level 4 | |
| Level 5 | |
- Unpack the test strip.
- Open the water tap and let the water flow for about 1 minute.
- Submerge the test strip in the water for 1 second.
- Remove the test strip from the water, shake it, and wait for 1 minute.
- Check the table above to see the water hardness level.
- Make the necessary adjustment according to the test strip result, see section "Adjust the water softener level", page 27.
Run an empty load.
Make sure that the machine is installed properly.
- Plug in the power cord.
- Open the water tap.
- Start a programme.
NOTE! Do not put any dishes in the machine.
The machine is ready for use when the programme has been completed.
WASHING
Before each wash
1
2
3
- Check if the items are dishwasher-safe. See section "Items suitable for use in dishwasher", page 36.
- Remove scraps of leftover food.
NOTE! It is not recommended to rinse the dishes under running water. This leads to increased water and energy consumption.
- Soften remnants of burnt food in pans by soaking them in water.
Start washing
The display is lit when the dishwasher is turned on, and when it is turned off, the display and icons turn off.
- Turn on the water supply.
- Open the door.
- Slide out the cutlery rack and then load it. See section "Guidelines for loading the cutlery rack", page 41.
- Push the cutlery rack back in.
- Slide out the lower basket and then load it. See section "Guidelines for loading the upper basket", page 40. WARNING! Knives and other utensils with sharp points must be loaded in the basket with their points facing down or placed in a horizontal position.
- Push the lower basket back in.
- Slide out the upper basket and then load it. See section "Guidelines for loading the lower basket", page 40.
- Push the upper basket back in and check that the spray arms move freely.
- Add detergent in the detergent dispenser. See section "Fill the detergent dispenser", page 32. NOTE!
- Only use detergents recommended for use in dishwasher. Never use soap, laundry detergent or hand washing detergent in the dishwasher.
- It is recommended to use powder as detergent instead of tablets. Some wash cycles may not dissolve the tablets fully.
- Check if the salt and rinse aid indicators are lit and add salt and rinse aid if needed. See section "Add salt to the water softener", page 34 and section "Fill the rinse aid dispenser", page 33.
- Touch① to turn on the power.
- Touch the symbol of the desired programme. See section "Programmes", page 44 and section "Consumption values", page 80.
The corresponding light bar of the programme you selected is lit.
- Select settings and options if needed.
If you choose any option during programme selection or time delay selection, an acoustic signal will sound to indicate that the option is supported by the chosen programme. The selected option's icon will be lit. To cancel the option, touch the selected option again until the indicator is no longer lit.
- Press ▶II.
- The selected programme will start when you close the door, and the time is displayed on the door display.
→ is lit, and an acoustic signal sounds, indicating the programme is completed
WARNING!
- It is dangerous to open the door mid-wash cycle, as hot steam may scald you.
- Open the door very carefully if the dishwasher is operating. There is a risk of water squirting out.
NOTE!
• If you want to pause the programme, press ▶. If you want to resume the programme, press ▶. - If the programme is paused, the programme will remain silent for a short period of time, to remove the water in the machine and on the dishes completely, and to clean the water softener. It will then resume running in drying mode.
- At the end of a programme, open the door and turn off the dishwasher, close the tap, and unplug the product.
If auto open is activated, the door is automatically opened at the end of the washing programme.
NOTE! The dishwasher automatically turns off after a time when the programme is completed or if the programme is not started.

WARNING!
Do not empty your dishwasher immediately after washing, items will be hot. Wait for 15 minutes before emptying the dishwasher.

NOTE!
If the electric power is interrupted during a wash cycle, the wash cycle will continue when the power is restored.

If you leave the door open when the programme is done, it will increase the drying effectiveness of your machine.
Add dishes during a wash
You can add more dishes to a wash any time before the detergent dispenser opens.

WARNING!
It is dangerous to open the door mid-cycle, as hot steam may scald you.
- Open the door a little to pause the washing programme.
- Wait for the spray arms to stop rotating and then open the door.
- Add the dishes.
- Press to resume washing.
- Close the door.
Cancel the programme during a wash
You can cancel the programme at any time during a wash.
- Carefully open the door.
- Touch and hold for more than 3 seconds.
A countdown from 3 to 0 starts, and when it is finished and 0:01 is displayed, close the front door.
The dishwasher will then start to cancel the programme, and when it is completed, an acoustic signal will sound. NOTE!
- It can take a couple of minutes for the dishwasher to cancel the programme.
- There might be residue of detergent or rinse aid in the dishwasher and on the items being washed, depending on the step the programme you cancelled was in.
Purpose of detergent
The chemical ingredients in the detergent are necessary to remove, dissolve and flush all dirt out of the dishwasher. Most commercial-quality dishwasher detergents are suitable for this purpose.
Fill the detergent dispenser

WARNING!
Do not put chemical solvents into the detergent dispenser. There is the risk of explosion.

CAUTION!
- Only use detergent that is specifically intended for dishwasher use. Keep your detergent fresh and dry. Do not put powdered detergent into the dispenser until you are ready to wash dishes.
- Detergents containing chlorine and phosphate can be harmful to the environment. Liquid detergents without chlorine may not remove tea and coffee stains from cups.

NOTE!
- Read the warnings on the detergent packaging to achieve better washing and drying results. Contact the detergent manufacturer for further questions.
- It is recommended to use powder or liquid/gel detergent when using shorter programmes without a prewash, as the solubility of tablet detergent may vary depending on the temperature and duration of the cycle.
- You can use powder, liquid/gel, or tablet detergents in the dishwasher.


- Open the door.
- Slide the release catch to open the detergent dispenser.
- Add the suggested amount of detergent for the main wash cycle to the cavity.
NOTE! Inside the detergent dispenser, there are level markings to help guide the use of the appropriate amount of powder detergent. Fill the detergent up to level marking 15 cm³ or 25 cm³ according to the fullness of the dishwasher and/or the degree of soiling on the dishes. The maximum amount of detergent is up to level marking 45 cm³.
One tablet is sufficient if you are using detergent tablets.
- Slide the cap.
Switch from tablet detergent to powder detergent.
When switching from tablet to powder detergent, water softener and rinse aid settings may need to be adjusted. Many tablets contain built-in water softener and rinse aid, and some even include special-purpose components like glass and stainless steel protectors. However, these tablets are typically only effective up to 21°dH water hardness. For water hardness above this level, you will need to add water softening salt and rinse aid separately.
- Make sure that salt and rinse aid reservoirs are full.
- Set the water hardness to the highest level and run an empty load. See section "Adjust the water softener level", page 27, and section "Run an empty load", page 29.
- When programme is complete, review the user manual and readjust the water softener level so it suits the water supply.
- Make the appropriate rinse aid settings. See section "Fill the rinse aid dispenser", page 33.
Purpose of rinse aid
Rinse aid is released during the final rinse to prevent water from forming droplets on your dishes, which can leave spots and streaks. It also improves drying by allowing water to run off the dishes. Your dishwasher is designed to use liquid rinse aids.
Fill the rinse aid dispenser
Do this when the indicator light is lit.

CAUTION!
- Only use rinse aid that is intended for dishwashers. Never fill the rinse aid dispenser with any other substances (e.g. dishwasher cleaning agent, liquid detergent). This would damage the dishwasher.
- Rinse aid that is spilled and left on the bottom of the machine may cause foaming in the next wash. If rinse aid is spilled, use an absorbent cloth to remove the spill.
1
2
3
- Lift up the handle to open the cap.
- Fill the rinse aid dispenser to the max level. CAUTION! Do not overfill the rinse aid dispenser.
- Slightly press down the cap to close it.
Adjust the rinse aid consumption
Set the rinse aid consumption according to the hardness of the water in your area. Your local water authority can advise you on the local water hardness. See section "Adjust the water softener level", page 27.
- Close the door.
- Press Ⓤ to turn on the machine.
- Press and hold for 3 seconds to enter the settings menu.
- Use ⟨·⟩ or → P is displayed to enter rinse aid setup mode.
- Press ☑ to cycle through the available rinse aid consumption levels (P1, P2, P3, P4 - the higher the number, the more rinse aid the dishwasher uses).
- Press Ⓐ to confirm and exit rinse aid setup mode.
Purpose of salt for the water softener
The water softener is designed to remove minerals and salts from the water that would have an adverse effect on the operation of the dishwasher. The more minerals there are, the harder your water is. The hardness of water varies from place to place. If hard water is used in the dishwasher, deposits will form on the dishes and utensils. The type of salt that is used must be specifically designed for eliminating lime and minerals from the water.
Add salt to the water softener
Do this when the indicator light is lit.

CAUTION!
- Only use salt specifically intended for dishwasher use. Any other type of salt, especially table or rock salt, will damage the water softener.
- Only fill with salt immediately before running a cycle. Salt or salty water that is spilled and left on the bottom of the machine for some time may cause corrosion. If salt is spilled, run the shortest washing programme to remove the spill.

NOTE!
The salt container will be filled with water when you start the product. Therefore, add salt before operating the machine.
1
2
3

4
5
6
7

- Open the door and remove the lower basket.
- Unscrew the cap.
- Place the end of the funnel into the hole.
- Add about 2 kg of dishwasher salt.
- Remove the funnel from the hole.
- Add about 1 liter of water to the salt container.
NOTE! Only fill the salt container with water the very first time you add salt to the water softener.

To speed up the dissolution process of salt in water, stir it with a spoon.
- Screw the cap back on tightly and close the door.
The indicator light is no longer lit.
NOTE! Depending on how well the salt dissolves it may take a couple of hours, the indicator light may still be lit even though the salt container has been filled.
- Immediately start a short washing programme.
CAUTION! After adding salt to the water softener you should immediately start a washing programme.
Otherwise the filter system, pump or other important parts of the machine may be damaged by salty water.
After each wash

NOTE!
It is normal for the inside of the dishwasher to be wet.
2
3
4
5
- Check that the detergent dispenser is empty.
- Turn off the water supply.
- Leave the door slightly open and wait for 15 minutes before removing the dishes.
- Remove the dishes.

Empty the lower basket first and then the upper basket, to prevent water dripping.
- Leave the door slightly open, so that moisture and odours are ventilated.
Items suitable for use in dishwasher
Before you load the dishwasher, make sure the dishes are dishwasher-safe.

NOTE!
Do not wash dishes soiled by cigarette ash, candle remnants, polish, dyestuff, chemicals, etc. in your dishwasher.
The following items are not dishwasher-safe:
- Cutlery with wooden, horn, china or mother-of-pearl handles;
- Plastic items that are not heat-resistant;

CAUTION!
Check any plastic items to make sure they are marked as dishwasher safe.
- Older cutlery with glued parts that are not temperature resistant; • Bonded cutlery items or dishes;
- Pewter, tin or copper items;
- Crystal glass; • Steel items subject to rusting;
- Wooden trays and cutting boards;
- Items made from synthetic fibres.
The appearance of some items can deteriorate when used in a dishwasher:
- Some types of glasses can become dull after a large number of washes. • Silver and aluminium parts have a tendency to discolour during washing.
- Glazed patterns may fade if machine-washed frequently.

- Consider purchasing utensils that are marked as dishwasher-safe.
- Use a mild and gentle dishwasher detergent.
- Select a low-temperature programme for delicate items.
- Select a low-temperature wash cycle for delicate items.
Adjusting baskets and racks before loading
Fold up and fold down cup racks
You can fold up the cup racks in the upper and lower baskets to make room for taller items. You can fold up the cup racks in the upper basket to make room for taller items.

- The cup racks can be adjusted by sliding them up and down the side of the basket. - With the cup racks in the upright position, you can lean tall glasses against them.

- Fold up and down the cup racks.
Fold back the plate racks
The plate racks are used for holding plates and platters. You can fold the plate racks to make room for larger items such as pans, bowls, and other large pieces.

NOTE!
It is not recommended to fold the plate racks by holding the tines by their tips, as this may cause bending. When folding the plate racks, hold the tines by their stems and then push them.


- Fold back the plate racks.

Adjust the height of the upper basket
The upper basket can be adjusted to three different positions (lower, center, or upper positions), to accommodate taller dishes in either the upper or lower basket.

NOTE!
- If the upper basket is overloaded or if the load is unbalanced, the movement mechanism may not function properly, causing the upper basket to fall to the next lower position.
- Ensure that the height adjustments on the right and left sides of the upper basket are aligned.


- Pull out the basket.
- Adjust the height of the upper basket by doing one of the following:
- To raise the upper basket, lift the upper basket until it locks into the desired height and clicks.

- To lower the upper basket, pull the handle on both sides of the upper basket to release it, then lower it.

- Push in the basket.
Adjust the height again if needed.
Loading the dishwasher efficiently
Use these guidelines when loading the dishwasher.
To optimize energy consumption and washing and drying performance, ensure you load the dishwasher according to its capacity.

WARNING!
Long-bladed knives stored in an upright position are a potential hazard.

CAUTION!
- Place sharp items so that they are not likely to damage the door seal.
- Very small items should not be washed in the dishwasher as they could easily fall out of the basket.
- If possible, place thin, narrow items in the middle sections of baskets.
- Place heavily soiled and larger items in the lower basket, and smaller, delicate, and light items in the upper basket.
- Items such as cups, glasses, pots and pans should face downwards.
- Curved items, or items with recesses, should be loaded at an angle so that water can run off.
- All utensils should be stacked securely so that they cannot tip over.
- All utensils should be placed so that they do not prevent the spray arms from rotating freely during washing.
- All utensils should be placed so that they do not prevent the spray arm from rotating freely during washing.
- Load hollow items such as cups, glasses, pans, etc. upside down so that water cannot collect in the container or a deep base.
- Dishes and items of cutlery must not lie inside one another, or cover each other.

NOTE!
- Load the baskets according to the standard loading options. Aim to use all 16 place settings. This is important for good results and for the efficient use of energy and water.
- If you do not load the baskets according to the standard loading options and you do not use all 16 place settings, it may lead to poorer performance and inefficient use of energy and water.
Guidelines for loading the upper basket
Use these guidelines together with the general guidelines when loading the upper basket.

A. Glasses B. Cups C. Plates/bowls
- Load with delicate and lighter dishware such as glasses, coffee cups, tea cups and saucers, as well as plates, small bowls and shallow pans (as long as they are not too dirty).
- You can fold the cup rack to make room for taller items. See section "Fold up and fold down cup racks", page 37.
- Position the items so that they will not be moved by the water spray.
- To avoid damage, glasses should not touch one another.
- Items of cutlery that are long or sharp, for example carving knives, must be laid horizontally in the upper basket.
Guidelines for loading the lower basket
Use these guidelines together with the general guidelines when loading the lower basket.

A. Cutlery basket B. Bowls C. Plates D. Cups
- Load with large items and the ones most difficult to clean such as pots, pans, lids, serving dishes and bowls.
- You can fold the plate racks to make room for larger items. See section "Fold back the plate racks", page 37.
- Place serving dishes and lids at the side of the racks to avoid blocking the rotation of the top spray arm.

NOTE!
The maximum recommended diameter for plates in front of the detergent dispenser is 14 cm, so that the dispenser can be opened easily.
Guidelines for loading the cutlery rack
Use these guidelines together with the general guidelines when loading the cutlery basket.

WARNING!
- Do not let any item stick through the basket bottom. • Always load sharp utensils with the sharp point down.
Cutlery should be placed separately from each other and in the appropriate positions, making sure that the utensils do not nest together, as this could impair the cleaning performance.
Loading the cutlery rack
A. Cutlery
Options, settings and functions
Options and functions are available to save time, water, and energy, while also providing improved washing results tailored to the type of soiling, degree of soiling, and properties of the dishes. They may affect programme duration, and some cannot be used together or with all programmes. If incompatible, their indicators will not light up.

Auto open
Opens the dishwasher door automatically at the end of the programme. This improves the drying results.
Delay
Delays the start of the wash cycle by a specified amount of time. Maximum delay time is 9 hours.
Delay
Delays the start of the wash cycle by a specified amount of time. Maximum delay time is 24 hours.
Extra drying
Gives the dishes an extra thorough drying.

Fast+
Shortens the time of the selected washing programme and decreases water consumption by enabling washing under higher pressure.

Half load
Saves energy and water. Can be used when half or less than half of the dishwasher's place settings are being used.

Hygiene+
Used when more hygiene is required for washing the dishes.

Tablet detergent
Enables better drying performance with multi-purpose detergents like 2in1, 3in1, 4in1, 5in1, etc., depending on the hardness of the inlet water.

Turbo wash
For effective cleaning of heavily soiled dishes. Place heavily soiled dishes on the right side of the lower basket and place the most heavily soiled dishes at the right front side of the lower basket.
Use the Auto open function
The Auto open function opens the dishwasher door at the end of the programme, using door-opening shafts.

WARNING!
- The dishwasher door must not be blocked when set to open automatically.
- Do not force the door to close if the power is interrupted while the shafts are out. When power is restored, the shafts retract automatically. The Auto open function opens the door at the end of the washing cycle, thanks to the 'door opening shafts'.

NOTE!
The Auto open function can cause changes to the programme time. The process can take up to 2 minutes.
FIX: tools
| Titel här | ||||||
| Auto MixWash | Intensive 70 ECO | 50 Delicate 40 Quick&Dry Mini 30 | ||||
| 20-51 (depend on the soil amount) | 20 min 20 min | 69 min 20 min 4 | 0 | |||
Activate Auto open
- Touch and hold for 3 seconds.
- Touch <- and + to cycle through the settings menu until ▶ flashes on the display and 1 is displayed. is lit.
- Touch ☑ to confirm the setting. After washing, the door will open automatically to achieve a better drying effect and save energy.
Deactivate Auto open
- Touch and hold for 3 seconds.
- Touch <- and + to cycle through the settings menu until ◇ flashes on the display and 0 is displayed. is no longer lit.
- Touch ☑ to confirm the setting.
Use the Delay function
When the Delay function is activated, you cannot make changes to the washing programme, options, functions, or the duration of the delay time. The Delay function cannot be set after the programme starts.
Activate Delay function
- Press find to cycle through and select the desired programme.
- Touch the symbol of the desired programme.
- Change settings and select options if needed.
- Press set the desired delay time. You can delay the programme for up to 24 hours.
Touch adjust the delay time. You can delay the programme for up to 24 hours.
0:30 is displayed, and the delay indicator starts to flash.
NOTE! Time will increase in increments of 30 minutes up to 6 hours, and then in increments of 1 hour up to 24 hours every time you press
Time will increase in increments of 30 minutes up to 6 hours, and then in increments of 1 hour up to 24 hours.
- Press
The time delay is activated and the washing programme starts after the delay time has passed.
- Close the door and and the selected programme will start after the delay time has passed.
Deactivate Delay function
- Press and hold for 3 seconds.
The countdown from 3 to 0 begins. Upon completion, the Ⓐ turns off, indicating that the delay has been cancelled, and the dishwasher returns to the programme selection mode.
- Open the door and touch and hold for 3 seconds.
The countdown from 3 to 0 begins. When the countdown is completed, close the door and wait for the draining process to complete, which can take up to 2 minutes. The dishwasher returns to the programme selection mode.
Use the Extra drying option
Extra drying enhances the drying performance.
- Touch the symbol of the desired programme.
- Touch
The corresponding light bar is lit.
- Close the door.
Use the Fast+ option
Shortens the time of the selected washing programme and decreases water consumption by enabling washing under higher pressure.
- Touch the symbol of the desired programme.
- Touch
The corresponding light bar is lit.
- Close the door.
Use the Hygiene+ option
Hygiene+ increases the washing and rinsing temperatures, extends their duration in the programme, and includes an extra rinse for cleaner dishes.
- Touch the symbol of the desired programme.
- Touch Hygiene+.
The corresponding light bar is lit.
- Close the door.
Use the Tablet detergent function
Enables better drying performance with multi-purpose detergents like 2-in-1, 3-in-1, 4-in-1, 5-in-1, etc., depending on the hardness of the inlet water.
Activate Tablet detergent function
- Touch and hold the button for 3 seconds to enter the settings menu.
- Touch ◁ and then → to cycle through the settings menu until the icon is displayed and 1 is shown.
- Touch to save the settings.
Deactivate Tablet detergent function
- Touch and hold the button for 3 seconds to enter the settings menu.
- Touch ◁ and then → to cycle through the settings menu until the icon is no longer lit and 0 is shown.
- Touch to save the settings.
Use the Turbo wash option
For effective cleaning of heavily soiled dishes. Place heavily soiled dishes on the right side of the lower basket and place the most heavily soiled dishes at the right front side of the lower basket.
- Touch the symbol of the desired programme.
- Touch. The corresponding light bar is lit.
- Touch
Programmes

NOTE!
- The amount of dishwasher detergent needed depends on how dirty the dishes are.
- Actual values for a programme may differ from the values presented here. The values given for programmes other than the ECO programme are indicative only.
- The programme duration can change depending on the ambient temperature where your machine is installed, the temperature of the supply water, and the amount of dishes and the hardness of the water.
Auto (P1) Auto (P2)


For lightly, normally or heavily soiled crockery with or without dried-on food.
| Cycle steps • Pre-wash 45 °C | • Wash 55 - 65 °C• Rinse• Rinse 50-60 °CDrying |
| Detergent, pre-wash | 5 g |
| Detergent, main wash | 19 g or 1 - 2 tablets |
| Default time | 2:552:25 - 3:131:50 - 3:18 |
| Rinse aid | Yes |
| Auto open | Yes, 5 minutes before the programme ends. |

The recommended wash cycle for normally soiled dishes, since it reduces the consumption of energy and water.
| Cycle steps • Pre-wash | • Wash 50 °C• Drying |
| Default time 4:003:56 |

Special programme for gentle cleaning of delicate glassware.
| Cycle steps • Pre-wash | • Wash 40 °C• Drying |
| Default time 2:00 |
Intensive (P3) Intensive (P4)

For heavily soiled crockery, and normally soiled pots, pans, dishes etc., with dried-on food.
| Cycle steps • Pre-wash | • Wash 70 °C• Drying |
| Default time 2:533:07 |
Mini 30 (P7)

For lightly soiled daily dishes that are scraped or pre-cleaned.
| Cycle steps • Wash 35 °C | |
| Default time 0:30 |
Mix Wash+ (P2)

For daily mixed dishes, including plastic items. Delicate glass items are washed in the upper basket, while pans and trays can be washed in the lower basket.
| Cycle steps • Pre-wash | • Wash• Drying |
| Default time 3:39 |
Pre-wash (P6) Pre-wash (P8)

For removing remnants from the soiled dishes that will be left in the machine for a few days, preventing bad odour buildup.
| Cycle steps • Pre-wash | |
| Default time 0:15 |
Quick & Dry (P6)

Daily washing programme for normally soiled dishes, designed to complete the task quickly.
| Cycle steps • Wash 60 °C | • Drying |
| Default time 0:58 |
Drying time
This table displays the remaining drying time when the door has opened.

CAUTION!
Wait 30 minutes after the programme has finished before unloading the dishes.

NOTE!
- If additional functions are selected, the time duration may vary.
- When the door opens, the remaining time will be displayed.
- When the countdown ends, END will be shown on the display.
| Programme Door opening Remaining time (hours:minutes) | ||
| Auto - 0:20 - 0:51 (depending on the amount of soil) | amount | |
| ECO Yes 1:09 | ||
| Glass care | Yes 0:20 | |
| Intensive | Yes 0:20 | |
| Mini 30Mix wash+ Yes 0:20 | Yes 0 | |
| Pre-wash No - | ||
| Quick & dry Yes 0:04 | ||
CLEANING
Correct maintenance of your product can extend its working life.

WARNING!
Before cleaning or maintenance of this product, read the safety information and the full instructions.

WARNING!
Unplug the machine before cleaning and carrying out maintenance.

CAUTION!
- If cleaning is required, only use a soft damp cloth moistened with mild soap. Use a dry cloth to wipe the machine dry.
- To remove spots or stains from the interior surface, use a cloth dampened with water and a little vinegar, or a cleaning product made specifically for dishwashers.

CAUTION!
- To avoid penetration of water into the door lock and electrical components, do not use a spray cleaner of any kind.
- Never use abrasive cleaners or scouring pads on the outer surfaces, as they may scratch the finish. Some paper towels may also scratch or leave marks on the surface.
- Never use abrasive cleaners, solvents or scouring pads on the outer surfaces, as they may scratch the finish. Only use gentle cleaning products. Some paper towels may also scratch or leave marks on the surface.
- Do not use sharp or abrasive tools, household cleaning products, detergents, gas, gasoline, thinner, alcohol, varnish, etc., for cleaning. They may damage the surface of the product and could cause a fire.
- Use a product designed to clean the stainless steel interior to restore the original brightness of the interior.
Clean the door and door seals
Do this regularly to remove food residue.

CAUTION!
Do not use solvents or abrasive cleaning products to clean the exterior and rubber parts of the dishwasher. Use a cloth moistened with warm soapy water.


- Clean the door seals and sides using a soft cloth dampened with soapy water or diluted detergent.
- Wipe the door seals and sides using a soft cloth dampened with warm water, then dry with a soft cloth.
- Clean the front of the door using a soft cloth dampened with soapy water or diluted detergent. NOTE! Only wipe the control panel with a soft dry cloth.
- Wipe the front of the door using a soft cloth dampened with warm water, then dry it with a soft cloth.
Clean the interior
Do this regularly to remove food residue and limescale.
- Start the Intensive programme with the highest possible temperature using detergent or special dishwasher cleaning agents.
Start the Intensive programme with the highest possible temperature using detergent or special dishwasher cleaning agents or use the Procare programme. See section .
This operation helps removing food residue and limescale from the interior.
- If there is water at the bottom of the dishwasher after the programme, do following:
- Drain the water. See section section "Cancel the programme during a wash", page 31.
- Remove and clean the filters. See section "Remove and clean the filtering system", page 50.
Clean the spray arms
Do this regularly. This prevents the spray arms and bearings from getting clogged.


- Remove the upper basket.
- To remove the upper spray arm, hold the nut still and rotate the spray arm.
- Remove the lower basket.
- To remove the lower spray arm, pull the spray arm upward.
- To remove the small lower spray arm, hold it still and unscrew it.
- Wash the spray arms in warm, soapy water.
- Clean the jets using a soft brush.
Install in reverse order.
Remove and clean the filtering system
Clean the filtering system once a week. Clear the coarse filter of any coarse particles before each wash cycle. This prevents the filters from getting clogged.

CAUTION!
- Refit the filters securely in the correct order, otherwise coarse debris could get into the system and cause a blockage.
- Never use the dishwasher without the filters in place. Incorrect replacement of the filters may reduce the performance of the dishwasher and damage dishes and utensils.


- Remove the basket.
- Rotate the coarse and the fine filter and then, remove the filter assembly. NOTE! If you are just cleaning the coarse filter, remove large food remnants and put the filters back in their initial position.
- Pull the coarse and fine filter off the filter assembly: gently squeeze the tabs on the coarse filter and pull the it off the filter assembly.
- Remove large food remnants by rinsing the filter parts under running water.

For a more thorough cleaning, use a soft cleaning brush or a dish brush.
- Reassemble the filters in the reverse order.
- Put the filter assembly in its initial position, then rotate the coarse and the fine filter. CAUTION! Do not over-tighten the filters.
Clean the hose filter
Check and clean the filter and the hose regularly. The hose filter attached to the water inlet hose prevents damage to the dishwasher caused by impurities from the water supply or your own water installation (such as sand, dirt, rust, etc.).

- Turn off the water supply.
- Remove the hose from the tap.
- Remove the hose filter.
- Clean the hose filter under running water.
- Install the hose filter.
- Attach the hose to the tap.
Prepare for longer periods of non-use
Do this when the dishwasher will not be used for a long time.
1
2
3
4
5
6
7
- Run a wash cycle with the dishwasher empty.
- Unplug the plug from the power socket.
- Turn off the water supply.
- Remove and clean the filter. See section "Remove and clean the filtering system", page 50
- Remove the filter. See section .
- Use a sponge to soak up water.
- Open the door slightly.
NOTE! Leaving the door slightly open helps the door seals to last longer and prevent odours from forming within the dishwasher.
TROUBLESHOOTING
The machine does not start
The problem can have different causes. Follow the instructions for the suggested causes to solve the problem.
Fuse has blown, or circuit breaker has tripped
- Replace the fuse or reset the circuit breaker.
- Disconnect any other appliances connected to the same circuit as the dishwasher.
Fuse has blown
Replace the fuse.
Machine is not connected to the power supply
Connect the power cord to the power outlet.
Machine is not turned on
Turn on the machine.
Water pressure is low
- Check that the water supply is connected properly.
- Check that the water is turned on.
The Water tap symbol is displayed


- Check that the water supply is connected properly.
- Check that the water is turned on.
Door of dishwasher not properly closed
Close the door properly and latch it.
Water is not pumped out of dishwasher
The problem can have different causes. Follow the instructions for the suggested causes to solve the problem.
Twisted, trapped or clogged drain hose
Check the drain hose.
- Remove the drain hose.
- If the drain hose is clogged, remove the blockage.
- Connect the drain hose, see section "Connect to an external drain", page 65.
Filter clogged
Check the coarse filter.
See, section
Kitchen sink clogged
Check the kitchen sink to make sure it is draining well. If the problem is due to a blocked kitchen sink, you may need to call a plumber rather than a dishwasher service technician.
Residue, deposits and stains
Detergent left in dispenser

NOTE!
Use gloves if detergent residue can be found on dishes to avoid skin irritations.
Dishes are blocking detergent dispenser
Re-load the dishes properly.
Detergent dispenser cavity is damp when detergent is added
Ensure the cavity is dry before adding detergent.
Detergent is added long before the washing process
Do not add detergent into the dispenser until you are ready to wash dishes.
Detergent is stored under unsuitable conditions
Do not store the detergent in a humid environment. Keep the detergent in a closed container if possible.
The filter assembly is not clean or is not correctly fitted in the base of the dishwasher cabinet
This may lead to blockage of the spray arm jets.
- Clean and fit the filter correctly. See section "Remove and clean the filtering system", page 50.
- Clean the spray arm jets. See section "Clean the spray arms", page 49.
Foam forms in the machine
The problem can have different causes. Follow the instructions for the suggested causes to solve the problem.
Dishes are washed with hand-washing detergent by hand but not rinsed before placing them into the machine
Hand-washing detergents do not contain anti-foam. There is no need to hand-wash the dishes before placing them into the machine. Remove leftovers and remnants without using hand-washing detergent. See section "Before each wash", page 30.
Rinse aid is spilled or rinse aid is leaking from the rinse aid dispenser
- Make sure to not spill rinse aid around the rinse aid dispenser when adding rinse aid.
- Make sure that the cap is closed properly after adding rinse aid.
- Wipe up rinse aid spills immediately.
Odours from the machine
The problem can have different causes. Follow the instructions for the suggested causes to solve the problem.
New machine has an odour
It is normal for a new machine to have an odour. The odour fades away after a few wash cycles.
The filter assembly is not clean or is not correctly fitted in the base of the dishwasher cabinet
This may lead to blockage of the spray arm jets.
- Clean and fit the filter correctly. See section "Remove and clean the filtering system", page 50.
- Clean the spray arm jets. See section "Clean the spray arms", page 49.
Dirty dishes are kept in the dishwasher for 2 to 3 days
If you are not going to start the machine right after you have put the dishes into it, do the following:
- Remove the remnants on the dishes and run the Pre-wash programme, without detergent, every 2 days.
- Leave the door slightly open, so that moisture and odours are ventilated.
You can also use commercially available odour removers or machine cleaners.
Noises
Knocking noise in the dishwasher
A spray arm is knocking against an item in a basket
- Pause the programme.
- Pause the wash cycle.
- Rearrange the items that are obstructing the spray arm.
Rattling noise in the dishwasher
Items of crockery are loose in the dishwasher
Pause the programme and rearrange the items of crockery.
Pause the wash cycle and rearrange the items of crockery.
Knocking noise in the water pipes
This may be caused by on-site installation or the cross-section of the piping
This has no effect on the operation of the dishwasher. If in doubt, contact a qualified plumber.
Dirty dishes
The dishes are not clean
The problem can have different causes. Follow the instructions for the suggested causes to solve the problem.
The dishes were not loaded correctly
See section "Loading the dishwasher efficiently", page 39.
See section
The programme was not powerful enough
Select a more vigorous programme.
The wash cycle was not powerful enough
Select a more vigorous wash cycle.
The programme was not powerful enough
Select a programme with higher temperature and longer washing time.
Wrong detergent was used
Use more detergent, or change your detergent.
Not enough detergent was dispensed
If powder detergent is used, adjust the amount of detergent according to how dirty the dishes are and the selected programme.
Not enough rinse aid was dispensed
Check the indicator light:
- If the indicator light is lit, fill the rinse aid dispenser. See section "Fill the rinse aid dispenser", page 33.
- If the indicator light is not lit, adjust the rinse aid consumption to a higher setting. See section "Adjust the rinse aid consumption", page 33.
Detergent is stored under unsuitable conditions
Do not store the detergent in a humid environment. Keep the detergent in a closed container if possible.
Detergent dispenser is left open
Make sure the detergent dispenser is closed properly after adding the detergent.
Items are blocking the movement of the spray arms
Rearrange the items so that the spray arms can rotate freely.
The filter assembly is not clean or is not correctly fitted in the base of the dishwasher cabinet
This may lead to blockage of the spray arm jets.
- Clean and fit the filter correctly. See section .
- Clean the spray arm jets. See section .
The filter assembly is not clean or is not correctly fitted in the base of the dishwasher cabinet
This may lead to blockage of the spray arm jets.
- Clean and fit the filter correctly. See section "Remove and clean the filtering system", page 50.
- Clean the spray arm jets. See section "Clean the spray arms", page 49.
The filter assembly is not clean or is not correctly fitted in the base of the dishwasher cabinet
This may lead to blockage of the spray arm jets.
- Clean and fit the filter correctly. See section .
- Clean the spray arm jet. See section .
The filter assembly is not clean or is not correctly fitted in the base of the dishwasher cabinet
This may lead to blockage of the spray arm jets.
- Clean and fit the filter correctly. See section .
- Clean the spray arm jet. See section .
The filter assembly is not clean or is not correctly fitted in the base of the dishwasher cabinet
This may lead to blockage of the spray arm jets.
- Clean and fit the filter correctly. See section
- Clean the spray arm jet. See section
The filter assembly is not clean or is not correctly fitted in the base of the dishwasher cabinet
This may lead to blockage of the spray arm jets.
- Clean and fit the filter correctly. See section
- Clean the spray arm jet. See section
Washing kitchen utensils with an absorbent coating or deteriorated surface quality
Tea, coffee, lipstick or similar dye stains may not be cleaned when they have penetrated deteriorated surfaces. Cutlery or dishes of this type are not suitable for washing in the dishwasher.
White spots on dishes and cloudiness on glasses
The problem can have different causes. Follow the instructions for the suggested causes to solve the problem.
Not enough rinse aid was dispensed
Check the indicator light:
- If the indicator light is lit, fill the rinse aid dispenser. See section "Fill the rinse aid dispenser", page 33.
- If the indicator light is not lit, adjust the rinse aid consumption to a higher setting. See section "Adjust the rinse aid consumption", page 33.
Hard water can cause limescale deposits
- Adjust the water softener level. See section "Adjust the water softener level", page 27.
- Add salt to the water softener. See section "Add salt to the water softener", page 34.
Salt is spilled or salt is leaking from the water softener
- Make sure to not spill salt around the salt filling hole when adding salt.
- Make sure that the cap is screwed on tightly after adding salt.
- To remove salt that spilled or leaked:
a) Run the Pre-wash programme. b) At the end of the programme, check that the cap is screwed on tightly.

NOTE!
Salt granules left under the cap will dissolve, making the cap loose.
There are stains on glasses that look like milk stains.
A smear remains on glasses that looks like a milk stain which cannot be easily removed. When the glass is pointed to light, the light creates a bluish rainbow appearance on the surface.
The problem can have different causes. Follow the instructions for the suggested causes to solve the problem.
Too much rinse aid was dispensed.
Adjust the rinse aid consumption to a lower setting. See section .
Adjust the rinse aid consumption to a lower setting. See section .
Adjust the rinse aid consumption to a lower setting. See section "Adjust the rinse aid consumption", page 33.
Spilled rinse aid.
Always wipe up rinse aid spills immediately.
Corrosion has occurred on glass due to soft water.
- Adjust the water softener level. See section "Adjust the water softener level", page 27. If your supply water is soft (lower than 5 dH), do not use salt.
- Select programmes with a higher washing temperature, for example 60 to 65°C.
You can also use commercially available glass protective detergents.
Rust, discolouration or surface deterioration occurs on dishes
The problem can have different causes. Follow the instructions for the suggested causes to solve the problem.
Salt is spilled or salt is leaking from the water softener
Salt may cause deterioration and oxidation on metal surfaces.
- Make sure to not spill salt around the salt filling hole when adding salt.
- Make sure that the cap is screwed on tightly after adding salt.
- To remove salt that spilled or leaked: a) Run the Pre-wash programme. b) At the end of the programme, check that the cap is screwed on tightly.

NOTE!
Salt granules left under the cap will dissolve, making the cap loose.
Salty food remnants have remained on dishes for a long time
Run the Pre-wash programme to remove salty food remnants or wash the dishes right away, when the dishes are placed in the dishwasher.
Electrical connection is not properly earthed

WARNING!
- Electrical equipment must be installed by professionals.
- The plug must be plugged into an appropriate power socket that is installed and earthed in accordance with all local laws and regulations.
- Improper connection of the earthing conductor can result in the risk of an electric shock.
- Check if the product is properly earthed, or check with a qualified electrician or service representative if you are in doubt whether the product is properly earthed.
If the electrical connection is not properly earthed, the static electric created in the product causes arcs on the surfaces of metal items creating marks, removing the protective cover on the surface and causing discolouration.
Intensive cleaning agents such as bleach are used
Do not wash your dishes with bleach. The protective cover on metal surfaces gets damaged and looses its efficiency over time when in contact with such cleaning agents.
Kitchen utensils that are already corroded are washed in dishwasher
Do not wash corroded items in the dishwasher. Rust on a corroded item can migrate to other stainless steel surfaces and cause corrosion.
Decorations and ornaments on dishes are being erased
Dishes are not dishwasher-safe
Decorated glasses and lustre porcelain kitchen utensils are not suitable for washing in the dishwasher. Manufacturers of some glassware and porcelain tableware items do not recommend washing such items in the dishwashers either.
The dishes are scratched
The problem can have different causes. Follow the instructions for the suggested causes to solve the problem.
Dishes that contain or are made of aluminium
Dishes that contains or are made of aluminium should not be washed in dishwasher. They may rub against other dishes and cause marks.
Salt is spilled or salt is leaking from the water softener
Salt may cause scratches.
- Make sure not to spill salt around the salt filling hole when adding salt.
- Make sure that the cap is screwed on tightly after adding salt.
- To remove salt that spilled or leaked:
a) Run the Pre-wash programme. b) At the end of the programme, check that the cap is screwed on tightly.

NOTE!
Salt granules left under the cap will dissolve, making the cap loose.
Hard water can cause limescale deposits.
- Adjust the water softener level. See section "Adjust the water softener level", page 27.
- Add salt to the water softener. See section "Add salt to the water softener", page 34.
The dishes were not loaded correctly.
See section "Loading the dishwasher efficiently", page 39. Do not lean glasses and other glassware against other dishes. The impact of water during washing causes glasses to strike against surrounding dishes, which may break, scratch or leave marks on the surfaces.
The dishes are broken.
The dishes were not loaded correctly or baskets were overloaded.
See section "Loading the dishwasher efficiently", page 39.
The dishes are not drying
The problem can have different causes. Follow the instructions for the suggested causes to solve the problem.
Improper loading
See section "Loading the dishwasher efficiently", page 39.
Not enough rinse aid was dispensed
Check the indicator light:
- If the indicator light is lit, fill the rinse aid dispenser. See section "Fill the rinse aid dispenser", page 33.
- If the indicator light is not lit, adjust the rinse aid consumption to a higher setting. See section "Adjust the rinse aid consumption", page 33.
Dishes are removed too soon
- Do not empty your dishwasher immediately after washing.
- Open the door slightly so that the steam can escape.
- Unload the lower basket first to prevent water dripping from the upper basket.
Wrong programme has been selected
Select a programme with a long washing time. With a short programme, the washing temperature is lower, decreasing cleaning performance.
Wrong wash cycle has been selected
Select a wash cycle with a long washing time. With a short wash cycle, the washing temperature is lower, decreasing cleaning performance.
Washing kitchen utensils with an absorbent coating or deteriorated surface quality
Water drainage is more difficult with such items. Cutlery or dishes of this type are not suitable for washing in the dishwasher.
Error messages
The E:01 error code is displayed
Overflow
Leak from the dishwasher or the dishwasher takes in too much water. The dishwasher attempts to discharge the water as long as there is an overflow.
If the overflow stops, the E:01 error code is no longer displayed. If the E:01 error code does not disappear, there is a permanent fault and the product needs to be repaired.

WARNING!
- Only authorised technicians may carry out repairs.
- If you experience problems with the product, please see if the user instructions and troubleshooting information in the user manual can help you find a solution. If the problem persists:
- turn off the product,
- unplug the product from its power supply, and
- contact the support.

WARNING!
- Any repair performed by someone who is not a qualified technician puts the users of the product at risk of personal injury.
- Any warranty claim resulting from repairs performed by someone who is not a qualified technician shall not be covered by the warranty.

NOTE!
If your product is broken, consider repairing it. Repairing instead of buying new is good for the environment.
The spare parts listed in the EU regulation 2019/2022 will be available to professional repairers at least 10 years after this product was placed on the market.
See section
See section
Contact Elvita support if you need help with your product.
The E:02 error code is displayed
Slow to fill with water
- Tap is not open. • Water intake is restricted. • Water pressure is too low.
The programme is paused as long as the problem persists. When water is restored, the E:02 error code is no longer displayed after a while and the programme resumes.
INSTALLATION
Follow the instructions in this section to install your machine.

WARNING!
Electrical shock hazard! Disconnect electrical power before installing the dishwasher. Failure to do so could result in death or electrical shock.

WARNING!
Read the safety information and the full instructions before installing or using this product.

WARNING!
- Electrical installation and repair can only be carried out by a qualified technician.
• Installation and repair can only be carried out by a qualified technician.
- Electrical equipment must be installed by professionals.
• Hoses should be installed by professionals.
- Any repair performed by someone who is not a qualified technician puts the users of the product at risk of personal injury.
- Any warranty claim resulting from repairs performed by someone who is not a qualified technician shall not be covered by the warranty.

WARNING!
Use the new hose sets supplied with the machine. Do not reuse old hose sets.

CAUTION!
Do not install or store the product in environments where the temperature falls below 0 °C
Installation tools
Tools needed for installation (not included)

A. Measuring tape
B. Cross-head screwdriver
C. Flat-head screwdriver
D. Scissors
E. Work gloves
F. Flat-tip plier
G. Spirit level
H. Pencil
Unpack the machine

WARNING!
Remove all packaging material before using the machine. Otherwise, serious damage may result.
1
2
3
4
5
6
7


- Remove the plastic packaging.
- Remove the cardboard packaging.
- Remove the pieces of foam.
- Lift the product and remove the base packaging.
- Remove the tape holding the door shut.
- Remove the accessories from the baskets.
- Remove the styrofoam packaging from the baskets.
- Remove the cable tie.
- Verify that the spray arms and the baskets move freely.

WARNING!
Keep all packaging material well away from children. There is a risk of suffocation!
Connect the cold-water supply hose to a tap.

CAUTION!
- If the water pipes are new or have not been used for an extended period of time, let the water run to make sure that the water is clear. This precaution is necessary to avoid the risk of the water inlet becoming blocked and damaging the dishwasher.
- If your sink has a spray jet fed by a hose that is connected to the same water line as the dishwasher, the hose could burst. If your sink has one, it is recommended that the hose be disconnected and the hole plugged.
- If the supplied hose does not fit your tap, use an adapter from your local plumbing suppliers.
1
2
- Lift up the hose to the tap.
- Screw the connector onto the threads of the tap.
NOTE!
The threaded connector must be 3/4 inches and make sure it is fastened tightly in place.
Connect the safety supply hose to a tap.
Use the safety supply hose to ensure that the flow of water stops if the hose is damaged. The hose is double-walled and the air space between the inner and the outer corrugated hose fills up with water if the hose is damaged. Water contact with the valve box of the system must be avoided to prevent damage to the electrical system.

CAUTION!
- If the water pipes are new or have not been used for an extended period of time, let the water run to make sure that the water is clear. This precaution is necessary to avoid the risk of the water inlet becoming blocked and damaging the dishwasher.
- If your sink has a spray jet fed by a hose that is connected to the same water line as the dishwasher, the hose could burst. If your sink has one, it is recommended that the hose be disconnected and the hole plugged.
- If the supplied hose does not fit your tap, use an adapter from your local plumbing suppliers.
- Do not connect the dishwasher to open warm water devices or flow-through water heaters. The permitted water temperature is up to 25°C.
1
2
- Lift up the hose to the tap.
- Screw the connector onto the threads of the tap.
CAUTION!
Do not use water pump pliers.
NOTE!
The threaded connector must be 3/4 inches and make sure it is fastened tightly in place.
Connect to an external drain

CAUTION!
- Avoid bending, kinking or squashing the drain hose.
- Do not immerse the end of the drain hose into the waste water. Immersing the hose could hamper the drainage and cause waste water to go back into the dishwasher again.
- Do not use a drain hose extension longer than 4 metres. Otherwise the cleaning performance of the dishwasher could be impaired.
If you need to use a drain hose extension, use a hose of the same type.
- Do not use a drain hose extension longer than 4 metres. Otherwise the cleaning performance of the dishwasher could be impaired. If you need to use a drain hose extension, use a hose of the same type.
- The drain pipe connection must be at a height of less than 100 cm from the base of the dishwasher. Otherwise you must drain excess water into a suitable container held lower than the sink.
The drain pipe connection must be at a height of less than 100 cm from the base of the dishwasher. You must drain excess water into a suitable container held lower than the sink.
The drain pipe connection must be at a height between 40 to 60 cm from the base of the dishwasher.
Otherwise you must drain excess water into a suitable container held lower than the sink.
- It is recommended to have the drain pipe connection lower than the base of the machine to completely empty the drain hose.
- The drain hose must be correctly fitted to avoid water leaks.
Position the drain hose into a floor drain


Connect the drain hose to a sink drain pipe
The drain hose can be directly connected to the drain hole or the sink's drainage.

WARNING!
Connection to the drain must only be performed by an authorised plumber.

WARNING!
Risk for electric shock!
Disconnect electrical power before installing or moving the product. Failure to do so could result in death or electrical shock.

CAUTION!
- Do not connect more than one drain hose to a sink pipe.
- The drain hose needs to be installed with an angle.

NOTE!
- The pipe needs to have a minimum diameter of ∅ 25 mm.
- Ensure there is an opening on the sink drain to connect the pipe, or cut the pipe to create one.

- Connect and secure the drain hose with the water hose clamp using flat-tip pliers. NOTE! See relevant installation measurements, section "Position the machine", page 69.
Position the drain hose into a sink
Use a drain hose holder to keep the drain hose bent downward into the sink without kinking.

NOTE!
Drain hose holder is not included.

Connecting to the electrical supply

WARNING!
Electrical equipment must be installed by professionals.

WARNING!
The plug must be plugged into an appropriate power socket that is installed and earthed in accordance with all local laws and regulations.

WARNING!
For personal safety:
- Do not use an extension cord or an adapter plug with this product.
- Do not use adapters or the like, as they could cause overheating and fires.
- Do not, under any circumstances, cut or remove the earthing connection from the power cord.
- Improper connection of the earthing conductor can result in the risk of an electric shock.
Electrical requirements
- Look at the rating label to check the rating voltage and connect the dishwasher to the appropriate power supply.
- Use the recommended fuse 10A (10A/13A/16A), time delay fuse, or circuit breaker.
- The power supply is 220-240 V (AC), 50Hz. The specification of the socket is 10A, 250 V (AC).
- Use a dedicated power socket, meaning that the power socket must not be shared with other products.
Electrical connection
- Ensure that the voltage and frequency of the power supply match those on the rating plate.
- Only insert the plug into a power socket that is properly and reliably earthed.
- Check with a qualified electrician or service representative if you are in doubt whether the product is properly earthed.
- If the electrical socket to which the product must be connected is not appropriate for the plug, replace the socket with the help of a qualified electrician.
- Make sure that the power plug always is accessible or that a switch is incorporated in the fixed wiring in accordance with the wiring rules, so that the product can be disconnected from the mains.
Fit the condensation strip

WARNING!
Always wear gloves when fitting the condensation strip.

- Clean the area where the condensation strip will be applied.
- Measure the length the condensation strip needs to be and cut it accordingly using scissors.
- Remove the backing paper from the condensation strip.
- Fit the condensation strip under the work surface of the cabinet.
NOTE! Make sure that the condensation strip is flush with the edge of the work surface.
Install the hose holder


- Remove the hose holder from the dishwasher.
- Install the hose holder to the wall.
- Insert the drain hose into the hose holder.
Position the machine

WARNING!
• Take care to avoid kinking or crushing the power cord. - If the power cord is damaged, it must be replaced by the manufacturer, the manufacturer's service agent or similarly qualified persons in order to avoid a hazard.

CAUTION!
• This product is only intended for indoor use. - The product must be installed on a clean, flat, and solid surface and leveled using the adjustable feet.

NOTE!
- The dishwasher is equipped with water supply and drain hoses that can be positioned either on the right or the left sides to facilitate proper installation.
- Depending on where your electrical outlet is, you may need to cut a hole in the side of the nearest cabinet.
- If the dishwasher must be moved, try to keep it in the vertical position. If absolutely necessary, it can be laid on its back.

NOTE!
The installation position of the dishwasher:
- Place the dishwasher near existing inlet and drain hoses and power cord. Install the dishwasher in a cabinet according to the specified dimensions.


- Install the dishwasher in a cabinet with the indicated dimensions.
NOTE! The gap between the top of the dishwasher and the cabinet, and between the edge of the outer door and the edge of the cabinet can be less than 5 mm.
- If the dishwasher is installed in a corner cabinet, make sure there is sufficient space around the fully opened dishwasher door.


Install the longer feet
With longer feet installed on the dishwasher, the height of the dishwasher increases by up to 50 mm.

CAUTION!
Ensure that two people are present when installing longer feet on the dishwasher.

NOTE!
Install the longer feet if the cabinet height exceeds 870 mm. No need to install longer feet if the cabinet height is 870 mm or less.


- Carefully tilt the dishwasher to one side to access the feet.
- Turn the front and back feet clockwise until they reach their maximum extension of 50 mm.
- Attach the longer feet onto the already mounted feet.
Repeat the steps for the other side of the dishwasher.
Level the machine
Level your dishwasher by adjusting the height of the front feet and the rear foot individually.

WARNING!
Steam may escape if the front door of the product is not adjusted properly. Hot steam may cause serious burns and injuries, and damage your furniture.

NOTE!
If the front door of the product cannot be closed properly or if the product is unstable, you need to adjust the feet of the product.
Check if there are any feet not touching the floor. If any foot is not touching the floor: screw out the foot until it makes contact with the floor.


- To adjust the rear feet, use a cross-head screwdriver and turn the screw clockwise to raise the height, anti-clockwise to lower the height.
- To adjust the front feet, use a flat-head screwdriver and turn the front feet clockwise to raise the height, and anti-clockwise to lower the height.
- Use a spirit level to check if the dishwasher is perfectly level and adjust the feet again if needed.
Secure the machine in place - for normal work surfaces

CAUTION!
Do not do this if you have a marble or granite work surface.
There are two installation options, depending on the width of the cabinet slot.
For a cabinet with a width longer than 610 mm


- Fit the 2 support brackets into the 2 slots.
- Bend the support brackets down using a flat-tip plier.
- Push the dishwasher to the recommended position in the cabinet.
- Use 4 (∅ 4 x 13 mm) screws to secure the dishwasher to the work surface.
For a cabinet with a width of 600 to 610 mm


- Plug the hole caps into the sides of the dishwasher using your hands.
NOTE! Do not use a screwdriver.
- Push the dishwasher to the recommended position in the cabinet.
- Use 4 (∅ 4 x 36 mm) screws to secure the dishwasher to the cabinet using screwdriver.
NOTE! Do not use an electric screwdriver.
Secure the machine in place - for marble or granite surfaces

CAUTION!
Only use this installation option if you have a marble or granite work-surface.
There are two installation options, depending on the width of the cabinet slot.
For a cabinet with a width longer than 610 mm


- Fit the 2 support brackets into the 2 slots.
- Bend the support brackets down using a flat-tip plier.
- Push the dishwasher to the recommended position in the cabinet.
- Use 4 (∅ 4 x 13 mm) screws to secure the dishwasher to the adjacent cabinets.
For a cabinet with a width of 600 to 610 mm


- Plug the hole caps into the sides of the dishwasher using your hands.
NOTE! Do not use a screwdriver.
- Push the dishwasher to the recommended position in the cabinet.
- Use (∅ 4 x 36 mm) screws to secure the dishwasher to the cabinet using screwdriver.
NOTE! Do not use an electric screwdriver.
Install the kick plate
There are three installation options, depending on the height of the cabinet.
For cabinets with a height of 820 to 840 mm


- Turn the locking mechanism anti-clockwise to unlock it.
- Push in the mounting brackets into the grooves.
- Turn the locking mechanism clockwise to lock the mounting brackets into place.
- Bend the prongs on the small kick plate using a flat-tip plier.
- Install the small kick plate using 2 (Ø 4 x 6 mm) screws.
- Install the screw covers onto the screws.
For cabinets with a height of 841 to 920 mm


- Turn the locking mechanism anti-clockwise to unlock it.
- Push in the mounting brackets into the grooves.
- Turn the locking mechanism clockwise to lock the mounting brackets into place.
- Do one of the following depending on the height the kick plate needs to be:
- 841 - 870 mm - Slide the small kick plate into the medium kick plate and adjust the height to fit the space where the kick plate is going to be installed.

- 871 - 920 mm - Slide the small kick plate into the large kick plate and adjust the height to fit the space where the kick plate is going to be installed.

- Install the kick plates using 2 (Ø 4 x 6 mm) screws.
- Install the screw covers onto the screws.
Install wooden kick plate


- Turn the locking mechanism anti-clockwise to unlock it.
- Attach the mounting brackets to the kick plate using 2 (Ø 3.5 × 14 mm) screws.
- Push in the mounting brackets into the grooves.
- Turn the locking mechanism clockwise to lock the mounting brackets into place.
SPECIFICATIONS
Technical specifications
| Model code See section "Find the model code", page 16 | |
| Height 818 (+100) mm | |
| Width 598 mm | |
| Depth 570 mm | |
| Weight 45 kg | |
| Capacity 14 place settings | |
| Water inlet hose length 1.8 m | |
| Water outlet hose length 1.75 m | |
| Power supply 220-240 V, 50 Hz | |
| Cord length, plug type | 1.65 m, earthed |
| Rated current | 10 A |
| Rated power | 1800-2100 W |
| Standard water pressure | 0.03 MPa ~ 1.0 MPa |
| Rated noise level | 42 dBA |
| Noise emission class | B |
| Water consumption | 9.5 l / cycle |
| Energy consumption | 0.766 kWh / cycle |
| Energy consumption, 100 cycles | 77 kWh |
| Energy efficiency class | C |
Energy efficiency
You can find information about the energy efficiency of this product in EPREL, the European product registry for energy labelling. Go to the EPREL website and use the model identifier to find the information. The model identifier can be found on the energy label accompanying the product.
EPREL website: https://eprel.ec.europa.eu/

ENERG

SUPPLIER'S NAME
MODEL IDENTIFIER
Dimensions

(mm)
Consumption values
Actual values for a programme may differ from the values presented here. The values given for programmes other than the ECO programme are indicative only.
| Programme Programme duration(hours:minutes) | Energy consumption (kWh) Water consumption (l) | ||
| Auto 1:50 - 3:18 0.90 - 1.45 | 9.4 - 12.4 | ||
| ECO 3:56 0.768 9.5 | |||
| Glass care 2:00 0.92 14.4 | |||
| Intensive 3:07 1.51 | 16.8 | ||
| Mini 30 | 0:30 0.8 | 10.8 | |
| Mix wash+ | 3:39 1.53 | 19.0 | |
| Pre-wash | 0.15 | 0 | 0.4 |
| Quick & dry | 0:58 1.18 | 10.6 | |
EU directives and standards
This product fulfils the applicable EU directives and regulations and carries the CE mark. If not included with the product, a copy of the EU Declaration of Conformity is available on request.
- The performance of the product has been tested in compliance with standard EN 60436 for dishwashers.
- Concerning EU regulation 2019/2022, programme used for comparability tests in accordance with EN 60436: ECO; other settings:
– Position of upper basket: lower position; - Rinse aid setting: MAX; - Softener setting: H3H4r3P3.
Content
SAFETY 85
Warnings.... 85
Intended use 85
●
●
4
5
* Optional
●
●

●

●
4
5
GETTING STARTED
2
3


4

2
3


A. Cutlery


2
3


3
4
5
6
7
2
3
4
5
6
7


2
2


3


Safety during installation

WARNING!
●
●
4
5
* Optional
Dishwashing 1
●
●

After disk 1
●

●
4
5

KOMMA IGÅNG
2
3
2
3
4
2
3


7

2
3
4
5


- Press in the basket.
A. Cutlery


2
3


3
4
5
6
7
2
3
4
5
6
7


2
2


3


Place in the plate rack 278
●
●
4
5
* Optional
Wash
1
●
●

After washing
1
●

●
4
5

GETTING STARTED
2
3
2
3
4
2
3


7

2
3
4
5
Fold down the plate rack


- Fold down the plate rack.


- Press in the basket.
A. Cutlery


3
4
5

6
3
4
A. Measuring tape


- Clean the area where the condensation strip will be applied.
- Measure how long the condensation strip needs to be, and cut it to the correct length with scissors.
- Remove the paper on the back of the condensation strip.
- Attach the condensation strip to the work surface of the cabinet. Note: Ensure that the condensation strip is flush with the edge of the work surface.
Install the hose holder


- Remove the hose holder from the dishwasher.
- Install the hose holder on the wall.
- Insert the drain hose into the hose holder.
Position the appliance

WARNING!


Install the longer feet


- Install the kick plates with 2 screws (∅ 4 x 6 mm).
- Install the screw covers on the screws.

●
●
4
5
* Optional
Vask
1
●
●

After vask
1
●

●


GET STARTED
Get to know your dishwasher
Control panel
2
3


2
3


7

2
3
4
5

- Fold the cup racks up and down.
Fold the plate racks down.


- Fold the plate racks down.

- Push the basket in.
A. Cutlery


- Remove the basket.
- Turn the coarse and fine filters, then remove the filter unit.
2
3
4
5
6
7
2
3
4
5
6
7


2
2


- Turn the locking mechanism counterclockwise to unlock it.
- Attach the mounting brackets to the kick plate with 2 (∅ 3.5 x 14 mm) screws
- Slide the mounting brackets into the grooves.
- Turn the locking mechanism clockwise to lock the mounting brackets in place.
SPECIFICATIONS
Technical specifications
●
●
4
5
●
●

After washing 1
●

●
4
5
STARTING
Place Part Description
2
3


2
3


7

2
3
4
5


- Push the basket in.
A. Cutlery


2
3


3
4
5
6
7
2
3
4
5
6
7


2
2
- Connect the hose to the tap.


●
●
4
5
* Valfrjálst
Pvottur
1
●
●

Eftir pvott
1
●

●
4
5

HEFJAST HANDA


2
3


2
3


7

2
3
4
5


- Replace the grinding discs.


- Push the basket in.
A. Cutlery
Options, settings, and operations


3
4
5

6
2
3
4
5
6
7
A. Mallet
B. Screwdriver
C. Flat screwdriver
D. Scissors
E. Work gloves
F. Flat pliers
G. Level
H. Pencil
2
3
4
5
6
7


2
2


Electrical connection

WARNING!


Set the longer feet on
With the longer feet installed on the dishwasher, the height of the dishwasher increases by 50 mm.

CAUTION!


EPREL website: https://eprel.ec.europa.eu/


SUPPLIER'S NAME
MODEL IDENTIFIER
Dimensions

(mm)
Usage values
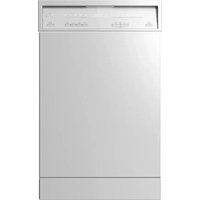
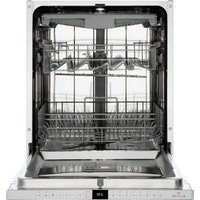
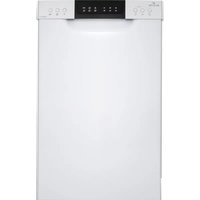


- CONTENTS/INHALT/INNEHÅLL/INNHOLD/INDHOLD/SISÄLLYSLUETTELO/EFNISYFIRLIT
- CONTENTS
- SAFETY
- QUICK START
- GETTING STARTED
- WASHING
- CLEANING
- INSTALLATION
- SPECIFICATIONS
- ADMONITIONS
- INTENDED USE
- SAFETY FOR CHILDREN AND PEOPLE WITH DISABILITIES
- WARNING
- GENERAL SAFETY
- CAUTION
- NOTE
- SAFETY DURING INSTALLATION
- SAFETY DURING OPERATION
- SAFETY DURING MAINTENANCE
- DISPOSAL
- BEFORE WASHING
- AFTER WASHING
- GETTING TO KNOW YOUR DISHWASHER
- SYMBOLS ON THE DISPLAY
- DETERGENT DISPENSER AND RINSE AID DISPENSER
- ACCESSORIES
- FIND THE MODEL CODE
- BEFORE FIRST USE
- ADJUST THE WATER SOFTENER LEVEL
- TO ADJUST THE WATER SOFTENER LEVEL, FOLLOW THESE STEPS
- DETERMINE THE WATER HARDNESS LEVEL
- RUN AN EMPTY LOAD
- BEFORE EACH WASH
- START WASHING
- ADD DISHES DURING A WASH
- CANCEL THE PROGRAMME DURING A WASH
- PURPOSE OF DETERGENT
- FILL THE DETERGENT DISPENSER
- SWITCH FROM TABLET DETERGENT TO POWDER DETERGENT
- PURPOSE OF RINSE AID
- FILL THE RINSE AID DISPENSER
- ADJUST THE RINSE AID CONSUMPTION
- PURPOSE OF SALT FOR THE WATER SOFTENER
- ADD SALT TO THE WATER SOFTENER
- AFTER EACH WASH
- ITEMS SUITABLE FOR USE IN DISHWASHER
- ADJUSTING BASKETS AND RACKS BEFORE LOADING
- FOLD UP AND FOLD DOWN CUP RACKS
- FOLD BACK THE PLATE RACKS
- ADJUST THE HEIGHT OF THE UPPER BASKET
- LOADING THE DISHWASHER EFFICIENTLY
- GUIDELINES FOR LOADING THE UPPER BASKET
- GUIDELINES FOR LOADING THE LOWER BASKET
- GUIDELINES FOR LOADING THE CUTLERY RACK
- OPTIONS, SETTINGS AND FUNCTIONS
- AUTO OPEN
- DELAY
- EXTRA DRYING
- FAST
- HALF LOAD
- HYGIENE
- TABLET DETERGENT
- TURBO WASH
- USE THE AUTO OPEN FUNCTION
- ACTIVATE AUTO OPEN
- DEACTIVATE AUTO OPEN
- USE THE DELAY FUNCTION
- ACTIVATE DELAY FUNCTION
- DEACTIVATE DELAY FUNCTION
- USE THE EXTRA DRYING OPTION
- USE THE FAST+ OPTION
- USE THE HYGIENE+ OPTION
- USE THE TABLET DETERGENT FUNCTION
- ACTIVATE TABLET DETERGENT FUNCTION
- DEACTIVATE TABLET DETERGENT FUNCTION
- USE THE TURBO WASH OPTION
- PROGRAMMES
- AUTO (P1) AUTO (P2)
- INTENSIVE (P3) INTENSIVE (P4)
- MINI 30 (P7)
- MIX WASH+ (P2)
- PRE-WASH (P6) PRE-WASH (P8)
- QUICK & DRY (P6)
- DRYING TIME
- CLEAN THE DOOR AND DOOR SEALS
- CLEAN THE INTERIOR
- CLEAN THE SPRAY ARMS
- REMOVE AND CLEAN THE FILTERING SYSTEM
- CLEAN THE HOSE FILTER
- PREPARE FOR LONGER PERIODS OF NON-USE
- TROUBLESHOOTING
- THE MACHINE DOES NOT START
- FUSE HAS BLOWN, OR CIRCUIT BREAKER HAS TRIPPED
- FUSE HAS BLOWN
- MACHINE IS NOT CONNECTED TO THE POWER SUPPLY
- MACHINE IS NOT TURNED ON
- WATER PRESSURE IS LOW
- THE WATER TAP SYMBOL IS DISPLAYED
- DOOR OF DISHWASHER NOT PROPERLY CLOSED
- WATER IS NOT PUMPED OUT OF DISHWASHER
- TWISTED, TRAPPED OR CLOGGED DRAIN HOSE
- FILTER CLOGGED
- KITCHEN SINK CLOGGED
- RESIDUE, DEPOSITS AND STAINS
- DETERGENT LEFT IN DISPENSER
- DISHES ARE BLOCKING DETERGENT DISPENSER
- DETERGENT DISPENSER CAVITY IS DAMP WHEN DETERGENT IS ADDED
- DETERGENT IS ADDED LONG BEFORE THE WASHING PROCESS
- DETERGENT IS STORED UNDER UNSUITABLE CONDITIONS
- THE FILTER ASSEMBLY IS NOT CLEAN OR IS NOT CORRECTLY FITTED IN THE BASE OF THE DISHWASHER CABINET
- FOAM FORMS IN THE MACHINE
- DISHES ARE WASHED WITH HAND-WASHING DETERGENT BY HAND BUT NOT RINSED BEFORE PLACING THEM INTO THE MACHINE
- RINSE AID IS SPILLED OR RINSE AID IS LEAKING FROM THE RINSE AID DISPENSER
- ODOURS FROM THE MACHINE
- NEW MACHINE HAS AN ODOUR
- DIRTY DISHES ARE KEPT IN THE DISHWASHER FOR 2 TO 3 DAYS
- NOISES
- KNOCKING NOISE IN THE DISHWASHER
- A SPRAY ARM IS KNOCKING AGAINST AN ITEM IN A BASKET
- RATTLING NOISE IN THE DISHWASHER
- ITEMS OF CROCKERY ARE LOOSE IN THE DISHWASHER
- KNOCKING NOISE IN THE WATER PIPES
- THIS MAY BE CAUSED BY ON-SITE INSTALLATION OR THE CROSS-SECTION OF THE PIPING
- DIRTY DISHES
- THE DISHES ARE NOT CLEAN
- THE DISHES WERE NOT LOADED CORRECTLY
- THE PROGRAMME WAS NOT POWERFUL ENOUGH
- THE WASH CYCLE WAS NOT POWERFUL ENOUGH
- WRONG DETERGENT WAS USED
- NOT ENOUGH DETERGENT WAS DISPENSED
- NOT ENOUGH RINSE AID WAS DISPENSED
- DETERGENT DISPENSER IS LEFT OPEN
- ITEMS ARE BLOCKING THE MOVEMENT OF THE SPRAY ARMS
- WASHING KITCHEN UTENSILS WITH AN ABSORBENT COATING OR DETERIORATED SURFACE QUALITY
- WHITE SPOTS ON DISHES AND CLOUDINESS ON GLASSES
- HARD WATER CAN CAUSE LIMESCALE DEPOSITS
- SALT IS SPILLED OR SALT IS LEAKING FROM THE WATER SOFTENER
- THERE ARE STAINS ON GLASSES THAT LOOK LIKE MILK STAINS
- TOO MUCH RINSE AID WAS DISPENSED
- SPILLED RINSE AID
- CORROSION HAS OCCURRED ON GLASS DUE TO SOFT WATER
- RUST, DISCOLOURATION OR SURFACE DETERIORATION OCCURS ON DISHES
- SALTY FOOD REMNANTS HAVE REMAINED ON DISHES FOR A LONG TIME
- ELECTRICAL CONNECTION IS NOT PROPERLY EARTHED
- INTENSIVE CLEANING AGENTS SUCH AS BLEACH ARE USED
- KITCHEN UTENSILS THAT ARE ALREADY CORRODED ARE WASHED IN DISHWASHER
- DECORATIONS AND ORNAMENTS ON DISHES ARE BEING ERASED
- DISHES ARE NOT DISHWASHER-SAFE
- THE DISHES ARE SCRATCHED
- DISHES THAT CONTAIN OR ARE MADE OF ALUMINIUM
- THE DISHES ARE BROKEN
- THE DISHES WERE NOT LOADED CORRECTLY OR BASKETS WERE OVERLOADED
- THE DISHES ARE NOT DRYING
- IMPROPER LOADING
- DISHES ARE REMOVED TOO SOON
- WRONG PROGRAMME HAS BEEN SELECTED
- WRONG WASH CYCLE HAS BEEN SELECTED
- ERROR MESSAGES
- THE E:01 ERROR CODE IS DISPLAYED
- OVERFLOW
- THE E:02 ERROR CODE IS DISPLAYED
- SLOW TO FILL WITH WATER
- INSTALLATION TOOLS
- UNPACK THE MACHINE
- CONNECT THE COLD-WATER SUPPLY HOSE TO A TAP
- CONNECT THE SAFETY SUPPLY HOSE TO A TAP
- CONNECT TO AN EXTERNAL DRAIN
- POSITION THE DRAIN HOSE INTO A FLOOR DRAIN
- CONNECT THE DRAIN HOSE TO A SINK DRAIN PIPE
- POSITION THE DRAIN HOSE INTO A SINK
- CONNECTING TO THE ELECTRICAL SUPPLY
- ELECTRICAL REQUIREMENTS
- ELECTRICAL CONNECTION
- FIT THE CONDENSATION STRIP
- INSTALL THE HOSE HOLDER
- POSITION THE MACHINE
- INSTALL THE LONGER FEET
- LEVEL THE MACHINE
- SECURE THE MACHINE IN PLACE - FOR NORMAL WORK SURFACES
- SECURE THE MACHINE IN PLACE - FOR MARBLE OR GRANITE SURFACES
- INSTALL THE KICK PLATE
- FOR CABINETS WITH A HEIGHT OF 841 TO 920 MM
- INSTALL WOODEN KICK PLATE
- ENERGY EFFICIENCY
- CONSUMPTION VALUES
- EU DIRECTIVES AND STANDARDS
- CONTENT
- KOMMA IGÅNG
- WASH
- FOLD DOWN THE PLATE RACK
- POSITION THE APPLIANCE
- VASK
- AFTER VASK
- GET STARTED
- GET TO KNOW YOUR DISHWASHER
- FOLD THE PLATE RACKS DOWN
- STARTING
- PLACE PART DESCRIPTION
- PVOTTUR
- EFTIR PVOTT
- HEFJAST HANDA
- OPTIONS, SETTINGS, AND OPERATIONS
- SET THE LONGER FEET ON
- USAGE VALUES
Brand : Elvita
Model : CDM7600X
Category : Dishwasher