
B1RKM09001 - Air conditioner BOSCH - Free user manual and instructions
Find the device manual for free B1RKM09001 BOSCH in PDF.
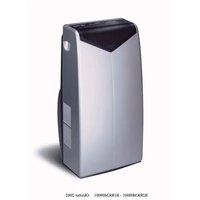


| Product Type | Split system air conditioner |
| Brand | Bosch |
| Model | B1RKM09001 |
| Cooling Capacity | approx. 2.5 kW (9000 BTU/h) |
| Heating Capacity | approx. 2.8 kW (heat pump) |
| Refrigerant | R32 |
| Power Supply | 230 V ~ 50 Hz |
| Power Consumption (Cooling) | approx. 800 W |
| Power Consumption (Heating) | approx. 900 W |
| Energy Efficiency | Class A++ (Cooling), A+ (Heating) |
| Indoor Unit Dimensions (WxHxD) | approx. 870 x 290 x 195 mm |
| Outdoor Unit Dimensions (WxHxD) | approx. 720 x 550 x 260 mm |
| Indoor Unit Weight | approx. 10 kg |
| Outdoor Unit Weight | approx. 30 kg |
| Main Functions | Cooling, heating, ventilation, dehumidification, auto mode, timer, sleep, turbo |
| Air Filter | High-efficiency washable filter |
| Indoor Unit Sound Level | 22 - 38 dB(A) |
| Outdoor Unit Sound Level | up to 55 dB(A) |
| Maximum Pipe Length | 15 m (standard 5 m) |
| Refrigerant Connection Diameter | 1/4" (liquid), 3/8" (gas) |
| Maintenance and Cleaning | Clean the filter every 2 weeks; clean the grilles with a soft cloth |
| Check-Up Frequency | Have the device checked by a professional every 2 years |
| Spare Parts | Remote control, filter, mounting kits available at authorized dealers |
| Repairability | Repairability index of 7.5/10 |
| Warranty | 2 years parts and labor |
| Standards | CE compliant, RoHS |
Frequently Asked Questions - B1RKM09001 BOSCH
User questions about B1RKM09001 BOSCH
0 question about this device. Answer the ones you know or ask your own.
Ask a new question about this device
Download the instructions for your Air conditioner in PDF format for free! Find your manual B1RKM09001 - BOSCH and take your electronic device back in hand. On this page are published all the documents necessary for the use of your device. B1RKM09001 by BOSCH.
USER MANUAL B1RKM09001 BOSCH
B1 RKM 09001

GB Instructions for Use
FR Mode d'emploi
Household Appliances


Notes:


Air purification

Disposal of packaging....19
Disposal of your old appliance....19
Before connecting your new appliance....19
Your new appliance
Description of your appliance....20
Control panel....21
Requirements for Use
Requirements for use.... 22
Transportation requirements ....22
Instructions for Use
Temperature control 23
Ways of releasing air outdoors....24
Dehumidification....25
Air purification....25
Setting the time/Programming the timer
Setting the time ....26
Setting the timer 26
Disconnecting the timer....27
Cleaning and Maintenance
Cleaning 28
Prior to use at change of season....28
Technical Service / Warranty....29
Things that can save you from making unnecessary phone calls....30
Technical Information ....31
Important Information
Disposal of packaging
Disposal of your old appliance
Before connecting your new appliance

☐ Respect the environment when disposing of the material your appliance comes packed in. ☐ Our products are all carefully packed for transportation purposes. The packaging is designed to not harm the environment. All the materials used in the production of this packaging are environmentally friendly or can be re-used. ☐ Recycling the material your appliance comes packed in helps contribute to the conservation of raw materials and reduces the amount of waste produced in the world. ☐ It may be possible to return packaging to the establishment that supplied you with your appliance. Contact them for more information. ☐ Unplug your old appliance from the mains electricity supply and cut the power cable. ☐ Appliances of this kind contain refrigerants which need to be disposed of in accordance with current regulations. ☐ Do not dispose of your old appliance yourself. Get in touch with your local council or other competent body for information about how best to dispose of it. ☐ Read the instructions book before using your appliance for the first time. It contains important information, not only concerning use, but maintenance and personal safety as well. ☐ Keep this instructions book. It may be useful for later owners. ☐ Do not turn a damaged appliance on. ☐ Your appliance must be assembled and connected in accordance with the assembly instructions and current regulations. If these instructions are not observed, you run the risk of losing your warranty. ☐ All our appliances are made in accordance with present-day safety regulations. Only technicians instructed in these matters are authorised to repair them. Your safety is at stake. ☐ Make sure that the drainage plugs are properly inserted. They may have come loose during transportation.
Your new appliance
Description of your appliance

Control panel

Requirements for Use
Requirements for use
☐ This appliance must be connected to a 220/240 V 50 Hz mains electricity supply using an earthed plug. ☐ It must be protected with a 10 A slow-action fuse. ☐ Should an extension lead be needed, this lead must be at least 1.5 mm² per terminal thick, no more than 25 m long and earthed. ☐ There is a cavity at the back of the appliance for the mains electricity supply connection wire. ☐ Do not allow water to enter the appliance. ☐ Do not block the air inlets or outlets on your appliance, especially when used for heating.
Should the mains electricity supply wire be damaged in any way, it must only be replaced with a wire of similar characteristics. Get in touch with the manufacturer, after-sales service or similarly qualified person.
Warning!
If the appliance is turned off and then turned back on again, there is a 3-minute interval before the compressor starts up again. This interval is necessary in order for the appliance to work properly.
Transportation requirements

There are castors fitted on your appliance to make moving it easier. If it is necessary to tilt your appliance in order to move it, then the internal water tank must be drained first. To do this, connect drainage pipe to stopcock at the bottom of the appliance.
Warning!
Be particularly careful when transporting this unit. There is a water drainage pipe on the bottom of the appliance which may break if knocked.
Instructions for Use
Temperature control


□ Plug your appliance in. ☐ Lead the hot-air expulsion duct outdoors. □ Set to maximum ✦ or silent ✦ temperature control. □ Turn the drainage stopcock to the cooling position. ☐ Set the required temperature with the ⏻ and ⏱ buttons. ☐ The appliance lowers the temperature and dries the air in the room at the same time in order to create ideal air conditions. ☐ If the appliance turns itself off due to the thermostat, it will come back on again automatically when the ambient temperature rises 2°C! ☐ Condensed water formed during air conditioning evaporates automatically and is expelled outdoors, together with hot air, through the hot-air expulsion duct. ☐ In conditions of extreme humidity, the appliance accumulates water in an internal tank. □ When the water in this tank reaches a certain level, safety pilot light comes on, indicating that the tank needs to be emptied. ☐ You may also use the Dehumidification Mode to empty the water. To do this, first turn the appliance off and wait 10 minutes in order for the safety systems to reset. Having done this, proceed as described in the section "Dehumidification".
Ways of releasing air outdoors
Temporary installation
□ Connect the diffusion duct to the hot-air expulsion duct. □ Leave the window ajar and feed the air-expulsion nozzle through the gap. On windows with double frames, feed the expulsion nozzle through the gap in the middle. ☐ Close the window as much as possible and secure it in place using the suction pad provided.
Permanent installation The appliance can be installed on a permanent basis using window/wall Optional Accessory, reference B1 RKZ 06009, available from your supplier.

☐ A hole must be made in the wall and the wall accessory fitted in order to expel hot air. □ Store the diffusion duct away and connect the air expulsion duct to the accessory. ☐ Only the transparent end section of the accessory is used when air is to be expelled through a window on a permanent basis. A 10.5 cm. diameter hole must be made in the glass in order to fit the accessory.

N.B.
- Do not extend the hot-air expulsion duct more than necessary (maximum length: 140 cm.).
- There must be a distance of at least 70 cm. between the floor and the end of the duct.
- Do not bend the duct too sharply when positioning it.
This can impede proper hot-air expulsion, which may reduce cooling efficiency.
Dehumidification


Air purification

When set to , the appliance removes humidity from the atmosphere. It does not, however, control the temperature.
☐ Turn drainage stopcock 90° in an anti-clockwise direction. ☐ Remove stopcock plug and insert drainage pipe. stored in the main filter compartment. ☐ Place a bowl at the drainage pipe outlet to collect the condensed water in. ☐ Put the air extraction duct in storage position. ☐ Set control knob to dehumidification position ☐ The amount of water removed from the air can reach as much as 30 liters/24 hours, depending on atmospheric conditions.
Warning!
- Do not forget to put the plug back in place on the drainage stopcock and to turn the stopcock 90° in a clockwise direction before setting the appliance to the temperature control setting. The appliance will shed water should you fail to do so.
- If the "Dehumidification" light flashes on and off, then room temperature is lower than 18°C. Always remember that in order for the dehumidification function to work properly, ambient temperature must be at least 18°C.
The air inside a room is circulated through a set of purifying filters when the appliance is set to this function.
☐ The appliance comes with a main filter with a double active purifying filter. This special filter is for:
- Smells and smoke.
- Pollen, bacteria and dust.
☐ Put the air expulsion duct in the same position as for dehumidification.
□ Set purification speed setting:
maximum or silent .
We recommend you leave the optional filters in position regardless of the desired function setting (cooling, dehumidification, air purification). The appliance purifies the air more efficiently in this way.
Setting the time/Programming the timer
Setting the time
With the appliance on, the present time currently set can be displayed by pressing the "Time/Temperature" button. The present time is then displayed on the digital screen for a period of 5 seconds with the two dots flashing. The present time displayed on the screen can be altered using the and buttons. Each time one of these buttons is pressed the present time is put forwards or back one minute. The present time can be altered continuously by keeping these buttons pressed in. Unless another button is pressed in the meantime, 5 seconds after the present time has been set, the temperature will reappear on the display screen.
Setting the timer
(To turn air conditioning on and off automatically). Then the timer can be programmed to turn the air conditioning on and off at set times – regardless of whether the air conditioning is working at the time of setting or not.

Press the "START" or "STOP" button: The last timer setting will appear on the display screen. The timer light comes on to indicate that the timer has been activated.
Press the ⏻ or ⏱ button in order to alter the timer setting. The timer is set in blocks of 15 minutes. 5 seconds after the timer has been set, the set temperature will reappear on the display screen. When the "on" and "off" times set on the timer are shown on the display screen, the two dots do not flash.
Disconnecting the timer
Press the START/STOP buttons for a period of two seconds. The timer light goes out. The timer deactivated. The times and functions set on the timer remain active and the programmed operation will be repeated at the set times until deactivated or cancelled as described above.
Cleaning and Maintenance
Cleaning

The appliance is equipped with a main air filter. This filter must be removed, washed with water, dried and refitted on a regular basis. The set of accessory purifying filters, reference B1 RKZ 09013, must be replaced with a new set every year in order to work efficiently. Contact your supplier. The filters must be fitted as shown in figures. Place only one set of filters onto fixture to avoid affecting cooling efficiency. The appliance can be cleaned with a cloth or sponge, warm water and mild detergent. Never use hot water (more than 40°C), bleach, petrol-based products, acids or brushes when cleaning your appliance. Prevent water entering the appliance. Do not clean your appliance with a hose.

Prior to use at change of season
Clean the air filter. Then clean the casing and grilles if necessary.
Technical Service / Warranty
Technical service
Should your appliance fail to work properly and all the instructions for use and installation (especially the section headed "Requirements ...") have been carefully observed, then remember that our Technical Service Network is at your full disposal.
When contacting the Technical Service, quote the model code (E-NR) and the appliance's factory number (FD). This information can be found on the characteristics plate.
Warranty
The conditions of warranty depend on the relevant Supplier in a particular country. Contact the establishment where you purchased your appliance for more information and quote the appliance model and factory number. The receipt of purchase for the appliance must be produced prior to any work carried out under warranty.
The following procedures can help you solve a number of small problems and save you from contacting our Technical Service unnecessarily.
If after performing the procedures described the problem persists or happens again, then contact our Technical Service.
Things that can save you from making unnecessary phone calls
What to do if ...
The following procedures can help you solve a number of small problems and save you from contacting our Technical Service unnecessarily.
If after performing the procedures described the problem persists or happens again, then contact our specialised technicians.
... the appliance does not work ...
☐ Make sure that the appliance is plugged in properly. ☐ Make sure that there is power in the mains electricity supply and all the fuses are in working order. ☐ Select a lower temperature with the button.
... the appliance does not work and the safety light is flashing ...
Place the appliance on a flat surface. If the pilot light still doesn't go out, then empty the appliance's internal water tank. (See instructions for Temperature Control or Dehumidification).
... the safety pilot light comes on frequently ...
□ Make sure that the drainage stopcock is set to the right position.
... the appliance fails to cool the air properly ...
☐ Make sure that the connections on hot-air expulsion duct are in working order. ☐ Make sure that the expulsion duct is not excessively bent or longer than 140 cm. ☐ Make sure that drainage stopcock is set to the temperature control position. ☐ Use the suction pad to make the opening on the window as small as possible. ☐ Lower blinds if available to reduce direct sunlight.
... the appliance is switched on but the compressor is not running ...
☐ Whenever the appliance is switched on, the 3-minute switch-on delay is activated. The compressor will then start audibly after 3 minutes.
☐ If the dehumidification LED flashes, the appliance has been set to dehumidification mode and the ambient temperature is below 18°C. The compressor therefore switches off (see also information on “Dehumidification only”).
☐ The ambient temperature must be above 18°C for the appliance to operate in dehumidification mode.
☐ If “F1” or “F2” is displayed, the temperature sensors are defective. Call customer service!.
... the appliance makes a lot of noise ...
☐ Make sure that the air extraction duct is properly fitted onto the appliance.
□ Make sure that the appliance's air inlets and outlets are free from obstruction.
☐ If the noise sounds like water flowing, then this is due to the pump which circulates water around the system so as to enhance the efficiency of the appliance.
Warning!
Any other kind of fault or repair work must be dealt with by a specialised technician. Contact your authorised supplier, the after-sales service or the Technical Service Network.
Technical Information
Technical information
Consumption at maximum power....1.180W
Fuse....10 A
Cooling capacity *......2.600W
Operating range
- Temperature control......min. 18°C-max. 35°C
- Dehumidification ....min. 18°C-max. 35°C
* Ashrae 128
Index
Important Notes
Disposal of packaging ....33
Transport conditions


Remarks:


Attention!


N.B.:


Notes:


Notes:


Air purification



- NOTES
- AIR PURIFICATION
- YOUR NEW APPLIANCE
- REQUIREMENTS FOR USE
- INSTRUCTIONS FOR USE
- SETTING THE TIME/PROGRAMMING THE TIMER
- CLEANING AND MAINTENANCE
- IMPORTANT INFORMATION
- DISPOSAL OF PACKAGING
- DISPOSAL OF YOUR OLD APPLIANCE
- BEFORE CONNECTING YOUR NEW APPLIANCE
- DESCRIPTION OF YOUR APPLIANCE
- CONTROL PANEL
- WARNING
- TRANSPORTATION REQUIREMENTS
- TEMPERATURE CONTROL
- WAYS OF RELEASING AIR OUTDOORS
- N.B
- DEHUMIDIFICATION
- SETTING THE TIME
- SETTING THE TIMER
- DISCONNECTING THE TIMER
- CLEANING
- PRIOR TO USE AT CHANGE OF SEASON
- TECHNICAL SERVICE / WARRANTY
- TECHNICAL SERVICE
- WARRANTY
- THINGS THAT CAN SAVE YOU FROM MAKING UNNECESSARY PHONE CALLS
- WHAT TO DO IF
- TECHNICAL INFORMATION
- INDEX
- IMPORTANT NOTES
- TRANSPORT CONDITIONS
- REMARKS
- ATTENTION
Brand : BOSCH
Model : B1RKM09001
Category : Air conditioner