CKS5172X - Refrigerator Elvita - Free user manual and instructions
Find the device manual for free CKS5172X Elvita in PDF.


| Product Type | Freestanding Refrigerator |
| Brand | Elvita |
| Model | CKS5172X |
| Dimensions (H x W x D) | 1850 x 595 x 650 mm |
| Weight | 65 kg |
| Power Supply | 220-240 V, 50 Hz |
| Energy Rating | E (EU 2021) |
| Annual Energy Consumption | 250 kWh |
| Net Capacity (Fridge) | 350 L |
| Net Capacity (Freezer) | 60 L |
| Freezing Capacity | 4 kg per 24h |
| Climate Class | N-ST |
| Noise Level | 40 dB(A) |
| Defrost System | Frost-Free (No Frost) |
| Adjustable Shelves | Yes, 4 glass shelves |
| Interior Light | LED |
| Door Hinges | Reversible |
| Child Lock | No |
| Maintenance | Clean condenser coils annually; use mild detergent |
| Spare Parts Availability | 7 years after discontinuation |
Frequently Asked Questions - CKS5172X Elvita
User questions about CKS5172X Elvita
0 question about this device. Answer the ones you know or ask your own.
Ask a new question about this device
Download the instructions for your Refrigerator in PDF format for free! Find your manual CKS5172X - Elvita and take your electronic device back in hand. On this page are published all the documents necessary for the use of your device. CKS5172X by Elvita.
USER MANUAL CKS5172X Elvita
CKS5172X - 2025-07-17
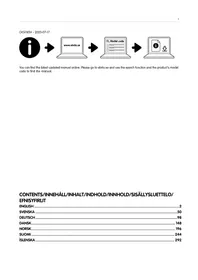
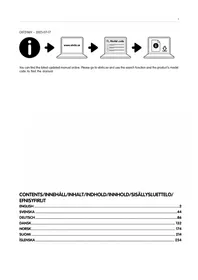
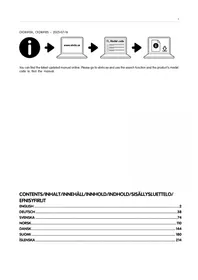
![graph LR A["i"] --> B["www.elvita.se"] B --> C["Model code"] C --> D["i"]](/content/2026/07/1448866/images/eff695b231b2743e48e6b883a16a7d063e3d955063aef572fcb7850bc95a1b01.jpg)
You can find the latest updated manual online. Please go to elvita.se and use the search function and the product's model code to find the manual.
CONTENTS/INNEHÅLL/INHALT/INDHOLD/INNHOLD/SISÄLLYSLUETTELO/EFNISYFIRLIT
ENGLISH 2
SVENSKA 50
DEUTSCH....98
DANSK....146
NORSK....194
SUOMI 242
ÍSLENSKA 290
Contents
SAFETY 4
Safety overview 4
Admonitions 4
Intended use 4
Safety for children and people with disabilities.... 4
General safety 5
Safety during installation 6
Safety during operation 6
Safety during maintenance 7
Disposal.... 8
QUICK START 9
GETTING STARTED 10
Getting to know your fridge.... 10
Controls and display 10
Accessories.... 10
Installation parts.... 11
Interior of the fridge.... 11
Find the model code.... 12
Before first use 12
USING YOUR FRIDGE 14
Turn off and turn on the fridge 14
Door alarm 14
Settings and modes 14
Unlock the child lock 14
Change the temperature in the fridge 14
Settings and modes 15
Turn on and turn off Eco mode 16
Turn on and turn off SuperCool mode.... 16
Storing food.... 16
Store food in the fridge.... 16
CLEANING AND MAINTENANCE 18
Clean the exterior.... 18
Clean the interior.... 19
Clean the door seals 23
Prepare for longer periods of non-use 25
Replacing the LED light.... 26
TROUBLESHOOTING 29
Fridge is not working correctly.... 29
Odour from the compartments.... 29
Noise from the fridge 29
Layer of frost in the compartment 30
Compressor runs continuously.... 30
Temperature inside is too warm 30
Temperature inside is too cold 30
Doors cannot be closed easily 30
Light is not working.... 31
INSTALLATION 32
Installation area 32
Unpack the fridge 34
Install the handle.... 35
Install the rubber supporting block.... 36
Level the fridge.... 37
Remove and install the door 38
Reverse the door 41
Install a top cabinet.... 45
SPECIFICATIONS 46
Technical specifications.... 46
Dimensions.... 47
EU directives and standards.... 47
Climate classes.... 47
General storage recommendations.... 48
SAFETY
Safety overview
Carefully read the instructions before you install and use the product. Save the instructions and keep them near the product for future reference. All kinds of warranties shall be invalid if these instructions are not followed.
Admonitions

DANGER!
Used when there is a risk for personal injury or death.

WARNING!
Used when there is a risk for personal injury.

CAUTION!
Used when there is a risk for damage to the product.

NOTE!
General information that you should be aware of.

Helpful tips that you may find useful.
Intended use
This product is only intended for:
- Indoor use in a household or a similar environment such as:
– staff kitchen areas in shops, offices and other working environments; -farm houses; – by clients in hotels, motels and other residential type environments; – bed and breakfast type environments; – catering and similar non-retail applications.
- Household use, such as storage of food and beverages.
This refrigerating product is not intended to be used as a built-in product.
Safety for children and people with disabilities

WARNING!
Only let the following groups use the product if they are supervised or if instructions are provided to them about how to use the product in a safe way. They must understand the hazards involved.
- Children 8 years and older. (Children younger than 8 years must be continuously supervised, or be kept away from the product.)
- Children aged 3 to 8 years are allowed to load and unload the product.
- People with reduced physical, sensory or mental capabilities.
- People with a lack of experience and knowledge.

WARNING!
- Do not let children or pets play with the product.
- Do not let children clean the product without supervision.
- Do not let children or pets enter or climb inside the product, otherwise they may suffocate or fall.

WARNING!
Keep all packaging away from children as there is a risk of suffocation.
General safety

WARNING!
Do not place hands, feet, or metal objects under or behind the product. There is a risk of crushing, and sharp edges can cause injury.

WARNING!
• Take care when moving the product. The product is heavy. - Do not stand on any parts of the product or use any parts of the product as supports.

WARNING!
Risk of electric shock!
- If the power cord is damaged, it must be replaced by the manufacturer, its service agent or similarly qualified persons in order to avoid a hazard. • If the power socket is loose, do not plug in the power plug. There is a risk of electric shock and fire.
- Do not pull on the power cord when you unplug the product. Grab the power plug firmly and pull it out of the power socket.
- Do not damage or crush the power cord, and do not use it if it is damaged or worn. Any damage to the cord may cause a short circuit, fire, and electric shock.
WARNING!
Risk of fire!
- The following symbol can be found on the product. It is a warning and indicates that the refrigerant and insulation blowing gas are flammable.

- During transportation and installation of the product, ensure that none of the components of the refrigerant circuit become damaged. The refrigerant, isobutane (R600a), contained within the refrigerant circuit is flammable.
- If the refrigerant circuit is damaged, avoid open flames and sources of ignition and thoroughly ventilate the area surrounding the product.
- Do not alter the specifications or modify the product in any way. • If the power socket is loose, do not plug in the power plug. There is a risk of electric shock or fire.
- Do not damage or crush the power cord, and do not use it if it is damaged or worn. Any damage to the cord may cause a short circuit, fire, and electric shock.
Safety during installation
WARNING!
- Always use personal protective equipment (gloves etc.) during installation, maintenance and repair. There is a risk of injury.
- Do not damage the refrigerant circuit.
- When positioning the product, ensure the power cord and power plug are not trapped or damaged. A damaged power plug may overheat and cause a fire.
- When positioning the product, ensure the power plug is accessible.
- Do not install the product in a location with direct sunlight.
- Keep ventilation openings outside the product clear of obstruction.
- Do not install the product without sufficient space and air ventilation around the product. This leads to overheating.
- Do not install the product close to radiators or cookers.
- This product must be placed on a level surface of hard material that is the same height as the rest of the flooring.
- The surface that the product is installed on should be strong enough to support a fully loaded product.
- Adjust the feet until all feet make contact with the floor and the product is level. This prevents the product from moving, tipping over and risk of injury.
- Do not install the back of the product too close to a wall. There is a risk of fire if the compressor gets overheated.
WARNING!
- Do not connect the product to the power socket if the product is damaged. Contact the retailer from which you purchased the product.
- Use a dedicated power socket, meaning that the power socket must not be shared with other products.
- Do not locate multiple portable socket outlets or portable power supplies behind the product.
- Make sure to connect the power plug to an earthed socket. Check carefully to ensure that your socket is properly and reliably earthed.
- Do not use extension cords and do not lengthen the power cord.
- After positioning the product, it is recommended to wait at least 4 hours before connecting the product to the mains. This allows the oil to flow back in the compressor.
- If the fluctuation of voltage in the installation area exceeds the single phase alternating current of 220\~240V/50Hz, use an AC automatic voltage regulator of more than 350W.

NOTE!
Contact Elvita support if you need help with the installation of your product.
Safety during operation
WARNING!
- Do not store explosive substances in this product, such as aerosol cans that contain a flammable propellant.
- Do not store flammable gas or liquids in the product. There is a risk of an explosion.
WARNING!
Keep burning candles, lamps, and other items with naked flames away from the product to avoid the risk of fire.
WARNING!
- This refrigerating product is not suitable for freezing foodstuffs.
- Keep ventilation openings inside the product clear of obstruction.
- Do not use electrical appliances inside the food storage compartments of the product, other than those recommended by the manufacturer.
- Do not overload the shelves, door racks, or put too much food in the crisper drawers to avoid items falling and causing injury or damage to the fridge.
WARNING!
Do not operate the product without the interior lighting lamp cover.

CAUTION!
- Do not place hot items near the plastic components of the product.
- Do not place food products directly against the air outlet on the rear wall.

CAUTION!
Warnings for food safety!
To avoid contamination of food, please follow these instructions:
- Avoid prolonged door openings: Keeping the door open for long periods can cause a significant increase in the temperature inside the compartments.
- Regular cleaning: Clean surfaces that come into contact with food and accessible drainage systems regularly.
- Water dispenser maintenance: For models with a water dispenser: If the water dispenser has not been used for 48 hours, clean it before use. If the water system is connected to a water supply and has not been used for 5 days, flush it before consumption.
- Proper storage of raw meat and fish: Store raw meat and fish in suitable containers in the compartments to prevent contact with or dripping onto other food.
• Star-rated compartments:
- Two-star frozen food compartments are suitable for storing pre-frozen food, preserving ice cream, and making ice cubes.
- One-star, two-star, and three-star compartments are not suitable for freezing fresh food.
- Long-term storage precautions: If the refrigerating product is left empty for long periods, switch it off, defrost, clean, dry, and leave the door open to prevent mould from developing inside.
- The storage recommendations should be strictly adhered to.
Safety during maintenance
WARNING!
- Any electrical work must be performed by a qualified electrician or a person with comparable qualifications.
- This product must only be serviced by an authorised service centre, and only genuine spare parts must be used.
- Do not try to repair, disassemble or modify the product by yourself.
WARNING!
Before any cleaning or performing any maintenance of the product, unplug the product from the power socket.
WARNING!
Do not use tools or other means to accelerate the defrosting process, other than those recommended by the manufacturer.
WARNING!
Do not replace the lamps in the product. If the lamps are broken, contact the support.

CAUTION!
- Do not use metal objects, steam cleaner, thinner, car detergent, clorox, ethereal oil, abrasive cleansers or organic solvent such as benzene for cleaning. They may damage the surface of the product and may cause fire.
- Do not use sharp objects to remove frost from the product. Use a plastic scraper.
- Do not use sponges and rough cleaning cloths. They may cause scratches.
- Regularly clean surfaces that can come in contact with food and accessible drainage systems.
- Ensure that frozen food does not increase in temperature during manual defrosting, maintenance or cleaning. This may result in reduced storage time.
Disposal
WARNING!
- To prevent children from getting trapped inside, remove the doors before disposing of the product.
- Some older models have a spring lock on the door. Make the spring lock unusable before disposing of the product.
- To prevent children from getting an electric shock, unplug the power cord from the socket and cut it as close to the product as you can before disposing of the product.
WARNING!
- Ensure that the tubing of the refrigerant circuit is not damaged prior to disposal.
- Refrigerators contain refrigerant and gases in the insulation. Refrigerant and gases must be disposed of professionally at an authorised waste disposal centre as they may cause eye injuries or ignition. The refrigerant and insulation blowing gas are flammable. Do not expose to flame.

Dispose of packaging in an environmentally-friendly manner. Recycling packaging, while observing national and local regulations, can reduce the consumption of raw materials and the amount of waste in landfill sites.
This product is marked in compliance with European Directive 2012/19/EU, Waste Electrical and Electronic Equipment (WEEE). The symbol on the product or on its packaging indicates that this product must not be treated as household waste. Instead it shall be handed over to the applicable collection point for the recycling of electrical and electronic equipment.
By ensuring this product is disposed of correctly, you will help prevent potential negative consequences for the environment and human health, which could otherwise be caused by inappropriate waste handling of this product. For more detailed information about recycling of this product, please contact the relevant municipal body in charge of waste management, your household waste disposal service or the store where you purchased the product.
QUICK START
Changing temperature in the fridge
1

Storing food in the fridge
1
●
●
GETTING STARTED
Getting to know your fridge
Controls and display
A. Power on/off indicator B. Child lock indicator C. Eco mode indicator D. SuperCool mode indicator E. Temperature indicator F. Display G. Alarm indicator H. Set Temp. touch area I. SuperCool touch area J. Eco touch area K. Power touch area
Accessories
A. Egg holder B. Upper hinge cover C. Screw hole cover D. Upper hinge
Egg holder: For storing eggs in the fridge.
Upper hinge cover: For covering the hinge on the upper left side of the fridge.
Screw hole cover: For covering the screw holes on the upper right side of the fridge.
Upper hinge: For hanging the door on the left side of the fridge.
For covering the screw holes on the upper right side of the fridge.
A. Handle B. Screws (handle) C. Screw hole covers D. Rubber supporting block E. Screw (rubber supporting block)
For hanging the door on the left side of the fridge.
The fridge is suitable for storing a variety of fruits, vegetables, beverages and other foods for consumption in the short term.

A. Handle B. Screws (handle) C. Screw hole covers D. Rubber supporting block E. Screw (rubber supporting block)
Interior of the fridge
The fridge is suitable for storing a variety of fruits, vegetables, beverages and other foods for consumption in the short term.
The inside is equipped with door racks, shelves, a wine rack and two drawers.

A. Cool fresh box B. Fruit and vegetable box
Cool fresh box The temperature in this box is normally 2 \~ 4 °C lower than the rest of the compartment.
The box is suitable for storing fish, meat and other erodible food.

NOTE!
It is normal for liquid to freeze in the box as the temperature may be lower than 0° C.
Fruit and vegetable box The box is suitable for storing fruits and vegetables.
Set the humidity level in the box to accommodate for different types of food. The crisper cover for the box allows for better control of the temperature and keeps the fruits and vegetables from losing moisture.

NOTE!
This product is most energy efficient with all shelves and drawers in their original positions. However, the shelves can be removed for cleaning or to get more space in the fridge.

NOTE!
This fridge contains a light source of energy efficiency class F.
Find the model code

The model code is printed on a label on the product. You need the code to find the complete and most recent information, service and support for your product model.

NOTE!
This product and label text are examples. Your product and text may have a different look and content.
Before first use
Prepare the fridge for use before plugging it in and storing food.
- Make sure the fridge is unpacked and placed properly.

- Leave the fridge to stand for at least 4 hours before plugging it in.

- Plug in the power cord. Your fridge is now ready for use.


NOTE!
- At first startup the product's default temperature is 5°C (recommended is 4°C).
- Storing too much food when your fridge is first turned on may affect the refrigerating performance negatively.
- When the product is powered on for the first time, the backlighting of the icons on the control panel is lit. If no buttons are pressed and the doors are closed, the backlighting will turn off.
USING YOUR FRIDGE
Turn off and turn on the fridge
The controls can only be used when the child lock is unlocked. To turn off the child lock, see section "Unlock the child lock", page 14.

CAUTION!
Do not store food in the fridge when the fridge is turned off.
- Touch and hold Power for 3 seconds to turn off the fridge.
is lit and - - is displayed on the control display.
- Touch and hold Power for 3 seconds to turn on the fridge.
Door alarm

NOTE!
To save energy, avoid keeping the door open for a long time.
When the door has been open for over 2 minutes, an acoustic alarm sounds 3 times every 1 minute, dr is displayed and
☐ is lit. Turn off the alarm by closing the door. If the door is left open, the alarm is turned off automatically after
10 minutes.
Settings and modes
Unlock the child lock
The controls are locked after 20 seconds if no button has been pressed. is
- Touch and hold Eco/Child lock for 3 seconds.
is no longer displayed. All buttons are now unlocked.
Change the temperature in the fridge
Set the average temperature for the whole fridge compartment.

CAUTION!
- A high temperature setting will accelerate food waste.
- An unnecessarily low temperature setting wastes energy.
- For optimum food preservation, a medium temperature setting is the most suitable. Recommended temperature is 4 °C.
1. Open the fridge door.
NOTE! If the control panel is locked, see section "Unlock the child lock", page 14.

- Touch SET TEMP. to cycle through the available temperatures: from 2 °C to 8 °C (46 °F to 36 °F). NOTE! Touch SET TEMP. and hold for 3 seconds to switch between °C and °F. °C or °F is lit.


NOTE!
At first startup, the product's default temperature is 5 °C (recommended is 4 °C).

NOTE!
Temperatures inside each compartment may vary from the temperature value displayed on the panel, depending on how much food is stored and where the food is placed. High or low room temperature may also affect the actual temperature inside the fridge.
Settings and modes

Eco
Eco mode sets the temperature to 6 °C (43 °F). Saves power by reducing energy consumption. See section "Turn on and turn off Eco mode", page 16.

SuperCool
Refrigerate your food faster and keeps the food fresh for a longer period. See section "Turn on and turn off SuperCool mode", page 16.

SET TEMP.
Adjusts the temperature. See section "Change the temperature in the fridge", page 14.
Turn on and turn off Eco mode
Use Eco mode to reduce energy consumption.
The controls can only be used when the child lock is unlocked. To unlock the child lock, see section "Unlock the child lock", page 14.
- Touch Eco/Child lock to turn on Eco mode.
is displayed and the temperature is set to 6 °C (43 °F).
- Touch Eco/Child lock again or touch SET TEMP. to turn off Eco mode.
is no longer displayed and the temperatures reverts back to the previous settings.
Eco mode needs to be manually turned off.
Turn on and turn off SuperCool mode
Use SuperCool mode to refrigerate food much faster and keeping food fresh for a longer period.
The controls can only be used when the child lock is unlocked. To unlock the child lock, see section "Unlock the child lock", page 14.
- Touch SuperCool to turn on SuperCool mode.
is displayed and the temperature is set to 2 °C (-36 °F).
- Touch SuperCool or SET TEMP. to turn off SuperCool mode.
is no longer displayed and the temperature reverts back to the previous setting.
SuperCool mode automatically turns off after 6 hours and the temperature setting in the fridge reverts back to the previous setting.
Storing food
Store food in the fridge
WARNING!
Do not overload the shelves, door racks or put too much food in the drawers to avoid items falling and causing injury or damage to the fridge.

CAUTION!
• Always follow food storage times and expiration dates suggested by manufacturers. - Opening the door for long periods can cause a significant increase of the temperature in the compartments. - Pack food in bags and liquids in bottles or capped containers before putting them into the fridge. This is to avoid soiling the product. - Store raw meat and fish in suitable containers in the fridge, so that it is not in contact with or drip onto other food.

CAUTION!
Do not close the door while any shelves are extended or drawers are open. It may damage the shelves, drawers and door.

NOTE!
To avoid wasting energy:
- Do not store warm food or evaporating liquid in the fridge. Placing hot food directly into the fridge causes the internal temperature to rise, resulting in the compressor having to work harder and therefore consume more energy.
- Do not keep the doors open for longer periods.
Use the following tips and recommendations when storing food in the fridge.
When refrigerating fresh food:
- Cover or wrap the food, particularly if it has a strong flavour.
- Place the food so that air can circulate freely around it.
Other refrigerating recommendations:
| Food Recommendation | |
| Meat (all types) and fish Wrap in polythene and place on the glass shelves or in the Cool fresh box drawer where the temperature is lower than in the fridge chamber.Store raw meat and fish in suitable containers, so that it is not in contact with or drip onto other food. | |
| Cooked food, cold dishes etc. Cover and place on any shelf | |
| Fruit and vegetables Store in the Fruit and vegetable box which has the optimal level of humidity for fruits and vegetables | |
| Butter and cheese Wrap in airtight foil or plastic film wrap | |
| Milk bottles, other bottled drinks, and canned liquids | Ensure bottles have a lid and store in the door racks or on the flexible wine rack |
| Eggs and packed foods Store in the door racks, put eggs in the egg holder | |

NOTE!
This product is most energy efficient with all shelves in their original position.
CLEANING AND MAINTENANCE
Clean the exterior
Clean the exterior every two months. This will help maintain a good appearance of the fridge.
WARNING!
- Unplug the fridge before cleaning. There is a risk of electric shock.
- Do not use metal objects, sharp objects, steam cleaner, thinner, car detergent, clorox, ethereal oil, abrasive cleansers or organic solvent such as benzene for cleaning. They may damage the surface of the product and may cause fire.

CAUTION!
Regularly clean surfaces that can come in contact with food and accessible drainage systems.
- Touch and hold Power for 3 seconds to turn off the fridge.
is lit and - - is displayed on the control display.

- Unplug the fridge.

- Clean the door, handle and cabinet surface with a soft cloth dampened with, for example, mild detergent.

Spray water onto the cleaning cloth instead of spraying directly on the surface of the fridge. This helps ensure an even distribution of moisture on the surface.

- Wipe the door, handle and cabinet surface dry with a soft cloth.

Clean the interior
Clean the interior every two months. It will be easier to clean when food stocks are low.
WARNING!
- Unplug the fridge before cleaning. There is a risk of electric shock.
- Do not use metal objects, sharp objects, steam cleaner, thinner, car detergent, clorox, ethereal oil, abrasive cleansers or organic solvent such as benzene for cleaning. They may damage the surface of the product and may cause fire.

CAUTION!
Regularly clean surfaces that can come in contact with food and accessible drainage systems.
- Touch and hold Power for 3 seconds to turn off the fridge.
is lit and - - is displayed on the control panel.

- Unplug the fridge.

- Remove food from the fridge.

- Remove shelves and drawers.

- Use a soft cloth or sponge to wipe the inside of the fridge using a weak solution of bicarbonate of soda.

- Rinse with warm water using a wrung-out sponge or cloth.

- Wipe the interior dry or let it stand to dry with the doors open.

- Clean the shelves and drawers with a soft cloth dampened with soapy water or diluted detergent.

- Wipe the shelves and drawers dry.

- Install the shelves and drawers.

- Plug in the fridge.

- Place the food back in the fridge.

Clean the door seals
Check and clean the door seals regularly to make sure there is no debris. Sticky food and drinks can cause the seals to stick to the cabinet and tear when you open the door.
WARNING!
- Unplug the fridge before cleaning. There is a risk of electric shock.
- Do not use metal objects, sharp objects, steam cleaner, thinner, car detergent, clorox, ethereal oil, abrasive cleansers or organic solvent such as benzene for cleaning. They may damage the surface of the product and may cause fire.
- Do not plug the fridge back into the mains socket unless the door seals are completely dry.
- Touch and hold Power for 3 seconds to turn off the fridge.
is lit and - - is displayed on the control display.

- Unplug the fridge.

- Wash the seals with a mild detergent and warm water.

- Rinse and dry the seals thoroughly after cleaning.

- Plug in the fridge.

Prepare for longer periods of non-use
When switching off the fridge for an extended period of time some preparations need to be made to keep the fridge in good condition and prevent mould.
- Unplug the fridge.

- Remove food from the fridge.

- Clean the fridge. See section "Clean the interior", page 19 and see section "Clean the exterior", page 18.

- Leave the doors open to prevent odour.

Replacing the LED light
WARNING!
- Any electrical work required to service the product should be carried out by a qualified electrician or competent person.
- This product must be serviced by an authorised service center, and only genuine spare parts must be used.

CAUTION!
The LED light should not be replaced by the user. If the LED light is damaged, contact the Elvita support.

NOTE!
This product contains a light source of energy efficiency class F.
- Unplug the product.

- Remove the light cover.

- Remove the LED light and detach the connector latch.

- Replace the LED light and attach the connector latch.

- Install the light cover.

TROUBLESHOOTING
Fridge is not working correctly
WARNING!
- Only authorised technicians may carry out repairs.
- If you experience problems with the product, see if the user instructions and troubleshooting information can help you find a solution. If the problem persists, contact an authorised technician, qualified electrician or the retailer where the product was purchased.
The problem can have different causes. Follow the instructions for the suggested causes to solve the problem.
Power supply is not working
- Check the fuse or circuit of the power supply.
- If it is not in working condition contact an authorised electrician.
Main plug is not inserted
Connect main plug to power outlet.
Odour from the compartments
The problem can have different causes. Follow the instructions for the suggested causes to solve the problem.
Interior is not clean
Clean the interior. See section "Clean the interior", page 19.
Food, containers or wrapping are causing odours
Use a different container, wrap food properly or remove food from the fridge.
Noise from the fridge
The problem can have different causes. Follow the instructions for the suggested causes to solve the problem.
Noise is normal during operation
The following noises are normal during operation:
- Clicking noise before the compressor starts.
- Noise from the compressor running.
- Air movement noise from the small fan motor in some of the compartments. • Gurgling sound similar to water boiling.
Cabinet is not level
Level the fridge. See section "Level the fridge", page 37.
Back of the fridge touches the wall
Move the fridge so that it has sufficient space around it. See section "Installation area", page 32.
Bottles or containers fall or roll
Check if any bottles or containers have fallen or rolled.
Layer of frost in the compartment
The problem can have different causes. Follow the instructions for the suggested causes to solve the problem.
Air outlet is blocked or ventilation is not sufficient
Check that the air outlets are not blocked by food and ensure food is placed to allow sufficient ventilation.
Door is not closed properly
Make sure that the door is fully closed.
Compressor runs continuously
Normal to hear the sound of the compressor
It is normal to frequently hear the sound of the compressor. The compressor will need to run more when:
- the temperature setting is set colder than necessary. Increase the temperature;
- a large quantity of warm food has recently been stored. Do not put hot food in the product;
- the temperature outside the product is too high;
- the doors are kept open too long or too often;
- this product is larger than a previously installed product. Larger refrigerating products need to operate for a longer period of time;
- The product is recently installed or it has been switched off for a long time.
Temperature inside is too warm
The problem can have different causes. Follow the instructions for the suggested causes to solve the problem.
Doors are left open too long or too frequently
Make sure that the door is fully closed. Check that the doors are not kept open by some obstacle.
The product does not have sufficient space around it
Move the product so that it has sufficient space around it. See section "Installation area", page 32.
Temperature inside is too cold
Temperature setting is set to too cold
Increase the temperature. See section "Change the temperature in the fridge", page 14.
Doors cannot be closed easily
The problem can have different causes. Follow the instructions for the suggested causes to solve the problem.
Something inside is preventing the doors from closing
Remove the item preventing the doors from closing.
The product is not tilted backward slightly
Tilting the product backward allows for the doors to slowly close on their own. See section "Level the fridge", page 37.
Light is not working

NOTE!
If your product is broken, consider repairing it. Repairing instead of buying new is good for the environment.
The spare parts listed in the EU regulation 2019/2022 will be available to professional repairers at least 10 years after this product was placed on the market.
WARNING!
- Only authorised technicians may carry out repairs.
- If you experience problems with the product, see if the user instructions and troubleshooting information can help you find a solution. If the problem persists, contact an authorised technician, qualified electrician or the retailer where the product was purchased.
The problem can have different causes. Follow the instructions for the suggested causes to solve the problem.
LED light is damaged
The LED light should not be replaced by the user. If the LED light is damaged, contact Elvita support. See section "Replacing the LED light", page 26.
INSTALLATION
Follow the instructions in this section to install your product.
WARNING!
This product is not intended for use as a built-in appliance.
WARNING!
Before installing or adjusting accessories, make sure that the product is unplugged from the power socket.
WARNING!
- When positioning the product, ensure the power cord is not trapped or damaged.
- Do not use extension cords and do not lengthen the power cord.
- Do not locate multiple portable socket outlets or portable power supplies behind the product.
- Use a dedicated power socket, which must not be shared with other products.

CAUTION!
Take care when handling the product to ensure that it does not fall and cause injury.

NOTE!
The product can be installed in pairs. The energy consumption will increase slightly.
Installation area
WARNING!
- When positioning the product, ensure the power cord and power plug are not trapped or damaged. A damaged power plug may overheat and cause a fire.
- The rollers, which are not castors, should only be used for forward movement or backward movement. Moving the product sideways may damage the floor and the rollers.
- This product must be placed on a level surface of hard material that is the same height as the rest of the flooring.
- This surface should be strong enough to support a fully loaded product.
- When positioning the product, ensure the power plug is accessible.
- Keep ventilation openings outside the product clear of obstruction.
- Do not install the product without sufficient space and air ventilation around the product. This leads to overheating.
- Do not install the back of the product too close to a wall. There is a risk of fire if the compressor gets overheated.

CAUTION!
- This product performs well within the climate class from SN to T. See section "Climate classes", page 47. The product may not work properly if it is exposed to temperatures above or below temperature ranges spanning from 10°C to 43°C for a long period.
- The rollers, which are not castors, should only be used for forward movement or backward movement. Moving the product sideways may damage the floor and the rollers.
Keep the following in mind when choosing a location to install the product:
- Avoid direct sunlight, rain or frost.
- Keep away from heat sources, such as cookers, ovens, fires, heaters or radiators.
- Position in a well-ventilated indoor location.
- Do not install the product in a damp or wet location.
- The surface should be rigid, dry and level.
- Leave enough space to allow the doors and drawers to open easily, in accordance with the dimensions.
To level the product properly and allow air to circulate in the lower rear of the product, the feet may need to be adjusted. See section "Level the fridge", page 37.

You can save energy and improve the efficiency of the cooling system by installing the product with sufficient space around it. This ensures good ventilation.

Unpack the fridge
- Check the packaging for any damage. If the packaging is damaged, do not unpack the product and contact the retailer where the product was purchased.

- Remove the cardboard box.

- Remove the styrofoam packaging and the base packaging.

- Remove the plastic wrapping.

- Remove the protective film on the shelves and on the drawers.

- Check the product for any damage. If the product is damaged, do not connect the product to the power supply, keep the packaging and contact the retailer where the product was purchased.

Install the handle

NOTE!
For the convenience of transportation, the door handles are separately provided in a plastic bag, you can install the door handles as follows.
- Remove the screw hole covers and install them on the opposite side of the door.

- Install the handle with the screws provided with the product. Install the screw covers.

Install the rubber supporting block
The rubber supporting block stabilises the fridge when the door is open while the cabinet is empty and the door is loaded with heavy weight. There is no need to install this accessory under normal usage. Only under extreme circumstances when the cabinet is empty and there is a load on the fridge door with heavy weight, at the same time.
- Tilt the fridge slightly back in order to gain access to the screw hole on the left of the lower base cover.

- Install the rubber supporting block.

Level the fridge
Adjust the bottom feet when needed for sufficient leveling and air circulation in the lower rear section of the fridge.

NOTE!
If necessary, lay the fridge on its back to gain access to the base. Lay the fridge on soft foam packaging to avoid damaging the product.
- Check if there are any feet not touching the floor.

- If any foot is not touching the floor: screw out the foot, by hand or using a suitable spanner, until it makes contact with the floor.
NOTE!
- Turn the feet counter-clockwise to raise the fridge.
- Turn the feet clockwise to lower the fridge.
To make the doors close slowly on their own, tilt the top of the fridge backwards by about 10-15 mm.
- Use a spirit level to check if the fridge is level and adjust the feet again if needed.
Remove and install the door
WARNING!
Do not have the product connected to the power socket when removing and installing the door.
- Unplug the fridge.

- Remove the door racks.

- Carefully lift up the hinge cover and the sensor that is placed in the hinge cover. CAUTION! Be careful not to cause damage to the sensor.

- Remove the sensor from the hinge cover and place the sensor in the small rectangular compartment.

- Remove the screws and the upper hinge.

- Lift the door upwards to remove it. Place the door on a smooth surface with the front panel facing upward.

- Place the screw hole cover over the sensor and the screw holes.

- To install the doors, repeat the steps in reverse order.
NOTE! When placing the door, make sure the hinge pin enters the bushing at the lower frame section of the door.

Reverse the door
You can change at which side the door opens if the installation site requires it.
- Remove the door from the hinges. See section "Remove and install the door", page 38.

- On top of the fridge, remove the screw hole cover and install it on the opposite side of the fridge.

- Remove the screw and rubber supporting block (if these are installed, normally not) and remove the screw, stop block and door stopper. Install the screw and rubber supporting block on the opposite side and install the screw, stop block and door stopper on the opposite side.


- Tilt the fridge slightly back in order to gain access to the front feet and lower hinge.
CAUTION! Rest the fridge on soft foam packaging or similar material to avoid damaging the backboard.

- Screw out the two front feet fully.

- Remove the screws, the hinge assembly and the screw cover.

- Swap places for the support block, hinge pin and supporting leg.

- Install the hinge assembly on the opposite side of the fridge, fasten the nut and fix the assembly using the screws. Install the screw cover.

- Install the two front feet. Swap places for the foot that is installed on the hinge assembly.

- Mount the door on the hinges. See section "Remove and install the door", page 38.

- Remove and install the handle on the opposite side. See section "Install the handle", page 35.

Install a top cabinet
Install a top cabinet to get more storage space. Purchase this product from the retailer.
- Remove the hinge cover.

- Install the top cabinet by following the supplied instructions.

SPECIFICATIONS
Technical specifications
| Product model code See section "Find the model code", page 12 | |
| Height 1720 mm | |
| Width 595 mm | |
| Depth 590 mm | |
| Total volume 322 l | |
| Recommended temperature setting for optimised food storage, fresh food | 4°C |
| Recommended temperature setting for optimised food storage, chill | 2°C |
| Defrosting type Automatic | |
| Minimum ambient temperature, for which the refrigerating product is suitable | +10°C |
| Maximum ambient temperature, for which the refrigerating product is suitable | +43°C |
| Power supply 220~240 V, 50 Hz | |
| Rated current 0.6 A | |
| Rated power 90 W | |
Energy efficiency
You can find information about the energy efficiency of this product in EPREL, the European product registry for energy labelling. Go to the EPREL website and use the model identifier to find the information. The model identifier can be found on the energy label accompanying the product.
EPREL website: https://eprel.ec.europa.eu/

ENERG

SUPPLIER'S NAME
MODEL IDENTIFIER
Dimensions

EU directives and standards
This product fulfils the applicable EU directives and regulations and carries the CE mark. If not included with the product, a copy of the EU Declaration of Conformity is available on request.
The performance of the product has been tested in compliance with standard EN 60335 for refrigerating appliances.
Climate classes
| Class Symbol Ambient temperature range | ||
| Extended temperate SN +10°C to +32°C | ||
| Temperate N +16°C to +32°C | ||
| Subtropical ST +16°C to +38°C | ||
| Tropical T +16°C to +43°C | ||
- Extended temperate: This product is intended to be used at ambient temperatures ranging from 10°C to 32°C. • Temperate: This product is intended to be used at ambient temperatures ranging from 16°C to 32°C.
- Subtropical: This product is intended to be used at ambient temperatures ranging from 16°C to 38°C. • Tropical: This product is intended to be used at ambient temperatures ranging from 16°C to 43°C.
General storage recommendations
Store different foods according to the recommended compartments and target storage temperature of the food products. Do this to ensure the best preservation over the longest period and to avoid food waste.

CAUTION!
- Two-star (**) frozen-food compartments are suitable for storing pre-frozen food, storing or making ice cream and making ice cubes.
- One-star (*), two-star (**), and three-star (*** ) compartments are not suitable for the freezing of fresh food.

NOTE!
Some products may not have all compartment types listed in the table below.
| Compartment type Target storage temperature (°C) Appropriate food | ||
| Fridge +2 ~ +8 Eggs, cooked food, packaged food, | fruits and vegetables, dairy products, cakes, drinks and other foods which are not suitable for freezing. | |
| (***)*-Freezer ≤ -18 Seafood (fish, shrimp, shellfish), | freshwater aquatic products and meat products (recommended for 3 months, the longer the storage time, the worse the taste and nutrition), suitable for frozen fresh food. | |
| ***-Freezer ≤ -18 Seafood (fish, shrimp, shellfish), | freshwater aquatic products and meat products (recommended for 3 months, the longer the storage time, the worse the taste and nutrition), are not suitable for frozen fresh food. | |
| **-Freezer | ≤ -12 Seafood (fish, shrimp, shellfish), | freshwater aquatic products and meat products (recommended for 2 months, the longer the storage time, the worse the taste and nutrition), are not suitable for frozen fresh food. |
| *-Freezer | ≤ -6 | Seafood (fish, shrimp, shellfish), freshwater aquatic products and meat products (recommended for 1 month, the longer the storage time, the worse the taste and nutrition), are not suitable for frozen fresh food. |
| 0-starChill -2 ~ +3 Fresh/frozen pork, beef, chicken, | -6 ~ 0 | Fresh pork, beef, fish, chicken, some packaged processed foods, etc. (Recommended to eat within the same day, preferably no later than 3 days). Partially encapsulated processed foods (non-freezable foods).freshwater aquatic products, etc.(7 days below 0 °C and above 0 °C is recommended for consumption within that day, preferably no later than 2 days). Seafood (less than 0 °C for 15 days, it is not recommended to store above 0 °C) |
| Fresh Food 0 ~ +4 Fresh pork, beef, fish, chicken, cooked | food, etc. (Recommended to eat within the same day, preferably no later than 3 days) | |
| Wine +5 ~ +20 Red wine, white wine, sparkling wine | etc. | |
Contents
SAFETY 52
Safety during installation
WARNING!
2
●
●
GETTING STARTED
A. Cool fresh box B. Fruit and vegetable box

NOTE!
Clean the inside
- Connect the refrigerator.

- Connect the refrigerator.

Replacing the LED lamp
WARNING!
- Remove the lamp cover.

- Install the lamp cover.

TROUBLESHOOTING
- Remove the carton.

Installing the handle

NOTE!
- Attach the rubber support.

Reversing the door

Install the upper cabinet
SPECIFICATIONS
Technical specifications

●
●
FIRST STEPS
A. Simple
A. Cool fresh box B. Fruit and vegetable box
Cool fresh box

NOTE!
TROUBLESHOOTING
Reversing the door

Install the upper cabinet.
SPECIFICATIONS

●
GETTING STARTED
A. Cool fresh box B. Fruit and vegetable box
Cool fresh box: The temperature in this drawer is normally 2-4 °C lower than in the rest of the compartment.
Fruit and vegetable box

NOTE!
Clean the inside
- Remove the lamp cover.

TROUBLESHOOTING
- Remove the cardboard box.

- Remove the plastic film.

Mount the handle

NOTE!
Mount the rubber base block
- Mount the rubber base block.

- Place the screw hole cover over the sensor and screw holes.

Turn the door around
- Remove the screw and rubber pad (if these are fitted, usually not), and remove the screw, stop block, and door stopper. Mount the screw and rubber pad on the opposite side, and mount the screw, stop block, and door stopper on the opposite side.


Install an upper cabinet
SPECIFICATIONS
Technical specifications

●
●
GETTING STARTED
A. Egg holder
B. Upper hinge cover
C. Screw hole cover
D. Upper hinge
A. Cool fresh box B. Fruit and vegetable box
- Let the refrigerator stand for at least 4 hours before connecting it.


NB:
Clean the inside
- Wipe with a sponge or cloth that has been rinsed in warm water and wrung out well.

Replacing the LED lamp
WARNING!
- Mount the cover on the lamp.

TROUBLESHOOTING
- Remove the cardboard box.

- Remove the plastic film.

Mounting the handle

NB:
Level the refrigerator
- Remove the door shelves.

Reversing the door

Mounting a wall cabinet
SPECIFICATIONS

●
●
STARTING
A. Egg tray
A. Cool fresh box B. Fruit and vegetable box

NOTE!
- Remove the light cover.

- Install the light cover.

TROUBLESHOOTING
- Remove the plastic wrap.

Install the handle

NOTE!
Level the refrigerator
- Remove the door shelves.


Install the upper cabinet
TECHNICAL DATA
Technical data

Storing food in the refrigerator
1
●
●
GETTING STARTED
A. Egg holder
B. Upper hinge cover C. Screw hole cover D. Upper hinge
A. Cool fresh box B. Fruit and vegetable box

NOTE!
- Remove food from the refrigerator.

- Remove shelves and drawers.

- Put the shelves and drawers back in.

- Put the food back in the refrigerator.

- Remove food from the refrigerator.

If the LED light needs to be replaced
WARNING!
TROUBLESHOOTING
Handle installed

CHECK!
Install the rubber support block
- Install the rubber support block.

- Place the screw hole cover over the sensor and screw holes.

Door reversed

Cabinet on top installed
SPECIFICATIONS
Specifications
- CONTENTS/INNEHÅLL/INHALT/INDHOLD/INNHOLD/SISÄLLYSLUETTELO/EFNISYFIRLIT
- CONTENTS
- SAFETY
- QUICK START
- GETTING STARTED
- INSTALLATION
- SPECIFICATIONS
- SAFETY OVERVIEW
- ADMONITIONS
- DANGER
- WARNING
- CAUTION
- NOTE
- INTENDED USE
- SAFETY FOR CHILDREN AND PEOPLE WITH DISABILITIES
- GENERAL SAFETY
- SAFETY DURING INSTALLATION
- SAFETY DURING OPERATION
- SAFETY DURING MAINTENANCE
- DISPOSAL
- GETTING TO KNOW YOUR FRIDGE
- THE FRIDGE IS SUITABLE FOR STORING A VARIETY OF FRUITS, VEGETABLES, BEVERAGES AND OTHER FOODS FOR CONSUMPTION IN THE SHORT TERM
- INTERIOR OF THE FRIDGE
- FIND THE MODEL CODE
- BEFORE FIRST USE
- USING YOUR FRIDGE
- TURN OFF AND TURN ON THE FRIDGE
- DOOR ALARM
- SETTINGS AND MODES
- UNLOCK THE CHILD LOCK
- CHANGE THE TEMPERATURE IN THE FRIDGE
- OPEN THE FRIDGE DOOR
- ECO
- SUPERCOOL
- SET TEMP
- TURN ON AND TURN OFF ECO MODE
- TURN ON AND TURN OFF SUPERCOOL MODE
- STORING FOOD
- STORE FOOD IN THE FRIDGE
- CLEANING AND MAINTENANCE
- CLEAN THE EXTERIOR
- CLEAN THE INTERIOR
- CLEAN THE DOOR SEALS
- PREPARE FOR LONGER PERIODS OF NON-USE
- REPLACING THE LED LIGHT
- TROUBLESHOOTING
- FRIDGE IS NOT WORKING CORRECTLY
- POWER SUPPLY IS NOT WORKING
- ODOUR FROM THE COMPARTMENTS
- NOISE FROM THE FRIDGE
- NOISE IS NORMAL DURING OPERATION
- CABINET IS NOT LEVEL
- BACK OF THE FRIDGE TOUCHES THE WALL
- BOTTLES OR CONTAINERS FALL OR ROLL
- LAYER OF FROST IN THE COMPARTMENT
- AIR OUTLET IS BLOCKED OR VENTILATION IS NOT SUFFICIENT
- DOOR IS NOT CLOSED PROPERLY
- COMPRESSOR RUNS CONTINUOUSLY
- NORMAL TO HEAR THE SOUND OF THE COMPRESSOR
- TEMPERATURE INSIDE IS TOO WARM
- DOORS ARE LEFT OPEN TOO LONG OR TOO FREQUENTLY
- THE PRODUCT DOES NOT HAVE SUFFICIENT SPACE AROUND IT
- TEMPERATURE INSIDE IS TOO COLD
- TEMPERATURE SETTING IS SET TO TOO COLD
- DOORS CANNOT BE CLOSED EASILY
- SOMETHING INSIDE IS PREVENTING THE DOORS FROM CLOSING
- THE PRODUCT IS NOT TILTED BACKWARD SLIGHTLY
- LIGHT IS NOT WORKING
- LED LIGHT IS DAMAGED
- INSTALLATION AREA
- UNPACK THE FRIDGE
- INSTALL THE HANDLE
- INSTALL THE RUBBER SUPPORTING BLOCK
- LEVEL THE FRIDGE
- REMOVE AND INSTALL THE DOOR
- REVERSE THE DOOR
- INSTALL A TOP CABINET
- ENERGY EFFICIENCY
- DIMENSIONS
- EU DIRECTIVES AND STANDARDS
- CLIMATE CLASSES
- GENERAL STORAGE RECOMMENDATIONS
- CLEAN THE INSIDE
- REPLACING THE LED LAMP
- INSTALLING THE HANDLE
- REVERSING THE DOOR
- INSTALL THE UPPER CABINET
- FIRST STEPS
- COOL FRESH BOX
- FRUIT AND VEGETABLE BOX
- MOUNT THE HANDLE
- MOUNT THE RUBBER BASE BLOCK
- TURN THE DOOR AROUND
- INSTALL AN UPPER CABINET
- NB
- MOUNTING THE HANDLE
- LEVEL THE REFRIGERATOR
- MOUNTING A WALL CABINET
- STARTING
- TECHNICAL DATA
- IF THE LED LIGHT NEEDS TO BE REPLACED
- HANDLE INSTALLED
- CHECK
- INSTALL THE RUBBER SUPPORT BLOCK
- DOOR REVERSED
- CABINET ON TOP INSTALLED
Brand : Elvita
Model : CKS5172X
Category : Refrigerator