
SL X - Bike light Lupine - Free user manual and instructions
Find the device manual for free SL X Lupine in PDF.


| Product Type | Bicycle Headlight |
| Brand | Lupine |
| Model | SL X |
| Light Source | High-power LED |
| Brightness | 2200 lumens (max) |
| Battery Type | Rechargeable Li-Ion, 7.2V |
| Battery Capacity | 6400 mAh |
| Runtime | Up to 12 hours (eco mode) |
| Charging Time | Approx. 4 hours |
| Light Modes | High, Medium, Low, Eco, Pulse, SOS |
| Water Resistance | IPX7 (waterproof to 1m) |
| Material | CNC-machined aluminum, stainless steel |
| Dimensions (L x W x H) | 95 x 30 x 30 mm |
| Weight | 145 g (light head) |
| Mounting | Handlebar bracket (22-35mm) |
| Connectivity | Wireless remote control (optional) |
| Warranty | 5 years |
Frequently Asked Questions - SL X Lupine
User questions about SL X Lupine
0 question about this device. Answer the ones you know or ask your own.
Ask a new question about this device
Download the instructions for your Bike light in PDF format for free! Find your manual SL X - Lupine and take your electronic device back in hand. On this page are published all the documents necessary for the use of your device. SL X by Lupine.
USER MANUAL SL X Lupine
Möglichkeit 2:

Avoid looking directly into the light emitted by the light or shining the light into your own eyes or the eyes of another person. If the light accidentally shines into your eyes, close your eyes and move your head out of the light beam. Do not use any strongly focusing optical device to look at the light beam.
This device may then be used by children 8 years of age or older, persons with limited physical, sensory or mental capabilities, as well as persons with no previous experience in handling such devices, if they are supervised by a person responsible for their safety.
Carry a spare light with you at all times, as the product can potentially fail unexpectedly at any time.
Heat generation: The housing of SL may heat up; so make sure that you always keep the light at a safe distance to any combustible or flammable materials. Could cause fire or death! However, quiescent operation (without cooling the light housing via airflow or the like) is possible at any time and will not damage the product.
Water resistance: All SL components are waterproof and can of course be used under extremely severe conditions. The lamp complies with IP protection class 68 but is NOT a diving lamp and is NOT suitable for use under water.
Cleaning: Do not use a strong water jet or heavy detergent to clean the lamp.
Note:
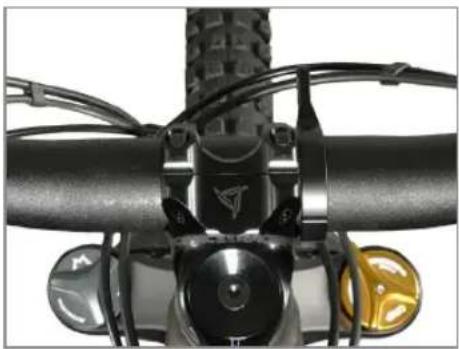
The CNC holder can be mounted on both sides, depending on the stem width.
Possibility 1:

Possibility 2:

Assembly


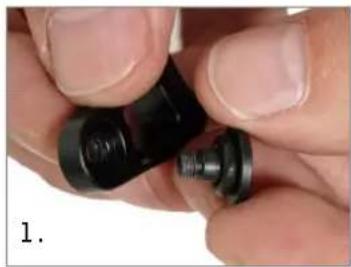
- Put the M4 bolt screw through the hole of the upper part of the holding clamp. Follow the order: Screw / O-Ring / Holder / O-Ring

- Mount the upper clamp on to the lamphead. Use the enclosed allen key size 3 for that. (2Nm)
Note: The screw should bite easily. If not, please try to position it and screw it on again. Otherwise the thread can be damaged.

- Position the lamp together with the clamp at the preferred side of the stem. Then bring both halfs of the mount together.

- Align the lamp correctly and screw it tightly with the allen key 2.5, max. 1Nm
Note: The mount should be positioned near to the stem. The notches of the junction have to interlock perfectly. The lamphead should be positioned centered and also near to the stem.
Adjustment of the lamp:
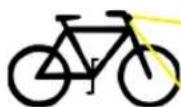
Height of the light cone after 5m: Half height as outlet
Height for Mounting: 400-1200mm
1/2
5m:
Wired remote
As shown in the picture down below, the wire remote should be mounted right next to the handle. Then attach the screw with the enclosed allen key size 2.

The remote doesn't light
→ The lamp is switched off or daytime running light is activated.

The remote lights green
→ Low beam is activated.
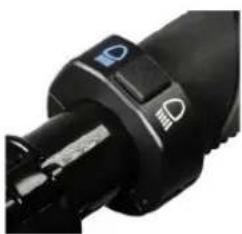
The remote lights blue
→ High beam is activated.
Turn on:
- Activate the light at the display.
- Turn it on by pushing the button of the wired remote.
Light settings:
The brightness sensor is activated, it automatically switches between daytime running light and low beam.
| Brightness sensor | Comment | |
| Mode | The sensor is activated. | When low beam is activated, it's possible to change into high beam by pushing the wire remote. |
Note: When factory setting is active, the daytime running light of the SL X lights up once after you turn on the drive unit.
Operation
Customizing the settings via the button on the wired remote:
| Keep the buttonpressed until it lights up (let go to select) | Available settings Explanation | |
| Lights up 1x | Mode BNote: Not recommended for Bosch systems, because they don't provide enough power. | High beam: 22W, Low beam: 9WNote: When this mode is active the daytime running light lights up twice. |
| Lights up 2x | Delay (5 sec / 16 sec)Factory setting 5 sec | The sensor controlled switchover from low beam to daytime running light occurs as required in either 5 or 16 seconds. |
| Lights up 3x | Manual mode | By pushing the wire remote you can change between daytime running light and low beam. In the dark it's possible to activate high beam. |
| Lights up 4x | Sensor calibrationOnly in the assembled state! Improper calibration may greatly affect the functionality of the light!Calibrate only outdoors. No artificial light or close to reflective objects! | Saves the measured brightness value as a switching point from daytime running lights to low beam. The successful sensor calibration is confirmed by a short illumination of the daytime running light. |
| Lights up 5x | Reset to factory settings | Resets every programmed setting to default. |
Light mode factory setting:
18W high beam, 7.5W low beam, 2.5W daytime running light
Troubleshooting
Technical data
| Error | Cause | Fix |
| → The light does not turn on and does not light up | → The light cable is not connected to the drive.→ The light input is not activated in the software.→ The drive units voltage is too low.→ The drive unit is not compatible with the lamp. | → Connect the light cable.→ Have the light input activated at the dealer.→ Switch the drive unit to 12V.→ Check compatibility, www.lupine.de |
| → The light does not switch to low beam | → The sensor was wrongly calibrated.→ It's not dark enough. | → Set back to factory setting. |
| → The light does not switch to high beam | → Low beam is not activated. (Only in the dark, it's possible to switch to high beam) |
| Factory setting: | |
| 6-12V operation | 1600 Lumens Max. |
| High beam | 18 Watts |
| Low beam | 7.5 Watts |
| Daytime running light | 2.5 Watts |
| Mode B: | |
| 6-12V operation | 1800 Lumens Max. |
| High beam | 22 Watts |
| Low beam | 9 Watts |
| Daytime running light | 2.5 Watts |
| Operation | Wire remote |
| Lamp | 9x Osram Automotive LEDs |
| Lens system | Fresnel Lens Reflector System |
| Dimensions LxWxH | 45 x 84 x 48mm |
| Material | Aluminium 6061-T6, CNC machined |
| Protection class | IP68 |
| Approval | StVZ0 ~K1753 |
Notizen/Notes
Notice of restricted use:
The headlight only can be mounted on bicycles with pedal assistance with DC power supply if they come with their own control unit (battery charge indicator) and an automatic Motor cut-off to avoid a deep discharge of the battery.
Defects:
Light source must be replaced in general if the light source (or one of the LEDs) is defective. Replacement or repair only at Lupine.


More informations at www.lupine.de
EC Declaration of Conformity: www.lupine.de/ce/
Notizen/Notes Notizen/Notes

Lupine lighting systems GmbH
Im Zwiesel 9, 92318 Neumarkt, Germany
Phone: +49 (0) 91 81 - 50 94 90
Fax: +49 (0) 91 81 - 50 94 915

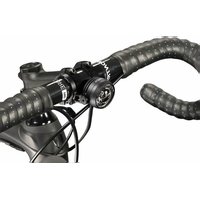

Brand : Lupine
Model : SL X
Category : Bike light