
DRC12B1DBD - Cooker DANBY - Free user manual and instructions
Find the device manual for free DRC12B1DBD DANBY in PDF.
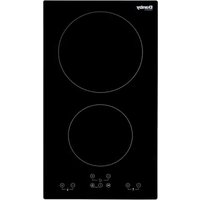


| Product Type | Compact Electric Range |
| Brand | Danby |
| Model | DRC12B1DBD |
| Width | 60 cm (23.6 inches) |
| Depth | 65 cm (25.6 inches) |
| Height | 90 cm (35.4 inches) |
| Net Weight | 45 kg (99 lbs) |
| Power Supply | 240 V / 60 Hz, 30 A |
| Total Power | Approximately 9.6 kW |
| Number of Burners | 4 (2 medium, 2 small) |
| Burner Type | Electric Radiant |
| Oven Capacity | 100 L (3.5 cubic feet) |
| Oven Type | Electric Convection |
| Broiler | Yes, built-in |
| Oven Light | Yes, removable bulb |
| Timer | Yes, up to 120 minutes |
| Thermostat | Range 80-250°C (180-480°F) |
| Residual Heat Indicators | Yes, per burner |
| Child Safety | Control Lock |
| Oven Door | Removable double glass |
| Cleaning | Pyrolytic (self-cleaning) |
| Adjustable Feet | Yes, 4 points |
| Color | White / Black depending on version |
| Spare Parts | Available on request from after-sales service |
Frequently Asked Questions - DRC12B1DBD DANBY
User questions about DRC12B1DBD DANBY
0 question about this device. Answer the ones you know or ask your own.
Ask a new question about this device
Download the instructions for your Cooker in PDF format for free! Find your manual DRC12B1DBD - DANBY and take your electronic device back in hand. On this page are published all the documents necessary for the use of your device. DRC12B1DBD by DANBY.
USER MANUAL DRC12B1DBD DANBY
OWNER'S MANUAL MANUEL DU PROPRIÉTAIRE
CERAMIC/INDUCTION COOKTOP
Owner's Manual....1 - 18
TABLE DE CUISSON EN CÉRAMIQUE/À INDUCTION
Danby Products Limited, Guelph, Ontario, Canada N1H 6Z9
Danby Products Inc. Findlay, Ohio, U.S.A. 45840
www.danby.com
f in x
Printed in China | Imprimé en Chine
2025.07.08
Welcome to the Danby family.
We are proud of our quality products and we believe in dependable service. We suggest that you read this owner's manual before using your new appliance as it contains important operation information, safety information, troubleshooting, and maintenance tips to ensure the reliability and longevity of your appliance.
You are entitled to the warranty coverage as described in the owner's manual provided with your new appliance.
- Please write down your appliance information below. You must keep the original proof of purchase receipt to validate and receive warranty services.
- Register your product online and receive a FREE 2 MONTH WARRANTY EXTENSION after filling out a product survey, at www.danby.com/support/product-registration/
Model Number:
Serial Number:
Date of Purchase:
Need Help?
- Read your Owner's Manual for installation help, troubleshooting, and maintenance assistance.
- Visit www.Danby.com to access self-service tools, FAQs and much more by searching your model number in the search bar.
- For the Quickest Customer Service, please fill out the web form at www.danby.com/support. Your submission will go directly to an expert on your particular appliance. Our average response times are between 20 minutes and 2 hours, during EST business hours.
- Call 1-800-263-2629 - please note that during peak hours, hold times can exceed one hour.

Important Safety Information READ AND FOLLOW ALL SAFETY INSTRUCTIONS
IMPORTANT SAFETY INSTRUCTIONS
- Read these instructions carefully before installing or using the appliance. Install the appliance according to these instructions to avoid hazard.
- Do not place combustible material or products on this appliance at any time.
- This appliance must be properly installed and grounded by a suitably qualified person.
- This appliance should be connected to a circuit which incorporates an isolating switch providing full disconnection from the power supply.
- Failure to install the appliance correctly could invalidate any warranty or liability claims.
- Never leave the appliance unattended when in use. Boil over causes smoking and greasy spillovers that may ignite.
- Never use this appliance as a work or storage surface.
- Never leave any objects or utensils on the appliance.
- Never use the appliance to warm or heat the room.
- Ensure the appliance is turned off after use.
- Do not allow children to sit, stand, climb on or play with the appliance.
- Do not store items of interest to children in cabinets above the appliance. Children climbing on the cooktop could be seriously injured.
- This appliance is not intended for use by persons (including children) whose physical, sensory or mental capabilities may be different or reduced, or who lack experience or knowledge, unless such persons receive supervision or training to operate the appliance by a person responsible for their safety.
- This appliance can be used by children aged 8 years and above and persons with reduced physical, sensory or mental capabilities or lack of experience and knowledge if they have been given supervision or instruction concerning use of the appliance in a safe way and understand the hazards involved.
- Do not repair or replace any part of the appliance unless specifically recommended in the manual. All other servicing should be done by a qualified technician.
- Do not use a steam cleaner to clean the cooktop.
- Do not place or drop heavy objects on the cooktop.
- Do not stand on the cooktop.
- Do not use pans with jagged edges or drag pans across the glass surface as this can damage the glass.
- Do not use scouring pads or any other harsh abrasive cleaning agents to clean the cooktop as this can damage the glass. Only use cleaning products especially made for ceramic glass.
- If the power supply cord is damaged, it must be replaced by the manufacturer, its service agent, or a similarly qualified person in order to avoid a hazard.
- This appliance is intended for household and similar applications such as: staff kitchen areas in shops, offices, and other working environments; farmhouses; and by clients in hotels, motels, and other residential-type environments; bed and breakfast-type environments; catering and similar non-retail applications.
- This appliance is not intended to be operated by means of an external timer or a separate remote control system.
- The surface of the cooktop may still be hot even if the hot surface indicator is turned off. Extreme care should be taken to avoid injury.
- Loose-fitting or hanging garments should never be worn when using the appliance.
- Do not use water on grease fires. Smother the fire or flame, or use a dry chemical or foam-type fire extinguisher.
- Only use dry pot holders. Moist or damp pot holders on hot surfaces may result in burns from steam. Do not let the pot holder touch the heating elements. Do not use a towel or other bulky item.
- Use proper pan size. This appliance is equipped with one or more surface burners of different sizes. Select utensils with flat bottoms large enough to cover the surface of the heating element. The use of undersized utensils will expose a portion of the heating element to direct contact and may result in ignition of clothing. Proper relationship of utensil to burner will also improve efficiency.

Important Safety Information READ AND FOLLOW ALL SAFETY INSTRUCTIONS
- Only certain types of glass, glass/ceramic, ceramic, earthenware, or other glazed utensils are suitable for range top use without breaking due to sudden changes in temperature.
- Utensil handles should be turned inward and not extend over adjacent elements. To reduce the risk of burns, ignition of flammable materials, and spillage due to unintentional contact with the utensil, the handle of a utensil should be positioned so that it is turned inward and does not extend over adjacent elements.
- Clean the cooktop with caution. If a wet sponge or cloth is used to wipe spills on a hot cooking area, be careful to avoid steam burn. Some cleaners can produce noxious fumes if applied to a hot surface.
Cut Hazard
• Take care - panel edges are sharp. - Failure to use caution could result in injury or cuts. - The razor sharp blade of a cooktop scraper is exposed when the safety cover is retracted. Use with extreme care and always store safely and out of reach of children.
Electrical Shock Hazard
- Disconnect the appliance from the power supply before carrying out any work or maintenance on it.
- Connection to a good earth wiring system is essential and mandatory.
- Alterations to the domestic wiring system must only be made by a qualified electrician.
- Failure to follow this advice may result in electrical shock or death.
- Proper installation - ensure the appliance is properly installed and grounded by a qualified technician.
- Do not cook on a broken or cracked cooktop. If the cooktop surface breaks or cracks, switch the appliance off immediately at the main power supply and contact a qualified technician.
Health Hazard
- This appliance complies with electromagnetic safety standards, however, persons with cardiac pacemakers or other electrical implants (such as insulin pumps) must consult with their doctor or implant manufacturer before using this appliance to ensure that their implants will not be affected by the electromagnetic field.
- Failure to follow this advice may result in injury or death.
Hot Surface Hazard
- Accessible parts of the appliance will become hot enough to cause burns during use.
- Do not touch surface units or areas near units - surface units may be hot even though they are dark in colour.
- Metallic objects such as knives, forks, spoons and lids should not be placed on the cooktop surface as they can get hot.
- Keep children away.
- Handles of saucepans may be hot to the touch. Check that saucepan handles do not overhang other cooking zones that are in use. Keep handles out of reach of children.
- Failure to follow this advice could result in burns and scalds.
Warning: Unattended cooking on a hob with fat or oil can be dangerous and may result in fire. NEVER try to extinguish a fire with water but switch off the appliance and then cover it with a flame e.g. with a lid or a fire blanket.

WARNING: This product can expose you to chemicals including [Lead & Lead Compounds], which is [are] known to the State of California to cause cancer, birth defects and / or reproductive harm. To minimize exposure to these substances. Always operate this unit according to the Owner's Manual, and ensure that you provide proper ventilation. For more information go to www.P65Warnings.ca.gov

Important Safety Information READ AND FOLLOW ALL SAFETY INSTRUCTIONS
FCC/ISED COMPLIANCE STATEMENTS
MODEL: DRC12B1DBD
SUPPLIER'S DECLARATION OF CONFORMITY 47 CFR § 2.1077 Compliance Information
Danby Products, Inc.
1800 Production Drive
Findlay, OH 45840
- Contact information: www.danby.com 1-800-263-2629
This device complies with Part 15 of the FCC Rules and ICES-003(B)/NMB-003(B).
Operation is subject to the following two conditions:
- This device may not cause harmful interference.
- This device must accept any interference received, including interference that may cause undesired operation.
Please note that changes or modifications to this product not expressly approved by the party responsible for FCC and ISED compliance could void the user's authority to operate the equipment. NOTE: This equipment has been tested and found to comply with the limits for a Class B digital device, pursuant to Part 15 of the FCC Rules. These limits are designed to provide reasonable protection against harmful interference in a residential installation. This equipment generates, uses, and can radiate radio frequency energy and, if not installed and used in accordance with the instructions, may cause harmful interference to radio communications. However, there is no guarantee that interference will not occur in a particular installation.
If this equipment does cause harmful interference to radio or television reception, which can be determined by turning the equipment off and on, the user is encouraged to try to correct the interference by one or more of the following measures:
• Reorient or relocate the receiving antenna. • Increase the separation between the equipment and receiver. • Connect the equipment into an outlet on a circuit different from that to which the receiver is connected. • Consult the dealer or an experienced radio/TV technician for help.
MODEL: DIC12B1DBD
SUPPLIER'S DECLARATION OF CONFORMITY 47 CFR § 2.1077 Compliance Information
Danby Products, Inc. 1800 Production Drive Findlay, OH 45840
- Contact information: www.danby.com 1-800-263-2629
This device complies with Part 18 of the FCC Rules and ICES-001(B)/NMB-001(B).
Please note that changes or modifications to this product not expressly approved by the party responsible for FCC and ISED compliance could void the user's authority to operate the equipment.
Note: This equipment has been tested and found to comply with the limits for a Consumer ISM equipment, pursuant to Part 18 of the FCC Rules. These limits are designed to provide reasonable protection against harmful interference in a residential installation. This equipment generates, uses, and can radiate radio frequency energy and, if not installed and used in accordance with the instructions, may cause harmful interference to radio communications. However, there is no guarantee that interference will not occur in a particular installation.
If this equipment does cause harmful interference to radio or television reception, which can be determined by turning the equipment off and on, the user is encouraged to try to correct the interference by one or more of the following measures:
• Reorient or relocate the receiving antenna. - Increase the separation between the equipment and receiver. - Connect the equipment into an outlet on a circuit different from that to which the receiver is connected. - Consult the dealer or an experienced radio/TV technician for help
INSTALLATION INSTRUCTIONS
INSTALLATION
To eliminate the risk of burns or fire by reaching over heated surfaces, cabinet storage space located above the cooktop should be avoided. If cabinet storage is being provided, the risk can be reduced by installing a range hood that projects horizontally a minimum of 5 inches (127 mm) beyond the bottom of the cabinets.
Cut out the work surface according to the sizes shown in the drawing and chart below. For the purpose of installation and use, a minimum of 2" (50mm) of space should be preserved around the hole. Be sure the thickness of the work surface is at least 1 3/16" (30mm). Please select a heat-resistant work surface to avoid deformation caused by heat radiation, as shown below:
Make sure the cooktop is well ventilated - the air inlet and outlet must not be blocked under any circumstances.


| Model L | W H D A B | X | |||||
| 30cm ceramic hob | 11 11/32" 280mm | 20 15/32" 520mm | 2 1/16" 52mm | 1 14/16" 48mm | 10 7/16" + 3/16" 265mm+5mm -0 | 19 1/2" + 3/16" 495mm+5 -0 | 2" 50mm minimum |
| 30cm induction hob | 11 11/32" 280mm | 20 15/32" 520mm | 2 7/32" 56mm | 2 1/16" 52mm | 10 7/16" + 3/16" 265mm+5mm -0 | 19 1/2" + 3/16" 495mm+5 -0 | 2" 50mm minimum |
INSTALLATION INSTRUCTIONS
NOTE: The safety distance between the hotplate and the cupboard above the hotplate should be at least 30" (760mm).


| A B C D E | ||||
| 29 29/32"760mm | 1 15/16"50mm minimal | 13/16"20mm minimal | Air intake 3 | 16"Air exit 5mm |
Before inserting the hob into the opening of the kitchen worktop, the supplied foam gasket (located in a plastic bag) must be attached to the lower side of the ceramic glass
IMPORTANT: Do not install the hob without the foam gasket!
INSTALLING THE FOAM GASKET
- Remove the protective film from the gasket
- Attach the gasket to the lower side of the glass, next to the edge
- The gasket must be attached along the entire length of the glass edge, and should not overlap at the corners
NOTE: When installing the gasket please ensure the glass does not come into contact with any sharp objects
| Item Quantity | |
| Foam gasket 1 | |
| Easy fit kit 1 | |

INSTALLATION INSTRUCTIONS
INSTALLING THE FIXING BRACKETS
- Before locating the fixing brackets, the unit should be placed on a stable, smooth surface (like the packaging).
- Do not apply force onto the controls protruding from the hob.
Note: There is one easy fit kit package for each hob, including fixing clips and screws.
Install Instructions
- Find the easy fit package.
- Fix clips to hob by inserting the fixing clips into the fixing holes (located on 2 sides of housing). Use screw to attach fix clip to housing.

- Fix hob into cabinet/work surface as shown in the diagram below.
- Use the mounting clips on the side to secure the hob.
③

INSTALLATION INSTRUCTIONS
FOR DRC12B1DBD MODEL ONLY
Connecting The Hob To The Main Power Supply
The power supply should be connected in compliance with all relevant standards, or a single-pole circuit breaker.
NOTE: The appliance has a high power rating and must be connected by a qualified electrician.
- The cable must not be bent or compressed. The cable must be checked regularly.
- If the cable is damaged or needs replacing, it should only be done by a qualified technician.
- If the appliance is being connected directly to the main power supply, an omnipolar circuit breaker must be installed with a minimum gap of 2/16" (3 mm) between the contacts.
- The installer must ensure that the correct electrical connections are made and that they comply with all safety regulations.

CAUTIONS
- The cooktop must be installed by qualified personnel or technicians.
- The cooktop must not be installed next to cooling equipment, dishwashers or dryers.
- The cooktop must be installed such that better heat radiation can be ensured to enhance its reliability.
- The wall and induced heating zone above the work surface shall withstand heat.
- To avoid damage, the sandwich layer and the adhesive must be resistant to heat.
- A steam cleaner must not be used.
- If necessary, please consult your supply authority for system impedance information.
FOR DIC12B1DBD MODEL ONLY
- Some models may be supplied with a power cord with a plug.
- If so, you can directly plug this into a socket
- Please unplug the power cord when the cooktop is not in use
COMPLETE INSTALLATION
- Check that all parts are installed. If there is an extra part, go back through the steps to find which step was skipped.
- Check that you have all tools.
- Dispose of or recycle all packaging materials.
- Use a mild solution of liquid household cleaner and warm water to clean the cooktop before use. Dry thoroughly with a soft cloth. For more information, see the cleaning section.
- Read the entire manual before using the cooktop.
- Reconnect power.
Note: If the cooktop does not work after turning on the power, check that a circuit breaker has not tripped or that a household fuse has not blown.
OPERATING INSTRUCTIONS
BEFORE FIRST USE
- Read this guide, taking special note of the "Safety Instructions" section.
- Remove any packaging, protective films, or warning stickers that may be on the cooktop.
- Wipe the cooktop with a soft, dry cloth to remove any dust.
TOUCH CONTROLS
- The controls will respond to touch, so you do not need to apply excess pressure.
- Use the ball of your finger, not the tip. Each time a touch is registered, you will hear a beep.
- Ensure the controls are always clean, dry, and that there is nothing covering them (e.g., utensil, cloth, etc.). Even a thin layer of water may make it difficult to operate the controls.

COOKWARE
- Do not use cookware with jagged edges or a curved base.
- Ensure the base of your cookware is smooth, sits flat against the glass, and is the same size as the cooking zone. Always center your cookware on the element.
- WARNING: When removing cookware from the ceramic surface, always lift it - do not slide it, as it may scratch the glass.
①
②
③
OPERATING INSTRUCTIONS
INDUCTION COOKWARE (DIC12B1DBD ONLY)
- Only use cookware with a base that is suitable for induction cooking. Look for the induction symbol on the packaging or on the bottom of the pan.
- You can also check whether your cookware is suitable or not by performing the magnet test.
Magnet Test
- Move a magnet towards the base of the pan.
- If it is attracted to the pan, then the pan is suitable for the induction cooktop.
- If you do not have a magnet, put some water in the pan you wish to test.
- If the display does not flash and the water is heating, then the pan is suitable for induction.

Cookware made from the following materials will not be suitable for induction:
- Pure stainless steel • Aluminum or copper without a magnetic base
- Glass
- Wood
- Porcelain
- Ceramic
- Earthenware
OPERATING INSTRUCTIONS
DETECTION OF COOKWARE
If the display flashes alternately with heat setting
- You have not placed any cookware on the selected cooking zone
- The cookware is not suitable for induction cooking
- The cookware is too small or not centered correctly on the cooking zone
Notes:
- No heating takes place unless there's suitable cookware on the cooking zone
- When unsuitable size or non-magnetic cookware (or some other small item like a knife, key, fork) has been left on the cooktop, the corresponding cooking zone will automatically turn off in 1 minute
Cautions:
- It is important to only use metal pans designed specifically for induction, or ones that are approved for use with induction
- Never allow melamine or plastic containers to come into contact with the heat zones
Cookware size for Induction
Cooking zones are, up to a limit, automatically adapted to the diameter of your cookware. However, cookware with a diameter less than 5 8/16" (140 mm) may not be detected by the induction cooktop. Below is the best base diameter of cookware for your induction cooktop:
| Cooking Zone Minimum (mm) Maximum (mm) | |
| 6 5/16" (160mm) | 5 1/2" (140mm) 6 5/16" (160mm) |
| 8 9/32" (210mm) | 6 5/16" (160mm) 8 9/32" (210mm) |
OPERATING INSTRUCTIONS
PRODUCT OVERVIEW (DRC12B1DBD)
- Glass plate
- 1200 W Cooking zone
- 1200 W Cooking zone
- Control Panel

PRODUCT OVERVIEW (DIC12B1DBD)
- Glass plate
- 1800 W Cooking zone
- 1300 W Cooking zone
- Control Panel

DRC12B1DBD DIC12B1DBD
CONTROL PANEL
- Timer "-" / "+" button
- Heating level "-" / "+" button
- Stop & Go control button
- ON/OFF button
- Safety Lock control button
![graph TD A["①"] --> B["30Ω"] B --> C["+"] B --> D["-"] D --> E["30Ω"] E --> F["+"] E --> G["+"] B --> H["1"] H --> I["3 sec"] I --> J["+"] B --> K["2"] K --> L["3 sec"] L --> M["+"] B --> N["③"] N --> O["4 sec"] O --> P["+"] B --> Q["⑤"] Q --> R["5 sec"] R --> S["+"] B --> T["②"] T --> U["2 sec"]](/content/2026/07/1440675/images/5067528da20d24d0ae85c762a7e4f95e55c867ae366a293eb9bdc3a4d37ff7b9.jpg)
OPERATING INSTRUCTIONS
TO START COOKING
Place a suitable pan on the cooking element. Ensure the bottom of the pan and the surface of the cooktop are clean and dry.
- After the cooktop is plugged in and powered on, press and hold the ON/OFF Control button for approximately 3 seconds until you hear a "beep" indicating the cooktop is on.
The cooktop is now in Standby Mode, and all heat setting indicators and timer settings will show "-".

- Place your suitable cookware on the cooking zone you want to use, ensuring the bottom of the pan and the cooktop surface are both clean and dry.
- Set the heating level of the cooking zone.
Touch the + or - button to set the heat.
If you press and hold either of the two buttons, the value will adjust up or down rapidly, cycling from 0 to 9.

Notes:
- After the cooktop is connected to a power source and is powered on, the buzzer will beep once, and all indicators will light up for 1 second, then go out.
- If the cooktop is in Standby mode for 1 minute without any interaction, the cooktop will beep once, then automatically turn off. To turn the cooktop off, press the ON/OFF button.
- The power level can be adjusted between 0 and 9.
- The heat setting indicator of the selected zone will flash while you adjust the temperature. After adjusting, the number will flash for 5 seconds. Once it stops, the heat setting has been confirmed.
TURNING OFF COOKTOP
- Turn off cooking zone by adjusting the heat setting all the way to level 0. The indicator will show "-".
- You can also touch the ON/OFF control button to turn off the cooktop.

Notes:
- If there is a power outage, or the power cuts off during cooking, all settings will be canceled.
- The cooling fan for the induction cooktop will remain on for approx. 1 minute after the cooktop is turned off.
POWER MANAGEMENT: DIC12B1DBD
Model DIC12B1DBD includes a power management function that will limit total power to 1800W, even when both zones are in use. If you would like to increase the power level of one burner and the total output is 1800W, the cooktop will automatically reduce the power level of the other element as you adjust.
OPERATING INSTRUCTIONS
HOUSEKEEPING SAFETY LOCK
- The controls will respond to touch, so you do not need to apply pressure.
- This active Housekeeping Safety Lock function allows you to lock the controls to prevent unintended use (ex. children accidentally turning the cooking zones on).
To lock the controls:
- Touch the Safety Lock control button once.
- The timer indicator will show "Lo", and the Safety Lock function will be active.
To unlock the controls:
- Ensure the cooktop is turned on.
- Touch and hold the Safety Lock control button for 3 seconds.
- The buzzer will beep once and "Lo" will disappear from the timer indicator.
- This means the Safety Lock has been deactivated and you may now start using the cooktop.
Caution:
- When this function is enabled, all touch control buttons are disabled except for the ON/OFF button and the Safety Lock control button.
- You can always turn off the cooktop using the ON/OFF button in an emergency, but the next time you operate the cooktop you will need to unlock it.
Note:
- Under the Safety Lock function, if you turn on the cooktop without disabling the Safety Lock, then the next time you turn it on it will still be active.
STOP & GO FUNCTION:
- This function can turn off all zones in case you need to step out of the kitchen while cooking (doorbell, phone rings, etc.).
To activate the stop & go function:
- Press the Stop & go function button once.
- This will put a hold on all programmed settings and the cooktop will stop heating.
- When on, all heat setting indicators will display "P".
To deactivate the stop & go function:
- Once you return, press the Stop & Go function button again.
- This will remove the hold on all settings, and they will return to what they were previously.
- The "P" will disappear from all indicators.
Note:
- When the Stop & Go function is active, all control buttons are disabled, except for the ON/OFF and Stop & Go button.
- If the Stop & Go function is enabled for more than 10 minutes, the cooktop will automatically turn off.
TIMER FUNCTION
![graph TD A["Clock"] --> B["Minutes display"] C["-"] --> D["30"] E["+"] --> D D --> F["Timer control"]](/content/2026/07/1440675/images/d35208697fe53ff828f3d94356a67d4cb8462fe0b1f575dcc35ca08ac4832667.jpg)
- The timer function has two different settings:
- Minute Minder
- Auto Off
- Default setting is 30 minutes.
- If you press and hold down either button when setting the timer, the value will go up and down rapidly.
- After adjusting the timer, the display will flash for 5 seconds. Once it stops, the time has been confirmed and the timer has begun.
OPERATING INSTRUCTIONS
1. Minute Minder
- Functions like a regular timer - when timer is complete the time will show “- -” and the buzzer will beep for 30 seconds. Press any of the control buttons to shut buzzer off
• To use the Minute Minder setting:
- Turn the appliance on
- Set desired time using the ⑦ buttons on the timer control
- When the Minute Minder function is active a dot will be displayed next to the time
2. Auto Off

- In this setting, the cooking zone will turn off when the timer is complete • To use the Auto Off setting:
- Turn the appliance on
- On the desired cooking zone, set the heat using the ⏻ buttons
- While the heat setting is flashing, set the timer using the ⏻ buttons on the timer control
- When the Auto Off function is active a dot will be displayed next to the heat setting

- You can set both cooking zones with different times - the time displayed will be the lowest time setting and the

dot will appear next to the corresponding heat setting
Both timer settings can be used at the same time
- The time displayed will be the lowest time setting
- If Minute Reminder is active: dot next to the time display will flash
- If Auto Off is active: dot next to the corresponding heat setting will flash
RESIDUAL HEAT WARNING
Beware of hot surfaces
When the cooktop has been operating for some time, there will be some residual heat. The letter "H" appears on the power setting indicator to warn you to keep away from it.
It can also be used as an energy saving function: if you want to heat other cookware you may use the cooking zone that is still hot

AUTO SHUTDOWN
This safety feature is in place just in case you forget to turn off a cooking zone. The cooktop will automatically shut off after 60 minutes.
OVER-HEAT PROTECTION
Equipped with a temperature sensor that can monitor the temperature inside the cooktop. When an excessive temperature is registered, the cooktop will automatically stop operating.
NOTE: Maximum setting time for alarm and timer is 60 minutes
OPERATING INSTRUCTIONS
OVER-FLOW PROTECTION
For your safety, this setting will automatically shut off the power if boiling liquid or a wet cloth touches the control panel. All control buttons will be disabled except the ON/OFF and Child Lock buttons. You must wipe the control panel area dry to enable the rest of the buttons.
HEAT SETTINGS
These are guidelines only, the exact setting will depend on other factors including your cookware and the amount of food you are cooking. Test the cooktop out to find the setting that works best for you.
| Heat setting Suitability | |
| 1 - 2 | Delicate warming for small amounts of foodMelting chocolate, butter, and foods that burn quicklyGentle simmeringSlow warming |
| 3 - 4 | ReheatingRapid simmeringCooking rice |
| 5 - 6 | Pancakes |
| 7 - 8 | SautéingCooking pasta |
| 9 | Stir-fryingSearingBringing soup to a boilBoiling water |
CARE & MAINTENANCE
CLEANING
For everyday cleaning of marks, fingerprints and non-sugary spillovers, apply a ceramic cooktop cleaning product. Rinse and wipe dry with a clean cloth or paper towel.
For boil overs, melts and hot sugary spills on the cooktop, remove the spill or food item immediately with a ceramic cooktop razor but beware hot cooking surfaces. Hold the razor at a 45-degree angle and scrape the spilled food to a cool area of the cooktop, then clean it up with a dish cloth or paper towel. Large spills should be removed immediately to ensure they do not bake onto the surface of the cooktop.
Use a soft cloth to clean the control knobs. The control knobs are not removable.
For a burned-on residue...
Let the cooktop cool, then, spread a few drops of ceramic cooktop cleaning product on all the burned residue area. Rub this area with a non-scratching cleaning pad and if some residue remains, repeat these steps.
For a heavy burned on residue...
Let the cooktop cool, then use a ceramic cooktop razor at a 45-degree angle and scrape to remove the residue. After scraping the heavy residue, spread a few drops of ceramic cooktop cleaning product on all the burned residue area. Rub this area with a non-scratching cleaning pad.
DISPOSAL

- Do not dispose of this product as unsorted municipal waste. Collection of such waste separately for special treatment is necessary.
TROUBLESHOOTING
Appliance will not operate
- Blown fuse or circuit breaker
Some pans make crackling or clicking noises
- This may be caused by the construction of the cookware, different layers of metal may be heating at different rates; this is normal.
The cooktop is scratched
- This may be caused by dragging uneven or rough edged cookware across the surface of the cooktop.
- This may be caused by using unsuitable or abrasive cleaning products.
Danby
Limited Warranty
This quality product is warranted to be free from manufacturer's defects in material and workmanship, provided that the unit is used under the normal operating conditions intended by the manufacturer. This warranty is available only to the person to whom the unit was originally sold by Danby Products Limited (Canada) or Danby Products Inc. (U.S.A.) (hereafter "Danby") or by an authorized distributor of Danby, and is non-transferable.
Terms of Warranty
Plastic parts are warranted for thirty (30) days from the date of purchase, with no extensions provided.
First 3 years
During the first three (3) years, any functional parts of this product found to be defective, will be repaired or replaced, at warrantor's option, at no charge to the original purchaser.
To obtain service
Contact the dealer where the unit was purchased, or contact Danby Consumer Service at www.danby.com/service or 1-800-263-2629. It is the responsibility of the purchaser to transport the appliance to the Dealer.
Transportation charges to and from the service location are not protected by this warranty and are the responsibility of the purchaser.
Exclusions
Except as provided herein by Danby, there are no other warranties, conditions, representations, or guarantees, express or implied, made or intended by Danby or its authorized distributors, and all other warranties, conditions, representations, or guarantees, including any warranties, conditions, representations, or guarantees under any Sale of Goods Act or like legislation or statute, are hereby expressly excluded. Except as provided herein, Danby shall not be responsible for any damages to persons or property, including the unit itself, howsoever caused, or any consequential damages arising from the malfunction of the unit. By the purchase of the unit, the purchaser hereby agrees to indemnify and hold harmless Danby from any claim for damages to persons or property caused by the unit.
General Provisions
No warranty or insurance herein contained or set out shall apply when damage or repair is caused by any of the following:
- Power failure.
- Damage in transit or when moving the appliance.
- Improper power supply such as low voltage, defective house wiring, or inadequate fuses.
- Accident, alteration, abuse, or misuse of the appliance such as inadequate air circulation in the room or abnormal operating conditions (i.e., extremely high or low room temperature).
- Use for commercial or industrial purposes (i.e., if the appliance is not installed in a domestic residence).
- Fire, water damage, theft, war, riot, hostility, acts of God such as hurricanes, floods, etc.
- Service calls resulting in customer education.
- Improper installation (i.e., building-in of a free standing appliance or using an appliance outdoors that is not approved for outdoor application, including but not limited to: garages, patios, porches, or anywhere that is not properly insulated or climate controlled).
Proof of purchase date will be required for warranty claims; retain bills of sale. In the event that warranty service is required, present the proof of purchase to our authorized service depot.
FCC/ISED COMPLIANCE STATEMENTS
MODEL: DRC12B1DBD
SUPPLIER'S DECLARATION OF CONFORMITY 47 CFR § 2.1077 Compliance Information
Danby Products, Inc.
1800 Production Drive
Findlay, OH 45840
• Contact: www.danby.com 1-800-263-2629
FCC/ISED COMPLIANCE STATEMENTS
MODEL: DIC12B1DBD
SUPPLIER'S DECLARATION OF CONFORMITY 47 CFR § 2.1077 Compliance Information
Unique Identifier: DIC12B1DBD
Responsible Party:
Danby Products, Inc.
1800 Production Drive
Findlay, OH 45840
Contact: www.danby.com 1-800-263-2629

| Modèle L | W | H | D | A | B | X | |||||
| 30cm plaque de cuisson en céramique | 11 11/32" 280mm | 20 15/32" 520mm | 2 1/16" 52mm | 1 14/16" 48mm | 10 7/16" + 3/16" 265mm+5mm -0 | 19 1/2" + 3/16" 495mm+5 -0 | 2" 50mm minimum | ||||
| 30cm plaque à induction | 11 11/32" 280mm | 20 15/32" 520mm | 2 7/32" 56mm | 2 1/16" 52mm | 10 7/16" + 3/16" 265mm+5mm -0 | 19 1/2" + 3/16" 495mm+5 -0 | 2" 50mm minimum | ||||
INSTALLATION INSTRUCTIONS
| A B C D E | ||||
| 29 29/32"760mm | 1 15/16"50mm minimal | 13/16"20mm minimal | Admission d'air | 3/16"Air exit 5mm |

INSTALLATION INSTRUCTIONS
FOR MODEL DRC12B1DBD ONLY
①
②
③
USE AND CARE INSTRUCTIONS
INDUCTION COOKTOP (DIC12B1DBD ONLY)
PRODUCT OVERVIEW (DRC12B1DBD)
Notes:
Notes:
Caution: Hot surfaces
Danby Products Limited, Guelph, Ontario, Canada N1H 6Z9 Danby Products Inc. Findlay, Ohio, U.S.A. 45840
www.danby.com


- OWNER'S MANUAL MANUEL DU PROPRIÉTAIRE
- WELCOME TO THE DANBY FAMILY
- NEED HELP
- IMPORTANT SAFETY INFORMATION READ AND FOLLOW ALL SAFETY INSTRUCTIONS
- IMPORTANT SAFETY INSTRUCTIONS
- CUT HAZARD
- ELECTRICAL SHOCK HAZARD
- HEALTH HAZARD
- HOT SURFACE HAZARD
- FCC/ISED COMPLIANCE STATEMENTS
- MODEL: DRC12B1DBD
- MODEL: DIC12B1DBD
- INSTALLATION INSTRUCTIONS
- INSTALLATION
- IMPORTANT: DO NOT INSTALL THE HOB WITHOUT THE FOAM GASKET
- INSTALLING THE FOAM GASKET
- INSTALLING THE FIXING BRACKETS
- INSTALL INSTRUCTIONS
- FOR DRC12B1DBD MODEL ONLY
- CONNECTING THE HOB TO THE MAIN POWER SUPPLY
- CAUTIONS
- FOR DIC12B1DBD MODEL ONLY
- COMPLETE INSTALLATION
- OPERATING INSTRUCTIONS
- BEFORE FIRST USE
- TOUCH CONTROLS
- COOKWARE
- INDUCTION COOKWARE (DIC12B1DBD ONLY)
- MAGNET TEST
- DETECTION OF COOKWARE
- NOTES
- COOKWARE SIZE FOR INDUCTION
- PRODUCT OVERVIEW (DRC12B1DBD)
- PRODUCT OVERVIEW (DIC12B1DBD)
- CONTROL PANEL
- TO START COOKING
- TURNING OFF COOKTOP
- POWER MANAGEMENT: DIC12B1DBD
- HOUSEKEEPING SAFETY LOCK
- TO LOCK THE CONTROLS
- TO UNLOCK THE CONTROLS
- CAUTION
- NOTE
- STOP & GO FUNCTION
- TO ACTIVATE THE STOP & GO FUNCTION
- TO DEACTIVATE THE STOP & GO FUNCTION
- TIMER FUNCTION
- MINUTE MINDER
- AUTO OFF
- BOTH TIMER SETTINGS CAN BE USED AT THE SAME TIME
- RESIDUAL HEAT WARNING
- BEWARE OF HOT SURFACES
- AUTO SHUTDOWN
- OVER-HEAT PROTECTION
- OVER-FLOW PROTECTION
- HEAT SETTINGS
- CARE & MAINTENANCE
- CLEANING
- DISPOSAL
- TROUBLESHOOTING
- APPLIANCE WILL NOT OPERATE
- SOME PANS MAKE CRACKLING OR CLICKING NOISES
- THE COOKTOP IS SCRATCHED
- DANBY
- LIMITED WARRANTY
- TERMS OF WARRANTY
- FIRST 3 YEARS
- TO OBTAIN SERVICE
- EXCLUSIONS
- GENERAL PROVISIONS
- FOR MODEL DRC12B1DBD ONLY
- USE AND CARE INSTRUCTIONS
- INDUCTION COOKTOP (DIC12B1DBD ONLY)
- CAUTION: HOT SURFACES
Brand : DANBY
Model : DRC12B1DBD
Category : Cooker