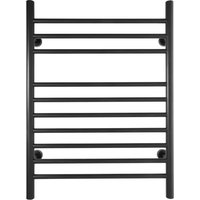
Infinity TW-F10KS-HP - Electric towel warmer WarmlyYours - Free user manual and instructions
Find the device manual for free Infinity TW-F10KS-HP WarmlyYours in PDF.


| Product Type | Electric Towel Warmer |
| Brand | WarmlyYours |
| Model | Infinity TW-F10KS-HP |
| Dimensions (W x H x D) | 24 x 48 x 4 inches |
| Weight | 15 lbs |
| Power Supply | 120V, 60Hz, 1500W |
| Material | Brushed Stainless Steel |
| Finish | Polished Chrome |
| Mounting Type | Wall-Mounted (Hardwired or Plug-in) |
| Number of Bars | 10 |
| Heating Element | Electric, Thermostatic Control |
| Maximum Towel Capacity | 5 standard towels |
| Safety Features | Overheat Protection, Tip-Over Switch |
| Energy Efficiency | Energy Star Certified |
| Controls | On/Off Switch with Timer (1-12 hours) |
| Installation Requirements | Dedicated 15A circuit recommended |
| Operating Temperature Range | 140°F to 160°F |
| Warranty | 5 years (limited) |
| Maintenance | Wipe with damp cloth, avoid abrasive cleaners |
| Certifications | ETL, UL Listed |
| Country of Origin | China |
Frequently Asked Questions - Infinity TW-F10KS-HP WarmlyYours
User questions about Infinity TW-F10KS-HP WarmlyYours
0 question about this device. Answer the ones you know or ask your own.
Ask a new question about this device
Download the instructions for your Electric towel warmer in PDF format for free! Find your manual Infinity TW-F10KS-HP - WarmlyYours and take your electronic device back in hand. On this page are published all the documents necessary for the use of your device. Infinity TW-F10KS-HP by WarmlyYours.
USER MANUAL Infinity TW-F10KS-HP WarmlyYours
Installation & Operation Manual for Warmly Yours Infinity Dual Connection Towel Warmers
Thank you for choosing your finely crafted Warmly Yours Towel Warmer. Now you can add luxury and comfort to your bathroom with the soothing embrace of a warm towel or bathrobe upon stepping from the shower. The radiant heat from the Towel Warmer warms your towel.
Included in this document are all necessary installation and operation instructions. If you encounter any difficulties while installing your system, installation support is available by phone at (800) 875-5285.
SAFETY INFORMATION

This towel warmer has a temperature limiting device. When internal temperatures reach 167° F, the device will stop warming and will then cool down. When temperatures decrease to approximately 149° F, the heating circuit will reactivate.
- Towel Warmers are designed to warm towels and bathrobes only and should not be used for any other purpose.
- Never stand, sit on or hang on the Towel Warmer unit.
- Never allow children to play on or with the Towel Warmer.
- Make sure that the electrical circuit breaker is shut off at the main panel before wiring or servicing your Towel Warmer.
- The Towel Warmer must be properly grounded.
- All wiring must be in accordance with the National Electrical Code and should be performed by a licensed professional who is certified to do electrical wiring.
- Never place your Towel Warmer inside a shower, sauna or steam room.
- Never attempt to warm more than 2 towels on the Towel Warmer at a time. Overloading the Towel Warmer will cause the unit to become extremely hot and may result in a burn if touched.
CLEANING INFORMATION
- Clean the Towel Warmer with a soft, non-abrasive, damp cloth while warm. Once the Towel Warmer has cooled, lightly polish with a soft dry cloth. Do not use abrasive cleaning powders, metal polish or chlorine-based cleaners on any part of the Towel Warmer.
INSTALLATION
This appliance must be installed in accordance with the instructions in the manual and the NEC guidelines relating to electrical fixtures in bathrooms. The Towel Warmer must be on a GFCI protected circuit and be wired by a professional who is certified to do electrical wiring.
Affixing the Towel Warmer to the Wall
Step 1
Draw a diagram of the preferred location of the brackets on the Towel Warmer box to create a template (see Step 2 for template instructions). At least two of the four brackets must be attached directly to a stud.
The Infinity Plug-In model must be installed less than 6 feet (183cm) from a properly grounded outlet to ensure the plug can reach. Make sure to measure the distance from where the plug is attached to the towel warmer to the electrical outlet. Do NOT use an extension cord to make the connection between the towel warmer plug and outlet.
Step 2
Create the template:
A. Attach brackets into desired positions on the Towel Warmer (see pages 7-8 for bracket assembly for each model).
B. Place Towel Warmer on the box (or a large sheet of paper) and lay on a flat surface with brackets facing downwards.
C. Mark the location of the brackets.
D. Use the template as a guide to mark the wall with the correct locations of the four brackets, ensuring the following:
- Plug-in model must be installed less than 6 feet (183cm) from properly grounded outlet. Do NOT use an extension cord.
- At least two of the brackets are lined up with a wall stud.
• The towel warmer is level.
• Electrical supply wire can enter the Power Leg.
Step 3
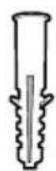
Install the brackets onto the wall. Use the drywall anchors that are supplied for the brackets that are not being installed into a stud.
Refer to pages 7-8 or 10-11
Affixing the Towel Warmer to the Wall - cont'd
Note: Dimensions shown are distances between the center of anchor points. This example shows 16" on center construction. Your situation may vary depending on your stud spacing.
WARNING:
Locations of anchor points may vary. Measure all dimensions prior to rough-in and installation.
Infinity: Anchor Points
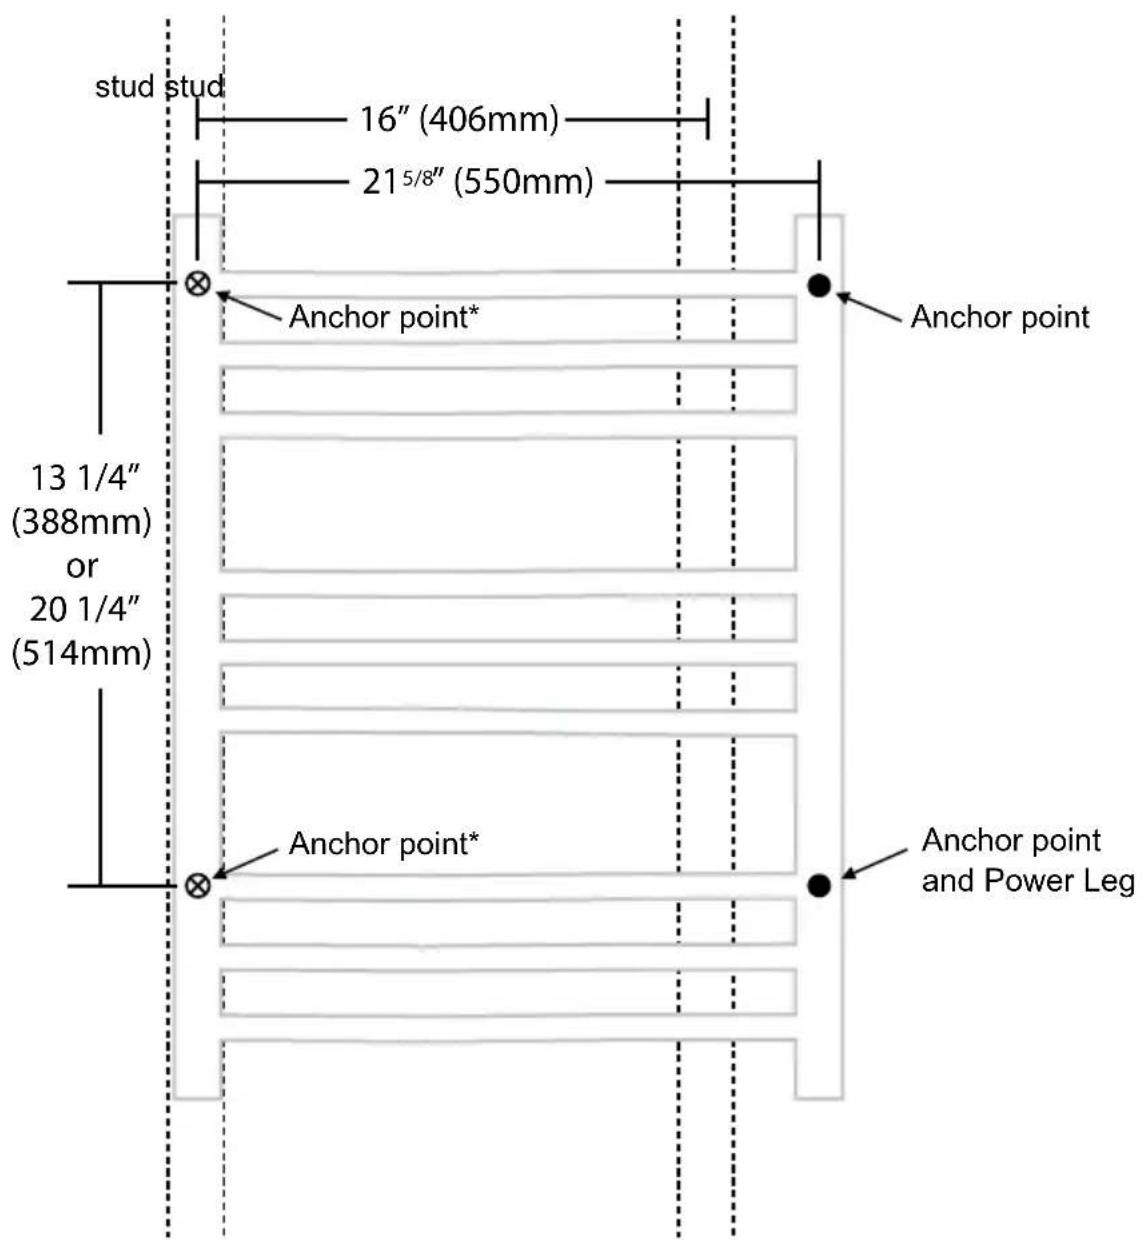
* Note: Left anchor points should be attached to a stud, if possible.
Affixing the Towel Warmer to the Wall (continued)
Diagram B: Rough-In Diagram
Note: Dimensions shown are distances between the center of anchor points. This example shows 16 inches on center construction. Your situation may vary depending on stud spacing.
WARNING:
Locations of anchor points may vary. Measure all dimensions prior to rough-in and installation.

* Note: Left anchor points should be attached to a stud, if possible.
Bracket Assembly Instructions
Diagram C: Bracket Assembly Diagrams
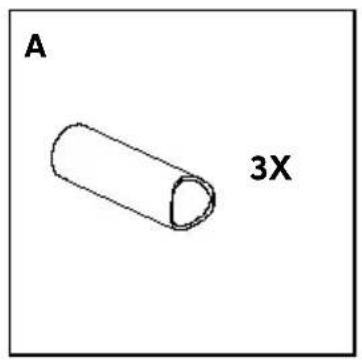
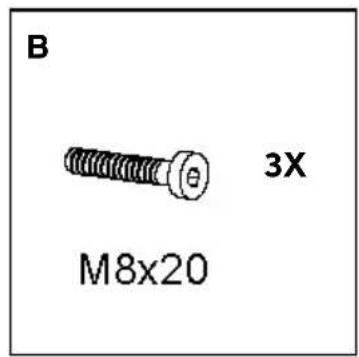
Bracket Assembly Instructions (continued)
Parts List
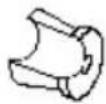
H

C
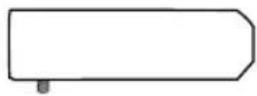
A
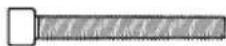
B

|
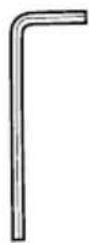
L
FG
|
E
i
DJ
Power Leg

Plug
K
Infinity and Riviera Power Leg
| Part Number Description | Quantity Partslist ID | ||
| 0005-58140-0002 Leg, | Mounting, Brushed 3 A | ||
| 0005-58120-0002 | Leg, Mounting, Polished | 3 | A |
| 0005-58300-0000 Screw, Leg to Rail, M8x20, Socket | 3 | B | |
| 0005-58110-0000 | Bracket, Round, Mounting, Full | 3 | C |
| 0005-58200-0001 Screw, Set, Allen, Socket, M5*6 | 4 | D | |
| 0005-58200-0002 | Screw, Set, Allen, Socket, M5*6, Power Leg | 1 | E |
| 0005-58500-0000 | Anchor, Wall | 4 | F |
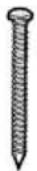
| 0005-58200-0001 Screw, Bracket Mounting, ST4.2*40, Phillips, | 4 | G | |
| 0005-58110-0000 | Bracket, Mounting, Power Leg, 3/4 size | 1 | H |
| 0005-51900-0001 | Wrench, Hex, 6mm | 1 | I |
| 0005-58810-0001 Collar, Leg, Brushed | 4 | J | |
| 0005-58120-0004 Collar, Leg, Polished | 4 | J | |
| 0005-58790-0000 | Plug, Plastic, Power Leg 1 K | ||
| 0005-51900-0000 Wrench, Hex, 2.5mm | 1 | L | |
| 0005-58140-0003 Leg, | Mounting, Power, Brushed | 1 | M |
| 0005-58120-0003 | Leg, Mounting, Power, Polished | 1 | M |
| AK05-58040-0000 | Parts Kit Infinity Infinity, Power Leg, Brushed | 1 | N/S |
| AK05-58020-0002 | Parts Kit Infinity Infinity, Power Leg, Polished | 1 | N/S |
Installation Instructions (Plug-in)
Tools required
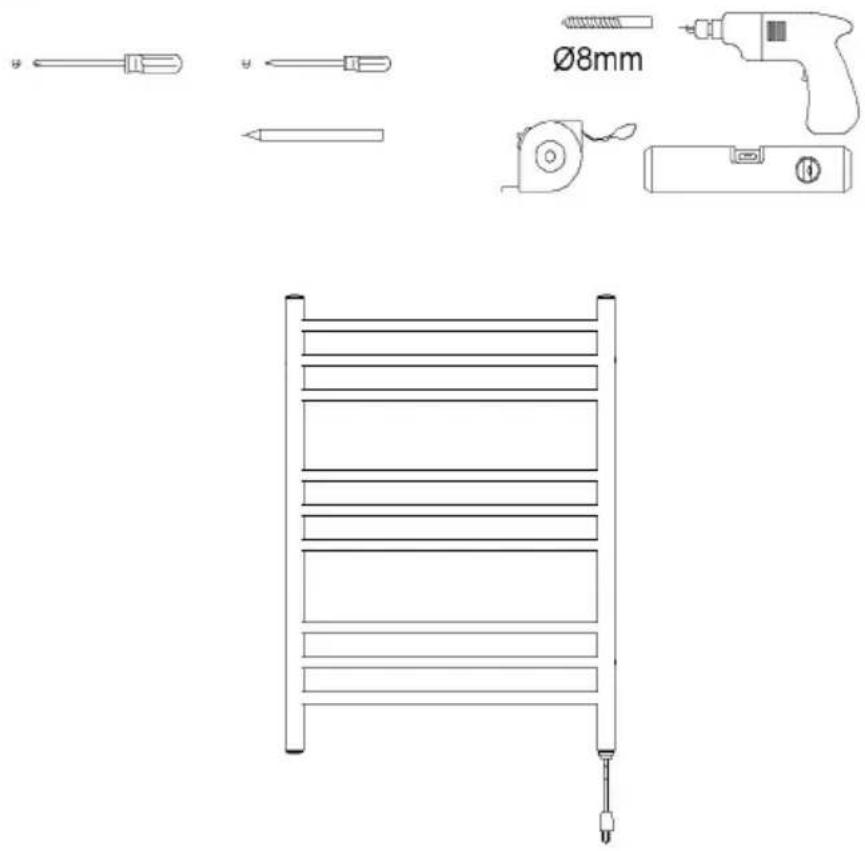
A1

A2

Installation Instructions (Plug-in)
A3   | A4 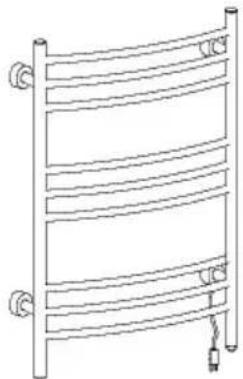 |
B1  | E  |
B3   | B4  |
Bracket Assembly Instructions (continued)
Plug-In Model Only
Plug the cord into a properly grounded outlet. Do NOT use an extension cord to make the connection between the towel warmer plug and outlet.
Step 1
Hold the towel warmer in place while tightening the hex-head screws D at the base of each section of tubing A using the smaller Allen wrench L provided to secure the towel warmer in place.
Step 2
Make sure the unit is turned on using the ON/OFF switch located at the bottom rail on the left side (when facing the towel warmer). A light will illuminate the switch when the switch is turned to the “ON” position. Refer to Diagram D for switch location.
Diagram D

Bracket Assembly Instructions (continued)
Step 3
Measure for bracket positions using the template if desired. At least two brackets must be attached to a stud.
Step 4
Affix brackets C and H to the wall using screw G and drywall anchor F where necessary.
Repeat Step 4 for the remaining brackets.
Step 5
Place and orient the legs A and M with the threaded inserts located at four points on the back of the towel warmer. Affix legs (A and M) to the threaded inserts with bolt B and tighten using the large Allen wrench i provided.
Repeat Step 5 for the remaining sections of tubing.
Step 6
Loosen the hex-head screws D at the base of each section of legs A using the smaller Allen wrench L provided. Hang towel warmer by aligning and sliding all four sections of legs A and M over bracket C and H. Partially tighten hex-head screws D at the base of each section of tubing A and M to hold the towel warmer in place but do NOT fully secure the fasteners at this time. Verify that bracket H is rotated to allow set screw to engage to it.
Hardwired Assembly and wiring
Step 1. Cut power cord as shown.
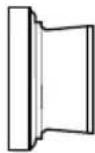
Step 2. Remove Power Leg.
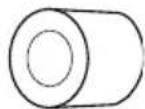
Step 3. Install plastic plug into Power Leg.
Step 4. Using the template marking made on the wall, drill hole for power cord, and fish power supply cord out of the wall. Place 3/4 size mounting bracket H on the wall and make a mark for the mounting hole.
Step 5. Using an 8mm drill bit, drill hole for the mounting bracket.
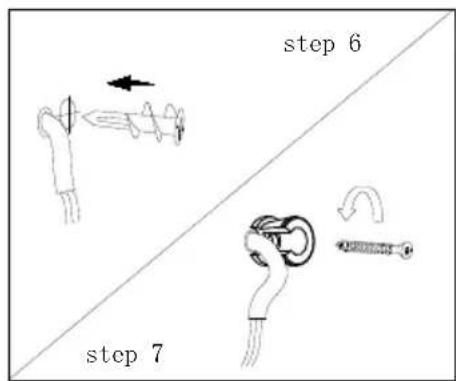
Step 6. Insert wall anchor into wall, next to the power cord.
Step 7. Use screw to attach 3/4 size mounting bracket.
Step 8. Place collar onto Power Leg and feed power supply cord through the Power Leg.
Step 9. While having assistant hold the towel warmer in place, make power connections. See connection section in this manual.
Step 10. Push connected wires into Power Leg.
Step 11. Push towel warmer onto all 4 mounting brackets.
Step 12. To fasten the towel warmer to the wall, tighten the 2 set screws on the Power Leg and tighten the single set screw on the 3 other legs.
Step 13. Have a licensed electrician make connections to the GFCI protected. circuit.
Step 14. Remove plastic shipping caps from vertical bars of towel warmer.
Hardware Assembly and Wiring (Diagram E)




Electrical Considerations
Diagram F: Wiring Diagram (hardwired models only)
![graph TD A["TOWEL WARMER"] --> B["NEUTRAL (WHITE)"] B --> C["LOAD (RED)"] C --> D["GROUND (GREEN)"] D --> E["CONNECT TO HOUSE GROUND"] E --> F["3-WAY TERMINAL* (YELLOW/RED)"] F --> G["HOT (BLACK)"] G --> H["POWER SOURCE 120VAC"] H --> I["NEUTRAL (WHITE)"] I --> J["CONNECT TO HOUSE GROUND"]](/content/2026/07/1439423/images/406457746c99a04fdedbdb8952b81dc59f74845e646573609bcc2ecbbbec62d7.jpg)
OPERATION
Manual
Use the ON/OFF switch located on the bottom right side (when facing the towel warmer) to control when you want the unit to warm. Refer to Diagram D for switch for location.
With a Control
You may want to pair your towel warmer with a compatible Warmly Yours timer or switch. Make sure to refer to the installation manual of the control for proper operation and installation. If you have any questions, call 800-875-5285.
Your Warmly Yours Towel Warmer is designed to gradually warm towels and works best when towels are left to hang for at least 1 hour.
For optimum operation of your new towel warmer, we recommend placing no more than two (2) towels at a time on the warmer. Place the towels in a way to maximize the contact area between the towel and the towel warmer. The towel will be its warmest when it is placed over the top bar. This allows a greater portion of the towel to make the most contact with the warmer.
5. SPECIFICATIONS
| Model Name Dimensions | Voltage (Volts) | Heat Output (Watts) | Resistance (ohms) | Amperage (amps) | ||
| TW-F10BS-HP | Infinity - Brushed | 24"w (600mm) x 32"h (790mm) x 6"d (120mm) | 12015096 | 1.25 | ||
Product Construction - Towel Warmer
The towel warmer is constructed from 304 stainless steel with a wall thickness of between 0.8 mm and 1.2 mm. The towel warmer is heated by a UL listed wire. The mounting brackets are manufactured from stainless steel and finished to match the finish of the specific model.
Connection Method
The heating wire is connected to a non-heated lead by a mechanical crimp connection, sealed with a heat shrink tube. Electricity is fed into the Towel Warmer via a Power Leg. Power can then be fed to the control unit which may be located anywhere in the room.
Safety Ratings
The main electrical line feeding the Towel Warmer must per local and national codes and incorporate an Appliance Leakage Current Interrupter (ALCI) for North America, or GFCI.
Warmly Yours Towel Warmer Warranty
WarmlyYours.com Inc. warrants the WarmlyYours towel warmers (“the Product”) to be free from defects in materials and workmanship for two years from the date of sale, provided that the Product is installed in accordance with the accompanying Installation and Operation Manual and any special written design or installation guidelines provided by WarmlyYours.com Inc. for this product, the National Electric Code (NEC) and Canadian Electrical Code (CEC), and all applicable local building and electrical codes. Controls sold under the WarmlyYours.com Inc. name are warranted for one year from the date of sale.
Any suspected defect must be reported by registered letter immediately upon discovery. The determination of such a defect must be made by WarmlyYours.com Inc. or its authorized representative only. This warranty is null and void if the product is improperly installed, improperly operated, or abused. WarmlyYours.com Inc. assumes no responsibility under this warranty for any damage to the product caused by any trades person, or visitor on the job site, or damage caused as a result of post installation work.
Under this Limited Warranty, WarmlyYours.com Inc. will provide the following remedy:
If the Product is determined to be defective in materials and workmanship, and has not been damaged as a result of misuse or misapplication, WarmlyYours.com Inc. will refund the original purchase price or replace the towel warmer, at WarmlyYours.com Inc. expense. WarmlyYours.com Inc. will not be liable for the labor required to replace the towel warmer.
The Limited Warranty is null and void if the project owner or his representative attempts to repair the Product without receiving authorization. Upon notification of a real or possible problem, WarmlyYours.com Inc., will issue an Authorization to Proceed under the terms of the Limited Warranty.
WARMLYYOURS.COM INC. DISCLAIMS ANY WARRANTY NOT PROVIDED HEREIN, INCLUDING ANY IMPLIED WARRANTY OF MERCHANTABILITY OR IMPLIED WARRANTY OF FITNESS FOR A PARTICULAR PURPOSE. WARMLYYOURS.COM INC. FURTHER DISCLAIMS ANY RESPONSIBILITY FOR SPECIAL, INDIRECT, SECONDARY, INCIDENTAL, OR CONSEQUENTIAL DAMAGES ARISING FROM OWNERSHIP OR USE OF THIS PRODUCT, INCLUDING INCONVENIENCE OR LOSS OF USE. THERE ARE NO WARRANTIES WHICH EXTEND BEYOND THE FACE OF THIS DOCUMENT. NO AGENT OR REPRESENTATIVE OF WARMLYYOURS.COM INC. HAS ANY AUTHORITY TO EXTEND OR MODIFY THIS WARRANTY UNLESS SUCH EXTENSION OR MODIFICATION IS MADE IN WRITING BY A CORPORATE OFFICER.
Please fill in warranty card information at http://www.warmlyyours.com/towel-warmers/warranty or call (800) 875-5285 to register via phone.


- SAFETY INFORMATION
- CLEANING INFORMATION
- INSTALLATION
- AFFIXING THE TOWEL WARMER TO THE WALL
- STEP 1
- STEP 2
- STEP 3
- AFFIXING THE TOWEL WARMER TO THE WALL - CONT'D
- WARNING
- AFFIXING THE TOWEL WARMER TO THE WALL (CONTINUED)
- DIAGRAM B: ROUGH-IN DIAGRAM
- BRACKET ASSEMBLY INSTRUCTIONS
- DIAGRAM C: BRACKET ASSEMBLY DIAGRAMS
- BRACKET ASSEMBLY INSTRUCTIONS (CONTINUED)
- PARTS LIST
- INSTALLATION INSTRUCTIONS (PLUG-IN)
- PLUG-IN MODEL ONLY
- STEP 4
- REPEAT STEP 4 FOR THE REMAINING BRACKETS
- STEP 5
- REPEAT STEP 5 FOR THE REMAINING SECTIONS OF TUBING
- STEP 6
- HARDWIRED ASSEMBLY AND WIRING
- HARDWARE ASSEMBLY AND WIRING (DIAGRAM E)
- ELECTRICAL CONSIDERATIONS
- OPERATION
- MANUAL
- WITH A CONTROL
- SPECIFICATIONS
- PRODUCT CONSTRUCTION - TOWEL WARMER
- CONNECTION METHOD
- SAFETY RATINGS
- WARMLY YOURS TOWEL WARMER WARRANTY
Brand : WarmlyYours
Model : Infinity TW-F10KS-HP
Category : Electric towel warmer