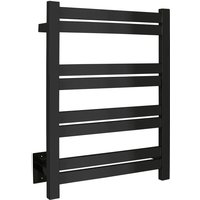
Maple TWS6-MPL08KH - Electric towel warmer WarmlyYours - Free user manual and instructions
Find the device manual for free Maple TWS6-MPL08KH WarmlyYours in PDF.


| Product Type | Electric Towel Warmer |
| Brand | WarmlyYours |
| Model | Maple TWS6-MPL08KH |
| Series | TWS6 Series |
| Voltage | 120 VAC |
| Surface Temperature | 122-131°F (50-55°C) |
| Usage | Drying and warming towels, clothes |
| Installation Type | Hardwired |
| Circuit Requirement | GFCI protected, 15A branch circuit |
| Wiring | Three-wire cable or three-prong plug |
| Certification | cULus |
| Material | Steel |
| Mounting | Wall-mounted with brackets |
| Cleaning | Soft dry cloth; avoid abrasive cleaners |
| Safety | Do not use with silk; do not overlap towels; replace unit if heating wire damaged |
| Included Accessories | Mounting tubes, set screws, brackets, screws, drywall anchors |
| Installation Height | At least 23.5 inches above floor |
| Electrical Connection | Avoid water; connect to grounded outlet |
| Repair | Must be done by qualified technician |
Frequently Asked Questions - Maple TWS6-MPL08KH WarmlyYours
User questions about Maple TWS6-MPL08KH WarmlyYours
0 question about this device. Answer the ones you know or ask your own.
Ask a new question about this device
Download the instructions for your Electric towel warmer in PDF format for free! Find your manual Maple TWS6-MPL08KH - WarmlyYours and take your electronic device back in hand. On this page are published all the documents necessary for the use of your device. Maple TWS6-MPL08KH by WarmlyYours.
USER MANUAL Maple TWS6-MPL08KH WarmlyYours
For TWS6 Series hardwired towel warmers
TOOLS REQUIRED ACCESSORIES FOR SQUARE/ROUND MOUNTING TUBES
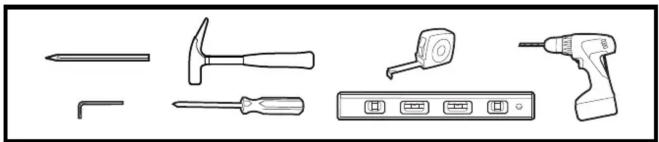
natural_image
Line drawings of various hand tools including a hammer, screwdriver, screwdriver, and power tool (no text or labels)INSTRUCTIONS
Before using this product, please read the following instructions carefully and keep this pamphlet for future reference.
ABOUT THE PRODUCT:
This heated towel warmer is designed for drying/warming towels or clothes, it has a surface stabilized temperature of 122-131°F, and it is used in household bathrooms and kitchens, as well as in hotels and restaurants or other public areas. This appliance uses a voltage of 120 VAC, and is manufactured according to cULus standards.
SAFETY PRECAUTIONS:
- The towel warmer must be used with a Ground Fault Circuit Interceptor (GFCI) circuit.
- This product is supplied with a three-prong plug or three-wire cable.
To avoid unnecessary risk or danger, this product must be properly grounded. - Any repairs must be done by a qualified technician who is deemed qualified by industry standards. When any external wire fittings are required, the unit must be disconnected from the circuit.
WARNING:
- Only use for drying textiles which have been dampened by water. Please note: silk fabrics can not be used on the towel warmer.
- If heating wire is damaged, the whole product should be replaced.
- If warming multiple towels on the device simultaneously, make sure that the towels do not overlap one another.
NOTE:
- In the event of any difference in technical specifications, please refer to the actual product.
- Please wipe the towel rail with a soft, dry cloth when cleaning it. Do not use scrubbers or abrasive cleaners.
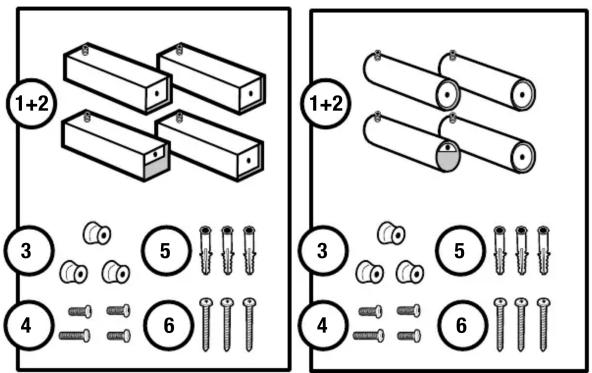
Installation Fittings:
(1+2): Mounting tubes (4 pieces) & Set screws (4 pieces)
(3) 3 brackets (3 pieces)
(4) Short mounting screws (3 pieces) Long mounting screw (1 piece)
(5) Drywall anchor (3 pieces)
(6) Long screws (3 pieces)
This product must be installed in accordance with the instructions in the manual and the NEC and CEC guidelines relating to electrical fixtures in bathrooms. The Towel Warmer must be on a GFCI protected circuit and be wired by a professional who is certified to do electrical wiring.
In order to reduce electrical shock, this towel warmer should be installed on a 15A GFCI protected branch circuit (14AWG) and to an outlet box that is 4 inches (10.16 cm) high by 2 Inches (5.08 cm) wide.

WarmlyYours
Radiant Heating
INSTALLATION GUIDE
For TWS6 Series hardwired towel warmers
ACCESSORIES

INSTALLATION: (WARNING: The electrical connection should avoid all water.)
Please refer to all the following steps if the wall brackets are taken apart from the vertical bars.
Please refer to Steps 5-11 if the wall brackets are fixed on vertical bars already.
STEP 1

STEP 2

STEP 3

STEP 4
natural_image
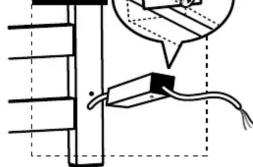
Diagram showing a vertical structure with a magnified inset of a component, no text or symbols presentSTEP 1: As shown in the picture, insert the short mounting screw (d) through the tube in the center of the mounting tube (a).
STEP 2: Use the short mounting screw (d) to fix the mounting tube (a) to the threaded metal pad on the vertical bar on the back of the towel warmer.
STEP 3: Screw down the short mounting screw (d) with a screwdriver. Note that the set screw of the tube (a) should point towards the floor when the towel warmer is wall mounted. Fix the remaining two mounting tubes (a) to the vertical bars with threaded metal pads by repeating Step 1-3.
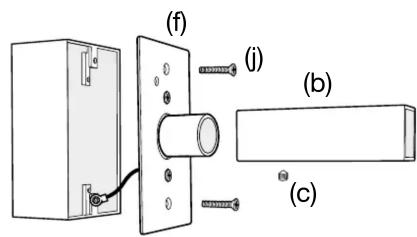
STEP 4: Guide the electrical cord through the electrical connection mounting tube (b) and use the long mounting screw (e) to tighten the electrical connection mounting tube to the vertical bar.
WarmlyYours
Radiant Heating
INSTALLATION GUIDE
For TWS6 Series hardwired towel warmers
STEP 5
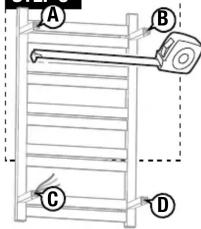
STEP 5: Use a tape measure to measure the distance between the center points of each wall bracket tube; record the distances between points AB, AC, CD, and BD. Mounting point C will determine electrical box location. See Electrical Assembly in following instructions.
STEP 6

STEP 6: Mark A, B, C, and D according to the data from Step 5; It is suggested that this product be installed at least 23.5 inches (59.69 cm) above floor level. (WARNING: The electrical connection should avoid all water). This mounting location must comply with all local building and electrical codes.
ALTERNATIVE TO STEPS 5 & 6

Place towel warmer on the box (or a large sheet of paper) and lay on a flat surface with mounting tubes facing downwards. Mark the location of the following:
- The electrical collar (hardwired model only) - The location of the mounting tubes
Use the template as a guide to mark the wall with the correct locations of the four mounting tubes (A, B, C, and D)
STEP 7

STEP 7: Drill A, B, C, and D holes with an appropriately sized bit.
STEP 8
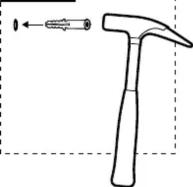
STEP 8: Use a hammer to knock plastic drywall anchor (f) into wall completely.
STEP 9

STEP 9: Insert long screw (i) through mounting bracket (g), then screw into plastic drywall anchor (f).
STEP 10

STEP 10: Install the tube (a) onto the bracket (g).
STEP 11
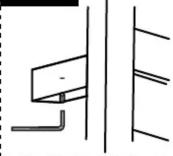
STEP 11: As shown in the picture, install the set screws (c) into the hole of all the tubes (a and b) using the allen wrench; fix the tube (a) onto the mounting bracket (g).

WarmlyYours
Radiant Heating
INSTALLATION GUIDE
For TWS6 Series hardwired towel warmers
ELECTRICAL ASSEMBLY


CAUTION :
To provide continued protection against risk of electric shock, connect to properly grounded outlets only.


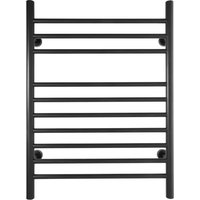
Brand : WarmlyYours
Model : Maple TWS6-MPL08KH
Category : Electric towel warmer