
iPod Nano 5th generation - Mp3 player APPLE - Free user manual and instructions
Find the device manual for free iPod Nano 5th generation APPLE in PDF.



| Product Type | MP3 Player |
| Brand | Apple |
| Model | iPod Nano 5th Generation |
| Dimensions | 90.7 x 38.7 x 6.2 mm (3.57 x 1.52 x 0.24 in) |
| Weight | 36.4 g (1.28 oz) |
| Display | 2.2-inch color LCD with 320x240 resolution |
| Storage Capacity | 8 GB or 16 GB |
| Battery Type | Built-in rechargeable lithium-ion |
| Battery Life | Up to 24 hours audio playback, up to 5 hours video |
| Charging | Via USB to computer or power adapter (sold separately) |
| Audio Formats | AAC, MP3, WAV, Apple Lossless, AIFF, Audible |
| Video Formats | H.264, MPEG-4 (.mp4, .m4v) |
| Image Formats | JPEG, BMP, GIF, TIFF, PSD (view only) |
| Radio | FM radio with live pause |
| Camera | Built-in video camera (H.264, up to 640x480) |
| Connectivity | Dock connector, 3.5 mm headphone jack |
| Genius Mixes | Yes |
| VoiceOver | Yes (accessibility feature) |
| Nike+iPod Support | Built-in |
| Operating System | iPod OS (firmware) |
| Compatible Operating Systems | Mac OS X 10.4.11 or later; Windows XP/Vista |
| System Requirements | iTunes 9 or later |
| Care Instructions | Clean with a soft, slightly damp, lint-free cloth |
| Safety | Do not expose to liquids; use only Apple accessories |
| Spare Parts/Repairability | Battery not user-replaceable; service by Apple or authorized provider |
Frequently Asked Questions - iPod Nano 5th generation APPLE
User questions about iPod Nano 5th generation APPLE
0 question about this device. Answer the ones you know or ask your own.
Ask a new question about this device
Download the instructions for your Mp3 player in PDF format for free! Find your manual iPod Nano 5th generation - APPLE and take your electronic device back in hand. On this page are published all the documents necessary for the use of your device. iPod Nano 5th generation by APPLE.
USER MANUAL iPod Nano 5th generation APPLE
4 iPod nano at a Glance 5 Using iPod nano Controls 9 Using iPod nano Menus 12 About the iPod nano Internal Speaker 13 Connecting and Disconnecting iPod nano 16 About the iPod nano Battery
Chapter 2 19 Setting Up iPod nano
20 Setting Up Your iTunes Library 20 Importing Music to iTunes 21 Adding More Details to Your iTunes Library 21 Organizing Your Music 22 Importing Video to iTunes 24 Adding Music, Videos, and Other Content to iPod nano 24 Connecting iPod nano to a Computer for the First Time 25 Syncing Music Automatically 27 Syncing Videos Automatically 28 Adding Podcasts to iPod nano 29 Adding iTunes U Content to iPod nano 29 Adding Audiobooks to iPod nano 30 Adding Other Content to iPod nano 30 Managing iPod nano Manually 32 Setting Up VoiceOver
Chapter 3 33 Listening to Music
33 Playing Music and Other Audio 39 Using Genius on iPod nano 47 Playing Podcasts 48 Playing iTunes U Content 48 Listening to Audiobooks
Chapter 4 49 Watching Videos
49 Watching Videos on iPod nano
50 Watching Videos on a TV Connected to iPod nano
Chapter 5 52 Using the Video Camera
53 Recording Video 54 Playing Recorded Videos 55 Deleting Recorded Videos 55 Importing Recorded Videos to Your Computer
Chapter 6 58 Listening to FM Radio
60 Tuning the FM radio 61 Pausing Live Radio 64 Tagging Songs to Sync to iTunes 65 Using the Radio Menu
Chapter 7 67 Photo Features
69 Viewing Photos 71 Adding Photos from iPod nano to a Computer
Chapter 8 72 More Settings, Extra Features, and Accessories
72 Using iPod nano as a Pedometer 74 Recording Voice Memos 77 Using Extra Settings 81 Syncing Contacts, Calendars, and To-Do Lists 83 Mono Audio 83 Using Spoken Menus for Accessibility 84 Using iPod nano as an External Disk 84 Storing and Reading Notes 85 Learning About iPod nano Accessories
Chapter 9 86 Tips and Troubleshooting
86 General Suggestions 92 Updating and Restoring iPod Software
Chapter 10 93 Safety and Cleaning
93 Important Safety Information 96 Important Handling Information
Chapter 11 97 Learning More, Service, and Support
Index 100
iPod nano Basics
Read this chapter to learn about the features of iPod nano, how to use its controls, and more.
iPod nano at a Glance
Get to know the controls on iPod nano:
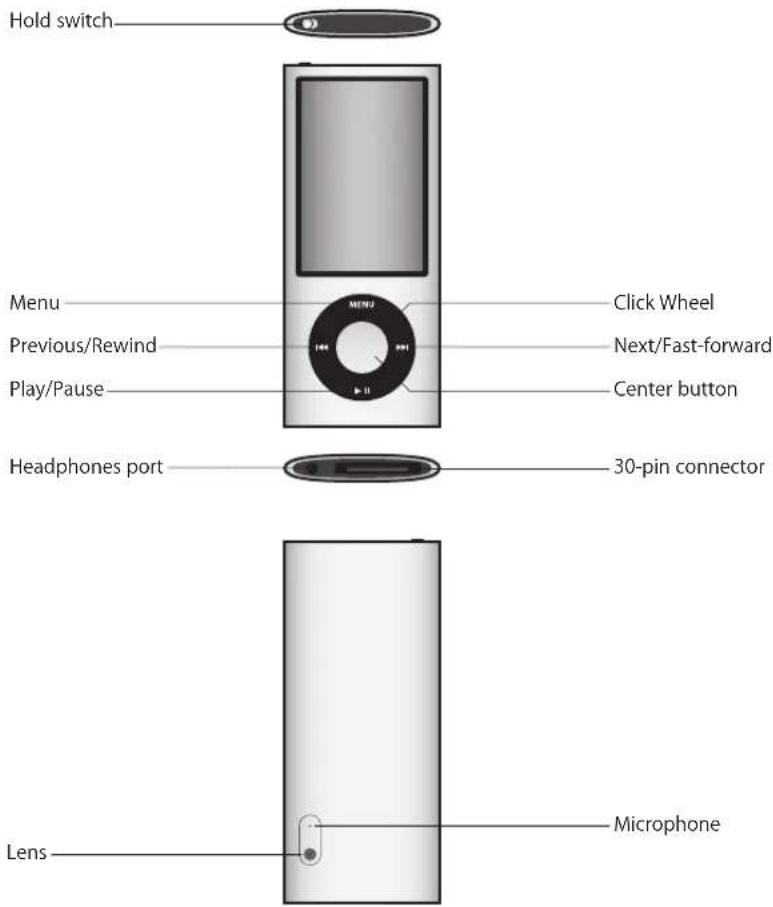
What's New in iPod nano
• Larger, 2.2-inch display • Polished aluminum finish • A built-in video camera that lets you record video with special effects • An FM radio that lets you pause live radio and tag songs for purchase from the iTunes Store (radio tagging may not be available in some countries) • Internal speaker and microphone • A pedometer that records your workout history
Using iPod nano Controls
The controls on iPod nano are easy to find and use. Press any button to turn on iPod nano.
The first time you turn on iPod nano, the language menu appears. Use the Click Wheel to scroll to your language, and then press the Center button to choose it. The main menu appears in your language.
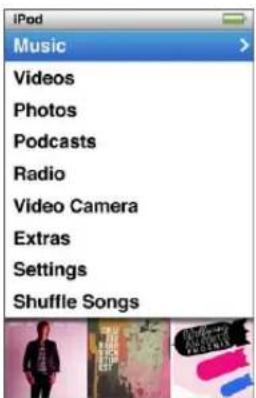
Use the Click Wheel and Center button to navigate through onscreen menus, play songs, change settings, and get information.
Move your thumb lightly around the Click Wheel to select a menu item. To choose the item, press the Center button.
To go back to the previous menu, press Menu.
Here's what else you can do with iPod nano controls.
| ToDo this | |
| Turn on iPod nano | Press any button. |
| Turn off iPod nano | Press and hold Play/Pause (▶II). |
| Turn on the backlight | Press any button or use the Click Wheel. |
| Disable iPod nano controls(so nothing happens if you press them accidentally) | Slide the Hold switch to HOLD (an orange bar appears). |
| Reset iPod nano(if it isn't responding) | Slide the Hold switch to HOLD and back again. Press Menu and the Center button at the same time for about 6 seconds, until the Apple logo appears. |
| Choose a menu item | Use the Click Wheel to scroll to the item and press the Center button to choose. |
| Go back to the previous menu | Press Menu. |
| Go directly to the main menu | Press and hold Menu. |
| Access additional options | Press and hold the Center button until a menu appears. |
| Browse for a song | From the main menu, choose Music. |
| Browse for a video | From the main menu, choose Videos. |
| Play a song or video | Select the song or video and press the Center button or Play/Pause (▶II). iPod nano must be ejected from your computer to play songs and videos. |
| Pause a song or video | Press Play/Pause (▶II) or unplug your headphones. |
| Change the volume | From the Now Playing screen, use the Click Wheel. |
| Play all the songs in a playlist or album | Select the playlist or album and press Play/Pause (▶II). |
| Play all songs in random order | From the main menu, choose Shuffle Songs. |
| Skip to a random song | Shake iPod nano. |
| Enable or disable Shake for shuffling songs | Choose Settings >Playback, choose Shake, and then select Shuffle or Off. |
| Skip to any point in a song or video | From the Now Playing screen, press the Center button to show the scrubber bar (the playhead on the bar shows the current location), and then scroll to any point in the song or video. |
| Skip to the next song or chapter in an audiobook or podcast | Press Next/Fast-forward (▶II). |
| Start a song or video over | Press Previous/Rewind (◀◀). |
| Fast-forward or rewind a song, video, or paused radio | Press and hold Next/Fast-forward (▶◀) or Previous/Rewind (◀◀). |
| Add a song to the On-The-Go playlist | Play or select a song, and then press and hold the Center button until a menu appears. Select “Add to On-The-Go,” and then press the Center button. |
| Play the previous song or chapter in an audiobook or podcast | Press Previous/Rewind (◀◀) twice. |
| Create a Genius playlist | Play or select a song, and then press and hold the Center button until a menu appears. Select Start Genius, and then press the Center button (Start Genius appears in the Now Playing screen only if there's Genius data for the selected song). |
| Save a Genius playlist | Create a Genius playlist, select Save Playlist then press the Center button. |
| Play a saved Genius playlist | From the Playlist menu, select a Genius playlist, and then press Play/Pause (▶II). |
| Play a Genius Mix | From the Music menu, choose Genius Mixes. Select a mix and then press Play/Pause (▶II). |
| Record video | Choose Video Camera from the main menu. Press the Center button to start or stop recording. |
| Record video with special effects | Before recording video, press and hold the Center button to display effects, then use the Click Wheel to browse and press the Center button to select. Press the Center button again to start recording. |
| Play back recorded video | Press the Center button to stop recording, then press Menu to enter the Camera Roll screen. Choose a video and press the Center button to play. |
| Watch recorded video | From the Videos menu, choose Camera Videos, then select a video and press Play/Pause (▶II). |
| Listen to FM radio Choose Radio from the main menu. | |
| Tune to an FM station Use the Click Wheel to browse the radio dial. | |
| Seek FM stations When the radio dial is visible, press Next/Fast-forward (▶◀) or Previous/Rewind (◀◀) to skip to the next or previous station. Not available if you save any stations as favorites. | |
| Scan FM stations When the radio dial is visible, press and hold Next/Fast-forward (▶◀). Press the Center button to stop scanning. | |
| Save an FM station as a favorite | Press and hold the Center button until a menu appears, and then choose Add to Favorites. |
| Pause and resume live radio From any screen, press Play/Pause (▶II) while listening to the radio. Press Play/Pause (▶I) again to resume playing. Changing the radio station clears paused radio. | |
| Switch between the radio dial and the Live Pause screen | Press the Center button. |
| Tag a song on the radio | Press and hold the Center button to tag songs marked with a tag symbol. Sync with iTunes to preview and purchase tagged songs. |
| Use the pedometer From the Extras menu, choose Fitness, and then choose Pedometer. Press the Center button to start or stop a session. | |
To do this
| Record a voice memo From the Extras menu, choose Voice Memos. Press Play/Pause ( ▶II) to start or stop recording. Press the Center button to add a chapter markers. | |
| Find the iPod nano serial number | From the main menu choose Settings > About and press the Center button until you see the serial number, or look on the back of iPod nano. |
Disabling iPod nano Controls
If you don't want to turn iPod nano on or activate controls accidentally, you can disable them with the Hold switch. The Hold switch disables all Click Wheel controls, and also disables functions that are activated by movement, such as shaking to shuffle and rotating to enter or exit Cover Flow.
To disable iPod nano controls:
■ Slide the Hold switch to HOLD (an orange bar appears).
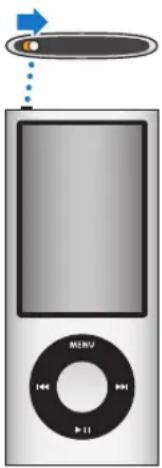
If you disable the controls while using iPod nano, the song, playlist, podcast, or video that's playing continues to play, and if the pedometer is turned on it continues counting steps. To stop or pause, slide the Hold switch to enable the controls again.
Using iPod nano Menus
When you turn on iPod nano, you see the main menu. Choose menu items to perform functions or go to other menus. Icons along the top of the screen show iPod nano status.

Display item Function
Menu title Displays the title of the current menu. The menu title doesn't appear when the Lock icon appears.
| Pedometer icon Appears when the pedometer is on. | |
| Play icon The Play ( ▶) icon appears when a song, video, or other item is playing. The Pause (I) icon appears when the item is paused. | |
| Battery icon The Battery icon shows the approximate remaining battery charge. | |
| Lock icon The Lock icon appears when the Hold switch is set to HOLD. This indicates that the iPod nano controls are disabled. When the Lock icon appears, it replaces the menu title. | |
| Menu items Use the Click Wheel to scroll through menu items. Press the Center button to choose an item. An arrow next to a menu item indicates that it leads to another menu or screen. | |
| Preview panel Displays album art, photos, and other information relating to the menu item selected. |
Adding or Removing Items on the Main Menu
You might want to add often-used items to the iPod nano main menu. For example, you can add a Songs item to the main menu, so you don't have to choose Music before you choose Songs.
To add or remove items on the main menu:
1 Choose Settings > General > Main Menu.
2 Select each item you want to appear in the main menu. A checkmark indicates which items have been added.
Turning Off the Preview Panel
The preview panel at the bottom of the main menu displays album art, photo thumbnails, available storage, and other information. You can turn it off to allow more space for menu items.
To turn the preview panel on or off:
- Choose Settings > General > Main Menu > Preview Panel, and then press the Center button to select On or Off.
The preview panel displays art for a category only if iPod nano contains at least five items with art in the category.
Setting the Font Size in Menus
iPod nano can display text in two different sizes, standard and large.
To set the font size:
- Choose Settings > General > Font Size, and then press the Center button to select Standard or Large.
Setting the Language
iPod nano can use different languages.
To set the language:
- Choose Settings > Language, and then choose a language.
Setting the Backlight Timer
You can set the backlight to illuminate the screen for a certain amount of time when you press a button or use the Click Wheel. The default is 10 seconds.
To set the backlight timer:
- Choose Settings > General > Backlight, and then choose the time you want. Choose "Always On" to prevent the backlight from turning off (choosing this option decreases battery performance).
Setting the Screen Brightness
You can adjust the brightness of the iPod nano screen.
To set the screen brightness:
- Choose Settings > General > Brightness, and then use the Click Wheel to adjust the brightness.
You can also set the brightness during a slideshow or video. Press the Center button until the brightness slider appears, and then use the Click Wheel to adjust the brightness.
Turning Off the Click Wheel Sound
When you scroll through menu items, you can hear a clicking sound through the earphones or headphones and through the iPod nano internal speaker. If you like, you can turn off the Click Wheel sound.
To turn off the Click Wheel sound:
- Choose Settings > General and set Clicker to Off.
To turn the Click Wheel sound on again, set Clicker to On.
Scrolling Quickly Through Long Lists
You can scroll quickly through a long list by moving your thumb quickly on the Click Wheel.
Note: Not all languages are supported.
To scroll quickly:
1 Move your thumb quickly on the Click Wheel, to display a letter of the alphabet on the screen.
2 Use the Click Wheel to navigate through the alphabet until you find the first letter of the item you're looking for.
Items beginning with a symbol or number appear after the letter Z.
3 Lift your thumb momentarily to return to normal scrolling.
4 Use the Click Wheel to navigate to the item you want.
Getting Information About iPod nano
You can get details about your iPod nano, such as the amount of space available, the number of songs, videos, photos, and other items, and the serial number, model, and software version.
To get information about iPod nano:
- Choose Settings > About, and press the Center button to cycle through the screens of information.
Resetting All Settings
You can reset all the items on the Settings menu to their default setting.
To reset all settings:
- Choose Settings > Reset Settings, and then choose Reset.
About the iPod nano Internal Speaker
With the iPod nano internal speaker, you can listen to any audio on iPod nano without earphones or headphones — except for the built-in FM radio, which uses the earphone or headphone cord as an antenna.
Connecting earphones or headphones to iPod nano disables the internal speaker. Any audio that's playing continues to play, but only through the earphones or headphones.
If you disconnect the earphones or headphones while audio is playing, the audio pauses. To resume listening through the internal speaker, press Play/Pause (11). If you disconnect the earphones or headphones while the radio is playing or paused, the radio stops and any paused radio is cleared.
If you choose Video Camera or Voice Memos while audio is playing, the audio turns off.
Connecting and Disconnecting iPod nano
You connect iPod nano to your computer to add music, videos, photos, and files to iPod nano, to import recorded videos and voice memos to your computer, and to charge the battery. Disconnect iPod nano when you're done.
Important: The battery doesn't charge when your computer is in sleep.
Connecting iPod nano
To connect iPod nano to your computer:
- Plug the included Dock Connector to USB Cable into a high-powered USB 2.0 port on your computer, and then connect the other end to iPod nano.
If you have an iPod dock, you can connect the cable to a USB 2.0 port on your computer, connect the other end to the dock, and then put iPod nano in the dock.
Note: The USB port on most keyboards doesn't provide enough power to charge iPod nano. Connect iPod nano to a USB 2.0 port on your computer.

By default, iTunes syncs songs on iPod nano automatically when you connect it to your computer. When iTunes is finished, you can disconnect iPod nano. You can sync songs while your battery is charging.
If you connect iPod nano to a different computer and it's set to sync music automatically, iTunes prompts you before syncing any music. If you click Yes, the songs and other audio files already on iPod nano will be erased and replaced with songs and other audio files on the computer iPod nano is connected to. For information about adding music to iPod nano and using iPod nano with more than one computer, see Chapter 2, "Setting Up iPod nano," on page 19.
Disconnecting iPod nano
It's important not to disconnect iPod nano while it's syncing. You can see if it's OK to disconnect iPod nano by looking at the iPod nano screen. Don't disconnect iPod nano if you see the "Connected" or "Synchronizing" message, or you could damage files on iPod nano.
If you see one of these messages, you must eject iPod nano before disconnecting it:
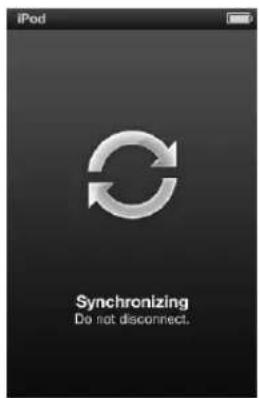
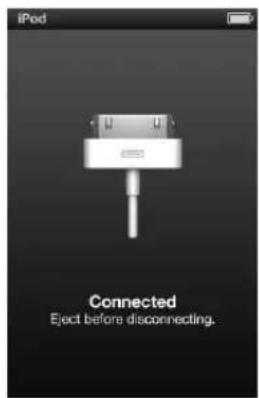
If you see the main menu or a large battery icon, you can disconnect iPod nano.
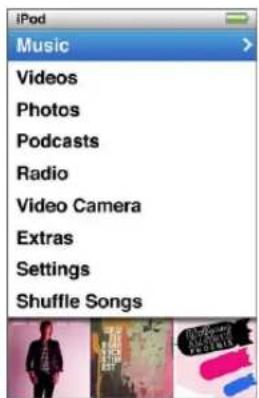
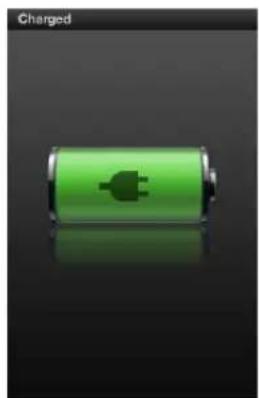
If you set iPod nano to manage songs manually (see "Managing iPod nano Manually" on page 30) or enable iPod nano for disk use (see "Using iPod nano as an External Disk" on page 84), you must always eject iPod nano before disconnecting it.
If you accidentally disconnect iPod nano without ejecting it, reconnect iPod nano to your computer and sync again.
To eject iPod nano:
In iTunes, click the Eject (▲) button next to iPod nano in the device list on the left side of the iTunes window.
You can safely disconnect iPod nano while either of these messages is displayed:

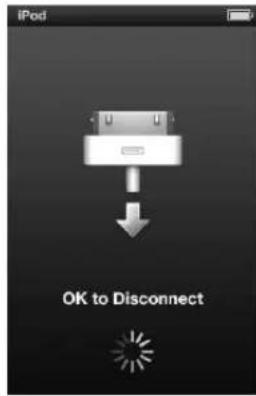
If you're using a Mac, you can also eject iPod nano by dragging the iPod nano icon on the desktop to the Trash.
If you're using a Windows PC, you can also eject iPod nano in My Computer or by clicking the Safely Remove Hardware icon in the Windows system tray and selecting iPod nano.
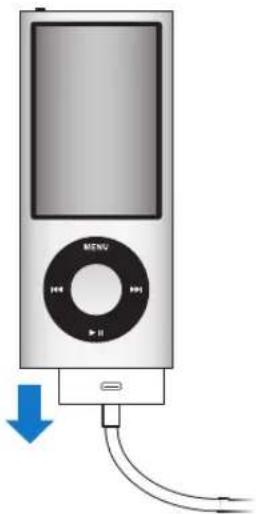
To disconnect iPod nano:
1. Unplug your earphones or headphones, if they're attached. 2. Disconnect the cable from iPod nano. If iPod nano is in the dock, simply remove it.
About the iPod nano Battery
iPod nano has an internal, non-user-replaceable battery. For best results, the first time you use iPod nano, let it charge for about three hours or until the battery icon in the status area of the display shows that the battery is fully charged. If iPod nano isn't used for a while, the battery might need to be charged.
Note: iPod nano continues to use battery power after it's been turned off.
The iPod nano battery is 80-percent charged in about one and a half hours, and fully charged in about three hours. If you charge iPod nano while adding files, playing music, watching videos, or viewing a slideshow, it might take longer.
Charging the iPod nano Battery
You can charge the iPod nano battery in two ways:
- Connect iPod nano to your computer.
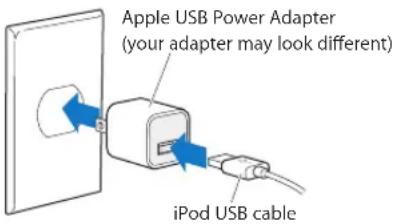
- Use the Apple USB Power Adapter, available separately.
To charge the battery using your computer:
- Connect iPod nano to a USB 2.0 port on your computer. The computer must be turned on and not in sleep.
If the battery icon on the iPod nano screen shows the Charging screen, the battery is charging. If it shows the Charged screen, the battery is fully charged.
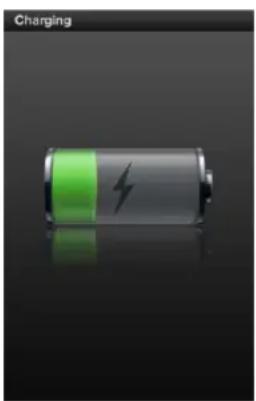

If you don't see the Charging screen, iPod nano might not be connected to a high-power USB port. Try another USB port on your computer.
Important: If a "Charging, Please Wait" or "Connect to Power" message appears on the iPod nano screen, the battery needs to be charged before iPod nano can communicate with your computer. See "If iPod nano displays a "Connect to Power" message" on page 88.
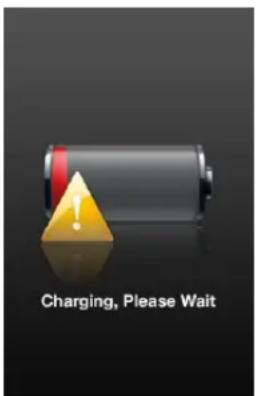
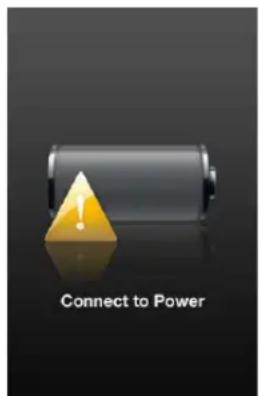
If you want to charge iPod nano when you're away from your computer, you can purchase the Apple USB Power Adapter.
To charge the battery using the Apple USB Power Adapter:
1. Connect the AC plug adapter to the power adapter (they might already be connected).
2. Connect the Dock Connector to USB Cable to the power adapter, and plug the other end of the cable into iPod nano.
3. Plug the power adapter into a working power outlet.
Understanding Battery States
When iPod nano isn't connected to a power source, a battery icon in the top-right corner of the iPod nano screen shows approximately how much charge is left.

Battery less than 20% charged

Battery about halfway charged

Battery fully charged
When iPod nano is connected to a power source, the battery icon changes to show that the battery is charging or fully charged.

Battery charging (lightning bolt)

Battery fully charged (plug)
You can disconnect and use iPod nano before it's fully charged.
Note: Rechargeable batteries have a limited number of charge cycles and might eventually need to be replaced. Battery life and number of charge cycles vary by use and settings. For information, go to www.apple.com/batteries.
Improving Battery Performance with Energy Saver
Energy Saver can extend the time between battery charges by turning off the iPod nano screen when you aren't using the controls.
Energy Saver is turned on by default.
To turn Energy Saver on or off:
Choose Settings > Playback > Energy Saver, and then select On or Off.
If you turn Energy Saver off, iPod nano displays the following information after the backlight turns off:

Turning off Energy Saver increases the rate of battery consumption.
Setting Up iPod nano
2
You use iTunes on your computer to set up iPod nano to play your music, video, and other media content. No setup is needed to record video or listen to FM radio.
Using iTunes
iTunes is the free software application you use to set up, organize, and manage your content on iPod nano. iTunes can sync music, audiobooks, podcasts, and more with iPod nano. If you don't already have iTunes installed on your computer, you can download it at www.apple.com/downloads. iPod nano requires iTunes 9 or later.
iTunes is available for Mac and Windows.
You can use iTunes to import music from CDs and the Internet, buy songs and other audio and video from the iTunes Store, create personal compilations of your favorite songs (called playlists), sync them to iPod nano, and adjust iPod nano settings.
iTunes also has a feature called Genius that creates playlists and mixes of songs from your iTunes library that go great together. You can sync Genius playlists that you create in iTunes to iPod nano, and you can create Genius playlists and listen to Genius Mixes on iPod nano. To use Genius, you need an iTunes Store account.
iTunes has many other features. You can burn your own CDs that play in standard CD players (if your computer has a recordable CD drive); listen to streaming Internet radio; watch videos and TV shows; rate songs according to preference; and much more.
For information about using these iTunes features, open iTunes and choose Help > iTunes Help.
If you already have iTunes 9 or later installed on your computer and you've set up your iTunes library, you can skip ahead to "Adding Music, Videos, and Other Content to iPod nano" on page 24.
If you want to get started recording video or listening to FM radio, you can set up iPod nano at a later time. To learn how to record video, see "Using the Video Camera" on page 52. For information about the FM radio, see "Listening to FM Radio" on page 58.
Setting Up Your iTunes Library
To listen to music and watch videos on iPod nano, you first need to get that music and video into iTunes on your computer.
Importing Music to iTunes
There are three ways of getting music and other audio into iTunes.
Purchase Songs and Download Podcasts Using the iTunes Store
If you have an Internet connection, you can easily purchase and download songs, albums, and audiobooks online using the iTunes Store. You can also subscribe to and download podcasts, and you can download free educational content from iTunes U.
To purchase music online using the iTunes Store, you set up a free iTunes account in iTunes, find the songs you want, and then buy them. If you already have an iTunes account (also called an Apple ID), you can use that account to sign in to the iTunes Store and buy songs.
You don't need an iTunes Store account to download or subscribe to podcasts.
To enter the iTunes Store, open iTunes and click iTunes Store below Store on the left side of the iTunes window.
Add Songs Already on Your Computer to Your iTunes Library
If you have songs on your computer encoded in file formats that iTunes supports, you can easily add the songs to iTunes. To learn how to get songs from your computer into iTunes, open iTunes and choose Help > iTunes Help.
Using iTunes for Windows, you can convert nonprotected WMA files to AAC or MP3 format. This can be useful if you have a library of music encoded in WMA format. For more information, open iTunes and choose Help > iTunes Help.
Import Music From Your Audio CDs Into iTunes
iTunes can import music and other audio from your audio CDs. If you have an Internet connection, iTunes gets the names of the songs on the CD from the Internet (if available) and lists them in the iTunes window. When you add the songs to iPod nano, the song information is included. To learn how to import music from your CDs into iTunes, open iTunes and choose Help > iTunes Help.
Adding More Details to Your iTunes Library
Once you import your music into iTunes, you can add more details to your iTunes library. Most of these additional details appear on iPod nano when you add songs.
Enter Song Names and Other Information
If you don't have an Internet connection, if song information isn't available for music you import, or if you want to include additional information (such as composer names), you can enter the information manually. To learn how to enter song information, open iTunes and choose Help > iTunes Help.
Add Lyrics
You can enter song lyrics in plain text format into iTunes so that you can view the song lyrics on iPod nano while the song is playing. To learn how to enter lyrics, open iTunes and choose Help > iTunes Help.
For more information, see "Viewing Lyrics on iPod nano" on page 37.
Add Album Artwork
Music you purchase from the iTunes Store includes album artwork, which iPod nano can display. You can add album artwork automatically for music you've imported from CDs, if the CDs are available from the iTunes Store. You can add album artwork manually if you have the album art on your computer. To learn more about adding album artwork, open iTunes and choose Help > iTunes Help.
For more information, see "Viewing Album Artwork on iPod nano" on page 37.
Organizing Your Music
In iTunes, you can organize songs and other items into lists, called playlists, in any way you want. For example, you can create playlists with songs to listen to while exercising, or playlists with songs for a particular mood.
You can create Smart Playlists that update automatically based on rules you define. When you add songs to iTunes that match the rules, they automatically get added to the Smart Playlist.
You can turn on Genius in iTunes and create playlists of songs that go great together. Genius can also organize your music library automatically by sorting and grouping it into collections called Genius Mixes.
You can create as many playlists as you like, using any of the songs in your iTunes library. Adding a song to a playlist or later removing it doesn't remove it from your library.
To learn how to set up playlists in iTunes, open iTunes and choose Help > iTunes Help.
Note: To create playlists on iPod nano when iPod nano isn't connected to your computer, see "Creating On-The-Go Playlists on iPod nano" on page 41.
Turning On Genius in iTunes
Genius finds songs in your library that go great together in order to create Genius playlists and Genius Mixes.
A Genius playlist starts with a song that you select. To create the Genius playlist, iTunes then compiles a collection of songs that go great with the one you selected.
Genius Mixes are pre-selected compilations of songs that go great together, and are created for you by iTunes using songs from your library. Genius Mixes are designed to provide a different listening experience each time you play one. iTunes creates up to 12 Genius Mixes, depending on the variety of music in your iTunes library.
To use Genius on iPod nano to create Genius playlists and Genius Mixes, you first need to turn on Genius in iTunes. To learn about turning on and using Genius in iTunes, open iTunes and choose Help > iTunes Help.
Genius playlists and Genius Mixes created in iTunes can be synced to iPod nano like any iTunes playlist. Genius Mixes can't be added to iPod nano manually. See "Syncing Genius Playlists and Genius Mixes to iPod nano" on page 26.
Genius is a free service, but an iTunes Store account is required to use it (if you don't have an account, you can set one up when you turn on Genius).
Importing Video to iTunes
There are several ways to import video into iTunes, described below.
Purchase or Rent Videos and Download Video Podcasts from the iTunes Store
To purchase videos—movies, TV shows, and music videos—or rent movies online from the iTunes Store (part of iTunes and available in some countries only), you sign in to your iTunes Store account, find the videos you want, and then buy or rent them.
A rented movie expires 30 days after you rent it or 24 hours after you begin playing it (48 hours outside the U.S.), whichever comes first. Expired rentals are deleted automatically. These terms apply to U.S. rentals. Rental terms vary among countries.
To enter the iTunes Store, open iTunes and click iTunes Store below Store on the left side of the iTunes window.
You can view movie trailers or TV show previews by clicking the Preview button next to them.
Purchased videos appear when you select Movies or TV Shows (under Library) or Purchased (under Store) in the source list. Rented videos appear when you select Rented Movies (under Library).
Some items have other options, such as TV shows that let you buy a Season Pass for all episodes.
Video podcasts appear along with other podcasts in the iTunes Store. You can subscribe to them and download them just as you would other podcasts. You don't need an iTunes Store account to download podcasts. See "Purchase Songs and Download Podcasts Using the iTunes Store" on page 20.
Create Versions of Your Own Videos to Work with iPod nano
You can view other video files on iPod nano, such as videos you create in iMovie on a Mac or videos you download from the Internet. Import the video into iTunes, convert it for use with iPod nano, if necessary, and then add it to iPod nano.
iTunes supports many of the video formats that QuickTime supports. For more information, see "If you can't add a song or other item to iPod nano" on page 89.
Some videos may be ready for use with iPod nano after you import them to iTunes. If you try to add a video to iPod nano (see “Syncing Videos Automatically” on page 27), and a message says the video can’t play on iPod nano, then you must convert the video for use with iPod nano.
Depending on the length and content of a video, converting it for use with iPod nano can take several minutes to several hours.
When you create a version of a video for use with iPod nano, the original video also remains in your iTunes library.
For more about converting video for iPod nano, open iTunes and choose Help >iTunes Help, or go to www.info.apple.com/kbnum/n302758.
Adding Music, Videos, and Other Content to iPod nano
After your music and video are imported and organized in iTunes, you can easily add them to iPod nano.
To manage how music, videos, photos, and other content are added to iPod nano from your computer, you connect iPod nano to your computer, and then use iTunes to choose iPod nano settings.
Connecting iPod nano to a Computer for the First Time
The first time you connect iPod nano to your computer (after installing iTunes), iTunes opens automatically and the iPod nano Setup Assistant appears:
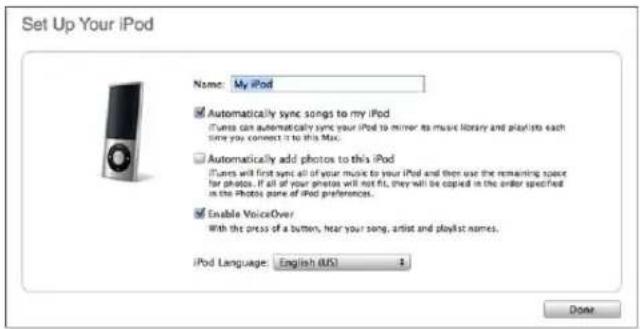
To use the iPod nano Setup Assistant:
1. Enter a name for iPod nano. This is the name that will appear in the device list on the left side of the iTunes window.

2. Select your settings. Automatic syncing and VoiceOver are selected by default.
If you don't want to enable VoiceOver at this time, deselect Enable VoiceOver. If you change your mind, you can enable VoiceOver any time you connect iPod nano to your computer. See "Setting Up VoiceOver" on page 32.
3. Click Done.
If you selected to enable VoiceOver during setup, follow any onscreen instructions for downloading and installing the VoiceOver Kit. For more information, see "Using VoiceOver in iPod nano" on page 44. To learn how to set up VoiceOver in iPod nano, see "Setting Up VoiceOver" on page 32.
You can change the device name and settings any time you connect iPod nano to your computer.
After you click Done, the Summary pane appears. If you selected automatic syncing, iPod nano begins syncing.
Adding Content Automatically or Manually
There are two ways to add content to iPod nano:
- Automatic syncing: When you connect iPod nano to your computer, iPod nano is automatically updated to match the items in your iTunes library. You can sync all your songs, playlists, videos, and podcasts, or, if your entire iTunes library doesn't fit on iPod nano, you can sync only selected items. You can sync iPod nano automatically with only one computer at a time.
- Manually managing iPod nano: When you connect iPod nano, you can drag items individually to iPod nano and delete them individually from iPod nano. You can add songs from more than one computer without erasing songs from iPod nano. When you manage music yourself, you must always eject iPod nano from iTunes before you disconnect it.
Syncing Music Automatically
By default, iPod nano is set to sync all songs and playlists when you connect it to your computer. This is the simplest way to add music to iPod nano. You just connect iPod nano to your computer, let it add songs, audiobooks, videos, and other items automatically, and then disconnect it and go. If you added any songs to iTunes since the last time you connected iPod nano, they are synced with iPod nano. If you deleted songs from iTunes, they are removed from iPod nano.
To sync music with iPod nano:
Connect iPod nano to your computer. If iPod nano is set to sync automatically, the update begins.
Important: If you connect iPod nano to a computer that it's not synced with, a message asks if you want to sync songs automatically. If you accept, all songs, audiobooks, and videos are erased from iPod nano and replaced with songs and other items from that computer.
While music is being synced from your computer to iPod nano, the iTunes status window shows progress, and you see a sync icon next to the iPod nano icon in the device list.
When the update is done, a message in iTunes says "iPod sync is complete." A bar at the bottom of the iTunes window displays how much disk space is used by different types of content.

If there isn't enough space on iPod nano for all your music, you can set iTunes to sync only selected songs and playlists. Only the songs and playlists you specify are synced with iPod nano.
Syncing Music From Selected Playlists, Artists, and Genres to iPod nano
You can set iTunes to sync selected playlists, artists, and genres to iPod nano if the music in your iTunes library doesn't all fit on iPod nano. Only the music from the playlists, artists, and genres you select is synced to iPod nano.
To set iTunes to sync music from selected playlists, artists, and genres to iPod nano:
1. In iTunes, select iPod nano in the device list and click the Music tab.

2. Select "Sync music," and then choose "Selected playlists, artists, and genres." 3. Select the playlists you want. 4. To include music videos, select "Include music videos." 5. To set iTunes to automatically fill any remaining space on iPod nano, select "Automatically fill free space with songs." 6. Click Apply.
If "Sync only checked songs and videos" is selected in the Summary pane, iTunes syncs only items that are checked.
Syncing Genius Playlists and Genius Mixes to iPod nano
You can set iTunes to sync Genius playlists and Genius Mixes to iPod nano.
Genius Mixes can only be synced automatically. You can't add Genius Mixes to iPod nano if you manage your content manually. Genius playlists can be added manually to iPod nano.
If you select any Genius Mixes to sync, iTunes may select and sync additional songs from your library that you didn't select.
To set iTunes to sync Genius playlists and selected Genius Mixes to iPod nano:
1 In iTunes, select iPod nano in the device list and click the Music tab.
2 Select "Sync music," and then choose "Selected playlists, artists, and genres."
3 Under Playlists, select the Genius playlists and Genius Mixes you want.
4 Click Apply.
If you choose to sync your entire music library, iTunes syncs all your Genius playlists and Genius Mixes.
If "Sync only checked songs and videos" is selected in the Summary pane, iTunes syncs only items that are checked.
Adding Videos to iPod nano
You add movies and TV shows to iPod nano much the same way you add songs. You can set iTunes to sync all movies and TV shows to iPod nano automatically when you connect iPod nano, or you can set iTunes to sync only selected playlists. Alternatively, you can manage movies and TV shows manually. Using this option, you can add videos from more than one computer without erasing videos already on iPod nano.
Note: Music videos are managed with songs, under the Music tab in iTunes. See "Adding Music, Videos, and Other Content to iPod nano" on page 24.
Important: You can view a rented movie on only one device at a time. For example, if you rent a movie from the iTunes Store and add it to iPod nano, you can only view it on iPod nano. If you transfer the movie back to iTunes, you can only view it there and not on iPod nano. All standard time limits apply to rented movies added to iPod nano.
Syncing Videos Automatically
By default, iPod nano is set to sync all movies and TV shows when you connect it to your computer. This is the simplest way to add videos to iPod nano. You just connect iPod nano to your computer, let it add videos and other items automatically, and then disconnect it and go. If you added any videos to iTunes since the last time you connected iPod nano, they're added to iPod nano. If you deleted videos from iTunes, they're removed from iPod nano.
If there isn't enough space on iPod nano for all your videos, you can set iTunes to sync only the videos you specify. You can sync selected videos or selected playlists that contain videos.
The settings for syncing movies and TV shows are unrelated. Movie settings don't affect TV show settings, and vice versa.
To set iTunes to sync movies to iPod nano:
1 In iTunes, select iPod nano in the device list and click the Movies tab.

2 Select "Sync movies."
3 Select the movies or playlists you want.
All, recent, or unwatched movies: Select "Automatically include ... movies" and choose the option you want from the pop-up menu.
Selected movies or playlists: Select the movies or playlists you want.
4 Click Apply.
If "Sync only checked songs and videos" is selected in the Summary pane, iTunes syncs only movies that are checked.
To set iTunes to sync TV shows to iPod nano:
1 In iTunes, select iPod nano in the device list and click the TV Shows tab.

2 Select "Sync TV Shows."
3 Select the shows, episodes, and playlists you want.
All, most recent, or unwatched episodes: Select "Automatically include ... episodes of ..." and choose the options you want from the pop-up menus.
Episodes on selected playlists: Select the playlists you want.
4 Click Apply.
If "Sync only checked songs and videos" is selected in the Summary pane, iTunes syncs only TV shows that are checked.
Adding Podcasts to iPod nano
The settings for adding podcasts to iPod nano are unrelated to the settings for adding songs and videos. Podcast settings don't affect song or video settings, and vice versa. You can set iTunes to automatically sync all or selected podcasts, or you can add podcasts to iPod nano manually.
To set iTunes to update the podcasts on iPod nano automatically:
1 In iTunes, select iPod nano in the device list and click the Podcasts tab.

2 In the Podcasts pane, select "Sync Podcasts."
3 Select the podcasts, episodes, and playlists you want, and set your sync options.
4 Click Apply.
When you set iTunes to sync iPod nano podcasts automatically, iPod nano is updated each time you connect it to your computer.
If you select "Sync only checked songs and videos" in the Summary pane, iTunes syncs only items that are checked in your Podcasts and other libraries.
Adding Video Podcasts to iPod nano
You add video podcasts to iPod nano the same way you add other podcasts (see "Adding Podcasts to iPod nano" on page 28). If a podcast has video, the video plays when you choose it from the Podcasts menu.
Adding iTunes U Content to iPod nano
The settings for adding iTunes U content to iPod nano are unrelated to the settings for adding other content. iTunes U settings don't affect other settings, and vice versa. You can set iTunes to automatically sync all or selected iTunes U content, or you can add iTunes U content to iPod nano manually.
To set iTunes to update the iTunes U content on iPod nano automatically:
1 In iTunes, select iPod nano in the device list and click the iTunes U tab.

2 In the iTunes U pane, select "Sync iTunes U."
3 Select the collections, items, and playlists you want, and set your sync options.
4 Click Apply.
When you set iTunes to sync iTunes U content automatically, iPod nano is updated each time you connect it to your computer.
If you select "Sync only checked songs and videos" in the Summary pane, iTunes syncs only items that are checked in your iTunes U and other libraries.
Adding Audiobooks to iPod nano
You can purchase and download audiobooks from the iTunes Store or audible.com, or import audiobooks from CDs, and listen to them on iPod nano.
Use iTunes to add audiobooks to iPod nano. If you sync iPod nano automatically, all audiobooks in your iTunes library are included in a playlist named Audiobooks, which you can sync to iPod nano. If you manage your content on iPod nano manually, you can add audiobooks one at a time.
To sync audiobooks to iPod nano:
1 In iTunes, select iPod nano in the device list and click the Music tab.

2 Select Sync Music, and then do one of the following:
- Select "Entire music library."
- Select "Selected playlists, artists, and genres," and then select Audiobooks (below Playlists).
3 Click Apply.
The update begins automatically.
Adding Other Content to iPod nano
You can also use iTunes to sync photos, games, contacts, and more to iPod nano. You can set iTunes to sync your content automatically, or you can manage your content on iPod nano manually.
For more information about adding other types of content to iPod nano, see:
- "Adding Photos from Your Computer to iPod nano" on page 67
• "To sync games automatically to iPod nano:" on page 76
- "Syncing Contacts, Calendars, and To-Do Lists" on page 81
• "Mono Audio" on page 83
Managing iPod nano Manually
If you manage iPod nano manually, you can add and remove individual songs (including music videos) and videos (including movies and TV shows). You can also add music and video from multiple computers to iPod nano without erasing items already on iPod nano.
You can't manually add Genius Mixes to iPod nano, but you can manually add Genius playlists.
Setting iPod nano to manually manage music and video turns off the automatic sync options in the Music, Movies, TV Shows, Podcasts, iTunes U, Photos, Contacts, and Games panes. You can't manually manage some and automatically sync others at the same time.
If you set iTunes to manage content manually, you can reset it later to sync automatically.
To set iTunes to manage content on iPod nano manually:
1 In iTunes, select iPod nano in the device list and click the Summary tab.

2 In the Options section, select "Manually manage music and video."
3 Click Apply.
When you manually manage content on iPod nano, you must always eject iPod nano from iTunes before you disconnect it.
When you connect a manually-managed iPod nano to a computer, it appears in the device list on the left side of the iTunes window.
To add a song, video, or other item to iPod nano:
1 In iTunes, click Music or another item below Library on the left side of the iTunes window.
2 Drag a song or other item to iPod nano in the device list.
To remove a song, video, or other item from iPod nano:
1 In iTunes, select iPod nano in the device list.
2 Select a song or other item on iPod nano, and then press the Delete or Backspace key on your keyboard.
If you remove a song or other item from iPod nano, it isn't deleted from your iTunes library.
To create a new playlist on iPod nano:
1 In iTunes, select iPod nano in the device list, and then click the Add (+) button or choose File > New Playlist.
2 Type a name for the playlist.
3 Click an item, such as Music, in the Library list, and then drag songs or other items to the playlist.
To add items to or remove items from a playlist on iPod nano:
- Drag an item to a playlist on iPod nano to add the item. Select an item in a playlist and press the Delete key on your keyboard to delete the item.
To reset iTunes to sync music, video, and podcasts automatically:
1 In iTunes, select iPod nano in the device list and click the Summary tab.
2 Deselect "Manually manage music and videos."
3 Select the Music, Movies, TV Shows, and Podcasts tabs, and select your sync options.
4 Click Apply.
The update begins automatically.
Setting Up VoiceOver
VoiceOver announces the title and artist of the song you're listening to, on demand. If you have the Apple Earphones with Remote and Mic or the In-Ear Headphones with Remote and Mic, you can also use VoiceOver to navigate playlists.
Note: VoiceOver isn't available in all languages.
You set VoiceOver options in the Summary pane in iTunes. When you first set up iPod nano, VoiceOver is enabled by default. Follow any onscreen instructions to download and install the VoiceOver Kit.
If you don't want VoiceOver enabled when you set up iPod nano, deselect Enable VoiceOver in the Setup Assistant. If you change your mind, you can enable VoiceOver at a later time.
To enable VoiceOver at a later time:
1. Connect iPod nano to your computer. 2. In iTunes, select iPod nano in the device list and click the Summary tab. 3. Under Voice Feedback, select Enable VoiceOver. 4. Click Apply. 5. Follow the onscreen instructions to download and install the VoiceOver Kit. 6. Click Apply.
When syncing is finished, VoiceOver is enabled.
If your computer has a system voice that you want to use instead of the built-in voice that comes with VoiceOver, select "Use system voice instead of built-in voice" under Voice Feedback in the Summary pane.
You can disable VoiceOver any time you connect iPod nano to your computer.
To disable VoiceOver:
1. In iTunes, select iPod nano in the device list and click the Summary tab. 2. Under Voice Feedback, deselect Enable VoiceOver. 3. Click Apply.
When syncing is finished, VoiceOver is disabled.
Listening to Music
3
Read this chapter to learn about listening on the go.
After you set up iPod nano, you can listen to songs, podcasts, audiobooks, and more.
Playing Music and Other Audio
When a song is playing, the Now Playing screen appears. The following table describes the elements on the Now Playing screen.
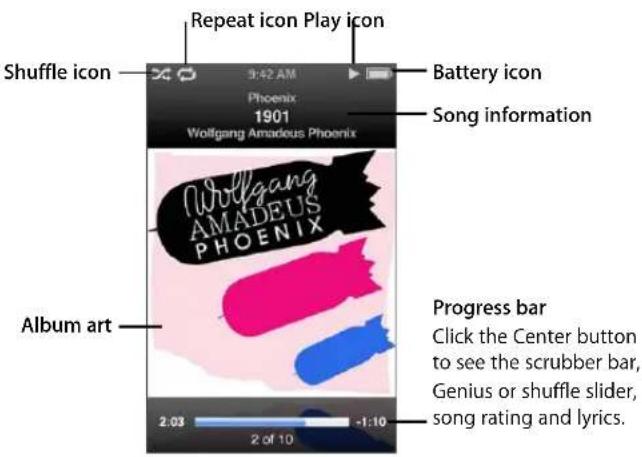
Screen item Function
| Shuffle icon Appears if iPod nano is set to shuffle songs or albums. | |
| Repeat icon Appears if iPod nano is set to repeat all songs. The Repeat Once (➊) icon appears if iPod nano is set to repeat one song. | |
| Play icon | Appears when song is playing. The Pause (II) icon appears when song is paused. |
| Battery icon Shows the approximate remaining battery charge. | |
| Song information Displays the song title, artist, and album title. | |
| Album art Shows the album art, if it's available. | |
| Progress bar Shows the elapsed and remaining times for the song that's playing. | |
Press the Center button to click through these additional items in the Now Playing screen:
Screen item Function
| Scrubber bar Lets you quickly navigate to a different part of the track. |
| Genius slider Creates a Genius playlist based on the current song. The slider doesn’t appear if Genius information isn’t available for the current song. |
| Shuffle slider Lets you shuffle songs or albums directly from the Now Playing screen. |
| Song rating Lets you rate the song. |
| Lyrics Displays the lyrics of the song that’s playing. Lyrics don’t appear if you didn’t enter them in iTunes. |
Use the Click Wheel and Center button to browse for a song or music video.
When you play music videos from the Music menu, you only hear the music. When you play them from the Videos menu, you also see the video.
To browse for and play a song:
- Choose Music, browse for a song or music video, and then press Play/Pause (▶II).
To change the playback volume:
- When you see the progress bar, use the Click Wheel to change the volume.
If you don't see the progress bar, press the Center button until it appears.
To listen to a different part of a song:
1 Press the Center button until you see the scrubber bar.
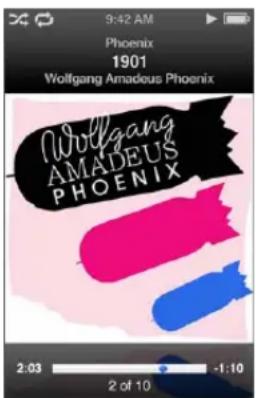
2 Use the Click Wheel to move the playhead along the scrubber bar.
To create a Genius playlist from the current song:
1 Press the Center button until you see the Genius slider.
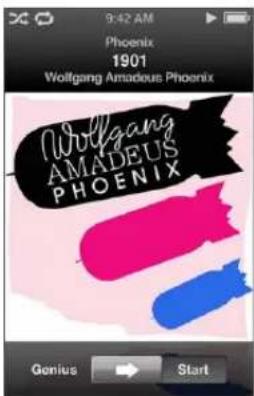
2 Use the Click Wheel to move the slider to Start.
The Genius slider doesn't appear if Genius information isn't available for the current song.
To shuffle songs from the Now Playing screen:
1 Press the Center button until you see the shuffle slider.
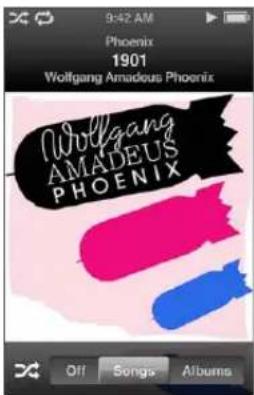
2 Use the Click Wheel to move the slider to Songs or Albums.
- Choose Songs to play all songs on iPod nano at random.
- Choose Albums to play all songs in the current album in order. iPod nano then randomly selects another album and plays through it in order.
To just listen to a music video:
- Choose Music and browse for a music video.
When you play the video, you hear it but don't see it. When you play a playlist that includes video podcasts, you hear the podcasts but don't see them.
To return to the previous menu:
■From any screen, press Menu.
Rating Songs
You can assign a rating to a song (from 1 to 5 stars) to indicate how much you like it. You can use song ratings to help you create Smart Playlists automatically in iTunes.
To rate a song:
1 Start playing the song.
2 From the Now Playing screen, press the Center button until the five rating bullets appear.
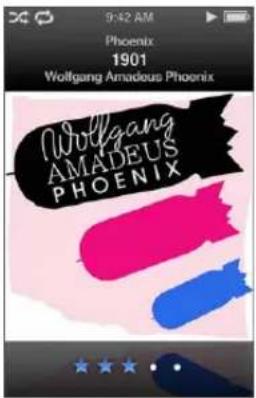
3 Use the Click Wheel to assign a rating.
The ratings you assign to songs on iPod nano are transferred to iTunes when you sync.
Note: You can't assign ratings to video podcasts.
Viewing Lyrics on iPod nano
If you enter lyrics for a song in iTunes (see "Add Lyrics" on page 21) and then add the song to iPod nano, you can view the lyrics on iPod nano. Lyrics don't appear unless you enter them.
To view lyrics on iPod nano while a song is playing:
- On the Now Playing screen, press the Center button until you see the lyrics. You can scroll through the lyrics as the song plays.
Viewing Album Artwork on iPod nano
iTunes displays album artwork on iPod nano, if the artwork is available. Artwork appears on iPod nano in Cover Flow, in the album list, and when you play a song from the album.
To see album artwork on iPod nano:
- Hold iPod nano horizontally to view Cover Flow, or play a song that has album artwork and view it in the Now Playing screen.
For more information about album artwork, open iTunes and choose Help > iTunes Help.
Browsing Music Using Cover Flow
You can browse your music collection using Cover Flow, a visual way to flip through your library. Cover Flow displays your albums alphabetically by artist name.
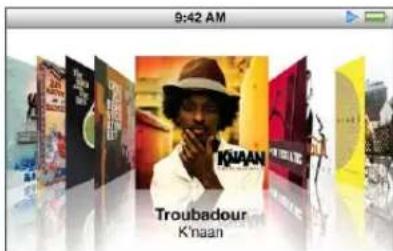
You can activate Cover Flow from the main menu, any music menu, or the Now Playing screen.
To use Cover Flow:
1 Rotate iPod nano 90 degrees to the left or right. Cover Flow appears.
2 Use the Click Wheel to move through your album art.
3 Select an album and press the Center button.
4 Use the Click Wheel to select a song, and then press the Center button to play it.

You can also browse quickly through your albums in Cover Flow by moving your thumb quickly on the Click Wheel.
Note: Not all languages are supported.
To browse quickly in Cover Flow:
1 Move your thumb quickly on the Click Wheel, to display a letter of the alphabet on the screen.
2 Use the Click Wheel to navigate through the alphabet until you find the first letter of the artist you're looking for.
Albums by artists beginning with a symbol or number appear after the letter Z.
3 Lift your thumb momentarily to return to normal browsing.
4 Select an album and press the Center button.
5 Use the Click Wheel to select a song, and then press the Center button to play it.
To turn Cover Flow on or off:
1 From the main menu, choose Settings > General > Rotate.
2 Press the Center button to select Cover Flow or Off.
Accessing Additional Commands
Some additional iPod nano commands can be accessed directly from the Now Playing screen and some menus.
To access additional commands:
■Press and hold the Center button until a menu appears, select a command, and then press the Center button again.
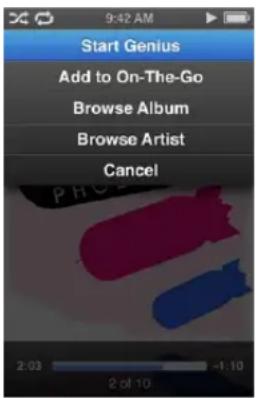
If a menu doesn't appear, no additional commands are available.
Using Genius on iPod nano
Even when iPod nano isn't connected to your computer, Genius can automatically create instant playlists of songs that go great together. You can also play Genius Mixes, which are pre-selected compilations of songs that go great together. To use Genius, you need to set up Genius in the iTunes Store, and then sync iPod nano to iTunes. You can also create Genius playlists in iTunes and add them to iPod nano, and you can sync Genius Mixes to iPod nano.
To learn how to set up Genius in iTunes, open iTunes and choose Help > iTunes Help. Genius is a free service, but you need an iTunes Store account to use it.
To make a Genius playlist on iPod nano:
1 Select a song, and then press and hold the Center button until a menu appears.
You can select a song from a menu or playlist, or you can start from the Now Playing screen.
2 Choose Start Genius.
Start Genius doesn't appear in the menu of additional commands, if any of the following apply:
- You haven't set up Genius in iTunes and then synced iPod nano with iTunes.
- Genius doesn't recognize the song you selected.
- Genius recognizes the song, but there aren't at least ten similar songs in your library.
3 Press the Center button. The new playlist appears.
4 To keep the playlist, choose Save Playlist.
The playlist is saved with the song title and artist of the song you used to make the playlist.
5 To change the playlist to a new one based on the same song, choose Refresh. If you refresh a saved playlist, the new playlist replaces the previous one. You can't recover the previous playlist.
You can also start Genius from the Now Playing screen by pressing the Center button until you see the Genius slider, and then using the Click Wheel to move the slider to the right. The Genius slider won't appear if Genius information isn't available for the current song.
Genius playlists saved on iPod nano are synced back to iTunes when you connect iPod nano to your computer.
To play a Genius playlist:
- Choose Music > Playlists and choose the playlist.
Playing Genius Mixes
Genius Mixes are created for you by iTunes and contain songs from your library that go great together. Genius Mixes are designed to provide a different listening experience each time you play one. iTunes creates up to 12 Genius Mixes, depending on the variety of music in your iTunes library.
To find out how to sync Genius Mixes to iPod nano, see "Syncing Genius Playlists and Genius Mixes to iPod nano" on page 26.
To play a Genius Mix:
1 Choose Music > Genius Mixes.
2 Use Next/Fast-forward (▶) or Previous/Rewind (◀) to browse the Genius Mixes. The dots at the bottom of the screen indicate how many Genius Mixes are synced to iPod nano.
3 To start playing a Genius Mix, press the Center button or Play/Pause (▶II) when you see its screen.

The Speaker (icon) appears when the selected Genius Mix is playing.

Creating On-The-Go Playlists on iPod nano
You can create On-The-Go Playlists on iPod nano when iPod nano isn't connected to your computer.
To create an On-The-Go playlist:
1 Select a song, and then press and hold the Center button until a menu appears.
2 Choose "Add to On-The-Go."
3 To add more songs, repeat steps 1 and 2.
4 Choose Music > Playlists > On-The-Go to browse and play your list of songs.
You can also add a group of songs. For example, to add an album, highlight the album title, press and hold the Center button until a menu appears, and then choose "Add to On-The-Go."
To play songs in the On-The-Go playlist:
- Choose Music > Playlists > On-The-Go, and then choose a song.
To remove a song from the On-The-Go playlist:
1 Select a song in the playlist and hold down the Center button until a menu appears. 2 Choose "Remove from On-The-Go," and then press the Center button.
To clear the entire On-The-Go playlist:
- Choose Music > Playlists > On-The-Go > Clear Playlist, and then click Clear.
To save the On-The-Go playlist on iPod nano:
- Choose Music > Playlists > On-The-Go > Save Playlist.
The first playlist is saved as "New Playlist 1" in the Playlists menu. The On-The-Go playlist is cleared and ready to reuse. You can save as many playlists as you like.
After you save a playlist, you can no longer remove songs from it.
To copy On-The-Go playlists from iPod nano to your computer:
If iPod nano is set to sync songs automatically (see "Syncing Music Automatically" on page 25) and you create an On-The-Go playlist, the playlist is automatically synced to iTunes when you connect iPod nano. The new On-The-Go playlist appears in the list of playlists in iTunes. You can rename, edit, or delete the new playlist, just as you would any playlist.
Browsing Songs by Album or Artist
When you're listening to a song, you can browse more songs by the same artist or all the songs in the current album.
To browse songs by album:
1 From the Now Playing screen, press and hold the Center button until a menu appears. 2 Choose Browse Album, and then press the Center button.
You see all the songs from the current album that are on iPod nano. You can select a different song or return to the Now Playing screen.
To browse songs by artist:
1 From the Now Playing screen, press and hold the Center button until a menu appears. 2 Choose Browse Artist, and then press the Center button.
You see all the songs by that artist that are on iPod nano. You can select a different song or return to the Now Playing screen.
Setting iPod nano to Shuffle Songs
You can set iPod nano to play songs, albums, or your entire library in random order.
To set iPod nano to shuffle and play all your songs:
- Choose Shuffle Songs from the iPod nano main menu.
iPod nano begins playing songs from your entire music library in random order, skipping audiobooks and podcasts.
To set iPod nano to always shuffle songs or albums:
1 Choose Settings from the iPod nano main menu.
2 Set Shuffle to either Songs or Albums.
When you set iPod nano to shuffle songs, iPod nano shuffles songs within whatever list (for example, album or playlist) you choose to play.
When you set iPod nano to shuffle albums, it plays all the songs on an album in order, and then randomly selects another album and plays through it in order.
You can also set iPod nano to shuffle songs directly from the Now Playing screen.
To set iPod nano to shuffle songs from the Now Playing screen:
1. From the Now Playing screen, press the Center button until the shuffle slider appears.
2. Use the Click Wheel to set iPod nano to shuffle songs or albums.
You can skip ahead to a random song by shaking iPod nano.
To shuffle songs while a song is playing or paused:
■ Shake iPod nano from side to side. A new song starts to play.
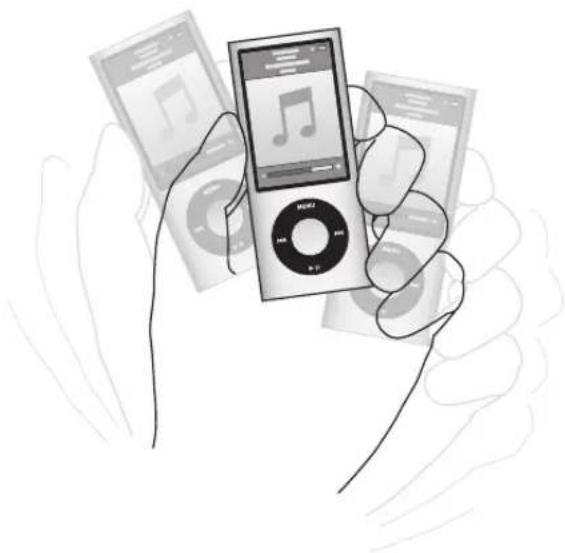
Shaking to shuffle doesn't change your shuffle settings.
To disable shaking:
- Choose Settings > Playback > Shake and select Off.
To turn shaking on again, choose Settings > Playback > Shake, and then select Shuffle.
Shaking is also disabled when the Hold switch is in the HOLD position, when the iPod nano built-in radio is playing, or when the display is off. If iPod nano is off, you can't turn it on by shaking it.
Setting iPod nano to Repeat Songs
You can set iPod nano to repeat a song over and over, or repeat songs within the list you choose to play.
To set iPod nano to repeat songs:
- Choose Settings from the iPod nano main menu.
• To repeat all songs in the list, set Repeat to All. • To repeat one song over and over, set Repeat to One.
Using VoiceOver in iPod nano
With VoiceOver, iPod nano can announce the title and artist of the song you're listening to. VoiceOver is available in selected languages.
To use VoiceOver, install the VoiceOver Kit and enable the VoiceOver feature in iTunes. For more information, see "Setting Up VoiceOver" on page 32.
To hear the current song announcement:
■From the Now Playing screen, press the Center button.
You hear the current song title and artist name. If you're listening to an audiobook, you hear the book title and author's name.
If you have the Apple Earphones with Remote and Mic or the In-Ear Headphones with Remote and Mic (available at store.apple.com or your local Apple Store), you can also use VoiceOver to navigate through playlists. For more information, see the documentation for those accessories.
Searching Music
You can search iPod nano for songs, playlists, album titles, artist names, audio podcasts, and audiobooks. The search feature doesn't search videos, notes, calendar items, contacts, or lyrics.
Note: Not all languages are supported.
To search for music:
1 From the Music menu, choose Search. 2 Enter a search string by using the Click Wheel to navigate the alphabet and pressing the Center button to enter each character.
iPod nano starts searching as soon as you enter the first character, displaying the results on the search screen. For example, if you enter "b," iPod nano displays all music items containing the letter "b." If you enter "ab," iPod nano displays all items containing that sequence of letters.
To enter a space character, press Next/Fast-forward (▶).
To delete the previous character, press Previous/Rewind (◀).
3 Press Menu to display the results list, which you can navigate by using the Click Wheel. Items appear in the results list with icons identifying their type: song, video, artist, album, audiobook, or podcast.
To return to Search (if Search is highlighted in the menu), press the Center button.
Customizing the Music Menu
You can add items to or remove them from the Music menu, just as you do with the main menu. For example, you can add a Compilations item to the Music menu, so you can easily choose compilations that are put together from various sources.
To add or remove items in the Music menu:
1 Choose Settings > General > Music Menu.
2 Select each item you want to appear in the Music menu. A checkmark indicates which items have been added. To revert to the original Music menu settings, choose Reset Menu.
Setting the Maximum Volume Limit
You can set a limit for the maximum volume on iPod nano and assign a combination to prevent the setting from being changed.
To set the maximum volume limit for iPod nano:
1 Choose Settings > Playback > Volume Limit.
The volume control shows the current volume.
2 Use the Click Wheel to select the maximum volume limit.
3 Press the Center button to set the maximum volume limit.
4 If you don't want to require a combination to change the maximum volume, choose Done.
To require a combination to change the maximum volume:
1 After setting the maximum volume, choose Lock.
2 In the screen that appears, enter a combination.
To enter a combination:
- Use the Click Wheel to select a number for the first position. Press the Center button to confirm your choice and move to the next position.
- Use the same method to set the remaining numbers of the combination. You can use Next/Fast-forward (▶) to move to the next position and Previous/Rewind (◀) to move to the previous position. Press the Center button in the final position to confirm the entire combination.
The volume of songs and other audio may vary depending on how the audio was recorded or encoded. See “Setting Songs to Play at the Same Volume Level” on page 46 for information about how to set a relative volume level in iTunes and on iPod nano. The volume level may also vary if you use different earphones or headphones. Accessories that connect using the Dock Connector don’t support volume limits.
If you set a combination, you must enter it before you can change or remove the maximum volume limit.
To change the maximum volume limit:
1 Choose Settings > Playback > Volume Limit.
2 If you set a combination, enter it by using the Click Wheel to select the numbers and pressing the Center button to confirm them.
A triangle on the volume bar indicates the current volume limit.
3 Use the Click Wheel to change the maximum volume limit.
4 Press Play/Pause (▶) to accept the change.
To remove the maximum volume limit:
1 If you're currently listening to iPod nano, press Play/Pause (▶II).
2 Choose Settings > Playback > Volume Limit.
3 If you set a combination, enter it by using the Click Wheel to select the numbers and pressing the Center button to confirm each number.
4 Use the Click Wheel to move the volume limit to the maximum level on the volume bar. This removes any restriction on volume.
5 Press Play/Pause (▶) to accept the change.
If you forget the combination, you can restore iPod nano. See "Updating and Restoring iPod Software" on page 92.
Setting Songs to Play at the Same Volume Level
iTunes can automatically adjust the volume of songs, so they play at the same relative volume level. You can set iPod nano to use the iTunes volume settings.
To set iTunes to play songs at the same sound level:
1 In iTunes, choose iTunes > Preferences if you're using a Mac, or choose Edit > Preferences if you're using a Windows PC.
2 Click Playback and select Sound Check, and then click OK.
To set iPod nano to use the iTunes volume settings:
- Choose Settings > Playback and set Sound Check to On.
If you haven't activated Sound Check in iTunes, setting it on iPod nano has no effect.
Using the Equalizer
You can use equalizer presets to change the sound on iPod nano to suit a particular music genre or style. For example, to make rock music sound better, set the equalizer to Rock.
To use the equalizer to change the sound on iPod nano:
- Choose Settings > Playback > EQ, and then choose an equalizer preset.
If you assigned an equalizer preset to a song in iTunes and the iPod nano equalizer is set to Off, the song plays using the iTunes setting. See iTunes Help for more information.
Crossfading Between Songs
You can set iPod nano to fade out at the end of each song and fade in at the beginning of the song following it.
To turn on crossfading:
- Choose Settings > Playback > Audio Crossfade and select On.
Note: Songs that are grouped for gapless playback play without gaps even when crossfading is on.
Playing Podcasts
Podcasts are free, downloadable shows available at the iTunes Store. Podcasts are organized by shows, episodes within shows, and chapters within episodes. If you stop playing a podcast and return to it later, the podcast begins playing where you left off.
To play a podcast:
1 From the main menu, choose Podcasts, and then choose a show.
Shows appear in reverse chronological order so you can play the most recent one first. You see a blue dot next to shows and episodes you haven't played yet.
2 Choose an episode to play it.
The Now Playing screen displays the show, episode, and date information, along with elapsed and remaining time. Press the Center button to see more information about the podcast.
If the podcast has chapters, you can press Next/Fast-forward (▶) or Previous/Rewind (◀) to skip to the next chapter or the beginning of the current chapter in the podcast.
If a podcast includes artwork, you also see a picture. Podcast artwork can change during an episode.
For more information about podcasts, open iTunes and choose Help > iTunes Help. Then search for "podcasts."
Playing iTunes U Content
iTunes U is a part of the iTunes Store featuring free lectures, language lessons, audiobooks, and more, which you can download and enjoy on iPod nano. iTunes U content is organized by collections, items within collections, authors, and providers.
If you stop listening to iTunes U content and return to it later, the collection or item begins playing where you left off.
To play iTunes U content:
1 From the main menu, choose iTunes U, and then choose a collection.
Items within a collection appear in reverse chronological order so you can listen to the most recent one first. You see a blue dot next to collections and items you haven't watched or listened to yet.
2 Choose an item to play it.
For more information about iTunes U, open iTunes and choose Help > iTunes Help. Then search for "iTunes U."
Listening to Audiobooks
To listen to audiobooks on iPod nano, choose Audiobooks from the Music menu. Choose an audiobook, and then press Play/Pause (▶II).
If you stop listening to an audiobook on iPod nano and return to it later, the audiobook begins playing where you left off. iPod nano skips audiobooks when set to shuffle.
If the audiobook you're listening to has chapters, you can press Next/Fast-forward (▶▶) or Previous/Rewind (◀◀) to skip to the next chapter or the beginning of the current chapter. You can also choose the audiobook from the Audiobooks menu, and then choose a chapter, or choose Resume to begin playing where you left off.
You can play audiobooks at speeds faster or slower than normal. Setting the play speed affects only audiobooks purchased from the iTunes Store or audible.com.
To set audiobook play speed:
- Choose Settings > Playback > Audiobooks and choose a speed, or press and hold the Center button from the Now Playing window, and then choose a speed.
You can use iPod nano to watch TV shows, movies, video podcasts, and more. Read this chapter to learn about watching videos on iPod nano and on your TV.
You can view and listen to videos on iPod nano. If you have a compatible AV cable (available separately at www.apple.com/ipodstore), you can watch videos from iPod nano on your TV.
Watching Videos on iPod nano
Videos you add to iPod nano appear in the Videos menus. Music videos also appear in Music menus. Videos recorded with the iPod nano built-in video camera appear in the Videos menu, under Camera Videos.
To watch a video on iPod nano:
1 Choose Videos and browse for a video. To browse for a video recorded with the iPod nano built-in video camera, choose Camera Videos. 2 Select a video and then press Play/Pause (▶II).
To watch the video, hold iPod nano horizontally. You can rotate iPod nano to either the left or right.
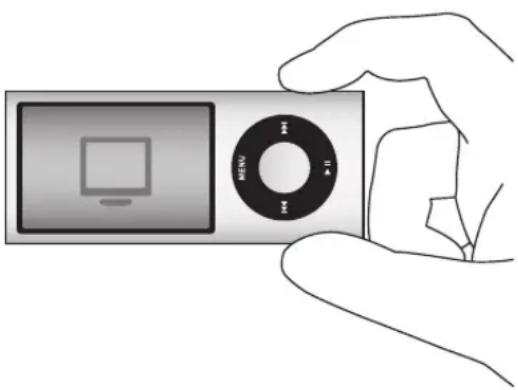
To watch videos recorded in portrait (vertical) format with the built-in video camera, hold iPod nano vertically.
Watching Video Podcasts
To watch a video podcast:
From the main menu, choose Podcasts and then choose a video podcast.
For more information, see "Playing Podcasts" on page 47.
Watching Videos Downloaded from iTunes U
To watch an iTunes U video:
From the main menu, choose iTunes U and then choose a video.
For more information, see "Playing iTunes U Content" on page 48.
Watching Videos on a TV Connected to iPod nano
If you have an AV cable from Apple, you can watch videos on a TV connected to your iPod nano. First you set iPod nano to display videos on a TV, then connect iPod nano to your TV, and then play a video.
Use the Apple Component AV Cable, the Apple Composite AV Cable, or the Apple AV Connection Kit. Other similar RCA-type cables might not work. You can purchase the cables at www.apple.com/ipodstore or your local Apple Store.
To set iPod nano to display videos on a TV:
Choose Videos > Settings, and then set TV Out to Ask or On.
If you set TV Out to Ask, iPod nano gives you the option of displaying videos on TV or on iPod nano every time you play a video. If you set TV Out to On, iPod nano displays videos only on TV. If you try to play a video when iPod nano isn't connected to a TV, iPod nano displays a message instructing you to connect to one.
You can also set video to display full screen or widescreen, and set video to display on PAL or NTSC devices.
To set TV settings:
- Choose Videos > Settings, and then follow the instructions below.
To set Do this
| Video to display on a TV Set TV Out to Ask or On. | |
| Video to display on a PAL or NTSC TV | Set TV Signal to PAL or NTSC. PAL and NTSC refer to TV broadcast standards. Your TV might use either of these, depending on the region where it was purchased. If you aren’t sure which your TV uses, check the documentation that came with your TV. |
| The format of your external TV | Set TV Screen to Widescreen for 16:9 format or Standard for 4:3 format. |
To set Do this
Video to fit to your screen
Set "Fit to Screen" to On. If you set "Fit to Screen" to Off, widescreen videos display in letterbox format on iPod nano or a standard (4:3) TV screen.
Alternate audio to play Set Alternate Audio to On.
Captions to display Set Captions to On.
Subtitles to display Set Subtitles to On.
To use the Apple Component AV Cable to connect iPod nano to your TV:
1 Plug the green, blue, and red video connectors into the component video (Y, Pb, and Pr) input ports on your TV.
If you use the Apple Composite AV cable, plug the yellow video connector into the video input port on your TV. Your TV must have RCA video and audio ports.
2 Plug the white and red audio connectors into the left and right analog audio input ports on your TV.
3 Plug the 30-pin connector into your iPod nano or Universal Dock.
4 Plug the USB connector into your Apple USB Power Adapter or your computer to keep your iPod nano charged.
5 Turn on iPod nano and your TV or receiver to start playing. Make sure you set TV Out on iPod nano to On or Ask.
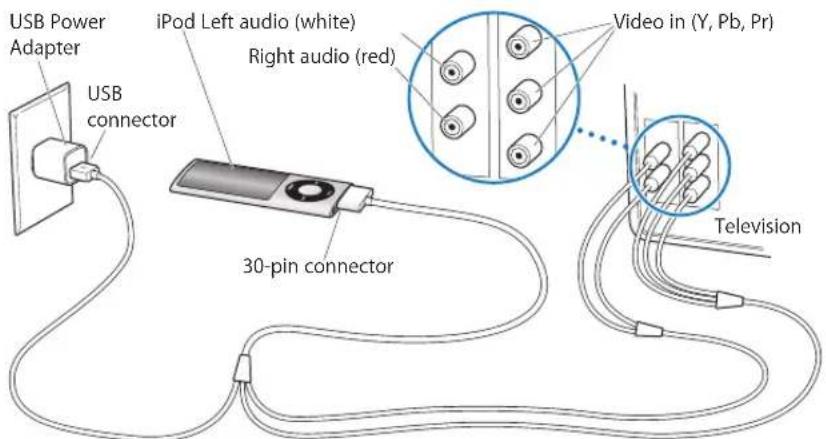
The ports on your TV or receiver may differ from the ports in the illustration.
To watch a video on your TV:
1. Connect iPod nano to your TV (see above).
2. Turn on your TV and set it to display from the input ports connected to iPod nano. For more information, see the documentation that came with your TV.
3. On iPod nano, choose Videos and browse for a video.
Using the Video Camera
5
With the built-in iPod nano video camera, you can record high-quality video with sound wherever you go. You can even record video with special effects. You can watch your recorded videos on iPod nano, and you can transfer them to your computer to edit and share.
To use iPod nano as a video camera, choose Video Camera from the main menu. The display screen becomes a viewfinder.

You can record video in landscape or portrait mode. In either mode, your current recording time appears in the upper right corner of the display.
The lens and microphone are on the back of iPod nano, so you can use the display to see the video you're recording. Be careful not to block the lens or microphone.
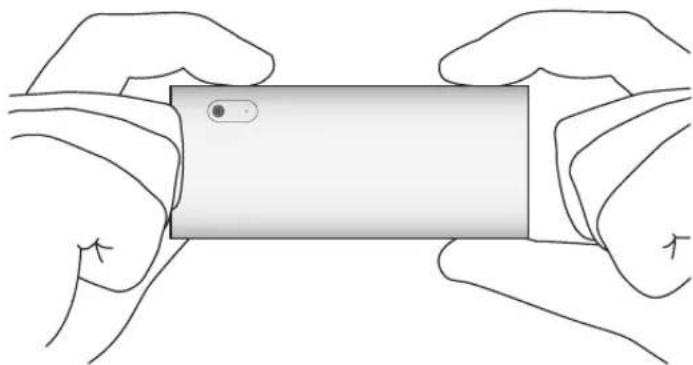
Recording Video
To record video:
1. Choose Video Camera from the main menu.
2. When you're ready to begin recording, press the Center button. Press the Center button again to stop recording.
When video is recording, a blinking red light appears in the upper right corner of the display, next to the recording time.
Recording time depends on the available disk space and battery level.
A recorded video can be up to 2 GB in size. Once a recorded video takes up 2 GB of disk space, recording stops. To resume recording, press the Center button.
Recording Video with Special Effects
You can record video with a variety of special effects on iPod nano.
Note: Video effects can only be selected before recording. iPod nano can't add effects to or remove effects from recorded videos. You can't change video effects settings while recording.
To record video with special effects:
1 Choose Video Camera from the main menu.
2 Press and hold the Center button to display the video effects palette.
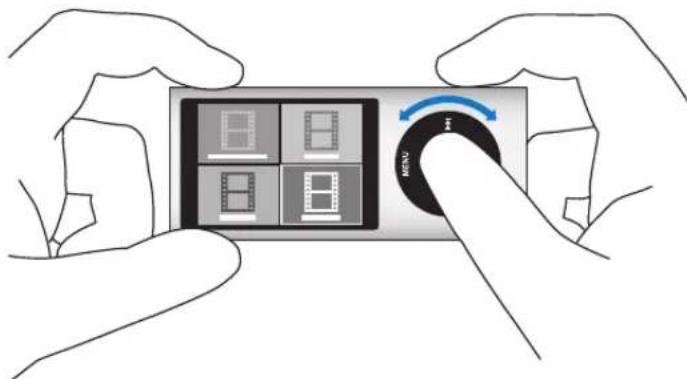
3 Use the Click Wheel to browse the effects, and press the Center button to select one. The viewfinder screen appears with the selected effect.
4 Press the Center button again to start recording with video effects.
5 Press the Center button to stop recording.
If you exit the Video Camera screen to play back your video, video effects are turned off. To resume recording with a video effect, repeat steps 2 through 4.
Playing Recorded Videos
iPod nano saves your recorded videos to the Camera Roll. To go to the Camera Roll screen, press Menu from the Video Camera viewfinder screen.
iPod nano lets you access your recorded videos from the Camera Roll screen, so you can watch what you just recorded without leaving the Video Camera application. Your recorded videos can also be played from the Videos menu.
To play back a video you just recorded:
1 Press the Center button to stop recording.
2 Press Menu to enter the Camera Roll screen.
3 Choose the recording, and then press the Center button to play.
You can also access a complete list of recorded videos on iPod nano from the Videos menu.
To play a recorded video from the Videos menu:
1 Choose Videos in the main menu.
2 Choose Camera Videos to display a list of recorded videos.
3 Use the Click Wheel to scroll to the video you want to play, and then press Play/Pause (▶) to start and stop playback. Playback stops automatically at the end of the video.
Deleting Recorded Videos
Removing unwanted videos clears disk space for new videos. Recorded videos can be deleted one at a time, or all at once.
To delete a recorded video:
1 Go to Videos > Camera Videos and select a video from the list, or select a video from the Camera Roll screen.
2 Press and hold the Center button until a menu appears.
3 Choose Delete, or Delete All.
Importing Recorded Videos to Your Computer
You can import your recorded videos to your computer. If you have a Mac with iPhoto, you can easily share your recorded videos and add background music to them.
iPod nano formats recorded videos as VGA video H.264 w/AAC 30 fps files.
To import your recorded videos to your computer, iPod nano must be enabled for disk use.
To enable iPod nano for disk use:
1 Connect iPod nano to your computer.
2 In iTunes, click iPod nano in the device list and click the Summary tab.
3 Select "Enable disk use."
In addition to appearing in iTunes, iPod nano also appears on your computer as an external disk, with the same name you gave it during initial setup. On a Mac, iPod nano appears in the Finder and on the Desktop. On a PC, iPod nano appears in Windows Explorer and My Computer.
Your recorded videos are stored in the DCIM folder on iPod nano, and can be copied to your computer when iPod nano is connected to it. See the documentation that came with your computer for more information about copying files.
After you copy your recorded videos to your computer, you can watch them on a Mac using QuickTime Player. You can watch them on a PC using QuickTime or Windows Media Player.
To clear disk space on iPod nano after you've copied your recorded videos to your computer, delete them from the DCIM folder.
Importing Recorded Videos to a Mac with iPhoto Installed
If your computer is a Mac with iPhoto 6.0.6 or later installed, you can use iPhoto to import your recorded videos from iPod nano to your Mac and post them on MobileMe. You can also add music by editing your recorded videos in QuickTime Player. To use iPhoto to import your recorded videos, iPod nano must be enabled for disk use.
To import videos to your Mac using iPhoto:
1 Connect iPod nano to your computer. 2 Open iPhoto if it doesn't open automatically. 3 Click iPod nano in the iPhoto device list. 4 Select the videos to import, and then click Selected or Import All. 5 Select Delete Photos or Keep Photos.
Your recorded videos appear in your iPhoto library in Events and Photos, and in the list of recent imports.
To share recorded videos using iPhoto:
1 Follow the instructions to import your recorded videos to iPhoto. 2 In iPhoto, select a recorded video. 3 Click MobileMe at the bottom of the iPhoto window. 4 Follow the onscreen instructions.
You need a MobileMe account in order to share your recorded videos using MobileMe, and you need to set up iPhoto to publish to your account. For more information about online sharing, open iPhoto and choose Help > iPhoto Help.
Sharing Recorded Videos from a Mac or PC
After you import your recorded videos to your computer, you can post them on YouTube using a Mac or PC.
To post recorded videos on Facebook:
1 Go to www.facebook.com and log in if necessary. 2 Click the video icon to the left of the Share button at the top of your Facebook homepage, and then click "Upload a Video." 3 Follow the onscreen instructions to select and upload your video.
To post recorded videos on YouTube:
1 Go to www.youtube.com and log in if necessary. 2 Click the Upload button at the top right of your YouTube homepage. 3 Follow the onscreen instructions to select and upload your video.
If you have a Mac with iPhoto 8.1 or later and Mac OS X v10.6.1 or later, you can also export your recorded videos directly to YouTube.
To post recorded videos on YouTube using iPhoto 8.1 or later and Mac OS X v10.6.1 or later:
1 In iPhoto, double-click the video you want to post. The video opens in QuickTime Player.
2 In QuickTime Player, choose Share > YouTube.
3 Enter your YouTube name and password, and then click Sign In.
4 Enter a description and tags. If you want to restrict access to your video, select "Make this movie personal."
5 Click Next, and then click Share.
When the export is complete, click the link that appears to go to your video page on YouTube.
Accounts are required to upload videos to Facebook or YouTube. For more information, visit the websites.
Adding Music to Your Recorded Videos
You can use QuickTime Player to add music to your recorded videos. Select a recorded video in iPhoto, and then click Edit at the bottom of the iPhoto window. The recorded video opens in QuickTime Player, where you can add a music track to your recorded video.
To learn how to add music to your recorded videos with QuickTime Player, choose Help > QuickTime Player Help, and see the instructions for extracting, adding, and moving tracks.
To add music to your recorded videos with a Windows PC, see the documentation that came with your computer or photo application.
iPod nano has a built-in FM radio that displays station and song information, lets you pause live radio, and tags songs that you can preview and purchase in iTunes.
To listen to FM radio, connect earphones or headphones to iPod nano, and then choose Radio from the main menu.
iPod nano uses the earphone or headphone cord as the radio antenna. You must connect earphones or headphones to iPod nano in order to receive a radio signal. The radio doesn't play through the iPod nano speaker.
After you choose Radio from the main menu, the radio screen appears.

When the radio dial is visible, you can use the Click Wheel or press Next/Fast-forward (▶) or Previous/Rewind (◀) to tune to a station.
Important: Radio frequencies shown in this chapter are for illustration purposes only and are not available in all areas.
When you tune to a station that supports RDS (Radio Data System), song, artist, and station information appear in the display. After you tune to a station, the progress bar replaces the radio dial. The progress bar fills up as you continue to listen to the station.

Display item Function
RDS data Displays the current station, song, and artist.
Radio dial Tunes the FM radio.
Favorite station markers Indicate that the current station is in the Favorites list.
Radio signal icon Appears when the radio is on and receiving a signal.
Station frequency Displays the number of the station that the radio is tuned to.
Tag icon Appears if the current song supports iTunes Tagging.
Progress bar Indicates the length of the radio buffer.
Tuning the FM radio
You can tune the FM radio by browsing stations, seeking or scanning available stations, or saving your favorite stations and tuning to them directly.
To browse radio stations:
1 Choose Radio from the main menu. If you don't see the radio dial, press the Center button until it appears.
2 Use the Click Wheel to browse the radio dial.
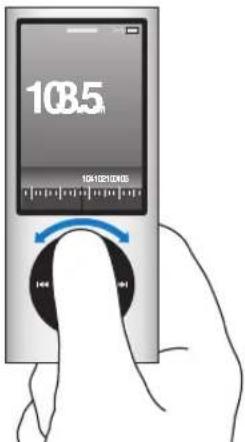
To seek available stations:
1. Choose Radio from the main menu. If you don't see the radio dial, press the Center button until it appears.
2. Press Next/Fast-forward (▶) or Previous/Rewind (◀) to seek the next or previous available station. Repeat to continue seeking.
The station seeking function isn't available if any favorite stations are set. If favorites are set, pressing Next/Fast-forward (▶) or Previous/Rewind (◀) tunes the radio to favorite stations.
To scan available stations:
1. Choose Radio from the main menu. If you don't see the radio dial, press the Center button until it appears.
- 2. Press and hold Next/Fast-forward (▶) or Previous/Rewind (◀) to scan available stations.
You hear a five-second preview of each station before advancing to the next one.
3. To stop scanning and listen to the current station, press the Center button.
To save your favorite stations:
1. Tune to a station you want to save. 2. Press and hold the Center button until a menu appears. 3. Choose "Add to Favorites" and then press the Center button.
To tune to a favorite station:
1. Choose Radio from the main menu. If you don't see the radio dial, press the Center button until it appears. 2. Press Next/Fast-forward (▶) or Previous/Rewind (◀) to tune to the next or previous favorite station. Repeat to continue tuning.
Pausing Live Radio
You can pause a radio broadcast, and resume playing it from the same point up to 15 minutes later.
To pause live radio:
While the radio is playing, press Play/Pause (▶) from any screen.
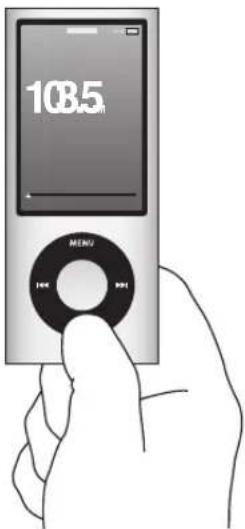
The Pause (II) icon appears, and the time at which you paused is displayed above the progress bar.

As Live Pause continues, a yellow triangle indicates the point where the radio was paused. The progress bar continues to fill up, indicating the time that's passed since you paused.
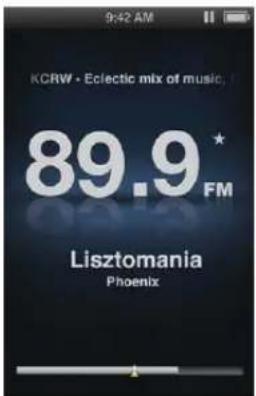
When you press Play/Pause (▶) again, the program resumes from the same point.
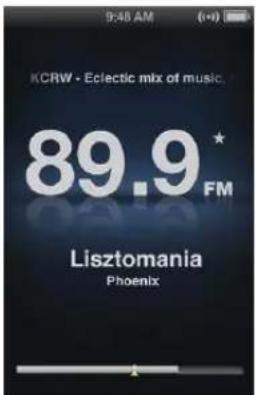
You can also navigate forward or back along the progress bar. To fast-forward or rewind, press and hold Next/Fast-forward (▶) or Previous/Rewind (◀), or use the Click Wheel. To skip forward or back in one-minute intervals, press Next/Fast-forward (▶) or Previous/Rewind (◀).
You can navigate through paused radio only when the progress bar appears, not the radio dial.
To switch between the progress bar and radio dial:
Press the Center button.
The progress bar is completely filled when Live Pause reaches the 15-minute limit. As long as your paused radio isn't cleared, you can navigate through the 15 most recent minutes of the station you're listening to. Anything older than 15 minutes is cleared to make room for the continuing broadcast.
If you pause without resuming for 15 minutes, iPod nano goes to sleep and clears your paused radio.
Paused radio is cleared if any of the following occurs:
- You change stations. If you try to change stations while Live Pause is active, a warning appears and gives you the option to cancel.
- You turn off iPod nano.
- You exit Radio to play other media content, use the video camera, or record a voice memo.
The battery is very low on power and needs to be charged.
You pause the radio for 15 minutes without resuming play.
You can disable Live Pause from the Radio menu, to conserve battery life.
To disable Live Pause:
1 From the Radio screen, press Menu.
2 Choose Live Pause, and then press the Center button to select Off. To enable Live Pause again, select On.
Tagging Songs to Sync to iTunes
If you're tuned to a radio station that supports iTunes Tagging, you can save a list of songs that you can preview and purchase later at the iTunes Store. Songs that can be tagged are marked with a tag icon next to the song title.
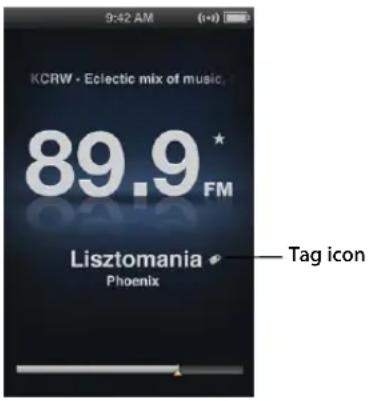
To tag a song:
1 Press and hold the Center button until a menu appears.

2 Choose Tag, and then press the Center button.
Your tagged songs appear in the Radio menu under Tagged Songs. The next time you sync iPod nano to iTunes, your tagged songs are synced and removed from iPod nano. They appear in Tunes, where you can preview and purchase them from the iTunes Store.
Note: This feature may not be available for all radio stations.
To preview and purchase tagged songs in iTunes:
1 Click Tagged below Store on the left side of the iTunes window. 2 Click the View button for the song you want. 3 To preview the song, double-click it or click the preview button. To buy the song, click the Buy button.
Using the Radio Menu
To go to the Radio menu, press Menu from the radio screen.
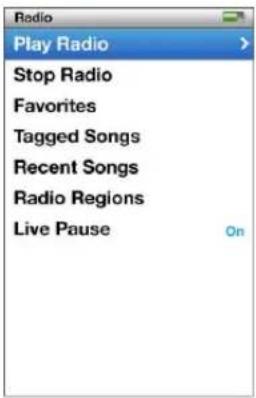
The Radio menu contains the following items.
Menu item What it does
| Play Radio Turns the radio on, and returns iPod nano to the radio screen. |
| Stop Radio Turns the radio off, and clears paused radio (appears only if the radio is on). |
| Favorites Displays a list of the stations you've saved as favorites. Choose a station and press the Center button to play. |
| Tagged Songs Displays a list of songs you've tagged for preview and purchase since you last synced with iTunes. |
| Recent Songs Displays a list of recently played songs. |
| Radio Regions Lets you set the radio for the region you're in. |
| Live Pause Enables or disables Live Pause. |
About Radio Regions
iPod nano can be used in many countries to receive FM radio signals. iPod nano comes with five preset signal ranges, identified by region: The Americas, Asia, Australia, Europe, and Japan.
To select a radio region:
- Choose Radio Regions from the Settings menu, and then choose your region.
The Radio Regions menu also appears in the Radio menu.
Region settings are determined by international radio standards, not actual geographic regions. If you live in a country not listed in the Radio Regions menu, choose a region that best matches the radio frequency specifications in your country.
The following table specifies the radio frequency range of each region in the Radio Regions menu, along with the increments between stations (indicated by the ± sign).
Important: iPod nano is intended for the reception of public broadcasts only. Listening to transmissions that are not intended for the public is illegal in some countries and violators may be prosecuted. Check and obey the laws and regulations in the areas where you plan to use iPod nano.
Radio region Radio frequency specifications
| Americas 87.5—107.9 MHz / ± 200 kHz |
| Asia 87.5—108.0 MHz / ± 100 kHz |
| Australia 87.5—107.9 MHz / ± 200 kHz |
| Europe 87.5—108.0 MHz / ± 100 kHz |
| Japan 76.0—90.0 MHz / ± 100 kHz |
Photo Features
Read this chapter to learn about importing and viewing photos.
You can import digital photos to your computer and add them to iPod nano. You can view your photos on iPod nano or as a slideshow on your TV.
Importing Photos
If your computer is a Mac, you can import photos from a digital camera to your computer using iPhoto. You can import other digital images into iPhoto, such as images you download from the web. For more information about importing, organizing, and editing your photos, open iPhoto and choose Help > iPhoto Help.
iPhoto is available for purchase as part of the iLife suite of applications at www.apple.com/ilife or your local Apple Store. iPhoto might already be installed on your Mac, in the Applications folder.
To import photos to a Windows PC, follow the instructions that came with your digital camera or photo application.
Adding Photos from Your Computer to iPod nano
If you have a Mac and iPhoto 7.1.5 or later, you can sync iPhoto albums automatically (for Mac OS X v10.4.11, iPhoto 6.0.6 or later is required). If you have a PC or Mac, you can add photos to iPod nano from a folder on your hard disk.
Adding photos to iPod nano the first time might take some time, depending on how many photos are in your photo library.
To sync photos from a Mac to iPod nano using iPhoto:
1 In iTunes, select iPod nano in the device list and click the Photos tab.

2 Select "Sync photos from: ..." and then choose iPhoto from the pop-up menu.
3 Select your sync options:
- If you want to add all your photos, select "All photos, albums, events, and faces."
- If you want to add selected photos, select "Selected albums, events, and faces, and automatically include ... " and choose an option from the pop-up menu. Then select the albums, events, and faces you want to add (Faces is supported only by iPhoto 8.1 or later).
- If you want to add videos from iPhoto, select "Include videos."
4 Click Apply.
Each time you connect iPod nano to your computer, photos are synced automatically.
To add photos from a folder on your hard disk to iPod nano:
1 Drag the images to a folder on your computer.
If you want images to appear in separate photo albums on iPod nano, create folders within the main image folder and drag images to the new folders.
2 In iTunes, select iPod nano in the device list and click the Photos tab.
3 Select "Sync photos from ..."
4 Choose "Choose Folder ..." from the pop-up menu and select the image folder.
5 Click Apply.
Adding Full-Resolution Image Files to iPod nano
When you add photos to iPod nano, iTunes optimizes the photos for viewing. Full-resolution image files aren't transferred by default. Adding full-resolution image files is useful, for example if you want to move them from one computer to another, but isn't necessary for viewing the images at full quality on iPod nano.
To add full-resolution image files to iPod nano:
1 In iTunes, select iPod nano in the device list and click the Photos tab.
2 Select "Include full-resolution photos."
3 Click Apply.
iTunes copies the full-resolution versions of the photos to the Photos folder on iPod nano.
To delete photos from iPod nano:
1 In iTunes, select iPod nano in the device list and click the Photos tab.
2 Select "Sync photos from: ..."
- On a Mac, choose iPhoto from the pop-up menu.
- On a Windows PC, choose Photoshop Album or Photoshop Elements from the pop-up menu.
3 Choose "Selected albums" and deselect the albums you no longer want on iPod nano.
4 Click Apply.
Viewing Photos
You can view photos on iPod nano manually or as a slideshow. If you have an optional AV cable from Apple (for example, the Apple Component AV Cable), you can connect iPod nano to your TV and view photos as a slideshow with music.
Viewing Photos on iPod nano
To view photos on iPod nano:
1 On iPod nano, choose Photos > All Photos. Or choose Photos and a photo album to see only the photos in the album. Thumbnail views of the photos might take a moment to appear.
2 Select the photo you want and press the Center button.
To view photos, hold iPod nano vertically for portrait format, or horizontally for landscape format.
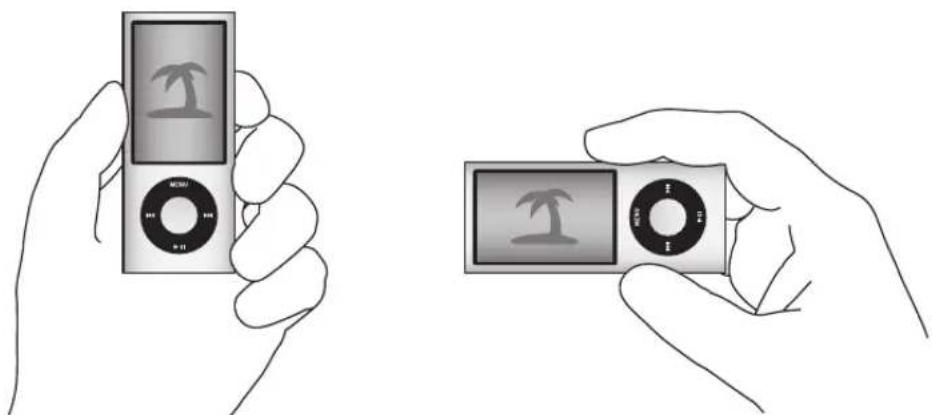
From any photo-viewing screen, use the Click Wheel to scroll through photos (if you're viewing a slideshow, the Click Wheel controls music volume only). Press Next/Fast-forward (▶) or Previous/Rewind (◀) to skip to the next or previous screen of photos. Press and hold Next/Fast-forward (▶) or Previous/Rewind (◀) to skip to the last or first photo in the library or album.
Viewing Slideshows
You can view a slideshow, with music and transitions if you choose, on iPod nano. If you have an optional AV cable from Apple, you can view the slideshow on your TV.
To set slideshow settings:
- Choose Photos > Settings, and then follow these instructions:
To set Do this
| How long each slide is shown Choose Time Per Slide and pick a time. | |
| The music that plays during slideshows | Choose Music and choose a playlist or Now Playing. If you're using iPhoto, you can choose From iPhoto to copy the iPhoto music setting. Only the songs that you've added to iPod nano play. |
| Slides to repeat Set Repeat to On. | |
| Slides to display in random order | Set Shuffle Photos to On. |
| Slides to display with transitions | Choose Transitions and choose a transition type. Random includes all transition types except Ken Burns. |
| Slideshows to display on iPod nano | Set TV Out to Ask or Off. |
| Slideshows to display on TV Set TV Out to Ask or On.If you set TV Out to Ask, iPod nano gives you the option of showing slideshows on TV or on iPod nano every time you start a slideshow. | |
| Slides to show on a PAL or NTSC TV | Set TV Signal to PAL or NTSC.PAL and NTSC refer to TV broadcast standards. Your TV might use either of these, depending on the region where it was purchased. If you aren't sure which your TV uses, check the documentation that came with your TV. |
To view a slideshow on iPod nano:
■Select any photo, album, or roll, and press Play/Pause (▶▶). Or select any full-screen photo and press the Center button. To pause, press Play/Pause (▶▶). To skip to the next or previous photo, press Next/Fast-forward (▶▶) or Previous/Rewind (◀◀).
When you view a slideshow, you can use the Click Wheel to control the music volume and adjust the brightness. You can't use the Click Wheel to scroll through photos during a slideshow.
If you view a slideshow of an album that includes videos, the slideshow pauses when it reaches a video. If music is playing, it continues to play. If you play the video, the music pauses while the video is playing, and then resumes. To play the video, press Play/Pause (▶II). To resume the slideshow, press Next/Fast-Forward (▶I).
To adjust the brightness during a slideshow:
1 Press the Center button until the brightness indicator appears. 2 Use the Click Wheel to adjust the brightness.
To connect iPod nano to your TV:
1 Connect the optional Apple Component or Composite AV cable to iPod nano.
Use the Apple Component AV Cable, Apple Composite AV Cable, or Apple AV Connection Kit. Other similar RCA-type cables might not work. You can purchase the cables at www.apple.com/ipodstore.
2 Connect the audio connectors to the ports on your TV.
Make sure you set TV Out on iPod nano to Ask or On.
Your TV must have RCA video and audio ports. The ports on your TV or receiver may differ from the ports in the illustration.
To view a slideshow on your TV:
1 Connect iPod nano to your TV (see page 51).
2 Turn on your TV and set it to display from the input ports connected to iPod nano. See the documentation that came with your TV for more information.
3 Use iPod nano to play and control the slideshow.
Adding Photos from iPod nano to a Computer
If you add full-resolution photos from your computer to iPod nano using the previous steps, they're stored in a Photos folder on iPod nano. You can connect iPod nano to a computer and put these photos on the computer. iPod nano must be enabled for disk use (see "Using iPod nano as an External Disk" on page 84).
To add photos from iPod nano to a computer:
1 Connect iPod nano to the computer.
2 Drag image files from the Photos folder or DCIM folder on iPod nano to the desktop or to a photo editing application on the computer.
You can also use a photo editing application, such as iPhoto, to add photos stored in the Photos folder. See the documentation that came with the application for more information.
To delete photos from the Photos folder on iPod nano:
1 Connect iPod nano to the computer.
2 Navigate to the Photos folder on iPod nano and delete the photos you no longer want.
More Settings, Extra Features, and Accessories
8
iPod nano can do a lot more than play songs. And you can do a lot more with it than listen to music.
Read this chapter to find out more about the extra features of iPod nano, including how to use it as a pedometer; record voice memos; use it as an external disk, alarm, or sleep timer; play games; show the time of day in other parts of the world; display notes; and sync contacts, calendars, and to-do lists. Learn about how to use iPod nano as a stopwatch and to lock the screen, and about the accessories available for iPod nano.
Using iPod nano as a Pedometer
You can use iPod nano as a pedometer to count your steps and record your workouts.
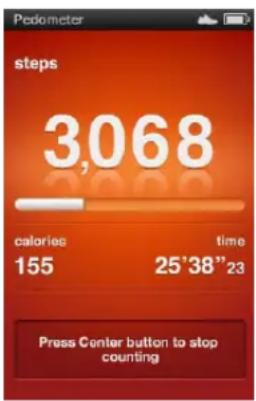
For more accurate results, keep iPod nano in your pocket or in the iPod nano Armband while using the pedometer.
To use iPod nano as a pedometer:
1 From the Extras menu, choose Fitness and then choose Pedometer. 2 If you're using the pedometer for the first time, enter your weight using the Click Wheel, and then press the Center button to begin a session. 3 At the end of the session, press the Center button to stop.
To customize the pedometer settings:
1 From the Extras menu, choose Fitness and then choose Settings.
2 Choose from the following options:
| To Do this | |
| Choose a pedometer mode | Select Pedometer, and press the Center button to switch between Manual and Always On. |
| Set a workout goal Choose Daily Step Goal, and then choose a goal from the list, or choose Custom and then use the Click Wheel to set a goal. | |
| Set your weight Choose Weight, use the Click Wheel to set your weight, and then press the Center button to enter. | |
| Set the pedometer orientation | Choose Screen Orientation, and then choose Vertical, Left, or Right. |
To view your workout history:
1 From the Extras menu, choose Fitness and then choose History.
2 Select a date from the calendar. Use the Click Wheel to select a day. Press Next/Fast-forward (▶) or Previous/Rewind (◀) to navigate through the months.
3 Press the Center button to display your workout history for the selected date. If you had multiple workout sessions on the selected date, choose a session.
iPod nano displays your step goal, workout duration, start and end times, calories burned, and totals for the week and month.
To view a bar graph of one of your workout sessions, choose a session, and then rotate iPod nano to landscape mode.
The Pedometer menu item appears in the main menu when the pedometer is on, so you can stop your session quickly. The preview panel below the main menu displays your step count when you scroll to the Pedometer menu item.
To set iPod nano to count your steps throughout the day, choose Pedometer in the Settings menu and select Always On. The Pedometer records your daily totals, so you can track your history without turning the pedometer off at the end of each day. The Pedometer menu item appears continuously in the main menu.
To start sessions quickly, you can also add the Pedometer menu item to the main menu manually. See "Adding or Removing Items on the Main Menu" on page 10.
With the Nike + iPod Sport Kit (available separately), iPod nano can also monitor and record your speed, distance, time elapsed, and calories burned, and track your cardio workouts on Nike + iPod-compatible gym equipment.
When you sync iPod nano with iTunes, you can upload your pedometer and other workout information to the Nike+ website, where you can track your history, compete with your friends, and more. You'll need a Nike+ account, which you can set up when you sync.
To upload your workout information to Nike+:
1 Connect iPod nano to your computer and open iTunes (if it doesn't open automatically). If you're syncing workout information for the first time, a message appears:

2 Click Send, and then follow the onscreen instructions to set up your Nike+ account. Once you set up your account, a new tab appears in the iTunes window:

3 Click the Nike + iPod tab, and select "Automatically send workout data to Nike+" if it isn't selected already.
4 Click Apply.
To view and share your information at Nike+, click "Visit Nike+" in the Nike + iPod pane when iPod nano is connected to your computer, or go to www.nike.com and then log in to your account.
Recording Voice Memos
You can record voice memos using the built-in microphone in iPod nano or an optional iPod nano-compatible microphone (available for purchase at www.apple.com/ipodstore). You can set chapter marks while you record, store voice memos on iPod nano and sync them with your computer, and add labels to voice memos.
Voice memos can be up to two hours long. If you record for more than two hours, iPod nano automatically starts a new voice memo to continue your recording.
To record a voice memo:
1 From the Extras menu, choose Voice Memos. The Record screen appears.
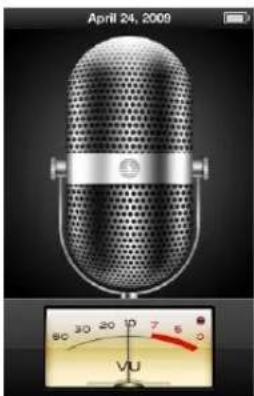
2 Press Play/Pause (▶) or the Center button to begin recording. Be careful not to block the microphone, which is on the back of iPod nano.
3 To pause recording, press Play/Pause (▶II).
Choose Resume to continue recording or press Play/Pause (▶) again.
4 When you finish, press Menu and then choose "Stop and Save." Your saved recording is listed by date and time.
To set chapter marks:
■ While recording, press the Center button whenever you want to set a chapter mark.
During playback, you can go directly to the next chapter by pressing the Next/Fast-forward button. Press Previous/Rewind (◀) once to go to the start of the current chapter, and twice to go to the start of the previous chapter.
To label a recording:
1 From the Extras menu, choose Voice Memos and then press Menu.
2 Choose Voice Memos, and then choose a recording.
3 Choose Label, and then choose a label for the recording.
You can choose Podcast, Interview, Lecture, Idea, Meeting, or Memo. To remove a label from a recording, choose None.
To play a recording:
1 From the Extras menu, choose Voice Memos and then press Menu.
2 Choose Voice Memos, and then choose a recording.
3 Choose Play and then press the Center button.
To delete a recording:
1 From the Extras menu, choose Voice Memos and then press Menu. 2 Choose Voice Memos, and then choose a recording. 3 Choose Delete and then press the Center button.
To sync voice memos with your computer:
Voice memos are saved in a Recordings folder on iPod in the WAV file format. If you enable iPod nano for disk use, you can drag voice memos from the folder to copy them to your computer.
If iPod nano is set to sync songs automatically (see "Syncing Music Automatically" on page 25) voice memos on iPod nano are automatically synced to a playlist in iTunes called Voice Memos (and removed from iPod nano) when you connect iPod nano. The Voice Memos playlist appears below Playlists on the left side of the iTunes window.
Playing Games
iPod nano comes with three games: Klondike, Maze, and Vortex.
To play a game:
- Choose Extras > Games and choose a game.
When you play a game created for previous versions of iPod nano, you're first shown how iPod nano controls work in the game you're about to play.
You can purchase additional games from the iTunes Store (in some countries) to play on iPod nano. After purchasing games in iTunes, you can add them to iPod nano by syncing them automatically or by managing them manually.
Many games can be played in portrait or landscape mode.
To buy a game:
1 In iTunes, select iTunes Store under Store on the left side of the iTunes window. 2 Choose iPod Games in the iTunes Store. 3 Select the game you want and click Buy Game.
To sync games automatically to iPod nano:
1 In iTunes, select iPod nano in the device list and click the Games tab.

2 Select "Sync games." 3 Click "All games" or "Selected games." If you click "Selected games," also select the games you want to sync. 4 Click Apply.
Using Extra Settings
You can set the date and time, clocks in different time zones, and alarm and sleep features on iPod nano. You can use iPod nano as a stopwatch or to play games, and you can lock the iPod nano screen.
Setting and Viewing the Date and Time
The date and time are set automatically from your computer's clock when you connect iPod nano, but you can change the settings.
To set date and time options:
1 Choose Settings > Date & Time.
Choose one or more of the following options:
To do this
| Set the date Choose Date. Use the Click Wheel to change the selected value.Press the Center button to move to the next value. | |
| Set the time Choose Time. Use the Click Wheel to change the selected value.Press the Center button to move to the next value. | |
| Specify the time zone Choose Time Zone and use the Click Wheel to select a city in another time zone. | |
| Display the time in 24-hour format | Choose 24 Hour Clock and press the Center button to turn the 24-hour format on or off. |
| Display the time in the title bar | Choose Time in Title and press the Center button to turn the option on or off. |
Adding Clocks for Other Time Zones
To add clocks for other time zones:
Choose Extras > Clocks.
On the Clocks screen, click the Center button and choose Add.
Choose a region and then choose a city.
The clocks you add appear in a list. The last clock you added appears last.
To delete a clock:
Choose Extras > Clocks.
Choose the clock.
Press the Center button.
Choose Delete.
Setting Alarms
You can set an alarm for any clock on iPod nano.
To use iPod nano as an alarm clock:
1 Choose Extras > Alarms.
2 Choose Create Alarm and set one or more of the following options:
ToDo this
| Turn the alarm on Choose Alarm and choose On. |
| Set the date Choose Date. Use the Click Wheel to change the selected value.Press the Center button to move to the next value. |
| Set the time Choose Time. Use the Click Wheel to change the selected value.Press the Center button to move to the next value. |
| Set a repeat option Choose Repeat and choose an option (for example, “weekdays”). |
| Choose a sound Choose Alerts or a playlist. If you choose Alerts, select Beep to hearthe alarm through the internal speaker. If you choose a playlist,connect iPod nano to speakers, earphones, or headphones to hearthe alarm. |
| Name the alarm Choose Label and choose an option (for example, “Wake up”). |
If you sync calendar events with alarms to iPod nano, the events appear in the Alarms menu.
To delete an alarm:
1 Choose Extras > Alarms.
2 Choose the alarm and then choose Delete.
Setting the Sleep Timer
You can set iPod nano to turn off automatically after playing music or other content for a specific period of time.
To set the sleep timer:
1 Choose Extras > Alarms.
2 Choose Sleep Timer and choose how long you want iPod nano to play.
Using the Stopwatch
You can use the stopwatch as you exercise to track your overall time and, if you're running on a track, your lap times. You can play music while you use the stopwatch.
To use the stopwatch:
1. Choose Extras > Stopwatch.
2. Press Play/Pause (▶) to start the timer.
3. Press the Center button to record lap times. The two most recent lap times appear above the overall time. All lap times are recorded in the log.
4. Press Play/Pause (▶II) to stop the overall timer. To start the timer again, press Play/Pause (▶II).
To start a new stopwatch session, press Menu and then choose New Timer.
To review or delete a logged stopwatch session:
1. Choose Extras > Stopwatch.
The current log and a list of saved sessions appear.
2. Choose a log to view session information.
iPod nano stores stopwatch sessions with dates, times, and lap statistics. You see the date and time the session started; the total time of the session; the shortest, longest, and average lap times; and the last several lap times.
3. Press the Center button and choose Delete Log to delete the chosen log, or Clear Logs to delete all current logs.
Locking the iPod nano Screen
You can set a combination to prevent iPod nano from being used by someone without your permission. If you lock iPod nano while it isn't connected to a computer, you must then enter a combination to unlock and use it.
This combination is different from the Hold button, which just prevents iPod nano buttons from being pressed accidentally. The combination prevents another person from using iPod nano.
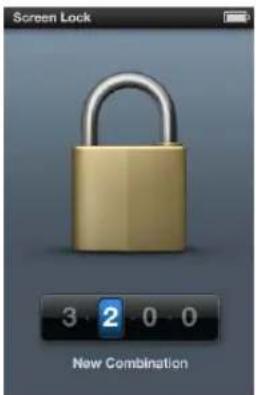
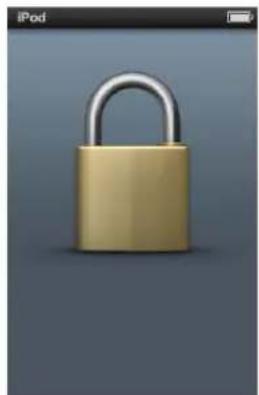
Chapter 8 More Settings, Extra Features, and Accessories
To set a combination for iPod nano:
1 Choose Extras > Screen Lock.
2 On the New Combination screen, enter a combination:
- Use the Click Wheel to select a number for the first position. Press the Center button to confirm your choice and move to the next position.
- Use the same method to set the remaining numbers of the combination. Press Next/Fast-forward (▶) to move to the next position, or Previous/Rewind (◀) to move to the previous position. Press the Center button in the final position.
3 On the Confirm Combination screen, enter the combination to confirm it, or press Menu to exit without locking the screen.
When you finish, you return to the Screen Lock screen, where you can lock the screen or reset the combination. Press Menu to exit without locking the screen.
To lock the iPod nano screen:
- Choose Extras > Screen Lock > Lock.
If you just finished setting your combination, Lock will already be selected on the screen. Just press the Center button to lock iPod.
When the screen is locked, you see a picture of a lock.
You might want to add the Screen Lock menu item to the main menu so that you can quickly lock the iPod nano screen. See "Adding or Removing Items on the Main Menu" on page 10.
When you see the lock on the screen, you can unlock the iPod nano screen in two ways:
- Press the Center button to enter the combination on iPod nano. Use the Click Wheel to select the numbers and press the Center button to confirm them. If you enter the wrong combination, the lock remains. Try again.
- Connect iPod nano to the primary computer you use it with, and iPod nano automatically unlocks.
If you try these methods and you still can't unlock iPod nano, you can restore iPod nano. See "Updating and Restoring iPod Software" on page 92.
To change a combination you've already set:
1 Choose Extras > Screen Lock > Reset Combination.
2 On the Enter Combination screen, enter the current combination.
3 On the New Combination screen, enter and confirm a new combination.
If you can't remember the current combination, the only way to clear it and enter a new one is to restore the iPod nano software. See "Updating and Restoring iPod Software" on page 92.
Syncing Contacts, Calendars, and To-Do Lists
iPod nano can store contacts, calendar events, and to-do lists for viewing on the go.
You can use iTunes to sync the contact and calendar information on iPod nano with Address Book and iCal.
If you're using Windows XP, and you use Windows Address Book or Microsoft Outlook 2003 or later to store your contact information, you can use iTunes to sync the address book information on iPod nano. If you use Microsoft Outlook 2003 or later to keep a calendar, you can also sync calendar information.
To sync contacts or calendar information using Mac OS X:
1 Connect iPod nano to your computer.
2 In iTunes, select iPod nano in the device list and click the Contacts tab.
Summary Music Movies TV Shows Podcasts iTunes U Photos Contacts Games
3 Do one of the following:
- To sync contacts, in the Contacts section, select "Sync Address Book contacts," and select an option:
- To sync all contacts automatically, select "All contacts."
- To sync selected groups of contacts automatically, select "Selected groups" and select the groups you want to sync.
- To copy contacts' photos to iPod nano, when available, select "Include contacts' photos."
When you click Apply, iTunes updates iPod nano with the Address Book contact information you specified.
- To sync calendars, in the Calendars section, select "Sync iCal calendars," and choose an option:
- To sync all calendars automatically, choose "All calendars."
- To sync selected calendars automatically, choose "Selected calendars" and select the calendars you want to sync.
When you click Apply, iTunes updates iPod nano with the calendar information you specified.
To sync contacts or calendars using Windows Address Book or Microsoft Outlook for Windows:
1 Connect iPod nano to your computer. 2 In iTunes, select iPod nano in the device list and click the Contacts tab. 3 Do one of the following:
- To sync contacts, in the Contacts section, select "Sync contacts from" and choose Windows Address Book or Microsoft Outlook from the pop-up menu. Then select which contact information you want to sync.
- To sync calendars from Microsoft Outlook, in the Calendars section, select "Sync calendars from Microsoft Outlook."
4 Click Apply.
You can also add contact and calendar information to iPod nano manually. iPod nano must be enabled as an external disk (see "Using iPod nano as an External Disk" on page 84).
To add contact information manually:
1 Connect iPod nano and open your favorite email or contacts application. You can add contacts using Palm Desktop, Microsoft Outlook, Microsoft Entourage, and Eudora, among others. 2 Drag contacts from the application's address book to the Contacts folder on iPod nano.
In some cases, you might need to export contacts and then drag the exported file or files to the Contacts folder. See the documentation for your email or contacts application.
To add appointments and other calendar events manually:
1 Export calendar events from any calendar application that uses the standard iCal format (filenames end in .ics) or vCal format (filenames end in .vcs). 2 Drag the files to the Calendars folder on iPod nano.
To add to-do lists to iPod nano manually, save them in a calendar file with an .ics or .vcs extension.
To view contacts on iPod nano:
Choose Extras > Contacts.
To sort contacts by first or last name:
Choose Settings > General > Sort Contacts, and then select First or Last.
To view calendar events:
Choose Extras > Calendars > All Calendars, and then choose a calendar.
To view to-do lists:
Choose Extras > Calendars > To Do's.
Mono Audio
Mono Audio combines the sound of the left and right channels into a monaural signal that's played through both sides. This enables users with a hearing impairment in one ear to hear both channels with the other ear.
To turn Mono Audio on or off:
- Choose Settings > Playback > Mono Audio, and then select On or Off.
Using Spoken Menus for Accessibility
iPod nano features optional spoken menus, enabling visually impaired users to browse through their iPod nano content more easily.
iTunes generates spoken menus using voices that are included in your computer's operating system or that you may have purchased from third parties. Not all voices from computer operating systems or third parties are compatible with spoken menus, and not all languages are supported.
To use spoken menus, VoiceOver must be enabled on iPod nano. For more information, see "Setting Up VoiceOver" on page 32.
You must enable spoken menus in iTunes before you can activate them on iPod nano.
To enable spoken menus in iTunes:
1 Connect iPod nano to your computer.
2 In iTunes, select iPod nano in the device list and click the Summary tab.
3 Select "Enable spoken menus."
In Mac OS X, if you have VoiceOver turned on in Universal Access preferences, this option is selected by default.
4 Click Apply.
After iPod nano syncs with iTunes, spoken menus are enabled and activated on your iPod nano. iPod nano takes longer to sync if spoken menus are being enabled.
To deactivate spoken menus on iPod nano:
- Choose Settings > General > Spoken Menus and then choose Off.
To turn spoken menus on again, choose Settings > General > Spoken Menus, and then choose On.
If VoiceOver is enabled, turning off spoken menus doesn't disable VoiceOver.
Note: The Spoken Menus option appears in the Settings menu on iPod nano only if spoken menus have been enabled in iTunes.
Using iPod nano as an External Disk
You can use iPod nano as an external disk to store data files.
You won't see songs you add using iTunes in the Mac Finder or in Windows Explorer. And if you copy music files to iPod nano in the Mac Finder or Windows Explorer, you won't be able to play them on iPod nano.
Important: To import photos and recorded videos from iPod nano to your computer, external disk use must be enabled.
To enable iPod nano as an external disk:
1 In iTunes, select iPod nano in the device list and click the Summary tab. 2 In the Options section, select "Enable disk use." 3 Click Apply.
When you use iPod nano as an external disk, the iPod nano disk icon appears on the desktop on a Mac, or as the next available drive letter in Windows Explorer on a Windows PC. Drag files to and from iPod nano to copy them.
You can also click Summary and select "Manually manage music and videos" in the Options section to use iPod nano as an external disk.
If you use iPod nano primarily as an external disk, you might want to keep iTunes from opening automatically when you connect iPod nano to your computer.
To prevent iTunes from opening automatically when you connect iPod nano to your computer:
1. In iTunes, select iPod nano in the device list and click the Summary tab. 2. In the Options section, deselect "Open iTunes when this iPod is connected." 3. Click Apply.
Storing and Reading Notes
You can store and read text notes on iPod nano, if it's enabled as an external disk (see "Using iPod nano as an External Disk" on page 84).
1. Save a document in any word-processing application as a text (.txt) file. 2. Place the file in the Notes folder on iPod nano.
To view notes:
- Choose Extras > Notes.
Learning About iPod nano Accessories
iPod nano comes with some accessories, and many other accessories are available.
To purchase iPod nano accessories, go to www.apple.com/ipodstore.
Available accessories include:
• iPod nano Armband • Apple Earphones with Remote and Mic • Apple In-Ear Headphones with Remote and Mic • Apple USB Power Adapter • Apple Component AV Cable • Apple Composite AV Cable • Apple Universal Dock • Nike + iPod Sport Kit • iPod Socks
To use the earphones included with iPod nano:
- Plug the earphones into the Headphones port. Then place the earbuds in your ears as shown.
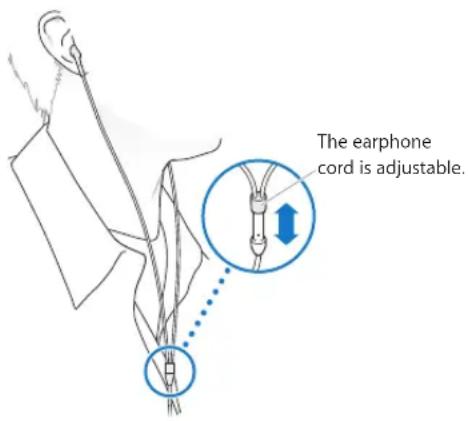
WARNING: Permanent hearing loss may occur if earbuds or headphones are used at high volume. You can adapt over time to a higher volume of sound that may sound normal but can be damaging to your hearing. If you experience ringing in your ears or muffled speech, stop listening and have your hearing checked. The louder the volume, the less time is required before your hearing could be affected. Hearing experts suggest that to protect your hearing:
- Limit the amount of time you use earbuds or headphones at high volume.
- Avoid turning up the volume to block out noisy surroundings.
- Turn the volume down if you can't hear people speaking near you.
For information about setting a maximum volume limit on iPod, see "Setting the Maximum Volume Limit" on page 45.
Tips and Troubleshooting
9
Most problems with iPod nano can be solved quickly by following the advice in this chapter.
The 5 Rs: Reset, Retry, Restart, Reinstall, Restore
Remember these five basic suggestions if you have a problem with iPod nano. Try these steps one at a time until your issue is resolved. If one of the following doesn't help, read on for solutions to specific problems.
- Reset iPod nano. See "General Suggestions," below.
- Retry with a different USB port if you cannot see iPod nano in iTunes.
- Restart your computer, and make sure you have the latest software updates installed.
- Reinstall iTunes software from the latest version on the web.
- Restore iPod nano. See "Updating and Restoring iPod Software" on page 92.
General Suggestions
Most problems with iPod nano can be solved by resetting it. First, make sure iPod nano is charged.
To reset iPod nano:
1. Toggle the Hold switch on and off (slide it to HOLD and then back again). 2. Press and hold Menu and the Center button for at least 6 seconds, until the Apple logo appears.
If iPod nano won't turn on or respond
- Make sure the Hold switch isn't set to HOLD.
- The iPod nano battery might need to be recharged. Connect iPod nano to your computer or to an Apple USB Power Adapter and let the battery recharge. Look for the lightning bolt icon on the iPod nano screen to verify that iPod nano is receiving a charge.
To charge the battery, connect iPod nano to a USB 2.0 port on your computer.
- Try the 5 Rs, one by one, until iPod nano responds.
If you want to disconnect iPod nano, but you see the message "Connected" or "Sync in Progress"
- If iPod nano is syncing music, wait for it to complete.
- Select iPod nano in the iTunes device list and click the Eject (▲) button.
- If iPod nano disappears from the device list in iTunes, but you still see the "Connected" or "Sync in Progress" message on the iPod nano screen, disconnect iPod nano.
- If iPod nano doesn't disappear from the device list in iTunes, drag the iPod nano icon from the desktop to the Trash if you're using a Mac. If you're using a Windows PC, eject the device in My Computer or click the Safely Remove Hardware icon in the system tray and select iPod nano. If you still see the "Connected" or "Sync in Progress" message, restart your computer and eject iPod nano again.
If iPod nano isn't playing music
• Make sure the Hold switch isn't set to HOLD.
- Make sure the headphone connector is pushed in all the way.
- Make sure the volume is adjusted properly. A maximum volume limit might have been set. You can change or remove it by using Settings > Volume Limit. See "Setting the Maximum Volume Limit" on page 45.
- iPod nano might be paused. Try pressing Play/Pause (▶II).
- Make sure you're using iTunes 9.0 or later (available at www.apple.com/downloads). Songs purchased from the iTunes Store using earlier versions of iTunes won't play on iPod nano until you upgrade iTunes.
- If you're using the Apple Universal Dock, make sure the iPod nano is seated firmly in the dock and make sure all cables are connected properly.
If the internal speaker continues to play audio after you connect earphones or headphones to iPod nano
- Disconnect and then reconnect the earphones or headphones.
If the internal speaker doesn't start playing audio after you disconnect earphones or headphones from iPod nano
- Any audio that's playing pauses automatically when you disconnect earphones or headphones from iPod nano. Press Play/Pause (▶) to resume.
- The FM radio doesn't play through the internal speaker, because iPod nano uses the earphone or headphone cord as the radio antenna.
If you connect iPod nano to your computer and nothing happens
- Make sure you've installed the latest iTunes software from www.apple.com/downloads.
- Try connecting to a different USB port on your computer.
Note: A USB 2.0 port is recommended to connect iPod nano. USB 1.1 is significantly slower than USB 2.0. If you have a Windows PC that doesn't have a USB 2.0 port, in some cases you can purchase and install a USB 2.0 card. For more information, go to www.apple.com/ipod.
- iPod nano might need to be reset (see page 86).
- If you're connecting iPod nano to a portable computer using the Apple Dock Connector to USB 2.0 Cable, connect the computer to a power outlet before connecting iPod nano.
- Make sure you have the required computer and software. See "If you want to double-check the system requirements" on page 91.
- Check the cable connections. Unplug the cable at both ends and make sure no foreign objects are in the USB ports. Then plug the cable back in securely. Make sure the connectors on the cables are oriented correctly. They can be inserted only one way.
- Try restarting your computer.
- If none of the previous suggestions solves your problems, you might need to restore iPod nano software. See "Updating and Restoring iPod Software" on page 92.
If iPod nano displays a "Connect to Power" message
This message may appear if iPod nano is exceptionally low on power and the battery needs to be charged before iPod nano can communicate with your computer. To charge the battery, connect iPod nano to a USB 2.0 port on your computer.
Leave iPod nano connected to your computer until the message disappears and iPod nano appears in iTunes or the Finder. Depending on how depleted the battery is, you may need to charge iPod nano for up to 30 minutes before it will start up.
To charge iPod nano more quickly, use the optional Apple USB Power Adapter.
If iPod nano displays a "Use iTunes to restore" message
- Make sure you have the latest version of iTunes on your computer (download it from www.apple.com/downloads).
- Connect iPod nano to your computer. When iTunes opens, follow the onscreen prompts to restore iPod nano.
- If restoring iPod nano doesn't solve the problem, iPod nano may need to be repaired. You can arrange for service at the iPod Service & Support website: www.apple.com/support/ipod
If songs or data sync more slowly over USB 2.0
- If you sync a large number of songs or amount of data using USB 2.0 and the iPod nano battery is low, iPod nano syncs the information at a reduced speed in order to conserve battery power.
- If you want to sync at higher speeds, you can stop syncing and keep the iPod nano connected so that it can recharge, or connect it to the optional iPod USB 2.0 Power Adapter. Let iPod nano charge for about an hour, and then resume syncing your music or data.
If you can't add a song or other item to iPod nano
The song may have been encoded in a format that iPod nano doesn't support.
The following audio file formats are supported by iPod nano. These include formats for audiobooks and podcasting:
• AAC (M4A, M4B, M4P, up to 320 Kbps) • Apple Lossless (a high-quality compressed format) • MP3 (up to 320 Kbps) • MP3 Variable Bit Rate (VBR)
• WAV
• AA (audible.com spoken word, formats 2, 3, and 4)
• AIFF
A song encoded using Apple Lossless format has full CD-quality sound, but takes up only about half as much space as a song encoded using AIFF or WAV format. The same song encoded in AAC or MP3 format takes up even less space. When you import music from a CD using iTunes, it's converted to AAC format by default.
Using iTunes for Windows, you can convert nonprotected WMA files to AAC or MP3 format. This can be useful if you have a library of music encoded in WMA format.
iPod nano doesn't support WMA, MPEG Layer 1, MPEG Layer 2 audio files, or audible.com format 1.
If you have a song in iTunes that isn't supported by iPod nano, you can convert it to a supported format. For information, see iTunes Help.
If iPod nano displays a "Connect to iTunes to activate Genius" message
You haven't turned on Genius in iTunes, or you haven't synced iPod nano since you turned on Genius in iTunes. See "Turning On Genius in iTunes" on page 22.
If iPod nano displays a "Genius is not available for the selected song" message
Genius is on but is unable to make a Genius playlist using the selected song. New songs are added to the iTunes Store Genius database all the time, so try again soon.
If iPod nano can't receive a radio signal
You haven't connected earphones or headphones. Make sure the connection is complete, and try moving around the earphone or headphone cord.
If you accidentally set iPod nano to use a language you don't understand
You can reset the language:
1 Press and hold Menu until the main menu appears. 2 Use the Click Wheel to find the menu item that causes the iPod nano device name to appear in the preview panel, and then choose it. That's the Settings menu. 3 Choose the last menu item (Reset Settings). 4 Choose the first item (Reset) and select a language.
Other iPod nano settings, such as song repeat, are also reset. Your synced content is not deleted or modified.
If you can't find the Reset Settings menu item, you can restore iPod nano to its original state and choose a language. See "Updating and Restoring iPod Software" on page 92.
If you can't see videos or photos on your TV
- Use RCA-type cables made specifically for iPod nano, such as the Apple Component or Apple Composite AV cables, to connect iPod nano to your TV. Other similar RCA-type cables won't work.
- Make sure your TV is set to display images from the correct input source (see the documentation that came with your TV).
- Make sure all cables are connected correctly (see "Watching Videos on a TV Connected to iPod nano" on page 50).
- Make sure the yellow end of the Apple Composite AV Cable is connected to the video port on your TV.
- If you're trying to view a video, choose Videos > Settings and set TV Out to On, and then try again. If you're trying to view a slideshow, choose Photos > Slideshow Settings and set TV Out to On, and then try again.
- If that doesn't work, choose Videos > Settings (for video) or Photos > Settings (for a slideshow) and set TV Signal to PAL or NTSC, depending on which type of TV you have. Try both settings.
If you want to double-check the system requirements
To use iPod nano, you must have:
• One of the following computer configurations:
• A Mac with a USB 2.0 port
• A Windows PC with a USB 2.0 port or a USB 2.0 card installed
• One of the following operating systems:
• Mac OS X v10.4.11 or later
• Windows Vista
• Windows XP Home or Professional with Service Pack 3 or later
• iTunes 9 or later (iTunes can be downloaded from www.apple.com/downloads)
If your Windows PC doesn't have a USB 2.0 port, you can purchase and install a USB 2.0 card. For more information about cables and compatible USB cards, go to www.apple.com/ipod.
On a Mac, iPhoto 7.1.5 or later is recommended for adding photos and albums to iPod nano. iPhoto 8.1 or later is required to use all iPod nano photo features. This software is optional. iPhoto might already be installed on your Mac. Check the Applications folder.
On both Mac and Windows PC, iPod nano can sync digital photos from folders on your computer's hard disk.
If you want to use iPod nano with a Mac and a Windows PC
If you're using iPod nano with a Mac and you want to use it with a Windows PC, you must restore the iPod software for use with the PC (see "Updating and Restoring iPod Software" on page 92). Restoring the iPod software erases all data from iPod nano, including all songs.
You cannot switch from using iPod nano with a Mac to using it with a Windows PC without erasing all data on iPod nano.
If you lock the iPod nano screen and can't unlock it
Normally, if you can connect iPod nano to the computer it's authorized to work with, iPod nano automatically unlocks. If the computer authorized to work with iPod nano is unavailable, you can connect iPod nano to another computer and use iTunes to restore iPod software. See the next section for more information.
If you want to change the screen lock combination and you can't remember the current combination, you must restore the iPod software and then set a new combination.
Updating and Restoring iPod Software
You can use iTunes to update or restore iPod software. It's recommended that you update iPod nano to use the latest software. You can also restore the software, which puts iPod nano back to its original state.
- If you choose to update, the software is updated, but your settings and songs aren't affected.
- If you choose to restore, all data is erased from iPod nano, including songs, videos, files, contacts, photos, calendar information, and any other data. All iPod nano settings are restored to their original state.
1 Make sure you have an Internet connection and have installed the latest version of iTunes from www.apple.com/downloads. 2 Connect iPod nano to your computer. 3 In iTunes, select iPod nano in the device list and click the Summary tab. The Version section tells you whether iPod nano is up to date or needs a newer version of the software. 4 Click Update to install the latest version of the software. 5 If necessary, click Restore to restore iPod nano to its original settings (this erases all data from iPod nano). Follow the onscreen instructions to complete the restore process.
Safety and Cleaning
10
Read the following important safety and handling information before using iPod nano to avoid injury.

Read all safety information below and operating instructions before using iPod to avoid injury.
Keep this safety information and the iPod nano User Guide handy for future reference. For downloadable versions of the iPod nano User Guide and the latest safety information, visit support.apple.com/manuals/ipod.
Important Safety Information
WARNING: Failure to follow these safety instructions could result in fire, electric shock, or other injury or damage.
Handling iPod nano: Do not drop, disassemble, open, crush, bend, deform, puncture, shred, microwave, incinerate, paint, or insert foreign objects into iPod nano.
Avoiding water and wet locations: Do not use iPod nano in rain, or near washbasins or other wet locations. Take care not to spill any food or liquid on iPod nano. In case iPod nano gets wet, unplug all cables, turn iPod nano off, and slide the Hold switch to HOLD before cleaning, and allow it to dry thoroughly before turning it on again. Do not attempt to dry iPod nano with an external heat source such as a microwave oven or hair dryer. An iPod nano that has been damaged as a result of exposure to liquids is not serviceable.
Repairing iPod nano: Never attempt to repair iPod nano yourself. iPod nano does not contain any user-serviceable parts. If iPod nano has been submerged in water, punctured, or subjected to a severe fall, do not use it until you take it to an Apple Authorized Service Provider. For service information, choose iPod Help from the Help menu in iTunes or go to www.apple.com/support/ipod. The rechargeable battery in iPod nano should be replaced only by an Apple Authorized Service Provider. For more information about batteries, go to www.apple.com/batteries.
Charging iPod nano: To charge iPod nano, only use the included Apple Dock Connector to USB Cable with an Apple USB Power Adapter, or a high-power USB port on another device that is compliant with the USB 2.0 standard; another Apple branded product or accessory designed to work with iPod; or a third-party accessory certified to use the Apple "Made for iPod" logo.
Read all safety instructions for any products and accessories before using with iPod nano. Apple is not responsible for the operation of third party accessories or their compliance with safety and regulatory standards.
When you use the Apple USB Power Adapter (sold separately at www.apple.com/ipodstore) to charge iPod nano, make sure that the power adapter is fully assembled before you plug it into a power outlet. Then insert the Apple USB Power Adapter firmly into the power outlet. Do not connect or disconnect the Apple USB Power Adapter with wet hands. Do not use any power adapter other than an Apple iPod power adapter to charge your iPod.
The Apple USB Power Adapter may become warm during normal use. Always allow adequate ventilation around the Apple USB Power Adapter and use care when handling.
Unplug the Apple USB Power Adapter if any of the following conditions exist:
• The power cord or plug has become frayed or damaged. • The adapter is exposed to rain, liquids, or excessive moisture. • The adapter case has become damaged. • You suspect the adapter needs service or repair. • You want to clean the adapter.
Avoiding hearing damage: Permanent hearing loss may occur if the internal speaker, earbuds, or headphones are used at high volume. Set the volume to a safe level. You can adapt over time to a higher volume of sound that may sound normal but can be damaging to your hearing. If you experience ringing in your ears or muffled speech, stop listening and have your hearing checked. The louder the volume, the less time is required before your hearing could be affected. Hearing experts suggest that to protect your hearing:
- Limit the amount of time you use earbuds or headphones at high volume.
- Avoid turning up the volume to block out noisy surroundings.
Turn the volume down if you can't hear people speaking near you.
For information about how to set a maximum volume limit on iPod nano, see “Setting the Maximum Volume Limit” on page 45.
Driving and riding safely: Use of iPod nano alone, or with headphones (even if used in only one ear) while operating a vehicle is not recommended and is illegal in some areas. Check and obey the laws and regulations on the use of mobile devices like iPod nano in areas where you drive or ride. Be careful and attentive while driving or riding a bicycle. Stop using iPod nano if you find it disruptive or distracting while operating any type of vehicle, or performing any other activity that requires your full attention.
Seizures, blackouts, and eye strain: A small percentage of people may be susceptible to blackouts or seizures (even if they have never had one before) when exposed to flashing lights or light patterns such as when playing games or watching video. If you have experienced seizures or blackouts or have a family history of such occurrences, please consult a physician before playing games (if available) or watching videos on your iPod nano. Discontinue use and consult a physician if you experience: headaches, blackouts, seizures, convulsion, eye or muscle twitching, loss of awareness, involuntary movements, or disorientation. To reduce risk of headaches, blackouts, seizures, and eyestrain, avoid prolonged use, hold iPod nano some distance from your eyes, use iPod nano in a well lit room, and take frequent breaks.
Glass parts: The outside cover of the display on iPod nano is made of glass. This glass could break if iPod nano is dropped on a hard surface or receives a substantial impact. If the glass chips or cracks, do not touch or attempt to remove the broken glass. Stop using iPod nano until the glass is replaced by an Apple Authorized Service Provider. Glass cracked due to misuse or abuse is not covered under the warranty.
Repetitive motion: When you perform repetitive activities such as playing games on iPod nano, you may experience occasional discomfort in your hands, arms, shoulders, neck, or other parts of your body. Take frequent breaks and if you have discomfort during or after such use, stop use and see a physician.
Exercising Before starting any exercise program, you should have a complete physical examination by your physician. Do a warmup or stretching exercise before beginning any workout. Be careful and attentive while exercising. Slow down, if necessary, before adjusting your device while running. Stop exercising immediately if you feel pain, or feel faint, dizzy, exhausted, or short of breath. By exercising, you assume the risks inherent in physical exercise, including any injury that may result from such activity.
Important Handling Information
NOTICE: Failure to follow these handling instructions could result in damage to iPod nano or other property.
Carrying iPod nano iPod nano contains sensitive components, including, in some cases, a hard drive. Do not bend, drop, or crush iPod nano. If you are concerned about scratching iPod nano, you can use one of the many cases sold separately.
Using connectors and ports Never force a connector into a port. Check for obstructions on the port. If the connector and port don't join with reasonable ease, they probably don't match. Make sure that the connector matches the port and that you have positioned the connector correctly in relation to the port.
Operating iPod nano in acceptable temperatures Operate iPod nano in a place where the temperature is always between 0° and 35° C (32° to 95° F). In low-temperature conditions, iPod nano play time may temporarily shorten and battery charge time may temporarily lengthen.
Store iPod nano in a place where the temperature is always between -20° and 45° C (-4° to 113° F). Don't leave iPod nano in your car, because temperatures in parked cars can exceed this range.
When you're using iPod nano or charging the battery, it is normal for iPod nano to get warm. The exterior of iPod nano functions as a cooling surface that transfers heat from inside the unit to the cooler air outside.
Keeping the outside of iPod nano clean To clean iPod nano, unplug all cables, turn iPod nano off, and slide the Hold switch to HOLD. Then use a soft, slightly damp, lint-free cloth. Avoid getting moisture in openings. Don't use window cleaners, household cleaners, aerosol sprays, solvents, alcohol, ammonia, or abrasives to clean iPod nano.
Disposing of iPod nano properly For information about the proper disposal of iPod nano, including other important regulatory compliance information, see "Regulatory Compliance Information" on page 98.
Learning More, Service, and Support
You can find more information about using iPod nano in onscreen help and on the web.
The following table describes where to get more iPod-related software and service information.
| To learn about Do this | |
| Service and support, discussions, tutorials, and Apple software downloads | Go to: www.apple.com/support/ipodnano |
| Using iTunes Open iTunes and choose Help > iTunes Help.For an online iTunes tutorial (available in some areas only), go to: www.apple.com/support/itunes | |
| Using iPhoto (on Mac OS X) Open iPhoto and choose Help > iPhoto Help. | |
| Using iCal (on Mac OS X) Open iCal and choose Help > iCal Help. | |
| The latest information on iPod nano | Go to: www.apple.com/ipodnano |
| Registering iPod nano | To register iPod nano, install iTunes on your computer and connect iPod nano. |
| Finding the iPod nano serial number | Look at the back of iPod nano or choose Settings > About and press the Center button. In iTunes (with iPod nano connected to your computer), select iPod nano in the device list and click the Settings tab. |
| Obtaining warranty service First follow the advice in this booklet, the onscreen help, and online resources. Then go to: www.apple.com/support/ipodnano | |
Regulatory Compliance Information
FCC Compliance Statement
This device complies with part 15 of the FCC rules. Operation is subject to the following two conditions: (1) This device may not cause harmful interference, and (2) this device must accept any interference received, including interference that may cause undesired operation. See instructions if interference to radio or TV reception is suspected.
Radio and TV Interference
This computer equipment generates, uses, and can radiate radio-frequency energy. If it is not installed and used properly—that is, in strict accordance with Apple's instructions—it may cause interference with radio and TV reception.
This equipment has been tested and found to comply with the limits for a Class B digital device in accordance with the specifications in Part 15 of FCC rules. These specifications are designed to provide reasonable protection against such interference in a residential installation. However, there is no guarantee that interference will not occur in a particular installation.
You can determine whether your computer system is causing interference by turning it off. If the interference stops, it was probably caused by the computer or one of the peripheral devices.
If your computer system does cause interference to radio or TV reception, try to correct the interference by using one or more of the following measures:
- Turn the TV or radio antenna until the interference stops.
- Move the computer to one side or the other of the TV or radio.
- Move the computer farther away from the TV or radio.
- Plug the computer in to an outlet that is on a different circuit from the TV or radio. (That is, make certain the computer and the TV or radio are on circuits controlled by different circuit breakers or fuses.)
If necessary, consult an Apple Authorized Service Provider or Apple. See the service and support information that came with your Apple product. Or, consult an experienced radio/TV technician for additional suggestions.
Important: Changes or modifications to this product not authorized by Apple Inc. could void the EMC compliance and negate your authority to operate the product.
This product was tested for EMC compliance under conditions that included the use of Apple peripheral devices and Apple shielded cables and connectors between system components.
It is important that you use Apple peripheral devices and shielded cables and connectors between system components to reduce the possibility of causing interference to radios, TV sets, and other electronic devices. You can obtain Apple peripheral devices and the proper shielded cables and connectors through an Apple Authorized Reseller. For non-Apple peripheral devices, contact the manufacturer or dealer for assistance.
Responsible party (contact for FCC matters only):
Apple Inc. Corporate Compliance
1 Infinite Loop, MS 26-A
Cupertino, CA 95014
Industry Canada Statement
This Class B device meets all requirements of the Canadian interference-causing equipment regulations.
VCCI Class B Statement
Voluntary Control Council for Interference by Information Technology Equipment (VCCI) Statement
Korea Class B Statement
Class B Equipment Compliance Statement
The rechargeable battery in iPod nano should be replaced only by an authorized service provider. For battery replacement services go to: www.apple.com/support/ipod/service/battery
Disposal and Recycling Information
Your iPod must be disposed of properly according to local laws and regulations. Because this product contains a battery, the product must be disposed of separately from household waste. When your iPod reaches its end of life, contact Apple or your local authorities to learn about recycling options.
For information about Apple's recycling program, go to: www.apple.com/environment/recycling
European Union—Disposal Information:

This symbol means that according to local laws and regulations your product should be disposed of separately from household waste. When this product reaches its end of life, take it to a collection point designated by local authorities. Some collection points accept products for free. The separate collection and recycling of your product at the time of disposal will help conserve natural resources and ensure that it is recycled in a manner that protects human health and the environment.
Apple and the Environment
At Apple, we recognize our responsibility to minimize the environmental impacts of our operations and products.
For more information, go to: www.apple.com/environment
© 2009 Apple Inc. All rights reserved. Apple, the Apple logo, iCal, iLife, iPhoto, iPod, iPod nano, iPod Socks, iTunes, Mac, Macintosh, and Mac OS are trademarks of Apple Inc., registered in the U.S. and other countries. Finder, the FireWire logo, and Shuffle are trademarks of Apple Inc. iTunes Store is a service mark of Apple Inc., registered in the U.S. and other countries. NIKE is a trademark of NIKE, Inc. and its affiliates and is used under license. Other company and product names mentioned herein may be trademarks of their respective companies.
Mention of third-party products is for informational purposes only and constitutes neither an endorsement nor a recommendation. Apple assumes no responsibility with regard to the performance or use of these products. All understandings, agreements, or warranties, if any, take place directly between the vendors and the prospective users. Every effort has been made to ensure that the information in this manual is accurate. Apple is not responsible for printing or clerical errors.
019-1716/2009-11
Index
A
accessibility
using spoken menus 83
accessing additional options 6, 39
accessories for iPod 85
adding album artwork 21
adding menu items 10,45
adding music
disconnecting iPod 13
from more than one computer 25, 27
manually 30
methods 24
On-The-Go playlists 42
tutorial 97
adding other content 30
adding photos
about 67
all or selected photos 67, 68
from computer to iPod 67
from iPod to computer 71
full-resolution image 68
address book, syncing 81
alarms
deleting 78
setting 78
album, browsing by 42
album artwork
adding 21
viewing 37
Apple USB Power Adapter 16
charging the battery 17
artist, browsing by 42
audiobooks 48
adding to iPod nano 29
setting play speed 48
automatic syncing 25, 27
AV cables 50, 51, 71
B
backlight
setting timer 11
turning on 6,11
battery
charge states when disconnected 17
charging 16
Energy Saver 18
improving performance 18
rechargeable 18
replacing 18
very low 88
viewing charge status 16
brightness setting 11
browsing
by album 42
by artist 42
quickly 11, 38
songs 6, 34
videos 6
with Cover Flow 37, 38
buttons
Center 5
disabling with Hold switch 6
Eject 15
C
calendar events, syncing 81
Camera Roll 54
Center button, using 5, 34
Charging, Please Wait message 88
charging the battery
about 16
using the Apple USB Power Adapter 17
using your computer 16
when battery very low 88
cleaning iPod 96
Click Wheel
browsing songs 34
turning off the Click Wheel sound 11
using 5
clocks
adding for other time zones 77
settings 77
close captions 51
compilations 45
component AV cable 50, 51, 71
composite AV cable 50, 51, 71
computer
adding photos to iPod 67
charging the battery 16
connecting iPod 13
getting photos from iPod 71
problems connecting iPod 88
requirements 91
connecting iPod
about 13
charging the battery 16
to a TV 51,71
contacts
sorting 82
syncing 81
controls
disabling with Hold switch 8
using 5
converting unprotected WMA files 89
Cover Flow 37, 38
crossfading 47
customizing the Music menu 45
D
data files, storing on iPod 84
date and time
setting 77
viewing 77
determining battery charge 17
diamond icon on scrubber bar 6
digital photos. See photos
disconnecting iPod
about 13
during music update 13
ejecting first 14
instructions 15
troubleshooting 87
disk, using iPod as 84
displaying time in title bar 77
downloading
See also adding; syncing
E
Eject button 15
ejecting before disconnecting 13, 14
Energy Saver 18
external disk, using iPod as 55, 84
F
fast-forwarding a song or video 6
file formats, supported 89
finding your iPod serial number 8
fit video to screen 51
font size
setting 10
full-resolution images 68
G
games 76
buying games 76
Genius
creating a playlist 7,40
Genius slider 35
playing a playlist 7, 40, 41
saving a playlist 7, 40
syncing to iPod nano 26
turning on in iTunes 22
using on iPod nano 39
Genius Mixes
playing 7, 40
syncing to iPod nano 26
getting help 97
getting information about your iPod 12
getting started with iPod 91
H
hearing loss warning 85
help, getting 97
Hold switch 6, 8
I
iCal, getting help 97
images. See photos
importing
video 22
importing contacts, calendars, and to-do lists. See syncing
iPhoto
getting help 97
importing camera videos 56
recommended version 91
iPod Dock 13
iPod Dock Connector 13
iPod Updater application 92
iTunes
ejecting iPod 15
getting help 97
setting not to open automatically 84
Sound Check 47
iTunes U 29, 48, 50
L
language
resetting 90
specifying 10
letterbox 51
lightning bolt on battery icon 16
Live Pause 61
navigating 63
locating your iPod serial number 8
locking iPod screen 79, 80
lyrics
adding 21
viewing on iPod 37
M
Mac OS X operating system 91
main menu
adding or removing items 10
opening 5
returning to 6
settings 10,45
using 9
Managing iPod manually 25
managing iPod manually 30
manually adding 30
maximum volume limit, setting 45
memos, recording 74
menu items
adding or removing 10,45
choosing 6
returning to main menu 6
returning to previous menu 6
modifying playlists 31
movies
See also videos
music
iPod not playing 87
rating 36
setting for slideshows 70
tutorial 97
See also adding music; songs
Music menu, customizing 45
music videos
syncing 26
N
navigating quickly 11
notes, storing and reading 84
Now Playing screen
moving to any point in a song or video 6
scrubber bar 6
NTSC TV 50,70
0
On-The-Go playlists
copying to computer 42
making 39,41
rating songs 36
saving 42
operating system requirements 91
organizing your music 21
P
PAL TV 50,70
pausing
a song 6
a video 6
Pedometer 72
settings 73
workout history 73
phone numbers, syncing 81
photo library 67
photos
adding to iPod nano 67
deleting 68,71
full-resolution 68
importing 67
syncing 67, 68
viewing on iPod 69
viewing slideshows 70
playing
games 76
songs 6
videos 6
playlists
adding songs 6, 31
making on iPod 39,41
modifying 31
On-The-Go 39,41
plug on battery icon 16
podcasting 47
podcasts
listening 47
updating 28
ports
RCA video and audio 51, 71
USB 91
preview panel 10
previous menu, returning to 6
problems. See troubleshooting
Q
quick navigation 11
R
Radio 58
antenna 58, 90
Live Pause 61
Radio menu 65
screens 59
tagging songs 64
tuning 60
random play 6
rating songs 36
RCA video and audio ports 51, 71
rechargeable batteries 18
recorded videos
adding music 57
deleting from iPod nano 55
importing to your computer 55
playing 54
sharing with iPhoto 56
recording voice memos 74
registering iPod 97
relative volume, playing songs at 46
removing menu items 10, 45
repairing iPod 94
replacing battery 18
replaying a song or video 6
requirements
computer 91
operating system 91
reset all settings 12
resetting iPod 6,86
resetting the language 90
restore message 88
restoring iPod software 92
rewinding a song or video 6
S
Safely Remove Hardware icon 15
safety considerations
setting up iPod 93
saving On-The-Go playlists 42
screen brightness, setting 11
screen lock 79
scrolling quickly 11
scrubber bar 6
searching
iPod 44
Select button. See Center button
serial number 8, 12
serial number, locating 97
service and support 97
sets of songs. See playlists
setting combination for iPod 79
settings
about your iPod 12
alarm 78
audiobook play speed 48
backlight timer 11
brightness 11
Click Wheel sound 11
date and time 77
font size 10
language 10
main menu 10,45
PAL or NTSC TV 50, 70
playing songs at relative volume 46
repeating songs 44
reset all 12
shuffle songs 43
sleep timer 78
slideshow 70
TV 50
volume limit 45
setup 24
shake to shuffle 43
shuffle 35
shuffling songs on iPod 6, 43
sleep mode and charging the battery 16
sleep timer, setting 78
slideshows
background music 70
random order 70
settings 70
viewing on iPod 70
software
getting help 97
iPhoto 91
iPod Updater 92
updating 92
songs
adding to On-The-Go playlists 6
browsing 6
browsing and playing 34
fast-forwarding 6
pausing 6
playing 6
playing at relative volume 46
rating 36
repeating 44
replaying 6
rewinding 6
shuffling 6,43
skipping ahead 6
viewing lyrics 21
See also music
sorting contacts 82
Sound Check 47
spoken menus 83
standard TV 50
stopwatch 79
storing
data files on iPod 84
notes on iPod 84
supported operating systems 91
suppressing iTunes from opening 84
syncing
address book 81
music 24
music videos 26
photos 67, 68
to-do lists 81
See also adding
system requirements 91
T
tagging songs 64
previewing and purchasing 64
time, displaying in title bar 77
timer, setting for backlight 11
time zones, clocks for 77
title bar, displaying time 77
to-do lists, syncing 81
transitions for slides 70
troubleshooting
connecting iPod to computer 88
cross-platform use 91
disconnecting iPod 87
iPod not playing music 87
iPod won't respond 86
resetting iPod 86
restore message 88
safety considerations 93
setting incorrect language 90
slow syncing of music or data 89
software update and restore 92
TV slideshows 90
unlocking iPod screen 91
turning iPod on and off 6
tutorial 97
TV
connecting to iPod 51,71
PAL or NTSC 50, 70
settings 50
viewing slideshows 51,71
TV shows
See also videos
U
unlocking iPod screen 80, 91
unresponsive iPod 86
unsupported audio file formats 89
updating and restoring software 92
USB 2.0 port
recommendation 91
slow syncing of music or data 89
USB port on keyboard 13
Use iTunes to restore message in display 88
V
Video Camera 52
importing recorded videos 55
playing recorded videos 54
recording video 53
sharing recorded videos 56
special effects 53
video captions 51
video podcasts
viewing on a TV 50
videos
adding to iPod 27
browsing 6
fast-forwarding 6
importing from video camera 55
pausing 6
playing 6
playing recorded 54
renting 22
replaying 6
rewinding 6
skipping ahead 6
viewing on a TV 50
viewing on iPod 49
viewing album artwork 37
viewing lyrics 37
viewing photos 69
viewing slideshows
on a TV 51,71
on iPod 70
settings 70
troubleshooting 90
Voice Memos
recording 74
syncing with your computer 76
VoiceOver
setting up 32
using 44
volume
changing 6
setting maximum limit 45
W
warranty service 97
widescreen TV 50
Windows
supported operating systems 91
troubleshooting 91
WMA files, converting 89


- CHAPTER 2 19 SETTING UP IPOD NANO
- CHAPTER 3 33 LISTENING TO MUSIC
- CHAPTER 4 49 WATCHING VIDEOS
- CHAPTER 5 52 USING THE VIDEO CAMERA
- CHAPTER 6 58 LISTENING TO FM RADIO
- CHAPTER 7 67 PHOTO FEATURES
- CHAPTER 8 72 MORE SETTINGS, EXTRA FEATURES, AND ACCESSORIES
- CHAPTER 9 86 TIPS AND TROUBLESHOOTING
- CHAPTER 10 93 SAFETY AND CLEANING
- CHAPTER 11 97 LEARNING MORE, SERVICE, AND SUPPORT
- IPOD NANO BASICS
- IPOD NANO AT A GLANCE
- WHAT'S NEW IN IPOD NANO
- USING IPOD NANO CONTROLS
- DISABLING IPOD NANO CONTROLS
- TO DISABLE IPOD NANO CONTROLS
- USING IPOD NANO MENUS
- ADDING OR REMOVING ITEMS ON THE MAIN MENU
- TURNING OFF THE PREVIEW PANEL
- SETTING THE FONT SIZE IN MENUS
- SETTING THE LANGUAGE
- SETTING THE BACKLIGHT TIMER
- TO SET THE BACKLIGHT TIMER
- SETTING THE SCREEN BRIGHTNESS
- TO SET THE SCREEN BRIGHTNESS
- TURNING OFF THE CLICK WHEEL SOUND
- TO TURN OFF THE CLICK WHEEL SOUND
- SCROLLING QUICKLY THROUGH LONG LISTS
- TO SCROLL QUICKLY
- GETTING INFORMATION ABOUT IPOD NANO
- TO GET INFORMATION ABOUT IPOD NANO
- RESETTING ALL SETTINGS
- TO RESET ALL SETTINGS
- ABOUT THE IPOD NANO INTERNAL SPEAKER
- CONNECTING AND DISCONNECTING IPOD NANO
- CONNECTING IPOD NANO
- TO CONNECT IPOD NANO TO YOUR COMPUTER
- DISCONNECTING IPOD NANO
- TO EJECT IPOD NANO
- TO DISCONNECT IPOD NANO
- ABOUT THE IPOD NANO BATTERY
- CHARGING THE IPOD NANO BATTERY
- TO CHARGE THE BATTERY USING YOUR COMPUTER
- TO CHARGE THE BATTERY USING THE APPLE USB POWER ADAPTER
- UNDERSTANDING BATTERY STATES
- IMPROVING BATTERY PERFORMANCE WITH ENERGY SAVER
- TO TURN ENERGY SAVER ON OR OFF
- SETTING UP IPOD NANO
- USING ITUNES
- SETTING UP YOUR ITUNES LIBRARY
- IMPORTING MUSIC TO ITUNES
- PURCHASE SONGS AND DOWNLOAD PODCASTS USING THE ITUNES STORE
- ADD SONGS ALREADY ON YOUR COMPUTER TO YOUR ITUNES LIBRARY
- IMPORT MUSIC FROM YOUR AUDIO CDS INTO ITUNES
- ADDING MORE DETAILS TO YOUR ITUNES LIBRARY
- ENTER SONG NAMES AND OTHER INFORMATION
- ADD LYRICS
- ADD ALBUM ARTWORK
- ORGANIZING YOUR MUSIC
- TURNING ON GENIUS IN ITUNES
- IMPORTING VIDEO TO ITUNES
- PURCHASE OR RENT VIDEOS AND DOWNLOAD VIDEO PODCASTS FROM THE ITUNES STORE
- CREATE VERSIONS OF YOUR OWN VIDEOS TO WORK WITH IPOD NANO
- ADDING MUSIC, VIDEOS, AND OTHER CONTENT TO IPOD NANO
- CONNECTING IPOD NANO TO A COMPUTER FOR THE FIRST TIME
- TO USE THE IPOD NANO SETUP ASSISTANT
- ADDING CONTENT AUTOMATICALLY OR MANUALLY
- SYNCING MUSIC AUTOMATICALLY
- TO SYNC MUSIC WITH IPOD NANO
- SYNCING MUSIC FROM SELECTED PLAYLISTS, ARTISTS, AND GENRES TO IPOD NANO
- TO SET ITUNES TO SYNC MUSIC FROM SELECTED PLAYLISTS, ARTISTS, AND GENRES TO IPOD NANO
- SYNCING GENIUS PLAYLISTS AND GENIUS MIXES TO IPOD NANO
- TO SET ITUNES TO SYNC GENIUS PLAYLISTS AND SELECTED GENIUS MIXES TO IPOD NANO
- ADDING VIDEOS TO IPOD NANO
- SYNCING VIDEOS AUTOMATICALLY
- TO SET ITUNES TO SYNC MOVIES TO IPOD NANO
- TO SET ITUNES TO SYNC TV SHOWS TO IPOD NANO
- ADDING PODCASTS TO IPOD NANO
- TO SET ITUNES TO UPDATE THE PODCASTS ON IPOD NANO AUTOMATICALLY
- ADDING VIDEO PODCASTS TO IPOD NANO
- ADDING ITUNES U CONTENT TO IPOD NANO
- ADDING AUDIOBOOKS TO IPOD NANO
- TO SYNC AUDIOBOOKS TO IPOD NANO
- ADDING OTHER CONTENT TO IPOD NANO
- MANAGING IPOD NANO MANUALLY
- TO SET ITUNES TO MANAGE CONTENT ON IPOD NANO MANUALLY
- TO ADD A SONG, VIDEO, OR OTHER ITEM TO IPOD NANO
- TO REMOVE A SONG, VIDEO, OR OTHER ITEM FROM IPOD NANO
- TO CREATE A NEW PLAYLIST ON IPOD NANO
- TO ADD ITEMS TO OR REMOVE ITEMS FROM A PLAYLIST ON IPOD NANO
- TO RESET ITUNES TO SYNC MUSIC, VIDEO, AND PODCASTS AUTOMATICALLY
- SETTING UP VOICEOVER
- TO ENABLE VOICEOVER AT A LATER TIME
- TO DISABLE VOICEOVER
- LISTENING TO MUSIC
- READ THIS CHAPTER TO LEARN ABOUT LISTENING ON THE GO
- PLAYING MUSIC AND OTHER AUDIO
- TO BROWSE FOR AND PLAY A SONG
- TO CHANGE THE PLAYBACK VOLUME
- TO LISTEN TO A DIFFERENT PART OF A SONG
- TO CREATE A GENIUS PLAYLIST FROM THE CURRENT SONG
- TO SHUFFLE SONGS FROM THE NOW PLAYING SCREEN
- RATING SONGS
- VIEWING LYRICS ON IPOD NANO
- VIEWING ALBUM ARTWORK ON IPOD NANO
- BROWSING MUSIC USING COVER FLOW
- TO USE COVER FLOW
- TO BROWSE QUICKLY IN COVER FLOW
- TO TURN COVER FLOW ON OR OFF
- ACCESSING ADDITIONAL COMMANDS
- TO ACCESS ADDITIONAL COMMANDS
- USING GENIUS ON IPOD NANO
- TO MAKE A GENIUS PLAYLIST ON IPOD NANO
- TO PLAY A GENIUS PLAYLIST
- PLAYING GENIUS MIXES
- TO PLAY A GENIUS MIX
- CREATING ON-THE-GO PLAYLISTS ON IPOD NANO
- TO CREATE AN ON-THE-GO PLAYLIST
- TO PLAY SONGS IN THE ON-THE-GO PLAYLIST
- TO REMOVE A SONG FROM THE ON-THE-GO PLAYLIST
- TO CLEAR THE ENTIRE ON-THE-GO PLAYLIST
- TO SAVE THE ON-THE-GO PLAYLIST ON IPOD NANO
- TO COPY ON-THE-GO PLAYLISTS FROM IPOD NANO TO YOUR COMPUTER
- BROWSING SONGS BY ALBUM OR ARTIST
- TO BROWSE SONGS BY ALBUM
- TO BROWSE SONGS BY ARTIST
- SETTING IPOD NANO TO SHUFFLE SONGS
- TO DISABLE SHAKING
- SETTING IPOD NANO TO REPEAT SONGS
- TO SET IPOD NANO TO REPEAT SONGS
- USING VOICEOVER IN IPOD NANO
- TO HEAR THE CURRENT SONG ANNOUNCEMENT
- SEARCHING MUSIC
- TO SEARCH FOR MUSIC
- CUSTOMIZING THE MUSIC MENU
- SETTING THE MAXIMUM VOLUME LIMIT
- TO ENTER A COMBINATION
- TO CHANGE THE MAXIMUM VOLUME LIMIT
- TO REMOVE THE MAXIMUM VOLUME LIMIT
- SETTING SONGS TO PLAY AT THE SAME VOLUME LEVEL
- TO SET ITUNES TO PLAY SONGS AT THE SAME SOUND LEVEL
- USING THE EQUALIZER
- CROSSFADING BETWEEN SONGS
- PLAYING PODCASTS
- PLAYING ITUNES U CONTENT
- TO PLAY ITUNES U CONTENT
- LISTENING TO AUDIOBOOKS
- TO SET AUDIOBOOK PLAY SPEED
- WATCHING VIDEOS ON IPOD NANO
- TO WATCH A VIDEO ON IPOD NANO
- WATCHING VIDEO PODCASTS
- WATCHING VIDEOS DOWNLOADED FROM ITUNES U
- WATCHING VIDEOS ON A TV CONNECTED TO IPOD NANO
- TO SET IPOD NANO TO DISPLAY VIDEOS ON A TV
- TO SET TV SETTINGS
- TO SET DO THIS
- TO USE THE APPLE COMPONENT AV CABLE TO CONNECT IPOD NANO TO YOUR TV
- TO WATCH A VIDEO ON YOUR TV
- USING THE VIDEO CAMERA
- RECORDING VIDEO
- TO RECORD VIDEO
- RECORDING VIDEO WITH SPECIAL EFFECTS
- TO RECORD VIDEO WITH SPECIAL EFFECTS
- PLAYING RECORDED VIDEOS
- TO PLAY BACK A VIDEO YOU JUST RECORDED
- TO PLAY A RECORDED VIDEO FROM THE VIDEOS MENU
- DELETING RECORDED VIDEOS
- TO DELETE A RECORDED VIDEO
- IMPORTING RECORDED VIDEOS TO YOUR COMPUTER
- TO ENABLE IPOD NANO FOR DISK USE
- IMPORTING RECORDED VIDEOS TO A MAC WITH IPHOTO INSTALLED
- TO IMPORT VIDEOS TO YOUR MAC USING IPHOTO
- TO SHARE RECORDED VIDEOS USING IPHOTO
- SHARING RECORDED VIDEOS FROM A MAC OR PC
- TO POST RECORDED VIDEOS ON FACEBOOK
- TO POST RECORDED VIDEOS ON YOUTUBE
- ADDING MUSIC TO YOUR RECORDED VIDEOS
- DISPLAY ITEM FUNCTION
- TUNING THE FM RADIO
- TO BROWSE RADIO STATIONS
- TO SEEK AVAILABLE STATIONS
- TO SCAN AVAILABLE STATIONS
- TO SAVE YOUR FAVORITE STATIONS
- TO TUNE TO A FAVORITE STATION
- PAUSING LIVE RADIO
- TO PAUSE LIVE RADIO
- TO SWITCH BETWEEN THE PROGRESS BAR AND RADIO DIAL
- TO DISABLE LIVE PAUSE
- TAGGING SONGS TO SYNC TO ITUNES
- TO TAG A SONG
- TO PREVIEW AND PURCHASE TAGGED SONGS IN ITUNES
- USING THE RADIO MENU
- ABOUT RADIO REGIONS
- TO SELECT A RADIO REGION
- PHOTO FEATURES
- READ THIS CHAPTER TO LEARN ABOUT IMPORTING AND VIEWING PHOTOS
- IMPORTING PHOTOS
- ADDING PHOTOS FROM YOUR COMPUTER TO IPOD NANO
- TO ADD PHOTOS FROM A FOLDER ON YOUR HARD DISK TO IPOD NANO
- ADDING FULL-RESOLUTION IMAGE FILES TO IPOD NANO
- TO ADD FULL-RESOLUTION IMAGE FILES TO IPOD NANO
- TO DELETE PHOTOS FROM IPOD NANO
- VIEWING PHOTOS
- VIEWING PHOTOS ON IPOD NANO
- TO VIEW PHOTOS ON IPOD NANO
- VIEWING SLIDESHOWS
- TO SET SLIDESHOW SETTINGS
- TO VIEW A SLIDESHOW ON IPOD NANO
- TO ADJUST THE BRIGHTNESS DURING A SLIDESHOW
- TO CONNECT IPOD NANO TO YOUR TV
- TO VIEW A SLIDESHOW ON YOUR TV
- ADDING PHOTOS FROM IPOD NANO TO A COMPUTER
- TO ADD PHOTOS FROM IPOD NANO TO A COMPUTER
- TO DELETE PHOTOS FROM THE PHOTOS FOLDER ON IPOD NANO
- MORE SETTINGS, EXTRA FEATURES, AND ACCESSORIES
- IPOD NANO CAN DO A LOT MORE THAN PLAY SONGS. AND YOU CAN DO A LOT MORE WITH IT THAN LISTEN TO MUSIC
- USING IPOD NANO AS A PEDOMETER
- TO USE IPOD NANO AS A PEDOMETER
- TO CUSTOMIZE THE PEDOMETER SETTINGS
- TO VIEW YOUR WORKOUT HISTORY
- TO UPLOAD YOUR WORKOUT INFORMATION TO NIKE
- RECORDING VOICE MEMOS
- TO RECORD A VOICE MEMO
- TO SET CHAPTER MARKS
- TO LABEL A RECORDING
- TO PLAY A RECORDING
- TO DELETE A RECORDING
- TO SYNC VOICE MEMOS WITH YOUR COMPUTER
- PLAYING GAMES
- TO PLAY A GAME
- TO BUY A GAME
- TO SYNC GAMES AUTOMATICALLY TO IPOD NANO
- USING EXTRA SETTINGS
- SETTING AND VIEWING THE DATE AND TIME
- TO SET DATE AND TIME OPTIONS
- ADDING CLOCKS FOR OTHER TIME ZONES
- TO ADD CLOCKS FOR OTHER TIME ZONES
- TO DELETE A CLOCK
- SETTING ALARMS
- TO USE IPOD NANO AS AN ALARM CLOCK
- TO DELETE AN ALARM
- SETTING THE SLEEP TIMER
- TO SET THE SLEEP TIMER
- USING THE STOPWATCH
- TO USE THE STOPWATCH
- TO REVIEW OR DELETE A LOGGED STOPWATCH SESSION
- LOCKING THE IPOD NANO SCREEN
- TO SET A COMBINATION FOR IPOD NANO
- TO LOCK THE IPOD NANO SCREEN
- TO CHANGE A COMBINATION YOU'VE ALREADY SET
- SYNCING CONTACTS, CALENDARS, AND TO-DO LISTS
- TO SYNC CONTACTS OR CALENDAR INFORMATION USING MAC OS X
- TO SYNC CONTACTS OR CALENDARS USING WINDOWS ADDRESS BOOK OR MICROSOFT OUTLOOK FOR WINDOWS
- TO ADD CONTACT INFORMATION MANUALLY
- TO ADD APPOINTMENTS AND OTHER CALENDAR EVENTS MANUALLY
- TO VIEW CONTACTS ON IPOD NANO
- TO SORT CONTACTS BY FIRST OR LAST NAME
- TO VIEW CALENDAR EVENTS
- TO VIEW TO-DO LISTS
- MONO AUDIO
- USING SPOKEN MENUS FOR ACCESSIBILITY
- TO ENABLE SPOKEN MENUS IN ITUNES
- TO DEACTIVATE SPOKEN MENUS ON IPOD NANO
- USING IPOD NANO AS AN EXTERNAL DISK
- TO ENABLE IPOD NANO AS AN EXTERNAL DISK
- TO PREVENT ITUNES FROM OPENING AUTOMATICALLY WHEN YOU CONNECT IPOD NANO TO YOUR COMPUTER
- STORING AND READING NOTES
- LEARNING ABOUT IPOD NANO ACCESSORIES
- TIPS AND TROUBLESHOOTING
- MOST PROBLEMS WITH IPOD NANO CAN BE SOLVED QUICKLY BY FOLLOWING THE ADVICE IN THIS CHAPTER
- THE 5 RS: RESET, RETRY, RESTART, REINSTALL, RESTORE
- GENERAL SUGGESTIONS
- TO RESET IPOD NANO
- IF IPOD NANO WON'T TURN ON OR RESPOND
- IF IPOD NANO ISN'T PLAYING MUSIC
- IF YOU CONNECT IPOD NANO TO YOUR COMPUTER AND NOTHING HAPPENS
- IF IPOD NANO DISPLAYS A "CONNECT TO POWER" MESSAGE
- IF IPOD NANO DISPLAYS A "USE ITUNES TO RESTORE" MESSAGE
- IF SONGS OR DATA SYNC MORE SLOWLY OVER USB
- IF YOU CAN'T ADD A SONG OR OTHER ITEM TO IPOD NANO
- IF IPOD NANO DISPLAYS A "CONNECT TO ITUNES TO ACTIVATE GENIUS" MESSAGE
- IF IPOD NANO CAN'T RECEIVE A RADIO SIGNAL
- IF YOU ACCIDENTALLY SET IPOD NANO TO USE A LANGUAGE YOU DON'T UNDERSTAND
- IF YOU CAN'T SEE VIDEOS OR PHOTOS ON YOUR TV
- IF YOU WANT TO DOUBLE-CHECK THE SYSTEM REQUIREMENTS
- IF YOU WANT TO USE IPOD NANO WITH A MAC AND A WINDOWS PC
- IF YOU LOCK THE IPOD NANO SCREEN AND CAN'T UNLOCK IT
- UPDATING AND RESTORING IPOD SOFTWARE
- SAFETY AND CLEANING
- IMPORTANT SAFETY INFORMATION
- IMPORTANT HANDLING INFORMATION
- LEARNING MORE, SERVICE, AND SUPPORT
- YOU CAN FIND MORE INFORMATION ABOUT USING IPOD NANO IN ONSCREEN HELP AND ON THE WEB
- REGULATORY COMPLIANCE INFORMATION
- FCC COMPLIANCE STATEMENT
- RADIO AND TV INTERFERENCE
- INDUSTRY CANADA STATEMENT
- VCCI CLASS B STATEMENT
- KOREA CLASS B STATEMENT
- DISPOSAL AND RECYCLING INFORMATION
- EUROPEAN UNION—DISPOSAL INFORMATION
- APPLE AND THE ENVIRONMENT
- INDEX
- A
- B
- C
- D
- E
- F
- G
- H
- I
- L
- M
- N
- P
- Q
- R
- S
- T
- U
- V
- W
Brand : APPLE
Model : iPod Nano 5th generation
Category : Mp3 player