
HF122MPA 011 - Vacuum Cleaner HOOVER - Free user manual and instructions
Find the device manual for free HF122MPA 011 HOOVER in PDF.
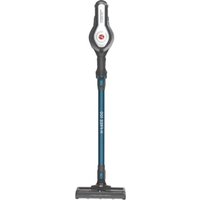


| Product Type | Bagless Canister Vacuum Cleaner |
| Brand | Hoover |
| Model | HF122MPA 011 |
| Maximum Power | 700 W |
| Filtration Type | Washable HEPA |
| Separation Technology | Cyclonic |
| Container Capacity | 2 L |
| Dimensions (L x W x H) | 40 x 30 x 25 cm |
| Weight | 5 kg |
| Power Cord Length | 8 m |
| Operating Radius | 10 m |
| Noise Level | 78 dB(A) |
| Vacuum Type | Dry Only |
| Included Accessories | Upholstery nozzle, parquet brush, crevice tool |
| Full Container Indicator | Yes |
| Cord Storage System | Automatic Cord Rewind |
| Filter Maintenance | Wash with cold water every 3 months |
| Available Spare Parts | Filter, container, brush, nozzles |
| Repairability | Repairability index: 7.5/10 |
| Warranty | 2 years |
Frequently Asked Questions - HF122MPA 011 HOOVER
User questions about HF122MPA 011 HOOVER
0 question about this device. Answer the ones you know or ask your own.
Ask a new question about this device
Download the instructions for your Vacuum Cleaner in PDF format for free! Find your manual HF122MPA 011 - HOOVER and take your electronic device back in hand. On this page are published all the documents necessary for the use of your device. HF122MPA 011 by HOOVER.
USER MANUAL HF122MPA 011 HOOVER
INSTRUCTION MANUAL (PT).....P 25
INSTRUCTION MANUAL (ES).....P 31
USER MANUAL (NL)....P 37
USER GUIDE (DK)....P 43
USER MANUAL (NO)....P 49
INSTRUCTION MANUAL (SE)....P 55
USER GUIDE (FI)....P 61

* Certain models only, accessories may vary according to model


INSTRUCTIONS FOR SAFE USE
This appliance should only be used for domestic cleaning, as described in this user guide. Please ensure that this guide is fully understood before operating the appliance.
Always switch off and remove the charger from the socket before cleaning the appliance or any maintenance task.
This appliance can be used by children aged from 8 years and above and persons with reduced physical, sensory or mental capabilities or lack of experience and knowledge if they have been given supervision or instruction concerning use of the appliance in a safe way and understand the hazards involved. Children shall not play with the appliance. Cleaning and user maintenance shall not be made by children without supervision.
If the power cord is damaged stop using the appliance immediately. To avoid a safety hazard, an authorised Hoover service engineer must replace the power cord.
Keep hands, feet, loose clothing and hair away from rotating brushes.
Use only the original charger supplied with the appliance.
Check that your supply voltage is the same as that stated on the charger.
This appliance is supplied with a double insulated battery charger which is only suitable for insertion in a 230V (UK 240V) socket outlet.
Plug the charger into a suitable socket outlet and connect the charger jack plug to the appliance.
When charging the appliance, the power switch lever must be in the off position.
Before first use, charge your appliance for at least 24 hours. The battery pack LED light will illuminate Red during charging and will turn WHITE when fully charged.
Re-connect the appliance to the charger after use to recharge the battery.
Never charge the batteries in temperatures above 37°C or below 0°C.
It is normal for the charger to become warm to the touch when charging.
Do not unplug the charger by pulling on the power cord.
Unplug the charger in the event of prolonged absence (holidays, etc.). Recharge appliance again before use as batteries may self discharge over increased periods of storage.
If the appliance is to be disposed of, the batteries must first be removed. The appliance must be disconnected from the supply mains when removing the battery. Dispose of the batteries safely. Run the appliance until it stops because the batteries are fully discharged. Used batteries should be taken to a recycling station and not disposed of with household waste. To remove the batteries, please contact the Hoover Customer Centre or proceed according to the following instructions.
IMPORTANT: Always fully discharge the batteries before removal and ensure the charger is unplugged.
Run the cleaner until the batteries are completely empty.
Remove the charger jack plug from the appliance.
Press the battery pack release button and slide to remove. [3]
Note: Should you experience any difficulty in dismantling the unit or for more detailed information on treatment, recovery and recycling of this appliance, please contact your local city office or your household waste disposal service.
Use only attachments, consumables or spares recommended or supplied by Hoover.
Static electricity: Some carpets can cause a small build up of static electricity. Any static discharge is not hazardous to health.
Do not use your appliance out of doors or on any wet surface or for wet pick up.
Do not pick up hard or sharp objects, matches, hot ashes, cigarette ends or other similar items. Do not spray with or pick up flammable liquids, cleaning fluids, aerosols or their vapours.
Do not run over the power cord when using your appliance or remove the plug by pulling on the power cord. Do not continue to use your appliance or charger if it appears faulty.
Hoover service: To ensure the continued safe and efficient operation of this appliance we recommend that any servicing or repairs are only carried out by an authorised Hoover service engineer.
Do not use the appliance to clean animals or people.
Do not replace the batteries with non-rechargeable batteries.
The Environment:
This appliance is marked according to the European directive 2011/65/EC on Waste Electrical and Electronic Equipment (WEEE). By ensuring this product is disposed of correctly, you will help prevent potential negative consequences for the environment and human health, which could otherwise be caused by inappropriate waste handling of this product. The symbol on the product indicates that this product may not be treated as household waste. Instead it shall be handed over to the applicable collection point for the recycling of electrical and electronic equipment. Disposal must be carried out in accordance with local environmental regulations for waste disposal. For more detailed information about treatment, recovery and recycling of this product, please contact your local city office, your household waste disposal service or the shop where you purchased the product.


This product complies with the European Directives 2014/53/EU and 2011/65/EU.
CANDY HOOVER GROUP S.r.l. Via Privata Eden Fumagalli, 20861 Brugherio (MB) Italy
PRODUCT COMPONENTS
A. Main Body
B. Integrated Dusting Brush
C. Handheld Release Button
D. Flexible Tube
D1. Flexible Tube Release Button
E. Nozzle Release Button
F. Nozzle
G. Front LED Lights
H. Agitator Release Flap
I. Intense Floor Roller
J. Mesh Filter
K. Single Cyclone
L. Dust Bin
M. Dust Flap Release Button
N. Dust Bin Release Button
O. Crevice Cover Cap
P. Switch ON/OFF
Q. Switch Lever
R. Exhaust Filter Release Buttons
S. Exhaust Filter
T. Sponge
U. Exhaust Filter Frame
V. Battery Pack LED Light
W. Battery Pack Release Button
X. Battery Pack
Y. Charger
Z. Wall Mount *
AA. Screws Plugs *
AB. Crevice Tool
AC. Accessory Adaptor *
AD. Up To Top Tool *
AE. Radiator Tool *
AF. Deep Cleaning Brush *
AG. Mini-Turbo Nozzle *
AH. Long Flexible Crevice Tool *
AI. Accessory Bag *
PREPARING YOUR CLEANER
- Insert the nozzle head into one side of the tube until you hear a "click" sound. [2a]
- Insert the other side of the tube into the handheld until you hear a "click" sound. [2b]
- Fix the wall mount to your wall using the screws and screw plugs provided. [3]
- To fully charge the appliance, connect the charge jack plug to the removable battery pack. It will take around 6 hours. [4]
NOTE: To remove the nozzle, press the nozzle release button and pull away from the main body.
NOTE: Use only the charger supplied with your cleaner to recharge.
IMPORTANT: When charging the cleaner, the switch lever must be in the OFF position. You can also charge the removable battery pack when it is released from the product.
It is normal for the charger to become warm to the touch when charging.
* Certain Models Only
USING YOUR CLEANER
There are three working modes:
- TURBO MODE: The product will start on full power with agitator ON when you press the ON/OFF switch and stop when released. [5a]
- ECO MODE: The product will start on lower power with agitator ON when you press the ON/OFF switch 2 times consecutively and stop when released. [5b]
- CONTINUOUS MODE: To enable continuous mode push back lever until locked. It is advisable to disable continuous mode after every time actioned, this is completed by simply pushing the lever forward to the unlocked position. [5c]
FLEXIBLE MODE: If you want to easily access hard-to-reach areas under furniture, press the flexible tube release button to position the tube to a lower angle. [1]
IMPORTANT: After each use of your product, please ensure to push the switch lever forward to the unlocked position. Failure to do so may result in a reduction in battery life or failure.
SAFETY PROTECTION SYSTEM
To ensure the reliability of the product is not affected if used under arduous conditions, the product features an integrated safety protection system. [14]
NOTE: The Safety protection system will action if the agitator has a blockage or is locked, once actioned the agitator will stop rotating, the white Led lights on the front of the nozzle will go out. If this happens, simply switch off your product and clear the agitator obstruction. To resume cleaning, press the on/off button and the product will restart in turbo mode.
BATTERY
DISPLAY LED:
This cleaner is equipped with a Battery Status LED Lights.
BATTERY LEVEL:
White colour: 100% - 5% charge
Blink White colour: < 5% charge
Red colour: during the charging
There are two methods of charging:
Charge the battery when fitted to the product. [3]
Insert the battery charger jack into the battery pack. The LED status indicator will illuminate red when charging. When charging is complete, the LED status indicator will illuminate white.
Charge the battery when removed from the product. [4]
Remove the battery from the product by pressing the battery release button.
Insert the battery charger jack into the battery pack. The battery pack LED will illuminate red when charging. When charging is complete, the LED indicator will illuminate white.
NOTE: It is normal for the charger to become warm to the touch when charging. Use only the charger supplied with your product.
NOTE: If you are not going to use the cleaner for a long period of time, please remove the removable battery pack from the cleaner to maintain the battery life.
ACCESSORIES*
CREVICE TOOL ON BOARD, INTEGRATED DUSTING BRUSH, MINI TURBO NOZZLE*, ACCESSORY ADAPTOR*, UP TO TOP TOOL*, RADIATOR TOOL*, DEEP CLEANING BRUSH* AND LONG FLEXIBLE CREVICE TOOL*.
All the accessories can be fitted on the main product and on the tube. [6]
NOTE: To remove the nozzle or main body unit from the tube, press the respective release button and pull apart.
RADIATOR TOOL* / DEEP CLEANING BRUSH* / UP TO TOP TOOL*
The accessory adaptor* must be fitted when using these 3 accessories. [6]
NOTE: There is only one way to store the crevice tool in the main body. Align the slot on the crevice tool with the arrow on the main body, push crevice tool into the main body. [17]
NOTE: The mini-turbo nozzle is ideal for deep cleaning textile surfaces (i.e. sofas) and pet hair removal. Move it steadily
* Certain Models Only
backwards and forwards. After using, please remove hair / threads collected on the brush with scissors if necessary.
NOTE: The up to top tool is designed to easily clean delicate surfaces without scratching and to reach difficult areas
NOTE: The radiator tool is ideal for cleaning inside and around cabinets, radiators, blinds and more.
NOTE: The deep cleaning brush is useful to clean in tight spaces without scratching surfaces, and inside your car.
NOTE: The long flexible crevice tool is ideal for cleaning in hard to reach areas, underneath furniture and in your car.
ACCESSORY BAG*
Accessories can be stored in the accessory bag.
WALL MOUNT*
For storage and space saving, your appliance can be fixed to your wall using the three screws and screw plugs included. [3].
CLEANER MAINTENANCE
Emptying the Dust Container
- Press the Handheld Release Button and remove the tube.
- Press the Dust flap release button to open the bin flap and empty the contents. [7]
- Close the dust cup up, you will hear a click when fully locked.
NOTE: It is recommended to empty the dust cup after each use or when dust is up to the max fill line.
Cleaning the Dust Container and Filter
- Press the Handheld Release Button and remove the tube.
- Press the dust flap release button to open the bin flap and empty the contents. [7]
- Press the battery release button and remove the battery pack. [4]
- Press the dust bin release button and remove the dust bin from the main body. [8]
- Turn the mesh filter frame counterclockwise and remove it from the product. [9]
- Press the exhaust filter release buttons to remove the exhaust filter. [10]
- Remove the sponge from the exhaust filter and take out the exhaust filter from its frame. [11]
- When cleaning the exhaust filter, wash the sponge and the exhaust filter frame in lukewarm water and leave to dry for 24 hours. Please ensure all parts are completely dry before reassembling. [12, 13]
- When cleaning the single cyclone, wash the mesh filter and dust bin in lukewarm water and leave to dry for 24 hours. Please ensure all parts are completely dry before reassembling. [12, 13]
- Ensure it is fully dry before returning to the main body of the cleaner. [13]
NOTE: Do not use hot water or detergents when cleaning the filters. If the filters are incidentally damaged, fit a genuine Hoover replacement. Do not try to use the product without a filter fitted.
IMPORTANT: For optimum performance, always keep your filter clean. We recommend that the filter should be washed at least once a month.
Changing and Cleaning the Intense Floor Roller
IMPORTANT: Always switch off the cleaner and remove the removable battery pack before changing or cleaning the agitator.
- Detach the nozzle from the tube. [15]
- Position the nozzle with the Intense Floor Roller facing you. Pull the agitator release system lever upwards and remove Intense Floor Roller. [16a]
- Remove all debris, fibers and hair from Intense Floor Roller, using scissors. [16b]
- Re-insert Intense Floor Roller and locate agitator release system back in position. [16c]
Replacing the Batteries
This cleaner is fitted with a rechargeable Lithium ion removable battery pack and it is replaceable. Moreover, the battery can be charged also out of the product.
WARNING: Only use approved replacement parts for your cleaner. Using parts not validated by Hoover are dangerous and will invalidate your guarantee.
WARNING: Do not try to open the removable battery pack and repair it by yourself.
- Press the removable battery pack release button and it can be taken out from main body.
- Remove the old removable battery pack and replace it with the new one.
- Dispose of the batteries safely. Used batteries should be taken to a recycling station and not disposed of with household waste.
* Certain Models Only
TROUBLESHOOTING
Should you have any problem with your cleaner, follow this simple check list before calling the Hoover Customer Service Centre:
A. Cleaner does not switch on
Check if the battery pack is charged.
Check if the battery pack is assembled in place.
B. Loss of suction or no suction
Empty the dust cup and wash the mesh filter and cyclone separator.
Remove nozzle and check for any blockages in the duct.
C. Batteries cannot be charged
Ensure that the continuous mode switch has not been actioned as your battery will not have been charging. This may also result if the product has not been used or stored for a long period. Contact Hoover customer service to arrange a replacement battery. If the problem persists, contact the Hoover customer service.
HOOVER SPARES AND CONSUMABLES
Always replace parts with genuine Hoover spares. These are available from your local Hoover dealer or direct from Hoover. When ordering parts always quote your model number.
YOUR GUARANTEE
The guarantee conditions for this appliance are as defined by our representative in the country in which it is sold. Details regarding these conditions can be obtained from the dealer from whom the appliance was purchased. The bill of sale or receipt must be produced when making any claim under the terms of this guarantee.
IMPORTANT: The battery in this cleaner is guaranteed for 6 months from the date of purchase. After 6 months the customer is liable for the cost of a new battery.
Subject to change without notice.
INSTRUCTIONS FOR SAFE USE
G. Front LED lights
G. Front LED lights
AC. Accessory adapter *
AD. Up to top tool *
AE. Radiator brush *
MAINTENANCE OF THE VACUUM CLEANER
AG. Mini turbo nozzle *
INSTRUCTIONS FOR SAFE USE
- INSTRUCTIONS FOR SAFE USE
- DO NOT USE THE APPLIANCE TO CLEAN ANIMALS OR PEOPLE
- DO NOT REPLACE THE BATTERIES WITH NON-RECHARGEABLE BATTERIES
- THE ENVIRONMENT
- PRODUCT COMPONENTS
- PREPARING YOUR CLEANER
- USING YOUR CLEANER
- SAFETY PROTECTION SYSTEM
- BATTERY
- DISPLAY LED
- BATTERY LEVEL
- THERE ARE TWO METHODS OF CHARGING
- CHARGE THE BATTERY WHEN FITTED TO THE PRODUCT. [3]
- CHARGE THE BATTERY WHEN REMOVED FROM THE PRODUCT. [4]
- ACCESSORIES
- CREVICE TOOL ON BOARD, INTEGRATED DUSTING BRUSH, MINI TURBO NOZZLE*, ACCESSORY ADAPTOR*, UP TO TOP TOOL*, RADIATOR TOOL*, DEEP CLEANING BRUSH* AND LONG FLEXIBLE CREVICE TOOL
- RADIATOR TOOL* / DEEP CLEANING BRUSH* / UP TO TOP TOOL
- ACCESSORY BAG
- WALL MOUNT
- CLEANER MAINTENANCE
- EMPTYING THE DUST CONTAINER
- CLEANING THE DUST CONTAINER AND FILTER
- CHANGING AND CLEANING THE INTENSE FLOOR ROLLER
- REPLACING THE BATTERIES
- TROUBLESHOOTING
- CLEANER DOES NOT SWITCH ON
- LOSS OF SUCTION OR NO SUCTION
- BATTERIES CANNOT BE CHARGED
- HOOVER SPARES AND CONSUMABLES
- YOUR GUARANTEE
- MAINTENANCE OF THE VACUUM CLEANER
Brand : HOOVER
Model : HF122MPA 011
Category : Vacuum Cleaner