
S9000 Prestige SP9830 - Razor PHILIPS - Free user manual and instructions
Find the device manual for free S9000 Prestige SP9830 PHILIPS in PDF.
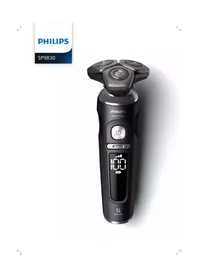


| Product Type | Electric Rotary Shaver |
| Model | Philips S9000 Prestige SP9830 |
| Cutting System | NanoTech Precision Blades with V-Track Precision |
| Wet & Dry Usage | Yes, AquaTec for wet and dry shaving |
| Cleaning System | SmartClean Pro with Quick Clean Pod |
| Battery Type | Lithium-ion |
| Battery Runtime | 60 minutes of cordless shaving |
| Charging Time | 1 hour for full charge |
| Quick Charge | 5 minutes for one shave |
| Power Supply | 100-240V automatic voltage adapter |
| Display | LED interface with battery level and cleaning indicator |
| Dimensions | Approx. 6.5 x 2.5 x 2.0 inches (165 x 64 x 50 mm) |
| Weight | Approx. 0.62 lbs (280 g) |
| Travel Lock | Yes, slide lock for travel |
| Replacement Heads | Philips SH90 heads (replace every 2 years) |
| Water Resistance | IPX7 (fully washable) |
| Accessories Included | Cleaning brush, SmartClean Pro, travel case |
| Warranty | 2-year manufacturer warranty |
Frequently Asked Questions - S9000 Prestige SP9830 PHILIPS
User questions about S9000 Prestige SP9830 PHILIPS
0 question about this device. Answer the ones you know or ask your own.
Ask a new question about this device
Download the instructions for your Razor in PDF format for free! Find your manual S9000 Prestige SP9830 - PHILIPS and take your electronic device back in hand. On this page are published all the documents necessary for the use of your device. S9000 Prestige SP9830 by PHILIPS.
USER MANUAL S9000 Prestige SP9830 PHILIPS


English 6
Simplified Chinese 26
Introduction
Congratulations on your purchase and welcome to Philips! To fully benefit from the support that Philips offers, register your product at
www.philips.com/welcome.
Please read this user manual, as it contains information about the features of this shaver as well as some tips to make shaving easier and more enjoyable.
General description (Fig. 1)
1 Click-on precision trimmer attachment 2 Shaving unit with hair chamber 3 On/off button 4 Personal comfort settings increase button 5 Personal comfort settings decrease button 6 Personal comfort settings bar 7 Battery charge percentage 8 Battery charge indicator 9 Notification symbol 10 Cleaning reminder 11 Replacement reminder 12 Unplug for use symbol 13 Travel lock symbol 14 Pouch 15 Small plug 16 Supply unit
Important safety information
Read this important information carefully before you use the appliance and its accessories and save it for future reference. The accessories supplied may vary for different products.
Only use the product for its intended purpose. Read this important information carefully before you use the product and its batteries and accessories, and save it for future reference. Misuse can lead to hazards or serious injuries. Accessories supplied may vary for different products.
Warning


- Keep the supply unit dry.
- This symbol means: Forbidden to clean under a running tap.
- This shaver is waterproof. It is suitable for use in the bath or shower and for cleaning under the tap. For safety reasons, the shaver can therefore only be used without cord.
- This symbol means: Suitable to be used in the shower. It is allowed to use this appliance close to a bathtub, shower or other containers filled with water.
- Do not modify the supply unit.
- This appliance can be used by children aged from 8 years and above and persons with reduced physical, sensory or mental capabilities or lack of experience and knowledge if they have been given supervision or instruction concerning use of the appliance in a safe way and understand the hazards involved. Children shall not play with the appliance. Cleaning and user maintenance shall not be made by children without supervision.
- Unplug the appliance before cleaning it with water.
- Do not use a damaged appliance. Replace damaged parts with new Philips parts.
- Do not use the supply unit in or near wall sockets that contain an electric air freshener to prevent irreparable damage to the supply unit.
- Because of hygiene, only one person should use the appliance.
- Only use cold or lukewarm water to clean the appliance.
- Never use compressed air, scouring pads, abrasive cleaning agents or aggressive liquids to clean the appliance.
- Water may drip from the socket at the bottom of the shaver when you rinse it. This is normal and not dangerous because all electronics are enclosed in a sealed power unit inside the shaver.
- Only use original Philips accessories or consumables. Only use detachable supply unit HQ8505.
- Charge, use and store the product at a temperature between 5 °C and 35 °C.
- Keep product and batteries away from fire and do not expose them to direct sunlight or high temperatures.
- If the product becomes abnormally hot or smelly, changes color or if charging takes longer than usual, stop using and charging the product and contact Philips.
- Do not place products and their batteries in microwave ovens or on induction cookers.
- Do not open, modify, pierce, damage or dismantle the product or battery to prevent batteries from heating up or releasing toxic or hazardous substances. Do not short-circuit, overcharge or reverse charge batteries.
- If batteries are damaged or leaking, avoid contact with the skin or eyes. If this occurs, immediately rinse well with water and seek medical care.
Electromagnetic fields (EMF)
This Philips appliance complies with all applicable standards and regulations regarding exposure to electromagnetic fields.
The display
Note: Remove any sticker or protective foil from the display before using the product.
Charging

When the shaver is charging, the battery charge indicator on the shaver flashes white.
The battery charge is indicated by the battery charge percentage flashing on the display, which is shown when the shaver is moved.
Quick charge: After approx. 5 minutes charging, the shaver contains enough energy for one shave.
Battery fully charged

When the battery is fully charged, the battery charge indicator lights up white continuously.
Note: When the battery is full, the display switches off automatically after 15 minutes.
The battery charge percentage lights up white continuously when the shaver is moved.
Battery low

When the battery is almost empty, the battery charge indicator flashes orange and the shaver beeps. At this point there is enough energy left for one shave.
Remaining battery charge

The remaining battery charge is indicated by the battery charge percentage shown on the display.
Personal comfort settings

The shaver has a feature that allows you to personalize your settings. Depending on your personal shaving needs, choose between three settings, from low to high: comfort, dynamic or efficiency. When you press the button on the left or right of the display, the segment of the personal comfort settings bar lights up to indicate the selected setting. To select a lower or higher setting, press the button on the left or right of the display.
Cleaning reminder

Clean the shaver after every use for optimal performance (see 'Cleaning and maintenance'). When you switch off the shaver, the cleaning reminder flashes to remind you to clean the shaver.
Travel lock

When you are going to travel, you can lock the shaver to prevent it from accidentally switching on (see 'Activating the travel lock').
Replacement reminder

For maximum shaving performance, replace the shaving heads every two years. The shaver is equipped with a replacement reminder which reminds you to replace the shaving heads. The shaver beeps, the replacement reminder lights up and the arrows flash to indicate that you have to replace the shaving heads.
Note: After replacing the shaving heads, you can reset the replacement reminder by pressing the on/off button for 7 seconds. If you do not reset the replacement reminder, the shaver resets automatically after 9 shaves.
'Unplug for use' reminder


The 'unplug for use' symbol flashes to remind you to disconnect the shaver from the wall socket before you can switch it on.
Notification symbol

Overheating
If the shaver overheats during charging, the notification symbol flashes. When this happens, the shaver automatically stops charging. Charging continues once the temperature of the shaver has decreased to the normal level after approx. 10 minutes.

Blocked shaving heads
If the shaving heads are blocked, the notification symbol continuously lights up red. The replacement reminder and the cleaning reminder alternately flash white and the shaver beeps. In this case, the motor cannot run because the shaving heads are dirty or damaged. If the shaving heads are dirty, you have to clean them. If the shaving heads are damaged, you have to replace them.
Charging
Charge the shaver before you use it for the first time and when the display indicates that the battery is almost empty.
Charging takes approx. 1 hour. A fully charged shaver has a shaving time of up to 60 minutes.
Note: You cannot use the shaver while it is charging.
Quick charge
After approx. 5 minutes of charging the shaver contains enough power for one shave.
Charging with the supply unit
1 Make sure the shaver is switched off.
English

2 Put the small plug in the shaver and put the supply unit in the wall socket.
The display of the shaver indicates that the shaver is charging.
3 After charging, remove the supply unit from the wall socket and pull the small plug out of the shaver.
Note: When the battery is full, the display switches off automatically after 15 minutes.
Using the shaver

Always check the shaver and all accessories before use. Do not use the shaver or any accessory if it is damaged, as this may cause injury. Always replace a damaged part with one of the original type.
This symbol indicates that the shaver can be used in the bath or shower.
- Use this shaver for its intended household use as described in this manual.
- For hygienic reasons, the shaver should only be used by one person.
- Trimming is easier when the skin and hair are dry.
Note: This shaver is waterproof. It is suitable for use in the bath or shower and for cleaning under the tap. For safety reasons, the shaver can only be used without cord.
Switching the shaver on and off

1 To switch on the shaver, press the on/off button once. The battery charge percentage lights up for a few seconds. 2 To switch off the shaver, press the on/off button once. The battery charge percentage lights up for a few seconds and shows the remaining battery charge.
Shaving
Skin adaptation period
Your first shaves may not bring you the result you expect and your skin may even become slightly irritated. This is normal. Your skin and beard need time to adapt to any new shaving system. To allow your skin to adapt to this
new appliance, we advise you to shave regularly (at least 3 times a week) and exclusively with this appliance for a period of 3 weeks.
Shaving tips
- For the best results on skin comfort, pre-trim your beard if you have not shaved for 3 days or longer.
- Select your personal comfort setting (see 'Personal comfort settings').
Dry shaving
1 Switch on the shaver. 2 Move the shaving heads over your skin in circular movements to catch all hairs growing in different directions. Make sure each shaving head is fully in contact with the skin. Exert gentle pressure for a close, comfortable shave. Note: Do not press too hard, as this can cause skin irritation. 3 Switch off and clean the shaver after each use (see 'Cleaning and maintenance'). The display lights up for a few seconds to show the remaining battery charge.
Wet shaving
For a more comfortable shave, you can also use this appliance on a wet face with shaving foam or shaving gel.
1 Apply some water to your skin.


2 Apply shaving foam or shaving gel to your skin.

3 Rinse the shaving unit under the tap to ensure that the shaving unit glides smoothly over your skin.
4 Switch on the shaver.
5 Move the shaving heads over your skin in circular movements to catch all hairs growing in different directions. Make sure each shaving head is fully in contact with the skin. Exert gentle pressure for a close, comfortable shave.
Note: Do not press too hard, as this can cause skin irritation.
Note: Rinse the shaving unit regularly to ensure that it continues to glide smoothly over your skin.
6 Dry your face.
7 Switch off the shaver and clean it after each use.
Note: Make sure that you rinse all foam or shaving gel off the shaver.
Using click-on attachments
Removing or attaching click-on attachments

1 Make sure the shaver is switched off.
2 Pull the attachment straight off the shaver.
Note: Do not twist the attachment while you pull it off the shaver.
3 Insert the lug of the attachment into the slot in the top of the shaver. Then press down the attachment to attach it to the shaver ('click').
Using the precision trimmer attachment
You can use the precision trimmer attachment to touch up your beard, sideburns and moustache.

1 Attach the attachment to the appliance ('click'). 2 Switch on the appliance.
3 Hold the precision trimmer perpendicular to the skin and move it downwards while exerting gentle pressure. 4 Switch off the appliance and clean the attachment after use.
Travel lock
You can lock the shaver when you are going to travel to prevent it from switching on accidentally.
Activating the travel lock

1 Press the on/off button for 3 seconds to use the travel lock mode.
While you activate the travel lock, the travel lock symbol lights up briefly and the shaver produces a short sound. When the travel lock is activated, the travel lock symbol flashes.
If you try to switch on the shaver while the travel lock is active, the travel lock symbol flashes.
Deactivating the travel lock

1 Press the on/off button for 3 seconds.
While you deactivate the travel lock, the travel lock symbol lights up briefly and the shaver produces a short sound. The shaver switches on and is now ready for use again.
Note: The shaver unlocks automatically when it is connected to the wall socket.
Cleaning and maintenance
Regular cleaning guarantees better shaving results.
Never clean, remove or replace the shaving unit while the shaver is switched on.
Do not apply pressure to shaving head guards.
Do not touch shaving heads with hard objects as this may dent or damage the precision-made slotted guards.
Do not use compressed air, abrasives, scourers or aggressive liquids such as petrol or acetone to clean the shaver.
Cleaning the shaver under the tap
Clean the shaver after every shave for optimal performance.
Always check if the water is too hot, to prevent burning your hands.
Never dry the shaving unit with a towel or tissue, as this may damage the shaving heads.
While rinsing the shaving unit, water may drip out of the bottom of the shaver. This is a normal occurrence.

1 Switch on the shaver.
2 Rinse the shaving unit under a warm tap.
3 Switch off the shaver. Pull the shaving head holder off the bottom part of the shaving unit.

4 Rinse the hair chamber and shaving head holder under the tap.

While rinsing the shaving unit, water may drip out of the bottom of the shaver. This is a normal occurrence.

5 Carefully shake off excess water and let the shaving head holder air-dry completely.

6 Attach the shaving head holder to the bottom part of the shaving unit ('click').
Thorough cleaning

We advise you to clean the shaving heads thoroughly once a month or when the shaver does not shave as well as it used to.
1 Switch off the shaver. 2 Pull the shaving head holder off the bottom part of the shaving unit.

3 Rinse the hair chamber and shaving head holder under the tap.
![graph TD A["Step 1"] --> B["Step 2"] B --> C["Lock Icon"] style A fill:#f9f,stroke:#333 style B fill:#bbf,stroke:#333 style C fill:#dfd,stroke:#333](/content/2026/07/1412546/images/729dce7bf61af0e053789c6d8e699852fdf6fc628d7f83c0e85dd68ab2f7481a.jpg)
4 Turn the retaining ring anticlockwise and lift it off the shaving head. Repeat this process for the other retaining rings. Place them aside in a safe place.

5 Remove the shaving heads from the shaving head holder. Each shaving head consists of a cutter and guard.
Note: Do not clean more than one cutter and guard at a time, since they are all matching sets. If you accidentally put a cutter in the wrong shaving guard, it may take several weeks before optimal shaving performance is restored.

6 Clean the cutter and guard under the tap.
7 Shake off excess water.
8 Put the cutter back into the guard.
![graph TD A["Central Circle"] --> B["Top Circular Component"] B --> C["Bottom Circular Component"] C --> D["Bottom Circular Component"] style A fill:#4CAF50,stroke:#333 style B fill:#2196F3,stroke:#333 style C fill:#2196F3,stroke:#333 style D fill:#2196F3,stroke:#333](/content/2026/07/1412546/images/a8efe2a9ab5ef8f1d98262d97e5de6536fbc68446b70e09e7a380722aeae359d.jpg)
9 Place the shaving heads in the shaving head holder.

10 Place the retaining ring on the shaving head.
11 Align the arrows on the retaining ring with the projections in the shaving head holder. Turn the ring clockwise until it clicks to indicate that the ring is fixed.
12 Attach the shaving head holder to the bottom part of the shaving unit ('click').
Cleaning the trimmer attachment

Never dry the trimmer with a towel or tissue, as this may damage the trimming teeth.
Clean the trimmer attachment after each use.
1 Switch on the appliance with the precision trimmer attachment attached. 2 Rinse the attachment under a warm tap. 3 After cleaning, switch off the appliance. 4 Carefully shake off excess water and let the attachment air-dry completely.
Tip: For optimal performance, lubricate the teeth of the attachment with a drop of sewing machine oil regularly.
Replacement
Replacing the shaving heads
For maximum shaving performance, we advise you to replace the shaving heads every two years. Replace
![graph TD A["2yrs"] --> B["Device Rotation"] B --> C["Battery Storage"] C --> D["Water Splitter"] D --> E["Take Battery to Cover"] E --> F["7 sec. Time-Sale Icon"] style A fill:#f9f,stroke:#333 style B fill:#ccf,stroke:#333 style C fill:#cfc,stroke:#333 style D fill:#fcc,stroke:#333 style E fill:#cff…](/content/2026/07/1412546/images/8624f613b18835adddce7d89628c2fff9e1af7fa2654a87bd87330c67fa0cf9a.jpg)
damaged shaving heads immediately.
Always replace the shaving heads with original Philips shaving heads (see 'Ordering accessories').
Replacement reminder
The replacement reminder indicates that the shaving heads need to be replaced. The shaving unit symbol lights up continuously, the arrows flash white and you hear a beep when you switch the shaver on or off.
1 Switch off the shaver. Pull the shaving head holder off the bottom part of the shaving unit.
2 Discard the old shaving head holder and attach the new shaving head holder to the bottom part of the shaving unit ('click').
3 After replacing the shaving heads, you can reset the replacement reminder by pressing the on/off button for 7 seconds. Wait until your hear 3 beeps. If you do not reset the replacement reminder, the shaver resets automatically after 9 shaves.
Storage

Store the shaver in the pouch.
Note: Always let the shaver dry completely before you store it in the pouch.
Ordering accessories
To buy accessories or spare parts, visit www.philips.com/parts-and-accessories or go to your Philips dealer. You can also contact the Philips Consumer Care Center in your country (see the international warranty leaflet for contact details).
The following accessories and spare parts are available:
- SH91 Philips shaving heads
- HQ110 Philips shaving head cleaning spray
- RQ111 Philips beard styler attachment
- RQ585 Philips cleansing brush attachment
- RQ560 Philips cleansing brush attachment
- RQ563 Philips cleansing brush attachment 3-pack
- HQ8505 supply unit
Note: The availability of the accessories may differ by country.
Recycling

- This symbol means that electrical products and batteries shall not be disposed of with normal household waste.
- Follow your country's rules for the separate collection of electrical products and batteries.
Removal of built-in rechargeable battery
The built-in rechargeable battery must only be removed by a qualified professional when the appliance is discarded. Before removing the battery, make sure that the appliance is disconnected from the wall socket and that the battery is completely empty.
Take any necessary safety precautions when you handle tools to open the appliance and when you dispose of the rechargeable battery.
When you handle batteries, make sure that your hands, the product and the batteries are dry.
To avoid accidental short-circuiting of batteries after removal, do not let battery terminals come into contact with metal objects (e.g. coins, hairpins, rings). Do not wrap batteries in aluminum foil. Tape battery terminals or put batteries in a plastic bag before you discard them.
Removing the rechargeable shaver battery
Only remove the rechargeable battery when you discard the shaver. Before you remove the battery, make sure that the shaver is disconnected from the wall socket and that the battery is completely empty.
Take any necessary safety precautions when you handle tools to open the shaver and when you dispose of the rechargeable battery.

1 Remove the click-on attachment from the appliance.
2 On top of the appliance insert a screwdriver between the black cylinder and silver ring. Force the silver ring up off the appliance and remove the top panel. 3 Unscrew the two screws and remove the frame. 4 Remove the two back black covers and slide the front housing off the appliance.

5 Unscrew the two screws at the top of the inner panel.

6 Place a screwdriver between the lips of the inner panel and bend them aside. Then remove the inner panel.

7 Lift out the printed circuit board with the rechargeable battery.

8 Bend the battery tags aside with a screwdriver.
9 Remove the rechargeable battery.
Support
For all product support such as frequently asked questions, please visit www.philips.com/support.
Troubleshooting
This chapter summarizes the most common problems you could encounter with the appliance. If you are unable to solve the problem with the information below, visit www.philips.com/support for a list of frequently asked questions or contact the Consumer Care Center in your country.
Shaver Problem Possible cause Solution
| The appliance does not work when I press the on/off button. | The rechargeable battery is empty. | Recharge the battery (see 'Charging'). |
| The travel lock is activated. | Press the on/off button for 3 seconds to deactivate the travel lock. | |
| The shaving unit is soiled or damaged to such an extent that the motor cannot run. | Clean the shaving heads thoroughly or replace them. | |
| The appliance does not shave as well as it used to. | The shaving heads are damaged or worn. | Replace the shaving heads (see 'Replacement'). |
| Hairs or dirt obstruct the shaving heads. | Clean the shaving heads in the regular way or clean them thoroughly. | |
| I replaced the shaving heads, but the display still shows the replacement reminder. | You have not reset the appliance. | Reset the appliance by pressing the on/off button for approx. 7 seconds. |
| A shaving unit symbol has suddenly appeared on the display. | This symbol reminds you to replace the shaving heads. | Replace the shaving heads (see 'Replacement'). |
| The notification symbol flashes and the shaver beeps while the shaver is charging. | The appliance is overheated. | When this happens, the shaver stops charging automatically. Charging continues once the temperature of the shaver has decreased to the normal level after approx. 10 minutes. |
Problem Possible cause Solution
| The notification symbol flashes and the shaver beeps when I try to shave. | The shaving heads are soiled. | Clean the shaving heads (see 'Cleaning and maintenance'). |
| The notification symbol flashes and the shaver beeps after cleaning the shaving heads. | The shaving heads are damaged. | Replace the shaving heads (see 'Replacement'). |
| Water is leaking from the bottom of the appliance. | During cleaning, water may collect between the inner body and the outer shell of the appliance. | This is normal and not dangerous because all electronics are enclosed in a sealed power unit inside the appliance. |
Introduction

- Keep the power supply unit dry.

Notice symbols


Travel lock
1 Press the on/off button for 3 seconds.

Store the shaver in the storage bag.
1 Remove the snap-in attachment from the product.
- INTRODUCTION
- GENERAL DESCRIPTION (FIG. 1)
- IMPORTANT SAFETY INFORMATION
- WARNING
- ELECTROMAGNETIC FIELDS (EMF)
- THE DISPLAY
- CHARGING
- BATTERY FULLY CHARGED
- BATTERY LOW
- REMAINING BATTERY CHARGE
- PERSONAL COMFORT SETTINGS
- CLEANING REMINDER
- TRAVEL LOCK
- REPLACEMENT REMINDER
- UNPLUG FOR USE' REMINDER
- NOTIFICATION SYMBOL
- OVERHEATING
- BLOCKED SHAVING HEADS
- QUICK CHARGE
- CHARGING WITH THE SUPPLY UNIT
- ENGLISH
- USING THE SHAVER
- SWITCHING THE SHAVER ON AND OFF
- SHAVING
- SKIN ADAPTATION PERIOD
- SHAVING TIPS
- DRY SHAVING
- WET SHAVING
- USING CLICK-ON ATTACHMENTS
- REMOVING OR ATTACHING CLICK-ON ATTACHMENTS
- USING THE PRECISION TRIMMER ATTACHMENT
- ACTIVATING THE TRAVEL LOCK
- DEACTIVATING THE TRAVEL LOCK
- CLEANING AND MAINTENANCE
- CLEANING THE SHAVER UNDER THE TAP
- THOROUGH CLEANING
- CLEANING THE TRIMMER ATTACHMENT
- NEVER DRY THE TRIMMER WITH A TOWEL OR TISSUE, AS THIS MAY DAMAGE THE TRIMMING TEETH
- REPLACEMENT
- REPLACING THE SHAVING HEADS
- STORAGE
- ORDERING ACCESSORIES
- RECYCLING
- REMOVAL OF BUILT-IN RECHARGEABLE BATTERY
- REMOVING THE RECHARGEABLE SHAVER BATTERY
- SUPPORT
- TROUBLESHOOTING
- NOTICE SYMBOLS
Brand : PHILIPS
Model : S9000 Prestige SP9830
Category : Razor