COOL 360 - Audio and video software ULEAD - Free user manual and instructions
Find the device manual for free COOL 360 ULEAD in PDF.


| Product Type | Audio and Video Software |
| Brand | Ulead |
| Model | COOL 360 |
| Category | Multimedia Software |
| Platform | Windows (7/8/10) |
| Language | Multilingual (including English) |
| Main Functions | 360-degree video editing, audio mixing, effects, transitions, export |
| System Requirements | 2 GB RAM, 500 MB free disk space, DirectX 9.0c compatible graphics |
| Supported Video Formats | MP4, AVI, MOV, WMV, 360° equirectangular |
| Supported Audio Formats | MP3, WAV, AAC, WMA |
| User Interface | English (default) with customizable toolbars |
| License Type | Commercial (single-user license) |
| Version | 1.0 (initial release) |
| Updates | Free updates within 1 year of purchase |
| Customer Support | Online FAQ, email support, and community forum |
| Security | Watermark protection, password-encrypted project files |
| Maintenance | Regular updates via official website |
| Repairability | N/A (software; reinstallation possible via product key) |
Frequently Asked Questions - COOL 360 ULEAD
User questions about COOL 360 ULEAD
0 question about this device. Answer the ones you know or ask your own.
Ask a new question about this device
Download the instructions for your Audio and video software in PDF format for free! Find your manual COOL 360 - ULEAD and take your electronic device back in hand. On this page are published all the documents necessary for the use of your device. COOL 360 by ULEAD.
USER MANUAL COOL 360 ULEAD
First English edition for Ulead COOL 360 version 1.0, February 1999.
© 1992-1999 Ulead Systems, Inc.
All rights reserved. No part of this publication may be reproduced or transmitted in any form or by any means, electronic or mechanical, including photocopying, recording or storing in a retrieval system, or translated into any language in any form without the written permission of Ulead Systems, Inc.
Software license
The software described in this document is furnished under a License Agreement which is included with the product. This Agreement specifies the permitted and prohibited uses of the product.
Licenses and trademarks
ICI Library © 1991–1992 C-Cube Microsystems.
Ulead and the Ulead Systems logo are registered trademarks and COOL 360 is a trademark of Ulead Systems, Inc. Microsoft, Windows, and the Windows Logo are registered trademarks of Microsoft Corporation in the United States and other countries. Intel and Pentium are registered trademarks of Intel Corporation. QuickTime and the QuickTime logo are trademarks used under license. QuickTime is registered in the U.S. and other countries. PhotoDisc® Copyright 1998, PhotoDisc. PhotoDisc is a trademark of PhotoDisc, Inc. Other product names used herein are trademarks or registered trademarks of their respective owners.
Sample files
Files provided as samples on the program CD can be used for personal demonstrations, productions and presentations. No rights are granted for commercial reproduction or redistribution of any sample files.
Ulead Systems, Inc.
United States International
970 West 190th Street, Suite 520 10F, 45 Tung Hsing Rd.
Torrance, CA 90502 Taipei, Taiwan 110
Tel: 1-(310) 523-9393 Tel: +886 (2) 2764-8599
Fax: 1-(310) 523-9399 Fax: +886 (2) 2764-9599
URL: www.ulead.com URL: www.ulead.com
E-mail: info@ulead.com E-mail: info@ulead.com.tw
Europe Japan
Wolfenbütteler Str. 33 No. 31, Hills 2
38102 Braunschweig Setagaya Business Square
Germany 4-10-3 Yohga, Setagaya-ku
Tel: +49-531-220-7920 Tokyo 158-0097, Japan
Fax: +49-531-220-7999 Tel: +81-3-5491-5661
Fax: +81-3-5491-5663
URL: www.ulead.de URL: www.ulead.co.jp
E-mail: info@ulead.de
E-mail: info@ulead.co.jp
Contents
License Agreement 1 Important legal notes.
Contents & Installation 2 What's in the manual and how to get the software onto your machine.
Getting Around 3 A map of the program's organization and layout.
Getting the Picture 4 Taking good pictures is the best way to get awesome panoramas.
Starting a Project 6 Setting up a project is the first step towards a finished panorama.
Adjusting Images 8 Sometimes a little retouching is just what your images need.
Finishing Up 9 Create your final image, choose an output format, and get ready to be amazed.
Sharing 10 It's easy to share your panorama by e-mail, on a Web page, as a screen saver, and more.
Installation
- Place the Ulead COOL 360 CD into your CD-ROM drive.
- When the Setup screen appears, follow the instructions to install COOL 360 onto your computer.
- If you want to create QuickTime *.MOV files, you will also need to install QuickTime 3.0 (included on the CD).
- For complete technical support, make sure your register your new software. Registering will also entitle you to special prices and discounts on other great Ulead Systems products.
Note: If the Setup screen does not appear after loading the CD:
- Double-click the My Computer icon on the desktop.
- Browse for the CD-ROM drive.
- Double-click Setup.
To run COOL 360:
* Double-click the Ulead COOL 360 icon on your Windows desktop.
-Or-
* On the Windows Start menu, select the Ulead COOL 360 icon from the Ulead COOL 360 program group.
Getting Around
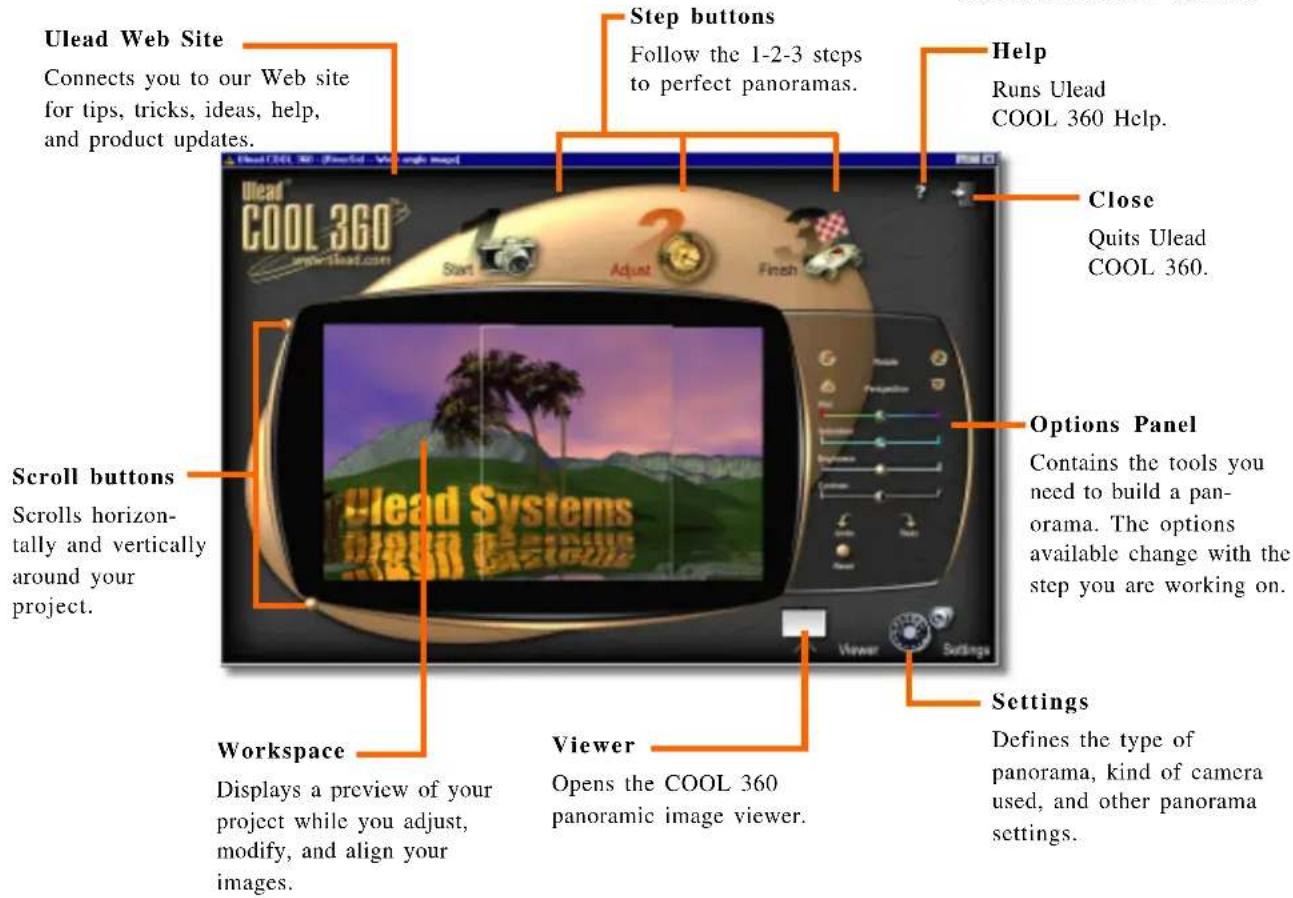
The Ulead COOL 360 user interface is more than just attractive. The large workspace at the center and the three step buttons at the top make creating panoramas effortless. You begin with the Start step. The Options panel on the right displays your choices. Create or open a project and COOL 360 automatically switches to the Adjust step. The controls in the Options panel change to photo retouching tools. When you have lined up and adjusted everything, click Finish to save your panorama or send it off to your friends. It's that easy.
When you need more information than we can provide in a few short pages, click the Help button. Watch for ToolTips, or short descrip-

tions, that appear when you hold the cursor over an item. In addition, pressing F1 when the cursor is over an item will open the Help right to that topic.
The Help button.
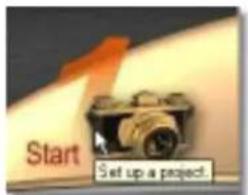
ToolTips appear when the mouse is held over an item.
Getting the Picture
The secret to creating awesome panoramas is to start out with the best images possible. A panorama is typically composed of twelve or more images that are shot in succession, carefully lined up, and joined together. This requires some planning on the photographer's part.
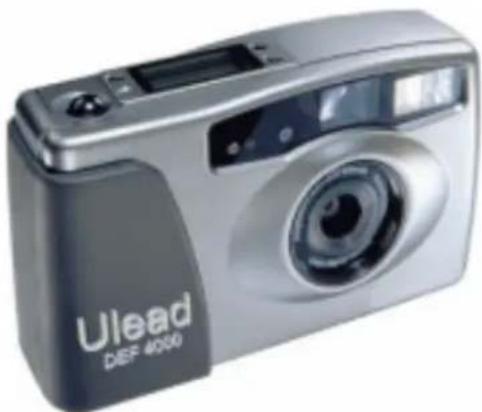
While digital cameras are easy to use, it is still up to you to take great pictures.
With many popular digital cameras, you should be able to take about twelve images to complete a 360° panorama. This depends on the kind of camera and camera lens you use. There are two good techniques, outlined below, you should combine to ensure you get suitable images.
One of the easiest ways to get twelve shots is to think about a clock, taking one picture at each hour mark. Again, this may not work for all cameras, but it can be helpful. Don't worry if you only get eleven shots before you finish, or need a thirteenth; it'll still work.
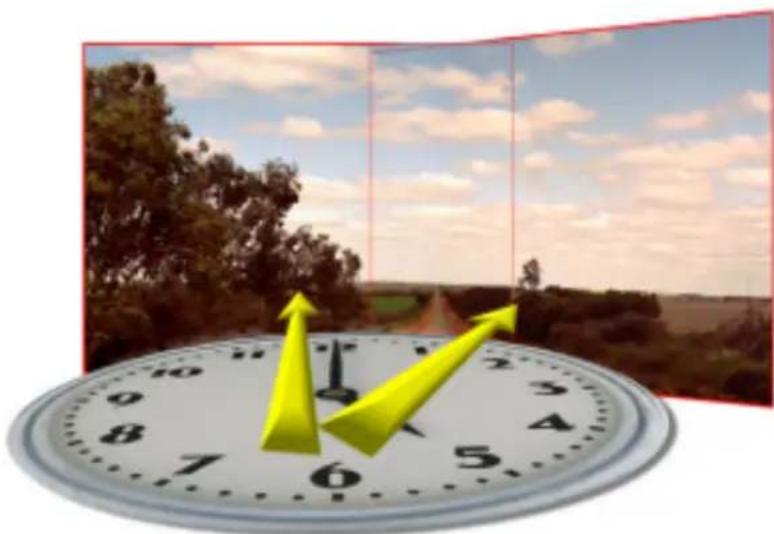
Thinking about the hours on a clock can help you remember where you are in a sequence of images.
The most important thing to remember when taking panoramas is that you must overlap adjacent images. COOL 360 needs some overlap between adjoining images, so be as generous as you can. An overlap of at least 15% of the right and left sides is a good minimum. Use landmarks to remember where you need to take your next shot. When you take a picture, note a landmark on the right side of the image frame. Then move clockwise until this landmark is in the left side of the frame.

Overlap adjacent images by a minimum of 15% on each side. Use prominent landmarks to line up the shot.

A tripod, even a small one, can help you steady your shots.
By using a combination of the two methods outlined above, you should achieve excellent results on your first try. Since the “film” in your digital camera is essentially free, you should take a lot of pictures. That’s the best way to get the perfect shot. A tripod, while not required, certainly helps. Otherwise, you’ll also have to make sure the horizon is lined up correctly in each picture.
Starting a Project
1 Click the Start step button.

New Project Wizard - Step 1 of 3.
2 Click New Project.
This opens the New Project Wizard which guides you through the process of creating a file (*.UPJ) that organizes the many parts of a panorama.
3 Select a type of project. (Step 1 of 3 in the Wizard.)
There are two types of projects to choose from: Wide Angle or 360° panorama. See the illustrations for more details.
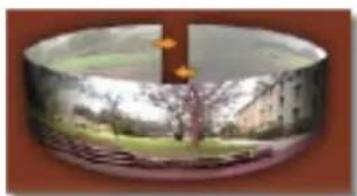
Create a special immersive 360° panorama.

Merge together a conventional Wide Angle panorama.
4 Enter your project's name.
(Step 1 of 3 in the Wizard continued.) After you have selected a type of project, enter a Project name (*.UPJ), a Location to save it in, and a brief Description (optional). Click Next to continue.
5
Select the image files.
(Step 2 of 3 in the Wizard.)
Select the images to be used in your panorama. Browse for the folder where your images are stored. Click on an image to select it and click Add. Drag the images to arrange them. Click Remove All to clear all of the images from a project, or press the Remove button below the thumbnails to remove individual images. Click Next when you are done.
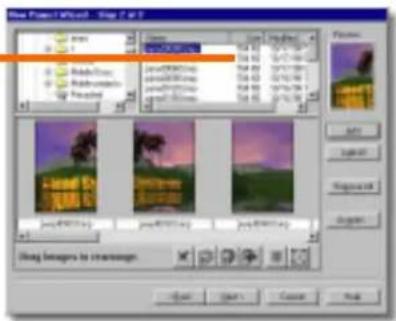
New Project Wizard - Step 2 of 3.

New Project Wizard - Step 3 of 3.
6 Select a lens.
(Step 3 of 3 in the Wizard.)
Select your camera or lens from the list. The type of lens you used to take the pictures determines how the panorama will be put together. You can see a quick preview of your panorama using the selected lens. Don't worry if you can't find your exact lens on the list. COOL 360 often works fine when using the default Generic Camera. Click Finish when you are ready.
Note: If your camera or lens is not listed, you can download additional lens settings from Ulead's Web site. You can also manually enter your camera's lens properties by clicking the Custom tab. The information required is often printed on the lens housing or in your camera's user manual.
When you have finished creating a new project, COOL 360 will automatically switch to the Adjust step. If you want to change any of the details of your project, click Settings or go back to the Start step.

A new project file opened in COOL 360, ready for polishing up.
Click the Adjust step to clean up your panorama.
Adjusting Images
The range of tools on the Options panel gives you a lot of control over the appearance of your images. Because many cameras have automatic exposure settings, adjacent images can sometimes have quite different light levels, especially when shooting a rapidly changing scene, like a sunset. While the primary purpose of these tools is to let you touch up and precisely match all of the images in a panorama, feel free to express your artistic side as well.

Drag the round button on the one of the control bars (e.g. the Hue bar) to change the selected image, which is outlined in white. The appearance of the image will change in real time.

Lining up the images correctly is the most important part of creating a panorama. Occasionally, you may not be able to do this if the images are slightly crooked. Use the Rotate and Perspective tools to align skewed shots.
Any changes you make can be undone by clicking Undo. If you want to start over again with the original image, just click Reset.
Finishing Up
The process of joining your images together into a panorama is called stitching or merging. After you have created a new project in the Start step, COOL 360 automatically switches to the Adjust step and stitches them together. Most of the time, the program will handle the entire process automatically, and you shouldn't have to worry about a thing. If you need to, you can drag an image to line it up manually. Images connected to the one you are moving will also move, preserving the alignment between those images.

Two adjacent images that need to be aligned manually. The image with the white outline (right) is active and can be adjusted.
Viewing your panorama is easy. Depending on the format you have chosen, this type of project produces a standard image file that can be viewed in your favorite image editor or even in your Web browser. 360° images are different, since they require a special viewer. The easiest way to experience your panorama from within COOL 360 is to simply click Viewer.
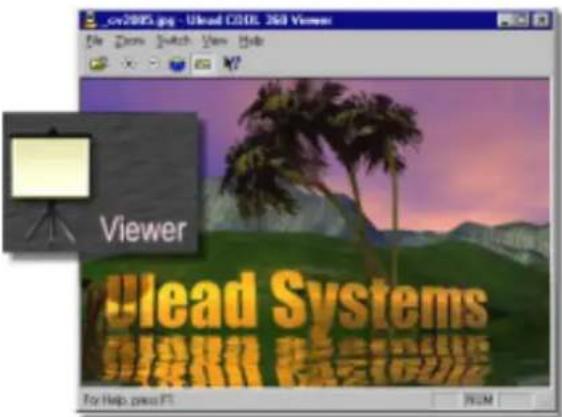
Use the mouse to control scrolling, panning, and zooming in the Viewer.
The Viewer is simple to use. Click the buttons on the top toolbar or watch the cursor and move your mouse to scroll and pan around your image in a full 360° circle. You can also use the mouse to zoom. The cursor changes from an arrow for scrolling to a magnifying glass for zooming when positioned roughly in the center of the Viewer. The '+' and '-' keys on your keyboard are convenient shortcuts for zooming.

When the cursor looks like the central icon, click and drag the mouse in the direction indicated to scroll.

When the cursor looks like the

central magnifying glass, click and

out or down to zoom in.
Click the Finish step to create your final panorama.
After you have adjusted your panorama, select Finish to create the final image. A small window pops up informing you that COOL 360 is merging the images together. The following pages explain this process in more detail.
Sharing
In order to view an immersive wrap around image, you need a special viewer. This isn't a problem for you because COOL 360 comes with a viewer. If you want to save your panorama for someone else to view, make sure they also have the viewer. This is true whether you are publishing to the web, sending an image by e-mail, or even just transferring the image to another computer over a network or by floppy disk.
To create QuickTime *.MOV files, Apple QuickTime 3.0 needs to be installed on your computer. This is included on the CD or can be downloaded.
Saving a panorama
- Click Save.
- Select a file format in the Save as type box (BMP, JPG, PNG, TIF or MOV).
- Enter a File name and browse for a location.
- Click Save.
Sending a panorama by e-mail
- Click E-mail.
- In the E-mail dialog box, select Attach Viewer (default) if the recipient doesn't have a panorama viewer.
- Click Send.
- This opens a new e-mail message with the panorama attached.

If you have any difficulties, see the Help. Run the Help, go to the Index and find the heading Setting up your e-mail program.
Putting a panorama on the Web
- Click Web.
- Enter a File name, Output folder, and a Title for your Web page.
- Enter a size for the Panorama window which will contain your panorama on the Web page.
- Click OK.
The image, an HTML file, and a UVR (Ulead Virtual Reality) file will all be saved to the Output folder. You can now upload all of these to your Web site. Visitors will need to install the Viewer to see your image, so include a link to it on your page.
Creating a screen saver
- Click Screen Saver.
- Browse for a location to save your screen saver file.
- Click Preview screen saver to test it.
- Click OK.
You can modify the behavior of your screen saver from your Windows Display properties control panel. (Right-click on the desktop, select Properties, then the Screen Saver tab.)
Larger posters are printed on multiple sheets of paper that you can tape together.
Printing a panorama
- Click Print.
- Select a format: Fit on page, One row or Two rows.
- Click the Print button.

Copying to the Clipboard
- Click Copy to place the panorama on Windows Clipboard.
- Switch to the application you want to put the panorama into (e.g. MS Word or PowerPoint).
- Paste the Clipboard data into the application with the paste command. Often this is found on the Edit menu or press Ctrl+V.
Double-click the pasted object to interactively view the panorama.
Exporting a panorama
- Click Export.
- Enter a File name and an Output folder.
- Select Attach Viewer.
- Click OK.
The saved file contains your panorama with the Viewer already attached. When the user opens the self-executable file (*.EXE), the Viewer automatically runs and displays your image.

- SOFTWARE LICENSE
- LICENSES AND TRADEMARKS
- SAMPLE FILES
- ULEAD SYSTEMS, INC
- UNITED STATES INTERNATIONAL
- EUROPE JAPAN
- CONTENTS
- INSTALLATION
- TO RUN COOL 360
- GETTING AROUND
- GETTING THE PICTURE
- STARTING A PROJECT
- 2 CLICK NEW PROJECT
- 3 SELECT A TYPE OF PROJECT. (STEP 1 OF 3 IN THE WIZARD.)
- 4 ENTER YOUR PROJECT'S NAME
- 5
- SELECT THE IMAGE FILES
- 6 SELECT A LENS
- ADJUSTING IMAGES
- FINISHING UP
- SHARING
- SAVING A PANORAMA
- SENDING A PANORAMA BY E-MAIL
- PUTTING A PANORAMA ON THE WEB
- CREATING A SCREEN SAVER
- PRINTING A PANORAMA
- COPYING TO THE CLIPBOARD
- EXPORTING A PANORAMA
Brand : ULEAD
Model : COOL 360
Category : Audio and video software