
HD Plug-in 2.0 - Photo/Video Software ULEAD - Free user manual and instructions
Find the device manual for free HD Plug-in 2.0 ULEAD in PDF.


| Product Type | Photo/Video Software Plugin |
| Version | 2.0 |
| Compatible Software | Ulead VideoStudio, Ulead PhotoImpact (varies by version) |
| Supported OS | Windows 7, 8, 10 (32-bit and 64-bit) |
| Installation Method | Download or CD-ROM, runs installer |
| Primary Function | Enhances HD video editing with filters, transitions, and effects |
| Supported Video Formats | AVI, MPEG, MOV, WMV, MP4, and more |
| Supported Image Formats | JPEG, PNG, BMP, TIFF, GIF |
| Hardware Acceleration | Requires graphics card with DirectX 9.0c or higher |
| Minimum RAM | 512 MB (1 GB or more recommended) |
| Disk Space Required | 200 MB free space |
| Video Resolution Support | Up to 1920x1080 (Full HD) |
| Audio Support | Stereo, multichannel audio editing |
| User Interface Language | English, French, German, Spanish, Italian, etc. |
| Maintenance | Keep updated via official Ulead website; check for patches |
| Safety Precautions | Only install from trusted sources; back up data before use |
| Spare Parts | Not applicable (software) |
| Repairability | Reinstall or update to fix issues |
Frequently Asked Questions - HD Plug-in 2.0 ULEAD
User questions about HD Plug-in 2.0 ULEAD
0 question about this device. Answer the ones you know or ask your own.
Ask a new question about this device
Download the instructions for your Photo/Video Software in PDF format for free! Find your manual HD Plug-in 2.0 - ULEAD and take your electronic device back in hand. On this page are published all the documents necessary for the use of your device. HD Plug-in 2.0 by ULEAD.
USER MANUAL HD Plug-in 2.0 ULEAD
Ulead ® HD Plug-in 2.0
Ulead® HD Plug-in 2.0 is a plug-in for Ulead MediaStudio Pro 7 that allows you to capture, edit and output HDV or HD video. Using Ulead MediaStudio Pro 7's advanced video editing tools, you can natively edit high-definition 1080i and 720p as well as other formats including MPEG-2. After editing the video, you can save it as a video file or record it back to the HDV/HD camcorder.
This plug-in currently supports the following Sony and JVC high-definition camcorders and VTRs:
- Sony HVR-Z1
- Sony HDR - FX 1
- Sony HVR-M10N
• J V C G R - H D 1 - JVC JY-HD10U
• J V C G R - P D 1
• J V C G R - P D 1 E K
System requirements
- Micr® Windows® tXP with Service Pack 2
- I n Pentium 4 3GHz (recommended) or higher with Hyper Threading technology
- 1GB DDR RAM
- Firewire (IEEE-1394) controller for connection to the HDV/HD camcorder
Installing the plug-in
You need to have Ulead MediaStudio Pro 7 installed on your computer before you can install the plug-in.
To install:
- Insert the installation CD into your disc drive.
- Use Windows Explorer to locate the setup.exe file. Double-click the file to install the plug-in.
If your plug-in is an ESD version (downloaded), use Windows Explorer to locate the MSP7_HD2_E.exe then double-click it to install the plug-in.
The workflow
![graph TD A["MPEG-2 Transport Stream (TS)"] --> B["Capture"] B --> C["Video Capture"] B --> D["Video Editor"] B --> E["Export Back to camcorder"] E --> F["Create Video File"] F --> G["MPEG-2 Program Stream (PS) Play back on computer"]](/content/2026/05/1090790/images/6f38bc653fe88dc87b7ed550a0e8f6f3650d5c1c619017a62d653234e6137dd3.jpg)
The Ulead HD Plug-in converts the source video from your HDV or HD camcorder into an MPEG-2 Program Stream (PS) video file when capturing it into your computer. By converting the video, it allows you to take advantage of MediaStudio Pro's SmartRender technology. SmartRender is a technology that permits "changes-only" rendering. This means that whenever
you create a video file, be it a preview or the final sequence, only the clips which have been altered will be rendered.
Before capturing
Before capturing your HDV or HD video into Video Capture, make sure that your camcorder (or deck) is properly detected by your computer. Also check the following:
On Sony HDV camcorder
If you have connected your Sony HDV camcorder before to your computer, check the Device Manager to see if your camcorder is detected as a DV device (left image below) or AV/C tape device (right image below). If the camcorder is detected as a DV device, you can capture DV footage using MediaStudio Pro's Video Capture program. If the camcorder is detected as an AV/C tape device, you can capture HDV footage. (For details on how to capture video, see "Capturing HDV/HD video using Video Capture" on page 6).

DV mode HDV mode
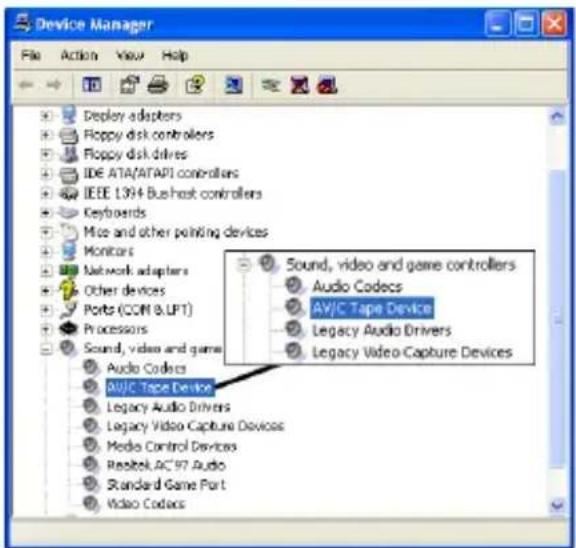
Note: The Sony HDV camcorder can be detected only under Windows XP Service Pack 2.
On JVC HD camcorder
If you have connected your JVC HD camcorder before to your computer, check the Device Manager to see if your camcorder is detected as a DV device (left image below) or JVC tape device (right image below).
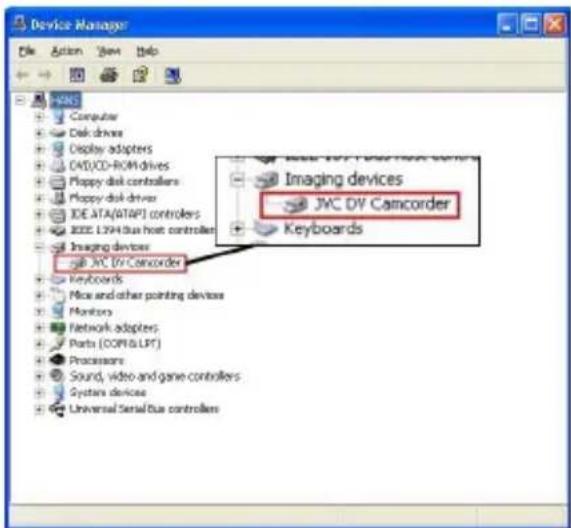
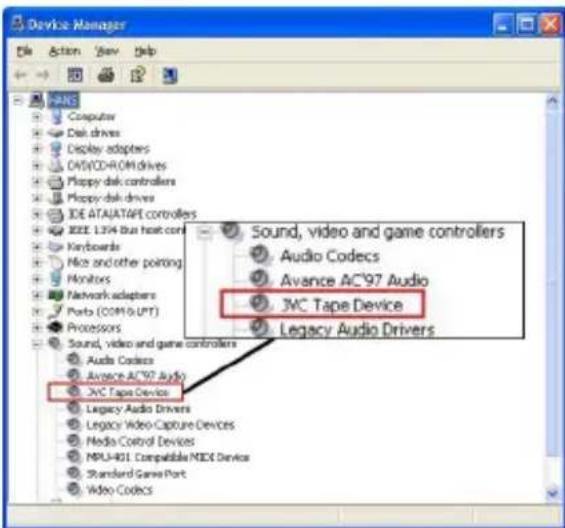
DV mode MPEG-2 mode
If the camera is detected as a DV device, follow the procedure on the next page to switch it to MPEG-2 mode. If the camcorder is detected as a JVC tape device, you don't have to do the procedure on the next page. You can directly run Video Capture and start capturing your video. (For details on how to capture video, see "Capturing HDV/HD video using Video Capture" on page 6).
Note: To switch the JVC HD camcorder to MPEG-2 mode, you only have to do the procedure on the next page once.
If you have not connected your JVC HD camcorder before to your computer, follow the procedure on the next page starting from step 5.
To switch the JVC HD camcorder to MPEG-2 mode:
- Turn on your camcorder and flip open the camcorder's LCD monitor to reveal the camera panel. In the camera panel, switch i.LINK OUT to DV and switch off your camcorder.
- Connect your JVC HD camcorder to your computer's IEEE-1394 port using the IEEE-1394 cable.
- Turn on your camcorder and switch it to Play mode. Check the Device Manager to see if your camcorder is detected.
- Switch off your camcorder and unplug the camcorder from the computer.
- Turn on your camcorder. Flip open the camcorder's LCD monitor to reveal the camera panel. In the camera panel, switch i.LINK OUT to MPEG2 and switch off your camcorder.
- Connect your JVC HD camcorder again to your computer's IEEE-1394 port using the IEEE-1394 cable.
- Turn on your camcorder and switch it to VTR mode.
- The Found New Hardware Wizard will open. Select Install from a list or specific location (Advanced) and click Next.
Note: If the wizard does not automatically open, go to Start: Control Panel - Add Hardware.
-
Select Don't search. I will choose the driver to install and click Next.
-
Select Sound, video and game controllers and click Next.
-
Select JVC in the Manufacturer list and JVC Tape Device in the Model list. Click Next.
-
A message will prompt you to continue installing the driver or not. Click Yes.
Capturing HDV/HD video using Video Capture
Use MediaStudio Pro's Video Capture to capture the video from your camcorder into your computer.
To capture videos:
- Connect your HDV or HD camcorder to your computer's IEEE-1394 port using the IEEE-1394 cable.
- Turn on your camcorder and switch it to Play mode.
- If you have a Sony HDV camcorder, make sure it is switched to HDV mode.
If you have a JVC HD camcorder, open the camcorder's LCD monitor to reveal the camera panel. In the camera panel, switch i.LINK OUT to MPEG2. - Run Video Capture. Video Capture automatically switches to the HDV MPEG Capture Plug-in and HDV 1394 Device Control.
Notes:
- To check if your HDV/HD camcorder has been detected, select Setup: HDV MPEG Capture Plug-in. You will see the name of the camcorder in the menu.
-
To check if the proper capture plug-in and device control are being used, select Setup: Switch Capture Plug-in/Device Control.
-
Use the Navigation Panel to go to the start of the section of the video where you want to capture and select Capture: Video.
-
In the Capture Video dialog box, set the options you want for the video to capture. Click OK to start capturing.
Tip: You can view the video while capturing on Video Capture's Preview Window. The playback on the Preview Window may appear choppy. This does not affect the video quality.
Editing HDV/HD video
Use the vast array of tools in MediaStudio Pro's Video Editor to edit your HDV or HD videos.
To edit videos:
-
Run Video Editor.
-
Click New and in the dialog box, select one of the HDV or HD project templates in the Existing project templates list, depending on how your source video was encoded (HDV, HD or SD). Click OK.

- Import your HDV or HD video files into the Library.
- Drag each video file to the video track, Va or Vb, on the Timeline.
- Apply transitions, overlays, video filters, titles, and audio filters to your video project.
Tip: You can preview your project simultaneously on your computer monitor and an external display device if you have a dual head display card. To preview, click File: Playback Options and in the dialog box select Dual Head Device in the Playback in list.
Creating an HDV or HD video file
After editing your project, create a video file that you can view on your computer using a software player that supports playback of HDV or HD formatted videos.
To create a video file:
- Select File: Create - Video File.
- In Save as type, select MPEG in the list.
Note: You can also choose to export the video in other formats such as DVD-compliant MPEG-2 or DV.
- Click Template and select an HDV or HD template from the pop-up menu, depending on how your video was encoded (HDV, HD or SD).
![Create Video File Save in 7.0 File name: Save as type: MPEG files [5 mpg^.m2t] Save options: MPEG files 24 Bits, 1440 x 1080, 29.97 fps Upper Field First [MPEG-2], 16.9 Video data rate: 25000 kbps Audio data rate: 384 kbps Save to Production Library Folder: Media Library Template Delete HDV 720p (4:…](/content/2026/05/1090790/images/59d76104373e98b778fdf6391849c55708c9da46bb7b230be0eb5d9bf5b3985b.jpg)
Note: If you want to record the video file back to the HDV or HD camcorder, select a transport stream template. The file name extension for this type of video file is M2T (MPEG-2 Transport Stream).
- Enter a File name and click Save.
Recording video back to the Sony HDV or JVC HD camcorder
After editing, you can export your HDV video back to your Sony camcorder or record your edited HD video to your JVC camcorder.
To record back to the camcorder:
- Turn on your Sony HDV or JVC HD camcorder and switch it to VTR mode.
- Select File: Export - DV Recording.
- In the Select Video File dialog box, locate the HDV or HD video file (M2T) and click Open.
- In the HDV Recording - Preview Window dialog box, preview the video that you created using the Navigation Panel. When you are done previewing, click Next.
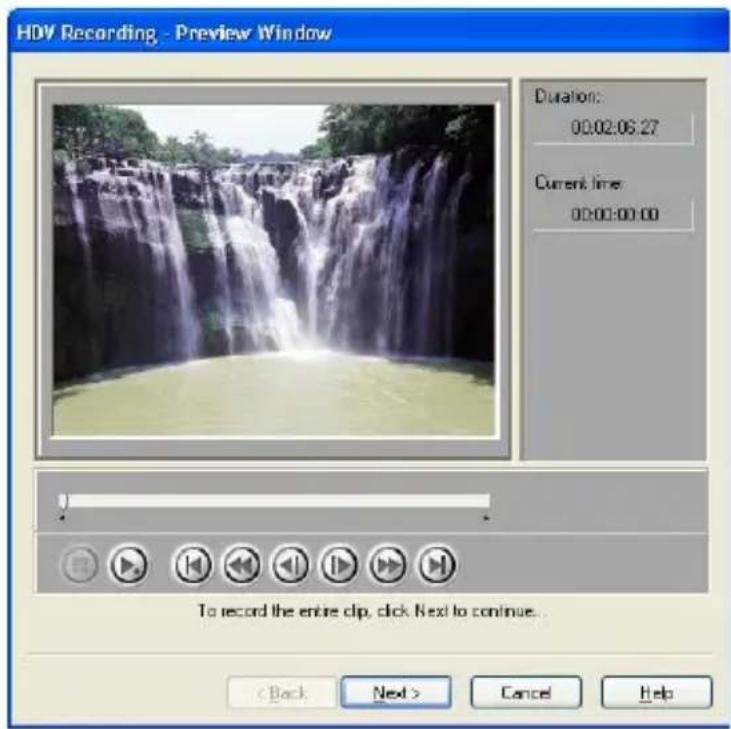
- In the HDV Recording - Record Window dialog box, click Record to start recording the video to the camcorder.
You can view the video being recorded on your camcorder's LCD monitor but not on the Preview Window.
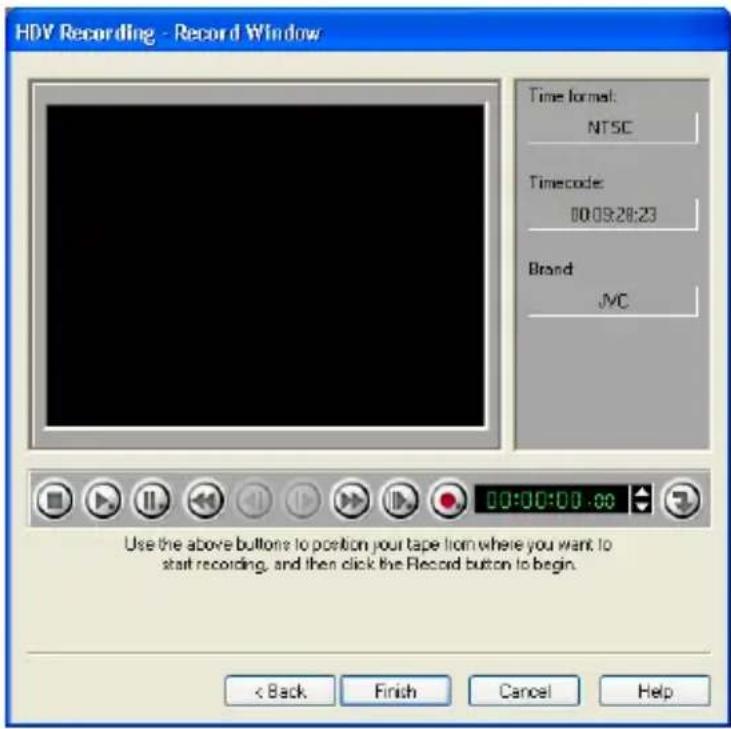
Tip: Click Transmit to preview the video first on your camcorder's LCD monitor before you record the video to your camcorder.
- Click Finish when you are done recording the video to your camcorder.
- ULEAD ® HD PLUG-IN 2.0
- SYSTEM REQUIREMENTS
- INSTALLING THE PLUG-IN
- TO INSTALL
- BEFORE CAPTURING
- ON SONY HDV CAMCORDER
- ON JVC HD CAMCORDER
- TO SWITCH THE JVC HD CAMCORDER TO MPEG-2 MODE
- CAPTURING HDV/HD VIDEO USING VIDEO CAPTURE
- TO CAPTURE VIDEOS
- NOTES
- EDITING HDV/HD VIDEO
- TO EDIT VIDEOS
- CREATING AN HDV OR HD VIDEO FILE
- TO CREATE A VIDEO FILE
- RECORDING VIDEO BACK TO THE SONY HDV OR JVC HD CAMCORDER
- TO RECORD BACK TO THE CAMCORDER
Brand : ULEAD
Model : HD Plug-in 2.0
Category : Photo/Video Software