
HD6301 - Grill plate PHILIPS - Free user manual and instructions
Find the device manual for free HD6301 PHILIPS in PDF.


| Product Type | Electric Grill Plate |
| Brand | Philips |
| Model | HD6301 |
| Dimensions (L x W x H) | Approx. 35 x 25 x 10 cm |
| Weight | 2.2 kg |
| Power Supply | 220-240 V, 50-60 Hz |
| Power Consumption | 2000 W |
| Cooking Surface | Non-stick coated |
| Temperature Control | Adjustable thermostat |
| Indicator Lights | Power and ready light |
| Safety Features | Auto shut-off, cool-touch handles |
| Cleaning | Removable plate for easy cleaning |
| Dishwasher Safe | Plate is dishwasher safe |
| Warranty | 2 years |
| Accessories Included | User manual, recipe booklet |
Frequently Asked Questions - HD6301 PHILIPS
User questions about HD6301 PHILIPS
0 question about this device. Answer the ones you know or ask your own.
Ask a new question about this device
Download the instructions for your Grill plate in PDF format for free! Find your manual HD6301 - PHILIPS and take your electronic device back in hand. On this page are published all the documents necessary for the use of your device. HD6301 by PHILIPS.
USER MANUAL HD6301 PHILIPS

English 6
Czech 18
Montenegrin 31
Danish 43
German 55
Spanish 69
French 82
Croatian 95
Italian 108
Latvian 121
Lithuanian 133
Hungarian 145
Dutch 158
Norwegian 171
Polish 183
Portuguese 196
Romanian 209
Albanian 221
Slovenian 234
Slovak 246
Serbian 259
Finnish 271
Swedish 283
Turkish 295
Greek 307
Bulgarian 320
Macedonian 333
Russian 346
Ukrainian 359
Kazakh 372
Introduction
Congratulations on your purchase and welcome to Philips!
To fully benefit from the support that we offer, register your product at www.philips.com/welcome.
General description
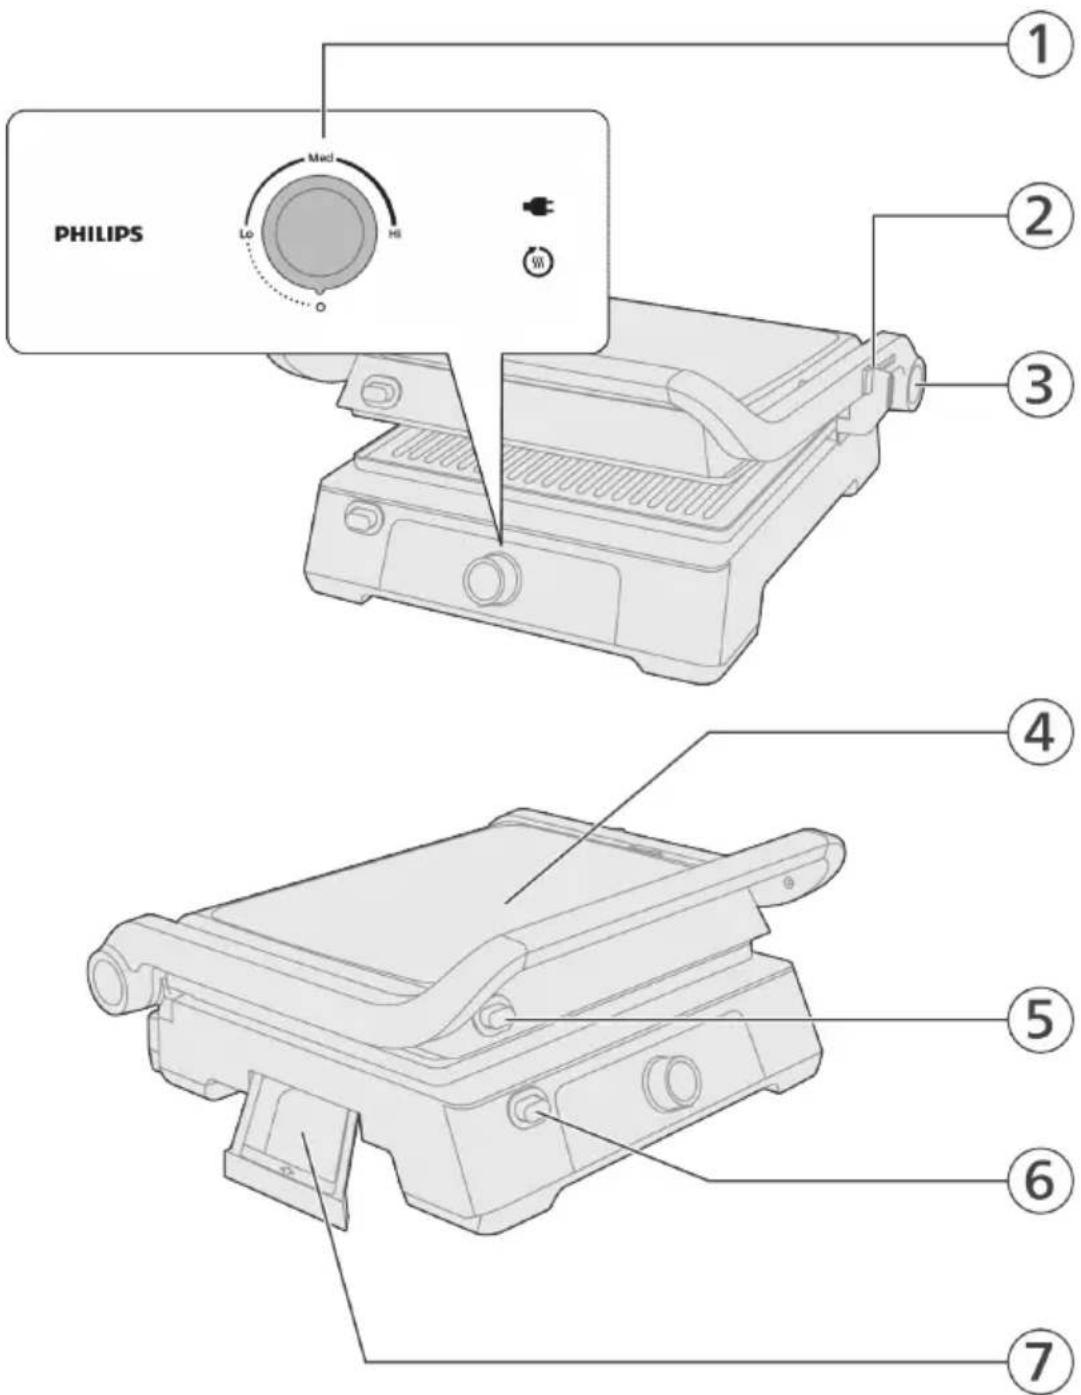
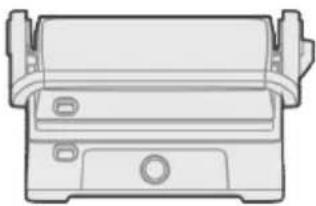
1 Control panel - Control knob - Status display 2 Lid position selector
3 Lid release button (for table grill)
4 Lid
5 Top plate release button
6 Bottom plate release button
7 Oil collector
Important
Danger
Warning
- Do not immerse the appliance or the mains cord in water or any other liquid.
- Check if the voltage indicated on the bottom of the appliance corresponds to the local mains voltage before you connect the appliance.
- Do not use the appliance if the plug, the mains cord or other parts are damaged.
- Keep the mains cord away from hot surfaces.
- Never connect this appliance to an external timer switch in order to avoid a hazardous situation.
- Do not let the appliance operate unattended.
- This appliance can be used by children aged from 8 years and above and persons with reduced physical, sensory or mental capabilities or lack of experience and knowledge if they have been given supervision or instruction concerning use of the appliance in a safe way and understand the hazards involved. Children shall not play with the appliance. Cleaning and user maintenance shall not be made by children unless they are older than 8 and supervised.
- Keep the appliance and its cord out of reach of children less than 8 years.
- The appliance is not intended to be operated by means of an external timer or a separate remote control system.
- If the supply cord is damaged, it must be replaced by the manufacturer, its service agent or similarly qualified persons in order to avoid a hazard.
- The accessible surfaces may become hot during use.
Caution
- This appliance is intended for normal household use only. It is not intended for use in environments such as staff kitchens of shops, offices, farms or other work environments. Nor is it intended to be used by clients in hotel, motels, bed and breakfasts and other residential environments.
- If you wash the grill plates in the dishwasher, there's a chance that oxidation may happen at the back of the plate, which could result in black powder or substance remaining on the rear side of the plate.
- Only connect the appliance to an earthed wall socket.
- Do not let the mains cord hang over the edge of the table or worktop on which the appliance stands.
- The temperature of accessible surfaces may be high when the appliance operates.
- Let the appliance cool down completely before you clean the appliance or put it away.
- Never touch the plates with sharp or abrasive items, as this damages the non-stick surface.
- Always switch off and unplug the appliance after use.
- In order to get the best result from your contact grill, always clean the appliance after every use. When you take the grills out, the heating elements will be exposed. You can clean these parts with a piece of cloth. Be careful not to drop any water on these pads.
Before first use
Thoroughly clean all parts that will come into food contact before you use the appliance for the first time (see chapter 'Cleaning').
Make sure all parts are completely dry before you start using the appliance.
Preparing for use

1. Unlock the lid by sliding the slider to the unlock position.

2. Lift the lid to its default angle.
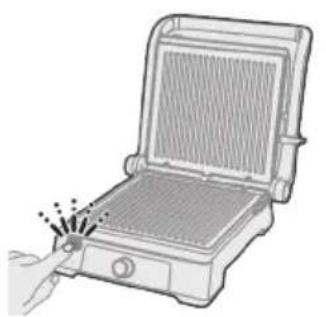
3. Press the release button to unlock the plate on the bottom.

4. Remove the bottom plate.
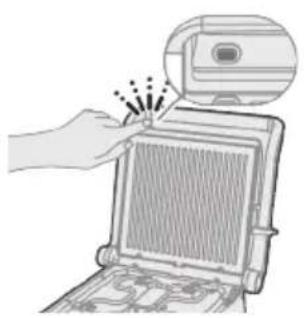
5. Press the plate release button to unlock the plate on the top.

6. Remove the top plate.

7 Wash the plates with a soft cloth. 8 Dry the plates completely before reattaching.

9 Attach the top plate to the grill lid clips and press firmly to secure it in place.

10 Attach the bottom plate to the grill lid clips and press firmly to secure it in place.
Using the appliance

1 Unlock the lid by sliding the slider to the unlock position.
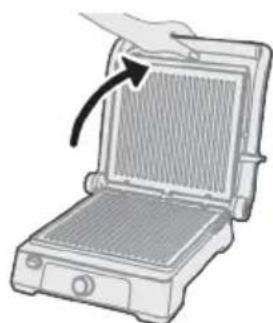
2 Lift the lid to its default angle.

- You can press the lid release button to open the lid to 180 degrees and use it as a table grill.

3 Plug in the appliance.
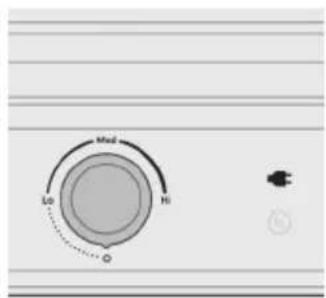
4 The plug icon lights up.

5 Turn the control knob to Hi position to preheat the appliance. The preheat icon lights up.

6 Wait until the preheat process is complete. The preheat icon goes off.

7 Add ingredients to the grill.
- You can use it as either a contact grill or a table grill.
- For a contact grill, lift the lid to its default angle, place the food on the bottom plate, and close the lid.
- For a table grill, cook the food on the open surface.
Hot grill plate. Use heat-resistant gloves when adding ingredients.

8 Wait until the ingredients are fully cooked. Refer to the cooking time in the grilling table.
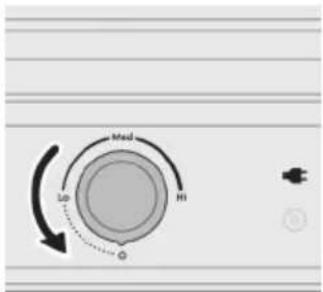
9 Turn the control knob to 0 position to turn off the appliance.
Grilling table
The table gives indications of which temperature to select, how long the food has to be grilled and the appropriate position of the grill. The time necessary to preheat the appliance is not included in the indicated grilling time.
The actual grilling time and temperature depend on the type of food that is prepared (e.g. meat), its thickness and its temperature and also on your own taste.
| Ingredients Temperature level(Lo-Med-Hi) | Suggested cooking time | Cooking position(table/contact grill ) |
| Beef steak Hi 6-9min contact grill | ||
| Beef escalope Hi 3-4min contact grill | ||
| Beef burger Hi 4-6min contact grill | ||
| Lamb chop Hi 8-10min contact grill | ||
| Pork chop Hi 5-8min contact grill | ||
| Chicken Hi 10-12min contact grill | ||
| Fish Hi 6-8min contact grill | ||
| Fish fillet Hi 4-6min contact grill | ||
| Kebab Hi Table grill 18-20min | Contact grill 8-10min | table grill or contact grill |
| Hot dog Hi Table grill 25-30min | Contact grill 7-9min | table grill or contact grill |
Panini Med 5-6min contact grill
| Sandwich Med 6-7min contact grill | ||
| Champignon & tomato Med Table grill 20-25min | Contact grill 6-10min | table grill or contact grill |
| Zucchini & bell pepper Med Table grill 20-25min | Contact grill 6-10min | table grill or contact grill |
| Shrimp Hi Table grill 8-12min | Contact grill 3-5min | table grill or contact grill |
| Defrost Lo 6-10min contact grill | ||
| kofte Hi 6-8min contact grill | ||
Cleaning and Maintenance
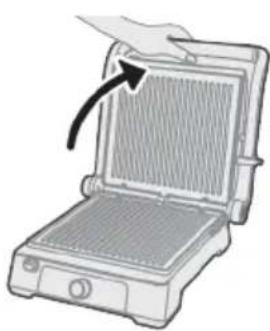
- Make sure the appliance is unplugged and cool.
- Clean after each use, avoid abrasive cleaners, and store in a dry place.
1 Unplug the appliance. 2 Allow the appliance to cool down completely before cleaning. 3 Unlock the lid by sliding the slider to the unlock position. 4 Lift the lid to its default angle.
5 Press the release button to unlock the plate on the bottom.

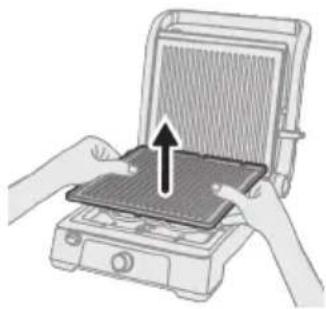
6 Remove the bottom plate.

7 Press the release button to unlock the plate on the top.
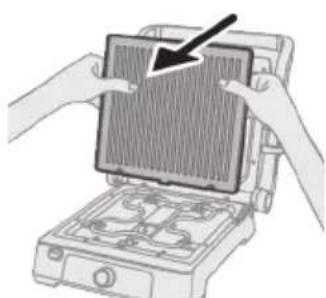
8 Remove the top plate.

9. Wash the plates with a damp soft cloth or sponge using warm, soapy water.
10. Dry the plates completely before reattaching.

11. Attach the top plate back.

12. Attach the bottom plate back.

13. Pull out the oil collector from the appliance.

14. Pour out the oil from the collector.
15. Wash the collector with soapy water.
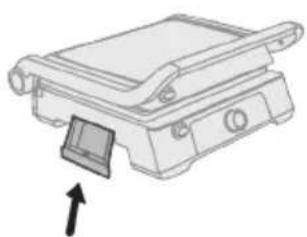
16. Attach the oil collector back.
Clean table
 | √ | √ | √ | × |
 | √ | × | √ | × |
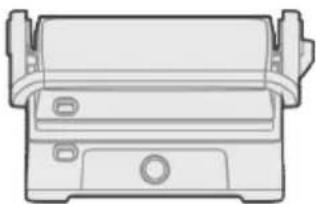 | × | × | √ | × |
Troubleshooting
This chapter summarizes the most common problems you could encounter with the appliance. If you are unable to solve the problem with the information below, visit www.philips.com/support for a list of frequently asked questions or contact the Consumer Care Center in your country.
The grill doesn't turn on:
- Make sure the power cord is plugged into a working outlet.
- Check the power switch to ensure it is in the "on" position.
- Make sure the removable plate is properly installed and seated in place.
Uneven heating:
- Check if the grill plates are properly aligned and seated in place.
- Make sure the food is evenly spaced on the grill plates.
- Adjust the temperature to an even setting and allow the grill to preheat thoroughly.
Excessive smoke or burning smells:
- Ensure that excess fat or oil is not dripping onto the heating elements.
- Clean the grill plates thoroughly to remove any built-up residue that may be causing smoke during cooking.
- Avoid using excessive amounts of oil or fats when cooking, as this can lead to smoke and burning smells.
Non-stick coating issues:
- If the non-stick coating is peeling or damaged, discontinue use and contact the manufacturer for repairs or replacements.
- Use non-metal utensils to prevent scratching the non-stick coating.
- Follow the cleaning and maintenance instructions to prolong the life of the non-stick coating.
Inconsistent cooking results:
- Ensure the food is of even thickness and properly prepared before placing it on the grill.
- Follow the recommended cooking times and temperatures for different types of food.
- Avoid opening the grill constantly during cooking, as this can lead to uneven results.
Electromagnetic fields (EMF)
This appliance complies with the applicable standards and regulations regarding exposure to electromagnetic fields.
Recycling
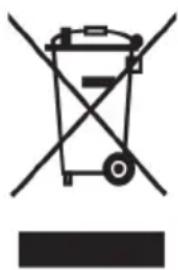
- This symbol means that electrical products shall not be disposed of with normal household waste.
- Follow your country's rules for the separate collection of electrical products.
Warranty and support
Versuni offers a two-year warranty after purchase on this product. This warranty is not valid if a defect is due to incorrect use or poor maintenance. Our warranty does not affect your rights under law as a consumer. For more information or for invoking the warranty, please visit our website www.philips.com/support.
Introduction
7 Place the ingredients on the grill.

| √ | √ | √ | × |
| √ | × | √ | × |
 | × | × | √ | × |
Troubleshooting
2 Lift the lid to the factory-preset angle.

3 Press the release button to unlock the lower plate.

4 Remove the lower plate.
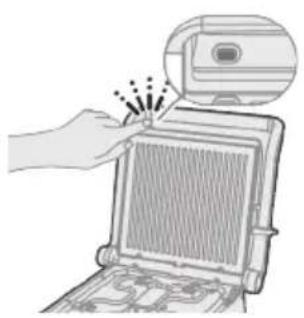
5 Press the plate release button to unlock the upper plate.

6 Remove the top plate.

7 Clean the plates with a soft cloth. 8 Dry the plates completely before reattaching them.

9 Attach the top plate to the clips on the grill lid and press firmly to set it securely in place.

10 Attach the bottom plate to the clips on the grill lid and press firmly to set it securely in place.
Using the appliance
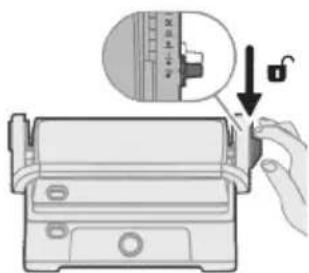
2 Lift the lid to the factory-set angle.

- You can press the lid release button to open the lid 180 degrees and use it as a tabletop grill.

3 Connect the appliance to the power supply.

7 Place the ingredients on the grill.
- You can use it as a contact grill or a tabletop grill.
- For contact grilling, lift the lid to the factory-set angle, place food on the lower plate, and close the lid.
- For tabletop grilling, prepare food on the open surface.
The grill plate is hot. Use heat-resistant gloves when adding ingredients.

8 Wait until the ingredients are fully cooked. See the cooking times in the grilling table.

9 Turn the control knob to position 0 to switch off the appliance.
Grilling table
The table provides instructions on which temperature to select, how long to cook the food, and the appropriate grill position. The time required for preheating the appliance is not included in the indicated grilling time.
The actual grilling time and temperature depend on the type of food being prepared (e.g., meat), its thickness and temperature, as well as your personal taste.
| Sastojci Nivo temperature(Niska-Srednja-Visoka) | Predloženovrijemespremanja | Položaj za spremanje(stoni/kontaktni roštilj) |
| Biftek Visoko 6-9 min kontaktni roštilj | ||
| Teleće šnicle Visoka 3-4 min kontaktni roštilj | ||
| Govedi burger Visoka 4-6 min kontaktni roštilj | ||
| Jagnjeći kotlet Visoka 8-10 min kontaktni roštilj | ||
| Svinjski kotlet Visoka 5-8 min kontaktni roštilj | ||
| Piletina Visoka 10-12 min kontaktni roštilj | ||
| Riba Visoka 6-8 min kontaktni roštilj | ||
| Riblji fileti Visoka 4-6 min kontaktni roštilj | ||
| Čevapi Visoka Stoni roštilj 18-20 | minKontaktni roštilj 8-10min | stoni roštilj ili kontaktni roštilj |
| Viršle Visoka Stoni roštilj 25-30 | minKontaktni roštilj 7-9min | stoni roštilj ili kontaktni roštilj |
| Panini Srednja 5-6 min kontaktni roštilj | ||
| Sendvič Srednja 6-7 min kontaktni roštilj | ||
| Šampinjoni i paradajz Srednja Stoni roštilj 20-25 | minKontaktni roštilj 6-10min | stoni roštilj ili kontaktni roštilj |
| Tikvica i paprika Srednja Stoni roštilj 20-25 | minKontaktni roštilj 6-10min | stoni roštilj ili kontaktni roštilj |
| Škampi Visoka Stoni roštilj 8-12 min | Kontaktni roštilj 3-5min | stoni roštilj ili kontaktni roštilj |
| Odmrzavanje Niska 6-10 min kontaktni roštilj | ||
| Pljeskavice Visoka 6-8 min kontaktni roštilj | ||
Cleaning and Maintenance

5 Press the release button to unlock the lower plate.

6 Remove the lower plate.

7 Press the release button to unlock the upper plate.

8 Remove the upper plate.

9 Wash the plates with a damp soft cloth or sponge using warm water and a mild detergent.
10 Dry the plates completely before reattaching them.

11 Reattach the upper plate.

12 Reattach the lower plate.

13 Pull the oil collection tray out of the appliance.

14 Pour out the oil from the oil collection tray.
15 Wash the oil collection tray with a mild detergent.

This appliance complies with the applicable standards and regulations regarding exposure to electromagnetic fields.
Recycling
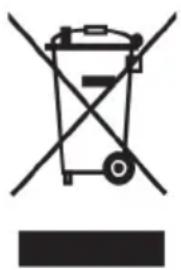
- This symbol indicates that electrical products must not be disposed of with ordinary household waste.
- Follow your country's regulations for the separate collection of waste electrical products.
Warranty and support
1 Unlock the lid by sliding the slider to the unlocked position.

2 Lift the lid to its standard angle.

4 Remove the base plate.

1 Unlock the lid by sliding the slider to the unlocked position.
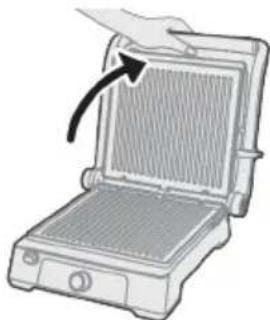
2 Lift the lid to its standard angle.

8 Wait until the ingredients are fully cooked. See the cooking time in the grill table.
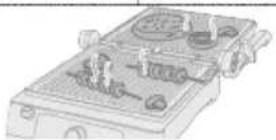

9 Turn the control knob to position 0 to switch off the appliance.
Grill table
Brand : PHILIPS
Model : HD6301
Category : Grill plate