
WTL-120715B - Dishwasher Vivax - Free user manual and instructions
Find the device manual for free WTL-120715B Vivax in PDF.


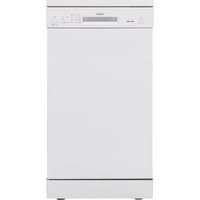
| Product Type | Freestanding Dishwasher |
| Brand | Vivax |
| Model | WTL-120715B |
| Place Settings | 12 |
| Energy Class | E |
| Noise Level | 49 dB(A) |
| Dimensions (H x W x D) | 85 x 60 x 60 cm |
| Weight | 55 kg |
| Power Supply | 220-240 V ~ 50 Hz, 10 A |
| Water Connection | Cold water only |
| Programs | 6: Eco, Intensive, Normal, Quick, Glass, Pre-rinse |
| Drying System | Condensation drying |
| Salt and Rinse Aid Indicator | Yes |
| Delay Start | Up to 24 hours |
| Child Lock | Yes |
| Adjustable Upper Basket | Yes, height adjustable |
| Cutlery Basket | Yes, removable |
| Cleaning and Maintenance | Clean filters regularly, check spray arms, descale as needed |
| Safety Features | Overflow protection, anti-flood system, child lock |
| Spare Parts Availability | Via authorized service centers |
| Repairability Index | 7.5/10 (estimated) |
Frequently Asked Questions - WTL-120715B Vivax
User questions about WTL-120715B Vivax
0 question about this device. Answer the ones you know or ask your own.
Ask a new question about this device
Download the instructions for your Dishwasher in PDF format for free! Find your manual WTL-120715B - Vivax and take your electronic device back in hand. On this page are published all the documents necessary for the use of your device. WTL-120715B by Vivax.
USER MANUAL WTL-120715B Vivax

Warning!
- Before starting use, be sure to read the "Installation" section within these instructions!
Contents
Safety warnings 3 Installation
Device description 11
Installation 12
Use
Quick start guide 17
Before each wash 18
Detergent drawer 19
Control panel 22
Wash programs 23
Additional functions 27
Cleaning and maintenance 29 ■ Troubleshooting 33 ■ Technical specifications 35 Disposal of the used appliance, EU Declaration of Conformity 36 ■ EPREL Information sheet 36
Dear:
Caps for the transport screw openings, cold water supply hose, instructions for use with warranty statement
INSTALLATION
Installation location

Warning
Unpacking the machine

Warning
- Remove the cardboard box and the Styrofoam packaging.
- Lift the washing machine and remove the bottom part of the Styrofoam packaging. Make sure that you have also removed the Styrofoam protrusion together with the bottom Styrofoam.
- Remove the tape that secures the power cable and the drain hose.
- Remove the water supply hose and other accessories from the drum.
Removing the transport screws

Warning
- Before starting use, you must remove the transport screws and the plastic inserts located on the back side!
- If you transport the washing machine, you need to reinstall the transport screws. Store the screws in a known place in case of reuse. ■ The warranty does not cover damage caused by not removing the transport screws!


Note
- If the machine in the kit has support for a drain hose, position the drain end as follows.


Warning
- When installing the drain hose, secure it properly.
- If the drain hose is too long, do not place it in the washing machine, as this may cause operational problems or water discharge issues.
Congratulations!
Your new washing machine is now ready for use!
QUICK START

Caution!

Load the laundry

Add detergent

Close the drum door

Close the top lid

Note
- If you have selected the prewash function, detergent should be added to "compartment I" (for prewash) and "compartment II" (main wash) (for washing machines that have this function).

Note

2. Washing
Select the washing program
Select the additional function (optional) Press the Start/Pause button to start washing
Note
- Step 2 is optional and can be skipped.
- The drawings are for information purposes only; your product may differ slightly, but the functionality remains the same
3. After washing
Remove all foreign objects from pockets

Place smaller pieces of clothing in a laundry bag.

Press [Delay] and [Function]
3 sec. until an audible signal sounds.

Caution!
electrical insulation and other parts. Use a lightly dampened cloth, then a dry cloth to clean the front control panel.

Note
- Do not use acids, thinners, or other corrosive solvents such as alcohol and corrosive chemical products for cleaning.
Cleaning the drum

Cleaning the inlet filter on the washing machine:


Note
- The filter can be cleaned separately: disconnect it from the inlet, wash it, and reconnect it.
- Reconnect the hose, open the inlet tap, and check for leaks.
Cleaning the detergent drawer:
- Press the plastic part in the softener compartment, indicated by the arrow in the lower drawing.
- Lift the drawer upward and remove it. Thoroughly wash all compartments of the drawer with water, including the plastic softener insert.
- Replace the softener insert and push the drawer back into place.

Pull out the detergent drawer by first pressing the button A indicated by the arrow in the upper drawing.

Clean the drawer with running water.

Put the drawer back into the washing machine compartment.

Note
Open the cover at the lower front.

Remove the filter by turning it counterclockwise.

Remove dirt or foreign objects.

Replace the filter and close the lid.

Warning
■ Be careful as the water in the washing machine may be very hot! - Wait for the water inside the washing machine to cool down. - Before cleaning, disconnect the washing machine from the power supply to avoid the risk of electric shock. - The drain pump filter can filter out small foreign substances from the wash, but larger items may get stuck in the filter and block the pump or water drainage. - Clean the filter periodically so that the washing machine can operate smoothly.

Caution!
WTL-120715B
SR BiH CG
User Manual

Warning!
■ Before starting use, be sure to remove the transport screws located at the back! - The warranty does not cover damage caused by not removing the transport screws!


Warning!
- Before starting use, be sure to read the "Installation" section within this manual!
Contents
Safety warnings 3 Installation
Description of the device 11
Installation 12
Usage
Quick Start 17
Before Each Wash 18
Detergent Drawer 19
Control Panel 22
Wash Programs 23
Additional Functions 27
Cleaning and Maintenance 29 ■ Troubleshooting 33 ■ Technical Specifications 35 Disposal of Used Appliance, EU Declaration of Conformity 36 ■ Information Sheet 36
Dear Customer,
Thank you for purchasing a VIVAX product. To ensure safe use and to take advantage of all the functions this appliance offers, please read this manual carefully before using your new appliance and keep it in a known place for future reference.
Please ensure proper and adequate disposal of the packaging, in accordance with local environmental regulations.
Caps for transport screw holes Cold water inlet hose User manual with warranty statement and Info sheet
INSTALLATION
Installation location

Warning
- Machine stability is very important to prevent the machine from moving and sliding!
- Make sure the product does not stand on or pinch the power cord!

Unpacking the machine

Warning
- Packaging materials (e.g., foils, plastic bags, styrofoam) can be dangerous for children. ■ There is a risk of suffocation! Keep all packaging away from children.

- Remove the cardboard box and styrofoam packaging.
- Lift the washing machine and remove the bottom part of the styrofoam packaging. Make sure to remove the styrofoam protrusion together with the bottom styrofoam.
- Remove the tape securing the power cord and drain hose.
- Remove the water inlet hose and other accessories from the drum.
Raise

Lower
3
2. Connect the other end of the hose to the inlet valve on the back of the machine and tighten it firmly clockwise.

Drain hose

Warning
■ Do not bend or flatten the drain hose. - Correctly position the drain hose, otherwise water may leak from the washing machine.
There are two ways to position the end of the drain hose:

Note
- The corner support for the hose is not included with the appliance. If needed, look for the holder at your local store.


Warning
- When installing the drain hose, secure it properly.
- If the drain hose is too long, do not put it in the washing machine as this may cause problems with operation or water drainage.
Congratulations!
Open the water tap

Load the laundry

Add detergent

Close the drum door

Close the top door

Note

2. Washing
![graph TD A["1: Rotation"] --> B["2: Inputting Table"] B --> C["3: Hand press with playback indicator"]](/content/2026/06/1405252/images/8a500ecbef9af2380183800d0c7c1fc6031a33e95d70bed63a388041dd01b200.jpg)
Select the washing program Select the additional function (option) Press the Start/Pause button to start washing

Note
Check the labels on the clothes

Remove all foreign objects from pockets

Turn delicate laundry inside out

Separate different types of laundry for separate washing
DETERGENT DRAWER
| Compartment for detergent - Prewash II Compartment for detergent - Main wash
Compartment for fabric softener

Caution!
- Detergent should be placed in compartment "I" only if you have selected a washing program with the Prewash function.
| Program | I II | Program | I II | ||
| Cotton (Pamuk) | ○ | ● ○ | Rinse & Spin(Ispiranje i centrifuga | ○ | |
| Cotton 30°C(Pamuk 30°C) | ○ | ● ○ | Jeans(Farmerke) | ○ | ● ○ |
| Cotton 40°C(Pamuk 40°C) | ○ | ● ○ | Mix 40°C(Šareni veš 60°C) | ○ | ● ○ |
| Cotton 60°C(Pamuk 60°C) | ○ | ● ○ | Mix 40°C(Šareni veš 60°C) | ○ | ● ○ |
| Hygiene 90°C(Higijensko pr. 90°C) | ○ | ● ○ | 20°C | ● ○ | |
| Delicate(Osetljivo) | ● ○ | Rapid 45'(Brzo 45') | ○ | ● ○ | |
| ECO 40-60 | ● ○ | Quick 15'(Brzo 15') | ● | ||
| Spin Only(Samo centrifuga) |

Select the washing program

Set the delay time

Start![graph TD A["Delay"] --> C["Lock Icon"] B["Function"] --> C["Lock Icon"]](/content/2026/06/1405252/images/d50e1fa88746a4fca738b539f5aaf585107f89dfd479dfd5242e0a4c7b1aa5c3.jpg)
Press [Delay] and [Function] for 3 seconds until a beep sounds.

Caution!

Note
- For cleaning, do not use acids, thinners, or other corrosive agents such as alcohol and corrosive chemical products.
Cleaning the drum
Due to increased humidity and contact between metal parts on clothing and the drum, rust stains may appear on the drum. It is recommended to clean such stains immediately with a non-chlorine detergent. Never use abrasive agents or cloths with abrasive properties, such as steel wool.

Note

Cleaning the inlet filter:
- Close the inlet tap
- Remove (unscrew) the inlet hose from the connection on the machine.
- Clean the filter at the connection.
- Reconnect the hose to the machine, open the tap, and check for any leaks.


Note
- The filter can be cleaned separately: detach it from the connection, wash it, and put it back on the connection;
- Reconnect the hose, open the inlet tap, and check for leaks.
Cleaning the detergent drawer:
- Press the plastic part in the softener compartment, indicated by the arrow in the lower drawing.
- Lift the drawer upward and remove it. Thoroughly wash all parts of the drawer with water, including the plastic softener insert.
- Replace the softener insert and push the drawer back into place.

Clean the drawer with running water

Return the drawer to the machine compartment

Note
- Do not use acids, thinners, or other corrosive agents such as alcohol or corrosive chemical products for cleaning.
Open the cover at the lower front side

Remove the filter by turning it counterclockwise.

Remove dirt or foreign objects.

Replace the filter and close the cover.

Warning
■ Be careful as the water in the machine may be hot! - Wait for the water inside the machine to cool down. - Before cleaning, disconnect the machine from the power supply to avoid the risk of electric shock. - The drain pump filter can filter out small foreign objects from the wash, but larger items may get stuck in the filter and block the pump or water drainage. - Clean the filter periodically to ensure the machine operates smoothly.

Warning!
- Place a shallow container under the filter pump opening, because when you remove the filter, water from the machine's plumbing may start to leak.
- Depending on the program selected, the pump may contain hot water when the machine is in use. Never remove the pump cover during a wash cycle! Wait until the machine has finished the cycle and is empty. When replacing the filter, ensure it is firmly tightened to prevent water leakage.
Transport
WTL-120715B
MK

Warning!


Note

Warning
Load laundry

Add detergent


2. Washing


Note


WTL-120715B
AL

Warning!


Note

Warning

Fill the washing machine

Add detergent


2. Washing


Note


Remove foreign objects

WTL-120715B
SLO
Instructions for use

Warning!

Warning!
- Before use, be sure to read the "Installation" section in this manual!
Contents
Covers for transport screw openings Cold water inlet hose Instructions for use with warranty card and information sheet
INSTALLATION
Installation location

Warning
■ The stability of the machine is very important to prevent it from moving and sliding! ■ Make sure the product does not stand on the cable or pinch the power cord!

Unpacking the machine

Warning
2. Attach the other end of the hose to the inlet valve on the back of the machine and tighten it clockwise.

2. Connection to the drain outlet.
Allowed height: Min 60cm
Max.: 100cm

Note
- If the machine has a drain hose support in the accessories, install the drain end as follows.
- Hose retainer is not part of the accessories. If you need it, please ask in your local shop


Warning
Load the laundry

Add detergent. Close the door.

drum


2. Washing


Note
Check the labels on the clothes

Tie ribbons, close zippers

Press [Delay] and [Function] for 3 sec. until a beep sounds

Warning!

Note


Note
Press at point A to pull out the detergent drawer

Clean the drawer with running water

Return the drawer to the washing machine compartment

Note
Remove the filter by turning it clockwise

Remove dirt or foreign objects.

Reinstall the filter and close the cover.

Warning
WTL-120715B
EN
Instruction manual

Warning!
■ Before the first usage, you must remove the transport bolts from the backside! - The warranty does not cover damages caused by not removing the transport bolts!


Warning!
- Before the first usage, please carefully read the "Installation" chapter in this Manual!
Contents
■ Safety warnings 3 Installation
Product Description 11
Installation 12
Operations
Quick Start 17
Before Each Washing 18
Detergent Dispenser 19
Control Panel 22
Programmes 23
Extra Functions 27
Cleaning and Care 29, Trouble Shooting 33, Technical Specifications 35, Disposal, EU Declaration of Conformity 36, Product Fiche info 36
DEAR CUSTOMER:
Thank you for buying a VIVAX product. To ensure that you get the best results from your new machine, please take time to read through the simple instructions in this booklet.
Please ensure that the packing material is disposed of in accordance with the current environmental requirements.
When disposing of any electric product, please contact your local waste disposal department for advice on safe disposal.
This appliance must only be used for its intended purpose.
Please read these instructions carefully before installing and powering the machine. The manufacturer is not responsible for improper device usage.
Follow the instructions for use. Keep your instructions in a known and safe place for future reference.
SAFETY WARNINGS
Meaning of safety warning symbols

The symbols indicate matters to pay attention to, and these behaviors shall be specially noted. Due precautions are needed or serious or moderate injuries or damages of the product will be caused.

The symbols indicate prohibited matters, and those behaviors are forbidden. Non-compliance with the instructions may result in product damages or endanger the personal safety of users.

The symbols indicate matters that must be followed, and those behaviors must be strictly executed in line with the operation requirements. Non-compliance with the instructions may result in product damages or endanger the personal safety of users.

WARNING!
Electric Shock!
- If the supply cord is damaged, it must be replaced by the manufacturer, its service agent or similarly qualified persons in order to avoid a hazard.
- The new hose-sets supplied with the appliance are to be used and that old hose-sets should not be reused.
- Before any maintenance of the device, unplug the appliance from the mains.
- Always unplug the machine and turn off the water supply after use. The max. inlet water pressure, in pascals. The min. inlet water pressure, in pascals.
- To ensure your safety, power plug must be inserted into an earthed three-pole socket. Check carefully and make sure that your socket is properly and reliably earthed.
- Make sure that the water and electrical devices must be connected by a qualified technician in accordance with the manufacturer's instructions and local safety regulations.
- This appliance is not intended for use by persons (including children) with reduced physical, sensory or mental capabilities, or lack of experience and knowledge, unless they have been given supervision or instruction concerning use of the appliance by a person responsible for their safety.
Risk to Children!
- This appliance can be used by children aged from 8 years and above and persons with reduced physical, sensory or mental capabilities or lack of experience and knowledge if they have been given supervision or instruction concerning use of the appliance in a safe way and understand the hazards involved. Children shall not play with the appliance.
- Children should be supervised to ensure that they do not play with the appliance.
- Cleaning and user maintenance shall not be made by children without supervision.
- Do not climb or sit on the appliance.
- Children of less than 3 years should be kept away unless continuously supervised.
- Animals and children may climb into the machine. Check the machine before every operation.
- Glass door may be very hot during the operation. Keep kids and pets far away from the machine during the operation.
- Do not place machine into very wet rooms as well as in the rooms with explosive or caustic gas.
- Remove all packages and transport bolts before using the appliance. Otherwise, serious damage may result.
- Plug must be accessible after installation.
Risk of Explosion!
- Do not wash or dry articles that have been cleaned in, washed in, soaked in, or dabbed with combustible or explosive substances (such as wax, oil, paint, gasoline, degreasers, dry-cleaning solvents, kerosene, etc.) This may result in fire or explosion.
- Before hand thoroughly rinse items of washing by hand.

CAUTION!
Installing the Product!
- All washing and additional substances are to be kept in a safe place out of the reach of children.
- Do not install the machine on a carpet floor. The obstruction of the openings by a carpet can damage the machine.
- Keep the appliance clear from heating sources and direct sunlight to avoid plastic and rubber parts to corrode.
- Do not use the appliance in humid environments or rooms containing explosive or caustic gas. In case of water leakage or water splashes let the appliance dry in the open air.
- The appliance must not be installed behind a lockable door, a sliding door or a door with a hinge on the opposite side to that of the washing machine.
- Do not operate the machine in rooms with a temperature of below 5°C. This can cause damages to parts of it. If it is unavoidable, make sure to drain the water completely from the appliance after every use (see "Maintenance - Cleaning of drain pump filter") to avoid damages caused by frost.
- Never use flammable sprays or substances in the immediate proximity of the appliance.
- This washing machine is for indoor use only.
- It is not intended for built-in use.
- The washing machine with single inlet valve only can be connected to the cold water supply.
- The plug must be accessible after installation.
- The power cord should be firmly contacted with the socket or else fires might be caused. Do not pull or bend the power cable.
- Remove all packages and transport bolts before using the appliance. Otherwise, serious damage may result.
Operating the appliance!
- Before washing clothes for the first time, run the product through one complete cycle without any clothes inside.
- Before using the washing machine, the product must be calibrated.
- Do not place any excessively heavy objects on the appliance, such as water containers or heating devices.
- Use the new hose-sets supplied with the appliance; do not reuse old hose-sets.
- Maximum inlet water pressure: 1 MPa. Minimum inlet water pressure: 0.05 MPa.
- Flammable, explosive, or toxic solvents are forbidden.
- Gasoline and alcohol, etc., must not be used as detergents.
- Only select detergents suitable for machine washing, especially for drum machines.
- Make sure all pockets are emptied. Sharp and rigid items such as coins, brooches, nails, screws, or stones may cause serious damage to this machine.
- Check that the water inside the drum has been drained before opening the door. Do not open the door if any water is visible.
- Be careful of burns when the product drains hot washing water.
- Never refill water by hand during washing.
- After the program is completed, please wait for two minutes to open the door.
The unit must stand upright and in the plane of the floor. Use two adjustable feet to adjust the device.
IMPORTANT: Machine must be placed so that all feet firmly lie on the ground.
Please leave enough space to ensure easy door opening and drawer removal.
Electrical connection
- Make sure the supply cable is not trapped by the machine, as it can get damaged.
- Connect the product to a grounded outlet protected by a fuse complying with the values in the “Technical specifications” table.
- The grounding installation has to be made by a qualified electrician.
- Ensure that the machine is installed in accordance with the local regulations.
- Water and electrical connections must be carried out by a qualified technician in accordance with the manufacturer's instructions and local safety regulations.

Warning!
- Don't use multiple plugs or extension cords.
- The appliance must not have an external switching device such as a timer or be connected to a circuit that is regularly switched on and off.
- Do not pull the plug out of the mains outlet if there is flammable gas around. ■ Never pull out the power plug with wet hands. ■ Always pull at the plug, not at the cable. ■ Always unplug the appliance if it is not being used.
Water connections
- Check the connections of the water inlet tubes, the water tap and the outlet hose for possible problems due to changes of water pressure. If the connections loosen or leak, close the water tap and get it repaired. Do not use the appliance before the pipes and hoses are installed properly by qualified persons.
- Glass door may become very hot during the operation. Keep children and pets far away from the machine while it is operating.
- The water inlet and outlet hoses have to be safely installed and remain undamaged. Otherwise, water leakage can occur.
- Do not remove the drain pump filter while there is still water in the appliance. Big quantities of water can leak out, and there is a risk of scalding due to hot water.
Operation and Maintenance
- Never use any flammable, explosive or toxic solvents. Do not use gasoline and alcohol etc. as detergents. Only select detergents that are suitable for machine washing.
- Make sure that all pockets are emptied. Sharp and rigid items such as coins, brooches, nails, screws, stones etc. may cause serious damages to this machine.
- Remove all objects from pockets such as lighters and matches before use the appliance.
- Thoroughly rinse items that have been washed by hand.
- Items that have been soiled with substances such as cooking oil, acetone, alcohol, petrol, kerosene, spot removers, turpentine, wax and wax removers should be washed in hot with an extra amount of detergent before being dried in the appliance.
- Items containing foam rubber (latex foam), shower caps, water proof textiles, rubber backed articles and clothes or pillows fitted with foam rubber pads should not be dried in the machine.
- Fabric softeners or similar products should be used as recommended in their instructions.
- Never try to open the door forcefully. The door will unlock shortly after the end of a cycle.
- Please do not close the door with excessive force. If it is found difficult to close the door, please check if the clothes are properly inserted and distributed.
- Always unplug the appliance and close the water tap before cleaning and maintenance and after each use.
- Never pour water over the appliance for cleaning purpose. Risk of electric shock!
- Repairs shall only be carried out by the manufacturer, its service agent or similarly qualified persons in order to avoid a hazard. The producer will not be responsible for damages caused by the intervention of not authorized persons.
Intended use
The product is intended only for home use and for textiles in household amounts suitable for machine washing and drying. This appliance is for indoor use only and not intended for built in use.
Only use according to these instructions. The appliance is not intended for commercial use.
Any other use is considered as improper use. The producer is not responsible for any damage or injuries that may result of it.
This appliance is intended to be used in household and similar applications such as:
- Staff kitchen areas in shops, offices and other working environments;
- Farm houses;
- By clients in hotels, motels and other residential type environments;
- Bed and breakfast type environments;
- Areas for communal use in blocks of flats or in launderettes.
PRODUCT DESCRIPTION


Warning
■ Stability is important to prevent the product from wandering! ■ Make sure that the product should not stand on the power cord

Note
■ The product line chart is for reference only, please refer to real product as standard
Accessories!

Transport hole plugs Supply hose cold water User manual
INSTALLATION
Installation area

Warning
■ Stability is important to prevent the product from wandering! ■ Make sure that the product should not stand on the power cord

Before installing the machine, the location characterized As follows shall be selected:
- Rigid, dry, and level surface
- Avoid direct sunlight
- Sufficient ventilation
- Room temperature is above 0°C
- Keep far away from heat sources such as coal or gas.

Unpacking the Washing Machine

Warning
- Packaging material (e.g., films, Styrofoam) can be dangerous for children.
- There is a risk of suffocation! Keep all packaging well away from children.

- Remove the cardboard box and Styrofoam packing.
- Lift the washing machine and remove the base packing. Make sure the small triangle foam is removed together with the bottom one. If not, lay the unit down on its side, then remove the small foam from the unit bottom manually.
- Remove the tape securing the power supply cord and drain hose.
- Remove the inlet hose from the drum.
Remove transport bolts.

Warning
- You must remove the transport bolts from the backside before using the product.
- You will need the transport bolts again if you move the product, so make sure you keep them in a safe place.
- The warranty does not cover damages caused by not removing the transport bolts!

Please take the following steps to remove the bolts:
- Loosen 4 bolts with a spanner and then remove them.
- Stop the holes with transport hole plugs.
- Keep the transport bolts properly for future use.
Levelling the washing machine

Warning
■ The lock nuts on all four feet must be screwed tightly against the housing.
- Check if the legs are closely attached to the cabinet. If not, please turn them to their original positions and tighten the nuts.
- Loosen the lock nut and turn the feet until they closely contact the floor.
- Adjust the legs and lock them with a spanner, making sure the machine is steady.


Connect Water Supply Hose

Warning
- To prevent leakage or water damage, follow the instructions in this chapter. ■ Do not kink, crush, modify, or sever the water inlet hose.
- For the model equipped with a hot valve, connect it to the hot water tap with the hot water supply hose. Energy consumption will decrease automatically for some programs.
- Connect the water tap to the inlet hose.
Tap with threads and inlet hose

- Connect the other end of the inlet pipe to the inlet valve at the back of the product and fasten the pipe tightly clockwise.

Drain Hose

Warning
- Do not kink or protract the drain hose.
- Position the drain hose properly, otherwise damage might result from water leakage.
There are two ways to place the end of the drain hose:
- Put it into the water trough

2. Connect it to the branch drain pipe of the trough.
The trough height: Min 60cm
Max: 100cm

Note
- If the machine has a drain hose support, please install it as follows.
- Hose retainer is not part of the accessories. If you need it, please ask in your local shop.


Warning
- When installing drain hose, fix it properly with a rope.
- If drain hose is too long, do not force it into washing machine as it will cause abnormal noises.
Congratulations!
Now, your new machine is ready for the first use!
QUICK START

Caution!
Before washing, please make sure it's installed properly. ■ Before washing at first time, the washing machine shall be operated in one round of the whole procedures without clothes in as follows.
1. Before Washing

Plug in Open water tap


Load Loundries

Add Detergent

Close drum door

Close the door

Note
- Detergent needs to be added in "compartment I" (prewash) and "compartment II" (main wash), after selecting pre-washing (for machines with this function).

Note
■ Make sure that the drum flaps are properly locked. - All metal hooks must be properly hooked inside the rear door flap. - Check the roller before each laundry, it must roll smoothly.


2. Washing


Note
■ If default is selected, step 2 can be skipped.
3. After Washing
When the washing program is complete, the 🎋 and 🏠 LED lights will flash.
BEFORE EACH WASHING
- The working condition of the washer should be (0-40)°C. If used under 0°C, the inlet valve and draining system may be damaged. If the machine is placed under conditions of 0°C or less, then it should be transferred to normal ambient temperature to ensure the water supply hose and drain hose are not frozen before use.
- Please check the labels and the explanation of using detergent before wash. Use non-foaming or less-foaming detergent suitable for machine washing properly.

Warning
- When washing a single clothes, it may easily cause great eccentricity and give alarm due to great unbalance. Therefore it is suggested to add one or two more clothes to be washed together so that draining can be done smoothly.
- Do not wash or dry articles that have been cleaned in, washed in, soaked in, or dabbed with combustible or explosive substances like wax, oil, paint, gasoline, alcohol, kerosene, and other flammable materials.

Check the Label

Take all the items out of the pockets

Knot the long strips, zip or button

Put small clothes into the pillow slip.

Turn easy-pilling and long-pile fabric inside out

Separate clothes with different textures
DETERGENT DRAWER
Pre wash detergent compartment 11 Main wash detergent compartment
Softener compartment

Caution!
- Detergent only need to be added in "case I "after selecting pre-washing for machines with this function.
- Do not exceed the "MAX" level mark when filling in detergent, additives or softener.
| Programme | I II | Programme | I II | ||
| Cotton | ○ | ● ○ | Rinse & Spin | ○ | |
| Cotton 30°C | ○ | ● ○ | Jeans | ○ | ● ○ |
| Cotton 40°C | ○ | ● ○ | Mix 40°C | ○ | ● ○ |
| Cotton 60°C | ○ | ● ○ | Mix 60°C | ○ | ● ○ |
| Hygiene 90°C | ○ | ● ○ | 20°C | ● ○ | |
| Delicate | ● ○ | Rapid 45' | ○ | ● ○ | |
| ECO 40-60 | ● ○ | Quick 15' | ● | ||
| Spin Only |
- Fill Detergent compartment Fill Detergent compartment as Option
Detergent Recommendation
| Recommended washing detergent | Wash cycles | Washing temp. | Type of laundry and textile |
| Heavy-duty detergent with bleaching agents and optical brighteners | Cotton, ECO 40-60, Mix | 20 / 3040 / 60 | White laundry made from boil-proof cotton or linen |
| Colour detergent without bleaching agent and optical brighteners | Cotton, ECO 40-60, Mix | Cold / 20 /30 / 40 | Coloured laundry made from cotton or linen |
| Color or mild detergent without optical brighteners | Delicate 20 | Coloured laundry made from easy care fibres or synthetic materials | |
| Mild washing detergent | Delicate | 20 | Delicate textiles, silk, viscose |

Note
- As for the agglomerated or ropy detergent or additive, before they are poured into the detergent box, it is suggested to use some water for dilution to prevent the inlet of detergent box from being blocked and overflowing while filling water.
- Please choose suitable type of detergent for the various washing temperature to get the best washing performance with less water and energy consumption.
- To achieve the best cleaning result a proper detergent dosing is important. ■ Use a reduced detergent amount if the drum is not filled completely. ■ Always adjust the amount of detergent to the water hardness, if your tap water is soft, use less detergent.
- Dose according to how dirty your laundry is, less dirty clothes require less detergent.
- Highly concentrated (compact detergent) requires particularly accurate dosing.
Following symptoms are a sign of detergent overdosing:
- heavy foam formation
- poor washing and rinsing result
Following symptoms are a sign of detergent underdosing:
- laundry turns grey
- built-up of limescale deposits on the drum, the heating element and/or the laundry
CONTROL PANEL

1. ON/OFF
Washing machine is switched On/ Off.
2. Start/ Pause
Press the button to Start or Pause the washing cycle.
3. Option
This allows you to select an additional function and will light when selected.
4. Washing Programmes
Select available washing programmes according to the laundry type.
5. Display
The display shows the settings, estimated time remaining, options, and status messages for your washing machine.
The display will remain on through the cycle.

PROGRAMMES
| Programme | Load capacity (kg) | Display Time |
| Cotton | 7,0 2:20 | |
| Cotton 30°C | 7,0 2:30 | |
| Cotton 40°C | 7,0 2:40 | |
| Cotton 60°C | 7,0 2:45 | |
| Hygiene 90°C | 3,5 2:36 | |
| Delicate | 2,0 0:49 | |
| ECO 40-60 | 7,0 3:28 | |
| Spin Only | 7,0 0:12 | |
| Rinse & Spin | 7,0 0:20 | |
| Jeans | 7,0 1:45 | |
| Mix 60°C | 7,0 1:30 | |
| Mix 40°C | 7,0 1:20 | |
| 20°C | 3,5 1:01 | |
| Rapid 45' | 2,5 0:45 | |
| Quick 15' | 2,0 0:15 |

Note
- The parameters in this table are only for user's reference. The real washing parameters may be different from the parameters in the above-mentioned table, depending on actual conditions (water temperature, laundry weight, and ambient temperature).
| Cycle | Normal capacity (kg) | Temperature settings | Cycle Duration h:min | Energy Consumption in kWh/cycle | Water consumption L/cycle | Highest water temp.°C 1 | Residual moisture in % / Spin speed in rpm 2 |
| Eco 40-60 3 | 7.0 - | 3:28 0.985 | 52,0 41 | 62% / 1200 | |||
| 3.5 - | 2:42 0.556 | 43,5 30 | 62% / 1200 | ||||
| 2.0 - | 2:42 0.406 | 38,3 28 | 62% / 1200 | ||||
| 20°C 3.5 | 20 1:01 | 0.213 43 | 20 65% / 1000 | ||||
| Cotton (60°C) | 7.0 60 | 1:30 1.385 | 65 60 70% / 800 | ||||
| Mix 60°C 7.0 | 40 1:20 | 1.210 65 | 40 65% / 1000 | ||||
| Mix 40°C 7.0 | 40 3:48 | 0.742 65 | 40 65% / 1000 | ||||
| Quick 15' 2.0 | Cold 0:15 | 0.030 | 40 Cold 70% / 800 |
- The above data is for reference only, and the data may change due to different actual use conditions.
- The values given for programmes other than the ECO 40-60 programme are indicative only. • For EU Countries: Concerning EN 60456:2016/prA2019 with (EU)2019/2014, (EU)2019/2023, the EU energy efficiency class is: D. Energy test program: ECO 40-60. Other as default. Half load for 7.0 kg machine: 3.5 kg. Quarter load for 7.0 kg machine: 2.0 kg.
1) The highest temperature reached by the laundry in the wash cycle for at least 5 minutes. 2) Residual moisture after the wash cycle in water content percent and the spin speed at which this was achieved. 3) The ECO 40-60 programme is able to clean normally soiled cotton laundry declared to be washable at 40°C or 60°C, together in the same cycle. This programme is used to assess compliance with regulation (EU) 2019/2023.
The most efficient programmes in terms of energy consumption are generally those that perform at lower temperatures and longer duration.
Loading the household washing machine up to the capacity indicated for the respective programmes will contribute to energy and water savings.
Noise and remaining moisture content are influenced by the spinning speed: the higher the spinning speed in the spinning phase, the higher the noise and the lower the remaining moisture content.

Caution!
- If there is any break in the power supply while the machine is operating, a special memory stores the selected programme and when the power is restarted, the program will continue.
Programmes
You can choose a different washing programme, depending on the laundry type, level of dirt, and laundry weight.
| Programmes Description | |
| Cotton | Hard-wearing textiles, heat-resistant textiles made of cotton or linen. |
| Hygiene | Washing the baby's clothes, it can make the baby's wear cleaner and make the rinse performance better to protect the baby skin. |
| Rapid 45' Washing few and not very dirty clothes quickly. | |
| Mix | Mixed load consisting of textiles made of cotton and synthetics. |
| Jeans Special programme for Jeans | |
| Quick 15' | Extra short programme approx. suitable for lightly soiled washing as a small amounts of laundry. |
| Delicate | For delicate, washable textiles, e.g. made of silk, satin, synthetic fibres or blended fabrics. |
| Spin Only Extra Spin. | |
| Rinse & Spin Extra Rinse with Spin. | |
| ECO 40-60 | Default 40°C,not selectable,suitabale for laundry washing at about 40°C-60°C.. |
| 20°C | Washing brightly colored clothes, it can protect the colors better. |
Options
| Cycle | Default Temp. (°C) | Default spin speed in rpm | Additional functions |
| Cotton | Cold 800 | ➊, ➁, ➁ | |
| Cotton 30°C | 30 800 | ➊, ➁, ➁ | |
| Cotton 40°C | 40 800 | ➊, ➁, ➁ | |
| Cotton 60°C | 60 800 | ➊, ➁, ➁ | |
| Hygiene 90°C | 90 1000 | ➊, ➁, ➁ | |
| Delicate | 20 600 | ➊, ➁ | |
| ECO 40-60 | - 1200 | ➊ | |
| Spin Only | - 1000 | ➊ | |
| Rinse & Spin | - 1000 | ➊, ➁ | |
| Jeans | 60 1000 | ➊, ➁, ➁ | |
| Mix 60°C | 60 1000 | ➊, ➁, ➁ | |
| Mix 40°C | 40 1000 | ➊, ➁, ➁ | |
| 20' | 20 1000 | ➊, ➁ | |
| Rapid 45' | 40 800 | ➊, ➁, ➁ | |
| Quick 15' | Cold 800 | ➊ |

Note
- For the maximum spin speed, program time, and other details of the ECO 40-60 program, please refer to the content on the Product Fiche page by scanning the QR code at the last page of this user manual or scanning the QR code on the Energy label, or visit www.vivax.com. The table shows which cycle offers which options for adjustment.
EXTRA FUNCTIONS
Optional Functions
Speed:

Press the button to change the spin speed.
1200 rpm model: 0-600-800-1000-1200
Delay:
Delay
Set the Delay function:
- Select a programme
- Press the Delay button to choose the time (the delaying time is 3h-6h-9h-12h)
- Press [Start/Pause] to commence the delay operation


Choose the programme, set delay time, start
Cancel the Delay function:
Press the [Delay] button until the display light turns OFF.
It should be pressed before starting the programme.
If the programme has already started, press the [On/Off] button to reset the programme.

Caution!
- If there is any break in the power supply while the machine is operating, a special memory stores the selected programme and when the power is restarted, the program will continue.
Prewash:

The Prewash function can get an extra wash before the main wash; it is suitable for washing clothes with dust on the surface. You need to put detergent into Compartment I when selecting it.
Extra Rinse:

The laundry will undergo an extra rinse once after you select it.
Child Lock:

To avoid misoperation by children:
![graph TD A["Delay"] --> C["Lock Icon"] B["Function"] --> C["Lock Icon"]](/content/2026/06/1405252/images/574eaffae1e618935c70f23bc59170c8cb0971d27e9c497174dba6d6a0cf4ee0.jpg)
Press [Delay] and [Function] for 3 seconds until the buzzer beeps.

Caution!
- When the Child Lock is activated, the LED light "Lock" will be activated.
- Pressing any other button will cause the Child Lock indicator to flash for 3 seconds.
- Press the two buttons [Delay] and [Function] for 3 seconds to release the function. The Child Lock will lock all buttons except the ON/OFF button.
- If the power supply is cut off, the Lock function will be released.
- The child lock will remain effective when the power is resumed for some modes.
CLEANING AND CARE

Warning
Before your maintenance starts, please unplug the machine and close the tap.
Cleaning the Cabinet
Proper maintenance on the washing machine can extend its working life. The surface can be cleaned with diluted nonabrasive neutral detergents when necessary.
If there is any water overflow, use the wet cloth to wipe it off immediately.
Do not use hard brushes, clean steel balls, wire brushes, abrasives, such as toothpastes, organic solvents (such as alcohol, acetone, banana oil, etc.), boiling water, acid or alkaline items.
Do not rinse with water so as not to affect the electrical insulation properties. Please use a dry cloth

when cleaning lighting lamps, temperature control knob and electrical components.

Note
- Formic acid and its diluted solvents or equivalent are forbidden, such as alcohol, solvents or chemical products etc.
Cleaning the Drum
The rusts left inside the drum by the metal articles shall be removed immediately with chlorine-free detergents. Never use steel wool.

Note
- Don't put laundry in the washing machine during the drum cleaning.
Cleaning the Inlet Water Filter

Note
- Inlet filter must be cleaned if inlet water flow decrease.
Washing the filter in the tap:
- Close the tap.
- Remove the water supply hose from the tap.
- Clean the filter.
- Reconnect the water supply hose.


Washing the filter in washing machine:
- Close the tap.
- Screw off the inlet pipe from the backside of the machine.
- Pull out the filter with long nose pliers and reinstall it back after being washed.
- Use the brush to clean the filter.
- Reconnect, turn on the tap and check that no water leakage.


Note
■ If the brush is not clean, you can pull out the filter washed separately; ■ Reconnect, turn on the tap.
Cleaning the Detergent Drawer:
- Press down the arrow location on softener cover inside the drawer.
- Lift the clip up and take out the softener cover, then wash all grooves with water.
- Restore the softener cover and push the drawer into position.

Pull out the dispenser drawer by pressing the A button.

Clean the dispenser drawer under water.

Insert the dispenser drawer.

Note:
- Do not use alcohol, solvents, or chemical products to clean the machine.
- Clean the detergent dispenser every 3 months to ensure the normal operation of the appliance.
Cleaning the Drain Pump Filter:

Open the lower cover cap.

Open the filter by turning it counterclockwise.

Remove extraneous matter.

Close the lower cover cap.

Warning:
■ Be careful of the hot water! Allow water inside the machine to cool down. ■ Unplug the machine to avoid electrical shock before cleaning. The drain pump filter can filter small foreign matters from the washing, but larger particles can get stuck in the filter and block water drainage. Clean the filter periodically every 6 months, or if you find that the filter is blocked, to ensure the normal operation of the washing machine.

Caution!
- Please insert the drain plate, aligning it with the hole, to collect drain water when you remove the filter, because water may leak after you remove the filter cap.
- When the appliance is in use and depending on the programme selected, there can be hot water in the pump. Never remove the pump cover during a wash cycle; always wait until the appliance has finished the cycle and is empty. When replacing the cover, ensure it is securely re-tightened.
Transport
- Before Transport:
- Bolts shall be reinstalled to the machine by a specialized person.
- Accumulated water shall be drained out of the machine.
- This appliance is heavy. Transport with care. Never hold any protruding part of the machine when lifting. The machine door cannot be used as a handle.
- The appliance should be transported in its original box and partitions, or as wrapped with a soft cloth.
- Incorrect packaging may cause damage to the outer surface of the appliance.
- Hold the unit around its sides or base when moving it. Under no circumstances should it be lifted by holding the edges of the top surface.
- Do not turn upside down, place horizontally, or vibrate the machine.
NOTE:
Any malfunction or damage caused during loading, unloading, or transport after the delivery of the product to the customer is not covered by the warranty.
Switching Off for Long Periods of Time
When the unit is not in use for a long period of time, disconnect the machine from the mains supply, empty the drum, and close the water tap.
Keep the door open to avoid bad odors.
Do not store the machine in a room where the temperature may be lower than 0°C.
Freezing water may damage parts of the machine.
TROUBLESHOOTING

Note
- The following simple issues can be handled by the user. Please call the after-sales service department if the issues are not resolved.
| Description Reason | Solution | |
| Washing machine cannot start up | ·Door is not closed properly | ·Restart after the door is closed ·Check if the clothes is stuck |
| Door can't be open | ·This is normal. ·The safety protection mechanism is active. Please wait a few minutes. | ·Wait that Program Cycle is finished. After washing program is finished, a few minutes later door will be unlocked. ·Disconnect the power, restart the product |
| Water leakage | ·The connection between inlet pipe or outlet hose is not tight ·The Filter cap is not tight. | ·Check and fasten water pipes and Drain Pump Filter cap. ·Clean up outlet hose and Drain Pump Filter. |
| Detergent residues in the box | ·Detergert is dampened or agglomerated | ·Clean and wipe the detergent box |
| Indicator or display does not light | ·Disconnect the power PC board or harness has connection problem | ·Check if the power is shut down and the power plug is connected correctly |
| Abnormal noise | · | ·Check if the fixing (bolts) have been removed ·Check it's installed on a solid and level floor |
Error Code Description
In case of a malfunction, button lights will flash.
To solve a problem, please refer to the table below:
| Description Reason Solution | ||
 | Door is not closed properlyRestart after the door is closedCheck if the clothes is stuck | |
 | Water inlet problemCheck if the water pressure is too lowStraighten the water pipeCheck if the inlet valve filter is blocked | |
 | Water overflow in the drumCheck and fasten water pipes and Drain Pump Filter cap.Clean up outlet hose and Drain Pump Filter. | |
 | Overtime water drainingCheck if the drain hose is blocked.Drain Water Pump is blocked-Clean Drain Pump Filter | |
| Others | OthersPlease try again first, call up service line if there are still troubles | |

Light OFF Light Flash

Note
■ After the check, activate the appliance. ■ If the problem occurs again, please contact the authorized service.
TECHNICAL SPECIFICATIONS
| Model: WTL-120715B | |
| Rated Voltage: 220-240V, 50Hz | |
| Rated Current 10A | |
| Rated power 2100W | |
| Standard Water pressure | 0,05-1Mpa |
| Washing Capacity 7,0 kg | |
| Dimension (WxDxH) 400*6 | 10*875 mm |
| Net weight | 56 kg |
CUSTOMER SERVICE
Spare parts for your appliance are available for a minimum period of 10 years after placing the last unit of the model on the market.
In case of questions, please contact our customer service at the attached service network or your distributor: M SAN Grupa d.d., Buzinski prilaz 10, Zagreb, Croatia.
The following spare parts are available at distributor M SAN Grupa d.d. or MR Servis:
Door, door hinges and seals, other seals, door locking assembly, and plastic peripherals such as detergent dispensers.
Warning!
Risk of electric shock.
Never try to repair an appliance that is defective or presumed to be defective.
You may put your own and future users' lives in danger. Only authorized specialists are allowed to carry out this repair work.
Improper repair will void the warranty and subsequent damages cannot be recognized!
Disposal, EU Declaration of Conformity
Disposal of electrical and electronic equipment

To protect our environment and to recycle the raw materials used as completely as possible, the consumer is asked to return unserviceable equipment to the public collection system for electrical and electronic equipment.
The symbol of the crossed-out wheeled bin indicates that this product must be returned to the collection point for electronic waste to be recycled as best as possible for raw material recycling.
By ensuring this product you will prevent possible negative effects on the environment and human health, which could otherwise be caused due to improper disposal of that product. The recycling of materials from this product will help to preserve a healthy environment and natural resources.
For detailed information about the collection of EE products, contact the dealer where you purchased the product.
This device is manufactured in accordance with the applicable European standards and in accordance with all applicable Directives and Regulations.

EU declaration of conformity can be downloaded from the following link: www.msan.hr/dokumentacijaartikala
Product information sheet (EU) 2019/2014)
Product Information sheet data entered into the EPREL database
For more info and Product Information sheet, please scan QR code or visit Vivax web site: www.vivax.com

WARRANTY CERTIFICATE
VIVAX
HR
MODEL OF THE DEVICE
SERIAL NUMBER
DATE OF SALE
SELLER'S INVOICE NUMBER
SELLER'S SIGNATURE AND STAMP
- With this warranty, M SAN Grupa as the warranty provider in the Republic of Croatia guarantees free repair of the device in accordance with applicable regulations and the conditions described in this warranty certificate. With this warranty, we guarantee that the subject of this warranty will operate without errors caused by possible poor workmanship or poor materials. All possible defects will be repaired free of charge at an authorized service center within the warranty period.
- WARRANTY TERMS: The warranty period begins from the date of purchase of the product and lasts:
| 60 MJESECI (5 godina) | HLADNJACI,VERTIKALNE I HORIZONTALNE LEDENICE |
| 36 MJESECI (3 godine) | SAMOSTOJEĆI ŠTEDNJACI, PERILICE I SUŠILICERUBLJA, PERILICE SUĐA, KUHINJSKE NAPEUGRADBENE PEĆNICE I PLOČE, KUHINJSKE NAPEGRIJALICE VODE |
- In the event of a malfunction of the product covered by this warranty, we undertake to repair it as soon as possible, but no later than within 45 days. If the product cannot be repaired or is not repaired within 45 days, it will be replaced with a new one. The warranty will be extended for the duration of the repair.
- The warranty is recognized only with the purchase receipt and this warranty card, which must be properly filled out, i.e., it must contain the date of sale, stamp, and signature of the seller.
- THE WARRANTY DOES NOT COVER
SIGNATURE AND STAMP OF THE SELLER
WARRANTY DECLARATION
- With this warranty, the manufacturer of the product, through KIM TEC d.o.o., as the importer and warranty provider in Bosnia and Herzegovina, guarantees free repair of the product in accordance with applicable regulations and the conditions described in this warranty card. With this warranty, we guarantee that the subject of this warranty will operate without defects caused by possible poor workmanship and poor materials. Any defects that may occur will be repaired free of charge at an authorized service center during the warranty period.
- WARRANTY TERMS: The warranty period begins from the date of purchase of the product and lasts:
| 60 MJESECI (5 godina) | HLADNJACI,VERTIKALNE I HORIZONTALNE ŠKRINJE |
| 36 MJESECI (3 godine) | ŠTEDNJACI, PERILICE I SUŠILICE RUBLJA, PERILICESUĐA, KUHINJSKE NAPE, UGRADBENE PEĆNICE IPLOČE, GRIJALICE VODE |
- In the event of a malfunction of the product covered by this warranty, we undertake to repair it as soon as possible, but no later than within 45 days. If the product cannot be repaired or is not repaired within 45 days, it will be replaced with a new one.
- The warranty is only recognized with the purchase receipt and this warranty card, which must be properly filled out, including the date of sale, stamp, and signature of the seller.
- The warranty provider ensures service and spare parts for 7 years from the date of purchase.
THE WARRANTY DOES NOT COVER:
- WARNING
- CONTENTS
- DEAR
- INSTALLATION
- INSTALLATION LOCATION
- UNPACKING THE MACHINE
- REMOVING THE TRANSPORT SCREWS
- NOTE
- CONGRATULATIONS
- QUICK START
- CAUTION
- WASHING
- AFTER WASHING
- CLEANING THE DRUM
- CLEANING THE INLET FILTER ON THE WASHING MACHINE
- CLEANING THE DETERGENT DRAWER
- DEAR CUSTOMER
- CONNECT THE OTHER END OF THE HOSE TO THE INLET VALVE ON THE BACK OF THE MACHINE AND TIGHTEN IT FIRMLY CLOCKWISE
- DRAIN HOSE
- THERE ARE TWO WAYS TO POSITION THE END OF THE DRAIN HOSE
- DETERGENT DRAWER
- CLEANING THE INLET FILTER
- TRANSPORT
- ATTACH THE OTHER END OF THE HOSE TO THE INLET VALVE ON THE BACK OF THE MACHINE AND TIGHTEN IT CLOCKWISE
- CONNECTION TO THE DRAIN OUTLET
- SAFETY WARNINGS
- MEANING OF SAFETY WARNING SYMBOLS
- ELECTRIC SHOCK
- RISK TO CHILDREN
- RISK OF EXPLOSION
- INSTALLING THE PRODUCT
- OPERATING THE APPLIANCE
- ELECTRICAL CONNECTION
- WATER CONNECTIONS
- OPERATION AND MAINTENANCE
- INTENDED USE
- PRODUCT DESCRIPTION
- ACCESSORIES
- INSTALLATION AREA
- UNPACKING THE WASHING MACHINE
- REMOVE TRANSPORT BOLTS
- LEVELLING THE WASHING MACHINE
- CONNECT WATER SUPPLY HOSE
- CONNECT IT TO THE BRANCH DRAIN PIPE OF THE TROUGH
- BEFORE WASHING
- BEFORE EACH WASHING
- CONTROL PANEL
- ON/OFF
- START/ PAUSE
- OPTION
- WASHING PROGRAMMES
- DISPLAY
- PROGRAMMES
- OPTIONS
- EXTRA FUNCTIONS
- OPTIONAL FUNCTIONS
- SPEED
- DELAY
- SET THE DELAY FUNCTION
- CANCEL THE DELAY FUNCTION
- PREWASH
- EXTRA RINSE
- CHILD LOCK
- CLEANING AND CARE
- CLEANING THE CABINET
- CLEANING THE INLET WATER FILTER
- WASHING THE FILTER IN THE TAP
- WASHING THE FILTER IN WASHING MACHINE
- CLEANING THE DRAIN PUMP FILTER
- SWITCHING OFF FOR LONG PERIODS OF TIME
- TROUBLESHOOTING
- ERROR CODE DESCRIPTION
- TECHNICAL SPECIFICATIONS
- CUSTOMER SERVICE
- DISPOSAL, EU DECLARATION OF CONFORMITY
- DISPOSAL OF ELECTRICAL AND ELECTRONIC EQUIPMENT
- PRODUCT INFORMATION SHEET (EU) 2019/2014)
- WARRANTY CERTIFICATE
- VIVAX
- SIGNATURE AND STAMP OF THE SELLER
- WARRANTY DECLARATION
- THE WARRANTY DOES NOT COVER
Brand : Vivax
Model : WTL-120715B
Category : Dishwasher