
MX-HG6401 - Blender PANASONIC - Free user manual and instructions
Find the device manual for free MX-HG6401 PANASONIC in PDF.


| Product Type | Blender |
| Brand | Panasonic |
| Model | MX-HG6401 |
| Jar Capacity | 1.5 liters |
| Jar Material | Glass |
| Power Consumption | 800 W |
| Speed Settings | 2 speeds + pulse |
| Blade Material | Stainless steel |
| Control Type | Rotary switch |
| Safety Features | Non-slip feet, overload protection, safety lock |
| Dishwasher Safe Parts | Jar and lid |
| Dimensions (HxWxD) | 40 x 18 x 18 cm |
| Weight | 2.5 kg |
| Cord Length | 1.2 m |
| Functions | Blending, pureeing, crushing ice |
| Cleaning | Easy-clean design, removable blades |
| Warranty | 2 years |
| Repairability | Spare parts available, service centers |
Frequently Asked Questions - MX-HG6401 PANASONIC
User questions about MX-HG6401 PANASONIC
0 question about this device. Answer the ones you know or ask your own.
Ask a new question about this device
Download the instructions for your Blender in PDF format for free! Find your manual MX-HG6401 - PANASONIC and take your electronic device back in hand. On this page are published all the documents necessary for the use of your device. MX-HG6401 by PANASONIC.
USER MANUAL MX-HG6401 PANASONIC
Operating Instructions
Operating Instructions
Operating Instructions
Cooking Blender (Household Use)
Cooking Blender (Household Use)
Thank you for purchasing this Panasonic product.
- Please read these instructions carefully to use the product correctly and safely.
- Before using this product, please give your special attention to "Safety Precautions" and "Important Information" (P. EN2-EN5).
- Please keep the warranty certificate and this Operating Instructions properly for future use.
- Panasonic will not accept any liability if the appliance is subject to improper use or for failure to comply with these instructions.
Contents
Safety Precautions ...... EN2 Important Information......EN5 Parts Names and Instructions....EN6 Control Panel Instructions...... EN7 How to Use......EN9 Recipe Recommendations in Automatic Mode...... EN10 Recipe Recommendations in Manual Mode......EN11 How to Clean...... EN12 Troubleshooting ...... EN13 Replacement Parts ...... EN14 Specifications ...... EN14
Safety Precautions
Please make sure to follow these instructions.
In order to prevent accidents or injuries to the user, other people, and damage to property, please follow the instructions below.
The following signals indicate the degree of harm and damage when the product is misused.

WARNING: Indicates potential hazard that could result in serious injury or death.

CAUTION: Indicates potential hazard that could result in minor injury or property damage.
The symbols are classified and explained as follows.

This symbol indicates prohibition.

This symbol indicates a requirement that must be followed.

WARNING
To avoid risk of electric shock, fire due to short circuit, smoke, scald or injury.

- Do not allow infants and children to play with the packaging materials. (It may cause suffocation.)
- Do not disassemble, repair or modify this appliance.
→ Contact Panasonic Service Centre for inspection or repair.
- Do not damage the power cord or power plug.
Following actions are strictly prohibited:
Modifying, touching on or placing near heating elements or hot surfaces, bending, twisting, pulling, hanging/pulling over sharp edges, putting heavy objects on top, bundling the power cord or carrying the appliance by the power cord.
To avoid risk of electric shock, fire due to short circuit, smoke, scald or injury.

- Do not use the appliance if the power cord or power plug is damaged or the power plug is loosely connected to the outlet.
→ If the power cord is damaged, it must be replaced by the manufacturer, its service center or similarly qualified person in order to avoid a hazard.
- Do not plug or unplug the power plug with wet hands.
- Do not immerse the appliance, power cord or power plug in water (or any liquid), or splash it with water or any liquid.
● The blender jug handle and jug lid are equipped with magnetic safety locks. Do not immerse them in water or any liquid.
- Be careful not to wet the coupler and upper/lower connectors when cleaning or using the blender jug and the body.
- Ensure that the power cord does not dangle over the edge of the table or work top and prevent it from contacting with high-temperature surfaces. Unplug the plug when the appliance is not in use. Please be careful with the residual heat after use.
- Do not touch high-temperature parts during or after use, such as blender jug, upper and lower connectors, etc.
- Keep the appliance and its power cords and power plugs out of reach of infants and children.
● Make sure to set the appropriate time for preparing the menu. Over-mixing the ingredients can cause overheating and potentially create a safety hazard.
● This appliance is strictly prohibited from running idle or being used under overload conditions.

● This appliance is not intended for use by persons (including children) with reduced physical, sensory or mental capabilities or a lack of experience and knowledge, unless they have been given supervision or instructions concerning use of the appliance by a person responsible for their safety. Children should be supervised to ensure that they do not play with the appliance.
- Insert the power plug into outlet firmly.
● Make sure that the voltage indicated on the label of the appliance is the same as your local supply.
Also avoid plugging other devices into the same outlet to prevent electric overheating. However, if you are connecting a number of power plugs, make sure that the total wattage does not exceed the rated wattage of the outlet.
● Dust off the power plug regularly.
→ Unplug the power plug and wipe with a dry cloth.
→ Unplug and disconnect from the power supply before cleaning. Ensure that the power plug and outlet are dry before using them again.
- Switch off the appliance and disconnect from supply before changing accessories or approaching parts that move in use.
- Be careful if hot liquid is poured into the blender jug as it can be ejected out of the appliance due to sudden steaming.
● Turn off the power and unplug the power plug first before removing the blender jug from the body.
● To prevent any accidents, do not put your hand into the blender jug when it is attached to the main body.
● Discontinue using the appliance immediately and unplug it in the unlikely event that this appliance stops working properly.
Examples for abnormal occurrences or breaking down:
The power plug or the power cord become abnormally hot.
Damaged power cords and power failure.
The body is deformed, has visible damage or is abnormally hot.
There is an unpleasant smell.
It makes unusual noises when in use.
There are other abnormalities or failures.
Unplug immediately and contact Panasonic Service Center for inspection or repair.
The blender jug is intended for use with the supplied base.
CAUTION
To avoid risk of electric leakage, electric shock, fire due to short circuit, scald, injury or property damage.

- Do not use the appliance for any purpose other than those specified in the Operating Instructions.
- Do not use the appliance close to walls, furniture, or in confined spaces such as built-in cabinets.
Otherwise, it may cause discoloration or deformation.
Do not move the appliance by holding the power cord.
- Do not place any objects on the appliance or insert any object in the bottom/gaps of the appliance. Do not use the appliance on the following places.
On uneven surfaces, on carpets, non-waterproof surfaces, or tablecloths etc. Place where it may be splashed with water or near a heat source. Near any open water source such as bathtubs, sinks or other containers. Place the appliance on a firm, dry, clean, flat and heat-resistant worktop.
- Do not substitute any components of the appliance with anything other than its original attachments.
- Do not put your fingers or utensils such as spoon or fork into the blender jug while the appliance is operating.
- Do not exceed the maximum when adding ingredients to the blender jug. (P. EN6)
- When taking the mixture out of the blender jug, avoid using your hands directly. Instead, use an implement such as a rubber spatula or spatula.
- Do not heat in any container that is not provided with the appliance.
- Do not use an external timer, etc. The appliance is unable to work when it is connected to an external timer or an external independent remote control system.
- Do not operate the appliance if the jug lid is not properly secured.
● Do not leave the appliance unattended while in use. - Do not open the jug lid or take apart the blender jug while the appliance is in use. - If the appliance gets stuck while in use, immediately disconnect it from the power supply, unplug and remove the blender jug. Carefully remove the ingredient that is jamming the blade. Wait for the appliance to cool down before continuing to use it. ● Make sure to hold the power plug when unplugging it. Never pull on the power cord. ● Beware not to trip over or get caught in the power cord while in use. ● To prevent accidents, be careful when opening the jug lid while using this appliance and even after use, as it can release steam that may scald you. - Only open the jug lid or remove the blender jug from the body when the blade has completely stopped. - Be sure to disconnect the appliance from the power supply and unplug it from the power outlet when it is not in use. This is particularly important before installing, disassembling, moving or cleaning the appliance. Before you use the appliance again, ensure that it is completely dry. ● Make sure that the attachments are clean and properly installed when using the appliance. ● Care shall be taken when handling the sharp blades, emptying the blender jug and during cleaning. Do not clean the blade with your bare hands. ● Wait until the appliance cools down before moving or cleaning it. - Be careful while pouring out the ingredients and avoid tilting the appliance excessively. - Refer to the Specifications for information on time of use and operations when using the appliance. (P. EN14 "Specifications") - Ensure to clean the appliance after use, especially surfaces in contact with food. (P.EN12 "How to Clean") ● This appliance is intended for household use only.

Important Information
- Do not place the blender jug on any heat sources or in a microwave.
- Do not drop the appliance to avoid damaging it. ● Do not use the appliance outdoors.
- Do not wrap the power cord around the body. ● Ensure that the safety device has been securely installed and fastened before use. ● After the hot food is prepared, the blender jug may become too heavy to lift using just one hand. To handle this, you can put on thick, heat-resistant gloves, firmly hold the blender jug with both hands and carefully pour out the cooked meal.
- Do not use the appliance unless the ingredients have been added.
- Do not use the blender jug to store food or liquids for an extended period.
- If the appliance is not used for an extended period, store it in a dry and well-ventilated area to prevent any moisture buildup and the growth of mold.

This symbol on the appliance indicates "Hot surface and should not be touched without caution".
Parts Names
Clean all parts before using the appliance for the first time or when you have not used it for a while. (Please follow the cleaning instructions on P. EN12.)

● Find and use your own rubber spatula or scraper for removing cooked meals or food from the blender jug. ● Also, find and use your own thick, heat-resistant gloves if you need them.
Operation Panel
General Function:
| Name of Function Method of Operations | |
| Start/Set | Start/SetIt is used to set the temperature, adjust the time, or initiate the operations of the appliance. |
| Stop | StopPress and hold for 2 seconds to return to the initial screen. |
| < > | Tap: Modify temperature, rotational speed and time. Press and hold: Quick switch. |
Customized Function:
| Name of Function Method of Operations | |
| MManual | Manual ModeIn Standby mode, tap the “M” button to switch to Manual mode.1 Tap either “<” or “>to adjust the temperature. Once the setting is completed, press the “#” button.Selectable temperatures: -- °C, 40 °C, 50 °C, 60 °C, 70 °C, 80 °C, 90 °C, and 100 °C. The program can cycle through the temperature options.Choosing “-- °C” means not to heat up and “” will go out.The initial temperature is set at “-- °C.”2 Tap either “<” or “>to adjust the rotational speed. The program can cycle through the rotational speed options. When the setting is completed, press the “#” button.When the temperature is set to “-- °C” (not heating up), the rotational speed can range from P, L, 1-8 or H, providing a total of 11 different options. Once you tap the “#” button, the appliance does not allow for time setting and automatically starts blending. The P setting enables an Instant Rotation mode, with a maximum blending duration of 60 seconds. For all other settings, the maximum blending duration is 20 minutes. Once the blending process is complete, the appliance automatically stops and returns to the initial screen.When the temperature is set to either 40 °C, 50 °C, 60 °C, 70 °C, 80 °C, 90 °C, or 100 °C, the rotational speed can range from either 0, L, 1-8, or H, providing a total of 11 different options.3 When the rotational speed is set, press the #/l button to access the time settings. Use the “<” or the “>button to adjust the time. When the time is set, press the “#” button to initiate the heating or blending process. (If the temperature setting is “-- °C”, simply skip this step).Adjustable time range: 1 to 60 minutes (0:01 to 1:00)Adjustable by one minute at a time.4 While in Working stateWhen the temperature is set to 60 °C or lower (including 60 °C), the motor doesn’t function at speed 0 and the “#” indicator goes out.When the temperature is set to 70 °C or higher (including 70 °C), the blending continues even if the gear is set to 0 to prevent scorched bottoms.5 You can choose to keep your food warm at 60 °C, with the maximum warming duration being one hour. |
| Timer(This feature is only available for automatic menus with a heating function.) | 1 When on standby, select the menu that can be reserved with “<” or “>Tap the “#” button to access the “Reserve Mode” for the selected menu.2 Adjust the reservation completion time using “<” or “">Adjustable time range: 2 hours - 12 hours (the program can cycle through the options).Adjustable by 30 minutes at a time.The initial reservation time is set for 2 hours.If no adjustments are made within 5 minutes during the setup process or if the “#” button is pressed, the program returns to the initial screen.3 Tap the “#” button to start working.The scheduled time is the completion time, which is dependent on various factors such as the quantity of ingredients and the environment. |
Control Panel Instructions
| Name of Function | Method of Operations |
| Soy MilkCorn MilkNut MilkBaby FoodPorridgeSoup (Pumpkin Soup)Healthy SoupMilk ShakeFruit JamChilli Sauce | Add ingredients, tap “<” or “>” to select a menu and then tap “” to start cooking.1 When a menu is selected, the time and speed cannot be adjusted any more. (The actual time of the Automatic menu may vary depending on the water temperature and ingredients, etc. The display time is a reference value.).2 When the Healthy Soup menu is selected, the ingredients are not ground. |
| Name of Function | Method of Operations |
| Cleaning | It is used to help cleaning the blender jugs.1 After adding 1000 mL of fresh water (adjust the water amount as necessary), press the “button to access the cleaning mode and press the ” button to initiate the cleaning process.If the “button is not pressed within 5 minutes during the setup process, the program will return to the initial screen.2 The cleaning mode is programmed for a duration of 10 minutes, and starts with one minute of blending followed by blending and heating simultaneously later (in a dynamic circular manner). However, note that the actual time may differ from the displayed time due to variations in water temperature or amount. Once the pre-heating process is finished, the countdown shows 3 minutes remaining.The “symbol flashes during heating and ” stays on when the heating process stops.The “symbol flashes during blending and the blending gear remains on.When the blending process comes to a stop, the “symbol stays on, and the blending gear goes out.3 The buzzing sound is heard when the cleaning process is complete.* Make sure that the maximum water amount does not exceed approximately 1200 mL. If there are food residues, adjust the amount of water accordingly.* Make sure that the minimum water amount is approximately 400 mL to prevent the blades from running idle, which could lead to malfunctions or accidents.* When the function is running, the appliance heats up. Therefore, be careful with the residual heat during and after cleaning. |
Every detail in this Operating Instructions has been thoroughly examined. However, if you come across any typographical errors or ambiguities, consult with us for clarification.
Note: Texts and images highlighted with background colors provide supplementary information.
Any technical improvements to the appliance will be incorporated in the updated version of the Operating Instructions without any prior notice.
Note that the appearance and color of the appliance may be subject to changes. Please refer to the actual item.
How to Use
- Cut ingredients into 2 cm (harder ingredients) or 3 - 5 cm (softer ingredients) pieces. Refer to P.EN11 "Preparation of Ingredients" for details.
● Slice the meat into strips and remove any tendons.
- When making fruit and vegetable drinks, remove any seeds from the ingredients.
- Following the recipe, measure each ingredient one by one before adding them into the blender jug.
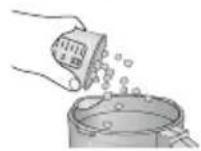
- Place the jug lid over the blender jug in a way that the lid tab and the blender jug protrusion are not aligned and press down the jug lid. Rotate the jug lid clockwise until it cannot be turned any further, ensuring the handle of the lid is vertically aligned with the blender jug handle. Secure the silent anti-spill valve onto the jug lid by turning it clockwise until tight.
The lid gasket should be installed as well.
The blender jug comes with an opening protection feature. If the lid is not properly secured in place, pressing the Start button does not start the appliance; instead, it triggers an error beep.
Tighten the silent anti-spill valve during the operation to prevent burns and injuries.


- Align the icon on the bottom of the blender jug with the icon on the body, then place blender jug onto the base.
- Even when plugged in, the Control Panel does not display anything unless the blender jug is properly installed.
- Choose your preferred menu or set it to Manual mode as needed. Press the button to start operations.
- Once the process is complete, the appliance beeps. Unplug the appliance, remove the blender jug and open the lid.
- Finally, pour out your cooked meal.


Recipe Recommendations in Automatic Mode
| Menu Ingredients and Cooking Methods | |
| Soy Milk | Ingredients: Soybeans (soaked for 12 hours) 70 g (3/4 measuring cup), sugar 35 g (1/3 measuring cup), and water 850 g.Cooking Methods: Put the soybeans soaked for 12 hours together with other ingredients into the blender jug and choose Soy Milk on the panel. |
| Corn Milk | Ingredients: Fresh corn (kernels) 250 g, milk 150 g, condensed milk 50 g and water 250 g.Cooking Methods: Wash and peel the corn. Once all the ingredients are ready, put them into the blender jug. Choose Corn Milk on the panel. |
| Nut Milk | Ingredients: Oats (soaked for 1 hour) 60 g, cashews 75 g, water 980 g.Cooking Methods: Put the oats soaked for one hour together with other ingredients into the blender jug and choose Nut Milk on the panel. |
| Baby Food | Ingredients: Rice 45 g (1/2 measuring cup), glutinous rice 20 g (between 1/5 and 1/3 measuring cup), minced meat 20 g, pumpkin 30 g (1 cm), and water 380 g.Cooking Methods: Wash the rice and glutinous rice thoroughly. Clean the meat and dice it into small pieces. Wash the pumpkin and chop it into sizable chunks. Once all the ingredients are ready, put them into the blender jug and choose Baby Food on the panel. |
| Porridge | Ingredients: Rice 80 g (3/4 measuring cup), minced meat 100 g, water 800 g.Cooking Methods: Wash the rice thoroughly. Clean the meat and dice it into small pieces. Once all the ingredients are ready, put them into the blender jug and choose Porridge on the panel. |
| Soup(Pumpkin Soup) | Ingredients: Pumpkin 500 g (2 cm), white onion 100 g (2 cm), garlic 5 g, chicken broth 350 g, whipping cream 100 g, salt 3 g and a dash of pepper.Cooking Methods: Cooking Methods: Wash and chop the pumpkin and white onions into chunks. Put all the ingredients, excluding the whipping cream, into the blender jug. Choose Soup on the panel and wait for it to complete the process. Once done, stir in the whipping cream and your soup is ready to serve. |
| Healthy Soup | Ingredients: Potatoes 90 g (2 cm), corn 170 g (2 cm), carrot 40 g (2 cm), meat 100 g, water 700 g and salt 3 g.Cooking Methods: Wash and chop the potatoes, corn, carrots, and meat into pieces. Once all the ingredients are ready, put them into the blender jug and choose Healthy Soup on the panel. |
| Milk Shake | Ingredients: Banana 100 g (3~5 cm), frozen strawberries (cut into 2 cm pieces and frozen for over 24 hours) 200 g, syrup 45 g, ice cubes 100 g and almond milk 500 g.Cooking Methods: Wash the strawberries thoroughly, chop them into pieces and then place them in the freezer for a minimum of 24 hours. Slice the bananas into pieces. Once all the ingredients are ready, put them into the blender jug and choose Milk Shake on the panel.Note: It is recommended to use ice cubes of less than 10 g. There may be ice residue depending on the size of the ice cubes. |
| Fruit Jam | Ingredients: Strawberries 400 g, sugar 200 g (2 and 1/5 measuring cup) and lemon juice 25 g.Cooking Methods: Wash the strawberries thoroughly and chop them into pieces. Once all the ingredients are ready, put them into the blender jug in order. Choose Fruit Jam on the panel.(Please remove the silent anti-spill valve when cooking.)Note: The ripeness of strawberries may affect the thickness of the finished product. |
| Chilli Sauce | Ingredients: Tomato 400 g (3~5 cm), chilli 200 g (3 cm), garlic 50 g oil 50 g vinegar 50 g,syrup 50 g, flour 15 g (between 1/5 and 1/3 measuring cup), salt 5 g and water 150 g.Cooking Methods: Wash and chop the tomatoes and chilli into pieces. Once all the ingredients are ready, put them into the blender jug in order. Choose Chilli Sauce on the panel. |
The flavor of the final dishes can be affected by a variety of factors, including the season, temperature, amount of ingredients or even the cooking utensils. Therefore, make necessary adjustments based on the actual conditions.
When cooking hard ingredients like fish bones, make sure to use a sieve to get rid of them to prevent accidental swallowing.
The Automatic menu features pre-set time, speed and temperature. The appliance automatically turns off once the menu is completed.
When there is milk difference or when the ratio of milk to water is higher than the recommended menu amount, it may result in overflow or a mushy bottom.
The actual cooking time for a reservation menu may vary from the initial reservation time, depending on the conditions of the appliance being used.
Recipe Recommendations in Manual Mode
| Menu Ingredients and Cooking Methods | |
| Ice Crush | Ingredients: Ice cubes (8 g ~ 10 g / cube) 220 g.Cooking Methods: Place the ice cubes in the blender jug, adjust the temperature to “-- °C”, switch the speed to P gear and begin crushing the ice.Note: Use the blender jug that has been cooled with ice water for a better smoothie. Keep the blender jug dry before making the smoothie. The maximum amount of ice can not exceed 220 g or the blade may not work properly and an error code will appear.U53 error code solution: Press Stop button to return to the initial page. Pour out all the ice cubes, then put them back into the blender jug and restart again. (If the appliance has no response, it means that the temperature of motor is too high and the appliance has entered the protection mode.Disconnect the power and let it rest for more than 10 minutes. Then restart the procedures with new ice cubes.) If other error codes appear, refer to P.EN14 for troubleshooting methods. |
● For harder ingredients like carrots, pumpkin, and potatoes, chop them into cubes of 2 cm. ● For softer ingredients like bananas and tomatoes, cut them into larger cubes of 3-5 cm. ● Leafy and stem vegetables: Chop into small pieces, about 3-5 cm in size. ● Nuts: Ensure to remove the shell and skin. ● Grains: Pre-cook or soak in water to soften before use. Frozen fruits: Always blend with a liquid. Blending only frozen fruits may cause the blender to run idle. ● Other frozen ingredients: Thaw them before blending.
Handling Precautions
- Never use the appliance to blend or grind dried goods and hard ingredients (like large bones). The ingredient measurements in these recipes are based on a standard water level. Adjust the total quantity of ingredients to suit the water level and the specific ingredients you are using. To prevent overflows or scorched bottoms, the maximum capacity for heating should not exceed 1400 mL (For Soy milk and Nut milk functions, the maximum capacity should not exceed 1200 mL), and the maximum capacity for cold drinks should not go beyond 1750 mL. The minimum amount should not be less than 500 mL, otherwise it will easily cause the blade to idle.
- Do not heat dense liquids like milk, grain porridge, or cold rice paste using the appliance, as it could lead to scorching and an unpleasant odor.
- When making porridge, rice paste, soup, and similar dishes, it is essential to choose the appropriate function button. Failing to do so could result in a poorly tasting or undercooked dish and in extreme cases, it could even overflow or burn.
- When using this appliance, avoid adding sugar, brown sugar, or other seasonings directly to the bottom of the blender jug. This is to prevent these seasonings from sticking to the bottom of the blender jug during the heating process.
- Once the ingredients start to boil (this is when the countdown begins), do not stop the program. If it's accidentally suspended, avoid using the heating function to resume cooking, as this could cause the hot food to boil over or stick to the bottom. Instead, replace the ingredients and re-select the appropriate function, or cook them in a pot first before grinding them in the Custom mode.
- During the heating process of hot drinks, dynamic "----" will be displayed. When the temperature inside the blender jug exceeds 70 °C, the temperature inside the blender jug and dynamic "----" will be displayed interactively (temperature change in units of 5 °C). During the countdown time, the temperature inside the blender jug and the remaining time will be displayed interactively. The displayed temperature and the actual temperature will vary depending on the measurement position and the ingredients. (Temperature is not displayed for the Fruit Jam menu.)
How to Clean
● Unplug and disconnect from the power supply before cleaning.
● Clean the appliance before using it for the first time and after use.
● Disassemble all removable parts before cleaning.
● Use the brush to clean the blender jug.
- Ingredients like fruits and vegetables may cause discoloration on the parts, but this does not affect their function.

CAUTION
- Do not use volatile oils, diluting agents, alcohol, bleach, abrasive powders, metal brushes or nylon brushes as they can damage the surface of the appliance.
● The body, jug lid, silent valve cover, silent valve and blender jug should not be cleaned in a dishwasher.
● Sharp objects like toothpicks or pins should not be used to clean the appliance.
- To prevent damage to the coupler or internal structure, do not submerge the jug lid, blender jug and body in water.
- Avoid directly rinsing the coupler at the bottom of the blender jug to prevent malfunction and potential accidents.
- Keep the appliance, its power cord and packaging attachments out of direct sunlight.
● Be sure to wait until the appliance cools down before cleaning.
● Rinse the interior of the blender jug and its attachments with water and then dry them.
Care shall be taken when cleaning the sharp blades to avoid cutting yourself.
| Silent Valve Cover | Silent Valve | Jug Lid Lid | Gasket Blender | Jug Body | Measuring Cup | Scraper | Brush | ||
 |  |  |  |  |  |  |  | [78AA] | |
| Running Water | √ | √ | √ | √ | √ | ||||
| Dishwasher | X | X | X | X | X | X | X | X | X |
| Well-wrung Damp Cloth | √ | √ | √ | √ | √ | √ | |||
| Brush | √ | √ | √ | √ | √ | X | X | √ | √ |
| Scouring Pad | X | X | X | X | X | X | X | X | X |
| Soft Sponge | √ | √ | √ | √ | X | √ | √ | ||
| Remark | Clean these items with a mild, neutral dish-washing detergent and a soft sponge, taking care to avoid the coupler at the bottom of the blender jug. Rinse them thoroughly with water and dry them well. | Wipe it down with a wet cloth that is thoroughly wrung out. Be careful not to wet the coupler. | Clean these items with a mild, neutral dish-washing detergent and a soft sponge. Rinse them thoroughly with water and dry them well. | ||||||
Troubleshooting
Before calling for service, please check through this section.
Problem Culture and Action
Overflows

● Excessive amount of ingredients
→ Add ingredients as per the instructions for the required quantity.
● Excessive amount of water
→ Fill the water up to the indicated water level.
● Selected a wrong function
→ Choose the correct function as per the instructions.
● Product malfunction
→ Contact your local after-sales service for repair.
● The jug lid was not properly secured
→ Ensure that the jug lid is properly attached.
Scorched bottoms

● Excessive amount of ingredients
→ Add ingredients as per the instructions for the required quantity.
● Wrong ingredients
→ Do not add ingredients that can easily cause scorched bottoms.
● Insufficient amount of water
→ Fill the water up to the indicated water level.
● The bottom of the blender jug isn't clean
→ Ensure to clean it before using.
● Selected a wrong function
→ Choose the correct function as per the instructions.
● Product malfunction
→ Contact your local Service Centre for repair.
Ingredients cannot be ground

● Excessive or insufficient amount of ingredients
→ Please add ingredients as required by the recipe.
● Excessive or insufficient amount of water
→ Fill the water up to the indicated water level.
● Selected a wrong function
→ Choose the correct function as per the instructions.
● Product malfunction
- Contact your local Service Centre for repair.
Operating noise

● Motor running sound
→ It is normal.
● Break-in period
→ Occasional noise is considered normal.
● Unusual noise and abnormal motor
→ Contact your local Service Centre for repair.
The screen isn't illuminated.

● The power cord isn't firmly plugged in.
Check that the power cord is properly plugged in and the appliance is powered on.
● The jug lid and the blender jug are not installed properly
→ Install the jug lid and the blender jug properly.
● Product malfunction
→ Contact your local Service Centre for repair.
Troubleshooting
| Code Root Cause Analysis Solution | ||
| H01H03H04 | Failure of the circuit board or internal wiring of the appliance. | Contact your local Service Centre for repair. |
| U16 | The buttons on the Control Panel is covered by foreign objects or stains for an extended period. | Remove any foreign objects or stains that are covering the buttons. |
| U12 | Opening or moving the jug lid during operation causes the Control Panel to display a U12 error. | Ensure the jug lid is properly installed again. |
| U53 | Large or excessive amounts of food chunks trigger the motor's overload protection. | Try to cut the ingredients into smaller pieces before placing them in the blender jug and only add an appropriate amount. |
Replacement Parts
| Parts Names Parts No. | |
| Silent Valve Cover VE69V339 | |
| Silent Valve VE68V339 | |
| Silent Valve Gasket VE22V339 | |
| Jug Lid VE07V339 | |
| Lid Gasket VE23V339 | |
| Blender Jug VA01V339 |
Specifications
| Power Supply 220-240 V 50-60 Hz | ~ |
| Power Consumption Blending: | 425-465 W; Heating: 800-950 W |
| Speed Control 12 options are available. | |
| Rated Working Time (Blending) | Continuous operation(In Manual mode, the appliance continues to operate for 20 minutes. After 20 minutes, it automatically stops blending and returns to the initial screen and needs to rest for 6 minutes.) |
| Maximum Capacity | MAX (Cold drink): 1.75 L / MAX (Hot drink): 1.4 L |
| Dimensions(W × D × H) (Approx.) | 234 mm × 285 mm × 432 mm |
| Weight (Approx.) 4.5 kg | |
| Length of the Power Cord (Approx.) | 1.0 m |
Control Panel Instructions
General Functions:
● The cup lid sealing ring must not be omitted.
- Pour out the finished product.

Recommended Recipes for Fully Automatic Menu
General Functions:
Control Panel Instructions

© Panasonic Manufacturing (Xiamen) Co., Ltd. 2023
PZ92M339
WK0224L0
Printed in China
SK


Brand : PANASONIC
Model : MX-HG6401
Category : Blender