
Kasa Smart KS225 - Smart Home TP-LINK - Free user manual and instructions
Find the device manual for free Kasa Smart KS225 TP-LINK in PDF.
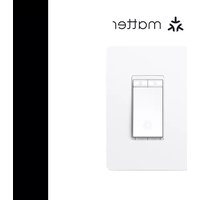


| Product Type | Smart Wi-Fi Dimmer Switch |
| Model | KS225 |
| Brand | TP-Link Kasa |
| Dimensions (W x H x D) | 4.1 x 2.0 x 1.5 inches |
| Weight | 0.15 lbs (68 g) |
| Power Supply | 120 VAC, 60 Hz |
| Maximum Load | 600 W incandescent, 300 W LED/CFL |
| Wireless Standard | Wi-Fi 2.4 GHz 802.11 b/g/n |
| App Compatibility | Kasa Smart app (iOS/Android) |
| Voice Control | Amazon Alexa, Google Assistant |
| Dimmer Type | Single-pole, 3-way compatible |
| Dimmer Range | 1% to 100% brightness |
| Operating Temperature | 32°F to 104°F (0°C to 40°C) |
| Safety Certifications | UL Listed, FCC |
| Material | Polycarbonate, fire retardant |
| Color | White |
| Installation | Requires neutral wire, wall box |
| Maintenance | Wipe with a dry, soft cloth |
| Spare Parts | No user-replaceable parts; contact support |
| Warranty | 2-year limited |
Frequently Asked Questions - Kasa Smart KS225 TP-LINK
User questions about Kasa Smart KS225 TP-LINK
0 question about this device. Answer the ones you know or ask your own.
Ask a new question about this device
Download the instructions for your Smart Home in PDF format for free! Find your manual Kasa Smart KS225 - TP-LINK and take your electronic device back in hand. On this page are published all the documents necessary for the use of your device. Kasa Smart KS225 by TP-LINK.
USER MANUAL Kasa Smart KS225 TP-LINK
User Guide
Smart Wi-Fi Dimmer Switch

matter

Works with
Apple Home
Contents
About This Guide 1
Introduction 2
Appearance 3
Wire Your Dimmer Switch 5
Set Up Your Dimmer Switch via Kasa …… 9
Set Up Your Dimmer Switch via Matter……10
Authentication....13
About This Guide
This guide provides a brief introduction to Kasa Smart Wi-Fi Dimmer Switch and regulatory information.
Please note that features of Kasa Smart Wi-Fi Dimmer Switch may vary slightly depending on the model and software version you have, and on your location and language. All images, steps, and descriptions in this guide are only examples and may not reflect your actual experience.
Conventions
In this guide, the following convention is used:
| Convention | Description |
| Teal | Key information appears in teal, including management page text such as menus, items, buttons and so on. |
| Underline | Hyperlinks are in teal and underlined. You can click to redirect to a website. |
More Info
- Operating temperature, storage temperature, and other specifications can be found on the product page at https://www.tp-link.com.
- Our Technical Support and troubleshooting information can be found at https://www.tp-link.com/support/. A TP-Link Community is provided for you to discuss our products at https://community.tp-link.com.
Introduction
KS225 is a smart Wi-Fi dimmer switch that allows you to control your home lighting brightness according to your needs. After easily installing your dimmer according to the in-app guide, adjust your home's brightness freely using the Kasa Smart app, dimmer buttons, and voice commands via Siri®, Alexa, or Google Assistant. Control your dimmer from anywhere, anytime with Schedule, Timer and Group Control. Set up Fade On/Off effects to enhance your home lighting.

- Matter-certified - Integrate Matter-certified Kasa devices with other certified products into any Matter-certified ecosystem.
- Brightness Control - Control the brightness of your lights to set the perfect ambiance for any activity.
- Voice Control - Hands-free control with Siri®, Alexa or Google Assistant.
- Schedule -- Turn on and off connected device automatically at a specific time.
- Grouping - Use Grouping to combine your light switch with other Kasa Smart devices for seamless control with one single tap on your smartphone.
- Away Mode - Set your smart light switch to turn connected fixtures on and off at random intervals to make it appear as if you're home even while you're away.
- No Hub Required - The Kasa Smart Wi-Fi Light Switch connects to your home's secure Wi-Fi network. No need for a hub or extra equipment.
Appearance
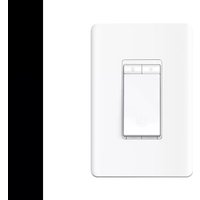
The Smart Dimmer Switch is compatible with incandescent, LED, halogen, and compact fluorescent light bulbs. The dimmer switch also includes two brightness adjustment buttons and an LED indicator to show device status and easily locate the dimmer switch at night. See the explanation below:


Matter Numeric Code
- For Matter initial setup. Scan to add to the first Matter ecosystem.
Wire Your Dimmer Switch
Follow the steps below to wire your Smart Wi-Fi Dimmer Switch. If you are not familiar with basic electrical wiring, please consult an electrician.
Before You Start
1. Prepare Basic Knowledge of Wiring
• Ground: Usually green or copper. - Neutral: Usually white, not connected to the dumb switch. • Line: Usually black, and connected to the dumb switch. - Load: Usually black, and connected to the dumb switch.
Note: If you are unsure, consult a qualified electrician.
2. Prepare Your Tools
Prepare a Phillips and slotted screwdriver, pliers, wire strippers, and a voltage detector.
3. Check Wi-Fi Strength
Make sure your switch is in an area with strong Wi-Fi signal.
Wire Your Dimmer Switch
Step 1. Turn Off Power and Remove the Wallplate
Turn off the circuit breaker. Then remove the old wallplate of the wall switch and label the wires.


CAUTION
Risk of Electric Shocks - High Voltage - Disconnect power supply at the circuit breaker before servicing.

MISE EN GARDE
Step 2. Disconnect the Wires
Gently pull the switch out and take a picture of the wires. Then disconnect wires from the old switch.
Step 3. Label the Ground and Neutral Wires
Apply the Neutral label to one of a bundle of white wires. They may be folded in the very back. Apply the Ground label to the Ground wire.

Step 4. Identify the Line and Load Wires
1) Turn on the circuit breaker. Use a voltage detector to identify the energized wire (Line wire).
⚠️ Take care to avoid electric shocks.

2) Turn off the circuit breaker. Label the Line and Load wires.
Step 5. Connect the Wires
Connect the wires to the smart dimmer switch as shown below.

Step 6. Install Your Smart Dimmer Switch
Gently fold all of the wires back into the wall box. Line up the switch with the mounting holes. Secure it with screws.

Step 7. Attach the Wallplate and Turn on Power
Attach the wallplate and turn on the circuit breaker. Then the wiring is finished.

Set Up Your Dimmer Switch via Kasa
Follow the steps below to set up your smart dimmer switch via Kasa Smart app.
1. Install Kasa Smart app
Get the Kasa Smart app from Google Play or the App Store, or scan the QR code below to download it.

2. Log in or sign up with TP-Link ID
Open the Kasa Smart app and log in with your TP-Link ID. If you don't have an account, create one first.

3. Add Device
Tap the Button in the Kasa Smart app, select Add a Device > Smart Switches > Matter Smart Switch. Follow the step-by-step app instructions to complete the setup.

Set Up Your Dimmer Switch via Matter
This is a Matter-certified device. You can integrate it into any Matter ecosystem you prefer for easy control, such as Alexa, Google, and Apple ecosystems. As IoT manufacturers are working to optimize the user experience of Matter setup, the setup process and user experience should improve over time. Follow the instructions below to set up your smart device via the Matter app.
Before You Start
- Get a Matter Controller: This is needed to connect and manage Matter devices on your home network. For instance, Apple TV and HomePod are examples of Matter controllers. For details, please refer to the Part 3. General Questions for TP-Link Matter-enabled Devices at https://www.tp-link.com/support/faq/3520/.
- Reset Your Device: It's important to start with a fresh device.
- Connect to Wi-Fi: Connect your phone to the same Wi-Fi network as your Matter controller. Choose the 2.4 GHz network if 2.4 GHz and 5 GHz networks are separate.
- Access Matter Setup Mode: This mode turns off in 15 minutes after the device is powered up. To return to setup, simply turn your device off and then back on.
- Locate Matter Setup Code: Look for a QR code or a numeric code on your device or in its packaging. Snap a picture of it for future reference.
- Regarding the Matter Code: The original Matter code can only be used for setup in one app (you can reuse it after a device reset). If you wish to set it up in multiple apps, generate a new code using the first app for all subsequent ones.
How to Set Up?
*Setup processes may vary between different apps.
- Turn on Bluetooth on your phone.
- Open the smart home app, and either scan the Matter QR code or input the given numeric code.
- Connect your device to the same network as your controller.
- Follow the instructions in the app to complete setup.
Failed to Set Up?
Refer to the following and you can resolve most setup issues.
- Update Firmware: Make sure the firmware of your Matter hub and Smart Home app is updated to support Matter.
- Restart: Try turning off and then turning back on your device and the controller. Restart your smartphone and clear the cache of the smart home app.
- Check IPv6: Ensure that IPv6 is activated on your router. Visit our FAQ for step-by-step guidance at https://www.tp-link.com/support/faq/1525/.
- Enable Setup Mode: Restart your device to re-enter setup mode since Bluetooth should be turned off in 15 minutes after the device is powered up.
- Regarding the Matter Code: The original Matter code can only be used for setup in one app (you can reuse it after a device reset). If you wish to set it up in multiple apps, generate a new code using the first app for all subsequent ones.
- Stay on the Code-Generating Page: Do not close the pairing code-generating page in the multi-admin setup. Otherwise, this may lead to exiting the setup mode. If you accidentally close the page after generating the pairing code before adding the device to another ecosystem, you can try to reopen it. If the reopening fails, it is recommended to restart the device and try to generate the pairing code again.
- Factory Reset Your Device: Try to factory reset the device.
- If the Matter-enabled device has already been added to another ecosystem, you will need to get a new setup code for pairing according to FAQ how to integrate your device into another ecosystem.
If the above steps did not help solve your problem, it's recommended that you try to factory reset the Matter-enabled device or use another smartphone to configure it.
More Information of Matter
- For matter setup guides for Alexa, Google and Apple, please refer to https://www.tp-link.com/support/faq/3564/
- For Matter setup troubleshooting, please refer to https://www.tp-link.com/support/faq/3574/
- For general questions and troubleshooting about Matter, please refer to https://www.tp-link.com/support/faq/3520/
- For the third-party setup video, please visit https://youtu.be/JS_7KmENSbo
- For Matter multi-admin setup and demo video, please visit https://youtu.be/C3t4kg|K6tc

Matter is still developing and the progress of each platform may differ from one another. There may also be different device performances and bugs that have no relation to the device itself. TP-Link is working hard to optimize user experience with other CSA members to provide better services.

Our expert Technical Support team is ready to assist you. Please don't hesitate to reach out with any questions. Your feedback is vital to us!

support.usa@tp-link.com

CALL
+1 866 225 8139 (Toll Free)

CHAT
https://livechat.tp-link.com/us/smart/

Authentication
FCC compliance information statement
FC
Product Name: Kasa Smart Wi-Fi Dimmer Switch
Model Number: KS225
Responsible party:
TP-Link USA Corporation
Address: 10 Mauchly, Irvine, CA 92618
Website: http://www.tp-link.com/us/
Tel: +1 626 333 0234
This equipment has been tested and found to comply with the limits for a Class B digital device, pursuant to part 15 of the FCC Rules. These limits are designed to provide reasonable protection against harmful interference in a residential installation. This equipment generates, uses and can radiate radio frequency energy and, if not installed and used in accordance with the instructions, may cause harmful interference to radio communications. However, there is no guarantee that interference will not occur in a particular installation. If this equipment does cause harmful interference to radio or television reception, which can be determined by turning the equipment off and on, the user is encouraged to try to correct the interference by one or more of the following measures:
- Reorient or relocate the receiving antenna.
- Increase the separation between the equipment and receiver.
- Connect the equipment into an outlet on a circuit different from that to which the receiver is connected.
- Consult the dealer or an experienced radio/TV technician for help.
This device complies with part 15 of the FCC Rules. Operation is subject to the following two conditions:
- This device may not cause harmful interference.
- This device must accept any interference received, including interference that may cause undesired operation.
Note: The manufacturer is not responsible for any radio or TV interference caused by unauthorized modifications to this equipment. Such modifications could void the user's authority to operate the equipment.
Note: The manufacturer is not responsible for any radio or TV interference caused by unauthorized modifications to this equipment. Such modifications could void the user's authority to operate the equipment.
FCC RF Radiation Exposure Statement
This equipment complies with FCC RF radiation exposure limits set forth for an uncontrolled environment. This device and its antenna must not be co-located or operating in conjunction with any other antenna or transmitter.
To comply with FCC RF exposure compliance requirements, this grant is applicable to only Mobile Configurations. The antennas used for this transmitter must be installed to provide a separation distance of at least 20 cm from all persons and must not be co-located or operating in conjunction with any other antenna or transmitter.
We, TP-Link USA Corporation, have determined that the equipment shown above complies with the applicable technical standards, FCC part 15. There is no unauthorized change made in the equipment and the equipment is properly maintained and operated.
Issue Date: 2023-08-21
Canadian Compliance Statement
This device contains licence-exempt transmitter(s)/receiver(s) that comply with Innovation, Science and Economic Development Canada's licence-exempt RSS(s). Operation is subject to the following two conditions:
(1) This device may not cause interference. (2) This device must accept any interference, including interference that may cause undesired operation of the device.
Radiation Exposure Statement:
This equipment complies with IC radiation exposure limits set forth for an uncontrolled environment. This equipment should be installed and operated with minimum distance 20cm between the radiator & your body.
Industry Canada Statement
CAN ICES-3 (B)/NMB-3(B)
Safety Information
Before installing, servicing or removing the switch, read and follow all safety precautions including the following:
- Follow all national and local safety regulations and practices. If you are uncertain or uncomfortable when performing the installation, consult a qualified electrician.
- CAUTION – Risk of Electric Shock – More than one disconnect switch may be required to de-energize the equipment and luminaire before servicing. A circuit breaker which disconnects the Line and Neutral conductor simultaneously is suitable.
- CAUTION – High Voltage – Disconnect power supply before servicing. Ensure power is off at the circuit breaker before removing or installing any switch. Use a non-contact voltage tester to ensure the power is off.
- Do not install the Smart Dimmer Switch with wet hands or when standing on wet or damp surfaces.
- Keep the device away from water, fire, humidity or hot environments.
- Do not attempt to disassemble, repair, or modify the device. If you need service, please contact us.
- Do not use the device where wireless devices are not allowed. • Rating: 120V~60Hz • Supported Load: 300W Incandescent/Halogen, 150W LED. • Operation temperature: 32°F~104°F (0~40°C) • Install only in a suitable UL Listed outlet box (suitable dimensions: H > 2.95 in. / 75 mm, W > 1.81 in. / 46 mm, D > 2 in. / 51 mm).
- Tighten terminal screws to 13 lbf-in.

CAUTION
Electrical switch integrated in this product is only intended for functional purposes. De-energize the product at the circuit breaker before servicing.
Explanation of the symbols on the product label
Symbols may vary from products
| SymbolExplanation | |
| Class II equipment | |
| Class II equipment with functional earthing | |
| ~ | Alternating current |
| --- | DC voltage |
| Polarity of output terminals | |
| Indoor use only | |
| Dangerous voltage | |
| Caution, risk of electric shock | |
| [AZAS] | Energy efficiency Marking |
| Protective earth | |
 | Earth |
 | Frame or chassis |
| Functional earthing | |
| Caution, hot surface | |
| [YYG] | Caution |
| [YAS8] | Operator's manual |
| Stand-by | |
| "ON"/"OFF" (push-push) | |
 | Fuse |
| Fuse is used in neutral N | |
 | RECYCLINGThis product bears the selective sorting symbol for Waste electrical and electronic equipment (WEEE). This means that this product must be handled pursuant to European directive 2012/19/EU in order to be recycled or dismantled to minimize its impact on the environment.User has the choice to give his product to a competent recycling organization or to the retailer when he buys a new electrical or electronic equipment. |
 | Caution, avoid listening at high volume levels for long periods |
 | Disconnection, all power plugs |
| m Switch of mini-gap construction | |
| μ | Switch of micro-gap construction (for US version)Switch of micro-gap / micro-disconnection construction (for other versions except US) |
| ε Switch without contact gap (Semiconductor switching device) | |



- USER GUIDE
- CONTENTS
- ABOUT THIS GUIDE
- CONVENTIONS
- MORE INFO
- INTRODUCTION
- APPEARANCE
- WIRE YOUR DIMMER SWITCH
- BEFORE YOU START
- PREPARE BASIC KNOWLEDGE OF WIRING
- PREPARE YOUR TOOLS
- CHECK WI-FI STRENGTH
- STEP 1. TURN OFF POWER AND REMOVE THE WALLPLATE
- CAUTION
- MISE EN GARDE
- STEP 2. DISCONNECT THE WIRES
- STEP 3. LABEL THE GROUND AND NEUTRAL WIRES
- STEP 4. IDENTIFY THE LINE AND LOAD WIRES
- STEP 5. CONNECT THE WIRES
- STEP 6. INSTALL YOUR SMART DIMMER SWITCH
- STEP 7. ATTACH THE WALLPLATE AND TURN ON POWER
- SET UP YOUR DIMMER SWITCH VIA KASA
- INSTALL KASA SMART APP
- LOG IN OR SIGN UP WITH TP-LINK ID
- ADD DEVICE
- SET UP YOUR DIMMER SWITCH VIA MATTER
- HOW TO SET UP
- FAILED TO SET UP
- MORE INFORMATION OF MATTER
- CALL
- CHAT
- AUTHENTICATION
- FCC RF RADIATION EXPOSURE STATEMENT
- CANADIAN COMPLIANCE STATEMENT
- RADIATION EXPOSURE STATEMENT
- INDUSTRY CANADA STATEMENT
- SAFETY INFORMATION
- EXPLANATION OF THE SYMBOLS ON THE PRODUCT LABEL
Brand : TP-LINK
Model : Kasa Smart KS225
Category : Smart Home