
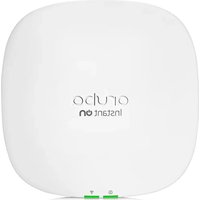
Aruba Instant On AP 15 - Access Point HP - Free user manual and instructions
Find the device manual for free Aruba Instant On AP 15 HP in PDF.


| Product Type | Access Point |
| Brand | HP (Aruba Instant On) |
| Model | Aruba Instant On AP15 |
| Wi-Fi Standard | 802.11ac Wave 2 |
| Maximum Data Rate | 1.2 Gbps (2.4 GHz: 400 Mbps, 5 GHz: 867 Mbps) |
| Dimensions (W x D x H) | 160 mm x 160 mm x 44 mm |
| Weight | 0.38 kg |
| Power | 802.3af PoE (Power over Ethernet) or 12V DC adapter (sold separately) |
| Ethernet Ports | 1 x 10/100/1000 Base-T Ethernet (PoE in) |
| Management | Aruba Instant On mobile app or web browser |
| Security | WPA2/WPA3, VLAN, Rogue AP detection |
| Mounting | Wall or ceiling (kit included) |
| Operating Temperature | 0°C to 40°C |
| Humidity | 5% to 95% non-condensing |
| LED Indicators | Power, LAN, Wi-Fi status |
| Maintenance | Clean with a soft, dry cloth. Do not use liquid cleaners. |
| Safety Certifications | UL, CE, FCC, Wi-Fi Alliance |
| Spare Parts / Repairability | Contact HP support for replacement units; no user-serviceable parts. |
| Warranty | Limited lifetime warranty |
Frequently Asked Questions - Aruba Instant On AP 15 HP
User questions about Aruba Instant On AP 15 HP
0 question about this device. Answer the ones you know or ask your own.
Ask a new question about this device
Download the instructions for your Access Point in PDF format for free! Find your manual Aruba Instant On AP 15 - HP and take your electronic device back in hand. On this page are published all the documents necessary for the use of your device. Aruba Instant On AP 15 by HP.
USER MANUAL Aruba Instant On AP 15 HP
Aruba Instant On User Guide
aruba
Instant On
Copyright Information
© Copyright 2019 Hewlett Packard Enterprise Development LP.
Open Source Code
This product includes code licensed under the GNU General Public License, the GNU Lesser General Public License, and/or certain other open source licenses. A complete machine-readable copy of the corresponding source code is available upon request. This offer is valid to anyone in receipt of this information and shall expire three years following the date of the final distribution of this product by Hewlett Packard Enterprise Company. To obtain such source code, send a check or money order in the amount of US $10.00 to:
Hewlett Packard Enterprise Company
6280 America Center Drive
San Jose, CA 95002
USA
Contents ... 3.
Aruba Instant On Solution 4
Key Features 4
Supported Devices 4
Provisioning your Aruba Instant On Devices...5
Downloading the Mobile App...5
Setting up your network...5
Accessing Aruba Instant On Application...6
Discovering Available Devices...9
Managing Sites Remotely 10
Aruba Instant On User Interface 11
Site management 15
About 18
Configuring and using Aruba Instant On Application 19
Monitoring Site Health 19
Configuring Networks 24
Employee Network 25
Modifying the Employee Network Name and Password...
Statistics 26
Schedule 27
Guest Network 28
Analyzing Application Usage...31
Managing Clients 35
Managing AP Firmware Upgrades 38
Managing Your Account 40
Troubleshooting 42
The Instant On Solution is a simple, fast, and secure solution designed for small businesses. It is affordable to own and easy to use. The Instant On Solution is ideal for businesses with simple technology requirements and setups that do not have IT staff. Instant On offers Wi-Fi technology so that your business can have a fast experience even in a busy office or store.
The Instant On mobile app and web application in the Instant On Solution suite enable provisioning and managing your networks. Instant On offers the following benefits:
■ Mobile app and web application based quick setup and faster network bring-up ■ Ease of use and right-sized feature set ■ Simple statistics to view the network health and usage ■ Remote monitoring capabilities ■ Simple troubleshooting
Key Features
The key features introduced as part of the Aruba Instant On app are:
■ Monitoring Site Health ■ Configuring Networks ■ Analyzing Application Usage ■ Managing Clients ■ Managing Sites Remotely
Supported Devices
Aruba Instant On currently supports the following APs:
• AP 11 - AP11D - AP12 • AP15 • AP17
This chapter describes the following procedures:
■ Downloading the Mobile App ■ Setting up your network ■ Accessing Aruba Instant On Application ■ Discovering Available Devices ■ Managing Sites Remotely
Downloading the Mobile App
The Aruba Instant On mobile app enables you to provision, manage, and monitor your network. To start using the Instant On mobile app, perform the following actions:
- Download the app on your smartphone
■ To install the app on iPhone, go to Apple App Store and search for Aruba Instant On. ■ To install the app on Android phones, go to Google Play Store and search for Aruba Instant On.
- Launch the Instant On application and follow the on-screen instructions to complete the setup. Alternatively, you may choose to complete the setup on a web browser using the Instant On web interface. For more information, see Accessing Aruba Instant On Application.
Setting up your network
The Instant On Solution requires you to connect the Aruba Instant On access point (AP) to a network that provides internet connectivity.
Pre-Requisites
Before you begin to provision your Instant On AP, ensure that the following pre-requisites are met:
■ A stable internet connection. ■ A switch that is connected to the Internet gateway or modem. ■ A DHCP server that should be available to provide IP addresses to the clients connecting to the Wi-Fi network. The DHCP server may be offered by the switch or the internet gateway. ■ Ports 80, 443, and 123 should not be blocked by a firewall. ■ The Instant On APs must be powered on and have access to the internet.
Provision the Instant On Network
To provision your network, follow these steps:
Table 1: Instant On Network Provisioning
| SL No | Steps | Illustration |
| 1. Power on the Aruba Instant On AP using the power adapter or using a Power Ethernet (PoE) port on a PoE capable switch. Ensure that the AP is connect your network using an ethernet cable (included in the box). |  | |
| 2. Verify the LED indicators. If the AP is successfully connected to your provisioning network and is ready for to configure, the LED indicator starts blinking alternatively between green an amber. |  | |
| 3. Download the mobile app on your Andro or iOS device. For more information, Downloading the Mobile App. As an alternative, you may choose to configure the Instant On AP using th application. For more information, seeAccessing Aruba Instant On Application. |  | |
| 4. Launch the Instant On application, follow the on-screen instructions to complete setup. |  | |
Accessing Aruba Instant On Application
Ensure that your system meets the following device OS and browser requirements to access the mobile app or web application.
Mobile OS Requirements
The following mobile OS versions support the Aruba Instant On mobile app:
■ Android 7 or later versions ■ iOS 11 or later versions
Browser Requirements
The following versions of the web browsers support the Instant On web application:
■ Google Chrome ■ Mozilla Firefox
■ Microsoft Edge ■ Apple Safari
Create an Instant On Account
Follow these steps to create an Instant On account:
- Launch the Instant On mobile app or web application.
- Click Create an account to create a new Instant On account.
- Enter an email ID in the Email field. The email ID should not be associated with another Instant On account.
- Enter a password for the account in the Password field.
- Select the End User License Agreement and Data Privacy Policy and Security Agreement.
- Click Create Account.
- A verification email is sent to your email account. Follow the instructions in the email to activate your Instant On account.
NOTE: The email notification with the verification link could sometimes end up in the junk email folder instead of your inbox.
- Once the above task is complete, click Continue on the mobile app or web application. You have now successfully registered an Instant On account.
You can use the same account credentials to sign in to the mobile app, web application, and support site.
Logging in to Instant On
To log in to the Instant On application, launch the Aruba Instant On mobile app or web app. In the Mobile app:
If you are signing in for the first time, enter the registered email ID and password in the Email and Password boxes respectively, and then click Review. For all future logins, the Instant On app stores the credentials and attempts to validate them every time the app is launched. Hence, for all future logins, the app or web application displays the home page directly.
In the Web Application:
- Open a browser.
- Type https://portal.arubainstanton.com in the address bar and press the Enter key.
- If you are signing in for the first time, enter the registered email ID and password in the Email and Password boxes respectively, and then click Sign In. For all future logins, the credentials are saved based on the web browser settings.
NOTE: The home page is displayed based on the number of sites associated with your account. For multiple sites associated with your account, you have the option to choose a site from the list before you are taken to the respective home page.
Follow the onscreen instructions to complete the access point setup, if the Instant On mobile interface is launched for the first time.
Resetting Your Account Password
To reset your Instant On login password, follow these steps:
- Click Forgot your password? on the login screen.
- Enter the email address associated with your Aruba Instant On account in the space provided.
- Click Reset password. The instructions to create a new password will be sent to your email address.
- Open the link provided in the email. The change password page is displayed.
- To change the password of your Instant On account, confirm your email address and password.
- Click Change Password. An acknowledgment message that your password has been changed successfully is displayed on the screen.
NOTE: The email notification with the Reset password link may sometimes end up in the junk email folder instead of your inbox.
Discovering Available Devices
Once the initial setup for your network is complete and you have created an Instant On account, you can begin to add the available devices in your network. There are multiple ways to add an Instant On device.
■ BLE Scanning—The Instant On mobile app or web application scans for nearby devices through BLE and displays the discovered APs on the screen. Tap or Click the Add devices button to add the discovered devices to the site or Search again if there are more devices to be displayed. ■ Serial Number—If the BLE scanning fails to discover any devices in the vicinity, you can choose to add devices to your network by entering their serial number. Enter the serial number information from the back of your Instant On AP and click Add device. ■ Barcode Scanning—As an alternative to manually entering the serial number to add devices, tap the barcode scan icon on the mobile app and scan the barcode at the back of your Instant On AP.
Multiple Sites
When you log in to the Aruba Instant On mobile app or web application using your administrator credentials, the My Sites page is displayed if multiple Aruba Instant On sites are registered to your account.
To view or manage the settings of a particular site, click on any of the registered sites listed.
Account Management
To navigate to the Account Management page:
- Tap the (M) icon in the homepage of the Instant On mobile app or web application.
- Select Account Management from the list to view the account settings. For more information, refer to Managing Your Account.
Setup a new site
The Instant On application prompts you to set up a new site when you sign on to the app. The site must have at least one network which would be used as the main network. You can have a maximum of 8 networks in a site.
- To register a new Instant On site to your account:
■ In the mobile app—Tap the advanced menu (≡) icon and select Setup a new site from the
menu. You will be redirected to the initial setup page.
■ In the web application—Click the Settings (💡) icon and select Setup a new site from the drop-
down list. You will be redirected to the initial setup page.
- Follow the instructions given in Setting up your network to add a new Instant On site.
- If you already have more than one site configured, and would like to set up a new site, you can do so from your registered account:
■ In the mobile app—Tap the advanced menu ( : ) icon in the My Sites screen.
■ In the web application—Click the Setup a new site tab in the page header.
Sign Out
Click on this field to sign out from your Aruba Instant On account.
Help & Support
Takes you to the Contact support page. Following are the available technical support options:
■ Help center—Opens the Aruba Instant On documentation portal. For more information, see https://www.ArubalnstantOn.com/docs. ■ Support center—Opens the Aruba Instant On Support Portal, which provides information on warranty and support policy for the product you selected and also the chat and on-call technical support information, see https://community.arubainstanton.com/t5/Support/ct-p/Support.
Upon instruction by a support personnel, you may also send a diagnostic report from your device by entering the support code in the Support resources field, provided to you by the on-call technical support representative.
Managing Sites Remotely
Remote access allows you to configure, monitor, and troubleshoot Aruba Instant On deployment sites.
- When an Instant On site is deployed and configured, it establishes a connection to the Instant On cloud, which allows you to access and manage sites remotely. The site information and account credentials associated with the site are registered and stored in the cloud. After the Instant On site is accessed and managed remotely through the Instant On application.
NOTE: The remote site must have access to the Internet in order to connect to the Instant On cloud. If the site loses Internet connectivity and fails to establish a connection to the cloud, you will not be able to access the site remotely.
■ When you log in to the Instant On application, the complete list of sites associated with your account is displayed. Select a site from the list for which you want to initiate a remote access session. Once the access session is established, you can begin managing the site remotely.
NOTE: The list of sites is only displayed if your account is associated with multiple sites. If your account is only associated with one site, the Instant On application connects directly to that site.
Username and Password Management
You can change your account username or password at any point in time remotely. The Instant On application automatically communicates with the Instant On cloud to update the credentials associated with the account.
Aruba Instant On User Interface
The Aruba Instant On user interface allows you to create, modify, and monitor network components from a central location. The user interface is designed to offer ease-of-use through an intuitive layout and navigation model.
The Instant On user interface comprises a header and the Instant On modules.
Figure 1: Web Application User Interface Overview
Figure 2: Mobile App User Interface Overview
Configuring Menu Items in the Header
The header includes the following menu items:
Table 2: Menu Items in the Header
| Header Content | Description | Mobile App | Web Application |
| Alert Notification() | Displays the alerts that are triggered by the system Yes when unusual activity is observed on the network. See Alerts for more information. |
Table 2: Menu Items in the Header
| Header Content | Description | Mobile App | Web Application |
| Settings menu icon (for desktop) or advanced menu icon (for mobile) | Displays the site name and provides menu options to administer your account and the sites associated with it. | ||
| Help & Support—Leads you to the Contact support No page. Following are the available technical support options:■ Help center—Opens the Aruba Instant On documentation portal. For more information, see https://www.ArubalstantOn.com/docs.■ Support center—Opens the Aruba Instant On Support Portal, which provides information on warranty and support policy for the product you selected and also the on-call technical support. For more information, see https://community.arubainstanton.com/t5/Support/ct-p/Support.Additionally, you may also send a diagnostic report from your registered device by entering the support code in the Support resources field, provided to you by the on-call technical support representative | |||
| Site management—Allows you to modify various Yes Yes account settings, including time zone and notifications. For more information, see Site management. | |||
| Add a new device—Opens the Extend my networks page and allows you to add a new device. For more information, see Extending your Network. | |||
| Connect to another site—Allows you to connect Yes Yes another Instant On account. After clicking Connect to another site, you are logged out of your account and automatically redirected to the Aruba Instant On login page. Enter the registered email ID and password to access the respective Aruba Instant On. If you have multiples sites configured under the same administrator account, you will be redirected to the My Sites page from where you can select one of the listed sites. | |||
| Setup a new site—Allows you to setup a new Yes Yes Aruba Instant On site. For more information, see Setting up your network. | |||
| About—Displays the software image version and Yes No mobile app version that is currently installed on the Aruba Instant On site. See About for more details. | |||
| Technical Support—Following are the available technical support options:■ Support Resources—Allows you to generate a support ID by clicking on the Generate Support ID tab. The ID is then shared with Aruba Support personnel to run a diagnosis on your device.■ Reset to Factory Defaults—Reset all devices within your Instant On site to factory defaults by clicking on the Reset tab. | No Yes |
Table 2: Menu Items in the Header
| Header Content | Description | Mobile App | Web Application |
| Administration Menu (M) icon | Displays the account username registered email provides options to administer account information and setup notifications or alerts.Account Management—Allows you to modify your account information for all associated sites. For more information, see Managing Your Account.Notifications—Allows you configure the notification settings for the alerts received from the site. For more information, see Notifications. | ||
| Sign out—Allows you to log out of your Aruba Notas Yes On account. | |||
| Help Ⓞ) | Opens the Instant On online help documentation. No Yes |
Configuring Settings in the Modules
Modules allow you to configure and monitor network components such as application usage and alerts.
The Instant On user interface consists of the following modules:
■ Site Health: Provides the health status of devices connected to the network. See Monitoring Site Health for more information on the Site Health module. ■ Networks: Provides a summary of the networks that are available for primary and guest users. See Configuring Networks for more information on the Networks module. ■ Clients: Provides connection information for the clients in your network. See Managing Clients for more information on the Clients module. ■ Applications: Provides daily usage data for the different types of applications and websites accessed by clients in the network. See Analyzing Application Usage for more information on the Applications module. ■ Inventory: Specifies the number of devices on the site that are UP. This page also allows you to add a new device or remove an existing device. See Viewing and Updating Inventory for more information on devices on the site.
Opening a Module
To open a module, click one of the following module tiles on the Instant On home page:
Table 3 Module Tiles
| Module | Tile |
| Site Health |  |
| Networks |  |
| Clients |  |
| Applications |  |
| Inventory |  |
After opening a module, you can switch to another module by clicking one of the modules on the page.
Closing a Module
In the Web Application—To close a module and return to the Instant On home page, do one of the following:
- Click X at the top-right corner of the module.
- Click the Aruba Instant On logo at the top-left corner of the page.
In the Mobile App—Click the back arrow (Back) on the title bar of the mobile app to exit the module.
Site management
The Site management page displays the following user settings that can be modified in the Aruba Instant On application:
■ Administration
■ Time Zone
■ Captive Portal (for web application only)
Software Update
Viewing Settings
To view the Site management page, follow these steps:
In the web application—Click the settings menu (gear icon) on the Aruba Instant On header and select Site
management from the drop-down menu. The Site management page is displayed.
In the mobile app—Tap the advanced menu (hamburger icon) on the Aruba Instant On home screen. Select Site
management from the menu.
Administration
The Administration page allows you to modify administrator information, including your Aruba Instant On site name and account credentials. You can also add a secondary administrator account. See Administration Settings for more details on the Administration page.
Time Zone
The Time Zone page allows you to set the local time zone, date, and time for your Aruba Instant On site. See
Time Zone Settings for more details on the Time Zone page.
Captive Portal (for web application only)
The Captive Portal page on the Instant On web application provides you with a Captive Portal and customize a welcome page as you see fit. This is used in Guest networks without the password for authentication. See Enabling Captive Portal, for more information.
Software Update
You can now manage your software updates by creating schedules using the Instant On mobile application. For more information, see Updating the Software Image on an Instant On Site.
Administration Settings
The Administration page allows you to modify administrator information, including your Aruba Instant On site name and account credentials. You can also add a secondary administrator account. Both accounts have full privileges to the Instant On site configuration and status.
Modifying the Aruba Instant On Site Name
To modify the Aruba Instant On site name, follow these steps:
- Go to the Administration page in the Aruba Instant On application.
In the web application—Click the advanced settings menu (💡) icon on the Aruba Instant On header and select Site management from the drop-down menu. From the Site management page, click Administration to view the administration settings.
In the mobile app—Tap the advanced menu (≡) icon, and then select Site management. The Site management screen displays the account administration settings.
- Enter a new name for the Aruba Instant On site under Site name.
NOTE: The site name must be between 1 and 20 characters in length.
Adding a Secondary Account
Each Aruba Instant On site can be managed by two different administrator accounts. To add an administrator account to your site, follow these steps:
In the web application—Click the advanced settings menu (💡) icon on the Aruba Instant On header and select Site management from the drop-down menu. From the Site management page, click Administration to view the administration settings.
In the mobile app—Tap the advanced menu (≡) icon, and then select Site management. The Site management screen displays the account administration settings.
- Click the (+) sign to assign a secondary administrator account.
- Enter a valid email ID in the Email field and click Assign account to save the changes.
Transferring Account Ownership
Aruba Instant On allows you to transfer ownership from one administrator account to another. To transfer ownership of an Aruba Instant On site to another administrator account, follow these steps:
In the Web Application
- Click the advanced settings menu (💡) icon on the Aruba Instant On header and select Site management from the drop-down menu. From the Site management page, click the Administration tab
to view the administration settings.
- Under Account managing this site, click Transfer ownership. The Transfer Ownership page opens.
- Enter the new email ID under Email.
- Click Transfer ownership to transfer ownership of the site to the new administrator account.
After your account is removed, you are logged out of the site. A confirmation message is shown that ownership has been transferred successfully.
In the Mobile App
- Tap the advanced menu ( ) icon on the Aruba Instant On home screen.
- Select Site management to view the administrator account settings.
- Under Account managing this site, tap the settings (💡) icon and select Transfer ownership. The
Transfer Ownership page opens.
- Enter the new email ID under Email.
- Click Transfer ownership to transfer ownership of the site to the new administrator account.
After your account is removed, you are logged out of the site. A confirmation message is shown that ownership has been transferred successfully.
Time Zone Settings
The time zone is set automatically when the device is configured for the first time. However, to change the time zone settings, the Time Zone page allows you to set the local time zone, date, and time for your Aruba Instant On site. This information is used for the following Aruba Instant On features:
■ Displaying daily statistics for your network. ■ Enforcing network availability schedules. ■ Performing daily image checks on the Aruba Instant On image server.
Setting a Local Time Zone
To set the local time zone for your Aruba Instant On site, follow these steps:
- Go to the Time Zone page in the Aruba Instant On application.
In the web application—Click the advanced settings menu (💡) icon on the Aruba Instant On header and select Site management from the drop-down menu. The Site management page is displayed. From the Site Management page, click Time Zone to open the Time Zone page.
■ In the mobile app—Tap the advanced menu (≡) icon on the Aruba Instant On home screen. Select Site management from the menu. From the Site management screen, tap Time Zone to open the Time Zone screen.
- Select a time zone from the Site local time zone drop-down list.
After the local time zone is set, Aruba Instant On automatically updates the local date and time under Site local date & time.
About
The About page provides information about the software currently installed on the cluster and the mobile application. This page allows you to upgrade the software when new software versions are available. To view the information in the About page, follow these steps:
- Click the advanced menu icon (for desktop √ or for mobile ≡) from the title bar and select About from the drop-down menu.
- In the About page, you can view the version of the Aruba Instant On software currently running on the cluster and the mobile application. The About page for the mobile app additionally displays the current version of the Aruba Instant On app running on your registered device.
This chapter describes the following features and tasks:
■ Monitoring Site Health ■ Configuring Networks ■ Analyzing Application Usage ■ Managing Clients
Monitoring Site Health
The Site Health page provides a summary of the health status of the Instant On devices connected to the network. It shows a consolidated list of alerts that are triggered from the devices provisioned. It also displays the inventory details of the connected devices and real-time data of active clients on an hourly basis with the cumulative transfer speed of all the devices.
Viewing and Updating Inventory
The Inventory displays a list of devices in the network along with the devices' current operational status. To view the Inventory page, follow these steps:
- Click the Inventory tile on the Instant On mobile app or web application home page or click the Site Health banner and then click on Show inventory.
- The Inventory page lists the APs added in the network and their operational status. Click an AP to view the details of the device.
The following table lists icons and their corresponding status:
Table 4: Device Status
| Status Icon Condition | ||
Up Device is reachable. | ||
Down Device is not reachable. | ||
Warning  | Reachable device with a major alert reported by the device. | |
Minor warning  | Reachable device with a minor alert reported by the device. | |
Adding a Device
To add a device to the inventory list, follow these steps:
- Click the Inventory tile on the Instant On mobile app or web application home page, or click the Site Health banner and then click on Show inventory. The Inventory page is displayed.
- Click the add icon at the bottom right corner of the page.
- The Extending your Network page is displayed. Follow the instructions on this page.
Extending your Network
The Extend Network page provides instructions on how to extend your network by adding more devices.
There are 2 ways by which you can extend your network:
■ Extend using a cable ■ Extend over-the-air (Mesh)
To extend your network, follow these steps:
- Click the Inventory tile on the Aruba Instant On home page, or click Site Health > Show inventory.
- You can deploy additional Aruba Instant On APs in the same network by following the instructions. To ensure optimal performance, connect additional Aruba Instant On APs to the same switch as the first AP, using network cables. Power up the AP using Power over Ethernet (PoE) or a power adapter (if you have ordered one with the installation kit).
a. If network cabling is an issue at the site, APs can be connected over a wireless connection. If you choose this option, power on your Instant On AP and do not connect it with a network cable. For more information, see Adding Wireless Mesh Access Points.
- Wait for the LED lights on the additional Aruba Instant On AP(s) to blink alternately and turn amber.
- Go to the Extend your network page:
a. In the Mobile App—Click the add (+) icon in the Inventory screen or tap the advanced menu (
≡) icon in the Aruba Instant On home page and select Add a new device.
b. In the Web Application—Click on the Extend Network ( ) icon on the title bar of the
Inventory page or click the advanced settings menu (💡) icon on the Aruba Instant On header and
select Add new devices.
- Select Search for my device to make the Aruba Instant On scan for both wired and wireless devices. The AP should show up in the list of devices detected in the network.
- Select the AP and click Finish.
- If you need guidance on how to connect to your wired or wireless devices, select How to extend my network and follow the instructions displayed on the portal screen.
Adding Wireless Mesh Access Points
The wireless provisioning for access points is automated and is made simple for easy installation. Follow these steps to setup Instant On wireless APs in the network.
- Connect at least one Instant On AP to a local wired switch or a router and ensure complete.
- Place a wireless Instant On AP in a location within the Wi-Fi range and power up th
- Ensure the wireless AP is in its factory default state.
- Power up the wireless AP and wait for 3-5 minutes for it to boot up. The AP must switch or router in the local network.
- Follow the instructions in the Extending your Network section to add the Aruba Instant On wired network.
- A Confirmation window appears, displaying the list of detected devices. Select the device and click Accept.
The wireless AP is now successfully added to the Inventory list.
Instant On AP Wireless Access Point Placement Guidelines
The following guidelines should be considered when installing additional APs in the wireless network:
- Interfering sources or obstacles—Check for interfering sources or obstacles and follow the instructions to properly install the APs on a ceiling or a wall. ■ Line of sight—If you can clearly see the wired AP from where you stand, it is likely that the AP will offer a strong signal and good coverage. ■ No line of sight—When line of sight is not possible, the APs should be placed in close range to each other. The number of obstacles and type of materials heavily influence and attenuate the RF scenario; a minimum distance of 16 feet (5 meters) and a maximum distance of 60 feet (18 meters) is recommended between the APs. ■ Wireless APs are placed on different floors—If you place the APs on different floors, try to align them along a vertical line.
NOTE: These are general guidelines, and you may need to experiment with the placement of your Instant On APs before settling on a permanent location.
Access Point Details
The Access Point Details page provides details of the selected AP, including the AP name, MAC address, serial number, radio, and model type of the AP. This page also provides a summary of the wireless radios, including the number of clients currently connected.
Viewing AP Details
To view the Access Point Details, follow these steps:
- Click the Inventory tile on the Aruba Instant On home page, or click the Site Health banner and then click Show inventory.
- Click any of the APs listed in the Inventory list. The Access Point Details page is displayed with details such as the AP name, IP address of the AP, MAC address, serial number, AP type, radio, and the clients connected on each radio channel.
Restarting Your Device
To restart the device, follow these steps:
In the mobile app—Click the advanced menu ( ) icon in the title bar of the Access Points Details page and select More actions from the drop-down menu. The appropriate assistant page is displayed. Click Restart Device. In the web application—Click the troubleshooting (💡) icon, and click Restart.
Removing an AP from the Inventory
Follow these steps to remove an AP which is still online:
In the mobile app—Click the advanced menu (☐) icon in the title bar of the Access Points Details page and select More actions from the drop-down menu. The appropriate assistant page is displayed. Click Remove from inventory. In the web application—Navigate to Inventory. Select the AP you want to remove from the inventory. Click the troubleshooting (💡) icon, and click Remove from inventory.
Follow these steps to remove an AP which is offline:
On the Access Point Details Page, a rectangular bar appears below the Access point name when an alert is triggered. The color of the rectangular alert bar will appear according to the alert type.
- Click Show details. You will be directed to the Alert Details page which provides more information about the unusual activity.
NOTE: The Advanced menu does not appear on the title bar when the status is down.
- To remove the access point from the inventory, follow these steps:
a. If the Instant On device is removed from the network, you can choose to remove the inventory by clicking Remove from inventory in the Access Point Details page. A pop-up box appears on the screen requesting your confirmation. b. Click Remove to delete the device from the inventory.
Configuring a Static IP Address
You can configure a static IP address for your device by following these steps:
- Navigate to the Static IP address configuration page:
In the mobile app—Click the advanced menu (☐) icon in the title bar of the Access Points Details page and select Static IP address from the drop-down menu. In the web application—Click any of the APs listed in the Inventory list and then click on the Advanced tab.
- Slide the toggle switch to the right to enable ( ) Static IP address configuration.
- Enter values in the IP address, Subnet mask, Default gateway, and DNS server fields.
- Click Save. The device restarts automatically and the changes are saved.
Alerts
Alerts are triggered by the system when unusual activity is observed with the network. To view the Alerts page, click the SiteHealth banner (Wr) and tap Show alert history.
Types of alerts
There are three types of alerts:
■ Connection problem (⚠️) — Alerts that are sent when problems accessing the Internet are detected. ■ Device problem (⚠️) — Alerts that are sent when a problem with the device is detected.
Viewing Pending Alerts
The Alert (💡) icon appears on the title bar of the mobile app or web application when there is a pending alert. The number of alerts in the system is displayed as a colored badge on top of the Alert (💡) icon. The color of the badge determines the severity of the alert present in the system. When there are no alerts present in the system or all the alerts have been acknowledged, the Alert (💡) icon will not appear in any of the title bars on the app or the application.
To view the Alert history, follow these steps:
- Click the Site Health banner ( ) on the Instant On home page.
- On the Site Health main page, you will see the details of the latest alert. Click Show alert history. The Alerts page displays a list of all the alerts received by the app, including the active alerts and the ones that have been cleared.
- Click the alert you want to acknowledge. The Alert Details page is displayed.
Acknowledging Alerts
When there are multiple active alerts received by the application, the summary box in the Site Health page displays the active alerts with the highest severity in the system along with their color code. Major active alert takes the highest priority and is displayed in a red summary box.
To acknowledge the alerts, follow these steps:
- Click the summary box.
- The Alerts page displays a list of active alerts in descending order of the alert severity and the order by which they should be acknowledged.
- Click the alert to view the Alert Details page. Follow the recommended actions to clear the alert.
Viewing Alert Details
The Alert Details page provides information about a specific alert received from the Aruba Instant On site.
To view the Alert Details page, follow these steps:
- Tap the Site Health banner on the Instant On portal banner and then Show alert history. The list of alerts displayed includes the alerts that were raised previously and have been cleared. They usually appear dimmed.
- Click the alert to view the details.
On clicking the alert, you are directed to the Alert Details page that specifies the type of alert and the time when it was received. The details provided in this page include possible causes or reasons why the alert might have occurred.
The Alert Details page also lists out the recommended actions that you can take to clear the alert.
Configuring Networks
The Aruba Instant On provides a summary of the networks that are available for employees. Viewing the Network Summary
To view the Networks page, click Networks on the Aruba Instant On home page.
Table 5: Network Information
| Parameter | Description | Mobile App | Web Application |
| Network Name | Identifies the Instant On network used to connect computers, tablets, or phones together. The network name is also Wi-Fi identifier. | Yes, used as | Yes the |
| Type Indicates | if the network is a employee or guest network. | Yes Yes | |
| Status Shows | the status of the network. Guest networks can be set to Yes Active ( ) or Inactive ( ) by changing the status manually or by creating a network schedule to change the status at a specific day and time. See Guest Network for more details on setting network schedules. | ||
| Security Shows | the security option set for the network: | Yes Yes | |
| Network password (PSK)—Secured using a shared password (PSK). Provides the following security options.■ WPA2 Personal—This is the default setting.■ WPA2+WPA3 PersonalAuthentication server (RADIUS)—You must have a RADIUS server available to use this option. Secured using a higher encryption RADIUS authentication server. This option is available only for Employee networks. The following options are available.■ WPA2 Enterprise—This is the default setting.■ WPA2+WPA3 Enterprise■ Welcome page—No security. Any user can connect to this network without entering a username or password. This option is available only for guest networks. This network requires Captive Portal to be configured. | |||
| Clients | Shows the number of clients currently connected to the network. Click the client number to open the Clients page. The Clients page provides connection information for clients in the network. See Managing Clients for more information about the Clients page. | Yes Yes | |
| Transferred Shows | shows the amount of data, in bytes, transferred in the network throughout the day. | Yes Yes |
Viewing Network Configuration Details
For more details about a specific network, select a network from the Networks page. The Employee Network Details or Guest Network Details page opens. See Employee Network for more information about the Employee Network Details page, or Guest Network for more information about the Guest Network Details page.
Employee Network
An Employee network is a classic Wi-Fi network. This network type is used by the employee organization and it supports passphrase-based (PSK) or 802.1X-based authentication methods. Employees may access the protected data of an enterprise through the employee network after successful authentication. The employee network is selected by default during a network profile configuration. Note that the very first employee network you create for the site cannot be deleted unless you remove the site entirely from your account.
Configuring an Employee Network
To configure an employee network:
- Select Employee as the Network Type.
- Enter a Network name for the employee network. This will also be broadcast as the SSID for the WLAN network.
- Choose a Security level for the network and update the required fields.
■ Network password (PSK)—Secures the network using a shared password (PSK). Create a password of your choosing in the Network password field. The following options can be configured. ■ WPA2 Personal ■ WPA2+WPA3 Personal
If you wish to use a RADIUS authentication server, tap the Use authentication server (RADIUS) instead? link.
■ Authentication server (RADIUS)—A RADIUS server must be available to use this option. Secures the network using a higher encryption RADIUS authentication server. Update the following ■ WPA2 Enterprise ■ WPA2 + WPA3 Enterprise ■ Radius server IP address—Enter the IP address of the RADIUS server. ■ Shared secret—Enter a shared key for communicating with the external RADIUS server. ■ Server timeout—Specify a timeout value in seconds. The value determines the timeout for one RADIUS request. The Instant On AP retries to send the request several times (as per Retry count) before the user gets disconnected. For example, if the Timeout is 5 seconds and the Retry count is 3, the user is disconnected after 20 seconds. The default value is 5 seconds. ■ Retry count—Specify a number between 1 and 5. Retry count indicates the maximum number of authentication requests that are sent to the server group, and the default value is 3. ■ Authentication Port—Enter the authentication port number of the external RADIUS server within the range of 1-65535. The default port number is 1812. ■ NAS IP address—Enter an arbitrary IP address to be used as RADIUS attribute 4, NAS IP Address, without changing the source IP Address in the IP header of the RADIUS packet. ■ NAS identifier—Enter a string value for RADIUS attribute 32, NAS Identifier, to be sent with RADIUS requests to the RADIUS server.
- To configure a Secondary RADIUS Server, slide the toggle switch to the right ( ) and update the required fields.
- To Send RADIUS Accounting requests, slide the toggle switch to the right ( ).
- To assign a VLAN to your network, slide the toggle switch to the right ( ) and enter a VLAN ID.
- Slide the Show network toggle switch to the right (☐) to broadcast the employee network in the list of available Wi-Fi networks.
- Click Save.
Modifying Network Details
In the Instant On mobile app or web application, the Employee Details page includes the following tabs to provide additional information about the network:
■ Identification: Provides general identification and login information for the network. For more information, see Modifying the Employee Network Name and Password. ■ Statistics: Provides client and application usage statistics for the network. For more information, see Statistics. ■ Schedule: Allows you to create a schedule during which the network is to be made available to users. For more information, see Schedule.
Modifying the Employee Network Name and Password
To modify the network name or password of the employee network in the Aruba Instant On web application, follow these steps:
Table 6: Steps to Modify the Employee Network Name and Password
| No of Steps | Steps | Mobile app | Web application |
| Step 1 | Tap Networks on the Instant On home screen. The Networks screen opens. | Yes Yes | |
| Step 2 | Select the employee network from the Networks list to expand the Employee Network Details screen opens. | Yes Yes | |
| Step 3 Click the Identification tab. No Yes | |||
| Step 4 Enter a new name under Network name to change the main network name or a new password under Network password to change the main network password. A warning message appears, indicating that changes to the network settings will disconnect all clients accessing the network. | Yes Yes | ||
| Step 5 Click Save. | Yes Yes | ||
Statistics
The Statistics tab in the Aruba Instant On provides an overview of the client and application usage statistics for the employee network. To view the statistics displaying the application usage data for the
■ In the mobile app—Under the employee network, tap the pie chart displaying the data transferred (in MB). ■ In the web application—Select the employee network and then click on the Statistics tab.
Viewing Client Count
The Statistics page in the Aruba Instant On displays the client count, which is the total number of clients currently connected to the network. Click the client number under the Clients icon to open the Clients page.
The Clients page provides connection information for clients in the network. See Viewing Details of Active Clients for more information about the Clients page.
Viewing Applications Chart Data
The Applications chart in the Aruba Instant On provides data for the top five application categories, by usage. Data is presented in both bytes and percentage.
Figure 3: Applications Chart
Viewing Total Data Transferred
The Statistics page in the Aruba Instant On displays the total amount of data (in MB), transferred in the network throughout the day.
Schedule
The Aruba Instant On allows you to enable or disable a network for users at a particular time. You can now create a time range schedule specific to the employee network, during which access to the network is restricted during the specified time period. This feature is particularly useful if you want the network to be available to users only during specific times, for example, only when you are open.
Creating an Access Schedule on an Employee Network
To create a network access schedule for an employee network, follow these steps:
- Select the employee network from the Networks list. The Network Details screen is displayed.
- Click Add a network access schedule. The Network Schedule page opens.
- Slide the toggle switch to the right to enable the network schedule.
When the toggle switch is turned on, the network schedule is Enabled. When the toggle switch is turned off, the network schedule is Disabled.
- Under Days of the week, select the day(s) during which the network will be active.
- Under Active hours during the day, select one of the following options to set a time range during which the network will be active:
All Day: The network is active throughout the day. Active Between: The network is only active between the designated Start time and End time.
Guest Network
A Guest Network is configured to provide access to non-enterprise users who require temporary access to the Internet.
Creating a Guest Network
To create a Guest Network, follow these steps:
- In the Networks page, click on ACTIVATE GUEST NETWORK to configure a Guest Network.
- Set the toggle switch to Active ( ) in the Guest Network Details page.
- Enter a Network name.
- Select one of the following security levels:
a. Welcome page—If you do not wish to secure the network with a password or if you want to redirect users to your Captive Portal page before being able to access the network. For information, see Enabling Captive Portal.
b. Network password (PSK)—Secures the network using a shared password (PSK) by using either WPA2 Personal or WPA2 + WPA3 Personal encryption. Create a password of your choice in the Network password field.
- Slide the Show network toggle switch to the right ( ) to broadcast the guest network in the list of available Wi-Fi networks.
Changing the Guest Network Status Manually
To set the guest network status to Inactive, follow these steps:
- Select the guest network from the Networks list. The Guest Network Details screen opens.
- Slide the Active toggle switch (☐) to the left to set the network to Inactive (☐).
- Click APPLY CHANGES. The network is marked as Inactive, and all network settings are hidden.
To set the guest network status to Active, follow these steps:
- From the Networks list, click on Activate Guest Network for the Guest network group.
- Slide the Inactive toggle switch (○) to the right to set the network to Active (●).
- The network is marked as Active, and all previously configured network settings are restored.
Creating Access Schedules
To create a network access schedule, follow these steps:
- Select a guest network from the Networks list. The Guest Network Details screen is displayed.
- Click Add a network access schedule. The Network Schedule page opens.
- Slide the toggle switch to the right to enable the network schedule.
■ When the toggle switch is turned on ( ), the network schedule is Enabled. ■ When the toggle switch is turned off (○), the network schedule is Disabled.
- Under Days of the week, select the day(s) during which the network will be active.
- Under Active hours during the day, select one of the following options to set a time range during which the network will be active:
■ ALL DAY: The network is active throughout the day. ■ ACTIVE BETWEEN: The network is only active between the designated Start time and End time.
Enabling Captive Portal
A captive portal is a web page accessed with a web browser that is displayed to newly connected Wi-Fi users before they are granted broader access to network resources. Captive portals are used to present a landing or log-in page which may require the guest to accept your terms and conditions before connecting to the internet. You may also use this to add details about your business, special offers, etc. Aruba Instant On offers you the ability to customize the captive portal with your business logo, terms, and other details. To configure the Captive Portal service on the Aruba Instant On mobile application, follow these steps:
In the Mobile App
- Click Networks from the Aruba Instant On home page.
- Select an active Guest Network connection.
- Under Security Level, select the Open tab.
- Slide the Show Captive Portal toggle switch to the right ( ) to enable captive portal.
- Click the edit ( ) icon to modify the captive portal or splash page.
- Tap the save ( ) icon to apply the changes.
In the Web Application
- Click Networks from the Aruba Instant On home page.
- Select one of the active Guest Network connections.
- Under the Identification page, ensure that the Security Level is set to Open.
- Slide the Show Captive Portal toggle switch to the right ( ) to enable captive portal.
- Click Save.
Statistics
The Statistics tab in the Aruba Instant On provides an overview of the client and application usage statistics for the employee network. To view the statistics displaying the application usage data for the
In the mobile app—Under the guest network, tap the pie chart displaying the data transferred (in MB).
■ In the web application—Select the guest network and then click on the Statistics tab.
Viewing Client Count
The Statistics page in the Aruba Instant On displays the client count, which is the total number of clients currently connected to the network. Click the client number under the Clients icon to open the Clients page. The Clients page provides connection information for clients in the network. See Viewing Details of Active Clients for more information about the Clients page.
Viewing Applications Chart Data
The Applications chart in the Aruba Instant On provides data for the top five application categories, by usage. Data is presented in both bytes and percentage.
Figure 4 Applications Chart
The above data is also categorized as a list. For more information, see Applications List.
Viewing Total Data Transferred
The Statistics page in the Aruba Instant On displays the total amount of data, in bytes, transferred in the network throughout the day.
Analyzing Application Usage
The Aruba Instant On provides daily usage data for the different types of applications and web by clients in the network.
Viewing Application Information
The Applications page provides the following information about the types of applications accessed by clients in your network:
Table 7: Application Information
| Parameter | Description Mobile App | Web Application | |
| Name Shows the name of the application category. See Analyzing Application Usage for the complete application categories. | Yes Yes list of | ||
| Total Usage Shows the total usage for a given application category, in bytes. | Yes Yes | ||
| Total Usage % | Shows the total usage for a given application category, in percentage (%). | Yes Yes | |
| Overall Usage Shows the total usage for all application categories in No bytes. | Yes in No | ||
Filtering Application Information in the Web Application
To filter the information that is displayed on the Applications page of the Instant On web application, follow these steps:
- Click Applications on the Instant On home page. The Applications page opens.
- Click the tool (☐) button at the top-right corner of the Applications list to open the parameter dropdown list.
- Select the parameters that you want to display or hide from the Applications page. ■ Parameters with an orange check mark are displayed on the Applications page. ■ Parameters without an orange check mark are not displayed on the Applications page.
Sorting Application Information in the Web Application
Application data can be sorted in the Instant On web application to help you locate the efficiently. For example, application data can be sorted in alphabetical order based on the application category name. Click one of the parameters at the top of the Applications list to sort the information based on your needs.
Changing the Applications Display Mode in the Mobile App
The Instant On mobile app offers two ways to display application information, the Applications chart (default) or Applications list. Click the list (☐) or the chart (☐) icon at the top right corner of the
Applications page to switch between the two views.
Applications Chart
Data for the top five application categories (by usage) is displayed in a donut chart. If more
application categories have been accessed throughout the day, the fifth section of the Applications chart is represented as Other. Any applications that do not fall under the top four application categories are grouped into Other.
Applications List
Data for every application category is displayed in a list, which is organized in descending o
Table 8: Application Categories and their Webroot Classification
| Application Category Icon | Webroot Classification | |
| Recreational—Recreational applications include websites on personal activities interests. | a  | ■ Travel■ Home and Garden■ Entertainment and Arts■ Local Information■ Hunting and Fishing■ Society■ Sports■ Music■ Fashion and Beauty■ Recreation and Hobbies■ Motor Vehicles■ Kids■ Online Greeting cards■ Religion |
| Enterprise—Enterprise applications include websites on professional and information services that are helpful for working environments. |  | ■ Financial Services■ Business and Economy■ Individual Stock Advice and Tools■ Job Search■ Philosophy and Political Advocacy■ Educational Institutions■ Health and Medicine■ Legal■ Real Estate |
| Internet tools—Internet tool applications include tools and services for Internet navigation and usage. |  | ■ Computer and Internet Security■ Computer and Internet Information■ Translation■ Reference and Research■ Personal Storage■ Search Engines■ Pay-to-Surf■ Internet Portals■ Internet Communications■ Web-based email■ Shareware and Freeware■ Dynamically Generated Content■ Training and Tools■ Web Hosting |
| Shopping—Shopping applications include websites for online shopping. |  | ■ Auctions■ Shopping |
| Restricted Content—Restricted content applications include websites with sensitive information or graphic content. |  | ■ Cult and Occult■ Sex Education■ Gambling■ Weapons■ Swimsuits & Intimate Apparel■ Alcohol and Tobacco■ Cheating■ Questionable |
| Adult Content—Adult content applications include websites with graphic adult control or illegal subjects. |  | ■ Abused Drugs■ Marijuana■ Adult and Pornography■ Nudity■ Violence■ Abortion■ Hate and Racism■ Gross■ Illegal |
| Military & Government—Military and government applications include websites military and government information and services. |  | ■ Military■ Government |
| Social—Social applications include websites for social networking and media. |  | ■ Social Networking■ Dating■ Personal sites and Blogs■ News and Media |
| Games & Streaming—Games and streaming applications include websites online gaming and video streaming. |  | ■ Streaming Media■ Games■ Web Advertisements■ Content Delivery Networks■ Image and Video Search |
| Local network—The Local network category includes the internal sites hosted locally your private network. |  | ■ Peer to Peer■ Hacking■ Keyloggers and Monitoring■ Malware Sites■ Phishing and Other Fraudst■ Proxy Avoidance and Anonymize■ Spyware and Adware■ Bot Nets■ SPAM URLs |
High Security Risk—High security risk applications include websites that contain  known malicious Internet tools that can devices and damage the internal network. known malicious Internet tools that can devices and damage the internal network. | ■ Private IP addresses | |
| Uncategorized—Uncategorized applications include websites that cannot be grouped under any of the categories described list. |  | ■ Unknown by Webroot |
| Do not consider these web categories | — ■ Dead | Sites■ Parked DomainsNOTE: The data of these categories is negligible, they will be ignored in the data transferred calculation and nothing will be displayed about them in Aruba Instant On. |
Managing Clients
The Aruba Instant On provides connection information on the clients in your network. Viewing AP Clients
The Client Details page provides additional information about the clients in your network.
To view the Client Details page for a specific client, follow these steps:
- Click the Clients ( ) tile on the Instant On home page. The Clients page is displayed.
- Select a client from the clients list. The Client Details page for the selected client is displayed.
For more information, refer to Client Details Information
Viewing Details of Active Clients
The following information is available on the Client Details page. For details on the client information preceding the Client Details page in the Aruba Instant On web application, see Client Details Information.
Table 9: Client Details Information
| Parameter | Description | Mobile App | Web Application |
| Name Denotes the name of the client. Yes Yes | |||
| IP Address Denotes the IP address of the client.NOTE: Not displayed by default. See Filtering Client Information in the Web Application for details on this parameter on the Clients page. | Yes Yesdisplaying | ||
| OS | Operating system (OS) of the client device.NOTE: Not displayed by default. See Filtering Client Information in the Web Application for details on this parameter on the Clients page. | Yes Yesdisplaying | |
| Network | Shows the network to which the client is connected. YesClick the network name to view the Network Details page. See Employee Network for more details on the Main Network Details page, or Guest Network for more details on the Guest Network Details page. | ||
| Device | Shows the access point to which the client is connected. YesClick the device name to view the Access Point Details page. See Access Point Details for more details on the Access Point Details page. | ||
| Duration | Denotes the amount of time that the client has been connected to the network. | Yes Yes | |
| Signal | Indicates the client signal quality, based on the clients Signal-to-Noise Ratio (SNR). See Table 2 for details different signal qualities. | Yes Yeson the | |
| MAC Address | Denotes the MAC address of the client. | Yes Yes | |
| Downloading | Shows the download throughput within the last 30 seconds in bytes per second. | Yes | |
| Uploading | Shows the upload throughput within the last 30 seconds bytes per second. | Yes in Yes | |
| Top Application | Shows the most frequently used application type. No Yes | ||
| Applications Chart | Shows the application usage data for the selected client, Yes bytes. In the Aruba Instant On mobile app, tap the donut chart preceding transferred to open the Applications chart for the client. | Yes, Yes | |
| Transferred | Shows the total amount of data transferred during the Yes session, in bytes. | Yes | Yes |
Table 10: Signal Quality
| Signal Quality Icon Signal Strength | ||
Good 30 dB or  | ||
Fair  | 16 dB—29 dB | |
Poor  | 15 dB or lower | |
Viewing Application Information for a Specific Client
You can view the application usage information for a specific client in your network by selecting the Clients list. See Viewing Application Information for details on the type of application usage information that is displayed.
In the Web Application
To view application information for a specific client in the Instant On web application, follow these steps:
- Click Clients on the Instant On home page. The Clients page opens.
- Select a client from the Clients list to open the Client Details page. The Applications chart for the selected client is displayed directly on the Client Details page.
In the Mobile App
To view application information for a specific client in the Instant On mobile app, follow these steps:
- Tap Clients on the Instant On home screen. The Clients screen opens.
- Select a client from the Clients list to open the Client Details screen.
- Tap the donut chart preceding Transferred to open the Applications chart for the selected client.
Filtering Client Information in the Web Application
To filter the information that is displayed on the Clients page of the Instant On web application, follow these steps:
steps:
- Click Clients on the Instant On home page. The Clients page opens.
- Click the tool (☐) button at the top-right corner of the Clients list to open the parameter drop-down list.
- Select the parameters that you want to display or hide from the Clients page. ■ Parameters with a green check mark are displayed on the Clients page. ■ Parameters without a green check mark are not displayed on the Clients page.
To restore the default settings, follow these steps:
- Click Clients on the Instant On home page. The Clients page opens.
- Click the tool (☐) button at the top-right corner of the Clients list to open the parameter drop-down list.
- Select Restore Defaults to restore the Instant On to the default settings.
Sorting Client Information in the Web Application
Client data can be sorted in the Instant On web application to help you locate the information efficiently. For example, client data can be sorted in alphabetical order based on the client. Use the parameters at the top of the Clients list to sort the information based on your needs.
Firmware is the software programmed on Instant On APs to make sure the devices run and provide functionality to users. The firmware installed on the Instant On APs is the Instant On software. When the firmware is upgraded, device performance and functionality is improved through feature enhancements and bug fixes.
Upgrading the AP Firmware
When an AP is deployed into the network, it joins an Instant On site, which is a group of APs configured and managed from a single location. Upon joining the site, the AP automatically updates its software image with the software image version configured on the site. Each time the software image is updated on the site, all APs in the site are upgraded to the new software image version.
Instant On Image Server
Every version of the Instant On software image is uploaded and stored in a public cloud-based server that is hosted by Aruba. The image server always contains the latest version of the Instant On software so that you can keep your system up-to-date. See Updating the Software Image on an Instant On Site for details on updating your APs to the latest version of the Instant On software image.
Updating the Software Image on an Instant On Site
Instant On allows you to control when a software update on the site needs to take place. You can configure a date and time of your preference for the site on the Instant On mobile app.
To create a schedule for the software update to be installed automatically on the site, follow these steps:
- Navigate to the Site management page.
■ In the web application—Click the settings menu (💡) icon on the Aruba Instant On header and select Site management from the drop-down menu. The Site management page is displayed. ■ In the mobile app—Tap the advanced menu (≡) icon on the Aruba Instant On home screen. Select
Site management from the menu.
- Click the Software Update tab to view the scheduling options.
- Select the Preferred day of the week for the software update to be installed automatically.
- Select a suitable Time from the drop-down menu.
Each AP installs the new software image and reboots. After every AP in the site has rebooted with the new version of the Instant On software image, the upgrade process is complete.
NOTE: Critical software updates may override the settings configured by you and will be installed within 24 hours.
Verifying Client Connectivity During Upgrade
APs are automatically rebooted with the new version of the Instant On software image during upgrade. When an AP goes down during the reboot, the wireless clients connected to that AP are moved to another AP in the Instant On site or completely dropped from the network. Though expected, keep in mind that a firmware upgrade can cause major disruptions for the clients. This is limited to the time-period that the APs take to reboot, which is 3-5 minutes. We recommend you schedule this activity for when you don't expect users connected to the network actively.
Schedule this activity for when you don't expect users to be actively connected to the network.
If a software upgrade fails, the Instant On continues to run the software image version currently on the APs. You can continue running the current software image version or try installing the image again.
If a software upgrade fails, the Instant On continues to run the software image version currently on the APs. You can continue running the current software image version or try installing the image again.
Not sure which version of the Instant On you are using? Go to the About page in the Instant On application to check which version of the Instant On software image is currently running on your APs. For more details on the About page.
Not sure which version of the Instant On you are using? Go to the About page in the Instant On application to check which version of the Instant On software image is currently running on your APs. For more details, see the About page.
In the Instant On web application, select About from the advanced drop-down menu on the Aruba Instant On header. The About page opens, displaying the current Instant On software version.
In the Instant On web application, select About from the advanced drop-down menu on the Aruba Instant On header. The About page opens, displaying the current Instant On software version.
In the Mobile App
In the Instant On mobile app, tap the advanced menu ( ) icon on the Instant On home screen.
The About screen opens. It displays the current Instant On software version and the current Instant On mobile app version.
Instant On Mobile App Compatibility
Although the Instant On mobile app is backward-compatible with older versions of the Instant On software image, the Instant On software image is NOT backward-compatible with older versions of the mobile app. If the mobile app installed on your device is older than the Instant On software image running on the site, a warning message appears when you attempt to launch the app.
The mobile app can only be launched if it is updated to the latest version. To update the app, tap the app store icon that appears below the warning message.
Managing Your Account
The Account Management page allows you to modify your administrator account information associated with your sites.
NOTE: The Account Management page is only available from the My Sites page when your account is registered to multiple Aruba Instant On sites.
Modifying Administrator Account Information
To modify your administrator account information for all associated Aruba Instant On sites, follow these steps:
In the Web Application
- Log in to the Aruba Instant On.
- Click the advanced settings (M) icon and select Account Management from the advanced drop-down menu on the Aruba Instant On header. The Account Management page opens.
- Modify the password for your registered account. Select the Password tab. To modify your account password, enter your current password, followed by a new password.
- Click Change password to save your changes.
In the Mobile App
- In case of multiple sites, select the advanced menu (☰) icon on the My Sites screen. Else, tap the advanced settings (⚙) icon on the mobile app header.
- Select Account Management to open the Account management screen.
- Modify the password for your registered account.
Select the Password tab.
To modify your account password, enter your current password, followed by a new password.
- Click Change password to save your changes.
The Account management screen also allows you to enable or disable alert notifications for information. See Notifications.
Notifications
Notifications are standard messages that are sent to mobile devices connected to the Aruba Instant On app when an alert is triggered by the system. The notification mechanism updates administrators about alerts that are triggered on site.
When you click a notification, your registered device automatically opens the Instant On app and the corresponding management interface for the Instant On site. The stored user credentials are used against the management interface. Upon successful login, you are directed to the Alerts page corresponding to the selected notification. If no action is taken on the alert, the notification remains in the list and can still be viewed at any time until it is cleared.
Enabling or Disabling Alert Notifications
To enable notifications for alerts, follow these steps:
- Go to the Notifications page in the Aruba Instant On application.
In the Aruba Instant On web application, click the advanced settings (⚙) icon and select Account Management from the drop-down menu on the Aruba Instant On header. From the Account management page, click Notifications to open the Notifications page. In the Aruba Instant On mobile app, tap the advanced menu (☰) icon. From the Account management screen, tap Notifications to open the Notifications screen.
- Click the notification toggle switch(es) to enable ( ) or disable ( ) the alerts you want notified about. For more information on viewing and managing alerts, see Alerts.
NOTE: By default, the notifications are enabled for all three alert types.
Notification Messages
The Operating System (OS) of each registered device determines how the notification messages are displayed. The following table lists the notification messages and their corresponding alert type:
Table 1 Notification Messages and Alert Types
| Notification Message | Corresponding Ale |
| Connection problem Cannot access Internet | |
| Device problem | has problem unauthorized is down |
Simple Notification
By default, a simple notification is displayed on 2 distinct lines:
■ The first line displays the name of the alert. ■ The second line displays the site name.
Collapsed Notification
When the system triggers multiple alerts from the same site, the notification mechanism collapses the notifications generated from the alerts. The notification mechanism displays it as a single notice on the registered device.
The troubleshooting assistant can be invoked from the Alert Details page:
- Navigate to Site Health and click View Alert History.
- In the Alert Details page, review the Recommended Actions to clear the alert.
- For additional troubleshooting options, click Need more help?. The Troubleshooting Assistant page is displayed with the following information:
a. Most typical situations based on the LED patterns. b. Recommended actions.
Figure 5 Troubleshooting Assistant Page
- Check the status of the LED lights on the Instant On and click the corresponding solution in the troubleshooting assistant.
- If you are unable to find a solution to the problem, click Additional support options. You will be directed to external discussion forums and chat support to assist you better.


- ARUBA INSTANT ON USER GUIDE
- COPYRIGHT INFORMATION
- OPEN SOURCE CODE
- CONTENTS
- ARUBA INSTANT ON SOLUTION
- PROVISIONING YOUR ARUBA INSTANT ON DEVICES
- CONFIGURING AND USING ARUBA INSTANT ON APPLICATION
- MANAGING AP FIRMWARE UPGRADES
- TROUBLESHOOTING
- KEY FEATURES
- SUPPORTED DEVICES
- DOWNLOADING THE MOBILE APP
- SETTING UP YOUR NETWORK
- PRE-REQUISITES
- PROVISION THE INSTANT ON NETWORK
- ACCESSING ARUBA INSTANT ON APPLICATION
- MOBILE OS REQUIREMENTS
- BROWSER REQUIREMENTS
- CREATE AN INSTANT ON ACCOUNT
- LOGGING IN TO INSTANT ON
- RESETTING YOUR ACCOUNT PASSWORD
- DISCOVERING AVAILABLE DEVICES
- MULTIPLE SITES
- ACCOUNT MANAGEMENT
- SETUP A NEW SITE
- SIGN OUT
- HELP & SUPPORT
- MANAGING SITES REMOTELY
- USERNAME AND PASSWORD MANAGEMENT
- ARUBA INSTANT ON USER INTERFACE
- CONFIGURING MENU ITEMS IN THE HEADER
- CONFIGURING SETTINGS IN THE MODULES
- OPENING A MODULE
- CLOSING A MODULE
- SITE MANAGEMENT
- VIEWING SETTINGS
- ADMINISTRATION
- TIME ZONE
- CAPTIVE PORTAL (FOR WEB APPLICATION ONLY)
- SOFTWARE UPDATE
- ADMINISTRATION SETTINGS
- MODIFYING THE ARUBA INSTANT ON SITE NAME
- ADDING A SECONDARY ACCOUNT
- TRANSFERRING ACCOUNT OWNERSHIP
- IN THE MOBILE APP
- TIME ZONE SETTINGS
- SETTING A LOCAL TIME ZONE
- ABOUT
- MONITORING SITE HEALTH
- VIEWING AND UPDATING INVENTORY
- ADDING A DEVICE
- EXTENDING YOUR NETWORK
- ADDING WIRELESS MESH ACCESS POINTS
- INSTANT ON AP WIRELESS ACCESS POINT PLACEMENT GUIDELINES
- ACCESS POINT DETAILS
- VIEWING AP DETAILS
- RESTARTING YOUR DEVICE
- CONFIGURING A STATIC IP ADDRESS
- ALERTS
- TYPES OF ALERTS
- VIEWING PENDING ALERTS
- ACKNOWLEDGING ALERTS
- VIEWING ALERT DETAILS
- CONFIGURING NETWORKS
- VIEWING NETWORK CONFIGURATION DETAILS
- EMPLOYEE NETWORK
- CONFIGURING AN EMPLOYEE NETWORK
- MODIFYING NETWORK DETAILS
- MODIFYING THE EMPLOYEE NETWORK NAME AND PASSWORD
- STATISTICS
- VIEWING CLIENT COUNT
- VIEWING APPLICATIONS CHART DATA
- VIEWING TOTAL DATA TRANSFERRED
- SCHEDULE
- CREATING AN ACCESS SCHEDULE ON AN EMPLOYEE NETWORK
- GUEST NETWORK
- CREATING A GUEST NETWORK
- CHANGING THE GUEST NETWORK STATUS MANUALLY
- CREATING ACCESS SCHEDULES
- ENABLING CAPTIVE PORTAL
- IN THE WEB APPLICATION
- ANALYZING APPLICATION USAGE
- VIEWING APPLICATION INFORMATION
- FILTERING APPLICATION INFORMATION IN THE WEB APPLICATION
- SORTING APPLICATION INFORMATION IN THE WEB APPLICATION
- CHANGING THE APPLICATIONS DISPLAY MODE IN THE MOBILE APP
- APPLICATIONS CHART
- APPLICATIONS LIST
- MANAGING CLIENTS
- VIEWING DETAILS OF ACTIVE CLIENTS
- VIEWING APPLICATION INFORMATION FOR A SPECIFIC CLIENT
- FILTERING CLIENT INFORMATION IN THE WEB APPLICATION
- STEPS
- SORTING CLIENT INFORMATION IN THE WEB APPLICATION
- UPGRADING THE AP FIRMWARE
- INSTANT ON IMAGE SERVER
- UPDATING THE SOFTWARE IMAGE ON AN INSTANT ON SITE
- VERIFYING CLIENT CONNECTIVITY DURING UPGRADE
- IF A SOFTWARE UPGRADE FAILS, THE INSTANT ON CONTINUES TO RUN THE SOFTWARE IMAGE VERSION CURRENTLY ON THE APS. YOU CAN CONTINUE RUNNING THE CURRENT SOFTWARE IMAGE VERSION OR TRY INSTALLING THE IMAGE AGAIN
- NOT SURE WHICH VERSION OF THE INSTANT ON YOU ARE USING? GO TO THE ABOUT PAGE IN THE INSTANT ON APPLICATION TO CHECK WHICH VERSION OF THE INSTANT ON SOFTWARE IMAGE IS CURRENTLY RUNNING ON YOUR APS. FOR MORE DETAILS ON THE ABOUT PAGE
- INSTANT ON MOBILE APP COMPATIBILITY
- MANAGING YOUR ACCOUNT
- MODIFYING ADMINISTRATOR ACCOUNT INFORMATION
- NOTIFICATIONS
- ENABLING OR DISABLING ALERT NOTIFICATIONS
- NOTIFICATION MESSAGES
- SIMPLE NOTIFICATION
- COLLAPSED NOTIFICATION
Brand : HP
Model : Aruba Instant On AP 15
Category : Access Point