
Azur 7000 Series DST7041 - Iron PHILIPS - Free user manual and instructions
Find the device manual for free Azur 7000 Series DST7041 PHILIPS in PDF.

 FR
FR
 BG
BG
 CS
CS
 DA
DA
 DE
DE
 EL
EL
 EN
EN
 ES
ES
 ET
ET
 FI
FI
 HU
HU
 ID
ID
 IT
IT
 KK
KK
 KO
KO
 LT
LT
 LV
LV
 NL
NL
 NO
NO
 PL
PL
 PT
PT
 RO
RO
 RU
RU
 SK
SK
 SV
SV
 TH
TH
 TR
TR
 UK
UK
 ZH
ZH
| Product type | Steam iron |
| Brand | Philips |
| Model | Azur 7000 Series DST7041 |
| Color | White and blue |
| Dimensions (L x W x H) | 30 x 15 x 15 cm |
| Weight | 1.5 kg |
| Power | 2400 W |
| Water tank capacity | 300 ml |
| Soleplate type | Ceramic soleplate |
| Continuous steam output | 40 g/min |
| Steam boost | 180 g/min |
| Anti-calc system | Yes, with self-cleaning function |
| Auto shut-off | Yes, after 30 seconds horizontally and 8 minutes vertically |
| Anti-drip function | Yes |
| Cord length | 2 meters |
| Power supply | Mains, 220-240 V ~ 50-60 Hz |
| Cleaning and maintenance | Use the self-cleaning button regularly; descale every 2-3 months |
| Safety | Auto shut-off; stable base; protection pad |
| Spare parts available | Water tank, soleplate, buttons, base |
| Repairability | Repairability index: 8.1/10 (according to ADEME) |
| Package contents | Iron, protection pad, water tank, user manual |
| Warranty | 2 years |
Frequently Asked Questions - Azur 7000 Series DST7041 PHILIPS
User questions about Azur 7000 Series DST7041 PHILIPS
0 question about this device. Answer the ones you know or ask your own.
Ask a new question about this device
Download the instructions for your Iron in PDF format for free! Find your manual Azur 7000 Series DST7041 - PHILIPS and take your electronic device back in hand. On this page are published all the documents necessary for the use of your device. Azur 7000 Series DST7041 by PHILIPS.
USER MANUAL Azur 7000 Series DST7041 PHILIPS
natural_image
Black Philips air iron with a black body and handle, no visible text or symbols on the device itself.Congratulations on your purchase and welcome to Philips! To fully benefit from the support that Philips offers, register your product at www.philips.com/welcome. Read this user manual, the important information leaflet, and the quick start guide carefully before you use the appliance. Save them for future reference.
Product overview

4 English
1 Water tank lid
2 Steam selector
3 Water spray
4 Cord
5 Cord winding
6 Indicator light
7 Steam boost trigger
8 Temperature dial
9 Quick Calc Release collector
Using the appliance
Type of water to use
Note: The iron may give off some steam when you use it for the first time. This stops after a short while.
Type of water to use
The appliance is suitable to be used with tap water. However, if you live in an area with hard water, we recommend that you mix an equal amount of tap water with distilled or demineralized water. This will prevent fast scale build up and prolong the lifetime of the appliance.
Do not add perfume, water from the tumble dryer, vinegar, starch, descaling agents, ironing aids, chemically descaled water or other chemicals, as they may cause water spitting, brown staining or damage to your appliance.
Filling the water tank

natural_image
Illustration of a steam iron with a warning symbol (no text or labels)1 Do not plug in the iron.

natural_image
Illustration of a steam iron with a magnified inset showing internal components (no text or symbols)2 Slide the steam selector to the right to select no steam mode/dry ironing mode

natural_image
Illustration of a hand using a tool to press down a steam iron (no text or symbols visible)3 Flip open the water tank lid.

4 Fill water tank up to the MAX indication mark. Do not add any additives like perfume, fragrances, soap or vinegar.

natural_image
Illustration of a hand using a tool to press down a steaming iron (no text or symbols visible)5 Close the water tank lid firmly.
Setting the temperature and steam
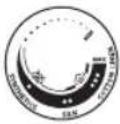 |  | |
| MAXLINEN | /^* | |
| ●●●COTTON | /^* | |
| ●●SILK | ECO | |
| ●SYNTHETICS |

natural_image
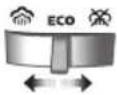
Illustration of a hand ironing an iron with 'ECO' label (no other text or symbols)ECO setting: Minimum constant steam is delivered continuously for garments with less creases. This setting also saves energy.

natural_image
Illustration of a hand steaming a steam iron with a circular icon showing a cloud or smoke (no text or symbols)Two steam clouds: More constant steam is delivered continuously for tough creases.

For stubborn creases, set the steam setting to two steam clouds and press and hold the steam boost trigger below the handle. Maximum constant steam will be delivered continuously.
Preparing for use

Smoke can be visible during the first use, and it is normal. This ceases after a short while.
1 Check the garment label to ensure that the fabric is ironable and its appropriate temperature setting.

2 Turn the temperature dial to the appropriate ironable temperature indication according to the garment label.

natural_image
Illustration of two iron iron holders with a cross mark indicating the angle (no text or symbols present)3 Allow the iron to rest on its heel.

natural_image
Illustration of a steam iron with a cord and plug, no text or symbols present4 Insert the plug into an earthed socket and allow the iron rest on its heel. If using an extension plug, ensure that the power rating of the extension plug is suitable for the iron.

natural_image
Close-up of a mechanical component with an hourglass icon highlighting a specific area (no text or symbols present)5 Wait for the iron to heat up. The indicator light will turn steady on while it is heating up.
8 English

natural_image
Close-up of a mechanical component with a checkmark and magnified detail (no text or symbols)6 Once the iron is ready to be used, the indicator light will switch off. The indicator light may turn on and off during ironing as the iron heats up periodically to maintain its temperature.
Ironing with steam
1 Slide the steam selector to ECO mode or steam mode.

2 Turn the temperature dial to between silk and linen based on the image.


natural_image
Illustration of a person using a steam iron to press down a surface (no text or symbols visible)3 Steam will be released during ironing.
No steam mode/dry ironing mode

1 Set the steam setting to no steam mode/dry ironing mode

natural_image
Illustration of a hand ironing a steam iron on a bed (no text or symbols)2 After a short while, steam will cease during ironing.
Water spray

natural_image
Illustration of a hand using a power iron to press down on a surface, with a downward arrow indicating motion (no text or symbols present)1 Press and release the water spray button at the top of the handle. Water will be sprayed out of the nozzle.
Horizontal & vertical steam boost
1 Set temperature dial to MAX setting between cotton and linen.

10
English

natural_image
Illustration of a hand using an iron to clean clothes, with a circular icon showing upward motion and checkmark indicators (no text or symbols)2 Vertical steam boost: Press and release the steam boost trigger in the vertical position to release shots of steam on hanging garments. Holding down the steam boost trigger in the vertical position will not deliver constant steam.

natural_image
Illustration of hands using a steam iron to clean clothing, showing motion and shading (no text or symbols)3 Vertical steam boost: Pull and stretch your hanging garment while using the steam boost to remove stubborn creases.

4 Do not use your bare hand as a supporting surface when you iron.

natural_image
Illustration of a person using an iron with a cross mark (no text or symbols)5 Do not position the iron towards yourself or others.
Auto shut off (DST7030, DST7040, DST7050, DST7060, DST7510 only)

1 To give you a peace of mind, the appliance will cool down on its own if it is left unattended for a period of time.
2 When the iron is not in use for more than 30 seconds while resting on its soleplate or 8 minutes while resting on its heel/ base, the iron will enter auto shut off mode.
3 The temperature of the iron will decrease in auto shut off mode. The Auto Shut Off light will also blink quickly to indicate the iron is at auto-off status. To completely switch off the iron, plug out the iron/ switch off the mains plug.
4 Picking up or moving the iron will reactivate it.
5 The indicator light will turn steady ON, indicating that the iron is heating up again.
12 English

natural_image
Close-up of a mechanical component with a checkmark and magnified detail (no text or symbols)6 Once the indicator light switches OFF, the iron is ready for use.
Cleaning and maintenance

natural_image
Illustration of a steam iron being compressed with a magnified inset showing a plug (no text or symbols)1 Ensure the iron is not plugged in.

2 Ensure the iron is cooled down.

natural_image
Illustration of a hand holding a seed or pod with a checkmark indicating selection (no text or symbols present)3 Wipe the soleplate with a damp cloth.

natural_image
Illustration of a lit fuse with a magnified inset showing a bottle and bulb (no text or symbols)Note: To keep the soleplate smooth, avoid hard contact with metal objects. Never use a scouring pad, vinegar or other chemicals to clean the soleplate.

natural_image
Illustration of a stainless steel iron with warning symbols (no text or labels)4 Do not wash/ clean the iron under running water as it may damage the electrical components within.
Calc-Clean

Tip: The Quick Calc Release function can be used at any time. If you live in a hard water area, use the function more frequently.
1 It is recommended to descale your iron after every 1 to 3 months of use to prolong its lifetime, or when brown stains/water is observed.
IMPORTANT: The Quick Calc Release automatically collects loose scale particles during ironing.

natural_image
Illustration of a wall socket connected to a plug with a black arrow indicating direction (no text or symbols)2 Ensure the iron is not plugged in.

3 Ensure the iron is cooled down.
14 English

natural_image
Hand inserting a card into a device (no text or symbols visible)4 Slide up the Quick Calc Release collector lever.

natural_image
Illustration of a steam iron being placed on a kitchen sink with a small appliance nearby (no text or symbols)5 Pull out the Quick Calc Release collector lid.

natural_image
Illustration of a stainless steel kitchen sink with a faucet and a hand holding a bag, against a grid background (no text or symbols)6 Clean the Quick Calc Release collector lid with water.

natural_image
Illustration of a hand washing a shower with a drain, no text or symbols present7 Shake the iron to drain the water and scale particles from the opening of the iron.

8 Do not run water into the opening of the iron.

natural_image
Illustration of a biological structure with labeled parts (1 and 2), no readable text or symbols present.9 Shake the iron to drain the water and scale particles from the opening of the iron.

natural_image
Hand pressing down a button on a metallic object (no text or symbols visible)10 Push down the lever to lock the Quick Calc Release collector. You will hear a 'click' sound.
Storage

1 Slide the steam selector to select no steam mode/dry ironing mode

natural_image
Illustration of a wall socket connected to a plug with a black arrow indicating direction (no text or symbols)2 Unplug the iron.

3 Let the iron cool down.

natural_image
Illustration of a hand using a power iron to press or install a surface, with a grid-patterned background (no text or symbols)4 Pour any remaining water out of the water tank.

natural_image
Diagram of a mechanical or fluidic device with rotating arrows indicating flow or movement (no text or symbols)5 Wind the power cord around the main body of the iron.
Trouble shooting
This chapter summarizes the most common problems you could encounter with the appliance. If you are unable to solve the problem with the information below, visit www.philips.com/support for a list of frequently asked questions or contact the Consumer Care Center in your country.
Problem Possible cause Solution
| My Philips Steam Iron does not produce steam. | There is no water/not enough water in the tank. | If there is no water in the water tank of your Philips Steam Iron, your iron is not able to generate steam. Please refill the water tank with water. After this, your iron should produce steam again. |
| The iron is not ready to steam. | Your iron is ready to produce steam when the indicator light switches off. | |
| The steam setting is set to no steam mode/dry ironing mode | Aways ensure that the temperature dial is at the 2-dot ●3 ●lot or ●te●HEN setting. Then, select a steam setting (ECO setting and 2-cloud setting) on the steam selector at the top of the handle.Ironing with steam with the temperature dial at the 1-dot or SYNTHETIC setting may cause wet spots/leaking as the temperature of the iron may not be hot enough to convert water to steam | |
| My Philips Steam Iron does not remove creases. | The temperature is set too low. | For irons with a temperature dial, please set the temperature according to the fabric that you are ironing. You can use the following table as a reference.Note: For some fabrics such as silk, wool, cotton and linen, steam would be needed to remove creases more efficiently. |
| Steam is not used. Switch the steam selector to or 2-cloECOettingYour Philips Iron does not produce steam when the temperature dial is at the 1-dot position, SYNTHETIC or Calc-Clean setting. You can get more steam by changing to a stronger steam setting, or using the steam boost function to help remove tough wrinkles.To remove creases in the vertical position, press and release the steam boost trigger or button to release a shot of steam. Holding down the trigger or button will not produce a continuous steam boost.Note that repeated usage of the steam boost in a short period of time may cause spitting or a reduction in the amount of steam produced. If this happens, wait for a short while before using the steam boost function again. | ||
| The steam boost in my Philips Steam Iron is not working. | The steam boost trigger has not been pressed and released. | To activate the steam boost in your Philips Steam Iron, press and release the steam boost button/trigger. Holding onto the steam boost button/trigger does not produce continuous steam boost. You may need to press the steam boost button/trigger several times on the first use for the pump to draw sufficient water.Note: We recommend to use the steam boost at the 3-dot temperature setting or higher. Using the steam boost at lower temperature settings may result in wet spots forming as the temperature of the iron may not be high enough to convert water into steam. |
| The steam boost function was used too often within a short period of time. | When you use the steam boost function of your Philips Steam Iron too often within a short period, the steam boost function will stop working for a while. In this case, please wait a couple of minutes before you use the steam boost again.For stubborn wrinkles, we recommend to use the steam boost with the steam setting at the no steam mode/dry ironing mode for the best effect. | |
| The iron is not ready to steam. | The iron is ready to steam when the indicator light switches off. | |
English
| My Philips Steam Iron produces smoke when heating up. | First usage. During production, some parts of the iron have been slightly greased. As a result of this, your iron may produce some smoke when it is switched on for the first few times, this is normal and should dissipate shortly. | |
| There is water in the soleplate. | Sometimes, there might still be some remaining water in your iron's soleplate after the last usage. This water will evaporate when your iron's soleplate heats up, and the steam generated may look like smoke. This is normal and should dissipate shortly. | |
| My iron is still producing smoke even after checking the above. | There could be an issue with the iron, we recommend you to contact us. | |
| There are water droplets/leaking on my garment during ironing. | First time usage. If you experience leaking/spitting during your first usage, perform the Calc Clean function once. If this does not resolve the leaking on your next use, we recommend you to contact us. | |
| The steam boost function was used too often within a short period of time. | Continue ironing in horizontal position and wait a while before you use the steam boost function again. | |
| There is a build up of scale/calcification in the iron. | If there is brown water or white flakes coming out of the iron, this may indicate a build up of calcification in the iron. Perform the Calc Clean function to clear this. If you live in an area with hard water, we recommend to use distilled water (or 50% distilled and 50% tap water) and perform the calc clean function once a month to prolong the lifetime of the iron.Note: the presence of white flakes on the very first use of the iron is normal. | |
| You have added other chemicals or additives into the water tank. | Fragrances/oils/chemicals/additives/descaling solutions should not be added into the water tank as they are damaging to the device. Please rinse the water tank, fill it up with water and descale your iron. | |
| You have not closed the water tank lid properly. | Close the lid firmly after filling. | |
| Steam has condensed onto the ironing board. | Steam may condense on the board cover, particularly when using irons that produce powerful levels of steam for a prolonged period of time. This can look like your iron is leaking from the soleplate. To prevent this, you can do the following:1 Select a lower steam setting than the setting you have been using or use steam during the first ironing strokes and then finish up with the dry-ironing strokes.2 You can also put an extra layer of cloth between the ironing board and the ironing board cover to minimize condensation.3 Replace the ironing board cover if the sponge material has worn out. | |
| Small droplets/wet spots that occur during start of ironing session. | If small droplets or wet spots occur during the start of the ironing session, this is normal as water might have collected in the soleplate from the previous ironing session, and the iron was used before it had fully heated up. Iron over the droplets/wet spots We recommend that the iron be stored in a vertical position with the steam setting set to no steam mode/dry ironing mode before it is unplugged to minimize the collection of water in the soleplate. | |
| The iron leaks after ironing. | If your iron leaks after unplugging/during storage, it may be because water has collected in the soleplate from leaving the steam setting on before the anti-drip feature activates. We recommend to set the steam selector to no steam mode/dry ironing mode before unplugging the iron. Empty the water tank and place the iron in the vertical position when cooling down/for storage. | |
| The iron leaves a shine or an imprint on the garment. | The surface to be ironed was uneven. | The iron is safe to use on all ironable garments. The shine or imprint is not permanent and disappears when you wash the garment. Avoid ironing over seams or folds. You can also place a cotton cloth over the area to be ironed to avoid imprints. |
| You have set a higher temperature than recommended for the fabric type. | Using a higher than recommended temperature setting for the fabric type may cause the iron to burn the fabric. Check your garment and that your iron is set to the correct temperature setting before ironing. The iron is safe to use on all ironable garments with the correct temperature setting. The shine or imprint is not permanent and disappears when you wash the garment. Avoid ironing over seams or folds. You can also place a cotton cloth over the area to be ironed to avoid imprints. | |
English
| The iron has stopped heating up. | Auto shut-off has been activated. | When your iron has not been used in 30 seconds in the horizontal position or 8 minutes in the vertical position), the iron will automatically shut-off. This is indicated by a constant blinking of the indicator light. To re-activate the iron, move the iron and the indicator light will light up again, indicating that the iron is heating up.If your iron has a dedicated Auto Shut Off light, the ASO light will blink when the iron enters the ASO state. When the iron is moved, the ASO light will switch off and the temperature indicator light will turn on, indicating that it is heating up again. |
| There is a power connection problem. | Please check the mains cord, the plug and the wall socket. Ensure that everything is properly connected. If you are using an extension plug, please ensure that power rating is suitable for the iron. | |
| The iron does not switch on anymore (I have tried the above but my iron still does not heat up). | If this is the case, there might be a problem with your iron. We recommend you to contact us. | |
| The indicator light on the iron is blinking/breathing. | Iron is heating up. The indicator light may turn on and off during ironing as the iron heats up periodically to maintain its temperature. | |
Giriş
22 Azərbaycanca
1 Water tank lid
2 Steam selector
3 Water spray
4 Cord
5 Cord winding
6 Indicator light
7 Steam boost trigger
8 Temperature dial
9 Quick Calc Release collector
Cihazdan istifadə
Type of water to use
Note: The iron may give off some steam when you use it for the first time. This stops after a short while.
Type of water to use
The appliance is suitable to be used with tap water. However, if you live in an area with hard water, we recommend that you mix an equal amount of tap water with distilled or demineralized water. This will prevent fast scale build up and prolong the lifetime of the appliance.
Do not add perfume, water from the tumble dryer, vinegar, starch, descaling agents, ironing aids, chemically descaled water or other chemicals, as they may cause water spitting, brown staining or damage to your appliance.
Filling the water tank

natural_image
Illustration of a steam iron with a warning symbol (no text or labels)1 Do not plug in the iron.

natural_image
Illustration of a steam iron with a magnified inset showing internal components (no text or symbols)2 Slide the steam selector to the right to select no steam mode/dry ironing mode

natural_image
Illustration of a hand using a tool to press down a steam iron (no text or symbols visible)3 Flip open the water tank lid.

4 Fill water tank up to the MAX indication mark. Do not add any additives like perfume, fragrances, soap or vinegar.

natural_image
Illustration of a hand using a tool to press down a steamer (no text or symbols visible)5 Close the water tank lid firmly.
Setting the temperature and steam
 |  | |
| MAXLINEN | //^* | |
| COTTON | //^* | |
| SILK | ECO | |
| SYNTHETICS |

natural_image
Illustration of a hand ironing an iron, labeled 'ECO' in the top-left corner (no other text or symbols)ECO setting: Minimum constant steam is delivered continuously for garments with less creases. This setting also saves energy.

natural_image
Illustration of a hand steaming iron with steam rising (no text or symbols)Two steam clouds: More constant steam is delivered continuously for tough creases.

For stubborn creases, set the steam setting to two steam clouds and press and hold the steam boost trigger below the handle. Maximum constant steam will be delivered continuously.
Preparing for use

Smoke can be visible during the first use, and it is normal. This ceases after a short while.
1 Check the garment label to ensure that the fabric is ironable and its appropriate temperature setting.

2 Turn the temperature dial to the appropriate ironable temperature indication according to the garment label.

natural_image
Illustration of two iron iron holders with a cross mark indicating the angle (no text or symbols present)3 Allow the iron to rest on its heel.

natural_image
Illustration of a steam iron with a cable, showing internal components and a power outlet (no text or symbols)4 Insert the plug into an earthed socket and allow the iron rest on its heel. If using an extension plug, ensure that the power rating of the extension plug is suitable for the iron.

natural_image
Close-up of a mechanical component with an hourglass icon highlighting a specific area (no text or symbols present)5 Wait for the iron to heat up. The indicator light will turn steady on while it is heating up.
Azərbaycanca

natural_image
Close-up of a mechanical component with a checkmark and magnified detail (no text or symbols)6 Once the iron is ready to be used, the indicator light will switch off. The indicator light may turn on and off during ironing as the iron heats up periodically to maintain its temperature.
Ironing with steam
1 Slide the steam selector to ECO mode or steam mode.

2 Turn the temperature dial to between silk and linen based on the image.


natural_image
Illustration of a person using a steam iron to press down a surface (no text or symbols visible)3 Steam will be released during ironing.
No steam mode/dry ironing mode

1 Set the steam setting to no steam mode/dry ironing mode

natural_image
Illustration of a hand ironing a steam iron on a bed (no text or symbols)2 After a short while, steam will cease during ironing.
Water spray

natural_image
Illustration of a hand using a power iron to press down on a surface, with a downward arrow indicating motion (no text or symbols present)1 Press and release the water spray button at the top of the handle. Water will be sprayed out of the nozzle.
Horizontal & vertical steam boost
1 Set temperature dial to MAX setting between cotton and linen.

Azərbaycanca

natural_image
Illustration of a hand using an iron to clean clothes, with a magnified inset showing upward and downward arrows (no text or symbols)2 Vertical steam boost: Press and release the steam boost trigger in the vertical position to release shots of steam on hanging garments. Holding down the steam boost trigger in the vertical position will not deliver constant steam.

natural_image
Illustration of hands using a steam iron to clean clothing (no text or symbols)3 Vertical steam boost: Pull and stretch your hanging garment while using the steam boost to remove stubborn creases.

4 Do not use your bare hand as a supporting surface when you iron.

natural_image
Illustration of a person using an iron with a cross mark (no text or symbols)5 Do not position the iron towards yourself or others.
Auto shut off (DST7030, DST7040, DST7050, DST7060, DST7510 only)

1 To give you a peace of mind, the appliance will cool down on its own if it is left unattended for a period of time.
2 When the iron is not in use for more than 30 seconds while resting on its soleplate or 8 minutes while resting on its heel/ base, the iron will enter auto shut off mode.
3 The temperature of the iron will decrease in auto shut off mode. The Auto Shut Off light will also blink quickly to indicate the iron is at auto-off status. To completely switch off the iron, plug out the iron/ switch off the mains plug.
4 Picking up or moving the iron will reactivate it.
5 The indicator light will turn steady ON, indicating that the iron is heating up again.

natural_image
Close-up of a mechanical component with a checkmark and magnified detail (no text or symbols)6 Once the indicator light switches OFF, the iron is ready for use.
Cleaning and maintenance

natural_image
Illustration of a steam iron being compressed with a magnified inset showing a plug (no text or symbols)1 Ensure the iron is not plugged in.

2 Ensure the iron is cooled down.

natural_image
Illustration of a hand holding a pear-shaped object with a checkmark indicating selection (no text or symbols present)3 Wipe the soleplate with a damp cloth.

natural_image
Illustration of a lit fuse with a magnified inset showing a bottle and bulb (no text or symbols)Note: To keep the soleplate smooth, avoid hard contact with metal objects. Never use a scouring pad, vinegar or other chemicals to clean the soleplate.

natural_image
Illustration of a steam iron with warning symbols (no text or labels)4 Do not wash/ clean the iron under running water as it may damage the electrical components within.
Calc-Clean

Tip: The Quick Calc Release function can be used at any time. If you live in a hard water area, use the function more frequently.
1 It is recommended to descale your iron after every 1 to 3 months of use to prolong its lifetime, or when brown stains/water is observed.
IMPORTANT: The Quick Calc Release automatically collects loose scale particles during ironing.

natural_image
Illustration of a wall socket connected to a plug with a black arrow indicating direction (no text or symbols)2 Ensure the iron is not plugged in.

3 Ensure the iron is cooled down.
32 Azərbaycanca

natural_image
Hand inserting a card into a device (no text or symbols visible)4 Slide up the Quick Calc Release collector lever.

natural_image
Illustration of a steam iron being placed on a kitchen sink with a small appliance nearby (no text or symbols)5 Pull out the Quick Calc Release collector lid.

natural_image
Illustration of a stainless steel kitchen sink with a faucet and a hand holding a bag, against a grid background (no text or symbols)6 Clean the Quick Calc Release collector lid with water.

natural_image
Illustration of a steam iron being placed into a sink with a drain, against a grid background (no text or symbols)7 Shake the iron to drain the water and scale particles from the opening of the iron.

8 Do not run water into the opening of the iron.

natural_image
Illustration of a mechanical device with two views of a component (no text or symbols)9 Shake the iron to drain the water and scale particles from the opening of the iron.

natural_image
Hand pressing down a button on a surface, no text or symbols visible10 Push down the lever to lock the Quick Calc Release collector. You will hear a 'click' sound.
Storage

1 Slide the steam selector to select no steam mode/dry ironing mode

natural_image
Illustration of a wall socket connected to a plug with a black arrow indicating direction (no text or symbols)2 Unplug the iron.

3 Let the iron cool down.

natural_image
Illustration of a hand using a power iron to press or install a surface, with a grid-patterned background (no text or symbols)4 Pour any remaining water out of the water tank.

natural_image
Diagram of a mechanical or fluidic device with rotating arrows indicating flow or movement (no text or symbols)5 Wind the power cord around the main body of the iron.
Trouble shooting
This chapter summarizes the most common problems you could encounter with the appliance. If you are unable to solve the problem with the information below, visit www.philips.com/support for a list of frequently asked questions or contact the Consumer Care Center in your country.
Problem Possible cause Solution
| My Philips Steam Iron does not produce steam. | There is no water/not enough water in the tank. | If there is no water in the water tank of your Philips Steam Iron, your iron is not able to generate steam. Please refill the water tank with water. After this, your iron should produce steam again. |
| The iron is not ready to steam. | Your iron is ready to produce steam when the indicator light switches off. | |
| The steam setting is set to no steam mode/dry ironing mode | Aways ensure that the temperature dial is at the 2-dot ●3 ●lot or ●te●HEN setting. Then, select a steam setting (ECO setting and 2-cloud setting) on the steam selector at the top of the handle.Ironing with steam with the temperature dial at the 1-dot or SYNTHETIC setting may cause wet spots/leaking as the temperature of the iron may not be hot enough to convert water to steam | |
| My Philips Steam Iron does not remove creases. | The temperature is set too low. | For irons with a temperature dial, please set the temperature according to the fabric that you are ironing. You can use the following table as a reference.Note: For some fabrics such as silk, wool, cotton and linen, steam would be needed to remove creases more efficiently. |
| Steam is not used. Switch the steam selector to or 2-cloECOettingYour Philips Iron does not produce steam when the temperature dial is at the 1-dot position, SYNTHETIC or Calc-Clean setting. You can get more steam by changing to a stronger steam setting, or using the steam boost function to help remove tough wrinkles.To remove creases in the vertical position, press and release the steam boost trigger or button to release a shot of steam. Holding down the trigger or button will not produce a continuous steam boost.Note that repeated usage of the steam boost in a short period of time may cause spitting or a reduction in the amount of steam produced. If this happens, wait for a short while before using the steam boost function again. | ||
| The steam boost in my Philips Steam Iron is not working. | The steam boost trigger has not been pressed and released. | To activate the steam boost in your Philips Steam Iron, press and release the steam boost button/trigger. Holding onto the steam boost button/trigger does not produce continuous steam boost. You may need to press the steam boost button/trigger several times on the first use for the pump to draw sufficient water.Note: We recommend to use the steam boost at the 3-dot temperature setting or higher. Using the steam boost at lower temperature settings may result in wet spots forming as the temperature of the iron may not be high enough to convert water into steam. |
| The steam boost function was used too often within a short period of time. | When you use the steam boost function of your Philips Steam Iron too often within a short period, the steam boost function will stop working for a while. In this case, please wait a couple of minutes before you use the steam boost again.For stubborn wrinkles, we recommend to use the steam boost with the steam setting at the no steam mode/dry ironing mode for the best effect. | |
| The iron is not ready to steam. | The iron is ready to steam when the indicator light switches off. | |
Azərbaycanca
| My Philips Steam Iron produces smoke when heating up. | First usage. During production, some parts of the iron have been slightly greased. As a result of this, your iron may produce some smoke when it is switched on for the first few times, this is normal and should dissipate shortly. | |
| There is water in the soleplate. | Sometimes, there might still be some remaining water in your iron's soleplate after the last usage. This water will evaporate when your iron's soleplate heats up, and the steam generated may look like smoke. This is normal and should dissipate shortly. | |
| My iron is still producing smoke even after checking the above. | There could be an issue with the iron, we recommend you to contact us. | |
| There are water droplets/leaking on my garment during ironing. | First time usage. If you experience leaking/spitting during your first usage, perform the Calc Clean function once. If this does not resolve the leaking on your next use, we recommend you to contact us. | |
| The steam boost function was used too often within a short period of time. | Continue ironing in horizontal position and wait a while before you use the steam boost function again. | |
| There is a build up of scale/calcification in the iron. | If there is brown water or white flakes coming out of the iron, this may indicate a build up of calcification in the iron. Perform the Calc Clean function to clear this. If you live in an area with hard water, we recommend to use distilled water (or 50% distilled and 50% tap water) and perform the calc clean function once a month to prolong the lifetime of the iron.Note: the presence of white flakes on the very first use of the iron is normal. | |
| You have added other chemicals or additives into the water tank. | Fragrances/oils/chemicals/additives/descaling solutions should not be added into the water tank as they are damaging to the device. Please rinse the water tank, fill it up with water and descale your iron. | |
| You have not closed the water tank lid properly. | Close the lid firmly after filling. | |
| Steam has condensed onto the ironing board. | Steam may condense on the board cover, particularly when using irons that produce powerful levels of steam for a prolonged period of time. This can look like your iron is leaking from the soleplate. To prevent this, you can do the following:1 Select a lower steam setting than the setting you have been using or use steam during the first ironing strokes and then finish up with the dry-ironing strokes.2 You can also put an extra layer of cloth between the ironing board and the ironing board cover to minimize condensation.3 Replace the ironing board cover if the sponge material has worn out. | |
| Small droplets/wet spots that occur during start of ironing session. | If small droplets or wet spots occur during the start of the ironing session, this is normal as water might have collected in the soleplate from the previous ironing session, and the iron was used before it had fully heated up. Iron over the droplets/wet spots We recommend that the iron be stored in a vertical position with the steam setting set to no steam mode/dry ironing mode before it is unplugged to minimize the collection of water in the soleplate. | |
| The iron leaks after ironing. | If your iron leaks after unplugging/during storage, it may be because water has collected in the soleplate from leaving the steam setting on before the anti-drip feature activates. We recommend to set the steam selector to no steam mode/dry ironing mode before unplugging the iron. Empty the water tank and place the iron in the vertical position when cooling down/for storage. | |
| The iron leaves a shine or an imprint on the garment. | The surface to be ironed was uneven. | The iron is safe to use on all ironable garments. The shine or imprint is not permanent and disappears when you wash the garment. Avoid ironing over seams or folds. You can also place a cotton cloth over the area to be ironed to avoid imprints. |
| You have set a higher temperature than recommended for the fabric type. | Using a higher than recommended temperature setting for the fabric type may cause the iron to burn the fabric. Check your garment and that your iron is set to the correct temperature setting before ironing. The iron is safe to use on all ironable garments with the correct temperature setting. The shine or imprint is not permanent and disappears when you wash the garment. Avoid ironing over seams or folds. You can also place a cotton cloth over the area to be ironed to avoid imprints. | |
Azərbaycanca
| The iron has stopped heating up. | Auto shut-off has been activated. | When your iron has not been used in 30 seconds in the horizontal position or 8 minutes in the vertical position), the iron will automatically shut-off. This is indicated by a constant blinking of the indicator light. To re-activate the iron, move the iron and the indicator light will light up again, indicating that the iron is heating up.If your iron has a dedicated Auto Shut Off light, the ASO light will blink when the iron enters the ASO state. When the iron is moved, the ASO light will switch off and the temperature indicator light will turn on, indicating that it is heating up again. |
| There is a power connection problem. | Please check the mains cord, the plug and the wall socket. Ensure that everything is properly connected. If you are using an extension plug, please ensure that power rating is suitable for the iron. | |
| The iron does not switch on anymore (I have tried the above but my iron still does not heat up). | If this is the case, there might be a problem with your iron. We recommend you to contact us. | |
| The indicator light on the iron is blinking/breathing. | Iron is heating up. The indicator light may turn on and off during ironing as the iron heats up periodically to maintain its temperature. | |
Pendahuluan
1 Tutup tangki air
2 Pemilih uap
3 Semprotan air
4 Kabel
5 Tempat menggulung kabel
6 Lampu indikator
7 Pemicu semburan uap
8 Kenop suhu
9 Penampung Quick Calc Release
Menggunakan alat
natural_image
Illustration of a steam iron with a warning symbol (no text or labels)1 Jangan colokkan steker setrika ke stopkontak.

natural_image
Illustration of a hand using a tool to press down a steam iron (no text or symbols visible)natural_image
Illustration of a hand using a tool to press down a steamer (no text or symbols visible)natural_image
Illustration of a hand using an iron on a steam, labeled 'ECO' in the top-left corner (no other text or symbols)natural_image
Illustration of a hand steaming iron with a circular icon showing a steam drop symbol (no text or symbols present)natural_image
Illustration of two iron shavings with a cross mark indicating a defect or damage (no text or symbols present)natural_image
Illustration of a steam iron with a cord and plug, no text or symbols presentnatural_image
Close-up of a mechanical component with an hourglass icon highlighting a specific area (no text or symbols present)natural_image
Close-up of a mechanical component with a checkmark and magnified detail (no text or symbols)natural_image
Illustration of a hand ironing an iron on a person's back (no text or symbols)3 Uap akan keluar saat menyetrika.
Mode tanpa uap/mode penyetrikaan kering

1 Atur pengaturan uap ke mode tanpa uap/mode penyetrikaan kering


natural_image
Illustration of a hand ironing a steam iron on a bed (no text or symbols)natural_image
Illustration of a hand using a power iron to clean or wear, with a downward arrow indicating the process (no text or symbols present)natural_image
Illustration of a hand using an iron to clean clothes, with a magnified inset showing upward and downward arrows (no text or symbols)natural_image
Illustration of hands using a steam iron to clean clothing, showing a downward motion (no text or symbols)natural_image
Illustration of a person using an iron with a cross mark (no text or symbols)5 Jangan arahkan setrika menghadap Anda atau orang lain.
Mati otomatis (DST7030, DST7040, DST7050, DST7060, DST7510 saja)

natural_image
Close-up of a mechanical component with a checkmark and magnified detail (no text or symbols)natural_image
Illustration of a steam iron being compressed with a magnified inset showing a plug (no text or symbols)natural_image
Illustration of a hand using a tool to cut a leaf or seed, with a checkmark indicating the correct removal (no text or symbols present)natural_image
Illustration of a light bulb with a magnified inset showing a bottle and a textured sphere (no text or symbols)natural_image
Illustration of a steam iron in a kitchen sink with warning symbols (no text or labels)natural_image
Illustration of a wall socket connected to a plug with a downward arrow indicating compression (no text or symbols)natural_image
Hand inserting a card into a device (no text or symbols visible)4 Geser tuas penampung Quick Calc Release ke atas.

natural_image
Illustration of a steam iron being placed on a kitchen sink with a small appliance nearby (no text or symbols)5 Tarik tutup penampung Quick Calc Release ke luar.

natural_image
Illustration of a stainless steel kitchen sink with a faucet and showerhead, against a grid background (no text or symbols)natural_image
Illustration of a steam iron being placed into a sink with a drain, against a grid background (no text or symbols)8 Jangan mengisi air melalui lubang setrika.

natural_image
Illustration of a mechanical device with two views of a component (no text or symbols)9 Goyangkan setrika untuk mengeluarkan air beserta partikel kerak melalui lubang setrika.

natural_image
Hand pressing down a button on a surface, no text or symbols visible10 Dorong tuas ke bawah untuk mengunci penampung Quick Calc Release. Pastikan terdengar bunyi "klik".
Penyimpanan

natural_image
Illustration of a wall socket connected to an electrical plug with a black arrow indicating direction (no text or symbols)3 Biarkan setrika mendingin.
52 Bahasa Indonesia

natural_image
Close-up of a hand using a power iron to clean or install a component, with a grid background (no text or symbols visible)natural_image
Illustration of a mechanical component with rotating arrows indicating motion (no text or symbols)5 Gulung kabel listrik di sekeliling bodi setrika.
Pemecahan masalah
1 Penutup tangki air
2 Pemilih stim
3 Penyembur air
4 Kord
5 Menggulung kord
6 Lampu penanda
7 Picu pancutan stim
8 Tombol suhu
9 Pengumpul Pelepasan Kerak Pantas
natural_image
Illustration of a steam iron with a warning symbol (no text or labels)natural_image
Illustration of a steam iron being cut with a magnified inset showing internal components (no text or symbols)natural_image
Illustration of a hand using a tool to press down a steam iron (no text or symbols visible)natural_image
Illustration of a hand using a tool to press or install a component on an iron (no text or symbols visible) | | ||||||
| MAXLINEN | / | \( / | \( /● | \( / | \( /● | ECO | |
| \( SUTERA | |||||||
| SINTETIK |

natural_image
Illustration of a hand ironing an iron with 'ECO' label (no other text or symbols)natural_image
Illustration of a hand steaming a steam iron with a circular icon showing a cloud or smoke (no text or symbols)natural_image
Illustration of two iron shavings with a cross mark indicating a defect or damage (no text or symbols present)natural_image
Illustration of a steam iron with a cord and plug, no text or symbols presentnatural_image
Close-up of a mechanical component with an hourglass icon highlighting a specific area (no text or symbols present)natural_image
Close-up of a mechanical component with a checkmark and magnified detail (no text or symbols)natural_image
Illustration of a hand ironing an iron on a person's back (no text or symbols)3 Stim akan dilepaskan semasa penyeterikaan.
natural_image
Illustration of a hand ironing a steam iron on a bed (no text or symbols)2 Selepas seketika, stim akan berhenti semasa proses penyeterikaan.
Penyembur air

natural_image
Illustration of a hand ironing an iron on a surface, with a downward arrow indicating motion (no text or symbols)natural_image
Illustration of a hand using an iron to clean clothes, with arrows indicating direction (no text or symbols)natural_image
Illustration of a hand using an iron to clean clothing, with a downward arrow indicating the process (no text or symbols present)natural_image
Illustration of a person holding a medical device with a cross symbol (no text or labels)natural_image
Close-up of a mechanical component with a checkmark and magnified detail (no text or symbols)6 Sebaik sahaja lampu penanda MATI, seterika sedia digunakan.
natural_image
Illustration of a hand cleaning a pear-shaped object with a checkmark indicating inspection (no text or symbols)natural_image
Illustration of a lit candle with a magnified inset showing a bottle and a textured surface (no text or symbols)natural_image
Illustration of a steam iron in a kitchen sink with warning symbols (no text or labels)natural_image
Illustration of a wall socket connected to a plug with a black arrow indicating direction (no text or symbols)natural_image
Hand inserting a small object into a container with arrows indicating direction (no text or symbols)natural_image
Illustration of a steam iron pressing down on a surface with a small device nearby (no text or symbols visible)5 Keluarkan penutup pengumpul Pelepas Kerak Pantas.

natural_image
Close-up of a stainless steel kitchen sink with a faucet and bucket, against a tiled wall (no text or symbols visible)natural_image
Illustration of a hand washing a showerhead with a drain, against a grid background (no text or symbols)natural_image
Illustration of a kitchen sink with a drain, showing a shower and warning symbols (no text or labels)natural_image
Hand pressing down a button on a metallic object (no text or symbols visible)natural_image
Illustration of a wall socket connected to a plug with a magnified inset showing internal structure (no text or symbols)natural_image
Close-up of a hand using a power iron to clean or install a component, with a grid background (no text or symbols visible)natural_image
Illustration of a mechanical device with rotating arrows indicating motion (no text or symbols)natural_image
Illustration of a steam iron with a warning symbol (no text or labels)natural_image
Illustration of a steam iron with a magnified inset showing internal components (no text or symbols)natural_image
Illustration of a hand using a tool to press down a steam iron (no text or symbols visible)3 Odklopte víčko nádržky na vodu.

natural_image
Illustration of a hand using a tool to press down a steaming iron (no text or symbols visible)natural_image
Illustration of a hand ironing an iron, labeled 'ECO' in the top-left corner (no other text or symbols)natural_image
Illustration of a hand steaming iron with steam rising (no text or symbols)natural_image
Illustration of two iron iron holders with a cross mark indicating the angle (no text or symbols present)natural_image
Illustration of a steam iron with a cord and plug, no text or symbols presentnatural_image
Close-up of a mechanical component with an hourglass icon highlighting a specific area (no text or symbols present)natural_image
Close-up of a mechanical component with a checkmark and magnified detail (no text or symbols)natural_image
Illustration of a person using a steam iron to press down a surface (no text or symbols visible)natural_image
Illustration of a hand ironing a steam iron on a bed (no text or symbols)natural_image
Illustration of a hand using an iron to press down on a textured surface, with a downward arrow indicating motion (no text or symbols present)Čeština

natural_image
Illustration of a hand using an iron to clean clothes, with a magnified inset showing upward and downward arrows (no text or symbols)natural_image
Illustration of hands using a steam iron to clean clothing (no text or symbols)natural_image
Illustration of a person using an iron with a cross mark (no text or symbols)natural_image
Close-up of a mechanical component with a checkmark and magnified detail (no text or symbols)natural_image
Illustration of a steam iron being compressed with a magnified inset showing a plug (no text or symbols)natural_image
Illustration of a hand holding a seed or pod with a checkmark indicating selection (no text or symbols present)natural_image
Illustration of a light bulb with a magnified inset showing a bottle and a textured sphere (no text or symbols)natural_image
Illustration of a showerhead with warning symbols (no text or labels)natural_image
Illustration of a wall socket connected to a plug with a black arrow indicating direction (no text or symbols)natural_image
Hand inserting a card into a device (no text or symbols visible)natural_image
Illustration of an iron (£) being placed on a sink with a small device nearby (no text or symbols visible)natural_image
Illustration of a stainless steel kitchen sink with a faucet and a hand holding a bag, against a grid background (no text or symbols)natural_image
Illustration of a hand washing a shower with a drain, no text or symbols presentnatural_image
Illustration of a mechanical device with two views of a component (no text or symbols)natural_image
Hand pressing down a button on a surface, no text or symbols visiblenatural_image
Illustration of a steam iron with a magnified inset showing internal components (no text or symbols)natural_image
Illustration of a wall socket connected to an electrical plug with a black arrow indicating direction (no text or symbols)2 Žehličku odpojte.

natural_image
Illustration of a hand using a power iron to clean or install a surface (no text or symbols visible)natural_image
Diagram of a mechanical device with rotating arms and internal components (no text or symbols)natural_image
Illustration of a steam iron with a warning symbol (no text or labels)natural_image
Illustration of a hand using a tool to press down a steam iron (no text or symbols visible)3 Åbn läget til vandtanken.

natural_image
Illustration of a hand using a tool to press down a steamer (no text or symbols visible)natural_image
Illustration of a hand ironing an iron, labeled 'ECO' in the top-left corner (no other text or symbols)natural_image
Illustration of a hand steaming iron with steam rising (no text or symbols)To dampskyer: Der leveres mere kontinuerligt maksimal damp til genstridige folder.

natural_image
Illustration of two iron shavings with a cross mark indicating a defect or damage (no text or symbols present)natural_image
Illustration of a steam iron with a cord and plug, no text or symbols presentnatural_image
Close-up of a mechanical component with an hourglass icon highlighting a specific area (no text or symbols present)natural_image
Close-up of a mechanical component with a checkmark and magnified detail (no text or symbols)natural_image
Illustration of a hand ironing an iron on a person's back (no text or symbols)3 Dampen bliver frigivet under strygning.
natural_image
Illustration of a hand ironing an iron on a bed (no text or symbols)natural_image
Illustration of a hand using a steam iron to press down on a surface, with a downward arrow indicating motion (no text or symbols present)102 Dansk

natural_image
Illustration of a hand using an iron to clean clothes, with a circular icon showing upward motion and checkmark indicators (no text or symbols)natural_image
Illustration of hands using a steam iron to clean clothing, showing motion and shading (no text or symbols)natural_image
Illustration of a person using an iron with a cross mark (no text or symbols)natural_image
Close-up of a mechanical component with a checkmark and magnified detail (no text or symbols)natural_image
Illustration of a steam iron being heated by a plug, with a magnified inset showing the plug's electrical contact (no text or symbols present)natural_image
Illustration of a hand holding a pear-shaped object with a checkmark indicating selection (no text or symbols present)natural_image
Illustration of a lit fuse with a magnified inset showing a bottle and bulb (no text or symbols)natural_image
Illustration of a showerhead with an exclamation mark and a cross symbol, against a tiled wall background (no text or symbols)natural_image
Illustration of a wall socket connected to a plug with a black arrow indicating direction (no text or symbols)natural_image
Hand inserting a card into a device (no text or symbols visible)4 Skub dækslet til Quick Calc Release-opsamleren op.

natural_image
Illustration of a steam iron being placed on a kitchen sink with a small appliance nearby (no text or symbols)natural_image
Illustration of a stainless steel kitchen sink with a faucet and a hand holding a bag, against a grid background (no text or symbols)natural_image
Illustration of a hand washing a shower with a drain, no text or symbols presentnatural_image
Illustration of a mechanical device with two views of a component (no text or symbols)natural_image
Hand pressing down a button on a surface, no text or symbols visiblenatural_image
Illustration of a wall socket connected to a plug with a black arrow indicating direction (no text or symbols)natural_image
Illustration of a hand using a power iron to press or install a surface, with a grid-patterned background (no text or symbols)natural_image
Diagram of a mechanical or fluidic device with rotating arrows indicating flow or movement (no text or symbols)natural_image
Illustration of a steam iron with a warning symbol (no text or labels)natural_image
Illustration of a hand using a tool to press down a steam iron (no text or symbols visible)natural_image
Illustration of a hand using a tool to press down a steaming iron (no text or symbols visible)natural_image
Illustration of a hand ironing an iron with 'ECO' label (no other text or symbols)natural_image
Illustration of a hand steaming a steam iron with a circular icon showing a cloud or smoke (no text or symbols)natural_image
Illustration of two iron shavings with a cross mark indicating a defect or damage (no text or symbols present)natural_image
Illustration of a steam iron with a cord and plug, no text or symbols presentnatural_image
Close-up of a mechanical component with an hourglass icon highlighting a specific area (no text or symbols present)natural_image
Close-up of a mechanical component with a checkmark and magnified detail (no text or symbols)natural_image
Illustration of a person using a steam iron to burn or steam (no text or symbols visible)natural_image
Illustration of a hand ironing an iron on a bed (no text or symbols)natural_image
Illustration of a hand using an iron on a textured surface, with a downward arrow indicating motion (no text or symbols)natural_image
Illustration of a hand using a iron to clean clothing, with arrows and checkmark symbols indicating inspection or repair (no text present)natural_image
Illustration of hands using a steam iron to burn or smoke (no text or symbols)natural_image
Illustration of a person using a steam iron to clean air, with a hand holding the iron and a cross mark above (no text or symbols)natural_image
Close-up of a mechanical component with a checkmark and magnified detail (no text or symbols)natural_image
Illustration of a steam iron being heated by a plug, with a magnified inset showing a plug plug (no text or symbols present)natural_image
Illustration of a hand holding a pear-shaped object with a checkmark indicating selection (no text or symbols present)natural_image
Illustration of a lit fuse with a magnified inset showing a bottle and bulb (no text or symbols)natural_image
Illustration of a showerhead with warning symbols (in警告, exclamation, and cross) against a grid background, no text or labels present.natural_image
Illustration of a wall socket connected to a plug with a black arrow indicating direction (no text or symbols)natural_image
Hand inserting a card into a device (no text or symbols visible)natural_image
Illustration of a steam iron being placed on a kitchen sink with a small appliance nearby (no text or symbols)natural_image
Illustration of a stainless steel kitchen sink with a faucet and a hand holding a bag, against a grid background (no text or symbols)natural_image
Illustration of a hand washing a shower with a drain, no text or symbols presentnatural_image
Illustration of a mechanical device with two views of a component (no text or symbols)natural_image
Hand pressing down a button on a surface, no text or symbols visiblenatural_image
Illustration of a wall socket connected to an electrical plug with a black arrow indicating direction (no text or symbols)natural_image
Illustration of a hand using a power iron on a metal surface (no text or symbols visible)natural_image
Illustration of a mechanical device with rotating arrows indicating motion (no text or symbols)natural_image
Illustration of a steam iron with a warning symbol (no text or labels)2 Libistage auruvalijat paremale, et valida aururežiim / kuiv triikimine

natural_image
Illustration of a hand using a tool to press down a steam iron (no text or symbols visible)3 Keerake veepaagi kaas lahti.

natural_image
Illustration of a hand using a tool to press down a steaming iron (no text or symbols visible)natural_image
Illustration of a hand using an iron iron to clean (ECO) from a machine, no text or symbols present.natural_image
Illustration of a hand ironing an iron with steam, no text or symbols presentnatural_image
Illustration of two iron shavings with a cross mark indicating a defect or damage (no text or symbols present)natural_image
Illustration of a steam iron with a cord and plug, no text or symbols presentnatural_image
Close-up of a mechanical component with an hourglass icon highlighting a specific area (no text or symbols present)natural_image
Close-up of a mechanical component with a checkmark and magnified detail (no text or symbols)natural_image
Illustration of a person ironing a steam iron on a bed (no text or symbols)Ilma auruta režiim / kuivtriikimise režiim

1 Seadke auruseadistus ilma auruta režiimile / kuivtriikimise režiimile

natural_image
Illustration of a hand ironing a steam iron on a bed (no text or symbols)natural_image
Illustration of a hand using an iron to clean or wear a textured surface, with a downward arrow indicating motion (no text or symbols present)
natural_image
Illustration of a hand using an iron to clean clothes, with arrows indicating direction (no text or symbols)natural_image
Illustration of a hand using an iron to clean clothing, with a downward arrow indicating the process (no text or symbols present)natural_image
Illustration of a person holding a medical device with a cross symbol (no text or labels)natural_image
Close-up of a mechanical component with a checkmark and magnified detail (no text or symbols)natural_image
Illustration of a steam iron being compressed with a magnified inset showing a plug (no text or symbols)natural_image
Illustration of a hand using a tool to cut a leaf or seed, with a checkmark indicating the correct removal (no text or symbols present)natural_image
Illustration of a steam iron in a kitchen sink with warning symbols (no text or labels)natural_image
Illustration of a wall socket connected to a plug with a black arrow indicating direction (no text or symbols)natural_image
Illustration of a hand inserting a device into a container with an arrow (no text or symbols)natural_image
Illustration of a steam iron being placed on a kitchen sink with a small appliance nearby (no text or symbols)natural_image
Illustration of a stainless steel kitchen sink with a faucet and showerhead, against a grid background (no text or symbols)natural_image
Illustration of a steam iron being placed into a sink with a drain, against a grid background (no text or symbols)8 Ärge valage triikraua avasse vett.
Eesti

natural_image
Illustration of a biological structure with numbered annotations (1, 2), no readable text or symbols present.natural_image
Hand pressing down a button on a metallic object (no text or symbols visible)natural_image
Illustration of a wall socket connected to a plug with a black arrow indicating direction (no text or symbols)3 Laske seadmel jahtuda.

natural_image
Illustration of a hand using a power iron to clean or install a surface, with a grid background (no text or symbols)natural_image
Diagram of a mechanical device with rotating arms and internal components (no text or symbols)natural_image
Illustration of a steam iron with a warning symbol (no text or labels)152
Español

natural_image
Illustration of a iron (£) being cut with a magnified inset showing internal components (no text or symbols)natural_image
Illustration of a hand using a tool to press down a steam iron (no text or symbols visible)natural_image
Illustration of a hand using a tool to press down a steamer (no text or symbols visible)natural_image
Illustration of a hand using an iron iron to clean (ECO) from a machine, no text or symbols present.natural_image
Illustration of a hand steaming iron with a circular icon showing a steam drop symbol (no text or symbols present)natural_image
Illustration of two iron iron holders with a cross mark indicating a specific part (no text or symbols present)natural_image
Illustration of a steam iron with a cable, showing internal components and a plug (no text or symbols)natural_image
Illustration of a mechanical component with an hourglass icon and magnified detail (no text or symbols)natural_image
Close-up of a mechanical component with a checkmark and magnified detail (no text or symbols)natural_image
Illustration of a person ironing a piece of material, showing steam and motion (no text or symbols)natural_image
Illustration of a hand ironing an iron on a bed (no text or symbols visible)natural_image
Illustration of a hand using an iron on a surface with a downward arrow indicating motion (no text or symbols)natural_image
Illustration of a hand using an iron to clean clothes, with a magnified inset showing upward and downward arrows (no text or symbols)natural_image
Illustration of a hand using an iron to clean clothing, with a downward arrow indicating the process (no text or symbols present)natural_image
Illustration of a person holding a medical device with a cross symbol (no text or labels)natural_image
Close-up of a mechanical component with a checkmark and magnified detail (no text or symbols)natural_image
Illustration of a steam iron being compressed with a magnified inset showing a plug (no text or symbols)natural_image
Illustration of a hand using a tool to cut a leaf or seed, with a checkmark indicating the correct removal (no text or symbols present)natural_image
Illustration of a light bulb with a magnified inset showing a bottle and a textured sphere, no text or symbols present.natural_image
Illustration of a steam iron in a kitchen sink with warning symbols (no text or labels)natural_image
Illustration of a wall socket connected to a plug with a black arrow indicating direction (no text or symbols)natural_image
Illustration of a hand inserting a plug into a container with an arrow (no text or symbols)natural_image
Illustration of a steam iron being placed on a kitchen sink with a small appliance nearby (no text or symbols)natural_image
Illustration of a stainless steel kitchen sink with a faucet and a bucket, against a grid background (no text or symbols)natural_image
Illustration of a steam iron being placed into a sink with a drain, against a grid background (no text or symbols)natural_image
Illustration of a robotic arm with labeled parts (1 and 2), showing mechanical components and a close-up view of the arm (no text or symbols present)natural_image
Hand pressing down a button on a metallic object (no text or symbols visible)natural_image
Illustration of a wall socket connected to a plug with a black arrow indicating direction (no text or symbols)natural_image
Illustration of a hand using a power iron to press or install a surface, with a grid-patterned background (no text or symbols)natural_image
Diagram of a bottle with internal structure and curved arrows indicating motion (no text or symbols)natural_image
Illustration of a steam iron with a warning symbol (no text or labels)natural_image
Illustration of a hand using a power tool to press down a steam iron (no text or symbols visible)natural_image
Illustration of a hand using a tool to press down a steaming iron (no text or symbols visible)natural_image
Illustration of a hand using an iron iron to clean (ECO) from a machine, no text or symbols present.natural_image
Illustration of a hand ironing an iron with steam, no text or symbols presentnatural_image
Illustration of two iron shavings with a cross mark indicating a specific part (no text or symbols present)natural_image
Illustration of a steam iron with a cord and plug, no text or symbols presentnatural_image
Close-up of a mechanical component with an hourglass icon highlighting a specific area (no text or symbols present)natural_image
Close-up of a mechanical component with a checkmark and magnified detail (no text or symbols)
natural_image
Illustration of a person using a steam iron to burn or steam (no text or symbols visible)natural_image
Illustration of a hand ironing a steam iron on a bed (no text or symbols)natural_image
Illustration of a hand using a steam iron to press down on a surface, with a downward arrow indicating motion (no text or symbols present)natural_image
Illustration of a hand using an iron to clean clothes, with a magnified inset showing upward and downward arrows (no text or symbols)natural_image
Illustration of a hand using an iron to clean clothing, with a downward arrow indicating the process (no text or symbols present)natural_image
Illustration of a person holding a medical device with a cross symbol (no text or labels)natural_image
Close-up of a mechanical component with a checkmark and magnified detail (no text or symbols)natural_image
Illustration of a steam iron being heated by a plug, with a magnified inset showing the plug's electrical contact (no text or symbols present)natural_image
Illustration of a hand using a tool to cut a leaf or seed, with a checkmark indicating the correct removal (no text or symbols present)natural_image
Illustration of a light bulb with a magnified inset showing a bottle and a textured sphere, no text or symbols present.natural_image
Illustration of a steam iron in a kitchen sink with warning symbols (no text or labels)natural_image
Illustration of a wall socket connected to a plug with an arrow indicating direction (no text or symbols)natural_image
Hand inserting a small object into a container with arrows indicating direction (no text or symbols)natural_image
Illustration of a steam iron being placed on a surface with a small device nearby (no text or symbols visible)natural_image
Close-up of a stainless steel kitchen sink with a faucet and showerhead, against a tiled wall (no text or symbols visible)natural_image
Illustration of a steam iron being placed on a kitchen sink (no text or symbols visible)natural_image
Illustration of a shower drain with a water drop and warning symbols (no text or labels)natural_image
Illustration of a biological structure with numbered annotations (1, 2), no readable text or symbols present.natural_image
Hand pressing down a button on a metallic object (no text or symbols visible)natural_image
Illustration of a wall socket connected to an electrical plug with a black arrow indicating direction (no text or symbols)natural_image
Illustration of a hand using a power iron to clean or install a surface (no text or symbols visible)natural_image
Diagram of a mechanical device with rotating arms and internal components (no text or symbols)1 Poklopac spremnika za vodu
2 Gumb za odabir pare
3 Raspršivanje vode
4 Kabel
5 Namotavanje kabela
6 Indikator
7 Okidač za dodatnu količinu pare
8 Regulator temperature
9 Odjeljak Quick Calc Release
Uporaba aparata
Vrsta vode koju treba upotrebljavati
Napomena: Prilikom prve uporabe glačala možda ćete primijetiti malo pare. To će ubrzo prestati.
Vrsta vode koju treba upotrebljavati
natural_image
Illustration of a steam iron with a warning symbol (no text or labels)1 Nemojte ukopčavati glačalo.

natural_image
Illustration of a steam iron with a magnified inset showing internal components (no text or symbols)natural_image
Illustration of a hand using a tool to press down a steam iron (no text or symbols visible)3 Otvorite poklopac spremnika za vodu.

4 Napunite spremnik za vodu do oznake MAX. Nemojte dodavati parfeme, mirise, sapun ni ocat.

natural_image
Illustration of a hand using a tool to press down a steaming iron (no text or symbols visible)5 Čvrsto zatvorite poklopac spremnika za vodu.
Postavljanje temperature i pare
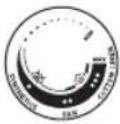 |  | |
| MAXLAN | / / * | |
| PAMUK | / / * | |
| SVILA | ECO | |
| SINTETIKA |

natural_image
Illustration of a hand using an iron on a steam, labeled 'ECO' in the top-left corner (no other text or symbols)natural_image
Illustration of a hand steaming iron with a circular icon showing a steam drop symbol (no text or symbols present)Dva oblaka pare: veća dosljedna količina pare kontinuirano se ispušta radi uklanjanja tvrdokornih nabora.

Za tvrdokorne nabore, podesite postavku pare na dva oblaka pare na zatim pritisnite i držite okidač za dodatnu količinu pare ispod drške. Najveća moguća dosljedna količina pare kontinuirano će se ispuštati.
Priprema za uporabu

2 Okrenite regulator temperature na oznaku odgovarajuće temperature koja je naznačena na ušivenoj markici odjevnog predmeta.

natural_image
Illustration of two iron shavings with a cross mark indicating a defect or damage (no text or symbols present)3 Glačalo postavite u uspravan položaj.

natural_image
Illustration of a steam iron with a cord and plug, no text or symbols present4 Utikač umetnite u uzemljenu utičnicu i postavite glačalo u uspravan položaj. Ako upotrebljavate produžni kabel, provjerite odgovaraju li njegove specifikacije glačalu.

natural_image
Close-up of a mechanical component with an hourglass icon highlighting a specific area (no text or symbols present)natural_image
Close-up of a mechanical component with a checkmark and magnified detail (no text or symbols)natural_image
Illustration of a person ironing a steam iron on a bed (no text or symbols)1 Postavite postavku pare na način rada bez pare / suho glačanje

natural_image
Illustration of a hand ironing an iron on a bed (no text or symbols)natural_image
Illustration of a hand using a steam iron to press down on a surface, with a downward arrow indicating motion (no text or symbols present)natural_image
Illustration of a hand using an iron to clean clothes, with a circular icon showing upward motion and checkmark indicators (no text or symbols)2 Dodatna količina pare u okomitom položaju: Pritisnite i otpustite okidač za dodatnu količinu pare u okomitom položaju kako biste ispustili mlazove pare na odjeću koja visi. Ako stalno držite okidač za dodatnu količinu pare dok je glačalo u uspravnom položaju, konstantna para neće se ispuštati.

natural_image
Illustration of hands using a steam iron to clean clothing, showing motion and shading (no text or symbols)3 Dodatna količina pare u okomitom položaju: Povucite i razvucite odjevni predmet koji visi dok upotrebljavate dodatnu količinu pare za uklanjanje tvrdokornih nabora.

4 Nemojte golom šakom podržavati odjevni predmet prilikom glačanja.

natural_image
Illustration of a person using an iron with a cross mark (no text or symbols)natural_image
Close-up of a mechanical component with a checkmark and magnified detail (no text or symbols)natural_image
Illustration of a steam iron being heated by a plug, with a magnified inset showing the plug's electrical contact (no text or symbols present)2 Provjerite je li se glačalo ohladilo.

natural_image
Illustration of a hand using a tool to cut a leaf or seed, with a checkmark indicating the correct removal (no text or symbols present)natural_image
Illustration of a light bulb with a magnified inset showing a bottle and a textured sphere (no text or symbols)natural_image
Illustration of a showerhead with warning symbols (in警告, exclamation, and cross) against a grid background, no text or labels present.4 Glačalo nemojte prati/čistiti pod mlazom vode iz slavine jer se time mogu oštetiti električne komponente u njemu.
Calc-Clean

natural_image
Illustration of a wall socket connected to a plug with an arrow indicating direction (no text or symbols)3 Provjerite je li se glačalo ohladilo.
Hrvatski

natural_image
Hand inserting a card into a device (no text or symbols visible)4 Ručicu odjeljka Quick Calc Release povucite prema gore.

natural_image
Illustration of a steam iron being placed on a kitchen sink with a small appliance nearby (no text or symbols)5 Izvucite poklopac odjeljka Quick Calc Release.

natural_image
Illustration of a stainless steel kitchen sink with a faucet and a hand holding a bag, against a grid background (no text or symbols)6 Poklopac odjeljka Quick Calc Release očistite vodom.

natural_image
Illustration of a hand washing a shower with a drain, no text or symbols present7 Protresite glačalo kako biste ispustili vodu i čestice kamenca iz otvora glačala.

natural_image
Illustration of a mechanical device with two views of a component (no text or symbols)9 Protresite glačalo kako biste ispustili vodu i čestice kamenca iz otvora glačala.

natural_image
Hand pressing down a button on a surface, no text or symbols visiblenatural_image
Illustration of a wall socket connected to a plug with a black arrow indicating direction (no text or symbols)3 Pustite glačalo da se ohladi.
200 Hrvatski

natural_image
Illustration of a hand using a power iron to press or install a surface, with a grid-patterned background (no text or symbols)4 Ispraznite ostatak vode iz spremnika za vodu.

natural_image
Diagram of a mechanical or fluidic device with rotating arrows indicating flow or movement (no text or symbols)206 Italiano
natural_image
Illustration of a steam iron with a warning symbol (no text or labels)natural_image
Illustration of a steam iron with a magnified inset showing internal components (no text or symbols)natural_image
Illustration of a hand using a tool to press down a steam iron (no text or symbols visible)natural_image
Illustration of a hand using a tool to press down a steaming iron (no text or symbols visible)natural_image
Illustration of a hand ironing an iron, labeled 'ECO' in the top-left corner (no other text or symbols)natural_image
Illustration of a hand steaming iron with steam rising (no text or symbols)natural_image
Illustration of two iron shavings with a cross mark indicating a defect or damage (no text or symbols present)natural_image
Illustration of a steam iron with a cord and plug, no text or symbols presentnatural_image
Close-up of a mechanical component with an hourglass icon highlighting a specific area (no text or symbols present)natural_image
Close-up of a mechanical component with a checkmark and magnified detail (no text or symbols)natural_image
Illustration of a person ironing a piece of material, showing steam and hair (no text or symbols)natural_image
Illustration of a hand ironing a steam iron on a bed (no text or symbols)natural_image
Illustration of a hand using a power iron to lift or spread material, with a downward arrow indicating motion (no text or symbols)natural_image
Illustration of a hand using an iron to clean clothes, with a magnified inset showing upward and downward arrows (no text or symbols)natural_image
Illustration of hands using a steam iron to clean clothing (no text or symbols)natural_image
Illustration of a person using an iron with a cross mark (no text or symbols)natural_image
Close-up of a mechanical component with a checkmark and magnified detail (no text or symbols)natural_image
Illustration of a steam iron being compressed with a magnified inset showing a plug (no text or symbols)natural_image
Illustration of a hand using a tool to cut a leaf or seed, with a checkmark indicating the correct removal (no text or symbols present)natural_image
Illustration of a showerhead with warning symbols (in警告, exclamation, and cross) against a grid background, no text or labels present.natural_image
Illustration of a wall socket connected to a plug with a cable, showing an arrow indicating direction (no text or symbols)natural_image
Hand inserting a card into a device (no text or symbols visible)natural_image
Illustration of a steam iron being placed on a kitchen sink with a small appliance nearby (no text or symbols)natural_image
Illustration of a stainless steel kitchen sink with a faucet and a hand holding a bag, against a grid background (no text or symbols)natural_image
Illustration of a steam iron being placed into a sink with a drain, against a grid background (no text or symbols)natural_image
Illustration of a mechanical device with two views of a component (no text or symbols)natural_image
Hand pressing down a button on a surface, no text or symbols visiblenatural_image
Illustration of a wall socket connected to a plug with a black arrow indicating direction (no text or symbols)natural_image
Illustration of a hand using a power iron to clean or install a surface, with a grid-patterned background (no text or symbols)natural_image
Illustration of a mechanical device with rotating components and motion arrows (no text or symbols)224 Latviešu
natural_image
Illustration of a steam iron with a warning symbol (no text or labels)1 Nepievienojiet gludekli strāvas avotam.

natural_image
Illustration of a hand using a tool to press down a steam iron (no text or symbols visible)natural_image
Illustration of a hand using a tool to press down a steamer (no text or symbols visible)5 Cieši aizveriet udens tvertnes vaku.
natural_image
Illustration of a hand ironing an electric iron, labeled 'ECO' in the top-left corner (no other text or symbols)natural_image
Illustration of a hand steaming iron with a circular icon showing a steam drop symbol (no text or symbols present)natural_image
Illustration of two iron iron holders with a cross mark indicating the angle (no text or symbols present)natural_image
Illustration of a steam iron with a cord and plug, no text or symbols presentnatural_image
Close-up of a mechanical component with an hourglass icon highlighting a specific area (no text or symbols present)natural_image
Close-up of a mechanical component with a checkmark and magnified detail (no text or symbols)natural_image
Illustration of a hand ironing an iron on a person's back (no text or symbols)natural_image
Illustration of a hand ironing an iron on a bed (no text or symbols)natural_image
Illustration of a hand using a power iron to press down a surface, with a downward arrow indicating motion (no text or symbols present)natural_image
Illustration of a hand using an iron to clean clothes, with a magnified inset showing upward and downward arrows (no text or symbols)natural_image
Illustration of hands using a steam iron to clean clothing, showing a downward motion (no text or symbols)natural_image
Illustration of a person using an iron with a cross mark (no text or symbols)5 Neversiet gludekli pret sevi vai citiem cilvékiem.
natural_image
Close-up of a mechanical component with a checkmark and magnified detail (no text or symbols)natural_image
Illustration of a steam iron being compressed with a magnified inset showing a plug (no text or symbols)1 Pärliecinieties, ka gludeklis nav pievienots elektrotiklam.

natural_image
Illustration of a hand using a tool to cut a leaf or seed, with a checkmark indicating the correct removal (no text or symbols present)natural_image
Illustration of a light bulb with a magnified inset showing a bottle and a textured sphere, no text or symbols present.natural_image
Illustration of a showerhead with an exclamation mark and a cross symbol, against a tiled wall background (no text or symbols)natural_image
Illustration of a wall socket connected to an electrical plug with a black arrow indicating direction (no text or symbols)2 Pärliecinieties, ka gludeklis nav pievienots elektrotiklam.

natural_image
Hand inserting a card into a device (no text or symbols visible)natural_image
Illustration of a steam iron being placed on a kitchen sink with a small appliance nearby (no text or symbols)natural_image
Illustration of a stainless steel kitchen sink with a faucet and showerhead, against a grid background (no text or symbols)natural_image
Illustration of a steam iron being placed into a sink with a drain, against a grid background (no text or symbols)7 Pakratiet gludekli, lai izlietu udeni un katlakmens daljinas pa gludekla atveri.

8 Nelejiet üdeni gludekla atvere.

natural_image
Illustration of a mechanical device with two views of a component (no text or symbols)9 Pakratiet gludekli, lai izlietu üdeni un katlakmens daljinas pa gludekla atveri.

natural_image
Hand pressing down a button on a surface, no text or symbols visiblenatural_image
Illustration of a wall socket connected to an electrical plug with a magnified view (no text or symbols)2 Atvienojiet gludekla kontaktdakšu.

3 Laujiet gludeklim atdzist.

natural_image
Illustration of a hand using a power iron on a kitchen (no text or symbols visible)4 Izlejiet no ūdens tvertnes atlikušo ūdeni.

natural_image
Diagram of a bottle with internal structure and curved arrows indicating rotation or movement (no text or symbols)242 Lietuviškai
natural_image
Illustration of a steam iron with a warning symbol (no text or labels)natural_image
Illustration of a hand using a tool to press down a steam iron (no text or symbols visible)3 Atidarykite vandens bakelio dangtj.

natural_image
Illustration of a hand using a tool to press down a steaming iron (no text or symbols visible)natural_image
Illustration of a hand ironing an iron, labeled 'ECO' in the top-left corner (no other text or symbols)natural_image
Illustration of a hand steaming a steam iron with a circular icon showing a cloud or smoke (no text or symbols)natural_image
Illustration of two iron iron holders with a cross mark indicating the angle (no text or symbols present)natural_image
Illustration of a steam iron with a cable, showing internal components and a power outlet (no text or symbols)natural_image
Close-up of a mechanical component with an hourglass icon highlighting a specific area (no text or symbols present)natural_image
Close-up of a mechanical component with a checkmark and magnified detail (no text or symbols)natural_image
Illustration of a person using a steam iron to burn on a person's back (no text or symbols visible)natural_image
Illustration of a hand ironing a steam iron on a bed (no text or symbols)natural_image
Illustration of a hand using a steam iron to press down on a surface, with a downward arrow indicating motion (no text or symbols present)natural_image
Illustration of a hand using an iron to clean clothes, with a magnified inset showing upward and downward arrows (no text or symbols)natural_image
Illustration of hands using a steam iron to clean clothing, showing motion and shading (no text or symbols)4 Lygindami nelaikykite plikomis rankomis.

natural_image
Illustration of a person using an iron with a cross mark (no text or symbols)natural_image
Close-up of a mechanical component with a checkmark and magnified detail (no text or symbols)natural_image
Illustration of a steam iron being heated by a plug, with a magnified inset showing the plug's electrical contact (no text or symbols present)natural_image
Illustration of a hand using a tool to cut a leaf or seed, with a checkmark indicating the correct removal (no text or symbols present)natural_image
Illustration of a light bulb with a magnified inset showing a bottle and a textured sphere (no text or symbols)natural_image
Illustration of a steam iron in a kitchen sink with warning symbols (no text or labels)natural_image
Illustration of a wall socket connected to a plug with a black arrow indicating direction (no text or symbols)natural_image
Hand pressing a button on a mechanical component (no text or symbols visible)natural_image
Illustration of a steam iron being placed on a sink with a small device nearby (no text or symbols visible)natural_image
Illustration of a stainless steel kitchen sink with a faucet and showerhead, against a tiled wall (no text or symbols)natural_image
Illustration of a steam iron being placed on a kitchen sink, with no visible text or symbols.natural_image
Illustration of a mechanical device with two views of a component (no text or symbols)natural_image
Hand pressing down a button on a metallic object (no text or symbols visible)natural_image
Illustration of a wall socket connected to an electrical plug with a black arrow indicating direction (no text or symbols)natural_image
Illustration of a hand using a power iron on a kitchen (no text or symbols visible)natural_image
Illustration of a bottle with a coiled tube wrapped around it, showing motion arrows (no text or symbols)260 Magyar
natural_image
Illustration of a steam iron with a warning symbol (no text or labels)natural_image
Illustration of a hand using a tool to press down a steam iron (no text or symbols visible)natural_image
Illustration of a hand using a tool to press down a steamer (no text or symbols visible)natural_image
Illustration of a hand ironing an iron with 'ECO' label (no other text or symbols)natural_image
Illustration of a hand steaming iron with steam rising (no text or symbols)natural_image
Illustration of two iron shavings with a cross mark indicating a defect or damage (no text or symbols present)natural_image
Illustration of a steam iron with a cord and plug, no text or symbols presentnatural_image
Close-up of a mechanical component with an hourglass icon highlighting a specific area (no text or symbols present)natural_image
Close-up of a mechanical component with a checkmark and magnified detail (no text or symbols)natural_image
Illustration of a person using a steam iron to press down a surface (no text or symbols visible)natural_image
Illustration of a hand ironing an iron on a bed (no text or symbols)natural_image
Illustration of a hand using a steam iron to clean or wear, with a downward arrow indicating the process (no text or symbols present)Magyar

natural_image
Illustration of a hand using an iron to clean clothes, with a circular icon showing upward motion and checkmark indicators (no text or symbols)natural_image
Illustration of hands using a steam iron to clean clothing, showing a downward motion (no text or symbols)natural_image
Illustration of a person using an iron with a cross mark (no text or symbols)natural_image
Close-up of a mechanical component with a checkmark and magnified detail (no text or symbols)natural_image
Illustration of a steam iron being heated by a plug, with a magnified inset showing the plug's electrical contact (no text or symbols present)natural_image
Illustration of a hand using a tool to cut a leaf or seed, with a checkmark indicating the correct removal (no text or symbols present)natural_image
Illustration of a showerhead with an exclamation mark and a warning symbol, set against a tiled wall background (no text or labels)natural_image
Illustration of a wall socket connected to a plug with a black arrow indicating direction (no text or symbols)natural_image
Hand inserting a card into a device (no text or symbols visible)natural_image
Illustration of a steam iron being placed on a kitchen sink with a small appliance nearby (no text or symbols)natural_image
Illustration of a stainless steel kitchen sink with a faucet and showerhead, against a grid background (no text or symbols)natural_image
Illustration of a steam iron being placed into a sink with a drain, against a grid background (no text or symbols)natural_image
Illustration of a mechanical device with two views of a component (no text or symbols)natural_image
Hand pressing down a button on a metallic object (no text or symbols visible)natural_image
Illustration of a wall socket connected to a plug with a black arrow indicating direction (no text or symbols)natural_image
Illustration of a hand using a power iron to press or install a surface, with a grid-patterned background (no text or symbols)natural_image
Diagram of a bottle with internal structure and curved arrows indicating motion (no text or symbols)278 Nederlands
natural_image
Illustration of a steam iron with a warning symbol (no text or labels)natural_image
Illustration of a steam iron with a magnified inset showing internal components (no text or symbols)natural_image
Illustration of a hand using a tool to press down a steam iron (no text or symbols visible)natural_image
Illustration of a hand using a tool to press down a steaming iron (no text or symbols visible)natural_image
Illustration of a hand ironing an iron, labeled 'ECO' in the top-left corner (no other text or symbols)natural_image
Illustration of a hand steaming iron with steam rising (no text or symbols)natural_image
Illustration of two iron shavings with a cross mark indicating a defect or damage (no text or symbols present)natural_image
Illustration of a steam iron with a cord and plug, no text or symbols presentnatural_image
Close-up of a mechanical component with an hourglass icon highlighting a specific area (no text or symbols present)natural_image
Close-up of a mechanical component with a checkmark and magnified detail (no text or symbols)natural_image
Illustration of a hand ironing an iron on a person's back (no text or symbols)natural_image
Illustration of a hand ironing a steam iron on a bed (no text or symbols)natural_image
Illustration of a hand using a steam iron to clean or wear, with a downward arrow indicating the process (no text or symbols present)284 Nederlands

natural_image
Illustration of a hand using an iron to clean clothes, with a magnified inset showing upward and downward arrows (no text or symbols)natural_image
Illustration of hands using a steam iron to clean clothing, showing a downward motion (no text or symbols)natural_image
Illustration of a person using an iron with a cross mark (no text or symbols)natural_image
Close-up of a mechanical component with a checkmark and magnified detail (no text or symbols)natural_image
Illustration of a steam iron being heated by a plug, with a magnified inset showing the plug's electrical contact (no text or symbols present)natural_image
Illustration of a hand using a tool to cut a leaf or seed, with a checkmark indicating the correct removal (no text or symbols present)natural_image
Illustration of a light bulb with a magnified inset showing a bottle and a textured sphere (no text or symbols)natural_image
Illustration of a showerhead with an exclamation mark and a cross symbol, against a tiled wall background (no text or symbols)natural_image
Illustration of a wall socket connected to a plug with a black arrow indicating direction (no text or symbols)natural_image
Hand inserting a card into a device (no text or symbols visible)natural_image
Illustration of a steam iron being placed on a kitchen sink with a small appliance nearby (no text or symbols)natural_image
Illustration of a stainless steel kitchen sink with a faucet and showerhead, against a grid background (no text or symbols)natural_image
Illustration of a steam iron being placed into a sink with a drain, against a grid background (no text or symbols)natural_image
Illustration of a mechanical device with two views of a component (no text or symbols)natural_image
Hand pressing down a button on a surface, no text or symbols visiblenatural_image
Illustration of a steam iron with a magnified inset showing internal components (no text or symbols)natural_image
Illustration of a wall socket connected to an electrical plug with a black arrow indicating direction (no text or symbols)natural_image
Illustration of a hand using a power iron to clean or install a surface, with a grid-patterned background (no text or symbols)natural_image
Illustration of a mechanical device with rotating components and a handle, no visible text or symbolsnatural_image
Illustration of a steam iron emitting smoke with a warning symbol (no text or labels)natural_image
Illustration of a steam iron with a magnified inset showing internal components (no text or symbols)natural_image
Illustration of a hand using a tool to press down a steam iron (no text or symbols visible)natural_image
Illustration of a hand using a tool to press down a steaming iron (no text or symbols visible)natural_image
Illustration of a hand ironing an electric iron, labeled 'ECO' in the top-left corner (no other text or symbols)natural_image
Illustration of a hand steaming iron with a circular icon showing a steam drop symbol (no text or symbols present)natural_image
Illustration of two iron steamers with a cross mark indicating the angle (no text or symbols present)natural_image
Illustration of a steam iron with a cord and plug, no text or symbols presentnatural_image
Close-up of a mechanical component with an hourglass icon highlighting a specific area (no text or symbols present)natural_image
Close-up of a mechanical component with a checkmark and magnified detail (no text or symbols)natural_image
Illustration of a person using a steam iron to press down a piece of material (no text or symbols visible)3 Damp slippes ut under stryking.
Ingen dampmodus/tørrstrykingsmodus

1 Still inn dampinnstillingen til ingen dampmodus/tørrstrykingsmodus

natural_image
Illustration of a hand ironing an iron on a bed (no text or symbols)2 Etter en liten stund stopper dampen mens du stryker.
Vanntåke

natural_image
Illustration of a hand using a steam iron to press down on a surface, with a downward arrow indicating motion (no text or symbols present)natural_image
Illustration of a hand using an iron to clean clothes, with a magnified inset showing upward and downward arrows (no text or symbols)natural_image
Illustration of hands using a steam iron to clean clothing, showing a downward motion (no text or symbols)natural_image
Illustration of a person using an iron with a cross mark (no text or symbols)natural_image
Close-up of a mechanical component with a checkmark and magnified detail (no text or symbols)6 Når indikatorlyset er av, er strykejernet klar til bruk.
natural_image
Illustration of a steam iron being heated by a plug, with a magnified inset showing a plug plug (no text or symbols present)natural_image
Illustration of a hand holding a pear-shaped object with a checkmark indicating selection (no text or symbols present)natural_image
Illustration of a lit fuse with a magnified inset showing a bottle and bulb (no text or symbols)natural_image
Illustration of a steam iron in a kitchen sink with warning symbols (no text or labels)natural_image
Illustration of a wall socket connected to an electrical plug with a black arrow indicating direction (no text or symbols)natural_image
Hand inserting a card into a device (no text or symbols visible)natural_image
Illustration of a steam iron being placed on a kitchen sink with a small appliance nearby (no text or symbols)natural_image
Illustration of a stainless steel kitchen sink with a faucet and a hand holding a bag, against a grid background (no text or symbols)natural_image
Illustration of a steam iron being placed into a sink with a drain, against a grid background (no text or symbols)natural_image
Illustration of a mechanical device with two views of a component (no text or symbols)natural_image
Hand pressing down a button on a surface, no text or symbols visiblenatural_image
Illustration of a steam iron with a magnified inset showing internal components (no text or symbols)natural_image
Illustration of a wall socket connected to a plug with a black arrow indicating direction (no text or symbols)natural_image
Illustration of a hand using a power iron to clean or install a surface, with a grid background (no text or symbols)natural_image
Diagram of a mechanical device with rotating arms and textured body, no visible text or symbols1 Water tank lid
2 Steam selector
3 Water spray
4 Cord
5 Cord winding
6 Indicator light
7 Steam boost trigger
8 Temperature dial
9 Quick Calc Release collector
Jihozdan foydalanish
Type of water to use
Note: The iron may give off some steam when you use it for the first time. This stops after a short while.
Type of water to use
The appliance is suitable to be used with tap water. However, if you live in an area with hard water, we recommend that you mix an equal amount of tap water with distilled or demineralized water. This will prevent fast scale build up and prolong the lifetime of the appliance.
Do not add perfume, water from the tumble dryer, vinegar, starch, descaling agents, ironing aids, chemically descaled water or other chemicals, as they may cause water spitting, brown staining or damage to your appliance.
Filling the water tank

natural_image
Illustration of a steam iron with a warning symbol (no text or labels)1 Do not plug in the iron.

natural_image
Illustration of a steam iron with a magnified inset showing internal components (no text or symbols)2 Slide the steam selector to the right to select no steam mode/dry ironing mode

natural_image
Illustration of a hand using a tool to press down a steam iron (no text or symbols visible)3 Flip open the water tank lid.

4 Fill water tank up to the MAX indication mark. Do not add any additives like perfume, fragrances, soap or vinegar.

natural_image
Illustration of a hand using a tool to press down a steaming iron (no text or symbols visible)5 Close the water tank lid firmly.
Setting the temperature and steam
| | |
| MAXLINEN | /^* | |
| ●●●COTTON | /^* | |
| ●●SILK | ECO | |
| ●SYNTHETICS |

natural_image
Illustration of a hand ironing an iron with 'ECO' label (no other text or symbols)ECO setting: Minimum constant steam is delivered continuously for garments with less creases. This setting also saves energy.

natural_image
Illustration of a hand steaming a steam iron with a circular icon showing a cloud or smoke (no text or symbols)Two steam clouds: More constant steam is delivered continuously for tough creases.

For stubborn creases, set the steam setting to two steam clouds and press and hold the steam boost trigger below the handle. Maximum constant steam will be delivered continuously.
Preparing for use

Smoke can be visible during the first use, and it is normal. This ceases after a short while.
1 Check the garment label to ensure that the fabric is ironable and its appropriate temperature setting.

2 Turn the temperature dial to the appropriate ironable temperature indication according to the garment label.

natural_image
Illustration of two iron iron holders with a cross mark indicating the angle (no text or symbols present)3 Allow the iron to rest on its heel.

natural_image
Illustration of a steam iron with a cable, showing internal components and a power outlet (no text or symbols)4 Insert the plug into an earthed socket and allow the iron rest on its heel. If using an extension plug, ensure that the power rating of the extension plug is suitable for the iron.

natural_image
Close-up of a mechanical component with an hourglass icon highlighting a specific area (no text or symbols present)5 Wait for the iron to heat up. The indicator light will turn steady on while it is heating up.

natural_image
Close-up of a mechanical component with a checkmark and magnified detail (no text or symbols)6 Once the iron is ready to be used, the indicator light will switch off. The indicator light may turn on and off during ironing as the iron heats up periodically to maintain its temperature.
Ironing with steam
1 Slide the steam selector to ECO mode or steam mode.

2 Turn the temperature dial to between silk and linen based on the image.


natural_image
Illustration of a person using a steam iron to press down a surface (no text or symbols visible)3 Steam will be released during ironing.
No steam mode/dry ironing mode

1 Set the steam setting to no steam mode/dry ironing mode

natural_image
Illustration of a hand ironing a steam iron on a bed (no text or symbols)2 After a short while, steam will cease during ironing.
Water spray

natural_image
Illustration of a hand using an iron to clean or wear a surface, with a downward arrow indicating the process (no text or symbols present)1 Press and release the water spray button at the top of the handle. Water will be sprayed out of the nozzle.
Horizontal & vertical steam boost
1 Set temperature dial to MAX setting between cotton and linen.

320 O'zbek

natural_image
Illustration of a hand using an iron to clean clothes, with a circular icon showing upward motion and checkmark indicators (no text or symbols)2 Vertical steam boost: Press and release the steam boost trigger in the vertical position to release shots of steam on hanging garments. Holding down the steam boost trigger in the vertical position will not deliver constant steam.

natural_image
Illustration of hands using a steam iron to clean clothing, showing motion and shading (no text or symbols)3 Vertical steam boost: Pull and stretch your hanging garment while using the steam boost to remove stubborn creases.

4 Do not use your bare hand as a supporting surface when you iron.

natural_image
Illustration of a person using an iron with a cross mark (no text or symbols)5 Do not position the iron towards yourself or others.
Auto shut off (DST7030, DST7040, DST7050, DST7060, DST7510 only)

1 To give you a peace of mind, the appliance will cool down on its own if it is left unattended for a period of time.
2 When the iron is not in use for more than 30 seconds while resting on its soleplate or 8 minutes while resting on its heel/ base, the iron will enter auto shut off mode.
3 The temperature of the iron will decrease in auto shut off mode. The Auto Shut Off light will also blink quickly to indicate the iron is at auto-off status. To completely switch off the iron, plug out the iron/ switch off the mains plug.
4 Picking up or moving the iron will reactivate it.
5 The indicator light will turn steady ON, indicating that the iron is heating up again.
322 O'zbek

natural_image
Close-up of a mechanical component with a checkmark and magnified detail (no text or symbols)6 Once the indicator light switches OFF, the iron is ready for use.
Cleaning and maintenance

natural_image
Illustration of a steam iron being heated by a plug, with a magnified inset showing a plug plug (no text or symbols present)1 Ensure the iron is not plugged in.

2 Ensure the iron is cooled down.

natural_image
Illustration of a hand holding a pear-shaped object with a checkmark indicating selection (no text or symbols present)3 Wipe the soleplate with a damp cloth.

natural_image
Illustration of a lit fuse with a magnified inset showing a bottle and bulb (no text or symbols)Note: To keep the soleplate smooth, avoid hard contact with metal objects. Never use a scouring pad, vinegar or other chemicals to clean the soleplate.

natural_image
Illustration of a showerhead with an exclamation mark and a cross symbol, against a grid background (no text or symbols)4 Do not wash/ clean the iron under running water as it may damage the electrical components within.
Calc-Clean

Tip: The Quick Calc Release function can be used at any time. If you live in a hard water area, use the function more frequently.
1 It is recommended to descale your iron after every 1 to 3 months of use to prolong its lifetime, or when brown stains/water is observed.
IMPORTANT: The Quick Calc Release automatically collects loose scale particles during ironing.

natural_image
Illustration of a wall socket connected to a plug with a black arrow indicating direction (no text or symbols)2 Ensure the iron is not plugged in.

3 Ensure the iron is cooled down.
324 O'zbek

natural_image
Hand inserting a card into a device (no text or symbols visible)4 Slide up the Quick Calc Release collector lever.

natural_image
Illustration of a steam iron being placed on a kitchen sink with a small appliance nearby (no text or symbols)5 Pull out the Quick Calc Release collector lid.

natural_image
Illustration of a stainless steel kitchen sink with a faucet and a hand holding a bag, against a grid background (no text or symbols)6 Clean the Quick Calc Release collector lid with water.

natural_image
Illustration of a steam iron being placed into a sink with a drain, against a grid background (no text or symbols)7 Shake the iron to drain the water and scale particles from the opening of the iron.

8 Do not run water into the opening of the iron.

natural_image
Illustration of a mechanical device with two views of a component (no text or symbols)9 Shake the iron to drain the water and scale particles from the opening of the iron.

natural_image
Hand pressing down a button on a surface, no text or symbols visible10 Push down the lever to lock the Quick Calc Release collector. You will hear a 'click' sound.
Storage

1 Slide the steam selector to select no steam mode/dry ironing mode

natural_image
Illustration of a wall socket connected to a plug with a black arrow indicating direction (no text or symbols)2 Unplug the iron.

3 Let the iron cool down.

natural_image
Illustration of a hand using a power iron to press or install a surface, with a grid-patterned background (no text or symbols)4 Pour any remaining water out of the water tank.

natural_image
Diagram of a mechanical or fluidic device with rotating arrows indicating flow or movement (no text or symbols)5 Wind the power cord around the main body of the iron.
Trouble shooting
This chapter summarizes the most common problems you could encounter with the appliance. If you are unable to solve the problem with the information below, visit www.philips.com/support for a list of frequently asked questions or contact the Consumer Care Center in your country.
Problem Possible cause Solution
| My Philips Steam Iron does not produce steam. | There is no water/not enough water in the tank. | If there is no water in the water tank of your Philips Steam Iron, your iron is not able to generate steam. Please refill the water tank with water. After this, your iron should produce steam again. |
| The iron is not ready to steam. | Your iron is ready to produce steam when the indicator light switches off. | |
| The steam setting is set to no steam mode/dry ironing mode | Aways ensure that the temperature dial is at the 2-dot ●3 ●lot or ●te●HEN setting. Then, select a steam setting (ECO setting and 2-cloud setting) on the steam selector at the top of the handle.Ironing with steam with the temperature dial at the 1-dot or SYNTHETIC setting may cause wet spots/leaking as the temperature of the iron may not be hot enough to convert water to steam | |
| My Philips Steam Iron does not remove creases. | The temperature is set too low. | For irons with a temperature dial, please set the temperature according to the fabric that you are ironing. You can use the following table as a reference.Note: For some fabrics such as silk, wool, cotton and linen, steam would be needed to remove creases more efficiently. |
| Steam is not used. Switch the steam selector to or 2-cloECOettingYour Philips Iron does not produce steam when the temperature dial is at the 1-dot position, SYNTHETIC or Calc-Clean setting. You can get more steam by changing to a stronger steam setting, or using the steam boost function to help remove tough wrinkles.To remove creases in the vertical position, press and release the steam boost trigger or button to release a shot of steam. Holding down the trigger or button will not produce a continuous steam boost.Note that repeated usage of the steam boost in a short period of time may cause spitting or a reduction in the amount of steam produced. If this happens, wait for a short while before using the steam boost function again. | ||
| The steam boost in my Philips Steam Iron is not working. | The steam boost trigger has not been pressed and released. | To activate the steam boost in your Philips Steam Iron, press and release the steam boost button/trigger. Holding onto the steam boost button/trigger does not produce continuous steam boost. You may need to press the steam boost button/trigger several times on the first use for the pump to draw sufficient water.Note: We recommend to use the steam boost at the 3-dot temperature setting or higher. Using the steam boost at lower temperature settings may result in wet spots forming as the temperature of the iron may not be high enough to convert water into steam. |
| The steam boost function was used too often within a short period of time. | When you use the steam boost function of your Philips Steam Iron too often within a short period, the steam boost function will stop working for a while. In this case, please wait a couple of minutes before you use the steam boost again.For stubborn wrinkles, we recommend to use the steam boost with the steam setting at the no steam mode/dry ironing mode for the best effect. | |
| The iron is not ready to steam. | The iron is ready to steam when the indicator light switches off. | |
| My Philips Steam Iron produces smoke when heating up. | First usage. During production, some parts of the iron have been slightly greased. As a result of this, your iron may produce some smoke when it is switched on for the first few times, this is normal and should dissipate shortly. | |
| There is water in the soleplate. | Sometimes, there might still be some remaining water in your iron's soleplate after the last usage. This water will evaporate when your iron's soleplate heats up, and the steam generated may look like smoke. This is normal and should dissipate shortly. | |
| My iron is still producing smoke even after checking the above. | There could be an issue with the iron, we recommend you to contact us. | |
| There are water droplets/leaking on my garment during ironing. | First time usage. If you experience leaking/spitting during your first usage, perform the Calc Clean function once. If this does not resolve the leaking on your next use, we recommend you to contact us. | |
| The steam boost function was used too often within a short period of time. | Continue ironing in horizontal position and wait a while before you use the steam boost function again. | |
| There is a build up of scale/calcification in the iron. | If there is brown water or white flakes coming out of the iron, this may indicate a build up of calcification in the iron. Perform the Calc Clean function to clear this. If you live in an area with hard water, we recommend to use distilled water (or 50% distilled and 50% tap water) and perform the calc clean function once a month to prolong the lifetime of the iron.Note: the presence of white flakes on the very first use of the iron is normal. | |
| You have added other chemicals or additives into the water tank. | Fragrances/oils/chemicals/additives/descaling solutions should not be added into the water tank as they are damaging to the device. Please rinse the water tank, fill it up with water and descale your iron. | |
| You have not closed the water tank lid properly. | Close the lid firmly after filling. | |
| Steam has condensed onto the ironing board. | Steam may condense on the board cover, particularly when using irons that produce powerful levels of steam for a prolonged period of time. This can look like your iron is leaking from the soleplate. To prevent this, you can do the following:1 Select a lower steam setting than the setting you have been using or use steam during the first ironing strokes and then finish up with the dry-ironing strokes.2 You can also put an extra layer of cloth between the ironing board and the ironing board cover to minimize condensation.3 Replace the ironing board cover if the sponge material has worn out. | |
| Small droplets/wet spots that occur during start of ironing session. | If small droplets or wet spots occur during the start of the ironing session, this is normal as water might have collected in the soleplate from the previous ironing session, and the iron was used before it had fully heated up. Iron over the droplets/wet spots We recommend that the iron be stored in a vertical position with the steam setting set to no steam mode/dry ironing mode before it is unplugged to minimize the collection of water in the soleplate. | |
| The iron leaks after ironing. | If your iron leaks after unplugging/during storage, it may be because water has collected in the soleplate from leaving the steam setting on before the anti-drip feature activates. We recommend to set the steam selector to no steam mode/dry ironing mode before unplugging the iron. Empty the water tank and place the iron in the vertical position when cooling down/for storage. | |
| The iron leaves a shine or an imprint on the garment. | The surface to be ironed was uneven. | The iron is safe to use on all ironable garments. The shine or imprint is not permanent and disappears when you wash the garment. Avoid ironing over seams or folds. You can also place a cotton cloth over the area to be ironed to avoid imprints. |
| You have set a higher temperature than recommended for the fabric type. | Using a higher than recommended temperature setting for the fabric type may cause the iron to burn the fabric. Check your garment and that your iron is set to the correct temperature setting before ironing. The iron is safe to use on all ironable garments with the correct temperature setting. The shine or imprint is not permanent and disappears when you wash the garment. Avoid ironing over seams or folds. You can also place a cotton cloth over the area to be ironed to avoid imprints. | |
330 O'zbek
| The iron has stopped heating up. | Auto shut-off has been activated. | When your iron has not been used in 30 seconds in the horizontal position or 8 minutes in the vertical position), the iron will automatically shut-off. This is indicated by a constant blinking of the indicator light. To re-activate the iron, move the iron and the indicator light will light up again, indicating that the iron is heating up.If your iron has a dedicated Auto Shut Off light, the ASO light will blink when the iron enters the ASO state. When the iron is moved, the ASO light will switch off and the temperature indicator light will turn on, indicating that it is heating up again. |
| There is a power connection problem. | Please check the mains cord, the plug and the wall socket. Ensure that everything is properly connected. If you are using an extension plug, please ensure that power rating is suitable for the iron. | |
| The iron does not switch on anymore (I have tried the above but my iron still does not heat up). | If this is the case, there might be a problem with your iron. We recommend you to contact us. | |
| The indicator light on the iron is blinking/breathing. | Iron is heating up. The indicator light may turn on and off during ironing as the iron heats up periodically to maintain its temperature. | |
Wstep
332 Polski
natural_image
Illustration of a steam iron with a warning symbol (no text or labels)natural_image
Illustration of a hand using a power tool to press down a steam iron (no text or symbols visible)natural_image
Illustration of a hand using a tool to press down a steamer (no text or symbols visible)natural_image
Illustration of a hand ironing an iron, labeled 'ECO' in the top-left corner (no other text or symbols)natural_image
Illustration of a hand steaming iron with steam rising (no text or symbols)natural_image
Illustration of two iron shavings with a cross mark indicating a defect or damage (no text or symbols present)natural_image
Illustration of a steam iron with a cord and plug, no text or symbols presentnatural_image
Close-up of a mechanical component with an hourglass icon highlighting a specific area (no text or symbols present)natural_image
Close-up of a mechanical component with a checkmark and magnified detail (no text or symbols)natural_image
Illustration of a person using a steam iron to burn or press (no text or symbols visible)natural_image
Illustration of a hand ironing an iron on a bed (no text or symbols)natural_image
Illustration of a hand using a steam iron to press down on a surface, with a downward arrow indicating motion (no text or symbols present)natural_image
Illustration of a hand using an iron to clean clothes, with a magnified inset showing upward and downward arrows (no text or symbols)natural_image
Illustration of hands using a steam iron to clean clothing, showing motion and shading (no text or symbols)natural_image
Illustration of a person using an iron with a cross mark (no text or symbols)natural_image
Close-up of a mechanical component with a checkmark and magnified detail (no text or symbols)natural_image
Illustration of a steam iron being compressed with a magnified inset showing a plug (no text or symbols)natural_image
Illustration of a hand holding a pear-shaped object with a checkmark indicating selection (no text or symbols present)natural_image
Illustration of a lit fuse with a magnified inset showing a bottle and bulb (no text or symbols)natural_image
Illustration of a showerhead with an exclamation mark and a warning symbol, set against a tiled wall background (no text or labels)natural_image
Illustration of a wall socket connected to an electrical plug with a black arrow indicating direction (no text or symbols)natural_image
Hand inserting a card into a device (no text or symbols visible)natural_image
Illustration of a steam iron being placed on a kitchen sink with a small appliance nearby (no text or symbols)natural_image
Illustration of a stainless steel kitchen sink with a faucet and showerhead, against a grid background (no text or symbols)natural_image
Illustration of a steam iron being placed into a sink with a drain, against a grid background (no text or symbols)natural_image
Illustration of a mechanical device with two views of a component (no text or symbols)natural_image
Hand pressing down a button on a surface, no text or symbols visiblenatural_image
Illustration of a wall socket connected to a plug with a black arrow indicating direction (no text or symbols)2 Odłącz żelazko.

natural_image
Illustration of a hand using a power iron to press or install a surface, with a grid-patterned background (no text or symbols)natural_image
Diagram of a mechanical device with rotating components and motion arrows (no text or symbols)natural_image
Illustration of a steam iron with a warning symbol (no text or labels)natural_image
Illustration of a hand using a tool to press down a steam iron (no text or symbols visible)natural_image
Illustration of a hand using a tool to press down a steaming iron (no text or symbols visible)natural_image
Illustration of a hand using an iron on a steam, labeled 'ECO' in the top-left corner (no other text or symbols)natural_image
Illustration of a hand steaming iron with a circular icon showing a steam drop symbol (no text or symbols present)natural_image
Illustration of two iron iron holders with a cross mark indicating the angle (no text or symbols present)natural_image
Illustration of a steam iron with a cord and plug, no text or symbols presentnatural_image
Close-up of a mechanical component with an hourglass icon highlighting a specific area (no text or symbols present)natural_image
Close-up of a mechanical component with a checkmark and magnified detail (no text or symbols)natural_image
Illustration of a person ironing a piece of material, showing steam and hair (no text or symbols)natural_image
Illustration of a hand ironing a steam iron on a bed (no text or symbols)natural_image
Illustration of a hand using a power iron to clean or wear a textured surface (no text or symbols)Português

natural_image
Illustration of a hand using a iron to clean clothing, with arrows and checkmark symbols indicating inspection or repair (no text present)natural_image
Illustration of hands using a steam iron to burn on a garment (no text or symbols)3 Jato de vapor vertical: puxe e estique a peça de roupa pendurada enquanto usa o jato de vapor para remover os vincos persistentes.

natural_image
Illustration of a person using a steam iron with a cross mark (no text or symbols)natural_image
Close-up of a mechanical component with a checkmark and magnified detail (no text or symbols)natural_image
Illustration of a steam iron being heated by a plug, with a magnified inset showing the plug's electrical contact (no text or symbols present)natural_image
Illustration of a hand holding a pear-shaped object with a checkmark indicating selection (no text or symbols present)natural_image
Illustration of a light bulb with a magnified inset showing a bottle and a textured sphere (no text or symbols)natural_image
Illustration of a stainless steel iron with warning symbols (no text or labels)natural_image
Illustration of a wall socket connected to a plug with a black arrow indicating direction (no text or symbols)natural_image
Hand inserting a card into a device (no text or symbols visible)natural_image
Illustration of a steam iron being placed on a kitchen sink with a small appliance nearby (no text or symbols)natural_image
Illustration of a stainless steel kitchen sink with a faucet and showerhead, against a grid background (no text or symbols)natural_image
Illustration of a steam iron being placed into a sink with a drain, against a grid background (no text or symbols)natural_image
Illustration of a mechanical device with two views of a component (no text or symbols)natural_image
Hand pressing down a button on a surface, no text or symbols visiblenatural_image
Illustration of a wall socket connected to an electrical plug with a black arrow indicating direction (no text or symbols)natural_image
Illustration of a hand using a power iron on a metal surface (no text or symbols)natural_image
Diagram of a mechanical or fluidic device with rotating arrows indicating flow or movement (no text or symbols)natural_image
Illustration of a steam iron with a warning symbol (no text or labels)natural_image
Illustration of a steam iron with a magnified inset showing internal components (no text or symbols)natural_image
Illustration of a hand using a power tool to press down a steam iron (no text or symbols visible)natural_image
Illustration of a hand using a tool to press down a steamer (no text or symbols visible)natural_image
Illustration of a hand ironing an electric iron, labeled 'ECO' in the top-left corner (no other text or symbols)natural_image
Illustration of a hand ironing an iron with steam rising (no text or symbols)natural_image
Illustration of two iron shavings with a cross mark indicating a defect or damage (no text or symbols present)natural_image
Illustration of a steam iron with a cord and plug, no text or symbols presentnatural_image
Close-up of a mechanical component with an hourglass icon highlighting a specific area (no text or symbols present)natural_image
Close-up of a mechanical component with a checkmark and magnified detail (no text or symbols)natural_image
Illustration of a person using a steam iron to burn or steam (no text or symbols visible)natural_image
Illustration of a hand ironing a steam iron on a bed (no text or symbols)natural_image
Illustration of a hand using a power iron to clean or wear a textured surface (no text or symbols)natural_image
Illustration of a hand using an iron to clean clothes, with a circular icon showing upward motion and checkmark indicators (no text or symbols)natural_image
Illustration of hands using a steam iron to clean clothing (no text or symbols)3 Jato de vapor vertical: Puxe e estique a roupa pendurada enquanto usa o jato de vapor para remover os vincos mais difíceis.

natural_image
Illustration of a person using an iron with a cross mark (no text or symbols)natural_image
Close-up of a mechanical component with a checkmark and magnified detail (no text or symbols)natural_image
Illustration of a hand holding a pear-shaped object with a checkmark indicating selection (no text or symbols present)natural_image
Illustration of a lit candle with a magnified inset showing a bottle and sand (no text or symbols)natural_image
Illustration of a showerhead with warning symbols (in警告, exclamation, and cross) against a grid background, no text or labels present.natural_image
Illustration of a wall socket connected to a plug with a black arrow indicating direction (no text or symbols)natural_image
Hand inserting a card into a device (no text or symbols visible)natural_image
Illustration of a steam iron being placed on a kitchen sink with a small appliance nearby (no text or symbols)5 Retire a tampa do coletor do Quick Calc Release.

natural_image
Illustration of a stainless steel kitchen sink with a faucet and a hand holding a bag, against a grid background (no text or symbols)natural_image
Illustration of a steam iron being placed into a sink with a drain, against a grid background (no text or symbols)natural_image
Illustration of a mechanical device with two views of a component (no text or symbols)natural_image
Hand pressing down a button on a surface, no text or symbols visiblenatural_image
Illustration of a wall socket connected to an electrical plug with a black arrow indicating direction (no text or symbols)2 Desconecte o ferro.

natural_image
Close-up of a hand using an iron on a surface, no text or symbols visiblenatural_image
Illustration of a mechanical component with rotating arrows indicating motion (no text or symbols)natural_image
Illustration of a steam iron emitting smoke with a warning symbol (no text or labels)
natural_image
Illustration of a hand using a tool to press down a steam iron (no text or symbols visible)natural_image
Illustration of a hand using a tool to press down a steamer (no text or symbols visible)natural_image
Illustration of a hand ironing an electric iron, labeled 'ECO' in the top-left corner (no other text or symbols)natural_image
Illustration of a hand using a steam iron to clean or smoke (no text or symbols)natural_image
Illustration of two iron iron holders with a cross mark indicating the angle (no text or symbols present)natural_image
Illustration of a steam iron with a cord and plug, no text or symbols presentnatural_image
Close-up of a mechanical component with an hourglass icon highlighting a specific area (no text or symbols present)natural_image
Close-up of a mechanical component with a checkmark and magnified detail (no text or symbols)natural_image
Illustration of a person using a steam iron to press down a surface (no text or symbols visible)natural_image
Illustration of a hand ironing an iron on a bed (no text or symbols visible)natural_image
Illustration of a hand using a steam iron to clean or wear, with a downward arrow indicating the process (no text or symbols present)natural_image
Illustration of a hand using an iron to clean clothes, with a circular icon showing upward motion and checkmark indicators (no text or symbols)natural_image
Illustration of hands using a steam iron to clean clothing, showing a downward motion (no text or symbols)natural_image
Illustration of a person using an iron with a cross mark (no text or symbols)natural_image
Close-up of a mechanical component with a checkmark and magnified detail (no text or symbols)natural_image
Illustration of a steam iron being compressed with a magnified inset showing a plug (no text or symbols)natural_image
Illustration of a hand holding a pear-shaped object with a checkmark indicating selection (no text or symbols present)natural_image
Illustration of a lit fuse with a magnified inset showing a bottle and bulb (no text or symbols)natural_image
Illustration of a steam iron in a kitchen sink with warning symbols (no text or labels)natural_image
Illustration of a wall socket connected to an electrical plug with a black arrow indicating direction (no text or symbols)natural_image
Hand inserting a card into a device (no text or symbols visible)natural_image
Illustration of a steam iron being placed on a kitchen sink with a small appliance nearby (no text or symbols)natural_image
Illustration of a stainless steel kitchen sink with a faucet and a hand holding a bag, against a grid background (no text or symbols)natural_image
Illustration of a hand washing a shower with a drain, no text or symbols presentnatural_image
Illustration of a mechanical device with two views of a component (no text or symbols)natural_image
Hand pressing down a button on a metallic object (no text or symbols visible)natural_image
Illustration of a steam iron with a magnified inset showing internal components (no text or symbols)natural_image
Illustration of a wall socket connected to an electrical plug with a black arrow indicating direction (no text or symbols)natural_image
Illustration of a hand using an iron on a kitchen sink (no text or symbols visible)natural_image
Diagram of a bottle with internal structure and curved arrows indicating rotation or movement (no text or symbols)404 Shqip
1 Water tank lid
2 Steam selector
3 Water spray
4 Cord
5 Cord winding
6 Indicator light
7 Steam boost trigger
8 Temperature dial
9 Quick Calc Release collector
Type of water to use
Note: The iron may give off some steam when you use it for the first time. This stops after a short while.
Type of water to use
The appliance is suitable to be used with tap water. However, if you live in an area with hard water, we recommend that you mix an equal amount of tap water with distilled or demineralized water. This will prevent fast scale build up and prolong the lifetime of the appliance.
Do not add perfume, water from the tumble dryer, vinegar, starch, descaling agents, ironing aids, chemically descaled water or other chemicals, as they may cause water spitting, brown staining or damage to your appliance.
Filling the water tank

natural_image
Illustration of a steam iron with a warning symbol (no text or labels)1 Do not plug in the iron.

natural_image
Illustration of a steam iron with a magnified inset showing internal components (no text or symbols)2 Slide the steam selector to the right to select no steam mode/dry ironing mode

natural_image
Illustration of a hand using a tool to press down a steam iron (no text or symbols visible)3 Flip open the water tank lid.

4 Fill water tank up to the MAX indication mark. Do not add any additives like perfume, fragrances, soap or vinegar.

natural_image
Illustration of a hand using a tool to press down a steamer (no text or symbols visible)5 Close the water tank lid firmly.
Setting the temperature and steam
| | |
| MAXLINEN | / * | |
| ●●●COTTON | / * | |
| ●●SILK | ECO | |
| ●SYNTHETICS |

natural_image
Illustration of a hand using an iron on a steam, labeled 'ECO' in the top-left corner (no other text or symbols)ECO setting: Minimum constant steam is delivered continuously for garments with less creases. This setting also saves energy.

natural_image
Illustration of a hand steaming a steam iron with a circular icon showing a cloud or smoke (no text or symbols)Two steam clouds: More constant steam is delivered continuously for tough creases.

For stubborn creases, set the steam setting to two steam clouds and press and hold the steam boost trigger below the handle. Maximum constant steam will be delivered continuously.
Preparing for use

Smoke can be visible during the first use, and it is normal. This ceases after a short while.
1 Check the garment label to ensure that the fabric is ironable and its appropriate temperature setting.

2 Turn the temperature dial to the appropriate ironable temperature indication according to the garment label.

natural_image
Illustration of two iron iron holders with a cross mark indicating the angle (no text or symbols present)3 Allow the iron to rest on its heel.

natural_image
Illustration of a steam iron with a cord and plug, no text or symbols present4 Insert the plug into an earthed socket and allow the iron rest on its heel. If using an extension plug, ensure that the power rating of the extension plug is suitable for the iron.

natural_image
Close-up of a mechanical component with an hourglass icon highlighting a specific area (no text or symbols present)5 Wait for the iron to heat up. The indicator light will turn steady on while it is heating up.
408 Shqip

natural_image
Close-up of a mechanical component with a checkmark and magnified detail (no text or symbols)6 Once the iron is ready to be used, the indicator light will switch off. The indicator light may turn on and off during ironing as the iron heats up periodically to maintain its temperature.
Ironing with steam
1 Slide the steam selector to ECO mode or steam mode.

2 Turn the temperature dial to between silk and linen based on the image.


natural_image
Illustration of a person using a steam iron to press down a surface (no text or symbols visible)3 Steam will be released during ironing.
No steam mode/dry ironing mode

1 Set the steam setting to no steam mode/dry ironing mode

natural_image
Illustration of a hand ironing a steam iron on a bed (no text or symbols)2 After a short while, steam will cease during ironing.
Water spray

natural_image
Illustration of a hand using an iron to clean or wear a textured surface, with a downward arrow indicating motion (no text or symbols present)1 Press and release the water spray button at the top of the handle. Water will be sprayed out of the nozzle.
Horizontal & vertical steam boost
1 Set temperature dial to MAX setting between cotton and linen.

Shqip

natural_image
Illustration of a hand using an iron to clean clothes, with a magnified inset showing upward and downward arrows (no text or symbols)2 Vertical steam boost: Press and release the steam boost trigger in the vertical position to release shots of steam on hanging garments. Holding down the steam boost trigger in the vertical position will not deliver constant steam.

natural_image
Illustration of hands using a steam iron to clean clothing, showing motion and shading (no text or symbols)3 Vertical steam boost: Pull and stretch your hanging garment while using the steam boost to remove stubborn creases.

4 Do not use your bare hand as a supporting surface when you iron.

natural_image
Illustration of a person using an iron with a cross mark (no text or symbols)5 Do not position the iron towards yourself or others.
Auto shut off (DST7030, DST7040, DST7050, DST7060, DST7510 only)

1 To give you a peace of mind, the appliance will cool down on its own if it is left unattended for a period of time.
2 When the iron is not in use for more than 30 seconds while resting on its soleplate or 8 minutes while resting on its heel/ base, the iron will enter auto shut off mode.
3 The temperature of the iron will decrease in auto shut off mode. The Auto Shut Off light will also blink quickly to indicate the iron is at auto-off status. To completely switch off the iron, plug out the iron/ switch off the mains plug.
4 Picking up or moving the iron will reactivate it.
5 The indicator light will turn steady ON, indicating that the iron is heating up again.
412
Shqip

natural_image
Close-up of a mechanical component with a checkmark and magnified detail (no text or symbols)6 Once the indicator light switches OFF, the iron is ready for use.
Cleaning and maintenance

natural_image
Illustration of a steam iron being heated by a plug, with a magnified inset showing the plug's internal structure (no text or symbols)1 Ensure the iron is not plugged in.

2 Ensure the iron is cooled down.

natural_image
Illustration of a hand holding a seed or pod with a checkmark indicating selection (no text or symbols present)3 Wipe the soleplate with a damp cloth.

natural_image
Illustration of a lit fuse with a magnified inset showing a bottle and bulb (no text or symbols)Note: To keep the soleplate smooth, avoid hard contact with metal objects. Never use a scouring pad, vinegar or other chemicals to clean the soleplate.

natural_image
Illustration of a showerhead with an exclamation mark and a cross symbol, against a tiled wall background (no text or symbols)4 Do not wash/ clean the iron under running water as it may damage the electrical components within.
Calc-Clean

Tip: The Quick Calc Release function can be used at any time. If you live in a hard water area, use the function more frequently.
1 It is recommended to descale your iron after every 1 to 3 months of use to prolong its lifetime, or when brown stains/water is observed.
IMPORTANT: The Quick Calc Release automatically collects loose scale particles during ironing.

natural_image
Illustration of a wall socket connected to a plug with a black arrow indicating direction (no text or symbols)2 Ensure the iron is not plugged in.

3 Ensure the iron is cooled down.
414
Shqip

natural_image
Hand inserting a card into a device (no text or symbols visible)4 Slide up the Quick Calc Release collector lever.

natural_image
Illustration of a steam iron being placed on a kitchen sink with a small appliance nearby (no text or symbols)5 Pull out the Quick Calc Release collector lid.

natural_image
Illustration of a stainless steel kitchen sink with a faucet and showerhead, against a grid background (no text or symbols)6 Clean the Quick Calc Release collector lid with water.

natural_image
Illustration of a hand washing a shower with a drain, no text or symbols present7 Shake the iron to drain the water and scale particles from the opening of the iron.

8 Do not run water into the opening of the iron.

natural_image
Illustration of a mechanical device with two views of a component (no text or symbols)9 Shake the iron to drain the water and scale particles from the opening of the iron.

natural_image
Hand pressing down a button on a surface, no text or symbols visible10 Push down the lever to lock the Quick Calc Release collector. You will hear a 'click' sound.
Storage

1 Slide the steam selector to select no steam mode/dry ironing mode

natural_image
Illustration of a wall socket connected to a plug with a black arrow indicating direction (no text or symbols)2 Unplug the iron.

3 Let the iron cool down.

natural_image
Illustration of a hand using a power iron to press or install a surface, with a grid-patterned background (no text or symbols)4 Pour any remaining water out of the water tank.

natural_image
Diagram of a mechanical or fluidic device with rotating arrows indicating flow or movement (no text or symbols)5 Wind the power cord around the main body of the iron.
Trouble shooting
This chapter summarizes the most common problems you could encounter with the appliance. If you are unable to solve the problem with the information below, visit www.philips.com/support for a list of frequently asked questions or contact the Consumer Care Center in your country.
Problem Possible cause Solution
| My Philips Steam Iron does not produce steam. | There is no water/not enough water in the tank. | If there is no water in the water tank of your Philips Steam Iron, your iron is not able to generate steam. Please refill the water tank with water. After this, your iron should produce steam again. |
| The iron is not ready to steam. | Your iron is ready to produce steam when the indicator light switches off. | |
| The steam setting is set to no steam mode/dry ironing mode | Aways ensure that the temperature dial is at the 2-dot ●3 ●lot or ●te●HEN setting. Then, select a steam setting (ECO setting and 2-cloud setting) on the steam selector at the top of the handle.Ironing with steam with the temperature dial at the 1-dot or SYNTHETIC setting may cause wet spots/leaking as the temperature of the iron may not be hot enough to convert water to steam | |
| My Philips Steam Iron does not remove creases. | The temperature is set too low. | For irons with a temperature dial, please set the temperature according to the fabric that you are ironing. You can use the following table as a reference.Note: For some fabrics such as silk, wool, cotton and linen, steam would be needed to remove creases more efficiently. |
| Steam is not used. Switch the steam selector to or 2-cloECOettingYour Philips Iron does not produce steam when the temperature dial is at the 1-dot position, SYNTHETIC or Calc-Clean setting. You can get more steam by changing to a stronger steam setting, or using the steam boost function to help remove tough wrinkles.To remove creases in the vertical position, press and release the steam boost trigger or button to release a shot of steam. Holding down the trigger or button will not produce a continuous steam boost.Note that repeated usage of the steam boost in a short period of time may cause spitting or a reduction in the amount of steam produced. If this happens, wait for a short while before using the steam boost function again. | ||
| The steam boost in my Philips Steam Iron is not working. | The steam boost trigger has not been pressed and released. | To activate the steam boost in your Philips Steam Iron, press and release the steam boost button/trigger. Holding onto the steam boost button/trigger does not produce continuous steam boost. You may need to press the steam boost button/trigger several times on the first use for the pump to draw sufficient water.Note: We recommend to use the steam boost at the 3-dot temperature setting or higher. Using the steam boost at lower temperature settings may result in wet spots forming as the temperature of the iron may not be high enough to convert water into steam. |
| The steam boost function was used too often within a short period of time. | When you use the steam boost function of your Philips Steam Iron too often within a short period, the steam boost function will stop working for a while. In this case, please wait a couple of minutes before you use the steam boost again.For stubborn wrinkles, we recommend to use the steam boost with the steam setting at the no steam mode/dry ironing mode for the best effect. | |
| The iron is not ready to steam. | The iron is ready to steam when the indicator light switches off. | |
| My Philips Steam Iron produces smoke when heating up. | First usage. During production, some parts of the iron have been slightly greased. As a result of this, your iron may produce some smoke when it is switched on for the first few times, this is normal and should dissipate shortly. | |
| There is water in the soleplate. | Sometimes, there might still be some remaining water in your iron's soleplate after the last usage. This water will evaporate when your iron's soleplate heats up, and the steam generated may look like smoke. This is normal and should dissipate shortly. | |
| My iron is still producing smoke even after checking the above. | There could be an issue with the iron, we recommend you to contact us. | |
| There are water droplets/leaking on my garment during ironing. | First time usage. If you experience leaking/spitting during your first usage, perform the Calc Clean function once. If this does not resolve the leaking on your next use, we recommend you to contact us. | |
| The steam boost function was used too often within a short period of time. | Continue ironing in horizontal position and wait a while before you use the steam boost function again. | |
| There is a build up of scale/calcification in the iron. | If there is brown water or white flakes coming out of the iron, this may indicate a build up of calcification in the iron. Perform the Calc Clean function to clear this. If you live in an area with hard water, we recommend to use distilled water (or 50% distilled and 50% tap water) and perform the calc clean function once a month to prolong the lifetime of the iron.Note: the presence of white flakes on the very first use of the iron is normal. | |
| You have added other chemicals or additives into the water tank. | Fragrances/oils/chemicals/additives/descaling solutions should not be added into the water tank as they are damaging to the device. Please rinse the water tank, fill it up with water and descale your iron. | |
| You have not closed the water tank lid properly. | Close the lid firmly after filling. | |
| Steam has condensed onto the ironing board. | Steam may condense on the board cover, particularly when using irons that produce powerful levels of steam for a prolonged period of time. This can look like your iron is leaking from the soleplate. To prevent this, you can do the following:1 Select a lower steam setting than the setting you have been using or use steam during the first ironing strokes and then finish up with the dry-ironing strokes.2 You can also put an extra layer of cloth between the ironing board and the ironing board cover to minimize condensation.3 Replace the ironing board cover if the sponge material has worn out. | |
| Small droplets/wet spots that occur during start of ironing session. | If small droplets or wet spots occur during the start of the ironing session, this is normal as water might have collected in the soleplate from the previous ironing session, and the iron was used before it had fully heated up. Iron over the droplets/wet spots We recommend that the iron be stored in a vertical position with the steam setting set to no steam mode/dry ironing mode before it is unplugged to minimize the collection of water in the soleplate. | |
| The iron leaks after ironing. | If your iron leaks after unplugging/during storage, it may be because water has collected in the soleplate from leaving the steam setting on before the anti-drip feature activates. We recommend to set the steam selector to no steam mode/dry ironing mode before unplugging the iron. Empty the water tank and place the iron in the vertical position when cooling down/for storage. | |
| The iron leaves a shine or an imprint on the garment. | The surface to be ironed was uneven. | The iron is safe to use on all ironable garments. The shine or imprint is not permanent and disappears when you wash the garment. Avoid ironing over seams or folds. You can also place a cotton cloth over the area to be ironed to avoid imprints. |
| You have set a higher temperature than recommended for the fabric type. | Using a higher than recommended temperature setting for the fabric type may cause the iron to burn the fabric. Check your garment and that your iron is set to the correct temperature setting before ironing. The iron is safe to use on all ironable garments with the correct temperature setting. The shine or imprint is not permanent and disappears when you wash the garment. Avoid ironing over seams or folds. You can also place a cotton cloth over the area to be ironed to avoid imprints. | |
Shqip
| The iron has stopped heating up. | Auto shut-off has been activated. | When your iron has not been used in 30 seconds in the horizontal position or 8 minutes in the vertical position), the iron will automatically shut-off. This is indicated by a constant blinking of the indicator light. To re-activate the iron, move the iron and the indicator light will light up again, indicating that the iron is heating up.If your iron has a dedicated Auto Shut Off light, the ASO light will blink when the iron enters the ASO state. When the iron is moved, the ASO light will switch off and the temperature indicator light will turn on, indicating that it is heating up again. |
| There is a power connection problem. | Please check the mains cord, the plug and the wall socket. Ensure that everything is properly connected. If you are using an extension plug, please ensure that power rating is suitable for the iron. | |
| The iron does not switch on anymore (I have tried the above but my iron still does not heat up). | If this is the case, there might be a problem with your iron. We recommend you to contact us. | |
| The indicator light on the iron is blinking/breathing. | Iron is heating up. The indicator light may turn on and off during ironing as the iron heats up periodically to maintain its temperature. | |
Uvod
422 Slovenščina
1 Water tank lid
2 Steam selector
3 Water spray
4 Cord
5 Cord winding
6 Indicator light
7 Steam boost trigger
8 Temperature dial
9 Quick Calc Release collector
Uporaba aparata
Type of water to use
Note: The iron may give off some steam when you use it for the first time. This stops after a short while.
Type of water to use
The appliance is suitable to be used with tap water. However, if you live in an area with hard water, we recommend that you mix an equal amount of tap water with distilled or demineralized water. This will prevent fast scale build up and prolong the lifetime of the appliance.
Do not add perfume, water from the tumble dryer, vinegar, starch, descaling agents, ironing aids, chemically descaled water or other chemicals, as they may cause water spitting, brown staining or damage to your appliance.
Filling the water tank

natural_image
Illustration of a steam iron with a warning symbol (no text or labels)1 Do not plug in the iron.

natural_image
Illustration of a steam iron with a magnified inset showing internal components (no text or symbols)2 Slide the steam selector to the right to select no steam mode/dry ironing mode

natural_image
Illustration of a hand using a tool to press down a steam iron (no text or symbols visible)3 Flip open the water tank lid.

4 Fill water tank up to the MAX indication mark. Do not add any additives like perfume, fragrances, soap or vinegar.

natural_image
Illustration of a hand using a tool to press down a steamer (no text or symbols visible)5 Close the water tank lid firmly.
Setting the temperature and steam
| | |
| MAXLINEN | /\^* | |
| COTTON | /\^* | |
| SILK | ECO | |
| SYNTHETICS |

natural_image
Illustration of a hand ironing an electric iron, labeled 'ECO' in the top-left corner (no other text or symbols)ECO setting: Minimum constant steam is delivered continuously for garments with less creases. This setting also saves energy.

natural_image
Illustration of a hand steaming iron with steam rising (no text or symbols)Two steam clouds: More constant steam is delivered continuously for tough creases.

For stubborn creases, set the steam setting to two steam clouds and press and hold the steam boost trigger below the handle. Maximum constant steam will be delivered continuously.
Preparing for use

Smoke can be visible during the first use, and it is normal. This ceases after a short while.
1 Check the garment label to ensure that the fabric is ironable and its appropriate temperature setting.

2 Turn the temperature dial to the appropriate ironable temperature indication according to the garment label.

natural_image
Illustration of two iron iron holders with a cross mark indicating the angle (no text or symbols present)3 Allow the iron to rest on its heel.

natural_image
Illustration of a steam iron with a cord and plug, no text or symbols present4 Insert the plug into an earthed socket and allow the iron rest on its heel. If using an extension plug, ensure that the power rating of the extension plug is suitable for the iron.

natural_image
Close-up of a mechanical component with an hourglass icon highlighting a specific area (no text or symbols present)5 Wait for the iron to heat up. The indicator light will turn steady on while it is heating up.
426 Slovenščina

natural_image
Close-up of a mechanical component with a checkmark and magnified detail (no text or symbols)6 Once the iron is ready to be used, the indicator light will switch off. The indicator light may turn on and off during ironing as the iron heats up periodically to maintain its temperature.
Ironing with steam
1 Slide the steam selector to ECO mode or steam mode.

2 Turn the temperature dial to between silk and linen based on the image.


natural_image
Illustration of a person using a steam iron to press down a surface (no text or symbols visible)3 Steam will be released during ironing.
No steam mode/dry ironing mode

1 Set the steam setting to no steam mode/dry ironing mode

natural_image
Illustration of a hand ironing a steam iron on a bed (no text or symbols)2 After a short while, steam will cease during ironing.
Water spray

natural_image
Illustration of a hand ironing an iron on a surface, with a downward arrow indicating motion (no text or symbols)1 Press and release the water spray button at the top of the handle. Water will be sprayed out of the nozzle.
Horizontal & vertical steam boost
1 Set temperature dial to MAX setting between cotton and linen.

Slovenščina

natural_image
Illustration of a hand using an iron to clean clothes, with a circular icon showing upward motion and checkmark indicators (no text or symbols)2 Vertical steam boost: Press and release the steam boost trigger in the vertical position to release shots of steam on hanging garments. Holding down the steam boost trigger in the vertical position will not deliver constant steam.

natural_image
Illustration of hands using a steam iron to clean clothing, showing motion and shading (no text or symbols)3 Vertical steam boost: Pull and stretch your hanging garment while using the steam boost to remove stubborn creases.

4 Do not use your bare hand as a supporting surface when you iron.

natural_image
Illustration of a person using an iron with a cross mark (no text or symbols)5 Do not position the iron towards yourself or others.
Auto shut off (DST7030, DST7040, DST7050, DST7060, DST7510 only)

1 To give you a peace of mind, the appliance will cool down on its own if it is left unattended for a period of time.
2 When the iron is not in use for more than 30 seconds while resting on its soleplate or 8 minutes while resting on its heel/ base, the iron will enter auto shut off mode.
3 The temperature of the iron will decrease in auto shut off mode. The Auto Shut Off light will also blink quickly to indicate the iron is at auto-off status. To completely switch off the iron, plug out the iron/ switch off the mains plug.
4 Picking up or moving the iron will reactivate it.
5 The indicator light will turn steady ON, indicating that the iron is heating up again.
430 Slovenščina

natural_image
Close-up of a mechanical component with a checkmark and magnified detail (no text or symbols)6 Once the indicator light switches OFF, the iron is ready for use.
Cleaning and maintenance

natural_image
Illustration of a steam iron being heated by a plug, with a magnified inset showing the plug's internal structure (no text or symbols)1 Ensure the iron is not plugged in.

2 Ensure the iron is cooled down.

natural_image
Illustration of a hand holding a seed or pod with a checkmark indicating selection (no text or symbols present)3 Wipe the soleplate with a damp cloth.

natural_image
Illustration of a lit fuse with a magnified inset showing a bottle and bulb (no text or symbols)Note: To keep the soleplate smooth, avoid hard contact with metal objects. Never use a scouring pad, vinegar or other chemicals to clean the soleplate.

natural_image
Illustration of a stainless steel iron with warning symbols (no text or labels)4 Do not wash/ clean the iron under running water as it may damage the electrical components within.
Calc-Clean

Tip: The Quick Calc Release function can be used at any time. If you live in a hard water area, use the function more frequently.
1 It is recommended to descale your iron after every 1 to 3 months of use to prolong its lifetime, or when brown stains/water is observed.
IMPORTANT: The Quick Calc Release automatically collects loose scale particles during ironing.

natural_image
Illustration of a wall socket connected to an electrical plug with a black arrow indicating direction (no text or symbols)2 Ensure the iron is not plugged in.

3 Ensure the iron is cooled down.
432 Slovenščina

natural_image
Hand inserting a card into a device (no text or symbols visible)4 Slide up the Quick Calc Release collector lever.

natural_image
Illustration of a steam iron being placed on a kitchen sink with a small appliance nearby (no text or symbols)5 Pull out the Quick Calc Release collector lid.

natural_image
Illustration of a stainless steel kitchen sink with a faucet and a hand holding a bag, against a grid background (no text or symbols)6 Clean the Quick Calc Release collector lid with water.

natural_image
Illustration of a hand washing a shower with a drain, no text or symbols present7 Shake the iron to drain the water and scale particles from the opening of the iron.

8 Do not run water into the opening of the iron.

natural_image
Illustration of a mechanical device with two views of a component (no text or symbols)9 Shake the iron to drain the water and scale particles from the opening of the iron.

natural_image
Hand pressing down a button on a surface, no text or symbols visible10 Push down the lever to lock the Quick Calc Release collector. You will hear a 'click' sound.
Storage

1 Slide the steam selector to select no steam mode/dry ironing mode

natural_image
Illustration of a wall socket connected to a plug with a black arrow indicating direction (no text or symbols)2 Unplug the iron.

3 Let the iron cool down.
434 Slovenščina

natural_image
Illustration of a hand using a power iron to clean or install a surface, with a grid-patterned background (no text or symbols)4 Pour any remaining water out of the water tank.

natural_image
Illustration of a mechanical device with rotating arrows indicating motion (no text or symbols)5 Wind the power cord around the main body of the iron.
Trouble shooting
This chapter summarizes the most common problems you could encounter with the appliance. If you are unable to solve the problem with the information below, visit www.philips.com/support for a list of frequently asked questions or contact the Consumer Care Center in your country.
Problem Possible cause Solution
| My Philips Steam Iron does not produce steam. | There is no water/not enough water in the tank. | If there is no water in the water tank of your Philips Steam Iron, your iron is not able to generate steam. Please refill the water tank with water. After this, your iron should produce steam again. |
| The iron is not ready to steam. | Your iron is ready to produce steam when the indicator light switches off. | |
| The steam setting is set to no steam mode/dry ironing mode | Aways ensure that the temperature dial is at the 2-dot ●3 ●lot or ●te ●MEN setting. Then, select a steam setting (ECO setting and 2-cloud setting) on the steam selector at the top of the handle.Ironing with steam with the temperature dial at the 1-dot or SYNTHETIC setting may cause wet spots/leaking as the temperature of the iron may not be hot enough to convert water to steam | |
| My Philips Steam Iron does not remove creases. | The temperature is set too low. | For irons with a temperature dial, please set the temperature according to the fabric that you are ironing. You can use the following table as a reference.Note: For some fabrics such as silk, wool, cotton and linen, steam would be needed to remove creases more efficiently. |
| Steam is not used. Switch the steam selector to or 2-cloECOettingYour Philips Iron does not produce steam when the temperature dial is at the 1-dot position, SYNTHETIC or Calc-Clean setting. You can get more steam by changing to a stronger steam setting, or using the steam boost function to help remove tough wrinkles.To remove creases in the vertical position, press and release the steam boost trigger or button to release a shot of steam. Holding down the trigger or button will not produce a continuous steam boost.Note that repeated usage of the steam boost in a short period of time may cause spitting or a reduction in the amount of steam produced. If this happens, wait for a short while before using the steam boost function again. | ||
| The steam boost in my Philips Steam Iron is not working. | The steam boost trigger has not been pressed and released. | To activate the steam boost in your Philips Steam Iron, press and release the steam boost button/trigger. Holding onto the steam boost button/trigger does not produce continuous steam boost. You may need to press the steam boost button/trigger several times on the first use for the pump to draw sufficient water.Note: We recommend to use the steam boost at the 3-dot temperature setting or higher. Using the steam boost at lower temperature settings may result in wet spots forming as the temperature of the iron may not be high enough to convert water into steam. |
| The steam boost function was used too often within a short period of time. | When you use the steam boost function of your Philips Steam Iron too often within a short period, the steam boost function will stop working for a while. In this case, please wait a couple of minutes before you use the steam boost again.For stubborn wrinkles, we recommend to use the steam boost with the steam setting at the no steam mode/dry ironing mode for the best effect. | |
| The iron is not ready to steam. | The iron is ready to steam when the indicator light switches off. | |
436 Slovenščina
| My Philips Steam Iron produces smoke when heating up. | First usage. During production, some parts of the iron have been slightly greased. As a result of this, your iron may produce some smoke when it is switched on for the first few times, this is normal and should dissipate shortly. | |
| There is water in the soleplate. | Sometimes, there might still be some remaining water in your iron's soleplate after the last usage. This water will evaporate when your iron's soleplate heats up, and the steam generated may look like smoke. This is normal and should dissipate shortly. | |
| My iron is still producing smoke even after checking the above. | There could be an issue with the iron, we recommend you to contact us. | |
| There are water droplets/leaking on my garment during ironing. | First time usage. If you experience leaking/spitting during your first usage, perform the Calc Clean function once. If this does not resolve the leaking on your next use, we recommend you to contact us. | |
| The steam boost function was used too often within a short period of time. | Continue ironing in horizontal position and wait a while before you use the steam boost function again. | |
| There is a build up of scale/calcification in the iron. | If there is brown water or white flakes coming out of the iron, this may indicate a build up of calcification in the iron. Perform the Calc Clean function to clear this. If you live in an area with hard water, we recommend to use distilled water (or 50% distilled and 50% tap water) and perform the calc clean function once a month to prolong the lifetime of the iron.Note: the presence of white flakes on the very first use of the iron is normal. | |
| You have added other chemicals or additives into the water tank. | Fragrances/oils/chemicals/additives/descaling solutions should not be added into the water tank as they are damaging to the device. Please rinse the water tank, fill it up with water and descale your iron. | |
| You have not closed the water tank lid properly. | Close the lid firmly after filling. | |
| Steam has condensed onto the ironing board. | Steam may condense on the board cover, particularly when using irons that produce powerful levels of steam for a prolonged period of time. This can look like your iron is leaking from the soleplate. To prevent this, you can do the following:1 Select a lower steam setting than the setting you have been using or use steam during the first ironing strokes and then finish up with the dry-ironing strokes.2 You can also put an extra layer of cloth between the ironing board and the ironing board cover to minimize condensation.3 Replace the ironing board cover if the sponge material has worn out. | |
| Small droplets/wet spots that occur during start of ironing session. | If small droplets or wet spots occur during the start of the ironing session, this is normal as water might have collected in the soleplate from the previous ironing session, and the iron was used before it had fully heated up. Iron over the droplets/wet spots We recommend that the iron be stored in a vertical position with the steam setting set to no steam mode/dry ironing mode before it is unplugged to minimize the collection of water in the soleplate. | |
| The iron leaks after ironing. | If your iron leaks after unplugging/during storage, it may be because water has collected in the soleplate from leaving the steam setting on before the anti-drip feature activates. We recommend to set the steam selector to no steam mode/dry ironing mode before unplugging the iron. Empty the water tank and place the iron in the vertical position when cooling down/for storage. | |
| The iron leaves a shine or an imprint on the garment. | The surface to be ironed was uneven. | The iron is safe to use on all ironable garments. The shine or imprint is not permanent and disappears when you wash the garment. Avoid ironing over seams or folds. You can also place a cotton cloth over the area to be ironed to avoid imprints. |
| You have set a higher temperature than recommended for the fabric type. | Using a higher than recommended temperature setting for the fabric type may cause the iron to burn the fabric. Check your garment and that your iron is set to the correct temperature setting before ironing. The iron is safe to use on all ironable garments with the correct temperature setting. The shine or imprint is not permanent and disappears when you wash the garment. Avoid ironing over seams or folds. You can also place a cotton cloth over the area to be ironed to avoid imprints. | |
438 Slovenščina
| The iron has stopped heating up. | Auto shut-off has been activated. | When your iron has not been used in 30 seconds in the horizontal position or 8 minutes in the vertical position), the iron will automatically shut-off. This is indicated by a constant blinking of the indicator light. To re-activate the iron, move the iron and the indicator light will light up again, indicating that the iron is heating up.If your iron has a dedicated Auto Shut Off light, the ASO light will blink when the iron enters the ASO state. When the iron is moved, the ASO light will switch off and the temperature indicator light will turn on, indicating that it is heating up again. |
| There is a power connection problem. | Please check the mains cord, the plug and the wall socket. Ensure that everything is properly connected. If you are using an extension plug, please ensure that power rating is suitable for the iron. | |
| The iron does not switch on anymore (I have tried the above but my iron still does not heat up). | If this is the case, there might be a problem with your iron. We recommend you to contact us. | |
| The indicator light on the iron is blinking/breathing. | Iron is heating up. The indicator light may turn on and off during ironing as the iron heats up periodically to maintain its temperature. | |
Úvod
440 Slovensky
natural_image
Illustration of a steam iron with a warning symbol (no text or labels)natural_image
Illustration of a hand using a tool to press down a steam iron (no text or symbols visible)natural_image
Illustration of a hand using a tool to press down a steamer (no text or symbols visible)5 Veko zásobníka na vodu pevne zatvorte.
Nastavenie teploty a pary
| | |
| MAXLINEN | /^* | |
| ●●●COTTON | /^* | |
| ●●SILK | ECO | |
| ●SYNTHETICS |

natural_image
Illustration of a hand ironing an iron, labeled 'ECO' in the top-left corner (no other text or symbols)natural_image
Illustration of a hand steaming iron with steam rising (no text or symbols)natural_image
Illustration of two iron iron holders with a cross mark indicating the angle (no text or symbols present)3 Počas nečinnosti postavte žehličku na pätu.

natural_image
Illustration of a steam iron with a cord and plug, no text or symbols presentnatural_image
Close-up of a mechanical component with an hourglass icon highlighting a specific area (no text or symbols present)natural_image
Close-up of a mechanical component with a checkmark and magnified detail (no text or symbols)natural_image
Illustration of a person using a steam iron to press down a surface (no text or symbols visible)natural_image
Illustration of a hand ironing a steam iron on a bed (no text or symbols)natural_image
Illustration of a hand using a steam iron to press down on a surface, with a downward arrow indicating motion (no text or symbols present)1 Stlačte a uvolnite tlačidlo kropenia vodou v hornej časti rukoväti. Z dýzy bude striekat' voda.
natural_image
Illustration of a hand using an iron to clean clothes, with a magnified inset showing upward and downward arrows (no text or symbols)natural_image
Illustration of hands using a steam iron to clean clothing, showing a downward motion (no text or symbols)natural_image
Illustration of a person using an iron with a cross mark (no text or symbols)natural_image
Close-up of a mechanical component with a checkmark and magnified detail (no text or symbols)natural_image
Illustration of a steam iron being compressed with a magnified inset showing a plug (no text or symbols)natural_image
Illustration of a hand holding a pear-shaped object with a checkmark indicating selection (no text or symbols present)3 Žehliacu plochu utrite navlhčenou handričkou.

natural_image
Illustration of a lit fuse with a magnified inset showing a bottle and bulb (no text or symbols)natural_image
Illustration of a showerhead with warning symbols (no text or labels)natural_image
Illustration of a wall socket connected to a plug with an arrow indicating direction (no text or symbols)natural_image
Hand inserting a card into a device (no text or symbols visible)4 Páčku zberača funkcie Quick Calc Release posuňte nahor.

natural_image
Illustration of a steam iron being placed on a kitchen sink with a small appliance nearby (no text or symbols)5 Vytiahnite veko zberača funkcie Quick Calc Release.

natural_image
Illustration of a stainless steel kitchen sink with a faucet and a hand holding a bag, against a grid background (no text or symbols)6 Veko zberača funkcie Quick Calc Release očistite vodou.

natural_image
Illustration of a hand washing a shower with a drain, no text or symbols presentnatural_image
Illustration of a mechanical device with two views of a component (no text or symbols)natural_image
Hand pressing down a button on a surface, no text or symbols visible10 Stlačte páčku, aby ste zaistili zberač funkcie Quick Calc Release. Budete počut kliknutie.
Odkladanie

natural_image
Illustration of a wall socket connected to a plug with a magnified inset showing its internal structure (no text or symbols)2 Žehličku odpojte zo siete.

natural_image
Illustration of a hand using a power iron on a kitchen sink (no text or symbols visible)natural_image
Diagram of a bottle with internal structure and curved arrows indicating rotation or movement (no text or symbols)1 Poklopac posude za vodu
2 Birač postavke pare
3 Prskalica
4 Kabl
5 Namotavanje kabla
6 Indikator
7 Okidač za dodatnu količinu pare
8 Regulator temperature
9 Quick Calc Release sakupljač
Upotreba aparata
Tip vode koji bi trebalo koristiti
Napomena: Pri prvoj upotrebi, pegla može da izbaci malo pare. To će ubrzo prestati.
Tip vode koji bi trebalo koristiti
Ovaj aparat je prikladan za korišćenje sa vodom iz česme. Medutim, ako živite u oblasti sa tvrdom vodom, preporučujemo da pomešate jednake količine vode sa česme i destilovane ili demineralizovane vode. To će sprečiti brzo stvaranje naslaga kamenca i produžiti radni vek aparata.
Nemojte da dodajete parfem, vodu iz mašine za sušenje veša, sirće, štirak, sredstva za uklanjanje kamenca, aditive za peglanje, vodu čiji je sadržaj kamenca smanjen hemijskim putem niti druge hemikalije zato što to može da dovede do prskanja vode, pojave braon fleka ili oštećenja aparata.
Punjenje rezervoara za vodu

natural_image
Illustration of a steam iron with a warning symbol (no text or labels)natural_image
Illustration of a steam iron with a magnified inset showing internal components (no text or symbols)2 Pomerite birač postavke pare udesno da biste izabrali režim bez pare / režim za suvo peglanje 🚗

natural_image
Illustration of a hand using a tool to press down a steam iron (no text or symbols visible)natural_image
Illustration of a hand using a tool to press down a small object on an iron (no text or symbols visible)5 Čvrsto zatvorite poklopac rezervoara za vodu.
Podešavanje temperature i pare
| | ||
| MAKSLAN | / A | / | |
| PAMUK | / ECO | ||
| SVILA | |||
| SINTETIKA | A hat hatA A | ||

natural_image
Illustration of a hand using an iron on a steam, labeled 'ECO' in the top-left corner (no other text or symbols)natural_image
Illustration of a hand steaming iron with a circular icon showing a steam drop symbol (no text or symbols present)Dva oblaka pare: Uzastopno se primenjuje veća količina pare, za tvrdokorne nabore.

Za tvrdokorne nabore, podesite postavku pare na dva oblaka pare 📄ipritisnite i držite dugme za dodatnu količinu pare ispod drške. Maksimalna konstantna para će se neprekidno ispuštati.
Pre upotrebe

Tokom prve upotrebe možda ćete videti dim, to je normalna pojava. To će ubrzo nestati.
1 Proverite etiketu na odeći da biste se uverili da se tkanina može peglati i koja je odgovarajuća postavka temperature za nju.

2 Okrenite regulator temperature na odgovarajuću oznaku u skladu sa etiketom na odeći.

natural_image
Illustration of two iron shavings with a cross mark indicating a defect or damage (no text or symbols present)3 Postavite peglu u uspravan položaj.

natural_image
Illustration of a steam iron with a cord and plug, no text or symbols present4 Uključite utikač u uzemljenu utičnicu i ostavite peglu da stoji na postolju. Ako koristite produžni kabl, postarajte se da nominalna snaga produžnog kabla odgovara pegli.

natural_image
Close-up of a mechanical component with an hourglass icon highlighting a specific area (no text or symbols present)5 Sačekajte da se pegla zagreje. Indikatorska lampica će svetleti neprekidno dok se pegla zagreva.
462 Srpski

natural_image
Close-up of a mechanical component with a checkmark and magnified detail (no text or symbols)6 Kada je pegla spremna za upotrebu, lampica će se isključiti. Lampica se može paliti i gasiti tokom peglanja, pošto se pegla povremeno dogreva da bi održala temperaturu.
Peglanje parom
1 Pomerite birač postavke pare na režim ECOECO režim pare.

2 Okrenite regulator temperature na položaj između svile i lana na osnovu slike.


natural_image
Illustration of a person using a steam iron to press down a surface (no text or symbols visible)1 Podesite postavku pare na režim bez pare / režim za suvo peglanje

natural_image
Illustration of a hand ironing a steam iron on a bed (no text or symbols)2 Nakon kratkog vremena para će prestati da izlazi tokom peglanja.
Prskalica

natural_image
Illustration of a hand using a steam iron to press down on a surface, with a downward arrow indicating motion (no text or symbols present)1 Pritisnite i otpustite dugme za prskanje vode na vrhu drške. Voda će prskati iz mlaznice.
Horizontalni i vertikalni mlaz pare
1 Podesite regulator temperature na postavku MAKS, između pamuka i lana.

464 Srpski

natural_image
Illustration of a hand using an iron to clean clothes, with a magnified inset showing upward and downward arrows (no text or symbols)natural_image
Illustration of hands using a steam iron to clean clothing, showing a downward motion (no text or symbols)3 Vertikalni mlaz pare: Zategnite viseći komad odeće dok koristite mlaz pare da biste uklonili tvrdokorne nabore.

natural_image
Illustration of a person using an iron with a cross mark (no text or symbols)natural_image
Close-up of a mechanical component with a checkmark and magnified detail (no text or symbols)6 Kada se indikatorska lampica isključi, pegla je spremna za upotrebu.
natural_image
Illustration of a steam iron being heated by a plug, with a magnified inset showing the plug's electrical contact (no text or symbols present)2 Uverite se da se pegla ohladila.

natural_image
Illustration of a hand holding a pear-shaped object with a checkmark indicating selection (no text or symbols present)3 Očistite grejnu ploču vlažnom krpom.

natural_image
Illustration of a lit fuse with a magnified inset showing a bottle and bulb (no text or symbols)natural_image
Illustration of a steam iron in a kitchen sink with warning symbols (no text or labels)natural_image
Illustration of a wall socket connected to a plug with an arrow indicating direction (no text or symbols)natural_image
Hand inserting a card into a device (no text or symbols visible)4 Gurnite nagore ručicu Quick Calc Release sakupljača.

natural_image
Illustration of a steam iron being placed on a kitchen sink with a small appliance nearby (no text or symbols)natural_image
Illustration of a stainless steel kitchen sink with a faucet and showerhead, against a grid background (no text or symbols)6 Očistite poklopac Quick Calc Release sakupljača vodom.

natural_image
Illustration of a hand washing a shower with a drain, no text or symbols present7 Protresite peglu da biste ispraznili vodu i čestice kamenca iz otvora.

8 Ne sipajte vodu u otvor pegle.

natural_image
Illustration of a mechanical device with two views of a component (no text or symbols)9 Protresite peglu da biste ispraznili vodu i čestice kamenca iz otvora.

natural_image
Hand pressing down a button on a surface, no text or symbols visible10 Gurnite ručicu nadole da biste zaključali Quick Calc Release sakupljač. Čućete zvuk „klik“.
Odlaganje

1 Pomerite birač postavke pare da biste izabrali režim bez pare / režim za suvo peglanje

natural_image
Illustration of a wall socket connected to an electrical plug with a black arrow indicating direction (no text or symbols)2 Isključite peglu iz zidne utičnice.

3 Ostavite peglu da se ohladi.

natural_image
Illustration of a hand using a power iron on a metal surface (no text or symbols)4 Prospite preostalu vodu iz rezervoara za vodu.

natural_image
Diagram of a mechanical device with rotating arms and internal components (no text or symbols)5 Namotajte kabl za napajanje oko glavnog kućišta pegle.
Rešavanje problema
U ovom poglavlju ukratko su navedeni najčešći problemi do kojih može da dođe sa aparatom. Ako ne uspete da rešite problem pomoću informacija navedenih u nastavku, posetite www.philips.com/support da biste pronašli listu najčešćih pitanja ili se obratite centru za korisničku podršku u svojoj zemlji.
natural_image
Illustration of a steam iron with a warning symbol (no text or labels)natural_image
Illustration of a steam iron with a magnified inset showing internal components (no text or symbols)natural_image
Illustration of a hand using a tool to lift a cup on an iron (no text or symbols)natural_image
Illustration of a hand using a tool to press down a steamer (no text or symbols visible)natural_image
Illustration of a hand ironing an iron with 'ECO' label (no other text or symbols)natural_image
Illustration of a hand steaming a steam iron with a circular icon showing a cloud or smoke (no text or symbols)natural_image
Illustration of two iron steamers with a cross mark indicating the angle (no text or symbols present)natural_image
Illustration of a steam iron with a cord and plug, no text or symbols presentnatural_image
Close-up of a mechanical component with an hourglass icon highlighting a specific area (no text or symbols present)natural_image
Close-up of a mechanical component with a checkmark and magnified detail (no text or symbols)natural_image
Illustration of a person using a steam iron to press down a surface (no text or symbols visible)natural_image
Illustration of a hand ironing an iron on a bed (no text or symbols)natural_image
Illustration of a hand using an iron on a textured surface, with a downward arrow indicating motion (no text or symbols)natural_image
Illustration of a hand using an iron to clean clothing, with arrows indicating direction (no text or symbols)natural_image
Illustration of hands using a steam iron to burn on a garment (no text or symbols present)natural_image
Illustration of a person using a steam iron with a cross mark (no text or symbols)natural_image
Close-up of a mechanical component with a checkmark and magnified detail (no text or symbols)natural_image
Illustration of a steam iron being heated by a plug, with a magnified inset showing the plug's internal structure (no text or symbols)natural_image
Illustration of a hand holding a pear-shaped object with a checkmark indicating selection (no text or symbols present)natural_image
Illustration of a lit fuse with a magnified inset showing a bottle and bulb (no text or symbols)natural_image
Illustration of a showerhead with warning symbols (in警告, exclamation, and cross) against a grid background, no text or labels present.natural_image
Illustration of a wall socket connected to a plug with a black arrow indicating direction (no text or symbols)natural_image
Hand inserting a card into a device (no text or symbols visible)natural_image
Illustration of a steam iron being placed on a kitchen sink with a small appliance nearby (no text or symbols)natural_image
Illustration of a stainless steel kitchen sink with a faucet and a hand holding a bag, against a grid background (no text or symbols)natural_image
Illustration of a hand washing a shower with a drain, no text or symbols presentnatural_image
Illustration of a mechanical device with two views of a component (no text or symbols)natural_image
Hand pressing down a button on a surface, no text or symbols visiblenatural_image
Illustration of a wall socket connected to a plug with a black arrow indicating direction (no text or symbols)2 Irrota silitysraudan pistoke pistorasiasta.

natural_image
Illustration of a hand using a power iron on a metal surface (no text or symbols)natural_image
Diagram of a mechanical device with rotating arms and internal components (no text or symbols)natural_image
Illustration of a steam iron with a warning symbol (no text or labels)natural_image
Illustration of a hand using a tool to press down a steam iron (no text or symbols visible)natural_image
Illustration of a hand using a tool to press down a steaming iron (no text or symbols visible)natural_image
Illustration of a hand ironing an iron with 'ECO' label (no other text or symbols)natural_image
Illustration of a hand steaming a steam iron with a circular icon showing a cloud or smoke (no text or symbols)natural_image
Illustration of two iron steamers with a cross mark indicating the angle (no text or symbols present)natural_image
Illustration of a steam iron with a cord and plug, no text or symbols presentnatural_image
Close-up of a mechanical component with an hourglass icon highlighting a specific area (no text or symbols present)natural_image
Close-up of a mechanical component with a checkmark and magnified detail (no text or symbols)natural_image
Illustration of a hand ironing an iron on a person's back (no text or symbols)3 Ånga avges under strykningen.
natural_image
Illustration of a hand ironing an iron on a bed (no text or symbols)natural_image
Illustration of a hand using a power iron to press down on a surface, with a downward arrow indicating motion (no text or symbols present)500 Svenska

natural_image
Illustration of a hand using an iron to clean clothes, with a magnified inset showing upward and downward arrows (no text or symbols)natural_image
Illustration of hands using a steam iron to clean clothing, showing a downward motion (no text or symbols)natural_image
Illustration of a person using an iron with a cross mark (no text or symbols)natural_image
Close-up of a mechanical component with a checkmark and magnified detail (no text or symbols)natural_image
Illustration of a steam iron being compressed with a magnified inset showing a plug (no text or symbols)natural_image
Illustration of a hand holding a pear-shaped object with a checkmark indicating selection (no text or symbols present)natural_image
Illustration of a lit fuse with a magnified inset showing a bottle and bulb (no text or symbols)natural_image
Illustration of a showerhead with warning symbols (in警告, exclamation, and cross) against a grid background, no text or labels present.natural_image
Illustration of a wall socket connected to a plug with a black arrow indicating direction (no text or symbols)natural_image
Hand inserting a card into a device (no text or symbols visible)natural_image
Illustration of a steam iron being placed on a kitchen sink with a small appliance nearby (no text or symbols)5 Dra ut Quick Calc Release-uppsamlarens lock.

natural_image
Illustration of a stainless steel kitchen sink with a faucet and a hand holding a bag, against a grid background (no text or symbols)natural_image
Illustration of a hand washing a shower with a drain, no text or symbols presentnatural_image
Illustration of a mechanical device with two views of a component (no text or symbols)natural_image
Hand pressing down a button on a surface, no text or symbols visiblenatural_image
Illustration of a wall socket connected to an electrical plug with a magnified inset showing its internal structure (no text or symbols)2 Koppla ur strykjärnet.

natural_image
Illustration of a hand using a power iron to clean or install a surface (no text or symbols visible)natural_image
Illustration of a bottle with rotating arms and a handle, showing fluid flow (no text or symbols)512 Tiếng Việt
1 Water tank lid
2 Steam selector
3 Water spray
4 Cord
5 Cord winding
6 Indicator light
7 Steam boost trigger
8 Temperature dial
9 Quick Calc Release collector
Sử dụng thiết bị
Type of water to use
Note: The iron may give off some steam when you use it for the first time. This stops after a short while.
Type of water to use
The appliance is suitable to be used with tap water. However, if you live in an area with hard water, we recommend that you mix an equal amount of tap water with distilled or demineralized water. This will prevent fast scale build up and prolong the lifetime of the appliance.
Do not add perfume, water from the tumble dryer, vinegar, starch, descaling agents, ironing aids, chemically descaled water or other chemicals, as they may cause water spitting, brown staining or damage to your appliance.
Filling the water tank

natural_image
Illustration of a steam iron with a warning symbol (no text or labels)1 Do not plug in the iron.

natural_image
Illustration of a steam iron with a magnified inset showing internal components (no text or symbols)2 Slide the steam selector to the right to select no steam mode/dry ironing mode

natural_image
Illustration of a hand using a tool to press down a steam iron (no text or symbols visible)3 Flip open the water tank lid.

4 Fill water tank up to the MAX indication mark. Do not add any additives like perfume, fragrances, soap or vinegar.

natural_image
Illustration of a hand using a tool to press down a steamer (no text or symbols visible)5 Close the water tank lid firmly.
Setting the temperature and steam
| | |
| MAXLINEN | /\^* | |
| ●●●COTTON | /\^* | |
| ●●SILK | ECO | |
| ●SYNTHETICS |

natural_image
Illustration of a hand ironing an electric iron, labeled 'ECO' in the top-left corner (no other text or symbols)ECO setting: Minimum constant steam is delivered continuously for garments with less creases. This setting also saves energy.

natural_image
Illustration of a hand steaming iron with steam rising (no text or symbols)Two steam clouds: More constant steam is delivered continuously for tough creases.

For stubborn creases, set the steam setting to two steam clouds and press and hold the steam boost trigger below the handle. Maximum constant steam will be delivered continuously.
Preparing for use

Smoke can be visible during the first use, and it is normal. This ceases after a short while.
1 Check the garment label to ensure that the fabric is ironable and its appropriate temperature setting.

2 Turn the temperature dial to the appropriate ironable temperature indication according to the garment label.

natural_image
Illustration of two iron iron holders with a cross mark indicating the angle (no text or symbols present)3 Allow the iron to rest on its heel.

natural_image
Illustration of a steam iron with a cord and plug, no text or symbols present4 Insert the plug into an earthed socket and allow the iron rest on its heel. If using an extension plug, ensure that the power rating of the extension plug is suitable for the iron.

natural_image
Close-up of a mechanical component with an hourglass icon highlighting a specific area (no text or symbols present)5 Wait for the iron to heat up. The indicator light will turn steady on while it is heating up.

natural_image
Close-up of a mechanical component with a checkmark and magnified detail (no text or symbols)6 Once the iron is ready to be used, the indicator light will switch off. The indicator light may turn on and off during ironing as the iron heats up periodically to maintain its temperature.
Ironing with steam
1 Slide the steam selector to ECO mode in steam mode.

2 Turn the temperature dial to between silk and linen based on the image.


natural_image
Illustration of a person using a steam iron to press down a surface (no text or symbols visible)3 Steam will be released during ironing.
No steam mode/dry ironing mode

1 Set the steam setting to no steam mode/dry ironing mode.

natural_image
Illustration of a hand ironing a steam iron on a bed (no text or symbols)2 After a short while, steam will cease during ironing.
Water spray

natural_image
Illustration of a hand using a steam iron to press down on a surface, with a downward arrow indicating motion (no text or symbols present)1 Press and release the water spray button at the top of the handle. Water will be sprayed out of the nozzle.
Horizontal & vertical steam boost
1 Set temperature dial to MAX setting between cotton and linen.

Tiếng Việt

natural_image
Illustration of a hand using a iron to clean clothing, with arrows and checkmark symbols indicating inspection or repair (no text present)2 Vertical steam boost: Press and release the steam boost trigger in the vertical position to release shots of steam on hanging garments. Holding down the steam boost trigger in the vertical position will not deliver constant steam.

natural_image
Illustration of hands using a steam iron to burn on a garment (no text or symbols)3 Vertical steam boost: Pull and stretch your hanging garment while using the steam boost to remove stubborn creases.

4 Do not use your bare hand as a supporting surface when you iron.

natural_image
Illustration of a person using a steam iron with a cross mark (no text or symbols)5 Do not position the iron towards yourself or others.
Auto shut off (DST7030, DST7040, DST7050, DST7060, DST7510 only)

1 To give you a peace of mind, the appliance will cool down on its own if it is left unattended for a period of time.
2 When the iron is not in use for more than 30 seconds while resting on its soleplate or 8 minutes while resting on its heel/ base, the iron will enter auto shut off mode.
3 The temperature of the iron will decrease in auto shut off mode. The Auto Shut Off light will also blink quickly to indicate the iron is at auto-off status. To completely switch off the iron, plug out the iron/ switch off the mains plug.
4 Picking up or moving the iron will reactivate it.
5 The indicator light will turn steady ON, indicating that the iron is heating up again.
520 Tiếng Việt

natural_image
Close-up of a mechanical component with a checkmark and magnified detail (no text or symbols)6 Once the indicator light switches OFF, the iron is ready for use.
Cleaning and maintenance

natural_image
Illustration of a steam iron being heated by a plug, with a magnified inset showing the plug's electrical contact (no text or symbols present)1 Ensure the iron is not plugged in.

2 Ensure the iron is cooled down.

natural_image
Illustration of a hand holding a pear-shaped object with a checkmark indicating selection (no text or symbols present)3 Wipe the soleplate with a damp cloth.

natural_image
Illustration of a lit fuse with a magnified inset showing a bottle and bulb (no text or symbols)Note: To keep the soleplate smooth, avoid hard contact with metal objects. Never use a scouring pad, vinegar or other chemicals to clean the soleplate.

natural_image
Illustration of a showerhead with warning symbols (in警告, exclamation, and cross) against a grid background, no text or labels present.4 Do not wash/ clean the iron under running water as it may damage the electrical components within.
Calc-Clean

Tip: The Quick Calc Release function can be used at any time. If you live in a hard water area, use the function more frequently.
1 It is recommended to descale your iron after every 1 to 3 months of use to prolong its lifetime, or when brown stains/water is observed.
IMPORTANT: The Quick Calc Release automatically collects loose scale particles during ironing.

natural_image
Illustration of a wall socket connected to a plug with an arrow indicating direction (no text or symbols)2 Ensure the iron is not plugged in.

3 Ensure the iron is cooled down.
522 Tiếng Việt

natural_image
Hand inserting a card into a device (no text or symbols visible)4 Slide up the Quick Calc Release collector lever.

natural_image
Illustration of a steam iron being placed on a kitchen sink with a small appliance nearby (no text or symbols)5 Pull out the Quick Calc Release collector lid.

natural_image
Illustration of a stainless steel kitchen sink with a faucet and showerhead, no text or symbols present6 Clean the Quick Calc Release collector lid with water.

natural_image
Illustration of a steam iron being placed into a sink with a drain, against a grid background (no text or symbols)7 Shake the iron to drain the water and scale particles from the opening of the iron.

8 Do not run water into the opening of the iron.

natural_image
Illustration of a mechanical device with two views of a component (no text or symbols)9 Shake the iron to drain the water and scale particles from the opening of the iron.

natural_image
Hand pressing down a button on a metallic object (no text or symbols visible)10 Push down the lever to lock the Quick Calc Release collector. You will hear a 'click' sound.
Storage

1 Slide the steam selector to select no steam mode/dry ironing mode.

natural_image
Illustration of a wall socket connected to a plug with a black arrow indicating direction (no text or symbols)2 Unplug the iron.

3 Let the iron cool down.
524 Tiếng Việt

natural_image
Illustration of a hand using a power iron to clean or install a surface, with a grid-patterned background (no text or symbols)4 Pour any remaining water out of the water tank.

natural_image
Diagram of a bottle with internal structure and curved arrows indicating motion (no text or symbols)5 Wind the power cord around the main body of the iron.
Trouble shooting
This chapter summarizes the most common problems you could encounter with the appliance. If you are unable to solve the problem with the information below, visit www.philips.com/support for a list of frequently asked questions or contact the Consumer Care Center in your country.
Problem Possible cause Solution
| My Philips Steam Iron does not produce steam. | There is no water/not enough water in the tank. | If there is no water in the water tank of your Philips Steam Iron, your iron is not able to generate steam. Please refill the water tank with water. After this, your iron should produce steam again. |
| The iron is not ready to steam. | Your iron is ready to produce steam when the indicator light switches off. | |
| The steam setting is set to no steam mode/dry ironing mode | Aways ensure that the temperature dial is at the 2-dot ●3 ●lot or ●te●HEN setting. Then, select a steam setting (ECO setting and 2-cloud setting) on the steam selector at the top of the handle.Ironing with steam with the temperature dial at the 1-dot or SYNTHETIC setting may cause wet spots/leaking as the temperature of the iron may not be hot enough to convert water to steam |
Tiếng Việt 525
| My Philips Steam Iron does not remove creases. | The temperature is set too low. | For irons with a temperature dial, please set the temperature according to the fabric that you are ironing. You can use the following table as a reference.Note: For some fabrics such as silk, wool, cotton and linen, steam would be needed to remove creases more efficiently. |
| Steam is not used. Switch the steam selector to or 2-cloECOettingYour Philips Iron does not produce steam when the temperature dial is at the 1-dot position, SYNTHETIC or Calc-Clean setting. You can get more steam by changing to a stronger steam setting, or using the steam boost function to help remove tough wrinkles.To remove creases in the vertical position, press and release the steam boost trigger or button to release a shot of steam. Holding down the trigger or button will not produce a continuous steam boost.Note that repeated usage of the steam boost in a short period of time may cause spitting or a reduction in the amount of steam produced. If this happens, wait for a short while before using the steam boost function again. | ||
| The steam boost in my Philips Steam Iron is not working. | The steam boost trigger has not been pressed and released. | To activate the steam boost in your Philips Steam Iron, press and release the steam boost button/trigger. Holding onto the steam boost button/trigger does not produce continuous steam boost. You may need to press the steam boost button/trigger several times on the first use for the pump to draw sufficient water.Note: We recommend to use the steam boost at the 3-dot temperature setting or higher. Using the steam boost at lower temperature settings may result in wet spots forming as the temperature of the iron may not be high enough to convert water into steam. |
| The steam boost function was used too often within a short period of time. | When you use the steam boost function of your Philips Steam Iron too often within a short period, the steam boost function will stop working for a while. In this case, please wait a couple of minutes before you use the steam boost again.For stubborn wrinkles, we recommend to use the steam boost with the steam setting at the no steam mode/dry ironing mode for the best effect. | |
| The iron is not ready to steam. | The iron is ready to steam when the indicator light switches off. | |
| My Philips Steam Iron produces smoke when heating up. | First usage. During production, some parts of the iron have been slightly greased. As a result of this, your iron may produce some smoke when it is switched on for the first few times, this is normal and should dissipate shortly. | |
| There is water in the soleplate. | Sometimes, there might still be some remaining water in your iron's soleplate after the last usage. This water will evaporate when your iron's soleplate heats up, and the steam generated may look like smoke. This is normal and should dissipate shortly. | |
| My iron is still producing smoke even after checking the above. | There could be an issue with the iron, we recommend you to contact us. | |
| There are water droplets/leaking on my garment during ironing. | First time usage. If you experience leaking/spitting during your first usage, perform the Calc Clean function once. If this does not resolve the leaking on your next use, we recommend you to contact us. | |
| The steam boost function was used too often within a short period of time. | Continue ironing in horizontal position and wait a while before you use the steam boost function again. | |
| There is a build up of scale/calcification in the iron. | If there is brown water or white flakes coming out of the iron, this may indicate a build up of calcification in the iron. Perform the Calc Clean function to clear this. If you live in an area with hard water, we recommend to use distilled water (or 50% distilled and 50% tap water) and perform the calc clean function once a month to prolong the lifetime of the iron.Note: the presence of white flakes on the very first use of the iron is normal. | |
| You have added other chemicals or additives into the water tank. | Fragrances/oils/chemicals/additives/descaling solutions should not be added into the water tank as they are damaging to the device. Please rinse the water tank, fill it up with water and descale your iron. | |
| You have not closed the water tank lid properly. | Close the lid firmly after filling. | |
Tiếng Việt 527
| Steam has condensed onto the ironing board. | Steam may condense on the board cover, particularly when using irons that produce powerful levels of steam for a prolonged period of time. This can look like your iron is leaking from the soleplate. To prevent this, you can do the following:1 Select a lower steam setting than the setting you have been using or use steam during the first ironing strokes and then finish up with the dry-ironing strokes.2 You can also put an extra layer of cloth between the ironing board and the ironing board cover to minimize condensation.3 Replace the ironing board cover if the sponge material has worn out. | |
| Small droplets/wet spots that occur during start of ironing session. | If small droplets or wet spots occur during the start of the ironing session, this is normal as water might have collected in the soleplate from the previous ironing session, and the iron was used before it had fully heated up. Iron over the droplets/wet spots We recommend that the iron be stored in a vertical position with the steam setting set to no steam mode/dry ironing mode before it is unplugged to minimize the collection of water in the soleplate. | |
| The iron leaks after ironing. | If your iron leaks after unplugging/during storage, it may be because water has collected in the soleplate from leaving the steam setting on before the anti-drip feature activates. We recommend to set the steam selector to no steam mode/dry ironing mode before unplugging the iron. Empty the water tank and place the iron in the vertical position when cooling down/for storage. | |
| The iron leaves a shine or an imprint on the garment. | The surface to be ironed was uneven. | The iron is safe to use on all ironable garments. The shine or imprint is not permanent and disappears when you wash the garment. Avoid ironing over seams or folds. You can also place a cotton cloth over the area to be ironed to avoid imprints. |
| You have set a higher temperature than recommended for the fabric type. | Using a higher than recommended temperature setting for the fabric type may cause the iron to burn the fabric. Check your garment and that your iron is set to the correct temperature setting before ironing. The iron is safe to use on all ironable garments with the correct temperature setting. The shine or imprint is not permanent and disappears when you wash the garment. Avoid ironing over seams or folds. You can also place a cotton cloth over the area to be ironed to avoid imprints. | |
| The iron has stopped heating up. | Auto shut-off has been activated. | When your iron has not been used in 30 seconds in the horizontal position or 8 minutes in the vertical position), the iron will automatically shut-off. This is indicated by a constant blinking of the indicator light. To re-activate the iron, move the iron and the indicator light will light up again, indicating that the iron is heating up.If your iron has a dedicated Auto Shut Off light, the ASO light will blink when the iron enters the ASO state. When the iron is moved, the ASO light will switch off and the temperature indicator light will turn on, indicating that it is heating up again. |
| There is a power connection problem. | Please check the mains cord, the plug and the wall socket. Ensure that everything is properly connected. If you are using an extension plug, please ensure that power rating is suitable for the iron. | |
| The iron does not switch on anymore (I have tried the above but my iron still does not heat up). | If this is the case, there might be a problem with your iron. We recommend you to contact us. | |
| The indicator light on the iron is blinking/breathing. | Iron is heating up. The indicator light may turn on and off during ironing as the iron heats up periodically to maintain its temperature. | |
Giriş
natural_image
Illustration of a steam iron with a warning symbol (no text or labels)natural_image
Illustration of a steam iron with a magnified inset showing internal components (no text or symbols)natural_image
Illustration of a hand using a tool to press down a steam iron (no text or symbols visible)natural_image
Illustration of a hand using a tool to press down a steaming iron (no text or symbols visible)natural_image
Illustration of a hand ironing an iron with 'ECO' label (no other text or symbols)natural_image
Illustration of a hand steaming a steam iron with a circular icon showing a cloud or smoke (no text or symbols)natural_image
Illustration of two iron shavings with a cross mark indicating a defect or damage (no text or symbols present)natural_image
Illustration of a steam iron with a cord and plug, no text or symbols presentnatural_image
Close-up of a mechanical component with an hourglass icon highlighting a specific area (no text or symbols present)natural_image
Close-up of a mechanical component with a checkmark and magnified detail (no text or symbols)natural_image
Illustration of a hand using a steam iron to press down a person's arm (no text or symbols visible)natural_image
Illustration of a hand ironing a steam iron on a bed (no text or symbols)natural_image
Illustration of a hand using an iron on a surface, with a downward arrow indicating motion (no text or symbols)Türkçe

natural_image
Illustration of a hand using a iron to clean clothing, with arrows and checkmark symbols indicating inspection or repair (no text present)natural_image
Illustration of hands using a steam iron to burn on a garment (no text or symbols present)natural_image
Illustration of a person using a steam iron with a cross mark (no text or symbols)natural_image
Close-up of a mechanical component with a checkmark and magnified detail (no text or symbols)natural_image
Illustration of a hand cleaning a pear-shaped object with a checkmark indicating inspection (no text or symbols present)natural_image
Illustration of a lit candle with a magnified inset showing a bottle and a textured surface (no text or symbols)natural_image
Illustration of a showerhead with an exclamation mark and a cross symbol, against a grid background (no text or symbols)natural_image
Illustration of a wall socket connected to an electrical plug with a black arrow indicating direction (no text or symbols)natural_image
Hand inserting a card into a device (no text or symbols visible)natural_image
Illustration of a steam iron being placed on a kitchen sink with a small appliance nearby (no text or symbols)natural_image
Illustration of a stainless steel kitchen sink with a faucet and a hand holding a bag, against a grid background (no text or symbols)natural_image
Illustration of a hand washing a shower with a drain, no text or symbols presentnatural_image
Illustration of a mechanical device with two views of a component (no text or symbols)natural_image
Hand pressing down a button on a metallic object (no text or symbols visible)natural_image
Illustration of a wall socket connected to an electrical plug with a magnified inset showing its internal structure (no text or symbols)natural_image
Illustration of a hand using a power iron on a kitchen sink (no text or symbols visible)natural_image
Illustration of a mechanical device with rotating arrows indicating motion (no text or symbols)1 Water tank lid
2 Steam selector
3 Water spray
4 Cord
5 Cord winding
6 Indicator light
7 Steam boost trigger
8 Temperature dial
9 Quick Calc Release collector
Enjamy ulanmak
Type of water to use
Note: The iron may give off some steam when you use it for the first time. This stops after a short while.
Type of water to use
The appliance is suitable to be used with tap water. However, if you live in an area with hard water, we recommend that you mix an equal amount of tap water with distilled or demineralized water. This will prevent fast scale build up and prolong the lifetime of the appliance.
Do not add perfume, water from the tumble dryer, vinegar, starch, descaling agents, ironing aids, chemically descaled water or other chemicals, as they may cause water spitting, brown staining or damage to your appliance.
Filling the water tank

natural_image
Illustration of a steam iron with a warning symbol (no text or labels)1 Do not plug in the iron.

2 Slide the steam selector to the right to select no steam mode/dry ironing mode

natural_image
Illustration of a hand using a tool to press down a steam iron (no text or symbols visible)3 Flip open the water tank lid.

4 Fill water tank up to the MAX indication mark. Do not add any additives like perfume, fragrances, soap or vinegar.

natural_image
Illustration of a hand using a tool to press down a steaming iron (no text or symbols visible)5 Close the water tank lid firmly.
Setting the temperature and steam
| | |
| MAXLINEN | /^* | |
| ●●●COTTON | /^* | |
| ●●SILK | ECO | |
| ●SYNTHETICS |

natural_image
Illustration of a hand ironing an electric iron, labeled 'ECO' in the top-left corner (no other text or symbols)ECO setting: Minimum constant steam is delivered continuously for garments with less creases. This setting also saves energy.

natural_image
Illustration of a hand steaming iron with steam rising (no text or symbols)Two steam clouds: More constant steam is delivered continuously for tough creases.

For stubborn creases, set the steam setting to two steam clouds and press and hold the steam boost trigger below the handle. Maximum constant steam will be delivered continuously.
Preparing for use

Smoke can be visible during the first use, and it is normal. This ceases after a short while.
1 Check the garment label to ensure that the fabric is ironable and its appropriate temperature setting.

2 Turn the temperature dial to the appropriate ironable temperature indication according to the garment label.

natural_image
Illustration of two iron iron holders with a cross mark indicating the angle (no text or symbols present)3 Allow the iron to rest on its heel.

natural_image
Illustration of a steam iron with a cord and plug, no text or symbols present4 Insert the plug into an earthed socket and allow the iron rest on its heel. If using an extension plug, ensure that the power rating of the extension plug is suitable for the iron.

natural_image
Close-up of a mechanical component with an hourglass icon highlighting a specific area (no text or symbols present)5 Wait for the iron to heat up. The indicator light will turn steady on while it is heating up.
552 Türkmençe

natural_image
Close-up of a mechanical component with a checkmark and magnified detail (no text or symbols)6 Once the iron is ready to be used, the indicator light will switch off. The indicator light may turn on and off during ironing as the iron heats up periodically to maintain its temperature.
Ironing with steam
1 Slide the steam selector to ECO mode or steam mode.

2 Turn the temperature dial to between silk and linen based on the image.


natural_image
Illustration of a person using a steam iron to press down a surface (no text or symbols visible)3 Steam will be released during ironing.
No steam mode/dry ironing mode

1 Set the steam setting to no steam mode/dry ironing mode

natural_image
Illustration of a hand ironing an iron on a bed (no text or symbols visible)2 After a short while, steam will cease during ironing.
Water spray

natural_image
Illustration of a hand using a steam iron to press down on a surface, with a downward arrow indicating motion (no text or symbols present)1 Press and release the water spray button at the top of the handle. Water will be sprayed out of the nozzle.
Horizontal & vertical steam boost
1 Set temperature dial to MAX setting between cotton and linen.

554 Türkmençe

natural_image
Illustration of a hand using an iron to clean clothes, with a magnified inset showing upward and downward arrows (no text or symbols)2 Vertical steam boost: Press and release the steam boost trigger in the vertical position to release shots of steam on hanging garments. Holding down the steam boost trigger in the vertical position will not deliver constant steam.

natural_image
Illustration of hands using a steam iron to clean clothing, showing motion and shading (no text or symbols)3 Vertical steam boost: Pull and stretch your hanging garment while using the steam boost to remove stubborn creases.

4 Do not use your bare hand as a supporting surface when you iron.

natural_image
Illustration of a person using an iron with a cross mark (no text or symbols)5 Do not position the iron towards yourself or others.
Auto shut off (DST7030, DST7040, DST7050, DST7060, DST7510 only)

1 To give you a peace of mind, the appliance will cool down on its own if it is left unattended for a period of time.
2 When the iron is not in use for more than 30 seconds while resting on its soleplate or 8 minutes while resting on its heel/ base, the iron will enter auto shut off mode.
3 The temperature of the iron will decrease in auto shut off mode. The Auto Shut Off light will also blink quickly to indicate the iron is at auto-off status. To completely switch off the iron, plug out the iron/ switch off the mains plug.
4 Picking up or moving the iron will reactivate it.
5 The indicator light will turn steady ON, indicating that the iron is heating up again.

natural_image
Close-up of a mechanical component with a checkmark and magnified detail (no text or symbols)6 Once the indicator light switches OFF, the iron is ready for use.
Cleaning and maintenance

natural_image
Illustration of a steam iron being heated by a plug, with a magnified inset showing the plug's internal structure (no text or symbols)1 Ensure the iron is not plugged in.

2 Ensure the iron is cooled down.

natural_image
Illustration of a hand holding a seed or pod with a checkmark indicating selection (no text or symbols present)3 Wipe the soleplate with a damp cloth.

natural_image
Illustration of a lit fuse with a magnified inset showing a bottle and bulb (no text or symbols)Note: To keep the soleplate smooth, avoid hard contact with metal objects. Never use a scouring pad, vinegar or other chemicals to clean the soleplate.

natural_image
Illustration of a showerhead with an exclamation mark and a cross symbol, against a tiled wall background (no text or symbols)4 Do not wash/ clean the iron under running water as it may damage the electrical components within.
Calc-Clean

Tip: The Quick Calc Release function can be used at any time. If you live in a hard water area, use the function more frequently.
1 It is recommended to descale your iron after every 1 to 3 months of use to prolong its lifetime, or when brown stains/water is observed.
IMPORTANT: The Quick Calc Release automatically collects loose scale particles during ironing.

natural_image
Illustration of a wall socket connected to an electrical plug with a black arrow indicating direction (no text or symbols)2 Ensure the iron is not plugged in.

3 Ensure the iron is cooled down.
558 Türkmençe

natural_image
Hand inserting a card into a device (no text or symbols visible)4 Slide up the Quick Calc Release collector lever.

natural_image
Illustration of a steam iron being placed on a kitchen sink with a small appliance nearby (no text or symbols)5 Pull out the Quick Calc Release collector lid.

natural_image
Illustration of a stainless steel kitchen sink with a faucet and a hand holding a bag, against a grid background (no text or symbols)6 Clean the Quick Calc Release collector lid with water.

natural_image
Illustration of a hand washing a shower with a drain, no text or symbols present7 Shake the iron to drain the water and scale particles from the opening of the iron.

8 Do not run water into the opening of the iron.
Türkmençe 559

natural_image
Illustration of a mechanical device with two views of a component (no text or symbols)9 Shake the iron to drain the water and scale particles from the opening of the iron.

natural_image
Hand pressing down a button on a surface, no text or symbols visible10 Push down the lever to lock the Quick Calc Release collector. You will hear a 'click' sound.
Storage

1 Slide the steam selector to select no steam mode/dry ironing mode

natural_image
Illustration of a wall socket connected to a plug with a black arrow indicating direction (no text or symbols)2 Unplug the iron.

3 Let the iron cool down.
560 Türkmençe

natural_image
Illustration of a hand using a power iron to clean or install a surface, with a grid-patterned background (no text or symbols)4 Pour any remaining water out of the water tank.

natural_image
Diagram of a mechanical or fluidic device with rotating arrows indicating flow or movement (no text or symbols)5 Wind the power cord around the main body of the iron.
Trouble shooting
This chapter summarizes the most common problems you could encounter with the appliance. If you are unable to solve the problem with the information below, visit www.philips.com/support for a list of frequently asked questions or contact the Consumer Care Center in your country.
Problem Possible cause Solution
| My Philips Steam Iron does not produce steam. | There is no water/not enough water in the tank. | If there is no water in the water tank of your Philips Steam Iron, your iron is not able to generate steam. Please refill the water tank with water. After this, your iron should produce steam again. |
| The iron is not ready to steam. | Your iron is ready to produce steam when the indicator light switches off. | |
| The steam setting is set to no steam mode/dry ironing mode | Aways ensure that the temperature dial is at the 2-dot ●3 ●lot or ●te●HEN setting. Then, select a steam setting (ECO setting and 2-cloud setting) on the steam selector at the top of the handle.Ironing with steam with the temperature dial at the 1-dot or SYNTHETIC setting may cause wet spots/leaking as the temperature of the iron may not be hot enough to convert water to steam | |
| My Philips Steam Iron does not remove creases. | The temperature is set too low. | For irons with a temperature dial, please set the temperature according to the fabric that you are ironing. You can use the following table as a reference.Note: For some fabrics such as silk, wool, cotton and linen, steam would be needed to remove creases more efficiently. |
| Steam is not used. Switch the steam selector to or 2-cloECOettingYour Philips Iron does not produce steam when the temperature dial is at the 1-dot position, SYNTHETIC or Calc-Clean setting. You can get more steam by changing to a stronger steam setting, or using the steam boost function to help remove tough wrinkles.To remove creases in the vertical position, press and release the steam boost trigger or button to release a shot of steam. Holding down the trigger or button will not produce a continuous steam boost.Note that repeated usage of the steam boost in a short period of time may cause spitting or a reduction in the amount of steam produced. If this happens, wait for a short while before using the steam boost function again. | ||
| The steam boost in my Philips Steam Iron is not working. | The steam boost trigger has not been pressed and released. | To activate the steam boost in your Philips Steam Iron, press and release the steam boost button/trigger. Holding onto the steam boost button/trigger does not produce continuous steam boost. You may need to press the steam boost button/trigger several times on the first use for the pump to draw sufficient water.Note: We recommend to use the steam boost at the 3-dot temperature setting or higher. Using the steam boost at lower temperature settings may result in wet spots forming as the temperature of the iron may not be high enough to convert water into steam. |
| The steam boost function was used too often within a short period of time. | When you use the steam boost function of your Philips Steam Iron too often within a short period, the steam boost function will stop working for a while. In this case, please wait a couple of minutes before you use the steam boost again.For stubborn wrinkles, we recommend to use the steam boost with the steam setting at the no steam mode/dry ironing mode for the best effect. | |
| The iron is not ready to steam. | The iron is ready to steam when the indicator light switches off. | |
562 Türkmençe
| My Philips Steam Iron produces smoke when heating up. | First usage. During production, some parts of the iron have been slightly greased. As a result of this, your iron may produce some smoke when it is switched on for the first few times, this is normal and should dissipate shortly. | |
| There is water in the soleplate. | Sometimes, there might still be some remaining water in your iron's soleplate after the last usage. This water will evaporate when your iron's soleplate heats up, and the steam generated may look like smoke. This is normal and should dissipate shortly. | |
| My iron is still producing smoke even after checking the above. | There could be an issue with the iron, we recommend you to contact us. | |
| There are water droplets/leaking on my garment during ironing. | First time usage. If you experience leaking/spitting during your first usage, perform the Calc Clean function once. If this does not resolve the leaking on your next use, we recommend you to contact us. | |
| The steam boost function was used too often within a short period of time. | Continue ironing in horizontal position and wait a while before you use the steam boost function again. | |
| There is a build up of scale/calcification in the iron. | If there is brown water or white flakes coming out of the iron, this may indicate a build up of calcification in the iron. Perform the Calc Clean function to clear this. If you live in an area with hard water, we recommend to use distilled water (or 50% distilled and 50% tap water) and perform the calc clean function once a month to prolong the lifetime of the iron.Note: the presence of white flakes on the very first use of the iron is normal. | |
| You have added other chemicals or additives into the water tank. | Fragrances/oils/chemicals/additives/descaling solutions should not be added into the water tank as they are damaging to the device. Please rinse the water tank, fill it up with water and descale your iron. | |
| You have not closed the water tank lid properly. | Close the lid firmly after filling. | |
| Steam has condensed onto the ironing board. | Steam may condense on the board cover, particularly when using irons that produce powerful levels of steam for a prolonged period of time. This can look like your iron is leaking from the soleplate. To prevent this, you can do the following:1 Select a lower steam setting than the setting you have been using or use steam during the first ironing strokes and then finish up with the dry-ironing strokes.2 You can also put an extra layer of cloth between the ironing board and the ironing board cover to minimize condensation.3 Replace the ironing board cover if the sponge material has worn out. | |
| Small droplets/wet spots that occur during start of ironing session. | If small droplets or wet spots occur during the start of the ironing session, this is normal as water might have collected in the soleplate from the previous ironing session, and the iron was used before it had fully heated up. Iron over the droplets/wet spots We recommend that the iron be stored in a vertical position with the steam setting set to no steam mode/dry ironing mode before it is unplugged to minimize the collection of water in the soleplate. | |
| The iron leaks after ironing. | If your iron leaks after unplugging/during storage, it may be because water has collected in the soleplate from leaving the steam setting on before the anti-drip feature activates. We recommend to set the steam selector to no steam mode/dry ironing mode before unplugging the iron. Empty the water tank and place the iron in the vertical position when cooling down/for storage. | |
| The iron leaves a shine or an imprint on the garment. | The surface to be ironed was uneven. | The iron is safe to use on all ironable garments. The shine or imprint is not permanent and disappears when you wash the garment. Avoid ironing over seams or folds. You can also place a cotton cloth over the area to be ironed to avoid imprints. |
| You have set a higher temperature than recommended for the fabric type. | Using a higher than recommended temperature setting for the fabric type may cause the iron to burn the fabric. Check your garment and that your iron is set to the correct temperature setting before ironing. The iron is safe to use on all ironable garments with the correct temperature setting. The shine or imprint is not permanent and disappears when you wash the garment. Avoid ironing over seams or folds. You can also place a cotton cloth over the area to be ironed to avoid imprints. | |
564 Türkmençe
| The iron has stopped heating up. | Auto shut-off has been activated. | When your iron has not been used in 30 seconds in the horizontal position or 8 minutes in the vertical position), the iron will automatically shut-off. This is indicated by a constant blinking of the indicator light. To re-activate the iron, move the iron and the indicator light will light up again, indicating that the iron is heating up.If your iron has a dedicated Auto Shut Off light, the ASO light will blink when the iron enters the ASO state. When the iron is moved, the ASO light will switch off and the temperature indicator light will turn on, indicating that it is heating up again. |
| There is a power connection problem. | Please check the mains cord, the plug and the wall socket. Ensure that everything is properly connected. If you are using an extension plug, please ensure that power rating is suitable for the iron. | |
| The iron does not switch on anymore (I have tried the above but my iron still does not heat up). | If this is the case, there might be a problem with your iron. We recommend you to contact us. | |
| The indicator light on the iron is blinking/breathing. | Iron is heating up. The indicator light may turn on and off during ironing as the iron heats up periodically to maintain its temperature. | |
Εισαγωγή
natural_image
Illustration of a steam iron with a warning symbol (no text or labels)natural_image
Illustration of a steam iron with a magnified inset showing internal components (no text or symbols)natural_image
Illustration of a hand using a tool to press down a steam iron (no text or symbols visible)natural_image
Illustration of a hand using a tool to press down a steaming iron (no text or symbols visible)natural_image
Illustration of a hand ironing an iron, labeled 'ECO' in the top-left corner (no other text or symbols)natural_image
Illustration of a hand steaming a steam iron with a circular icon showing a cloud or smoke (no text or symbols)natural_image
Illustration of two iron iron holders with a cross mark indicating the angle (no text or symbols present)natural_image
Illustration of a steam iron with a cord and plug, no text or symbols presentnatural_image
Close-up of a mechanical component with an hourglass icon highlighting a specific area (no text or symbols present)natural_image
Close-up of a mechanical component with a checkmark and magnified detail (no text or symbols)natural_image
Illustration of a person using a steam iron to burn on a person's back (no text or symbols visible)natural_image
Illustration of a hand ironing an iron on a bed (no text or symbols)natural_image
Illustration of a hand using a steam iron to press down on a surface, with a downward arrow indicating motion (no text or symbols present)natural_image
Illustration of a hand using an iron to clean clothes, with a circular icon showing upward motion and checkmark indicators (no text or symbols)natural_image
Illustration of hands using a steam iron to clean clothing (no text or symbols)natural_image
Illustration of a person using an iron with a cross mark (no text or symbols)natural_image
Close-up of a mechanical component with a checkmark and magnified detail (no text or symbols)natural_image
Illustration of a steam iron with a magnified inset showing a plug (no text or symbols)natural_image
Illustration of a hand using a tool to cut a leaf or seedling with a checkmark indicating the correct removal (no text or symbols present)natural_image
Illustration of a steam iron in a kitchen sink with warning symbols (no text or labels)natural_image
Illustration of a wall socket connected to a plug with an arrow indicating direction (no text or symbols)natural_image
Hand inserting a card into a device (no text or symbols visible)natural_image
Illustration of a steam iron pressing down on a sink with a small device nearby (no text or symbols)natural_image
Illustration of a stainless steel kitchen sink with a faucet and a hand holding a bag, against a grid background (no text or symbols)natural_image
Illustration of a steam iron being placed into a sink with a drain, against a grid background (no text or symbols)natural_image
Illustration of a mechanical device with two views of a component (no text or symbols)natural_image
Hand pressing down a button on a surface, no text or symbols visiblenatural_image
Illustration of a steam iron with a magnified inset showing internal components (no text or symbols)natural_image
Illustration of a wall socket connected to a plug with a black arrow indicating direction (no text or symbols)natural_image
Illustration of a hand using a power iron to clean or install a surface, with a grid-patterned background (no text or symbols)natural_image
Illustration of a mechanical device with rotating arrows indicating motion (no text or symbols)natural_image
Illustration of a steam iron with a warning symbol (no text or labels)natural_image
Illustration of a steam iron with a magnified inset showing internal components (no text or symbols)natural_image
Illustration of a hand using a tool to press down a steam iron (no text or symbols visible)natural_image
Illustration of a hand using a tool to press down a steamer (no text or symbols visible)natural_image
Illustration of a hand ironing an electric iron, labeled 'ECO' in the top-left corner (no other text or symbols)natural_image
Illustration of a hand steaming iron with steam rising (no text or symbols)natural_image
Illustration of two iron iron holders with a cross mark indicating the angle (no text or symbols present)natural_image
Illustration of a steam iron with a cord and plug, no text or symbols presentnatural_image
Close-up of a mechanical component with an hourglass icon highlighting a specific area (no text or symbols present)natural_image
Close-up of a mechanical component with a checkmark and magnified detail (no text or symbols)natural_image
Illustration of a hand ironing an iron on a person's back (no text or symbols)natural_image
Illustration of a hand ironing an iron on a bed (no text or symbols)natural_image
Illustration of a hand using a steam iron to clean or wear, with a downward arrow indicating the process (no text or symbols present)natural_image
Illustration of a hand using an iron to clean clothing, with arrows indicating direction (no text or symbols)natural_image
Illustration of a hand using an iron to clean clothing, with a downward arrow indicating the process (no text or symbols present)natural_image
Illustration of a person holding a medical device with a cross symbol (no text or labels)natural_image
Close-up of a mechanical component with a checkmark and magnified detail (no text or symbols)natural_image
Illustration of a steam iron with a magnified inset showing a magnified view of a plug (no text or symbols)natural_image
Illustration of a hand cleaning a pear-shaped object with a checkmark indicating inspection (no text or symbols present)natural_image
Illustration of a lit candle with a magnified inset showing a bottle and a textured surface (no text or symbols)natural_image
Illustration of a steam iron on a sink with warning symbols (no text or labels)natural_image
Illustration of a wall socket connected to an electrical plug with a black arrow indicating direction (no text or symbols)natural_image
Hand inserting a button into a device (no text or symbols visible)natural_image
Illustration of a steam iron being placed on a kitchen sink with a small appliance nearby (no text or symbols)natural_image
Illustration of a stainless steel kitchen sink with a faucet and a bucket, against a grid background (no text or symbols)6 Почистете с вода капачето на колектора Quick Calc Release.

natural_image
Illustration of a steam iron being placed into a sink with a drain, against a grid background (no text or symbols)natural_image
Hand pressing down a button on a metallic object (no text or symbols visible)natural_image
Illustration of a wall socket connected to a plug with a black arrow indicating direction (no text or symbols)natural_image
Illustration of a hand using an iron on a surface, no text or symbols presentnatural_image
Illustration of a mushroom-shaped container with rotating arrows indicating flow or movement (no text or symbols)604 Кыргызча
1 Water tank lid
2 Steam selector
3 Water spray
4 Cord
5 Cord winding
6 Indicator light
7 Steam boost trigger
8 Temperature dial
9 Quick Calc Release collector
Шайманды колдонуу
Type of water to use
Note: The iron may give off some steam when you use it for the first time. This stops after a short while.
Type of water to use
The appliance is suitable to be used with tap water. However, if you live in an area with hard water, we recommend that you mix an equal amount of tap water with distilled or demineralized water. This will prevent fast scale build up and prolong the lifetime of the appliance.
Do not add perfume, water from the tumble dryer, vinegar, starch, descaling agents, ironing aids, chemically descaled water or other chemicals, as they may cause water spitting, brown staining or damage to your appliance.
Filling the water tank

natural_image
Illustration of a steam iron with a warning symbol (no text or labels)1 Do not plug in the iron.

natural_image
Illustration of a steam iron with a magnified inset showing internal components (no text or symbols)2 Slide the steam selector to the right to select no steam mode/dry ironing mode

natural_image
Illustration of a hand using a tool to press down a steam iron (no text or symbols visible)3 Flip open the water tank lid.

4 Fill water tank up to the MAX indication mark. Do not add any additives like perfume, fragrances, soap or vinegar.

natural_image
Illustration of a hand using a tool to press down a steamer (no text or symbols visible)5 Close the water tank lid firmly.
Setting the temperature and steam
| | |
| MAXLINEN | ||
| ●●●COTTON | ||
| ●●SILK | ECO | |
| ●SYNTHETICS |

natural_image
Illustration of a hand ironing an electric iron, labeled 'ECO' in the top-left corner (no other text or symbols)ECO setting: Minimum constant steam is delivered continuously for garments with less creases. This setting also saves energy.

natural_image
Illustration of a hand steaming iron with steam rising (no text or symbols)Two steam clouds: More constant steam is delivered continuously for tough creases.

For stubborn creases, set the steam setting to two steam clouds and press and hold the steam boost trigger below the handle. Maximum constant steam will be delivered continuously.
Preparing for use

Smoke can be visible during the first use, and it is normal. This ceases after a short while.
1 Check the garment label to ensure that the fabric is ironable and its appropriate temperature setting.

2 Turn the temperature dial to the appropriate ironable temperature indication according to the garment label.

natural_image
Illustration of two iron iron holders with a cross mark indicating the angle (no text or symbols present)3 Allow the iron to rest on its heel.

natural_image
Illustration of a steam iron with a cable, showing internal components and a power outlet (no text or symbols)4 Insert the plug into an earthed socket and allow the iron rest on its heel. If using an extension plug, ensure that the power rating of the extension plug is suitable for the iron.

natural_image
Close-up of a mechanical component with an hourglass icon highlighting a specific area (no text or symbols present)5 Wait for the iron to heat up. The indicator light will turn steady on while it is heating up.
608 Кыргызча

natural_image
Close-up of a mechanical component with a checkmark and magnified detail (no text or symbols)6 Once the iron is ready to be used, the indicator light will switch off. The indicator light may turn on and off during ironing as the iron heats up periodically to maintain its temperature.
Ironing with steam
1 Slide the steam selector to ECO mode or steam mode.

2 Turn the temperature dial to between silk and linen based on the image.


natural_image
Illustration of a person using a steam iron to press down a surface (no text or symbols visible)3 Steam will be released during ironing.
No steam mode/dry ironing mode

1 Set the steam setting to no steam mode/dry ironing mode

natural_image
Illustration of a hand ironing a steam iron on a bed (no text or symbols)2 After a short while, steam will cease during ironing.
Water spray

natural_image
Illustration of a hand using an iron to clean or wear a textured surface, with a downward arrow indicating motion (no text or symbols present)1 Press and release the water spray button at the top of the handle. Water will be sprayed out of the nozzle.
Horizontal & vertical steam boost
1 Set temperature dial to MAX setting between cotton and linen.

Кыргызча

natural_image
Illustration of a hand using an iron to clean clothes, with a magnified inset showing upward and downward arrows (no text or symbols)2 Vertical steam boost: Press and release the steam boost trigger in the vertical position to release shots of steam on hanging garments. Holding down the steam boost trigger in the vertical position will not deliver constant steam.

natural_image
Illustration of hands using a steam iron to clean clothing (no text or symbols)3 Vertical steam boost: Pull and stretch your hanging garment while using the steam boost to remove stubborn creases.

4 Do not use your bare hand as a supporting surface when you iron.

natural_image
Illustration of a person using an iron with a cross mark (no text or symbols)5 Do not position the iron towards yourself or others.
Auto shut off (DST7030, DST7040, DST7050, DST7060, DST7510 only)

1 To give you a peace of mind, the appliance will cool down on its own if it is left unattended for a period of time.
2 When the iron is not in use for more than 30 seconds while resting on its soleplate or 8 minutes while resting on its heel/ base, the iron will enter auto shut off mode.
3 The temperature of the iron will decrease in auto shut off mode. The Auto Shut Off light will also blink quickly to indicate the iron is at auto-off status. To completely switch off the iron, plug out the iron/ switch off the mains plug.
4 Picking up or moving the iron will reactivate it.
5 The indicator light will turn steady ON, indicating that the iron is heating up again.

natural_image
Close-up of a mechanical component with a checkmark and magnified detail (no text or symbols)6 Once the indicator light switches OFF, the iron is ready for use.
Cleaning and maintenance

natural_image
Illustration of a steam iron being heated by a plug, with a magnified inset showing the plug's internal structure (no text or symbols)1 Ensure the iron is not plugged in.

2 Ensure the iron is cooled down.

natural_image
Illustration of a hand holding a seed or pod with a checkmark indicating selection (no text or symbols present)3 Wipe the soleplate with a damp cloth.

natural_image
Illustration of a lit fuse with a magnified inset showing a bottle and bulb (no text or symbols)Note: To keep the soleplate smooth, avoid hard contact with metal objects. Never use a scouring pad, vinegar or other chemicals to clean the soleplate.

natural_image
Illustration of a steam iron with warning symbols (no text or labels)4 Do not wash/ clean the iron under running water as it may damage the electrical components within.
Calc-Clean

Tip: The Quick Calc Release function can be used at any time. If you live in a hard water area, use the function more frequently.
1 It is recommended to descale your iron after every 1 to 3 months of use to prolong its lifetime, or when brown stains/water is observed.
IMPORTANT: The Quick Calc Release automatically collects loose scale particles during ironing.

natural_image
Illustration of a wall socket connected to a plug with a black arrow indicating direction (no text or symbols)2 Ensure the iron is not plugged in.

3 Ensure the iron is cooled down.
Кыргызча

natural_image
Hand inserting a card into a device (no text or symbols visible)4 Slide up the Quick Calc Release collector lever.

natural_image
Illustration of a steam iron being placed on a kitchen sink with a small appliance nearby (no text or symbols)5 Pull out the Quick Calc Release collector lid.

natural_image
Illustration of a stainless steel kitchen sink with a faucet and a hand holding a bag, against a grid background (no text or symbols)6 Clean the Quick Calc Release collector lid with water.

natural_image
Illustration of a hand washing a shower with a drain, no text or symbols present7 Shake the iron to drain the water and scale particles from the opening of the iron.

8 Do not run water into the opening of the iron.

natural_image
Illustration of a mechanical device with two views of a component (no text or symbols)9 Shake the iron to drain the water and scale particles from the opening of the iron.

natural_image
Hand pressing down a button on a surface, no text or symbols visible10 Push down the lever to lock the Quick Calc Release collector. You will hear a 'click' sound.
Storage

1 Slide the steam selector to select no steam mode/dry ironing mode

natural_image
Illustration of a wall socket connected to a plug with a black arrow indicating direction (no text or symbols)2 Unplug the iron.

3 Let the iron cool down.

natural_image
Illustration of a hand using a power iron on a metal surface (no text or symbols visible)4 Pour any remaining water out of the water tank.

natural_image
Illustration of a mechanical device with rotating arrows indicating motion (no text or symbols)5 Wind the power cord around the main body of the iron.
Trouble shooting
This chapter summarizes the most common problems you could encounter with the appliance. If you are unable to solve the problem with the information below, visit www.philips.com/support for a list of frequently asked questions or contact the Consumer Care Center in your country.
Problem Possible cause Solution
| My Philips Steam Iron does not produce steam. | There is no water/not enough water in the tank. | If there is no water in the water tank of your Philips Steam Iron, your iron is not able to generate steam. Please refill the water tank with water. After this, your iron should produce steam again. |
| The iron is not ready to steam. | Your iron is ready to produce steam when the indicator light switches off. | |
| The steam setting is set to no steam mode/dry ironing mode | Aways ensure that the temperature dial is at the 2-dot ●3 ●lot or ●te ●MEN setting. Then, select a steam setting (ECO setting and 2-cloud setting) on the steam selector at the top of the handle.Ironing with steam with the temperature dial at the 1-dot or SYNTHETIC setting may cause wet spots/leaking as the temperature of the iron may not be hot enough to convert water to steam | |
| My Philips Steam Iron does not remove creases. | The temperature is set too low. | For irons with a temperature dial, please set the temperature according to the fabric that you are ironing. You can use the following table as a reference.Note: For some fabrics such as silk, wool, cotton and linen, steam would be needed to remove creases more efficiently. |
| Steam is not used. Switch the steam selector to or 2-cloECOettingYour Philips Iron does not produce steam when the temperature dial is at the 1-dot position, SYNTHETIC or Calc-Clean setting. You can get more steam by changing to a stronger steam setting, or using the steam boost function to help remove tough wrinkles.To remove creases in the vertical position, press and release the steam boost trigger or button to release a shot of steam. Holding down the trigger or button will not produce a continuous steam boost.Note that repeated usage of the steam boost in a short period of time may cause spitting or a reduction in the amount of steam produced. If this happens, wait for a short while before using the steam boost function again. | ||
| The steam boost in my Philips Steam Iron is not working. | The steam boost trigger has not been pressed and released. | To activate the steam boost in your Philips Steam Iron, press and release the steam boost button/trigger. Holding onto the steam boost button/trigger does not produce continuous steam boost. You may need to press the steam boost button/trigger several times on the first use for the pump to draw sufficient water.Note: We recommend to use the steam boost at the 3-dot temperature setting or higher. Using the steam boost at lower temperature settings may result in wet spots forming as the temperature of the iron may not be high enough to convert water into steam. |
| The steam boost function was used too often within a short period of time. | When you use the steam boost function of your Philips Steam Iron too often within a short period, the steam boost function will stop working for a while. In this case, please wait a couple of minutes before you use the steam boost again.For stubborn wrinkles, we recommend to use the steam boost with the steam setting at the no steam mode/dry ironing mode for the best effect. | |
| The iron is not ready to steam. | The iron is ready to steam when the indicator light switches off. | |
| My Philips Steam Iron produces smoke when heating up. | First usage. During production, some parts of the iron have been slightly greased. As a result of this, your iron may produce some smoke when it is switched on for the first few times, this is normal and should dissipate shortly. | |
| There is water in the soleplate. | Sometimes, there might still be some remaining water in your iron's soleplate after the last usage. This water will evaporate when your iron's soleplate heats up, and the steam generated may look like smoke. This is normal and should dissipate shortly. | |
| My iron is still producing smoke even after checking the above. | There could be an issue with the iron, we recommend you to contact us. | |
| There are water droplets/leaking on my garment during ironing. | First time usage. If you experience leaking/spitting during your first usage, perform the Calc Clean function once. If this does not resolve the leaking on your next use, we recommend you to contact us. | |
| The steam boost function was used too often within a short period of time. | Continue ironing in horizontal position and wait a while before you use the steam boost function again. | |
| There is a build up of scale/calcification in the iron. | If there is brown water or white flakes coming out of the iron, this may indicate a build up of calcification in the iron. Perform the Calc Clean function to clear this. If you live in an area with hard water, we recommend to use distilled water (or 50% distilled and 50% tap water) and perform the calc clean function once a month to prolong the lifetime of the iron.Note: the presence of white flakes on the very first use of the iron is normal. | |
| You have added other chemicals or additives into the water tank. | Fragrances/oils/chemicals/additives/descaling solutions should not be added into the water tank as they are damaging to the device. Please rinse the water tank, fill it up with water and descale your iron. | |
| You have not closed the water tank lid properly. | Close the lid firmly after filling. | |
| Steam has condensed onto the ironing board. | Steam may condense on the board cover, particularly when using irons that produce powerful levels of steam for a prolonged period of time. This can look like your iron is leaking from the soleplate. To prevent this, you can do the following:1 Select a lower steam setting than the setting you have been using or use steam during the first ironing strokes and then finish up with the dry-ironing strokes.2 You can also put an extra layer of cloth between the ironing board and the ironing board cover to minimize condensation.3 Replace the ironing board cover if the sponge material has worn out. | |
| Small droplets/wet spots that occur during start of ironing session. | If small droplets or wet spots occur during the start of the ironing session, this is normal as water might have collected in the soleplate from the previous ironing session, and the iron was used before it had fully heated up. Iron over the droplets/wet spots We recommend that the iron be stored in a vertical position with the steam setting set to no steam mode/dry ironing mode before it is unplugged to minimize the collection of water in the soleplate. | |
| The iron leaks after ironing. | If your iron leaks after unplugging/during storage, it may be because water has collected in the soleplate from leaving the steam setting on before the anti-drip feature activates. We recommend to set the steam selector to no steam mode/dry ironing mode before unplugging the iron. Empty the water tank and place the iron in the vertical position when cooling down/for storage. | |
| The iron leaves a shine or an imprint on the garment. | The surface to be ironed was uneven. | The iron is safe to use on all ironable garments. The shine or imprint is not permanent and disappears when you wash the garment. Avoid ironing over seams or folds. You can also place a cotton cloth over the area to be ironed to avoid imprints. |
| You have set a higher temperature than recommended for the fabric type. | Using a higher than recommended temperature setting for the fabric type may cause the iron to burn the fabric. Check your garment and that your iron is set to the correct temperature setting before ironing. The iron is safe to use on all ironable garments with the correct temperature setting. The shine or imprint is not permanent and disappears when you wash the garment. Avoid ironing over seams or folds. You can also place a cotton cloth over the area to be ironed to avoid imprints. | |
| The iron has stopped heating up. | Auto shut-off has been activated. | When your iron has not been used in 30 seconds in the horizontal position or 8 minutes in the vertical position), the iron will automatically shut-off. This is indicated by a constant blinking of the indicator light. To re-activate the iron, move the iron and the indicator light will light up again, indicating that the iron is heating up.If your iron has a dedicated Auto Shut Off light, the ASO light will blink when the iron enters the ASO state. When the iron is moved, the ASO light will switch off and the temperature indicator light will turn on, indicating that it is heating up again. |
| There is a power connection problem. | Please check the mains cord, the plug and the wall socket. Ensure that everything is properly connected. If you are using an extension plug, please ensure that power rating is suitable for the iron. | |
| The iron does not switch on anymore (I have tried the above but my iron still does not heat up). | If this is the case, there might be a problem with your iron. We recommend you to contact us. | |
| The indicator light on the iron is blinking/breathing. | Iron is heating up. The indicator light may turn on and off during ironing as the iron heats up periodically to maintain its temperature. | |
Вовед
622 Македонски
1 Water tank lid
2 Steam selector
3 Water spray
4 Cord
5 Cord winding
6 Indicator light
7 Steam boost trigger
8 Temperature dial
9 Quick Calc Release collector
Type of water to use
Note: The iron may give off some steam when you use it for the first time. This stops after a short while.
Type of water to use
The appliance is suitable to be used with tap water. However, if you live in an area with hard water, we recommend that you mix an equal amount of tap water with distilled or demineralized water. This will prevent fast scale build up and prolong the lifetime of the appliance.
Do not add perfume, water from the tumble dryer, vinegar, starch, descaling agents, ironing aids, chemically descaled water or other chemicals, as they may cause water spitting, brown staining or damage to your appliance.
Filling the water tank

natural_image
Illustration of a steam iron with a warning symbol (no text or labels)1 Do not plug in the iron.

natural_image
Illustration of a steam iron with a magnified inset showing internal components (no text or symbols)2 Slide the steam selector to the right to select no steam mode/dry ironing mode

natural_image
Illustration of a hand using a tool to press down a steam iron (no text or symbols visible)3 Flip open the water tank lid.

4 Fill water tank up to the MAX indication mark. Do not add any additives like perfume, fragrances, soap or vinegar.

natural_image
Illustration of a hand using a tool to press down a steamer (no text or symbols visible)5 Close the water tank lid firmly.
Setting the temperature and steam
| | |
| MAXLINEN | / * | |
| COTTON | / * | |
| SILK | ECO | |
| SYNTHETICS |

natural_image
Illustration of a hand ironing an electric iron, labeled 'ECO' in the top-left corner (no other text or symbols)ECO setting: Minimum constant steam is delivered continuously for garments with less creases. This setting also saves energy.

natural_image
Illustration of a hand ironing an iron with steam rising (no text or symbols)Two steam clouds: More constant steam is delivered continuously for tough creases.

For stubborn creases, set the steam setting to two steam clouds and press and hold the steam boost trigger below the handle. Maximum constant steam will be delivered continuously.
Preparing for use

Smoke can be visible during the first use, and it is normal. This ceases after a short while.
1 Check the garment label to ensure that the fabric is ironable and its appropriate temperature setting.

2 Turn the temperature dial to the appropriate ironable temperature indication according to the garment label.

natural_image
Illustration of two iron iron holders with a cross mark indicating the angle (no text or symbols present)3 Allow the iron to rest on its heel.

natural_image
Illustration of a steam iron with a cable, showing internal components and a power outlet (no text or symbols)4 Insert the plug into an earthed socket and allow the iron rest on its heel. If using an extension plug, ensure that the power rating of the extension plug is suitable for the iron.

natural_image
Close-up of a mechanical component with an hourglass icon highlighting a specific area (no text or symbols present)5 Wait for the iron to heat up. The indicator light will turn steady on while it is heating up.

natural_image
Close-up of a mechanical component with a checkmark and magnified detail (no text or symbols)6 Once the iron is ready to be used, the indicator light will switch off. The indicator light may turn on and off during ironing as the iron heats up periodically to maintain its temperature.
Ironing with steam
1 Slide the steam selector to ECO mode or steam mode.

2 Turn the temperature dial to between silk and linen based on the image.


natural_image
Illustration of a person using a steam iron to press down a surface (no text or symbols visible)3 Steam will be released during ironing.
No steam mode/dry ironing mode

1 Set the steam setting to no steam mode/dry ironing mode

natural_image
Illustration of a hand ironing a steam iron on a bed (no text or symbols)2 After a short while, steam will cease during ironing.
Water spray

natural_image
Illustration of a hand using a steam iron to press down on a surface, with a downward arrow indicating motion (no text or symbols present)1 Press and release the water spray button at the top of the handle. Water will be sprayed out of the nozzle.
Horizontal & vertical steam boost
1 Set temperature dial to MAX setting between cotton and linen.

Македонски

natural_image
Illustration of a hand using an iron to clean clothes, with a circular icon showing upward motion and checkmark indicators (no text or symbols)2 Vertical steam boost: Press and release the steam boost trigger in the vertical position to release shots of steam on hanging garments. Holding down the steam boost trigger in the vertical position will not deliver constant steam.

natural_image
Illustration of hands using a steam iron to clean clothing, showing motion and shading (no text or symbols)3 Vertical steam boost: Pull and stretch your hanging garment while using the steam boost to remove stubborn creases.

4 Do not use your bare hand as a supporting surface when you iron.

natural_image
Illustration of a person using an iron with a cross mark (no text or symbols)5 Do not position the iron towards yourself or others.
Auto shut off (DST7030, DST7040, DST7050, DST7060, DST7510 only)

1 To give you a peace of mind, the appliance will cool down on its own if it is left unattended for a period of time.
2 When the iron is not in use for more than 30 seconds while resting on its soleplate or 8 minutes while resting on its heel/ base, the iron will enter auto shut off mode.
3 The temperature of the iron will decrease in auto shut off mode. The Auto Shut Off light will also blink quickly to indicate the iron is at auto-off status. To completely switch off the iron, plug out the iron/ switch off the mains plug.
4 Picking up or moving the iron will reactivate it.
5 The indicator light will turn steady ON, indicating that the iron is heating up again.

natural_image
Close-up of a mechanical component with a checkmark and magnified detail (no text or symbols)6 Once the indicator light switches OFF, the iron is ready for use.
Cleaning and maintenance

natural_image
Illustration of a steam iron being heated by a plug, with a magnified inset showing the plug's internal structure (no text or symbols)1 Ensure the iron is not plugged in.

2 Ensure the iron is cooled down.

natural_image
Illustration of a hand holding a pear-shaped object with a checkmark indicating selection (no text or symbols present)3 Wipe the soleplate with a damp cloth.

natural_image
Illustration of a lit fuse with a magnified inset showing a bottle and bulb (no text or symbols)Note: To keep the soleplate smooth, avoid hard contact with metal objects. Never use a scouring pad, vinegar or other chemicals to clean the soleplate.

natural_image
Illustration of a stainless steel iron with warning symbols (no text or labels)4 Do not wash/ clean the iron under running water as it may damage the electrical components within.
Calc-Clean

Tip: The Quick Calc Release function can be used at any time. If you live in a hard water area, use the function more frequently.
1 It is recommended to descale your iron after every 1 to 3 months of use to prolong its lifetime, or when brown stains/water is observed.
IMPORTANT: The Quick Calc Release automatically collects loose scale particles during ironing.

natural_image
Illustration of a wall socket connected to a plug with a black arrow indicating direction (no text or symbols)2 Ensure the iron is not plugged in.

3 Ensure the iron is cooled down.
632 Македонски

natural_image
Hand inserting a card into a device (no text or symbols visible)4 Slide up the Quick Calc Release collector lever.

natural_image
Illustration of a steam iron being placed on a kitchen sink with a small appliance nearby (no text or symbols)5 Pull out the Quick Calc Release collector lid.

natural_image
Illustration of a stainless steel kitchen sink with a faucet and a hand holding a bag, against a grid background (no text or symbols)6 Clean the Quick Calc Release collector lid with water.

natural_image
Illustration of a steam iron being placed into a sink with a drain, against a grid background (no text or symbols)7 Shake the iron to drain the water and scale particles from the opening of the iron.

8 Do not run water into the opening of the iron.

natural_image
Illustration of a mechanical device with two views of a component, labeled 1 and 2 (no text or symbols present)9 Shake the iron to drain the water and scale particles from the opening of the iron.

natural_image
Hand pressing down a button on a surface, no text or symbols visible10 Push down the lever to lock the Quick Calc Release collector. You will hear a 'click' sound.
Storage

1 Slide the steam selector to select no steam mode/dry ironing mode

natural_image
Illustration of a wall socket connected to a plug with a black arrow indicating direction (no text or symbols)2 Unplug the iron.

3 Let the iron cool down.

natural_image
Illustration of a hand using a power iron on a metal surface (no text or symbols visible)4 Pour any remaining water out of the water tank.

natural_image
Illustration of a mechanical device with rotating arrows indicating motion (no text or symbols)5 Wind the power cord around the main body of the iron.
Trouble shooting
This chapter summarizes the most common problems you could encounter with the appliance. If you are unable to solve the problem with the information below, visit www.philips.com/support for a list of frequently asked questions or contact the Consumer Care Center in your country.
Problem Possible cause Solution
| My Philips Steam Iron does not produce steam. | There is no water/not enough water in the tank. | If there is no water in the water tank of your Philips Steam Iron, your iron is not able to generate steam. Please refill the water tank with water. After this, your iron should produce steam again. |
| The iron is not ready to steam. | Your iron is ready to produce steam when the indicator light switches off. | |
| The steam setting is set to no steam mode/dry ironing mode | Aways ensure that the temperature dial is at the 2-dot ●3 ●lot or ●te ●MEN setting. Then, select a steam setting (ECO setting and 2-cloud setting) on the steam selector at the top of the handle.Ironing with steam with the temperature dial at the 1-dot or SYNTHETIC setting may cause wet spots/leaking as the temperature of the iron may not be hot enough to convert water to steam | |
| My Philips Steam Iron does not remove creases. | The temperature is set too low. | For irons with a temperature dial, please set the temperature according to the fabric that you are ironing. You can use the following table as a reference.Note: For some fabrics such as silk, wool, cotton and linen, steam would be needed to remove creases more efficiently. |
| Steam is not used. Switch the steam selector to or 2-cloECOettingYour Philips Iron does not produce steam when the temperature dial is at the 1-dot position, SYNTHETIC or Calc-Clean setting. You can get more steam by changing to a stronger steam setting, or using the steam boost function to help remove tough wrinkles.To remove creases in the vertical position, press and release the steam boost trigger or button to release a shot of steam. Holding down the trigger or button will not produce a continuous steam boost.Note that repeated usage of the steam boost in a short period of time may cause spitting or a reduction in the amount of steam produced. If this happens, wait for a short while before using the steam boost function again. | ||
| The steam boost in my Philips Steam Iron is not working. | The steam boost trigger has not been pressed and released. | To activate the steam boost in your Philips Steam Iron, press and release the steam boost button/trigger. Holding onto the steam boost button/trigger does not produce continuous steam boost. You may need to press the steam boost button/trigger several times on the first use for the pump to draw sufficient water.Note: We recommend to use the steam boost at the 3-dot temperature setting or higher. Using the steam boost at lower temperature settings may result in wet spots forming as the temperature of the iron may not be high enough to convert water into steam. |
| The steam boost function was used too often within a short period of time. | When you use the steam boost function of your Philips Steam Iron too often within a short period, the steam boost function will stop working for a while. In this case, please wait a couple of minutes before you use the steam boost again.For stubborn wrinkles, we recommend to use the steam boost with the steam setting at the no steam mode/dry ironing mode for the best effect. | |
| The iron is not ready to steam. | The iron is ready to steam when the indicator light switches off. | |
| My Philips Steam Iron produces smoke when heating up. | First usage. During production, some parts of the iron have been slightly greased. As a result of this, your iron may produce some smoke when it is switched on for the first few times, this is normal and should dissipate shortly. | |
| There is water in the soleplate. | Sometimes, there might still be some remaining water in your iron's soleplate after the last usage. This water will evaporate when your iron's soleplate heats up, and the steam generated may look like smoke. This is normal and should dissipate shortly. | |
| My iron is still producing smoke even after checking the above. | There could be an issue with the iron, we recommend you to contact us. | |
| There are water droplets/leaking on my garment during ironing. | First time usage. If you experience leaking/spitting during your first usage, perform the Calc Clean function once. If this does not resolve the leaking on your next use, we recommend you to contact us. | |
| The steam boost function was used too often within a short period of time. | Continue ironing in horizontal position and wait a while before you use the steam boost function again. | |
| There is a build up of scale/calcification in the iron. | If there is brown water or white flakes coming out of the iron, this may indicate a build up of calcification in the iron. Perform the Calc Clean function to clear this. If you live in an area with hard water, we recommend to use distilled water (or 50% distilled and 50% tap water) and perform the calc clean function once a month to prolong the lifetime of the iron.Note: the presence of white flakes on the very first use of the iron is normal. | |
| You have added other chemicals or additives into the water tank. | Fragrances/oils/chemicals/additives/descaling solutions should not be added into the water tank as they are damaging to the device. Please rinse the water tank, fill it up with water and descale your iron. | |
| You have not closed the water tank lid properly. | Close the lid firmly after filling. | |
| Steam has condensed onto the ironing board. | Steam may condense on the board cover, particularly when using irons that produce powerful levels of steam for a prolonged period of time. This can look like your iron is leaking from the soleplate. To prevent this, you can do the following:1 Select a lower steam setting than the setting you have been using or use steam during the first ironing strokes and then finish up with the dry-ironing strokes.2 You can also put an extra layer of cloth between the ironing board and the ironing board cover to minimize condensation.3 Replace the ironing board cover if the sponge material has worn out. | |
| Small droplets/wet spots that occur during start of ironing session. | If small droplets or wet spots occur during the start of the ironing session, this is normal as water might have collected in the soleplate from the previous ironing session, and the iron was used before it had fully heated up. Iron over the droplets/wet spots We recommend that the iron be stored in a vertical position with the steam setting set to no steam mode/dry ironing mode before it is unplugged to minimize the collection of water in the soleplate. | |
| The iron leaks after ironing. | If your iron leaks after unplugging/during storage, it may be because water has collected in the soleplate from leaving the steam setting on before the anti-drip feature activates. We recommend to set the steam selector to no steam mode/dry ironing mode before unplugging the iron. Empty the water tank and place the iron in the vertical position when cooling down/for storage. | |
| The iron leaves a shine or an imprint on the garment. | The surface to be ironed was uneven. | The iron is safe to use on all ironable garments. The shine or imprint is not permanent and disappears when you wash the garment. Avoid ironing over seams or folds. You can also place a cotton cloth over the area to be ironed to avoid imprints. |
| You have set a higher temperature than recommended for the fabric type. | Using a higher than recommended temperature setting for the fabric type may cause the iron to burn the fabric. Check your garment and that your iron is set to the correct temperature setting before ironing. The iron is safe to use on all ironable garments with the correct temperature setting. The shine or imprint is not permanent and disappears when you wash the garment. Avoid ironing over seams or folds. You can also place a cotton cloth over the area to be ironed to avoid imprints. | |
| The iron has stopped heating up. | Auto shut-off has been activated. | When your iron has not been used in 30 seconds in the horizontal position or 8 minutes in the vertical position), the iron will automatically shut-off. This is indicated by a constant blinking of the indicator light. To re-activate the iron, move the iron and the indicator light will light up again, indicating that the iron is heating up.If your iron has a dedicated Auto Shut Off light, the ASO light will blink when the iron enters the ASO state. When the iron is moved, the ASO light will switch off and the temperature indicator light will turn on, indicating that it is heating up again. |
| There is a power connection problem. | Please check the mains cord, the plug and the wall socket. Ensure that everything is properly connected. If you are using an extension plug, please ensure that power rating is suitable for the iron. | |
| The iron does not switch on anymore (I have tried the above but my iron still does not heat up). | If this is the case, there might be a problem with your iron. We recommend you to contact us. | |
| The indicator light on the iron is blinking/breathing. | Iron is heating up. The indicator light may turn on and off during ironing as the iron heats up periodically to maintain its temperature. | |
Введение
natural_image
Illustration of a steam iron with a clamped hook and a cross mark (no text or symbols)natural_image
Illustration of a steam iron with a magnified inset showing internal components (no text or symbols)natural_image
Illustration of a hand using a tool to press down a steam iron (no text or symbols visible)natural_image
Illustration of a hand using a tool to press down a surface, showing a curved arrow (no text or symbols)natural_image
Illustration of a hand using an iron iron to clean (ECO) from a machine, no text or symbols present.natural_image
Illustration of a hand using a steam iron to clean or smoke (no text or symbols)natural_image
Illustration of two iron shavings with a cross mark indicating a defect or damage (no text or symbols present)natural_image
Illustration of a steam iron with a cord and plug, no text or symbols presentnatural_image
Close-up of a mechanical component with an hourglass icon highlighting a specific area (no text or symbols present)natural_image
Close-up of a mechanical component with a checkmark and magnified detail (no text or symbols)natural_image
Illustration of a hand using a steam iron to press down a person's arm (no text or symbols visible)natural_image
Illustration of a hand ironing a steam iron on a bed (no text or symbols)natural_image
Illustration of a hand using a steam iron to press down on a surface, with a downward arrow indicating motion (no text or symbols present)Русский

natural_image
Illustration of a hand using an iron to clean clothing, with arrows indicating direction (no text or symbols)natural_image
Illustration of hands using a steam iron to burn on a garment (no text or symbols)natural_image
Illustration of a person using a steam iron with a cross mark (no text or symbols)natural_image
Close-up of a mechanical component with a checkmark and magnified detail (no text or symbols)natural_image
Illustration of a steam iron with a magnified inset showing a plug (no text or symbols)natural_image
Illustration of a hand using a tool to cut a leaf or seedling with a checkmark indicating the correct removal (no text or symbols present)natural_image
Illustration of a showerhead with an exclamation mark and a warning symbol, set against a tiled wall background (no text or labels)natural_image
Illustration of a wall socket connected to a plug with a black arrow indicating direction (no text or symbols)natural_image
Hand inserting a card into a device (no text or symbols visible)natural_image
Illustration of a steam iron being placed on a kitchen sink with a small appliance nearby (no text or symbols)5 Извлеките крышку контейнера Quick Calc Release.

natural_image
Illustration of a stainless steel kitchen sink with a faucet and a hand holding a bag, against a grid background (no text or symbols)natural_image
Illustration of a steam iron being placed into a sink with a drain, against a grid background (no text or symbols)natural_image
Illustration of a mechanical device with two views of a component, labeled 1 and 2 (no text or symbols present)natural_image
Hand pressing down a button on a metallic object (no text or symbols visible)natural_image
Illustration of a wall socket connected to a plug with a black arrow indicating direction (no text or symbols)natural_image
Illustration of a hand using a power iron on a metal surface (no text or symbols visible)natural_image
Illustration of a mechanical device with rotating arrows indicating motion (no text or symbols)1 Water tank lid
2 Steam selector
3 Water spray
4 Cord
5 Cord winding
6 Indicator light
7 Steam boost trigger
8 Temperature dial
9 Quick Calc Release collector
Истифодаи дастгох
Type of water to use
Note: The iron may give off some steam when you use it for the first time. This stops after a short while.
Type of water to use
The appliance is suitable to be used with tap water. However, if you live in an area with hard water, we recommend that you mix an equal amount of tap water with distilled or demineralized water. This will prevent fast scale build up and prolong the lifetime of the appliance.
Do not add perfume, water from the tumble dryer, vinegar, starch, descaling agents, ironing aids, chemically descaled water or other chemicals, as they may cause water spitting, brown staining or damage to your appliance.
Filling the water tank

natural_image
Illustration of a steam iron with a warning symbol (no text or labels)1 Do not plug in the iron.
660 Точикий

natural_image
Illustration of a steam iron with a magnified inset showing internal components (no text or symbols)2 Slide the steam selector to the right to select no steam mode/dry ironing mode

natural_image
Illustration of a hand using a tool to press down a steam iron (no text or symbols visible)3 Flip open the water tank lid.

4 Fill water tank up to the MAX indication mark. Do not add any additives like perfume, fragrances, soap or vinegar.

natural_image
Illustration of a hand using a tool to press down a steaming iron (no text or symbols visible)5 Close the water tank lid firmly.
Setting the temperature and steam
|  | ||
| MAXLINEN | / A | / | |
| COTTON | / / | / | |
| SILK | ECO | ||
| SYNTHETICS | A |

natural_image
Illustration of a hand ironing an iron, labeled 'ECO' in the top-left corner (no other text or symbols)ECO setting: Minimum constant steam is delivered continuously for garments with less creases. This setting also saves energy.

natural_image
Illustration of a hand steaming iron with steam rising (no text or symbols)Two steam clouds: More constant steam is delivered continuously for tough creases.

For stubborn creases, set the steam setting to two steam clouds and press and hold the steam boost trigger below the handle. Maximum constant steam will be delivered continuously.
Preparing for use

Smoke can be visible during the first use, and it is normal. This ceases after a short while.
1 Check the garment label to ensure that the fabric is ironable and its appropriate temperature setting.

2 Turn the temperature dial to the appropriate ironable temperature indication according to the garment label.

natural_image
Illustration of two iron shavings with a cross mark indicating a defect or damage (no text or symbols present)3 Allow the iron to rest on its heel.

natural_image
Illustration of a steam iron with a cord and plug, no text or symbols present4 Insert the plug into an earthed socket and allow the iron rest on its heel. If using an extension plug, ensure that the power rating of the extension plug is suitable for the iron.

natural_image
Close-up of a mechanical component with an hourglass icon highlighting a specific area (no text or symbols present)5 Wait for the iron to heat up. The indicator light will turn steady on while it is heating up.

natural_image
Close-up of a mechanical component with a checkmark and magnified detail (no text or symbols)6 Once the iron is ready to be used, the indicator light will switch off. The indicator light may turn on and off during ironing as the iron heats up periodically to maintain its temperature.
Ironing with steam
1 Slide the steam selector to ECO mode or steam mode.

2 Turn the temperature dial to between silk and linen based on the image.


natural_image
Illustration of a hand ironing an iron on a bed (no text or symbols)3 Steam will be released during ironing.
664 Точикй
No steam mode/dry ironing mode

1 Set the steam setting to no steam mode/dry ironing mode

natural_image
Illustration of a hand ironing a steam iron on a bed (no text or symbols)2 After a short while, steam will cease during ironing.
Water spray

natural_image
Illustration of a hand using a power iron to press down on a surface, with a downward arrow indicating motion (no text or symbols present)1 Press and release the water spray button at the top of the handle. Water will be sprayed out of the nozzle.
Horizontal & vertical steam boost
1 Set temperature dial to MAX setting between cotton and linen.

Точикй 665

natural_image
Illustration of a hand using an iron to clean clothes, with arrows indicating direction (no text or symbols)2 Vertical steam boost: Press and release the steam boost trigger in the vertical position to release shots of steam on hanging garments. Holding down the steam boost trigger in the vertical position will not deliver constant steam.

natural_image
Illustration of a hand using an iron to clean clothing, with a downward arrow indicating the process (no text or symbols present)3 Vertical steam boost: Pull and stretch your hanging garment while using the steam boost to remove stubborn creases.

4 Do not use your bare hand as a supporting surface when you iron.

natural_image
Illustration of a person holding a medical device with a cross symbol (no text or labels)5 Do not position the iron towards yourself or others.
Auto shut off (DST7030, DST7040, DST7050, DST7060, DST7510 only)

1 To give you a peace of mind, the appliance will cool down on its own if it is left unattended for a period of time.
2 When the iron is not in use for more than 30 seconds while resting on its soleplate or 8 minutes while resting on its heel/ base, the iron will enter auto shut off mode.
3 The temperature of the iron will decrease in auto shut off mode. The Auto Shut Off light will also blink quickly to indicate the iron is at auto-off status. To completely switch off the iron, plug out the iron/ switch off the mains plug.
4 Picking up or moving the iron will reactivate it.
5 The indicator light will turn steady ON, indicating that the iron is heating up again.

natural_image
Close-up of a mechanical component with a checkmark and magnified detail (no text or symbols)6 Once the indicator light switches OFF, the iron is ready for use.
Cleaning and maintenance

natural_image
Illustration of a steam iron being heated by a plug, with a magnified inset showing the plug's internal structure (no text or symbols)1 Ensure the iron is not plugged in.

2 Ensure the iron is cooled down.

natural_image
Illustration of a hand holding a leafy vegetable with a checkmark indicating inspection (no text or symbols)3 Wipe the soleplate with a damp cloth.

Note: To keep the soleplate smooth, avoid hard contact with metal objects. Never use a scouring pad, vinegar or other chemicals to clean the soleplate.

natural_image
Illustration of a steam iron in a kitchen sink with warning symbols (no text or labels)4 Do not wash/ clean the iron under running water as it may damage the electrical components within.
Calc-Clean

Tip: The Quick Calc Release function can be used at any time. If you live in a hard water area, use the function more frequently.
1 It is recommended to descale your iron after every 1 to 3 months of use to prolong its lifetime, or when brown stains/water is observed.
IMPORTANT: The Quick Calc Release automatically collects loose scale particles during ironing.

natural_image
Illustration of a wall socket connected to an electrical plug with a black arrow indicating direction (no text or symbols)2 Ensure the iron is not plugged in.

3 Ensure the iron is cooled down.

natural_image
Illustration of a hand inserting a button into a device (no text or symbols visible)4 Slide up the Quick Calc Release collector lever.

natural_image
Illustration of an iron (£) being placed on a surface with a small device nearby (no text or symbols visible)5 Pull out the Quick Calc Release collector lid.

natural_image
Modern stainless steel faucet with a showerhead and water droplet on the sink, against a grid-patterned wall (no text or symbols visible)6 Clean the Quick Calc Release collector lid with water.

natural_image
Close-up of a hand washing a showerhead with a drain, against a tiled background (no text or symbols visible)7 Shake the iron to drain the water and scale particles from the opening of the iron.

natural_image
Illustration of a kitchen sink with a drain marked by an exclamation mark and a grid background (no text or symbols)8 Do not run water into the opening of the iron.
670 Точикй

natural_image
Illustration of a robotic arm with labeled parts (1 and 2), showing mechanical components and a close-up view of the arm (no text or symbols present)9 Shake the iron to drain the water and scale particles from the opening of the iron.

natural_image
Hand pressing down a button on a metallic object (no text or symbols visible)10 Push down the lever to lock the Quick Calc Release collector. You will hear a 'click' sound.
Storage

1 Slide the steam selector to select no steam mode/dry ironing mode

natural_image
Illustration of a wall socket connected to a plug with a black arrow indicating direction (no text or symbols)2 Unplug the iron.

3 Let the iron cool down.

natural_image
Illustration of a hand using a power iron to press or install a surface, with a grid-patterned background (no text or symbols)4 Pour any remaining water out of the water tank.

natural_image
Diagram of a bottle with internal structure and curved arrows indicating motion (no text or symbols)5 Wind the power cord around the main body of the iron.
Trouble shooting
This chapter summarizes the most common problems you could encounter with the appliance. If you are unable to solve the problem with the information below, visit www.philips.com/support for a list of frequently asked questions or contact the Consumer Care Center in your country.
Problem Possible cause Solution
| My Philips Steam Iron does not produce steam. | There is no water/not enough water in the tank. | If there is no water in the water tank of your Philips Steam Iron, your iron is not able to generate steam. Please refill the water tank with water. After this, your iron should produce steam again. |
| The iron is not ready to steam. | Your iron is ready to produce steam when the indicator light switches off. | |
| The steam setting is set to no steam mode/dry ironing mode | Aways ensure that the temperature dial is at the 2-dot ●3 ●lot or ●te●HEN setting. Then, select a steam setting (ECO setting and 2-cloud setting) on the steam selector at the top of the handle.Ironing with steam with the temperature dial at the 1-dot or SYNTHETIC setting may cause wet spots/leaking as the temperature of the iron may not be hot enough to convert water to steam |
672 Точикй
| My Philips Steam Iron does not remove creases. | The temperature is set too low. | For irons with a temperature dial, please set the temperature according to the fabric that you are ironing. You can use the following table as a reference.Note: For some fabrics such as silk, wool, cotton and linen, steam would be needed to remove creases more efficiently. |
| Steam is not used. Switch the steam selector to or 2-cloECOettingYour Philips Iron does not produce steam when the temperature dial is at the 1-dot position, SYNTHETIC or Calc-Clean setting. You can get more steam by changing to a stronger steam setting, or using the steam boost function to help remove tough wrinkles.To remove creases in the vertical position, press and release the steam boost trigger or button to release a shot of steam. Holding down the trigger or button will not produce a continuous steam boost.Note that repeated usage of the steam boost in a short period of time may cause spitting or a reduction in the amount of steam produced. If this happens, wait for a short while before using the steam boost function again. | ||
| The steam boost in my Philips Steam Iron is not working. | The steam boost trigger has not been pressed and released. | To activate the steam boost in your Philips Steam Iron, press and release the steam boost button/trigger. Holding onto the steam boost button/trigger does not produce continuous steam boost. You may need to press the steam boost button/trigger several times on the first use for the pump to draw sufficient water.Note: We recommend to use the steam boost at the 3-dot temperature setting or higher. Using the steam boost at lower temperature settings may result in wet spots forming as the temperature of the iron may not be high enough to convert water into steam. |
| The steam boost function was used too often within a short period of time. | When you use the steam boost function of your Philips Steam Iron too often within a short period, the steam boost function will stop working for a while. In this case, please wait a couple of minutes before you use the steam boost again.For stubborn wrinkles, we recommend to use the steam boost with the steam setting at the no steam mode/dry ironing mode for the best effect. | |
| The iron is not ready to steam. | The iron is ready to steam when the indicator light switches off. | |
| My Philips Steam Iron produces smoke when heating up. | First usage. During production, some parts of the iron have been slightly greased. As a result of this, your iron may produce some smoke when it is switched on for the first few times, this is normal and should dissipate shortly. | |
| There is water in the soleplate. | Sometimes, there might still be some remaining water in your iron's soleplate after the last usage. This water will evaporate when your iron's soleplate heats up, and the steam generated may look like smoke. This is normal and should dissipate shortly. | |
| My iron is still producing smoke even after checking the above. | There could be an issue with the iron, we recommend you to contact us. | |
| There are water droplets/leaking on my garment during ironing. | First time usage. If you experience leaking/spitting during your first usage, perform the Calc Clean function once. If this does not resolve the leaking on your next use, we recommend you to contact us. | |
| The steam boost function was used too often within a short period of time. | Continue ironing in horizontal position and wait a while before you use the steam boost function again. | |
| There is a build up of scale/calcification in the iron. | If there is brown water or white flakes coming out of the iron, this may indicate a build up of calcification in the iron. Perform the Calc Clean function to clear this. If you live in an area with hard water, we recommend to use distilled water (or 50% distilled and 50% tap water) and perform the calc clean function once a month to prolong the lifetime of the iron.Note: the presence of white flakes on the very first use of the iron is normal. | |
| You have added other chemicals or additives into the water tank. | Fragrances/oils/chemicals/additives/descaling solutions should not be added into the water tank as they are damaging to the device. Please rinse the water tank, fill it up with water and descale your iron. | |
| You have not closed the water tank lid properly. | Close the lid firmly after filling. | |
| Steam has condensed onto the ironing board. | Steam may condense on the board cover, particularly when using irons that produce powerful levels of steam for a prolonged period of time. This can look like your iron is leaking from the soleplate. To prevent this, you can do the following:1 Select a lower steam setting than the setting you have been using or use steam during the first ironing strokes and then finish up with the dry-ironing strokes.2 You can also put an extra layer of cloth between the ironing board and the ironing board cover to minimize condensation.3 Replace the ironing board cover if the sponge material has worn out. | |
| Small droplets/wet spots that occur during start of ironing session. | If small droplets or wet spots occur during the start of the ironing session, this is normal as water might have collected in the soleplate from the previous ironing session, and the iron was used before it had fully heated up. Iron over the droplets/wet spots We recommend that the iron be stored in a vertical position with the steam setting set to no steam mode/dry ironing mode before it is unplugged to minimize the collection of water in the soleplate. | |
| The iron leaks after ironing. | If your iron leaks after unplugging/during storage, it may be because water has collected in the soleplate from leaving the steam setting on before the anti-drip feature activates. We recommend to set the steam selector to no steam mode/dry ironing mode before unplugging the iron. Empty the water tank and place the iron in the vertical position when cooling down/for storage. | |
| The iron leaves a shine or an imprint on the garment. | The surface to be ironed was uneven. | The iron is safe to use on all ironable garments. The shine or imprint is not permanent and disappears when you wash the garment. Avoid ironing over seams or folds. You can also place a cotton cloth over the area to be ironed to avoid imprints. |
| You have set a higher temperature than recommended for the fabric type. | Using a higher than recommended temperature setting for the fabric type may cause the iron to burn the fabric. Check your garment and that your iron is set to the correct temperature setting before ironing. The iron is safe to use on all ironable garments with the correct temperature setting. The shine or imprint is not permanent and disappears when you wash the garment. Avoid ironing over seams or folds. You can also place a cotton cloth over the area to be ironed to avoid imprints. | |
Точикй 675
| The iron has stopped heating up. | Auto shut-off has been activated. | When your iron has not been used in 30 seconds in the horizontal position or 8 minutes in the vertical position), the iron will automatically shut-off. This is indicated by a constant blinking of the indicator light. To re-activate the iron, move the iron and the indicator light will light up again, indicating that the iron is heating up.If your iron has a dedicated Auto Shut Off light, the ASO light will blink when the iron enters the ASO state. When the iron is moved, the ASO light will switch off and the temperature indicator light will turn on, indicating that it is heating up again. |
| There is a power connection problem. | Please check the mains cord, the plug and the wall socket. Ensure that everything is properly connected. If you are using an extension plug, please ensure that power rating is suitable for the iron. | |
| The iron does not switch on anymore (I have tried the above but my iron still does not heat up). | If this is the case, there might be a problem with your iron. We recommend you to contact us. | |
| The indicator light on the iron is blinking/breathing. | Iron is heating up. The indicator light may turn on and off during ironing as the iron heats up periodically to maintain its temperature. | |
Вступ
natural_image
Illustration of a steam iron with a warning symbol (no text or labels)
natural_image
Illustration of a hand using a power tool to press down a steam iron (no text or symbols visible)natural_image
Illustration of a hand using a tool to press down a steamer (no text or symbols visible)natural_image
Illustration of a hand ironing an electric iron, labeled 'ECO' in the top-left corner (no other text or symbols)natural_image
Illustration of a hand steaming a steam iron with a circular icon showing a cloud or smoke (no text or symbols)natural_image
Illustration of two iron shavings with a cross mark indicating a specific part (no text or symbols present)natural_image
Illustration of a steam iron with a cord and plug, no text or symbols presentnatural_image
Close-up of a mechanical component with an hourglass icon highlighting a specific area (no text or symbols present)natural_image
Close-up of a mechanical component with a checkmark and magnified detail (no text or symbols)natural_image
Illustration of a hand ironing an iron on a person's back (no text or symbols)natural_image
Illustration of a hand ironing a steam iron on a bed (no text or symbols)natural_image
Illustration of a hand using a power iron to clean or wear, with a downward arrow indicating the process (no text or symbols present)natural_image
Illustration of a hand using an iron to clean clothes, with arrows indicating direction (no text or symbols)natural_image
Illustration of hands using a steam iron to burn on a garment (no text or symbols)natural_image
Illustration of a person using a steam iron with a cross mark (no text or symbols)natural_image
Close-up of a mechanical component with a checkmark and magnified detail (no text or symbols)natural_image
Illustration of a steam iron with a magnified inset showing a plug (no text or symbols)natural_image
Illustration of a hand using a tool to cut a leaf or seedling with a checkmark indicating the correct removal (no text or symbols present)natural_image
Illustration of a steam iron on a sink with warning symbols (no text or labels)natural_image
Illustration of a wall socket connected to a plug with a black arrow indicating direction (no text or symbols)natural_image
Hand inserting a button into a device (no text or symbols visible)natural_image
Illustration of an iron (£) being placed on a surface with a small device nearby (no text or symbols visible)natural_image
Modern stainless steel faucet with a showerhead and water droplet on the sink, against a grid-patterned wall (no text or symbols visible)natural_image
Illustration of a hand washing a showerhead with a drain, against a grid background (no text or symbols)natural_image
Illustration of a kitchen sink with a drain, showing a shower and warning symbols (no text or labels)natural_image
Hand pressing a button on a device (no text or symbols visible)natural_image
Illustration of a wall socket connected to a plug with a black arrow indicating direction (no text or symbols)natural_image
Illustration of a hand using a power iron to clean or install a surface, with a grid background (no text or symbols)natural_image
Diagram of a bottle with internal structure and curved arrows indicating rotation or movement (no text or symbols)natural_image
Illustration of a steam iron with a warning symbol (no text or labels)natural_image
Illustration of a hand using a tool to press down a steam iron (no text or symbols visible)natural_image
Illustration of a hand using a tool to press down a steaming iron (no text or symbols visible)natural_image
Illustration of a hand ironing an iron, labeled 'ECO' in the top-left corner (no other text or symbols)natural_image
Illustration of a hand steaming iron with steam rising (no text or symbols)natural_image
Illustration of two iron shavings with a cross mark indicating a defect or damage (no text or symbols present)natural_image
Illustration of a steam iron with a cord and plug, no text or symbols presentnatural_image
Close-up of a mechanical component with an hourglass icon highlighting a specific area (no text or symbols present)natural_image
Close-up of a mechanical component with a checkmark and magnified detail (no text or symbols)
natural_image
Illustration of a hand ironing an iron on a person's back (no text or symbols)natural_image
Illustration of a hand ironing an iron on a bed (no text or symbols)natural_image
Illustration of a hand using an iron on a surface with a downward arrow indicating motion (no text or symbols)natural_image
Illustration of a person using an iron on a hanger with checkmarks and arrows indicating inspection or detail (no text or symbols)natural_image
Illustration of a hand using an iron to clean clothing, with a downward arrow indicating the process (no text or symbols present)natural_image
Illustration of a person holding a medical device with a cross symbol (no text or labels)natural_image
Close-up of a mechanical component with a checkmark and magnified detail (no text or symbols)natural_image
Illustration of a steam iron with a magnified inset showing a plug (no text or symbols)natural_image
Illustration of a hand using a tool to cut a leaf or seedling with a checkmark indicating the correct removal (no text or symbols present)natural_image
Illustration of a steam iron in a kitchen sink with warning symbols (no text or labels)natural_image
Illustration of a wall socket connected to an electrical plug with a black arrow indicating direction (no text or symbols)natural_image
Illustration of a hand inserting a button into a device (no text or symbols visible)natural_image
Illustration of an iron (£) being placed on a surface with a small device nearby (no text or symbols visible)5 Жылдам как тазалау коллекторының какпафын алыңыз.

natural_image
Modern stainless steel faucet with a showerhead and water droplet on the sink, against a grid-patterned wall (no text or symbols visible)natural_image
Illustration of a hand washing a showerhead with a drain, against a grid background (no text or symbols)natural_image
Illustration of a sink with a showerhead and warning symbols (no text or labels)natural_image
Hand pressing a button on a metallic object with a black arrow indicating motion (no text or symbols visible)natural_image
Illustration of a wall socket connected to a plug with an arrow indicating direction (no text or symbols)natural_image
Illustration of a hand using a power iron to press or install a surface, with a grid-patterned background (no text or symbols)natural_image
Diagram of a mechanical device with rotating arms and internal components (no text or symbols)1 Water tank lid
2 Steam selector
3 Water spray
4 Cord
5 Cord winding
6 Indicator light
7 Steam boost trigger
8 Temperature dial
9 Quick Calc Release collector
Uwnph oqunwqndnniún
Type of water to use
Note: The iron may give off some steam when you use it for the first time. This stops after a short while.
Type of water to use
The appliance is suitable to be used with tap water. However, if you live in an area with hard water, we recommend that you mix an equal amount of tap water with distilled or demineralized water. This will prevent fast scale build up and prolong the lifetime of the appliance.
Do not add perfume, water from the tumble dryer, vinegar, starch, descaling agents, ironing aids, chemically descaled water or other chemicals, as they may cause water spitting, brown staining or damage to your appliance.
Filling the water tank

natural_image
Illustration of a steam iron with a warning symbol (no text or labels)1 Do not plug in the iron.

natural_image
Illustration of a steam iron with a magnified inset showing internal components (no text or symbols)2 Slide the steam selector to the right to select no steam mode/dry ironing mode

natural_image
Illustration of a hand using a tool to press down a steam iron (no text or symbols visible)3 Flip open the water tank lid.

4 Fill water tank up to the MAX indication mark. Do not add any additives like perfume, fragrances, soap or vinegar.

natural_image
Illustration of a hand using a tool to press down a steamer (no text or symbols visible)5 Close the water tank lid firmly.
Setting the temperature and steam
| | |
| MAXLINEN | //^* | |
| COTTON | //^* | |
| SILK | ECO | |
| SYNTHETICS |

natural_image
Illustration of a hand ironing an iron with 'ECO' label (no other text or symbols)ECO setting: Minimum constant steam is delivered continuously for garments with less creases. This setting also saves energy.

natural_image
Illustration of a hand steaming iron with a circular icon showing a steam drop symbol (no text or symbols present)Two steam clouds: More constant steam is delivered continuously for tough creases.

For stubborn creases, set the steam setting to two steam clouds and press and hold the steam boost trigger below the handle. Maximum constant steam will be delivered continuously.
Preparing for use

Smoke can be visible during the first use, and it is normal. This ceases after a short while.
1 Check the garment label to ensure that the fabric is ironable and its appropriate temperature setting.

2 Turn the temperature dial to the appropriate ironable temperature indication according to the garment label.

natural_image
Illustration of two iron iron holders with a cross mark indicating the angle (no text or symbols present)3 Allow the iron to rest on its heel.

natural_image
Illustration of a steam iron with a cord and plug, no text or symbols present4 Insert the plug into an earthed socket and allow the iron rest on its heel. If using an extension plug, ensure that the power rating of the extension plug is suitable for the iron.

natural_image
Close-up of a mechanical component with an hourglass icon highlighting a specific area (no text or symbols present)5 Wait for the iron to heat up. The indicator light will turn steady on while it is heating up.
Ruijtntu

natural_image
Close-up of a mechanical component with a checkmark and magnified detail (no text or symbols)6 Once the iron is ready to be used, the indicator light will switch off. The indicator light may turn on and off during ironing as the iron heats up periodically to maintain its temperature.
Ironing with steam
1 Slide the steam selector to ECO model or steam mode


2 Turn the temperature dial to between silk and linen based on the image.


natural_image
Illustration of a hand ironing an iron on a bed (no text or symbols visible)3 Steam will be released during ironing.
No steam mode/dry ironing mode

1 Set the steam setting to no steam mode/dry ironing mode

natural_image
Illustration of a hand ironing a steam iron on a bed (no text or symbols)2 After a short while, steam will cease during ironing.
Water spray

natural_image
Illustration of a hand using an iron to press down on a textured surface, with a downward arrow indicating motion (no text or symbols)1 Press and release the water spray button at the top of the handle. Water will be sprayed out of the nozzle.
Horizontal & vertical steam boost
1 Set temperature dial to MAX setting between cotton and linen.

720 Rujtntu

natural_image
Illustration of a hand using an iron to clean clothes, with a magnified inset showing upward and downward arrows (no text or symbols)2 Vertical steam boost: Press and release the steam boost trigger in the vertical position to release shots of steam on hanging garments. Holding down the steam boost trigger in the vertical position will not deliver constant steam.

natural_image
Illustration of hands using a steam iron to clean clothing, showing a downward motion (no text or symbols)3 Vertical steam boost: Pull and stretch your hanging garment while using the steam boost to remove stubborn creases.

4 Do not use your bare hand as a supporting surface when you iron.

natural_image
Illustration of a person using an iron with a cross mark (no text or symbols)5 Do not position the iron towards yourself or others.
Auto shut off (DST7030, DST7040, DST7050, DST7060, DST7510 only)

1 To give you a peace of mind, the appliance will cool down on its own if it is left unattended for a period of time.
2 When the iron is not in use for more than 30 seconds while resting on its soleplate or 8 minutes while resting on its heel/ base, the iron will enter auto shut off mode.
3 The temperature of the iron will decrease in auto shut off mode. The Auto Shut Off light will also blink quickly to indicate the iron is at auto-off status. To completely switch off the iron, plug out the iron/ switch off the mains plug.
4 Picking up or moving the iron will reactivate it.
5 The indicator light will turn steady ON, indicating that the iron is heating up again.
722 Ruijtntu

natural_image
Close-up of a mechanical component with a checkmark and magnified detail (no text or symbols)6 Once the indicator light switches OFF, the iron is ready for use.
Cleaning and maintenance

natural_image
Illustration of a steam iron being heated by a plug, with a magnified inset showing the plug's internal structure (no text or symbols)1 Ensure the iron is not plugged in.

2 Ensure the iron is cooled down.

natural_image
Illustration of a hand holding a seed or pod with a checkmark indicating selection (no text or symbols present)3 Wipe the soleplate with a damp cloth.

natural_image
Illustration of a lit fuse with a magnified inset showing a bottle and bulb (no text or symbols)Note: To keep the soleplate smooth, avoid hard contact with metal objects. Never use a scouring pad, vinegar or other chemicals to clean the soleplate.

natural_image
Illustration of a showerhead with an exclamation mark and a cross symbol, against a grid background (no text or symbols)4 Do not wash/ clean the iron under running water as it may damage the electrical components within.
Calc-Clean

Tip: The Quick Calc Release function can be used at any time. If you live in a hard water area, use the function more frequently.
1 It is recommended to descale your iron after every 1 to 3 months of use to prolong its lifetime, or when brown stains/water is observed.
IMPORTANT: The Quick Calc Release automatically collects loose scale particles during ironing.

natural_image
Illustration of a wall socket connected to a plug with a black arrow indicating direction (no text or symbols)2 Ensure the iron is not plugged in.

3 Ensure the iron is cooled down.
724 Ruijtntu

natural_image
Hand inserting a card into a device (no text or symbols visible)4 Slide up the Quick Calc Release collector lever.

natural_image
Illustration of a steam iron being placed on a kitchen sink with a small appliance nearby (no text or symbols)5 Pull out the Quick Calc Release collector lid.

natural_image
Illustration of a stainless steel kitchen sink with a faucet and a hand holding a bag, against a grid background (no text or symbols)6 Clean the Quick Calc Release collector lid with water.

natural_image
Illustration of a hand washing a shower with a drain, no text or symbols present7 Shake the iron to drain the water and scale particles from the opening of the iron.

8 Do not run water into the opening of the iron.

natural_image
Illustration of a mechanical device with two views of a component (no text or symbols)9 Shake the iron to drain the water and scale particles from the opening of the iron.

natural_image
Hand pressing down a button on a surface, no text or symbols visible10 Push down the lever to lock the Quick Calc Release collector. You will hear a 'click' sound.
Storage

1 Slide the steam selector to select no steam mode/dry ironing mode

natural_image
Illustration of a wall socket connected to a plug with a black arrow indicating direction (no text or symbols)2 Unplug the iron.

3 Let the iron cool down.

natural_image
Illustration of a hand using a power iron on a metal surface (no text or symbols visible)4 Pour any remaining water out of the water tank.

natural_image
Illustration of a mechanical device with rotating arrows indicating motion (no text or symbols)5 Wind the power cord around the main body of the iron.
Trouble shooting
This chapter summarizes the most common problems you could encounter with the appliance. If you are unable to solve the problem with the information below, visit www.philips.com/support for a list of frequently asked questions or contact the Consumer Care Center in your country.
Problem Possible cause Solution
| My Philips Steam Iron does not produce steam. | There is no water/not enough water in the tank. | If there is no water in the water tank of your Philips Steam Iron, your iron is not able to generate steam. Please refill the water tank with water. After this, your iron should produce steam again. |
| The iron is not ready to steam. | Your iron is ready to produce steam when the indicator light switches off. | |
| The steam setting is set to no steam mode/dry ironing mode | Aways ensure that the temperature dial is at the 2-dot ●3 ●lot or ●te ●MEN setting. Then, select a steam setting (ECO setting and 2-cloud setting) on the steam selector at the top of the handle.Ironing with steam with the temperature dial at the 1-dot or SYNTHETIC setting may cause wet spots/leaking as the temperature of the iron may not be hot enough to convert water to steam | |
| My Philips Steam Iron does not remove creases. | The temperature is set too low. | For irons with a temperature dial, please set the temperature according to the fabric that you are ironing. You can use the following table as a reference.Note: For some fabrics such as silk, wool, cotton and linen, steam would be needed to remove creases more efficiently. |
| Steam is not used. Switch the steam selector to or 2-cloEcoettingYour Philips Iron does not produce steam when the temperature dial is at the 1-dot position, SYNTHETIC or Calc-Clean setting. You can get more steam by changing to a stronger steam setting, or using the steam boost function to help remove tough wrinkles.To remove creases in the vertical position, press and release the steam boost trigger or button to release a shot of steam. Holding down the trigger or button will not produce a continuous steam boost.Note that repeated usage of the steam boost in a short period of time may cause spitting or a reduction in the amount of steam produced. If this happens, wait for a short while before using the steam boost function again. | ||
| The steam boost in my Philips Steam Iron is not working. | The steam boost trigger has not been pressed and released. | To activate the steam boost in your Philips Steam Iron, press and release the steam boost button/trigger. Holding onto the steam boost button/trigger does not produce continuous steam boost. You may need to press the steam boost button/trigger several times on the first use for the pump to draw sufficient water.Note: We recommend to use the steam boost at the 3-dot temperature setting or higher. Using the steam boost at lower temperature settings may result in wet spots forming as the temperature of the iron may not be high enough to convert water into steam. |
| The steam boost function was used too often within a short period of time. | When you use the steam boost function of your Philips Steam Iron too often within a short period, the steam boost function will stop working for a while. In this case, please wait a couple of minutes before you use the steam boost again.For stubborn wrinkles, we recommend to use the steam boost with the steam setting at the no steam mode/dry ironing mode for the best effect. | |
| The iron is not ready to steam. | The iron is ready to steam when the indicator light switches off. | |
| My Philips Steam Iron produces smoke when heating up. | First usage. During production, some parts of the iron have been slightly greased. As a result of this, your iron may produce some smoke when it is switched on for the first few times, this is normal and should dissipate shortly. | |
| There is water in the soleplate. | Sometimes, there might still be some remaining water in your iron's soleplate after the last usage. This water will evaporate when your iron's soleplate heats up, and the steam generated may look like smoke. This is normal and should dissipate shortly. | |
| My iron is still producing smoke even after checking the above. | There could be an issue with the iron, we recommend you to contact us. | |
| There are water droplets/leaking on my garment during ironing. | First time usage. If you experience leaking/spitting during your first usage, perform the Calc Clean function once. If this does not resolve the leaking on your next use, we recommend you to contact us. | |
| The steam boost function was used too often within a short period of time. | Continue ironing in horizontal position and wait a while before you use the steam boost function again. | |
| There is a build up of scale/calcification in the iron. | If there is brown water or white flakes coming out of the iron, this may indicate a build up of calcification in the iron. Perform the Calc Clean function to clear this. If you live in an area with hard water, we recommend to use distilled water (or 50% distilled and 50% tap water) and perform the calc clean function once a month to prolong the lifetime of the iron.Note: the presence of white flakes on the very first use of the iron is normal. | |
| You have added other chemicals or additives into the water tank. | Fragrances/oils/chemicals/additives/descaling solutions should not be added into the water tank as they are damaging to the device. Please rinse the water tank, fill it up with water and descale your iron. | |
| You have not closed the water tank lid properly. | Close the lid firmly after filling. | |
| Steam has condensed onto the ironing board. | Steam may condense on the board cover, particularly when using irons that produce powerful levels of steam for a prolonged period of time. This can look like your iron is leaking from the soleplate. To prevent this, you can do the following:1 Select a lower steam setting than the setting you have been using or use steam during the first ironing strokes and then finish up with the dry-ironing strokes.2 You can also put an extra layer of cloth between the ironing board and the ironing board cover to minimize condensation.3 Replace the ironing board cover if the sponge material has worn out. | |
| Small droplets/wet spots that occur during start of ironing session. | If small droplets or wet spots occur during the start of the ironing session, this is normal as water might have collected in the soleplate from the previous ironing session, and the iron was used before it had fully heated up. Iron over the droplets/wet spots We recommend that the iron be stored in a vertical position with the steam setting set to no steam mode/dry ironing mode before it is unplugged to minimize the collection of water in the soleplate. | |
| The iron leaks after ironing. | If your iron leaks after unplugging/during storage, it may be because water has collected in the soleplate from leaving the steam setting on before the anti-drip feature activates. We recommend to set the steam selector to no steam mode/dry ironing mode before unplugging the iron. Empty the water tank and place the iron in the vertical position when cooling down/for storage. | |
| The iron leaves a shine or an imprint on the garment. | The surface to be ironed was uneven. | The iron is safe to use on all ironable garments. The shine or imprint is not permanent and disappears when you wash the garment. Avoid ironing over seams or folds. You can also place a cotton cloth over the area to be ironed to avoid imprints. |
| You have set a higher temperature than recommended for the fabric type. | Using a higher than recommended temperature setting for the fabric type may cause the iron to burn the fabric. Check your garment and that your iron is set to the correct temperature setting before ironing. The iron is safe to use on all ironable garments with the correct temperature setting. The shine or imprint is not permanent and disappears when you wash the garment. Avoid ironing over seams or folds. You can also place a cotton cloth over the area to be ironed to avoid imprints. | |
Ruijtntu
| The iron has stopped heating up. | Auto shut-off has been activated. | When your iron has not been used in 30 seconds in the horizontal position or 8 minutes in the vertical position), the iron will automatically shut-off. This is indicated by a constant blinking of the indicator light. To re-activate the iron, move the iron and the indicator light will light up again, indicating that the iron is heating up.If your iron has a dedicated Auto Shut Off light, the ASO light will blink when the iron enters the ASO state. When the iron is moved, the ASO light will switch off and the temperature indicator light will turn on, indicating that it is heating up again. |
| There is a power connection problem. | Please check the mains cord, the plug and the wall socket. Ensure that everything is properly connected. If you are using an extension plug, please ensure that power rating is suitable for the iron. | |
| The iron does not switch on anymore (I have tried the above but my iron still does not heat up). | If this is the case, there might be a problem with your iron. We recommend you to contact us. | |
| The indicator light on the iron is blinking/breathing. | Iron is heating up. The indicator light may turn on and off during ironing as the iron heats up periodically to maintain its temperature. | |
ข้อมูลเบื้องต้น
natural_image
Illustration of a steam iron with a warning symbol (no text or labels)natural_image
Illustration of a steam iron with a magnified inset showing internal components (no text or symbols)natural_image
Illustration of a hand using a tool to press down a steam iron (no text or symbols visible)natural_image
Illustration of a hand using a tool to press down a steaming iron (no text or symbols visible)natural_image
Illustration of a hand using an iron on a steam iron, labeled 'ECO' in the top-left corner (no other text or symbols)การตั้งค่า ECO:
natural_image
Illustration of a hand ironing an iron with steam, no text or symbols presentแบบไอน้ำสองก้อน:
natural_image
Illustration of two iron iron pieces with a cross mark, no text or symbols presentnatural_image
Illustration of a steam iron with a cord and plug, no text or symbols presentnatural_image
Close-up of a mechanical component with an hourglass icon highlighting a specific area (no text or symbols present)natural_image
Close-up of a mechanical component with a checkmark and magnified detail (no text or symbols)738 ภาษาไทย

natural_image
Illustration of a person using a steam iron to burn on a person's back (no text or symbols visible)natural_image
Illustration of a steam iron being processed with a magnified inset showing internal components (no text or symbols)natural_image
Illustration of a hand ironing an iron on a bed (no text or symbols visible)natural_image
Illustration of a hand using an iron on a textured surface, with a downward arrow indicating motion (no text or symbols)natural_image
Illustration of a hand using an iron to clean clothes, with a circular icon showing upward motion and a checkmark indicating inspection (no text or symbols present)natural_image
Illustration of hands using a steam iron to burn on a garment (no text or symbols)natural_image
Illustration of a person holding a medical device with a cross mark, no text or symbols presentnatural_image
Illustration of a person standing at a table with an iron iron, viewed from behind (no text or symbols present)natural_image
Close-up of a car's roof with a thermometer icon and temperature label (no readable text or symbols beyond the thermometer)natural_image
Illustration of a person using an iron on a surface with directional arrows indicating motion (no text or symbols)natural_image
Close-up of a hand holding a small object with an hourglass icon nearby (no text or symbols)natural_image
Close-up of a mechanical component with a checkmark and magnified detail (no text or symbols)natural_image
Illustration of a hand holding a piece of rice being cut with a checkmark (no text or symbols)natural_image
Illustration of a light bulb with a droplet and a cross symbol, no text or labels present.natural_image
Illustration of a steam iron with warning symbols (no text or labels)natural_image
Illustration of a wall socket connected to a plug with a black arrow indicating direction (no text or symbols)natural_image
Hand holding a mechanical component with an arrow indicating direction (no text or symbols visible)natural_image
Illustration of a steam iron with a small electronic device, placed on a surface with a grid background (no text or symbols)natural_image
Illustration of a stainless steel kitchen sink with a faucet and a small object floating inside (no text or symbols)natural_image
Illustration of a hand washing a car with steam rising, no text or symbols presentnatural_image
Hand pressing down a button on a metallic object (no text or symbols visible)natural_image
Illustration of a steam iron with a magnified inset showing a warning symbol (no text or labels present)natural_image
Illustration of a wall socket connected to a plug with an arrow indicating direction (no text or symbols)2 ถอดปลักเตาร็ด

natural_image
Illustration of a hand using an iron on a workbench (no text or symbols visible)natural_image
Illustration of a steamer with rotating arms and a handle, no text or symbols present1 Water tank lid
2 Steam selector
3 Water spray
4 Cord
5 Cord winding
6 Indicator light
7 Steam boost trigger
8 Temperature dial
9 Quick Calc Release collector
Type of water to use
Note: The iron may give off some steam when you use it for the first time. This stops after a short while.
Type of water to use
The appliance is suitable to be used with tap water. However, if you live in an area with hard water, we recommend that you mix an equal amount of tap water with distilled or demineralized water. This will prevent fast scale build up and prolong the lifetime of the appliance.
Do not add perfume, water from the tumble dryer, vinegar, starch, descaling agents, ironing aids, chemically descaled water or other chemicals, as they may cause water spitting, brown staining or damage to your appliance.
Filling the water tank

natural_image
Illustration of a steam iron with a warning symbol (no text or labels)1 Do not plug in the iron.
Jahmugun g63

2 Slide the steam selector to the right to select no steam mode/dry ironing mode

natural_image
Illustration of a hand using a tool to press down a steam iron (no text or symbols visible)3 Flip open the water tank lid.

4 Fill water tank up to the MAX indication mark. Do not add any additives like perfume, fragrances, soap or vinegar.

natural_image
Illustration of a hand using a tool to press down a steamer (no text or symbols visible)5 Close the water tank lid firmly.
Setting the temperature and steam
| | |
| MAXLINEN | /^* | |
| ●●●COTTON | /^* | |
| ●●SILK | ECO | |
| ●SYNTHETICS |

natural_image
Illustration of a hand ironing an electric iron, labeled 'ECO' in the top-left corner (no other text or symbols)ECO setting: Minimum constant steam is delivered continuously for garments with less creases. This setting also saves energy.

natural_image
Illustration of a hand ironing an iron with steam rising (no text or symbols)Two steam clouds: More constant steam is delivered continuously for tough creases.

For stubborn creases, set the steam setting to two steam clouds and press and hold the steam boost trigger below the handle. Maximum constant steam will be delivered continuously.
Preparing for use

Smoke can be visible during the first use, and it is normal. This ceases after a short while.
1 Check the garment label to ensure that the fabric is ironable and its appropriate temperature setting.

2 Turn the temperature dial to the appropriate ironable temperature indication according to the garment label.

natural_image
Illustration of two iron shavings with a cross mark indicating a defect or damage (no text or symbols present)3 Allow the iron to rest on its heel.

natural_image
Illustration of a steam iron with a cord and plug, no text or symbols present4 Insert the plug into an earthed socket and allow the iron rest on its heel. If using an extension plug, ensure that the power rating of the extension plug is suitable for the iron.

natural_image
Close-up of a mechanical component with an hourglass icon highlighting a specific area (no text or symbols present)5 Wait for the iron to heat up. The indicator light will turn steady on while it is heating up.

natural_image
Close-up of a mechanical component with a checkmark and magnified detail (no text or symbols)6 Once the iron is ready to be used, the indicator light will switch off. The indicator light may turn on and off during ironing as the iron heats up periodically to maintain its temperature.
Ironing with steam
1 Slide the steam selector to ECO mode in steam mode.

2 Turn the temperature dial to between silk and linen based on the image.


natural_image
Illustration of a person using a steam iron to press down a blanket (no text or symbols visible)3 Steam will be released during ironing.
760 ฟูดมอนุกง ๑๖๖
No steam mode/dry ironing mode

1 Set the steam setting to no steam mode/dry ironing mode.

natural_image
Illustration of a hand ironing a steam iron on a bed (no text or symbols)2 After a short while, steam will cease during ironing.
Water spray

natural_image
Illustration of a hand using a steam iron to press down on a surface, with a downward arrow indicating motion (no text or symbols present)1 Press and release the water spray button at the top of the handle. Water will be sprayed out of the nozzle.
Horizontal & vertical steam boost
1 Set temperature dial to MAX setting between cotton and linen.


natural_image
Illustration of a hand using an iron on a jacket with a circular icon showing upward motion (no text or symbols)2 Vertical steam boost: Press and release the steam boost trigger in the vertical position to release shots of steam on hanging garments. Holding down the steam boost trigger in the vertical position will not deliver constant steam.

natural_image
Illustration of hands using a steam iron to clean clothing, showing motion and shading (no text or symbols)3 Vertical steam boost: Pull and stretch your hanging garment while using the steam boost to remove stubborn creases.

4 Do not use your bare hand as a supporting surface when you iron.

natural_image
Illustration of a person using an iron with a cross mark (no text or symbols)5 Do not position the iron towards yourself or others.
Auto shut off (DST7030, DST7040, DST7050, DST7060, DST7510 only)

1 To give you a peace of mind, the appliance will cool down on its own if it is left unattended for a period of time.
2 When the iron is not in use for more than 30 seconds while resting on its soleplate or 8 minutes while resting on its heel/ base, the iron will enter auto shut off mode.
3 The temperature of the iron will decrease in auto shut off mode. The Auto Shut Off light will also blink quickly to indicate the iron is at auto-off status. To completely switch off the iron, plug out the iron/ switch off the mains plug.
4 Picking up or moving the iron will reactivate it.
5 The indicator light will turn steady ON, indicating that the iron is heating up again.

natural_image
Close-up of a mechanical component with a checkmark and magnified detail (no text or symbols)6 Once the indicator light switches OFF, the iron is ready for use.
Cleaning and maintenance

natural_image
Illustration of a steam iron being heated by a plug, with a magnified inset showing the plug's electrical contact (no text or symbols present)1 Ensure the iron is not plugged in.

2 Ensure the iron is cooled down.

natural_image
Illustration of a hand holding a leafy vegetable with a checkmark indicating inspection (no text or symbols)3 Wipe the soleplate with a damp cloth.

Note: To keep the soleplate smooth, avoid hard contact with metal objects. Never use a scouring pad, vinegar or other chemicals to clean the soleplate.
الله مكتوب وعربية

natural_image
Illustration of a steam iron in a kitchen sink with warning symbols (no text or labels)4 Do not wash/ clean the iron under running water as it may damage the electrical components within.
Calc-Clean

Tip: The Quick Calc Release function can be used at any time. If you live in a hard water area, use the function more frequently.
1 It is recommended to descale your iron after every 1 to 3 months of use to prolong its lifetime, or when brown stains/water is observed.
IMPORTANT: The Quick Calc Release automatically collects loose scale particles during ironing.

natural_image
Illustration of a wall socket connected to a plug with an arrow indicating direction (no text or symbols)2 Ensure the iron is not plugged in.

3 Ensure the iron is cooled down.

natural_image
Hand inserting a button into a device (no text or symbols visible)4 Slide up the Quick Calc Release collector lever.

natural_image
Illustration of an iron (£) being placed on a surface with a small device nearby (no text or symbols visible)5 Pull out the Quick Calc Release collector lid.

natural_image
Modern stainless steel faucet with a showerhead and water droplet on the sink, against a grid-patterned wall (no text or symbols visible)6 Clean the Quick Calc Release collector lid with water.

natural_image
Close-up of a hand washing a showerhead with a drain, against a tiled background (no text or symbols visible)7 Shake the iron to drain the water and scale particles from the opening of the iron.

natural_image
Illustration of a kitchen sink with a drain marked by an exclamation mark and a grid background (no text or symbols)8 Do not run water into the opening of the iron.
766 จุสมรูปติ จุสม

natural_image
Medical illustration showing a surgical procedure with labeled steps (no text or symbols present)9 Shake the iron to drain the water and scale particles from the opening of the iron.

natural_image
Hand pressing down a button on a metallic object (no text or symbols visible)10 Push down the lever to lock the Quick Calc Release collector. You will hear a 'click' sound.
Storage

1 Slide the steam selector to select no steam mode/dry ironing mode.

natural_image
Illustration of a wall socket connected to a plug with a black arrow indicating direction (no text or symbols)2 Unplug the iron.

3 Let the iron cool down.

natural_image
Illustration of a hand using a power iron to press or install a surface, with a grid-patterned background (no text or symbols)4 Pour any remaining water out of the water tank.

natural_image
Diagram of a mechanical or fluidic device with rotating arrows indicating flow or movement (no text or symbols)5 Wind the power cord around the main body of the iron.
Trouble shooting
This chapter summarizes the most common problems you could encounter with the appliance. If you are unable to solve the problem with the information below, visit www.philips.com/support for a list of frequently asked questions or contact the Consumer Care Center in your country.
Problem Possible cause Solution
| My Philips Steam Iron does not produce steam. | There is no water/not enough water in the tank. | If there is no water in the water tank of your Philips Steam Iron, your iron is not able to generate steam. Please refill the water tank with water. After this, your iron should produce steam again. |
| The iron is not ready to steam. | Your iron is ready to produce steam when the indicator light switches off. | |
| The steam setting is set to no steam mode/dry ironing mode | Aways ensure that the temperature dial is at the 2-dot ●3 ●lot or ●te●HEN setting. Then, select a steam setting (ECO setting and 2-cloud setting) on the steam selector at the top of the handle.Ironing with steam with the temperature dial at the 1-dot or SYNTHETIC setting may cause wet spots/leaking as the temperature of the iron may not be hot enough to convert water to steam | |
| My Philips Steam Iron does not remove creases. | The temperature is set too low. | For irons with a temperature dial, please set the temperature according to the fabric that you are ironing. You can use the following table as a reference.Note: For some fabrics such as silk, wool, cotton and linen, steam would be needed to remove creases more efficiently. |
| Steam is not used. Switch the steam selector to or 2-cloECOettingYour Philips Iron does not produce steam when the temperature dial is at the 1-dot position, SYNTHETIC or Calc-Clean setting. You can get more steam by changing to a stronger steam setting, or using the steam boost function to help remove tough wrinkles.To remove creases in the vertical position, press and release the steam boost trigger or button to release a shot of steam. Holding down the trigger or button will not produce a continuous steam boost.Note that repeated usage of the steam boost in a short period of time may cause spitting or a reduction in the amount of steam produced. If this happens, wait for a short while before using the steam boost function again. | ||
| The steam boost in my Philips Steam Iron is not working. | The steam boost trigger has not been pressed and released. | To activate the steam boost in your Philips Steam Iron, press and release the steam boost button/trigger. Holding onto the steam boost button/trigger does not produce continuous steam boost. You may need to press the steam boost button/trigger several times on the first use for the pump to draw sufficient water.Note: We recommend to use the steam boost at the 3-dot temperature setting or higher. Using the steam boost at lower temperature settings may result in wet spots forming as the temperature of the iron may not be high enough to convert water into steam. |
| The steam boost function was used too often within a short period of time. | When you use the steam boost function of your Philips Steam Iron too often within a short period, the steam boost function will stop working for a while. In this case, please wait a couple of minutes before you use the steam boost again.For stubborn wrinkles, we recommend to use the steam boost with the steam setting at the no steam mode/dry ironing mode for the best effect. | |
| The iron is not ready to steam. | The iron is ready to steam when the indicator light switches off. | |
| My Philips Steam Iron produces smoke when heating up. | First usage. During production, some parts of the iron have been slightly greased. As a result of this, your iron may produce some smoke when it is switched on for the first few times, this is normal and should dissipate shortly. | |
| There is water in the soleplate. | Sometimes, there might still be some remaining water in your iron's soleplate after the last usage. This water will evaporate when your iron's soleplate heats up, and the steam generated may look like smoke. This is normal and should dissipate shortly. | |
| My iron is still producing smoke even after checking the above. | There could be an issue with the iron, we recommend you to contact us. | |
| There are water droplets/leaking on my garment during ironing. | First time usage. If you experience leaking/spitting during your first usage, perform the Calc Clean function once. If this does not resolve the leaking on your next use, we recommend you to contact us. | |
| The steam boost function was used too often within a short period of time. | Continue ironing in horizontal position and wait a while before you use the steam boost function again. | |
| There is a build up of scale/calcification in the iron. | If there is brown water or white flakes coming out of the iron, this may indicate a build up of calcification in the iron. Perform the Calc Clean function to clear this. If you live in an area with hard water, we recommend to use distilled water (or 50% distilled and 50% tap water) and perform the calc clean function once a month to prolong the lifetime of the iron.Note: the presence of white flakes on the very first use of the iron is normal. | |
| You have added other chemicals or additives into the water tank. | Fragrances/oils/chemicals/additives/descaling solutions should not be added into the water tank as they are damaging to the device. Please rinse the water tank, fill it up with water and descale your iron. | |
| You have not closed the water tank lid properly. | Close the lid firmly after filling. | |
| Steam has condensed onto the ironing board. | Steam may condense on the board cover, particularly when using irons that produce powerful levels of steam for a prolonged period of time. This can look like your iron is leaking from the soleplate. To prevent this, you can do the following:1 Select a lower steam setting than the setting you have been using or use steam during the first ironing strokes and then finish up with the dry-ironing strokes.2 You can also put an extra layer of cloth between the ironing board and the ironing board cover to minimize condensation.3 Replace the ironing board cover if the sponge material has worn out. | |
| Small droplets/wet spots that occur during start of ironing session. | If small droplets or wet spots occur during the start of the ironing session, this is normal as water might have collected in the soleplate from the previous ironing session, and the iron was used before it had fully heated up. Iron over the droplets/wet spots We recommend that the iron be stored in a vertical position with the steam setting set to no steam mode/dry ironing mode before it is unplugged to minimize the collection of water in the soleplate. | |
| The iron leaks after ironing. | If your iron leaks after unplugging/during storage, it may be because water has collected in the soleplate from leaving the steam setting on before the anti-drip feature activates. We recommend to set the steam selector to no steam mode/dry ironing mode before unplugging the iron. Empty the water tank and place the iron in the vertical position when cooling down/for storage. | |
| The iron leaves a shine or an imprint on the garment. | The surface to be ironed was uneven. | The iron is safe to use on all ironable garments. The shine or imprint is not permanent and disappears when you wash the garment. Avoid ironing over seams or folds. You can also place a cotton cloth over the area to be ironed to avoid imprints. |
| You have set a higher temperature than recommended for the fabric type. | Using a higher than recommended temperature setting for the fabric type may cause the iron to burn the fabric. Check your garment and that your iron is set to the correct temperature setting before ironing. The iron is safe to use on all ironable garments with the correct temperature setting. The shine or imprint is not permanent and disappears when you wash the garment. Avoid ironing over seams or folds. You can also place a cotton cloth over the area to be ironed to avoid imprints. | |
| The iron has stopped heating up. | Auto shut-off has been activated. | When your iron has not been used in 30 seconds in the horizontal position or 8 minutes in the vertical position), the iron will automatically shut-off. This is indicated by a constant blinking of the indicator light. To re-activate the iron, move the iron and the indicator light will light up again, indicating that the iron is heating up.If your iron has a dedicated Auto Shut Off light, the ASO light will blink when the iron enters the ASO state. When the iron is moved, the ASO light will switch off and the temperature indicator light will turn on, indicating that it is heating up again. |
| There is a power connection problem. | Please check the mains cord, the plug and the wall socket. Ensure that everything is properly connected. If you are using an extension plug, please ensure that power rating is suitable for the iron. | |
| The iron does not switch on anymore (I have tried the above but my iron still does not heat up). | If this is the case, there might be a problem with your iron. We recommend you to contact us. | |
| The indicator light on the iron is blinking/breathing. | Iron is heating up. The indicator light may turn on and off during ironing as the iron heats up periodically to maintain its temperature. | |
772 简体中文
产品简介
natural_image
Illustration of a steam iron emitting smoke with a warning symbol (no text or labels)1 确保熨斗电源插头已拔下。
774 简体中文

natural_image
Illustration of a steam iron with a magnified inset showing internal components (no text or symbols)natural_image
Illustration of a hand using a tool to press down a steam iron (no text or symbols visible)3 翻开水箱盖。

natural_image
Illustration of a hand using a tool to press down a steamer (no text or symbols visible)5 盖紧水箱盖。
设置温度和蒸汽量
 |  | |
| 最高亚麻 | /^* | |
| 棉质 | /^* | |
| 丝质 | ECO | |
| 化纤 | ** |

natural_image
Illustration of a hand using an iron on a surface, labeled 'ECO' in a circular badge (no other text or symbols)natural_image
Illustration of a hand using a steam iron to clean or store air (no text or symbols)natural_image
Illustration of two iron iron pieces with a cross mark, no text or symbols present3 将熨斗竖立放置。

natural_image
Illustration of a steam iron with a cable, showing internal components and a lit fuse (no text or symbols)
natural_image
Close-up of a mechanical component with an hourglass icon highlighting a specific area (no text or symbols present)natural_image
Close-up of a mechanical component with a checkmark and magnified detail (no text or symbols)natural_image
Illustration of a hand ironing an iron on a person's back (no text or symbols)3 熨烫过程中将放出蒸汽。
无蒸汽/干熨模式

natural_image
Illustration of a steam iron with a magnified inset showing internal components (no text or symbols)1 将蒸汽设置调至无蒸汽/干熨模式

natural_image
Illustration of a hand ironing an iron on a bed (no text or symbols visible)2 片刻过后,熨烫过程中蒸汽将会消失。
喷雾按钮

natural_image
Illustration of a hand using a steam iron to press down on a surface, with a downward arrow indicating motion (no text or symbols)natural_image
Illustration of a hand using an iron on a hanger with checkmarks indicating correct and incorrect actions (no text or symbols)natural_image
Illustration of hands using an iron to steam or burn iron, showing airflow and a downward arrow (no text or symbols)4 熨烫时请不要用手作为支撑面。

natural_image
Illustration of a person holding a device with a cross symbol (no text or labels)5 切勿将熨斗朝向自己或他人。
natural_image
Close-up of a mechanical component with a checkmark and magnified detail (no text or symbols)natural_image
Illustration of a steam iron with a magnified inset showing a plug (no text or symbols)1 确保熨斗电源插头已拔下。

2 确保熨斗自然冷却。

natural_image
Illustration of a hand cleaning a pear-shaped object with a checkmark indicating inspection (no text or symbols present)3 用湿布擦拭熨斗底板。

natural_image
Illustration of a nail product with a magnified inset showing a paint bottle and a textured surface (no text or symbols)natural_image
Illustration of a steam iron on a sink with warning symbols (no text or labels)natural_image
Illustration of a wall socket connected to an electrical plug with a black arrow indicating direction (no text or symbols)2 确保熨斗电源插头已拔下。

3 确保熨斗自然冷却。

natural_image
Illustration of a hand inserting a button into a device (no text or symbols visible)4 向上滑动快速除垢收集器控制杆。

natural_image
Illustration of a steam iron being placed on a kitchen sink with a small appliance nearby (no text or symbols)5 拔出快速除垢收集器盖子。

natural_image
Illustration of a stainless steel kitchen sink with a faucet and a bucket, against a grid background (no text or symbols)6 用水清洗快速除垢收集器盖子。

natural_image
Illustration of a steam iron being placed into a sink with a drain, against a grid background (no text or symbols)8 请勿将水倒入熨斗的开口处。
784 简体中文

natural_image
Medical illustration showing a surgical procedure with labeled steps (no text or symbols present)natural_image
Hand pressing down a button on a metallic object (no text or symbols visible)natural_image
Illustration of a steaming iron with a magnified inset showing a small object (no text or symbols)natural_image
Illustration of a wall socket connected to an electrical plug with a black arrow indicating direction (no text or symbols)2 拔下熨斗插头。

3 让熨斗自然冷却。

natural_image
Close-up of a hand using an iron on a metal surface, no text or symbols visible4 将水箱中剩余的水倒出。

natural_image
Illustration of a mechanical component with rotating arrows indicating motion (no text or symbols)5 将电源线缠绕在熨斗机身上。
故障排除
natural_image
Illustration of a steam iron with a cord and a cross mark, no text or symbols present1 請勿將熨斗插上電源。

natural_image
Illustration of a steam iron with a magnified inset showing a close-up of its internal components (no text or symbols)natural_image
Illustration of a hand using a tool to press down a steam iron (no text or symbols visible)3 掀開水箱蓋。

natural_image
Illustration of a hand using a tool to press down a steaming iron (no text or symbols visible)5 確實蓋好水箱蓋。
設定溫度和蒸氣
| | |
| MAX (最大)LINEN (亞麻) | /^* | |
| ●●●COTTON (棉) | /^* | |
| ●●SILK (絲) | ECO | |
| ●SYNTHETICS (合成纖維) | ※ |

natural_image
Illustration of a hand ironing an iron, labeled 'ECO' in the top-left corner (no other text or symbols)natural_image
Illustration of a hand steaming a steam iron with a circular icon showing a cloud or smoke (no text or symbols)natural_image
Illustration of two iron iron holders with a cross mark indicating a specific part (no text or symbols present)3 將熨斗直立放置。

natural_image
Illustration of a steam iron with a cable, showing internal components and a plug (no text or symbols)natural_image
Illustration of a mechanical component with an hourglass icon and magnified detail (no text or symbols)natural_image
Close-up of a mechanical component with a checkmark and magnified detail (no text or symbols)natural_image
Illustration of a person using a steam iron to press down a blanket (no text or symbols visible)3 在熨燙期間將會釋放蒸氣。
796 繁體中文
無蒸氣模式/乾式熨燙模式

natural_image
Illustration of a hand ironing an iron on a bed (no text or symbols)2 一段時間後,蒸氣會在熨燙期間停止。
水噴霧

natural_image
Illustration of a hand using a steam iron to press down a surface, with a downward arrow indicating motion (no text or symbols present)natural_image
Illustration of a hand using an iron to clean clothes, with arrows indicating direction (no text or symbols)natural_image
Illustration of a hand using an iron to clean clothing, with a downward arrow indicating the process (no text or symbols present)natural_image
Illustration of a person holding a medical device with a cross symbol (no text or labels)5 請勿將熨斗朝向自己或他人。
natural_image
Close-up of a mechanical component with a checkmark and magnified detail (no text or symbols)6 指示燈關閉後,即可開始使用熨斗。
清潔與維護

1 請確認熨斗未插電。

2 請確認熨斗已經冷卻。

natural_image
Illustration of a hand holding a teardrop-shaped object with a checkmark indicating inspection (no text or symbols present)3 請用濕布擦拭底盤。

natural_image
Illustration of a steam iron in a kitchen sink with warning symbols (no text or labels)natural_image
Diagram showing a wall socket connected to an electrical plug with a directional arrow (no text or symbols)2 請確認熨斗未插電。

3 請確認熨斗已經冷卻。

natural_image
Illustration of a hand inserting a button into a device (no text or symbols visible)4 將快速脫鈣收集器控制桿向上滑動。

natural_image
Illustration of a steam iron being placed on a kitchen sink with a small appliance nearby (no text or symbols)5 將快速除鈣收集器上蓋拉出。

natural_image
Illustration of a stainless steel kitchen sink with a faucet and a bucket, against a grid background (no text or symbols)6 用水清潔快速除鈣收集器上蓋。

natural_image
Illustration of a steam iron being placed into a sink with a drain, against a grid background (no text or symbols)8 請勿對著熨斗開口加水。
802 繁體中文

natural_image
Hand pressing down a button on a metallic object (no text or symbols visible)10 將控制桿向下壓,將快速除鈣收集器鎖定。您會聽到咔噠聲。
收納

natural_image
Illustration of a wall socket connected to an electrical plug with a black arrow indicating direction (no text or symbols)2 拔下熨斗插頭。

3 讓熨斗冷卻。

natural_image
Close-up of a hand using a power iron to clean or install a surface, with a grid background (no text or symbols visible)4 將水箱中剩餘的水倒空。

natural_image
Illustration of a mechanical device with rotating components and motion arrows (no text or symbols)5 將電線纏繞在熨斗主體。
疑難排解
808 한국어
natural_image
Illustration of a steam iron emitting smoke with a warning symbol (no text or labels)natural_image
Illustration of a steam iron with a magnified inset showing internal components (no text or symbols)natural_image
Illustration of a hand using a tool to press down a steam iron (no text or symbols visible)3 물탱크 뚜껑을 젖혀서 엽니다.

natural_image
Illustration of a hand using a tool to press or brush on an iron (no text or symbols visible)5 물탱크 뚜껑을 꼭 단으십시오.
온도 및 스틼 설정
| | ||||||||
| 최대마 | / | \( / | \( / | \( / | \( / | \( /_ | \( ECO | ||
| ECO | |||||||||
| ECO | |||||||||
| ECO |

natural_image
Illustration of a hand ironing an iron, labeled 'ECO' in the top-left corner (no other text or symbols)natural_image
Illustration of a hand ironing an iron with a circular icon showing a roof symbol (no text or symbols present)natural_image
Illustration of two iron shavings with a cross mark indicating a defect or damage (no text or symbols present)3 다리미를 세워 듣니다.

natural_image
Illustration of a steam iron with a cord and plug, no text or symbols presentnatural_image
Close-up of a mechanical component with an hourglass icon highlighting a specific area (no text or symbols present)natural_image
Close-up of a mechanical component with a checkmark and magnified detail (no text or symbols)natural_image
Illustration of a person ironing a piece of hair, showing steam and motion (no text or symbols)natural_image
Illustration of a hand ironing an iron on a bed (no text or symbols)natural_image
Illustration of a hand using a power iron to press down a surface, with a downward arrow indicating motion (no text or symbols present)
natural_image
Illustration of a hand using an iron to clean clothing, with arrows indicating direction (no text or symbols)natural_image
Illustration of hands using a steam iron to burn on a garment (no text or symbols present)natural_image
Illustration of a person using a steam iron with a cross mark (no text or symbols)natural_image
Close-up of a mechanical component with a checkmark and magnified detail (no text or symbols)natural_image
Illustration of a steam iron being heated by a plug, with a magnified inset showing the plug's internal structure (no text or symbols)2 다리미가 식었는지 확인합니다.

natural_image
Illustration of a hand holding a pear-shaped object with a checkmark indicating selection (no text or symbols present)natural_image
Illustration of a lit fuse with a magnified inset showing a bottle and bulb (no text or symbols)natural_image
Illustration of a steam iron on a sink with warning symbols (no text or labels)natural_image
Illustration of a wall socket connected to a plug with a black arrow indicating direction (no text or symbols)3 다리미가 식었는지 확인합니다.

natural_image
Hand inserting a card into a device (no text or symbols visible)natural_image
Illustration of a steam iron being placed on a kitchen sink with a small appliance nearby (no text or symbols)natural_image
Illustration of a stainless steel kitchen sink with a faucet and showerhead, against a grid background (no text or symbols)natural_image
Illustration of a steam iron being placed into a sink with a drain, against a grid background (no text or symbols)natural_image
Illustration of a robotic arm with labeled parts, showing a close-up and hand positioning (no text or symbols present)natural_image
Hand pressing down a button on a metallic object (no text or symbols visible)natural_image
Illustration of a wall socket connected to a plug with a black arrow indicating direction (no text or symbols)2 다리미의 전원을 뽑으십시오.

3 다리미를 식혀주십시오.
820 한국어

natural_image
Illustration of a hand using a power iron to clean or install a surface (no text or symbols visible)natural_image
Diagram of a mechanical device with rotating arms and internal components (no text or symbols)العربية 825
natural_image
Illustration of a steam iron with a warning symbol (no text or labels)826 العربية


natural_image
Illustration of a hand using a tool to press down a steam iron (no text or symbols present)

natural_image
Illustration of a hand using a tool to press down a steamer (no text or symbols visible)荣
- ع الكي الجاف
طاء خزان المياه 3.
natural_image
Illustration of two iron iron holders, one with a cross mark and the other with a checkmark (no text or symbols)
natural_image
Illustration of a steam iron emitting a power cord (no text or symbols)
natural_image
Close-up of a mechanical component with an hourglass icon and magnified detail (no text or symbols)د على الملابس.
natural_image
Close-up of a mechanical component with a checkmark and magnified detail (no text or symbols)وُشر وينطفى في 6
بناً على الصورة.

natural_image
Illustration of a person ironing a steam iron on a bed (no text or symbols visible)natural_image
Illustration of a person using a steam iron on a hanger, with checkmarks and arrows indicating inspection or repair (no text or symbols)natural_image
Illustration of hands using a steam iron to burn on a garment (no text or symbols)م في أثناء الكي 4.

natural_image
Illustration of a person using a steam iron with a cross mark (no text or symbols)أشخاص آخرین.5
natural_image
Illustration of a person working at a table with an iron iron, next to two icons showing a close-up and a timer (no text or symbols present)لفترة من الوقت 1.
832 العربية

natural_image
Close-up of a car's dashboard with a circular icon showing temperature reading (no text or symbols on the dashboard itself)natural_image
Illustration of a person using an iron on a surface with directional arrows indicating movement (no text or symbols)natural_image
Illustration of a hand holding a small object with an hourglass icon nearby (no text or symbols)Liberia مرة أخرى.

natural_image
Close-up of a mechanical component with a checkmark and magnified detail (no text or symbols)هزة للاستخدام.
العربية 833
التنظيف والصيانة

لَة بمصدر طاقة.

مكواة قد بردت 2.

natural_image
Illustration of a hand holding a teardrop-shaped object with a checkmark indicating selection (no text or symbols present)- قماش رطبة

natural_image
Illustration of a droplet with a magnified inset showing a bottle and a textured surface (no text or symbols)natural_image
Illustration of a steam iron on a sink with warning symbols (no text or labels)natural_image
Illustration of a wall socket connected to an electrical plug with a black arrow indicating direction (no text or symbols)لَة بمصدر طاققة.

مكواة قد بردت 3.

natural_image
Hand holding a mechanical component with an arrow indicating direction (no text or symbols visible)ن بسرعة لأعل 4.
العربية 835

natural_image
Illustration of a steam iron pressing down on a laptop keyboard (no text or symbols visible)بسرعة للخارج.5

natural_image
Close-up of a stainless steel kitchen sink with a faucet and showerhead, against a tiled wall (no text or symbols visible)ن بسرعة بالமاء.6.

natural_image
Illustration of a steam iron emitting air from a drain, with no visible text or symbolsن فتحة المكواة.

ي فتحة المكواة.

ن فتحة المكواة.9
836 العربية

natural_image
Hand holding a device with a black arrow pointing to a component (no visible text or symbols). ستسمع صوت 10
" tightقة."
التخزين

- ع الكي الجاف
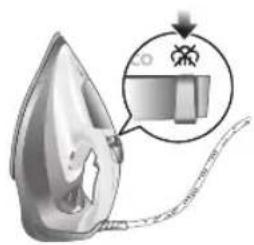
natural_image
Illustration of a steam iron with a magnified inset showing internal components (no text or symbols)ن مصر الطاقة.

natural_image
Illustration of a wall socket connected to a plug with a black arrow indicating direction (no text or symbols)٢٠٤٥ المكواة تبرد.

أي مياه متبقية. 4.

natural_image
Close-up of a hand using a power iron on a machine, with a grid-patterned background (no text or symbols visible)
natural_image
Illustration of a bottle with a curved tube wrapped around it, showing motion arrows (no text or symbols)لرئيسي للمكواة.5.
مخزن آب با درب 1
لليد انت Beach بخار 2
اسپری آب 3
4
سیم جمع کن 5
چراغ نشانگر 6
اشه تقویت بخار 7
يَجْ دما 8
سوبزدای سریع 9
استفاده از دستگاه
نوع آب مورد استفاده
natural_image
Illustration of a steam iron with a warning symbol (no text or labels)۸۴۳ فارسی

- ۱، انتخاب شود

natural_image
Illustration of a hand using a tool to press down a steam iron (no text or symbols visible)natural_image
Illustration of a hand using a tool to press down a steamer (no text or symbols visible)را محكم بندید.5
تنظيم دما و بخار
| حداکتر نخى | ||
| ECO | ||
| الياف مصنوعي |

natural_image
Illustration of a hand using an iron iron to clean (no text or symbols)natural_image
Illustration of a hand ironing an iron with steam, symbolizing heating or cooling (no text or symbols present)natural_image
Illustration of a pair of iron iron pieces, one with a cross mark and the other with a checkmark (no text or symbols)
natural_image
Illustration of a steam iron emitting a cable with a plug, no text or symbols presentگیرد. در صورت 4
natural_image
Illustration of a mechanical component with an hourglass icon and magnified detail (no text or symbols)روشن می ماند.5.
846 قارسی

natural_image
Close-up of a mechanical component with a checkmark and magnified detail (no text or symbols)natural_image
Illustration of a person using a steam iron to burn or steam (no text or symbols visible)natural_image
Illustration of a steam iron with a magnified inset showing a small component (no text or symbols)
natural_image
Illustration of a hand ironing a piece of steam (no text or symbols visible)
natural_image
Illustration of a hand using a power iron to lift a textured surface, with a downward arrow indicating motion (no text or symbols)
، تمام مى شود.
اسپری آب
پری خواهد شد.
natural_image
Illustration of a hand using an iron on a jacket, with a circular icon showing upward arrows and a checkmark (no text or symbols)natural_image
Illustration of hands using a steam iron to clean or smoke from a surface (no text or symbols)تا بخار به صورت 2
، استفاده نكنید.

natural_image
Illustration of a person using a steam iron to hold an iron, with a cross mark symbol indicating the iron (no text or symbols present)ز خودداری کنید. 5.
849 فارسی
natural_image
Illustration of a person sitting at a desk with an iron iron and two thought bubbles showing a wall and clock (no text or symbols)- شدن می کند

natural_image
Close-up of a thermometer icon with 'I°C' label, no other text or symbols visible3(Auto Shut O

natural_image
Illustration of a person ironing an iron, showing measurement arrows (no text or symbols)روشن می شود. 4.

natural_image
Close-up of a mechanical component with an hourglass icon highlighting a specific area (no text or symbols present)-اغ شدن است.5.
850 قارسی

natural_image
Close-up of a mechanical component with a checkmark and magnified detail (no text or symbols)ه استفاده است 6
دنک شده باشد.

طوب تميز كنید.

natural_image
Illustration of a hand pressing down on a pear-shaped object with a checkmark indicating selection (no text or symbols present)
natural_image
Illustration of a nail polish bottle and nail polish next to a pointed tip, with no text or symbols present.natural_image
Illustration of a showerhead with warning symbols (no text or labels)رسوب زدایی
natural_image
Illustration of a wall socket connected to an electrical plug with a black arrow indicating direction (no text or symbols)دنک شده باشد.

فارس

natural_image
Hand holding a metallic object with a triangular arrow, no visible text or symbolsمت بالا بکشید.4

natural_image
Illustration of a steam iron pressing down on a kitchen sink with a small remote device (no text or symbols visible)را بيرون بکشید.5

natural_image
Modern kitchen sink with faucet and soap bubbles on a grid background (no text or symbols)با آب تميز کنید. 6.

natural_image
Illustration of a steam iron being placed on a surface with curved blades (no text or symbols)ه آن خارج شود.

- هانه اتو نريزید.

natural_image
Illustration of a robotic arm with labeled parts, showing a close-up of the internal components (no text or symbols present)
natural_image
Hand holding a container with a black arrow pointing to a small object inside (no text or symbols visible)
natural_image
Illustration of a steam iron with a magnified inset showing internal components (no text or symbols)
natural_image
Illustration of a wall socket connected to a power plug with an arrow indicating direction (no text or symbols)
۸۵۳ ۶۱۰۴۲
۰ آن خارج شود.۹
کلیک" را خواهید 10
لثنيد.
نگهداری
- شک قرار گیرد
را از برق بکشید.
د اتو خنک شود.

natural_image
Illustration of a hand using a steam iron on a metal surface (no text or symbols visible)
natural_image
Illustration of a cylindrical container with internal flow arrows indicating process (no text or symbols)ب بيرون بریزید.
٥ اتو جمع کنید. 5

PHILIPS and the Philips Shield Emblem are registered trademarks of Koninklijke Philips N.V. and are used under license.
This product has been manufactured by and is sold under the responsibility of Versuni Holding B.V., and Versuni Holding B.V. is the warrantor in relation to this product.
2025 © Versuni Holding B.V.
642001019157 (09/2025)

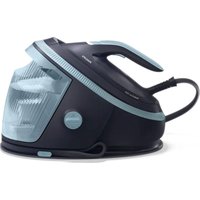
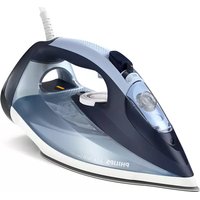

- Product overview
- English
- Using the appliance
- Type of water to use
- Filling the water tank
- Preparing for use
- English
- Ironing with steam
- No steam mode/dry ironing mode
- Water spray
- Horizontal & vertical steam boost
- English
- Auto shut off (DST7030, DST7040, DST7050, DST7060, DST7510 only)
- English
- Cleaning and maintenance
- Calc-Clean
- English
- Storage
- Trouble shooting
- Giriş
- Azərbaycanca
- Cihazdan istifadə
- Azərbaycanca
- Azərbaycanca
- Pendahuluan
- Menggunakan alat
- Mode tanpa uap/mode penyetrikaan kering
- Mati otomatis (DST7030, DST7040, DST7050, DST7060, DST7510 saja)
- Penyimpanan
- Bahasa Indonesia
- Pemecahan masalah
- Penyembur air
- Čeština
- Dansk
- Ilma auruta režiim / kuivtriikimise režiim
- Eesti
- Español
- Uporaba aparata
- Vrsta vode koju treba upotrebljavati
- Priprema za uporabu
- Hrvatski
- Hrvatski
- Italiano
- Latviešu
- Lietuviškai
- Magyar
- Magyar
- Nederlands
- Nederlands
- Ingen dampmodus/tørrstrykingsmodus
- Vanntåke
- Jihozdan foydalanish
- O'zbek
- O'zbek
- O'zbek
- Wstep
- Polski
- Português
- Shqip
- Shqip
- Shqip
- Uvod
- Slovenščina
- Slovenščina
- Slovenščina
- Slovenščina
- Slovenščina
- Slovenščina
- Úvod
- Slovensky
- Odkladanie
- Upotreba aparata
- Tip vode koji bi trebalo koristiti
- Punjenje rezervoara za vodu
- Pre upotrebe
- Srpski
- Peglanje parom
- Prskalica
- Horizontalni i vertikalni mlaz pare
- Srpski
- Odlaganje
- Rešavanje problema
- Svenska
- Tiếng Việt
- Sử dụng thiết bị
- Tiếng Việt
- Tiếng Việt
- Tiếng Việt
- Tiếng Việt
- Türkçe
- Enjamy ulanmak
- Türkmençe
- Türkmençe
- Türkmençe
- Türkmençe 559
- Türkmençe
- Εισαγωγή
- Кыргызча
- Шайманды колдонуу
- Кыргызча
- Кыргызча
- Вовед
- Македонски
- Македонски
- Македонски
- Введение
- Русский
- Истифодаи дастгох
- Точикий
- Точикй
- Точикй 665
- Точикй
- Вступ
- Uwnph oqunwqndnniún
- Ruijtntu
- Rujtntu
- Ruijtntu
- Ruijtntu
- ข้อมูลเบื้องต้น
- Jahmugun g63
- الله مكتوب وعربية
- จุสมรูปติ จุสม
- 简体中文
- 产品简介
- 简体中文
- 无蒸汽/干熨模式
- 喷雾按钮
- 简体中文
- 故障排除
- 繁體中文
- 無蒸氣模式/乾式熨燙模式
- 水噴霧
- 清潔與維護
- 繁體中文
- 收納
- 疑難排解
- 한국어
- التنظيف والصيانة
- التخزين
- استفاده از دستگاه
- نوع آب مورد استفاده
- رسوب زدایی
Brand : PHILIPS
Model : Azur 7000 Series DST7041
Category : Iron