
RS-116 DAB - Radio MAJESTIC - Free user manual and instructions
Find the device manual for free RS-116 DAB MAJESTIC in PDF.


| Product Type | DAB/DAB+ and FM Radio |
| Brand | Majestic |
| Model | RS-116 DAB |
| Dimensions (approx.) | 200 x 130 x 80 mm |
| Weight (approx.) | 500 g |
| Power Supply | AC 230V, 50Hz or 4 x AA batteries (not included) |
| Radio Bands | DAB/DAB+ (Band III) and FM (87.5–108 MHz) |
| Presets | 20 DAB and 20 FM presets |
| Display | LCD with backlight, shows station info, time, and date |
| Alarm Function | Dual alarm with snooze, wake to radio or buzzer |
| Sleep Timer | Adjustable 15–120 minutes |
| Audio Output | Built-in stereo speaker (3W RMS) and 3.5mm headphone jack |
| Additional Features | Clock auto-sync via DAB, FM RDS, manual tuning, station scan |
| Care and Cleaning | Wipe with a soft, dry cloth. Do not use abrasive cleaners. |
| Safety | Keep away from water and heat sources. Use only supplied adapter. |
| Spare Parts and Repairability | Contact Majestic customer service or authorized service centers. |
| General Information | Portable design, suitable for home or travel. Manual available online. |
Frequently Asked Questions - RS-116 DAB MAJESTIC
User questions about RS-116 DAB MAJESTIC
0 question about this device. Answer the ones you know or ask your own.
Ask a new question about this device
Download the instructions for your Radio in PDF format for free! Find your manual RS-116 DAB - MAJESTIC and take your electronic device back in hand. On this page are published all the documents necessary for the use of your device. RS-116 DAB by MAJESTIC.
USER MANUAL RS-116 DAB MAJESTIC
Importato da:
New Majestic S.p.A.
Via Rossi Martini, 41
26013 Crema (CR) – Italia
www.newmajestic.com
MADE IN CHINA

natural_image
Gradient color bar transitioning from black to white (no text or symbols)

natural_image
Vertical color block image with eight solid color blocks (cyan, magenta, yellow, blue, red, green, black) arranged in a horizontal row (no text or symbols)


AVVERTENZE
natural_image
Vertical color block image with eight solid color blocks (blue, magenta, yellow, blue, red, green, black, gray) in descending order from top to bottom.


natural_image
Gradient color bar transitioning from black to white (no text or symbols)


natural_image
Gradient color bar transitioning from black to white (no text or symbols)

natural_image
Vertical color block image with eight distinct horizontal bands in blue, magenta, yellow, purple, red, green, black, and gray (no text or symbols)


natural_image
Vertical color block image with eight solid color blocks (cyan, magenta, yellow, blue, red, green, black) in descending order from top to bottom.


natural_image
Gray gradient bar transitioning from black to white (no text or symbols)


OPERAZIONI INIZIALI
ALIMENTAZIONE
natural_image
Vertical color block image with 10 solid color blocks (cyan, magenta, yellow, blue, red, green, black) in descending order from top to bottom.

natural_image
Gradient color bar transitioning from black to white (no text or symbols)


RADIO DAB
natural_image
Vertical color block image with 10 solid color blocks (cyan, magenta, yellow, blue, red, green, black) in descending order from top to bottom.

natural_image
Gradient color bar transitioning from black to white (no text or symbols)


natural_image
Vertical color block image with eight solid color blocks (cyan, magenta, yellow, blue, red, green, black, gray) arranged vertically (no text or symbols)


natural_image
Gradient color bar transitioning from black to white (no text or symbols)


natural_image
Gradient color bar transitioning from black to white (no text or symbols)


natural_image
Gradient color bar transitioning from black to white (no text or symbols)


natural_image
Vertical color block image with eight solid color blocks (blue, magenta, yellow, blue, red, green, black, gray) in descending order from top to bottom.


natural_image
Gradient color palette with black, medium gray, and white squares (no text or symbols)



MENU DI SISTEMA
ACCESSO AL MENU DI SISTEMA
natural_image
Vertical color block image with 10 solid color blocks (cyan, magenta, yellow, blue, red, green, black) in descending order from top to bottom.

natural_image
Gradient color palette with black, medium gray, and white squares (no text or symbols)


DRC (Dynamic Range Control)
natural_image
Vertical color block image with eight solid color blocks (cyan, magenta, yellow, blue, red, green, black, gray) arranged vertically (no text or symbols)


natural_image
Gradient color bar transitioning from black to white (no text or symbols)


CURA E MANUTENZIONE

natural_image
Vertical color block image with eight distinct horizontal bars in blue, magenta, yellow, dark blue, red, green, black, and gray (no text or symbols)


natural_image
Gray gradient bar transitioning from black to white (no text or symbols)


natural_image
Vertical color block image with eight solid color blocks (cyan, magenta, yellow, blue, red, green, black, gray) arranged vertically (no text or symbols)


natural_image
Gradient color spectrum bar with black, white, and gray squares (no text or symbols)


INFORMAZIONE AGLI UTENTI DI APPARECCHIATURE DOMESTICHE

natural_image
Vertical color block image with eight solid color blocks (cyan, magenta, yellow, blue, red, green, black, gray) in descending order from top to bottom.


natural_image
Gradient color bar transitioning from black to white (no text or symbols)


natural_image
Vertical color palette bar with eight distinct solid color blocks (no text or symbols)
natural_image
Gradient color bar transitioning from black to white (no text or symbols)

MAJESTIC
DAB/DAB+/FM CLOCK RADIO USB INPUT FOR SMARTPHONE/TABLET CHARGING TWO ALARMS AND THREE RINGTONES ALARM CLOCK
User manual
MOD.: RS 116 DAB

Imported by:
New Majestic S.p.A.
Via Rossi Martini, 41
26013 Crema (CR) – Italy
www.newmajestic.com
MADE IN CHINA
Please read the following instruction manual carefully before using the appliance and keep it for future use.



natural_image
Gradient color bar transitioning from black to white (no text or symbols)

natural_image
Vertical color block image with eight solid color blocks (blue, magenta, yellow, blue, red, green, black, gray) arranged vertically (no text or symbols)


WARNING
-
READ INSTRUCTIONS - All the safety and operating instructions should be read before the appliance is operated.
-
RETAIN INSTRUCTIONS - The safety and operating instruction should be retained for future reference.
-
HEED WARNINGS - All warnings on the appliance and in the operating instructions should be adhered to.
-
FOLLOW INSTRUCTIONS - All operating instructions should be followed.
-
WATER AND MOISTURE - The appliance should not be used near water, for example, near a bathtub, washbowl, Kitchen sink, Landry tub, swimming pool or in a wet basement
-
VENTILATION - The appliance should be situated so that its location or position does not interfere with its proper ventilation. Do not place on bed, sofa, rug or similar surface that may block the ventilation openings, in a built-in installation, such as a bookcase or cabinet that may impede the flow of air through the ventilation openings.
-
HEAT - The appliance should be situated away from heat sources such as radiators, stoves, or other appliances (including amplifiers) that produce heat.
-
POWER SOURCE - The appliance should be connected to power supply only of the type described in the operating instructions or as marked on the appliance.
-
POWER CORD PROTECTION - Power supply cords should be routed so that they are not likely to be walked on or pinched by items placed upon or against them.
-
OBJECT and LIQUID ENTRY - Care should be taken so that objects do not fall and liquids are not spilled into the enclosure through openings.
-
ESD WARNING - The display does not function properly or no reaction to operation of any the control may due to the electrostatic discharge. Switch off and unplug the set. Reconnect after a few seconds.


natural_image
Vertical color block image with 10 solid color blocks (cyan, magenta, yellow, blue, red, green, black) in descending order from top to bottom.


natural_image
Gradient color bar transitioning from black to white (no text or symbols)


- DAMAGE REQUIRING SERVICE - The appliance should be serviced by qualified service personnel when:
a. The power-supply cord or plug has been damaged.
b. Objects have fallen into, or liquid has been spilled into the appliance enclosure.
c. The appliance has been exposed to rain.
d. The appliance has been dropped, or the enclosure damaged.
e. The appliance does not appear to operate normally.
- SERVICING - The user should not attempt to service the appliance beyond that described in the user operating instructions. All other servicing should be referred to qualified service personnel.
Important safety instructions
- WARNING: for information on the electrical system and safety, before installing or using the appliance, refer to the information printed on the lower external part.
- WARNING: To reduce the risk of fire or electric shock, do not expose this appliance to rain or moisture. The appliance must not be exposed to dripping or splashing and no objects filled with liquids, such as vases, must be placed on the appliance itself.
- WARNING: The power plug is used as a disconnecting device, the disconnecting device must remain easily usable.
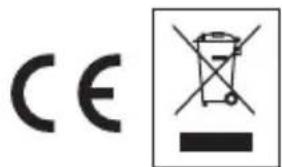
- Dispose of the appliance correctly. This mark indicates that this appliance must not be disposed of with other household waste throughout the EU.
- No source of nape flame, such as lighted candles, should be placed on the appliance.
- Use the appliance in temperate climates.



natural_image
Vertical color block image with eight distinct horizontal bands in blue, magenta, yellow, dark blue, red, green, black, and gray (no text or symbols)


natural_image
Gradient color bar transitioning from black to white (no text or symbols)


13

natural_image
Line drawing of a cylindrical tank with control panel and side-mounted gauges (no text or symbols)14
15 16
- Speaker
- ALARM button (1/2)
- < Backward
-
Forward
- MENU button / INFO button / BACK button
- VOLUME UP button
- VOLUME DOWN button
- SELECT button
- PRESET button
- SNOOZE button / SLEEP button / DIMMER button
- SOURCE button
- POWER button / ALARM OFF button
-
Display
-
Antenna
- USB charging port
- DC 5V - 1.5A IN jack



natural_image
Gray gradient bar transitioning from black to white (no text or symbols)

natural_image
Vertical color block image with eight solid color blocks (cyan, magenta, yellow, blue, red, green, black) in descending order from top to bottom.


Display
- Volume level
- Alarm 1 icon
- Alarm 2 icon
- DAB mode
- FM mode
- Sleep mode / Snooze mode
- Signal strength
- Time/Frequency/Message

8
Connecting to power
- Connect the cord of the power adapter to the DC IN jack of the radio.
- Connect the plug of the power adapter to a wall socket.
The radio is powered and in standby mode when you see the display is switched on.
Turning on or off
- Press the POWER button in standby mode to turn the radio on.
- Press the POWER button when the radio is turned on to switch it to standby mode. In standby mode, the time shows on the display.
- To completely disconnect the radio from power, remove the plug of the power adapter from the wall socket.
Setting the clock
The date and time of the radio is automatically set once it receives radio broadcast signals (and when such info is available). To set the date and time manually, see chapter "Time Setup" in "System menu".
Using the antenna
Uncoil and extend the antenna to improve FM signal reception.
Controlling the volume
Press the VOLUME UP or VOLUME DOWN button to adjust the volume.


natural_image
Gray gradient bar transitioning from black to white (no text or symbols)


Using the display dimmer
In standby mode, press the DIMMER button to adjust the brightness (5 levels) of the display.
Listening to DAB broadcasts
Selecting DAB mode
- Press the POWER button when unit is in standby mode to turn the radio on.
- Press the SOURCE button to select DAB mode. The DAB mode icon shows on the display.
Scanning for DAB stations
The first time you use the radio, or if the station list is empty, the radio automatically performs a station search.
To perform a station search manually:
- In DAB mode, press and hold the MENU button until you see "STATION SCAN" on the display.
- Press the SELECT button.
- Press the < or > button to select "FULL SCAN" or "MANUAL TUNE".
FULL SCAN: To perform a wide range search for DAB stations and store them automatically.
MANUAL TUNE: Press the < or > button to tune the frequency manually. - Press the SELECT button to confirm the selection.
Tuning to a DAB station
- In DAB mode, press the < or > button to cycle through the DAB stations in the station list.
- Press the SELECT button to tune to the selected DAB station.
Storing preset stations
You can store up to 20 DAB stations as preset stations.
- Tune to a DAB station.
- Keep pressed the "Preset" button until the preset number (01-20) starts to flash.


natural_image
Vertical color block image with eight solid color blocks (blue, magenta, yellow, blue, red, green, black, gray) in descending order from top to bottom.


natural_image
Gradient color bar transitioning from black to white (no text or symbols)


- Select the number of the preset in which you want to store the station (01-20) with the "Back" / "Forward" keys.
- Press the SELECT button to confirm. The DAB station is stored with the selected preset number.
- Repeat steps 1-4 to store more preset stations.
RECALL PRESETS
To tune to a preset station, press the PRESET button once, then press the < or > button to cycle through the list of preset stations and then press the SELECT button to confirm the selection.
Displaying DAB information
Press the INFO button repeatedly to cycle through the DAB information (such as program type, frequency, time, date, if available):
- Radio text
- Signal level
- Program type (NEWS, SPORT, POP, etc...)
- DAB channel/Frequency broadcasting
- Date
- Time
Using the DAB menus
- In DAB mode, press and hold the MENU button to access the DAB menus.
- Press the < or > button to cycle through the below options and then press the SELECT button to confirm the selection:
- Station scan (see chapter "Scanning for DAB stations")
- System (see chapter "System menu")
- Press MENU to return to main menu.
Listening to FM broadcasts
Selecting FM mode
- Press the POWER button when unit is in standby mode to turn the radio on.
- Press the SOURCE button to select FM mode. The FM mode icon shows on the display.


natural_image
Vertical color block image with eight solid color blocks (cyan, magenta, yellow, blue, red, green, black, gray) arranged vertically (no text or symbols)


natural_image
Gradient color palette with black, medium gray, and white squares (no text or symbols)



Scanning for FM stations
In FM mode, press the SELECT button to activate the automatic search for the next available FM station.
With the "Back" / "Next" keys you can manually select the frequency.
Tuning the FM frequency
Storing preset stations
You can store up to 20 FM stations as preset stations.
- Tune to the selected FM station.
- Keep pressed the "Preset" button until the preset number (01-20) starts to flash.
- Select the number of the preset in which you want to store the station (01-20) with the "Back" / "Forward" buttons.
- Pressing "Select" will save the station to the selected number.
- Repeat steps 1-4 to store other stations.
RECALL PRESELECTION
To tune to a preset station press the "Preset" button once then select the desired preset number with the "Back" / "Forward" buttons and confirm by pressing "Select".
Displaying RDS information
Press the INFO button repeatedly to cycle through the RDS (Radio Data System) information (such as radio text, program type, time and date, if available):
- Frequency broadcasting
- Radio text
- Program type (NEWS, SPORT, POP, etc...)
- Date
- Time
Using the FM menu
- In FM mode, press and hold the MENU button to access the FM menu.
- Press the < or > button to cycle through the below options and then press the SELECT button to confirm the selection.


natural_image
Vertical color block image with alternating solid and dotted blocks (no text or symbols)

natural_image
Gradient color bar transitioning from black to white (no text or symbols)


- Scan (To define how the radio scans for the next available station. Select "DX" to search for strong stations only, or "LOCAL" to search for all stations regardless of the signal strength)
- System (see chapter "System menu")
- Press MENU to return to previous menu.
Using the alarms
Setting alarms
The radio lets you have 2 alarm settings.
- Press the "Alarm" button to choose between "ALARM 1" or "ALARM 2" and confirm by pressing "Select".
-
Use the "Back" / "Next" keys to adjust and confirm by pressing "Select":
-
ON / OFF (to activate / deactivate the alarm)
- Time
- Minute
- Frequency repeat: Daily (every day), Once (once only), Weekdays (Weekdays), Weekends (holidays)
- Date: DD-MM-YY (displayed only if it is chosen as frequency repeat Once)
- Source: DAB / FM / Buzzer (selecting DAB / FM the last selected station will be used as alarm)
- Volume.
- When the alarm setting is active, the corresponding Alarm 1 and Alarm icon will be displayed. When the set time and date is reached, the device will sound an alarm. The volume will gradually increase until the set level is reached. The corresponding alarm icon will also flash on the display.
Turning off the alarm settings
- Press the ALARM button to select between Alarm 1 and Alarm 2 and then press the SELECT button to confirm the selection.
- Press the < or > button to select alarm "OFF" and then press the SELECT button to confirm the selection.
- When the alarm setting is deactivated (OFF), the corresponding alarm icon (1 or 2) turns off on the display.


natural_image
Vertical color block image with eight horizontal bars in blue, magenta, yellow, purple, red, green, black, and gray (no text or symbols)


natural_image
Gradient color bar transitioning from black to white (no text or symbols)


Deactivating a sounding alarm
Press the POWER button to deactivate a sounding alarm.
Snooze
- To temporarily silence a sounding alarm, press the SNOOZE button. The snooze period is 9 minutes.
- The radio will return to standby mode during the snooze period. The alarm will sound again when the snooze period is over.
- To cancel the snooze period and the alarm, press the POWER button.
Sleep
This sleep function defines the duration of time before the radio switches itself off automatically.
When the radio is turned on, press the SLEEP button repeatedly to select a sleep period (Options: Off, 5, 15, 30, 60 and 90 minutes).
Once a sleep period is set, the sleep icon will show on the display. The radio will automatically switch off when the sleep period is over.
Charging external devices
Connect an external device (e.g. smartphone, mp3 player) via a USB cable (not included) to the USB charging port on the back of the radio for charging. The radio cannot access the contents in the connected external device.
System menu
Accessing the system menu
- Press and hold the MENU button in DAB or FM mode.
- Press the < or > button to cycle through the options until you see "System".
- Press the SELECT button to confirm the selection "System".


natural_image
Vertical color block image with eight horizontal bars in blue, magenta, yellow, purple, red, green, black, and gray (no text or symbols)


natural_image
Gradient color palette with black, medium gray, and white squares (no text or symbols)


-
Press the < or > button to cycle through the below options.
-
Time Setup
- Alarms
• DRC (DAB mode only) - Prune (DAB mode only)
-
Factory Reset
• SW Ver (Software version) -
Confirm selection pressing "Select" button
-
To return to previous menu press "Back" button.
Time Setup
The Time Setup menu contains the below options:
- Set Clock (Set the clock time: HH:MM)
- Set Date (Set the date: DD-MM-YY)
- Auto Update (To define how the radio updates the time and date information. Select "From Radio" to update from radio signals, or "No Update" to stop automatic update.)
- Set 12/24 (Set the time format: 12 or 24 hours)
Note: You can also access the Time Setup menu in standby mode. To do so, press and hold the MENU button when the radio is turned off.
Alarms
See chapter "Using the alarms".
DRC (Dynamic Range Control) (DAB mode only)
Use this option to add or remove a degree of compensation for the differences in the dynamic range between radio stations. Select one of the options below.
• DRC off: No compensation applied.
• DRC low: Medium compensation applied.
- DRC high: Maximum compensation applied.
Prune (DAB mode only)
Use this option to remove any stations that are in the list but have no service in your area. Select "Yes" to confirm the removal.


natural_image
Vertical color block image with eight distinct horizontal bands in blue, magenta, yellow, purple, red, green, black, and gray (no text or symbols)


natural_image
Gradient color bar transitioning from black to white (no text or symbols)


Factory Reset
This setting clears all user-defined settings and replaces them with the original default settings. Select "Yes" to confirm factory reset.
Software Version
This option displays the current software version.
Resetting the device
If the device does not respond or exhibits erratic or intermittent operations, you may have experienced an electrostatic discharge (ESD) or a power surge that triggered the internal microcontroller to shut down automatically. If this occurs, disconnect the AC power adaptor from the wall socket. Wait at least 3 minutes, and re-attach the AC cord to the wall outlet. The device is now reset, and you will need to set up the unit time and alarm again.
Specifications
Tuner Range:
FM: 87.50 - 108.00 MHz
DAB: 174.928 - 239.200 MHz
Number of preset radio stations:
20 (FM) - 20 (DAB)
Amplifier Rated Output Power:
2.0W (RMS)
AC power adaptor:
Input: AC 100-240 V, 50/60Hz
Output: DC 5V 1.5A
Care and maintenance
- Clean the radio with a soft damp cloth and let all parts dry completely after cleaning.
- Do not use any aggressive cleaners, brushes with nylon bristles, sharp or metallic cleaning utensils, knives, scrapers and the like. They could damage the surfaces of the radio.
- Do not immerse the radio in water and do not let water getting into the housing of the radio


natural_image
Vertical color block image with eight solid color blocks (blue, magenta, yellow, blue, red, green, black, gray) in descending order from top to bottom.


natural_image
Gradient color bar transitioning from black to white (no text or symbols)


MOD: RS 116DAB
RADIO SVEGLIA DAB/DAB+/FM
FREQUENZA: FM: 87.5 - 108 MHz
DAB: 174.928 - 239.200MHz
ALIMENTAZIONE: DC 5V---1500mA
SI RACCOMANDA L'UTILIZZO SOLO
= Class II, double insulation

= WEEE Logo (Waste electrical and electronic equipment)

= Internal use

= Security level
natural_image
Vertical color block image with alternating solid and dotted blocks (no text or symbols)


natural_image
Gradient color bar transitioning from black to white (no text or symbols)


INFORMATION TO USERS OF DOMESTIC EQUIPMENTS

Pursuant to Art. 25, Paragraph 1 of the Legislative Act N. 49 14th March 2014, "Implement of the Directives 2011/65 / EU and 2012/19 / EU concerning the reduction of the use of hazardous substances in electrical and electronic equipment, as well as waste disposal".
The crossed bin symbol on the appliance or on its packaging indicates that the product at the end of its useful life must be collected separately from other waste. The user must, therefore, dispose the equipment at the end of its life to the appropriate electronic and electro technical waste centers, or return it to the retailer at the time of purchase of a new type of equivalent equipment, one by one.
Appropriate separate disposal for the subsequent start-up of the disused equipment for recycling, treatment and compatible environmental disposal helps to avoid possible negative effects on the environment and health and favors the re-use and / or recycling of the materials it is composed the equipment.
The illegal disposal of the product by the user involves the application of the penalties referred to in current laws.
Any rechargeable batteries or rechargeable batteries contained in the device must be disposed separately in the appropriate expired batteries bins.
Battery disposal

Disposal of expired batteries must take place at the appropriate recycling centers or according to local authority. Batteries in compliance with the 2013/56/EC directive.


natural_image
Vertical color block image with eight solid color blocks (blue, magenta, yellow, blue, red, green, black) in descending order from top to bottom.


natural_image
Gradient color palette with black, medium gray, and white squares (no text or symbols)


- AVVERTENZE
- OPERAZIONI INIZIALI
- ALIMENTAZIONE
- RADIO DAB
- MENU DI SISTEMA
- ACCESSO AL MENU DI SISTEMA
- DRC (Dynamic Range Control)
- CURA E MANUTENZIONE
- INFORMAZIONE AGLI UTENTI DI APPARECCHIATURE DOMESTICHE
- MAJESTIC
- DAB/DAB+/FM CLOCK RADIO USB INPUT FOR SMARTPHONE/TABLET CHARGING TWO ALARMS AND THREE RINGTONES ALARM CLOCK
- WARNING
- Important safety instructions
- Display
- Connecting to power
- Turning on or off
- Setting the clock
- Using the antenna
- Controlling the volume
- Using the display dimmer
- Listening to DAB broadcasts
- Selecting DAB mode
- Scanning for DAB stations
- Tuning to a DAB station
- Storing preset stations
- RECALL PRESETS
- Displaying DAB information
- Using the DAB menus
- Listening to FM broadcasts
- Selecting FM mode
- Scanning for FM stations
- Tuning the FM frequency
- RECALL PRESELECTION
- Displaying RDS information
- Using the FM menu
- Using the alarms
- Setting alarms
- Turning off the alarm settings
- Deactivating a sounding alarm
- Snooze
- Sleep
- Charging external devices
- System menu
- Accessing the system menu
- Time Setup
- Alarms
- DRC (Dynamic Range Control) (DAB mode only)
- Prune (DAB mode only)
- Factory Reset
- Software Version
- Resetting the device
- Specifications
- Care and maintenance
- INFORMATION TO USERS OF DOMESTIC EQUIPMENTS
Brand : MAJESTIC
Model : RS-116 DAB
Category : Radio