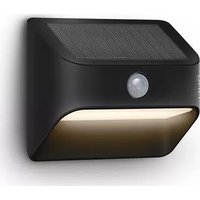
Smart Lighting Solar Steplight - Lighting RING - Free user manual and instructions
Find the device manual for free Smart Lighting Solar Steplight RING in PDF.


| Product Type | Solar-Powered Step Light |
| Brand | Ring |
| Model | Smart Lighting Solar Steplight |
| Dimensions (H x W x D) | 4.5 x 2.2 x 1.5 inches |
| Weight | 0.5 lbs |
| Power Source | Solar panel with rechargeable lithium-ion battery |
| Solar Panel Type | Polycrystalline |
| Battery Capacity | 2000 mAh |
| Light Source | LED (8 lumens) |
| Color Temperature | 3000K (warm white) |
| Motion Sensor | Passive infrared (PIR), range up to 15 ft |
| Dusk-to-Dawn Sensor | Built-in ambient light sensor |
| Weather Resistance | IP65 (dust-tight and water-resistant) |
| Installation | Wall-mounted with included screws; no wiring required |
| Color Options | Black or White |
| Charging Time | 6-8 hours of full sunlight |
| Run Time (fully charged) | Up to 12 hours on a full charge |
| Warranty | 1 year limited warranty |
| Maintenance | Clean solar panel with a soft cloth periodically |
| Safety Features | Low voltage (12V) for safe operation |
| Spare Parts Available | Replacement battery and mounting bracket |
| Repairability | Battery user-replaceable |
Frequently Asked Questions - Smart Lighting Solar Steplight RING
User questions about Smart Lighting Solar Steplight RING
0 question about this device. Answer the ones you know or ask your own.
Ask a new question about this device
Download the instructions for your Lighting in PDF format for free! Find your manual Smart Lighting Solar Steplight - RING and take your electronic device back in hand. On this page are published all the documents necessary for the use of your device. Smart Lighting Solar Steplight by RING.
USER MANUAL Smart Lighting Solar Steplight RING
natural_image
White rectangular wall-mounted smart lighting fixture with a black LED and solar panel (no text or symbols visible)Solar Steplight
Smart Lighting
Download the Ring app.
The app walks you through setting up and managing your Steplight.
Search for "Ring" in one of these app stores, or visit: ring.com/app

Download on the
App Store

GET IT ON
Google play
Set up your Ring Bridge.
The Bridge is required to connect your Ring Smart Lights to the Ring app and other compatible Ring devices.
To set up your Bridge, follow the instructions in the Ring app or the Bridge user manual.

natural_image
White electronic device labeled 'ring' with a small port and indicator lights (no readable text beyond branding)Slide off the mounting plate.
Slide the tabs out of the grooves and remove the plate from the rear of your Steplight.
Remove the battery cover.
Press in the tab on the bottom and lift to remove.

natural_image
Hand placing a component into a device casing with a blue downward arrow indicating motion (no text or symbols)
natural_image
Line drawing of a hand inserting a component into a device housing (no text or symbols)Remove the battery pull-tab.
Once removed, the included lithium-ion battery will be activated and your Steplight will flash twice to indicate its powered on.

Risk of fire, explosion, or burn. Do not short circuit, crush, heat above 60^ C, incinerate, or disassemble the battery.

natural_image
Line drawing of a hand inserting a device into a rectangular panel (no text or symbols)Charge your Steplight.
Plug the provided micro USB cord into a USB power supply (not included), then connect it to your Steplight to fully charge the battery.
The light will slowly turn on and off while charging and glow on continuously once charged.
Once charged, remove the micro USB cord.

If you can't wait to play with your Steplight, go ahead and set it up. But we recommend you fully charging it before installation.

natural_image
Hand inserting a USB into a device panel (no text or symbols visible)Re-attach the battery cover.
Push the battery cover back onto your Steplight, making sure the tab snaps into place.

natural_image
Hand pressing a button on a device panel, showing a blue arrow indicating the action (no text or symbols present)Set up your Steplight in the Ring app.
In the app, tap Set Up a Device.
When prompted, select Smart Lights and follow the in-app instructions.
natural_image
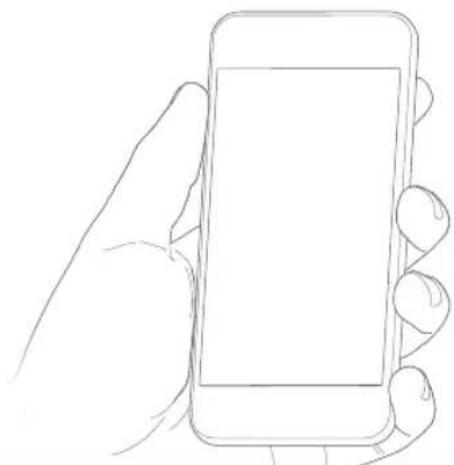
Line drawing of a hand holding a smartphone (no text or symbols)Mark the screw holes.
Use the holes in the mounting plate as a template to mark the screw locations.
As a solar light, please ensure you install your light in an area with plenty of sun.

natural_image
Simple line drawing of a sun shining over a box with a circular opening (no text or symbols)
natural_image
Line drawing of a hand holding a tool near a rectangular component with an upward arrow, against a vertical line (no text or symbols)Install Wall Anchors (optional).
If installing on a hard surface (such as stucco or brick), first drill holes using a 3/16" drill bit (not included).
If installing on wood or siding, skip this step.

natural_image
Illustration of brick wall and wooden tools (no text or symbols)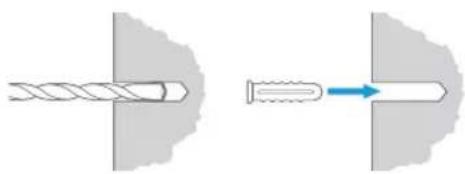
natural_image
Diagram showing a drill bit transforming into a screw with an arrow indicating process (no text or symbols)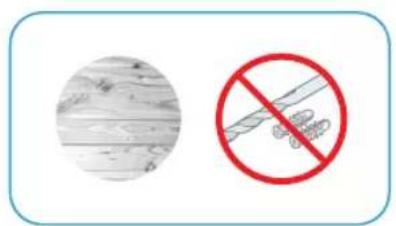
Install the mounting plate.
Place the mounting plate against the surface, making sure the arrow is pointing upwards, and drive the two mounting screws until the mounting plate is flush against the surface.
If installing on a wood surface, you can screw the bracket directly into your wall using a Philips head screwdriver.

natural_image
Hand holding a screwdriver to adjust a component with an arrow indicating upward motion (no text or symbols)Mount your Steplight.
Place your Steplight over the mounting plate, then slide it downward to lock it in place.

natural_image
Line drawing of a hand holding a device with a blue arrow indicating downward motion (no text or symbols)
natural_image
Line drawing of a sun shining over a rectangular container with a circular opening (no text or symbols)For additional help, visit: ring.com/help
Or give us a call...
US 1 800 656 1918
Canada 1 855 300 7289
Worldwide +1 310 929 7085
For a list of all our customer support numbers, visit: ring.com/callus
© 2019 Ring LLC or its affiliates.
Ring and all related logos are trademarks of Ring LLC or its affiliates.


- Solar Steplight
- Smart Lighting
- Download the Ring app.
- Set up your Ring Bridge.
- Slide off the mounting plate.
- Remove the battery cover.
- Remove the battery pull-tab.
- Charge your Steplight.
- Re-attach the battery cover.
- Set up your Steplight in the Ring app.
- Mark the screw holes.
- Install Wall Anchors (optional).
- Install the mounting plate.
- Mount your Steplight.
Brand : RING
Model : Smart Lighting Solar Steplight
Category : Lighting