
GoGear SA6065 - Mp3 player PHILIPS - Free user manual and instructions
Find the device manual for free GoGear SA6065 PHILIPS in PDF.


| Product Type | MP3 Player |
| Brand | Philips |
| Model | GoGear SA6065 |
| Storage Capacity | 8 GB (internal flash memory) |
| Display | 2.0-inch TFT color screen |
| Audio Formats | MP3, WMA, FLAC |
| Video Playback | MPEG-4 (AVI) format |
| FM Radio | Yes, with manual and auto tuning |
| Voice Recording | Built-in microphone, WAV format |
| Battery Type | Built-in rechargeable Li-ion |
| Battery Life | Up to 20 hours of audio playback |
| Charging | Via USB 2.0 port |
| Interface | USB 2.0 High Speed |
| Headphone Output | 3.5 mm stereo jack |
| Dimensions | 105 x 45 x 12 mm (4.1 x 1.8 x 0.5 in) |
| Weight | 60 g (2.1 oz) |
| Maintenance | Clean with a soft, dry cloth |
| Safety | Avoid exposure to extreme temperatures and moisture |
| Spare Parts & Repairability | Available through Philips authorized service centers |
| General Information | USB mass storage class support, drag-and-drop file transfer |
Frequently Asked Questions - GoGear SA6065 PHILIPS
User questions about GoGear SA6065 PHILIPS
0 question about this device. Answer the ones you know or ask your own.
Ask a new question about this device
Download the instructions for your Mp3 player in PDF format for free! Find your manual GoGear SA6065 - PHILIPS and take your electronic device back in hand. On this page are published all the documents necessary for the use of your device. GoGear SA6065 by PHILIPS.
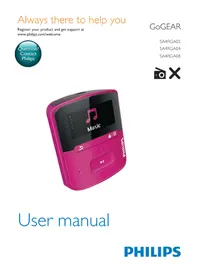
USER MANUAL GoGear SA6065 PHILIPS
SA6014
SA6015
SA6024
SA6025
SA6044
SA6045
SA6046
SA6065
SA6066
SA6085
SA6086
SA6087
www.philips.com/welcome
Digital audio video player
Need help?
Please visit
www.philips.com/welcome
where you can access to a full set of supporting materials such as user manual, flash tutorial, the latest software upgrades and answers to frequently asked questions.
Contents
1 Important safety information 3
2 Your new player 7
2.1 What's in the box 7
2.2 Register your product 7
3 Getting started 8
3.1 Overview of controls and connections 8
3.2 Main menu 9
3.3 Install 9
3.4 Connect and charge 10
3.4.1 Use the supplied USB cable 10
3.4.2 Battery level indication 11
3.5 Transfer music and pictures 11
3.6 Transfer video 12
3.7 Enjoy 13
3.7.1 Power on and off 13
3.7.2 Navigate the menu 13
3.7.3 Lock slider 13
4 Organize and transfer music and pictures with Windows Media Player 11 14
4.1 About Windows Media Player 11 14
4.1.1 Before installing Windows Media Player 11 (optional) 15
4.1.2 Installing Windows Media Player 11 16
4.1.3 Rolling back to a previous version of Windows Media Player 19
4.1.4 More about rolling back to a previous version of Windows Media Player
4.2 Music and pictures transfer 20
4.2.1 Add music and picture files to Windows Media Player Library 21
4.2.2 Switch between music and pictures library in Windows Media Player and your player
4.2.3 Rip songs from a CD 23
4.2.4 Buy music online 25
4.3 Sync your Windows Media contents to your player 26
4.3.1 Set up your player 26
4.3.2 Switch Between Automatic and Manual Sync 27
4.3.3 Select and Prioritise What Syncs Automatically 27
4.3.4 Select files and playlists for Manual Sync 28
4.3.5 Shuffle manual sync items on your player 30
4.3.6 Copy files from your player to your computer 31
4.4 Manage your Windows Media Player Playlist 31
4.4.1 Create a regular Playlist 31
4.4.2 Create an Auto Playlist 32
4.4.3 Edit playlist 33
4.4.4 Transfer playlists to your player 34
Contents
4.5 Manage your files and playlists in Windows Media Player
35
4.5.1 Search for music or pictures via Windows Media Player 35
4.5.2 Delete files and playlists from Windows Media Player library 35
4.5.3 Delete files and playlists from your player 35
4.5.4 Add or change album art 36
4.5.5 Edit song information via Windows Media Player 37
4.5.6 Format your player via Windows Media Player 38
5 Detailed operation 39
5.1 Music mode 39
5.1.1 Controls 39
5.1.2 Find your music 40
5.1.3 Play mode 41
5.2 Sound settings 41
5.3 Playlist on the go 42
5.3.1 Add songs to playlist on the go 42
5.3.2 Play back playlist on the go 42
5.3.3 Clear playlist on the go 42
5.4 Other playlists 43
5.4.1 Delete playlist from your player 43
5.4.2 Now playing 43
5.5 Videos 44
5.5.1 Find your Videos 44
5.5.2 Controls 45
5.6 Pictures 46
5.6.1 Transfer pictures from your computer to your player 46
5.6.2 Transfer pictures from your player to your computer 46
5.6.3 Find pictures on your player 47
5.7 Delete Media 47
5.8 Recordings 48
5.8.1 Play back recordings 48
5.8.2 Delete your recording 49
5.8.3 Upload your recordings to the computer 49
5.9 Radio 49
5.9.1 Select your FM region 49
5.9.2 Auto tune 50
5.9.3 Play a preset radio station and tune the station 50
5.10 Settings 51
5.11 Use your player to store and carry data files 52
6 Update your player 53
6.1 Manually verify whether your firmware is up to date 53
7 Frequently asked questions 54
8 Technical data 57
9 Glossary 59
I Important safety information
General maintenance
To avoid damage or malfunction:
- Do not expose the player to excessive heat caused by heating equipment or direct sunlight.
- Do not drop your player or allow objects to fall on your player.
- Do not allow your player to be submerged in water. Do not expose headphone socket or battery compartment to water, as water entering the set may cause major damage.
- Do not use any cleaning agents containing alcohol, ammonia, benzene, or abrasives as these may harm the set.
• Active mobile phones in the vicinity may cause interference. - Backup your files. Please ensure that you retain the original files you have downloaded to your device. Philips is not responsible for any loss of data if the product becomes damaged or not readable / legible.
- Manage (transfer, delete, etc.) your music files only with the supplied music software to avoid problems!
About operating and storage temperatures
- Operate in a place where temperature is always between 0 and 35°C (32 to 95°F )
- Store in a place where temperature is always between -20 and 45°C (-4 to 113°F )
- Battery life may be shortened in low temperature conditions.
Replacement parts/accessories
Visit www.philips.com/support or contact our Customer Care Helpline (the telephone number can be found on the first page of this manual) to order replacement parts/accessories.
Hearing Safety
Listen at a moderate volume.
- Using headphones at a high volume can impair your hearing. This product can produce sounds in decibel ranges that may cause hearing loss for a normal person, even for exposure less than a minute. The higher decibel ranges are offered for those that may have already experienced some hearing loss.
- Sound can be deceiving. Over time your hearing “comfort level” adapts to higher volumes of sound. So after prolonged listening, what sounds “normal” can actually be loud and harmful to your hearing. To guard against this, set your volume to a safe level before your hearing adapts and leave it there.
To establish a safe volume level:
- Set your volume control at a low setting.
- Slowly increase the sound until you can hear it comfortably and clearly, without distortion.

Listen for reasonable periods of time:
- Prolonged exposure to sound, even at normally “safe” levels, can also cause hearing loss.
- Be sure to use your equipment reasonably and take appropriate breaks.
Be sure to observe the following guidelines when using your headphones.
- Listen at reasonable volumes for reasonable periods of time.
- Be careful not to adjust the volume as your hearing adapts.
- Do not turn up the volume so high that you can't hear what's around you.
- You should use caution or temporarily discontinue use in potentially hazardous situations.
- Do not use headphones while operating a motorized vehicle, cycling, skateboarding, etc.; it may create a traffic hazard and is illegal in many areas.
Important (for models supplied with headphones):
Philips guarantees compliance with the maximum sound power of its audio players as determined by relevant regulatory bodies only with the original model of provided headphones. In case this one needs replacement, we recommend that you contact your retailer to order a model identical to that of the original, provided by Philips.
Copyright information
All other brands and product names are trademarks of their respective companies or organizations.
Unauthorized duplication of any recordings whether downloaded from the Internet or made from audio CDs is a violation of copyright laws and international treaties.
The making of unauthorized copies of copy-protected material, including computer programmes, files, broadcasts and sound recordings, may be an infringement of copyrights and constitute a criminal offence. This equipment should not be used for such purposes.
This product is protected by certain intellectual property rights of Microsoft Corporation. Use or distribution of such technology outside of this product is prohibited without a license from Microsoft or an authorized Microsoft subsidiary.
Content providers are using the digital rights management technology for Windows Media contained in this device (“WM-DRM”) to protect the integrity of their content (“Secure Content”) so that their intellectual property, including copyright, in such content is not misappropriated. This device uses WM-DRM software to play Secure Content (“WM-DRM Software”). If the security of the WM-DRM Software in this device has been compromised, Microsoft may revoke (either on its own or upon the request of the owners of Secure Content (“Secure Content Owners”)) the WM-DRM Software’s right to acquire new licenses to copy, display and/or play Secure Content. Revocation may also prevent your device’s ability to transfer, store, copy, display and/or play Secure Content which you have previously stored on your Device. Revocation does not alter the WM-DRM Software’s ability to play unprotected content. A list of revoked WM-DRM Software is sent to your device whenever you download a license for Secure Content from the Internet or from a PC. Microsoft may, in conjunction with such license, also download revocation lists onto your device on behalf of Secure Content Owners, which may disable your device’s ability to copy, display and/or play Secure Content.
In the event of revocation, Philips will attempt to make available software updates to restore some or all of your device's ability to transfer, store, access, copy, display and/or play Secure Content. However, the ability to make such updates available does not rest solely with Philips. Philips does not guarantee that, after revocation, such software updates will be available. If such updates are not available, your device will not have the ability to transfer, store, copy, display and/or play Secure Content - even Secure Content which you have previously stored on your device.
In addition, even if such software updates are available, they may not enable your Device to transfer, store, copy, display, and/or play Secure Content which was previously stored on your Device. In some cases you may be able to transfer the content from the PC. In other cases, you may have to repurchase previously obtained Secure Content.
To summarize - Microsoft, Secure Content Owners, and Secure Content distributors may deny you access, or restrict your access, to Secure Content. They may also disable your device's ability to transfer, store, copy, display and/or play Secure Content even after you have paid for and obtained it. Neither your consent nor the consent or approval of Philips is necessary for any of them to deny, withhold or otherwise restrict your access to Secure Content or to disable your device's ability to transfer, store, access, copy, display, and/or play Secure Content. Philips does not guaranty that you will be able to transfer, store, access, copy, display, and/or play Secure Content.
The Windows Media and the Windows logo are registered trademarks of Microsoft Corporation in the United States and/or other countries.
Data logging
Philips is committed to improving the quality of your product and enhancing the Philips user experience. To understand the usage profile of this device, this device logs some info / data to the non-volatile memory region of the device. These data are used to identify and detect any failures or problems you as a user may experience while using the device. The data stored, for example, will be the duration of playback in music mode, duration of playback in turner mode, how many times battery low was encountered, etc. The data stored do not reveal the content or media used on the device or the source of downloads. The data stored on the device are retrieved and used ONLY if the user returns the device to the Philips service centre and ONLY to simplify error detection and prevention. The data stored shall be made available to user on user's first request.
Disposal of your old product

Your product is designed and manufactured with high quality materials and components, which can be recycled and reused.
When this crossed-out wheeled bin symbol is attached to a product, it means the product is covered by the European Directive 2002/96/EC.
Please be informed about the local separate collection system for electrical and electronic products.
Please act according to your local rules and do not dispose of your old product with your normal household waste. The correct disposal of your old product will help prevent potential negative consequences to the environment and human health.
Modifications
Modifications not authorized by the manufacturer may void user authority to operate this device.
Notice for USA
Note:
This equipment has been tested and found to comply with the limits for a Class B digital device, pursuant to part 15 of the FCC Rules. These limits are designed to provide reasonable protection against harmful interference in a residential installation. This equipment generates, uses, Philips SA6014 SA6015 SA6024 SA6025 SA6044 SA6045

and can radiate radio frequency energy and, if not installed and used in accordance with the instruction manual, may cause harmful interference to radio communications.
However, there is no guarantee that interference will not occur in a particular installation. If this equipment does cause harmful interference to radio or television reception, which can be determined by turning the equipment off and on, the user is encouraged to try to correct the interference by one or more of the following measures:
- Relocate the receiving antenna.
- Increase the separation between equipment and receiver.
- Connect the equipment into an outlet on a circuit different from that to which the receiver is connected.
- Consult the dealer or an experienced radio/TV technician for help.
Notice for Canada
This Class B digital apparatus complies with Canadian ICES-003.
The set complies with the FCC-Rules, Part 15 and with 21 CFR 1040.10. Operation is subject to the following two conditions:
• This device may not cause harmful interference, and
- This device must accept any interference received, including interference that may cause undesired operation.
Notice for the European Union
This product complies with the radio interference requirements of the European Union.
2 Your new player
With your newly purchased player, you can enjoy the following:
• Video (WMV) playback
• MP3 and WMA playback
- Picture viewing
- FM radio
- Voice Recording
2.1 What's in the box
The following accessories are included with your player:

Quick start guide
CD-ROM containing Windows Media Player 11, Philips Device Manager, MediaConverter for Philips, User Manual and Frequently Asked Questions
2.2 Register your product
We strongly recommend that you register your product in order to gain access to free upgrades. To register your product, please log on to www.philips.com/welcome so that we can inform you as soon as new updates become available.
3 Getting started
3.1 Overview of controls and connections

A slider Lock all keys except volume keys
B Reset
C USB connector
D Headphones jack
E - Vol + Control volume
F MENU Press to access the menu / return to previous menu
G Playlist Press to add songs to Playlist on the go
H ☑ / ▶ II Short press to play/pause songs/videos, long press to power on/off
| I | Navigate back one menu level or exit a functionDuring songs / videos / recordings playback, press to go to previous songs / videos / recordings, or press and hold to rewind |
| Navigate forward one menulevel or select a functionDuring songs / videos / recordings playback, press to go to next songs /recordings, or press and hold to fast forward | |
| Scroll up in the list | |
| Scroll down in the list | |
| Microphone |
3.2 Main menu
Menu To
Video Watch your videos
Picture View your pictures
Music Play your digital music tracks
Radio Listen to FM radio
Recording Create or listen to recordings
Settings Customize the settings of your player
Now playing Go to the play screen
3.3 Install
Important Make sure to install the software provided in the supplied CD before connecting your player.
System requirements:
• Windows XP (SP2 or above)
- Pentium III 800MHz processor or higher
• 256MB RAM
• 200MB hard disk space
- Internet connection (preferable)
- Microsoft Internet Explorer 6.0 or later
- CD-ROM drive
- USB port
Important You need Windows XP Service Pack 2 to install and run this software.
In case you do not have this on your PC, you will be asked to install the Service Pack. Please do install this, complete the rest of your software installation and only then connect your device.
This is critical to ensure the proper working of your player when connected to the PC.
1 Insert the CD supplied with your product into the CD ROM drive of your PC.
2 Follow the on-screen instructions to complete the installation of Windows Media Player, MediaConverter for Philips and Philips Device Manager.
3 If the installation program does not start automatically, browse the CD contents via Windows Explorer and run the program by double clicking on the file ending with .exe.
Lost your CD? Don't worry, you can download the CD contents from www.philips.com/support.
3.4 Connect and charge
Your player will be charged when connected to the PC.
3.4.1 Use the supplied USB cable

Connect the supplied USB cable to PC for charging and data transfer. However, your PC must have hi-power capability in order to perform charging.

Note
Charge your player for at least 5 hours before using it for the first time.
The battery* will be fully charged (100%) in 4 hours.
The player is fully charged when the charging animation stops and is displayed.
Your fully charged player will allow up to 15 hours* of music playback or 4 hours* of video playback.
* Rechargeable batteries have a limited number of charge cycles and may eventually need to be replaced. Battery life and number of charge cycles vary by use and settings.
3.4.2 Battery level indication
The approximate power levels of your battery are indicated as follows:
Battery is full
Battery is two-thirds full
Battery is half full
Battery is low
Battery is empty
Note When the batteries are almost empty, the low battery screen blinks. Your player will power down in less than 60 seconds. Your player will save all settings and un-finished recordings before it powers down.
3.5 Transfer music and pictures
You can transfer music and pictures to your player using Windows Media Player. See Organize and transfer pictures and music with Windows Media Player 11 section of this user manual for more details.
3.6 Transfer videos
Important If you have DRM protected videos on your PC, make sure that you play these at least once in Windows Media Player before transferring them to your player using MediaConverter for Philips.

Use MediaConverter for Philips to convert the video files to the correct screen size and transfer videos from your PC to your player. This application will convert your video files to the right format and resolution before transferring them to your player so that they are guaranteed to playback on your player without any problems.
1 Connect your player to the PC via the supplied USB cable.
2 Start MediaConverter for Philips by clicking this icon on your desktop.

Note Video conversion and transfer is usually a long process and dependent on your PC configuration. Please be patient while this happens.

3 In the Convert to: option at the bottom of the screen, select Current Device, the contents will be stored directly on the connected player.
4 Press the Add Media button to select your video files.
5 Press OPEN when you have found the video files on your PC that you want to transfer to the player. You may also add additional video files.
OR
Select the files in Windows explorer and then drag and drop them into the
MediaConverter for Philips screen.
6 Press Convert.

Note If needed, the files will first be converted to a format that can be played on the yer.
All the converted files will be transferred to the player.

7 The progress of conversion and transfer is shown.
3.7 Enjoy
3.7.1 Power on and off
To power on, press ▶II until the Philips welcome screen appears.
To power off, press and hold ▶II until there is no display on the screen.

Tip Your player automatically powers down if there is no operation and no music or eo is played for 10 minutes.
3.7.2 Navigate the menu
Your player has an intuitive menu navigation system to guide you through various settings and operations.
To Do this
| Return to previous menu | Press ◀ or MENU |
| Return to main menu Press and hold MENU | |
| Browse through menus | Press ◀ or ▶ |
| Scroll through a list | Press ▲ or ▼ |
| Select an option Press ▶ | |
3.7.3 Lock slider
The player has a lock switch to prevent any accidental operation. When you slide the lock slider to the position while the power is on, appears on the screen and all function keys are disabled except for - VOL + to adjust the volume. Slide the lock switch to unlock position and the buttons function as normal.
4 Organize and transfer music and pictures with Windows Media Player II
4.1 About Windows Media Player 11
While your player will work with Windows Media Player 10, we suggest that you use Windows Media Player 11 for a more enhanced media experience, both on the computer and on your player.
Windows Media Player 11 is an all-in-one playback and recording program that lets you play your CDs, rip CD tracks to your hard disk, transfer media files to your player, etc. This chapter describes the steps that you need to follow to successfully set up and transfer music and pictures to your player. For more information, see Windows Media Player Help on your computer or visit www.microsoft.com/windows/windowsmedia/player/faq/default.mspx
Important Make sure that you have installed the Windows Media Player 11 software provided in the accompanying CD for music and picture transfer.
Although Windows Media Player also lets you transfer video files from your computer to the player, please use the MediaConverter for Philips provided in the accompanying CD for video transfers. For more information regarding transfer of videos, see 3.6 Transfer video.
Important You must be logged on as an administrator or a member of the Administrators group to perform the following procedures. For more information, please visit www.microsoft.com
4.1.1 Before installing Windows Media Player 11 (optional)
If necessary, before you install Windows Media Player 11, go to Windows Update and install any high-priority updates that are available for your computer.
Perform the following steps if you wish to save media information and star ratings to your media file, as well as back up your existing data:
1 In Windows Media Player 10, click Tools, and then click Options.
2 Click the Library tab, select the Maintain my star ratings as global ratings in the media files check box.
The user ratings for your songs will be saved in your media files rather than in your library database file (this may take several minutes).
3 Click Tools, and then click Process media information now.
This ensures that your ratings (and any changes that you have made to other media information) are saved to your media files immediately.
4 Select Start > All Programs > Accessories > System Tools > Backup to backup your existing data.
4.1.2 Installing Windows Media Player 11
1 Insert the accompanying CD into the CD ROM drive of your computer.
Note If the installation program does not start automatically, browse the CD contents via Windows Explorer and run the program by double clicking on the file ending with .exe.
2 Follow the onscreen instructions to complete the installation of Windows Media Player 11.
Note If the following dialog boxes appear during installation, read through the texts before you proceed with the installation:

3 Click Validate to continue.

4 Click I Accept to continue.

5 Select EXPRESS and click Finish.

Note Your existing media library is currently migrating to Windows Media Player 11. This may take several minutes depending on the size of your existing media library.

6 Click on the checkboxes to select the file types that you want Windows Media Player to play by default or click Select all and then click Finish.

7 Click on the checkboxes to select your privacy options and then click Next to complete the necessary settings.
4.1.3 Rolling back to a previous version of Windows Media Player
If you encounter some problems with Windows Media Player 11, you can simply roll back to the version that was previously on your computer.
1 Disconnect your player from your computer.
2 Select Start, and then click Control Panel.
3 In the Control Panel, select Add or Remove Programs.
4 Select Windows Media Player 11, and then click Remove.
A confirmation dialog box appears.
5 Click OK.
6 When the rollback process is completed (this may take several minutes), click Restart.
7 Select Start, and then click Control Panel.
8 In the Control Panel, select Add or Remove Programs.
9 Select Windows Media Format 11 Runtime, and then click Remove.
A confirmation dialog box appears.
10 Click OK.
A second confirmation dialog box appears.
11 Click OK.
12 When the rollback process is completed (this may take several minutes), click Restart.
13 Select Start, and then click Control Panel.
14 In the Control Panel, select Add or Remove Programs.
15 Select Microsoft User-Mode Driver Framework Feature Pack 1.0, and then click Remove.
16 Follow the instructions that appear in the Software Update Removal Wizard.
17 If the Wudf01000 confirmation dialog box appears, click Yes to continue. When the software removal process is completed (this might take several minutes), click Finish.
4.1.4 More about rolling back to a previous version of Windows Media Player
If you roll back to a previous version of Windows Media Player, and your player becomes undetectable by Windows or Windows Media Player, perform the following procedures:
1 Switch on your player and connect it to your computer using the supplied USB cable.
2 Right-click My Computer, and then click Manage.
3 In the left pane, click Device Manager.
4 In the right pane, click on the "+" sign beside Portable Devices.
5 Right-click GoGear SA60xx, and then click Uninstall.
6 In the confirmation dialog box, click OK to uninstall the player.
7 Disconnect your player from your computer, make sure it is still switched on, and then connect it to your computer again.
Windows will detect your device and automatically re-install it. Within a minute or two, GoGear SA60xx will reappear in the Portable Devices section of Device Manager.
4.2 Music and pictures transfer
You can view and manage your music and picture files using Windows Media Player.
Important We recommend that you always use Windows Media Player to transfer music and pictures to your player.
4.2.1 Add music and picture files to Windows Media Player library
By default, Windows Media Player automatically loads all the music and picture files stored in your My Music and My Pictures folders into the library. If you add new files to these folders, they will also be automatically added to the library.
Add music and picture files that are stored elsewhere on your computer or computer network
1 Select Start > All Programs > Windows Media Player to launch Windows Media Player program.
2 Click the down arrow beneath the Library tab and select Add to Library ...

Add to Library dialog box appears.

3 Click <<Advanced Options to expand the dialog box.
4 Click Add...
Add folder dialog box appears.
5 Select a folder in which you have kept your music or picture files and click OK.
6 Return to Add to library dialog box and click OK.
Windows Media Player will start scanning the folder and add available music or picture files to the library.
7 Click Close when done.
* Tip Windows Media Player is configured to skip audio files that are smaller than 100KB. To include files smaller than 100KB, you can change the default settings within the Add to library dialog box.
4.2.2 Switch between music and pictures library in Windows Media Player and your player
To switch between music and pictures library, simply click the arrow on the top left of Windows Media Player and select the category you want to view.

4.2.3 Rip songs from a CD
If you want to transfer music from a CD to your player, you need to create a digital copy of the music on your computer first. This is called ripping.
1 Start Windows Media Player.
2 Click the down arrow beneath the Rip tab and select Format to choose the format you want.

3 Click the down arrow beneath the Rip tab and select Bit Rate to choose the bit rate you want.

* Tip A higher bit rate produces a better sound quality, but the file size will be larger. The recommended format for your player is 128kbps MP3 or 64kbps WMA.
4 Insert the Audio CD into your computer's CD drive.
All the tracks from the CD are listed. By default, Windows Media Player will start to rip all the songs in the CD. To modify this option, click the down arrow beneath the Rip tab and select Rip CD Automatically When Inserted > Never.
![Windows Media Player Now Playing Library Hip/ Jazz FM - The Album (CD's Of Smooth Jazz & Classic [UK] Dec 1 (F)) Format: Bt Rate Hip CD Automatically When Inserted Exact CD After Rolling None Options... Help with Rolling 6 In The Music - Taylor, Dean... 3:31 7 Paraly Affair - Jaspalaher ... 6:03 8 B…](/content/2026/06/1371125/images/6cc555fd56ac917390386e6e366902c673cf7665d553e7144c7a3df75d8bfbf4.jpg)
Important Make sure that you are connected to the Internet before you start ripping so that Windows Media Player can download the album and track information from an online music database. If your computer is not connected to the Internet, you will have to enter the album and track information manually.
As Windows Media Player may not always identify the right song on the CD and the online music database may not always have the correct information (especially for new album releases or albums from lesser-known artists), you may need to manually edit or enter the album and track information. See Edit song information via Windows Media Player.
5 Select the songs that you want to rip by clicking on the checkboxes.

6 Click Start Rip.
The selected tracks will be converted and added to Windows Media Player library.
4.2.4 Buy music online
If you want to buy music online, you need to select a music store.
1 Start Windows Media Player.
2 Click the down arrow beneath the Media Guide tab and select Browse all Online Stores.
3 Choose a store and follow the on-screen instructions.

Note Depending on where you are and the language used, the list of stores may differ from what is shown here.
After you have bought a song or an album, it will appear in Windows Media Player library.
4.3 Sync your Windows Media contents to your player
You can sync your music and pictures to your player using Windows Media Player. Simply connect your player to your computer using the supplied USB cable, set up sync, and you will be ready to sync your media library to the player.
When you connect your player to the computer for the first time, Windows Media Player automatically selects the sync method (automatic or manual) that works best for your player.
Automatic: If your player has sufficient storage space (at least 4GB of free space) and your entire media library can fit on your player, your entire media library will be automatically copied to your player as soon as you connect it to your computer.
Manual: If your entire media library cannot fit on the player, then you will be prompted to manually select specific files or playlists that you want to transfer to your player.
4.3.1 Set up your player
1 Start Windows Media Player.
2 Switch on your player and then connect it to your computer using the supplied USB cable.
If prompted, select the option to sync the device using Windows Media Player.
3 If Windows Media Player selects to sync your device automatically, click Finish.
Your entire library will sync to your player. Thereafter, every time you connect your player to your computer, your player will sync automatically. You can also select and prioritise what syncs automatically (see Select and prioritise what syncs automatically).
4 If Windows Media Player selects to sync your device manually, click Finish.
You then need to click the Sync tab and select the files and playlists you want to sync manually (see 4.3.4 Select files and playlists for Manual Sync).
Important Do not disconnect your player while transferring is in progress. If you disconnect your player, the transfer will not be complete and Windows might not be able to recognize your player afterwards. To rectify this problem, perform steps 1 - 7 in 4.1.3 More about rolling back to a previous version of Windows Media Player.
4.3.2 Switch between automatic and manual sync
After your player is set up the first time, depending on your preference, you can switch between automatic and manual sync.
1 Click the down arrow beneath the Sync tab, select Philips GoGear SA60xx > Set Up Sync.
2 Select or clear the Sync this device automatically check box.
4.3.3 Select and prioritise what syncs automatically
If Windows Media Player has selected to sync your device automatically, you can choose not to sync your entire media library. You can choose what you wish to sync from existing playlists or create new playlists. These playlists you have selected will then sync to your player every time you connect it to your computer.
1 Click the down arrow beneath the Sync tab and select Philips GoGear SA60xx > Set Up Sync.

The Device Setup dialog box appears.
2 In the Available playlists pane, select the existing playlists you want to sync and then click Add.

3 To create a playlist, click New Auto Playlist and follow the steps on the screen to specify criteria for files in the auto playlist (for details on how to create an auto playlist, see 4.4.2 Create an Auto Playlist).
4 To remove a playlist, click the playlist in the list of Playlists to sync, and then click Remove.
5 In the Playlists to sync pane, select a playlist and click the Priority arrows to arrange them in the order that you want them to sync.

If your player is full before sync is complete, then the files and playlists that are lower in priority on the list will not sync.
* Tip If your player has limited storage capacity, or if your media library has grown too large to fit on your player, you can shuffle the files that are in the playlists you have selected to sync. To do so, select the Shuffle what syncs check box. Thereafter, every time you connect your player to the computer, the files on your player are removed and a new set of files (from the Playlists to sync pane) are added to the device.
4.3.4 Select files and playlists for Manual Sync
If you sync manually, you must create a list of files and playlists you want to sync. You can also shuffle which files from your playlists to sync to your player.
1 Start Windows Media Player.
2 Switch on your player and then connect it to your computer using the supplied USB cable.
3 Click the Sync tab.
4 Drag the files and playlists that you want to sync from the Contents pane to the Sync List pane. You can also right-click on the file or playlist and select Add to "Sync List".
* Tip To switch between music and pictures library, simply click the arrow on the top left of Windows Media Player and select the category you want to view.

5 In the Sync List pane, verify that the items you have selected to sync will all fit on your player. If necessary, remove items from the list.

6 To remove items, right-click on the item in the Sync List pane, and then select Remove from List.
7 Click Start Sync button to transfer the Sync List items to your player.
The progress is displayed on the bottom right of Windows Media Player.
* Tip If the track you are trying to sync is a protected file, you will be prompted to upgrade the security components on your computer. When this happens, play the track in Windows Media Player and when prompted, follow the steps on the screen to upgrade the security components. After you have upgraded your security components, sync the file to your player again.
8 If you wish to stop the transfer, click Stop Sync.

Tip To select multiple files, click on one file, then press and hold the CTRL key on our computer keyboard and click the other files that you want to select.
To select consecutive files, click on the first file, then press and hold the SHIFT key on your computer keyboard and click the last file in the list that you want to select.
To select all files, click on any file to highlight it, then press and hold CTRL + A key on your computer keyboard.
4.3.5 Shuffle manual sync items on your player
The Shuffle Sync feature in Windows Media Player is able to detect the amount of space in your player and load your player with a random sampling of files.
1 Start Windows Media Player.
2 Switch on your player and then connect it to your computer using the supplied USB cable.
3 Click the down arrow beneath the Sync tab and select Shuffle "Philips GoGear SA60xx".

4 If prompted, click Yes button to start synchronization. Otherwise synchronization starts immediately.
The progress is displayed on the bottom right of Windows Media Player.
5 To stop Sync, click the down arrow beneath the Sync tab and select Stop Sync to "Philips GoGear SA60xx".
4.3.6 Copy files from your player to your computer
Your player supports reverse sync, which lets you copy files from your player to your computer via Windows Media Player.
1 Start Windows Media Player.
2 Switch on your player and then connect it to your computer using the supplied USB cable.
3 Click on Philips GoGear SA60xx in the left Navigation pane.
You can browse your player's contents in a variety of views, such as Recently Added, Artist, Album, Songs, etc.
The contents on your player will be listed in the Contents pane.

Tip To switch between music and pictures library in your player, simply click the arrow the top left of Windows Media Player and select the category you want to view.
4 Navigate to the file or playlist you wish to copy from your player to your computer.
5 Right-click on the file or playlist and select Copy from Device.
4.4 Manage your Windows Media Player Playlist
Playlists allow you to mix any combination of songs or pictures you want so that you can enjoy hours of listening or viewing. You can create regular or auto playlists containing songs, pictures or both using Windows Media Player 11.
4.4.1 Create a regular Playlist
1 Click the down arrow beneath the Library tab and select Create Playlist.
Untitled Playlist appears on the List pane
2 Click on Untitled Playlist and enter a new name for the playlist.

3 To add items to your playlist, drag them from the Contents pane onto the List pane. Your playlist can contain both songs and pictures.
* Tip To switch between music and pictures library in your player, simply click the arrow on the top left of Windows Media Player and select the category you want to view.
4 When you have finished adding items to the playlist, click Save Playlist.
4.4.2 Create an Auto Playlist
Windows Media Player can automatically generate playlists based on various criteria.
1 Click the down arrow beneath the Library tab and select Create Auto Playlist.
A New Auto Playlist dialog box appears.
2 Enter a name for the auto playlist.

3 Click the first green plus sign and select your first criteria from the pull-down list.
Your criteria is listed.
4 Click on the underlined words to further define your criteria.
5 Click the second and third green plus signs to select and define more criteria for your auto playlist.
6 Click OK button when done.
4.4.3 Edit playlist
You can edit your existing playlists at any time.
1 Click on Playlists in the left Navigation pane.
All your playlists will be displayed in the Contents pane.
2 Right-click on the playlist you wish to edit and select Edit in List Pane from the pop-up menu.

The contents in the playlist appears on the List pane.
3 To remove an item from the playlist, right-click on the item and select Remove from List.

4 To change the order of the items in the playlist, click and drag any item to a new position within the List pane.
5 To add a new item to the playlist, select it from the library and drag it to the List pane.
6 When you have finished editing the playlist, click Save Playlist button.
4.4.4 Transfer playlists to your player
Refer to 4.3.4 Select files and playlists for Manual Sync.
4.5 Manage your files and playlists in Windows Media Player
4.5.1 Search for music or pictures via Windows Media Player
1 Click the Library tab.
2 To search for music files, click the arrow on the top left of Windows Media Player and select Music. To search for picture files, select Pictures.
3 Type a few keywords of the file, such as song title, artist, etc in the search box.
The results of your search appear in the Contents pane as you type, and are updated as you enter each new letter of your search.
3 Keep entering keywords to fine-tune the results of your search.
4.5.2 Delete files and playlists from Windows Media Player library
1 Click the Library tab.
2 To delete music files, click the arrow on the top left of Windows Media Player and select Music. To delete picture files, select Pictures.
3 Navigate to the file or playlist you wish to delete.
4 Right-click on the file or playlist and select Delete.
5 Select Delete from library only or Delete from library and my computer and click OK.
4.5.3 Delete files and playlists from your player
You can also use Windows Media Player to manage the files stored on your player. When you connect your player to the computer, the contents on your player will be displayed in Windows Media Player. You can then delete files or playlists, just as you would any other files displayed in Windows Media Player.
1 Click on Philips GoGear SA60xx in the left Navigation pane.
You can browse your player's contents in a variety of views, such as Recently Added, Artist, Album, Songs, etc.
The contents on your player will be listed in the Contents pane.
2 To delete music files, click the arrow on the top left of Windows Media Player and select Music. To delete picture files, select Pictures.
3 Navigate to the file or playlist you wish to delete.
4 Right-click on the file or playlist and select Delete.
5 Click OK.

4.5.4 Add or change album art
1 Locate and store your album art (preferably in JPG format) on your computer.
2 Right-click on the album art and select Copy.
3 Go to Windows Media Player and locate the album that you wish to add or change the album art.
4 Right-click on the album and select Paste.
The new album art now appears on your album in Windows Media Player.

Tip You can search for album art using Google Image Search (images.google.com)
4.5.5 Edit song information via Windows Media Player
1 Click the Library tab.
2 Navigate to the song you wish to edit.
3 Right-click on the song and select Advanced Tag Editor from the pop-up menu.

The Advanced Tag Editor dialog box appears.
4 Select the appropriate tab and enter or edit the information.

5 Click OK to save your changes.
4.5.6 Format your player via Windows Media Player
You can reformat the hard disk on your player to erase all data.
1 Start Windows Media Player.
2 Switch on your player and then connect it to your computer using the supplied USB cable.
3 Click the down arrow beneath the Sync tab and select Philips GoGear SA60xx > Format.

5 Detailed operation
5.1 Music mode
Your player is preloaded with some songs. You can transfer your digital music and picture collection from your computer to your player using Windows Media Player. More information on music transfer can be found in section Organize and transfer pictures and music with Windows Media Player in this user manual.
5.1.1 Controls
During music playback, you can do the following:
To Do this
| Play / Pause music Press ▶II |
| Skip to next song Press ▶ |
| Return to previous song Press ◀ |
| Fast forward Press and hold ▶ |
| Fast rewind Press and hold ◀ |
| Return to browsing menu Long/short press MENU |
| Increase volume Press VOL + |
| Decrease volume Press VOL - |
5.1.2 Find your music

1 From the main menu, select to enter music mode.
You can search from the following music options:
![graph LR A["All songs"] --> B["Alphabetically listed tracks"] C["Artists"] --> D["Alphabetically listed artists"] E["Albums"] --> F["Alphabetically listed albums"] G["Genres"] --> H["Alphabetically listed genres"] I["Playlists"] --> J["collections"] B --> K["Alphabetically listed albums"] D --> L["T…](/content/2026/06/1371125/images/471a2db5cf0d2d26f20c7a4cbc19be266e5e41c1c6daf825453b801b56793c47.jpg)
2 Press ▲ or ▼ to scroll through the list.
3 Press ▶ to select or press ◀ to return to previous level.
4 Press ▶II to play your selection.
* Tip Superplay™ allows you to playback the selected music or album immediately at any point by pressing ▶II on the selection.
5.1.3 Play mode
You can set your player to play songs randomly (Shuffle All ✦) or repeatedly (Repeat One or Repeat All).
1 From the main menu, select ⚙ > Play mode.
2 Press ▲ or ▼ to scroll up or down the options.
3 Press ▶ to select an option.
While you are playing music, you can see the above active play mode screen.
Note Digital Rights Management (DRM) Information
If you have songs that have been bought online stored on your player, from time to time you may see a message pop up “Licence problem”. This is because the license for the song on the player may have expired and synchronizing with the computer will help to update this license with the latest information.
5.2 Sound settings
Set your player to play songs with different EQ (equalizers) settings.

1 From the main menu, select ⚙ > Sound settings.
2 Press ▲ or ▼ to scroll through the list of options: Rock, Funk, Jazz, Classical, HipHop, Dance, Custom, or Off. You can select one of them.
Note Custom settings allow you to specify your desired equalizer settings by adjusting the individual settings for bass (B), low (L), mid (M), high (H) and treble (T).
3 Press ▶ to select.
5.3 Playlist on the go
Playlist on the go is a playlist that can be created on the player while on the move.
All songs will be displayed and listed in play order in the playlist. New songs are automatically added to the end of the playlist.
5.3.1 Add songs to playlist on the go
Simply press PLAYLIST, you can add the song from the highlighted song name or during the song playback.
5.3.2 Play back playlist on the go
1 Select > Playlists> Playlist on the go.
2 Select your playlist and press ▶II.
5.3.3 Clear playlist on the go
You can clear the playlist completely.
1 Press PLAYLIST and select Clear 'Playlist on the go'?.
2 Select Clear to confirm clearing all the songs in the selected playlist on the go, or select Cancel to return to the previous menu.
A message Cleared! will be displayed.

Tip This will empty playlist on the go but will not delete those songs from your player.
5.4 Other playlists
You can transfer playlists to the player using Windows Media Player. See section Manage your Windows Media Player playlist - Transfer playlists in this user manual for details.
5.4.1 Delete playlist from your player
You can only delete your player's playlists (except for Playlist on the go) via Windows Explorer.
1 Connect the player to your computer.
Your player will be identified as Philips or Philips GoGear in Windows Explorer.
2 Go to Music (Windows Media Player 10) or Playlists (Windows Media Player 11).
3 Delete playlist.

Note Any playlist you delete will not have its associated songs removed from your yer.
5.4.2 Now playing
You can browse your music and video library or pictures while you are listening to music.

To go back to the play screen, press ◀ to navigate back to the main menu and select Now playing.
5.5 Videos
You can play the videos that are loaded from the PC using the MediaConverter software.
5.5.1 Find your videos
1 In the root menu of your player, select 📁 by pressing ▲ or ▼. You can search from the following video options:
All videos Alphabetically listed videos
2 Press ▶ to enter the video library on your player.

3 Press ▲ or ▼ to select the video you want to watch, then press ▶II or ▶ to play your selection.

Note The video will playback in landscape mode to give you a full screen viewing experience,
* Tip To better organize your videos, you can create folders for your player via Windows Explorer.
1 Connect it to your computer.
Your player will be identified as Philips or Philips GoGear in Windows Explorer.
2 Go to Videos folder.
3 In Windows Explorer, right click to create and name a folder in your player.
4 Drag and drop converted video files (.wmv) to the newly created folder.
5 The video folders you have just created will be displayed under the Videos menu.
5.5.2 Controls
During video playback, you can do the following:
| To Do this | |
| Play / pause video Press ▶II | |
| Search forward and backward | Use the ◀ and ▶ keys to forward and rewind within a playing video |
| Go to previous / next video | Press ◀ and ▶ keys |
| Adjust volume | Use the + and - keys |
| Go back to previous menu Press MENU | |
5.6 Pictures
You can view your favorite pictures on your player. While you are browsing your pictures, you can listen to music at the same time.
5.6.1 Transfer pictures from your computer to your player

You can transfer pictures from your computer to your player using Windows Media Player. See section Organize and transfer pictures and music with Windows Media Player 11 in this user manual for details.
5.6.2 Transfer pictures from your player to your computer
1 Connect the player to your computer.
Your player will be identified as Philips or Philips GoGear in Windows Explorer.
2 Go to Media > Pictures (Windows Media Player 10) or Pictures (Windows Media Player 11).
3 Drag and drop your pictures to any desired location on your computer.
5.6.3 Find pictures on your player
Pictures on your player are organized in albums which are similar to the way they are organized in Windows Media Player.


Fig1 Fig2
1 From the main menu, select 🔒 using ▲ or ▼. You can search from the following options:
All pictures Alphabetically listed pictures
2 Select the picture album folder you wish to view.
You will see a thumbnail view (Fig1) of all pictures in that album folder.
3 To start a slide show, select □, press ▶II. If you wish to see a particular picture in its full view, select the thumbnail, press ▶II / ▶, to start slide show, press ▶II again.
4 When you are viewing the picture in full view, press ◀ / ▶ to go to previous / next picture. To return to previous menu, press MENU.
5.7 Delete media
You can delete music, videos and pictures via Windows Explorer on your computer.
Note The delete option is also available in the menu to delete Artists, Albums, Genres etc. This will permanently remove the entry including all content from your library. In case this content is also contained in a playlist, the entry will continue to be contained in the playlist and on playing back this playlist, the missing content will be skipped.
5.8 Recordings
You can make voice recordings using your player. See sections Overview of controls and connections for the location of recording microphone.


1 From the main menu, select .
2 Select Start recording to start recording a voice.
Your player will display the voice recording screen and voice recording starts automatically.
3 Press ▶II to pause.
4 Press ◀ to stop and save the voice recording.
Your voice recording will be saved on your player. (Filename format: VOICEXXX.WAV where XXX is the recording number which will be automatically generated.)
5 You can find this file under > Recordings library.
5.8.1 Play back recordings

From the main menu, select 📋 Recordings library.
1 Select the recording you want to hear.
2 Press ▶II to confirm.
5.8.2 Delete your recordings
The player provides the option to delete all the recordings files of your player.
1 From the main menu, select 📄 > Clear library.
2 Press ▶II to confirm.
Your can also delete the recordings on the computer.
1 Connect your player to your computer.
2 Select your player in Windows Explorer.
3 Double click the VOICE folder
4 Select the files your want to delete and press Delete on your computer keyboard.
5.8.3 Upload your recordings to the computer
1 Connect your player to your computer.
2 Select your player in Windows Explorer.
You will find a Voice folder. This folder contains the recordings.
3 Copy and paste the recordings to any desired location on the computer.
5.9 Radio
From the main menu, select to enter radio mode.
Connect the headphones
The supplied pair of headphones serves as a radio antenna. Make sure that it is properly connected to ensure optimal reception.
5.9.1 Select your FM region
From the main menu, select ➤ Radio settings.
| Region | Frequency range | Tuning steps |
| Europe | 87.5 - 108MHz | 0.05 MHz |
| USA | 87.5 - 108MHz | 0.1 MHz |
| Asia | 87.5 - 108MHz | 0.1 MHz |
5.9.2 Auto tune

1 Select Auto tune under Radio menu
The player will search for the stations with the strongest signals and automatically save up to 10 preset channels.

Tip Stop auto tune by pressing any key except volume key.
5.9.3 Play a preset radio station and tune the station
1 From the Radio menu, select Presets.
2 Press ▲ or ▼ to browse and select the preset stations.

3 After you select a preset station, short press ◀ / ▶ can change to another preset stations.
4 You can also tune the frequency of selected preset station by long pressing ▲ / ▼.
5 Short press ▲ or ▼ to move one tuning step, long press ▲ or ▼ to search next nearest strongest signal.
6 The frequency bar indicates the change in frequency.
7 To confirm and save the signal, press ▶II.
5.10 Settings
The settings menu allows you to make adjustments and personal preferences on your player.

1 From the main menu, select

2 Use ▲ or ▼ to select an option.
3 Press ▶ to go to the next level or ◀ to return to previous level.
4 Press ▶ to confirm your selection.
5 Press ◀ to exit the Settings menu.
In the Settings menu, the following options are available:
| Settings Options More options Description | ||
| Language English, French, German, Spanish, (Br)Portuguese, Portuguese (European),Italian, Dutch, Swedish, Norwegian,Finnish, Hungarian, Russian, Polish,Simplified Chinese, Traditional Chinese,Japanese, Korean | Choose the language for display on screen. | |
| Play mode Off / Repeat 1 / Repeat all / Shuffle all / Repeat & Shuffle | Choose the play mode option for all / selected songs. | |
| Sound settings Off, Rock, Funk, Jazz, Classical, HipHop,Dance, Custom | Choose the equalizer for best music experience. | |
| Backlight Always on / 10 Sec. / 20 Sec. / 30 Sec. | Choose the time for backlight display. | |
| Brightness 5 levels Choose the contrast level to | adjust the brightness. | |
| Date and time Set date format MM/DD/YYDD/MM/YY | Set your player's date format | |
| Set date Day / Month / Year Enter day, month and year to set the date in your player. | ||
| Set time format 12-hrs / 24-hrs Set your player's time format | ||
| Set time Hour / Minute / Second Enter hour, minute and second to set the time in your player. | ||
| Show time in Check box Enable check box to display the time at the top of the screen. | ||
| Information summary | Capacity, Free space, Firmware version Display information of your player. | |
| Radio settings Select frequency region | Europe / USA / Asia Choose the region in which you operate the FM | |
| Factory settings Restore factory settings | Restore / Cancel | Choose Restore to clear your player's current settings and restore to default factory settings. |
5.11 Use your player to store and carry data files
You can use your player to store and carry data files by copying data files into your player via Windows Explorer.

6 Update your player
Your player is controlled by an internal program called firmware. New versions of the firmware may be released after you have purchased your player.
A software program called Philips Device Manager will monitor the firmware status of your player and notify you if new firmware is available. You need an Internet connection for this.
Install Philips Device Manager from the supplied CD or download the latest version from www.philips.com/support.
After the installation of Philips Device Manager, every time you connect your player to your computer, Philips Device Manager will automatically connect to the Internet and check for updates.
6.1 Manually verify whether your firmware is up to date
Make sure your player is charged fully.
1 Connect your player to the computer.
2 Launch Philips Device Manager from Start > Programs > Philips Device Manager.
3 Select your device.
4 Click Update.
Philips Device Manager will check whether a new firmware is available on the Internet and install it on your player.
5 When Update completed appears on the screen, click OK and disconnect the player.
A message Updating firmware will be displayed. The player will automatically restart after firmware is completely updated. Your player is now ready to use again.
7 Frequently asked questions
If you encounter problems with your player, go through the following points listed in the next section. Please also check out FAQs at www.philips.com/support for further help and other troubleshooting tips.
Consult your dealer or service center if you are unable to find a solution by following these hints.
⚠ Warning Under no circumstances should you try to repair the set yourself, as this will invalidate the warranty.
My player skips songs.
The skipped song may be protected. You may not have sufficient rights to play the skipped song on your player. Check the music rights with the song provider.
My player is not recognized by Windows.
Make sure your computer is running Windows XP (SP2 or higher).
My player cannot power on.
Your device battery may be out of power due to long period of non-usage. Please charge your player.
In case of device error, connect your player to the computer and use Philips Device Manager to restore your player.
Important All your contents will be erased from your player after completion of repair process. After repair, simply synchronize your player again to transfer music to your player.
1 Reset your player first by inserting a pin or sharp object into the reset hole at the back of the player.
2 Launch Philips Device Manager from Start > Programs > Philips Device Manager. Select the Repair Tab.

3 While pressing the Vol + on your device, connect it to the PC.
4 Confirm Yes when you see the following screen, you can release the Vol + now.

5 Choose your device name (SA60xx) in the box.


6 After the repair is completed, click OK and continue using your player as usual.

There is no music on my player after transfer.
If you cannot find the songs that you have transferred to your player, check the following:
- Did you transfer using Windows Media Player? Files transferred via other means will only be recognized as data files. They will neither appear in the music library of your player nor can the songs be played.
- Are your songs in MP3 or WMA format? Other formats will not play back on the player.
My player hangs.
1 In the unlikely event that your player hangs, do not panic. Insert a small pin or other sharp object into the reset hole located at the back of the player. Hold until the player shuts down. Power on again after the player has shut down.

Note The existing contents on your player will not be erased.
2 If nothing happens, recharge the battery for at least 4 hours and try to power on or reset again. If this does not work, you might have to repair your player with Philips Device Manager. (See Update your player section in this user manual for details.)
My player is full and I have fewer songs on my player than I expected.
Your player has an internal memory to store songs. Check your model number to see the actual memory size. You will be able to store more songs on your player if you use WMA formatted songs in 64kbps+ with variable bitrate.
+Storage capacity based on 4 minutes per song and 64kbps WMA encoding.
8 Technical data
Power
• Power supply
800mAh Li-ion internal rechargeable battery*
- 4 hours full charge
Dimensions
9 3. 5 × 5 3. 2 × 1 2. 5 mm
Weight
7 5 g
Picture / Display
- White backlight LCD 320 x 240 pixels 65K colors
Sound
• Channel separation 40dB
- Equalizer settings
Rock, Funk, Jazz, Classical, HipHop, Dance, Custom
• Frequency response 60-18000Hz
• Signal to noise ratio > 85dB
- Output Power (RMS)
2x3mW (16Ω) (European Union countries)
2x12mW (16Ω) (non-European Union countries)
Audio playback
• Play time 15 hours*
- Compression format
MP3 (8-320kbps and VBR; Sample rates: 8, 11.025, 16, 22.050, 24, 32, 44.1, 48kHz)
WMA (32-192kbps; Sample rates: 8, 11.025, 16, 22.050, 24, 32, 44.1, 48kHz)
• ID3-tag support
Album title and artist name
Video playback
• Play time 4 hours*
- Compression format
WMV (30fps, 512kbps; 320 x 240 pixels)
Picture playback
- Format support JPEG
Tuner / Reception / Transmission
- Tuner band FM stereo
Storage media
• Built-in memory capacity SA601X 1GB NAND Flash+ SA602X 2GB NAND Flash+ SA604X 4GB NAND Flash+
Connectivity
• Headphone 3.5mm, USB 2.0++
Software
• Device manager
To restore and update
- MediaConverter for Philips
Converts following formats to player: AVI (Microsoft video I format), MPEG-1, 2, 4, DVD (*.vob), MOV, WMV, RM etc. Needs Quicktime (for MOV) and Windows Media Player 11 (for WMV) installations.
- Windows Media Player 11
System requirements
- Windows® XP (SP2 or above)
- Pentium III 800MHz processor or higher
- 256MB RAM
• 200MB hard disk space or more - Internet connection (preferable)
- Microsoft Internet Explorer 6.0 or later
- CD-ROM drive
- USB port
* Rechargeable batteries have a limited number of charge cycles and may eventually need to be replaced. Battery life and number of charge cycles vary by use and settings.
+ 1MB = 1 million bytes; available storage capacity will be less.
1GB = 1 billion bytes; available storage capacity will be less.
Full memory capacity may not be available as some memory will be reserved for the player.
Storage capacity based on 4 minutes per song and 64kbps WMA encoding.
++ Actual transfer speed may vary based on your operating system and software configuration.
9 Glossary
A
Album
A collection list of songs / pictures.
D
Digital Rights Management (DRM)
A technology that provides a persistent level of protection to digital content by encrypting it with a cryptographic key. Authorized recipients (or end users) must acquire a license in order to unlock and consume the content.
G
Genres
A particular style or type of music.
M
MP3
An audio compression format known as MPEG-1 Audio Layer 3.
P
Picture
Image, picture and picture in JPEG file format.
Playlist
A list of digital media contents.
Playlist on the go
A playlist that can be created on the player by adding favorite songs, albums, artists and genres during music playback.
R
Rip
To copy digital media content from an audio CD. Content may be converted to a different format during a ripping process.
Root menu
The main menu that sits on top of the user interface structure tree.
S
Songs
An individual track or a discrete piece of audio content.
Superscroll™
A Philips trademark user interface navigator feature to enhance the speed of browsing long lists of content.
Synchronization
The process of maintaining digital media files on a portable device based on the rules specified by the users. This may require copying digital media files from a computer to a device, updating information on the device or deleting files from the device.
T
Thumbnail
A small version of the main image, used for indexing and browsing.
Title
The largest unit of digital media content. For CD, it may be the name of the CD.
W
WAV
A digital media file format for storing sound.
Windows Media Audio (WMA)
An audio file in Windows Media Format. The audio content of the file is encoded with one of the Windows Media Audio codecs.
PHILIPS reserves the right to make design and specification changes for product improvement without prior notice.


Be responsible Respect copyrights
Specifications are subject to change without notice.
Trademarks are the property of Koninklijke Philips
Electronics N.V. or their respective owners
All rights reserved.
www.philips.com

Printed in China
wk7282


- NEED HELP
- CONTENTS
- 4.5 MANAGE YOUR FILES AND PLAYLISTS IN WINDOWS MEDIA PLAYER
- 5 DETAILED OPERATION 39
- 5.1 MUSIC MODE 39
- 5.2 SOUND SETTINGS 41
- 5.3 PLAYLIST ON THE GO 42
- 5.4 OTHER PLAYLISTS 43
- 5.5 VIDEOS 44
- 5.6 PICTURES 46
- 5.7 DELETE MEDIA 47
- 5.8 RECORDINGS 48
- 5.9 RADIO 49
- 5.10 SETTINGS 51
- 5.11 USE YOUR PLAYER TO STORE AND CARRY DATA FILES 52
- 6 UPDATE YOUR PLAYER 53
- 7 FREQUENTLY ASKED QUESTIONS 54
- 8 TECHNICAL DATA 57
- 9 GLOSSARY 59
- I IMPORTANT SAFETY INFORMATION
- GENERAL MAINTENANCE
- TO AVOID DAMAGE OR MALFUNCTION
- ABOUT OPERATING AND STORAGE TEMPERATURES
- REPLACEMENT PARTS/ACCESSORIES
- HEARING SAFETY
- LISTEN AT A MODERATE VOLUME
- TO ESTABLISH A SAFE VOLUME LEVEL
- LISTEN FOR REASONABLE PERIODS OF TIME
- BE SURE TO OBSERVE THE FOLLOWING GUIDELINES WHEN USING YOUR HEADPHONES
- IMPORTANT (FOR MODELS SUPPLIED WITH HEADPHONES)
- COPYRIGHT INFORMATION
- DATA LOGGING
- DISPOSAL OF YOUR OLD PRODUCT
- MODIFICATIONS
- NOTICE FOR USA
- NOTE
- NOTICE FOR CANADA
- NOTICE FOR THE EUROPEAN UNION
- 2 YOUR NEW PLAYER
- 2.1 WHAT'S IN THE BOX
- 2.2 REGISTER YOUR PRODUCT
- 3 GETTING STARTED
- 3.1 OVERVIEW OF CONTROLS AND CONNECTIONS
- 3.2 MAIN MENU
- MENU TO
- 3.3 INSTALL
- 3.4 CONNECT AND CHARGE
- 3.4.1 USE THE SUPPLIED USB CABLE
- 3.4.2 BATTERY LEVEL INDICATION
- 3.5 TRANSFER MUSIC AND PICTURES
- 3.6 TRANSFER VIDEOS
- 3.7 ENJOY
- 3.7.1 POWER ON AND OFF
- 3.7.2 NAVIGATE THE MENU
- 3.7.3 LOCK SLIDER
- 4 ORGANIZE AND TRANSFER MUSIC AND PICTURES WITH WINDOWS MEDIA PLAYER II
- 4.1 ABOUT WINDOWS MEDIA PLAYER 11
- 4.1.1 BEFORE INSTALLING WINDOWS MEDIA PLAYER 11 (OPTIONAL)
- 4.1.2 INSTALLING WINDOWS MEDIA PLAYER 11
- 4 CLICK I ACCEPT TO CONTINUE
- 5 SELECT EXPRESS AND CLICK FINISH
- NOTE YOUR EXISTING MEDIA LIBRARY IS CURRENTLY MIGRATING TO WINDOWS MEDIA PLAYER 11. THIS MAY TAKE SEVERAL MINUTES DEPENDING ON THE SIZE OF YOUR EXISTING MEDIA LIBRARY
- 4.1.3 ROLLING BACK TO A PREVIOUS VERSION OF WINDOWS MEDIA PLAYER
- 4.1.4 MORE ABOUT ROLLING BACK TO A PREVIOUS VERSION OF WINDOWS MEDIA PLAYER
- 4.2 MUSIC AND PICTURES TRANSFER
- 4.2.1 ADD MUSIC AND PICTURE FILES TO WINDOWS MEDIA PLAYER LIBRARY
- ADD MUSIC AND PICTURE FILES THAT ARE STORED ELSEWHERE ON YOUR COMPUTER OR COMPUTER NETWORK
- 4.2.2 SWITCH BETWEEN MUSIC AND PICTURES LIBRARY IN WINDOWS MEDIA PLAYER AND YOUR PLAYER
- 4.2.3 RIP SONGS FROM A CD
- 4.2.4 BUY MUSIC ONLINE
- 4.3 SYNC YOUR WINDOWS MEDIA CONTENTS TO YOUR PLAYER
- 4.3.1 SET UP YOUR PLAYER
- 4.3.2 SWITCH BETWEEN AUTOMATIC AND MANUAL SYNC
- 4.3.3 SELECT AND PRIORITISE WHAT SYNCS AUTOMATICALLY
- 4.3.4 SELECT FILES AND PLAYLISTS FOR MANUAL SYNC
- 4.3.5 SHUFFLE MANUAL SYNC ITEMS ON YOUR PLAYER
- 4.3.6 COPY FILES FROM YOUR PLAYER TO YOUR COMPUTER
- 4.4 MANAGE YOUR WINDOWS MEDIA PLAYER PLAYLIST
- 4.4.1 CREATE A REGULAR PLAYLIST
- 2 CLICK ON UNTITLED PLAYLIST AND ENTER A NEW NAME FOR THE PLAYLIST
- 4.4.2 CREATE AN AUTO PLAYLIST
- 2 ENTER A NAME FOR THE AUTO PLAYLIST
- 4.4.3 EDIT PLAYLIST
- 4.4.4 TRANSFER PLAYLISTS TO YOUR PLAYER
- 4.5.1 SEARCH FOR MUSIC OR PICTURES VIA WINDOWS MEDIA PLAYER
- 4.5.2 DELETE FILES AND PLAYLISTS FROM WINDOWS MEDIA PLAYER LIBRARY
- 4.5.3 DELETE FILES AND PLAYLISTS FROM YOUR PLAYER
- 4.5.4 ADD OR CHANGE ALBUM ART
- 4.5.5 EDIT SONG INFORMATION VIA WINDOWS MEDIA PLAYER
- 4.5.6 FORMAT YOUR PLAYER VIA WINDOWS MEDIA PLAYER
- 5 DETAILED OPERATION
- 5.1 MUSIC MODE
- 5.1.1 CONTROLS
- 5.1.2 FIND YOUR MUSIC
- 5.1.3 PLAY MODE
- NOTE DIGITAL RIGHTS MANAGEMENT (DRM) INFORMATION
- 5.2 SOUND SETTINGS
- 5.3 PLAYLIST ON THE GO
- 5.3.1 ADD SONGS TO PLAYLIST ON THE GO
- 5.3.2 PLAY BACK PLAYLIST ON THE GO
- 5.3.3 CLEAR PLAYLIST ON THE GO
- 5.4 OTHER PLAYLISTS
- 5.4.1 DELETE PLAYLIST FROM YOUR PLAYER
- 5.4.2 NOW PLAYING
- 5.5 VIDEOS
- 5.5.1 FIND YOUR VIDEOS
- 5.5.2 CONTROLS
- 5.6 PICTURES
- 5.6.1 TRANSFER PICTURES FROM YOUR COMPUTER TO YOUR PLAYER
- 5.6.2 TRANSFER PICTURES FROM YOUR PLAYER TO YOUR COMPUTER
- 5.6.3 FIND PICTURES ON YOUR PLAYER
- 5.7 DELETE MEDIA
- 5.8 RECORDINGS
- 5.8.1 PLAY BACK RECORDINGS
- 5.8.2 DELETE YOUR RECORDINGS
- 5.8.3 UPLOAD YOUR RECORDINGS TO THE COMPUTER
- 5.9 RADIO
- CONNECT THE HEADPHONES
- 5.9.1 SELECT YOUR FM REGION
- 5.9.2 AUTO TUNE
- 5.9.3 PLAY A PRESET RADIO STATION AND TUNE THE STATION
- 5.10 SETTINGS
- 5.11 USE YOUR PLAYER TO STORE AND CARRY DATA FILES
- 6 UPDATE YOUR PLAYER
- 6.1 MANUALLY VERIFY WHETHER YOUR FIRMWARE IS UP TO DATE
- 7 FREQUENTLY ASKED QUESTIONS
- MY PLAYER SKIPS SONGS
- THERE IS NO MUSIC ON MY PLAYER AFTER TRANSFER
- MY PLAYER HANGS
- NOTE THE EXISTING CONTENTS ON YOUR PLAYER WILL NOT BE ERASED
- MY PLAYER IS FULL AND I HAVE FEWER SONGS ON MY PLAYER THAN I EXPECTED
- 8 TECHNICAL DATA
- POWER
- DIMENSIONS
- WEIGHT
- PICTURE / DISPLAY
- SOUND
- AUDIO PLAYBACK
- VIDEO PLAYBACK
- PICTURE PLAYBACK
- TUNER / RECEPTION / TRANSMISSION
- STORAGE MEDIA
- CONNECTIVITY
- SOFTWARE
- SYSTEM REQUIREMENTS
- 9 GLOSSARY
- A
- ALBUM
- D
- DIGITAL RIGHTS MANAGEMENT (DRM)
- G
- GENRES
- M
- MP3
- P
- PICTURE
- PLAYLIST
- PLAYLIST ON THE GO
- R
- RIP
- ROOT MENU
- S
- SONGS
- SUPERSCROLL™
- SYNCHRONIZATION
- T
- THUMBNAIL
- TITLE
- W
- WAV
- WINDOWS MEDIA AUDIO (WMA)
- BE RESPONSIBLE RESPECT COPYRIGHTS
Brand : PHILIPS
Model : GoGear SA6065
Category : Mp3 player