
GN1406223XP - Refrigerator BEKO - Free user manual and instructions
Find the device manual for free GN1406223XP BEKO in PDF.
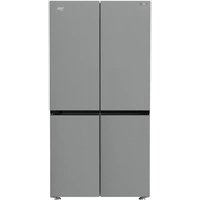


| Product Type | Freestanding Refrigerator-Freezer |
| Total Net Capacity | 350 L |
| Refrigerator Net Capacity | 250 L |
| Freezer Net Capacity | 100 L |
| Energy Efficiency Class | A+ |
| Annual Energy Consumption | 280 kWh |
| No Frost Technology | Yes (Freezer) |
| Temperature Control | Electronic |
| Cooling System | Static (Refrigerator) |
| Number of Shelves | 4 Glass Shelves in Refrigerator |
| Door Balcony | 4 Door Balconies |
| Freezer Drawers | 3 Drawers |
| Ice Cube Tray | Included |
| Defrosting | Automatic (Freezer) / Manual (Refrigerator) |
| Dimensions (Height x Width x Depth) | 1860 x 600 x 630 mm |
| Weight | 65 kg |
| Noise Level | 42 dB |
| Climate Class | SN-T (Subnormal to Tropical) |
| Reversible Door | Yes |
| Interior Light | LED |
| Adjustable Feet | Yes |
| Cleaning Instructions | Use mild detergent and soft cloth; avoid abrasive cleaners. |
| Safety Features | Child lock (if applicable) / High temperature alarm |
| Spare Parts Availability | Available from authorized service centers |
Frequently Asked Questions - GN1406223XP BEKO
User questions about GN1406223XP BEKO
0 question about this device. Answer the ones you know or ask your own.
Ask a new question about this device
Download the instructions for your Refrigerator in PDF format for free! Find your manual GN1406223XP - BEKO and take your electronic device back in hand. On this page are published all the documents necessary for the use of your device. GN1406223XP by BEKO.
USER MANUAL GN1406223XP BEKO
GN1406222XP-GN1406222GB-GN1406224XBR-GN1406222GW
GN1406223XP-GN1406226XBR-GN1406223GB-GN1406223GW
Please read this manual before using the product!
Dear Customer,
We'd like you to make the best use of our product, which has been manufactured in modern facilities with care and meticulous quality controls.
Thus, we advise you to read the entire user manual before you use the product. In case the product changes hands, do not forget to hand the guide to its new owner along with the product.
This guide will help you use the product quickly and safely.
- Please read the user guide carefully before installing and operating the product.
• Always observe the applicable safety instructions.
- Keep the user guide within easy reach for future use.
- Please read any other documents provided with the product.
Keep in mind that this user guide may apply to several product models. The guide clearly indicates any variations of different models.
 | Important information and useful tips. |
 | Risk of life and property. |
 | Risk of electric shock. |
 | The product's packaging is made of recyclable materials, in accordance with the National Environment Legislation. |
| i INFORMATION | ||
 ENERG7 ENERG7  IAME MODEL IDENTIFIER (*) IAME MODEL IDENTIFIER (*)   | The model information as stored in the product data base can be reached by entering following website and searching for your model identifier (*) found on energy label.https://eprel.ec.europa.eu/ | |
1 Safety and environment instructions 3
2 Your Refrigerator 7
2 Your Refrigerator 8
3 Installation 9
3.1 Appropriate location for installation .....9 3.2 Installing the plastic wedges .....9 3.3* Adjusting the feet .....10 3.4 Electric connection .....11
4 Preparation 12
4.1 Things to be done for saving energy .....12 4.2 Recommendations about the fresh food compartment.....12 4.3 Initial use....13
5 Operating the product 14
5.1 Indicator panel ..... 14 5.2 Indicator panel....18 5.3 Freezing fresh food.....21 5.4 Recommendations for preserving the frozen food .....22 5.5 Deep-freeze information .....22 5.6 Placing the food .....22 5.7 Door open warning .....22 5.8 Chiller compartment .....23 5.9 Crisper....23 5.10 Humidity-controlled crisper .....23 5.11 Egg tray .....23 5.12 Movable Middle Section .....24 5.13 Cool Control Storage Compartment .....24 5.14 Blue light .....24 5.15 Odour filter....25 5.16 Wine cellar compartment .....25 5.17 Use of internal water dispenser and water dispenser at the door .....26 5.18 Dispensing water .....26 5.19 For using water dispenser....27 5.20 Icematic 27 5.21 Icematic and ice storage container .....28
6 Maintenance and Cleaning 29
7. Troubleshooting 30
1. Safety and environment instructions
This section provides the safety instructions necessary to prevent the risk of injury and material damage. Failure to observe these instructions will invalidate all types of product warranty.
Intended use
| WARNING:Keep ventilation openings, in the appliance enclosure or in the built-instructure, clear of obstruction. | |
| WARNING:Do not use mechanical devices or other means to accelerate the defrosting process, other than those recommended by the manufacturer. | |
| WARNING:Do not damage the refrigerant circuit. | |
| WARNING:Do not use electrical appliances inside the food storage compartments of the appliance, unless they are of the type recommended by the manufacturer. |
This appliance is intended to be used in household and similar applications such as
- staff kitchen areas in shops, offices and other working environments; - farm houses and by clients in hotels, motels and other residential type environments;
— bed and breakfast type environments;
- catering and similar non-retail applications.
1.1. General safety
- This product should not be used by persons with physical, sensory or mental disabilities, without sufficient knowledge and experience, or by children. The device can only be used by such persons under supervision and instruction of a person responsible for their safety. Children should not be allowed to play with this device.
- In case of malfunction, unplug the device. After unplugging, wait at least 5 minutes before plugging in again.
- Unplug the product when not in use.
- Do not touch the plug with wet hands! Do not pull the cable to unplug, always hold the plug.
- Do not plug in the refrigerator if the socket is loose.
- Unplug the product during installation, maintenance, cleaning and repair.
Important instructions regarding safety and environment
- If the product will not be used for a while, unplug the product and remove any food inside.
- Do not use the product when the compartment with circuit cards located on the upper back part of the product (electrical card box cover) (1) is open.


- Do not use steam or steamed cleaning materials for cleaning the refrigerator and melting the ice inside. Steam may contact the electrified areas and cause short circuit or electric shock!
- Do not wash the product by spraying or pouring water on it! Danger of electric shock!
- In case of malfunction, do not use the product, as it may cause electric shock. Contact the authorised service before doing anything.
- Plug the product into an earthed socket. Earthing must be done by a qualified electrician.
- If the product has LED type lighting, contact the authorized service for replacement or in case of any problem.
- Do not touch frozen food with wet hands! It may adhere to your hands!
- Do not place liquids in bottles and cans into the freezer compartment. They may explode.
- Place liquids in upright position after tightly closing the lid.
- Do not spray flammable substances near the product, as it may burn or explode.
- Do not keep flammable materials and products with flammable gas (sprays, etc.) in the refrigerator.
- Do not place containers holding liquids on top of the product. Splashing water on an electrified part may cause electric shock and risk of fire.
- Exposing the product to rain, snow, sunlight and wind will cause electrical danger. When relocating the product, do not pull by holding the door handle. The handle may come off. • Take care to avoid trapping any part of your hands or body in any of the moving parts inside the product.
Important instructions regarding safety and environment
- Do not step or lean on the door, drawers and similar parts of the refrigerator. This will cause the product to fall down and cause damage to the parts. • Take care not to trap the power cable.

1.1.1 HC warning
If the product comprises a cooling system using R600a gas, take care to avoid damaging the cooling system and its pipe while using and moving the product. This gas is flammable. If the cooling system is damaged, keep the product away from sources of fire and ventilate the room immediately.

The label on the inner left side indicates the type of gas used in the product.
1.1.2 For models with water dispenser
- Pressure for cold water inlet shall be maximum 90 psi (6.2 bar). If your water pressure exceeds 80 psi (5.5 bar), use a
pressure limiting valve in your mains system. If you do not know how to check your water pressure, ask for the help of a professional plumber.
- If there is risk of water hammer effect in your installation, always use a water hammer prevention equipment in your installation. Consult professional plumbers if you are not sure that there is no water hammer effect in your installation.
- Do not install on the hot water inlet. Take precautions against the risk of freezing of the hoses. Water temperature operating interval shall be 33°F (0.6°C) minimum and 100°F (38°C) maximum.
- Use drinking water only.
1.2. Intended use
- This product is designed for home use. It is not intended for commercial use.
- The product should be used to store food and beverages only.
- Do not keep sensitive products requiring controlled temperatures (vaccines, heat sensitive medication, medical supplies, etc.) in the refrigerator.
Important instructions regarding safety and environment
- The manufacturer assumes no responsibility for any damage due to misuse or mishandling.
- Original spare parts will be provided for 10 years, following the product purchasing date.
1.3. Child safety
- Keep packaging materials out of children's reach.
- Do not allow the children to play with the product.
- If the product's door comprises a lock, keep the key out of children's reach.
1.4. Compliance with WEEE Directive and Disposing of the Waste Product
This product complies with EU WEEE Directive (2012/19/EU). This product bears a classification symbol for waste electrical and electronic equipment (WEEE).

This product has been manufactured with high quality parts and materials which can be reused and are suitable for recycling. Do not dispose of the waste product with normal domestic and other wastes at the end of its service life. Take it to the collection center for the recycling of electrical and electronic equipment. Please consult your local authorities to learn about these collection centers.
1.5. Compliance with RoHS Directive
This product complies with EU RoHS Directive (2011/65/EU). It does not contain harmful and prohibited materials specified in the Directive.
1.6. Package information
Packaging materials of the product are manufactured from recyclable materials in accordance with our National Environment Regulations. Do not dispose of the packaging materials together with the domestic or other wastes. Take them to the packaging material collection points designated by the local authorities.
2 Your Refrigerator

1- Control and indicator panel 2- Butter & Cheese section 3- 70 mm moving door shelf 4- Fridge compartment glass shelf 5- Fridge compartment crisper 6- Gallon door shelf
7- Chiller compartment 8- Icebox drawer 9- Multizone compartment glass shelf/cooler 10- Freezer compartment drawers 11- Multizone Compartment's drawer * OPTIONAL

Figures in this user manual are schematic and may not match the product exactly. If the subject parts are not included in the product you have purchased, then those parts are valid for other models.
2 Your Refrigerator

1- Control and indicator panel 2- Butter & Cheese section 3- 70 mm moving door shelf 4- Fridge compartment glass shelf 5- Fridge compartment crisper 6- Gallon door shelf
7- Chiller compartment 8- Icebox drawer 9- Multizone compartment glass shelf/cooler 10- Freezer compartment drawers * OPTIONAL

Figures in this user manual are schematic and may not match the product exactly. If the subject parts are not included in the product you have purchased, then those parts are valid for other models.
3 Installation
3.1 Appropriate location for installation
Contact an Authorized Service for the installation of the product. In order to prepare the product for use, refer the information in the user manual and ensure that electrical installation and water installation are appropriate. If not, call a qualified electrician and technician to have any necessary arrangements carried out.
 | WARNING: Manufacturer shall not be held liable for damages that may arise from procedures carried out by unauthorized persons. |
 | WARNING: Product must not be plugged in during installation. Otherwise, there is the risk of death or serious injury! |
 | WARNING: : If the door clearance of the room where the product shall be placed is so tight to prevent passing of the product, remove the door of the room and pass the product through the door by turning it to its side; if this does not work, contact the authorized service. |
- Place the product on a level floor surface to prevent jolts. • Install the product at least 30 cm away from heat sources such as hobs, heater cores and stoves and at least 5 cm away from electrical ovens.
- Product must not be subjected to direct sun light and kept in humid places.
- Appropriate air ventilation must be provided around your product in order to achieve an efficient operation. If the product is to be placed in a recess in the wall, pay attention to leave at least 5 cm distance with the ceiling and side walls.
- Do not install the product in places where the temperature falls below -5°C.
3.2 Installing the plastic wedges
Plastic wedges supplied with the product are used to create the distance for the air circulation between the product and the rear wall.
- To install the wedges, remove the screws on the product and use the screws supplied together with the wedges.

- Insert the 2 plastic wedges onto the rear ventilation cover as illustrated in the figure.

Installation
3.3* Adjusting the feet
If the product stands unbalanced after installation, adjust the feet on the front by rotating them to the right or left.
If your product does not have a wine compartment or is not a glass door, your product does not have adjustable stands; the product has fixed stands.

To adjust the doors vertically:
Loosen the fixing nut located at the bottom.
Rotate the adjusting nut according to the position of the door (clockwise/counter-clockwise).
Tighten the fixing nut in order to fix the position.
To adjust the doors horizontally:
Loosen the fixing nut located at the top.
Rotate the side adjusting nut according to the position of the door (clockwise/counter-clockwise).
Tighten the fixing nut which is at the top in order to fix the position.

Installation
The upper hinge group is fixed with 3 screws. The hinge cover is attached after the sockets are installed. Then the hinge cover is fixed with two screws.

3.4 Electric connection
| WARNING: Do not make connections via extension cables or multi-plugs. | |
| WARNING: Damaged power cable must be replaced by the Authorized Service Agent. | |
| If two coolers are to be installed side by side, there should be at least 4 cm distance between them. |
- Our company shall not be liable for any damages that will arise when the product is used without grounding and electrical connection in accordance with the national regulations.
- Power cable plug must be within easy reach after installation.
- Do not use extension cords or cordless multiple outlets between your product and the wall outlet.
4 Preparation
4.1 Things to be done for saving energy

Connecting your refrigerator to systems that save energy is dangerous as they may cause damage to the product.
- Do not leave the doors of your refrigerator open for a long time.
- Do not put hot food or drinks in your refrigerator.
- Do not overload the refrigerator. Cooling capacity will fall when the air circulation in the refrigerator is hindered.
- Do not place the refrigerator in places subject to direct sunlight. Install the product at least 30 cm away from heat sources such as hobs, ovens, heater units and stoves, and at least 5 cm away from electrical ovens.
- Pay attention to store your food in the refrigerator in closed containers.
- To be able to store maximum food in the freezer compartment of your refrigerator, the upper drawer has to be removed and placed on top of the glass shelf. Power consumption stated for your refrigerator has been determined after removing the icematic and the upper drawers to allow maximum loading. It is strongly recommended to use the lower drawers in the freezer and the multizone compartment while loading.
- Since hot and humid air will not directly penetrate into your product when the doors are not opened, your product will optimize itself in conditions sufficient to protect your food. In this energy saving function, functions and components such as compressor, fan, heater, defrost, lighting, display and so on will operate according to the needs to consume minimum energy while maintaining the freshness of your foodstuff.
- Airflow should not be blocked by placing foods in front of the freezer and the multizone compartment fans. Foods should be loaded by leaving a minimum of 5 cm space in front of the protective fan grid.
- Thawing the frozen foods in the fridge compartment both saves energy and preserves the quality of the foods.

The temperature of the room where your refrigerator is located should be at least 10°C / 50°F. Operating your refrigerator under cooler conditions is not recommended with regard to its efficiency.

The inside of your refrigerator must be cleaned thoroughly.

If two coolers are to be installed side by side, there should be at least 4 cm distance between them.
4.2 Recommendations about the fresh food compartment
- Make sure that the food does not touch the temperature sensor in the fresh food compartment. To allow the fresh food compartment to keep its ideal storage temperature, the sensor must not be hindered by food.
- Do not place hot foods or beverages inside the product.


Preparation
4.3 Initial use
Before using the product, make sure that all preparations have been made in accordance with the instructions given in the "Important instructions regarding safety and environment" and "Installation" chapters.
- Clean the interior of the refrigerator as recommended in the "Maintenance and cleaning" section. Before you start the refrigerator, make sure that the interior is dry.
- Plug the refrigerator into a grounded socket. The interior illumination is lit when the door of the refrigerator is opened.
- Operate the refrigerator for 6 hours without placing any food in it and do not open its door unless it is necessary.

You will hear a noise when the compressor starts up. The liquids and gases sealed within the refrigeration system may also give rise to noise, even if the compressor is not running, and this is quite normal.

Front edges of the refrigerator may feel warm. This is normal. These areas are designed to be warm to avoid condensation.
5 Operating the product
5.1 Indicator panel
The touch-controlled indicator panel allows you to set the temperature and control the other functions related to the refrigerator without opening the door of the product. Just press the relevant buttons for function settings.


Figures in this user manual are schematic and may not match the product exactly. If the subject parts are not included in the product you have purchased, then those parts are valid for other models.
Operating the product
1. Quick Cool Function Indicator
This indicator will light up when the quick refrigeration function is activated.
2. Fridge Compartment Temperature Indicator
It displays the temperature of the fridge compartment; it may be set at 8, 7, 6, 5, 4, 3, 2, 1.
It shows the temperature in degrees Fahrenheit. When the degree Fahrenheit indicator is activated, the temperature setpoint values are displayed in degrees Fahrenheit together with the display of its corresponding icon.
4. Key Lock Indicator
This indicator lights up when the Key Lock Function is activated. Buttons will not function if Key Lock mode is active.
5. Power Outage / High Temperature / Error Warning
This indicator lights up in the event of power outage, abnormal high temperature, and error warning. During prolonged power outages, the maximum temperature value reached by the freezer compartment blinks on the digital display. Upon inspecting the food in the freezer compartment, press the alarm off button to clear the warning. If you notice that this indicator is lit, please refer to the section “Recommended Solutions for Troubleshooting” in your manual.
6. Filter Replacement Icon
This icon is displayed when the water filter has to be replaced.
7. Wine Cellar Temperature Change Icon
It shows the compartment whose temperature has to be modified. When the compartment temperature change icon blinks, this means the corresponding compartment has been selected.
8. Freezer Compartment Temperature Indicator
It displays the temperature of the freezer compartment; it may be set at -18, -19, -20, -21, -22, -23, -24 °C.
9. Quick freeze function indicator
This indicator will light up when the Quick Freeze Function is activated.
It shows the temperature in degrees Fahrenheit. When the degree Fahrenheit indicator is activated, the temperature setpoint values are displayed in degrees Fahrenheit together with the display of its corresponding icon.
11. Quick freeze function button
Press this button to activate or deactivate the quick freezing function. When you activate this function, the freezer compartment will cool at a temperature below the setpoint.

Use the quick freeze function when you want to quickly freeze the food placed in the freezer compartment. If you want to freeze large amounts of fresh food, activate this function before putting the food into the product.

After 1 hour or when the freezer compartment reaches the desired temperature, the Quick Freeze Function will turn off automatically if you do not do so.

This function is not recalled when power restores after a power failure.
12. Filter Replacement
You can reset the water filter replacement alarm by pressing the Quick Freeze Button for 3 seconds.
13. FN Button
This button allows you to toggle between functions that you want to select. When you press this button, the icon whose function must be activated or deactivated starts blinking together with its indicator. The FN Button is automatically deactivated if not used within 20 seconds. Hence, you would have to press this button again if you wish to modify functions.
14. Celsius Indicator
It displays temperature in degrees Celsius. When the degree Celsius Indicator is activated, the temperature setpoint values are displayed in degrees Celsius together with the display of its corresponding icon.
Operating the product
15. OK Button
While scrolling through the functions using the FN button, activate the selected function by pressing the OK button. When the function is activated, the icon will remain lit.
16. Temperature Increase Button
Select the corresponding compartment with the selection button; the compartment icon for that compartment will blink. If you press the Temperature Increase Button during this process, the setpoint value will increase. If you press this button repeatedly, the setpoint value will be reset.
17. Freezer Compartment Temperature Change Icon
It shows the compartment whose temperature has to be modified. When the compartment temperature change icon blinks, it means the corresponding compartment has been selected.
18. Temperature Decrease Button
Select the corresponding compartment with the selection button; the compartment icon for that compartment will blink. If you press the Temperature Decrease Button during this process, the setpoint value will decrease. If you press this button repeatedly, the setpoint value will be reset.
19. Fridge Compartment Temperature Change Icon
It shows the compartment whose temperature has to be modified. When the compartment temperature change icon blinks, it means the corresponding compartment has been selected.
20. Setting Celsius and Fahrenheit Indicators
Press the FN button to select this setting, then press the OK button to choose between Fahrenheit and Celsius. When the corresponding temperature unit is selected, the Fahrenheit and Celsius indicators will light up.
21. ON/OFF Ice Maker Indicator
To turn off the Ice Maker, press the FN button until you reach the ice icon and the bottom line. The Ice Maker OFF icon and its ON indicator blink when you touch them. This allows you to determine if the Ice Maker is ON or OFF. When you press the OK button, the Ice Maker icon will display continuously while its indicator continues to blink throughout the process. If no button is pressed within 20 seconds, the icon and indicator will remain lit, and the Ice Maker will turn off. To turn the Ice Maker ON again, touch the icon and the indicator, and they will blink. If no button is pressed within 20 seconds, the icon and indicator will go off, and the Ice Maker will be ON again.

Indicates whether the icematic is on or off.

Water flow from the water tank will stop when this function is selected. However, ice made previously can be taken from the icematic.
22. Eco-Fuzzy Function Icon
Press the FN Button (until it reaches the e-letter icon and the bottom line). The Eco-Fuzzy Icon and indicator will blink when you touch them. Thus, you would be able to tell if the Eco-Fuzzy Function is activated or deactivated. When you press the OK button, the Eco-Fuzzy Icon will display continuously while its indicator will continue to blink throughout the process. If no button is pressed within 20 seconds, the icon and indicator will remain lit up. Hence, the Eco-Fuzzy Function will be activated. To deactivate the Eco-Fuzzy Function, touch its icon and indicator once more, then press OK. And both icon and indicator will begin to blink. If no button is pressed within 20 seconds, the icon and indicator will go off and the Eco-Fuzzy Function will be turned OFF.
23. Vacation Function Icon
To activate the Vacation Function, press the FN Button (until it reaches the umbrella icon and the bottom line). The Vacation Function Icon and indicator will blink when you touch them. Thus, you would be able to tell if the Vacation Function is activated or deactivated. When you press the OK button, the Vacation Function Icon will display continuously and this function will be activated. Its indicator will continue to blink throughout this process. Press the OK button to deactivate the Vacation Function. Both icon and indicator of the
Operating the product
Vacation Function will begin to blink and this function will be deactivated.
24. Celsius Indicator
It displays temperature in degrees Celsius. When the degree Celsius Indicator is activated, the temperature setpoint values are displayed in degrees Celsius together with the display of its corresponding icon.
25. Key lock
Press and hold the Key Lock button for 3 seconds. When the Key Lock symbol goes OFF,
Key Lock will be disabled. Buttons will not function if Key Lock mode is active. Press and hold the Key Lock button for 3 seconds again. When the Key Lock icon goes OFF, Key Lock will be disabled.
Press the Lock Key button if you want to prevent any changes to the temperature settings of the refrigerator.
26. Selection Button
Use this button to select the compartment whose temperature you intend to modify. By pressing this button, you can toggle between compartments. You can determine if the compartment was selected from the compartment icons (7, 17, 18, 20, 28, 29). Regardless of the blinking of the compartment icon, the compartment with the temperature setpoint value you want to modify will be selected. You can then change the setpoint by pressing the setpoint decrease button (27) and the setpoint increase button (19) of the compartment. If you do not press the selection button within 20 seconds, the compartment icon will go off. Hence, you would have to press this button again if you wish to select a compartment.
27. Alarm off warning
In case of power outage/high temperature alarm, and after inspecting food kept in the freezer compartment, press the alarm off button to clear the warning.
28. Quick Cool Function Button (QuickCool)
The button has two functions. To activate or deactivate the quick cool function, press it briefly. The Quick Cool indicator will turn off and the product will return to its normal settings.
Sabbath Mode:
Press the OK button for 3 seconds to activate or deactivate the Sabbath Mode. When Sabbath Mode is activated, the display, alarm, door opening, or light buttons will not function.


If the user does not deactivate the Sabbath mode, the refrigerator will automatically cancel it in 76 hours.

Use the quick cooling function when you want to quickly cool the food placed in the fridge compartment. If you want to cool large amounts of fresh food, activate this function before putting the food into the product.

After 24 hours or when the refrigerator compartment reaches the desired temperature, the Quick Cool Function will turn off automatically if you do not do so.

If you press the quick cooling button repeatedly with short intervals, the electronic circuit protection will be activated and the compressor will not start up immediately.

This function is not recalled when power restores after a power failure.
29. Wine Cellar Temperature Indicator
The temperature setpoint values of the wine cellar compartment display.
Operating the product
5.2 Indicator panel
The touch-control indicator panel allows you to set the temperature and control other functions related to the product without opening the refrigerator door. Simply press the relevant buttons for function settings.

1. On/Off function
Press the On/Off button for 3 seconds to turn the fridge off or on.
2. Quick freeze function button
Press this button to activate or deactivate the quick freeze function. When activated, the freezer compartment will be cooled to a temperature lower than the set value.

Use the quick freeze function when you want to quickly freeze food placed in the freezer compartment. If you want to freeze large amounts of fresh food, activate this function before putting the food into the product.

If you do not cancel it, Quick Freeze will cancel itself automatically after 1 hour at the most, or when the fridge compartment reaches the required temperature.

This function is not recalled when power restores after a power failure.
3. Select button
Use this button to select the compartment whose temperature you want to change. Switch between
the compartments by pressing this button. The selected compartment can be identified from the compartment icons (6, 25, 24). Whichever compartment icon is illuminated, that compartment's temperature set value can be changed. Then, you can change the set value by pressing the compartment set value Temperature Adjustment button (4).
4. Temperature Adjustment / Temperature Decrease
When pressed, decreases the temperature of the selected compartment.
5. Quick freeze indicator
This icon lights when the Quick Freeze function is active.
6. Fridge compartment indicator
When this indicator is active, the temperature of the fridge compartment is displayed on the temperature value indicator. The fridge compartment can be set to 8, 7, 6, 5, 4, 3, 2, or 1°C / 46, 45, 44, 43, 42, 41, 40, 39, 38, 37, 36, 35, 34, or 33°F by pressing the Temperature Adjustment button (4).
7. Temperature value indicator
Shows the temperature value of the selected compartment.

Figures in this user manual are schematic and may not match the product exactly. If the subject parts are not included in the product you have purchased, then those parts are valid for other models.
Operating the product
It is a Fahrenheit indicator. When the Fahrenheit indication is activated, the temperature set values are shown in Fahrenheit and the relevant icon turns on.
9. Joker fridge icon
When you select the joker fridge icon using the FN button (16) and press the OK button (17), the joker cabin turns into a fridge cabin and operates as a cooler.
10. Joker cabin icon
It shows the joker cabin icon.
11. Joker freezer icon
When you select the joker freezer icon using the FN button (16) and press the OK button (17), the joker cabin turns into a freezer cabin and operates as a freezer.
12. Power failure/High temperature / error warning
This indicator illuminates during power failure, high temperature failures, and error warnings. During long-term power failures, the highest temperature value that the freezer compartment reaches will blink on the digital display. After checking the food located in the freezer compartment, press the alarm off button (19) to clear the warning.
13. Setting the Celsius and Fahrenheit indicator
Hover over this key using the FN key and select Fahrenheit and Celsius via the OK key. When the relevant temperature type is selected, the Fahrenheit and Celsius indicator turns on.
14. Vacation function icon
Press the FN key (until it reaches the umbrella icon) to activate the vacation function. When you hover over the vacation function icon, it starts flashing. Thus, you can understand whether the vacation function will be activated or deactivated. When you press the OK button, the vacation function indicator lights continuously and thus the Vacation function is activated. Press the OK key to cancel the vacation function. Thus, the vacation function indicator will start flashing and the vacation function will be cancelled.
15. Quick cooling function indicator
It turns on when the quick fridge function is activated.
16. FN button
Using this key, you can switch between the functions that you want to select. Upon pressing this key, the icon, whose function is required to be activated or deactivated, and this icon's indicator starts flashing. The FN button gets deactivated if not pressed for 20 seconds. You need to press this button to change the functions again.
17. OK button
After navigating the functions using the FN button, when the function is cancelled via the OK button, the relevant indicator flashes. When the function is activated, it remains on. The indicator continues to flash in order to show the icon it is on.
18. Quick cooling function button
The button has two functions. To activate or deactivate the quick cool function, press it briefly. Quick Cool indicator will turn off and the product will return to its normal settings.
19. Alarm off warning
In case of power failure/high temperature alarm, after checking the foods in the freezer compartment, press the alarm off button to clear the High temperature warning icon (12).
20. Filter reset
The filter is reset when the alarm off button (19) is pressed for 3 seconds. The filter reset icon goes off.
21. Eco fuzzy function icon
Press the FN key (until it reaches the letter e icon) to activate the eco fuzzy. When you hover over the eco fuzzy icon, it starts flashing. Thus, you can understand whether the eco fuzzy function will be activated or deactivated. When you press the OK button, the eco fuzzy function icon lights continuously during this process. If you do not press any button after 20 seconds, the icon remains on. Thus, the eco fuzzy function is activated. In order to cancel the eco fuzzy function, hover over the icon again and press the OK key. Thus, the eco fuzzy function icon will start flashing.
Operating the product
If you do not press any button within 20 seconds, the icon will go off and the eco fuzzy function will be cancelled.
22. Ice machine off icon
Press the FN key (until it reaches the ice icon) to switch off the ice machine. The ice machine off icon starts flashing when you hover over it, thus you can understand whether the ice machine will be turned on or off. When you press the OK button, the ice machine icon lights continuously during this process. If you do not press any button after 20 seconds, the icon and the indicator remain on. Thus, the ice machine is switched off. In order to switch on the ice machine again, hover over the icon. The ice machine off icon will start flashing. If you press the OK button, the icon will go off and thus the ice machine will be switched on again.

Indicates whether the icematic is on or off.

Water flow from the water tank will stop when this function is selected. However, ice made previously can be taken from the icematic.
23. Filter reset icon
This icon turns on when the filter needs to be reset.
24. Celsius indicator
It is a Celsius indicator. When the Celsius indication is activated, the temperature set values are shown in Celsius and the relevant icon turns on.
25. Joker compartment indicator
When this indicator is active, the temperature of the joker compartment is displayed on the temperature value indicator. Joker compartment set values change by pressing Temperature Adjustment button (4).
26. Freezer compartment indicator
When this indicator is active, the temperature of the freezer compartment is displayed on the temperature value indicator. Freezer compartment can be set to -18, -19, -20, -21, -22, -23 and -24 °C / 0, -2, -4, -6, -8, -10 and -12 °F by pressing Temperature Adjustment button (4).
Sabbath Mode:
(This feature is optional)
Press the Quick Cool Button for 3 seconds to activate or deactivate the Sabbath Mode. When Sabbath Mode is activated, the display, alarm, door opening or light buttons will not function.


Use quick cooling function when you want to quickly cool the food placed in the fridge compartment. If you want to cool large amounts of fresh food, activate this function before putting the food into the product.

After 24 hours or when the refrigerator compartment reaches the desired temperature, the Quick Cool Function will turn off automatically if you do not do so.

If you press the quick cooling button repeatedly with short intervals, the electronic circuit protection will be activated and the compressor will not start up immediately.

This function is not recalled when power restores after a power failure.
Operating the product
5.3 Freezing fresh food
- In order to preserve the quality of the food, it shall be frozen as quickly as possible when it is placed in the freezer compartment, use the fast freezing feature for this purpose.
- You may store the food longer in freezer compartment when you freeze them while they are fresh.
- Pack the food to be frozen and close the packing so that it would not allow entrance of air.
- Ensure that you pack your food before putting them in the freezer. Use freezer containers, foils and moisture-proof papers, plastic bags and other packing materials instead of traditional packing papers.
- Label each pack of food by adding the date before freezing. You may distinguish the freshness of each food pack in this way when you open your freezer each time. Store the food frozen before in the front side of compartment to ensure that they are used first.
- Frozen food must be used immediately after they are thawed and they should not be re-frozen.
- Do not freeze too large quantities of food at one time.
Operating the product
| Freezer Compartment Setting | Fridge Compartment Setting | Remarks |
| -18°C 4°C This is the normal recommended setting. | ||
| -20, -22 or -24°C | 4°C | These settings are recommended when the ambient temperature exceeds 30°C. |
| Quick Freeze 4°C | Use when you wish to freeze your food in a short time. Your product will return to its previous mode when the process is over. | |
| -18°C or colder | 2°C | Use these settings if you think that your fridge compartment is not cold enough because of the hot ambient conditions or frequent opening and closing of the door. |
5.4 Recommendations for preserving the frozen food
Compartment shall be set to -18°C at least.
- Put packages in the freezer as quickly as possible after purchase without allowing the to thaw.
- Check whether the "Use By" and "Best Before" dates on the packaging are expired or not before freezing it.
- Ensure that the package of the food is not damaged.
5.5 Deep-freeze information
According to IEC 62552 standards, the product shall freeze at least 4.5 kg of food at 25°C ambient temperature to -18°C or lower within 24 hours for every 100-litres of freezer volume. It is possible to preserve the food for a long time only at -18°C or lower temperatures.
You can keep the freshness of food for many months (at -18°C or lower temperatures in the deep freeze).
Foods to be frozen should not be allowed to come in contact with the previously frozen items to prevent them from getting thawed partially.
Boil the vegetables and drain their water in order to store vegetables for a longer time as frozen.
After draining their water, put them in air-proof packages and place them inside the freezer. Food such as bananas, tomatoes, lettuce, celery, boiled eggs, and potatoes are not suitable for freezing. When these foods are frozen, only their nutritional value and taste shall be affected negatively. They shall not be spoiled so that they would create a risk for human health.
5.6 Placing the food
| Freezer compartment shelves | Various frozen food such as meat, fish, ice cream, vegetables and etc. |
| Refrigerator compartment shelves | Food in pans, covered plates and closed containers, eggs (in closed container) |
| Door shelves of fridge compartment | Small and packaged food or beverage |
| Crisper Vegetables and fruits | |
| Fresh zone compartment | Delicatessen (breakfast food, meat products that shall be consumed in a short time) |
5.7 Door open warning
(This feature is optional)
The door open alert system of your refrigerator may differ depending on the model.
Version 1;
If the door of the product remains open for a certain time (between 60 s and 120 s), an audio warning signal sounds; depending on the product model, a visual warning signal (light flash) can also be displayed. If you close the door of the device or press a button on the screen of the device, if any, the warning sound will stop.
Version 2;
If the door of the device remains open for a certain period of time (between 60 s and 120 s), the door open alert is sounded. The door open alert is sounded gradually. First, an audible warning starts to sound. After 4 minutes, if the door is still not closed, a visual warning (lighting flash) is activated.
Operating the product
The door open alert will be delayed for a certain period of time (between 60 s and 120 s) when any key on the product screen, if any, is pressed. Then the process will start again. When the device door is closed, the door open alert will be cancelled.
5.8 Chiller compartment
Chiller compartments allow you to prepare the food for freezing. You can also use these compartments to store your food at a temperature a few degrees below the fridge compartment.
You can increase the inner volume of your refrigerator by removing any of the chiller compartments:
- Pull the compartment towards yourself until it stops.
- Lift the compartment about 1 cm up and pull towards yourself to remove it from its seating.
5.9 Crisper
Crisper of the refrigerator is designed specially to keep the vegetables fresh without losing their humidity. For this purpose, cool air circulation is intensified around the crisper in general. Remove the door shelves that stand against the crisper before removing the crisper.
5.10 Humidity-controlled crisper
(This feature is optional)
Humidity rates of fruits and vegetables are kept under control thanks to the humidity-controlled crisper and thus the food is ensured to stay fresh for a longer period.
We recommend that you place leafy vegetables such as lettuce and spinach and vegetables sensitive to humidity loss as horizontally as possible when putting them in the crisper; not in a vertical position on their roots.
While the vegetables are being replaced, their specific weights should be taken into consideration. Heavy and hard vegetables must be placed at the bottom of the crisper and light and soft vegetables must be on the upper part.
Never leave the vegetables in their plastic bags in the crisper. If they are left in their plastic bags, this will cause them to rot in a little while. If you do not prefer the vegetable to get in contact with other vegetables for hygienic reasons, use perforated paper or a similar material instead of plastic bags.
Do not place pears, apricots, peaches etc., especially those fruits that generate large amounts of ethylene, in the same crisper with other fruits and vegetables. The ethylene gas emitted by these fruits cause other fruits to ripen sooner and to rot in a shorter span of time.

5.11 Egg tray
You can install the egg holder to the desired door or body shelf.
Never keep the egg holder in the freezer compartment.
5.12 Movable Middle Section
Movable middle section is intended to prevent the cold air inside your refrigerator from escaping outside.
1- Sealing is provided when the gaskets on the door press on the surface of the movable middle section while the fridge compartment doors are closed. 2- Another reason that your refrigerator is equipped with a movable middle section is that it increases the net volume of the fridge compartment. Standard middle sections occupy some non-usable volume in the refrigerator. 3- The movable middle section is closed when the left door of the fridge compartment is opened. 4- It must not be opened manually. It moves under the guidance of the plastic part on the body while the door is closed.
5.13 Cool Control Storage Compartment
(This feature is optional)
The Cool Control Storage Compartment of your refrigerator may be used in any desired mode by adjusting it to fridge (2/4/6/8 °C) or freezer (-18/-20/-22/-24) temperatures. You can keep the compartment at the desired temperature with the Cool Control Storage Compartment's Temperature Setting Button. The temperature of the Cool Control Storage Compartment may be set to 0 and 10 degrees in addition to the fridge compartment temperatures and to -6 degrees in addition to the freezer compartment temperatures. 0 degree is used to store the deli products longer, and -6 degrees is used to keep the meats up to 2 weeks in an easily sliceable condition.
The feature of switching to a Fridge or Freezer compartment is provided by a cooling element located in the closed section (Compressor
Compartment) behind the refrigerator. During operation of this element, sounds similar to the sound of seconds heard from an analogue clock may be heard. This is normal and is not fault cause.
5.14 Blue light
(in some models)
Crisper of the refrigerator are illuminated with a blue light. Foodstuff stored in the crisper continue their photosynthesis by means of the wavelength effect of blue light and thus, preserve their freshness and increase their vitamin content.
Operating the product
5.15 Odour filter
Odour filter in the air duct of the fridge compartment prevents build-up of unpleasant odours in the refrigerator.
5.16 Wine cellar compartment
(This feature is optional)

1 – Fill your cellar compartment
Wine cellar was built to contain up to 28 front bottles + 3 bottles accessible using a telescopic rack. These maximum quantities declared are given for information purpose only and correspond to tests carried out with a “Bordelaise 75cl” standard bottle.
2- Suggested optimum service temperatures
Our advice: If you mix different types of wines, choose a 12 ° Celsius setting just like in a real cellar. For white wines, which are to be served between 6 and 10 °, think of putting your bottles in the refrigerator 1/2 hour before serving, the refrigerator will be able to maintain the bottles at the preferred temperature. As regards red wines, they will heat up slowly at room temperature when serving.
16 -17°C Fine Bordeaux wines - Red 15 - 16°C Fine Burgundy wines- Red 14 -16°C Grand crus (great growth) of dry white wines 11 -12°C Light, fruity and young red wines 10 -12°C Provence rosé wines, French wines 10 -12°C Dry white wines and red country wines
Operating the product
8 - 10°C White country wines 7 - 8°C Champagnes 6-°C Sweet white wines
3- Suggestions relating to the opening of a wine bottle before tasting:
White wines About 10 minutes before serving
Young red wines About 10 minutes before serving
Thick and mature red wines About 30 to 60 minutes before serving
4- How long can an open bottle be preserved?
Unfinished bottles of wine must be cocked properly and can be preserved in a cold and dry place during the following periods:
Water dispenser at the door (in some models) White wines Red wines
75 % full bottle 3 to 5 days 4 to 7 days
50 % full bottle 2 to 3 days 3 to 5 days
Less than 50% 1 day
5.17 Use of internal water dispenser and water dispenser at the door (in some models)
After connecting the refrigerator to a water source or replacing the water filter, flush the water system. Use a sturdy container to depress and hold the water dispenser lever for 5 seconds, then release it for 5 seconds. Repeat until water begins to flow. Once water begins to flow, continue depressing and releasing the dispenser paddle (5 seconds on, 5 seconds off) until a total of 4 gal. (15L) has been dispensed. This will flush air from the filter and water dispensing system, and prepare the water filter for use. Additional flushing may be required in some households. As air is cleared from the system, water may spurt out of the dispenser.
Allow 24 hours for the refrigerator to cool down and chill water. Dispense enough water every week to maintain a fresh supply.


After 5 minutes of continuous dispensing, the dispenser will stop dispensing water to avoid flooding. To continue dispensing, press the dispenser paddle again.
5.18 Dispensing water
Hold a container under the dispenser spout while pressing the dispenser pad.
Release the dispenser pad to stop dispensing.

It is normal for the first few glasses of water taken from the dispenser to be warm.

If the water dispenser is not used for a long period of time, dispose of the water before using it to obtain fresh water.
Operating the product

Built-in water dispenser (in some models)

5.19 For using water dispenser

Before using your fridge for the first time and after replacing your water filter, the water dispenser may drip drops of water. To prevent water dripping or leaking from the dispenser, please bleed the air from the system by dispensing 5-6 gallons (about 20 liters) of water through the water dispenser before the first use and every time after you change the water filter. This will remove any air trapped in the system and stop the water dispenser from leaking. Checking coupler position and the straightness of the water line at the back of the unit will be required if there's an obstruction in water flow.

If your water dispenser is leaking just a few drops of water after you have dispensed some water, this is normal.
5.20 Icematic
(in some models)
To get ice from the icematic, fill the water tank in the fridge compartment with water up to the maximum level.
Ice cubes in the ice drawer may stick to each other and become a bulk due to hot and humid air in approximately 15 days. This is normal. If you cannot break the bulk apart, you can empty the ice container and make ice again.

It is recommended to change the water in the water tank if it remains in the water tank for more than 2-3 weeks.

Strange noises you hear from the refrigerator at 120-minute intervals are the sounds of ice-making and pouring. This is normal.

If you do not want to make ice, press the ice off icon to stop the icematic to save energy and prolong the service life of your refrigerator.

It is normal that a few drops of water drop from the dispenser after you have taken water.

Operating the product
5.21 Icematic and ice storage container
(in some models)
Using the Icematic
Fill the Icematic with water and place it into its seat. Your ice will be ready approximately in two hours. Do not remove the Icematic from its seating to take ice.
Turn the knobs on the ice reservoirs clockwise by 90 degrees.
Ice cubes in the reservoirs will fall down into the ice storage container below.
You may take out the ice storage container and serve the ice cubes.
If you wish, you may keep the ice cubes in the ice storage container.
Ice storage container
The ice storage container is only intended for accumulating ice cubes. Do not put water in it, otherwise it will break.
6 Maintenance and Cleaning
Cleaning the product regularly will prolong its service life.

WARNING: Disconnect the power before cleaning the refrigerator.
- Do not use sharp and abrasive tools, soap, household cleaning materials, detergents, gas, gasoline, varnish, or similar substances for cleaning.
- Melt a teaspoonful of carbonate in water. Moisten a piece of cloth in the water and wring it out. Wipe the device with this cloth and dry it off thoroughly.
- Take care to keep water away from the lamp's cover and other electrical parts.
- Clean the door using a wet cloth. Remove all items inside to detach the door and chassis shelves. Lift the door shelves up to detach. Clean and dry the shelves, then attach them back in place by sliding from above.
- Do not use chloric water or cleaning products on the exterior surface and chrome-coated parts of the product. Chlorine will cause rust on such metallic surfaces.
- Do not use sharp, abrasive tools, soap, household cleaning agents, detergents, kerosene, fuel oil, varnish, etc. to prevent removal and deformation of the prints on the plastic parts. Use lukewarm water and a soft cloth for cleaning, then wipe dry.
6.1. Preventing Bad Odour
The product is manufactured free of any odorous materials. However, keeping the food in inappropriate sections and improper cleaning of internal surfaces may lead to malodour.
To avoid this, clean the inside with carbonated water every 15 days.
- Keep the foods in sealed holders. Microorganisms may spread out of unsealed food items and cause malodour.
- Do not keep expired and spoilt foods in the refrigerator.
6.2. Protecting Plastic Surfaces
Oil spilled on plastic surfaces may damage the surface and must be cleaned immediately with warm water.
7. Troubleshooting
Check this list before contacting the service. Doing so will save you time and money. This list includes frequent complaints that are not related to faulty workmanship or materials. Certain features mentioned herein may not apply to your product.
The refrigerator is not working.
- The power plug is not fully settled. >>> Plug it in to settle completely into the socket.
- The fuse connected to the socket powering the product or the main fuse is blown. >>> Check the fuses.
Condensation on the side wall of the cooler compartment (MULTI ZONE, COOL, CONTROL and FLEXI ZONE).
- The door is opened too frequently >>> Take care not to open the product's door too frequently.
- The environment is too humid. >>> Do not install the product in humid environments.
- Foods containing liquids are kept in unsealed holders. >>> Keep the foods containing liquids in sealed holders.
- The product's door is left open. >>> Do not keep the product's door open for long periods.
- The thermostat is set to too low temperature. Set the thermostat to appropriate temperature.
Compressor is not working.
- In case of sudden power failure or pulling the power plug off and putting back on, the gas pressure in the product's cooling system is not balanced, which triggers the compressor thermic safeguard. The product will restart after approximately 6 minutes. If the product does not restart after this period, contact the service.
- Defrosting is active. >>> This is normal for a fully-automatic defrosting product. The defrosting is carried out periodically.
- The product is not plugged in. >>> Make sure the power cord is plugged in.
- The temperature setting is incorrect. >>> Select the appropriate temperature setting.
- The power is out. >>> The product will continue to operate normally once the power is restored.
The refrigerator's operating noise is increasing while in use.
- The product's operating performance may vary depending on the ambient temperature variations. This is normal and not a malfunction.
The refrigerator runs too often or for too long.
- The new product may be larger than the previous one. Larger products will run for longer periods.
- The room temperature may be high. >>> The product will normally run for long periods in higher room temperature.
- The product may have been recently plugged in or a new food item is placed inside. >>> The product will take longer to reach the set temperature when recently plugged in or a new food item is placed inside. This is normal.
- Large quantities of hot food may have been recently placed into the product. >>> Do not place hot food into the product.
- The doors were opened frequently or kept open for long periods. >>> The warm air moving inside will cause the product to run longer. Do not open the doors too frequently.
- The freezer or cooler door may be ajar. >>> Check that the doors are fully closed.
- The product may be set to temperature too low. >>> Set the temperature to a higher degree and wait for the product to reach the adjusted temperature.
- The cooler or freezer door washer may be dirty, worn out, broken or not properly settled. >>> Clean or replace the washer. Damaged / torn door washer will cause the product to run for longer periods to preserve the current temperature.
The freezer temperature is very low, but the cooler temperature is adequate.
- The freezer compartment temperature is set to a very low degree. >>> Set the freezer compartment temperature to a higher degree and check again.
The cooler temperature is very low, but the freezer temperature is adequate.
- The cooler compartment temperature is set to a very low degree. >>> Set the freezer compartment temperature to a higher degree and check again.
The food items kept in cooler compartment drawers are frozen.
Troubleshooting
- The cooler compartment temperature is set to a very low degree. >>> Set the freezer compartment temperature to a higher degree and check again.
The temperature in the cooler or the freezer is too high.
- The cooler compartment temperature is set to a very high degree. >>> Temperature setting of the cooler compartment has an effect on the temperature in the freezer compartment. Wait until the temperature of relevant parts reach the sufficient level by changing the temperature of cooler or freezer compartments.
- The doors were opened frequently or kept open for long periods. >>> Do not open the doors too frequently. • The door may be ajar. >>> Fully close the door.
- The product may have been recently plugged in or a new food item is placed inside. >>> This is normal. The product will take longer to reach the set temperature when recently plugged in or a new food item is placed inside.
- Large quantities of hot food may have been recently placed into the product. >>> Do not place hot food into the product.
Shaking or noise.
- The ground is not level or durable. >>> If the product is shaking when moved slowly, adjust the stands to balance the product. Also make sure the ground is sufficiently durable to bear the product.
- Any items placed on the product may cause noise. >>> Remove any items placed on the product.
The product is making noise of liquid flowing, spraying etc.
- The product's operating principles involve liquid and gas flows. >>> This is normal and not a malfunction.
There is sound of wind blowing coming from the product.
- The product uses a fan for the cooling process. This is normal and not a malfunction.
There is condensation on the product's internal walls.
- Hot or humid weather will increase icing and condensation. This is normal and not a malfunction.
- The doors were opened frequently or kept open for long periods. >>> Do not open the doors too frequently; if open, close the door. • The door may be ajar. >>> Fully close the door.
There is condensation on the product's exterior or between the doors.
- The ambient weather may be humid, this is quite normal in humid weather. >>> The condensation will dissipate when the humidity is reduced.
The interior smells bad.
- The product is not cleaned regularly. >>> Clean the interior regularly using a sponge, warm water, and carbonated water.
- Certain holders and packaging materials may cause odor. >>> Use holders and packaging materials that are free of odor.
- The foods were placed in unsealed holders. >>> Keep the foods in sealed holders. Micro-organisms may spread out of unsealed food items and cause malodour. Remove any expired or spoilt foods from the product.
The door is not closing.
- Food packages may be blocking the door. >>> Relocate any items blocking the doors.
- The product is not standing in full upright position on the ground. >>> Adjust the stands to balance the product.
- The ground is not level or durable. >>> Make sure the ground is level and sufficiently durable to bear the product.
The vegetable bin is jammed.
- The food items may be in contact with the upper section of the drawer. >>> Reorganize the food items in the drawer.
If The Surface Of The Product Is Hot.
- High temperatures may be observed between the two doors, on the side panels and at the rear grill while the product is operating. This is normal and does not require service maintenance! Be careful when touching these areas.
WARNING:
If the problem persists after following the instructions in this section, contact your vendor or an Authorised Service. Do not try to repair the product. This product is equipped with a lighting source of the "G" energy class.
The lighting source in this product shall only be replaced by professional repairers.
DISCLAIMER / WARNING
Some (simple) failures can be adequately handled by the end-user without any safety issue or unsafe use arising, provided that they are carried out within the limits and in accordance with the following instructions (see the “Self-Repair” section).
Therefore, unless otherwise authorized in the “Self-Repair” section below, repairs shall be addressed to registered professional repairers in order to avoid safety issues. A registered professional repairer is a professional repairer that has been granted access to the instructions and spare parts list of this product by the manufacturer according to the methods described in legislative acts pursuant to Directive 2009/125/EC.
However, only the service agent (i.e. authorized professional repairers) that you can reach through the phone number given in the user manual/warranty card or through your authorized dealer may provide service under the guarantee terms. Therefore, please be advised that repairs by professional repairers (who are not authorized by Beko) shall void the guarantee.
Self-Repair
Self-repair can be done by the end-user with regard to the following spare parts: door handles, door hinges, trays, baskets and door gaskets (an updated list is also available in support.beko.com as of 1st March 2021).
Moreover, to ensure product safety and to prevent risk of serious injury, the mentioned self-repair shall be done following the instructions in the user manual for self-repair or which are available in support.beko.com. For your safety, unplug the product before attempting any self-repair.
Repair and repair attempts by end-users for parts not included in such list and/or not following the instructions in the user manuals for self-repair or which are available in support.beko.com, might give rise to safety issues not attributable to Beko, and will void the warranty of the product.
Therefore, it is highly recommended that end-users refrain from the attempt to carry out repairs falling outside the mentioned list of spare parts, contacting in such cases authorized professional repairers or registered professional repairers. On the contrary, such attempts by end-users may cause safety issues and damage the product and subsequently cause fire, flood, electrocution and serious personal injury to occur.
By way of example, but not limited to, the following repairs must be addressed to authorized professional repairers or registered professional repairers: compressor, cooling circuit, main board, inverter board, display board, etc.
The manufacturer/seller cannot be held liable in any case where end-users do not comply with the above.
The spare part availability of the refrigerator that you purchased is 10 years.
During this period, original spare parts will be available to operate the refrigerator properly.
The minimum duration of guarantee of the refrigerator that you purchased is 24 months.
This product is equipped with a lighting source of the "G" energy class.
The lighting source in this product shall only be replaced by professional repairers.
https://eprel.ec.europa.eu/


https://eprel.ec.europa.eu/

8- Refrigerator drawer
2- Cheese
3.3* Setting the oldest


.5.19 Freezer drawer
(on some models)
5.20 oxide en cons delj and Delhi storage drawer
- PLEASE READ THIS MANUAL BEFORE USING THE PRODUCT
- THIS GUIDE WILL HELP YOU USE THE PRODUCT QUICKLY AND SAFELY
- SAFETY AND ENVIRONMENT INSTRUCTIONS
- YOUR REFRIGERATOR
- INSTALLATION
- PREPARATION
- OPERATING THE PRODUCT
- MAINTENANCE AND CLEANING
- TROUBLESHOOTING
- GENERAL SAFETY
- IMPORTANT INSTRUCTIONS REGARDING SAFETY AND ENVIRONMENT
- HC WARNING
- FOR MODELS WITH WATER DISPENSER
- INTENDED USE
- CHILD SAFETY
- COMPLIANCE WITH WEEE DIRECTIVE AND DISPOSING OF THE WASTE PRODUCT
- COMPLIANCE WITH ROHS DIRECTIVE
- PACKAGE INFORMATION
- APPROPRIATE LOCATION FOR INSTALLATION
- INSTALLING THE PLASTIC WEDGES
- ADJUSTING THE FEET
- ELECTRIC CONNECTION
- THINGS TO BE DONE FOR SAVING ENERGY
- RECOMMENDATIONS ABOUT THE FRESH FOOD COMPARTMENT
- INITIAL USE
- INDICATOR PANEL
- QUICK COOL FUNCTION INDICATOR
- FRIDGE COMPARTMENT TEMPERATURE INDICATOR
- KEY LOCK INDICATOR
- POWER OUTAGE / HIGH TEMPERATURE / ERROR WARNING
- FILTER REPLACEMENT ICON
- WINE CELLAR TEMPERATURE CHANGE ICON
- FREEZER COMPARTMENT TEMPERATURE INDICATOR
- QUICK FREEZE FUNCTION INDICATOR
- QUICK FREEZE FUNCTION BUTTON
- FILTER REPLACEMENT
- FN BUTTON
- CELSIUS INDICATOR
- OK BUTTON
- TEMPERATURE INCREASE BUTTON
- FREEZER COMPARTMENT TEMPERATURE CHANGE ICON
- TEMPERATURE DECREASE BUTTON
- FRIDGE COMPARTMENT TEMPERATURE CHANGE ICON
- SETTING CELSIUS AND FAHRENHEIT INDICATORS
- ON/OFF ICE MAKER INDICATOR
- ECO-FUZZY FUNCTION ICON
- VACATION FUNCTION ICON
- KEY LOCK
- SELECTION BUTTON
- ALARM OFF WARNING
- QUICK COOL FUNCTION BUTTON (QUICKCOOL)
- SABBATH MODE
- WINE CELLAR TEMPERATURE INDICATOR
- ON/OFF FUNCTION
- SELECT BUTTON
- TEMPERATURE ADJUSTMENT / TEMPERATURE DECREASE
- QUICK FREEZE INDICATOR
- FRIDGE COMPARTMENT INDICATOR
- TEMPERATURE VALUE INDICATOR
- JOKER FRIDGE ICON
- JOKER CABIN ICON
- JOKER FREEZER ICON
- POWER FAILURE/HIGH TEMPERATURE / ERROR WARNING
- SETTING THE CELSIUS AND FAHRENHEIT INDICATOR
- QUICK COOLING FUNCTION INDICATOR
- QUICK COOLING FUNCTION BUTTON
- FILTER RESET
- ECO FUZZY FUNCTION ICON
- ICE MACHINE OFF ICON
- FILTER RESET ICON
- JOKER COMPARTMENT INDICATOR
- FREEZER COMPARTMENT INDICATOR
- (THIS FEATURE IS OPTIONAL)
- FREEZING FRESH FOOD
- RECOMMENDATIONS FOR PRESERVING THE FROZEN FOOD
- DEEP-FREEZE INFORMATION
- PLACING THE FOOD
- DOOR OPEN WARNING
- CHILLER COMPARTMENT
- CRISPER
- HUMIDITY-CONTROLLED CRISPER
- EGG TRAY
- MOVABLE MIDDLE SECTION
- COOL CONTROL STORAGE COMPARTMENT
- BLUE LIGHT
- (IN SOME MODELS)
- ODOUR FILTER
- WINE CELLAR COMPARTMENT
- FILL YOUR CELLAR COMPARTMENT
- SUGGESTED OPTIMUM SERVICE TEMPERATURES
- SUGGESTIONS RELATING TO THE OPENING OF A WINE BOTTLE BEFORE TASTING
- HOW LONG CAN AN OPEN BOTTLE BE PRESERVED
- USE OF INTERNAL WATER DISPENSER AND WATER DISPENSER AT THE DOOR (IN SOME MODELS)
- DISPENSING WATER
- FOR USING WATER DISPENSER
- ICEMATIC
- ICEMATIC AND ICE STORAGE CONTAINER
- USING THE ICEMATIC
- ICE STORAGE CONTAINER
- PREVENTING BAD ODOUR
- PROTECTING PLASTIC SURFACES
- THE REFRIGERATOR IS NOT WORKING
- CONDENSATION ON THE SIDE WALL OF THE COOLER COMPARTMENT (MULTI ZONE, COOL, CONTROL AND FLEXI ZONE)
- COMPRESSOR IS NOT WORKING
- THE REFRIGERATOR'S OPERATING NOISE IS INCREASING WHILE IN USE
- THE REFRIGERATOR RUNS TOO OFTEN OR FOR TOO LONG
- THE FREEZER TEMPERATURE IS VERY LOW, BUT THE COOLER TEMPERATURE IS ADEQUATE
- THE COOLER TEMPERATURE IS VERY LOW, BUT THE FREEZER TEMPERATURE IS ADEQUATE
- THE FOOD ITEMS KEPT IN COOLER COMPARTMENT DRAWERS ARE FROZEN
- THE TEMPERATURE IN THE COOLER OR THE FREEZER IS TOO HIGH
- SHAKING OR NOISE
- THE PRODUCT IS MAKING NOISE OF LIQUID FLOWING, SPRAYING ETC
- THERE IS SOUND OF WIND BLOWING COMING FROM THE PRODUCT
- THERE IS CONDENSATION ON THE PRODUCT'S INTERNAL WALLS
- THERE IS CONDENSATION ON THE PRODUCT'S EXTERIOR OR BETWEEN THE DOORS
- THE INTERIOR SMELLS BAD
- THE DOOR IS NOT CLOSING
- THE VEGETABLE BIN IS JAMMED
- IF THE SURFACE OF THE PRODUCT IS HOT
- WARNING
- DISCLAIMER / WARNING
- SELF-REPAIR
- SETTING THE OLDEST
- FREEZER DRAWER
- (ON SOME MODELS)
Brand : BEKO
Model : GN1406223XP
Category : Refrigerator