
NH3214 - Television NIKKEI - Free user manual and instructions
Find the device manual for free NH3214 NIKKEI in PDF.


| Product Type | LED TV |
| Brand | Nikkei |
| Model | NH3214 |
| Screen Size | 32 inches (81 cm) |
| Resolution | 1366 x 768 (HD Ready) |
| Aspect Ratio | 16:9 |
| Refresh Rate | 60 Hz |
| Smart TV | No |
| Tuner | DVB-T/T2/C (built-in) |
| HDMI Ports | 2 |
| USB Ports | 1 (USB 2.0) |
| Composite Input | 1 (AV in) |
| Headphone Jack | 1 (3.5 mm) |
| Audio Output | 1 (optical S/PDIF) |
| Speaker Power | 2 x 8 W |
| Power Consumption (Operating) | 50 W |
| Power Consumption (Standby) | < 0.5 W |
| Power Supply | AC 100-240V, 50/60 Hz |
| Dimensions (W x H x D) with Stand | 732 x 478 x 185 mm |
| Dimensions (W x H x D) without Stand | 732 x 432 x 82 mm |
| Weight with Stand | 4.5 kg |
| Weight without Stand | 4.2 kg |
| VESA Mount Pattern | 100 x 100 mm |
| Energy Efficiency Class | A+ |
| Remote Control Included | Yes |
Frequently Asked Questions - NH3214 NIKKEI
User questions about NH3214 NIKKEI
0 question about this device. Answer the ones you know or ask your own.
Ask a new question about this device
Download the instructions for your Television in PDF format for free! Find your manual NH3214 - NIKKEI and take your electronic device back in hand. On this page are published all the documents necessary for the use of your device. NH3214 by NIKKEI.
USER MANUAL NH3214 NIKKEI
natural_image
Front view of a modern flat-screen TV with blank screen and stand (no visible text or symbols)IMPORTANT WARNINGS AND SAFETY ADVICE
We encourage you to read this user guide carefully and completely before installing and using your device.
It is important that this user guide is kept with the device for any new consultation. If this unit is to betransferred to another person, make sure that the user guide follows the unit so that the new user can be informed of the operation of the unit. In this user guide, the following symbols are used:
 | Important information about your personal safety and how to avoid damage to the device |
 | General information and advice |
 | Environmental information |
 | Fire hazard |
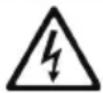 | Risk of electric shock |
Important safety instructions – please read carefully and keep for future reference

natural_image
Warning symbol of a lightning bolt inside a triangle (no text or numbers)To reduce the risk of fire or electric shock, do not expose this product to water, rain or moisture. To prevent the risk of electric shock, do not remove the cover or back of this product. In case of product failure, only qualified personnel can repair. There are no user-serviceable parts inside.
CAUTION!
Dangerous tension inside the product ! Do not open. Risk of electric shock ! No parts can be repaired by the end-user. Only qualified personnel can repair and maintain this product.
If the electric cord is damaged, it must be replaced by the manufacturer or qualified after-sales personnel in order to avoid any danger.
The product must be installed in accordance with local laws.
Damaged batteries must be properly disposed. In order to protect the environment, please dispose the batteries properly, in accordance with local laws (information is available at your reseller).
Remote control batteries (not included) shall not be exposed to excessive heat (e.g. from sun or fire).
Where to install the product
- Place the product on a straight, rigid and stable place. Do not place the product on a carpet.
- Do not place the product on top of another that may cause overheating (for example, a receiver or amplifier).
- Do not place anything underneath the product (for example, Cds or magazines).
Proper ventilation
- Place the product in a sufficiently-aerated place to avoid overheating. Allow at least 10cm spacing at the back and top of the product, and 5cm spacing on both sides to prevent overheating.
- Do not place items such as newspapers, tablecloth, curtains, in front of the ventilating openings.
Do not expose the product to high temperatures, moisture, water and dust.
- The apparatus shall not be exposed to dripping or splashing. No object filled with liquids, such as vases, shall be placed on the apparatus.
- Do not place other items close to this product that may damage it (for example, objects containing water or lightened candles).
- No naked flame sources, such as lighted candles, should be placed on the apparatus.
Electric supply
- Please unplug the product in case of prolonged non-use.
- If the supply cable is damaged, it must be replaced by the manufacturer or qualified after-sales personnel to avoid any danger.
- This product must be connected to an electrical supply 100-240V \~ 50/60Hz.
- The mains plug is used as the disconnect device, so the disconnect device shall remain readily operable
WARNING
Never place a television set in an unstable location. A television set may fall, causing serious personal injury or death. Many injuries, particularly to children, can be avoided by taking simple precautions such as:
- Using cabinets or stands recommended by the manufacturer of the television set.
- Only using furniture that can safely support the television set.
- Ensuring the television set is not overhanging the edge of the supporting furniture.
- Not placing the television set on tall furniture (for example, cupboards or bookcases) without anchoring both the furniture and the television set to a suitable support.
- Not placing the television set on cloth or other materials that may be located between the television set and supporting furniture.
- Educating children about the dangers of climbing on furniture to reach the television set or its controls.
- In case this television set is to be relocated to a different location, please keep in mind and apply the above safety instructions.
Information about the meaning of the conformity marking
The CE marking indicates that the product meets the main requirements of the European Directives 2014/35/EU (Low Voltage), 2014/30/EU (Electromagnetic Compatibility), 2011/65/EU (Restriction of the use of certain hazardous substances in electronic equipment), 2014/53/EU (Radio equipment).
Technical Specification:
Name: Television Product
Net Weight: 3.8Kg
Operation Temperature: 0°C\~40°C
TV Reception System: DVB-T2/C,DVB-S2

Auto Standby
In order to save energy, the electricity consumption of this product has been reduced in both operation mode and standby mode.
Furthermore, if no operation is carried out for four consecutive hours, the unit will automatically enter standby mode. Simply press the Standby button on the remote control to switch the unit back to operation mode.
Product Introduction
Congratulations! You have chosen the latest generation high definition television. Endowed with high display quality and light weight, it is power-saving and radiationless with high sensitivity television reception. The new generation television will bring you safe & comfortable brand new visual experience. Thank you for purchasing and using our products!
Accessories
User manual x1
Remote control x1
Safety
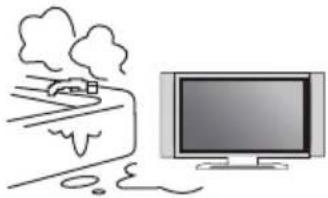
Please immediately pull out the AC power plug of adapter if there is abnormal sound or smell or it has sound but no picture, and contact with maintenance station after confirming no abnormality.


natural_image
Illustration of a computer monitor displaying a cartoon character (no text or symbols present)
natural_image
Simple line drawing of a landscape with a tree, a car, and a monitor (no text or symbols)TV should be kept free from rain, damp and dust for prevention of electric shock and short circuit.
TV should be kept from high temperature heating objects or direct sunlight. TV should be place with good ventilation.


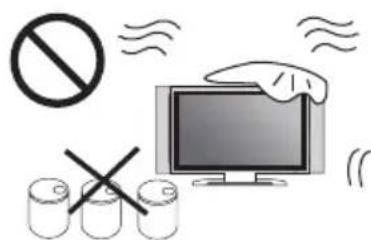
If necessary, you may clean the display with soft and clean cotton after pulling out the power plug, but do not emphatically and repeatedly wipe.
Scraping, tapping or striking the display with hard object or wiping the display with grinding object is forbidden.
Do not wipe the machine with naphtha or thinner, which will lead to transformation of enclosure or breakage of coating. It may result in dirt if the machine has been contacting with rubber or ethane for long time.
It's forbidden to contact the display with organic solvents such as alcohol or gasoline or chemical solvent such as acid or alkali, etc.
natural_image
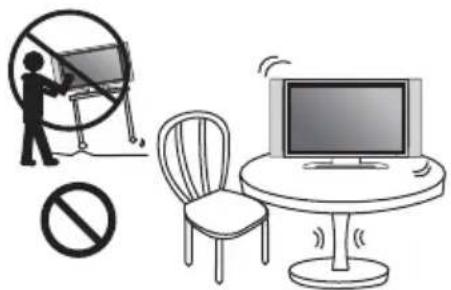
Illustration showing a person holding a monitor with a prohibition symbol, a chair, and a computer monitor (no text or symbols present)Do not put TV on unstable or shaky place
Please do not place the power line or signal line across walkway or at place where people usually come and go in case the line to be trampled. Do not overload the power line or power socket.

natural_image
Illustration of a cable being twisted from a computer monitor to a power cord (no text or symbols)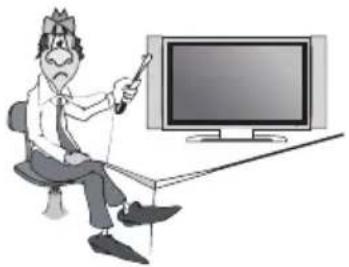
natural_image
Cartoon illustration of a man sitting on a chair watching a television (no text or symbols present)Please do not disassemble the back cover by non professionals as it has high voltage in the machine, in case for electric shock; and the internal adjustment and check should be conducted by professionals.
Do not put water container such as cosmetics or medicine liquid on TV.
Please pull out the plug and contact the maintenance station if there are abnormal objects or water in TV.

natural_image
Illustration of a computer monitor with a crossed-out 'No' symbol above it, no text or labels present.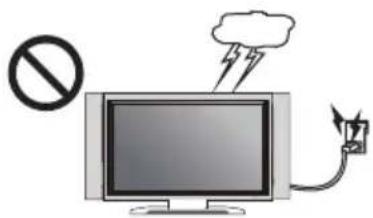
Please pull out the power plug of adapter in lightning strike, and pull out cable TV plug or outdoor antenna plug, in case the TV to be damaged. Do not contact the lead-in line of antenna.
Table Of Contents
| Important warnings and safety advice | 01 |
| I - Control Panel | 09 |
| II - Base Installation Guide | 10 |
| III - Wall Mounting instructions | 11 |
| IV - Connecting Cables | 12 |
| V - Remote Control | 13 |
| VI - Antenna Connections | 15 |
| VII - Watching Television Programs | 16 |
| VIII - First Time Installation | 17 |
| A - Channel | 17 |
| B - Picture | 19 |
| C - Sound | 19 |
| D - TIME | 19 |
| E - Setup | 20 |
| F - LOCK | 20 |
| IX - Important Notice | 22 |
| X -Troubleshooting | 23 |
This user guide is available in the following languages:
NR (translated from the original)
EN (translated from the original)
Any other translation would be a translation of the original version.
This user guide, its possible modifications or any new version, is available on our website.
Congratulations! Your have chosen the latest generation high definition television. Endowed with high display quality and light weight, it is power-saving and radiationless with high sensitivity television reception. The new generation television will bring you safe & comfortable brand new visual experience. Thank you for purchasing and using our products!
I - Control Panel
The command buttons are at the back of the TV.
Introduction for Each Key
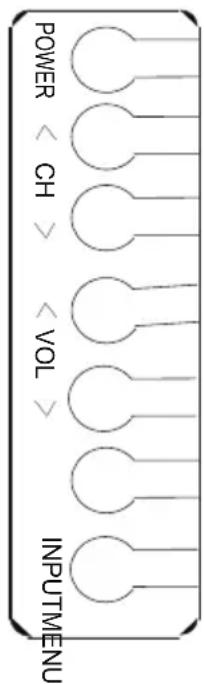
1 POWER
Turn the TV on or enter into standby mode.
② MENU
Enter/exit the main menu.
3 INPUT
Signal source selection button.
4 CH+
Channel upwards short cut key; skip to next channel no. and select the next option in the menu
5 CH-
Channel downwards short cut key; skip to previous channel no. and select the previous option in the menu.
6 VOL+
Volume increasing short cut key; enter into the next menu and adjust OSD options (increasing).
7 VOL-
Volume decreasing short cut key; enter into the next menu and adjust OSD options (decreasing).
II - Base Installation Guide
The Way Of Installing Base:
natural_image
Technical line drawing of a mechanical or electronic assembly with no visible text or symbols
natural_image
Line drawing of a vertical TV with a circular button labeled '✓' (no text or symbols on the device itself)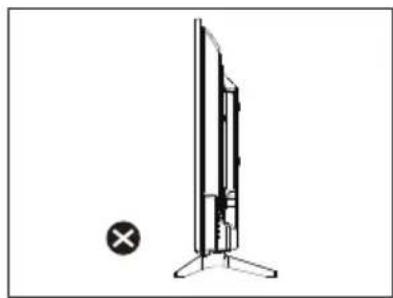
natural_image
Diagram of a modern TV with a stand and a cross symbol, no text or labels present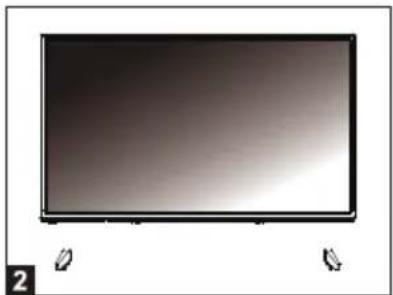
natural_image
Front view of a flat-screen monitor with control buttons at the bottom (no visible text or symbols on screen)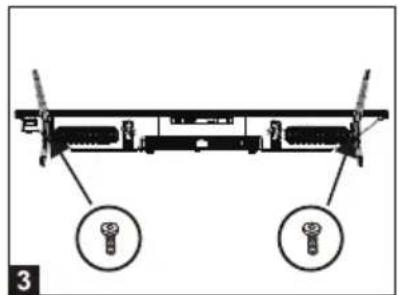

natural_image
Front view of a flat-screen monitor with a black frame and wheels (no text or symbols visible)- Please put the base on the desk as shown figure 1.
(the stand approximately 180 degrees from horizontal).
- Put the hole of the base upright into shaft of unit(as shown figure 2).
- Fix the stand and the screen with 4 screws (figure 3)
- The rendering after installed (as shown figure 4).
The Way Of Unloading Base:

natural_image
Technical diagram of a mechanical assembly with two circular insets showing bolt holes (no text or labels)
natural_image
Illustration of a hand pointing at a screen with a small icon, no text or symbols present- Please remove the screw between the base and shaft (as shown figure 1).
- Left hand hold the cabinet of the unit, right hand hold the base then remove the stand. (as shown figure 2)
III - Wall Mounting instructions
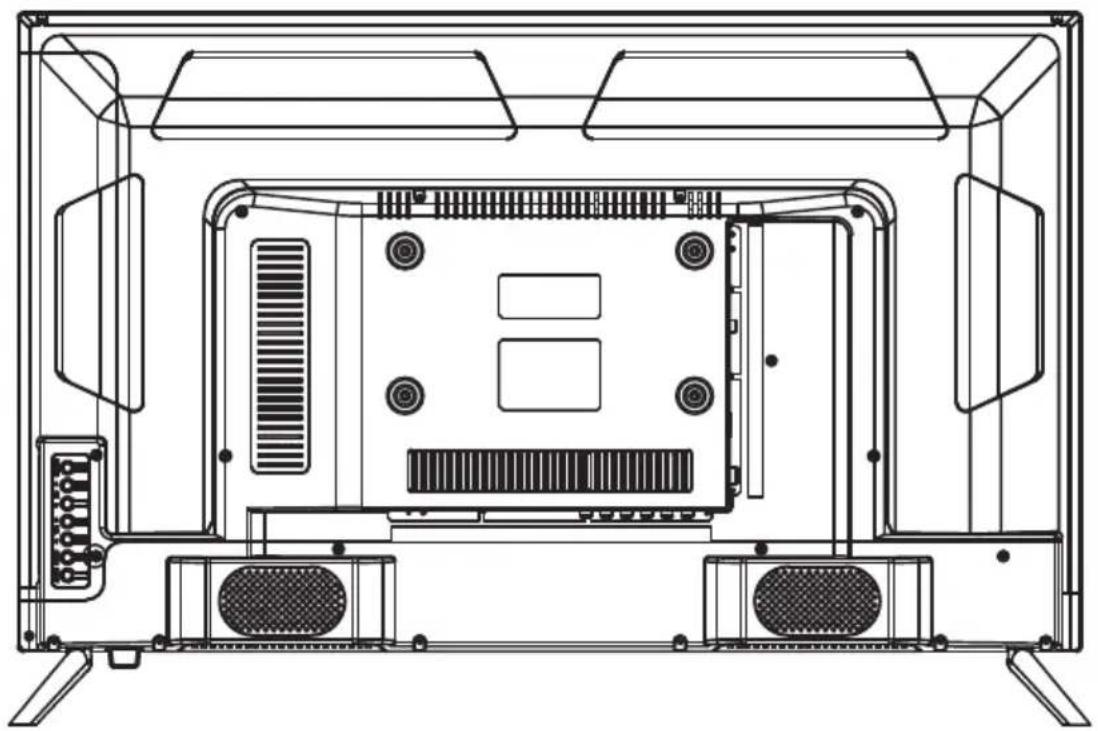
- Use standard M6x8mm screws (4 pieces, not included) to mount this TV. Using different screws as specified will damage the wall mounting support and will be outside the scope of product guarantee.
- Contact a professional technician for assistance when wall mounting your TV.
- Do not wall mount the TV while TV is turned on.
- Refer to the instruction of your wall mounting bracket.
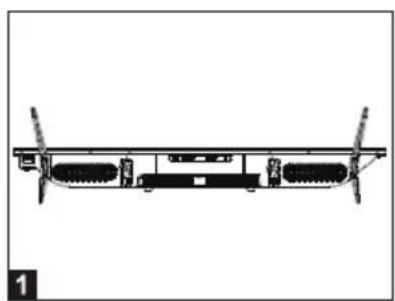
Back of your TV
natural_image
Technical line drawing of a computer monitor rear panel with ventilation slots and drive bays (no text or labels)IV - Connecting Cables
This TV has digital multimedia performance and can be connected to multiple external devices. The following diagram presents the connections to other video and audio


1. AC
AC 100-240V\~ 50/60Hz
2. EARPHONE OUTPUT
- COAXIAL (Digital TV sound output.)
4. HDMI
High-definition multimedia interface (Note: compatible video signal 480P/576P/720P/1080i/1080P)
5. AV IN
Connect to the left/right RCAvideo out connection of any vide resource.
6. RF S2
DVB-S.
7. RF T2
DVB-T/C.
8. MiniYPbPr IN
Component input terminal.
9. MiniAV IN
Connect to the left/right RCAvideo out connection of any vide resource.
10. CI SLOT
Insert a CI (common interface) card.
11. USB
Access multi-media files stored in the USB device.
(Note: compatible format includes: *.dat, *.vob, *.ts, *.mpg, *.avi, *.mkv and *.mp4 for video, *.jpg and *.bmp for photo, *.mp3 for music.)
V - Remote Control

Name
POWER
MUTE
NUMBERS
ASPECT
LIST
FAVORITE
MTS/AUDIO
SUBTITLE
MENU
SOURCE
NAVIGATION
EXIT
INFO
P.MODE
S.MODE
CH+/-, UP/DOWN
TELETEX /TXT/
SLEEP
PAUSE/Play
STOP
REWAND
FORWARD
NEXT/
BACK/
RED
GREEN
BLUE
YELLOW
Function
On/Off the power supply
Mute the sound
Number buttons
Select the aspect ratio
Channel list
Favorite channels
Multi Track Sound button
Subtitle sw ich
Main menu
Sw ich the input source
Navigation buttons
Exit
Display the info of the current place
Set up pictures
Set up sound mode
Channel up / down n
TELETEXT ON
On/off the power supply within / 0...240min
Play/Pause stop
Stop
Backw ard / TELETEXT menu
Forward
Next / TELETEXT color activator
Back / TXT/TELETEXT-TV mix
Red button for TELETEXT
Green button for TELETEXT
Blue button for TELETEXT
Yellow button for TELETEXT
BATTERY INSTALLATION
Install the batteries as shown in the following figures. Make sure the + and - terminals are positioned as indicated in the battery compartment (Fig. 1)-
USEFUL DURATION OF BATTERIES
- Normally the batteries last for a year, even if the consumption of the batteries depends on the effective use of the remote control.
- If the remote control does not work when it is used near the appliance, replace the batteries.
- Use two dry type 2xAAA batteries (batteries not included).
NOTE:
- Do not drop, step on or otherwise hit the remote control. This could damage the components or cause a malfunction.
- If the remote control is not used for a long time, remove the batteries.
Point the remote control at a distance of no more than 6 m from the remote sensor and within an angle of 60irc in front of the appliance (Fig. 2).
NOTE:
- The operating distance may vary depending on the brightness of the environment.
- Do not aim light sources at the remote sensor.
- Do not place any object between the remote control and the remote control sensor..
- Do not use this remote control when using the remote control of another device at the same time.
Fig. 1

flowchart
graph TD
    A["① Push"] --> B["② Open"]
    B --> C["③ Press"]
    C --> D["④ Press"]
Fig. 2

VI - Antenna Connections
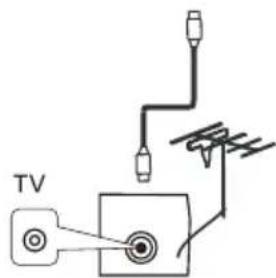
We recommend you use a 75Ω antenna cable so as to eliminate the disturbance caused by impedance mismatching. The antenna cable shall not be bundled together with the power cord.
Directly insert the 75Ω antenna cable plug into the antenna socket when applying cable television.
Note: The antenna should be checked periodically. If clear image is not available, shut down the power and then carefully check the antenna.

Power-on/Power-off
- Make sure all cables are disconnected from the main unit before connecting to the AC power source.
- Read the instructions carefully before connecting other devices.
Press the standby button again on the remote control for the television the indicating lamp becomes green, and then television image is available.
Press the standby button on the remote controller or the television to enter into standby state.
Power-saving & protection mode
- In video or PC state, the television will enter into lower power sleep state (standby state) to conduct power saving and protection after several minutes with no signal inputs.
VII - Watching Television Programs
MAKE SURE ALLTHE EQUIPMENTS AND POWER CORD ARE CONNECTED PROPERLY AND THE UNIT IS SET IN CORRECT MODE BEFORE KINDS OF OPERATIONS.
BASIC OPERATIONS
- Press POWER button on the unit or remote control to power ON the unit (indicator will glow green); press it again to power OFF (standby mode) the unit (indicator will glow red).
- Press SOURCE button on the unit or remote control to switch the unit to DTV or ATV mode.
SELECT DESIRED PROGRAM
- Press CH+ button to play next channel.
- Press CH- button to play previous channel.
- Press number buttons on remote control directly to select desired program.
NOTE: Press -/-- button repeatedly to switch the digit.
VOLUME CONTROL
- Press VOL+ or VOL- to adjust the level of current volume.
Available range: 0-100.
MUTE CONTROL
- Press MUTE button to mute the sound, press it again to turn on the sound.
SOURCE SETTING
- Press SOURCE button on the unit or remote control to display the input source list.
- Press UP or DOWN navigation button to select desired input source, then press OK button to confirm selection.
Available options: DTV, ATV, YPbPr, AV, HDMI, USB.
MULTIAUDIO SATLLITE
- Press AUDIO button on remote control and use navigation buttons to select desired audio language.
NOTE: To enable this function, make sure that the channel you are viewing supports multi-audio languages.
INFORMATION DISPLAY
- Press DISPLAY button on remote control to display information of current program.
VIII - First Time Installation
Mainmenu User Guide
1. First Time Installation
(1)3663OSD2021
This menu will show the first time you install this TV
1.1. Language: Press ◀/▶ to change the OSD language.
1.2. Country: Press ◀/▶ to change the country.
1.3. Environment: Press ◀/▶ to select Shop mode or home mode.
After configure the menu, press ENTER to start auto tuning or press exit to exit the menu.

2. Input Source
Press SOURCE to show input source list.
2.1. Press ▼/▲ to select and ENTER to confirm.
2.2. The menu will be automatically hidden in a few seconds, or press EXIT to clear on-screen menu.

3. Menu Function Description
3.1. Channel Menu
The channel menu is available only in DTV and ATV mode. Press MENU to display this menu default, if you want to Display other menu, press ◀ / ▶ to select.
LCN must be ON to get the channels in correct order (national ranking)!
Channel menu in ATV
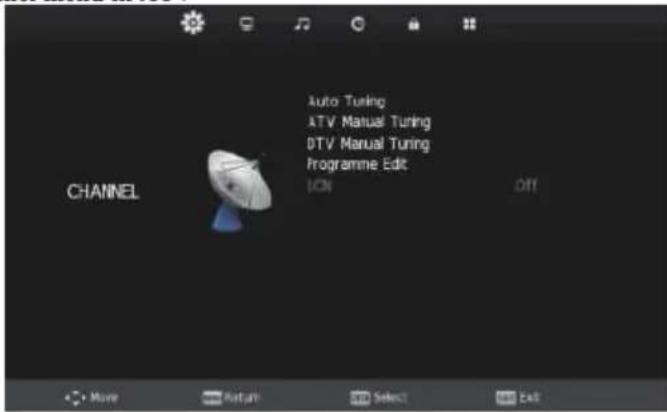

Channel menu in DTV
3.1.1. Auto Tuning
Auto Tuning can find out all effective channel automatically.
✿ Press ▼/▲ to select Auto Tuning, then press ENTER to configure the Tuning Setup menu.
◇ Press ▼/▲ to select and press ◀ / ▶ to change the setting or tuning, and then press ENTER to start tuning.
If you want to stop searching, press EXIT, and press ◀ to confirm or ▶ to cancel.
◇ (Opt.: DVB-T, DVB-C)


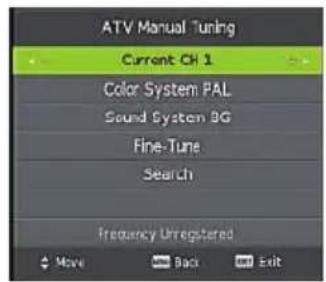
3.1.2. ATV Manual Tuning
✿ ATV Manual Tuning can search up or down, and will pause when find a channel.
◇ Press ◀ to search down from the current frequency, and press ▶ to search up.
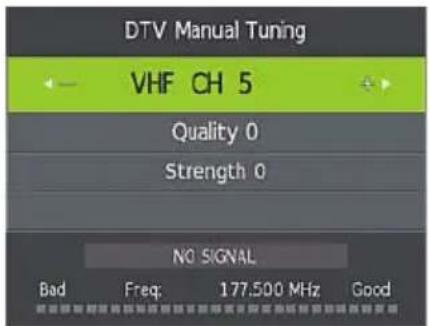
3.1.3. DTV Manual Tuning
✿ Press ◀ / ▶ to decrease or increase the current frequency. When the TV find signal in current frequency, the menu will show the strength of signal on the bar.
When the TV found signal in current frequency, press ENTER to search all channel in current frequency.
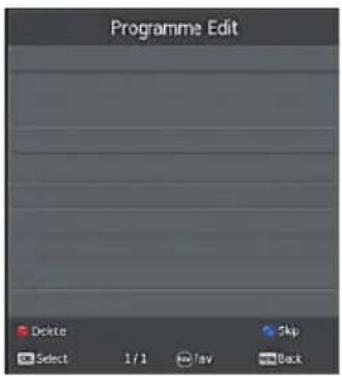
3.1.4. Programme Edit
There are four shortcut keys for programming the channel. First press ▼/▲ to highlight the channel, then:
◇ Delete: Delete the channel.
◇ Rename: Rename the channel (only show when input source is ATV).
◇ Move: Set the channel to moving state then press ▼/▲ to move it to the position you want.
✿ Skip: Skip the selected channel. (Your TV set will skip the channel automatically when using CH+/-.)
◇ ENTER: Press ENTER button to display the channel focus.
◆ Favorite: Press FAV to set favorite channel.
◆ Back: Press MENU button to return to previous menu.
3.2. Picture Menu
Press MENU to display the main menu, and press ◀ / ▶ to select the Picture Menu. Highlight the item and press ▼/▲ to select corresponding sub-menu.

3.2.1. Picture Mode: Dynamic/Standard/Mild/Personal.
3.2.2. Contrast
3.2.3. Brightness
3.2.4. Color
3.2.5. Tint/Hue/
3.2.6. Sharpness
3.2.7. Color Temperature: Select the color temperature
that you feel comfortable.
3.2.8. Noise Reduction: You can reduce the noise of the signal by setting the item. (opt.: Can't use when input source is PC).
3.2.9. HDMI Mode: Press to select Auto/Video/PC mode. (Only used when input source is HDMI)
3.3. Sound Menu
Press MENU to display the main menu, and press ◀ / ▶ to select the Sound Menu.

3.3.1. Sound Mode: Standard/Movie/Music/Sports/Personal.
3.3.2. Treble: Treble adjust.
3.3.3. Bass: Bass adjust.
3.3.4. Balance: Adjust the level of sound which is from the left and right speakers.
3.3.5. Auto /Volume: When set on, quick volume change will be smoothed.
3.3.6. SPDIF Mode: Press to select SPDIF mode, off/pcm/auto. (COAX port)
3.3.7. AD Switch: Press to select audio.
3.4. Time Menu

Press MENU to display the main menu, and press ◀/▶ to select the Time Menu.
3.4.1. Clock: Sets the system time.
3.4.2. Time Zone: Select time zone.
3.4.3. Sleep Time: Select the time in minutes (10min, 20min, 30min, 60min, and 90min) that you want the TV to
shut off automatically after you set the time. Set off to cancel setting.
3.4.4. Auto standby: Select the time in hours (3H/4H/5H) that you want the TV to shut off automatically. Set off to cancel setting.
3.4.5. OSD Timer: Set display time of OSD (5s, 15s, 30s).
3.5. Lock Menu
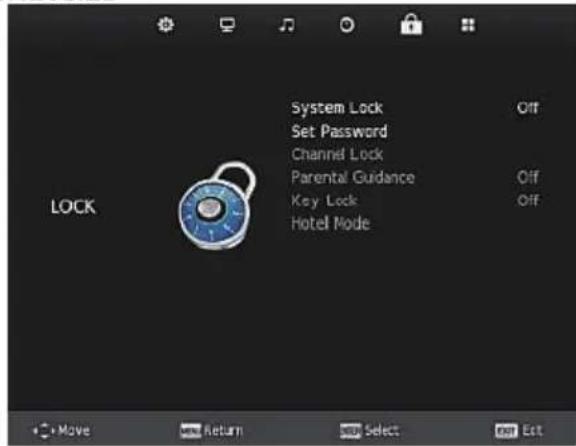

Press MENU to display the main menu, and press ◀/▶ to select the Lock Menu.
3.5.1. System Lock: System lock switch. Default lock : "0000"
3.5.2. Set Password: Set the system password lock.
3.5.3. Chanel /Block Program: Lock the channel.
3.5.4. Parental Guidance: Choose the Parental Guidance level.
3.5.5. Key lock: Lock or unlock the key.
3.5.6. Hotel mode: Only available if the System lock is on.
3.6. SETUP Menu
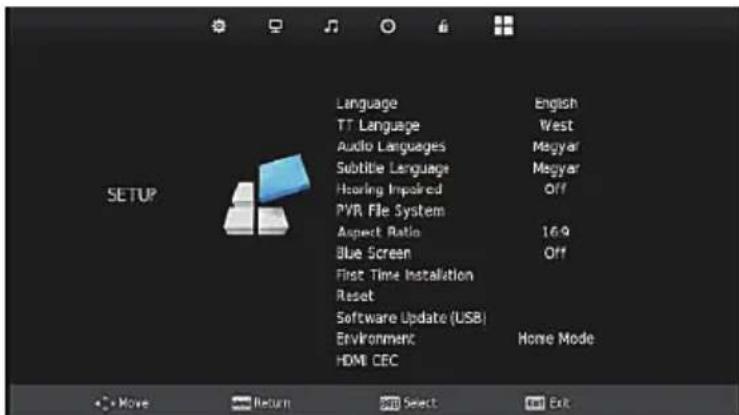
Press MENU to display the main menu, and press ◀ / ▶ to select the SETUP Menu.
3.6.1. Language: Set the OSD display language.
3.6.2. TT language: Set the image-text language.
3.6.3. Audio Languages: Set the Audio language.
3.6.4. Subtitle Language: Press to select the items.
3.6.5. Hearing Impaired: Press to set the Hearing Impaired to "on" or "off".
3.6.6. PVR File System: Set the recording file system.
3.6.7. Aspect Ratio: Set the aspect ratio Auto/4:3/16:9/Zoom1/Zoom2.
3.6.8. Blue screen: Select blue screen or not.
3.6.9. First Time Installation: Press ▶ or ENTER to enter relevant options including OSD Language, Country and Environment.
3.6.10. Reset: Recall the default setting.
3.6.11. Software Update (USB): Upgrade the software.
3.6.12. Environment: Press to select or ◀ / ▶ to choose home mode or shop mode.
3.6.13. HDMI CEC: Press to select HDMI CEC/HDMI ARC/Auto Standby/Auto TV on/ Device List/Device menu.
4. Media
The color of the icon means whether your TV has detected a USB memory or not. Blue: Yes; Gray: No Press ◀ / ▶ to select Photo/Music/Movie/Text icon and press ENTER to enter the USB memory. For details:

4.1. Photo
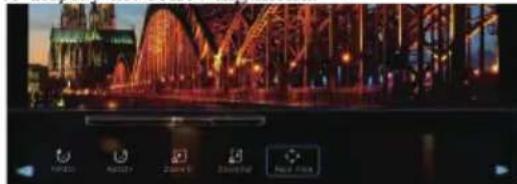
Select a picture file and press ENTER to view, and it will display all the picture in the folder automatically. Press ENTER to display the following menu.
natural_image
Nighttime cityscape featuring a brightly lit arched bridge and illuminated skyscrapers (no visible text or symbols)
natural_image
Nighttime cityscape with illuminated bridge and illuminated buildings (no visible text or symbols)4.1.1. Play: Press to play/ pause the slideshow.
4.1.2. Next/Prev.: Press "NEXT/PREV." button to skip to view the photo which are select the photo.
4.1.3. Stop: Press "STOP" button to stop and return.
4.1.4. Repeat ALL: Press ENTER to select the repeat mode: Repeat 1/ALL/None.
4.1.5. Music Off: Press to play or stop the background music.
4.1.6. Playlist: Press to view the list of pictures.
4.1.7. Info: Press to display the information of the current picture (Resolution/ Size/ Date/Time).
4.1.8. Rotate: Rotate the picture.
4.1.9. Zoom In: Zoom the picture in.
4.1.10. Zoom Out: Zoom the picture out.
4.1.11. Move View: Zoom out the picture first, Highlight the icon and press ENTER, then press ▼/▲ & ◀/▶ to move the picture.
4.2. Music


Press ENTER to display the menu.
4.2.1. Play/Pause: Press to play or stop.
4.2.2. FB: Press to play slower.
4.2.3. FF: Press to play faster.
4.2.4. Prev.: Press to play the previous song.
4.2.5. Next: Press to play the next song.
4.2.6. Stop: Press to stop and return to folder interface.
4.2.7. Repeat ALL: Press to select the repeat mode:
Repeat 1/ALL/None.
4.2.8. Set AB: Set AB mode.
4.2.9. Mute: Turn on or turn off the MUTE.
4.2.10. Playlist: Select "playlist" to display play list.
4.2.11. Info: Select "info" to display the music information.
4.2.12. Goto Time : select "goto time" to setup play time.
4.3. Movie

Press ENTER to display the menu.
4.3.1. Play /Pause: Press to play or stop.
4.3.2. FB: Press to play slower.
4.3.3. FF: Press to play faster.
4.3.4. Prev.: Press to play previous movie.
4.3.5. Next: Press to play next movie.
4.3.6. Stop: Press to stop and back to folder interface.
4.3.7. CharSet: Press to select charset.
4.3.8. Repeat ALL: Press to select the repeat mode: Repeat 1/ALL/None.
4.3.9. Set AB: Set AB mode.
4.3.10. Playlist: Press to view the list of pictures.
4.3.11. Info: Press to display the information of the current movie.
4.3.12.Slow: Slow foreword.
4.3.13.Step: Step forward.
4.3.14. Goto Time: Select "goto time" to setup play time.
4.3.15 Zoom In: Zoom the movie in.
4.3.16 Zoom Out: Zoom the movie out.
4.3.17. Aspect Ratio: Set the aspect ratio, Auto /4:3/16:9/Zoom1/Zoom2.
4.3.18. Move View: Zoom in the picture first. Highlight the icon and press ENTER, then press ▼/▲ & ◀/▶ to move the movie.
4.4.Text

4.4.1. Previous Page: Press to the previous page.
4.4.2. Next Page: Press to the next page.
4.4.3. Prev.: Press to play previous text.
4.4.4. Next: Press to play next text.
4.4.5. Stop: Press to stop and back to folder interface.
4.4.6. Char Set: Press to select char set.
4.4.7. Music On/Off: Press to play or stop the background music.
4.4.8. Playlist: Press to view the list of texts.
4.4.9. Info: Press to display the information of the current movie.
IX - Important Notice
The display of this television is made up of a large number of colour pixels. Although it has at least 99.999% of effective pixels, some black dots or bright spots (red, green or blue) may appear constantly on the screen. This is a characteristic of the screen (according to industrial standards), and is not a defect.
Sometimes, the screen may include an unlit pixel, which will be seen as a blue, red, green or black dot. This does not affect the functioning of the product and should be considered normal.
Note on Defective Pixels
Your product has been manufactured with great care. Nevertheless, it is possible that some pixels remain constantly on or unlit. Please refer to the table below about the tolerance level for defective pixels on this product.
| Screen Size | Resolution | No. of Bright or Dark Sub-Pixels (Color Pixels) | No. of Bright or Dark Pixels (White or Black) | Continuous Line |
| 32 | 1366*768 | 5 | 2 | 0 |
X - Troubleshooting
No image and voice [IMAGE] [IMAGE] | Possible causes:*Power cord, antenna or input devices are not connected;*The TV set is not powered on.Solutions:*Check Power cord , antenna and input devices;*Press Power key on the remote control;*Press Power key on the set to power it off for 5 seconds and then re-power it on . |
No voice [IMAGE] [IMAGE] | Possible causes:*The volume is too low; Muted or cancelled;*Incorrect sound system.Solutions:*Press Volume key to turn up the volume;*Press Mute key to cancel Mute mode.Well connect vonnection to the background sound;*Change the sound system in the menu. |
Snows and noises: [IMAGE] [IMAGE] | Possible causes:*The cable is damaged or gets loose;*Incorrect channel preset;*Improper antenna positioning.Solutions:*Check whether the connection of the antenna cable , DVD and the cables is correct;*Reset channels or fine tune the channel;*Adjust the direction of the antenna. |
Achromatic colour [IMAGE] [IMAGE] | Possible causes:*Incorrect Colour system settings; Low chroma level setting ;*Improper antenna positioning.Solutions:*Change the colour system into the local system in the menu ;*Increase chroma level;*Adjust the direction of the antenna. |
Remote controlis no effect :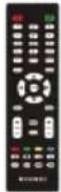 [IMAGE] [IMAGE] | Possible causes:*Battery runs up;*Incorrect battery loading;Solutions:*Check the battery electricity or replace the battery;*Check if the poles of the battery are correct. |
| Note: To properly watch CANAL + using this product, carry out DVB-T channel search when CANAL + is unsarambled.Form 12:30 p.m. to 1:30 p.m.From 7:00 p.m.to 8:30 p.m. | |
For any other problem that may occur on your device, please contact Customer Service.
- IMPORTANT WARNINGS AND SAFETY ADVICE
- Important safety instructions – please read carefully and keep for future reference
- CAUTION!
- Where to install the product
- Proper ventilation
- Do not expose the product to high temperatures, moisture, water and dust.
- Electric supply
- WARNING
- Information about the meaning of the conformity marking
- Technical Specification:
- Auto Standby
- Product Introduction
- Accessories
- Safety
- I - Control Panel
- II - Base Installation Guide
- The Way Of Installing Base:
- The Way Of Unloading Base:
- III - Wall Mounting instructions
- IV - Connecting Cables
- AC
- EARPHONE OUTPUT
- HDMI
- AV IN
- RF S2
- RF T2
- MiniYPbPr IN
- MiniAV IN
- CI SLOT
- USB
- V - Remote Control
- Name
- Function
- BATTERY INSTALLATION
- USEFUL DURATION OF BATTERIES
- NOTE:
- VI - Antenna Connections
- Power-on/Power-off
- Power-saving & protection mode
- VII - Watching Television Programs
- BASIC OPERATIONS
- SELECT DESIRED PROGRAM
- VOLUME CONTROL
- MUTE CONTROL
- SOURCE SETTING
- MULTIAUDIO SATLLITE
- INFORMATION DISPLAY
- VIII - First Time Installation
- Mainmenu User Guide
- First Time Installation
- Input Source
- Menu Function Description
- Channel Menu
- Channel menu in DTV
- Auto Tuning
- ATV Manual Tuning
- DTV Manual Tuning
- Programme Edit
- Picture Menu
- Sound Menu
- Time Menu
- Lock Menu
- SETUP Menu
- Media
- Photo
- Music
- Movie
- 4.4.Text
- IX - Important Notice
- Note on Defective Pixels
- X - Troubleshooting
Brand : NIKKEI
Model : NH3214
Category : Television