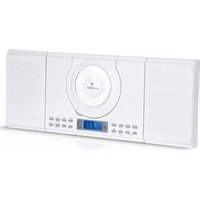
MC 120 - Hi-Fi System Auna - Free user manual and instructions
Find the device manual for free MC 120 Auna in PDF.


| Product type | Hi-Fi System |
| Brand | Auna |
| Model | MC 120 |
| Dimensions (W x H x D) | 400 x 250 x 300 mm |
| Weight | 5 kg |
| Power output (RMS) | 100 W |
| Power supply | AC 220-240V, 50/60 Hz |
| Supported media | CD, CD-R, CD-RW |
| Radio tuner | FM stereo, PLL |
| Bluetooth version | 4.2 |
| USB port | Yes, for MP3 playback |
| AUX input | 3.5 mm jack |
| Speaker impedance | 4 Ohm |
| Frequency response | 40 Hz - 20 kHz |
| Controls | Buttons and remote control |
| Display | LCD with white backlight |
| Maintenance | Clean with a soft, dry cloth. Avoid solvents. |
| Safety precautions | Do not expose to water or moisture. Do not open the casing. |
| Spare parts availability | Contact Auna customer service or authorized service centers. |
| Reparability | Repairs should be carried out by qualified personnel. |
| Warranty | 2 years |
Frequently Asked Questions - MC 120 Auna
User questions about MC 120 Auna
0 question about this device. Answer the ones you know or ask your own.
Ask a new question about this device
Download the instructions for your Hi-Fi System in PDF format for free! Find your manual MC 120 - Auna and take your electronic device back in hand. On this page are published all the documents necessary for the use of your device. MC 120 by Auna.
USER MANUAL MC 120 Auna
natural_image
Abstract geometric logo design with white curved shapes on black background (no text or symbols)auna
multimedia
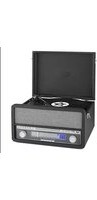
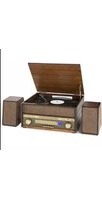
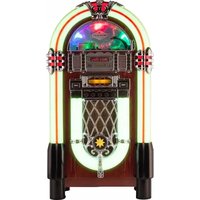
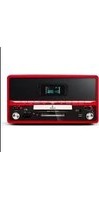
Mikroanlage Auna MC 120

natural_image
Black-and-white photo of a semi-DCD audio recording device with a CD, MP3, and AUX front panel (no readable text or symbols beyond branding)10006329
10006330
10006331
10011571

auna multimedia
Play It Loud!

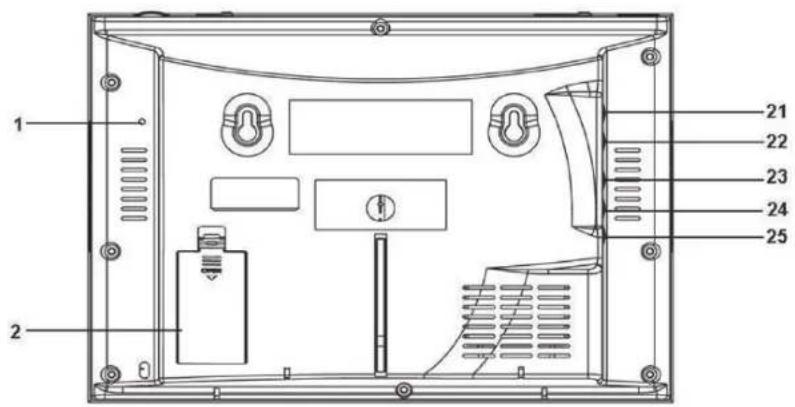
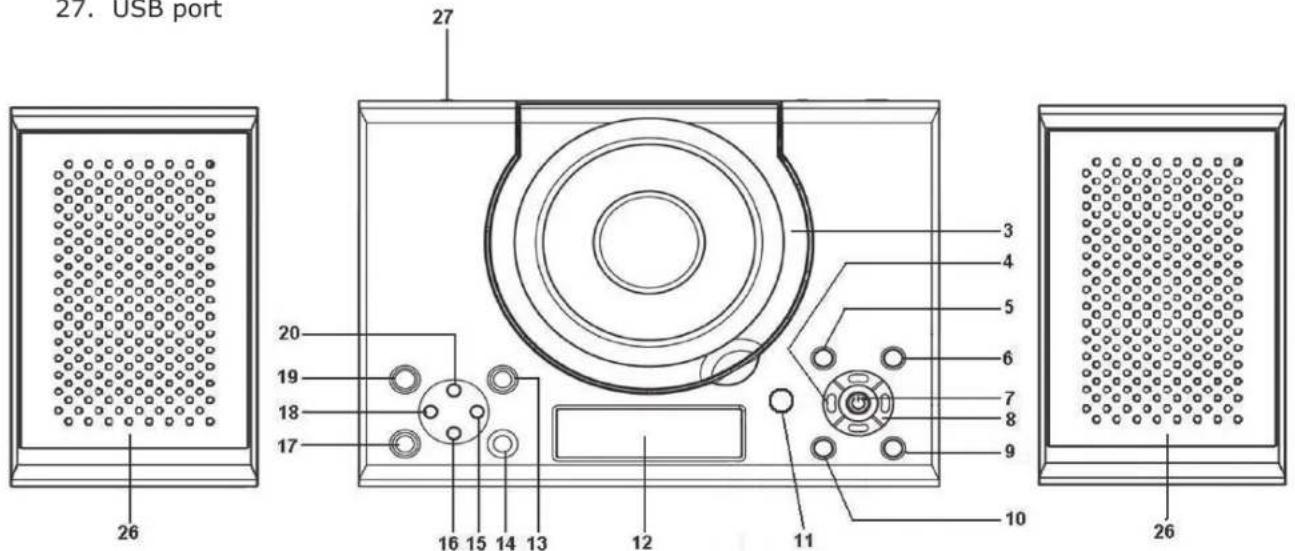
- FM antenna
- Battery compartment
- CD door
- TUNE -/ Backward
- Radio memory/ Program
- Play mode (Reapeat 1/ repeat all/ repeat folder/ random)
- Play/ Pause
-
TUNE +/ Fast forward
-
Stop
-
Function selection
-
Remote control sensor
-
LCD display
-
Volume control increase
-
Volume control decrease
-
Folder up/ +10
-
Alarm setting
-
Standby/On
-
Folder down/ -10
-
SLEEP/SNOOZE
-
Time set
-
Aux in jack
-
Headphone jack
-
Right speaker jack
-
Left speaker jack
-
DC Jack
-
External speakers
-
USB port
Unit power supply (mains 230V/50Hz)
Connect the power cable plug to the (230V) wall outlet.
Warning:
- Before using the unit, check that the local mains supply is compatible with the HI-FI System (230V 50Hz).
- Do not plug or unplug the power cable when your hands wet.
- When planning not to use this unit for long periods of time (i.e., Vacation etc.) disconnect the plug from the wall outlet.
- When disconnecting the power cord from the wall outlet, grasp the plug; do not pull the cord in order to avoid shock risks caused by the damaged cable.
BATTERY SAFETY PRECAUTIONS:
- Keep batteries away from children and pets.
- Insert the battery observing the proper polarity (+/-). Failure to properly align the battery polarity can cause personal injury and/or property damage.
- Remove spent or discharged batteries from the product. Remove the battery when the product will not be used for extended periods of time to prevent damage due to rusted or corroded batteries
● Never throw batteries into a fire, Do not expose batteries to fire or other heat sources - Battery Disposal: Spent or discharged batteries must be properly disposed of and recycled in compliance with all applicable laws. For detailed information, contact your local country solid waste authority.
BATTERY BACKUP:
Two 1.5V "AA" batteries (not included) may be installed as a backup option to maintain the time if electrical power fails. In the event of a power outage, the time will not appear on the clock LCD Display, however the clock will continue to operate and the actual time will be maintained. The Clock LCD Display and other functions will resume once electrical power is restored if used the backup battery. The backup battery should be replaced as needed; Remove the battery if the clock is not used or stored for long periods of time.
Set Clock & Alarm
TO SET THE CLOCK TIME
Switch off the item. Then press and hold the button "TIME SET" until the display starts to blink regularly. You can now choose between the 12h and the 24h modes by pressing the „FOLDER-/ HOUR” or „FOLDER+/MIN” buttons. By pressing the "TIME SET" button one more time you will skip to a screen where the display is blinking and showing the time. You now can adjust the time with the buttons "TUNE -/ Backward" and "TUNE +/ Forward". Confirm the time by pressing the "TIME SET" button.
TO SET ALARM FUNCTION
- Switch the item off. Then press and hold the button "AL.SET" until the displayed time starts to blink.
- By continuously pressing the "AL.Set" button you can rotate through the menu points hour alarm 1, minutes alarm 1, source of alarm 1, hour alarm 2, minutes alarm 2 and source of alarm 2.
- To define the hour and minutes of the alarm press the "Tun-/Skip-/ "Tun+/Skip+" buttons.
- To define the source of alarm press the "Tun-/Skip-/ "Tun+/Skip+" buttons continuously. The available options are CD, USB, radio and buzzer.
- In order to activate the alarm press the button "AI.ON/OFF". An active alarm is indicated by the symbol ⚙ on the upper left side if the display.
TO WAKE UP TO ALARM BUZZER:
a. Choose "â" during alarm settings mode.
b. The alarm buzzer will sound for 3 minutes at the set alarm time.
Note: Press AL. SET button to turn off the alarm when it sounds.
TO WAKE UP TO CD
a. Choose 'CD' during alarm settings mode.
b. Open the CD Door and insert a CD (with the label side facing up) into the CD compartment.
c. Close the CD Door.
d. The CD will sound at the set alarm time playing the first track on the CD.
Note: To deactivate the alarm (CD playing) manually, press the STOP Button.
TO WAKE UP TO USB:
a. Choose 'USB' during alarm settings mode.
b. Plug in the USB memory stick.
c. The first song will sounds at the set alarm time.
Note: To deactivate the alarm (Radio sound) manually, press the STANDBY/POWER ON BUTTON or ALARM ON/OFF mode.
TO WAKE UP TO RADIO:
a. Choose 'FM' during alarm settings mode.
b. Tune the radio to a broadcasting station and adjust the volume as desired.
c. Then press the STANDBY/POWER ON BUTTON again to turn off the unit.
d. The radio will sound at the set alarm time.
Note: To deactivate the alarm (Radio sound) manually, press the STANDBY/POWER ON BUTTON.
Operation
ADJUST VOLUME
- Press VOL.+ button to increase the volume.
- Press VOL. – button to decrease the volume.
RADIO OPERATION
- Select the radio radio function by continuously pressing the "Function" button.
- Press "Tun-/Skip-/ "Tun+/Skip+" buttons to search manually for a frequency.
- Press and hold "Tun-/Skip-/ "Tun+/Skip+" buttons to search automatically for a frequency. The search stops when the tuner hits a frequency with good reception.
- You can save a frequency / radio station by pressing the "PROG" button. After pressing the "PROG" button one time you can select the station memory number by pressing the "Folder up/+10" / "Folder down/-10" buttons. When you have arrived at the desired station memory number confirm the selection by pressing the "PROG" button.
- Saved memory stations can be pressing the "Folder-/Hour" and "Folder+/Min" buttons.
PLAYING A COMPACT DISC (CD)
NOTE: Never touch the laser lens inside of the CD compartment. Clean the laser lens with a CD cleaner disc if it becomes dirty.
- Select "CD" by continuously pressing the "Function" button.
- Open the CD DOOR and insert a CD into the tray with printed label side facing up.
- Press the PLAY/PAUSE BUTTON to start play.
- Press the PLAY/PAUSE BUTTON again to PAUSE play.
- Press the PLAY/PAUSE BUTTON again to restart play.
- The "STOP" button stops the play.
REVERSE/FORWARD
- The "Tun-/Skip-/ "Tun+/Skip+" buttons can be used to jump to a different track number or to scan disc tracks.
- Press "Tun-/Skip-" to skip forward and "Tun+/Skip+" to skip backward.
- Press and hold the "Tun-/Skip-/ "Tun+/Skip+" buttons to scan a track backward or forward. when the desired track section is found, release the button and normal play will resume.
PLAY MODE
When in CD mode, press the "Play Mode" button continuously to cycle through the options "Repeat one Track", "Repeat all tracks of a disc", "Random" and the regular play mode. In CD mode – when the CD is not playing – you can define a playlist by pressing the "PROG" button and selecting the desired track with the „TUN-/SKIP-„ und „TUN+/SKIP+" buttons.
PLAYING A USB DEVICE
- Select "USB" by continuously pressing the "Function" button.
- Insert USB media into the USB slot.
- Press the PLAY/PAUSE BUTTON to start play.
- Press the PLAY/PAUSE BUTTON again to PAUSE play.
- Skip tracks by pressing the "Tun-/Skip-" / "Tun+/Skip+" buttons. Scan Tracks by pressing and holding the
"Tun-/Skip-/ "Tun+/Skip+" buttons. - Navigate through folders by pressing the "FOLDER-/Hour" and "FOLDER+/Min" buttons.
- The "STOP" button stops the play.
AUX INPUT JACK
- Press STANDBY/POWER ON BUTTON to turn on the unit.
- Connect the AUX connect wire from the out jack of your Personal Player such as portable MP3 player to the AUX input jack.
- Press the "Function" button continuously to select the "AUX-mode".
- Play Start from your Personal Player.
HEADPHONE JACK
Your radio is equipped with a HEAPHONE JACK for private listening. Simply plug any 3.5 mm plug type stereo headphone into the HEADPHONE JACK. With the headphone connected the speaker in the radio will be automatically disconnected.
CHAL-TEC Vertriebs- + Handels GmbH; Wallstraße 16; 10179 Berlin, Germany
- auna
- Mikroanlage Auna MC 120
- Unit power supply (mains 230V/50Hz)
- Warning:
- BATTERY SAFETY PRECAUTIONS:
- BATTERY BACKUP:
- Set Clock & Alarm
- TO SET THE CLOCK TIME
- TO SET ALARM FUNCTION
- TO WAKE UP TO ALARM BUZZER:
- TO WAKE UP TO CD
- TO WAKE UP TO RADIO:
- Operation
- ADJUST VOLUME
- RADIO OPERATION
- PLAYING A COMPACT DISC (CD)
- REVERSE/FORWARD
- PLAY MODE
- PLAYING A USB DEVICE
- AUX INPUT JACK
- HEADPHONE JACK
Brand : Auna
Model : MC 120
Category : Hi-Fi System