
Galaxy Tab Ultra - Graphic tablet SAMSUNG - Free user manual and instructions
Find the device manual for free Galaxy Tab Ultra SAMSUNG in PDF.


| Product Type | Graphic Tablet |
| Brand | Samsung |
| Model | Galaxy Tab Ultra |
| Display Size | 14.6 inches |
| Display Resolution | 2960 x 1848 pixels (Super AMOLED) |
| Processor | Qualcomm Snapdragon 8 Gen 2 |
| RAM | 12 GB or 16 GB |
| Storage | 256 GB / 512 GB / 1 TB (expandable via microSD) |
| Stylus | S Pen included (Bluetooth, 4096 pressure levels) |
| Battery Capacity | 11,200 mAh |
| Dimensions (W x H x D) | 326.4 x 208.6 x 5.5 mm |
| Weight | 737 g (Wi-Fi) / 740 g (5G) |
| Operating System | Android (One UI with DeX support) |
| Connectivity | Wi-Fi 6E, Bluetooth 5.3, USB-C 3.2, optional 5G |
| Camera (Rear) | 13 MP + 8 MP ultrawide |
| Camera (Front) | 12 MP + 12 MP ultrawide |
| Audio | Quad speakers with Dolby Atmos |
| Colors Available | Graphite, Beige |
| Cleaning Instructions | Wipe with soft, dry cloth; avoid liquids |
| Spare Parts / Repairability | Replacement parts available via authorized service centers |
| Safety Information | Do not expose to extreme temperatures; avoid pressure on screen |
Frequently Asked Questions - Galaxy Tab Ultra SAMSUNG
User questions about Galaxy Tab Ultra SAMSUNG
0 question about this device. Answer the ones you know or ask your own.
Ask a new question about this device
Download the instructions for your Graphic tablet in PDF format for free! Find your manual Galaxy Tab Ultra - SAMSUNG and take your electronic device back in hand. On this page are published all the documents necessary for the use of your device. Galaxy Tab Ultra by SAMSUNG.
USER MANUAL Galaxy Tab Ultra SAMSUNG
Features
S Pen | Biometric security | Dark mode
Getting started
Device layout: Galaxy Tab S8 Ultra | Galaxy Tab S8+ | S8+ 5G | Galaxy Tab S8
Set up your device: Charge the battery | Accessories
Start using your device: Turn on your device | Use the Setup Wizard | Bring data from an old device | Lock or unlock your device | Side key settings | Accounts | Navigation | Navigation bar | Customize your home screen | S Pen | Bixby | Digital wellbeing and parental controls | Biometric security | Mobile continuity | Multi window | Edge panels | Enter text
Customize your home screen: App icons | Wallpaper | Widgets | Home screen settings | Status bar | Notification panel | Quick settings
Camera and Gallery
Camera: Navigate the camera screen | Configure shooting mode | AR Zone | Single take | Record videos | Camera settings
Gallery: View pictures | Edit pictures | Play video | Video brightness | Edit video | Share pictures and videos | Delete pictures and videos | Group similar images | Take a screenshot | Screen recorder
Samsung apps
AR Zone | Bixby | Galaxy Store | Game Launcher | PENUP | Samsung Flow | Samsung Free | Samsung Global Goals | Samsung TV Plus | SmartThings | Tips | Voice Recorder | Calculator | Calendar | Clock | Contacts | Internet | My Files | Samsung Health | Samsung Notes
Google apps
Chrome | Drive | Duo | Gmail | Google | Maps | Messages | Photos | Google Play Movies & TV | Play Store | YouTube | YT Music
Microsoft apps
Outlook | Office | OneDrive
Settings
Connections: Wi-Fi | Bluetooth | Airplane mode | Mobile networks | Data usage | Mobile hotspot | Tethering | Nearby device scanning | Connect to a printer | Virtual Private Networks | Private DNS | Ethernet
Customization: Display | Notifications | Sounds and vibration
Security: Lock screen and security | Face recognition | Fingerprint scanner
Accounts: Add an account | Account settings | Remove an account | Users | Backup and restore | Google settings
Backup: Samsung account | Google Account | External storage transfer
Accessibility: Recommended for you | TalkBack | Visibility enhancements | Hearing enhancements | Interaction and dexterity | Advanced settings | Installed apps | About Accessibility | Contact us
Other: Tips and help | Dual Messenger | Daily Board | Smart suggestions | Medical info | Quick Share | Labs | About tablet
Learn more
Legal information
Getting started
Galaxy Tab S8 Ultra
Galaxy Tab S8+ | S8+ 5G
Galaxy Tab S8
Set up your device
Start using your device

Galaxy Tab S8 Ultra

Galaxy Tab S8+ | S8+ 5G

Galaxy Tab S8

Set up your device
Charge the battery | Accessories
Your device uses a nano-SIM card (unless it is the Wi-Fi model). A SIM card may be preinstalled, or you may be able to use your previous SIM card. Network and 5G service are based on your carrier's specifications and network availability. Contact your carrier for more details.


NOTE: Use only Samsung-approved chargers and cables. To avoid injury or damage to your device, do not use incompatible, worn, or damaged chargers or cables. Using other charging devices and batteries may void your warranty and may cause damage. For more information on your device, including charging compatibility, please visit samsung.com.
Charge the battery
Your device is powered by a rechargeable battery. A compatible, reversible USB Type-C cable is included with the device. The USB Type-C cable can be used with a USB
Type-C travel adapter, portable charging devices, smartphones, laptops, wireless charging, and other devices that offer USB-C ports, both for charging and data transfer.

TIP: While charging, the device and the charger may become hot and stop charging. This usually does not affect the device's lifespan or performance and is within the device's normal range of operation. Disconnect the charger from the device and wait for the device to cool down. For more information, visit samsung.com/us/support/answer/ANS00076952.
Accessories
Supported accessories (sold separately) can be configured through Settings. The option may only appear after you have connected an accessory to your device.
Visit samsung.com/us/mobile/mobile-accessories to learn more.
From Settings, tap Advanced features > Accessories.
Start using your device
Turn on your device | Use the Setup Wizard | Bring data from an old device | Lock or unlock your device | Side key settings | Accounts | Navigation | Navigation bar | Customize your home screen | S Pen | Bixby | Digital wellbeing and parental controls | Biometric security | Mobile continuity | Multi window | Edge panels | Enter text
Turn on your device
Use the Side key to turn your device on. Do not use the device if the b broken. Use the device only after it has been repaired.
- Press and hold the Side key to turn the device on.
- To turn the device off, press and hold the Side and Volume down keys at the same time, and tap Power off. Confirm when prompted.
- To restart your device, press and hold the Side and Volume down keys at the same time, and tap Restart. Confirm when prompted.

TIP To learn more about powering off your device from Settings, tap Advanced features > Side key > How to power off your tablet.

NOTE Best 5G performance requires optimal 5G connection and unobstructed antennas (rear of device); see carrier for network availability; 5G performance may be impacted by a case or cover.
Use the Setup Wizard
The first time you turn your device on, the Setup Wizard guides you through the basics of setting up your device.
Follow the prompts to choose a default language, connect to a Wi-Fi network, set up accounts, choose location services, learn about your device's features, and more.
Bring data from an old device
Download Smart Switch to transfer contacts, photos, music, videos, messages, calendars, and more from your old device. Smart Switch can transfer via USB cable, Wi-Fi, or computer.
Visit samsung.com/smartswitch for more information.
- From Settings, tap Accounts and backup > Bring data from old device.
- Follow the prompts and select the content to transfer.
Lock or unlock your device
Use your device's screen lock features to secure your device. By default, the lock activates automatically when the screen times out. For more information about locks, see Lock screen and security.

Side key
Press to lock.
Press to turn on the screen, and then swipe the screen to unlock it.
Side key settings
You can customize the shortcuts assigned to the Side key.
Double press
Choose which feature is launched when the Side key is pressed twice.
- From Settings, tap Advanced features > Side key.
- Tap Double press to enable this feature, and tap an option:
- Quick launch camera (default)
- Open app
Press and hold
Choose which feature is launched when you press and hold the Side key.
- From Settings, tap Advanced features > Side key.
- Under the Press and hold heading, tap an option:
- Wake Bixby (default)
- Power off menu
Accounts
Set up and manage your accounts.

TIP Accounts may support email, calendars, contacts, and other features. Contact your carrier for more information.
Add a Google Account
Sign in to your Google Account to access your Google Cloud Storage, apps from your account, and make full use of your device.
When you sign in to a Google Account and set a Lock screen, Google De Protection is activated. This service requires your Google Account information to reset to factory settings. For more information, see Google Play Protect.
- From Settings, tap Accounts and backup > Manage accounts.
- Tap Add account > Google.
Add a Samsung account
Sign in to your Samsung account to access exclusive Samsung content and use of Samsung apps.
- From Settings, tap Samsung account.
Add an Outlook account
Sign in to your Outlook to view and manage email messages.
- From Settings, tap Accounts and backup > Manage accounts.
- Tap Add account > Outlook.
Navigation
A touch screen responds best to a light touch from the pad of your finger or a capacitive stylus. Using excessive force or a metallic object on the touch screen can damage the surface of the screen, and the damage will not be covered by warranty.
Tap

Lightly touch items to select or launch them.
- Tap an item to select it.
- Double-tap an image to zoom in or out.
Swipe

Lightly drag your finger across the screen.
- Swipe the screen to unlock the device.
- Swipe the screen to scroll through the Home screens or menu options.
Drag and drop

Touch and hold an item, and then move it to a new location.
- Drag an app shortcut to add it to a Home screen.
- Drag a widget to place it in a new location.
Zoom in and out

Bring your thumb and forefinger together or apart on the screen to zoom.
- Move your thumb and forefinger apart on the screen to zoom in.
- Move your thumb and forefinger together on the screen to zoom out.
Touch and hold

Touch and hold items to activate them.
- Touch and hold a field to display a pop-up menu of options.
- Touch and hold a Home screen to customize the Home screen.
Navigation bar
You may navigate your device by using either the navigation buttons or full gestures.

Navigation buttons
Use buttons along the bottom of the screen for quick navigation.
- From Settings, tap Display > Navigation bar > Buttons.
- Tap an option under Button order to choose which side of the screen the Back and Recent apps icons display.
- Tap Button position to choose the position of the buttons on the Navigation bar.
Navigation gestures
Hide the navigation buttons at the bottom of the screen for an unobstructed experience. Instead, swipe to navigate your device.
- From Settings, tap Display > Navigation bar > Swipe gestures to enable the feature.
- Tap an option to customize:
- More options: Choose a gesture type and sensitivity.
- Gesture hint: Display lines at the bottom of the screen where each gesture is located.
- Show button to hide keyboard: Show an icon on the bottom right of the screen to hide the keyboard when the device is in portrait mode.
- Block gestures with S Pen: Prevent the S Pen from making navigation gestures.
Customize your home screen
The Home screen is the starting point for navigating your device. You can favorite apps and widgets here, in addition to setting up additional Home screens, removing screens, changing the order of screens, and choosing a main Home screen.
App icons | Wallpaper | Widgets | Home screen settings | Status bar | Notification panel | Quick settings
App icons
Use app icons to launch an app from any Home screen.
From Apps, touch and hold an app icon, and tap Add to Home.
To remove an icon:
From a Home screen, touch and hold an app icon, and then tap Remove.

NOTE: Removing an icon does not delete the app; it just removes the icon from a Home screen.
Wallpaper
Change the look of the Home and Lock screens by choosing a favorite picture or preloaded wallpaper.
- From a Home screen, touch and hold the screen, and then tap Wallpaper style.
- Tap one of the following menus for available wallpapers:
- My wallpapers: Choose from featured and downloaded wallpapers.
- Gallery: Choose pictures and videos saved in the Gallery app.
- Lock screen wallpaper services: Enable additional features including Google page and Dynamic Lock screen. • Color palette: Choose a palette based on colors from your wallpaper.
- Apply Dark mode to Wallpaper: Enable to apply Dark mode to your wallpaper.
- Tap a picture or video to choose it.
- If choosing a single picture, choose which screen or screens you would apply the wallpaper to.
- Videos and multiple pictures can only be applied to the Lock screen.
- If choosing videos or pictures from the Gallery, tap on one or more then tap Done.
- Tap Set on Home screen, Set on Lock screen, or Set on Lock and Home screens (depending on which screens are applicable).
- If applying a picture from the Gallery to both the Home and Lock screens, enable Sync my edits if you want any edits made to that wallpaper applied to both screens.
Widgets
Add widgets to your home screens for quick access to info or apps.
- From a Home screen, touch and hold the screen.
- Tap Widgets, and then tap a widget set to open it.
- Swipe to the widget you want to add to the Home screen, and tap
Customize Widgets
Once you have added a widget, you can customize where it's located and functions.
From a Home screen, touch and hold a widget, and tap an option:
- Remove: Delete a widget from your screen.
- Settings: Customize the function or appearance of the widget.
- App info: Review the widget usage, permissions, and more.
Home screen settings
Customize your Home and Apps screens.
- From a Home screen, touch and hold the screen.
- Tap Settings to customize:
- Home screen layout: Set your device to have separate Home and Apps screens, or only a Home screen where all apps are located.
- Home screen grid: Choose a layout to determine how icons are arranged on the Home screen.
- Apps screen grid: Choose a layout to determine how icons are arranged on the Apps screen.
- Add media page to Home screen: When enabled, swipe right from the Home screen to show a media page. Tap to view available media services.
- Show Apps screen button on Home screen: Add a button to the Home screen for easy access to the Apps screen.
- Lock Home screen layout: Prevent items on the Home screen from being removed or repositioned.
- Add new apps to Home screen: Automatically add newly-downloaded apps to the Home screen.
- Hide apps: Choose apps to hide from the Home and Apps screens. Use this screen to restore hidden apps. Hidden apps are still installed and appear as results in Finder searches.
- App icon badges: Enable to show badges on apps with active notifications. You can also choose the badge style.
- Swipe down for notification panel: Enable this feature to open the notification panel by swiping down anywhere on the Home screen.
- About Home screen: View version information.
Status bar
The Status bar provides device information on the right side and notifications on the left.
Status icons

Battery full

Charging
Mute
Vibrate


Airplane mode

Bluetooth
active
Location

active
Alarm

Notification icons

New email

Download
Upload
App

update

Configure display options for the Status bar.

TIP: From Quick settings, tap More options > Status bar to configure settings for Status bar notifications.
Notification panel
For quick access to notifications, settings, and more, simply open the Notification panel.

View the Notification panel
You can access the Notification panel from any screen.
- Swipe down on the screen to display the Notification panel.
• To open an item, tap it. • To clear a single notification, drag the notification left or right.
• To clear all notifications, tap Clear. • To customize notifications, tap Notification settings.
- Drag upward from the bottom of the screen or tap Back to close the Notification panel.
Quick settings
The Notification panel provides quick access to device functions using Quick settings. The icons below show the most common settings available in Quick settings; colors change when enabled and disabled. Other settings may be available on your device.
- Drag the Status bar down to display the Notification panel.
- Swipe down again from the top of the screen to display Quick settings.
- Tap a quick setting icon to turn it on or off.
- Touch and hold a quick setting icon to open the setting.

Wi-Fi Sound

Bluetooth

Auto
rotate
Airplane

mode


Do not disturb Power saving Location


Eye comfort shield

Dark mode
Quick settings options
The following options are available in Quick settings.
- Finder search: search the device.
- Power off: Power off and Restart options.
- Open settings: Quickly access the device's settings menu. • More options: Reorder Quick settings or change the button layout.
- Device control: Control other devices when supported apps like SmartThin Google Home are installed.
- Media output: Access the Media panel and control playback of connected audio and video devices.
- Brightness slider: Drag to adjust the screen brightness.
S Pen
The S Pen provides a variety of helpful functions. Use your S Pen to launch notes or draw a picture. Some S Pen functions, such as tapping the touchscreen, may not work if the device is near a magnet.

Air Actions
The S Pen can be used to perform remote functions using the button and/or gestures. You can set up shortcuts to your favorite apps, navigate screens, complete actions, and more.
The S Pen remote feature is only supported by Samsung-approved S Pens with Bluetooth Low Energy (BLE). If the S Pen is too far from the device, or if there is interference, the S Pen disconnects from the device. The S Pen must be connected for Air Actions to work.
Hold the S Pen button shortcut
Set a shortcut when you press and hold the S Pen button. By default, this launches the Camera app.
- From Settings, tap Advanced features > S Pen > Air actions.
- Tap Hold down Pen button to, and tap to enable the feature.
- Tap an option to set the shortcut.
Anywhere actions
Anywhere actions are configurable shortcuts that are accessed by holding the button while making one of the following gestures: up, down, left, right, or these can be accessed from any screen and can include navigation, S Pen, or apps.
Action Gesture

Back Left to right

Recents Right to left

Home Up and down

Smart select Down and up

Screen write Zigzag
- From Settings, tap ✪ Advanced features > S Pen > Air actions.
- Tap a Gesture icon under Anywhere actions to customize the shortcut.
App actions
You can use your S Pen to do specific actions in certain apps.
- From Settings, tap ✦ Advanced features > S Pen > Air actions.
- Tap an app to view the available shortcuts.
- Tap to enable the shortcuts while using that app.
General app actions
You can customize some general actions while using camera and media apps specified in the app action list.
- From Settings, tap ✦ Advanced features > S Pen > Air actions.
- Under General app actions, tap an action to change it.
Air view
Hover the S Pen over the screen to preview content or view information on the screen. The following Air view features are available:
- Preview an email message before opening it.
- Preview the contents of a photo album or enlarge a picture.
- Preview a video and navigate to a specific scene by hovering over the · View the name or description of an icon or a button.

NOTE The preview function is only available when the S Pen's on-screen pointer is a solid color.
Air command
Access signature S Pen features from any screen, including Smart select, Sci and Samsung Notes.

- Tap Air command or hold the S Pen near the screen so that the point appears, and then press the S Pen button once.
- Tap an option:
• Create note: Launch a new note in the Samsung Notes app.
• View all notes: Launch the Samsung Notes app and view a listing of notes you have created.
- Smart select: Draw around an area of the screen to collect it in an app. • Screen write: Capture screenshots and write or draw on them. • Live messages: Create a short animated message by drawing or with the S Pen. • AR Doodle: Draw interactive doodles using the AR camera feature. • Translate: Hover the S Pen over a word to see it translated into a language and listen to its pronunciation.
- PENUP: Use the S Pen to draw, color, edit, and share live drawings.
- Add: Add more apps or functions to the Air command menu.
- Settings: Customize Air command by configuring apps and functions and by changing how the Air command menu appears.
Create note
Launch a new note directly in the Samsung Notes app. For more information on Samsung Notes.
Tap Air command > + Create note.
View all notes
Launch the Samsung Notes app and view a listing of the notes you have created.
Tap Air command > View all notes.
Smart select
The Smart select feature allows you to copy content from any screen. You can add it to your Gallery app or share it with your contacts.
- Tap Air command > Smart select.
- Tap a shape in the menu, and then drag the S Pen to select content. The following control options appear:
- Pin/Insert: Place a shortcut to the collected content on a Home screen or insert it into an app. • Auto select: Allow Smart select to automatically select content.
• Draw: Draw on the captured content. • Extract text: Identify and extract text from the selected content. • Share: Choose a sharing method to share your content.
- Tap Save.

TIP: You can tap GIF Animation to record an animation, or tap Pin to screen to pin the content to your screen using Smart select.
Screen write
Screen write allows you to capture screenshots and write or draw on them.
- Tap Air command > Screen write.
- The current screen is captured, and a pen tool appears. The following tools are provided:
- Crop: Drag the edges of the screen to crop the captured content.
- Pen type: Draw on the screenshot. Tap the Pen icon a second time to change the pen tip, size, and color.
- Eraser: Erase the writing or drawings on the screenshot.
- Undo: Reverse the last action.
- Redo: Repeat the last action that was undone. • Share: Choose a sharing method to share your content.
- Scroll capture: Capture any scrollable areas of the screen that may be hidden.
- Tap ↓ Save. The content is saved to the Gallery app.

TIP: Hold the S Pen button to erase your drawings on the screen memo.
Live messages
Record an animated drawing or written message.

- Tap Air command > Live messages.
- Select one of the following background options:
• Collection: See all live messages you have created. • Gallery: Pick an image or video for the background. • Camera: Capture an image to use for the background. • Color: Pick a color for the background.
- Follow the prompts to begin creating your live message.
- Tap Done to save.
AR Doodle
Draw interactive doodles on faces or other objects seen through the camera augmented reality.

- Tap Air command > AR Doodle.
- Select either the front or rear cameras by tapping Switch cameras.
- Position the camera so that your target is in the center of the screen.
- Use the S Pen to draw a doodle.
• The doodle follows the movements of the face in real-time.
- Tap Record to save a video of your AR Doodle.
Translate
Hover over words with the S Pen to translate them and listen to their pronunciation.
- Tap/Air command > Translate.
- Tap the icon to change between translating a word and translating a
- Phrases: Translate an entire phrase. • Words: Translate a word.
- Tap the source and target languages to change them to the desired
- Hover the S Pen over a word.
- Tap Sound to hear the word pronounced in the source language.
- Tap Copy to save the selected text and the translation to your clip
- Tap Close to close Translate.
PENUP
Use the S Pen to draw, color, edit, and share live drawings. For more info, see PENUP.
Tap Air command > PENUP.
Add shortcuts
You can customize the Air command menu by adding shortcuts to apps and functions.
- Tap Air command > + Add.
- Tap the apps or functions you would like to add to the Air command. To remove an app shortcut, tap Remove.
- Tap Navigate up to save your selection.
Screen off memo
You can write memos without turning on the screen.
- While the screen is off, press the S Pen button and tap the screen.
- Tap an option to customize your memo:
• Color: Change the pen color. • Pen settings: Tap to use the pen tool. Tap again to adjust the line width. • Eraser: Tap to use the eraser tool. Tap again to erase all.
- Tap Save to save your memo to the Samsung Notes app.

NOTE The screen off memo setting must be enabled. For more information, see Configure S Pen settings.
Configure S Pen settings
To configure S Pen settings:
From Settings, tap Advanced features > S Pen to configure the following settings:
• Air actions: Configure how the remote control functions while using the S Pen. - S Pen unlock: Use the S Pen button to unlock the device. A secure screen lock must be set to use this feature. - Screen off memo: Create memos without turning on the screen. Screen memos are saved in Samsung Notes. - Quick create notes: Press and hold the S Pen button, then tap the screen with your S Pen to start a new note. - S Pen to text: Use the S Pen to write in search fields, address bars, and text areas. Your handwriting is converted to text, and you can edit converted text with the S Pen. • Air view: Turn Air view on or off. - Show pointer when hovering: Turn the pointer on or off. The pointer appears on the screen when the tip of the S Pen is near the screen, showing available actions. - Allow multiple S Pens: Let other S Pens write on the screen.
Air Command
- Menu style: Configure the appearance of the Air command menu.
- Shortcuts: Configure the Air command menu with S Pen features, apps, and functions.
- Show Air command icon: Show an Air command icon that you can move around the screen.
- Open Air command with Pen button: Open the Air command menu when you hover your S Pen over the screen and press the Pen button.
Removal
- When S Pen is removed: Choose what happens when you detach the S Pen. Choose Open Air command, Create note, or Do nothing.
- Warn if S Pen is left behind: Set your device to show a warning if you leave the S Pen behind and walk away while the screen is off.
Feedback
- Sounds: Set your device to make sounds when writing on the screen.
General
- Tips for using your S Pen: Find out how to use S Pen features.
- About S Pen: View version information for the S Pen features.
- Contact us: Contact Samsung support through Samsung Members.
Bixby
Bixby is a virtual assistant that learns, evolves, and adapts to you. It learns routines, helps you set up reminders based on time and location, and is your favorite apps. Visit samsung.com/us/support/owners/app/Bixby for more information.
From a Home screen, press and hold the Side key.

TIP You can also access Bixby from the Apps list.
Bixby Routines
You can use Bixby to show you information or change device settings based on where you are and what you are doing.
- From Settings, tap Advanced features > Bixby Routines.
- Tap Add routine and follow the prompts to create a new routine.
Bixby Vision
Bixby is integrated with your Camera, Gallery, and Internet apps to give you an understanding of what you see. It provides contextual icons for translation, detection, landmark recognition, or shopping.
Camera
Bixby Vision is available on the Camera viewfinder to help understand what
From 📷 Camera, tap More > Bixby Vision and follow the prompts.
Gallery
Bixby Vision can be used on pictures and images saved in the Gallery app
- From *Gallery, tap a picture to view it.
- Tap Bixby Vision and follow the prompts.
Internet
Bixby Vision can help you find out more about an image you find in the
- From Internet, touch and hold an image until a pop-up menu is displayed
- Tap Search with Bixby Vision and follow the prompts.
Digital wellbeing and parental controls
You can monitor and manage your digital habits by getting a daily view of frequently you use apps, how many notifications you receive, and how often check your device. You can also set your device to help you wind down to bed.
From Settings, tap Digital Wellbeing and parental controls for the following features:
- Tap the Dashboard to view the following:
- Screen time: View how long an app has been opened and used
- Notifications received: View how many notifications have been received from an app each day.
- Unlocks: View how many times an app has been opened each day. Your goals
- Screen time: Set a screen time goal and view your daily average.
- App timers: Set a daily limit for how long you use each app.
Ways to disconnect
- Focus mode: Limit app usage for set periods of time to avoid distractions from your device.
- Bedtime mode: Schedule when to change the screen to grayscale, and silence calls, alerts, and other sounds.
- Driving monitor: Monitor your screen time while connected to your car's Bluetooth and see which apps you use the most.
Check on your kids
- Parental controls: Supervise your children's digital life with Google's Family Link app. You can choose apps, set content filters, keep an eye on time, and set screen time limits.
Biometric security
Use biometrics to securely unlock your device and log in to accounts.
Face recognition
You can enable Face Recognition to unlock your screen. To use your face to unlock your device, you must set a pattern, PIN, or password.
- Face recognition is less secure than Pattern, PIN, or Password. Your device could be unlocked by someone or something that looks like your image.
- Some conditions may affect face recognition, including wearing glasses, beards, or heavy make-up.
- When registering your face, ensure that you are in a well-lit area and the lens is clean.
- From Settings, tap Biometrics and security > Face recognition.
- Follow the prompts to register your face.
Face recognition management
Customize how face recognition works.
From Settings, tap Biometrics and security > Face recognition.
- Remove face data: Delete existing faces.
- Add alternative appearance to enhance recognition: Enhance face recognition by adding an alternative appearance.
- Face unlock: Enable or disable face recognition security.
- Stay on Lock screen until swipe: When you unlock your device with recognition, stay on the Lock screen until you swipe the screen.
- Faster recognition: Turn on for faster face recognition. Turn off to increase security and make it harder to unlock using an image or video of your likeness.
- Require open eyes: Facial recognition will only recognize your face when your eyes are open.
- Brighten screen: Temporarily increase the screen brightness so that your face can be recognized in dark conditions.
- About unlocking with biometrics: Learn additional information about securing your device with biometrics.
- About face recognition: Learn additional information about securing your device with face recognition.
Fingerprint scanner
Use fingerprint recognition as an alternative to entering passwords in certain situations. You can also use your fingerprint to verify your identity when logging in to your Samsung account. To use your fingerprint to unlock your device, you must set up a pattern, PIN, or password.
- From Settings, tap Biometrics and security > Fingerprints.
- Follow the prompts to register your fingerprint.
Fingerprint management
Add, delete, and rename fingerprints.
From Settings, tap Biometrics and security > Fingerprints for the following options:
- The list of registered fingerprints is at the top of this list. You can tap a fingerprint to remove or rename it.
- Add fingerprint: Simply follow the prompts to register another fingerprint.
- Check added fingerprints: Scan your fingerprint to see if it has been registered.
Fingerprint verification settings
Use fingerprint recognition to verify your identity in supported apps and actions.
- From Settings, tap Biometrics and security > Fingerprints.
- Fingerprint unlock: Use your fingerprint for identification when unlocking the device.
- Fingerprint always on: Scan your fingerprint even when the screen is off.
- Tap to show icon when screen off: Show the fingerprint icon when the screen is off.
- Show animation when unlocking: Show an animation when you use fingerprint verification.
- About unlocking with biometrics: Read details on the requirements each biometric security feature has for using your pattern, PIN, or password backup.
- About fingerprints: Learn additional information about securing your device with fingerprints.
Biometrics settings
Configure your preferences for biometric security options.
From Settings, tap Biometrics and security > More biometrics settings for the following:
- Show unlock transition effect: Show a transition effect when you use biometrics to unlock your device.
- Biometrics security patch: View the software version of the biometric security features.
Mobile continuity
Access storage and other functions of your device across compatible mobile and computers.
Samsung DeX
Connect your device to a PC or TV for an enhanced multitasking experience.
- Send DeX to your TV and keep using your device, or turn your device into a trackpad.
- Connect to a TV or monitor either wirelessly or with an HDMI cable.
- Get DeX on your PC for quick and easy file transfers.
Visit samsung.com/us/explore/dex for more information.
Enable DeX
- From Settings, tap Advanced features > Samsung DeX.
- Tap to turn on the feature.
- Follow the instructions on your device to connect to your monitor, TV, or PC.
- If connecting to a PC, download the DeX app on to your computer at samsungdex.com.
Continue apps on other devices
This feature allows you to make and answer calls and text messages from Galaxy devices that are signed in to your Samsung account.
- From Settings, tap ✪ Advanced features > Continue apps on other devices.
- Tap to turn on the feature. Connection occurs automatically.
- Sign in to your Samsung account on your Galaxy devices.

TIP Move your contacts from your device to your Samsung account so you can access them on all registered devices.
Multi window
Multitask by using multiple apps at the same time. Apps that support Multi can be displayed together on a split screen. You can switch between the adjust the size of their windows.

- From any screen, tap Recent apps.
- Tap the app icon, and then tap Open in split screen view.
- Tap an app in the other window to add it to the split screen view. • Drag the middle of the window border to adjust the window size.
Window controls
The Window controls modify the way app windows are displayed in split screen.
- Drag the middle of the window border to resize the windows.
- Tap the middle of the window border for the following options:
- ( ) Rotate clockwise: Rotate the screens clockwise to change the order of the split.
- Switch window: Swap the two windows.
- Add app pair to Edge panel: Create and add an app pair shortcut to the Edge panels on the Edge screen.
Edge panels
The Edge panels feature a variety of customizable panels that can be accessed from the edge of the screen. Edge panels can be used to access apps, tasks, as well as view news, sports, and other information.
From Settings, tap Display > Edge panels, then tap the switch to enable this feature.

Edge handle
Swipe to the center of the screen to open the Edge panels.
Apps panel
You can add apps in two columns to the Apps panel.
- From any screen, drag the Edge handle to the center of the screen. The Apps panel is displayed.
- Tap an app or app pair shortcut to open it. You can also tap the Options button >
All apps for the complete app list.
To open additional windows in pop-up view, drag the app icon from the panel to the open screen.
To configure Apps panel:
- From any screen, drag the Edge handle to the center of the screen. Swipe until the Apps panel is displayed.
- Tap Options button > Edit to add other apps to the Apps panel.
- To add an app to the Apps panel, find it on the left side of the screen, then drag it to an available space on the right column.
- To create a folder shortcut, drag an app from the left side of the screen and drop it on top of an app in the columns on the right.
- To change the order of the apps on the panel, drag each app to its desired location.
- To remove an app, tap Remove.
- Tap Back to save changes.
- From Settings, tap Display > Edge panels > Panels.
- The following options are available:
- Checkbox: Enable or disable each panel.
- Edit (if available): Configure individual panels. More options:
- Reorder: Change the order of the panels by dragging them to the right.
- Hide on Lock screen: Choose panels to hide on the Lock screen when a secure screen lock is set.
- Tap Back to save changes.
From Settings, tap Display > Edge panels > Handle for the following options:
- Edge handle: Drag to change the position of the Edge handle along the edge of the screen.
- Position: Choose either Right or Left to set which side the Edge screen displays on.
- Lock handle position: Enable to prevent the handle position from being moved when touched and held.
- Style: Choose a color for the Edge handle.
- Transparency: Drag the slider to adjust the transparency of the Edge handle.
- Size: Drag the slider to adjust the size of the Edge handle.
- Width: Drag the slider to adjust the width of the Edge handle.
About Edge panels
You can view the current software version and license information for the panels feature.
From Settings, tap Display > Edge panels > About Edge panels.
Enter text
Text can be entered using a keyboard or your voice.

Expand toolbar
Toolbar
The toolbar provides quick access to features of the keyboard. Options may vary by carrier.
From the Samsung keyboard, tap Expand toolbar for the following options:
- Expression: Explore different types of emojis, GIFs, create custom combined emojis, and more.
- Clipboard: Access the clipboard.
- Modes: Select a keyboard layout. • 📋 Voice input: Use Samsung voice input.
- Settings: Access keyboard settings.
- Handwriting: Use your handwriting to enter text. • Search: Locate specific words or phrases in your conversations.
- Translate: Type words or sentences in the keyboard to translate into another language.
- Pass Samsung Pass: Use biometrics for quick, secure access to your personal data and online accounts. • Spotify: Add music from Spotify™
- YouTube: Add videos from YouTube.
- Emojis: Insert an emoji. • GIF GIFs: Add animated GIFs.
- Bitmoji: Create your own personal emoji and use it in stickers.
- Mojitok: Create your own stickers or insert automatically suggested • AR Emoji: Create your own personal emoji and use it in stickers share.
- Keyboard size: Adjust the height and width of the keyboard.
- Text editing: Use an editing panel to help pinpoint text that you want to cut, copy, and paste.
Configure the Samsung keyboard
Set customized options for the Samsung keyboard.
From the Samsung keyboard, tap Settings for the following options:
- Languages and types: Set the keyboard type and choose which languages are available on the keyboard.
- To switch between languages, swipe the Space bar left or right.
Smart typing
- Predictive text: As you type, see suggested words and phrases.
- Suggest emojis: Include emojis when using predictive text.
- Suggest stickers while typing: View recommended stickers while you are typing.
- Auto replace: Automatically replace what you type with predictive text recommendations.
- Suggest text corrections: Underline misspelled words in red and suggest corrections.
- Text shortcuts: Create shortcuts for frequently used phrases.
- More typing options: Customize additional typing options.
Style and layout
- Keyboard toolbar: View or hide the keyboard toolbar.
- High contrast keyboard: Adjust the size of the Samsung keyboard and change its colors to increase the contrast between the keys and the background.
- Theme: Choose a theme for your keyboard.
- Mode: Choose between portrait and landscape mode.
- Size and transparency: Adjust the size and transparency of the keyboard.
- Layout: Display numbers and special characters on the keyboard.
- Font size: Drag the slider to adjust the font size.
Other settings
- Swipe, touch, and feedback: Customize gestures and feedback.
- Handwriting: Customize handwriting options.
- S Pen to text: Use the S Pen to write in search fields, address bars, and areas. Your handwriting is converted to text, and you can edit the text with the S Pen.
- Select third-party content to use: Enable third-party keyboard features.
- Reset to default settings: Return keyboard to original settings and clear personalized data.
- About Samsung keyboard: View version and legal information for the Samsung keyboard.
- Contact us: Contact Samsung support through Samsung Members.
Use Samsung voice input
Instead of typing, enter text by speaking.
From the Samsung keyboard, tap Voice input and speak your text.

Configure Samsung voice input
Set customized options for Samsung voice input.
- From the Samsung keyboard, tap Voice input.
- Tap Settings for options.
- Keyboard language: Choose the language for the keyboard.
- Voice input language: Select the language for Samsung voice input.
- Hide offensive words: Hide potentially offensive words with asterisks.
- About Samsung voice input: View version and legal information for Samsung voice input.
Camera and Gallery
You can capture high-quality pictures and videos using the Camera app. The videos are stored in the Gallery, where you can view and edit them.


Camera
Navigate the camera screen | Configure shooting mode | AR Zone | Single take | Record videos | Camera settings

Gallery
View pictures | Edit pictures | Play video | Video brightness | Edit video | Share pictures and videos | Delete pictures and videos | Group similar images | Take a screenshot | Screen recorder

Camera
You can capture high-quality pictures and videos using the Camera app.
From Apps, tap Camera.

TIP: Quickly press the Side key twice to open the Camera app.

Navigate the camera screen
Take stunning pictures with your device's front and rear cameras.
- From camera, set up your shot with the following features:
- Tap the screen where you want the camera to focus.
- When you tap the screen, a brightness scale appears. Drag to adjust the brightness.
- To quickly switch between the front and rear cameras, swipe the side or down.
- To zoom at a precise level, tap 1x and tap an option at the bottom of the screen. (Only available when using the rear camera.) • To change to a different shooting mode, swipe the screen right or left.
- To change camera settings, tap Settings.
- Tap Capture.
Configure shooting mode
Allow the camera to determine the ideal mode for your pictures or choose several shooting modes.
From camera, swipe the screen right and left to change shooting mode.
- Portrait: Adjust the background of your shots for portrait photos.
- Photo: Allow the camera to determine the ideal settings for pictures. • Video: Allow the camera to determine the ideal settings for videos.
- More: Choose other available shooting modes. Tap Add to drag modes into or out of the shooting modes tray at the bottom of the Camera screen.
- Pro: Manually adjust the ISO sensitivity, exposure value, white balance, and color tone while taking pictures.
- Pro video: Manually adjust the ISO sensitivity, exposure value, white balance, and color tone while recording videos.
- Single take: Capture multiple pictures and video clips from different angles.
- Panorama: Create a linear image by taking pictures in either a horizontal or vertical direction.
- Night: Use this to take photos in low-light conditions, without using
- Food: Take pictures that emphasize the vivid colors of food.
- Hyperlapse: Create a time lapse video by recording at various frame rates. The frame rate is adjusted depending on the scene being recorded and the movement of the device.
- Portrait video: Adjust the background of your shots for portrait video.
AR Zone
Access all of your Augmented Reality (AR) features in one place.
From Camera, swipe to More, and then tap AR Zone. The following features are available:
• AR Emoji Studio: Use AR tools to create and customize your My Emoji. • AR Emoji Camera: Use the camera to create your My Emoji avatar. • AR Emoji Stickers: Add AR stickers to your My Emoji avatar. • Deco Pic: Decorate photos or videos in real time with the camera.
Single take
Capture more in each shot by taking both photos and videos at the same time. This shooting mode uses AI to create high-quality images and videos from multiple shots. The number of images and videos may vary.
- From camera, swipe to More > Single take.
- Tap Record and pan around the scene to capture multiple angles and moments. The videos and images will be saved as a single entry in the Gallery.
Record videos
Record smooth lifelike videos using your device.
- From Camera, swipe right or left to change the shooting mode to Video.
- Tap Record to begin recording a video.
• To take a picture while recording, tap Capture. • To temporarily stop recording, tap Pause. To continue recording, tap Resume.
- Tap Stop when you are finished recording.
Camera settings
Use the icons on the main camera screen and the settings menu to configure the camera's settings.
From Camera, tap Settings for the following options:
Intelligent features
- Scene optimizer: Automatically adjust the color settings of your picture to match the subject matter.
- Shot suggestions: Get on-screen guides to help you line up great shots.
- Scan QR codes: Automatically detect QR codes when using the camera. Pictures
- Swipe Shutter button to: Choose to either take a burst shot or create a GIF when you swipe the shutter to the nearest edge. • Picture formats: Choose file formats and other saving options.
- High efficiency pictures: Save pictures as high efficiency images to save space. Some sharing sites may not support this format.
Selfies
- Save selfies as previewed: Save selfies as they appear in the preview, flipping them.
- Selfie color tone: Set the color tone for your selfies to Natural or Enhanced.
Videos
- Video stabilization: Activate anti-shake to keep the focus steady when the camera is moving.
- Reduce file size: Record videos in HEVC format to save space. Other platforms or sharing sites may not support playback of this format.
General
• Auto HDR: Capture more detail in the bright and dark areas of your photos. • Grid lines: Display viewfinder grid lines to help compose a picture. • Location tags: Attach a GPS location tag to your pictures and videos. • Shooting methods:
- Press Volume keys to: Use the Volume keys to take pictures, record videos, zoom, or control system volume.
- Floating shutter button: Add an extra shutter button that you can move anywhere on the screen.
- Show palm: Hold your hand out with your palm facing the camera to have your picture taken in a few seconds.
Settings to keep: Choose whether to launch Camera with the same mode, selfie angle, and filters as the last time.
Storage location: Select a memory location.
A memory card (not included) must be installed to view Storage location.
• Watermark: Add a watermark to the bottom left corner of your pictures.
- Shutter sound: Play a tone when taking a picture.
- Privacy Notice: View Samsung's privacy information.
- Permissions: View required and optional permissions for the Camera
- Reset settings: Reset the Camera settings.
- Contact us: Contact Samsung support through Samsung Members.
- About Camera: View app and software information.

Gallery
Go to the Gallery to look at all the visual media stored on your device, view, edit, and manage pictures and videos.
From Apps, tap Gallery.

View pictures
Pictures stored on your device are viewable in the Gallery app.
- From Gallery, tap Pictures.
- Tap a picture to view it. Swipe left or right to view other pictures or
- To use Bixby Vision on the current picture, tap Bixby Vision. For more information, see Bixby.
- To mark the picture as a favorite, tap Add to Favorites.
- To access the following features, tap More:
- Details: View and edit information about the picture.
- Remaster picture: Refine a picture with automatic image improvements.
- Add portrait effect: Enhance or reduce the visibility of the background your portrait photos by dragging the slider.
- Copy to clipboard: Copy the image to paste in another app.
- Set as wallpaper: Set the picture as wallpaper.
- Move to Secure Folder: Move the picture to a Secure Folder.
- Print: Send the picture to a connected printer.
Edit pictures
Enhance your pictures using the Gallery's editing tools.
- From *Gallery, tap Pictures.
- Tap a picture to view it, and then tap Edit for the following options:
• Auto adjust: Apply automatic adjustments to improve the picture. • Transform: Rotate, flip, crop, or make other changes to the overall appearance of the picture. • Filters: Add color effects. • Tone: Adjust the brightness, exposure, contrast, and more. • Decorations: Add text, stickers, or hand drawn content.
• More options: Tap to access additional editing features. • Revert: Undo the changes applied to restore the original picture.
- Tap Save when finished.
Play video
View the videos stored on your device. You can save videos as favorites, video details.
- From *Gallery, tap Pictures.
- Tap a video to view it. Swipe left or right to view other pictures or
- To mark the video as a favorite, tap Add to Favorites. The video is Favorites under the Albums tab. • To access the following features, tap More:
- Details: View and edit information about the video.
- Open in Video player: View this video in the default video player
- Move to Secure Folder: Add this video to your Secure Folder.
- Tap Play video to play the video.
Video brightness
Enhance the image quality of your videos to enjoy brighter and more vivid videos.
From Settings, tap Advanced features > Video brightness and choose an option.
Edit video
Edit videos stored on your device.
- From Gallery, tap Pictures.
- Tap a video to view it.
- Tap Edit to use the following tools:
• Audio: Adjust the volume levels and add background music to the video. • Play: Preview the edited video. • Trim: Cut segments of the video.
- Transform: Rotate, flip, crop, or make other changes to the overall appearance of the video. • Filters: Add visual effects to the video.
- Tone: Adjust the brightness, exposure, contrast, and more. • Decorations: Add text, stickers, or hand-drawn content. • More options: Tap to access additional editing features.
- Revert: Undo the changes applied to restore the original video.
- Tap Save, and then confirm when prompted.
Share pictures and videos
Share pictures and videos from the Gallery app.
- From Gallery, tap Pictures.
- Tap: More options > Edit and select the pictures or videos you want to share.
- Tap Share, and then choose an app or connection to use for sharing selection. Follow the prompts.
Delete pictures and videos
Delete pictures and videos stored on your device.
- From Gallery, tap More options > Edit.
- Tap pictures and videos to select them.
- Tap Delete, and confirm when prompted.
Group similar images
Organize pictures and videos in the Gallery by similarity.
- From Gallery, tap Group similar images.
- Tap Ungroup similar images to return to the default Gallery view.
Take a screenshot
Capture an image of your screen. Your device will automatically create an album in the Gallery app.
- From any screen, press and release the Side and Volume down keys.
Palm swipe to capture a screenshot
Capture an image of the screen by swiping the edge of your hand across the screen, keeping in contact with the screen.
- From Settings, tap Advanced features > Motions and gestures > Palm swipe to capture.
- Tap to enable this feature.
Screenshot settings
Modify screenshot settings.
From Settings, tap Advanced features > Screenshots and screen recorder.
- Screenshot toolbar: Show additional options after you take a screenshot
- Hide status and navigation bars: Do not display the status bar or navigation bars on screenshots.
- Delete shared screenshots: Automatically delete screenshots after they are shared through the screenshot toolbar.
- Screenshot format: Choose if you would like your screenshots to be saved as JPG or PNG files.
Screen recorder
Record activities on your device, write notes, and use the camera to record an overlay of yourself to share with friends or family.
- From Quick Settings, tap Screen recorder.
- Choose a sound setting, and tap Start recording.
- A three-second countdown runs before it starts recording. You can tap countdown to begin recording immediately.
- Tap Draw to draw on the screen.
- Tap Pointer to show an icon on the screen when using your S Pen.
- Tap Selfie video to include a recording from your front camera.
- Tap Stop to finish recording. These are automatically saved to the Screen recordings album in the Gallery.
Screen recorder settings
Control the sound and quality settings for the screen recorder.
From Settings, tap Advanced features > Screenshots and screen recorder.
• Sound: Choose what sounds to record while using the screen recorder. • Video quality: Select a resolution. Selecting a higher resolution requires more memory. • Selfie video size: Drag the slider to set the size of the video overlay. • Show taps and touches: Enable to indicate screen taps and touches during recording.
Apps
Using apps
Samsung apps
Google apps
Microsoft apps

Using apps
Uninstall or disable apps | Search for apps | Sort apps | Create and use folders | Game Booster | App settings
The Apps list displays all preloaded and downloaded apps. Apps can be downloaded from Galaxy Store and the Google Play Store.
From a Home screen, swipe the screen upward to access the Apps list.
Uninstall or disable apps
Installed apps can be removed from your device. Some apps that are preloaded (available on your device by default) can only be disabled. Disabled apps are turned off and hidden from the Apps list.
From Apps, touch and hold an app, and tap Uninstall/Disable.
Search for apps
If you are not sure where to find an app or a setting, you can use the search feature.
- From Apps, tap Search, and enter a word or words. As you type, matching apps and settings appear as results on the screen.
- Tap a result to go to that app.

TIP You can customize the search settings by tapping: More options > Settings.
Sort apps
App shortcuts can be listed alphabetically or in your own custom order.
From Apps, tap: More options > Sort for the following sorting options:
- Custom order: Arrange apps manually.
- Alphabetical order: Sort apps alphabetically.

TIP When apps are arranged manually (Custom order), empty icon spaces can be removed by tapping More options > Clean up pages.
Create and use folders
You can make folders to organize App shortcuts on the Apps list.
- From Apps, touch and hold an app shortcut, and then drag it on top of another app shortcut until it is highlighted.
- Release the app shortcut to create the folder.
- Folder name: Name the folder.
- Palette: Change the folder color.
- Add apps: Place more apps in the folder. Tap apps to select them, then tap Done.
- Tap Back to close the folder.
Copy a folder to a Home screen
You can copy a folder to a Home screen.
From Apps, touch and hold a folder, and tap Add to Home.
Delete a folder
When you delete a folder, the app shortcuts return to the Apps list.
- From Apps, touch and hold a folder to delete.
- Tap Delete folder, and confirm when prompted.
Game Booster
Get optimized performance while playing games based on your usage. Block notifications and enable features to improve your gaming experience.
While playing a game, swipe up from the bottom of the screen to view the navigation bar. The following options are seen on the far right and left.
- Touch protection: Lock the screen to prevent accidental taps. This is the default option.
- Game Booster: Configure other options, including performance monitoring and blocking the navigation bar, screen touches, and screenshots.
App settings
Manage your downloaded and preloaded apps.
From Settings, tap Apps. Tap an option to customize:
- Choose default apps: Choose which apps to use for making calls, set messages, going to websites, and more.
- Samsung app settings: View a list of Samsung apps and customize settings.
- Your apps: Tap an app to view and update information about its usage settings. Options vary by app.

TIP To reset app options that have been changed, tap: More options > Reset app preferences.
Samsung apps
The following apps may be preloaded or downloaded over-the-air to your device during setup. Apps can be downloaded from Galaxy Store and the Google Play Store. Options may vary by carrier.
AR Zone | Bixby | Galaxy Store | Game Launcher | PENUP | Samsung Flow | Samsung Free | Samsung Global Goals | Samsung TV Plus | SmartThings | Tips | Voice Recorder | Calculator | Calendar | Clock | Contacts | Internet | My Files | Samsung Health | Samsung Notes

AR Zone
Access all of your Augmented Reality (AR) features in one place.
For more information, see AR Zone.

Bixby
Bixby displays customized content based on your interactions. Bixby learns from usage patterns and suggests content you may like.
For more information, see Bixby.

Galaxy Store
Find and download premium apps that are exclusive to Galaxy devices. An account is required to download from Galaxy Store.

Game Launcher
Automatically arrange all your games in one place. For more information on Game Launcher, visit samsung.com/us/support/owners/app/game-launcher.

TIP If Game Launcher is not seen in the Apps list, then from Settings, tap Advanced features > Game Launcher, and then tap 🐎.

PENUP
Share photos, comment on other creations, or just browse through the page to add something to your personal collection. This community brings together those who use the S Pen to draw, sketch, scribble or paint.

Samsung Flow
Connect your phone and tablet with Samsung Flow. You can then view and reply to messages from your phone on your connected tablet. You can use Mobile hotspot to access the Internet on your tablet through your phone's connection when other networks are not available.
For more information, visit samsung.com/us/support/owners/app/samsung-flow.

Samsung Free
Access live TV shows, news and articles from numerous sources, and interactive games entirely free of charge.

Samsung Global Goals
Learn more about the Global Goals initiative and contribute towards donation support these causes with ads from this app.

Samsung TV Plus
Enjoy free news, entertainment, and more on your Samsung TV and mobile

SmartThings
SmartThings allows you to control, automate, and monitor your home environment through a mobile device to fit your specific needs. You can use the app on multiple devices at once or one device at a time. Check the status of your home by looking at the dashboard.

NOTE: Non-Samsung connected device errors or defects are not covered by the Samsung warranty; contact the non-Samsung device manufacturer for support.

Tips
View tips and techniques as well as the user manual for your device.

Voice Recorder
Make audio recordings or speech-to-text memos with the Voice Recorder app.

Calculator
The Calculator app features both basic and scientific math functions, as well as a converter.


Calendar
The Calendar app can be connected to your various online accounts to combine all your calendars in one place.

Add calendars
Add your accounts to the Calendar app.
- From Calendar, tap Navigation drawer.
- Tap Manage calendars > Add account and select an account type.
- Enter your account information and follow the prompts.

TIP Accounts may also support email, contacts, and other features.
Calendar alert style
Alerts from the Calendar app can be set to different styles.
- From Calendar, tap Navigation drawer > Calendar settings > Alert style. The following options are available:
• Light: Receive a notification and hear a short sound. • Medium: Get a full screen alert and hear a short sound. • Strong: Get a full-screen alert and ring sound that persist until dismissed.
- Depending on the alert style selected above, the following sound option available:
- Short sound: Choose the alert sound for Light or Medium alert styles.
- Long sound: Choose the alert sound for the Strong alert style.
Create an event
Use your Calendar to create events.
- From Calendar, tap Add event to add an event.
- Enter details for the event, and then tap Save.
Delete an event
Delete events from your Calendar.
- From i Calendar, tap an event, and tap again to edit it.
- Tap Delete, and confirm when prompted.

Clock
The Clock app offers features for keeping track of time and setting alarms

Alarm
Use the Alarm tab to set one-time or recurring alarms and choose options to be notified.
- From Clock, tap Add alarm.
- Tap the following items to configure an alarm:
• Time: Set a time for the alarm. • Day: Choose the days for this alarm. - Alarm name: Enter a name for the alarm.
- Alarm sound: Choose a sound to play for the alarm and drag the volume of the alarm.
- Vibration: Choose whether the alarm uses vibration alert.
- Snooze: Allow snoozing. Set interval and repeat values for the alarm snoozing.
- Tap Save to save the alarm.

TIP To add your sleep schedule, create a bedtime reminder, and automatically put your device in Bedtime mode, tap: More options > Set bedtime and wake-up time.
Delete an alarm
You can delete an alarm that you created.
- From Clock, touch and hold an alarm.
- Tap Delete.
Alert settings
You can set the device to vibrate for alarms and timers whether the sound is set to Mute or Vibrate.
- From Clock, tap: More options > Settings.
- Tap Vibrate for alarms and timers to enable the feature.
World clock
The World clock lets you keep track of the current time in multiple cities around the globe.

- From Clock, tap World clock.
- Tap Add city.
- Drag the globe to spin it, tap the city you want, and then tap Add. • To remove a city, touch and hold it, and tap Delete.
Time zone converter
Set a time in a city on your World clock list to see what the local times are in other listed cities.
- From Clock, tap World clock.
- Tap: More options > Time zone converter.
- Tap ▼Menu to choose a different city.
- To add a city to the list, tap Add city.
- Swipe the hours, minutes, and period (AM or PM) on the clock to set a time. Local times for the other cities listed are automatically updated.
• To return the clock to the current time, tap Reset.
Weather settings
Show weather information on your World clock.
- From Clock, tap World clock.
- Tap: More options > Settings > Show weather to enable or disable weather information.
- Tap Temperature to change from Fahrenheit to Celsius.
Stopwatch
The Stopwatch lets you time events down to a hundredth of a second.
- From Clock, tap Stopwatch.
- Tap Start to begin timing. • To keep track of lap times, tap Lap.
- Tap Stop to end timing. • To continue timing after stopping the clock, tap Resume. • To reset the Stopwatch to zero, tap Reset.
Timer
Set a countdown timer for up to 99 hours, 59 minutes, and 59 seconds.
- From Clock, tap Timer.
- Use the keypad and tap Hours, Minutes, and Seconds to set the Timer.
- Tap Start to begin the Timer.
- To temporarily stop the Timer, tap Pause. To continue, tap Resume.
- To stop and reset the Timer, tap Cancel.
Preset timer
Name and save preset timers.
- From Clock, tap Timer → Add preset timer.
- Configure the countdown time and timer name.
- Tap Add to save the timer.
- To edit a saved preset timer, tap: More options > Edit preset timers.
Timer options
You can customize the Timer options.
- From Clock, tap Timer.
- Tap: More options > Settings.
- Sound: Choose a preloaded timer sound or add your own.
- Vibration: Enable vibration for the timer.
- Show mini timer: Show a pop-up window of the timer when the Clock app is minimized.
General settings
View and configure settings for all Clock tools.
From Clock, tap More options > Settings.
- Customization Service: Sign in to your Samsung account to customize personal content in supported apps.
- About Clock: View the current software version and check for updates.

Contacts
Store and manage your contacts. You can synchronize with personal accounts added to your device. Accounts may also support email, calendars, and other features.

Create a contact
- From Contacts, tap Create contact.
- Enter details for the contact, and then tap Save.
Edit a contact
When editing a contact, you can tap a field and change or delete information. You can add more fields to the contact's list of information.
- From Contacts, tap a contact.
- Tap Edit.
- Tap any of the fields to add, change, or delete information.
- Tap Save.
Favorites
When you mark contacts as favorites, they are grouped at the top of your list and easily accessible from other apps.
- From Contacts, tap a contact.
- Tap Favorites to mark the contact as a favorite.
• To remove the contact from Favorites, tap Favorites.
Share a contact
Share a contact with others by using various sharing methods and services.
- From Contacts, tap a contact.
- Tap Share.
- Tap either Share as file or Share as text.
- Choose a sharing method and follow the prompts.

TIP: When viewing a contact, tap More > QR code to quickly share the information with friends or family. The QR code automatically updates when you change the contact information fields.
Apps
Show contacts when sharing content
Share content directly with your contacts from within any app. Once enabled, frequent contacts are displayed in the Share window.
From Settings, tap Advanced features > Show contacts when sharing content, and tap to enable the feature.
Groups
You can use groups to organize your contacts.
Create a group
Create your own contact groups.
- From Contacts, tap Show navigation menu > Groups.
- Tap Create group, and then tap fields to enter information about the
- Group name: Enter a name for the new group.
- Add member: Select contacts to add to the new group, and then tap Done.
- Tap Save.
Add or remove group contacts
Add more contacts to a group, or remove contacts.
From Contacts, tap Show navigation menu > Groups, and then tap a group.
- To remove a contact, touch and hold a contact to select it, and then tap Remove.
- To add a contact, tap Edit > Add member, and then tap the contacts you want to add. When finished, tap Done > Save.
Send an email to a group
Send an email to members of a group.
- From Contacts, tap Show navigation menu > Groups, and then tap a group.
- Tap: More options > Send email.
- Tap contacts to select them, or tap the All checkbox at the top to select all, and then tap Done.
- Only group members that have an email address in their records are displayed.
- Choose an email account and follow the prompts.
Delete a group
Delete a group you have created.
- From Contacts, tap Show navigation menu > Groups, and then tap a group.
- Tap: More options > Delete.
• To only delete the group, tap Delete group only.
- To delete the group and the contacts in the group, tap Delete group and move members to the trash.
Manage contacts
You can import or export contacts, as well as link multiple contacts into one entry.
Import contacts
Import contacts to your device as vCard files (VCF).
- From Contacts, tap the Show navigation menu icon (≡) > Manage contacts.
- Tap Import or export contacts.
- Tap Import and follow the prompts.
Export contacts
Export contacts from your device as vCard files (VCF).
- From Contacts, tap the Show navigation menu icon (≡) > Manage contacts.
- Tap Import or export contacts.
- Tap Export and follow the prompts.
Merge contacts
Consolidate contact information from multiple sources into one contact by merging duplicate entries into a single contact.
- From Contacts, tap the navigation menu icon (≡) and select Manage contacts.
- Tap Merge contacts. Contacts with duplicate phone numbers, email addresses, and names will be listed together.
- Tap the contacts to select them, and tap Merge.
Delete contacts
Delete a single contact or multiple contacts.
- From Contacts, touch and hold a contact to select it.
You can also tap other contacts to select them for deletion.
- Tap Delete, and confirm when prompted.

Internet
Samsung Internet is a simple, fast, and reliable web browser for your device. Experience more secure web browsing features with Secret Mode, Biometric Login, and Contents Blocker.


TIP: Visit samsung.com/us/support/owners/app/samsung-internet for more information.
Browser tabs
Use tabs to view multiple web pages at the same time.
From Internet, tap New tab.
To close a tab, tap Close tab.
Create a Bookmark
Bookmark your favorite webpages to quickly access them.
From Internet, tap Add to bookmarks to save the open webpage.
Open a Bookmark
Quickly launch a web page from the Bookmarks page.
- From Internet, tap Bookmarks.
- Tap a bookmark entry.
Save a web page
There are several options to save a webpage in the Samsung Internet app.
From Internet, tap Tools > Add page to for the following options:
- Bookmarks: Add the webpage to your Bookmark list.
- Quick access: View a list of commonly accessed or saved webpages.
- Home screen: Create a shortcut to the webpage on your Home screen.
- Saved pages: Save the webpage content on your device so that you can access it offline.
View history
To view a list of recently visited web pages:
From Internet, tap Tools > History.

TIP: To clear your browsing history, tap More options > Clear history.
Share pages
Web pages can be shared with your contacts.
From Internet, tap Tools > Share, and follow the prompts.
Secret mode
Pages viewed in secret mode are not listed in your browser history or search history, and leave no traces (such as cookies) on your device. Secret tabs are a different color than the normal tab windows.
Any downloaded files remain on your device after you close the secret tab.
From Internet, tap Tabs > Turn on secret mode. Tap Start to begin browsing in secret mode.
Secret mode settings
Require a password or biometric lock to use secret mode.
- From Internet, tap Tabs.
- Tap: More options > Secret mode settings for the following options:
- Use password: Create a password to enable secret mode.
- Face: Use Face recognition to keep Secret mode private.
- Fingerprints: Use Fingerprint scanner to keep Secret mode private.
- Reset Secret mode: Erase your secret mode data and restore default settings.
Turn off secret mode
Disable secret mode and return to normal browsing.
From Internet, tap Tabs > Turn off secret mode.
Internet settings
Modify settings associated with using the Internet app.
From Internet, tap Tools > Settings.

My Files
View and manage files stored on your device, including images, videos, music, and sound clips. You can also access and manage files saved to your cloud or SD card, if supported.

File groups
Files stored in the device are organized into the following groups:
- Recent files: View recently accessed files.
- Categories: View your files based on the file type.
- Storage: View files saved on your device, optional SD card, and cloud accounts.
- Cloud accounts vary depending on the services you sign in to.
- Analyze storage: See what's taking up space in your storage.
- Edit drawer: Enable, disable, or reorder items for My Files.
My Files settings
Use My Files settings to customize your file management options and more. Options may vary by carrier.
From My Files > Settings, the following options are available:
- Cloud accounts: Connect to and manage your cloud services.
- File management: Customize how files are displayed, deleted, and account mobile data.
- Analyze storage: Choose a file size to flag when analyzing storage.
- Privacy: View the permissions for My Files.

Samsung Health
Use Samsung Health to plan, track various aspects of daily life contributing to well-being such as physical activity, diet, and sleep. For more information, visit samsung.com/us/support/owners/app/samsung-health.

NOTE The information gathered from this device, Samsung Health, or related software is not intended for use in the diagnosis of disease or other conditions, or in the cure, mitigation, treatment, or prevention of disease.
The accuracy of the information and data provided by this device and its software may be affected by factors such as environmental conditions, species activity performed while using/wearing the device, settings of the device, user configuration/user-provided information, and other end-user interactions.
Before you start exercising
Although the Samsung Health application is a great companion to your exercise routine, it is always best to make sure you consult with your physician before beginning any exercise regimen. While moderate physical activity, such as walking, is safe for most people, health experts suggest that you talk with your doctor before you start an exercise program, particularly if you have any of the following conditions:
- Heart disease; Asthma or lung disease; Diabetes, or liver or kidney disease; Arthritis.
Before beginning your exercise regimen, check with your doctor if you have symptoms suggestive of heart, lung, or other serious disease, such as:
· Pain or discomfort in your chest, neck, jaw, or arms during physical activity; · Dizziness or loss of consciousness; · Shortness of breath with mild exertion or at rest, or when lying down in bed; · Ankle swelling, especially at night; · A heart murmur or a rapid or pronounced heartbeat; · Muscle pain when walking upstairs or up a hill that goes away when you rest.
It is recommended that before engaging in an exercise routine, you consult your doctor or medical practitioner. If you are unsure of your health status, have health problems, or are pregnant, you should speak with your doctor before starting a new exercise program.

Samsung Notes
Use Samsung Notes to create notes containing text, images with footnotes, recordings, and music. You can share your notes easily using social network services.
Visit samsung.com/us/support/owners/app/samsung-notes to learn more.

Create notes
Add text, images, voice recordings and more.
- From Samsung Notes, tap Add.
- Use the text options to create content.
Voice recordings
Create annotated voice recordings perfect for lectures or meetings. Take no recording audio. Playback is synced to scroll to the corresponding text.
- From Samsung Notes, tap Add.
- Tap Insert > Voice recording.
- Use the text options to create content while audio is being recorded.
Edit notes
Make edits to notes you create.
- From Samsung Notes, tap a note to view it.
- Tap Edit and make changes.
- When you are finished, tap Navigate up.
Notes options
You can edit, sort, or manage notes.
From Samsung Notes, the following options are available:
- Import PDFs: Open a PDF in Samsung Notes.
• Search: Search for a keyword.
• More options:
- Edit: Select notes to share, delete, save as file, lock, or move.
- View: Switch between Grid, List, or Simple list.
- Pin favorites to top: Keep notes marked as your favorites at the main page.
Notes menu
You can view your notes by category.
From Samsung Notes, tap Show navigation menu for the following options:
• Samsung Notes settings: View settings for the Samsung Notes app. - All notes: View all notes. - Shared notebooks: View notebooks shared with your contacts through your Samsung account. - Trash: View deleted notes for up to 15 days. - Folders: View notes by groups. - Manage folders: Add, remove, and organize groups.
Google apps
The following Google apps may be preloaded on your device. Apps can be downloaded from the Google Store.
Chrome | Drive | Duo | Gmail | Google | Maps | Messages | Photos | Google Play Movies & TV | Play Store | YouTube | YT Music

Chrome
Browse the Internet with Chrome. Bring your open tabs, bookmarks, and address bar data from your computer to your mobile device.
Visit support.google.com/chrome to learn more.

Drive
Open, view, rename, and share files saved to your Google Account.
Visit support.google.com/drive to learn more.

Duo
Make cross-platform video calls on phones and tablets, smart devices, and web.
Visit support.google.com/duo to learn more.

Gmail
Send and receive email with Google's web-based email service.
Visit support.google.com/mail to learn more.

Find online content with tools that learn what interests you. Turn on your feed to receive customized content.
Visit support.google.com/websearch to learn more.

Maps
Get directions and other location-based information. You must enable location services to use Google Maps. For more information, see Location.
Visit support.google.com/maps to learn more.

Messages
Send and receive messages over Wi-Fi or data with Google's official app for chat.
Visit support.google.com/messages to learn more.

Photos
Store and back up your photos and videos automatically to your Google Account with Google Photos™.
Visit support.google.com/photos to learn more.

Google Play Movies & TV
Watch movies and TV shows purchased from Google Play. You can also view content saved on your device.
Visit play.google.com/store/movies to learn more.

Play Store
Find new apps, movies and TV shows, music, books, magazines, and games in the Google Play store.
Visit support.google.com/play to learn more.

YouTube
Watch and upload YouTube videos right from your device.
Visit support.google.com/youtube to learn more.

YT Music
Stream and browse playlists, albums, and artists from YouTube Music.
Microsoft apps
The following Microsoft apps may be preloaded on your device. Apps can be downloaded from Galaxy Store and the Google Play store.
Outlook | Office | OneDrive

Outlook
Access email, calendar, contacts, tasks, and more in Outlook. See Add an Account. Visit support.office.com/en-us/article/outlook-for-ios-and-android-help-cd84214e-a5ac-4e95-9ea3-e07f78d0cde6 to learn more.

Devices and software are constantly evolving — the illustrations you see here are for reference only.

Office
Enjoy the Word, Excel, and PowerPoint apps on your mobile device with the Office mobile app.

OneDrive
Store and share photos, videos, documents, and more in your free online account, accessible from your personal computer, tablet, or phone.
Access Settings
Connections
Sounds and vibration
Notifications
Display
Device maintenance
Lock screen and security
Accounts
Accessibility
Other settings

Access Settings
There are a couple of ways to access your device settings.
- From a Home screen, swipe down and tap Settings.
• From Apps, tap Settings.
Search for Settings
If you are not sure exactly where to find a certain setting, you can search
- From Settings, tap Search, and enter keywords.
- Tap an entry to go to that setting.
Connections
Manage connections between your device and a variety of networks and other devices.
Wi-Fi | Bluetooth | Airplane mode | Mobile networks | Data usage | Mobile hotspot | Tethering | Nearby device scanning | Connect to a printer | Virtual Private Networks | Private DNS | Ethernet
Wi-Fi
You can connect your device to a Wi-Fi network to access the Internet without using your mobile data.
- From Settings, tap Connections > Wi-Fi, and then tap the switch to turn on Wi-Fi and scan for available networks.
- Tap a network, and enter a password if required.
- Tap Connect.
Connect to a hidden Wi-Fi network
If the Wi-Fi network you want is not listed after a scan, you can still connect by entering the information manually. Ask the Wi-Fi network administrator for the network name and password before you begin.
- From Settings, tap Connections > Wi-Fi, and then tap the switch to turn on Wi-Fi.
- Tap Add network at the bottom of the list.
- Enter information about the Wi-Fi network:
• Network name: Type the exact name of the network. • Security: Select a security option from the list, and enter the password required. • View more: Define other advanced options, such as IP and Proxy settings.
- Tap Save.

TIP: Tap QR scanner to connect to a Wi-Fi network by using your device's camera to scan a QR code.
Advanced Wi-Fi settings
You can configure connections to various types of Wi-Fi networks and hotspots, manage saved networks, and look up your device's network addresses. Options may vary by carrier.
- From Settings, tap Connections > Wi-Fi, and then tap to turn on Wi-Fi.
- Tap: More options > Advanced.
- Sync with Samsung Cloud/account: Sync Wi-Fi profiles with your Samsung account.
- Switch to mobile data: When enabled, your device will switch to mobile data whenever the Wi-Fi connection is unstable. When the Wi-Fi signal is strong, it switches back to Wi-Fi.
- Turn on Wi-Fi automatically: Turn on Wi-Fi in frequently-used locations.
- Detect suspicious networks: Get notified when suspicious activity is detected on the current Wi-Fi network.
- Show network quality info: Display network information (such as speed and stability) in the list of available Wi-Fi networks.
- Wi-Fi power saving mode: Enable Wi-Fi traffic analysis to reduce battery usage.
- Network notification / Wi-Fi notifications: Receive notifications when open networks in range are detected. • Show Wi-Fi pop-up: Alert me that Wi-Fi is available when opening apps.
- Manage networks: View saved Wi-Fi networks and configure whether to reconnect to or forget individual networks. • Wi-Fi control history: View apps that have recently turned your Wi-Fi
- Hotspot 2.0: Connect automatically to Wi-Fi networks that support Hotspot 2.0. • Install network certificates: Install authentication certificates.
Wi-Fi Direct
Wi-Fi Direct uses Wi-Fi to share data between devices.
- From Settings, tap Connections > Wi-Fi, and then tap to turn on Wi-Fi.
- Tap: More options > Wi-Fi Direct.
- Tap a device, and then follow the prompts to connect.
Disconnect from Wi-Fi Direct
Disconnect your device from a Wi-Fi Direct device.
From Settings, tap Connections > Wi-Fi > More options > Wi-Fi Direct. Tap a device to disconnect it.
Bluetooth
You can pair your device to other Bluetooth-enabled devices, like Bluetooth headphones or a Bluetooth-enabled vehicle infotainment system. Once a pairing is created, the devices remember each other and can exchange information without having to enter the passkey again.
- From Settings, tap Connections > Bluetooth, and then tap to turn on Bluetooth.
- Tap a device and follow the prompts to connect.

TIP When sharing a file, tap Bluetooth to use this feature.
Rename a paired device
You can rename a paired device to make it easier to recognize.
- From Settings, tap Connections > Bluetooth, and then tap to turn on Bluetooth.
- Tap Settings next to the device name, and then tap Rename.
- Enter a new name, and tap Rename.
Unpair from a Bluetooth device
When you unpair from a Bluetooth device, the two devices no longer recognize each other and you will need to pair with the device again in order to connect.
- From Settings, tap Connections > Bluetooth, and then tap to turn on Bluetooth.
- Tap Settings next to the device, and then tap Unpair.
Advanced options
Additional Bluetooth features are available in the Advanced menu. Options may vary by carrier.
- From Settings, tap Connections > Bluetooth.
- Tap Advanced or More options > Advanced for the following options:
- Sync with Samsung Cloud/account: Sync files transferred through Bluetooth with your Samsung account.
- Tablet name: Change the name of your device for Bluetooth connections.
- Received files: View a list of files received using Bluetooth. • Music Share: Let friends play music on your Bluetooth speaker or headphones.
- Ringtone sync: Use the ringtone set on your device when you receive calls through a connected Bluetooth device.
- Bluetooth control history: View apps that have used Bluetooth recently.
- Block pairing requests: Add devices to block pairing requests.
- Bluetooth scan history: View which apps have recently scanned for nearby Bluetooth devices and manage Bluetooth features for apps.
Airplane mode
Airplane mode turns off all network connections including calling, texting, mobile data, Wi-Fi, and Bluetooth. While Airplane mode is enabled, you can turn on Wi-Fi and Bluetooth in Settings or from the Quick settings panel.
From Settings, tap Connections > Airplane mode, and then tap the switch to enable this feature.

NOTE The use of mobile devices on an aircraft or a ship may be subject to federal and local guidelines and restrictions. Airplane mode will disable all network connectivity. Check with appropriate authorities and always follow crew instructions regarding when and how you may use your device.
Mobile networks
Use Mobile networks to configure your device's ability to connect to mobile networks and use mobile data. Options may vary by carrier.
From Settings, tap Connections > Mobile networks.
- Mobile data: Enable mobile data usage.
- International data roaming: Change voice, text, and data roaming settings for international roaming.
- Allow 2G service: Permit the use of 2G service in areas with limited coverage.
- Data roaming access: Configure access to mobile networks while roaming.
- Roaming state: Enable or disable data while roaming on other mobile networks. • Signal strength: View mobile signal strength.
- Access Point Names: Choose or add APNs, which have the network your device needs to connect to your provider. • Network operators: Choose available and preferred networks. • Network extenders: Scan for cells that can extend your network connection.

TIP Use these features to help manage connection settings that may affect your monthly bill.
Data usage
Check your current mobile and Wi-Fi data usage. You can also customize warnings and limits.
From Settings, tap Connections > Data usage.
Turn on Data saver
Use Data saver to reduce your data consumption by preventing selected apps from sending or receiving data in the background.
- From Settings, tap Connections > Data usage > Data saver.
- Tap to turn on Data saver.
- To allow some apps to have unrestricted data usage, tap Allowed while Data saver is on, and tap next to each app to specify restrictions.
Monitor mobile data
You can customize your mobile data access by setting limits and restrictions. Restrictions may vary by carrier.
From Settings, tap Connections > Data usage. The following options are available:
- Mobile data: Use mobile data from your plan.
- International data roaming: Enable mobile data services while roaming internationally.
- Mobile data only apps: Set apps to always use mobile data, even when the device is connected to Wi-Fi.
- Alert me about data usage: Enable alerts for when your mobile data usage reaches the amount you chose.
- Mobile data usage: View data usage over mobile connections over a period of time. You can view total usage as well as usage by app.
- Billing cycle and data warning: Change the monthly date to align with your carrier's billing date.

TIP Use these features to keep an eye on your estimated data usage.
Monitor Wi-Fi data
You can restrict Wi-Fi data access by customizing usage limits and network settings:
- From Settings, tap Connections > Data usage.
- Tap Wi-Fi data usage to view data usage over Wi-Fi connections over time. You can view total usage as well as usage by app.
Mobile hotspot
Mobile hotspot uses your data plan to create a Wi-Fi network that can connect multiple devices.
- From Settings, tap Connections > Mobile hotspot and tethering > Mobile hotspot.
- Tap to turn on Mobile hotspot.
- On the devices you want to connect, activate Wi-Fi and select your Mobile hotspot. Enter the Mobile hotspot password to connect.
Connected devices are listed under the heading Connected devices.

TIP: Tap QR code to connect another device to your Mobile hotspot by scanning a QR code instead of entering a password.
Configure mobile hotspot settings
You can customize your mobile hotspot's security and connection settings.
- From Settings, tap Connections > Mobile hotspot and tethering > Mobile hotspot.
- Tap Configure for the following settings:
• Network name: View and change the name of your Mobile hotspot. • Security: Choose the security level for your Mobile hotspot. - Password: If you choose a security level that uses a password, you can view or change it. - Band: Select one of the available bandwidth options. - Advanced: Configure additional Mobile hotspot settings.
Auto hotspot
Share your hotspot connection automatically with other devices signed in to your Samsung account.
- From Settings, tap Connections > Mobile hotspot and tethering > Mobile hotspot.
- Tap Auto hotspot, and tap to enable the feature.
Tethering
You can use tethering to share your device's Internet connection with another device. Options may vary by carrier.
- From Settings, tap Connections > Mobile hotspot and tethering.
- Tap an option:
- Tap Bluetooth tethering to share your device's Internet connection using Bluetooth.
- Connect the computer to the device using a USB cable, and then tap USB tethering.
- Connect the computer to the device using an Ethernet adapter, and then tap Ethernet tethering.
Nearby device scanning
Easily set up connections to other available devices by turning on Nearby device scanning. This feature sends you a notification when there are available devices to connect to.
- From Settings, tap Connections > More connection settings > Nearby device scanning.
- Tap to turn on the feature.
Connect to a printer
Connect your device to a printer on the same Wi-Fi network to easily print documents and images from your device.
- From Settings, tap Connections > More connection settings > Printing.
- Tap Default print service, and then tap: More options > Add printer.
- If your printer requires a plugin, tap Download plugin and follow the prompts to add a print service.

NOTE: Not all apps support printing.
Virtual Private Networks
A Virtual Private Network (VPN) allows you to connect to a private secured network from your device. You will need the connection information from your VPN administrator.
- From Settings, tap Connections > More connection settings > VPN.
- Tap More options > Add VPN profile.
- Enter the VPN network information provided by your network administrator and tap Save.
Manage a VPN
Use the VPN settings menu to edit or delete a VPN connection.
- From Settings, tap Connections > More connection settings > VPN.
- Tap Settings next to a VPN.
- Edit the VPN and tap Save, or tap Delete to remove the VPN.
Connect to a VPN
Once you have set up a VPN, you can connect to and disconnect from it.
- From Settings, tap Connections > More connection settings > VPN.
- Tap a VPN, enter your login information, and tap Connect.
- To disconnect, tap the VPN, and then tap Disconnect.
Private DNS
You can configure your device to connect to a private DNS host.
- From Settings, tap Connections > More connection settings > Private DNS.
- Tap one of the available options to configure a private DNS connection.
- Tap Save.
Ethernet
If wireless network connection is not available, you can use an Ethernet connection to connect your device to a local network.
- Connect an Ethernet cable to your device.
- From Settings, tap Connections > More connection settings > Ethernet, and follow the prompts.

TIP You need an adapter (not included) to connect an Ethernet cable to your device.
Sounds and vibration
You can control the sounds and vibrations used to indicate notifications, screen touches, and other interactions.
Sound mode | Vibrations | Volume | Notification sound | System sound themes | System sounds and vibration | Dolby Atmos | Equalizer | UHQ upscaler | Adapt sound | Separate app sound
Sound mode
You can change the sound mode on your device without using the volume keys.
From Settings, tap Sounds and vibration, and then choose a mode:
- Sound: Use the sounds, vibrations, and volume levels you have chosen. Sound settings for notifications and alerts.
- Vibrate: Use vibration only for notifications and alerts.
- Mute: Set your device to make no sounds.
- Temporary mute: Set a time limit for muting the device.

TIP Use the sound mode setting instead of the volume keys to change the sound mode without losing your customized sound levels.
Cover screen to mute
Mute alarms by putting your hand over the screen.
From Settings, tap Advanced features > Motions and gestures > Cover screen to mute, and tap to enable.
Vibrations
You can control how and when your device vibrates.
- From Settings, tap Sounds and vibration.
- Tap options to customize:
- Notification vibration pattern: Choose from preset vibration patterns for notifications.
- Vibration intensity: Set vibration intensity levels for notifications and touch interactions by dragging the sliders.
Volume
Set the volume level for notifications, media, and system sounds.
From Settings, tap Sounds and vibration > Volume, and drag the sliders for each sound type.

TIP You can also use the Volume keys to adjust the volume. When the pre-pop-up menu shows the volume level and current sound type, you can expand the menu and then adjust the volume of the other sound types by dragging their sliders.
Use Volume keys for media
Set the default action of the Volume keys to control the media sound volume rather than whichever sound type is in use.
- From Settings, tap Sounds and vibration > Volume.
- Tap Use Volume keys for media to enable this feature.
Media volume limit
Limit the maximum output of the device's volume while using Bluetooth spec headphones (not included).
- From Settings, tap Sounds and vibration > Volume.
- Tap: More options > Media volume limit.
- Tap to enable this feature.
- To set the maximum output volume, drag the Custom volume limit slider.
- To require a PIN to make changes to the volume setting, tap Set volume limit PIN.
Notification sound
Choose a preset sound for all notification alerts.
- From Settings, tap Sounds and vibration > Notification sound.
- Tap a sound to hear a preview and select it.

TIP You can also customize notification sounds to be unique for each app using the App settings menu.
System sound themes
Choose a sound theme to use for touch interactions, charging, changing the mode, and Samsung Keyboard, and more.
From Settings, tap Sounds and vibration > System sound and choose an available option.
System sounds and vibration
Customize your device's sounds and vibrations for actions like tapping the screen or charging the device. Options may vary by carrier.
From Settings, tap Sounds and vibration > System sound/vibration control for the following options:
Sound
- Touch interactions: Play tones when you touch or tap the screen to make selections.
- Screen lock/unlock: Play a sound when you lock or unlock the screen.
- Charging: Play a sound when a charger is connected.
- Dialing keypad: Play a tone when dialing numbers on the Phone keypad.
- Samsung keyboard: Play a sound when typing with the Samsung keyboard.
Vibration
- Dialing keypad: Vibrate when dialing numbers on the Phone keypad.
- Navigation gestures: Vibrate when using gestures.
Navigation gestures: Vibrate when using gestures.
- Samsung keyboard: Vibrate when typing with the Samsung keyboard.
Samsung keyboard: Vibrate when typing with the Samsung keyboard.
Enjoy Dolby Atmos quality when playing content that was specifically mixed for Atmos. This feature may only be available with a headset connected.
From Settings, tap Sounds and vibration > Sound quality and effects for the following options:
- Dolby Atmos: Experience breakthrough audio that flows above and around you.
- Dolby Atmos for gaming: Apply Dolby Atmos optimized for gaming.
Equalizer
Choose an audio preset that is customized to different genres of music, or change your audio settings.
- From Settings, tap Sounds and vibration > Sound quality and effects.
- Tap Equalizer to choose a music genre.
UHQ upscaler
Enhance the sound resolution of music and videos for a clearer listening experience. This feature is only available with a headset connected.
- From Settings, tap Sounds and vibration > Sound quality and effects.
- Tap UHQ upscaler and choose an upscaling option.
Adapt sound
Customize the sound for each ear and enhance your listening experience.
- From Settings, tap Sounds and vibration > Sound quality and effects > Adapt sound.
- Tap Adapt sound for to select when to change the sound settings.
- Tap the sound profile that fits you best, and tap Settings to customize

TIP Tap Test my hearing to let your device identify the best sound for you.
Separate app sound
You can choose to have an app play only media sound on a Bluetooth's headset separate from the other sounds (like notifications). Connect to a Bluetooth device to make this option available in the Audio device menu.
- From Settings, tap Sounds and vibration > Separate app sound.
- Tap Turn on now to enable Separate app sound, and then set the following options:
- App: Choose an app to play its sound on a separate audio device.
- Audio device: Choose the audio device that you want the app's sound played on.
Notifications
You can prioritize and streamline app alerts by changing which apps send notifications and how notifications alert you.
Notification pop-up style | Recently sent notifications | Do not disturb | Advanced settings
Notification pop-up style
You can change the style and additional settings for your notifications.
From Settings, tap Notifications, and then choose a pop-up style:
- Brief: Enable customization of your notification colors, lighting style, and included apps.
- Included apps: View brief notifications for your apps.
- Brief pop-up settings: Customize the Edge lighting style, colors, and notifications to show even while the screen is off.
- Detailed: Enable the default Samsung Notification settings.
Recently sent notifications
You can view a list of apps that have sent notifications under Recently sent notifications.
- From Settings, tap Notifications.
- Tap an entry under Recently sent to customize the notification settings.
- Tap More to see the expanded list.
Do not disturb
Do not disturb allows you to block sounds and notifications while this mode is on. You can also specify exceptions for people, apps, and alarms. You can schedule it for recurring events like sleep or meetings.
From Settings, tap Notifications > Do not disturb and configure the following:
- Do not disturb: Enable Do not disturb to block sounds and notifications.
- For how long?: Choose a default duration for Do not disturb mode when enabling it manually.
Schedule
- Sleeping: Customize a schedule for Do not disturb mode while you are sleeping.
- Add schedule: Create a new schedule to configure the days and times to regularly put your device in Do not disturb mode.
Exceptions
- Calls, messages, and conversations: Tap to allow Do not disturb exceptions.
- Alarms and sounds: Enable sounds and vibrations for alarms, events, and reminders while Do Not Disturb mode is active.
- Apps: Add apps that you would like to receive notifications from in Do Not Disturb mode. Call, message, and conversation notifications will still reach you even if you don't allow the associated apps.
- Hide notifications: View customization options to hide notifications.
Advanced settings
You can configure notifications from apps and services.
From Settings, tap Notifications > Advanced settings.
• Show date: Show the date in the Status bar. • Show notification icons: Modify how many notifications appear on the Status bar. • Show battery percentage: Display the current battery life of your device in the Status bar.
- Notification history: Display recent and snoozed notifications.
- Conversations: View conversation notifications. Touch and hold a conversation notification to mark it as priority, set it as alerting, or
- Floating notifications: Enable floating notifications in either Bubbles or pop-up view.
- Suggest actions and replies for notifications: Get applicable suggestions for actions to notifications and replies to messages.
- Show snooze button: Enable to display a button to quickly snooze your notifications.
- Notification reminders: Enable and customize periodic reminders about notifications from selected apps and services. Clear notifications to stop reminders.
- App icon badges: Identify which apps have active notifications with badges that appear on their icons. Tap to choose whether or not badges show the number of unread notifications.
Display
You can configure the screen brightness, timeout delay, font size, and many display settings.
Dark mode | Screen brightness | Motion smoothness | Eye comfort shield | Screen mode | Font size and style | Screen zoom | Screen timeout | Touch sensitivity | Screen saver | Double tap to turn on screen | Double tap to turn off screen | Keep screen on while viewing
Dark mode
Dark mode allows you to switch to a darker theme to keep your eyes comfortable at night, darkening white or bright screens and notifications.
From Settings, tap Display for the following options:
- Light: Apply a light color theme to your device (default).
- Dark: Apply a dark color theme to your device.
- Dark mode settings: Customize when and where Dark mode is applied
- Turn on as scheduled: Configure Dark mode for either Sunset to sunrise or Custom schedule.
Screen brightness
Adjust the screen brightness according to lighting conditions or personal preference.
- From Settings, tap Display.
- Customize options under Brightness:
- Drag the Brightness slider to set a custom brightness level.
- Tap Adaptive brightness to automatically adjust the screen brightness based on the lighting conditions.

TIP: You can also adjust screen brightness from the Quick settings panel.
Motion smoothness
Get smoother scrolling and more realistic animations by increasing the screen refresh rate.
- From Settings, tap Display > Motion smoothness.
- Tap an option, and then tap Apply.
Eye comfort shield
This feature may help you sleep better and reduce eye strain. You can set it to automatically turn on and off.
From Settings, tap Display > Eye comfort shield, and then choose one of the following options:
- Tap to enable this feature.
- Tap Set schedule and choose Always on, Sunset to sunrise, or Custom.
- Drag the Color temperature slider to set the opacity of the filter.
Screen mode
Your device has several screen mode options which adjust the screen quality for different situations. You can select the mode according to your preference.
- From Settings, tap Display > Screen mode.
- Tap an option to set a different screen mode.
Font size and style
You can change the font size and style to customize your device.
From Settings, tap Display > Font size and style for the following options:
- Tap Font style to choose a different font.
- Tap a font to select it, or tap Download fonts to add fonts from Galaxy Store.
- Tap Bold font to make all fonts appear with bold weight.
- Drag the Font size slider to adjust the size of text.
Screen zoom
Adjust the zoom level to make content easier to see.
- From Settings, tap Display > Screen zoom.
- Drag the Screen zoom slider to adjust the zoom level.
Screen timeout
You can set the screen to turn off after a set amount of time.
From Settings, tap Display > Screen timeout, and tap a time limit to set it.

NOTE: Prolonged display of non-moving images, excluding Always On Display, may result in permanent ghost-like afterimages or degraded image quality. Turn off the display screen when not in use.
Touch sensitivity
Increase the touch sensitivity of the screen for use with screen protectors.
From Settings, tap Display > Touch sensitivity to enable.
Screen saver
You can display colors or photos when the screen turns off or while charging.
- From Settings, tap Display > Screen saver.
- Choose one of the following options:
• None: Do not display a screen saver. • Colors: Tap the selector to display a changing screen of colors. • Photo table: Display pictures in a photo table. • Photo frame: Display pictures in a photo frame. • Photos: Display pictures from your Google Photos account.
- Tap Preview for a demonstration of the selected Screen saver.

TIP Tap ⚙️ Settings next to a feature for additional options.
Double tap to turn on screen
Turn on the screen by double-tapping instead of using the Side key.
From Settings, tap Advanced features > Motions and gestures > Double tap to turn on screen to enable this feature.
Double tap to turn off screen
Turn off the screen by double-tapping instead of using the Side key.
From Settings, tap Advanced features > Motions and gestures > Double tap to turn off screen to enable this feature.
Keep screen on while viewing
Use the front camera to detect when you're looking at the screen to keep
From Settings, tap Advanced features > Motions and gestures > Keep screen on while viewing, and tap to enable the feature.
Device maintenance
View the status of your device's battery, storage, and memory. You can also automatically optimize your device's system resources.
Quick optimization | Battery | Storage | Memory | Advanced device care options | Language and input | Date and time | Troubleshooting
Quick optimization
The quick optimization feature improves device performance through the following actions:
- Identifying apps that use excessive battery power and clearing unneeded ones from memory.
- Deleting unnecessary files and closing apps running in the background.
- Scanning for malware.
To use the quick optimization feature:
From Settings, tap Battery and device care > Optimize now.
Battery
View how battery power is used for your various device activities.
From Settings, tap Battery and device care > Battery for the following options:
- Usage since last full charge: View your recent battery usage by time and service.
- Power saving: Save battery life by limiting background network usage, syncing, and location checking. Choose from additional power saving options to save more power when this mode is enabled.
- Background usage limits: View apps that you don't use often and their battery usage. To disable this feature, tap Put unused apps to sleep.
- More battery settings: Configure additional battery settings and notices.
Storage
View your storage capacity and detailed usage by category and file type. Also mount, unmount, or format an optional memory card (not included).
From Settings, tap Battery and device care > Storage.
- Tap a category to view and manage files.
Memory card
Once an optional microSD memory card (not included) has been installed in the device, the card memory is displayed in the Storage setting.
For more information, see Set up your device.
Mount a memory card
When you install an optional memory card, it is automatically mounted (on the device) and prepared for use. However, should you unmount the card before removing it from the device, you need to mount it before it can be accessed.
- From Settings, tap Battery and device care > Storage.
- Swipe the screen to SD card, and then tap Mount.
Remove a memory card
To prevent damage to information stored on the memory card, unmount it before removing it from the device.
- From Settings, tap Battery and device care > Storage.
- Swipe the screen to SD card, and then tap: More options > Unmount.
- Remove your memory card from the device.
Format a memory card
When formatting an SD card, you should back up your music and photo files stored on the card because formatting the SD card deletes ALL stored files.
- From Settings, tap Battery and device care > Storage.
- Swipe the screen to SD card, and then tap: More options > Format.
- Tap Format to confirm.
Memory
Check the amount of available memory. You can close background apps at the amount of memory you are using to speed up your device.
From Settings, tap Battery and device care > Memory. The used and available memory are shown.
- Tap Clean now to free up as much memory as possible.
- Tap View more to view the full list of apps and services using memory. Tap to include or exclude these apps and services.
- Tap Apps not used recently to view apps and services that are in group. Tap to include or exclude these apps and services.
- Tap Excluded apps to view a list of apps that have been excluded. Tap Add apps to choose apps to exclude from memory usage checks.
- Tap RAM Plus to select how much internal storage to use as virtual memory to improve app performance.
Advanced device care options
Other Device care features are available in the Advanced menu.
From Settings, tap Battery and device care. The following options are available:
• Care report: View information about the restart history and charging temperature tips. • More options:
- Add to Apps screen: Display the icon for Device care on the Apps screen.
- Automation: Optimize your device automatically at set times based on your usage patterns.
- Contact us: Contact Samsung support through Samsung Members.
- About Device care: View version and license information about the care feature.
Language and input
Configure your device's language and input settings.
Change the device language
You can add languages to your list and organize them according to your preference. If an app does not support your default language, it will move to the next language in your list.
- From Settings, tap General management > Language.
- Tap Add language, and select a language from the list.
- Tap Set as default to change the device language.
- To switch to another language on the list, tap the desired language and tap Apply.
Text-to-speech
Configure your Text-to-Speech (TTS) options. TTS is used for various accessibility features, such as Voice Assistant.
From Settings, tap General management > Text-to-speech for options:
- Preferred engine: Choose either the Samsung or Google Text-to-speech engine. Tap Settings for options.
- Language: Set the default speech language.
- Speech rate: Set the speed at which the text is spoken.
- Pitch: Set the pitch of the speech.
- Play: Tap to play a short demonstration of speech synthesis.
- Reset: Reset the speech rate and pitch.
Keyboard list and default
Change your default keyboard, modify built-in keyboards, and change keyboard settings.
From Settings, tap General management > Keyboard list and default for the following options:
- Default keyboard: Choose a default keyboard for your device's menus and keyboards.
- Samsung keyboard: Modify settings for the Samsung keyboard.
- Google voice typing: Modify settings for Google Voice input.
- Google voice typing [Legacy]: Modify settings for Google Voice input.
- Samsung voice input: Modify settings for Samsung voice input.
- Keyboard button on navigation bar: Enable a button on the navigation bar to quickly switch between keyboards.
Mouse and trackpad
Configure pointer speed and button assignments for an optional mouse or trackpad (not included).
From Settings, tap General management > Mouse and trackpad.
- Pointer speed: Drag the slider to the right to go faster or to the left to go slower.
- Wheel scrolling speed: Drag the slider to the right to scroll faster or to the left to scroll slower.
- Enhance pointer precision: Enable to make the mouse cursor move faster or slower depending on how fast you move your mouse.
- Pointer size and color: Change the pointer size and color.
- Primary mouse button: Choose either the Left or Right mouse button to be your primary button.
- Secondary button: Choose the action of your secondary mouse button.
- Middle button: Choose the action of your middle mouse button. • Additional button 1: Choose an action for another available mouse button. • Additional button 2: Choose an action for another available mouse button.
Physical keyboards
Customize options when you have a physical keyboard connected to your device (sold separately).
- From Settings, tap General management.
- Tap Physical keyboard, and then choose an option:
- Show on-screen keyboard: Show the on-screen keyboard while a physical keyboard is also being used.
- Keyboard shortcuts: Show explanations of the keyboard shortcuts on screen.
- Change language shortcut: Enable or disable language key shortcuts on the physical keyboard.
Passwords and autofill
Save time entering information using autofill services.
- From Settings, tap General Management.
- Tap Passwords and autofill to view your selected services.
Date and time
By default, your device receives date and time information from the wireless network. Outside of network coverage, you can set the date and time manually.
From Settings, tap General management > Date and time. The following options are available:
- Automatic date and time: Receive date and time updates from your network. When Automatic date and time is disabled, the following options are available:
- Set date: Enter the current date.
- Set time: Enter the current time.
- Automatic time zone: Use the time zone provided by your mobile phone. - Select time zone: Choose a new time zone.
- Set time zone based on location: Receive time updates based on your location.
- Use 24-hour format: Set the format for displaying time.
Troubleshooting
You can check for software updates and, if necessary, reset services on your
Software update/System updates
Check for and install available software updates for your device. Options may vary by carrier.
From Settings, tap Software update/System updates for the following options:
- Check for updates: Manually check for software updates.
- Check for software updates: Manually check for software updates.
- Continue update: Resume an update that was interrupted.
- Show software update history: View a list of all software updates or device.
- Smart updates: Install security updates automatically.
- Use software upgrade assistant: Install a tool to install system update
Reset
Reset device and network settings. You can also reset your device to its factory defaults.
Reset all settings
You can reset your device to its factory default settings, which resets everything except the security, language, and account settings. Personal data is not affected.
- From Settings, tap General management > Reset > Reset all settings.
- Tap Reset settings, and confirm when prompted.
Reset network settings
You can reset Wi-Fi, mobile data, and Bluetooth settings with Reset network settings.
- From Settings, tap General management > Reset > Reset network settings.
- Tap Reset settings, and confirm when prompted.
Reset accessibility settings
You can reset device accessibility settings. Accessibility settings in downloaded apps and your personal data are not affected.
- From Settings, tap General management > Reset > Reset accessibility settings.
- Tap Reset settings, and confirm when prompted.
Auto restart at set times
Optimize your device by restarting it automatically at set times. Any unsaved data will be lost when the device restarts.
- From Settings, tap General management > Reset > Auto restart at set times.
- Tap to activate Auto restart, and then set the following parameters:
- Days: Select the day of the week to automatically restart your device
- Time: Set the time of day to restart your device.
Factory Data Reset
You can reset your device to factory defaults, erasing all data from your
This action permanently erases ALL data from the device, including Google account settings, system and application data and settings, downloaded applications, as well as your music, photos, videos, and other files. Any data on an external SD card is not affected.
If you sign in to a Google Account on your device and set a Lock screen Protection is automatically enabled.

NOTE If you reset your Google Account password, it can take 24 hours for the password reset to sync with all devices registered to the account.
Before resetting your device:
- Verify that the information you want to keep has transferred to your area.
- Log in to your Google Account and confirm your user name and pass
To reset your device:
- From Settings, tap General management > Reset > Factory data reset.
- Tap Reset and follow the prompts to perform the reset.
- When the device restarts, follow the prompts to set up your device.
Google Device Protection
When you sign in to a Google Account on your device and set a Lock service, Device Protection is enabled. This service protects your phone from unauthorized factory data resets by requiring your Google account information to verify your identity. For more information, visit samsung.com/us/support/answer/ANS00083965.
Enable Google Device Protection
Adding a Google Account to your device and setting a Lock screen automatically activates Google Device Protection.
Disable Google Device Protection
To disable Google Device Protection, you can either remove all Google Accounts from the device or remove the Lock screen.
To remove Google accounts:
- From Settings, tap Accounts and backup > Manage accounts > [Google Account].
- Tap Remove account.
To remove a secure Lock screen:
- From Settings, tap Lock screen > Screen lock type.
- Tap either Swipe or None.
Lock screen and security
You can secure your device and protect your data by setting a screen lock.
Screen lock types | Google Play Protect | Security update | Find My Mobile | Find My Device | Samsung Pass | Secure Folder | Private Share | Install unknown apps | Encrypt or decrypt SD card | Password for factory data reset | Set up SIM card lock | View passwords | Device administration | Credential storage | Advanced security settings | Permission manager | Controls and alerts | Samsung Privacy | Google Privacy | Location
Screen lock types
You can choose from the following screen lock types that offer high, medium, or low security: Swipe, Pattern, PIN, Password, and None.

NOTE: Biometric locks are also available to protect access to your device and sensitive data on your device. For more information, see Biometric security.
Set a secure screen lock
It is recommended that you secure your device using a secure screen lock (PIN, or Password). This is necessary to set up and enable biometric locks.
- From Settings, tap Lock screen > Screen lock type and tap a secure screen lock (Pattern, PIN, or Password).
- Tap to enable showing notifications on the lock screen. The following options are available:
- Icon only: Show only notification icons with no details on the lock screen.
- Details: Display notification details on the lock screen.
- Transparency: Set the transparency value of notification cards.
- Auto-reverse text color: Reverse the color of notification text based on background color.
- Hide content: Do not show notifications in the Notification panel.
- Notifications to show: Choose which notifications to show on the Lock screen.
- Tap Done to exit the menu.
- Configure the following screen lock options:
- Smart Lock: Unlock your device automatically when trusted locations or other devices have been detected. A secure screen lock is required for this feature.
- Secure lock settings: Customize your secure lock settings. A secure lock is required for this feature.
Clock and information
You can configure features that appear on the Lock screen, like the clock useful information.
From Settings, tap Lock screen for the following options:
- Wallpaper services: Enable additional features such as guide page and Dynamic Lock Screen.
- Clock style: Set the type and color of the clock on the Lock screen.
- Roaming clock: Show the time both where you are and at home while roaming.
- Widgets: Enable widgets on the Lock screen to get quick access to information.
- Contact information: Show your contact information, such as your phone number or email address.
- Notifications: Select which notifications to display on the Lock screen.
- Shortcuts: Select which app shortcuts to add to the Lock screen.
- About Lock screen: Update the Lock screen's software.
Google Play Protect
You can configure Google Play to regularly check your apps and device for risks and threats.
From Settings, tap Biometrics and security > Google Play Protect.
- Updates are checked for automatically.
Security update
You can easily check the date of the last installed security software update and see if newer updates are available.
From Settings, tap Biometrics and security > Security update to see the latest security update installed and check if a newer update is available.
Find My Mobile
You can protect your device from loss or theft by allowing your device to be tracked online, and for your data to be deleted remotely. A Samsung account is required, and Google location service must be turned on in order to use Find My Mobile. For more information, visit samsung.com/us/support/owners/app/find-my-mobile.
Turn on Find My Mobile
Before you can use the Find My Mobile feature, you must turn it on and configure its options. To access your device remotely, visit findmymobile.samsung.com.
- From Settings, tap Biometrics and security > Find My Mobile.
- Tap to enable Find My Mobile and log in to your Samsung account. The following options are available:
- Remote unlock: Allow Samsung to store your PIN, pattern, or password, allowing you to unlock and control your device remotely.
- Send last location: Allow your device to send its last location to the Mobile server when the remaining battery charge falls below a certain level.
Find My Device
You can protect your device from loss or theft by allowing your device to be tracked online, and for your data to be deleted remotely. A Google Account is required, and Google location service must be turned on.
- From Settings, tap Biometrics and security > Find My Device.
- If you are not logged in to a Google Account, tap Find My Device and follow the prompts to sign in.
- The following options are available:
• Find My Device: Download the app from Google Play. • Web: Access Find My Device on the Internet. - Google: Search for "find my device" topics online.
Samsung Pass
Use Samsung Pass to access your favorite services with biometric data. You must sign in to your Samsung account to use Samsung Pass.
- From Settings, tap Biometrics and security > Samsung Pass.
- Sign in to your Samsung account and add your biometric data.
Secure Folder
You can create a secure folder on your device to protect private content from anyone who may be using your device. You must sign in to your Samsung account to set up and use Secure Folder.
From Settings, tap Biometrics and security > Secure Folder and follow the prompts to secure content on your device.
Private Share
Share files privately, prevent recipients from resharing, and set expiration dates to keep your data safe with blockchain technology.
From Settings, tap Biometrics and security > Private Share, and follow the prompts to add files.
Install unknown apps
You can allow installation of unknown third-party apps from selected apps or sources.
- From Settings, tap Biometrics and security > Install unknown apps.
- Tap to allow installation from an app or source.

TIP: Installing unknown third-party apps could make your device and personal data more vulnerable to security risks.
Encrypt or decrypt SD card
You can encrypt your optional memory card (not included) to protect its data. This only allows the SD card information to be accessed from your device with a password.
- From Settings, tap Biometrics and security > Encrypt SD card.
- Tap Delete all data and encrypt SD card and follow the prompts to encrypt all data on your memory card.

NOTE: Performing a Factory data reset on your device prevents it from accessing an encrypted SD card. Before initiating a Factory data reset, make sure to decrypt the installed SD card first.
Decrypt SD card
You can decrypt an optional memory card (not included) if it was encrypted on the device. You may want to decrypt the memory card if you plan to use it on another device or before performing a Factory data reset.
- From Settings, tap Biometrics and security > Decrypt SD card.
- Tap Decrypt SD card and follow the prompts to decrypt all data on the card.
Password for factory data reset
You can require a password to reset your device to factory default settings. Options may vary by carrier.
From Settings, tap Biometrics and security > Other security settings > Set up/change password and enter a password.
Set up SIM card lock
You can set up a PIN to lock your SIM card, which prevents unauthorized use of your SIM card if someone attempts to use it in another device. Options may vary.
From Settings, tap Biometrics and security > Other security settings > Set up SIM card lock and follow the prompts.
- Tap Lock SIM card to turn on the feature.
- Tap Change SIM card PIN to create a new PIN.
View passwords
You can have characters displayed briefly in password fields as you type them.
From Settings, tap Biometrics and security > Other security settings > Make passwords visible to turn on the feature.
Device administration
You can authorize security features and apps to have administrative access to the device.
- From Settings, tap Biometrics and security > Other security settings > Device admin apps.
- Tap an option to turn it on as a device administrator.
Credential storage
You can manage the trusted security certificates installed on your device, which verify the identity of servers for secure connections.
From Settings, tap Biometrics and security > Other security settings for the following options:
- View security certificates: Display certificates in your device's ROM and certificates you have installed.
- User certificates: View user certificates that identify your device. • Install from device/phone storage: Install a new certificate from storage.
- Clear credentials: Erase credential contents from the device and reset password.
- Certificate management app: Select a certification management app for credential contents.
Advanced security settings
You can use these options to configure advanced security settings to better protect your device.
From Settings, tap Biometrics and security > Other security settings for the following options:
- Trust agents: Allow trusted devices to perform selected actions when connected.
- This option is only displayed when a lock screen is turned on. For information, see Set a secure screen lock.
- Pin windows: Pin an app on your device screen, which prevents access to other features of your device.
- Security policy updates: Keep your device secure by checking for security updates.
Permission manager
Apps might access features of your device that you permit them to (like a microphone, or location) when they are running in the background, not just when you are using the app. You can set your device to notify you when this happens.
- From Settings, tap Privacy > Permission manager.
- Tap a category, then tap an app to select which permissions you want to be notified about.

NOTE: When using an app or service for the first time that wants to access certain features of your device, a dialog box asks if you want to permit such access.
Controls and alerts
Control app access to the camera, microphone, and clipboard.
- From Settings, tap Privacy.
- Under Controls and alerts, tap the following options to enable or disable them.
- Camera access: Allow apps to use the camera if they have the app permissions.
- Microphone access: Allow apps to use the microphone if they have appropriate permissions.
- Alert when clipboard accessed: Get an alert when an app accesses copied to the clipboard.
Samsung Privacy
Send diagnostic information about your device to Samsung when you are having technical problems.
- From Settings, tap Privacy.
- Under Samsung tap the following options to customize:
- Samsung Privacy: View Samsung's privacy information.
- Customization Service: Allow Samsung to provide customized content recommendations.
- Send diagnostic data: Send diagnostic information about your device to Samsung when you are having technical problems.
Google Privacy
Customize Android and Google privacy features.
- From Settings, tap Privacy.
- Under Google, tap privacy services to customize them.
Location
Location services use a combination of GPS, mobile network, and Wi-Fi to determine the location of your device.
- From Settings, tap Location.
- Tap to turn on Location services.

TIP: Some apps require location services to be turned on for full functionality.
App permissions
Configure permissions for apps that want to access your location information.
- From Settings, tap Location > App permissions.
- Tap an app and choose which location permissions to grant it. Options vary by app.
Location services
Location services store and use your device's most recent location data. Certain apps can use this data to improve your search results based on places you have visited.
- From Settings, tap Location.
- Tap an entry under Location services to see how your location information is used.
Recent access
View a list of apps that have requested your location.
- From Settings, tap Location.
- Tap to turn on Location services.
- Tap an entry under Recent access to view the app's settings.
Emergency Location Service
If Emergency Location Service (ELS) is supported in your region, when you call an emergency number, your device can automatically send its location to emergency response partners.
- From Settings, tap Safety and emergency > Emergency Location Service.
- Tap to turn on Emergency Location Service.
Accounts
You can connect to and manage your accounts, including your Google Account, Samsung account, email, and social networking accounts.
Add an account | Account settings | Remove an account | Users | Backup and restore | Google settings
Add an account
You can add and sync all your email, social networking, and picture and accounts.
- From Settings, tap Accounts and backup > Manage accounts > + Add account.
- Tap one of the account types.
- Follow the prompts to enter your credentials and set up the account.
- Tap Auto sync data to enable automatic updates to your accounts.
Account settings
Each account has its own custom settings. You can configure common settings for accounts of the same type. Account settings and available features vary by account type.
- From Settings, tap Accounts and backup > Manage accounts.
- Tap an account to customize its settings.
Remove an account
You can remove accounts from your device.
- From Settings, tap Accounts and backup > Manage accounts.
- Tap the account and then tap Remove account.
Users
Share this tablet with multiple people by creating User accounts.
Users have their own space, which they can customize with their own apps, wallpaper, and settings. Users can also adjust tablet settings that affect everyone, such as Wi-Fi.
- From Settings, tap Accounts and backup > Users.
- Tap Add user or profile and follow the prompts to set up a new user.

TIP: Restricted profiles allow only limited access to apps and content.
Switch User Profiles
To access the device with a different user profile:
From a Lock screen, tap Manage users and tap a user or profile from the list.
Delete a User or Profile
- From Settings, tap Accounts and backup > Users.
- Tap a user profile.
- Tap Delete user, and then confirm when prompted.

NOTE: Only the device owner can delete other users or profiles. Deleting a user's profile removes the user account from the device entirely. This includes Google Account, Samsung account, and any other local accounts associated with the user.
Backup and restore
You can configure your device to back up data to your personal accounts.
Samsung account
You can enable backup of your information to your Samsung account. Options vary by carrier.
From Settings, tap Accounts and backup and tap an option under Samsung Cloud:
- Back up data: Configure your Samsung account to back up your data.
- Restore data: Use your Samsung account to restore your backup data.
Google Account
You can enable backup of your information to your Google Account.
- From Settings, tap Accounts and backup.
- Under Google Drive, tap Back up data.
External storage transfer
You can back up your data to an SD card or a USB storage device, or restore backup data using Smart Switch. For more information, see Bring data from an old device.
From Settings, tap Accounts and backup > External storage transfer.
Google settings
You can configure your device's Google settings. Available options depend on your Google Account.
From Settings, tap Google, and select an option to customize.
Accessibility
There are accessibility settings for people who need help seeing, hearing, or otherwise operating their device. Accessibility services are special features that make using the device easier for everyone. For more information about Accessibility for Samsung products, please contact us at accessibility@sea.samsung.com.
Recommended for you | TalkBack | Visibility enhancements | Hearing enhancements | Interaction and dexterity | Advanced settings | Installed apps | About Accessibility | Contact us
Recommended for you
View a list of accessibility features that you are using and some recommended features you may want to enable.
From Settings, tap Accessibility > Recommended for you to view recommendations.
TalkBack
Use special controls and settings that let you navigate without needing to see the screen.
- From Settings, tap Accessibility > TalkBack.
- Tap to enable the feature, and tap an option to customize:
- TalkBack shortcut: Choose a shortcut to quickly turn on TalkBack.
- Settings: Configure TalkBack settings to better assist you.
Visibility enhancements
You can configure Accessibility features to assist with visual aspects of your device.
Colors and clarity
You can adjust the colors and contrast of text and other screen elements for easier viewing.
From Settings, tap Accessibility > Visibility enhancements and tap an option:
- Choose an available display mode and tap Apply:
- Default: Default display mode.
- High contrast: Dark mode, High contrast fonts, High contrast keyboard, Remove animations, and Reduce transparency and blur are turned on.
- Large display: Font size and Screen zoom are increased and Bold Highlight buttons are turned on.
- High contrast fonts: Adjust the color and outline of fonts to increase contrast with the background.
- High contrast keyboard: Adjust the size of the Samsung keyboard and change its colors to increase the contrast between the keys and the background.
- Highlight buttons: Show buttons with shaded backgrounds to make them stand out better against the wallpaper.
- Color inversion: Reverse the display of colors from white text on a black background to black text on a white background.
- Color adjustment: Adjust the color of the screen if you find it difficult to see some colors.
- Add color filter: Adjust the screen colors if you have difficulty reading.
- Remove animations: Remove certain screen effects if you are sensitive to motion.
- Reduce transparency and blur: Reduce visual effects on dialogs and to make them easier to see.
- Extra dim: Dim the screen beyond the minimum brightness setting for comfortable viewing. Tap for additional options.
Size and zoom
You can increase the size of supported screen elements and create shortcut accessibility features on your device.
From Settings, tap Accessibility > Visibility enhancements and tap an option:
- Magnification: Use exaggerated gestures such as triple-tapping, double pinching, and dragging two fingers across the screen.
- Large mouse/touchpad pointer: Use a large pointer for a connected mouse or touchpad (accessories not included).
- Font size and style: Configure screen fonts.
- Screen zoom: Configure the screen zoom level.
Hearing enhancements
You can configure Accessibility features to assist with audial aspects of the device. Options may vary by carrier.
Sounds
You can adjust audio quality when using hearing aids or earphones.
From Settings, tap Accessibility > Hearing enhancements and tap an option:
• Live Transcribe: Use the microphone to record speech and convert it to text. • Live Caption: Automatically caption speech in media played on your device. • Caption preference: Configure closed caption and subtitle services. • Sound notifications: Receive alerts when the device detects a baby cry or a doorbell. • Hearing aid support: Improve the sound quality to work better with hearing aids. • Amplify ambient sound: Enable this feature and connect headphones to the device to amplify the sounds of conversations. • Adapt sound: Customize the sound for each ear and enhance your listening experience. See Adapt sound. • Mute all sounds: Turn off all notifications and audio for privacy.
- Mono audio: Switch audio from stereo to mono when using one earphone.
- Left/right sound balance: Use the sliders to adjust the left and right balance for connected audio and device speakers.
Interaction and dexterity
You can configure Accessibility features to assist with limited dexterity when interacting with your device.
Alternate input
You can control your device using different kinds of inputs and controls.
From Settings, tap Accessibility > Interaction and dexterity and tap an option:
- Universal switch: Control your device with your customized switches.
- Assistant menu: Improve device accessibility for users with reduced dexterity.
- Voice Access: Voice Access lets you control your device hands-free. Use voice commands to open apps, tap buttons, scroll, type, and more.
Interactions
You can simplify the motions needed to respond to notifications and alarms.
From Settings, tap Accessibility > Interaction and dexterity and tap an option:
- Interaction control: Customize areas of screen interactions, hardkeys, and the keyboard.
Touch settings
You can adjust your screen to be less sensitive to taps and touches.
From Settings, tap Accessibility > Interaction and dexterity and tap an option:
- Touch and hold delay: Select a time interval for this action.
- Tap duration: Set how long an interaction must be held to be recognized as a tap.
- Ignore repeated touches: Set a time duration in which to ignore repeated touches.
Mouse and physical keyboard
Configure settings for a connected mouse and physical keyboard.
From Settings, tap Accessibility > Interaction and dexterity and tap an option:
- Auto action after pointer stops: Automatically click on an item after pointer stops over it.
- Sticky keys: When you press a modifier key like Shift, Ctrl, or Alt, it stays pressed down, which allows you to enter keyboard shortcuts by pressing one key at a time.
- Slow keys: Set how long a key must be held before it is recognized, which helps avoid accidental key presses.
- Bounce keys: Set how long to wait before accepting a second press of the same key, which helps avoid accidentally pressing the same key multiple times.
Advanced settings
You can customize additional accessibility features and services for your device.

TIP: Additional accessibility apps may be downloaded from the Google Play store.
Accessibility shortcuts
From Settings, tap Accessibility > Advanced settings and tap an option:
- Accessibility button: Choose an accessibility shortcut for the Accessibility button.
- Side and Volume up keys: Configure selected Accessibility features to open by quickly pressing the Side and Volume up keys at the same time. Volume up and down keys: Configure selected services to turn on when you press and hold the Volume up and Volume down keys for three seconds.
Notifications
From Settings, tap Accessibility > Advanced settings and tap an option:
- Flash notification: Flash either the camera light or the screen when you receive notifications or when alarms sound.
- Time to take action: Choose how long to show messages that ask for action, but are visible only temporarily (like notifications).
- Speak keyboard input aloud: The device will read aloud what you type on the keyboard.
- Bixby Vision for accessibility: Add modes to read text aloud, describe scenes, detect colors, and more.
Installed apps
You can install additional assistance services for your device.
From Settings, tap Accessibility > Installed apps.

NOTE: Additional accessibility services are listed and configured here after they are installed.
About Accessibility
Legal and license information about the current Accessibility software is available in Settings.
From Settings, tap Accessibility > About Accessibility. The following information is available:
- Version: View the current Accessibility software version.
- Open source licenses: View information for the open source licenses used for Accessibility.
Contact us
If you have any questions or problems while using your device, access forums, error reports, remote support and more through Samsung Members (if supported by your carrier).
From Settings, tap Accessibility > Contact us.
Other settings
Configure features on your device that make it easier to use.
Tips and help | Dual Messenger | Daily Board | Smart suggestions | Medical info | Quick Share | Labs | About tablet
Tips and help
View tips and techniques as well as the user manual for your device.
From Settings, tap Tips and help.
Dual Messenger
Use two separate accounts for the same app.
- From Settings, tap Advanced features > Dual Messenger.
- Tap next to supported apps to enable the feature for each app.
To select which contacts have access to the secondary messenger, use the separate contacts list.
Daily Board
View a slideshow of your photos when your tablet is charging.
- From Settings, tap Advanced features > Daily Board.
- Tap to enable Daily Board.
- Choose one of the following options:
- Slideshow: Enable a button that launches a slideshow of images from
- Time, weather, and calendar: Display the current time, current weather, and a calendar.
- Memo: Display a memo for quick notes.
- SmartThings: Choose which scenes and devices you want to show on the board. • Music: Display playing music.
- Dark mode: Use a darker theme for easier viewing at night.
- Turn off as scheduled: Set a schedule time to turn the device off.
- Set time: Select a turn off time.
• Labs: Explore additional Daily Board features.
- Add Daily Board to Apps screen: Start Daily Board anytime with
- Auto start when charging: Daily Board will start if your tablet is you are on the Home screen when you start charging.
- About Daily Board: View the app version and other information.
Smart suggestions
Get suggestions for useful actions, such as calendar events to add and me send, based on how you use your device.
From Settings, tap Advanced features > Smart suggestions, and tap an option to enable the feature.
Medical info
Emergency responders and others can access your medical info even when device is locked.
- From Settings, tap Safety and emergency > Medical info.
- Tap Edit and then tap any of the fields to add, change, or delete inf
- Tap Save.
Quick Share
Anyone with a Samsung account can use Quick Share to share files with
From Settings, tap Advanced features > Quick Share. The following options are available:
• Samsung account: Tap to sign in and share with more people.
- Tablet name: Edit the name of your tablet that will be seen by other devices.
• Who can share with you: Disable sharing, allow only Samsung account in your contacts to share, or allow anyone nearby to share with you
- Convert videos to compatible format: HDR10+ and high resolution video be converted to standard resolution videos.
- Link sharing history: View sharing history for your Samsung account.
- Use Wi-Fi only: Tap to enable Quick Share only when connected to
- Auto delete expired files: Tap to select an option to manage how you are deleted or to turn the setting off.
- Privacy notice: Explains how Samsung handles your information when use Quick share services.
- About Quick Share: Tap to see additional information about Quick Show including version, the Terms and Conditions, and more.
Labs
Try experimental features. Some features may not work correctly with all a
- From Settings, tap Advanced features > Labs.
- Tap to enable an experimental feature.
About tablet
View information about your device, including current status, legal information, hardware and software versions, and more.
- From Settings, tap About tablet to view your model number, serial number and IMEI information.
- Tap additional items to view more information about your device.

TIP You can view your device's FCC ID from About tablet > Status information.
Samsung Knox
Samsung Knox is Samsung's security platform and is a mark for a Samsung tested for security with enterprise use in mind. Additional licensing fee may be required. For more information about Knox, please refer to: samsung.com/us/knox

Videos
youtube.com/samsungcare

Samsung Care+
samsung.com/us/support

Talk to an agent
Contact us on Facebook Messenger
Find us on Facebook
Follow us on Twitter

Tips
samsung.com/us/support/tips
Legal information
READ THIS INFORMATION BEFORE USING YOUR MOBILE DEVICE.
Arbitration Agreement - This Product is subject to a binding arbitration agreement between you and SAMSUNG ELECTRONICS AMERICA, INC. ("Samsung"). You can opt out of the agreement within 30 calendar days of the first consumer purchase by emailing optout@sea.samsung.com or calling 1-800-SAMSUNG (726-7864) and providing the applicable information.
The full Arbitration Agreement, Standard One-year Limited Warranty, End User Agreement (EULA), and Health & Safety Information for your device are available online:
Tablet:
- English: samsung.com/us/Legal/Tablet-HSGuide
- Spanish: samsung.com/us/Legal/Tablet-HSGuide-SP
This information can also be found on the device in the "About device" or "About phone" or "About tablet" section, for example:
- Settings > About phone or About device or About tablet > Legal information > Samsung legal
- Or, search "Legal"
If your device required Federal Communications Commission (FCC) approval, you can view the FCC certification by opening Settings > About phone or About device or About tablet > Status information.
Restricting children's access to your mobile device
Your device is not a toy. Do not allow children to play with it because they could hurt themselves and others, or damage the device. Keep the device and all its accessories out of the reach of small children.
Interference from Magnets

WARNING: Potential Interference with Medical Devices from Magnets. The device contains magnets which may interfere with medical devices such as pacemakers, implantable cardioverter defibrillators, or insulin pumps. IF YOU ARE A USER OF ANY OF THESE MEDICAL DEVICES, PLEASE CONSULT WITH YOUR PHYSICIAN.
Do not store or place your device near magnetic fields. Magnetic stripe cards, including credit cards, phone cards, passbooks, hotel keys, and boarding passes, can be damaged by the magnets in the device.
Samsung Electronics America, Inc.
Address:
85 Challenger Road
Ridgefield Park
New Jersey 07660
Phone: 1-800-SAMSUNG (726-7864)
Internet: samsung.com
©2022 Samsung Electronics Co., Ltd. Other company and product names mentioned herein may be trademarks of their respective owners.
Manufactured under license from Dolby Laboratories. Dolby, Dolby Atmos, and the double-D symbol are trademarks of Dolby Laboratories.

HEVC Advance™
Covered by Patents at patentlist.hevcadvance.com
Some multimedia (audio/video) files contain Digital Rights Management (DRM) technology to verify you have the right to use the files. Preloaded apps or device may not be compatible with DRM-protected files.
Screen images are simulated. Appearance of device may vary.
Descriptions are based on the device's default settings. Some content may be depending on carrier, model, or software.
The actual available capacity of the internal memory is less than the specific capacity because the operating system and default applications occupy part memory. The available capacity may change when you upgrade the device.
Please check with your service provider to verify qualifying services/features.


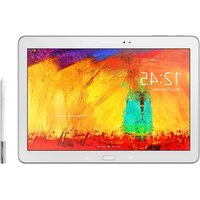
- FEATURES
- GETTING STARTED
- CAMERA AND GALLERY
- SAMSUNG APPS
- GOOGLE APPS
- MICROSOFT APPS
- SETTINGS
- GALAXY TAB S8 ULTRA
- GALAXY TAB S8+ | S8+ 5G
- GALAXY TAB S
- SET UP YOUR DEVICE
- CHARGE THE BATTERY | ACCESSORIES
- CHARGE THE BATTERY
- ACCESSORIES
- START USING YOUR DEVICE
- TURN ON YOUR DEVICE
- USE THE SETUP WIZARD
- BRING DATA FROM AN OLD DEVICE
- LOCK OR UNLOCK YOUR DEVICE
- SIDE KEY
- SIDE KEY SETTINGS
- DOUBLE PRESS
- PRESS AND HOLD
- ACCOUNTS
- ADD A GOOGLE ACCOUNT
- ADD A SAMSUNG ACCOUNT
- ADD AN OUTLOOK ACCOUNT
- NAVIGATION
- TAP
- SWIPE
- DRAG AND DROP
- ZOOM IN AND OUT
- TOUCH AND HOLD
- NAVIGATION BAR
- NAVIGATION BUTTONS
- NAVIGATION GESTURES
- CUSTOMIZE YOUR HOME SCREEN
- APP ICONS
- WALLPAPER
- WIDGETS
- CUSTOMIZE WIDGETS
- HOME SCREEN SETTINGS
- STATUS BAR
- STATUS ICONS
- NOTIFICATION ICONS
- NOTIFICATION PANEL
- VIEW THE NOTIFICATION PANEL
- QUICK SETTINGS
- QUICK SETTINGS OPTIONS
- S PEN
- AIR ACTIONS
- ANYWHERE ACTIONS
- APP ACTIONS
- GENERAL APP ACTIONS
- AIR VIEW
- AIR COMMAND
- CREATE NOTE
- VIEW ALL NOTES
- SMART SELECT
- SCREEN WRITE
- LIVE MESSAGES
- AR DOODLE
- TRANSLATE
- PENUP
- ADD SHORTCUTS
- SCREEN OFF MEMO
- CONFIGURE S PEN SETTINGS
- REMOVAL
- FEEDBACK
- GENERAL
- BIXBY
- BIXBY ROUTINES
- BIXBY VISION
- CAMERA
- GALLERY
- INTERNET
- DIGITAL WELLBEING AND PARENTAL CONTROLS
- BIOMETRIC SECURITY
- FACE RECOGNITION
- FACE RECOGNITION MANAGEMENT
- FINGERPRINT SCANNER
- FINGERPRINT MANAGEMENT
- FINGERPRINT VERIFICATION SETTINGS
- BIOMETRICS SETTINGS
- MOBILE CONTINUITY
- SAMSUNG DEX
- ENABLE DEX
- CONTINUE APPS ON OTHER DEVICES
- MULTI WINDOW
- WINDOW CONTROLS
- EDGE PANELS
- EDGE HANDLE
- APPS PANEL
- ABOUT EDGE PANELS
- ENTER TEXT
- TOOLBAR
- CONFIGURE THE SAMSUNG KEYBOARD
- SMART TYPING
- STYLE AND LAYOUT
- OTHER SETTINGS
- USE SAMSUNG VOICE INPUT
- CONFIGURE SAMSUNG VOICE INPUT
- NAVIGATE THE CAMERA SCREEN
- CONFIGURE SHOOTING MODE
- AR ZONE
- SINGLE TAKE
- RECORD VIDEOS
- CAMERA SETTINGS
- SELFIES
- VIDEOS
- VIEW PICTURES
- EDIT PICTURES
- PLAY VIDEO
- VIDEO BRIGHTNESS
- EDIT VIDEO
- SHARE PICTURES AND VIDEOS
- DELETE PICTURES AND VIDEOS
- GROUP SIMILAR IMAGES
- TAKE A SCREENSHOT
- PALM SWIPE TO CAPTURE A SCREENSHOT
- SCREENSHOT SETTINGS
- SCREEN RECORDER
- SCREEN RECORDER SETTINGS
- APPS
- USING APPS
- UNINSTALL OR DISABLE APPS
- SEARCH FOR APPS
- SORT APPS
- CREATE AND USE FOLDERS
- COPY A FOLDER TO A HOME SCREEN
- DELETE A FOLDER
- GAME BOOSTER
- APP SETTINGS
- GALAXY STORE
- GAME LAUNCHER
- SAMSUNG FLOW
- SAMSUNG FREE
- SAMSUNG GLOBAL GOALS
- SAMSUNG TV PLUS
- SMARTTHINGS
- TIPS
- VOICE RECORDER
- CALCULATOR
- CALENDAR
- ADD CALENDARS
- CALENDAR ALERT STYLE
- CREATE AN EVENT
- DELETE AN EVENT
- CLOCK
- ALARM
- DELETE AN ALARM
- ALERT SETTINGS
- WORLD CLOCK
- TIME ZONE CONVERTER
- WEATHER SETTINGS
- STOPWATCH
- TIMER
- PRESET TIMER
- TIMER OPTIONS
- GENERAL SETTINGS
- CONTACTS
- CREATE A CONTACT
- EDIT A CONTACT
- FAVORITES
- SHARE A CONTACT
- GROUPS
- CREATE A GROUP
- DELETE A GROUP
- MANAGE CONTACTS
- IMPORT CONTACTS
- EXPORT CONTACTS
- MERGE CONTACTS
- DELETE CONTACTS
- BROWSER TABS
- CREATE A BOOKMARK
- OPEN A BOOKMARK
- SAVE A WEB PAGE
- VIEW HISTORY
- SHARE PAGES
- SECRET MODE
- SECRET MODE SETTINGS
- INTERNET SETTINGS
- MY FILES
- FILE GROUPS
- MY FILES SETTINGS
- SAMSUNG HEALTH
- BEFORE YOU START EXERCISING
- SAMSUNG NOTES
- CREATE NOTES
- VOICE RECORDINGS
- EDIT NOTES
- NOTES OPTIONS
- NOTES MENU
- CHROME
- DRIVE
- DUO
- GMAIL
- MAPS
- MESSAGES
- PHOTOS
- GOOGLE PLAY MOVIES & TV
- PLAY STORE
- YOUTUBE
- YT MUSIC
- OUTLOOK
- OFFICE
- ONEDRIVE
- ACCESS SETTINGS
- SEARCH FOR SETTINGS
- CONNECTIONS
- WI-FI
- CONNECT TO A HIDDEN WI-FI NETWORK
- ADVANCED WI-FI SETTINGS
- WI-FI DIRECT
- BLUETOOTH
- RENAME A PAIRED DEVICE
- UNPAIR FROM A BLUETOOTH DEVICE
- ADVANCED OPTIONS
- AIRPLANE MODE
- MOBILE NETWORKS
- DATA USAGE
- TURN ON DATA SAVER
- MONITOR MOBILE DATA
- MONITOR WI-FI DATA
- MOBILE HOTSPOT
- CONFIGURE MOBILE HOTSPOT SETTINGS
- AUTO HOTSPOT
- TETHERING
- NEARBY DEVICE SCANNING
- CONNECT TO A PRINTER
- VIRTUAL PRIVATE NETWORKS
- MANAGE A VPN
- CONNECT TO A VPN
- PRIVATE DNS
- ETHERNET
- SOUNDS AND VIBRATION
- SOUND MODE
- COVER SCREEN TO MUTE
- VIBRATIONS
- VOLUME
- USE VOLUME KEYS FOR MEDIA
- MEDIA VOLUME LIMIT
- NOTIFICATION SOUND
- SYSTEM SOUND THEMES
- SYSTEM SOUNDS AND VIBRATION
- SOUND
- SAMSUNG KEYBOARD: VIBRATE WHEN TYPING WITH THE SAMSUNG KEYBOARD
- EQUALIZER
- UHQ UPSCALER
- ADAPT SOUND
- SEPARATE APP SOUND
- NOTIFICATIONS
- NOTIFICATION POP-UP STYLE
- RECENTLY SENT NOTIFICATIONS
- DO NOT DISTURB
- SCHEDULE
- EXCEPTIONS
- ADVANCED SETTINGS
- DISPLAY
- DARK MODE
- SCREEN BRIGHTNESS
- MOTION SMOOTHNESS
- EYE COMFORT SHIELD
- SCREEN MODE
- FONT SIZE AND STYLE
- SCREEN ZOOM
- SCREEN TIMEOUT
- TOUCH SENSITIVITY
- SCREEN SAVER
- DOUBLE TAP TO TURN ON SCREEN
- DOUBLE TAP TO TURN OFF SCREEN
- KEEP SCREEN ON WHILE VIEWING
- DEVICE MAINTENANCE
- QUICK OPTIMIZATION
- BATTERY
- STORAGE
- MEMORY CARD
- MOUNT A MEMORY CARD
- REMOVE A MEMORY CARD
- FORMAT A MEMORY CARD
- MEMORY
- ADVANCED DEVICE CARE OPTIONS
- LANGUAGE AND INPUT
- CHANGE THE DEVICE LANGUAGE
- TEXT-TO-SPEECH
- KEYBOARD LIST AND DEFAULT
- MOUSE AND TRACKPAD
- PHYSICAL KEYBOARDS
- PASSWORDS AND AUTOFILL
- DATE AND TIME
- TROUBLESHOOTING
- SOFTWARE UPDATE/SYSTEM UPDATES
- RESET
- RESET ALL SETTINGS
- RESET NETWORK SETTINGS
- RESET ACCESSIBILITY SETTINGS
- AUTO RESTART AT SET TIMES
- FACTORY DATA RESET
- GOOGLE DEVICE PROTECTION
- ENABLE GOOGLE DEVICE PROTECTION
- DISABLE GOOGLE DEVICE PROTECTION
- LOCK SCREEN AND SECURITY
- SCREEN LOCK TYPES
- SET A SECURE SCREEN LOCK
- CLOCK AND INFORMATION
- GOOGLE PLAY PROTECT
- SECURITY UPDATE
- FIND MY MOBILE
- TURN ON FIND MY MOBILE
- FIND MY DEVICE
- SAMSUNG PASS
- SECURE FOLDER
- PRIVATE SHARE
- INSTALL UNKNOWN APPS
- ENCRYPT OR DECRYPT SD CARD
- DECRYPT SD CARD
- PASSWORD FOR FACTORY DATA RESET
- SET UP SIM CARD LOCK
- VIEW PASSWORDS
- DEVICE ADMINISTRATION
- CREDENTIAL STORAGE
- ADVANCED SECURITY SETTINGS
- PERMISSION MANAGER
- CONTROLS AND ALERTS
- SAMSUNG PRIVACY
- GOOGLE PRIVACY
- LOCATION
- APP PERMISSIONS
- LOCATION SERVICES
- RECENT ACCESS
- EMERGENCY LOCATION SERVICE
- ADD AN ACCOUNT
- ACCOUNT SETTINGS
- REMOVE AN ACCOUNT
- USERS
- SWITCH USER PROFILES
- DELETE A USER OR PROFILE
- BACKUP AND RESTORE
- SAMSUNG ACCOUNT
- GOOGLE ACCOUNT
- EXTERNAL STORAGE TRANSFER
- GOOGLE SETTINGS
- ACCESSIBILITY
- RECOMMENDED FOR YOU
- TALKBACK
- VISIBILITY ENHANCEMENTS
- COLORS AND CLARITY
- SIZE AND ZOOM
- HEARING ENHANCEMENTS
- SOUNDS
- INTERACTION AND DEXTERITY
- ALTERNATE INPUT
- INTERACTIONS
- TOUCH SETTINGS
- MOUSE AND PHYSICAL KEYBOARD
- ACCESSIBILITY SHORTCUTS
- INSTALLED APPS
- ABOUT ACCESSIBILITY
- CONTACT US
- TIPS AND HELP
- DUAL MESSENGER
- DAILY BOARD
- SMART SUGGESTIONS
- MEDICAL INFO
- QUICK SHARE
- LABS
- ABOUT TABLET
- SAMSUNG KNOX
- LEGAL INFORMATION
- TABLET
- RESTRICTING CHILDREN'S ACCESS TO YOUR MOBILE DEVICE
- INTERFERENCE FROM MAGNETS
- SAMSUNG ELECTRONICS AMERICA, INC
Brand : SAMSUNG
Model : Galaxy Tab Ultra
Category : Graphic tablet