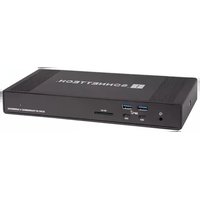
Echo 20 Thunderbolt 4 SuperDock - Computer Accessories Sonnet - Free user manual and instructions
Find the device manual for free Echo 20 Thunderbolt 4 SuperDock Sonnet in PDF.


| Product Type | Thunderbolt 4 Docking Station |
| Model | Echo 20 Thunderbolt 4 SuperDock |
| Brand | Sonnet |
| Dimensions (L x W x H) | 7.1 x 2.9 x 0.9 inches (180 x 74 x 23 mm) |
| Weight | 12 oz (340 g) |
| Power Input | External power adapter (included) |
| Power Output to Host | Up to 60W (USB-C Power Delivery) |
| Thunderbolt 4 Ports | 1 upstream (host), 3 downstream (device) |
| HDMI Port | 1 x HDMI 2.0 (up to 4K@60Hz) |
| USB-A Ports | 2 x USB 3.2 Gen 2 (10 Gbps) |
| USB-C Ports (Data only) | 2 x USB 3.2 Gen 2 (10 Gbps) |
| SD Card Slot | 1 x SD 4.0 (UHS-II) |
| 3.5mm Audio Jack | 1 x headphone/microphone combo |
| Ethernet | 1 x RJ45 Gigabit Ethernet |
| Display Support | Single display up to 8K@60Hz or dual 4K@60Hz |
| Daisy Chaining | Up to 5 Thunderbolt devices |
| Compatibility | Windows, Mac, Chromebook with Thunderbolt 4/USB4 |
| Care Instructions | Wipe with a soft, dry cloth. Avoid liquids and harsh chemicals. |
| Safety | Do not expose to water or excessive heat. Use only included power adapter. |
| Spare Parts | Power adapter and cable available from Sonnet |
| Repair Information | Contact Sonnet support for repair options. Limited warranty. |
Frequently Asked Questions - Echo 20 Thunderbolt 4 SuperDock Sonnet
User questions about Echo 20 Thunderbolt 4 SuperDock Sonnet
0 question about this device. Answer the ones you know or ask your own.
Ask a new question about this device
Download the instructions for your Computer Accessories in PDF format for free! Find your manual Echo 20 Thunderbolt 4 SuperDock - Sonnet and take your electronic device back in hand. On this page are published all the documents necessary for the use of your device. Echo 20 Thunderbolt 4 SuperDock by Sonnet.
USER MANUAL Echo 20 Thunderbolt 4 SuperDock Sonnet
User's Guide for Echo™ 20 Thunderbolt™ 4 SuperDock


portNote: This document was up to date at the time of printing. However,
changes to the hardware or software may have occurred since then. Please check the Sonnet website for the latest documentation.
- Go to https://www.sonnettech.com/support/kb/kb.php
- Navigate to and click the Echo 20 Thunderbolt 4 SuperDock link.
- Click the Manual link.
- Click the Echo 20 Thunderbolt 4 SuperDock User's Guide [English] link and then check the Document Version information. If the version listed is later than this document (revision C), click the Download Now button for the latest version.
Contents
1 Compatibility Information and Computer Preparation 1
Mac Compatibility
Windows Compatibility
iPad Compatibility
Required Drivers
2 Echo 20 Thunderbolt 4 SuperDock Description 2
Front Panel
Bottom Panel
Left Side Panel
Back Panel
Additional Package Contents
3 SSD Installation and Dock Connection Steps 6
4 SSD Formatting and Booting Information 9
How to Format an Installed SSD
Booting From an Installed SSD
5 Audio Jacks and Ethernet Port Configuration Information 10
Enabling the Combo Audio Jack—macOS
Enabling the Analog Audio Line Out Jacks—macOS
Enabling the Microphone Jack—macOS
2.5 Gigabit Ethernet Port Configuration Information—macOS and Windows
6 Tips, General Information, and Known Issues 11
Tips, General Information
Known Issues
7 Precautions, Compliance, and Support Information 13
Safety Precautions
Warnings
FCC Compliance
EU Compliance
Japan VCCI Compliance
Contacting Customer Service
Chapter 1 – Compatibility Information and Computer Preparation

Mac® Compatibility
- macOS® 11+
• Mac (M1/M2 Series)
• Mac (Intel®) with Thunderbolt 3 port
Windows® Compatibility
- Windows computer with a Thunderbolt 4 port or USB4® port*
- Windows computer with an 8th generation or later Intel CPU plus a Thunderbolt 3 port
Chromebook Compatibility
- Chromebook computer with Thunderbolt 4 or USB4* port
iPad® Compatibility
- iPad Pro® tablet with Thunderbolt port
Required Drivers
The standard drivers required to support the Echo 20 Thunderbolt 4 SuperDock are installed as part of macOS 11 and later; Windows 11 and 10, and iPadOS ® .
Chapter 2 – Echo 20 Thunderbolt 4 SuperDock Description
![graph TD A["①"] --> B["②"] B --> C["③"] C --> D["④"] D --> E["⑤"] style A fill:#f9f,stroke:#333 style B fill:#ccf,stroke:#333 style C fill:#cfc,stroke:#333 style D fill:#fcc,stroke:#333 note right of C SS-10](/content/2026/06/1363437/images/9704ef1eb175453f05934fcb20cf6d78bba842d41f48e2a835ffffe354483d08.jpg)
Front Panel
1 - Combo Audio Jack
Connect headphones or a headset.
2 - USB 3.2 Gen 2 (10Gbps) Type A Ports
Connect USB devices to these ports.
3 - USB 3.2 Gen 2 (10Gbps) Type-C Charging Ports
Connect USB devices to these ports. These ports are USB Type-C Charging-compliant; you may charge iOS ® devices — and other devices that charge via USB — connected to these ports.
4 - SD™ 4.0 Card Slot
This supports SD, SDHC ™ , and SDXC ™ memory cards. Insert cards label-side up. microSD, microSDHC, and microSDXC cards are also supported when used with an adapter (not included).
5 - Power Indicator LED
This lights when the Echo dock is powered, the Thunderbolt cable between the dock and your computer is plugged in securely, and the computer powered on.
Chapter 2 – Echo 20 Thunderbolt 4 SuperDock Description

Bottom Panel
6 - SSD Cover Plate
Remove this plate to install an M.2 NVMe 2280 PCIe SSD; instructions follow.

Left Side Panel
7 - Kensington® Lock Slot
When used with a Kensington Lock (sold separately), this can provide added security for the Echo dock. Also compatible with Kensington MicroSaver ® and MicroSaver 2 locks.
Chapter 2 – Echo 20 Thunderbolt 4 SuperDock Description

Back Panel
1 - 20VDC 7.5A Socket
Connect the included DC power adapter between this socket and the included power cord.
2 - HDMI 2.1 Port
Connect an HDMI display to this port.
3 - Threaded Nut for ThunderLok 4
Attach the included Thunderbolt connector retainer clip here.
4 - Computer/Charging Port
Connect your computer or iPad to this port using the included Thunderbolt 4 cable. For laptop/notebook computers (and iPad Pro) that support charging through a Thunderbolt port, this port delivers up to 100W of power.
5 - Thunderbolt Peripheral Ports
Connect Thunderbolt or USB peripheral devices (including monitors) to these ports using appropriate cables or adapters. These ports provide up to 15W of downstream power to connected bus-powered devices.
6 - 2.5 Gigabit Ethernet Port
Supports 2.5 Gb/s, 1 Gb/s, and 100 Mb/s link speeds. Connect to a switch or router using Cat 5e or better unshielded twisted pair (UTP) cable with RJ45 connectors. The left (green) LED lights up to indicate an Ethernet link, while the right (orange) LED flashes to indicate network activity.
7 - USB 3.2 Gen 2 (10Gbps) Type A Ports
Connect USB device to these ports.
8 - USB 3.2 Gen 2 (10Gbps) Type-C Charging Ports
Connect USB devices to these ports. These ports are USB Type-C Charging-compliant and can charge devices that charge via USB.
9 - Analog Audio Line Out Jacks
Connect stereo RCA cables (not included) between these jacks and the line in jacks of a preamplifier, integrated amplifier, receiver, powered speakers, or audio interface. Be sure to connect red and white cable connectors to red and white connectors, respectively, on the dock and end device.
10 - Microphone Jack
Connect a mono microphone to this connector.
Chapter 2 – Echo 20 Thunderbolt 4 SuperDock Description
Additional Package Contents
Thunderbolt 4 (40Gbps) Cable
Connect this cable between the Echo dock and one of your computer's Thunderbolt ports (often indicated by a logo) or USB4 port, or other Thunderbolt peripheral device in the chain connected to the computer. Connecting the dock to a computer port marked with the generic USB icon ( ) or USB + Charging Port icon ( ) is NOT supported.
ThunderLok 4 Thunderbolt 4 Connector Retainer Clip
This clip secures the Thunderbolt 4 connector plugged into the Echo dock's Computer/Charging Port to prevent accidental cable disconnection.
Power Adapter (Not Shown)
Connect this to the Echo dock's 20VDC 7.5A socket.
Power Cord (Not Shown)
Connect this between a power outlet and the power adapter.

Chapter 3 – SSD Installation and Dock Connection Steps
SSD Installation Steps and Dock Connection
Steps 1–8 are optional. If you are not installing an SSD, skip to the Support Note at the bottom of the next page.

tNote: To avoid
damaging components due to static electricity discharge, wear an antistatic wrist strap while working inside the Echo dock.
-
Turn the dock upside down. Using a #1 Phillips screwdriver, remove the two screws securing the SSD Cover Plate to the bottom of the dock as shown (Figure 1). Set aside the plate and screws.
-
Remove the screw from the standoff inside the dock as shown (Figure 1).
-
Handling it by its edges, remove your SSD from its packaging.
-
Fully insert the SSD at an angle into the SSD socket (Figure 2).

ING: When handling
computer products, take care to prevent components from being damaged by static electricity; avoid working in carpeted areas. Handle SSDs only by their edges and avoid touching connector traces and component pins. Also, avoid touching the Echo dock's circuit board and any of its components.
- Using the screw you removed previously, secure the SSD to the standoff; do not overtighten the screw (Figure 3).

Figure 1

Figure 2

Figure 3
Chapter 3 – SSD Installation and Dock Connection Steps
- Remove the plastic sheet covering the thermal transfer pad attached to the bottom of the SSD cover plate as shown (Figure 4).

Figure 4
-
Place the SSD Cover Plate back on the bottom of the dock with its thermal transfer pad face-down, and then rub the surface of the plate back and forth plate to ensure the pad makes good contact with the SSD (Figure 5).
-
Secure the cover plate using the two screws you removed previously; do not overtighten the screws (Figure 5).

Figure 5

ortNote: Sonnet's ThunderLok™ 4
Thunderbolt connector retainer clip secures the included Thunderbolt 4 cable to the Echo dock to prevent accidental disconnects. To attach the clip to the cable, remove both items from their packaging, and then insert the connector through the connector clip as shown (Figure 6). Note that the connector will pass all the way through the clip; when you connect the cable to the dock, the clip will secure the connector.

Figure 6
Chapter 3 – SSD Installation and Dock Connection Steps
- Connect the included Thunderbolt 4 cable (or
0.8-meter or shorter 100W
Thunderbolt 3 (40Gbps) cable, or any other Thunderbolt 4 cable) between the Echo dock's
Computer/Charging port and a Thunderbolt or USB4 port on your computer or iPad Pro (Figure 7).
Note that cables and computer ports marked with a generic USB icon ( ↔ ) or USB +
Charging Port icon (⚡) are NOT compatible.
Secure the retainer clip to the dock if you attached it.

Figure 7
- Connect the included power cord between a wall outlet or power strip and the power adapter; verify the connectors are plugged in securely.
- Connect the power adapter cable to the dock's 20VDC 7.5A socket. Note that the power indicator on the Echo dock will not light until the computer, and any other Thunderbolt device connected between it and the Echo dock, is powered on.
Chapter 4 – SSD Formatting and Booting Information
How to Format an Installed SSD
macOS:
Use Disk Utility (found in the Utilities folder within the Applications folder) to format an installed SSD.
Windows:
Use either Windows Disk Management or Storage Spaces to format an installed SSD.
Booting From an Installed SSD
macOS:
The Echo dock supports booting your Mac from an installed SSD. Please note that in some cases it may be necessary for you to hold the option key during a start, and then select the startup disk installed in the Sonnet dock.
Windows:
The Echo dock supports booting from an installed SSD when used with Windows computers with UEFI BIOS.
Chapter 5 – Audio Jacks and Ethernet Port Configuration Information
Enabling the Combo Audio Jack—macOS
- Connect headphones or a headset to the Combo Audio Jack.
- From the Apple menu, select System Preferences.
- In the System Preferences window, click Sound. In the Sound preference window, click the Output tab, and then select Dock Headset. If you wish to enable the audio input through Combo Audio Jack, click the Input tab, and then select Dock Headset.
Enabling the Analog Audio Line Out Jacks—macOS
- Connect RCA cables between the Line Out jacks and the line in jacks of a preamplifier, integrated amplifier, receiver, powered speakers, or audio interface.
- From the Apple menu, select System Preferences.
- In the System Preferences window, click Sound. In the Sound preference window, click the Output tab, and then select Dock RCA Line Out.
Enabling the Microphone Jack—macOS
- Connect an analog microphone to the Microphone jack.
- From the Apple menu, select System Preferences.
- In the System Preferences window, click Sound. In the Sound preference window, click the Input tab, and then select Dock Microphone.
2.5 Gigabit Ethernet Port Configuration Information—macOS and Windows
With the Echo dock connected to your computer and network infrastructure, configure the dock's network settings.
- Mac Users: Use System Preferences' Network preferences panel. The dock's Ethernet port will be identified as USB 10/100/1G/2.5G LAN.
- Windows Users: Use Windows Device Manager, Network Adapters category. The dock's Ethernet port will be identified as Realtek Gaming USB 2.5GbE Family Controller.
Chapter 6 – Tips, General Information, and Known Issues
TIPS, GENERAL INFORMATION
There's No Need to Unplug the Power Adapter Because the Echo dock automatically powers on and off with the computer to which it's connected, there's no power switch, nor is there any need to disconnect the power cable under normal use.
Power Indicator LED Operation
The dock's power indicator only lights when the computer to which it's connected is on, and turns off when the computer is sleeping or powered off.
Hot Plugging the Echo Dock
You may connect and disconnect the dock while the computer is on. If you have an SSD installed in the dock, or have anything connected such as storage devices, cameras, etc., follow proper procedures for ejecting (unmounting) those devices before unplugging the dock from the computer.
Using the Echo Dock to Charge Your Computer or iPad Pro
- Compatible laptop/notebook computers and iPad tablets may be charged via the Echo dock's Computer/Charging port (Power Delivery charging), which provides up to 100W of power.
- Windows laptops with AC power adapters rated at greater than 100W may display a Power Manager alert when the dock (but not the computer's power adapter) is initially connected to the computer. This is normal.
Using the Echo Dock to Charge Your Computer or iPad Pro (continued)
- Laptops with AC power adapters rated greater than 100W will accept up to 100W power from the dock, but may slowly discharge; connecting bus-powered storage to a laptop will draw additional power that may affect the charging (discharging) rate. When sleeping, any connected computer that supports Thunderbolt charging will be charged to 100%.
The Echo Dock Provides Downstream Power For connected peripheral devices requiring extra power, the Echo dock provides up to 15W to bus-powered devices through its Thunderbolt peripheral ports, enabling them to operate without connecting an additional power adapter.
Connecting Additional Thunderbolt 3 or 4 Peripheral Devices
The dock includes two Thunderbolt peripheral ports. They support connection of up to five additional Thunderbolt peripheral devices through daisy-chain connection.
Thunderbolt Cable Compatibility
You may use 0.8-meter or shorter Thunderbolt 3 (40Gbps) cables (or any Thunderbolt 4 cable) with Thunderbolt 4 or Thunderbolt 3 peripherals without any compromise in performance.
Chapter 6 – Tips, General Information, and Known Issues
How to Identify Thunderbolt 3 (40Gbps) Cables Full performance requires the use of the included Thunderbolt 4 cable, any other Thunderbolt 4 cable, or a 40Gbps (not 20Gbps) Thunderbolt 3 cable; look for the Thunderbolt icon (✗) AND the number 3 or 4 on the connector housings to identify Thunderbolt cables. Cables marked with the generic USB icon (✗) are NOT compatible for connecting the Echo dock to the computer.
2.5 Gb/s and 1 Gb/s Ethernet Link Speeds Support Requirements
The Echo dock only supports a 2.5 Gb/s Ethernet link speed when used with NBASE-T compatible (multi-Gigabit) switches, routers, and other devices and connected via CAT 5e (or better) cabling. Multi-Gigabit-compatible equipment is not required for 1 Gb/s and lower link speed support.
Display Support
Although this dock supports the connection of up to two displays (two through the Thunderbolt peripheral ports, or one through the HDMI port plus one through a Thunderbolt peripheral port), the number of displays supported (as well as specific resolutions and standards supported) is dependent on the connected computer, its GPU, and its OS software. Note that when used with an M1 or M2 MacBook Air, MacBook Pro, or Mac mini with two Thunderbolt/USB4 ports, only one display can be connected to the dock. For more information, see https://www.sonnettech.com/support/downloads/manuals/Thunderbolt_4_Dock_Compatibility.pdf
KNOWN ISSUES
Not All Computers' Thunderbolt Performance is Equal
When using the dock with Thunderbolt 3 Windows computers, be aware that some use an x2 (2 lane) implementation of Thunderbolt 3 that limits PCIe bandwidth to 20Gbps (up to 1,400 MB/s). All Thunderbolt 4 computer ports support PCIe x4.
Not All Thunderbolt Cables Deliver Full Performance
Full performance from the Echo dock requires the use of the included (or comparable) Thunderbolt 4 cable, or any 0.8-meter or shorter Thunderbolt 3 (40Gbps) cable. When shopping for a Thunderbolt 3 cable, please be aware that some support only lower data transfer speeds (20Gbps).
Operating System (OS) Updates May Break Compatibility
Specific device drivers that work under one OS version may not work under a later version. Before updating your computer to the latest OS, we recommend that you contact your Sonnet to verify that the existing drivers work. Note that other computer software updates may also break compatibility.
Some Devices' Performance May be Affected by Where They Are Connected in a Thunderbolt Chain
However small, Thunderbolt introduces latency to a device chain. If you connect additional Thunderbolt devices to the dock, you may need to experiment with ones work better closer to or farther from the computer in the chain.
Chapter 7 – Precautions, Compliance, and Support Information
SAFETY PRECAUTIONS
Please read this section carefully before proceeding. These precautions explain the correct and safe use of this device, thereby helping to prevent injury to you or others, and also help you to minimize the risk of damaging the device.
Warnings
Always follow the basic warnings listed here to avoid the risk of serious injury or death from electrical shock, short-circuiting, fire, and other hazards. These warnings include, but are not limited to:
- Do not attempt to modify the enclosure. If this device appears to be malfunctioning, contact your reseller or local distributor.
- Do not drop the dock; dropping or mishandling the dock may result in a malfunction leaving the product inoperable.
- Do not expose the device to rain, use it near water or containers that contain liquids which might spill into any openings, or in damp or wet conditions.
- If unusual smells, sounds, or smoke come from the device, or if liquids enter it, switch it off immediately and unplug it from the electrical outlet.
- Follow the instructions in this manual carefully; contact your reseller or local distributor for additional advice not covered in this User's Guide.
FCC Compliance
Echo 20 Thunderbolt 4 SuperDock complies with Part 15 of the FCC Rules. Operation is subject to the following two conditions: This device may not cause harmful interference, AND this device must accept any interference received, including interference that may cause undesired operation.
EU Compliance
Sonnet Technologies, Inc. hereby declares that this device is in compliance with Directive 2014/30/EU.
Japan VCCI Compliance
Chapter 7 – Precautions, Compliance, and Support Information
Contacting Customer Service
The Sonnet website located at www.sonnettech.com has the most current support information and technical updates. Before contacting Customer Service, please check our Web site for the latest updates and online support files, and check this User's Guide for helpful information. Email support requests generally receive the fastest responses, and are usually processed within a 24-hour period during normal business hours, excluding holidays. When you contact Customer Service, have the following information available so the customer service staff can better assist you:
- Product name
• Date and place of purchase - Computer model
- Operating system version
- Software/firmware versions
- A System Report (macOS) or a Microsoft System Information MSINFO32 (Windows) report (Windows), along with a description of the issue(s) you are encountering with your device
If further assistance is needed, please contact
Sonnet Customer Service at:
E-mail: support@sonnettech.com
Tel: 1-949-472-2772
(Monday–Friday, 9 a.m.–5 p.m. Pacific Time, excluding holidays)
Japan Customers
Contact Sonnet Customer Service Japan at:
E-mail: jp.support@sonnettech.com
- USER'S GUIDE FOR ECHO™ 20 THUNDERBOLT™ 4 SUPERDOCK
- CONTENTS
- 1 COMPATIBILITY INFORMATION AND COMPUTER PREPARATION 1
- 2 ECHO 20 THUNDERBOLT 4 SUPERDOCK DESCRIPTION 2
- 3 SSD INSTALLATION AND DOCK CONNECTION STEPS 6
- 4 SSD FORMATTING AND BOOTING INFORMATION 9
- 5 AUDIO JACKS AND ETHERNET PORT CONFIGURATION INFORMATION 10
- 6 TIPS, GENERAL INFORMATION, AND KNOWN ISSUES 11
- 7 PRECAUTIONS, COMPLIANCE, AND SUPPORT INFORMATION 13
- MAC® COMPATIBILITY
- WINDOWS® COMPATIBILITY
- CHROMEBOOK COMPATIBILITY
- IPAD® COMPATIBILITY
- REQUIRED DRIVERS
- CHAPTER 2 – ECHO 20 THUNDERBOLT 4 SUPERDOCK DESCRIPTION
- FRONT PANEL
- COMBO AUDIO JACK
- USB 3.2 GEN 2 (10GBPS) TYPE A PORTS
- USB 3.2 GEN 2 (10GBPS) TYPE-C CHARGING PORTS
- SD™ 4.0 CARD SLOT
- POWER INDICATOR LED
- BOTTOM PANEL
- SSD COVER PLATE
- LEFT SIDE PANEL
- KENSINGTON® LOCK SLOT
- BACK PANEL
- 20VDC 7.5A SOCKET
- HDMI 2.1 PORT
- THREADED NUT FOR THUNDERLOK 4
- COMPUTER/CHARGING PORT
- THUNDERBOLT PERIPHERAL PORTS
- 2.5 GIGABIT ETHERNET PORT
- ANALOG AUDIO LINE OUT JACKS
- MICROPHONE JACK
- THUNDERBOLT 4 (40GBPS) CABLE
- THUNDERLOK 4 THUNDERBOLT 4 CONNECTOR RETAINER CLIP
- POWER ADAPTER (NOT SHOWN)
- POWER CORD (NOT SHOWN)
- CHAPTER 3 – SSD INSTALLATION AND DOCK CONNECTION STEPS
- SSD INSTALLATION STEPS AND DOCK CONNECTION
- TNOTE: TO AVOID
- ING: WHEN HANDLING
- ORTNOTE: SONNET'S THUNDERLOK™ 4
- CHAPTER 4 – SSD FORMATTING AND BOOTING INFORMATION
- HOW TO FORMAT AN INSTALLED SSD
- BOOTING FROM AN INSTALLED SSD
- CHAPTER 5 – AUDIO JACKS AND ETHERNET PORT CONFIGURATION INFORMATION
- ENABLING THE COMBO AUDIO JACK—MACOS
- ENABLING THE ANALOG AUDIO LINE OUT JACKS—MACOS
- ENABLING THE MICROPHONE JACK—MACOS
- 2.5 GIGABIT ETHERNET PORT CONFIGURATION INFORMATION—MACOS AND WINDOWS
- CHAPTER 6 – TIPS, GENERAL INFORMATION, AND KNOWN ISSUES
- TIPS, GENERAL INFORMATION
- POWER INDICATOR LED OPERATION
- HOT PLUGGING THE ECHO DOCK
- USING THE ECHO DOCK TO CHARGE YOUR COMPUTER OR IPAD PRO
- CONNECTING ADDITIONAL THUNDERBOLT 3 OR 4 PERIPHERAL DEVICES
- THUNDERBOLT CABLE COMPATIBILITY
- 2.5 GB/S AND 1 GB/S ETHERNET LINK SPEEDS SUPPORT REQUIREMENTS
- DISPLAY SUPPORT
- KNOWN ISSUES
- NOT ALL THUNDERBOLT CABLES DELIVER FULL PERFORMANCE
- OPERATING SYSTEM (OS) UPDATES MAY BREAK COMPATIBILITY
- SOME DEVICES' PERFORMANCE MAY BE AFFECTED BY WHERE THEY ARE CONNECTED IN A THUNDERBOLT CHAIN
- CHAPTER 7 – PRECAUTIONS, COMPLIANCE, AND SUPPORT INFORMATION
- SAFETY PRECAUTIONS
- WARNINGS
- FCC COMPLIANCE
- EU COMPLIANCE
- JAPAN VCCI COMPLIANCE
- CONTACTING CUSTOMER SERVICE
Brand : Sonnet
Model : Echo 20 Thunderbolt 4 SuperDock
Category : Computer Accessories